author.travelffeine.com

Blog

  • Driving to Key West: A Road Trip in the Florida Keys

    Driving to Key West is a sun-filled, top-down, only-in-Florida kind of road trip. Just remember when you’re road tripping through the Florida Keys, that it is about the journey rather than the destination.  Yes, there is plenty to see in Key West, the end of the line for a Florida Keys road trip, but half the fun is getting there.  

    Driving to Key West should be a series of stops in whichever Key grabs your fancy, eating huge amounts of key lime pie, photo ops, and listening to your favorite road trip music.

    Where to Start Your Road Trip to Key West

    My hubby and I just finished a road trip from Orlando to Key West.  We stayed two nights in Islamorada and spent one full day driving to Key West.  We also stopped in Miami and spent a fun-filled day there before heading back to Orlando to catch our flight home.

    I recommend spending at least one night in the Florida Keys and giving yourself one full day to drive to Key West. Here are some examples of non-stop drive times to Key West:

    • Orlando to Key West ~  6 ½ hours
    • Miami to Key West ~ 3 ½ hours
    • Key Largo to Key West ~ 2 hours
    • Marathon to Key West ~ 1 hour

    It’s About the Journey, Not the Destination

    This should be a relaxed road trip, with lots of time for stopping whenever it strikes your fancy, and extra time to spend sightseeing in Key West. I mean, you’ve taken the time to drive all the way there, might as well spend a couple of hours before returning to the car and starting the adventure in reverse.

    Driving to Key West is not a trip of speed. US Hwy 1 is a mostly two-lane highway with lots of traffic.  So you shouldn’t take this trip thinking you’ll speed all the way to Key West. It’s not going to happen.  Enjoy the journey.

    I’ll cover things to do in the Florida Keys, places to eat, and where to find the best key lime pie.  Now put the top down or crank up the a.c. and let’s hit the road!

    Top Things to Do On Your Drive to Key West

    Americana Photo Opsgiant lobster in Islamorada Florida

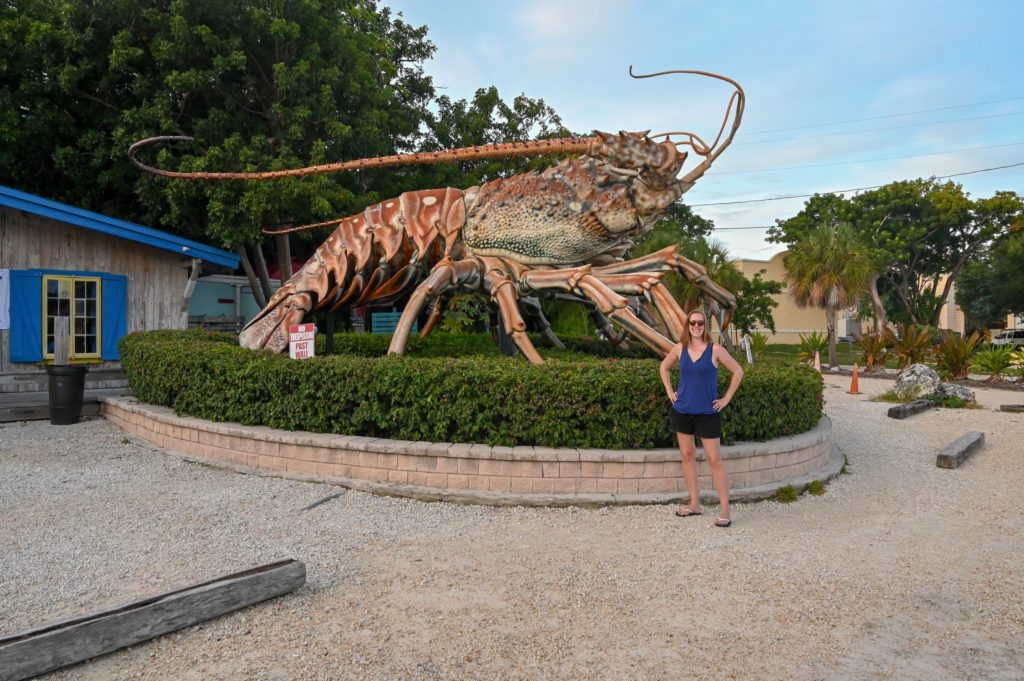
    This is one thing I love to do when taking a road trip in the U.S.! Stop and see the world’s largest ball of yarn, or a giant talking cow, these are a part of the quintessential American road trip.  The Florida Keys have lots of fun ones like this giant crab at the Rain Barrel Artisans Village in Islamorada. Keep a lookout, and you’ll see a billboard-sized mermaid, a large conch shell, and other fun stops to take photos of when driving to Key West.

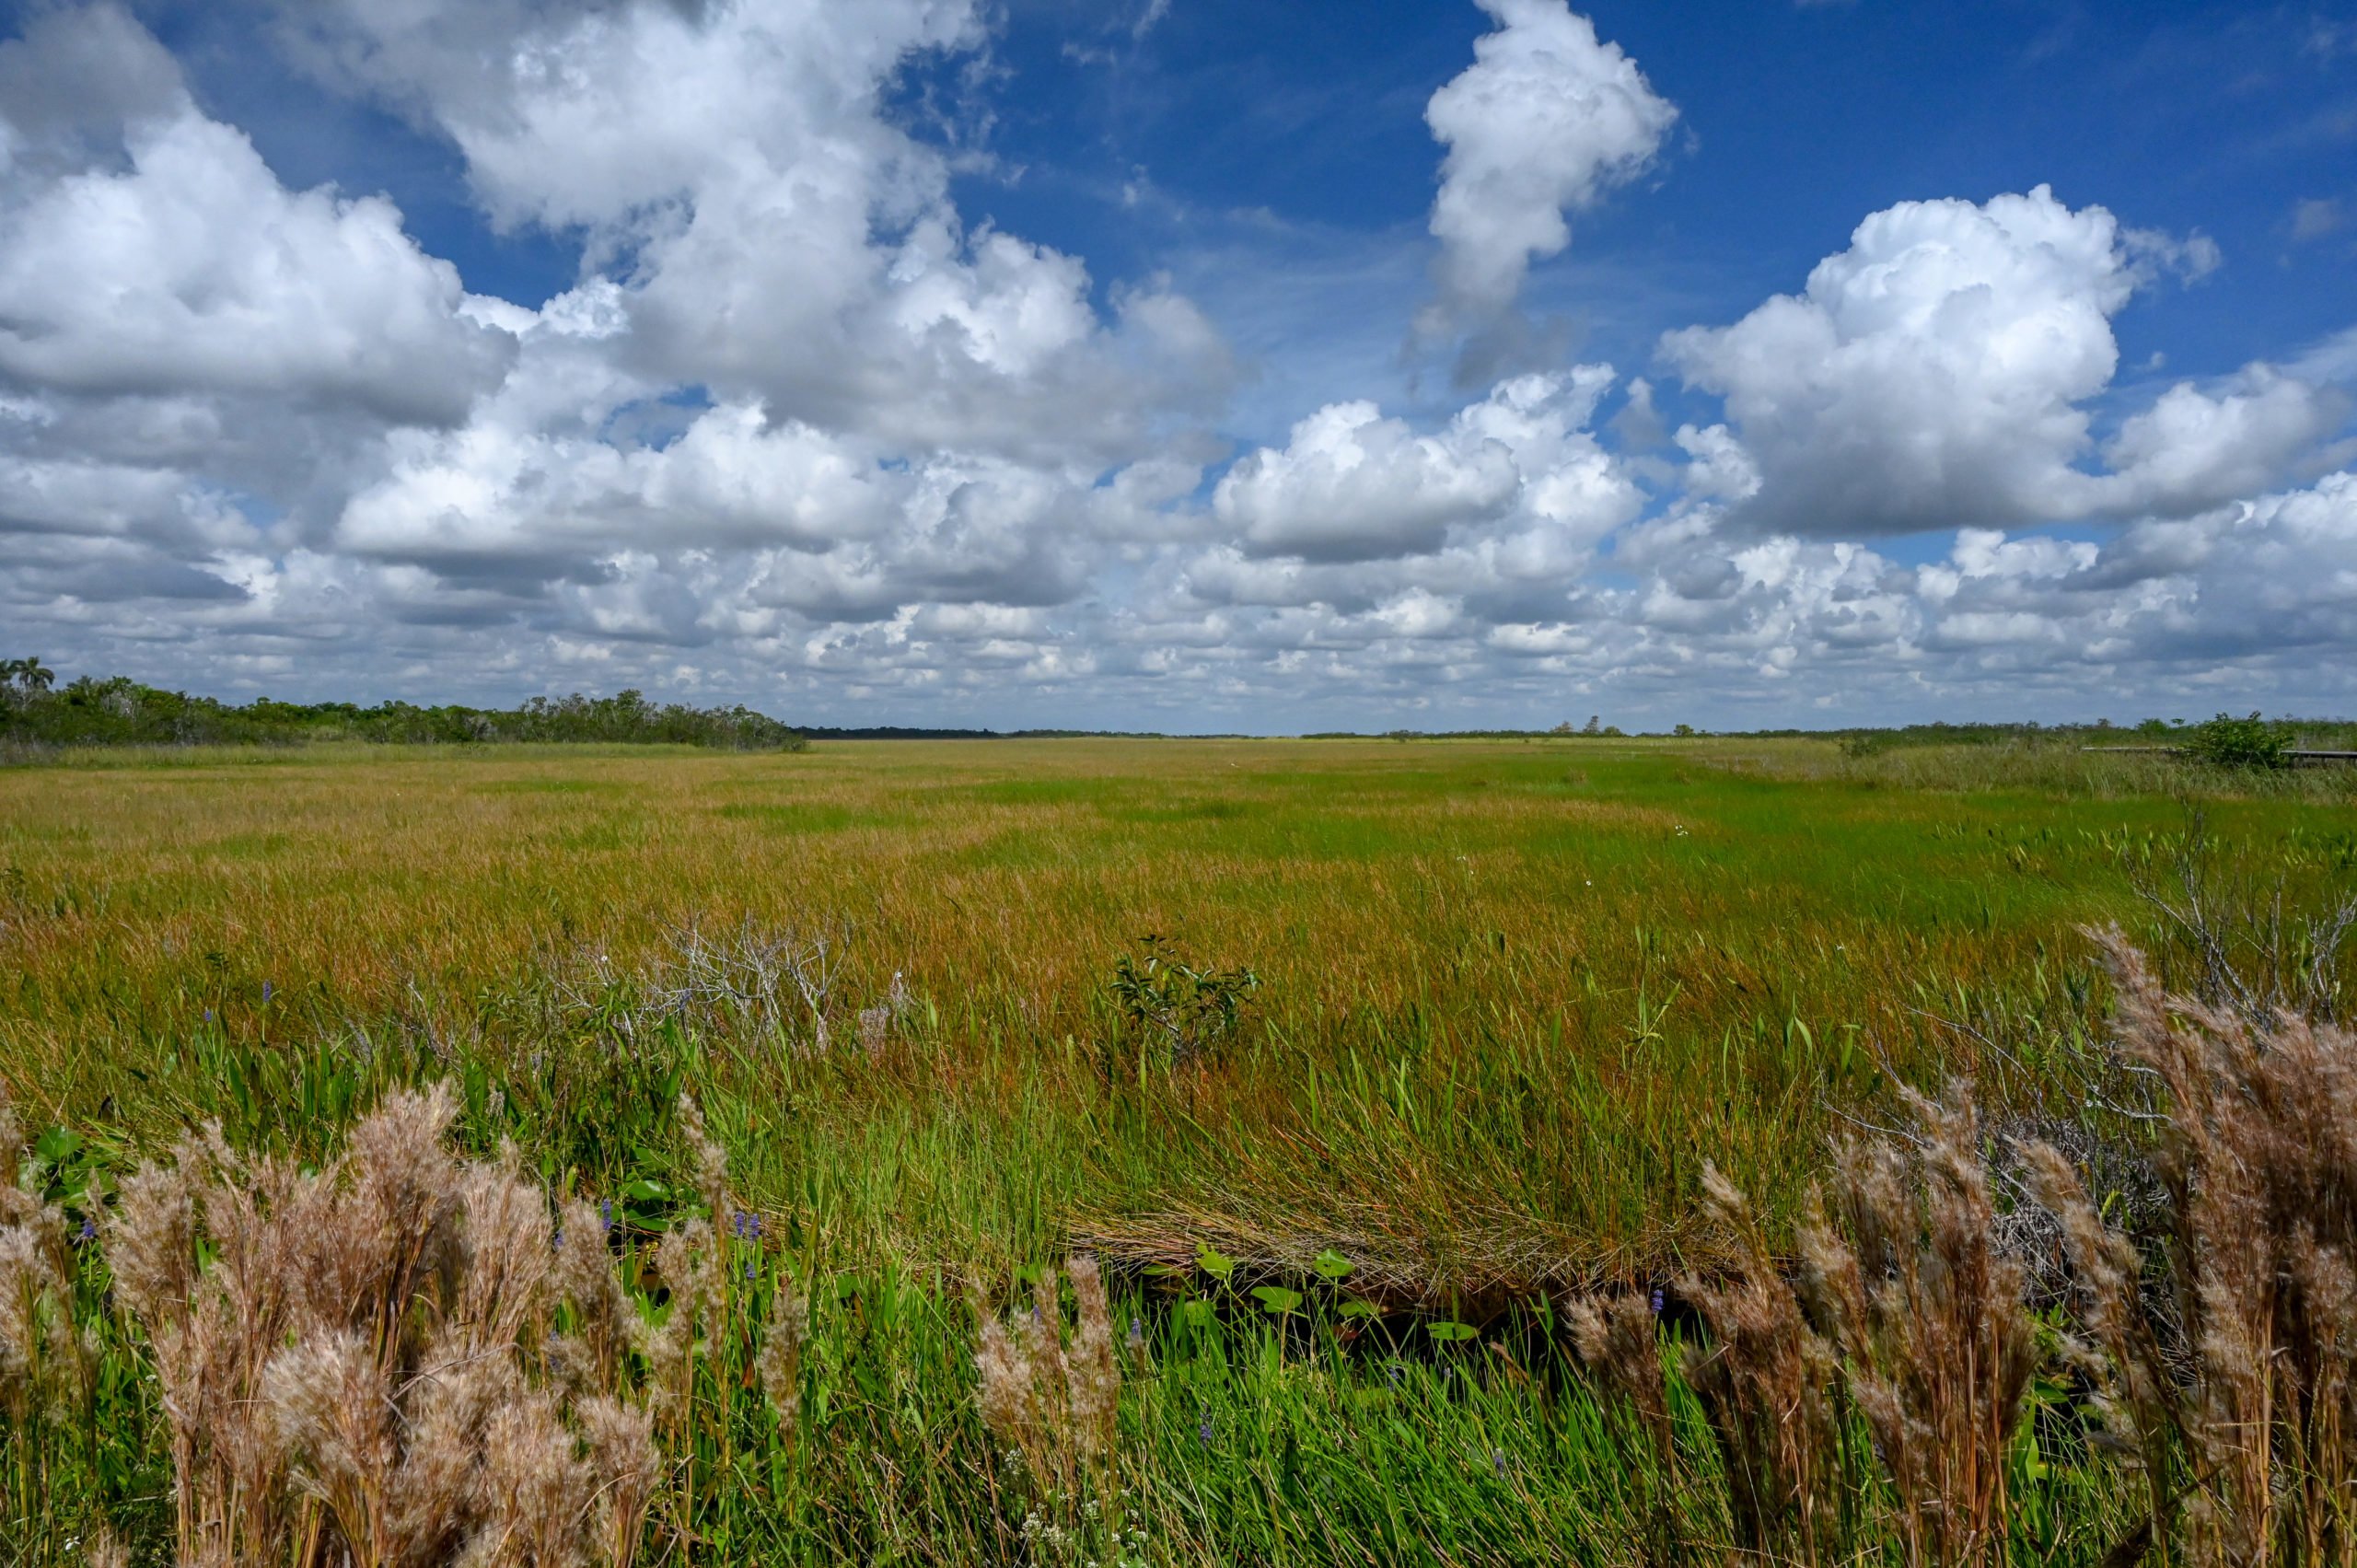
    Stop at a Park and Enjoy Some Beach Time

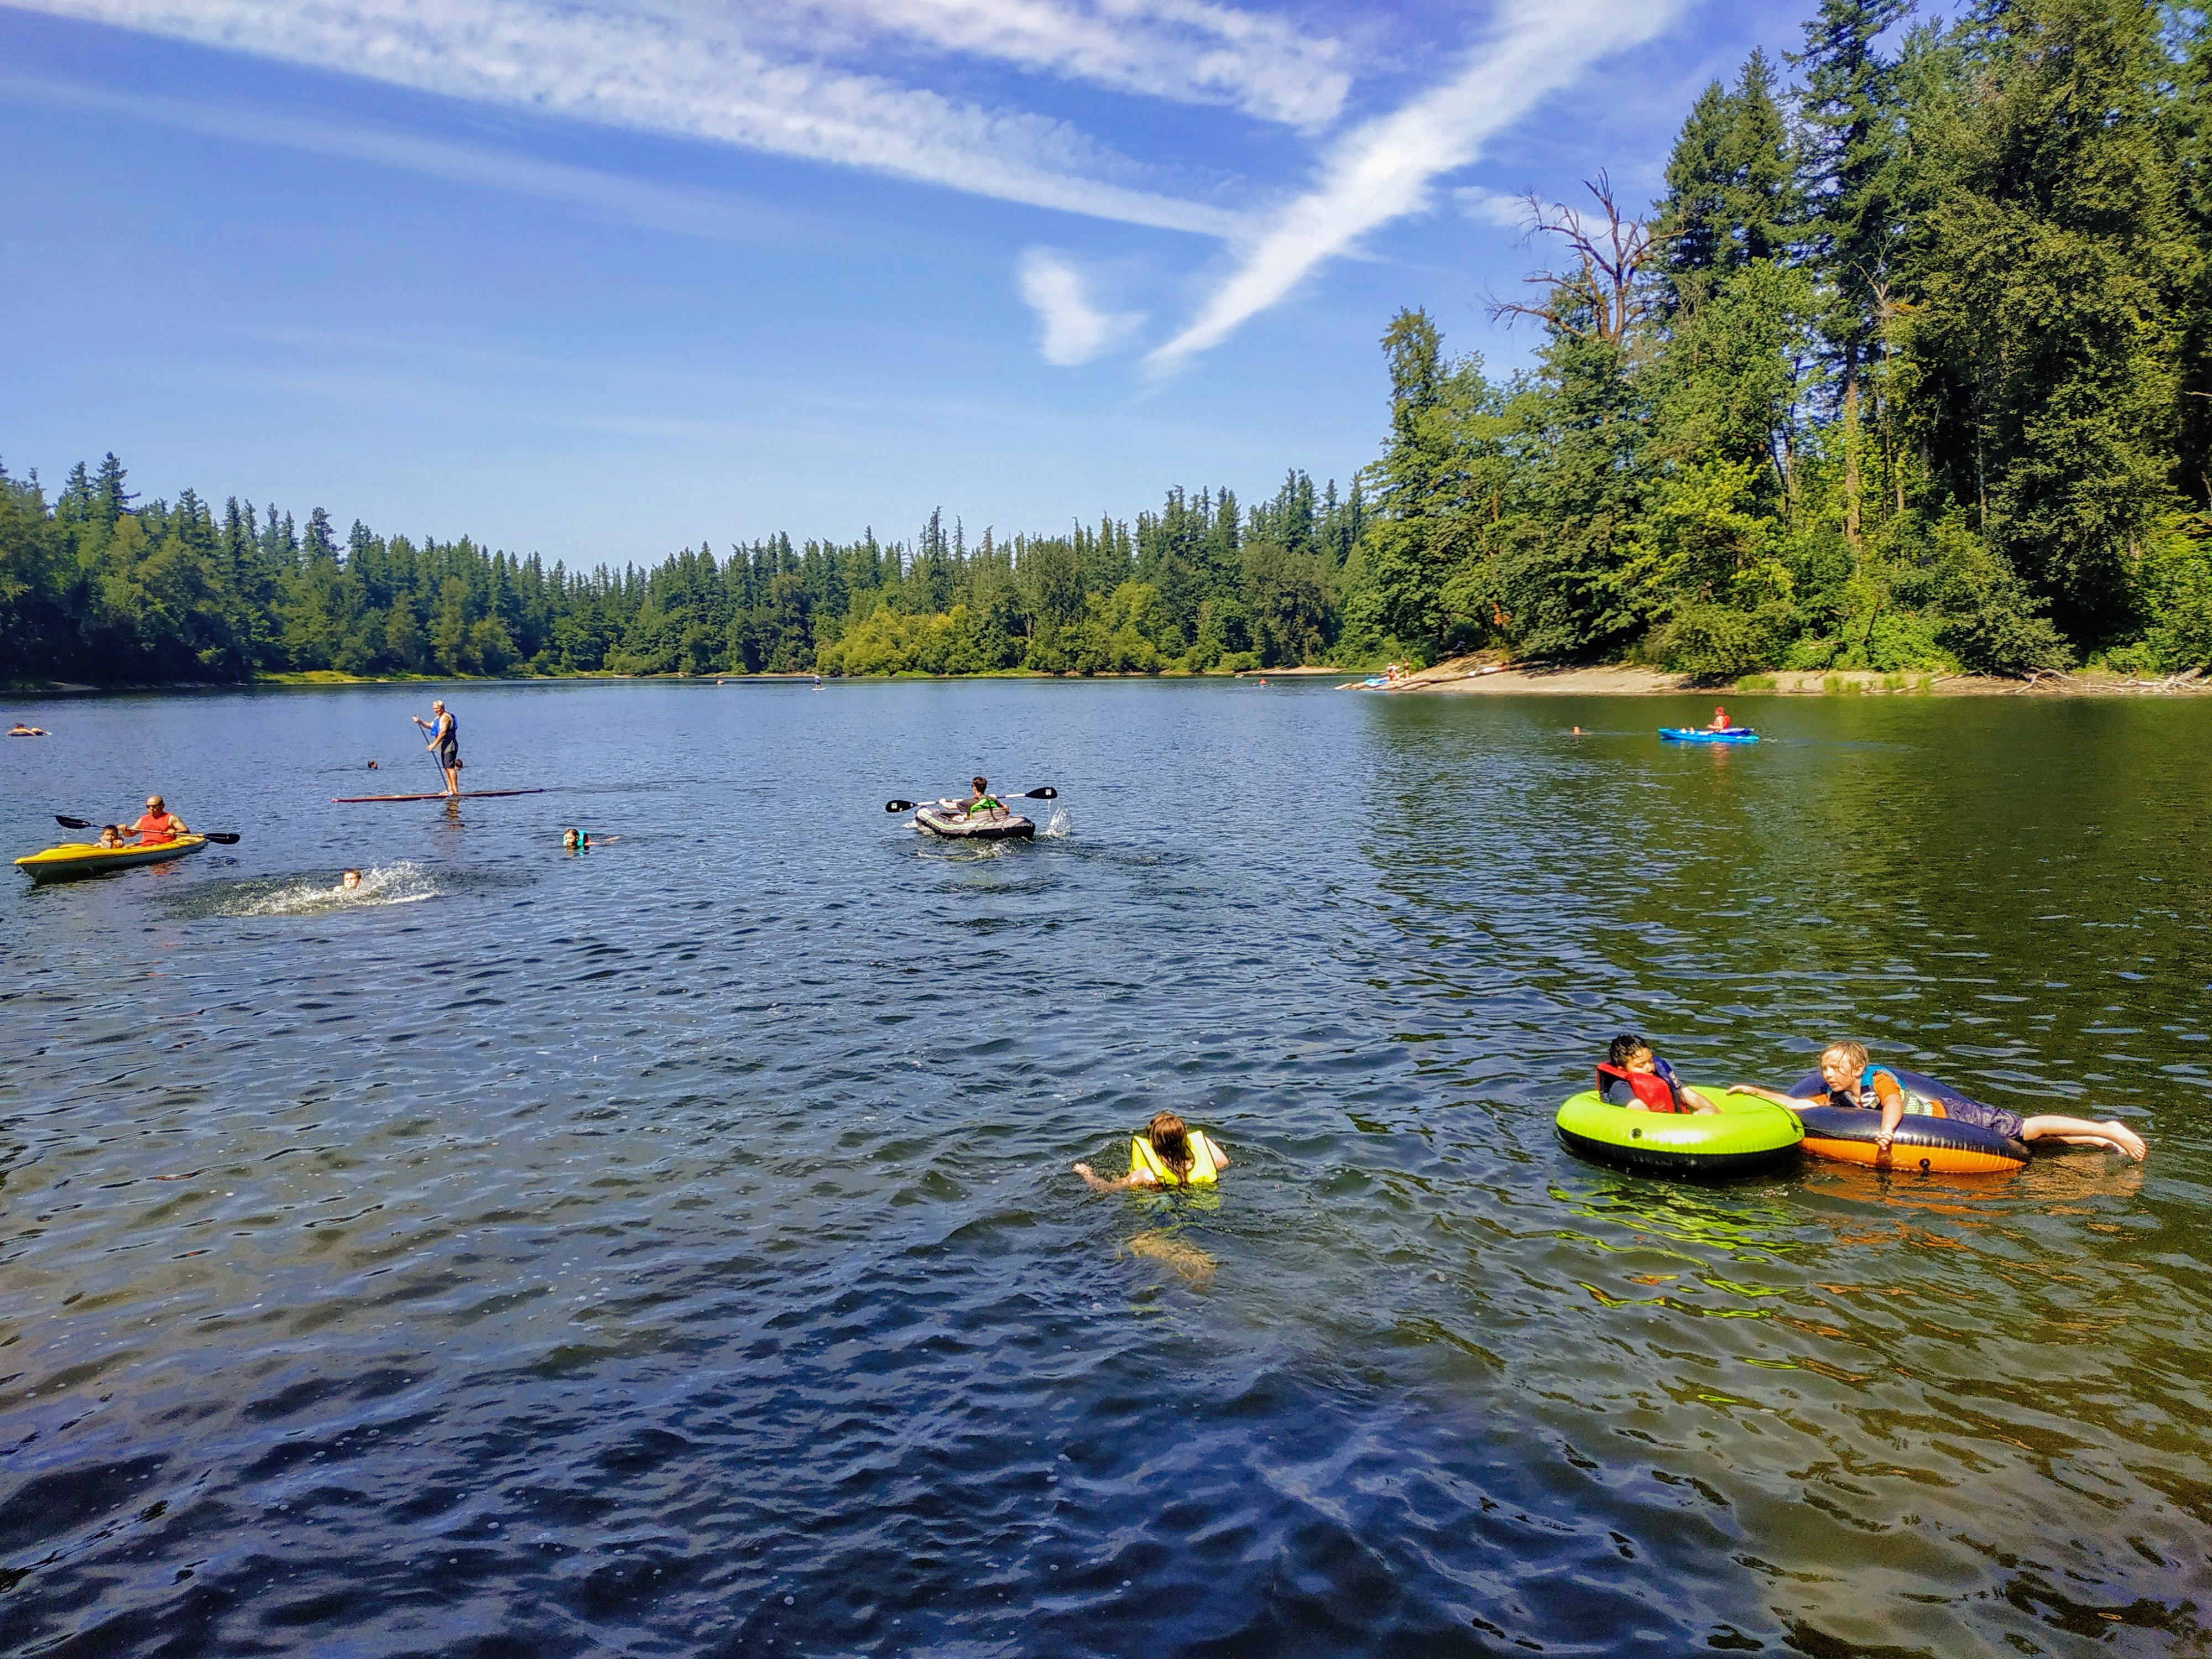
    Although the Florida Keys aren’t known for their traditional beaches, you can still find a sandy shore or two to walk along the water, rent kayaks, snorkel the reefs or even go for a swim if you can find a spot deep enough.

    Due to the reef system that protects the Florida Keys, it prevents the large waves from coming in and creating the large sandy beaches most people are accustomed to finding.  Sand is often brought in to develop man-made beaches in the Keys. This barrier of protection also creates a shallow bottom, but there are some areas you can still go for a swim or wade out for deeper waters.

    Don’t forget your sunscreen and also bring water shoes if you have them as the shoreline can be rocky due to the reef system that makes up the Florida Keys.

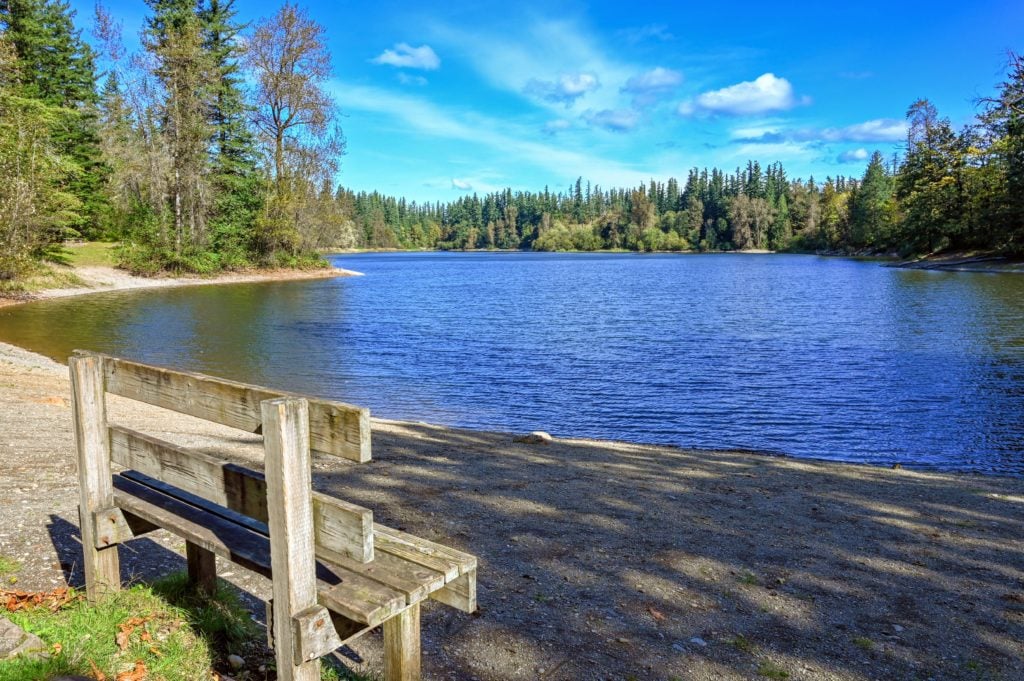
    John Pennekamp Coral Reef State Park and Bahia State Park are two great choices when looking for a park to spend some time by the water in the Florida Keys.  

    Another beach that makes a great place to go for a swim is Sombrero Beach in Marathon. The park has been completely renovated and is a beautiful park to spend the day snorkeling and swimming. It has bathrooms, showers, playgrounds, picnic areas, and a lovely beach area for sunbathing and relaxing.

    If you prefer, you can always save the beach time for your ride back through the Keys after visiting Key West.

    Feed the Tarpon at Robbie’s in Islamorada

    Stop at Robbie’s on your drive to Key West and create some fun memories feeding the giant silver tarpon. It costs $2.25 to gain access to the feeding dock. You can buy a bucket of fish for $4.00 to feed the tarpon, or you can watch others feed the fish from the pier.  Visit Robbie’s to watch a video of what it’s like to feed a tarpon.

    Robbie’s address: 77522 Overseas Hwy, Islamorada, FL 33036

    Walk along the old 7  Mile Bridge. 

    old and new 7 mile bridges in Florida Keys

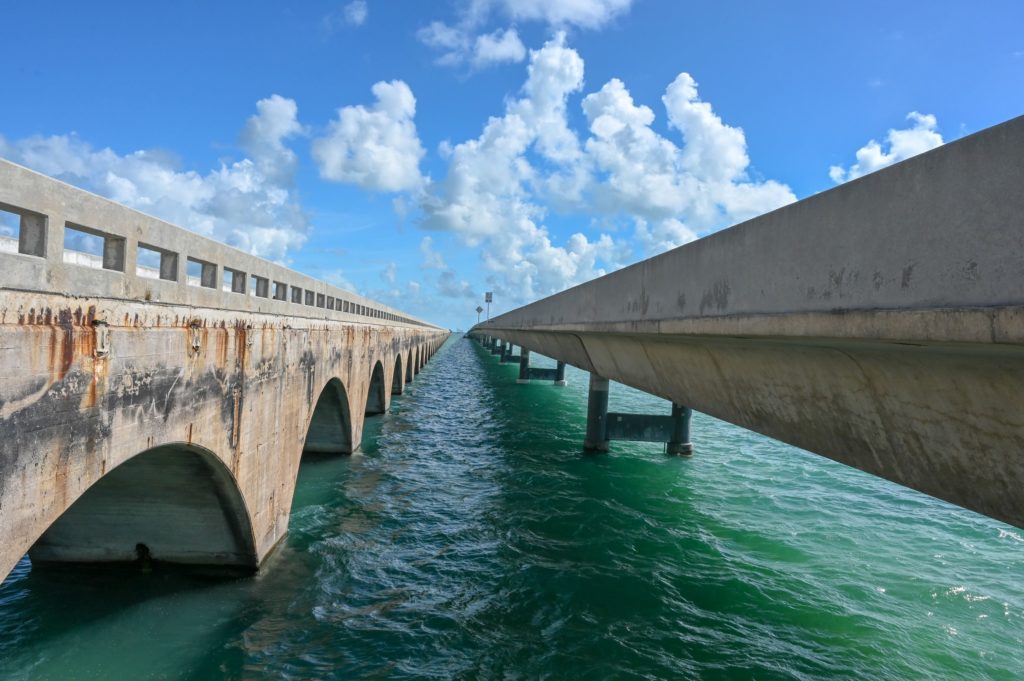
    Stop on Little Duck Key (yeah that made me smile too) at the parking lot for the boat launch and old 7 Mile Bridge near mile marker 40. The old 7 Mile Bridge is now a pedestrian walkway, and it runs parallel to the new 7 Mile Bridge. Walk along it and enjoy some beautiful views of Little Money Key.  Take time to watch people fishing, look for starfish, sea turtles, and to spot fish swimming below. Enjoy a stroll in the sun in a unique setting you probably won’t find anywhere else.  

    Visit the Dolphin Research Center on Grassy Key

    If you love dolphins, then consider stopping at the Dolphin Research Center and learn about the dolphins they have rescued and the rehabilitation efforts of the facility.  You can also book a dolphin encounter and get in the water with the dolphin.  Depending on your interest level or program you want to do, you’ll need to book in advance and plan for a few hours here.  So keep that in mind if you only have one day to drive through the Florida Keys.

    General Admission Fees: $28 for adults and $23 for kids. Program fees vary with each program you choose.  Visit the Dolphin Research Center to learn more about all the plans they have to offer and to book your experience.

    Dolphin Research Center address: 58901 Overseas Hwy, Grassy Key, FL 33050

    Eat Key Lime Pie at Kermit’s Key West Key Lime Shoppe

    You’ve finally made it to Key West! Your drive to Key West has been a full one so far,  why not congratulate yourself with some key lime pie for a trip well done, or whatever reason you can create to tell yourself its okay to eat another piece of key lime pie.

    I tried key lime pie from breakfast to dinner during my day in the Florida Keys, and Kermit’s was one of the best pieces of pie I ate!  You can read all abut the amazing key lime pie I ate, plus an unexpected, but delicious key lime creation that was a favorite of mine on Where to Find the Best Key Lime Pie in the Florida Keys.

    Visit Ernest Hemingway’s house in Key West

    Ernest Hemingway's Home in Key West

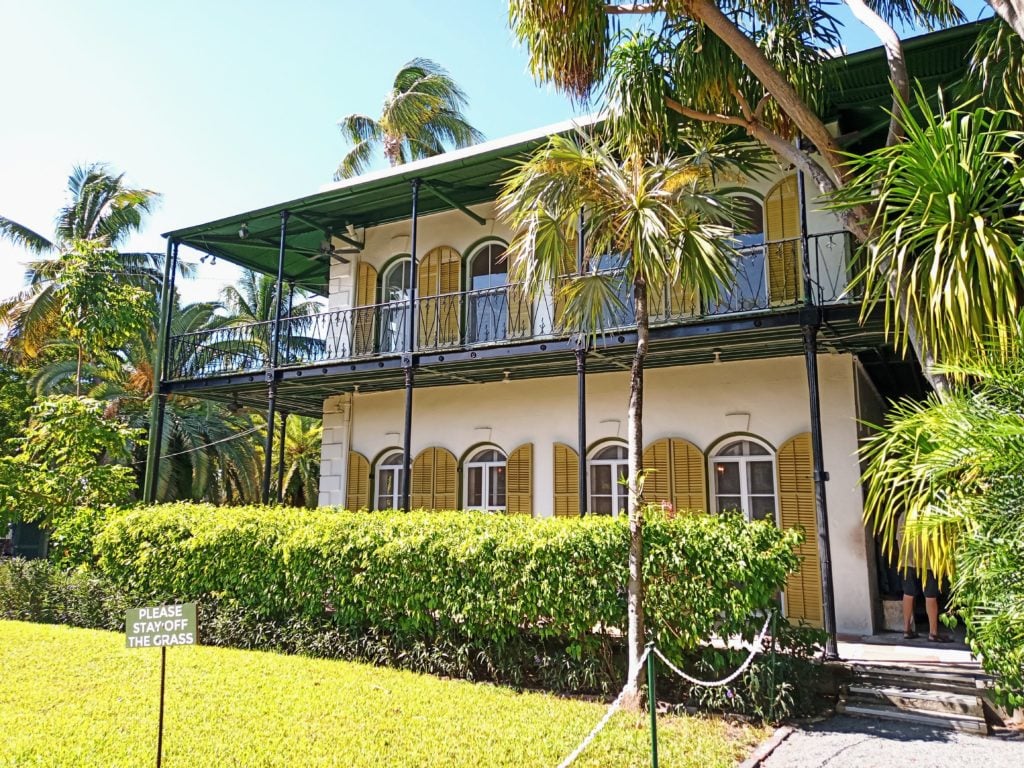
    Take a glance into the life of this famous American writer. Enjoy a break from the sun inside the air-conditioned house of what was Ernest Hemingway’s former residence. Hemingway lived here from 1931 to 1939. 

    The house is full of memorabilia from the many movies inspired by Hemingway’s books as well as his original possessions. One of his typewriters, books he owned and you can peer into his writer’s studio, his own space to create his masterpieces. 

    You can wander around the grounds as well. Look at the refreshing swimming pool, but don’t give in to its call to jump in. The grounds around the house offer lots of shaded spots for sitting and thinking. There is also a bookstore on the backside of the house where you can purchase souvenirs.

    General Admission is $14 for adults and $6 for children. It’s important to note that they don’t accept credit cards for tickets. They do, however, have an ATM by the bookstore in case you need to get some cash for payment. There is also an optional 30-minute guided tour included in the price of general admission.

    Address: 907 Whitehead St, Key West, FL 33040

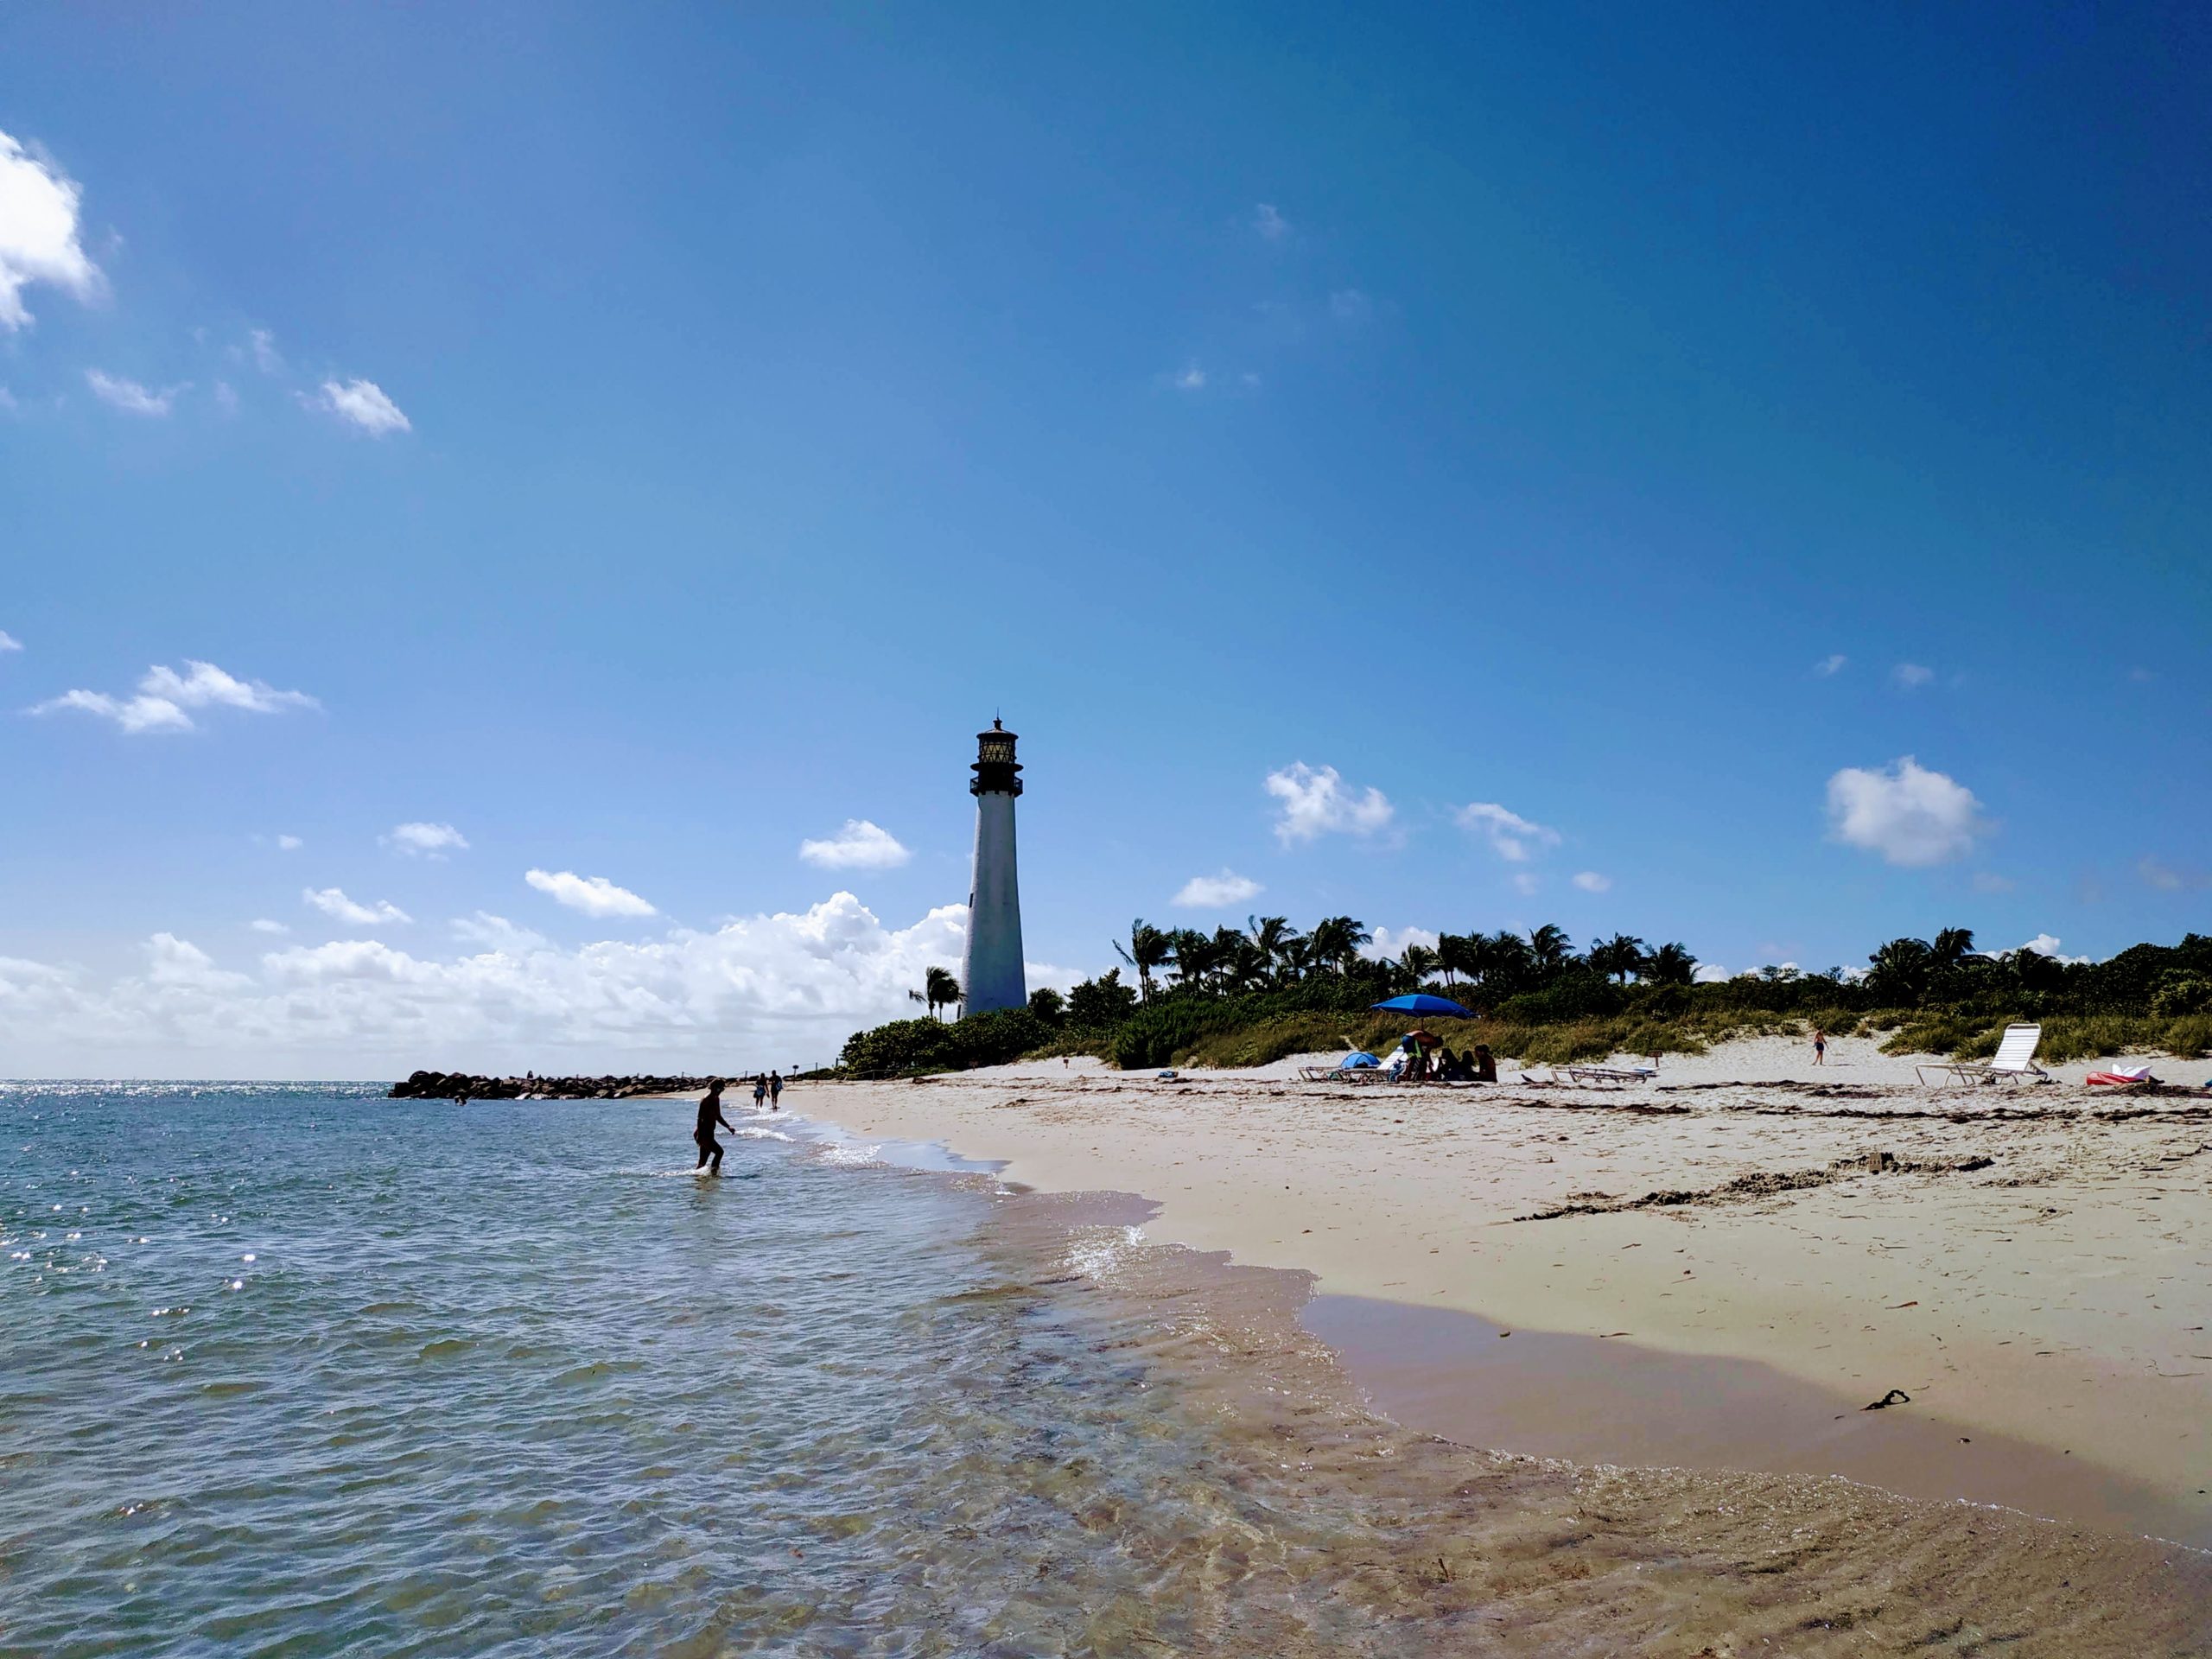
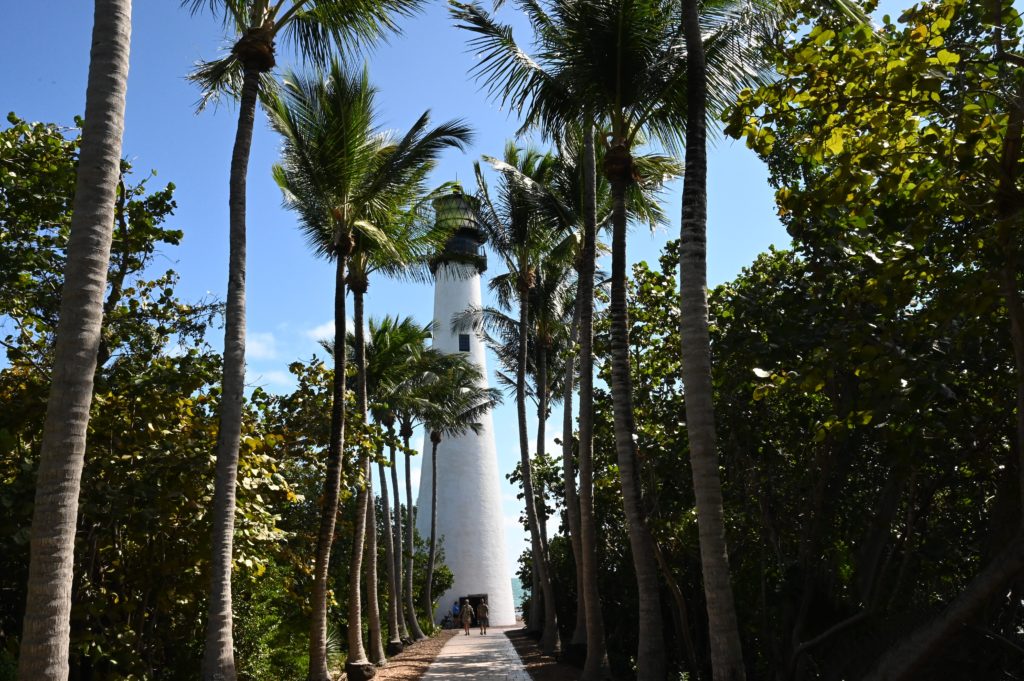
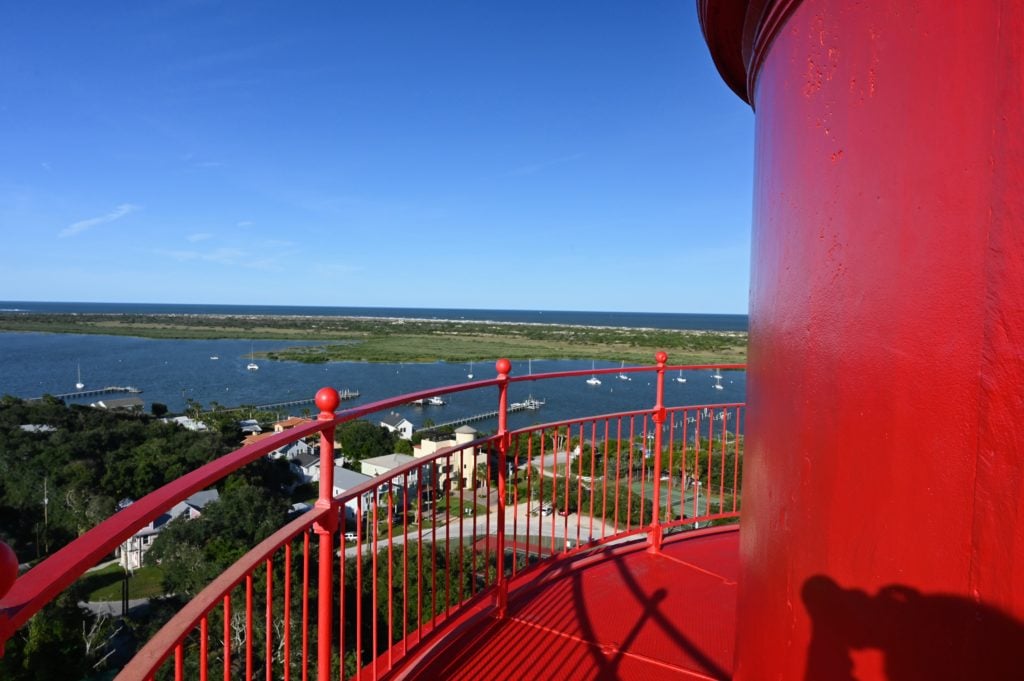
    Hike to the top of the Key West Lighthouse

    Across the street from Ernest Hemingway’s house is the Key West Lighthouse. You can climb the 88 stairs to the top to get a bird’s eye view of Key West.  This historic lighthouse was built in 1848 and was one of the first to have a woman as its Keeper.  You will have a chance to tour the lighthouse as well as the Keeper’s Quarters and learn a little more about the history of the Key West Lighthouse.

    General Admission is $12 for adults and $5 for kids.
    Address: 938 Whitehead St, Key West, FL 33040

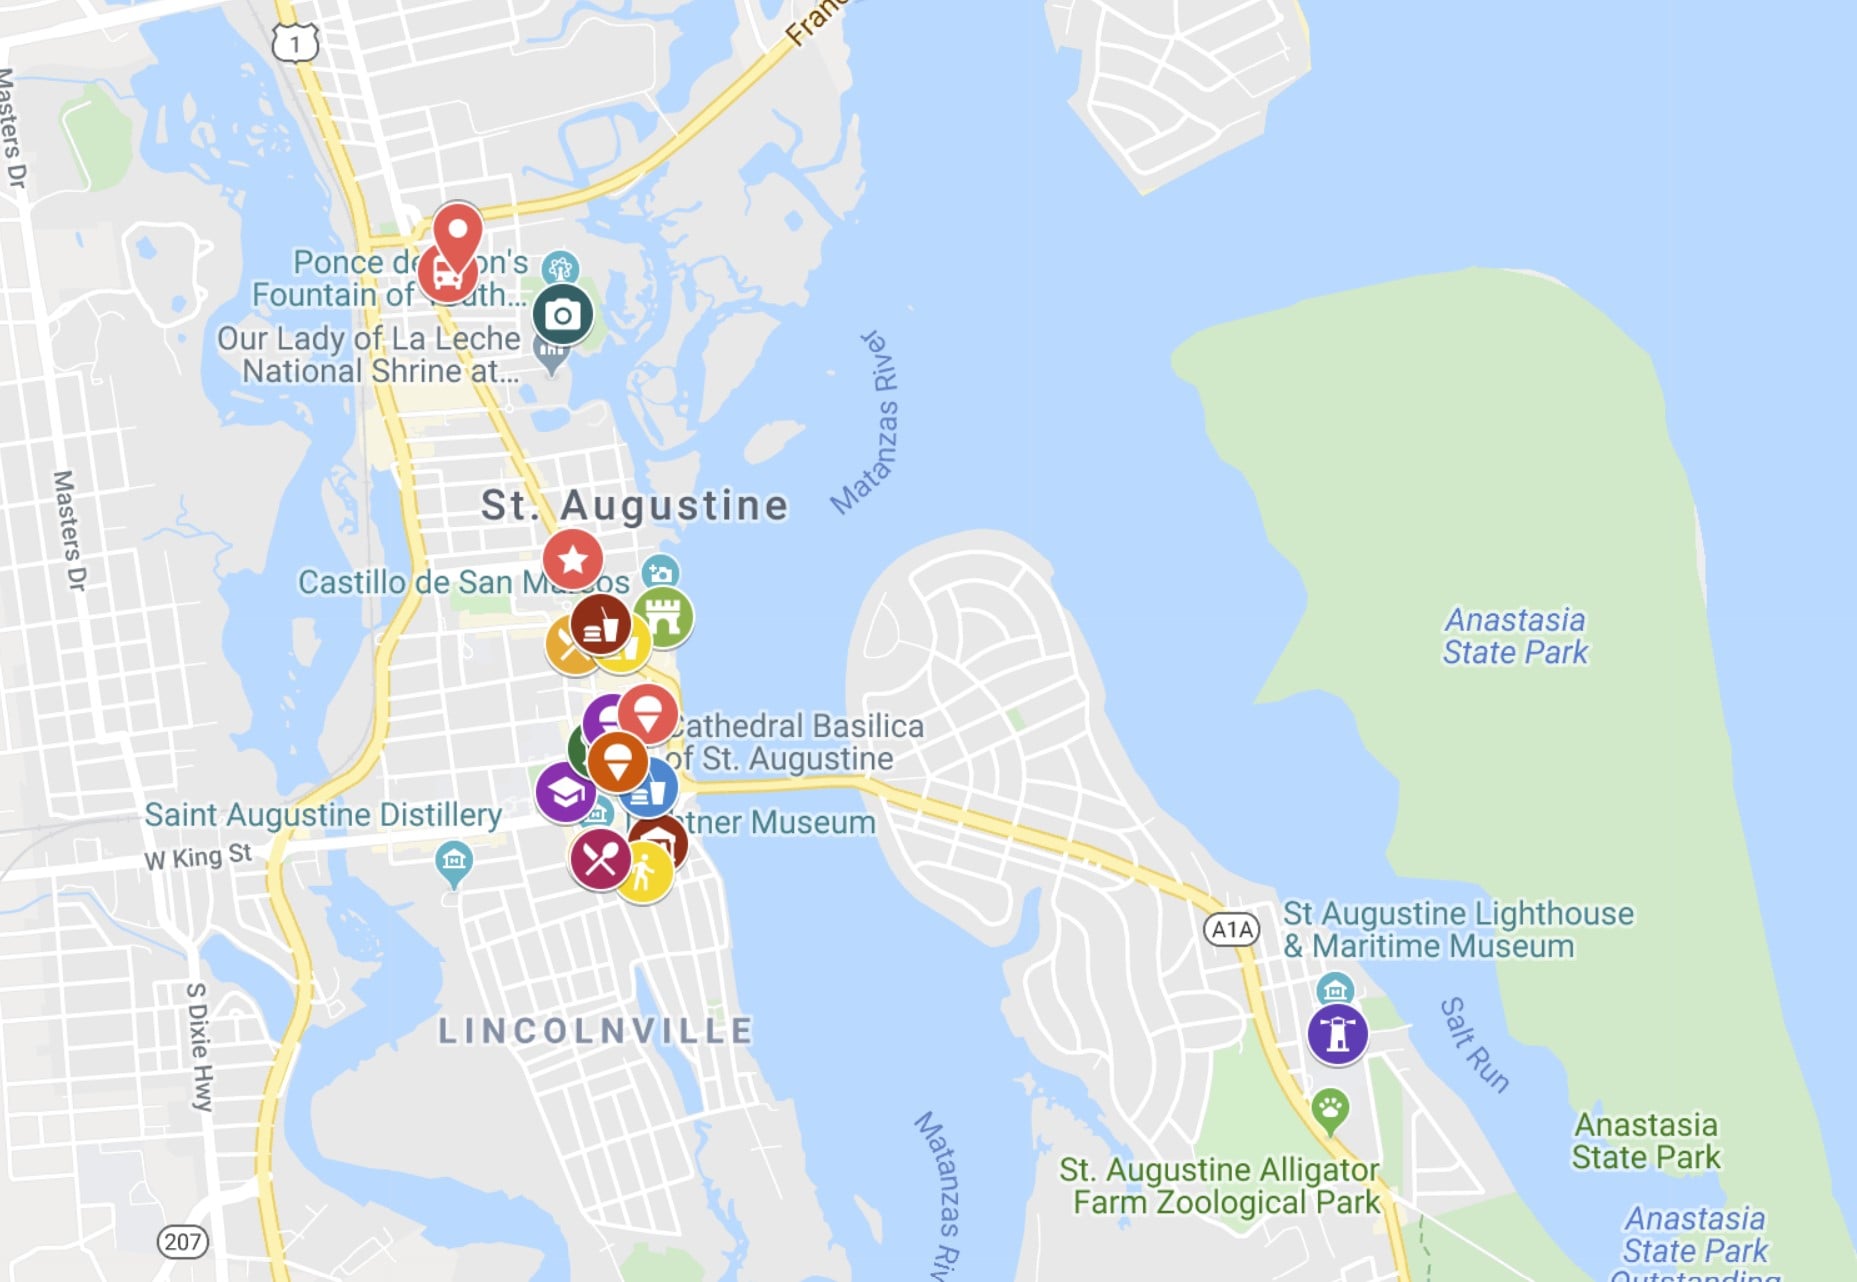
    Walk Around Old Town Key West

    White Church in Key West

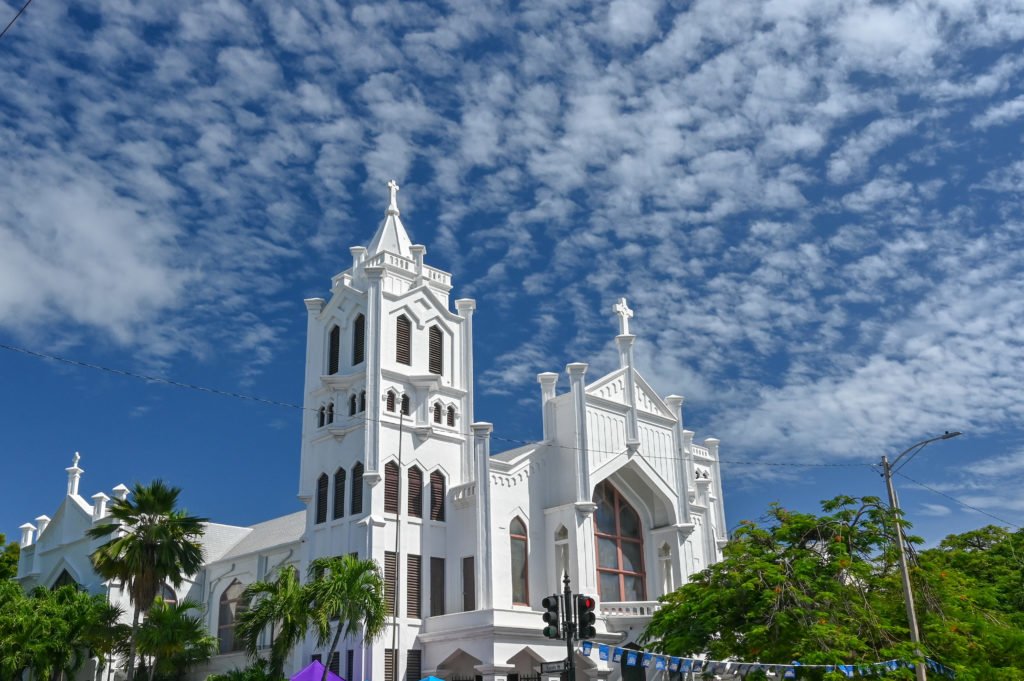
    Enjoy walking around town, shopping at the small boutique shops, and admiring the beautiful buildings in Old Town Key West. You can start at Mallory Square and walk down Duval Street to the Southernmost Point. Stop by the historic cemetery or visit Mile Marker Zero.  Old Town is a fun area to park the car and spend your time on foot.

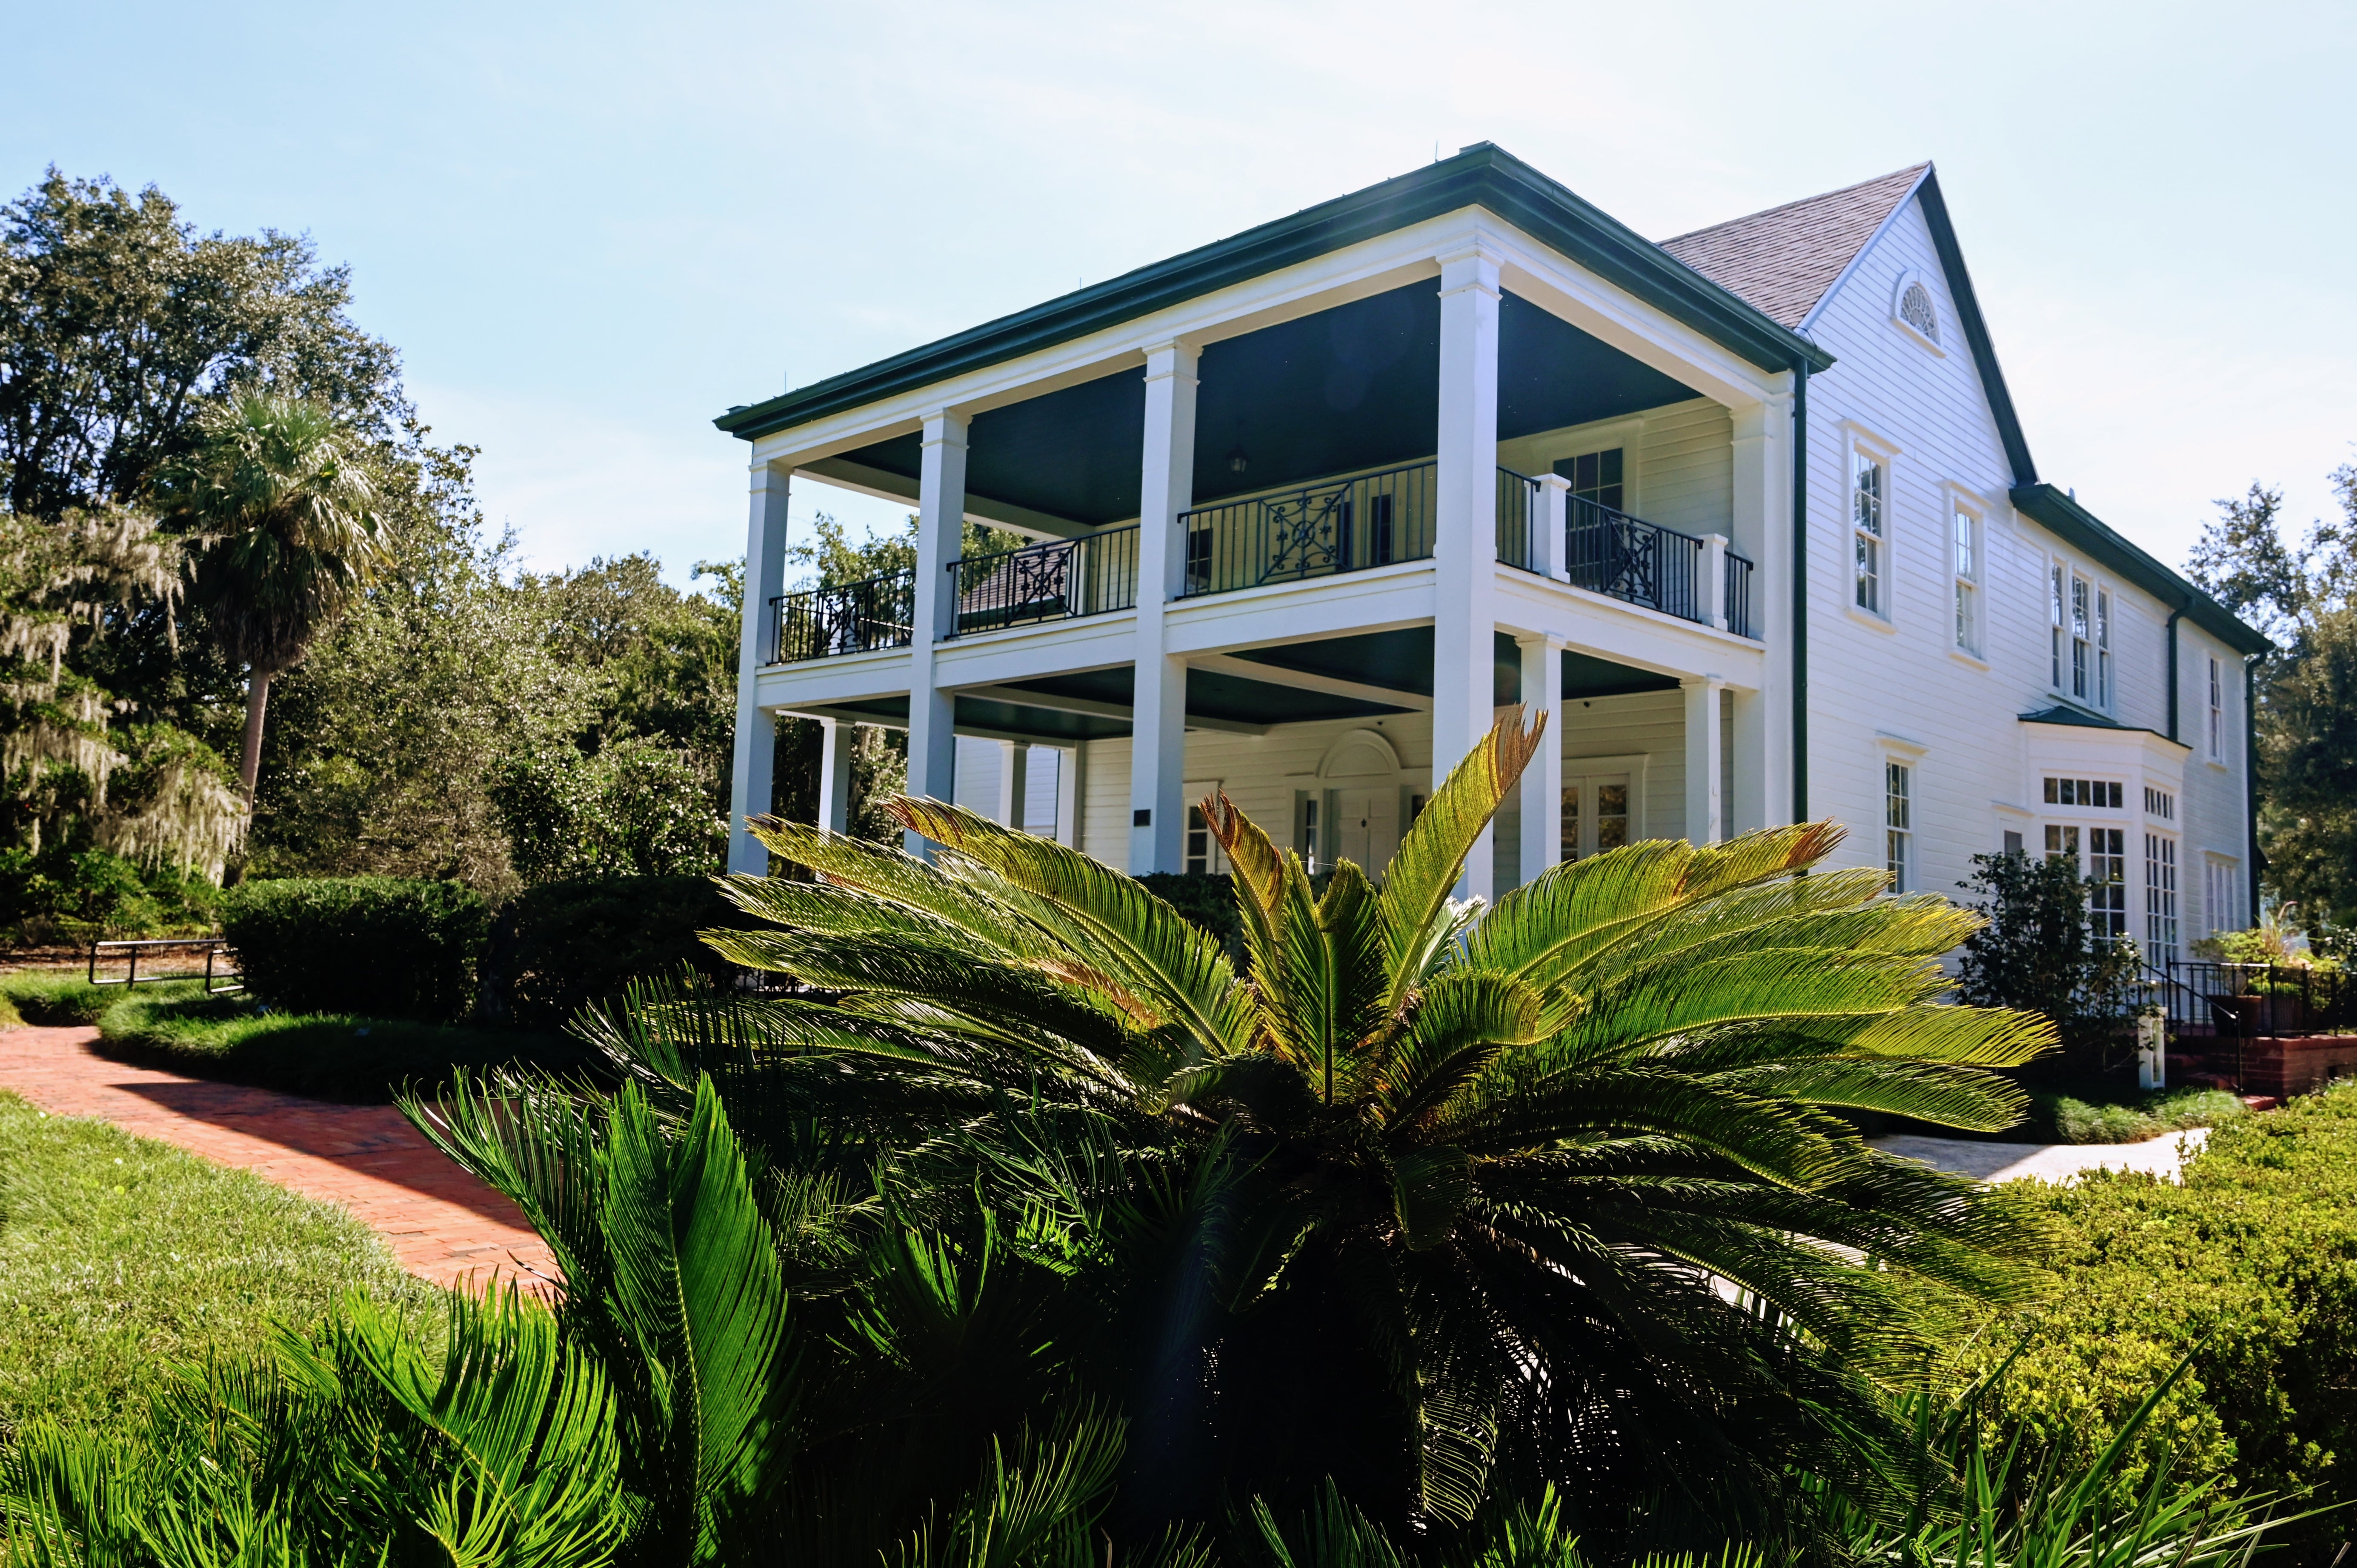
    Tour the Truman Little White House

    Get a chance to see where President Harry S. Truman spent his winters. It seems like a pretty excellent alternative to winter in Washington D.C.! Learn more about this historic house and its use since constructed by the U.S. Navy in 1890.

    General Admission is $21.45 for adults and $10.75 for kids. If you purchase your ticket online, you can save a couple of dollars.

    Address: 111 Front St, Key West, FL 33040

    Stop at the Southernmost Point in the Continental U.S.

    Southernmost Point Key West
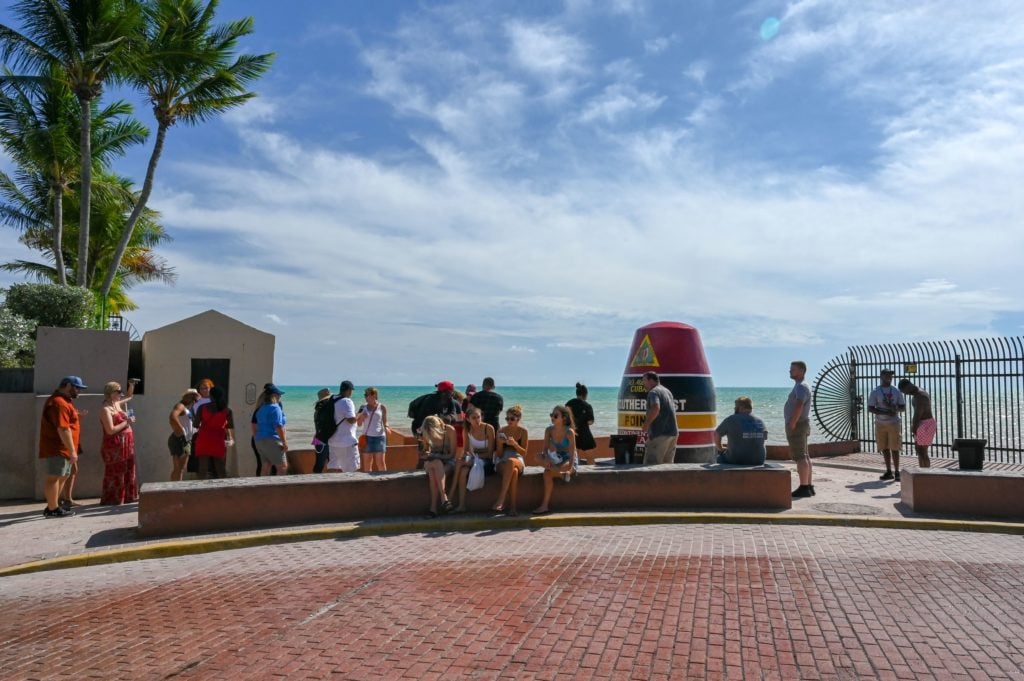
Enjoy another photo op, however just know that you may have to get in line to take your photo with the marker stating it is the Southernmost Point in the Continental U.S. There isn’t any shade either.  So you can decide just how important this photo op is to you.

    The Drive Back Thru the Florida Keys

    If you didn’t get a chance to spend some time on the water, now would be an excellent time to visit one of those parks I mentioned earlier.  It’s also a good time to grab some more key lime pie and decide where to watch the sunset.
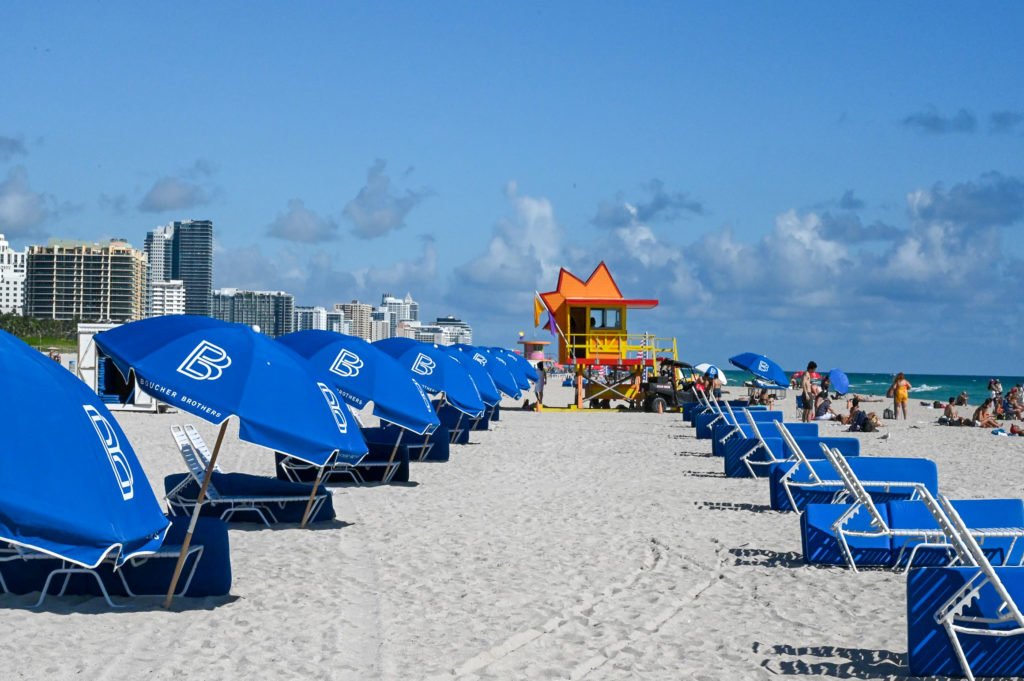
    Watch the Sunset

    Sunset on Islamorada in Florida Keys

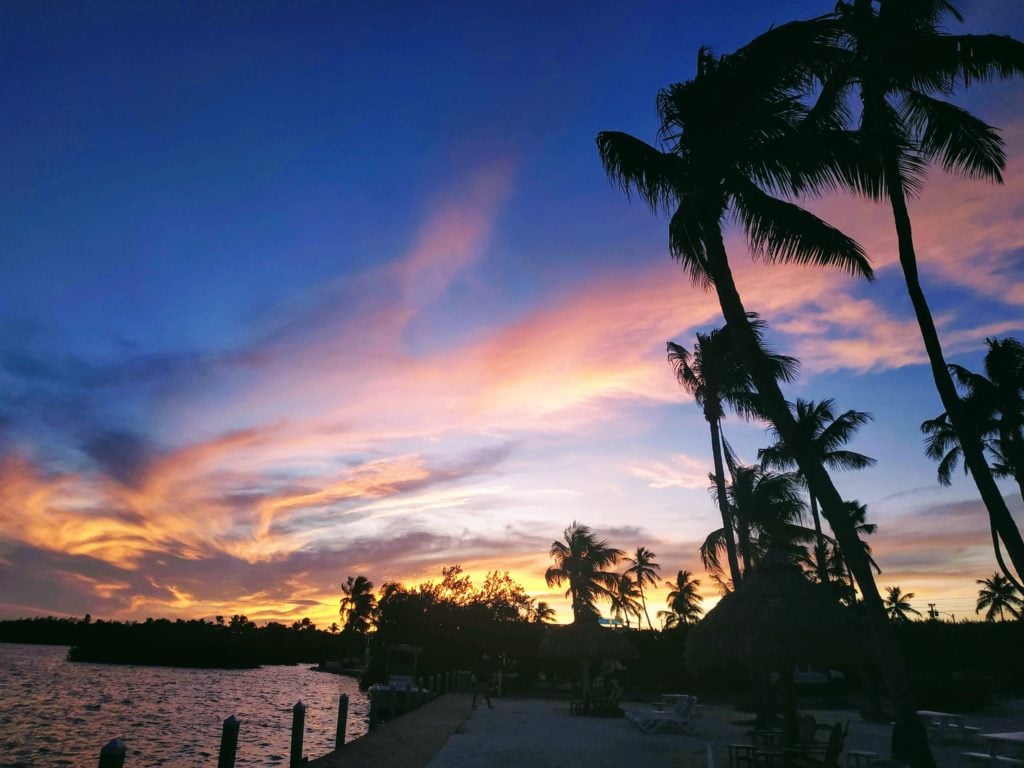
    Wherever you happen to be in the Florida Keys, make sure to enjoy a beautiful Florida sunset. Here are a few options for places to watch the sunset either in Key West or on your drive back.

    • Sunset Tiki Bar and Grille (at the Galleon Resort): 617 Front St, Key West, FL 33040
    • Lorelei Restaurant and Cabana Bar: 96 Madeira Rd, Islamorada, FL 33036
    • Sundowners: 103900 Overseas Hwy, Key Largo, FL 33037

    Places to Eat When Driving to Key West

    Coffee & Breakfast:

    • Midway Cafe & Coffee Bar
      Address: 
      80499 Overseas Hwy, Islamorada, FL 33036
    • Harriette’s Restaurant
      Address: 95710 Overseas Hwy, Key Largo, FL 33037

    Lunch Spots:

    • Twisted Shrimp
      Address: 87745 Overseas Hwy, Islamorada, FL 33036
    • Caroline’s Cafe
      Address: 310 Duval St, Key West, FL 33040

    Dinner Options:

    • Lorelei Restaurant & Cabana Bar
      Address: 96 Madeira Rd, Islamorada, FL 33036
    • Hobo’s Cafe
      Address: 
      101691 Overseas Hwy, Key Largo, FL 33037
    • Santiago’s Bodega
      Address: 7305, 207 Petronia St #101, Key West, FL 33040

    Things to Do if You Have More Than One Day

    Where to Stay in the Florida Keys

    You have so many choices for where to stay.  I’d pick one based on where you’re traveling to next.  Marathon is an excellent choice for a Key close to Key West, but outside the busy Key West party scene.  Islamorada was a great stop for us as we were heading to Miami the next day, so it was a good midway point. If you want choices galore and don’t mind driving the full length of the Florida Keys in one day, then you might research options in Key Largo.

    For a unique option, you might consider one of these Air BnB options:

    Final Thoughts on Driving to Key West

    As I stated at the beginning of this post, driving through the Florida Keys, is not a race to the finish, but more like a leisurely Sunday drive.  It should be full of sunshine and fun stops and road trip memories to last a lifetime. 

    Pack sunscreen, beach towels, extra water, flip flops, maybe a change of clothes, depending on your dinner plans and your favorite road trip music.  I suggest some fun hits like “Ice Ice Baby” to get everyone laughing and then throw in some upbeat Cuban music that’ll have you dancing in your seats.  Smiles for everyone!

    Happy Road Tripping!

  • How to Spend One Day in Miami: Top Things to Do

    One day in Miami is certainly not enough time to explore this lush and vibrant city. There are so many things to do in Miami, pick a few interests, and plan your day around those. Then make time for relaxing at the beach or people watching off the boardwalk. If you try to pack in too much sightseeing and then completely miss time at the beach, did you even visit Miami at all?  I’ll do my best to give you tips on things to do as well as make room for beach time in this one-day itinerary for Miami. So let’s get started!

    Good Morning Miami!

    Don’t skip breakfast this morning as you want to be fueled up for a full day of fun! Make sure to pack your swim clothes, beach towels, flip flops, sunglasses, and sunscreen before heading out. Then grab some breakfast. I recommend breakfast at the 11th Street Diner in Miami Beach.  This retro-styled railroad car diner is a fun way to kick off your day of sightseeing in Miami.  

    My second choice would be to grab breakfast at the 24 hour News Cafe, a diner that sits across the street from Lummus Park. Enjoy views of the boardwalk and the swaying of palm trees while you enjoy your breakfast.  There is indoor and outdoor seating available.

    Breakfast:

    Now that you’ve had some coffee and breakfast, you are ready to start this full day of sightseeing and soaking in the hot Miami sun!

    Things to Do with One Day in Miami

    Art Deco Architecture

    Let’s walk off breakfast and explore the Art Deco architecture that Miami Beach is so famous for. If you’re interested in learning more about the area’s history and more about Art Deco Architecture, then catch a walking tour at 10:30 a.m. in front of the South Beach Museum on Ocean Drive at Lummus Park. If you’re looking for something a little more casual, walk along Ocean Drive at your own pace, admiring the Art Deco pastels and sunny vibes before cooling off at the beach.

    Art Deco Tour Options:

    Art Deco Welcome Center Walking Tours: These 90-minute tours cost $30/adult ($25 for seniors and students). The tour allows you to step inside some of the buildings and learn more about Art Deco architecture and how it started in Miami as well as other cultural points of interest. 

    They also offer this tour as a self-guided audio tour, and you can walk at your own pace while listening to the audio guide.  It is $25 for adults ($20 seniors and students).
    Location: 1001 Ocean Drive and 10th Street, Miami Beach, FL 33139

    art deco welcome center miami beach
    The Art Deco Welcome Center.

    DIY Walking “Tour” Along Ocean Drive:
    If you would rather casually walk around and admire the buildings on your own, then the two main areas you’ll want to walk down are Ocean Drive and Collins Ave.  Although you won’t see every example of Art Deco here, you will get a good feel for the style.  

    Try to find parking at the Miami Beach Municipal Parking Garage at 1301 Collins Ave, Miami Beach, FL 33139. It is a short walk to Lummus Park, the Art Deco Welcome Center, and the beach! After you park, make your way to Ocean Drive and begin your DIY Art Deco Walking Tour, starting with the Cavalier South Beach Hotel. Then continue south along Ocean Drive, admiring all the Art Deco along the way.

    • Cavalier South Beach Hotel: 
    • The Carlyle: 1250 Ocean Dr, Miami Beach, FL 33139. (You may recognize this from movies such as Bad Boys 2, The Birdcage, and Scarface).
    • Enjoy the cheerfully painted Leslie: 1244 Ocean Dr, Miami Beach, FL 33139
    • Art Deco Welcome Center: 1001 Ocean Dr, Miami Beach, FL 33139. Even if you’re not taking a tour with them, it’s still an excellent place to stop in to learn a little more about the Art Deco architecture style.
    • Edison Hotel (across the street from the Art Deco Welcome Center): 960 Ocean Dr, Miami Beach, FL 33139
    • Hotel Breakwater South Beach (another block down from the Edison): 940 Ocean Dr, Miami Beach, FL 33139

    • Starlite Hotel (enjoy it’s pastel yellow and purple vibes): 750 Ocean Dr, Miami Beach, FL 33139

    • The Avalon Hotel (see photo at the top of the page with the classic car): 700 Ocean Dr, Miami Beach, FL 33139

    For more Art Deco architecture styles, you can cut over two blocks west to Collins Avenue (A1A) and admire more Art Deco architecture as you circle back to your car to get your beach gear.

    Top Miami Beaches

    You can’t spend a day in Miami and not go to the beach. So now that you’ve worked up a sweat walking around and seeing Art Deco Architecture, why not take a swim and cool off at one of Miami’s beautiful beaches! The following beaches are some great options off the A1A.

    Miami Beach: Come here if you want a massive beach with options to rent chairs and umbrellas, purchase drinks and food close by and have a long stretch of beach with lifeguard huts scattered up and down the beach. Miami Beach is a massive stretch of sandy beach. However, be prepared as parking can be challenging to find. 

    Location & Parking: There are several parking garages all along Ocean Drive that you can choose from.  Due to their proximity to this popular area, they are often quite expensive.  If you’re willing to walk a few blocks, you might be able to find some street parking a little further out.  For parking garages, try Miami Beach Municipal Parking Garage, Miami Beach Parking Garage, or 953 Florida A1A Parking Garage.

    Miami Beach lifeguard hut and umbrella chairs
    Enjoy the colorful lifeguard huts along Miami Beach.

    Allison Park, 6500 Collins Ave, Miami Beach, FL 33141: Come here if you want something a little quieter and a little cleaner than Miami Beach. This park has a playground area, workout equipment, clean bathrooms, and a beautiful beach. The only downside is limited parking. There is a small shaded parking lot for Allison Park, and if you’re lucky, you’ll snag a spot there.  However, if you are unable to find a parking spot, don’t worry, you can always try one of the other beaches listed here.

    36th Street Park, 3501 Collins Ave, Miami Beach, FL 33140: Come here and enjoy walking along the Miami Beach boardwalk.  This beachfront park has a clean beach and is away from the crowds of Miami Beach. There are bathrooms and showers here.  Park at the Miami Beach Parking lot or find street/metered parking nearby.

    North Shore Open Space Park, 8328 Collins Ave, Miami Beach, FL 33141: Come here for a large park full of picnic tables and BBQ grills, multiple restrooms, outdoor showers, and just a short walk to the beach.  The beach here is not as extensive as Miami Beach; however, there are lifeguard huts here, and you will find it to be a lot less crowded than South Miami Beach. There is lots of street parking for North Shore Open Space Park. There are also several parking garages nearby.

    Lunch Break to Regroup and Recharge

    Now that you’ve had your fill of Vitamin D, it’s time to take a break from the beach. Grab lunch at any of the many options along Ocean Drive or drive down to South Pointe Park Pier and enjoy more of the boardwalk and beach area.  You may prefer to instead grab a quick bite and squeeze in a shower at your hotel before heading to our next stop. Do what works best for you.  Here are some lunch options just in case you want to sit down to eat before moving on.

    Lunch Options:

    • The Local House: 400 Ocean Dr, Miami Beach, FL 33139
    • The Lobster Shack: 40 South Pointe Dr #104, Miami Beach, FL 33139
    • Bocas Grill Brickell (option close to the Vizcaya Museum): 2525 SW 3rd Ave, Miami, FL 33129
    • Zuuk Mediterranean Kitchen (cheaper option near Vizcaya): 1250 S Miami Ave #105, Miami, FL 33130

    Vizcaya Museum & Gardens

    You may only have one day in Miami, but that will be enough for you to recognize that there are a lot of wealthy people who call Miami home.  So why not explore how they live with a trip to Vizcaya Museum and Gardens–a Miami mansion turned museum. 

    If you’ve ever wondered what it’s like to live in one of Miami’s mansions, here’s your chance to peer into the lives of the wealthy. Villa Vizcaya was once home to James Deering, who spent almost ten years building this beautiful home.  

    Gaze upon the Italian inspired architecture and beautifully decorated rooms, and you may feel as though you’ve traveled to Italy, rather than a mansion in Miami.  The Venetian inspired barge and boat docks stole the show for me, not to mention the gorgeously manicured gardens.

    Vizcaya Gardens
    One of the beautiful gardens at Vizcaya Museum.

    The house is stunning. However, I wonder, did James Deering enjoy it? He only lived a few years after its completion before bequeathing to his nieces. Did they feel inspired as they wandered over their beautifully manicured gardens or looked out over the water? I hope so. I know I was. 

    stained glass windows
    Beautiful stained glass windows and doors leading out to the Vizcaya Gardens.

    One of the unique things about the Vizcaya Museum and Gardens is that they house the original antiquities purchased by the Deering family.  See the house as the original owner decorated it and learn what inspired its builder.

    Antique Furnished room in the Vizcaya Museum
    One of the rooms, still decorated with the original antiques from the Deering family.

    I think the Vizcaya Museum and Gardens are worth a stop during your one day in Miami. It is set on 50 acres of land and allows you to peer into the lives of the Deerings as well as give you a sense of the eclectic nature that is Miami. Don’t miss it!

    Bill Baggs Cape Florida State Park

    After visiting the museum, if you have time, consider making a trip out to Key Biscayne and the Cape Florida State Park. Its beach is one of the top 10 in the US! So if you didn’t get a chance to swim earlier, why not tour the lighthouse and then go for a swim while enjoying views of the lighthouse. 

    Cape Florida State Park is full of history. It was once used for the underground railroad. Runaway slaves would hide on its dark beaches until they could make the passage for the Bahamas.  This continued until the lighthouse was built–illuminating the once dark beaches of Cape Florida.

    The lighthouse was built in 1825, and according to the park, it is the oldest structure in Miami-Dade.  You can climb the 112 stairs to the top and admire the gorgeous views over the bay.  The Lighthouse tower and its surrounding complex are open Thursday through Monday from 9:00 a.m. until 5:00 p.m. Guided tours take place at 10:00 a.m. and 1:00 p.m. and include a visit to the Light Keeper’s House. Tours are free and begin at the entrance gate in front of the lighthouse.

    There are lots of picnic areas at the park, restrooms for changing, and a cafe where you can grab a bite to eat or rent bicycles and ride around the park. Make sure you don’t leave any food lying around unattended as there are a lot of raccoons here as well as iguanas and birds. Visit the park’s website to learn more about all the amenities offered at Bill Baggs Cape Florida State Park.

    Address: 1200 Crandon Blvd, Key Biscayne, FL 33149
    Park Hours: The park opens at 8:00 a.m. and closes at sunset.
    Fees: It costs $8 per vehicle to enter the State Park.

    Cape Florida Lighthouse
    The Historic Cape Florida Lighthouse.

    Dinner in Little Havana and An Evening in Miami

    Head to Versailles Restaurant in Little Havana and dine with locals and tourists at a traditional Cuban restaurant. Make sure to leave room for dessert or at least stop in at their adjoining bakery after dinner to grab some yummy key lime pie or pastries to go. Stroll through the neighborhood, and if you saved room and want some ice cream, stop in at Azcura ice cream for a treat.

    Versailles Restaurant Address: 3555 SW 8th St, Miami, FL 33135

    Azcura Ice Cream Company Address: 1503 SW 8th St, Miami, FL 33135

    An Evening in Miami:

    The evening is yours to spend how you want. Relax by the pool or see what nightlife Miami has to offer, it all depends on what you like to do! 

    If you’re up to it head back to Miami Beach to see the Art Deco buildings on Ocean Drive lit up in neon lights. It really has that feeling of Miami you’ve seen in the movies with the palm trees & neon lights.

    You can also stroll through the Lincoln Road pedestrian shopping and dining area or visit one of the hottest neighborhood’s in Miami and shop at The Shops at Mary Brickell Village. If shopping isn’t your thing, consider visiting Wynwood Walls and enjoying some art murals before it gets too dark.

    • Lincoln Road Shopping District (pedestrian street in Miami Beach): Lincoln Rd, Miami Beach, FL 33139
    • The Shops at Mary Brickell Village: 901 S Miami Ave, Miami, FL 33130
    • Wynwood Walls: 2520 NW 2nd Ave, Miami, FL 33127
    vizcaya garden gates
    Gates to one of the many gardens at Vizcaya Museum.

    Closing Thoughts and Tips

    As I mentioned in the beginning, there are so many things to do in Miami that you can’t possibly seem them all in one day. I recommend a mixture of sightseeing and relaxing as the best way to get a feel for this luxurious city.

    Choose where you stay, based on whether you want to participate in the Miami nightlife or prefer a more quiet area to sleep. If you like to be right in the midst of the noise and the hustle and bustle, then you might choose to stay in South Beach.  However, if you prefer to sleep at night, select one of the quieter neighborhoods, Coral Gables, Brickell, or Coconut Grove make good choices. 

    We stayed in the Coconut Grove neighborhood and loved it.  There are a lot of great coffee shops nearby, plenty of restaurants and parks and it felt safe. 

    Make sure to familiarize yourself with the beach flags on Miami’s beaches. Talk to a lifeguard if you are unsure about the conditions. 

    If you’re looking for more great destinations in Florida, consider visiting St. Augustine, the oldest city in America. Read about my day trip to St. Augustine from Orlando to learn more about this historic city. Whatever you decide to do, soak in the sun, and have fun!

    Have a beachy day!

  • Day Trip to St. Augustine Florida: America’s Oldest City

    If you’re planning a trip to Florida,  consider adding St. Augustine to your travel itinerary. I found myself in Orlando with some extra time and decided to take a day trip to St. Augustine. I am so glad that I did!  There are so many things to do in St. Augustine that you could easily spend a few days here. However, with a day and some careful planning you can get a good feel for this historic city.

    You will be delighted by its rich history and beautiful architecture and of course it doesn’t hurt that it is located on one of Florida’s beautiful coastlines!  In this post, I’ll cover some of the top sights that you can see on a day trip to St. Augustine, and perhaps you’ll find yourself returning for a night or two in this amazing city.

    A Little Background on St. Augustine, Florida

    St. Augustine is the oldest city in America.  How cool is that! The Spanish first settled St. Augustine in 1565, and you will notice the Spanish influence in the architecture of many of the buildings here.  St. Augustine has a unique story and history buffs will love learning about the chronology of events that led to Florida becoming an American territory. Pirates, wars, and oil tycoons all played a part in the story of St. Augustine. 

    Even if you are not a big fan of history, you will undoubtedly be able to appreciate the beautiful buildings and unique setting. Plus, who doesn’t want to visit the site of the Fountain of Youth? I mean, maybe, just maybe, your sip from the fountain will be “the sip.” Don’t you at least want to try?

    Making the Most of your Day trip to St. Augustine

    Start early. I recommend you arrive no later than 9:00 a.m. If you’re like me and making the day trip to St. Augustine from Orlando, the drive takes a little over 2 hours one-way, if you’re staying on the coast, say in Daytona, then your trip will be around 1 hour. I recommend grabbing a quick bite and a coffee for your drive and then planning another coffee break once you’re in St Augustine. 

    Getting Around St. Augustine, Florida

    You have a couple of options for getting to the sights in St Augustine.  

    Walk & Drive to the Sights: Park at the Visitor Center Parking Garage and walk to the various attractions. It is $15/vehicle for the day. The main attractions are about a 10-15 minute walk from the parking garage.  Please note that most places close at 5:00 p.m., so plan your sightseeing accordingly and make sure to pick up a free map at the Visitor’s Center.

    There are a few sights you will want to drive to, however they have their own free parking, so you won’t need to pay for parking twice. In the post below, I will explain which ones those are, and how I recommend ordering your day trip to St. Augustine.

    Take a Trolley Tour: Old Town Trolley Tours stops at 23 different stops along their route. Your ticket is good for the whole day.  Your legs get a rest, and you get some shade over your head on those hot sunny days. Plus, you get to hear about the history of the area as you ride from stop to stop. And of course, if you have any mobility issues that hinder your ability to walk for extended periods, this is the way to go.

    Your budget will help determine which choice you take. If you purchase your ticket online (no printer required), the one day trolley ticket cost around $25. This is what I did. However, if I were in a group, I would choose the more budget-friendly parking option and walk.  As it was, I did a fair amount of walking anyway, as things were close, and I didn’t always want to wait for the next trolley.

    How to Organize Your Sightseeing​

    With only one day, you will want to look at some of the options ahead of time and then structure your day in order of what is most important to you. Try to see the sights in order of what’s most important to you to least important. That way, if you run out of time, you’ll have at least seen your top picks.

    Below I will highlight my choices for my day trip to St. Augustine. However, I will also list a few additional options should you have more time. You can click on the links below to jump to a section to learn more about that site.

    What to Do on a Day Trip to St. Augustine

    Castillo de San Marcos

    My first stop was Castillo de San Marcos.  It is just up the street from the Visitor Center and close to the Colonial district and St. George Street. I stopped at the Colonial Quarter across the street from the Castillo de San Marco for a coffee and a snack before walking over to Castillo de San Marcos. 

    Construction on the Castillo de San Marcos began in 1672. Talk about history! History buffs will love learning about the fort’s history through the centuries. It was a refuge, storehouse, military defense, and now a historic landmark. They also shoot real cannons on Fridays, Saturdays, and Sundays. 

    Even if you are only mildly interested in history, it’s worth a quick tour inside to learn more about this fort that has been here for over three centuries! However, if your budget is tight, or you have other sights you don’t want to miss, you can always save this for later in the day and then decide if you have time. You can also take a walk around the outside and enjoy views of the water.

    Time Spent Here: I spent less than an hour here, however for history buffs who want to watch the videos and participate in discussions with the park rangers, you might want to allow yourself two hours.

    Colonial Quarter & St. George Street Pedestrian Area

    As I mentioned above, the Colonial Quarter is across the street from the Castillo de San Marcos. If you need a cold drink or an ice cream before you get started with more sightseeing, then pop in here. The Colonial Quarter is also the home to America’s oldest schoolhouse. The pedestrian-only St. George Street walking area also begins here.  This stretch of road is a great area to shop for souvenirs or grab a bite to eat.

    Lightner Museum

    Spend any amount of time in St. Augustine, and you will see the influence of Henry Flagler on the city. Flagler was the co-founder of Standard Oil. He was extremely influential in the development of Florida’s coast and also founded a railroad company. He was a man who saw what he wanted and had the means and the vision to make it a reality. Flagler visited St. Augustine, fell in love with the area, but determined it needed a hotel, and it needed a transportation system to get people there.  So, he built both.

    The Alcazar Hotel, was one of Flagler’s extravagant hotels that catered to the uber-rich. It is now home to the Lightner Museum. The Lightner Museum is a gorgeous building, and although it is a small museum, it is absolutely worth your time.  They have an eclectic collection of antiquities that makes for an interesting and unique visit. 

    Lightner Museum Courtyard
    The inner courtyard at Lightner Museum.

    The Lightner Museum has a beautiful courtyard and three levels to the museum. My favorite floor was the first floor with its extensive collection of seashells and antique musical instruments. They offer daily antique mechanical music demonstrations at 11 a.m. and 2 p.m. The musical instruments date back to the late 1800s. 

    In addition to the beautiful artifacts, Lightner Museum also houses one of the best spots for lunch in St. Augustine. Cafe Alcazar is a restaurant in what was once the swimming pool of the original Hotel Alcazar. Now how often can you tell someone that you dined in a swimming pool? They are only open for lunch between 11 a.m. and 3 p.m., so you’ll want to plan accordingly.

    Time Spent: Less than 1 hour.

    Flagler College

    Flagler College, once the home of the Ponce de Leon Hotel, is across the street from the Lightner Museum. Completed in 1888, it was the first hotel that oil tycoon Henry Flagler built in St. Augustine, and it is a stunning piece of Spanish architecture.  Henry Flagler was a detailed man, and you can see the excellent care he took with every detail of this hotel. 

    It is home to one of the largest collections of Tiffany glass still housed in their original location. Flagler had 79 stained glass windows installed in what is now the college dining hall, and those original 79 Tiffany glass windows are still there today. 

    Flagler College Tour

    You can take a 1-hour tour of the college. They provide a lot of fascinating history as to Henry Flagler and the Ponce de Leon Hotel. The tour takes you to the dining hall to view the collection of Tiffany stained glass windows, and you’ll also explore the courtyard with its frog fountain that also doubles as a sundial. 

    Flagler College frog fountain sun dial
    The frog fountain and sundial in the courtyard at Flagler College.

    You will finish out the tour by viewing what was once the women’s grand parlor. It is here you will see beautiful Austrian crystal chandeliers and a clock made from the largest piece of solid white onyx in the western hemisphere. 

    Our guide was a college student who was very proud and knowledgeable about the history of her school. She offered fun historical information regarding the period in which the hotel operated. I found it quite comical to learn that women weren’t allowed to stay in the same room while the men paid for their room, as seeing so much cash, might cause them to faint or become ill. So they were taken to a women’s sitting room for their protection. How thoughtful.

    Domed Ceiling at Flagler College
    Even if you don’t take the tour, stop in to admire this beautiful ceiling at Flagler College.

    Time Spent: 1 hour 30 minutes. The tour is 1 hour. However, I took a little extra time taking photographs and admiring its beauty. If you don’t have the time or aren’t that interested, you can skip the tour and pop inside the main hall entrance to take a look at the beautiful woodwork and stunning ceiling.

    The Ponce de Leon’s Fountain of Youth Archaeological Park

    I did not get to tour this park or drink from the Fountain of Youth. Unfortunately, during my visit, their credit card machines were down, and since I rarely carry cash, I was out of luck! So I guess I will have to live out my mortal life like the rest of the human race. However, it wasn’t all for nothing, as I was able to walk down Magnolia Avenue. Covering Magnolia Avenue is a live oak canopy draped in Spanish moss. Even if you don’t plan to visit the Archaeological Park, take the 5-minute detour to drive down this beautiful stretch of road.

    Time Spent: Less than 30 minutes. However, if you can tour the park, I’d estimate you’ll need an hour or more, depending on your interest level. 

    St. Augustine Churches

    If you’re walking to the various sites, make sure as you make your path towards Lightner Museum and Flagler College that you pass by the following two churches on your way. Henry Flagler constructed Grace United Methodist Church, and you will notice the similarities in its design and that of Flagler College. Visitors can typically stop in to tour it during the week from 1 p.m. to 3 p.m.  

    Flagler Memorial Presbyterian Church is another church built by Henry Flagler. This one has a much different design than the Grace Methodist Church and was constructed as a memorial to his only daughter Jenny. They offer self-guided tours Monday through Saturday from 11 a.m. to 3:45 p.m. 

    Even if you don’t want to tour the interiors of the churches, they are worth a glance as you walk or ride by on the trolley. If I were to choose one to take the time to walk thru, I would select Flagler Memorial Presbyterian Church for its unique design and background.

    St. Augustine Lighthouse & Maritime Museum

    Here’s another excellent museum option that families will enjoy. It is full of historical significance and beauty. I was fascinated to learn how close the German U-boats came up this coastline. In addition to highlighting the lighthouse’s participation in WWII, they also have a wonderful exhibit on the US Coast Guard with beautiful paintings portraying the heroics of this vital branch of our military. 

    I would have been happy to visit here for the ability to tour the lighthouse all on its own. However, this stop offers a lot more than just the lighthouse. It gives a glance into the lives of lighthouse keepers, history on the lens used to reflect the light, its use during WWII, exhibits on building wooden boats, and there is even a walking trail and garden area. I feel that it is worth your time, even with only a day trip to St. Augustine.

    View from the top of the St. Augustine Lighthouse
    The view is worth the 219 stairs I had to climb.

    The volunteers at St. Augustine’s Lighthouse and Maritime Museum are so helpful and full of knowledge regarding this lighthouse and the history surrounding it. Make sure to ask them any questions you might have. And to pass along a tip given to me by one of the workers here, if you want a beautiful sunset photo of the lighthouse, then drive across the street to the Marina and walk out along the long dock for views of the lighthouse.

    Getting Here: This is one of the sites you will need to drive to. I saved it for last since it was outside the town area. It is about a 10-minute drive from town, and there is plenty of free parking at the museum.

    Time Spent: Approximately 1 hour, including a stop at the marina across the street. 

    Additional Sites if Time Allows

    Old Jail: If you have extra time and want to visit the Old Jail, it is located just a few blocks from the Ponce de Leon’s Fountain of Youth Archaeological Park. It is also the main headquarters for Old Town Trolley Tours. So if you use the trolley, you can always tour this if you have time at the end of your trolley ride through town. Some might consider it “cheesy”; however, if you have kids, they will enjoy this fun stop. 

    Ximenez-Fatio House: This museum house is on the National Register of Historic Places. They have taken great care to preserve and display the home in a way that is true to its original period.  The tour takes around 30 minutes. If you can make the time, I highly recommend it!

    Fort Matanzas National Monument: Okay, this one isn’t actually in St. Augustine. Depending on where you’re coming from on your day trip to St. Augustine, you might pass right by it. This option is excellent for a couple of reasons. One, if your budget is tight, you could visit this historic fort, which is free to enter and skip Castillo de San Marcos. Second. Second, they have boat tours to the fort as well as a beautiful boardwalk along the waterfront. 

    As I write this, the boat ramp and boardwalk are closed due to recent storms. So check their website ahead of time and make your own decision on whether you want to stop or not. If it is already along your route, and you have the time to spare, then you may want to pop in since it’s free.

    Where to Eat in St. Augustine

    Coffee Breaks:

    • St. Augustine Coffeehouse
      6 St George St #107, St. Augustine, FL 32084
    • City Perks Coffee Co.
      15 St George St, St. Augustine, FL 32084
    • The Kookaburra
      24 Cathedral Pl, St. Augustine, FL 32084

    Ice Cream Breaks:

    • Mayday Ice Cream Historic St. Augustine
      100 St George St Suite J, St. Augustine, FL 32084
    • Cousteau’s Waffle and Milkshake Bar
      15 Hypolita St, St. Augustine, FL 32084
    • Kilwin’s Chocolates
      140 St George St, St. Augustine, FL 32084

    Lunch:

    • Cafe Alcazar
      25 Granada St, St. Augustine, FL 32084
    • Pizza Time (quick budget option)
      124 St George St, St. Augustine, FL 32084

    Dinner:

    • The Floridian Restaurant
      72 Spanish St #3638, St. Augustine, FL 32084
    • MOJO Old City BBQ
      5 Cordova St, St. Augustine, FL 32084

    Sample Itinerary for a Day Trip to St. Augustine

    • Arrive and park at the Historic Visitor Parking Garage by 8:30 a.m. Stop in at the Visitor Information Center located at the front of the parking garage near San Marco Avenue and get your free visitor’s map.
    • Walk to the Colonial Quarter and get a coffee and a snack to go. St. Augustine Coffeehouse or City Perks Coffee make excellent choices close by.
    • Go across the street to Castillo de San Marcos, which opens at 8:45 a.m. Spend 45 minutes walking around the fort.
    • Head to Flagler College and take the 10 a.m. tour. Walk by the Grace United Methodist Church and the Memorial Presbyterian Church on your way.
    • After the tour, walk across the street to the Lightner Museum and try to catch the 11 a.m. antique musical demonstrations. Then tour the rest of the museum before getting lunch at Cafe Alcazar on the basement level of the Lightner Museum.
    • After lunch, make your way to the Ximenez-Fatio House Museum to catch the next 30-minute tour, they begin every half hour.
    • After the tour, head to St. George Street and walk down it on your way to the parking garage. Take time to shop for souvenirs and certainly make time for ice cream!
    • It should be somewhere around 3:00 p.m., depending on how long you’ve taken at each stop. So get your car and head over to the Ponce de Leon’s Fountain of Youth Archaeological Park to learn about the early beginnings of St. Augustine.
    • Leave the park with plenty of time to make the 15-minute drive to the Maritime Museum and arrive no later than 5:00 as the park closes at 6:00 p.m.
    • Head back to town and have dinner before leaving town.

    Final Thoughts Regarding a Day Trip to St. Augustine

    As you can see there is a lot to cover in this remarkable city. You cannot see it all with only one day. There are just too many things to do in St. Augustine to fit them all in. So pick your top choices and enjoy the day. Whatever you miss, is just one more reason to come back.

    Happy Travels!

  • The Leu Gardens: An Oasis in Orlando

    When visiting Orlando, everyone immediately thinks of the fantastic amusement parks the area has to offer. However, as fun as these amusement parks are, they can be exhausting! So if you need a break from amusement parks during your visit to Orlando, look no further than the beautiful Henry P. Leu Gardens. The Leu Gardens are an oasis in Orlando. 

    Explore the history and culture of Orlando and enjoy a break from the hustle and bustle of the city. The Leu Gardens span 50 acres so although you could spend an entire day trying to cover it all, I will share some highlights from my visit to give you an idea of things you can see in 1-2 hours.

    About the Leu Gardens

    The Henry P. Leu Gardens were donated to the city of Orlando by the former owners Mr. Harry P. Leu and his wife, Mary Jane, in 1961.  However, the history of the garden goes back to the mid-1800s when the first owners settled the land. The final owners, Mr. and Mrs. Leu, purchased the property in 1936. They loved traveling, and they loved plants. They combined these two passions by buying plants during their travels and then bringing them back to plant in their garden. 

    The Leu House Museum is one of the historic buildings still on the property and is a historic landmark with the National Registry of Historic Places. However, the museum remains closed due to hurricane damage until further notice.  The home is still a beautiful place to view from the outside, and I’m sure you could ask the front desk for additional details regarding the families who lived here. The woman I spoke with when purchasing my ticket was so friendly and helpful.

    Leu Garden Favorites

    I happen to be in Orlando with my husband. He is here at a business conference, and I tagged along. After his conference ends, we will take a week’s vacation to explore the Florida coast on a road trip to the Keys.  However for now, I am on my own. I hoped to see a different side of Orlando than just the amusement parks. Someplace the locals go to when they want a quiet spot. The Henry P. Leu Gardens was highly recommended and was just what I was looking for! 

    The following are some of the areas I saw during my visit to the Leu Gardens. I spend almost 1.5 hours here, and I feel like I covered quite a lot during my short visit.

    Tropical Stream Garden

    You enter the gardens by leaving the Garden House (Welcome Center) through the side door. After a short stroll down the path, you come to the Tropical Stream Garden. You feel as though you’ve entered an exotic tropical destination. Vines creep down from trees, the faint trickle of water running over rocks greets your ears, and beautiful tropical flowers and palm trees surround you.

    The Tropical Stream Garden is the perfect way to begin your journey through the Leu Gardens. I immediately felt relaxed as I could stroll at my own pace, no crowds, just a winding shaded path, full of unique plants.

    The path through the Tropical Stream Garden eventually leads you to the Lake Rowena Overlook.  Enjoy a rest under the gazebo, or learn about the various creatures that call Central Florida home. I looked into the lake and watched some turtles swimming below. There are also some beautiful bald cypress trees growing in the water next to the overlook.  We do not have this type of tree in my home state of Washington, and I enjoy seeing new varieties of trees and plants.

    Rose Garden

    After exiting the overlook area, I continued through the Color Garden and into the Rose Garden. The sweet perfume of the roses wafted up to greet me, and I smiled.  I love the smell of roses. It was a subtle aroma, not overpowering, just a light sweetness, perfect for strolling through and spending some time by the fountain.

    Camellias

    I made my way to the Camellia Garden with hopes that perhaps they would be blooming. Their pamphlet states that the Leu Gardens is home to the most extensive documented camellia collection in Eastern North America. It also said that they bloom from mid-October through March.  Well, it is mid-October, however, unfortunately, they were not blooming. I would love to revisit this garden when they are in bloom as I can imagine what a beautiful spectacle they are. There are over 200 varieties!

    I exited the camellias area via the white garden, which, as you can imagine, is filled with plants whose blooms are only white.

    Vegetable Garden

    I stopped in briefly at the Vegetable Garden, in addition to growing a variety of fruit and vegetables here, they also have these delightful statues. Apparently they donate the food harvested from this garden to local food banks.  I think that is such a great idea! I’m a little jealous of Florida’s warm climate and its ability to grow fruit and vegetables year-round. 

    However, as I stand here admiring their plants, sweat is dripping down my face, and it reminds me why I live on the more mild West Coast and only visit warm destinations as an escape from the rain or in rare cases, the snow!

    Butterfly Garden

    The butterfly garden is just a few short steps away from the vegetable garden.  I was thrilled to watch the various butterflies flit about, sometimes in pairs, and often by themselves.  They dash about in random patterns, and at times, I have to duck to avoid them hitting me. I worked hard to try and capture this photo of one who landed long enough for me to photograph it. 

    monarch butterfly in leu gardens

    There are plaques placed in this area of the garden that teach you interesting facts about these beautiful creatures.  And they have butterfly cocoons inside a small glass enclosure so you can see the various colors of cocoons each butterfly has. This was so cocool! Sorry, I just had to go there.

    Floral Clock

    I left the Butterfly Garden and passed once more through the Rose Garden on my way to see the Floral Clock.  This working clock was donated to the Leu Gardens by the Kiwanis Club of Orlando in 1975. It was inspired by the first-ever floral clock in Edinburgh, Scotland, commissioned in 1903. The Leu Gardens floral clock varies in appearance, depending on the season.

    Palms, Cycads & Bamboo

    I was ready for another break from the sun, so I wandered into the Palms, Cycads & Bamboo Garden. The plants in this section date back to the prehistoric era. I’m sure everyone is familiar with palm trees. However, I often confused cycads for a type of palm tree plant.  They are, in fact, different. 

    Cycads are cone-bearing plants not related at all to palm trees. I would describe them as fern-looking palm trees. Meaning their leaves remind me more of ferns than palm tree leaves. Bamboo is so unique and regal looking, and this section makes a great way to enjoy time in the shade and marvel at these unusual plants.

    Leu House Museum

    As I mentioned above, the Leu House Museum is closed currently for renovations due to hurricane damage. However, you are welcome to walk around the house and admire the lush setting of the surrounding gardens.  I am not sure how different the gardens look now when compared to when Mr. and Mrs. Leu lived here. However, I like to imagine it must have been a marvelous place to live.

    Don’t miss the path lined with old oak trees, it is not far from the house, and you should pass by it on your way from the Palms Garden to the Leu House Museum. These beautiful oak trees are scattered throughout the Leu Gardens, and many of them are over 200 years old!

    Additional Areas in the Leu Gardens

    Although my path through the Leu Gardens might resemble that of a butterfly, I covered a lot of ground.  I passed by many beautiful gazebos and fun sculptures. There is an Idea Garden that demonstrates a variety of designs that will perhaps inspire your garden.  And there is also an Arid Garden which displays plants from deserts. No irrigation is used in this garden. So it offers a good demonstration for gardening in areas of drought — or perhaps for people like myself, who forget to water.

    Art Exhibits at Leu Gardens

    In addition to the gardens, the welcome center has a rotating art exhibit.  While I was there, they had a colorful display of watercolor paintings by local artists.  My morning spent admiring local art, and strolling through the gardens was just what I needed. I felt I had a morning of culture and beauty that left me ready to rejoin the city and my subsequent ride in traffic. 

    Other Activities at Leu Gardens

    As if the gorgeous gardens and art exhibits weren’t enough, the Leu Gardens also offer concerts in the park and movies in the park.  So make sure to check their calendar when you visit as you might find some new ways to create memories during your visit to Orlando.

    If you happen to visit with kids, there is a geocache hidden within the gardens.  Kids and adults alike will enjoy geocaching, which is essentially like a digital scavenger hunt, sometimes they have clues, but usually, you track the coordinates on your phone using a compass.  Geocaching.com provides the details on which app to download. It also shows the many geocaches hidden throughout the area. It is something fun your family can do together, whether at home or when traveling.

    Useful Information

    Admission Fees: It costs $10 for adults 18 and older. Children 4-17 are $5, and children three and under are free.  Additionally, you receive a wrist band so you can come and go throughout the day.

    Food: There is no food sold on-site. However, you can bring your lunch and eat it on the patio overlooking Lake Rowena.  Or, as I mentioned, you can always leave, grab something to eat or take a break from the heat and then return later in the day.

    Henry P. Leu Garden Hours: The Leu Gardens are open every day from 9 a.m. to 5 p.m.

    Other Amenities: There is a small gift shop located in the welcome center as well as a library filled with books on botany and gardening.  You are welcome to sit inside the air-conditioned space and read during your visit. It is also good to note that there are multiple water fountains and restrooms throughout the gardens.

    It was so lovely to take a break and see some of the culture and beauty of Florida.  Amusement parks can be fun, but it is always good to take a break from the tourist attractions and visit a place the locals enjoy going to. I hope you will take the time to visit the Henry P. Leu Gardens on your next trip to Orlando.  It is worth the visit!

  • Gold Creek Pond and Autumn Surprises

    If you’re looking for an easy trail with beautiful views, a picnic area, ADA accessible and close to Seattle–look no further! The Gold Creek Pond Trail is a 1.1 mile loop trail that circles the Gold Creek pond. It is a relatively flat, paved (with a few boardwalk bridges) trail that circles this very large alpine lake of a pond. Keep reading to discover why this trail is worth the trip!

    A Little History About Gold Creek Pond

    As you look at the photographs of Gold Creek Pond, try to imagine that back in the ’70s and ’80s, this pond didn’t even exist.  Instead, this area was a gravel pit supplying the construction of the I-90 freeway. Since that time, a restoration project began and is still underway, to develop the area around Gold Creek. It is such a beautiful location now, as you look out over the water, it is incredible to see the transformation from pit to pond.

    A Snowy Surprise

    The night before I visited Gold Creek Pond, I had plans to take my camera and go hunt down some fall foliage.  When I got up the next morning, my phone’s weather report showed it was 36 degrees out!  Let me tell you for Seattle fall weather–this is cold!

    Honestly, one of the things I love about the Seattle area is our mild weather.  Typically in early October, it is often sunny and in the 60s! I had initially planned on driving to Leavenworth; however, with my late morning start, I knew I’d need to adjust my plans. Gold Creek Pond Trail was on my radar for a while, and it was only an hour’s drive, so I decided to head there.

    Imagine my surprise when I discovered Snoqualmie Pass (Gold Creek Pond is near the summit) had snow! Snow. And it’s barely October! This was odd, but I figured if I didn’t get any photos of fall colors, at least I’d get some snowy fall photos?

    Gold Creek Pond Trail

    After you arrive at the parking lot, you will see a pit toilet on the right and an information board in the center. Follow the path to the left of the information board. Soon you will arrive at the above trail sign. 

    If you go right, this will also lead you to the trailhead for Gold Creek Trail, which takes you to the Alpine Lakes Wilderness Area. However, for this hike, you can go either right or left as you make your loop around the pond. If you come here for a picnic or BBQ, go left as this is the quickest way to the picnic area.

    There are a couple of small wooden bridges that you will cross as you make the 1.1-mile loop around Gold Creek Pond. The wooden planks were icy when I visited, so I took it slow when crossing. If you make the loop counterclockwise, as I did,  you will walk alongside Gold Creek through a wooded area before seeing Gold Creek Pond.

    As I walk, I hear the sounds of the water rushing over the rocks in the creek. The crunch, crunch of snow under my feet, and the faint laughter of someone on the other side of the pond greet my ears. I smile at the beauty this odd snow day had brought.

    One of the wooden bridges you will cross on the loop trail around Gold Creek Pond.

    Making Friends on the Trail

    About halfway around Gold Creek Pond, I came across the two hikers who I had heard earlier. They laughed and had fun as they splashed water and captured it in slow motion with their cell phones. I like meeting people on the trail and seeing their enjoyment of nature.

    informative sign about beavers in Gold Creek Pond
    There are a few informative signs scattered around the trail.

    Later I met a lovely woman who was out hiking with her dog. She said she comes out here during each season and takes a photo.  In wintertime, she uses crampons or snowshoes and said it is beautiful to see then too.

    Then I met a photographer who was seizing the opportunity to find snowy mushrooms, something you wouldn’t usually see.  And later towards the end of the loop trail, a nice man and his wife let me know when I crossed the creek that if I looked down, I could see salmon swimming below.

    So you see, besides enjoying the beauty of nature, you get to meet all sorts of friendly people. It’s a perfect way to relax and remember what a beautiful world we live in.

    fall colors and reflections in the water of gold creek pond
    Make sure to walk out to that tip by taking a short trail that splits off the main one just past the beaver sign.

    Taking Time to Soak in Nature’s Beauty

    Make sure to locate one of the many benches scattered along the trail. There are a few right next to the water that would make the perfect resting spot.

    And if you’re lucky, you might even spot a great blue heron. You are almost certain to see ducks and Canadian geese and of course, the frequent sightings of a mischievous squirrel or two.

    snowy bench by the water at Gold Creek Pond
    Perhaps another time when winter hasn’t beat me to the seat.

    Getting to Gold Creek Pond Trailhead

    It’s only about a 1-hour drive from Seattle to Gold Creek Pond. And what a beautiful drive it is!

    • Take I-90 E to Exit 54 for the Hyak ski area.
    • Turn left at the stop sign.
    • Make a right at the first road passed the I-90 on/off ramps (Forest Service Rd #4832).
    • Drive parallel to I-90 for about 1 mile before making a left at the sign for Gold Creek Rd and Trail.
    • Then continue another quarter mile before making a left onto the pavement and into the parking lot.

    Useful Information

    Road Conditions: The road leading to the trailhead parking lot is a dirt road that is full of potholes. So take it slow, and you should be fine. Once you make the final left, it returns to a paved road as you enter the parking area.

    Parking/Fees: You need a Northwest Forest Pass to park here.  Please note that in the winter, a Sno-Parks permit is required — which is different from the Northwest Forest Pass. If you don’t already have a Northwest Forest Pass, you can purchase a day pass at the parking lot trailhead. For winter use, buy the appropriate sno-parks permit ahead of time.

    Trail access: Gold Creek Pond Trail is ADA accessible, and I saw one woman in her motorized wheelchair here, even with the snow! Some parts of the trail, when I visited, were overgrown a little on each side, so the path got a bit narrow. I love that we have this beautiful trail accessible to those with mobility issues.

    Facilities: There is a pit toilet at the trailhead. Make sure to bring your hand sanitizer, as there was none provided when I visited. On the left side of the pond, you will find a large picnic area with lots of picnic tables and even a few grills scattered here and there.

    Don’t miss this beautiful and family-friendly trail. It is a short drive from Seattle, and if you have extra time and want to explore more of the Snoqualmie area’s beauty, make sure to stop and see the Snoqualmie Falls.

    Happy Trails!

  • Travel Tech and Tips for Navigating Internationally

    Traveling can be stressful, especially when you’re trying to navigate in an unfamiliar place. The following travel tech and tips will help make sure you get to where you want to go with as little stress as possible. I share my favorite travel apps and travel gear that I use to navigate while traveling. I have yet to get lost, although, it’s certainly not for lack of trying.

    Get Your Travel Tech Set Up

    One of the most important things you’ll need to do is to get your travel tech set up. Starting with the number one, most used travel tech device–your smartphone!

    First things first, do you have a GSM smartphone?

    You’ve probably heard the terms GSM and CDMA.  These terms refer to the types of cellular technologies our phones use. Typically, in the US, if you are with AT&T or T-Mobile, then your phone is a GSM phone. And if you’re with Verizon or Sprint, then you would have CDMA Technology. This isn’t always the case, but that’s the general rule. I won’t get into the technical side of what GSM and CDMA mean, but for simplification purposes, a GSM phone means you can use your phone internationally.  Most of the world operates off the GSM technology.

    Is your GSM smartphone unlocked?

    If you have a locked GSM smartphone, you need to contact your service provider and request they unlock your phone for your trip.  They each have their own rules about this, so contact them to determine how to proceed. You need an unlocked GSM smartphone to purchase and use your international SIM card while traveling abroad.

    If you discover that you do not have a GSM smartphone, there are a lot of great low-cost unlocked smartphone choices. I purchased the Redmi Note 5 for my trip to Europe, and it worked great everywhere I went.  The Google Pixel 3a has a top-rated camera and starts around $350. You can also buy unlocked versions of Samsung, Motorola, and even iPhones. There are a lot of great unlocked phone choices ranging from $150 and up.

    Check the supported bands or frequencies of your phone.

    No matter the GSM phone you decide to go with, you need to make sure that it supports the bands that your destination uses. Different countries support different frequencies or bands. Google your phone’s bands and then cross-reference with the link above to determine if your phone supports the bands of the country you intend to travel to.

    Research and purchase your international SIM card.  
    pile of SIM cards

    By owning an unlocked GSM cell phone, you can purchase international travel SIM cards wherever you travel. This saves you a lot of money when compared to paying roaming fees from your local company. These international SIM cards are sold specifically for tourists who typically need 30-60 days or less of data and talk time.  You can also purchase additional top-up cards, that allow you to add data and talk time, should you run out of service during your travels.

    I recommend you do a little internet research before traveling to find out what sort of SIM card options you will have when you arrive at your intended destination. This should help you get an idea of where you can purchase your SIM card too.

    Depending on where you travel to, you may be able to purchase your SIM card ahead of time, online. I did this for a trip to Europe, and it was very convenient to land at my destination and already be set up with a cell phone plan.

    When I traveled to Japan and Thailand, I purchased my SIM cards at the airport (this is commonly where you can find them). There are some countries where you might have to buy them from a vendor in the city, but generally, you can purchase at the airport. However, research your intended destination and where you can buy SIM cards, before your departure, so you will know what options you have.

    Travel Gear For Extended Periods of Navigation

    Whether you’re traveling around Europe or navigating the streets of Tokyo, you will most likely be using your phone for extended periods. Navigating from museum to museum and attraction to attraction can suck your battery, so don’t leave home without purchasing a power bank and compatible quick charging cables.

    A power bank, also known as a battery pack, is a lifesaver! I will spend an entire day walking across cities using only my smartphone.  Typically I need my screen brightness turned way up to do this, so as you can imagine, this sucks the battery up.  However, with a power bank inside my day bag, I can always have my phone charging so that I never run out of battery.  Then charge the battery pack overnight, and you’re all set for the next day of sightseeing.

    They come in multiple sizes and offer varying degrees of charging. Some are extremely small, and I would only recommend these if you are really limited on weight. They are only going to be suitable for an emergency when you need just a little charge to get you by until you can plug in somewhere else.

    I own two that I use for different purposes.  I have one that I use for all-day navigating as well as charging my Chromebook and mirrorless camera.  The other one is a large capacity battery pack that will not only charge all of my electronics, but it can jumpstart my motorcycle or car if needed!

    Make sure you can charge these overnight as some of the larger ones take up to 10 hours to charge fully.

    Travel Apps for Navigating

    Google Maps

    If you’re not already using Google Maps to navigate where you currently live, I’d be surprised. So it probably comes as no shock that Google Maps is my number one, go-to app when traveling.  Do not leave home without it!

    The wonderful thing about Google Maps is that you can download maps of entire cities or even whole countries for offline use, before leaving home.  That way, should you be in an area where you have no internet access, you can still get directions to and from your destination.

    In addition to offline maps, you can create personalized maps ahead of time before your trip.  In your Google Drive account on the upper left-hand side, you will see a colorful plus sign next to “New.” Click on that, then click on “More” from the drop-down menu. Finally, click on Google My Maps.

    From this screen, you can create your personalized travel maps.  Add museums, restaurants, hotels, and other attractions you want to visit during your trip. You can also share this map with others and save it for future reference.  Perhaps later you’ll chat with a friend who is traveling to a city you visited before, and you recommend a favorite restaurant, now you can share the exact map and location for your trip.  They can even use your map as a trip itinerary. See an example of one I created for our Maui Itinerary.

    Maui Map of Itinerary

    Google Translate

    Chances are you will successfully navigate yourself using the Google Maps app at least ninety percent of the time. However, there are times where you will need to ask for directions.  Or perhaps you will get separated from your traveling companion who had your only access to data (see Misadventures in Kanazawa for my experience). Either way, it is always good to know how to ask for directions in the local language.

    Again, I recommend you use the offline feature so that no matter whether you have internet access or not, you will still be able to use the features of this app.  So save some common phrases for offline use.  This comes in very handy! Save them as favorites and quickly pull up the list of the most common phrases you will use.

    WhatsApp

    This app is great for staying connected with any travel companions or for contacting your hotel for directions or notify them of late arrival. I also use WhatsApp to text with my family and friends back home.

    Google Duo

    I prefer to use Google Duo for phone calls and video chats rather than WhatsApp. I found during my travels that its video quality was typically better than WhatsApp. However, you could use WhatsApp for both.

    Google Voice

    If you don’t have a Google Voice number yet, here’s why I recommend you get one:

    • Give this number to your hotels, Air BnB, airlines, etc. You can then receive text updates to your Google Voice number while traveling. Also, Google Voice will transcribe any message left at this number. So although you may not be able to receive international calls to your Google Voice number, you will get the transcribed messages. Then you can call the person back using your international SIM and number.
    • I also recommend that you use your Google Voice number for password retrieval. If you use your local cell number for password retrieval, you won’t be able to get your password while traveling abroad. However, if you use Google Voice, you can get it no matter where you are.
    • Make sure all your two-factor authentication sites use your Google Voice number so you will receive the text while traveling. Your other option is to shut two-factor authentication off on all your accounts until you return home.

    Local Travel Apps

    Depending on where you travel to, there will be useful local travel apps you will also want to download.  For example, when I spent two months traveling around Europe by train, I installed the Rail Planner App. There are times when I also install the local metro app or airline apps. You will research and download based on what makes sense for your trip.

    Uber App

    Many countries now offer Uber as a means of transportation. In Eastern Europe, I found that it is often cheaper than a taxi. And the time it saves you is often worth the extra cost over public transportation. This is especially useful when traveling in a small group or pairs. The Uber App allows you to split the cost with your group directly from the app.

    Travel Tips for Navigating

    If you will be driving:

    • Familiarize yourself with the local street signs and rules of the road before your trip.
    • Know what car rental insurance you will need and whether or not your credit card company already covers this.
    • Practice Using Google Maps at home before you travel. This ensures you know how to use its features. Practice using driving directions as well as walking and public transportation, so you are familiar with all its features.
    • Make sure you download the offline Google Maps using WiFi and save your data.
    • A paper map or road atlas can also come in handy when driving cross country. My husband chuckled a little when he saw I put this in here. Although we have all this travel tech to help us, sometimes it’s good to keep it low-tech just in case our electronic travel tech fails us.

    If you are using the Metro or Bus:

    • Google Maps public transportation directions will tell you which bus or metro station to take to your destination. It also provides you with walking directions to the bus stop or nearest metro line.
    • For metro stations, make sure to get one of the free metro maps or download the local metro app (if they have one). I also take a photo of the metro map in the station, so I can quickly glance at the lines for the city I’m traveling in.
    • I rely heavily on Google Maps to tell me which bus to take. However, I also asked locals for advice on the best way to get to and from my location. They are always the best experts you can consult when traveling.

    Recap of Travel Tech Needed for Navigating Internationally​

    I know that it can seem a little daunting if this is your first time traveling abroad, but all you need to make sure you have the right travel tech and gear are the following:

    • An unlocked GSM smartphone
    • International SIM card
    • Power bank and charging cable
    • Downloaded Apps, including offline maps and phrases
    • And last but not least, a good attitude and an appetite for adventure (and good food, of course).

    Final Thoughts on Navigating While Traveling

    All roads lead to Rome.

    While in ancient times, this may have been true, here it is just a gentle reminder that there are multiple ways to do the same thing and that one can rarely ever be truly lost.  So, determine which navigation methods work best for your travel, but never panic should you find yourself a little lost. You’re most likely just taking the “scenic way” to your intended destination.

    One final tip, make sure to leave a copy of your travel itinerary with someone you trust.  That way, should any emergencies arise, that person will know where to reach you.

    If you have any questions regarding travel tech and how to get set up for your travel needs, please don’t hesitate to ask. I would be happy to help any way I can.

    Happy and Safe Travels!

  • Nolte State Park: A Pacific Northwest Secret

    Nolte State Park is a hidden gem in the Pacific Northwest.  This Washington State day-use park makes a perfect place to get away for a few hours or even the whole day! When you feel like you need to escape the hustle and bustle of the city it provides the perfect natural setting to get away and think. And when you want a park to take the whole family to for some fun in the sun, Nolte State Park makes the perfect choice!

    Below I list all the activities you can enjoy at Nolte State Park, and I hope you will take the time to visit it soon. You will feel like you have stumbled upon a retreat in the woods. It might even become your new favorite park, and perhaps you’ll want to keep it a secret too!

    Activities at Nolte State Park

    Feel free to click on links below and jump ahead to the various activities and information found in this article.

    I had heard of Deep Lake and Nolte State Park for years. However, I had never taken the time to visit it.  Then this year, my hubby and I purchased some inflatable stand up paddleboards (SUPs). So I started researching some places we could try them out around the Seattle region, and that’s when Nolte State Park popped up on my radar again. I am so glad we decided to check it out! It is such a beautiful lake for both stand up paddleboarding and kayaking. Please note that only non-motorized boating is allowed on Deep Lake.

    Besides boating around the lake, if you enjoy fishing, Deep Lake is a stocked lake that is open to fishing year-round. You can catch rainbow trout, cutthroat trout, kokanee, yellow perch and more.

    The first day we paddled out on our stand up paddleboards here, fish were jumping everywhere!  Honestly, I was a little concerned one might jump up and knock me off my SUP! Now that would have made for a good story!

    In addition to bank fishing, Nolte State Park also has a fishing dock, and of course, you can always bring your non-motorized boat for fishing too. The dock can sometimes get busy with other anglers and in the summer it is often commandeered by a large crowd of kids who test out their cannonball skills. So finding a spot along the bank is often the best choice. 

    If you prefer an activity that doesn’t require getting wet, take a peaceful stroll around Deep Lake. You will find the start of the 1.4-mile loop trail by following the path that goes alongside the playground area. I really this trail. It feels as though I’m miles away from the city as I listen to the wind gently blowing in the trees. I admire all the beautiful trees and meander down so many of the side paths that lead to the lake, that a man once lapped me 3 times!

    One thing I love, is that this trail makes for a beautiful walk no matter the time of year.  Even on a rainy day, you can just put on your raincoat and enjoy a quiet walk in the rain. Make sure to have fun exploring all the different side paths that take you down the lake.  Pick one and find your favorite thinking spot or perhaps your favorite fishing spot. Pull up a rock and enjoy the sound of wind rustling through the trees. 

    If you have kiddos who need to run off some energy, why not do a few laps around Deep Lake. Allow them to expend some energy while getting a little fresh air. There are multiple benches along the way for resting or for enjoying the serene surroundings. Also, the gravel path is stroller friendly!

    However, if you have mobility issues that make the path too rough for you, there is a short paved path alongside the large picnic area that has views of the lake and a grassy area with lots of picnic tables and grills that overlook Deep Lake.

    In addition to boating, fishing, and hiking, there is also a horseshoe pit and a kids’ play area. And there is a small field next to the kids’ play area where you can toss a frisbee or football. There is really everything you could want to create a day full of memories.  We created fun memories with our nephews and niece. They loved swimming, boating and fishing — all in one day!

    Reservable Group Shelters

    Nolte State Park also has large kitchen shelters that can be reserved for groups ahead of time, and there are BBQ grills at almost every picnic area. Most BBQ grills are located in the central area overlooking the lake, but there are also a few on both sides of the lake, so make sure to look around and find the perfect spot for you and your group.

    Fees: You need a Discover Pass to park at Nolte State Park as it is a part of the Washington State Park system. You can purchase a day pass at the park for $10 or buy an annual pass for only $30.  I think the ability to go to all of Washington’s State Parks as much as I want for a year is worth the price. Skip a few trips to the coffee store, or purchasing your favorite snack for a month, or whatever.  

    And if the budget is still too tight, make sure to check out the WA State Park website for their free park days. They have multiple days throughout the year, where no Discover Pass is needed.

    Swimming in Deep Lake: There is no lifeguard on duty. There is a rapid drop off after you enter the lake when it becomes deep. Make sure all kids (and anyone who isn’t a strong swimmer) have life vests on at all times.  It would be far too easy for a child to drown here as there isn’t much of a shallow entry before it becomes too deep to touch bottom. So please take the necessary safety precautions to ensure everyone has a fun and safe visit!

    Nolte State Park Hours: 8 a.m. to dusk

    Fishing at Deep Lake: A Washington State fishing license is required to fish here for anyone 15 years or older. Visit the Washington State Department of Fish and Wildlife for further information.

    Restrooms: There are multiple restrooms with sinks and soap. Additionally there are drinking water spouts in a few different spots around the park.

    Nolte State Park Address: 36921 Veazie Cumberland Road, Enumclaw, WA 98022

    From Seattle: 

    Take I-90 E to Exit 17 for Front Street/Issaquah-Hobart Road Southeast, turn right onto Front Street and follow this road for almost 9 miles, (Front Street becomes Issaquah Hobart Road), continue following the road for another 5.5 miles as it becomes  276th Ave SE, and then also Landsburg Rd SE. Then turn left at the 2-way onto SE Kent Kangley Rd and follow for about 1 mile before making a slight right onto Retreat-Kanaskat Rd/Retreat Kanasket Rd SE. 

    Stay on this for about 3 miles before turning right onto Cumberland Kanaskat Rd/Cumberland Kanasket Rd SE. After about 4 miles this becomes Veazie-Cumberland Road SE, continue anther 1.5 miles before making a right into the main entrance (pass the boat launch entrance) for Nolte State Park.

    From Tacoma:

    Take I-5 N to WA-18 E towards Auburn. Then take the WA-164 E exit toward Enumclaw and turn left onto WA-164 E/Auburn Way S. Stay on this for about 7 miles. Then turn left onto SE 400th St/Krain-Wabash Rd and follow for another 7 miles before making a slight right to merge onto SE 392nd Street. Continue for about a mile before making a left onto Veazie Cumberland Rd Se. After about 1.5 miles make a left into the Nolte State Park entrance.

    During the summer, Nolte State Park can be very busy. So plan to come early in the day to get a parking spot as well as pick out your area on the beach and picnic area if you want to barbecue. And if you have a large group, make sure to reserve a group shelter ahead of time. There are a few parking spaces on the shoulder of Veazie Cumberland Rd SE if the parking lot is full.

    Take a little walk down the paths along the sides of the lake to see if you can find a picnic table nestled in the trees or closer to the lake. I think as you come here and explore the path around Deep Lake, you will soon discover “your” spot.

    Don’t forget to pack sunscreen and possibly bug spray. I haven’t had an issue with bugs here, but you never know! If you do forget something, Enumclaw is only about 7 miles away. 

    Pack it in and pack it out. Please make sure to pick up all your garbage when you finish enjoying your time here. I appreciate the efforts that the park’s custodians go to, to keep this park so clean, so let’s all do our part too!

    Bench next to Deep Lake
    One of the best activities at Nolte State Park is finding a bench and enjoying the views!

    Nolte State Park makes the perfect getaway for the day. Bring your family and friends and spend the day creating fun memories by the lake.  Oh, and if you’re lucky, you won’t have any cell service here either. So you really can get away from it all! 

    Enjoy making memories!

  • Off Road Motorcycle Adventures: A Beginner’s Guide to Packing & Planning

    My husband and I recently returned from an off-road motorcycle adventure. It was our first multi-day moto trip where we camped off our motorcycles. We were riding sections 4, 5, and 6 of the Washington Backcountry Discovery Route (WABDR). This beautiful off-road route stretches from the Oregon/Washington border and up to the Washington/Canadian border. 

    The WABDR is a mixture of challenging fire service roads as well as the easier and more maintained gravel forest service roads.  The Washington Backcountry Discovery Route is full of adventure with spectacular scenery all along the way. In this post, I share how I planned the trip as well as what gear I packed for moto camping. First, let me give you a little background on my motorcycle experience.

    My Motorcycle Riding Experience Thus Far

    I grew up learning to ride motorcycles on a Honda 50.  All of my siblings did, and to this day, all of their kids learn on the same Honda 50.  It is a fun legacy, and this Honda 50 is a beast! It rarely ever needs any work and keeps going and going — take that Energizer! 

    I eventually outgrew the Honda 50 (although let’s be honest, all of us adult kids still like to ride it once in a while, just to say we can). I transitioned into riding a Honda 250 and a Yamaha 400–all lightweight off-road motorcycles, always intending to get my motorcycle license eventually.

    One day while in Seattle at a motorcycle store (can’t remember why), my husband and I learned from the owner, that WA state had a new motorcycle endorsement program. They provided the motorcycles and put you through a course to get your license, and all it takes is one weekend.

    When we left, my husband said: “let’s do it!”  And so we did. It is a great program that teaches a lot of excellent road safety techniques. By the end, you take the motorcycle driving test, and pass (hopefully) and then head to the DMV, get a new mugshot, and you are officially a motorcyclist

    Beginning Our Off Road Adventure Riding

    That was over five years ago.  We purchased motorcycles right after getting our licenses and have been getting road experience ever since.  We bought a BMW F650GS and a BMW G650GS, both dual-sport motorcycles. This means you can ride on and off-road. We did some off-roading with my brother when he’d visit, but it was mainly just dirt or gravel roads, nothing too technical.

    We learned about the Washington Backcountry Discovery Route in 2015 and decided we’d ride the last half of the route when my brother came over for his annual summer vacation. Wildfires had a different plan, and due to the forest fires burning all over Washington state, we had to cancel our trip plans.

    Fast forward four years, and we have the best fire season we’ve had in a long time!  A former UW classmate of mine posted his pictures of completing the WABDR in his 4×4 Toyota, and I told him how I’d planned to do the route.  He said, “you should do it this year.” And I thought, “yeah, he’s right!” There is no guarantee we’ll get another year with so few fires, why not seize the moment and do it!  

    So I contacted my brother, told him my idea to do the last three sections of the Washington Backcountry Discovery Route in September, and he said to let him know the dates, and he’d put in for his vacation.  Next, I convinced my husband that this was a great idea, and soon we had our dates picked out.

    Planning our Off Road Motorcycle Adventure

    Now, it is essential to note that this decision was made right in the middle of our crazy hectic summer. Which meant I was busy planning camping trips, and get-togethers with friends and family and did not give our ride my usual planning attention.

    So this trip felt a bit more spontaneous than my trips usually are. I skimmed a few websites on the subject of riding the WABDR, and we bought the official WABDR printed map. I downloaded the GPS tracks and a free GPS app for my phone. From my minimal research, I determined that we should only need one day of riding per section. So I reserved some campsites for our ride and continued making plans with our group.

    We live in the Seattle area, and my brother lives in North Central Washington. So we decided to meet in Leavenworth the night before we began our ride. Also, my brother and his wife would be riding in their Toyota 4Runner for sections 4 and 5, so he agreed to pack extra water for our group and to carry any gear that might lighten the load in our panniers. That was wonderful! When you’re riding an adventure bike off-road, reducing the weight in your panniers is always helpful.

    Easy, Lightweight Food Options

    I packed our backpacking propane burner and some dehydrated meals that you can prepare right in their pouches. And I also packed oatmeal packets and coffee for breakfast. To make each meal, all I needed to do was to boil water on our tiny propane stove.

    I used a new style of lightweight coffee filters to make coffee on this trip as they took up less space than my usual french press options. I like them, but I need to practice more to get the right strength.  The first cup was a little too weak. My husband then decided to triple that amount in his cup and oh my goodness! Way too, acidic! So I will perfect it, but overall I am pleased with my purchase.

    So in addition to a lightweight propane burner and dehydrated food, I also packed jerky and snack bars.  I planned for these to be both our lunch and our snacks. And that was it for food.  

    Breakfast: oatmeal and coffee. Lunch: jerky and snack bars. Dinner: Dehydrated meals. Remember, you want to keep your motorcycle as light as possible when off-roading.

    Packing Essentials: Camping Gear & Supplies

    I packed the same gear I used for backpacking and used it for this off-road motorcycle camping adventure. I think these two “hobbies” really compliment each other. You need lightweight gear for backpacking, and you need the same type of equipment for moto camping. The backpacking gear was small and lightweight and fit great inside our panniers. In addition to backpacking gear, I also packed motorcycle emergency supplies and of course, our riding gear.

    Packing List

    • Lightweight, fast-drying towel
    • Moisture-wicking clothing
    • Smartwool or riding socks of choice
    • Flip Flops or Tennis Shoes (when you’re at camp or in town, it’s nice to have a break from your riding boots)
    • Hat (for when you’re off the bike — to hide helmet head or to keep warm)
    • Sunglasses
    • Balaclava (great for cold morning rides)
    • Thin fleece pullover (great for layering in the morning and at night)
    • Waterproof riding gear
    • Jacket
    • Pants
    • Gloves
    • Riding Boots
    • Backpacking tent (lightweight, easy to set up)
    • Pillow (or use clothing) (we had inflatable pillows from backpacking)
    • Backpacking sleeping bag (you want something smaller than your standard car camping bag)
    • Sleeping Mat (it’s incredible what even an inch of padding can do for a rocky surface)
    • Ziplock bags for toiletries (at higher altitudes these may leak)
    • Packing Cubes — These are a great way to organize gear in the panniers and be able to grab out what you need quickly.
    • Toiletries (shampoo, soap, face wipes)
    • Travel-size brush/comb
    • Coffee and filter
    • Dehydrated Meals
    • Instant Oatmeal
    • Jerky
    • Snack bars (quick snack stuff when you’re on the go)
    • Water (refillable and collapsible water bottles are great)
    • Eating utensils/plates/bowls
    • Collapsible cups (I love these, and they can double as bowls too)
    • Propane stove and propane (use a small pocket rocket one)
    • Cash (for emergencies)
    • Paper Maps (GPS is great when it works, can cause real problems when it doesn’t)
    • Bungees (for tying down the gear to the back of your bike or panniers)
    • Zip ties (always useful)
    • Multi-purpose tool
    • Spare Fuses
    • Engine Oil
    • Spare Tire/Tube or patch kit of some kind
    • Duct Tape
    • Fast Acting JB Weld
    • Loctite Threadlocker Blue
    • Tylenol/Ibuprofen
    • Allergy Medicine
    • Bug Spray
    • Hand Sanitizer
    • Chapstick
    • Raincover for your packs and sleeping bags
    • Small handsaw
    • Toolset for motorcycle
    • Waterproof Matches
    • Toilet Paper
    • First Aid Kit
    • Headlamp/flashlight
    • WD-40
    • Phone/GPS/Comms Charger (powerpack)
    • Charging cables
    • Communication Devices (we use the Sena SMH10 and loved the ability to communicate direction, needs of the group and sightseeing all along the ride)
    • Camera (bring proper padding and rain protection)
    • Passport (if needed)

    Packing Tips

    Practice packing up your motorcycle at least a day in advance, so you know how everything fits.  Make sure the weight in your panniers is evenly distributed so that it doesn’t throw the balance of your bike off.

    Also, when packing the day before, I reduced the weight even further by taking a second look at what I was packing. I discovered more items I could leave behind.  This tends to be the case. You can usually do without that extra shirt or shorts or “just-in-case” gadget. 

    Pack the miniature version of whatever you can — miniature brush or comb, travel size shampoo, small flashlight and so on. Moisture-wicking clothing is great because you can wear it for multiple days and easily wash it the night before a ride and hang to dry to wear the next day. 

    Also, you will eventually pass through towns during your off-road adventure whether you’re on the Washington Backcountry Discovery Route or some other adventure touring ride. So typically, you can purchase additional items, if you find you need them later. 

    I try to ask myself if I need the item in question. And if for some reason I discovered I did need it later on the ride, could I purchase it then?  If the answer is at first “no” I don’t need it and “yes” I could buy it later, then leave it at home. Chances are you won’t miss whatever it was.

    Final Tips for Planning Your Off Road Adventure and What to Expect

    If you are a beginner, like I was, you’re going to be really sore.  I highly recommend you start exercising ahead of time. Build up your shoulder muscles and your quads.  I would say these were the two sorest areas for me after a full day of off-road riding. 

    You should stand most of the time while riding off-road. If you haven’t built up your stamina yet, you will most likely be alternating between standing and sitting. This equates to doing squats.  By the end of the first full day of riding my quads were on fire, and it hurt to sit and stand up.  

    Give yourself extra time.  Yes, we could have done each section in one day, however, when you’re just a beginner at off-road adventure riding, it’s better to give yourself more time than you think. Plan to have downtime at your campsite. Rest, relax, discuss the day’s ride, and go over tomorrow’s trip. This will make your off-road adventure far more enjoyable.

    I made the mistake of not giving us enough time, and I will not make that mistake again.  I made too many assumptions about the trail and our abilities. These assumptions proved incorrect, and it made for some very stressful riding conditions.  So learn from my mistakes and add rest time to your schedule. 

    It’s also good to have extra time for any emergencies or detours that might come up. When you are riding off-road things get a bit more unpredictable.  And help is a lot further away.

    Drink plenty of water while riding and keep your energy levels up.  And have fun!! You can read Misadventures on the WABDR for more information about the route and our ride.

    Happy Adventuring!

  • Misadventures Riding the Washington Backcountry Discovery Route

    I attempted the Washington Backcountry Discovery Route sections 4, 5 and 6 in early September.  You will learn more about why I say “attempted” as you read along.  The Washington Backcountry Discovery Route (WABDR) is 575 miles of (mostly) off-road riding that goes from the Oregon/Washington border to the Washington/Canadian border.  

    Read how I planned and what I packed. And if it is your first time planning a similar ride, I hope you will learn from my mistakes.  In this post, I will journal our experiences on this motorcycle adventure, my expectations before the trip and my confrontation with reality after day one of our journey.  

    Meeting Our Group the Night Before

    I am riding sections 4, 5 and 6 of the Washington Backcountry Discovery Route with my hubby, brother, and sister-in-law. Section 4 covers backroads from Cashmere to Chelan. Section 5 is Chelan to Conconully, and Section 6 is Conconully to the border crossing at Nighthawk. These three sections total to approximately 273 miles. We plan to spend one day riding per section.

    My hubby and I rode over from Seattle Tuesday night after work to meet my brother and his wife in the town of Leavenworth, Washington. We reserved a campsite and planned to get dinner with them before getting some rest for our ride on Section 4  the next day. We had a great evening hanging out in Leavenworth, and everyone’s spirits are high and our hearts full of adventure.

    Day 1: Section 4 of the Washington Backcountry Discovery Route

    I was up around 6:30 a.m. No one else is awake, so I walk up the road to get coffee. Typically when we go camping, I make coffee at camp, but today’s campsite is conveniently located down the street from Starbucks. The campsite is still quiet when I return, and no one else is up yet.  I read, and I journal, I drink more coffee and finally decide to wake up my husband. It is now almost 7:45 a.m., and the rest of the group is finally getting up.

    This is the first in a series of lessons where my expectations meet reality and lack of planning.  I should have discussed with the group, the night before, what time we all thought we should leave. Then set the alarm and made sure everyone was up and getting ready on time.  However, I assumed that the day’s ride would only take 4 or 5 hours, so I wasn’t panicked. That was lesson two in setting expectations.

    We decided (against our better judgment) to go into town for breakfast. By the time we got into town for breakfast, it was already after 10:00 a.m.  I knew we should have just eaten at camp or stopped at a place along the route, but again, I thought today’s ride wouldn’t be that long.

    So long story short, we don’t end up starting the ride until almost noon!  Yeah, that was a big mistake!  

    In the Beginning, There Was a Puddle

    In the few days preceding our ride, the area had received heavy rain and flash flooding.  So shortly after starting the off-road portion of Section 4, we run into the mother of all mud puddles.  Think crater filled with water and mud. Then after you cross said crater, you must traverse along a thin stretch of dirt like a tightrope walker to avoid getting stuck in the large muddy ruts on each side.  The grooves were so deep in places that if I were to get stuck in them, my panniers would hit the sides of the rut.

    Hubby is in the lead, and he makes it through the mud puddle (crater) and safely to the other side.  I, however, stopped at the edge of the mud crater– that was a mistake. And then I let that pit get in my head and psych me out — another mistake.  My brother gets out of his 4Runner to give me some pointers on crossing the puddle. He offers to ride it for me, but I say no, I need to do this myself.  So I proceed to descend into the muddy pit only to shortly thereafter lay the bike over.  

    Puddle Wins 1-0

    My husband said he heard “glub, glub, glub” on the communication system.  Yes, that was me and my helmet immersed in muddy puddle water. I ask my brother to get my bike up quick. The last thing I want is for it to take in water.  So he gets in and soaks his feet and legs to help me get my bike up. He’s a good big brother. I’m unhappy at this point and frustrated with myself for letting this puddle get the best of me.  And I am also not happy about just starting the ride and being soaking wet!

    But, I get back on my bike, and now I am staring down the deep ruts on either side, willing myself to look forward to where I want to go and not at those deep ruts where I don’t want to go!  (There’s probably a life metaphor in there somewhere.) My brother once again helps me, as I’ve slid into a rut, and after he helps me out, I make it safely across to where my hubby is waiting.  

    Oh, and a quick note about our communication devices. We purchased Sena SMH10s for this ride, and we loved having comms! It was invaluable to be able to communicate directions and needs while riding.  Additionally, besides the mud puddle, we also road in heavy rain on our way back to Seattle and the comms seemed unaffected.  I highly recommend you consider a communication system when doing a group ride.

    If A Tree Falls In the Forest

    And now the irony of it all, no one thought to take any pictures of the muddy crater, the huge ruts, me dripping wet, nothing.  So I ask you: If you ride off-road and take a plunge in a huge mud puddle, but no one captured it on camera, did it even happen?

    Little did we realize, but the puddle was just a taste of what this day would hold. There were more deep grooves and washouts, rocky ascents and descents, road closures and detours all culminating in a dark and rocky ride down to the town of Chelan.

    Chumstick Mountain Summit to Ardenvoir

    We make it to the summit of Chumstick Mountain, elevation 5,810 feet and take a break and enjoy the views.  Our spirits are high, and we’ve had a great time riding thus far.  Each puddle I’ve encountered since “the” puddle has been easily crossed or avoided, and we’ve been gaining confidence and experience. I’ve heard “whoops” and “wahoos” over the comms and enough corny jokes to last a lifetime.  This is what the journey is about.

    As we enjoy our break, we notice a fire in the distance, and we hope that we won’t need to ride through it. We don’t and are happy about that. We eat a snack and continue our ride to the next waypoint in the town of Ardenvoir.

    As we are about to hit pavement for our ride into Ardenvoir, a “road closed” sign is blocking our path.  We followed the detour signs, and it felt like we were backtracking in the direction we had already come. After the initial detour, we came to another fork in the road with another detour sign. According to the map, the detour would not take us where we wanted to go, so we continued straight to stay on NF-5801. It was around 1 to 1 1/2 hours later that we arrived in the town of Ardenvoir. 

    The gas station is closed, because, you know, it’s Wednesday.  So we decide to keep going. It is now about 5:30 p.m. as we start our ascent of over 4,000 feet to reach McKenzie Ridge. After that, we will ride down Slide Ridge and hopefully reach Lake Chelan before dark.

    McKenzie Ridge Meets Misguided Expectations

    Oh, the optimism and the naivete I held at that moment. I was sure we could make it to Lake Chelan before dark.

    As we reached McKenzie Ridge, we saw beautiful views of Lake Chelan. And it filled us with hope. We could see our destination, and it felt closer than it actually was.

    The lake calls to us as we begin our descent down Slide Ridge, telling us, we were close. We were not close enough. Soon daylight turned into dusk and dusk to darkness.

    Riding in the Dark

    We continue our ride down the mountain in the dark, passing primitive campsites along the way. I call out to my hubby, who was in the lead, “we can camp here.” He continues riding, his reply, “I just want off this mountain.”

    We are exhausted and sore and riding down that rocky road full of ruts took every ounce of concentration and strength. On top of that, my husband’s rear brakes overheated and were no longer working. This meant he had to use a combination of riding his clutch and applying soft front brake pressure in the steep areas. 

    I, on the other hand, had not taken the time to clean my visor from my initial fall in the mud puddle. So I was riding with my visor up, all the while praying that those bats that kept flying across my path would not fly into my helmet.  Standing up in the rough parts now took every ounce of strength I could muster.

    We skip the optional “jungle” on section 4 and take the easier alternate route down.

    I thoroughly regretted my foolish assumptions at this point. Assuming things would take less time and assuming our skill levels were higher. I was feeling bad that I had pressured my hubby into continuing the ride from Ardenvoir when he had doubts about it — and desperately wanting to get off the mountain safely.  Off-road motorcycle riding at night was not part of the plan.

    Pavement Oh Sweet Pavement How I Missed You

    We rolled into our campsite at Lake Chelan State Park around 10:30 p.m. After over 10 hours of riding, we were never so happy to see pavement as we were that night. I didn’t know if I’d be able to walk the next day. I was completely spent.

    Riding is a workout, and riding off-road is both physically and mentally demanding.  Choosing your lines and hours and hours of standing and sitting (think of doing squats for an entire day) and being pounded by rough and rocky road conditions. Even my brother and sister-in-law in the Toyota were feeling it. 

    I realized that day that I was not in the physical shape, I needed to be in, and I overestimated my stamina and ability. I should have planned to camp on the mountain and split section 4 into two days rather than one. We are beginners, not seasoned adventure riders.  What I want to be and what I was at that moment were two very different things.

    We set up camp in the dark, my brother quickly grills up some hot dogs, and we crawl into our sleeping bags.

    Day 2: Section 5 of the Washington Backcountry Discovery Route

    We get up around 7:00 a.m. this morning. I can move, and I can walk, so I’m thankful for that.  My quads are really feeling the workout from yesterday. My brother fixes some pancakes and eggs on his grill, while I get the coffee going.  We eat and then pack up camp before taking a quick stroll down to the lake.

    It’s after ten, and we’re finally leaving camp.  However right after leaving, we discover the communication devices aren’t working correctly and neither is the GPS.  We fuel up and re-sync the comms again. The GPS signal keeps dropping.  We continue driving in the direction of Section 5, and my sister-in-law tells me thru the comms that it keeps saying, “GPS signal lost.” 

    Then it said re-routing when it connected again. So we turn off where the GPS instructs us, and soon we hit gravel roads. We stop again to re-sync the comms as my brother can hear me, but I can’t hear him.  GPS is still acting up, but we’re just going to try to follow the line on the map.

    The Road Less Traveled

    The ride starts with a grated gravel road and then turns into a fun climb up dirt roads. The stress of the previous night is behind us as we enjoy riding along this new path. There’s nothing quite like standing on your bike, wind in your hair, and a little dirt under your tires.

    Soon we hit a section of road that looks like no one has ridden on it for a very long time.  We climb up a rocky section with ruts on either side only to reach an overgrown jungle of a road where we decide to stop and regroup. 

    This does not feel like the right path.  While I get out the paper map (something I should have done at camp before leaving), my brother decides to walk the trail a bit further. Soon he comes back and says, “uh I don’t think we’re going any further.”

    Let me tell you right here, if my brother has doubts, then it is absolutely a no-go for me.  He has years of off-road riding experience and is known to do some crazy stuff, so I listen when I hear any tiny whisper of doubt coming out of his mouth.

    Off Road Motorcycle Trail in Washington
    Something tells me this is not the road we are looking for. You can’t see from the picture, but on the left, there is a drop-off. The Toyota has “just” enough space to get by the tree on the right, but its tires would have to ride the edge that is already sloughing off. Not worth the risk. Not to mention the road doesn’t improve beyond this point.

    I look at the map, and I say “we’re here and you see this road, way over across the mountain, yeah that’s the road we’re supposed to be on!”  The GPS re-routed us to link up to the original road, unfortunately, the path we’re on, isn’t used by anyone other than cows, so it’s a no-go for us.

    We come to the unfortunate conclusion that we must now turn around and go back to the highway to start again. We will discuss what to do once we make it back down.

    Tough Decisions

    We’ve finally returned to the highway where we missed the correct turn off for Section 5 of the Washington Backcountry Discovery Route. It is around 2:30 p.m., and we are still tired from the previous day’s ride.  Due to our time limitations, current physical state, and desire to be safe; we decide to skip Section 5 and instead ride up to Omak via the highway. 

    We aren’t happy about the decision, but we know it is the right one for us at this time. It is too late in the day to complete section 5, and we did not plan enough days to allow for an extra day of camping and riding.

    So we ride to Omak where we’ll spend the night and get our gear ready for the final section of the Washington Backcountry Discovery Route, Section 6.

    Day 3: Section 6 of the Washington Backcountry Discovery Route

    Three Off Road Dual Sport Riders near Conconully Washington
    We stop on Section 6 near Conconully, to fix our gear and have a little fun.

    My brother and his wife are riding his KLR today. Since we will not be camping, he doesn’t need to bring the Toyota.  In the future, he’ll purchase panniers so he can camp off his motorcycle too.

    We eat breakfast and fuel up.  Then start the ride around 9:30. We don’t need our GPS or maps today as my brother has covered practically every road in the mountains surrounding the Omak area. He knows today’s route forward and backward.  I mean he knows where the dips are and where the mud pits are. If anyone needs a guide to ride in the Okanogan Valley, he’s your guy.

    We ride up to Conconully to the start of Section 6. It’s getting cold, and we all stop to zip up the vents on our clothing and add any layers for the cooler temps.  Then we keep going. Soon we reach the top of Lone Frank Pass, elevation 6,667 feet. It’s a bit windy up here, but there are beautiful views of the mountains and fire-damaged forests below. 

    Lone Frank Pass Forest Roads for Off Road WABDR route
    Looking down the road at Lone Frank Pass.

    Skull and Crossbones Road

    Continuing on we soon reach the turn off for the Skull and Crossbones road.  It sounds ominous, but it’s not so bad. We stop at the Skull and Crossbones cabin, which collapsed during the previous winter, it is still a nice stop for a photo opp.  Then we continue our journey. Not too far after the Skull and Crossbones cabin, my brother tells us that we will ride through a mud pit.

    The bikes got a bit squirrely riding through this slick section of the road, and after I make it through safely, I say “wow, why does it smell like manure?”  My brother then lets us know that the “mud” isn’t just mud… We were all grateful none of us took a plunge in the “mud.”

    Skull and Crossbone Cabin on WABDR
    What’s left of the Skull and Crossbones Cabin.

    The Final Stretch

    The Skull and Crossbones Road eventually connects to a little bit of pavement before returning to a gravel road.  My brother takes us on a slight detour to see the local “Christmas tree” near Tiffany Springs. We look at the “ornaments” before returning to our route. 

    We come up behind a herd of cows running down the road in front of us.  Although I am not afraid of a cow, I do know they are still animals, and with that comes some unpredictability.  My brother coaches me to pick one side of the road and continue at a steady pace. He said I would be “herding the cows,” and they will move to one side.  He was right, as I stayed to the right, they moved to the left and allowed me to pass safely.

    Soon we can see the town of Loomis below us as well as part of Palmer Lake. It is a fun and easy ride back down to the pavement. 

    Palmer Lake from above
    A view of Palmer Lake.

    After returning to the paved roads below, we make a left and continue our ride around the beautiful Palmer Lake. There are a lot of neighborhood deer in the Palmer Lake area, so watch out if you ride that section.  It’s a short ride around the lake, and soon we are pulling into the old mining town of Nighthawk. We stop to take a few pictures on the town bridge. 

    The river in the town of Nighthawk Washington
    Looking over the river in the town of Nighthawk.

    We continue down the road before making a left turn for the Canadian border crossing and also the end of Section 6 and the Washington Backcountry Discovery Route. We take a snack break before driving down into the town of Oroville and ultimately making our way back to Omak for the night. It is the end of one journey, but there are many more to come.

    Canadian border with dual sport motorcyclist
    The Nighthawk Washington/Canadian border and the end of the WABDR.

    Setting Realistic Expectations

    I overestimated how simple the ride would be and underestimated the time it would take to complete each section.  I imagined we’d roll into camp late afternoon, relax,  chat about the day’s ride, eat dinner and get a good night’s rest. And I was so wrong. I should have assumed it would take us longer, that it would be harder and that we would be far more tired each day than I could have imagined.

    My assumptions about the ride and us as riders were faulty. I made mistakes. However, I’ve learned from them.  I am a more experienced rider now than I was before we started riding the WABDR. I will plan better for trips like this in the future.  And I will set better expectations and better communicate to my group the miles for each day and what time I’d like to leave each morning, etc.  

    That said, we have a great time!  We had laughs, we got dirty, and we saw beautiful scenery–we had an adventure! The best way to turn a misadventure into an adventure is your attitude.  Always keep a positive attitude, and you’ll always have adventures.

    Lessons Learned On the Washington Backcountry Discovery Route

    If you are new to off-road motorcycle riding or riding an adventure motorcycle off-road, then give yourself extra time.  Extra time to rest, recover and to enjoy the trip and the scenery. Riding is about the journey, not the destination.

    • Assume the ride will take longer. 
    • Set the time you want to leave by each morning and do your best to stick to it.
    • Review the map and route the morning of the ride.
    • Allow extra time for fun, relaxing, and resting.
    • Prepare physically for the ride, months in advance, if possible.
    • Add an extra day or two for detours, emergencies, and other setbacks.
    • When it stops being fun, take a break, and camp for the night if needed. Then start fresh in the morning.
    • Take more photos.  Get a helmet cam. Document the experience.  Most people who don’t ride won’t understand what you mean when you say a “steep rocky descent.” Or when you say “big ruts” or “a huge puddle.”
    • Drink more water along the way.
    This trip has been a fun learning experience. I am a more experienced rider now and I faced my fears and pushed myself further than I thought I could.  I don’t regret the rough stuff, and I am proud of myself for what I accomplished and look forward to completing the Washington Backcountry Discovery Route in its entirety one day soon.
     
    My motto: Find your limit and then push past it just a little. Repeat for life.

    More Info on the Washington Backcountry Discovery Route

    If you want to learn more about the WABDR, you can stream the official Washington Backcountry Discovery Route video on Amazon.com.

    Touratech USA has YouTube videos on each section of the WABDR for free. And you can also purchase the map of the WA Backcountry Discovery Route online from Touratech USA.

    In addition to Washington’s Backcountry Discovery Route, there are nine other states with completed backcountry routes and more in development.  So make sure to check out all the available routes and see if there is one near you.

    Let the adventure begin!

  • Scenic Camping and Hiking at White River Campground

    White River Campground is a first-come-first-served campground near the Sunrise Visitor Center in Mount Rainier National Park. Many visitors overlook the beauty found in this eastern section of the park for the more popular area around Paradise. However, if you don’t take time to explore the area surrounding Sunrise and White River Campground, you will be missing out!

    During the summer Cougar Rock Campground and Ohanepecosh Campground fill up due to their online reservation system. Whenever this has been the case, I have always been able to find a site at White River Campground. I think it helps that it has no online reservation system and is strictly a first-come-first-serve system.

    While camping at White River Campground, you can hike from the campground to see the largest glacier in the lower 48 States. Fall asleep to the sound of the roaring river. And wake up to the most beautiful views of Mount Rainier. Visit Sunrise Visitor Center, the highest point in the park you can drive to.  You do not want to miss the fantastic views and hiking trails here!

    Getting to White River Campground

    Drive east on WA Highway 410. It is approximately 1 hour from Enumclaw to White River Campground. Follow Chinook Pass Highway/Highway 410 until you see the road fork to the right for Sunrise Rd/White River Rd. You will turn right here and follow the road to the entrance station for Mount Rainier National Park. Pay the Mt Rainier National Park entrance fee and continue for another 5 miles before making a left at the entrance sign for White River Campground.

    Finding a Campsite

    Follow the road into the campground, and you will pass the pay station parking on your right. I recommend you stop here and pick up the pay envelope that you need to complete your campsite reservation. Then continue driving thru Loop A, B, C, and D to find an available spot. 

    Tip: Loop A, C and D all have restrooms with flushing toilets and sinks. Loop B has a pit toilet supplied with hand sanitizer.

    Once you have found the campsite you want, fill out the envelope with the necessary information, then tear off the tab and attach to your site number to reserve the spot while you go pay. You will take your envelope with payment (cash or check) and submit it at the pay station, by dropping it in the pay slot. A ranger will come by later in the day to add a tab to your campsite number showing the date you have reserved your spot thru. 

    Things to Do at White River Campground

    There are lots of things to do at White River Campground and one of them is the hike to see the Emmons Moraine Glacier.  Mount Rainier is home to many different glaciers, but this one is the largest. In fact, it is the largest glacier in the lower 48 states! Pretty impressive, huh?

    Getting to the Trailhead

    You will find the trailhead for the Glacier Basin Trail in Loop D. Your hike to Emmons Moraine starts here. This easy hike is about 3 miles total out and back. It has a steady uphill climb, but it never gets very steep. The 6 year old in our group practically ran the whole way there and back. It takes 1-2 hours total to complete the hike. 

    Glacier Basin Trail to Emmons Moraine Trail

    Follow the Glacier Basin Trail as it winds its way thru the beautiful wooded forest with views of White River below. You will pass small streams and waterfalls forging paths down the mountainside. After about 1 mile the Emmons Moraine trail will split from the Glacier Basin Trail and you will make a left to continue to the viewpoint for the glacier. 

    log bridge crossing White River
    Hiker crossing the log bridge that takes you to the viewpoint for Emmons Moraine.

    Continuing on the Emmons Moraine Trail

    As you turn left  you will walk down to the river and cross a log bridge before climbing back up the hillside where you are rewarded with spectacular views of the Emmons Moraine Glacier. You will also have beautiful views of the turquoise lake created by the glacier run off and glacial silt. It is quite the stunning view. Feel free to wander further up the trail for closer views of the glacier before turning around to make the hike back to camp.
    Hiker looking down at the glacial ponds formed from Emmons Moraine Glacier
    The glacial pond formed from Emmons Moraine.

    Optional Side Hikes from Emmons Moraine Trail

    If you prefer to do a longer hike, you can always take the trail down to the glacial lake (although it’s a bit of a scramble, so proceed with caution) or you can return to the junction for the Glacier Basin Trail and hike to Glacier Basin Camp which is another 2.2 miles from the junction. This adds a total of 4.4 miles to the Emmons Moraine hike, making it about a 7.5 mile hike by the time you return to camp.

    Additional Hikes and Things to Do at White River Campground

    If you want additional hikes to do from White River Campground, you can hike a portion of the Wonderland Trail starting at  Loop C near the old patrol cabin. This trail will take you up to Sunrise. It is about a 3-mile hike from White River Campground to Sunrise Visitor Center.

    From the day-use parking lot, you can follow a trail down to the river. Kids and adults alike will enjoy looking for unique rocks and perhaps tossing one or two into the river for fun. It is also a great place to spot views of Rainier and the Emmons Moraine glacier.

    In the summer the rangers will often lead evening talks at the community campfire just off the main road in the park (the road that goes by the different loops). You will find the bulletin board here too, which should list any upcoming programs.

    “And into the forest I go, to lose my mind and find my soul.” ~John Muir

    Visit Sunrise Visitor Center

    Don’t miss a visit to Sunrise Visitor Center while staying at White River Campground. The visitor center is another 11 miles up the road from the campground. Follow the road out of the campground and make a left at the junction to get back on Sunrise Rd. Continue to the top where you will find the Sunrise Visitor Center Complex and parking. 

    There are so many beautiful hikes to do here. There are easy nature hikes that will only take an hour or less to longer multi-hour hikes. Stop by the ranger station and ask them for some recommended trails based on your preferences. Some easier ones I recommend are the: Sourdough Ridge Nature Trail, Shadow Lake, and the Sunrise Rim loop.

    Tips for Camping at White River Campground

    • There is no electricity in the restrooms. So bring a flashlight or LED lantern for those nighttime trips to the bathroom.
    • There is also no soap in the restrooms, so make sure to pack some from home.
    • White River Campground is at a much higher elevation, which means it can get a lot colder here at night, so pack layers and extra blankets.
    • The campground host drives thru the campground loops each night selling firewood. Make sure to have cash. As of 2019, it was $7/bundle.

    If you haven’t had a chance to check out this Eastern section of Mount Rainier, don’t miss it!  You will be amazed by the beauty you find here.  And if you want another stunning hike only a 25-minute drive from the campground, you will find the Naches Peak Loop Trail. I highly recommend it!

    Happy Camping & Happy Trails!