I love coffee! So when I found this coffee cake recipe, I knew I had to make it! You see, I’m not much of a “cake” person. I tend to gravitate toward spicy and salty snacks before desserts. When I do want a dessert, I typically choose a pie or cobbler rather than a sugary cake topped with cavity-inducing frosting.
All that changed when I found this coffee cake recipe. Six years ago, I purchased the Pioneer Woman’s “Food From My Frontier” Cookbook, and it changed my life! Okay, that’s a little dramatic, but it certainly gave me a new reason to eat cake on my birthday! I’ve made this every year for my birthday since getting this cookbook, that’s how much I like it. I recommend you consider buying her cookbook as it has a bunch of other great recipes in it!
However, in the Pioneer Woman’s cookbook, she makes this as a double layer round cake, and although I’ve made it this way, it’s not always the best choice when feeding a large crowd. So when my husband requested I make this for his team at work, I decided I needed to figure out a way to make this in a 9 x 13 cake pan or a 1/2 sheet.
A larger cake not only serves more people but I think a rectangular cake is also easier to transport. This comes in handy when the requests start streaming in for you to bring to all the group functions and holiday gatherings. It’s that good! So be prepared for this to become a new favorite!
Not Your Ordinary Coffee Cake
First off, let me say this isn’t your typical coffee cake recipe. You know the coffee cake you make to eat with your cup of coffee. Don’t get me wrong. I love that kind of coffee cake too. However, this is not that coffee cake. No, this coffee cake recipe is your coffee and your cake in one delicious treat! Think of it like you’re eating your coffee rather than drinking it. It’s a slice of coffee–coffee heaven!
This coffee cake is for true coffee lovers. If you don’t like the taste of coffee, then this recipe isn’t for you (and we should probably talk). However, if you’re like me and you like to take slow walks down the coffee aisle at the grocery store just to smell the coffee beans, then this recipe is for you. And if you want to try another coffee recipe of mine, check out these three ways to make Vietnamese coffee.
Soon, you will remember your life as “before this coffee cake” and “after eating this coffee cake.” It’s life-changing! Perhaps it’s the caffeine talking, but I’m pretty sure you’re going to think so too once you try it.
My Tips & Modifications for Making this Coffee Cake
When determining how to make this coffee cake recipe for a crowd, I needed to figure out a way to still have a double cake layer, but without it being too thick. You’re going to want a crowd to help you eat it too. Otherwise, you may be tempted to eat the whole thing by yourself!
A traditional 9 x 13 cake pan wouldn’t work for me as this is a double layer cake with a filling in between the layers. So I didn’t want each of the cake layers to be as thick as a standard 9 x 13 cake. I didn’t have two 1/2 sheet pans either, so I used the next closest thing I had, two 10 x 15 jelly roll pans.
Tips: Use parchment paper in your jellyroll pans for easier removal. Otherwise, make sure to use a baking spray that contains flour and spray your jellyroll pans down good before pouring in the batter.
I use a large cutting board to place over the cake after it’s cooled for 10 minutes in the pan, then I gently flip it over onto the cutting board. For the other layer, I do the same, but flip it onto my cake tray (I have a lid that fits over the top of this carrier, which I put on when it’s all finished).
Final note: I don’t take any credit for the deliciousness of the original recipe. That was all the Pioneer Woman’s doing. I want to make that clear. This is my adapted version for those of you who wish to make this cake to serve more people. It’s great for birthday parties and holiday parties at the office.
Step by Step Recipe
Feel free to jump ahead to the printable recipe below if you don’t wish to see the step-by-step instructions.
Step 1 Preheat the oven and Prep Your Pans:
Preheat your oven to 350 degrees and line two 10 x 15-inch jelly-roll pans with parchment paper. If you don’t have parchment paper make sure to spray your pans generously with a flour baking spray. Set those aside for now.
Step 2 Add a Whole Lot of Butter:
Place four sticks of butter in a medium saucepan and put the burner on medium-low to melt the butter slowly. You don’t want it to boil and splatter butter everywhere.
Step 3 Melt Butter & Prep Dry Ingredients:
While the butter is melting, begin measuring the flour, sugar, and salt into a large mixing bowl. (I use a 4.5-quart bowl) Whisk the flour, sugar, and salt together and set aside. Boil 2 cups of water. I like to boil the water in my tea kettle. I love using my tea kettle for boiling water. It’s so convenient!
Step 4 Add the Coffee & Breathe in the Aroma:
Now, add in the coffee crystals to the melted butter mixture and the 2 cups boiling water. And stir it until the coffee crystals melt and combine with the butter and water. Then let it begin to bubble just a little, about 5 seconds before you turn the burner off.
Step 5 Prepare Buttermilk Mixture:
While the coffee sits on the burner with the heat off, prep the buttermilk mixture, whisking it all together, and then set aside. I use a 4-cup Pyrex measuring cup for this step.
Step 6 Mix Your Batter:
Next, take your hot coffee mixture and pour it into the flour mixture. It’s essential to take your time and stir this together really well. When it’s all mixed, it reminds me of ginger snap cookie batter.
Step 7 Finish Mixing the Batter Completely:
Now add in the buttermilk mixture and slowly mix it into the batter. This may take a few minutes to get it fully incorporated.
Step 8 Pour Into Pans & Try Not to Lick the Bowl Clean:
Pour the thoroughly mixed batter into the two prepared jelly roll pans. Try your best to divide the mixture equally, but it doesn’t have to be perfect.
Step 9 Bake your Cake:
Then bake in the 350º Fahrenheit oven for 20 minutes (or until an inserted toothpick comes out clean).
Step 10 Remove Cakes From Pans:
Remove the baked cakes from the oven and let cool in their pans for 10 minutes. Then using a cutting board or if you have a cake platter/tray gently place that on top of your cake and slowly invert the cake pan. Your cake should easily come out of the pan and on to whatever surface you inverted it on top of.
Step 11 Cool the Cakes Completely:
Let the cakes sit there and cool completely. In the meantime, you can whip up your cream filling.
Step 12 Whisk Together the Delicious Cream Filling:
Fit a whisk attachment to a stand mixer and add the cream cheese, 2 cups powdered sugar, and heavy cream to a large mixing bowl. Beat this all together until it is light and fluffy.
Step 13 Spread the Creamy Filling Over the Bottom Cake Layer:
After your cakes are thoroughly cooled, place your bottom layer on a cake platter (if you haven’t already done this), and spread the creamy filling all over it. I use a big spatula for this part.
Step 14 Add the Top Layer of Cake:
Then invert your cutting board or whatever surface you’re using over the bottom cake layer and gently lay the top layer of cake on top of the creamy filling. It should now look like some giant delicious cookie sandwich or cake sandwich.
Step 15 Make the Icing:
Melt three sticks of butter in a large saucepan. Then add the 1/4 cup instant coffee crystals. Stir together with a whisk, then add in the half-and-half and whisk together good. Now add the 8 cups powdered sugar and 4 tsp vanilla. Whisk the icing until smooth.
Step 16 Frost Your Cake & Try Not to Eat All the Leftover Icing:
Let it cool for 5 minutes, then gently begin pouring it over your cake, making sure to cover the top of your cake evenly. I let mine drip all down the sides of my cake. If you want, you can always take a knife and try to spread it around the sides of the cake. No matter how it looks, you can be sure it’s going to taste amazing!
Step 17 Eat Cake!:
Considering that as I write this, my birthday is only two days away, I think an early piece of cake is in order! However, I’ll try to wait at least until my hubby gets here. In the meantime, I’ll grab some graham crackers, spread them with a little leftover cream filling, then drizzle with some icing and top with another graham cracker. I just made the best graham cracker sandwich ever! Try it with your leftovers.
Warning: This coffee icing is addicting. You may want to hide it from yourself, so you don’t devour it all in one sitting.
Best Ever Coffee Cake
5 from 1 vote
This delicious coffee cake is made with actual coffee!
Spray two jelly roll pans (10 x 15 inch) with a flour baking spray or line with parchment paper.
Melt the 4 sticks of butter in a medium saucepan.
Add the 6 Tbsp of instant coffee and then add the 2 cups boiling water.
Let this mixture bubble for about 5 seconds, then turn off the heat.
In a separate large bowl, whisk together the flour, sugar, and salt. Then pour the hot mixture over the dry ingredients and stir to combine.
In another medium bowl, mix together the buttermilk, eggs, baking soda, and vanilla extract. Pour this mixture into the ingredients in the large bowl and stir together. Mix until fully incorporated.
Pour this batter into the two jelly roll pans, dividing the batter equally between them both. Bake for about 20 minutes.
Take the pans out of the oven and let the cakes cool in the pans for about 10 minutes. Then turn the pans over on to a clean, prepared surface, and remove from the jelly roll pans. Gently peel off the parchment paper (if used) and allow the cakes to cool completely.
While the cake is cooling, begin preparing the filling.
Cake Filling Instructions
Fit a stand mixer with the wire whip attachment. (A hand mixer should work too)
Add the softened cream cheese, 2 cups powdered sugar, and heavy cream to a large mixing bowl. Beat until light and fluffy, then set aside while the cake cools completely.
When the cake has cooled completely, move it to your cake holder or cake stand. Then spread the creamy filling over the bottom layer.
Gently add the second layer of cake on top of the filling.
Coffee Cake Icing Instructions
Melt the 3 sticks of butter in a large saucepan and add ¼ cup instant coffee crystals. Stir together.
Add the half-and-half to the saucepan and whisk together. Then turn off the heat.
Add the 8 cups powdered sugar and vanilla. Whisk together really good to create a smooth icing.
Let the icing cool for 5 minutes. Then gently pour the coffee icing over the top of your cake. Make sure you pour it so it covers the entire cake and drips down over the sides.
Enjoy this delicious cup of coffee served as a slice of cake. Coffee and cream all in one bite!
Notes
*TIP: If some of the cake peels off with the parchment paper, don’t panic, you smooth it back on with a butter knife. However, you’ll cover with filling and icing later so any small patches won’t be noticed.*When frosting the cake, you can try to smooth the icing along the sides for better coverage. However, I find pouring it and letting it just drip down works best as it is hard to smooth after it begins to cool on the cake. So you have to act fast!
Visiting the historic D-Day sites is an unforgettable way to spend the day. It is one of those bucket list trips that leave you better for having made them. June 6, 1944, is one of the most historic dates in world history. The victory achieved on D-Day changed the course of the world.
The freedoms I have today are in large part due to the battles fought on the shores of Normandy. If you have an opportunity to travel to France, take some time to visit the D-Day sites in Normandy. You’ll never forget it.
In this post, I share my one-day self-guided itinerary to some of the D-Day sites in Normandy, France. You’ll get a chance to learn about my experience and also see how easy it is to plan your own trip to this historic region. Although I would have preferred a minimum of 2 days for my visit, even with only one day to see the D-Day sites, you can cover a lot of ground and still have an unforgettable trip.
Overview of Our One-Day Itinerary to D-Day Sites in Normandy
We took a direct train from Paris to Caen, where we’d booked our hotel and rental car. In addition to spending one day seeing the D-Day sites, we also spent one day driving to Mont-Saint-Michel. For our one-day D-Day itinerary, we drove from our hotel in Caen to our first stop, the Airborne Museum in Sainte-Mere-Eglise. Then we worked our way back in the direction of Caen for the remainder of the itinerary.
Tip: You could easily make this trip in reverse, and depending on what time of year you go, you may want to. We discovered during our visit here in October, that places open later and close earlier in the fall and winter.
So in the case of our route, we arrived at the Airborne Museum, thinking it opened at 9:00 a.m. (according to Google) only to discover it did not open until 10:00. Thus, we could have started at the Normandy American Cemetery, which opened at 9:00 and closed at 5:00 and then saved the Airborne Museum for last, which closed at 6:00 p.m. Live and learn!
Benefits of a Self-Guided Road Trip to See D-Day Sites
By driving yourself to the D-Day sites, you have more flexibility and choices in which places you see and how long you spend there. Driving in France was easy for me since they drive on the same side of the road as we do in the U.S. As long as you can drive a car with a manual transmission, it is pretty much the same as driving in the States. The road signs may look a little different, but all in all, it’s a very similar experience.
However, if you’re not comfortable with driving on your own in France, there are a lot of tour companies that will drive you around to the historic D-Day sites. You can take 12-hour day trips from Paris, or local tours starting at Caen and Bayeux. So decide on whichever option works best for you and your itinerary.
A Little Background About This Trip
My visit to Normandy, France, was a part of a 2 1/2 month backpacking trip I took with my friend through Europe. As I planned our route and the “must-see” stops along the way, I knew that visiting Normandy, France, and the historic D-Day sites was a must for me. Our visit to Normandy was during the final three weeks of our trip through Europe.
Before arriving in Normandy, we toured the house where Anne Frank hid in the attic before being captured by the Nazis. We visited Berlin and walked over what was once Hitler’s underground bunker and wandered through the Memorial to the Murdered Jews. Then we traveled to Krakow, Poland, where we took a day trip to the Auschwitz-Birkenau concentration camps. Finally, we went to Normandy, France, and visited some of the historic D-Day sites.
It was a journey through World War II history, starting with the atrocities that forced people into hiding and ultimately led to the death of millions of people. Our travels brought us full circle to Normandy, and the history surrounding D-Day, the battles leading up to it, and the battles fought afterward.
Although the history surrounding D-Day was one of tragedy, it was also one of triumph and hope. I saw the bleakness of death at Auschwitz, which only made my visit to the D-Day sites all the more impactful. The price was high, the sacrifice great, but freedom demands we risk everything or end up with nothing. I am so grateful for those who gave their lives so I could live in freedom.
Site 1: Church of Sainte-Mere-Eglise
We started our day of sightseeing in the town of Sainte-Mère-Église. We arrived a little after 9 a.m. and found that the Airborne Museum didn’t open until 10 a.m. So we wandered over to the Church of Sainte-Mère-Église, where a mannequin of a paratrooper’s body hangs from the church steeple.
John M. Steele
We learned more about the paratrooper represented on the church steeple during our visit to the Airborne Museum. His name was John Steele, and he was a paratrooper with the 82nd Airborne Division. During the drop into Sainte-Mère-Église, one of the houses caught fire, which unfortunately illuminated the night sky, and thus the paratroopers dropping in.
John Steele was hit in the foot on his way down and lost control of his parachute. His parachute caught on the church steeple. He hung there for around 2 hours, pretending to be dead before German soldiers came up and brought his body down. They took him as a prisoner, but three days later, he escaped and returned to his division. He survived WWII and returned home after the war was over.
A beautiful stained glass window in the Church at Sainte-Mere-Eglise.
There is so much more to John Steele’s story and to the paratroopers that dropped that night. For any of you who have watched “The Longest Day,” you might remember seeing the scene of the paratroopers dropping in.
The real story is full of heroism, as one of his fellow troopers on the ground gave his life to save John’s. The chaos was compounded by the house fire, which lit up the sky and made them glowing targets.
Go inside the church and take a look around. There is a beautiful stained glass window created in memory of the paratroopers that lost their lives here. There is also another one portraying the angel Michael surrounded by the symbols of the various Allied forces who fought to free Sainte-Mère-Église.
Time Spent Here: (~ 30 minutes) Location: Church of Sainte-Mère-Église, Rue Koenig, 50480 Sainte-Mère-Église, France Commute Time to Next Site: ~ 1-minute walk across the parking lot.
Site 2: The Airborne Museum at Sainte-Mere-Eglise
The Airborne Museum is a thoughtfully designed museum made up of multiple buildings as well as an outdoor area. At the ticket desk, you receive a tablet to carry with you as you make your way through the different areas. The tablet provides additional information about the exhibits and includes interactive features, which if you have kids, they will especially enjoy this feature. For the most part, you won’t need the tablet. However, it guides you in a particular order throughout the museum complex.
The first building we entered after purchasing our tickets was the building designed like the inside of a big parachute. Inside there are numerous displays of paratrooper’s gear, mementos, and stories of some of those involved in the liberation of Sainte-Mère-Église. The museum does a beautiful job portraying the details of what these paratroopers must have gone through to prepare for their mission.
In the next building is a large display of an airplane, and on one side is a mannequin of President Eisenhower and a printed copy of his D-Day order. Many of these guys were barely out of high school. They didn’t have much training, and yet they were going into one of the biggest and most important battles in US history. They would be some of the first boots on the ground for the US military in Normandy, France.
“You are about to embark upon the Great Crusade, toward which we have striven these many months. The eyes of the world are upon you. The hope and prayers of liberty-loving people everywhere march with you.” ~ General Dwight D. Eisenhower
One of the Airborne Museum’s life-sized displays.
In another room, audio speakers play the sounds of battle along with a display of an aerial view of Sainte-Mère-Église. I also learned during my visit here, that the paratroopers had to carry packs that weighed anywhere from 90 lbs to 180 lbs! Can you imagine jumping from a plane with a pack the size of a human strapped to your back?
The Soldier’s Stories Helped to Connect on a Personal Level
It was incredible to hear their stories and to take a glimpse into what those men went through. It was heroic yes, but also scary. Real courage isn’t without fear. It’s acknowledging the fear and moving forward in spite of it. Courage understands what’s at stake.
We watched a touching film that showed the images of Holocaust survivors and also the piles of dead bodies. Tears sprang to my eyes as it put in perspective what was being fought for. All of our future freedoms were at stake if Hitler, and the other countries fighting against democracy, had not been stopped.
I highly recommend making the Airborne Museum a part of your itinerary when visiting D-Day sites in Normandy. They took excellent care to make it a moving and thoughtful museum and memorial to 82nd and 101st Airborne Divisions.
Time Spent Here: (~ 1.5 hours) Location: Airborne Museum, 14 Rue Eisenhower, 50480 Sainte-Mère-Église, France Commute Time to Next Site: ~ 30-minute drive
The entryway in the German war cemetery at La Cambe.
Site 3: La Cambe German War Cemetery
Our next stop is the La Cambe German war cemetery. It is a simple and somber graveyard, and it is also the largest war cemetery in Normandy. There are over 21,000 bodies buried here as compared with the less than 10,000 buried at the American cemetery in Colleville-Sur-Mer.
As you walk through the entrance to the cemetery, you notice straight in front of you, a mound of raised earth (also known as a tumulus). Sitting on top is a giant dark stone cross with a man and a woman on either side. I assume this represents the mother and father of the dead. I recommend you walk to the top and get a bird’s eye view of the enormous size of this cemetery.
Most of the graves are marked with simple bronze-colored stones set in the ground. There are also rows of dark stone crosses spaced here and there across the cemetery. As I pass by the markers, I notice that most of the soldiers buried here were only 18 or 19 years old. According to the cemetery, most of the soldiers buried here died between June 6, 1944, and August 20, 1944.
The German soldiers buried here were teenagers sent off to war by the command of their country. A surviving German soldier said that some of the soldiers enlisted in WWII were only 16 years old, forced to go to war, scared to death, wanting to run, but told they’d be shot if they did. They had families who loved them and mourned their loss. War is ugly no matter which side you’re on.
A view of the German cemetery at La Cambe from atop the tumulus.
A Comparison of Two Cemeteries
My visit to the German war cemetery at La Cambe provided a thoughtful comparison with my visit to the Normandy American Cemetery at Colleville-Sur-Mer. I left the La Cambe cemetery feeling sorrow at the tragic loss as a result of this war. Although there is still certainly a sense of loss at the American cemetery, I left it feeling a sense of pride and gratefulness. It was a cemetery that celebrated and thanked those buried within, rather than only mourning their loss.
Time Spent Here: (~ 30 minutes) Location: La Cambe German war cemetery, Les Noires Terres, 14230 La Cambe, France Commute Time to Next Site: ~ 20-minute drive
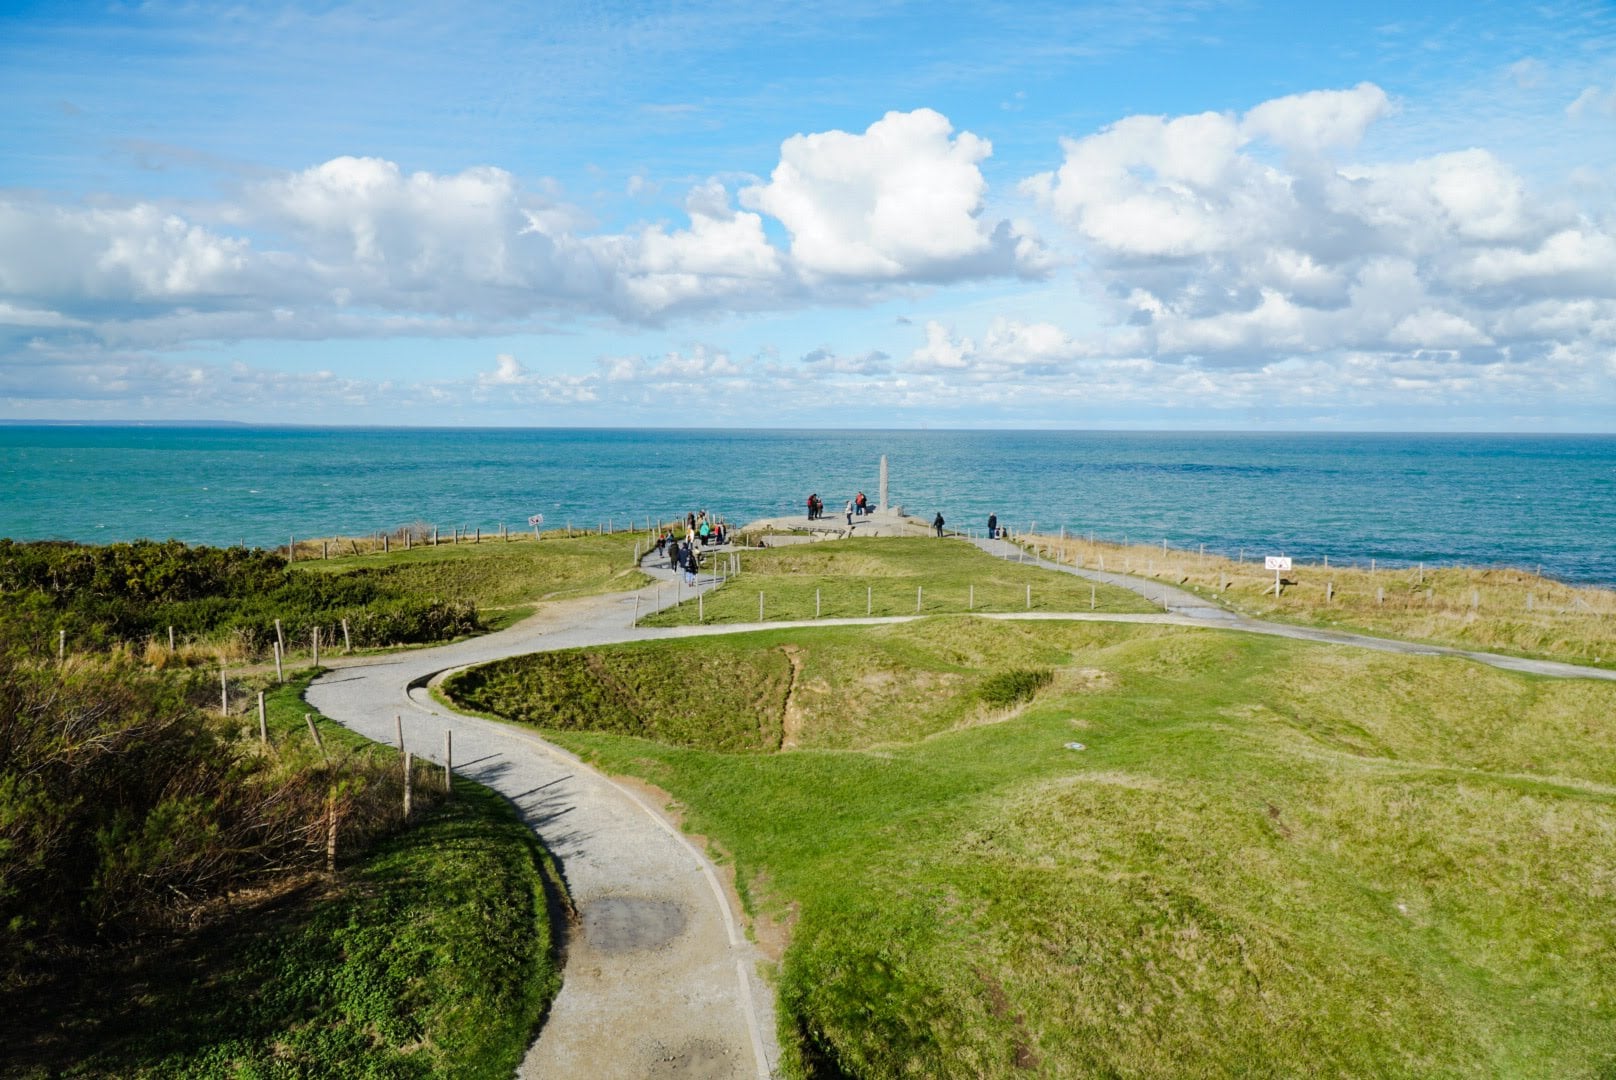
Looking down the path to the memorial for the fallen Rangers at Pointe du Hoc.
Site 4: Pointe du Hoc
Next, we drive to the parking area for Pointe Du Hoc. Near the parking area is a memorial to the Army Rangers who gave their lives during the bloody battle fought here. It is a moving tribute to their courage and sacrifice. It tells the story of the Ranger’s persistence to scale the cliffs soaking wet in the middle of a storm while being gunned down by Germans from above.
What courage and commitment it took for them to continue scaling the almost 100-foot cliffs! Their fellow soldiers were dying one after another, and yet they continued to climb until at last some of them reached the top and claimed Pointe du Hoc as an Allied stronghold.
The same cliffs at Pointe du Hoc the Rangers once scaled.
This, of course, is the short version. The entire story of what occurred at Pointe Du Hoc on June 6, 1944, is an incredible tale of heroism. It is almost unbelievable, like something out of a Hollywood movie, and yet it’s true. These men defied unbelievable odds.
The craters from the aerial bombings dot the landscape.
Lunar Landscape
From the memorial near the parking lot, you continue down a trail leading to the very cliffs these Rangers climbed on that dark and stormy night. You walk past large craters from aerial bombings and get a chance to step inside the bunkers the Germans built to house their 155mm arterial guns. These guns could target ships up to 12 miles offshore! You can understand why it was so crucial for Allied forces to overtake these strongholds to win the fight on D-Day.
The walk to the stone memorial overlooking the water is memorable in itself. It gives you a scope of the type of battle fought here. Kids will enjoy exploring the craters and empty bunkers. The walk from the parking lot takes about 10 minutes. Make sure to wear sturdy walking shoes and give yourself enough time to explore the grounds before heading on to your next stop.
Time Spent Here: (~ 1 hour) Location: Pointe du Hoc, 14450 Cricqueville-en-Bessin, France Commute Time to Next Site: ~ 15-minute drive
The National Guard Association Monument built atop a former German pillbox.
Site 5: National Guard Association Monument at Omaha Beach
The National Guard monument located along Omaha Beach is an inspiring monument dedicated to the soldiers of the National Guard who fought not only in World War I but also in World War II. That was one of the things written on the monument that stuck out to me. It mentioned how the sons of the National Guardsmen would fight for freedom in WWII just as their fathers had fought for freedom during WWI. What a powerful legacy.
Take time to read the words and quotes engraved on each side of the monument. Close to the monument is another memorial of a National Guardsmen carrying his fellow soldier out of battle. This memorial is in tribute to the National Guardsmen of the 29th Division’s 116th Infantry Regimental Combat Team.
They were some of the first to land on the area that is now referred to as “bloody Omaha.” They came with brothers, and boyhood friends, never to return home to their families or to live out their lives. They were so young and so courageous. The soldiers who fought in WWII are true superheroes.
The tribute to the National Guard titled “Ever Forward.”
Walk along the beach while you’re here and look up at the cliffs. Imagine what it was like for the soldiers who landed on these shores, wet, cold and disoriented, being gunned down in the water before they even had a chance to fight. No matter what, they wouldn’t be stopped. They knew what they had to do, no matter the cost!
Time Spent Here: (~ 15 minutes) Location: National Guard Monument (Secteur Charlie), 12 Boulevard de Cauvigny, 14710 Vierville-sur-Mer, France Commute Time to Next Site: ~ 5-minute drive
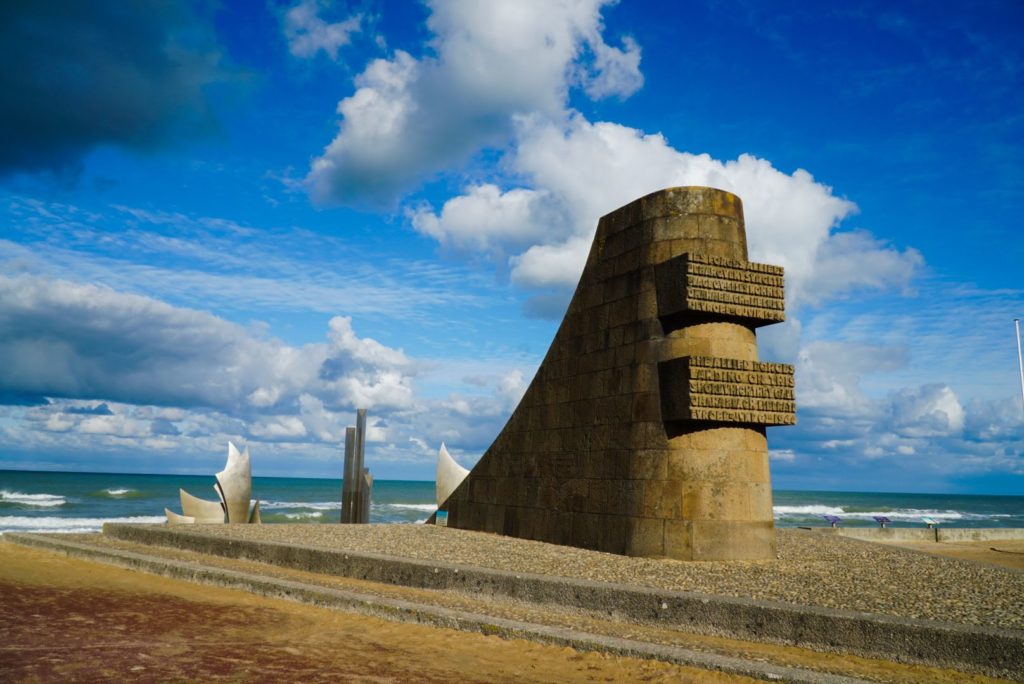
Site 6: Omaha Beach Memorial
We drove along the waterfront for another 5 minutes before reaching the parking area for the Omaha Beach Memorial. The wind was blowing and the cold air bit into our skin. The skies were blue and clouds dotted the horizon. It made me think of the weather conditions the soldiers dealt with during the early morning hours on June 6, 1944.
I tried to imagine a much darker and stormier scene. The first wave of soldiers arriving soaking wet, many drowned before they ever made it to shore. Gunfire raining down from German soldiers perched on the cliffs and the beach. This was war, ugly and chaotic with freedom on the line.
I live in the light of victory, but on D-Day, victory was still being fought for. It was a scene of tragedy, and decades later, many survivors would continue to have a hard time talking about it. I’ll never truly understand the full cost, but I’ll do my best to live gratefully.
A stone memorial at Omaha beach commemorating D-Day.
Next to the parking lot, there is a large stone marker, which is a memorial to the Allied forces landing here on Omaha Beach on June 6, 1944. On one side of the stone memorial is the inscription: —No mission too difficult —No sacrifice too great. Duty First. Forced Omaha Beach at dawn 6 June. The other is etched with the images of soldiers and reads: Erected in memory of those —The 116th RCT 29th Infantry Division AUS landed here June 6, 1944.
Les Braves
Just behind it is a beautiful metal sculpture rising out of the sand just off the shore. The sculpture created by French sculptor Anilore Banon is titled “Les Braves.” According to Banon, the sculpture consists of the following three elements:
The Wings of Hope – So that the spirit which carried these men on June 6, 1944, continues to inspire us, reminding us that together it is always possible to change the future.
Rise Freedom! – So that the example of those who rose against barbarity, helps us remain standing strong against all forms of inhumanity.
Wings of Fraternity – So that this surge of brotherhood always reminds us of our responsibility towards others as well as ourselves. On June 6th, 1944, these men were more than soldiers, they were our brothers.
“Les Braves” sculpture on Omaha Beach.
The people of Normandy are still very grateful to the American and Allied forces for freeing them from the Germans.
If you have extra time and want to stop, there is the Omaha Beach Museum about a 5-minute walk from the Omaha Beach Memorial.
Time Spent Here: (~ 1 hour) Location: Omaha Beach Memorial, Avenue de la Libération, 14710 Saint-Laurent-sur-Mer, France Commute Time to Next Site: ~ 15 minute drive
Lunch Break
We ate lunch at the D-Day restaurant across from the Omaha Beach Memorial parking lot. It was a choice of convenience. However, it was warm and cozy inside the restaurant. My lunch consisted of some toast topped with ham and cheese. It was a warm break from the chilly weather outside.
I recommend packing snacks and water in your car, and possibly a picnic lunch if you’re able to. I didn’t see too many dining choices along this route. However, that may be due in part to the time of year when we visited. In the summer, you might find more options available.
Location: D-Day House, 1 Rue Désiré Lemière, 14710 Saint-Laurent-sur-Mer, France
This beautiful cemetery dotted with white crosses is a serene resting place for the heroes buried here.
Site 7: Normandy American Cemetery & Memorial
Next, we drove to the Normandy American Cemetery and Memorial in Colleville-sur-Mer. Due to the delay at the Airborne Museum, we only had about an hour to spend at the cemetery before it closed at 5:00. So we quickly parked and headed down the long path. We bypassed the visitor’s center, knowing what little time we had and instead continued to follow the path towards the ocean, along the infinity pool, and then curving around to the cemetery.
The beautiful mosaic on the chapel ceiling.
The rows and rows of white crosses stretched out almost endlessly in front of us. People were milling about through the rows of crosses, searching perhaps for the grave of a loved one. As you walk throughout the Normandy American cemetery, you feel almost as though you are in a park and not a cemetery. The setting is so lush and green. It is very peaceful.
Sculptures & Artistic Tributes to the Fallen
Make sure to stop in the cemetery’s chapel. It is the rotund building at the center of the cemetery. Step inside the small chapel and admire the beauty and thoughtfulness put into the gorgeous mosaic on the chapel’s ceiling. American painter Leon Kroll created this beautiful portrait symbolizing American on one side, sending out her son to battle and France on the other side, taking our fallen soldier in her arms. It is such a beautiful image.
After you finish your walk around the cemetery, make your way to the large reflection pool where you’ll see a tall bronze statue rising above from the far end. This beautiful sculpture created by Donald Harcourt De Lueis titled “Spirit of American Youth Rising from the Waves.” It bears an inscription at the bottom that reads “Mine eyes have seen the glory of the coming of the Lord.” On the walls close to it, you’ll find huge maps displaying all of the various forces along the shore and their routes. It is awe-inspiring!
“The Spirit of American Youth Rising.”
If you have time, walk along the shores of Omaha Beach below the cemetery. Make sure to stop in at the visitor’s center for more helpful information regarding those buried here and to view the beautiful infinity pool. They have volunteers on staff who can also help you locate any loved ones who are buried here.
Normandy American Cemetery in Colleville-sur-Mer is a beautiful park-like setting, very peaceful. A wonderful resting place and memorial to these soldiers.
Time Spent Here: (~ 1 hour) Location: Normandy American Cemetery, 14710 Colleville-sur-Mer, France Commute Time to Next Site: This was the final stop, and it was about a 45-minute drive back to Caen.
The reflection pool at Normandy American Cemetery.
Tips & Recommendations for a Self-Guided Tour of D-Day Sites
Planning Tips
Always check the hours for each museum directly on the museum’s website. Google is not always up to date on its listing for hours and operations.
Pack snacks and drinks in the car to keep your energy up in between stops.
Make sure you can drive a manual transmission before renting a car in Europe.
Organize your day, so you have the most time at the sites you want to see. Then if you can’t make it to all the stops on the list, you will at least have seen the ones most important to you first.
Wear layers and sturdy walking shoes.
How Much Time To Spend Here
There is so much to see that you could spend days or possibly weeks here, depending on your interests. However, with only one day, you’ll need to pick the top sights you want to see and save the rest for your next trip. One site I would have liked to have fit into our day was Utah Beach. I guess I’ll save that for my next trip!
Getting Here:
You can take a direct train from Paris’ Saint-Lazare station to Caen. This takes approximately 2 hours, 15 minutes. You can also take a train from Caen to Bayeux if you prefer to stay there. In Bayeux, bus #70 takes you to many of the D-Day sites if you prefer not to drive. You can also, of course, book a tour of the sites. Caen also has an airport so if you’re coming from somewhere other than Paris, you might check to see if they have flights that go through it.
Recommended Apps to Download Before Your Trip
Google Maps:This invaluable tool will help you get to each destination along your journey. If you plan to do a self-guided driving itinerary, then you will want to install Google Maps on your phone ahead of time and also download it for offline use.
Normandy D-Day 1944 (by Spot on Locations Ltd): This Normandy D-Day app provides the names and locations for all the various D-Day sites in Normandy. It gives historical details associated with each area and includes over 500 photos and 100 locations. If you like learning more about the history, then consider downloading this app before your trip and looking through the areas you’ll visit and read up on the history associated with each.
Rick Steves Audio Europe: Consider downloading this app before any trip you take to Europe. If you enjoy self-guided tours, then you will appreciate this app. Just put your earbuds in, and Rick Steves will guide you on your walking tour to whichever destination you’ve chosen on the app.
So say you choose France, you will then see a list of all the audio guides the app has for France. Look for the one titled “Normandy: D-Day Sites” and listen to this before your trip to D-Day to get an idea about what there is to see and learn more about the history of the region. The app has not only audio walking guides, but also interviews with local experts on a variety of subjects relating to each location.
Roses and flowers left by crosses. Reminders that they are not forgotten.
Closing Thoughts on D-Day
Visiting the D-Day sites in Normandy was like walking through the history books. It is one thing to read about this incredible date in history, but it is something else to see the area firsthand. To see the graves of the thousands of soldiers who lost their lives here, and to read about their individual stories is an incredible and moving way to spend the day.
Visiting sites like D-Day or even Auschwitz remind me of the beauty of the human spirit. Yes, there is an ugly side to humanity. However, there is also resilience and a determination to overcome even the worst odds for the good of mankind.
I hope you plan a trip to visit Normandy, France, and the historic D-Day sites. However, if you can’t do that right now, why not visit a local Veteran’s Cemetery or museum near you, dedicated to those who gave so we could have freedom. Say thank you the next time you see a veteran, and let’s use our freedom to show compassion and grace to everyone we meet.
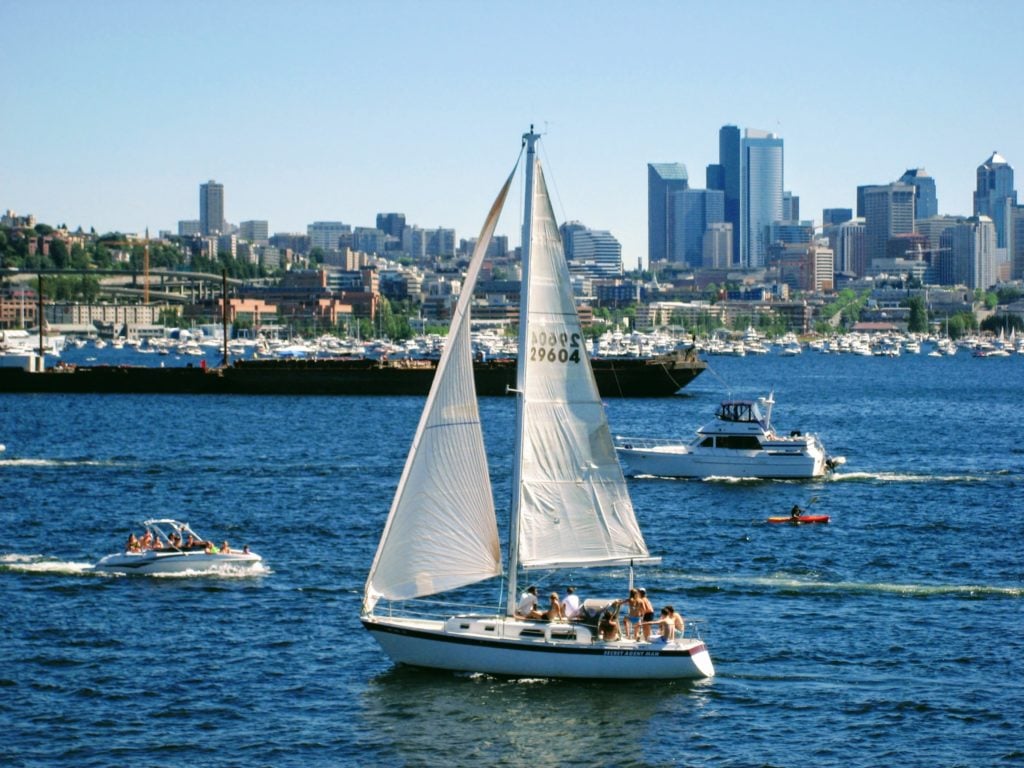
There are so many unique and fascinating museums in the Seattle area. So wouldn’t it be nice if you could get some free tickets? Guess what? You can! I know how inspiring a visit to the local art museum can be and the excitement of seeing a tiger at the zoo or an octopus at the aquarium.
I also realize that sometimes the budget can be a little tight, and you may not always have the funds to do these extra activities. That is why I created this post! I think everyone should have a chance to visit museums and zoos, no matter their income. They are perfect for making unforgettable memories for you and your family. It’s also an excellent way to spend a rainy day!
In this article, I share some great ways to get free tickets to over 25 of the top museums in the Seattle area, as well as the Woodland Park Zoo and the Seattle Aquarium!
For those of you in Pierce County, you are not only eligible to get a Seattle Public Library card (and therefore all the benefits that go with it), but there are also free museum programs through the PCLS, which I list below. If you don’t live in the Seattle area, check to see if your city has any of the additional options I mention in this post.
Updated January 20, 2022
After 2020 the museums offering free tickets through the KCLS have changed and continue to change. At this update, the Woodland Park Zoo is no longer one of the free museum pass attractions. Neither is the Seattle Children’s Museum, Seattle Art Museum, or Henry Art Gallery. This list could change again in the future, so please continue to check in with your library website to see the most up-to-date list.
One new addition to the KCLS museum pass system is the Washington State Parks! I am so excited about this option. You can reserve a 14-day Discover Park Pass for free! This allows you to use the many wonderful Washington State Parks without paying for a day pass. How great is that! There are a limited number of passes available, though, so place a hold today to reserve your spot. It’s sort of like putting a hold on a book that is currently checked out.
Continue reading my original post below.
How to Get Free Tickets to Seattle Museums & Attractions
Your Local Library
I love the library. My small-town library was a mainstay of my childhood. If you don’t have a library card, you need to get one! Your local library is an excellent resource for finding not only inspiration but also some great discounts! I doubt most people realize all the benefits they have through the power of their library card!
Below I discuss library museum passes and how to get free tickets using the following Puget Sound library systems: King County Library System (KCLS), Seattle Public Library System, and Pierce County Library System. If your library is not on this list, check with your local library to see all the benefits you have available in your area.
Those of us that live within the area of the King County Library System (KCLS) and the Seattle Public Library System have it especially good. In addition to a long list of free resources (language learning, job training, free printing, etc.) they also offer free tickets to visit the top museums in Seattle and Tacoma, plus the Woodland Park Zoo and the Seattle Aquarium! Keep reading to discover all of the included museums and attractions.
How to Get a King County Library System Museum Pass:
First off, you’ll need a KCLS library card. If you don’t already have a KCLS library card, but live in King County, visit the KCLS website to learn how to apply for a library card.
You can reserve a museum pass through the KCLS online. The King County Library System issues new museum passes each day at 2:00 p.m. So if you look for a pass, and one isn’t available for the date you want, just come back each day at 2:00 p.m. and try to get a pass then. Visit the KCLS museum pass website to learn more.
How to Get a Seattle Public Library Museum Pass:
If you live or work in one of Seattle Public Library’s “free service” areas, you can get a Seattle Public Library card. The “free service” areas include the cities of Seattle and Bothell, as well as those living in other areas in King County. If you have a library card from another county, such as the Pierce County Library System, you are also eligible to get a free Seattle Public Library card. Visit the Seattle Public Library to see the full list of eligible counties as well as what documentation you’ll need to get your Seattle Public Library card.
The Seattle Public Library Museum Pass works much like the KCLS Museum Pass in that you can reserve the passes ahead of time online (subject to availability). New passes are released nightly at 9 p.m. Visit the Seattle Public Library Museum Pass website for more information.King County Library System offers free museum passes to the following museums:
Learn about the people, places, and events that make up Washington state’s unique history. The KCLS Museum Pass is good for two adults and four children ages 17 & under. Passes not accepted during the annual Model Train Festival.
Visit the Bellevue Arts Museum for creative displays of art, craft, and design. I feel like the BAM tends to focus more on the craft and design side of art, a little more so than say the Seattle Art Museum. The first Friday every month is free. The KCLS Museum Pass is valid for two free tickets.
The Kids Quest Children’s Museum in Bellevue is a great place to spend a rainy day with the kids. It is tailored towards kids from 0-10, and they offer all sorts of hands-on activities, such as painting, storytime, and creative labs. They also have workshops just for adults too, make sure to check out their website to see what’s going on this month! The KCLS Museum Pass is good for two free tickets.
Location: 1116 108th Ave NE, Bellevue, WA 98004
Seattle Public Library offers free museum passes to the following museums:
The Seattle Children’s Museum is located at the Seattle Center and is a fun place for your child to explore their creativity in a hands-on interactive environment. It is the perfect place for your kids’ imaginations to come alive! They can build things in the Dunn Lumber Construction Zone or pretend to shop and play cashier at The Market, be a star of their theater production at the Bijou Theater or play optometrist for the day at The Eye Clinic.
John C. Maxwell once wrote, “Imagination is the soil that brings a dream to life.” The Seattle Children’s Museum is a great place to let your kids imagine and dream! The Seattle Public Library Museum Pass gives you 5 free admissions to the Seattle Children’s Museum, so bring a friend!
The newly redesigned Burke Museum of Natural History is now open for you and your family to explore. The building itself is a gorgeous piece of architecture; however, step inside and delve into the worlds of biology, archaeology, and paleontology. I mean, who doesn’t love seeing dinosaur bones! They have hands-on workshops and activities for the kids as well as some after-hours events for adults. You get two free tickets with your Seattle Public Library Museum Pass. Free tickets are available every first Thursday of the month, and you can even reserve your free ticket ahead of time online!
If you love boats and love being on the water, then the Center for Wooden Boats is a must-visit for you! They offer programs for all ages. Including sailing classes and boat building classes for adults, as well as programs for youth and teens such as learning to sail and beginner woodworking workshops.
In addition to historical exhibits, photography exhibits, and other hands-on displays, they also offer boat rentals (canoes, sailboats, kayaks, etc.). As you can imagine, there are many things to do at this “living” museum. They want you to come and touch, feel, and explore all there is to know about boats. This will make for a fantastic day of memories!
Admission is always free to the Center for Wooden Boats and exhibits. However, a Seattle Public Library Museum Pass permits one adult and up to three other people (assuming they fit in the boat) one hour’s use of one of the Museum’s historic rowboats on Lake Union. (Subject to the museum’s livery hours and availability of boats which rented on a first-come, first-served basis.)
Paul Allen’s Flying Heritage & Combat Armor Museum houses an exceptional collection of WWII tanks, combat armor, and aircraft. If you are interested in history, especially during WWII and vintage aircraft, then don’t miss this museum.
If The Museum of Flight is a favorite of yours, then you are sure to enjoy the Flying Heritage & Combat Armor Museum. They have special events throughout the year, including a unique Easter egg hunt. See their website for hours. A Seattle Public Library Museum Pass to the Flying Heritage & Combat Armor museum includes two free tickets.
Location: 3407 109th St SW, Everett, WA 98204 (at Paine Field)
The Henry Art Gallery is a contemporary art gallery located on the University of Washington’s main campus. Although a small gallery, they strive to be diverse and display contemporary artwork from artists around the world. Additionally, they also have an annual display of art from UW graduate students. The museum pass from Seattle Public Library gives you two free tickets to the Henry Art Gallery, and all youth 17 and under are free of charge. The Henry Art Gallery also offers free admission on the first Thursday and Sunday of every month.
Location: 15th Ave NE & NE 41st St University of Washington campus, Seattle, WA 98195
The Log House Museum is a small museum documenting the history of the early settlers to Seattle. Alki was the birthplace of what would become Seattle. It was where the first settlers landed ashore. Enjoy a day at the beach and stop in at this small historical museum to learn more about Seattle’s early history. A Seattle Public Library Pass admits up to 4 individuals to the Log House Museum.
The Museum of History and Industry (MOHAI) is located off beautiful Lake Union and is conveniently located next door to the Center for Wooden Boats, so you can visit two museums in one day if you plan accordingly. MOHAI is an interesting museum that tells the journey of Seattle’s development over the years.
Follow our history from the early Native Americans to the arrival of Europeans and all of the technological advances throughout our history. If you haven’t visited it before, definitely put this one on your list to see this year! With the Seattle Public Library Museum Pass, you get two free tickets, and children 14 and under are free. Additionally, the MOHAI offers free admission on the first Thursday of every month.
The Nordic Museum, located in Seattle’s Ballard neighborhood, is the largest in the United States. It displays the life, art, culture, and values of the five Nordic countries: Denmark, Finland, Iceland, Norway, and Sweden.
A pass through the Seattle Public Library includes admission for two individuals. Children 4 and under are free. The Nordic Museum also offers free admission on the first Thursday of every month. Their hours vary throughout the year, so make sure to check hours of operation when planning your visit.
Explore this unique museum located in Seattle’s International District. The Wing Luke Museum is dedicated to the history of Asian Pacific American immigrants. Learn what it was like for the first Asian Pacific immigrants and also what it is like for their culture today. In addition to the museum exhibits, they also offer walking tours that include history about the area as well as sampling delicious food along the way.
Admission also includes a 45-minute guided Historic Hotel Tour that transports you back in time to discover what the early Asian Pacific American pioneers must have experienced when first arriving in Seattle. A pass to the Wing Luke Museum through the Seattle Public Library includes two free tickets (includes a 45-minute tour).
Geeks everywhere will enjoy this museum. Discover the history of the computer and its initial uses. Learn about mainframes, green screens of the ’80s, and everything in between and up to the present day. Explore the future trends of augmented reality and robotics and be inspired for what is to come (or perhaps a little frightened).
They offer daily tours, talks, and hands-on exhibits, bring the whole family and geek it out! A pass through the Seattle Public Library is good for two tickets (children 5 and under are free). They also offer free admission on the first Thursday of the month.
Location: 2245 1st Ave S, Seattle, WA 98134
Free museum passes offered by both KCLS & Seattle Public Library:
*This list includes museum pass offers that are identical at both the KCLS and Seattle Public Library System. The lists above are for museum passes offered only at one or the other.
Learn about the history of African Americans in the Pacific Northwest at this museum located in Seattle’s Central District. It is located at the Jimi Hendrix Park. The museum is only open Wednesday through Sunday, so make sure to check their website for hours and information. Free admission on the first Thursday of every month. The KCLS Museum Pass/SPL Museum Pass is valid for four free tickets.
Location: 2300 S Massachusetts St, Seattle, WA 98144
The SAM is probably my favorite museum in Seattle. I have such fond memories of coming here with my hubby when we were dating. They offer some world-class exhibits throughout the year, and I love that they often have photography exhibits. The KCLS Museum Pass/SPL Museum Pass is good for two free tickets.
Also, as a tip, the best parking is beneath the SAM in the Russell Investment Center Garage. However, if you’ve got a raised vehicle, you may not fit, as only cars 6’7″ fit in this garage. Ask for a discount parking ticket at the ticket desk. We got 4 hours of parking for only $6 on our last weekend visit–that’s a steal!
I love that you can get free tickets to the Seattle Aquarium through the library program! Let’s face it–this aquarium is not cheap! With either your King County Library card or Seattle Public Library card, you can get four free tickets! So plan ahead and snag your four free tickets to the Seattle Aquarium. It makes a perfect way to spend a rainy day! (Children 3 and under are free.)
There is something for almost everyone at this museum. Enjoy movies? Science Fiction? Music? The MoPOP has it all. This is also one of the more expensive museums in the area, so getting some free tickets to visit is a total bonus! Learn about Seattle area musicians, explore the Minecraft exhibit, or see props from some of your favorite t.v. and movies. They also have regular movie showings in their theater throughout the year.
The MoPOP is conveniently located at the Seattle Center, so why not make a day of it and explore the Pacific Science Center too or head over to the fountain, and if it’s a hot day, have some fun cooling off! KCLS Museum Pass/SPL Museum Pass admits 2 adults and 2 children ages 5-17, children 4 and under are free (special exhibits may be extra).
This is a favorite museum of many in the Seattle area. If you love airplanes, space exploration, and history, the Museum of Flight has you covered! Learn about Amelia Earhart, immerse yourself in the Space Race and pretend to be an astronaut, explore the impact of flight during WWII or tour a retired Air Force One plane and pretend you’re the President for the day.
Additionally, the Vietnam Veterans Memorial Park, located next to the museum, was recently completed and is free to the public. KCLS Museum Pass/SPL Museum Pass admits 2 adults and 2 children ages 5-17, children 4 and under are free. Charges for interactive experiences and special exhibits are extra.
Location: 9404 E Marginal Way S, Seattle, WA 98108
Who doesn’t love a trip to the zoo? I love visiting the zoo and seeing all the beautiful animals. The Woodland Park Zoo prides itself on giving the best care possible to its animals, and they offer many interactive experiences and educational talks to improve our understanding of the animal kingdom. The KCLS Museum Pass/SPL Museum Pass is good for 4 free tickets to the zoo! So grab your family, pack a picnic lunch, ,and make some memories!
Location: 5500 Phinney Ave N, Seattle, WA 98103
Pierce County Library Museum Pass
For those of you who live in the Tacoma area and within Pierce County, you can “check out” museum passes at your local library. Rather than reserve individual passes online, as you would with the KCLS or SPL museum passes, the Pierce County Library Pass requires that you visit your local library. You then check out the pass(es) of your choice (subject to availability).
The passes work as your free ticket and are valid for one week and one museum per pass. However, you can check out passes for up to 6 different museums per week (museums listed below). Visit the Pierce County Museum Pass website for further information.
PCLS offers free museum passes to the following locations:
This museum is dedicated to maritime and boating history. You will discover the rich history of the Native American people who first called the area home as well as the early European settlers to the Tacoma area. Learn how the railway and shipping lines worked together to shape the Puget Sound region. Learn about the first tools and boats used by settlers and walk through the boat shop admiring the beautiful hand-crafted boats. Museum hours vary, so make sure to check the website for hours and admission information.
Present your Seaport Pass at the Foss Waterway Seaport front desk and receive free admission for up to 2 adults and 4 children under the age of 18. Children ages 5 and under are free. Location: 705 Dock St, Tacoma, WA 98402
This small museum located in Gig Harbor, Washington, is devoted to the remarkable legacy of the Gig Harbor Peninsula. Established in 1964, the museum offers hands-on exhibits and interactive displays to help tell the history of this area. Make a day of it and enjoy the beautiful drive out to the Peninsula as you learn more about the region’s history. Present the Harbor History Pass at the front desk and receive up to four free admissions. Children ages 5 and under are free.
Location: 4121 Harborview Dr, Gig Harbor, WA 98332
Enjoy exploring the trails throughout this 10-acre garden retreat in Lakewood, Washington. They are open year-round, and the gardens change with the seasons. You will find a peaceful retreat within these beautifully landscaped gardens. Opening hours vary based on the time of year, so make sure to check ahead of time before you plan to visit.
Present the Gardens Pass at Lakewold Gardens and receive free admission for up to 2 adults and 3 youth ages 13-18. Children ages 12 and under are free.
Location: 12317 Gravelly Lake Drive SW, Lakewood, WA 98499
Besides staring in awe at the gorgeous glass creations by Dale Chihuly and other outstanding artisans, you can also make your own glass creations or watch artists in the hot shop create their glass art live. Let the colors and shapes inspire you. There are workshops for kids and adults alike. They also have a night market where you can purchase glass creations from local artisans. Read here to learn more about hours, parking, and admission.
Present the Glass Pass at the Museum of Glass and receive free admission for up to 2 adults and unlimited family members under 18.
The TAM offers a unique selection of artwork highlighting the Pacific Northwest region as well as a focus on the American West. There is also a gorgeous collection of glass art donated from glass artists in Washington state.
Present the Art Access Pass at the TAM’s admission desk and receive admission for up to 2 adults and 4 children under the age of 18. Children ages 5 and under are free.
Learn about the people, places, and events that make up Washington state’s unique history. Present the History Pass for free admission for up to 2 adults and 4 children under the age of 18. Children ages 5 and under are free.
Location: 1911 Pacific Ave, Tacoma, WA 98402
Additional Options for Free Admission to Museums
Bank of America
If you are a Bank of America cardholder, then you are eligible to get free tickets to various museums nationwide as apart of their Museums On Us program. Look up your state to see the list of participating museums. This option is only available on the first full weekend (Sat and Sun) of each month. You get one free admission to the participating museum. Make sure to read all the details and restrictions on this offer and check with your local museum for hours and other information.
In the Seattle and Tacoma area you are eligible to get free tickets (as per links above) to the following:
Most museums have a free day each month. The most common free museum day in Seattle is the first Thursday of the month. However, check with each particular museum you’re interested in visiting to learn the exact day and hours offered. This is something to consider when you are visiting other states too. Check to see if they have any free museum dates during your visit.
I listed many of the ones that offer a monthly free museum day in my lists above. However, the Asian Art Museum isn’t included with any of the museum passes, and I think you should check it out when you get a chance.
Asian Art Museum:
The Asian Art Museum offers free museum days on the first and second Thursday of each month, as well as the first Saturday of each month. Another thing I love about the location of this Seattle museum is the free parking at Volunteer Park! Make sure to check out the museum’s website for opening hours and other useful information.
Location: 1400 E Prospect St, Seattle, WA 98112
Additional Options for Free or Discounted Tickets
Blue Star
Military personnel can go to all participating museums for free from May 18 through September 1st (the dates vary each year, so check Blue Star’s website each year to learn more).
Museums for All EBT Program
If you have a Snap EBT card, you can visit museums and some zoos for $5 or less at participating locations.
Student Discount
Almost all museums and attractions, such as zoos and aquariums, offer student discounts. If you are a student, always make sure to ask before purchasing your ticket, if there is a student discount. Then come prepared to show your Student ID.
AAA Discounts
If you have a AAA card, make sure to ask if there are any discounts before purchasing your tickets. It is not as common to find AAA discounts at museums. However, it never hurts to ask!
A small contemporary art museum (think large gallery) that houses artwork from the 19th century to current. They display art from both local artists as well as global artists. It’s worth a stop when you’re in the area.
Located by the Seattle Center, the Bill & Melinda Gates Foundation Discovery Center lets visitors learn more about the work the foundation is doing to help people around the world. Exhibits also display global needs and encourage visitors to discover what they can do to help in their local communities.
Location: North, 440 5th Avenue, Seattle, WA 98109
Journey through the history of Microsoft. Learn how they got started and what their plans are for the future. You’ll also get a chance to play Xbox games, try out your racing skills on the Forza simulator and shop at the Microsoft Store. Hands-on displays and products let you test out items you’re interested in purchasing as well as have some fun and be inspired by what’s coming next.
Did you know there is a National Park located within downtown Seattle? Well, there is! Sort of that is. It’s a National Park that is a museum dedicated to the history of the Klondike Gold Rush in our area.Visit and learn more about the impact of the Klondike Gold Rush on Seattle. It was an exciting time during the gold rush, with people streaming into the area with dreams of striking it rich! Have fun talking with a park ranger and learning all about this exciting time in Pacific Northwest history.
This small museum located on Seattle’s waterfront shares the history of the Coast Guard here in the Pacific Northwest. Volunteers on staff will be happy to give you a tour through the exhibits and answer any questions you might have. Plus, since you’re on the water, enjoy looking out to see what ships are docked during your visit. The Coast Guard plays an essential role in the U.S. Take some time to learn more about it here.
Location: 1519 Alaskan Way S, Seattle, WA 98134
Closing Tips
You need to print out a physical copy of your museum passes from both KCLS and Seattle Public Library. Make sure to bring your photo ID with the last name matching the last name on the pass.
In addition to the Blue Star program for military families, many museums also offer daily military discounts, so ask ahead of time.
If trying to get a museum pass through either the King County Library System or the Seattle Public Library, set a reminder on your phone’s calendar at either 2:00 p.m. (KCLS) or 9:00 p.m. (SPL) to check when new passes are released.
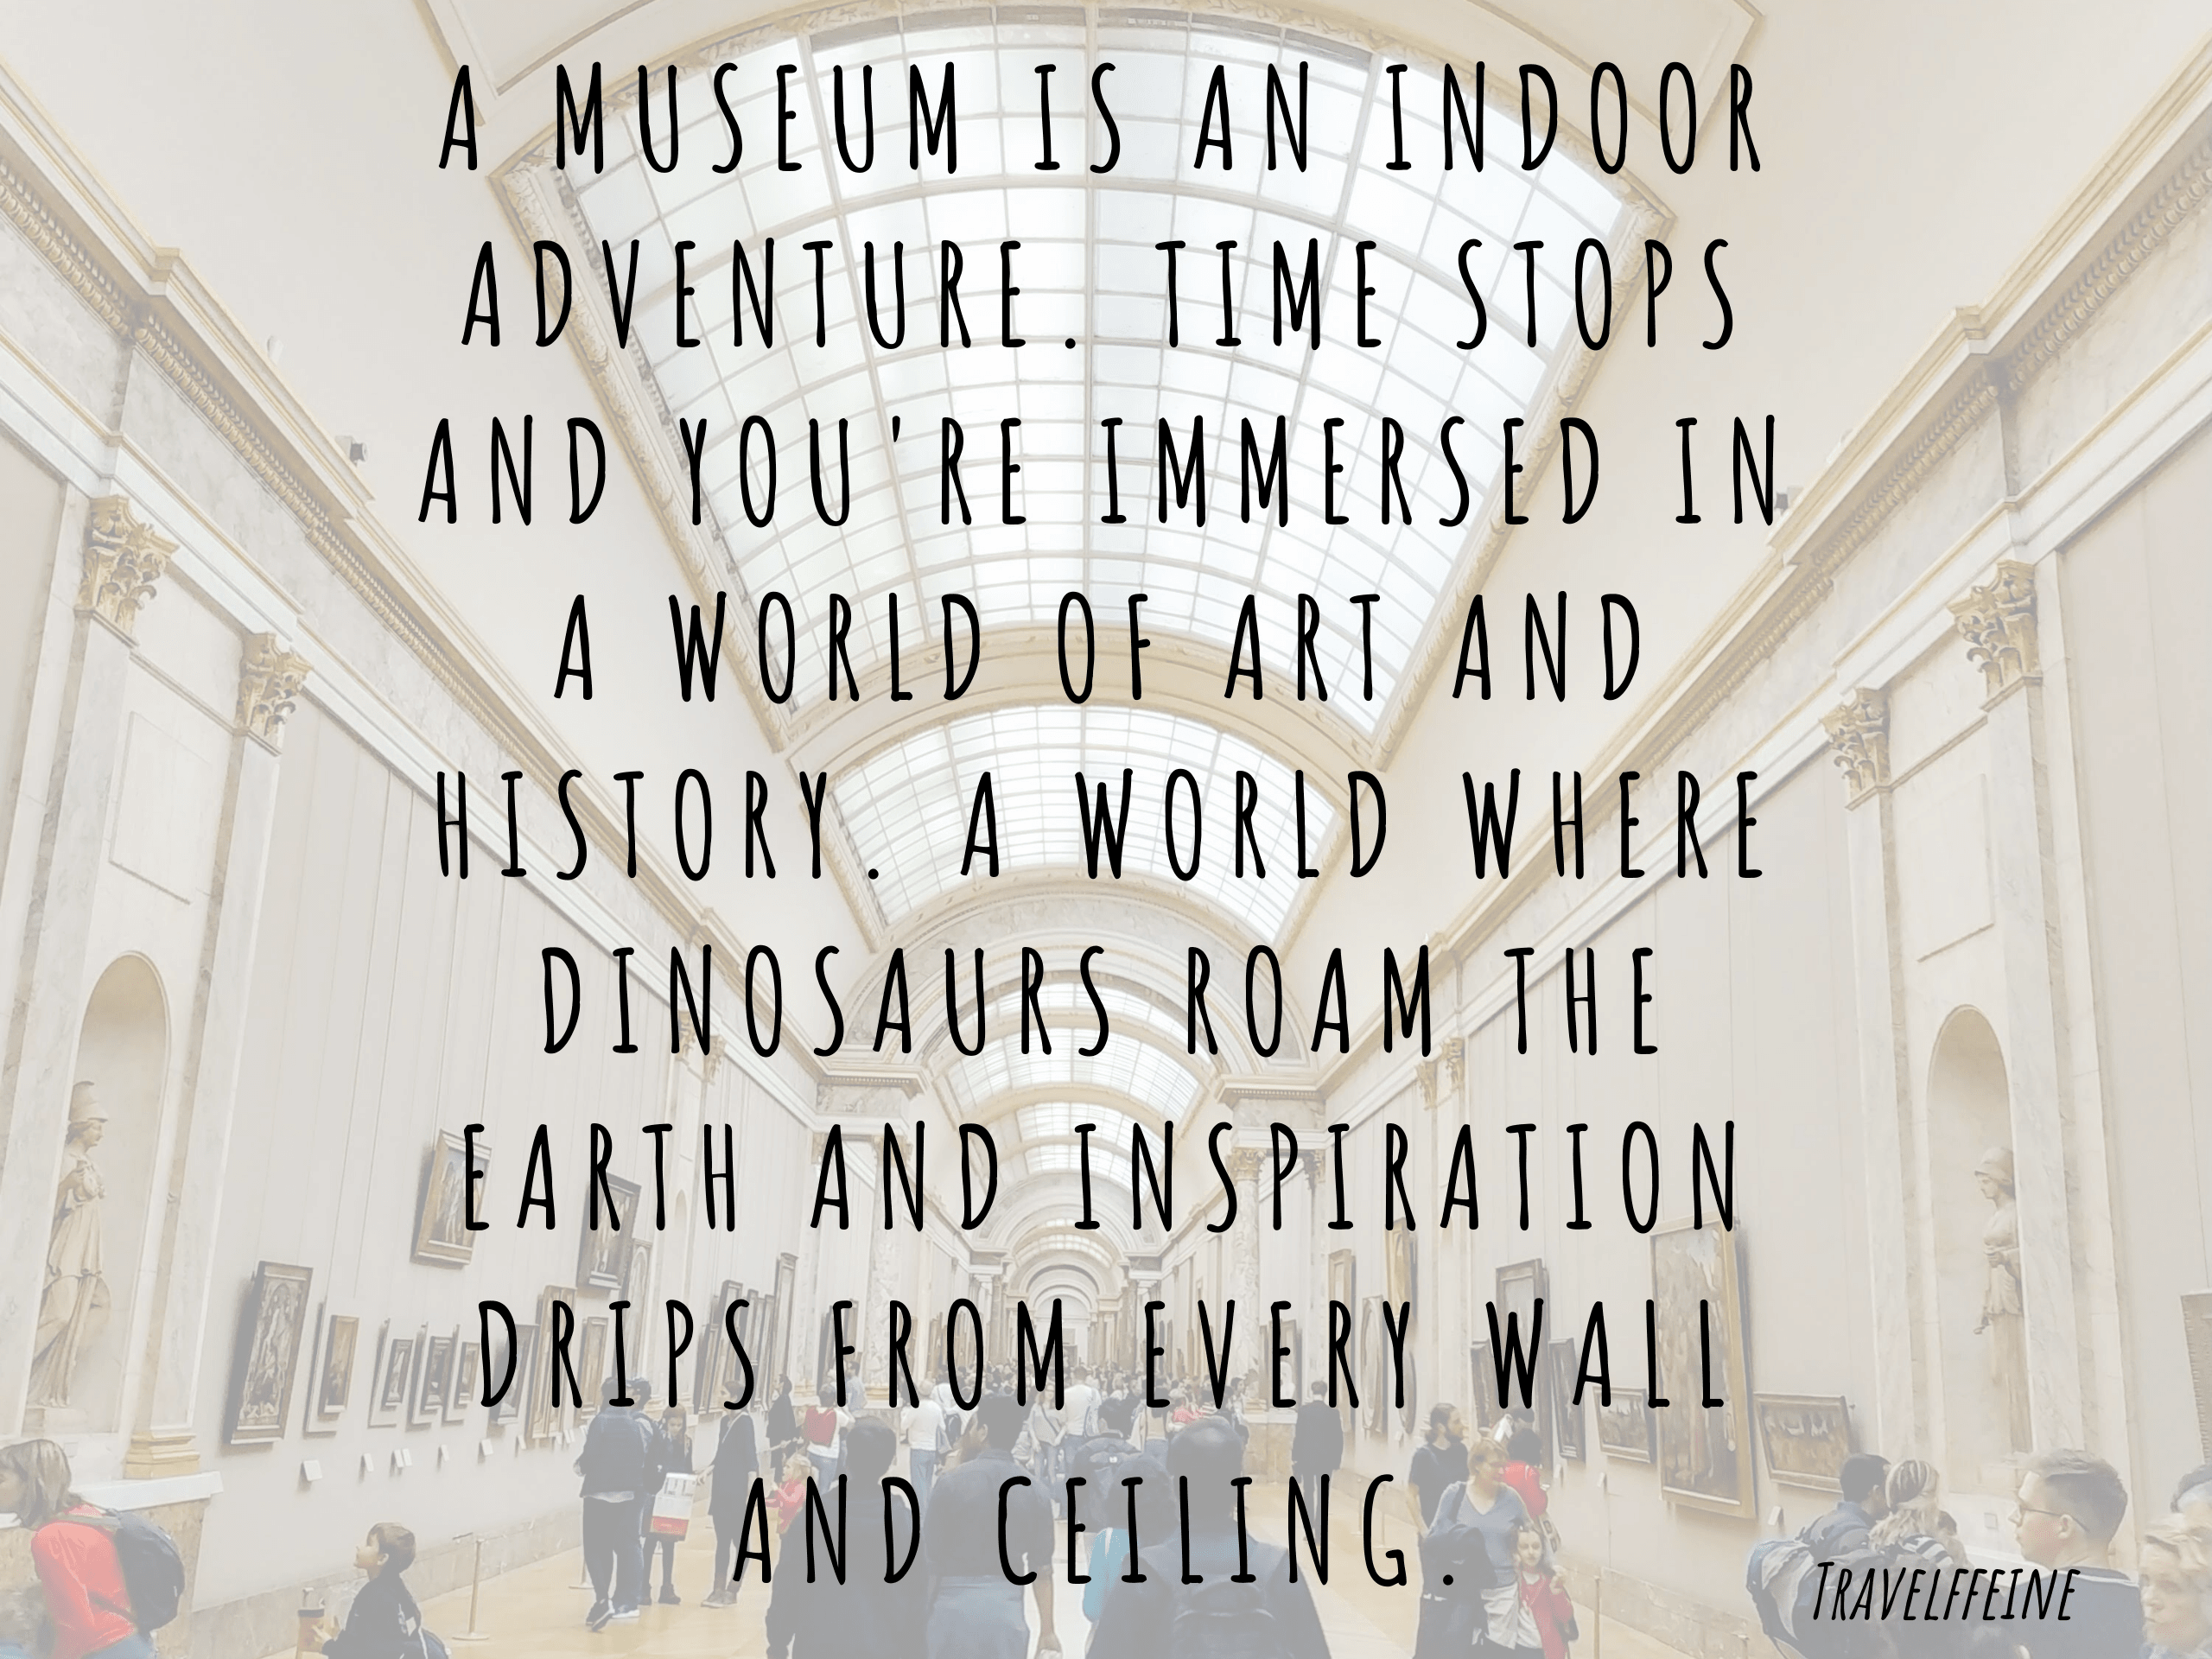
A museum is an indoor adventure. Time stops and you’re immersed in a world of art and history. A world where dinosaurs roam the earth and inspiration drips from every wall and ceiling.
In my blog post 20 New Year’s Resolutions for Travelers, I mention the idea of playing tourist at home. You don’t have to travel to far off places to make unforgettable memories. Going to the zoo or visiting a museum can become a favorite memory for both yourself and your family to remember for years to come. It’s about setting aside time to do something new, to be inspired, and to be reminded what a wonderful world we live in.
On the border of Normandy and Brittany, Mont-Saint-Michel rises above the bay like a bastion. This medieval fortress is chiseled into the granite that formed this small island. One look at it and you can understand its allure. There is something so unique about this little island. Mont-Saint-Michel is just one of the many historical treasures found in Normandy. It may take a little extra work getting here, but the historical significance and beauty of this region are well worth your time and effort!
Discover for yourself why over 2 million people visit this island every year. This article includes everything you need to plan your visit to Mont-Saint-Michel, whether you’re visiting from Paris or another area of France. Don’t be put off by the extra effort to visit this remarkable destination. It’s easier than you think!
Mont-Saint-Michel is a UNESCO Heritage Site. It reportedly dates back to 708. The story is that the Bishop of Avranches had a vision from the Archangel Michael telling him to build a sanctuary here. So one of the first things you might notice when looking up at Mont-Saint-Michel is the golden spire with the Archangel Michael rising high above everything else.
Benedictines settled in the abbey in the 10th century, where the town began to grow outward on the rocky island, and by the 14th century, it reached the foot of the rock. It was used as a stronghold during the Hundred Years War and became a symbol of national identity. The Germans also occupied Mont-Saint-Michel during World War II, bringing with them thousands of German tourists seeking to visit this incredible place. So, as you can see, this small island is rich with history!
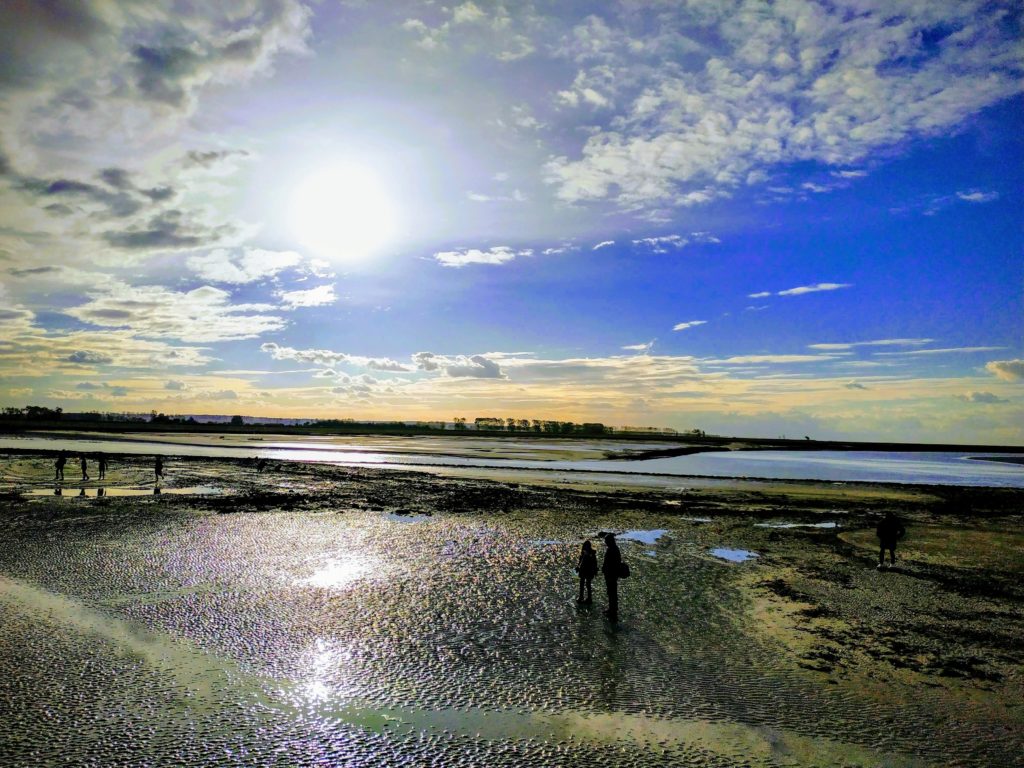
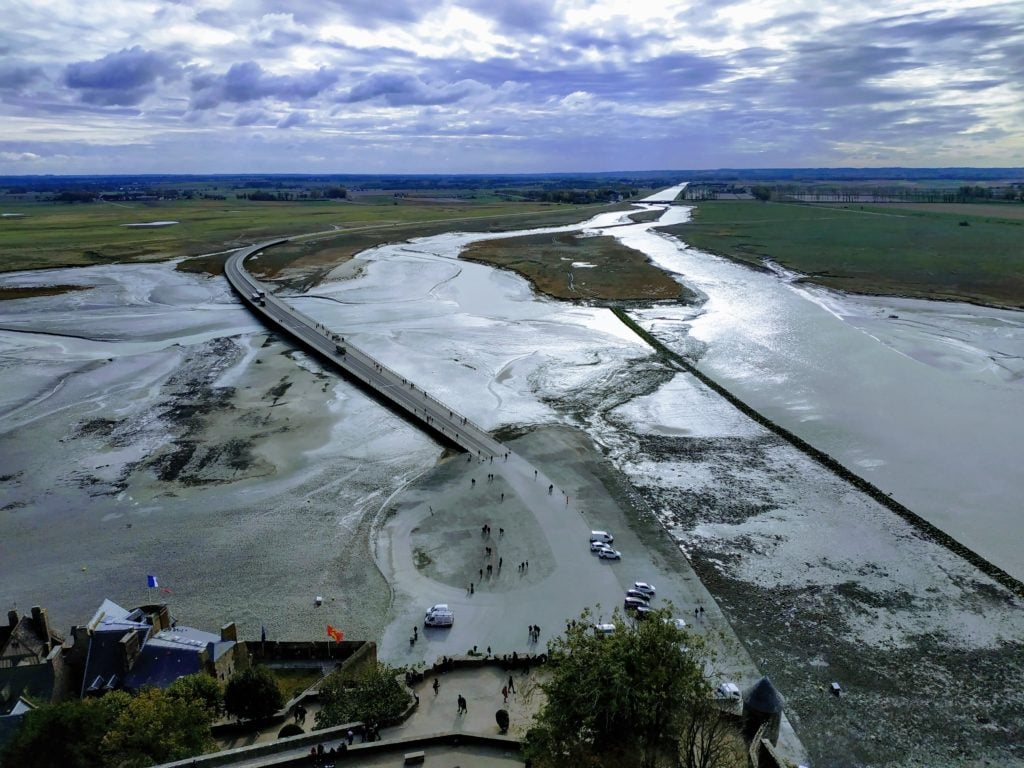
Explore the area around Mont-Saint-Michel at low tide.
As you explore the village of Mont-Saint-Michel, you will discover what a feat of engineering it is. The walls are built into the granite rock that makes up the island. This was certainly not the most natural choice of terrain for construction, and that is what makes it so extraordinary!
The tides at Mont-Saint-Michel are another aspect that makes this island fortress so remarkable. The highest tides in all of Continental Europe are observed here! Access to the island is restricted during “spring tides.” This is when the tide is the highest. You can view the tide charts for the whole year and also check Mont-Saint-Michel’s website for dates when they are closed.
Arriving at Mont-Saint-Michel
Whether you arrive via bus or car, you will still need to either walk the remaining 1.5 miles across the causeway to the island from the car park or take the complimentary shuttle.
This is the most water we saw surrounding Mont-Saint-Michel during our low-tide visit.
Parking at Mont Saint Michel:It costs around 9€ to 15€ to park for 24 hours at Mont-Saint-Michel. Prices vary depending on what time of year you visit.
Walking to Mont-Saint-Michel: It is approximately a 40-minute walk (~1.5 miles) from the parking lot at Mont-Saint-Michel to the main entrance into the walled city. There are signs posted along the trail telling you how long from “this” point the walk will be.
Complimentary Shuttle:You can walk over to the complimentary shuttle area following the signs from the parking lot or bus stop (if arriving via bus) and wait for the next free shuttle to transport you across the causeway.
My Recommendation:
If the weather is nice and you’re able to do it, I recommend walking. You have beautiful views all along the way to Mont Saint Michel. It gives you time to soak in the size and location of this walled island and the abbey rising from the top. You can always choose to ride the shuttle back at the end of your visit.
My friend Angela and I chose to walk the 1.5 miles, and although it was a cold day, the walk was beautiful. It helps that it is a flat, easy walk. There were lots of people out walking with us too. Oh, and of course, we chose to walk it before realizing that it would be a 40-minute walk in the cold. However, in the end, I’m glad we didn’t know how long it was, otherwise we would have missed out on admiring and photographing the views as we walked. So skip the shuttle and walk to the island, then take it back when you’re ready to leave.
Things to Do at Mont-Saint-Michel
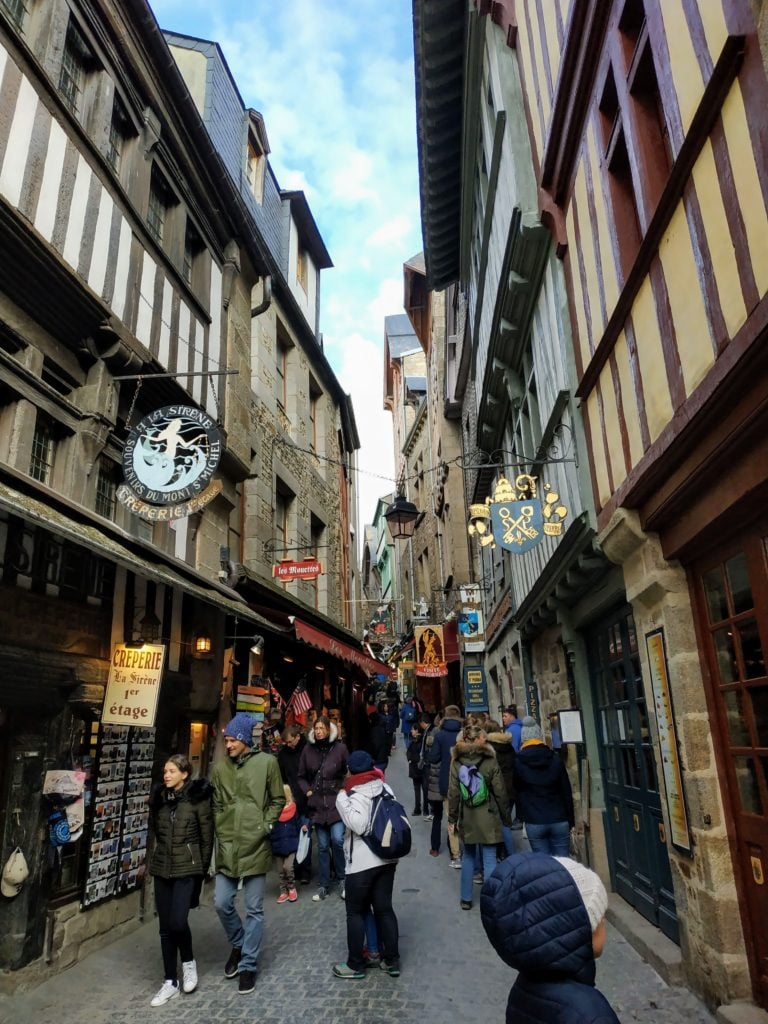
La Grande Rue
Enjoy exploring the narrow streets of Mont-Saint-Michel.
Upon arriving at Mont-Saint-Michel, you’ll pass by public restrooms and enter the archway on to La Grand Rue. This narrow street is the main street in the village. This is where you’ll find souvenir shops, hotels, cafes, and restaurants. Continue up this street to visit the abbey. I recommend you do that first, then take your time stopping at the shops and sites along La Grand Rue on your way back down.
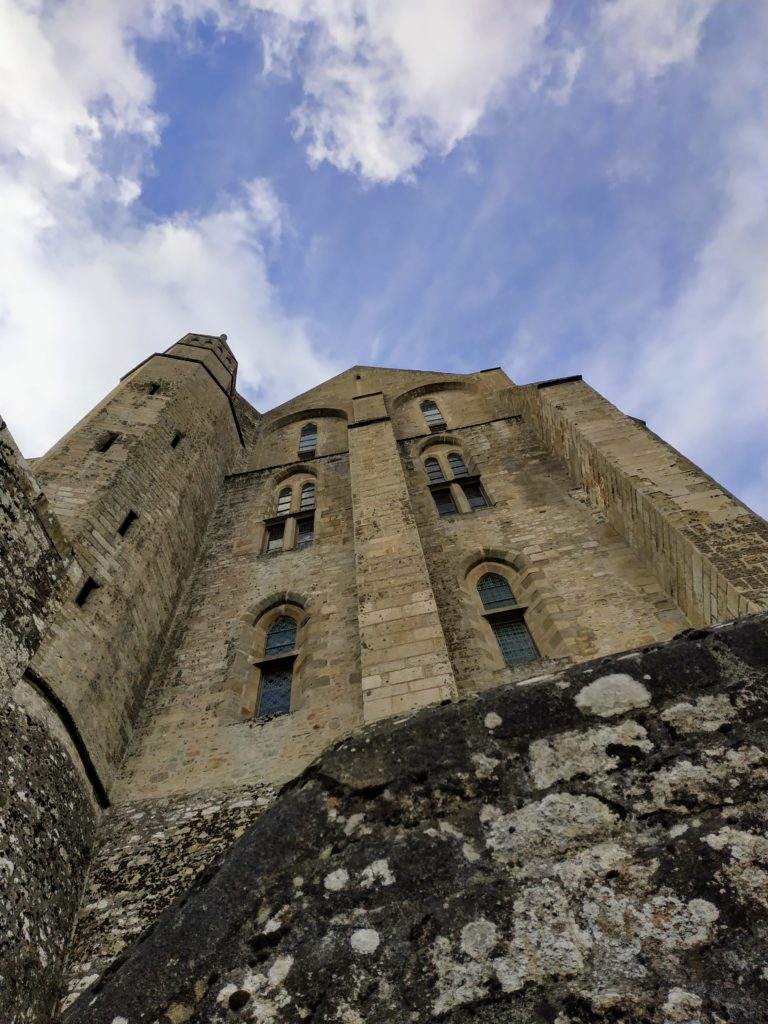
Mont-Saint-Michel Abbey
This is the one attraction you must see while visiting Mont-Saint-Michel. If you only pay for one, make this it. The historic Mont-Saint-Michel Abbey crowns the top of this rocky fortress. The Benedictine abbey was built around the 10th century and was used as an abbey until the French Revolution when it later became a prison; this lasted until 1863. Then in 1874, it became a historical monument. It took over 1300 years to build the abbey!
The climb up to the abbey is a steep one. However, it is fascinating to look up at this magnificent medieval structure rising and towering over everything surrounding it. It also makes your neck hurt!
Looking up at the Abbey can be a real pain in the neck!
The price of your ticket includes a guided tour (during certain hours). You can also purchase an audio guide for an additional 3€ and take a self-guided tour. There are a lot of stairs to climb as you make your way to see the abbey. However, the view from the top is worth it.
The Mont-Saint-Michel Abbey Church as seen from the terrace.
Terrasse de l’Ouest
Don’t miss this stop on your visit to the abbey. The terrace is located outside the abbey church and has incredible views! You can walk down the backside of the abbey from the terrace to return to the main town. I highly recommend you do this! There are also restrooms at the terrace. Soak in the views before exploring more of this unique island.
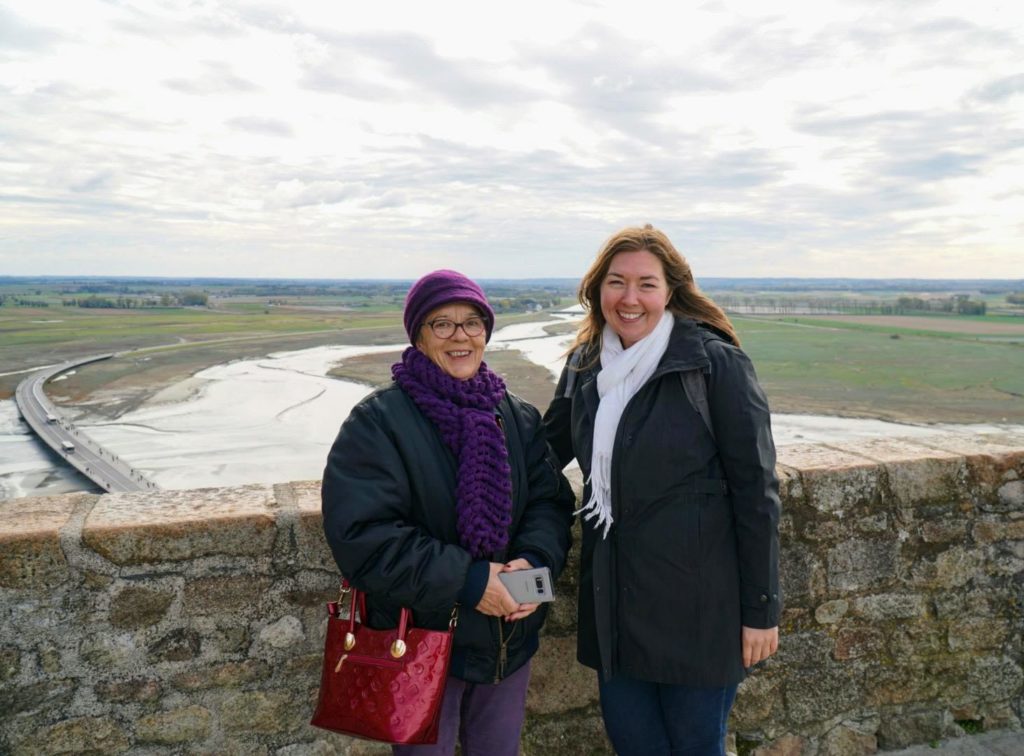
My friend, Angela, met the woman she was studying French with online before our trip, at Mont-Saint-Michel and we toured it together. It was fun to meet a local and get a chance to learn more about French culture. The French people I know are warm and funny, and yes, they love food! I love getting to learn about a country from the locals.
Travel, and be prepared to have your preconceived ideas forever transformed in the light of reality.
One of the gifts of travel is friendships made around the world!
Église Saint-Pierre
Step inside this small chapel just off the La Grand Rue and enjoy a quiet break. Make sure to also stop at the cemetery just up from the church. It is a unique setting with views of the bay below. This local parishioner’s church provides a more simplistic and less touristy space in which to have a quiet moment. Admire the beautiful stained glass windows as well as an impressive statue of the Archangel Michael slaying a dragon. You are welcome to join them in mass during its observed hours.
La Chapelle-Saint-Aubert
This small chapel was built towards the foot of Mont-Saint-Michel, you can access it via a path near the front entrance to La Grand Rue. It is best seen during low tide, though, due to its low position. Although you may not be able to go inside, you can look around the outside and take a peek in the windows.
Explore the Sandy Bay at Low Tide
Check with the Tourist Information Center to see whether or not there are any guided tours of the mudflats surrounding the island. Also, make sure to check the tide charts and ask the tourist information center about when it is safest to explore. Even if you can’t take a tour, you will have fun walking around the outside perimeter of the island, examining it from the ground level.
A view of the bay at low tide and the causeway leading up to Mont-Saint-Michel.
Getting to Mont-Saint-Michel
You have a lot of options when traveling to Mont-Saint-Michel. I will focus on the two most common options.
Fastest Route to Mont-Saint-Michel from Paris by Train:
If you’re coming from Paris to Mont-Saint-Michel on the train, the quickest route will take you about 3.5 hours to get to Mont-Saint-Michel. Take the train from Paris’ Montparnasse Station to Rennes and then a shuttle bus from Rennes to Mont-Saint-Michel. You can book the entire trip ahead of time online. Prices start around 50€ to travel from Paris to Mont-Saint-Michel (one-way).
In addition to passing through Rennes, there is also an option that takes you to Dol de Bretagne. Then it’s just a 20-minute shuttle from there to Mont-Saint-Michel. The travel times are similar for both options leaving Montparnasse Station. Visit SNCF’s website to view a timetable for the day you wish to travel.
You don’t have to book your shuttle bus from Rennes Station to Mont-Saint-Michel ahead of time either. You can always purchase your ticket at the Rennes train station. They schedule shuttle buses in conjunction with the arriving trains from Paris. Upon arrival at the station, you can purchase your ticket for the next departing shuttle (or purchase ahead of time online at SNCF). The ticket price from Rennes station to Mont-Saint-Michel is 30€ for a round trip ticket.
Here are some additional train options, as well as shuttle bus information if you’re arriving from Pontorson.
Car Rental Option from Caen:
Another option when traveling from Paris to Mont-Saint-Michel is to take a train from Saint-Lazare Station to Caen. If you plan to visit other sites in the Normandy region of France, such as historic D-Day sites, then Caen makes an excellent starting destination for your trip to Mont-Saint-Michel.
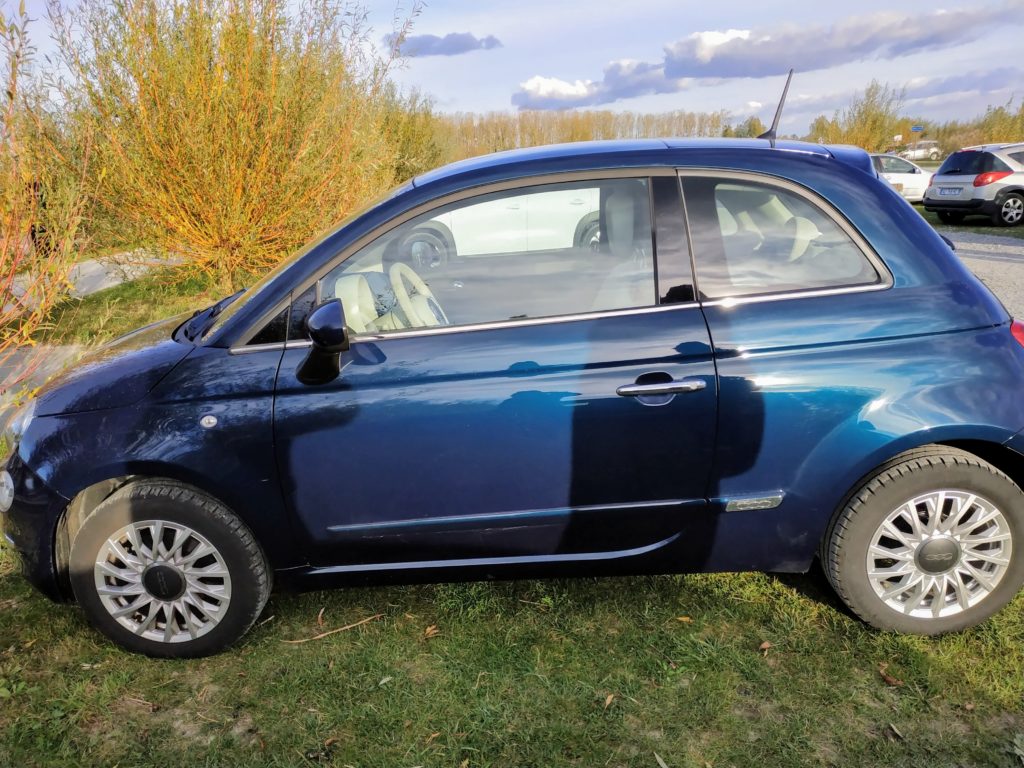
This is the option I chose for my trip. My friend Angela and I planned to see D-Day sites the following day, and we also had a flight scheduled from Caen to Toulouse, so it made the most sense for our trip. Our car rental experience turned out to be far more of an adventure than we had planned! However, renting a car in France is pretty much the same process as renting one in the States.
They drive on the right side of the road, so there’s no learning curve for American drivers. You do, however, need to know that when you rent a car in Europe, you will get a car with a standard transmission, unless you specifically request an automatic (subject to availability). So if you don’t know how to drive a clutch, learn before you go, or plan for another option.
With Google Maps, it is easy to navigate from Caen to Mont-Saint-Michel via their freeway systems. We had no issues getting lost, and there are lots of signs along the freeway for the major tourist sites too. We used our rental car to drive to all the D-Day sites, and the flexibility it provided is worth any extra hassle, in my opinion.
Side Note: If driving from Paris, make sure to choose the “avoid tolls” option with Google Maps, so you aren’t surprised by any huge toll fees. I’ve read they can be surprisingly high.
Thoughts on Driving vs. Public Transportation:
It depends where you are driving from, but for the Normandy region of France, unless you’re booking through a tour company, I think renting a car makes the most sense. A car gives you the most flexibility, and it is an easy area to navigate using Google Maps.
It will depend on your trip plans. If you’re going to be in the area for 2-3 days at a minimum, then renting a car probably makes the most sense, however, if you are planning this for a day trip only, then you may want to take the train and shuttle option or book through a tour company. If you’re traveling solo, this will most likely save you money. However, if you’re in a group, then a car rental might save you some money.
Approximate Travel Times:
Train from Paris to Rennes leaving from Montparnasse Station: Approximately 2 hours
A shuttle from Rennes to Mont-Saint-Michel: Approximately 1 hour 10 minutes
Train from Paris to Caen leaving from Saint-Lazare Station: Approximately 2 hours and 15 minutes
Drive time from Caen to Mont-Saint-Michel: Approximately 1 hour 40 minutes
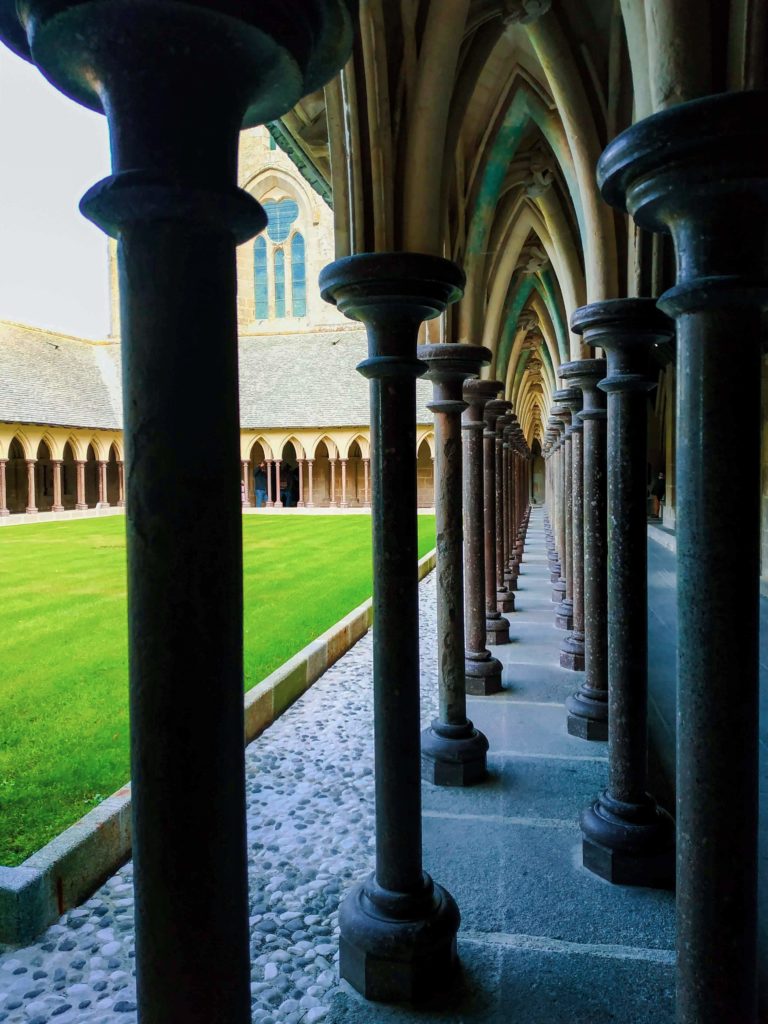
The cloister at Mont-Saint-Michel Abbey.
Tips for Your Visit to Mont-Saint-Michel
Best Times to Avoid the Crowds:
Spring to Fall is the busiest time to visit Mont-Saint-Michel, with summer being the absolute peak. If you can visit in the off-season (mid-October to February), you will be rewarded with fewer crowds. However, as I discovered during my visit there at the end of October, it can be frigid, so plan ahead and wear layers. Pack a scarf and gloves if you plan to visit during the colder months of the year.
Plan to arrive between 9 a.m. and 10 a.m. to avoid the crowds brought in on the tour buses. This is especially important during the peak season. When I visited in October, I didn’t arrive until around noon, and although crowded, it wasn’t unbearable.
Weather is typically the best April thru September. If you plan to explore outside and photography is one of your primary reasons for visiting, then I’d research weather patterns ahead of time to give yourself the best chance of good weather.
Where to Eat:
If you don’t plan ahead and pack a lunch or don’t plan to wait until you are off the island to eat, here are a couple of options for dining while at Mont-Saint-Michel. Just know that the prices and quality at most establishments here reflect the tourist-generated economy. In plain English: Prices are high, and food quality tends to be lower.
Au Pelerin: This is one of the more reasonably priced options off the Grand Rue at Mont-Saint-Michele. They serve baguettes and pizza and are a casual family-friendly establishment.
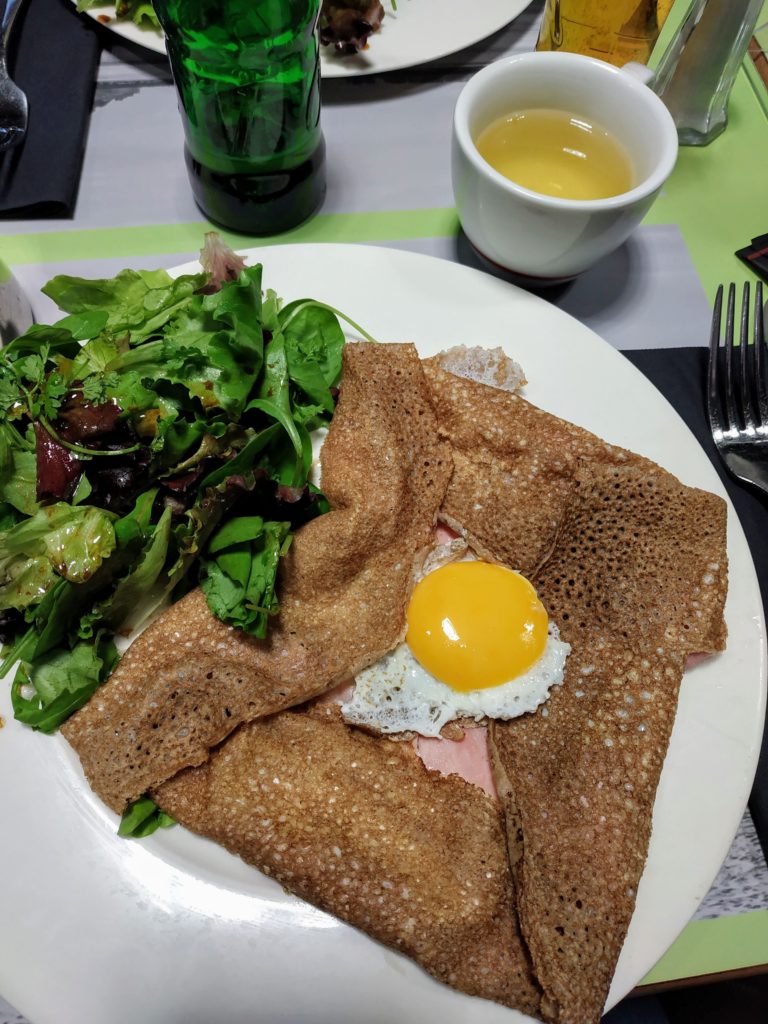
La Sirene: If you wish to try the local dish of galette bretonne (which I recommend you do while in the area), then this is a good choice. The galette bretonne is a savory style crepe filled with ham and served with an egg. It is a simple but delicious meal!
Make sure to eat a galette bretonne while in the area.
What to Wear:
Wear comfortable walking shoes as the climb up to the abbey is a steep one with lots of stairs. Additionally, if you plan to explore the area surrounding the island during low tide, you’ll want shoes that you’re okay with getting a little muddy.
If coming during the spring or fall, you’ll want to pack a light jacket, at least, plus a scarf. Even in summer, I’d pack a rain jacket. In the late fall and winter, you’ll want to dress in layers and wrap a scarf and gloves and perhaps a hat too.
How Much Time Should You Plan to Spend Here:
Plan to spend around 4 hours here. That allows you time to explore the village, tour the Abbey, and grab a bite to eat if you wish. You can also take time to explore the mudflats if the tide is out. However, make sure to check with the tourist office and tide charts first!
Consider spending the night if you want to see the tide at different levels and experience what it would be like to live on a small fortified island. You will also get a chance to explore the village at night and early in the morning without the crowds.
Mont-Saint-Michel at Night:
You may want to consider visiting here in the late afternoon and then plan to stay for the sunset and views of Mont-Saint-Michel lit up at night. Seeing the island’s lights reflecting off the surrounding sand and water makes for beautiful photographs and treasured memories.
Final Thoughts and Tips
This small island is built out of a large mound of granite. This means that they only had one way to go–up! This is the way you will go too. The streets are narrow because once again, this is a small town built on a small island chiseled from rock. So expect it to get crowded and to take things slow.
Your climb up to the Abbey is a rather steep one, especially towards the top, but take it slow and stop for breaks as you need to.
The goal is not to speed through this medieval village, but instead to take it all in, slowly meandering through the streets, stopping at whatever strikes your interest. Mont-Saint-Michel is a unique destination. I have not visited any other place like it. So give it some time and try to imagine what it was like 500 years ago.
If you’d like to read about Angela and my surprising discovery in the parking lot at Mont-Saint-Michel, then read Misadventures in Normandy France. If you have any questions about the trip that aren’t covered here, please don’t hesitate to ask!
My friend Angela and I took a two and a half month backpacking trip through Europe, and although the majority of our travel was via trains and planes, we did rent a car during our visit to the Normandy region of France. It wouldn’t have been a complete trip if I couldn’t say we used “trains, planes, and automobiles.”
Little did I know at the time, but this decision would go down in my travel journals as yet another travel misadventure. For those of you, who have read some of my previous misadventure stories, you know that I recommend you try to keep a positive attitude and have fun even when things don’t go the way you planned. Our misadventure in Normandy was no different!
The Misadventure Begins!
The Normandy region of France is known for its rich history and beautiful coastal towns. In addition to the historic D-Day sites, there is also the unique island fortress of Mont Saint-Michel, seaside towns like Honfleur, the historic city of Rouen, the home of Claude Monet in Giverny and much more in Normandy. This region deserves so much more time than we had to give it.
We took a train from Paris to Caen, where we had a hotel just outside the city. This is an excellent base for a quick trip to see the D-Day sites. It also has an airport, which made it convenient for us to get to our next destination. Upon arriving at Caen, we took an Uber to our hotel, where we spent the night.
The next morning we took a taxi to the car rental agency. However, we arrived before our rental time of 9:00 a.m., and the woman at the desk said that she couldn’t give us the car before 9:00. Since we still had around 20 minutes to wait, we decided to find an ATM and get some cash for our trip to Mont Saint-Michel.
We get our money and return to the car rental agency. When we arrive back at the agency, there is now a line. We wait and wait and wait. By the time they finally get around to helping us and giving us the keys to our car, it is almost 10:00 a.m.! Our car, a Fiat 500, is positioned at the exit to the garage, so we quickly look over it and then get in and drive away.
Our rental car while in Normandy, France.
Driving to Mont Saint-Michel
We are meeting a friend of Angela’s in Mont Saint-Michel, and we still have a 2-hour drive to get there. Since the car rental process took longer than expected, we are running a little behind schedule. This is a common occurrence when traveling. Often timetables, trains, planes, and so on run behind schedule, and you must be flexible enough to adapt your itinerary accordingly.
So Angela, with the help of Google, navigates us out of the city and onto the freeway. We talk about the road signs that are different than our own back home, but mostly this could have been any freeway in rural America. Fields and farmhouses dot the landscape. It is not so different from many highways in the U.S.
We arrive at the parking lot for Mont Saint-Michel and quickly locate a parking spot. Angela gets a text from her friend, who has also just arrived. We follow the signs from the parking lot to the shuttle area. However, since there is a long line for the shuttle, we decide we’ll walk to the island.
It is cold today. The low is around 32 degrees Fahrenheit, and the high is in the low 40’s, but with the wind chill, it feels much colder. However, we’re committed and figure it will give us excellent opportunities for photos along the way. It turns out that it’s about a 40-minute walk, thus, the reason for the shuttle line.
The view of Mont Saint-Michel as we walk up the causeway.
We meet with Angela’s friend and have a wonderful time exploring the city of Mont Saint-Michel. I plan to write a post all about our visit. It is such a unique destination, and I recommend you take a day to visit it if you’re ever in the area.
As we leave the walled city area, we walk through an archway, and as we exit the arch, there is a man with his two kids who are throwing something – food, I assume. Shortly after passing them, Angela says, “I think a bird just pooped on me,” but I say, “well, the kids were throwing stuff, so that was probably it.”
She leaves to use the restroom before our two-hour drive back to the hotel. She returns and shows me that she did indeed get pooped on by a bird. It is on the front of her jacket. Talk about misadventures! Yuck!
Angela shows me the evidence.
The Parking Lot Discovery
We return to our car and prepare to leave. I put the car in reverse, nothing happens. It doesn’t move. So I figure that I must not have the stick shift over in the correct position. Some cars can be a little finicky, no big deal. So I try to back up again. Nope. Nothing. I try everything I can think of and still NO REVERSE. So then Angela and I start Googling what to do. We discover that this is a common issue with the Fiat 500.
Now to all of you out there who think I must not know how to drive a stick shift, I assure you, that is not the case. I have driven and owned manual transmission cars off and on since receiving my driver’s license (and even before that). No, this car’s reverse was just not working.
There were a few suggestions from people online for ways to possibly get reverse to work, like turn the car ignition off, put it in first, then turn on and try putting it in reverse. I tried all of these suggestions and still nothing!
So we realize, there’s only one thing to do–push the car backward ourselves! So Angela, being the good sport she is, pushes the car back. Thankfully it’s a small car. We both feel entirely ridiculous and are laughing so hard as she pushes the car backward.
Angela is our personal reverse valet! Her superhero name is The Human Reverse Machine (coming to a parking lot near you)!
Accepting the Situation and Moving Forward
We laugh and discuss the absurdity of our situation as we begin our drive back. We both agree that it seems hard to believe the car rental company would not have known about this issue. It was rather convenient that the car was already facing forward when we got into it. Otherwise, we would have discovered the problem at the rental agency, rather than almost 100 miles away!
We talk about driving back to the rental company that night, but due to our late departure from Mont Saint-Michel, it would be a challenge to arrive before the rental agency closed. Plus, it was a hassle getting the car this morning, and we had a full day of driving to D-Day sites the following morning. So we agree to accept it as is, rather than miss out on our intended itinerary.
There’s No Going Back
Thus our misadventure in Normandy began. The next morning, we get in the car to leave, and Angela has to push the car out so we can be on our way. Nothing quite like something not working to make you appreciate those simple things you take for granted! Just imagine for a moment if your car didn’t have a working reverse.
You’re at the grocery store, you go to the front of your car to push it backward, and someone walks by and asks: “Watchya doin’?” You reply: “Oh, you know, just backing the car out.”
Perhaps you’re leaving for work in the morning, and you holler “Hey honey, I’m leaving for work, can you help me back the car up?”
You decide to stop in at the local Sonic drive-in, and the server brings your food out to your car, you thank them and then ask, “Could you help me back out now?”
Okay, you get the point, reverse is a requirement in a car! It’s also something I never thought I’d be missing, but then, travel is unpredictable!
Omaha Beach Memorial Site
Angela: The Human Reverse Machine in Action
We arrive at our first D-Day site, The Airborne Museum at Sainte-Mère-Église, and discover there are no pull-through parking spots. Just our luck! Unfortunately, this is a recurring theme throughout our entire day! Park to see D-Day sites, Angela pushes us out, and we continue to the next location.
When we arrive at Pointe du Hoc, I turn into a disabled parking lot by mistake. It is a dead-end lot too. So now I need to–yep, you guessed it–back out! I do my best to swing as wide as possible, but it is too tight with parked cars on either side for me to complete a full U-turn. So I am directly behind another vehicle that also happens to want to leave at this exact moment!
The passenger is outside the vehicle attempting to help her driver back up. She looks at Angela, who is getting out of our car and motions as if to say, “no-no, move, we’re trying to leave.” Angela, of course, nods her head, saying, “yes, I understand, so are we.”
I am inside the car, observing this hilarious game of charades. Angela then pushes our car backward and gets in. We drive off laughing hysterically at the absurdity of the situation and the look on that poor woman’s face! What she must have thought of us.
At Omaha Beach, when we begin to leave, people are standing around watching as these two crazy girls push their car out of the parking spot. One of them even stopped to ask Angela if she needed help, “no, been doing this all day long!” It is tough not to laugh as the situation is so odd and funny.
And so this is how our misadventures in Normandy went. We were so happy to return the car that night. Note to self: never rent (or buy) a Fiat 500 again. Enjoy this video clip of the human reverse machine in action.
Embrace Your Misadventure. Choose Laughter.
Summary of our misadventures in Normandy: We get our car late, Angela gets pooped on by a bird, and we discover (after driving almost 100 miles away) that we have no reverse – not to mention it’s freezing outside! Did this keep us from having an incredible visit to Normandy? Not one bit. I think it is even more memorable because of our misadventures!
Had I let the car situation ruin our trip, I would have missed out on so much. The D-Day sites in Normandy are full of world-changing history. They hold stories of honor and sacrifice, peace, and unity. I was humbled as an American to come and see first-hand these areas I had only read about in history books. I left inspired and grateful to all who sacrificed so I could have freedom, and just think, I could have let a little thing like working reverse stop me.
Things happen when you’re traveling, and you need to roll with the punches and have a good attitude. We took what could have been a very frustrating situation and chose to see the endless humor in it, and we didn’t waste our only day to see D-Day sites because of it. We played the hand we were dealt with and created some unforgettable memories in the process.
Thankfully, Angela was a good sport and isn’t a wimp. She backed our car up over and over again like a boss!
It’s that time of year again when we put pen to paper or fingers to keyboard to write out our New Year’s resolutions. I enjoy making New Year’s resolutions as a way to re-focus on my overall life goals and to create memory-making opportunities throughout the year.
You may not complete all of your resolutions, but if you try, you will accomplish some of them, and some are better than none. I hope this list gives you some ideas to add to your New Year’s resolution list and create unforgettable memories for you and those close to you.
20 New Year’s Resolutions for Travelers
New Year’s Resolution #1: Take a road trip.
Who doesn’t love a good road trip? I grew up taking road trips with my family, and I still love taking them as an adult. Plus, there’s a whole lot less of “he/she’s touching me” and “do I need to pull the car over?” as an adult. This one is totally on my list this year. I’m itching to take a long road trip. It’s been a while, and I am ready!
Whether you’ve got months or just a long weekend, plan at least one road trip this year. Load up with your favorite snacks and drinks, and don’t forget to bring your favorite playlist of all the songs you love to sing along to. Then hit the road!
New Year’s Resolution #2:Take a solo trip.
If you’ve never traveled anywhere by yourself, make this year the year you do. You will learn so much about yourself, and you will gain a better understanding of who you are and what you enjoy. There are so many reasons to travel, and a solo trip is one that will enrich you and return you a more confident individual. Trust me on this, but a solo trip should be on everyone’s bucket list at least once in their life.
New Year’s Resolution #3:Play tourist at home one weekend a month.
So many people travel around the world, but forget to play tourist at home. Make a list of all the places where you live or within a day’s drive that you want to see and then take one weekend a month to begin to explore the area close to your home. I bet you’ll be amazed at the memories you create when you look at your home through the lens of a tourist.
New Year’s Resolution #4:Get outdoors more.
Try a new hike you’ve never done in your area, or plan an overnight backpacking trip. Go camping with your family and friends, and create some memories in nature. I love the feeling of being outdoors; it can be just the thing to reset and refresh your spirit.
New Year’s Resolution #5:See the top 10 attractions in your state.
Do a little research and find out what are the top 10 attractions in your state and then plan to visit all of them by the end of the year. So for my state, Washington, it might include Olympic National Park, the Space Needle, Lake Chelan ferry, Mt Saint Helens, the San Juan Islands, the Columbia Gorge, Pike Place Market, Grand Coulee Dam, the North Cascades, and Mt Rainier National Park.
You’ll need to research your state and then create your own list. Have fun visiting areas of your state you haven’t seen before.
New Year’s Resolution #6:Visit the closest National Park to where you live.
If your state does not have a National Park, then choose the next closest state that does. Here in Washington State, we are incredibly fortunate to have three national parks. Mount Rainier National Park, Olympic National Park, and North Cascades National Park. Choose whichever park you haven’t been to, or whichever one you’ve visited the least.
New Year’s Resolution #7:Plan a family camping trip.
It is so much fun to get a group together for a camping trip. My hubby and I try each year to take our nieces and nephews camping. The kids look forward to it each year, and the cousins get a chance to make memories together. We hike and play games and tell ghost stories around the campfire. These are the moments that life is truly about. My advice is to go somewhere with no cell signal for the best possible experience.
New Year’s Resolution #8: Learn a language.
Make this the year you begin learning that language you’ve always wanted to learn. Maybe you’re planning an international trip, then take this opportunity to learn the country’s language before you get there. There are so many great resources online and apps for your phone to help you begin learning and make it fun! Start learning with Duolingo or Memrise. Carpe diem! (That’s Latin for seize the day!)
New Year’s Resolution #9: Start planning your next big trip.
You know, that dream trip you’ve been putting off, start planning it this year. Maybe you won’t be able to take it this year, but you can begin planning it, getting excited about it, and saving up for it, so perhaps next year will be the year you take it!
New Year’s Resolution #10: Start saving for your next trip.
Set a budget for your next trip and begin saving for it. Setting a budget for your trip, whether it’s that big dream trip that happens next year or a shorter trip you take this year, a budget will give you a goal and keep you focused. Make a jar labeled “trip fund” and begin putting all your spare change in it. Remind yourself that you are working toward a goal.
New Year’s Resolution #11: Make a list of ways to save.
So now that you’re planning your next big trip and you’ve set a budget, the next step is to create a list of ways to save. So maybe that list will include eliminating your daily Starbucks, bringing lunch to work three times a week, eating out only once every other month, no shopping for extra things you don’t need, switching to a card that gives you cash back rewards for your purchases, and so on. Brainstorm some ideas to save and then begin putting your savings toward your trip budget.
New Year’s Resolution #12: Post inspiring photos and quotes.
When you’re planning a big trip a year or more in advance, it can be hard to remember why you’re doing it. So, I suggest you print out some photos of your intended destination as well as inspiring quotes and place them around your house on the fridge, the bathroom mirror, and maybe some at the office too.
Create daily reminders of where you are going and why you are sacrificing and saving now. Plus, people will ask you about these photos and quotes, and then you’ll get to tell them all about your big trip, which will also get you excited and motivate you to stick with your plan!
New Year’s Resolution #13: Stretch yourself–go somewhere new!
Pick someplace new you’ve never been to, preferably someplace you might not usually choose. Go a little outside your comfort zone and explore a destination and culture you are unfamiliar with. Do you always go to beach destinations? Why not try a city next time. Only travel to the U.S. or Europe, plan a trip to Asia. Never go anywhere new, pick someplace new and go!
New Year’s Resolution #14: Try a new experience.
Try zip-lining, rock climbing, or skydiving–you decide. Perhaps it’s something you’ve thought about trying for years, but just haven’t got around to, or maybe you’ve seen classes at your local REI that you want to take, whatever it may be, try something new and create fun memories doing it.
New Year’s Resolution #15: Take advantage of long weekends and holiday breaks.
Utilize any long weekends you get throughout the year by planning trips and turning them into mini-vacations. Perhaps, you have a three-day weekend, plan ahead and book a cheap flight someplace 5 hours or less from where you live or rent a cabin and enjoy a little solitude for the weekend. Use these opportunities to create memories. You only live once!
New Year’s Resolution #16: Start a travel journal.
A travel journal is a fantastic way to document your experiences and bring home your own DIY souvenir. Fill it with receipts, ticket stubs, pictures from travel pamphlets, and your memories. We always think we’ll remember those special moments, but the truth is, over time, we forget a lot.
By creating a travel journal, you can preserve those memories for you to read about for years to come. You can also use your travel journal as a space to write about any future trips you want to take. Write a travel bucket list in it and check them off as you travel to each destination.
New Year’s Resolution #17: Pretend you’re on vacation at home.
One thing I love to do while vacationing in Maui is to get up in the morning and drink a hot cup of coffee on the lanai while enjoying the view. So at home, when the weather is nice, I like to pretend I’m on vacation, by occasionally drinking my coffee out on my “lanai” (also referred to as a deck but lanai sounds so much more interesting).
I sit out and sip my coffee and enjoy the view of my trees and watch the hummingbirds coming to drink. I pretend that I have nothing better to do and try to soak in the quiet moments often lost in our day-to-day business.
Maybe for you, it’s sitting out on your patio, or having a BBQ and putting fun umbrellas in your drinks, or perhaps it’s planning a fancy dinner with a tablecloth and a full set of silverware all laid out pretty-like. Infuse your moments at home, with a vacation-spirit. At least, until you get to go on vacation–then go on vacation!
New Year’s Resolution #18: Take a trip with a friend.
Taking a solo trip is a unique experience, and as I mentioned, it is very enriching, but taking a trip with a friend, is also something so rewarding! It can often be hard to find time between everyone’s schedules to plan a trip with a good friend, but with some planning, you can make it happen this year! It doesn’t have to be some big trip (but it could be), you might plan a weekend getaway. Make it fun, make it silly, and make memories to last a lifetime.
New Year’s Resolution #19: Take up a new hobby.
This is a fun one to do, as it gives you a chance to enjoy some activities at home, that perhaps you only relegated to vacations before. For example, this past year, I wanted to return to Maui and do some SUPing; however, plans never entirely lined up. So instead, my husband and I purchased a couple of inflatable SUPs and a kayak and started SUPing at different lakes around our area.
Maybe it wasn’t Hawaii, but it still put me out on the water and in the sunshine, and I smiled. I laughed, I breathed in the fresh air, and for those moments, I might as well have been on vacation.
Some ideas: SUPing (stand-up paddleboarding), kayaking, rock climbing, hiking, snowshoeing, skiing, mushroom hunting, coffee tasting (that could be a hobby!), fishing, and so on. These are just a few ideas, and I’m sure you’ll come up with some of your own.
New Year’s Resolution #20: Pick a recipe from your travels and learn to make it.
I love trying new food when I travel, and when I return home, I typically have had a favorite dish during my travels that I decide I need to learn to make at home. I’ll get back and begin researching how to make Japanese curry, or Thai glass noodle soup, or Chongqing chicken, and so on.
It’s fun to try making new things, and it is also a way of enjoying the memories of your travels over a delicious meal! You could plan a dinner party, make your special dish, and then share fun memories and photos with your dinner guests about your travels.
Conclusions on your New Year’s Resolutions
Whatever New Year’s resolutions you create, I hope you will focus on creating memories, simple moments, and fun adventures that will enrich your life and your relationships. We all need to do a little more unplugging and a lot more connecting with this amazing planet and each other.
Your New Year’s resolutions don’t all have to be huge and grand, it’s about building in time for experiences, and stories your children will tell their children. That’s what life is really about. Time is a gift; let’s do our best to use it wisely. So pick five to ten resolutions to focus on this year and then have fun making memories!
Have you ever wanted to start something new? Maybe you dreamed of becoming a published author, or starting your own business, traveling, or _________ fill in the blank, but something always kept you from doing it. I know how you feel, I have been there many times.
Typically it is fear that keeps us from starting our dreams. “Dream” is just another word for a goal or aspiration. It’s something you long to do, something that gets you excited and makes you smile when you think about it. It’s also what probably scares you. Facing your fears is the key to realizing your dreams.
I will cover four of the most common fears that keep people from starting down the path to their dreams. These are four fears that I struggled with and how I faced them. I say “faced” them because they are still there.
On some days, they are up close, face to face, toe to toe with me, and on other days they are far off in the distance. One thing to know, though, is that fear is a part of life, courage helps us to face it and move forward in spite of the fear. It takes courage to face your fears and start scared, but I promise it’s worth it!
4 Fears That Keep You From Starting Your Dreams
Fear #1: Fear of Failure
The fear of failure is typically the one that keeps most people from starting something new. We often fear failure because we fear what others will think of us when we fail. Atychiphobia is the psychological term for fear of failure. It is a common reason why people do not start things, whether that’s a dream, a career, or a new relationship.
Failure is often attributed as a personal attribute; i.e., I failed; therefore, I am a failure. This is entirely wrong. We must rewire our brains to see failure as a positive tool. If we are failing at something, then it also means we are trying at something.
Sara Blakely, the (now) billionaire and founder of Spanx, had an idea for a legging that would help women feel more comfortable and confident in their clothing. People told her that the idea was stupid–thankfully, she didn’t listen. She had an idea that she thought was good, and she wasn’t willing to give up on it.
In his book The Storyteller’s Secret, Carmine Gallo explains why Sara didn’t quit: “Sara’s father had taught her about the power of failure. At the dinner table, Sara’s father would ask, ‘What did you fail at today?’ He would be disappointed if she didn’t have anything to say. Failure meant she was trying new things.”
This is how we all should look at failure. Perhaps we should exchange our fear of failure, for fear of not doing new things, and then determine to start something new. I discuss some quotes from Thomas Edison on my post about not giving up. He also knew a thing or two about failure. It took him 1,000 unsuccessful attempts to invent the light bulb. He understood that failure is the pathway to success.
Fear #2: Fear of Imperfection
Facing my fear of imperfection was vital in my journey as a writer. I want things to be “perfect” before presenting them to the world. So, for over ten years, I put off starting my blog. I started several books, but never finished them. My need for perfection, my fear of failure, and fear of what others thought kept me from pursuing my dream of becoming a writer.
Elizabeth Gilbert’s book Big Magic gave me the approval I needed to start by letting go of perfect, and telling myself good enough is good enough. Gilbert states that “Perfectionism stops people from completing their work, yes–but even worse, it often stops people from beginning their work.”
Perfectionism is the killer of both beginning and finishing. I know it was with me. Gilbert said a favorite saying of her mother was, “Done is better than good.” Most people don’t finish what they start, and completing something as “good enough” is better than not finishing at all.
“A good-enough novel violently written now is better than a perfect novel meticulously written never.” ~Elizabeth Gilbert
That is what I needed to read at that moment. I wrote my first blog post, and let me tell you it was and is far from perfect. Although I have yet to achieve perfection, I learn with every post I create. And you know what? I started my dream, and I have finished post after post since then.
I know this may sound like settling for mediocrity, but it is the difference between doing nothing and doing something. The difference between starting your dream or living in fear–face your fears and start scared. Let go of the need for perfection, and you will feel free to be you. Good enough is a great place to start.
Fear #3: Fear That It’s Already Been Done
This is another fear I wrestle with. I mean, what is something that I could write that someone else hasn’t already written? It may feel like you have nothing new to offer, but just by you being uniquely you, that is something unique that people need to hear.
You have a voice, and you have a story. I know that not everyone wants to be a writer, but say you want to paint, or you have an idea for a business–don’t let the fear of what’s already been done keep you from offering the world what is in your heart. Your gifts and talents are unique and worth the effort.
“Most things have already been done–but they have not yet been done by you.” ~Elizabeth Gilbert
Fear #4: Fear of What Others Think
Oh, this is a big one. We are social creatures, and therefore, we care about the opinions of others. Our mistake often comes in caring more about what others think about us than we think about ourselves. Rachel Hollis says it best in her book Girl, Wash Your Face, “Someone else’s opinion of me is none of my business.”
The truth is, you’ll never be able to make everyone happy or have everyone like you. Accept that. You also need to see your value, and not find your value in the approval of others. This is your life. Just think back to the story of Sara that I mentioned in Fear #1, had she listened to the people who told her that her idea was dumb, and gave in to her fear of what others thought, she wouldn’t have become the successful businesswoman she is today.
And finally, when it comes to facing your fears of what others think, it might be comforting to know that most people are too busy thinking about themselves to think about what you’re doing.
Facing Your Fears Means Accepting Fear As a Companion
Elizabeth Gilbert states in her book Big Magic that “Creativity is a path for the brave, yes, but it is not a path for the fearless…Bravery means doing something scary.” She goes on to say that “your fear will always show up–especially when you’re trying to be inventive or innovative. Your fear [is] triggered by your creativity.” So she says that if you “want creativity in [your] life…then [you] will have to make space for fear, too.”
I hope as you begin the first steps toward facing your fears that you will recognize that fear is along for the journey, but it does not have a say in where you go and what you do. So start that new adventure, create the life you’ve always wanted, don’t wait to be fearless, start scared. Start now.
If you have a dream or goal you’re starting this year, I’d love to hear about it in the comments below or in an email. I would feel honored to cheer you on!
This post is a journal of the day’s sightseeing and experiences. I also wrote some travel guides to help you on your next trip to the Florida Keys. You’ll find these linked at the bottom of this post.
I visited Key West once before in the late ’90s; however, my husband had never been there before. He told me he wanted to see the Seven-Mile Bridge as he had seen it in the True Lies movie with Arnold Schwarzenegger.
I’m sure vacations have been planned on less. So we drove from Orlando, where he had just finished with a business conference, to Islamorada. We spent the night there before continuing our road trip to Key West.
Now before I continue, I thought I should put in a small disclaimer, just in case you’re reading this as a bedtime story to your kid or something.
Disclaimer: There are references to nudity and naked bodies in this post; if that bothers you, read one of my other posts instead.
Morning of our Florida Keys Road Trip
We packed up our camera gear, drone, swimming clothes, bottled water, and sunscreen and headed out the door! First stop was coffee and breakfast at the Midway Cafe and Coffee Bar in Islamorada.
I order some avocado toast and key lime pie for breakfast and a bottomless cup of coffee. I love a bottomless cup of coffee.
When I received my key lime pie, I was surprised to see it made with an actual pastry crust, not the graham cracker crust I was used to. You can read more about why that is in my post on finding the best key lime pie in the Florida Keys.
I enjoyed breakfast at the Midway Cafe and recommend you stop when you’re in the area. They have a little space where they sell handmade jewelry and other locally crafted items. It’s a brightly-colored, sunny spot, perfect for enjoying some coffee before heading to Key West.
Some say this is the traditional way to make a key lime pie.
After we finished, we went out to the car, where hubby was so excited to be driving a convertible Ford Mustang for our road trip. He made sure I took a few photos of him driving, and of course, we had a Florida road trip playlist that included “Ice Ice Baby.”
Back on the Road
It was great fun driving with the top-down and the wind blowing in our hair. However, I will say we didn’t leave the top down for our entire day of driving. For one thing, it is just too hot! And second, my hair-whipping about into a frantic rat’s nest did get old after awhile. It is still a lot of fun, and I recommend it if you get the chance for a free upgrade, like we did, to go for it!
Hubby loved driving with the convertible top down, wind in his hair.
Photo Stop at Duck Key
This one made me laugh, so I took a picture of the sign. Little Duck Key, get it? Hmm, perhaps you had to be there.
I love the play on words. The Florida Keys have lots of interestingly named Keys, which is part of the fun!
Hubby brought his drone, and we did a lot of research, including using apps that tell us whether it is okay to fly, what times of the day is better, and then we also read the local forums to find out where local Floridians went to fly their drones.
Unfortunately, there have been some not-so-bright drone owners who have flown their drones into restricted areas such as airports and other places most people would never dream of doing! This creates a very complicated and restrictive process for the rest of us drone owners.
So, after doing our do-diligence, we found a spot along the old seven-mile bridge that, according to locals, was approved for drone flying. We walked a little way up the bridge, away from other people (although there were some other tourists who at first gathered around hubby, as the drone always seems to bring spectators).
Once hubby felt we were a safe distance from people, and he had an open area to land when needed, he put the drone up in the air.
Walking the old seven-mile bridge. Beautiful, but hot!
The Heat Makes Me Crabby
I’m not sure how long we were out flying, but we did walk as far as we could on this section of the old seven-mile bridge, and needless to say, when I left the car, I had not planned on spending so much time walking in the hot sun. I didn’t put on sunscreen when I left this morning, as we headed to breakfast and then I thought I’d apply it afterward. I forgot.
So, now my shoulders are turning a bright red, and my feet are tired from walking miles on concrete, and I’m getting a little crabby. This always seems to happen when overheating. Hubby and I discussed this once when we were in Thailand. We were walking up the road in Koh Lanta, headed to a “secret” beach, and he mentioned how heat affects the way people act.
Sure enough, about 5 minutes into our walk, the conversation turned into a “whose idea was it to walk here anyway” argument. However, soon, we reached the beach, and as soon as we cooled off in the beautiful turquoise water, our attitudes were miraculously back to cheery and chipper.
That was how my walk back on the seven-mile bridge went. Of course, after I got back to the car, drank some water, put on some sunscreen, and turned on the a.c., I adjusted my overheated attitude, and we were on our way again.
This is, of course, the side social media doesn’t typically show. You see us in the pictures smiling together and looking like we never have a care in the world. Uh, no, we’re humans, only humans.
Sombrero Beach in Marathon, Florida.
Next stop Sombrero Beach
Sombrero Beach is reportedly one of the best beaches for swimming in the Florida Keys. For those of you who don’t know, the Florida Keys are formed from a protected reef system. In short, there are very few swimmable beaches here. Often, sand is brought in to form man-made beaches. So we headed for Sombrero Beach in Marathon, to check it out.
When we arrived, we found it under construction. The restoration project looked like it was in its final stages, and it appears to be a fantastic place to bring the family and spend the day. The one area you could still access had people swimming and sunbathing, so I’m sure this beach is a popular one and even more so once the restoration project is complete.
I hand hubby my camera for a little bit, not sure why. He took this “artistic” photo. I’ll let you see if it speaks to you.
“Beach Art”
Key West Here We Come!
With all the time we’ve had in the sun, we now prefer to sit in the air-conditioned car. So we decide to keep on rolling until we arrive in Key West. We can see anything we miss on the way back. A road trip through the Keys is about the journey, not the destination.
We Have Arrived!
We arrive in Key West and make our way for Old Town. Usually, I drive closest to my first sightseeing stop and then find a parking spot. Since today is Saturday, I navigate hubby to the nearest public parking garage, where we park and instead to walk to our destinations.
This was the best decision we could have made! We didn’t discover until later, but we arrived in Key West during their Fantasy Fest. The streets were blocked off for vehicle traffic, and crowds of pedestrians were everywhere! So, although the heat felt unbearable to a Pacific Northwestern like myself, I was happy we had parked and didn’t get tangled up in the mess of crowds and closed streets.
Lunch Stop
We head for lunch at Caroline’s Cafe on Duval Street. Breakfast was a long time ago, and we are hungry! As we walk there, we notice people carrying folding chairs and dragging coolers behind them. I say, “there must be a parade today.” Well, I was right, but it wasn’t quite what I expected.
As we cross the street to Caroline’s Cafe, I notice two people walking across the road towards us. I also see they have no clothes on. Their bodies are painted with patriotic “clothing,” stars and stripes “shorts” and giant “stars” up top. I think, hmm, that’s interesting, have we stumbled onto some Mardi Gras festival?
Let me say before I continue, that lunch was fabulous! I had the blackened chicken pasta, and it was SO good!! I highly recommend it if you are ever in Key West.
This blackened chicken pasta was so good! Hubby kept nibbling off of my plate as it was better than his Cuban sandwich.
Lunch-time “Sightseeing”
So, as we sit down to order, I notice the people at the table directly across from us, are also wearing painted “clothing.” Now, I’ve been to Europe, seen lots of statues, and even a few nude sunbathers, but this, this was not something I had seen before. We’re Americans. We don’t do public nudity.
So as I notice more and more people with their painted on clothing. Hubby leans across the table and tries to oh-so subtly tell me to look behind me. I think in my head, “Um, what could you possibly show me that I haven’t seen yet!” So I peer over my shoulder, in an “I’m not turning to look at you” sort of way and see another naked painted person.
It’s at this point that I realize my husband doesn’t know that he is surrounded by naked people. This is quite funny to me. So I also oh-so-subtly give him the nod to look at the table right next to us. A lot of glitter and paint–that is all my friend. Glitter and paint.
I will note here though that the men all have a grass skirt or some other covering for their lower front regions. Their backsides, not so much.
The resident rooster and vacuum cleaner at Caroline’s Cafe.
The Emperor’s New Clothes
So, as the realization hits my husband, he says, “they’re naked!” Yep. Bingo! He thought they were actually wearing something. Nope. Nothing but paint. He made a trip to the restroom while we waited for our check and saw the line of people waiting to be painted. As you can imagine, the people in line were wearing, um–the Emperor’s new clothes. Of course, the difference between them and the childhood story’s character was that they knew they were naked. They were naked as j-birds.
After lunch, we discussed his newfound realizations, and we laughed as he and I certainly had a new experience on this trip to Key West. We saw things we’d never seen before. I guess that’s what traveling is all about! We also discussed the problems that might arise from the lack of clothing.
Like where do they put their credit cards and wallet? Does every painted person bring a clothed person with them to carry stuff? What happens if they sweat or get wet? This question’s answer was discovered by hubby’s trip to the restroom, where he saw a sign stating that the paint was waterproof. Phew! That could have caused some problems.
Fantasy Fest
Fantasy Fest was created over 40 years ago as a way to increase tourism during Key West’s slow season. So every October for ten days, the city turns into a festival that is a mixture of Mardi Gras meets Halloween. The final weekend of the festival, which we just happened to arrive on, is when they block off a section of the city, for an adult-only area in which nudity laws are “relaxed.”
This is only in the sectioned off portion of the city and only during Fantasy Fest. We did not see any children in this area, or much at all, which of course makes sense. So, should you plan to visit Key West, during the off-season, you may want to keep this in mind when making your travel plans.
And in case you’re wondering how much people pay for their paint jobs, prices range from $100 to $1000. This depends on how much of your body is painted and how detailed of a design you want.
Kapok Tree in Key West
We left the restaurant and headed in the direction of our next stop, Ernest Hemingway’s former Key West residence. As we walked there, the heat felt unbearable. Soon I began to think there might be something to wearing no clothes.
A Kapok tree in Key West.
We passed this beautiful Kapok tree, which reminded me of the banyan trees in Maui. It was a nice place to stop in the shade. We kept crisscrossing the street to follow the shady side of the road. That is how hot it was in Key West. I later learned that they had a 234-day hot streak this year. During that time, Key West had temperatures at 80 degrees Fahrenheit or warmer.
Ernest Hemingway’s Home
When we finally arrived at Ernest Hemingway’s home, we discovered you had to pay in cash. We did not have any cash, and I was okay skipping it (when I’m hot and tired, I tend to lose interest). However, hubby asked the woman at the ticket window, “is it air-conditioned inside?” She replied “yes” that it was, and there was also an ATM around back to get cash. Well, that was enough for him. He heard the magic words “air-conditioned” and might have paid any price to get some reprieve from the heat.
The former residence of Ernest Hemingway.
So I got the cash, and we went inside where it was nice and cool. The inside of the home is decorated with some of Hemingway’s original furnishings. And on display are also some of his books, his typewriter, and movie posters from the many movies adapted after his books.
There is a swimming pool outside the house that calls to you to jump in; however, this is, of course, not allowed. We peeked inside Hemingway’s writing studio. I told hubby how nice it must be to have an entire studio dedicated to writing.
Soon, our tour was over, and after another stop in front of a fan, we went out into the heat to continue our sightseeing.
Southernmost Point in the Continental U.S.
Because it was hubby’s first trip to Key West, I thought he should go to the Southernmost Point in the Continental U.S.–just to say he had. As we walk, the sweat drips down our faces, and my husband assures me he does not need to walk all the way to the Southernmost Point. However, we were almost there, so we might as well finish.
We arrive only to discover there is a line, a line of people who all want a picture with the marker that shows they are at the Southernmost Point in the Continental U.S. It is crazy hot out! Hubby and I stand across the street in the shade, neither of us have any interest in standing in the hot sun for this photo opp.
The line stretches outside the frame. The heat is underrepresented in this photo.
We also conclude that we are way too hot, tired, and sunburned to walk back across town. It is at that moment, a man pedaling a rickshaw comes down the street, we ask him if he can take us to our next stop, the Key West Key Lime Pie Company. Thankfully, he says yes, and we hop on board!
Our driver pedals away almost effortlessly and chats with us about Key West and all the local sites. He said that this is cool, fall weather compared to the summer, where it can get over 100 degrees Fahrenheit, plus humidity! Yikes! Note to self, never visit Key West in the summer.
He takes us as far as he can before the closed roads prevent him from going further, and we thank him for the ride. This is the best $20 I have spent in a long time.
Key Lime Pie in Key West
We continue through the crowds, passing creatively painted people to make our way to the Key West Key Lime Pie Co. The man behind the counter is so friendly and welcoming. We purchase one of their mini key lime pies to share. The man pipes freshly made whipped topping on it before serving it to us. Yum!
The freshly piped whipped topping was a nice touch to this mini key lime pie.
We enjoy our pie and ice-cold water before walking down the street to our next stop, Kermit’s Key West Key Lime Shoppe. Yes, I have more key lime pie, all in the space of 10 minutes. I’m pretty sure I’ll sweat the calories off anyway!
We sit down to share a slice of key lime pie at Kermit’s. The pie at Kermit’s is everything I looked for in a key lime pie. Wonderful tart lime flavor with a buttery graham cracker crust–delicious!
Driving Back Through the Florida Keys
It is late afternoon, and with the parade just around the corner, we both agree we’d rather not get stuck in traffic. Although we may not have hit all of the sights in Key West, we certainly have had a unique experience. So we make our way in the heat to the parking garage, excited to turn the air conditioning on and begin our drive back to Islamorada.
We enjoy the drive back through the Keys, put the top down again, turn up some fun Latin music, and pretended to be carefree teenagers. Of course, we had to stop for selfies at this giant lobster, and we weren’t the only ones. Another man in a red convertible Chevy Camaro stopped and asked if we’d take his picture with the giant lobster too. Nothing like sunshine and warm breezes to make you feel like a kid again!
Who can pass up a selfie with a giant lobster?
We end the evening with a gorgeous sunset while watching a thunderstorm across the water in the distance. It was a fun day!
Do you have a traveler in your life that is hard to shop for? Or perhaps you’re the traveler, and you’re doing a little shopping for yourself. Whichever the case, I will share a few of my favorite travel items as well as other excellent travel gift ideas that are sure to make the perfect gift for the traveler and adventurer in your life. I include travel gift ideas for every budget, including some great DIY gift ideas and smaller items that would make great stocking stuffers! So start making that wish list!
Favorite Travel Gear Ideas
Portable Charger/Power Pack/Power Bank
Portable chargers, also known as power banks, are invaluable when you’re traveling, which is why they make a perfect travel gift! I used mine for a two-month backpacking trip through Europe, and it kept my phone charged for all-day navigating using Google Maps. Plus, I could also use it to charge my Sony Alpha a6500 mirrorless camera.
You’ll need to know the charging requirements of the traveler who will use the gift. Meaning, will they only want to charge their cell phone with it? Will they want to charge a camera or tablet with it?
If your traveler is only charging their cell phone, then something like this 10000mAh portable chargerwith Type-C input and output would be a good option.
However, if your traveling needs include charging a camera or tablet, then I’d choose something with 24000mAh or higher, such as this portable power bank. Make sure you know whether their devices use USB Type-C adapters or not and purchase accordingly.
Here is a solar-powered option for the hiker, camper, or motorcyclist in your life.
Also, note that power packs typically require you to charge them overnight, so plan ahead. I charge mine while sleeping and simultaneously charging my smartphone. This system worked great for me.
Universal Power Adapter
This would make a great travel gift idea for that traveler who is planning their first trip abroad. A universal power adapter like this one should take care of your traveler’s power needs during their around the world travels.
With just the one universal travel adapter, I can eliminate all the rest.
Travel Shoe Bags
As a traveler, I love having a shoe bag! I use it to put my dirty shoes in when I switch shoes during my travels. The shoe bag keeps the rest of my luggage from getting the dirt and grime off my shoes. Let’s face it streets are dirty, and I have stepped in all sorts of liquids, and otherwise— trust me, your traveler will thank you!
Packing Cubes
If you’ve never used a packing cube, you may wonder how you got by without them. I especially love using these when traveling with a backpack. I don’t want to rummage through my bag digging for all the loose items, these packing cubes solve that problem.
In addition to the regular packing cubes, you can also purchase compression cubes to fit even more! However, be aware that although you may have shrunk the size of your items, they still weigh the same. Perhaps someday they’ll create a weight-reducing sack, and if so, will they come in women’s dress sizes?
Shoe bags on the left, small mesh travel organizers top right, and packing cubes lower right.
Re-usable Travel Liquids Bottles
Say goodbye to buying new travel-sized shampoo, conditioner, and body wash bottles every time you take a new trip. These reusable travel bottles are so easy to fill and re-use over and over again!
Headphones
I have two different headphones that I use for traveling. I don’t always take both, as the noise-canceling ones are bulkier, so when limited on space and weight, I leave them at home. However, the Sony Bluetooth noise-canceling headphones do fold down and come with a protective carrying pouch. They are great when you want to block out the noise on the airplane or enjoy some relaxing music during your long flight.
The second pair I take and used throughout my 2 1/2 month backpacking trip in Europe are these lightweight sleeping earbuds. I am a side sleeper, and I needed some soft and small earbuds that would allow me to turn over in the night and not cause ear pain the next morning. The ATECh Sleeping earbuds fit that bill!
These are my Sony noise-canceling headphones.
Refillable Water Bottle
During our trip to Thailand this year, we purchased some collapsible water bottles, much like thesebottles on Amazon. It was an eco-friendly cafe in Bangkok that had great coffee, but that’s beside the point. We found them to be so useful during the remainder of our travel in Thailand, and since then, we continue to use them when traveling.
They are great because you can collapse them and save space when you don’t have any liquids in them. So they’d be perfect for carrying through security and then filling up with water before boarding your flight – thus saving a bunch of money on airport bottled water. REI also has a lot of great choices for collapsible water bottles.
I love my Yeti mug, it’s not compact like the above collapsible water bottles, but it is great for keeping your morning cup of coffee hot and is perfect for camping or road tripping in the U.S.
Laundry Washing Bag
This one is on my travel gift wish list. It would have come in so handy during my travels over the years. The Scrubba Wash Bag is a new version of the old-fashioned washboard but in a bag. Just put your soap in (shampoo will do the trick), add water, then your dirty clothes, now seal the bag up, and begin rubbing and scrubbing! When you’re finished, you empty the dirty water, rinse your clothes with clean water, and hang to dry. Voila!
The Scrubba Wash Bag can also double as a dry bag, perhaps for those overnight kayak camping trips or to keep your electronics dry when traveling.
Local Adventures
Why not encourage your traveler to be a tourist at home or perhaps create some memories together by visiting the local museums in your area. Most museums offer gift cards and annual passes for purchase.
Another great gift idea is to give them a gift card for an annual pass to your State Parks or buy them a National Parks pass. These are perfect for your outdoor adventurer! I have three passes that I use for hiking,camping, and when I stand-up paddleboard or kayak here in Washington state.
For those of us living in Washington State, we have a few options for recreational passes:
If the traveler in your life is anything like me, they want to make sure their coffee needs are covered, whether they’re at home, camping in the woods, or traveling around the world. I wrote this post previously that goes over how I make French Press coffee while traveling. However, there are a few other options that would also make great gifts for your traveling coffee lover.
Single-Serve Coffee Makers
The travel-sized French Press, as well as the Java Press mug, are two I recommended in the article I mentioned above.
This AeroPress coffee maker comes with a tote bag, and you can make a cup of espresso or add water for an Americano.
The Brew Buddy is a simple and lightweight option that is great when you are backpacking or motorcycle camping. Just put over a mug, add your coffee, then fill your cup with hot water and wait until it reaches your desired strength, remove brew buddy and enjoy!
Travel Coffee Mugs
These collapsible coffee mugs can also be used to eat oatmeal or soup or any other liquid items you might travel with or eat while on the go. I love them for backpacking and motorcycle traveling. They are a real space saver!
These insulated coffee mugswill keep your liquids hot for up to 6 hours or keep your cold beverages cold for up to 12 hours.
Coffee From Around the World
What better gift to give your coffee-loving traveler than coffee? Here are a few ways your traveler can sample coffee from around the world.
For the traveler who loves both coffee and chocolate, check out the ultimate Seattle coffee and chocolate tasting experience.You can also try their World Coffee Tour Tasting Box for a coffee trip around the world. Bean Box is a local, Seattle based company that works with small-batch coffee roasters here in Seattle to create and hand-pick these unique coffees for coffee enthusiasts everywhere! Consider gifting a coffee subscription to the coffee lover in your life. They will love you for it!
I love purchasing handmade gifts from local artisans or artisans around the world. It is something I enjoy doing while traveling, and also at home.
By purchasing a gift through Trades of Hope, you can buy beautiful gifts made by women in countries such as Thailand, India, Haiti, and Peru, to name a few. You’ll give your traveler a unique gift and also make a difference in the lives of women from other countries! Trades of Hope helpswomen out of human trafficking, poverty, reuniting women with their children, and giving them a life of hope.
Trades of Hope caters to the female shopper, so you may or may or not find a travel gift for your traveler if they are a man; however, it never hurts to look! And with each purchase, you’ll receive a card with the name of one of the women you are helping and a little about her story.
Travel Clothing
Scarvesmake great gifts for travelers. I love packing a scarf when I travel as they are lightweight and so versatile! Use them as a cover for your head, or wrap them around your shoulders and wear them like a shawl. For someone like myself, who loves to pack light, they are a go-to item for me.
Travel Bags
Trades of Hope also has some great bag and purse options for your traveler. They have everything from wallets, day bags, to overnight bags.
Sseko Designs
Sseko Designs is another company where your gift gives back by providing women in Uganda an income and an education. Sseko’s products are ethically sourced using only local materials. The women are paid a fair wage with benefits, and Sseko also offers a matching tuition fund.
With every product you receive from Sseko, you also receive the name of the woman who made your product. You can look that woman up on the Sseko website and learn more about her goals and what she is studying for. Pretty great, right?
Travel Shoes
One of the items I love from Sseko is their ribbon sandals. These sandals are very durable, and there is even one woman who has run over 200 miles in hers! Now, I’m not running in mine, but I do use them for walking around and sightseeing. You can customize them by changing the look of your ribbon. The ribbons come in different colors and designs, plus you can change the look of your sandal by moving the ribbons in different positions (great videos on Youtube of how to do this).
Travel Bags
Sseko also has some excellent travel bag optionsfor both men and women to choose from. They have high-quality genuine leather bags as well as beautiful canvas bags that will make great options while traveling.
The convertible tote would make a great travel gift! It can be worn as a cross-body bag or as a backpack! Using this as a day bag allows you to wear it on your back when you’re out sightseeing, but then, when you visit a museum, change the strap configuration, and now it looks like your everyday purse. A lot of museums don’t want people to wear backpacks inside the museum, so they force you to check your bag. Well, now you don’t have to!
DIY Travel Gifts
Do you have a talent for making crafts? If you enjoy making sentimental, one-of-a-kind gifts, then these DIY travel gift ideas are perfect for you!
Tonya at Travel Inspired Living shows how to make these fun DIY Photo Coasters using photos from your latest vacation or from the traveler who you’re creating this for.
Krista from The Happy Housie created these DIY map magnetsusing simple materials you can find at your local craft supplier. As a lover of all things map-related, I think they’re such a fun gift idea for the traveler in your life. You could even create these, so the map shown in each magnet is from a country or place your traveler has visited.
I made this DIY project using Ashlea’s instructions from Heart Hook Home. Ashlea’s DIY World Map instructionsare so easy to follow. Even a non-crafter like myself was able to create my own push-pin map to record where I travel.
My finished push-pin travel map. I need more pins in more places!!
This DIY Travel Shadow Boxfrom Bethany at The Southern Couture is a great way to preserve a favorite travel memory. I love how she used sand and shells from her beach vacation. However, you could do so many things with a shadow box. Place your favorite photo inside along with museum ticket stubs, metro passes, cafe receipts, and so on. There are so many fun options!
If you’re a scrapbooker, Boredart.com gives some creative examples of DIY Travel Scrapbook pages you can create. Use these to record your travels or give to the traveler in your life to inspire their travel journaling.
No matter what you create, your gift is treasured for the love and time you put into creating it.
Stocking Stuffer Ideas
If you’re shopping for Christmas gifts, here are some items that make perfect stocking stuffers for your favorite traveler.
Eye mask: An eye mask is invaluable when flying and sleeping while traveling. As a light-sleeper, it really helps when I can block out the surrounding light.
Washi Tape: I love having washi tape to attach souvenir tickets and receipts or photos and maps to my travel journal for safekeeping. The great thing about washi tape is that you can safely remove the items later without any damage.
Chocolate Covered Coffee Beans: I love carrying these in my day bag during my travels. They give me that little bit of pick me up when I’m on the go. Of course, I also like the taste!
Buff Headwear: I love my travel buff, I’ve used it for multi-day backpacking trips as well as international travels. Use it as a scarf, headband, hat, and even an eye mask should you forget yours.
Moleskin Blister Kit: Unfortunately, blisters, can often be a part of traveling. Whether you’ve spent too many hours sightseeing or hours hiking in the mountains, blisters can quickly ruin a trip fast! Moleskin blister dressings have you covered!
Additional Travel Gift Ideas
Here are a few more miscellaneous travel gift ideas to ensure you’ve got plenty of options!
Travel Journal: These make great gifts for travelers to document their adventures.
Travel puzzles: This is something fun the whole family can do together.
Feel free to forward this to that special someone who has a hard time finding your gifts. There’s no shame in giving a little help to the gift-buying challenged. I think we all fall into this category from time to time.
Note: Travelffeine is reader-supported. This post contains affiliate links. When you make a purchase using one of these affiliate links, we get paid a small commission at no extra cost to you. And as always, all opinions are our own. Thank you!
You can’t come to the Florida Keys without trying the dessert they’re most famous for. As the official state pie, key lime pie can be found all across the state of Florida. It is made from the tiny key limes grown in the Florida Keys. So on a recent trip to the Florida Keys, I decided I needed to eat key lime pie from breakfast to dinner in my quest to find the best key lime pie in the Florida Keys.
Below I share the results of this quest with you and also tell you about an alternative key lime option that isn’t a pie. It was so good I would come back just to eat another one! So continue reading below to find out what this delicious key lime dessert was.
Plus, I’ll list a bonus place to get amazing key lime pie in Miami, just in case you wish to stop there too. The below list is in order of my favorite key lime pie to my least favorite with bonus options listed below.
Two Main Ways to Make Key Lime Pie
You will find two main styles of key lime pie when you visit the Florida Keys. One is made using a graham cracker crust with optional whipped topping, and the other is made with a traditional pastry crust with a meringue topping. Florida residents hotly debate which way is best.
As a West Coast visitor, I was used to eating key lime pie baked with a graham cracker crust and then optional whipped topping. However, I did try the traditional pastry crust version with meringue topping while I visited the Keys, and I will share with you where that was and my thoughts below.
Best Key Lime Pie in the Florida Keys
Kermit’s Key West Key Lime Shoppe
Kermit’s has been around for over 25 years and is a Key West staple for all things key lime. So it comes as no surprise when I declared their key lime pie to be the best key lime pie I tasted in the Florida Keys!
If you aren’t able to make it to Key West to sample some for yourself, they will even ship it to you! In addition to key lime pie, they also sell key lime candy, jelly, salsa and dressings, bath and body products, and so on. You get the picture. They have tried to use key limes in just about everything!
It may not look like much, but this is one delicious piece of pie!
My Pie Impressions: It had a nice strong key lime flavor and a good graham cracker crust. It is important to me that I can taste the tartness of the key limes, I don’t want a key lime pie that is overly sweet. I also want a nice graham cracker crust, still crunchy, not soggy. If I had to find one thing wrong with it, I felt it’s filling was a little too dense (that’s just if I’m super picky).
Conclusion: Kermit’s Key West Key Lime Shoppe had my vote for the best key lime pie in the Florida keys. Try them on your next visit, you won’t be disappointed!
Kermit’s has two locations in Key West. Kermit’s Address: 200 Elizabeth St, Key West, FL 33040 or 431 Front St #2, Key West, FL 33040
Key West Key Lime Pie Co
This was my runner up for best key lime pie in the Florida Keys. I loved that you could purchase little mini key lime pies and also that they made their whipped topping fresh. I’m kind of a snob when it comes to store-bought whipped topping, but when I saw them piping the fresh-made whipped topping on their pies, I knew I wanted to try it!
In addition to selling key lime pies, they also offer a key lime pie class where they teach you to make your own mini key lime pie. That sounds like my kind of class!
The freshly piped whipped topping was a nice touch to this mini key lime pie.
My Pie Impressions: The pie filling was nice and creamy. I loved the texture of the filling, however the key lime flavor wasn’t as strong as I prefer it to be. Also, the crust fell apart and was a little too thin; thus, it became slightly soggy. So overall, I did enjoy their pie, but remember, I was on a quest to find the best key lime pie, so I had to nitpick a little to narrow it down.
Key West Key Lime Pie Co Address: 511 Greene St, Key West, FL 33040
Midway Cafe & Coffee Bar
The Midway Cafe & Coffee Bar is an excellent choice for breakfast if you happen to be in or near Islamorada. On this day, I decided I needed to have key lime pie for breakfast (don’t judge me). The Midway Cafe has the traditional key lime pie recipe, and for locals, they might argue that because of this, it is the best key lime pie.
For me, coming from the West Coast, this was my first time having key lime pie baked in a pastry crust and topped with a meringue topping. So, I was a little surprised when I received my pie. However, I do love trying new things, and it was still key lime pie, so I figured you couldn’t go too wrong with it. Plus, I was served some delicious fresh brewed coffee to go along with my pie.
This is the traditional way of making key lime pie using a pastry crust with meringue.
My Pie Impressions: This key lime pie was made in a traditional pastry crust, and served with a thick meringue topping. It was good, as a pie, but not quite what I expected for a key lime pie. The crust was nice and flaky, and they did an excellent job with the meringue. However, the flavor of the key limes was somewhat lost, I feel, due to the taste and thickness of the pastry crust. So, although not my choice for the best key lime pie, I would still recommend you try it since it is the contested “traditional” way to make a key lime pie.
Lorelei’s is a wonderful spot to watch the sunset in Islamorada. We had a table next to the water and were able to walk over and watch a small shark swim by and two manatees during the time we sat there for dinner. They also had a live band as well as a magic act. So they are a great place to catch dinner, entertainment, and a sunset if you are in Islamorada.
That being said, their key lime pie was a bit of a let down for me. It is not a traditional key lime pie; it is a frozen key lime pie topped with mango sauce and whipped topping.
View from our table at Lorelei’s.
My Pie Impressions: There was very little lime flavor, and the texture was more like a mousse than pie, perhaps that was because it wasn’t frozen when it was served to me. It was a bit of a let down on my quest for the perfect key lime pie. The atmosphere, waterfront view, and service I received at Lorelei’s, however, was terrific! So skip the key lime pie and enjoy dinner and a sunset here instead.
Tip: No assigned seating here, just show up and pick an empty table.
Best Key Lime Dessert That Wasn’t a Pie
In a category, all their own, are the key lime muffins at Harriette’s Restaurant in Key Largo. These muffins were SO good! They have a delicious tart filling, the muffin itself is fluffy and light, not dense and hockey-puckish like so many muffins can be. It is topped with powdered sugar and tastes oh so good with a cup of coffee.
I know this photo doesn’t show it, but this is the best tasting key lime muffin you’ll ever eat!
I want another one just thinking about it. It might have been one of the best muffins I’ve ever eaten. If I had to choose between a slice of key lime pie or this key lime muffin, I’d choose the muffin. It was that good. Plus, I can make a good key lime pie on my own, I do not know how to make this delectable muffin – but I want to learn!
In addition to Harriette’s amazing muffins, they also have excellent breakfast and coffee. The service was top notch too! I know if I lived in Key Largo, this would be a regular hang out of mine. I also know I would need to run every day to keep the pounds off!
So first things first, if you go to Miami, then you should try Cuban food. Let me just put that out there first off. If you’ve never eaten Cuban food, Versailles Restaurant in Little Havana is a great place to start.
If you happen to be in the area, but don’t want to eat a meal, they also have a bakery adjoining their restaurant where you can purchase all sorts of yummy baked goods made fresh each day. Their key lime pie happens to be really good! It might have tied Kermit’s for my first place position had I been able to do a side by side comparison, although, I still think the flavor of Kermit’s filling is better.
I love palm trees!
My Pie Impressions: It had a fantastic graham cracker crust, it was probably the thickest graham cracker crust I’d ever seen, and the filling had good lime flavor. However, the downside is that the crust may have stolen the show a little from the filling. So that’s where I have to get picky, the crust was so good, that it overpowered the filling just a little.
The food here was also amazing! If you come, I highly recommend–in addition to the key lime pie, that you try their imperial rice dish, you’ll be glad you did!
So there you have it. My choice for the best key lime pie in the Florida Keys is Kermit’s Key West Key Lime Shoppe. However, if you happen to be in Miami, check out the bonus key lime pie option there too.
Also, do not miss eating the muffin at Harriette’s Restaurant. I mean, you still need to try the key lime pie at Kermit’s, but also make Harriette’s a stop. You can buy the muffins to go, but I highly recommend you enjoy it with a cup of coffee, then get another for the road.
Okay, now that I am thoroughly craving a key lime pie, I think I will go on a hunt for a muffin recipe.


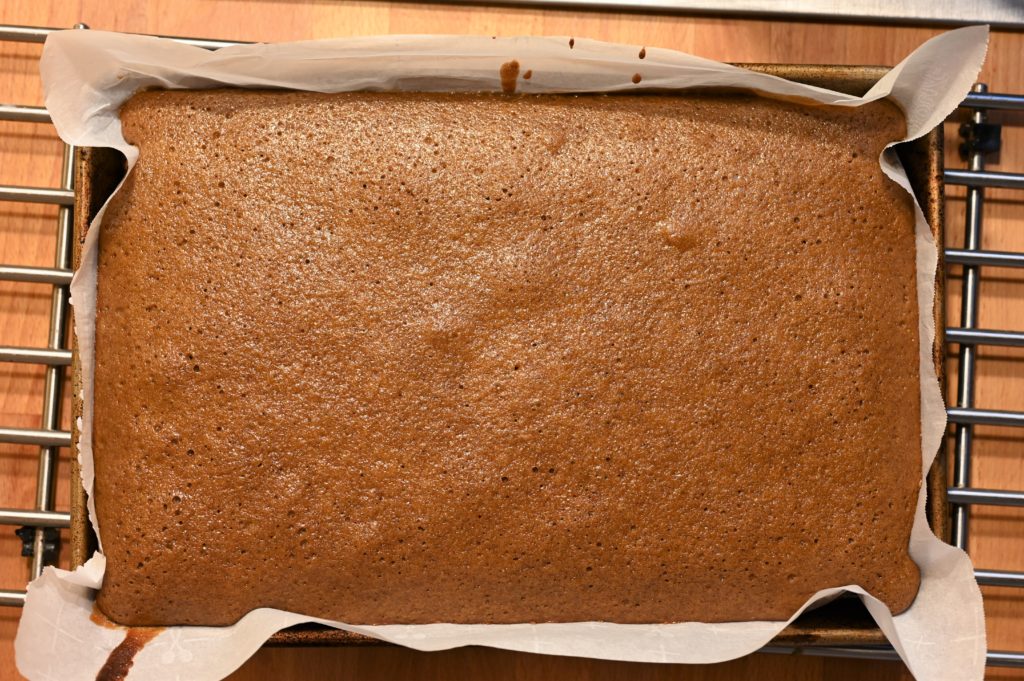


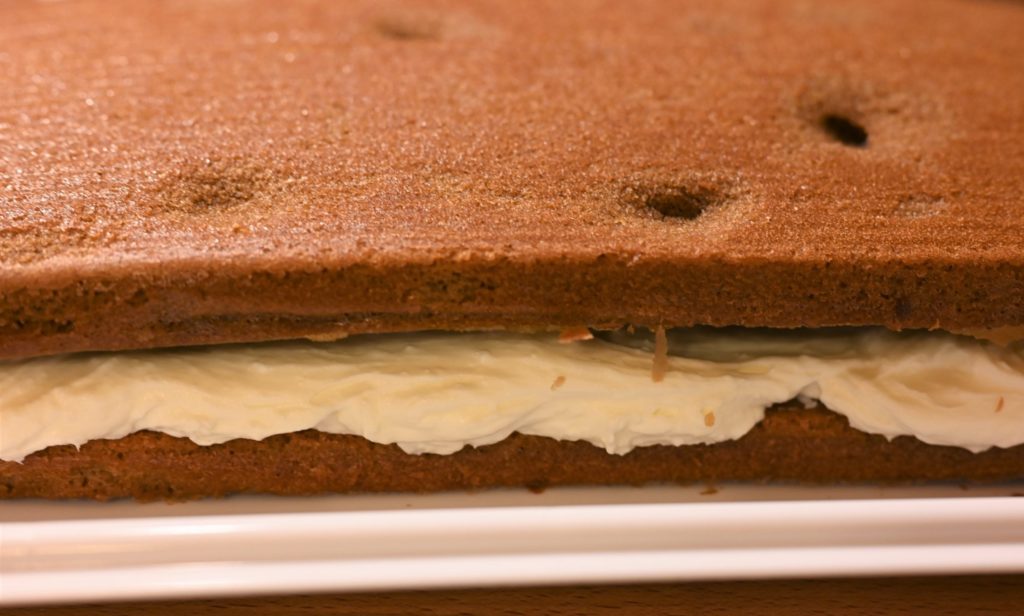
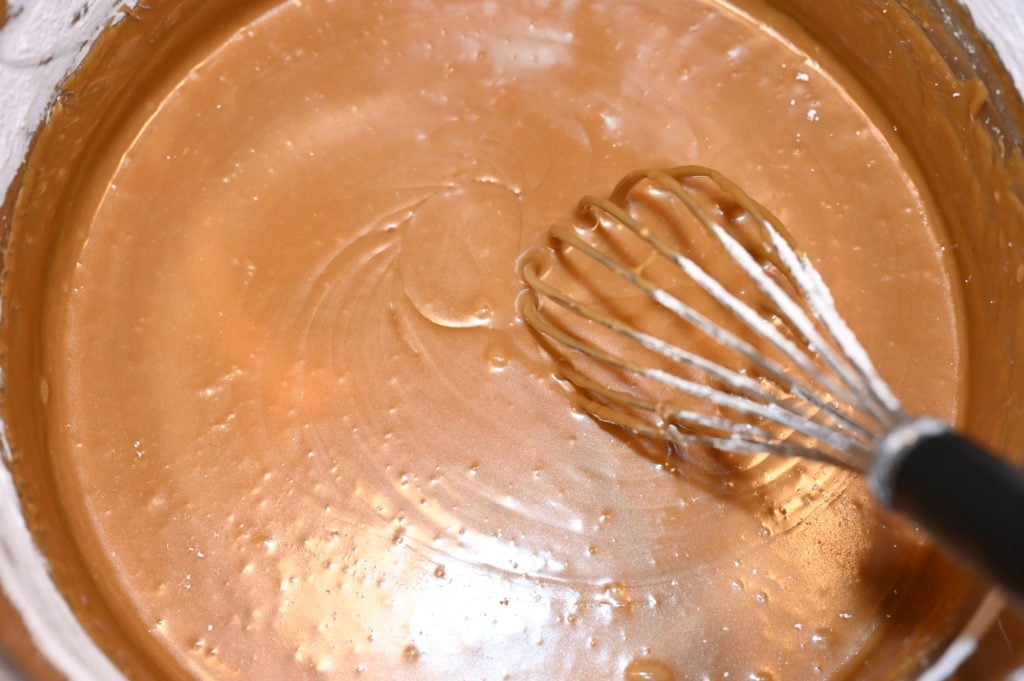

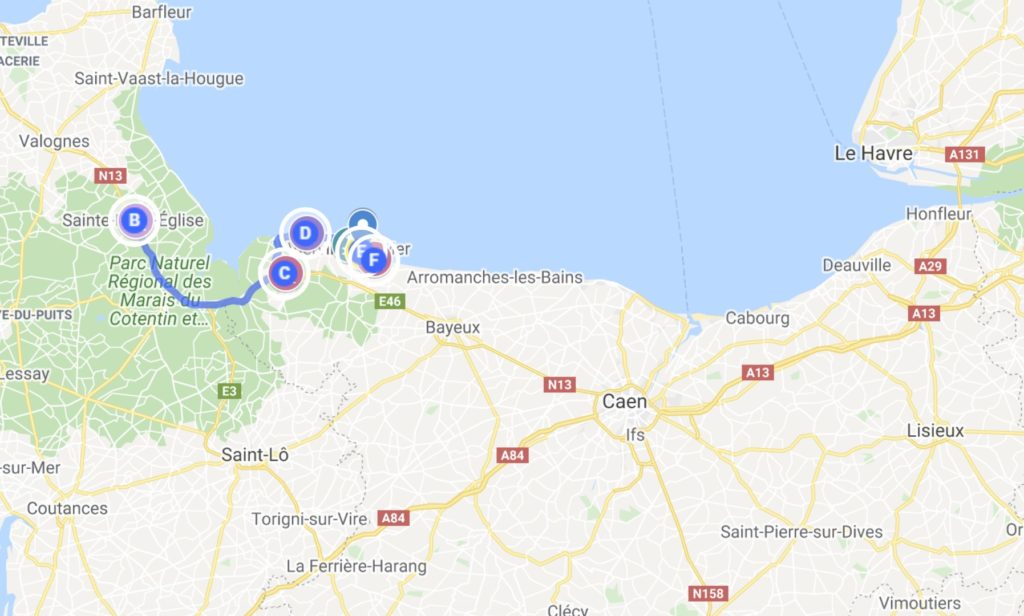

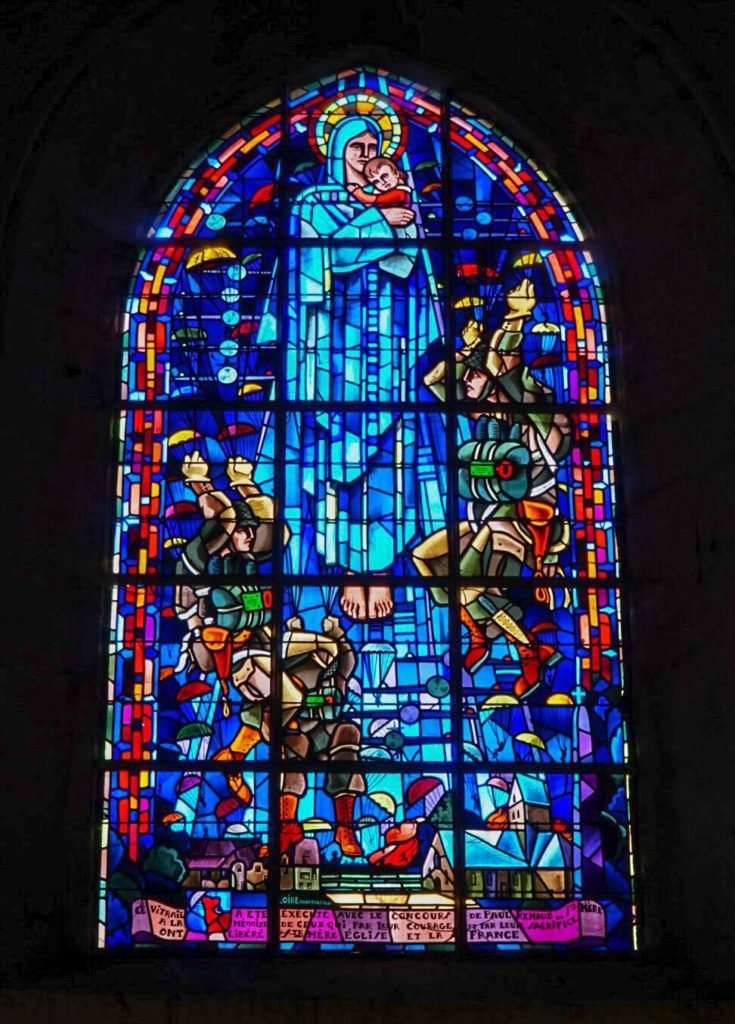
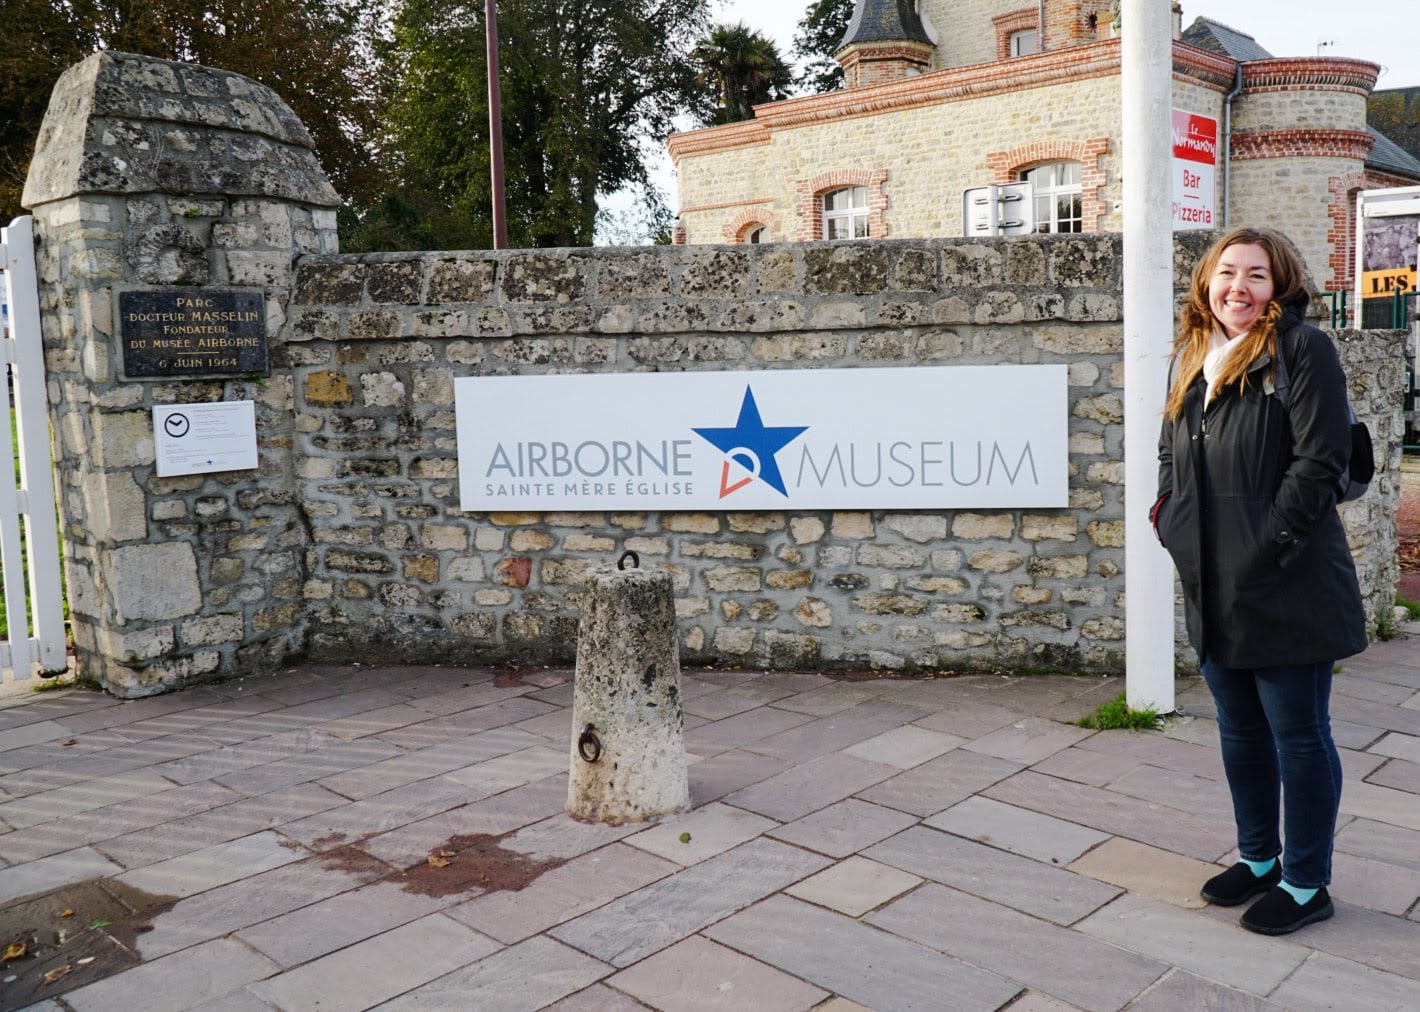

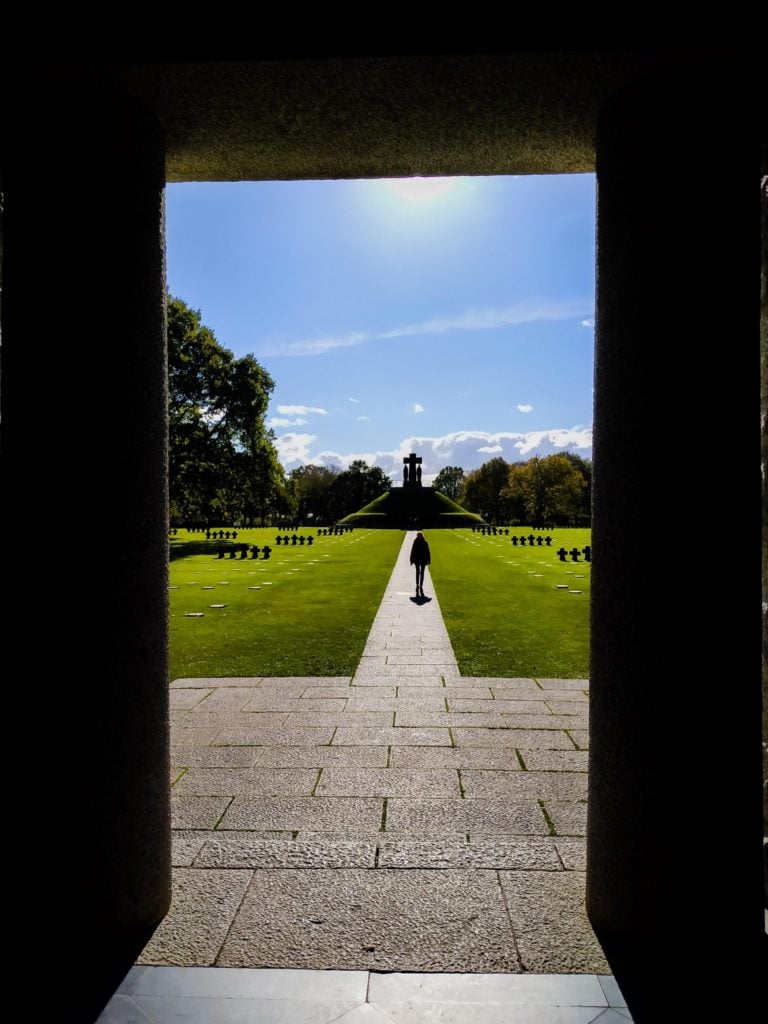
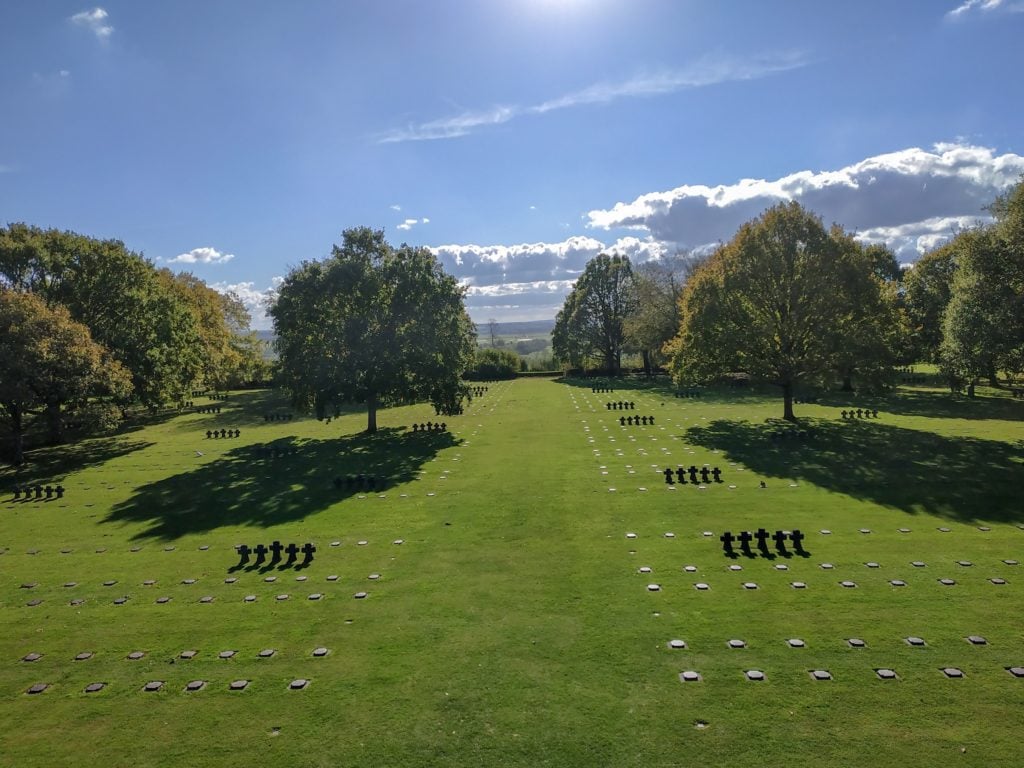
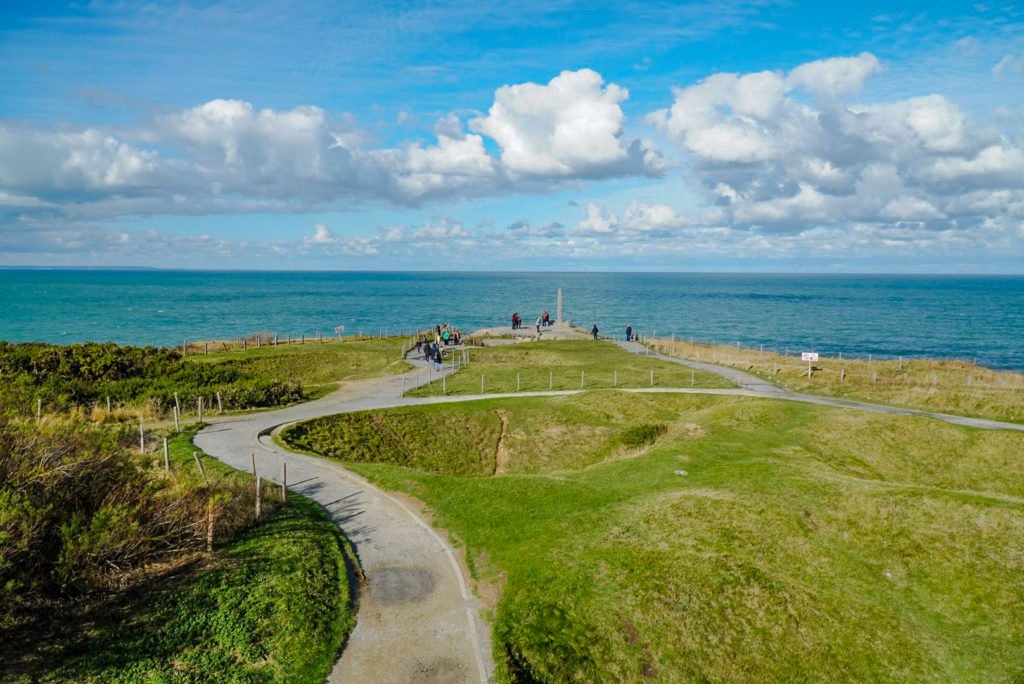
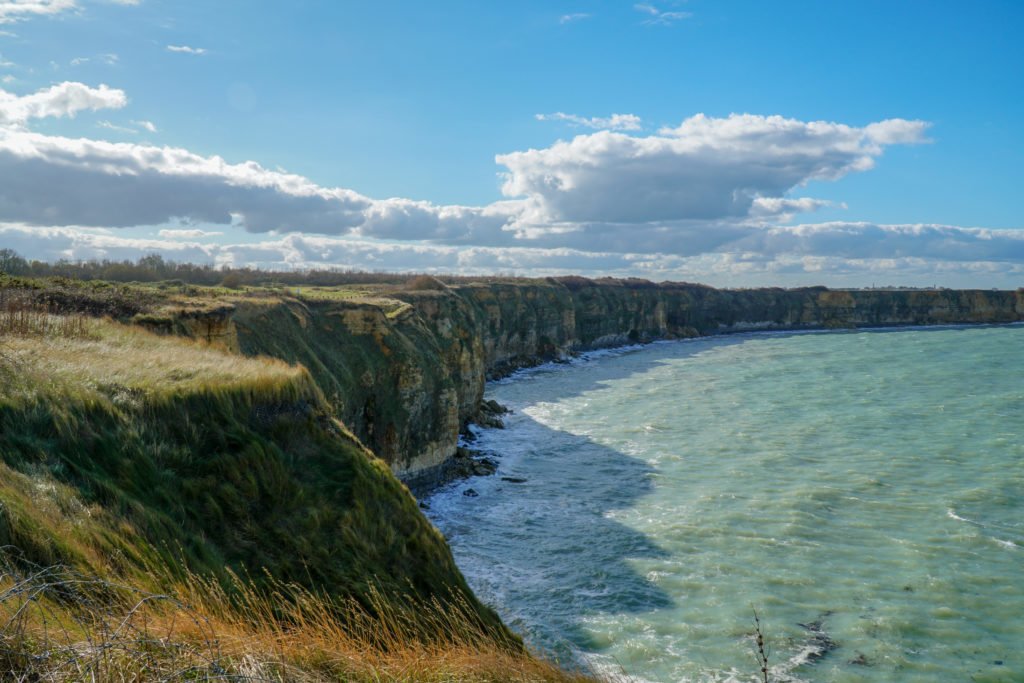
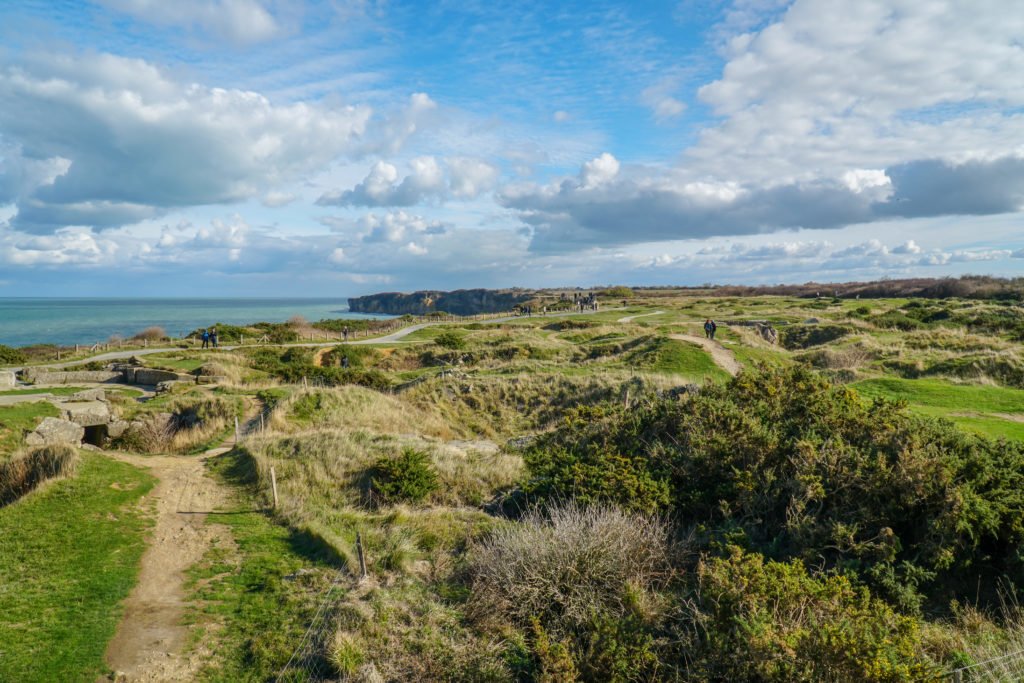
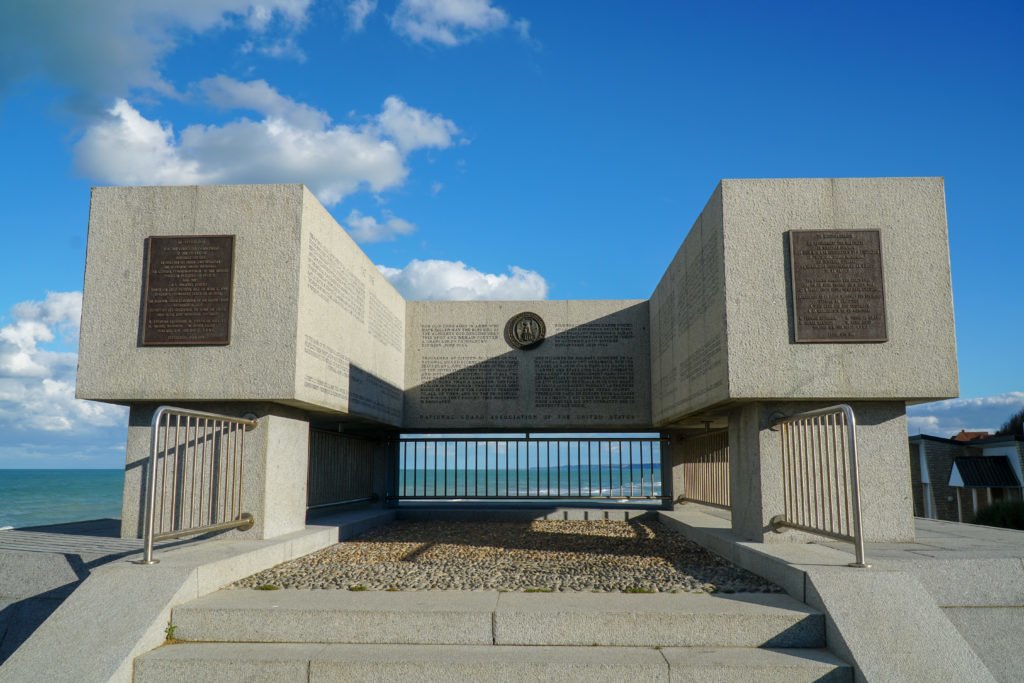
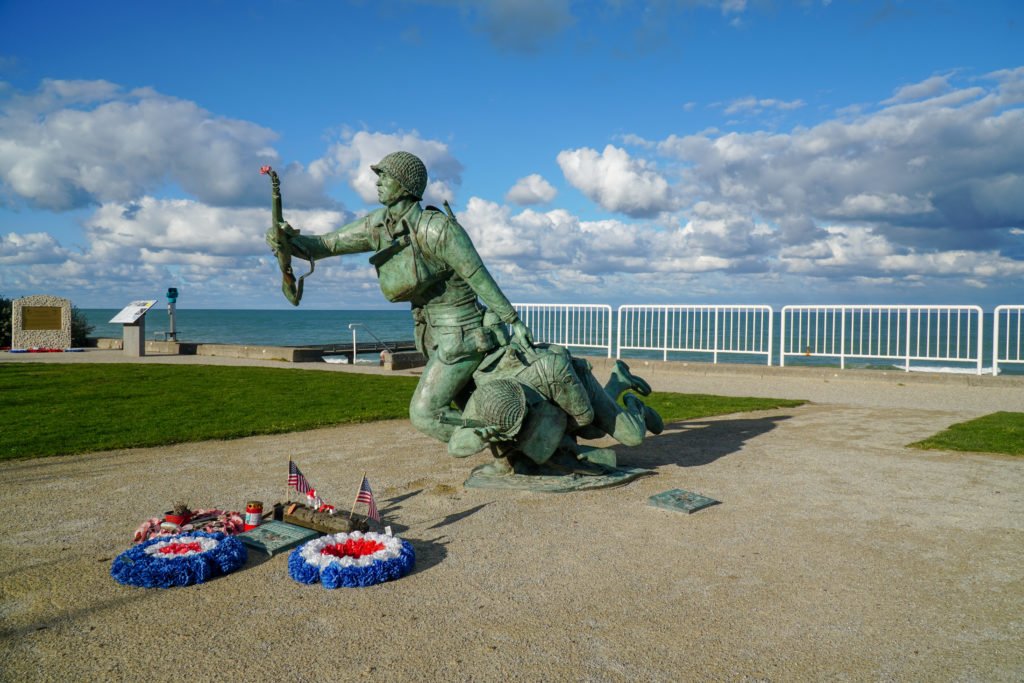
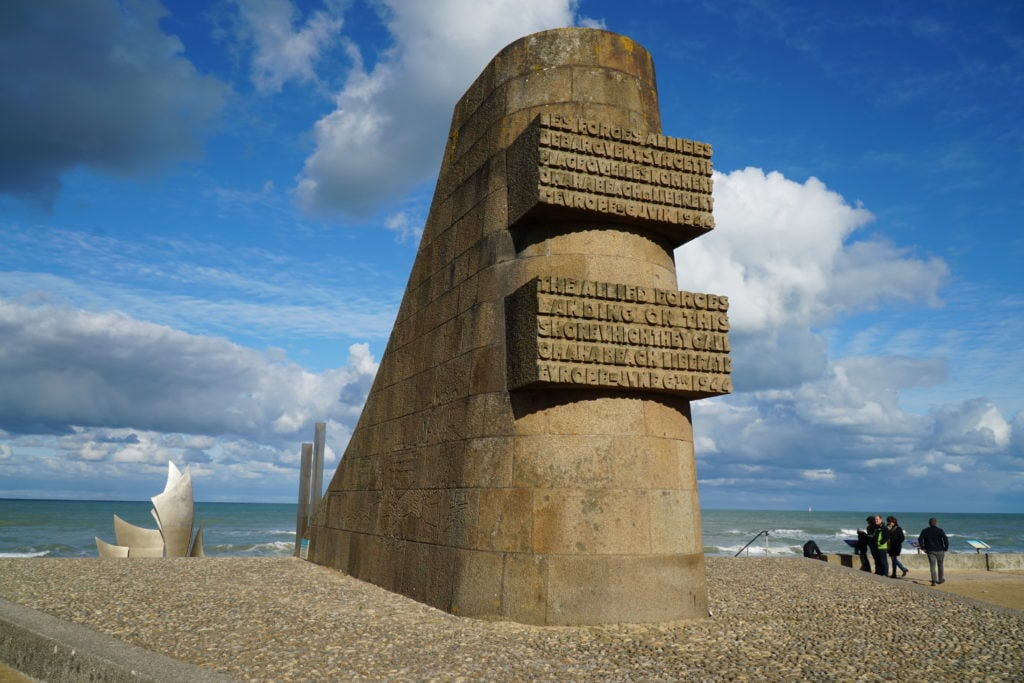
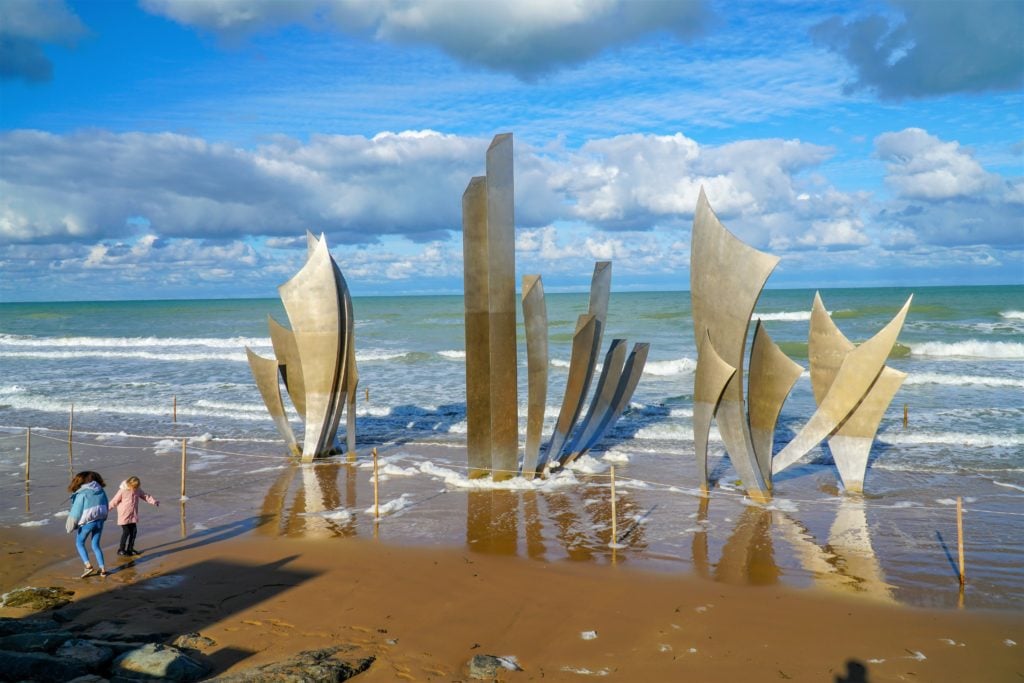


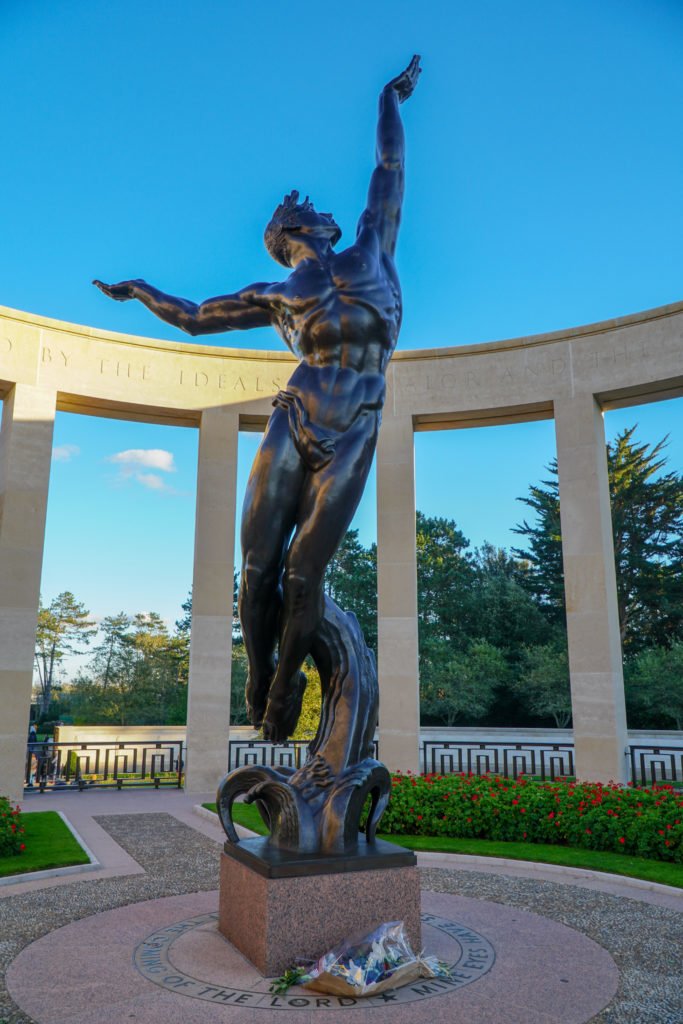


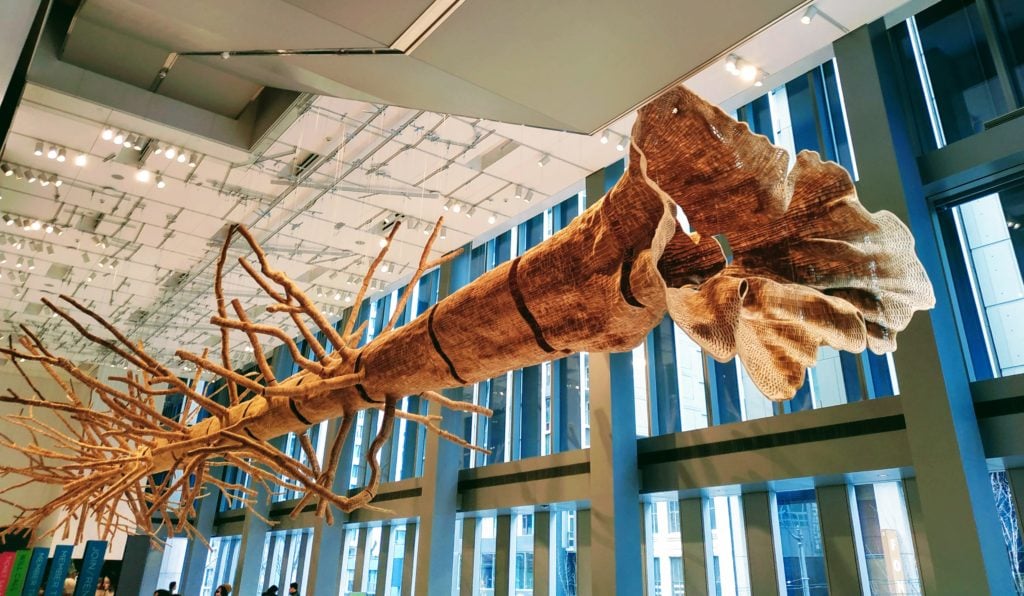 King County Library System offers free museum passes to the following museums: