**Update** The Gnomes Trail has relocated to 25719 Maple Valley Black Diamond Rd SE, Maple Valley, WA 98038. This is also the parking area for the Maple Valley Farmers Market. Read my updated post on the NEW Gnome Trail here.
Facebook
Pinterest
Reddit
Twitter
Email
If you’re looking for a fun, family-friendly hike, then look no further than the Gnomes Trail in Maple Valley, WA.
Explore this whimsical trail located within Henry’s Ridge Open Space. Henry’s Ridge Open Space is a network of trails that extend within the Maple Valley and Ravensdale areas.
The Gnomes Trail is an easy 2-mile roundtrip hike suitable for all ages. The trail is mostly flat and has a very mild elevation gain of only about 150 feet. I saw people of all ages and fitness levels hiking this trail. So if you are new to hiking or have younger kids, the Gnomes Trail is a great place to start.
Getting to the Gnomes Trail
There are two starting points for the Gnomes Trail in Maple Valley.
279th Street Park: Maple Ridge Way SE, Maple Valley, WA 98038
Henry’s Ridge Open Space: 253rd PI SE, Maple Valley, WA 98038
I chose to start my hike at the 279th Street Park. However, you can also start the hike from the Henry’s Ridge Open Space trailhead off of SE 281st Way and 253rd Place SE.
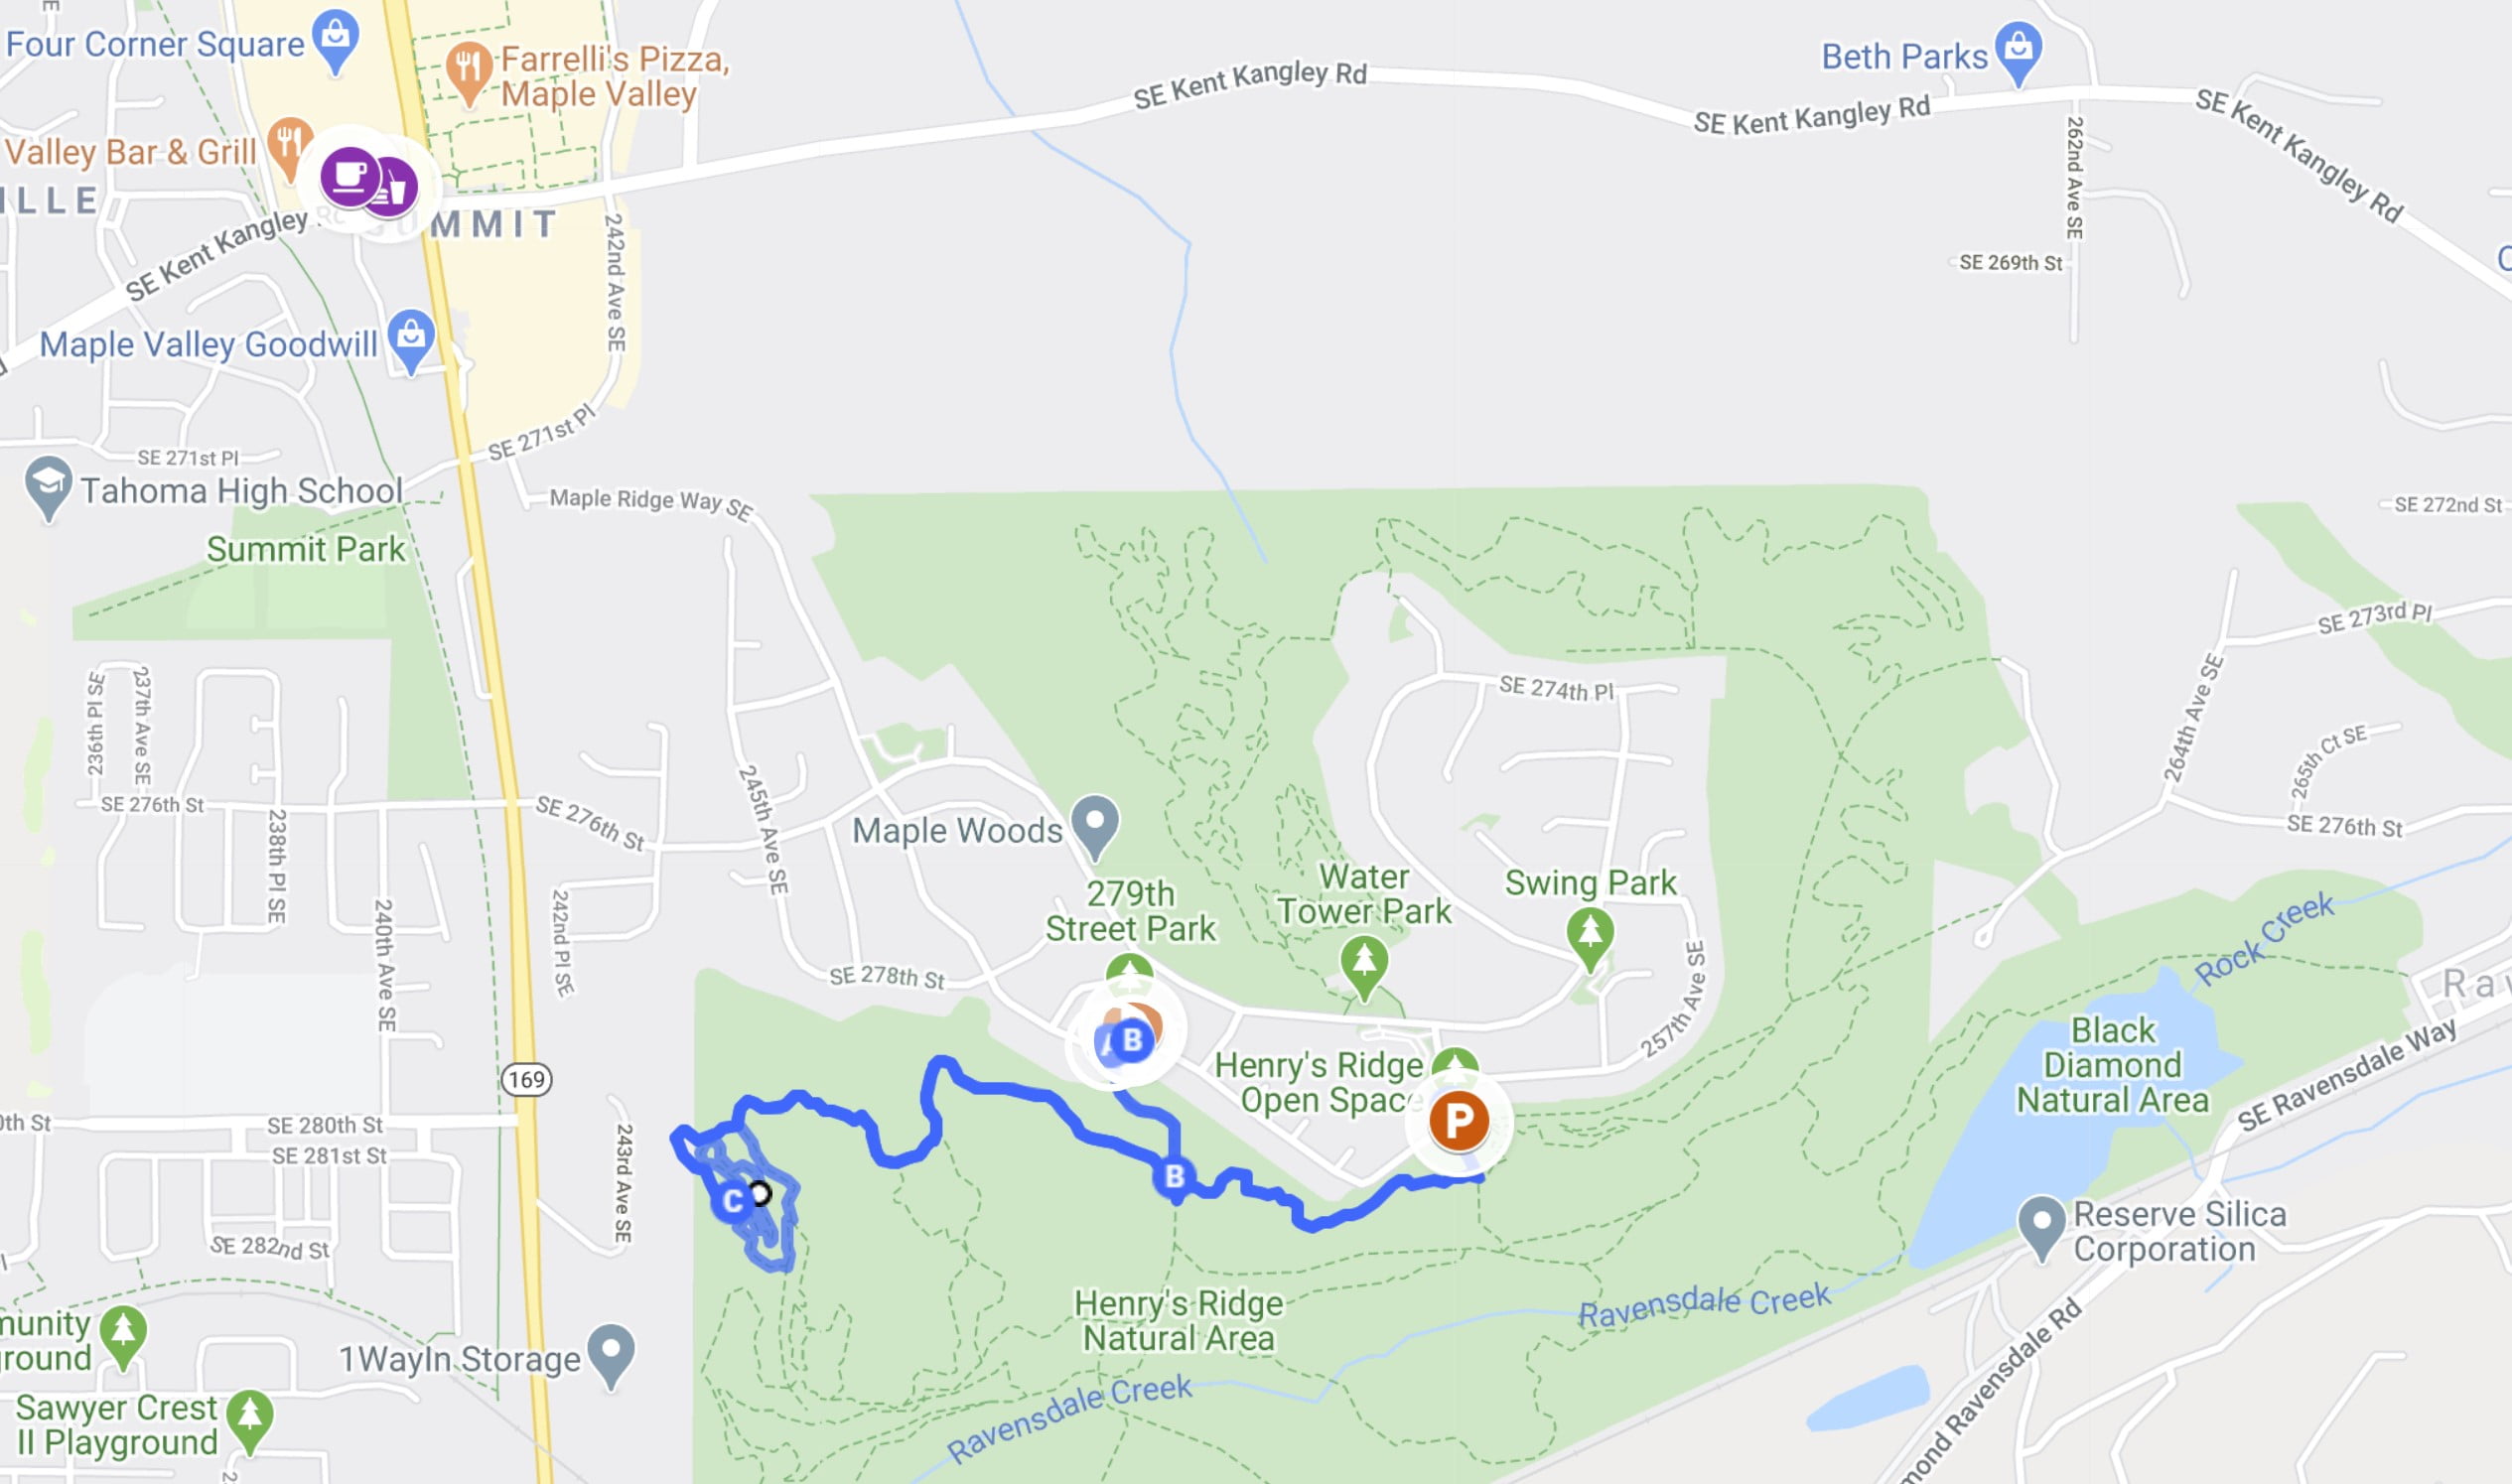
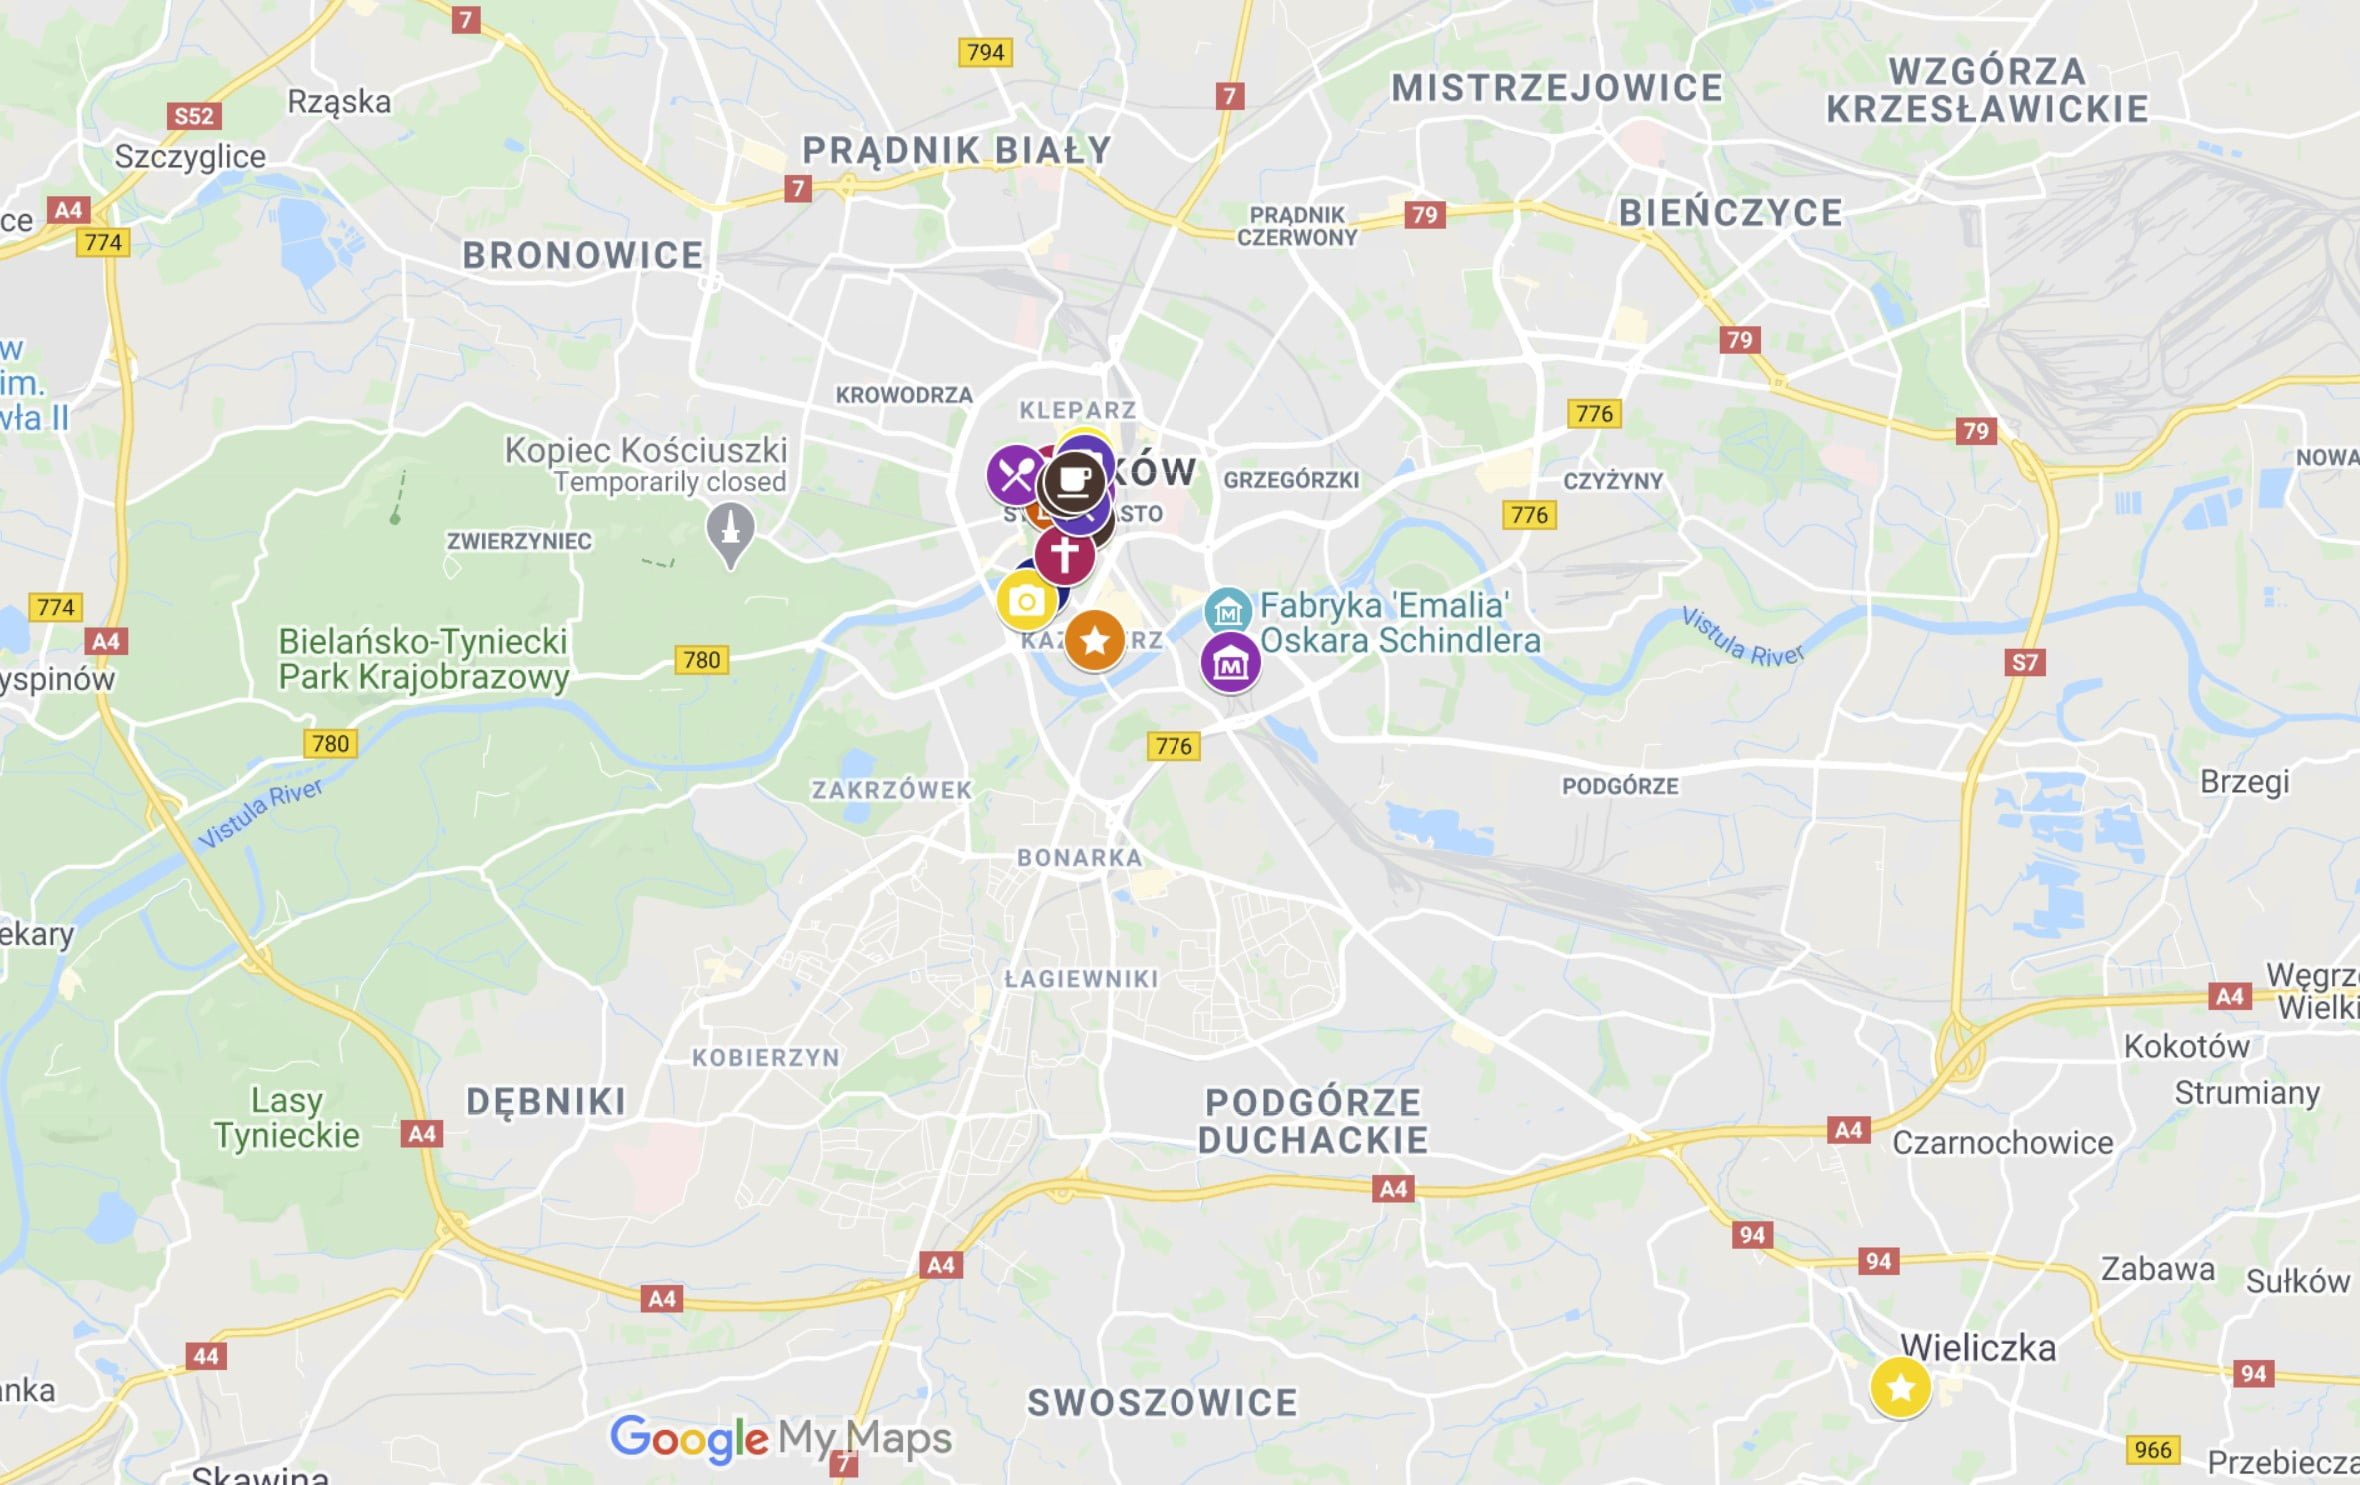
Click on the map and see the two trailhead parking areas as well as the mapped trail routes. I recommend downloading the Google Map for offline use before leaving for your hike.
Google Maps will give you walking directions from whichever parking area you choose to start the hike. Google Maps displays the trail and shows you which path to take. You can refer to the map all along the way to make sure you’re on the right track.
Parking for the Gnomes Trail
Whether you choose to start from the 279th Street Park or Henry’s Ridge Open Space, just know that there is only street parking at both trailheads.
I found the 279th Street Park to have less traffic and more parking areas than at the trailhead for Henry’s Ridge Open Space. You can always go to one, and if you can’t find parking, then try the next trailhead. Refer to the above map for directions.
Sharing the Trail
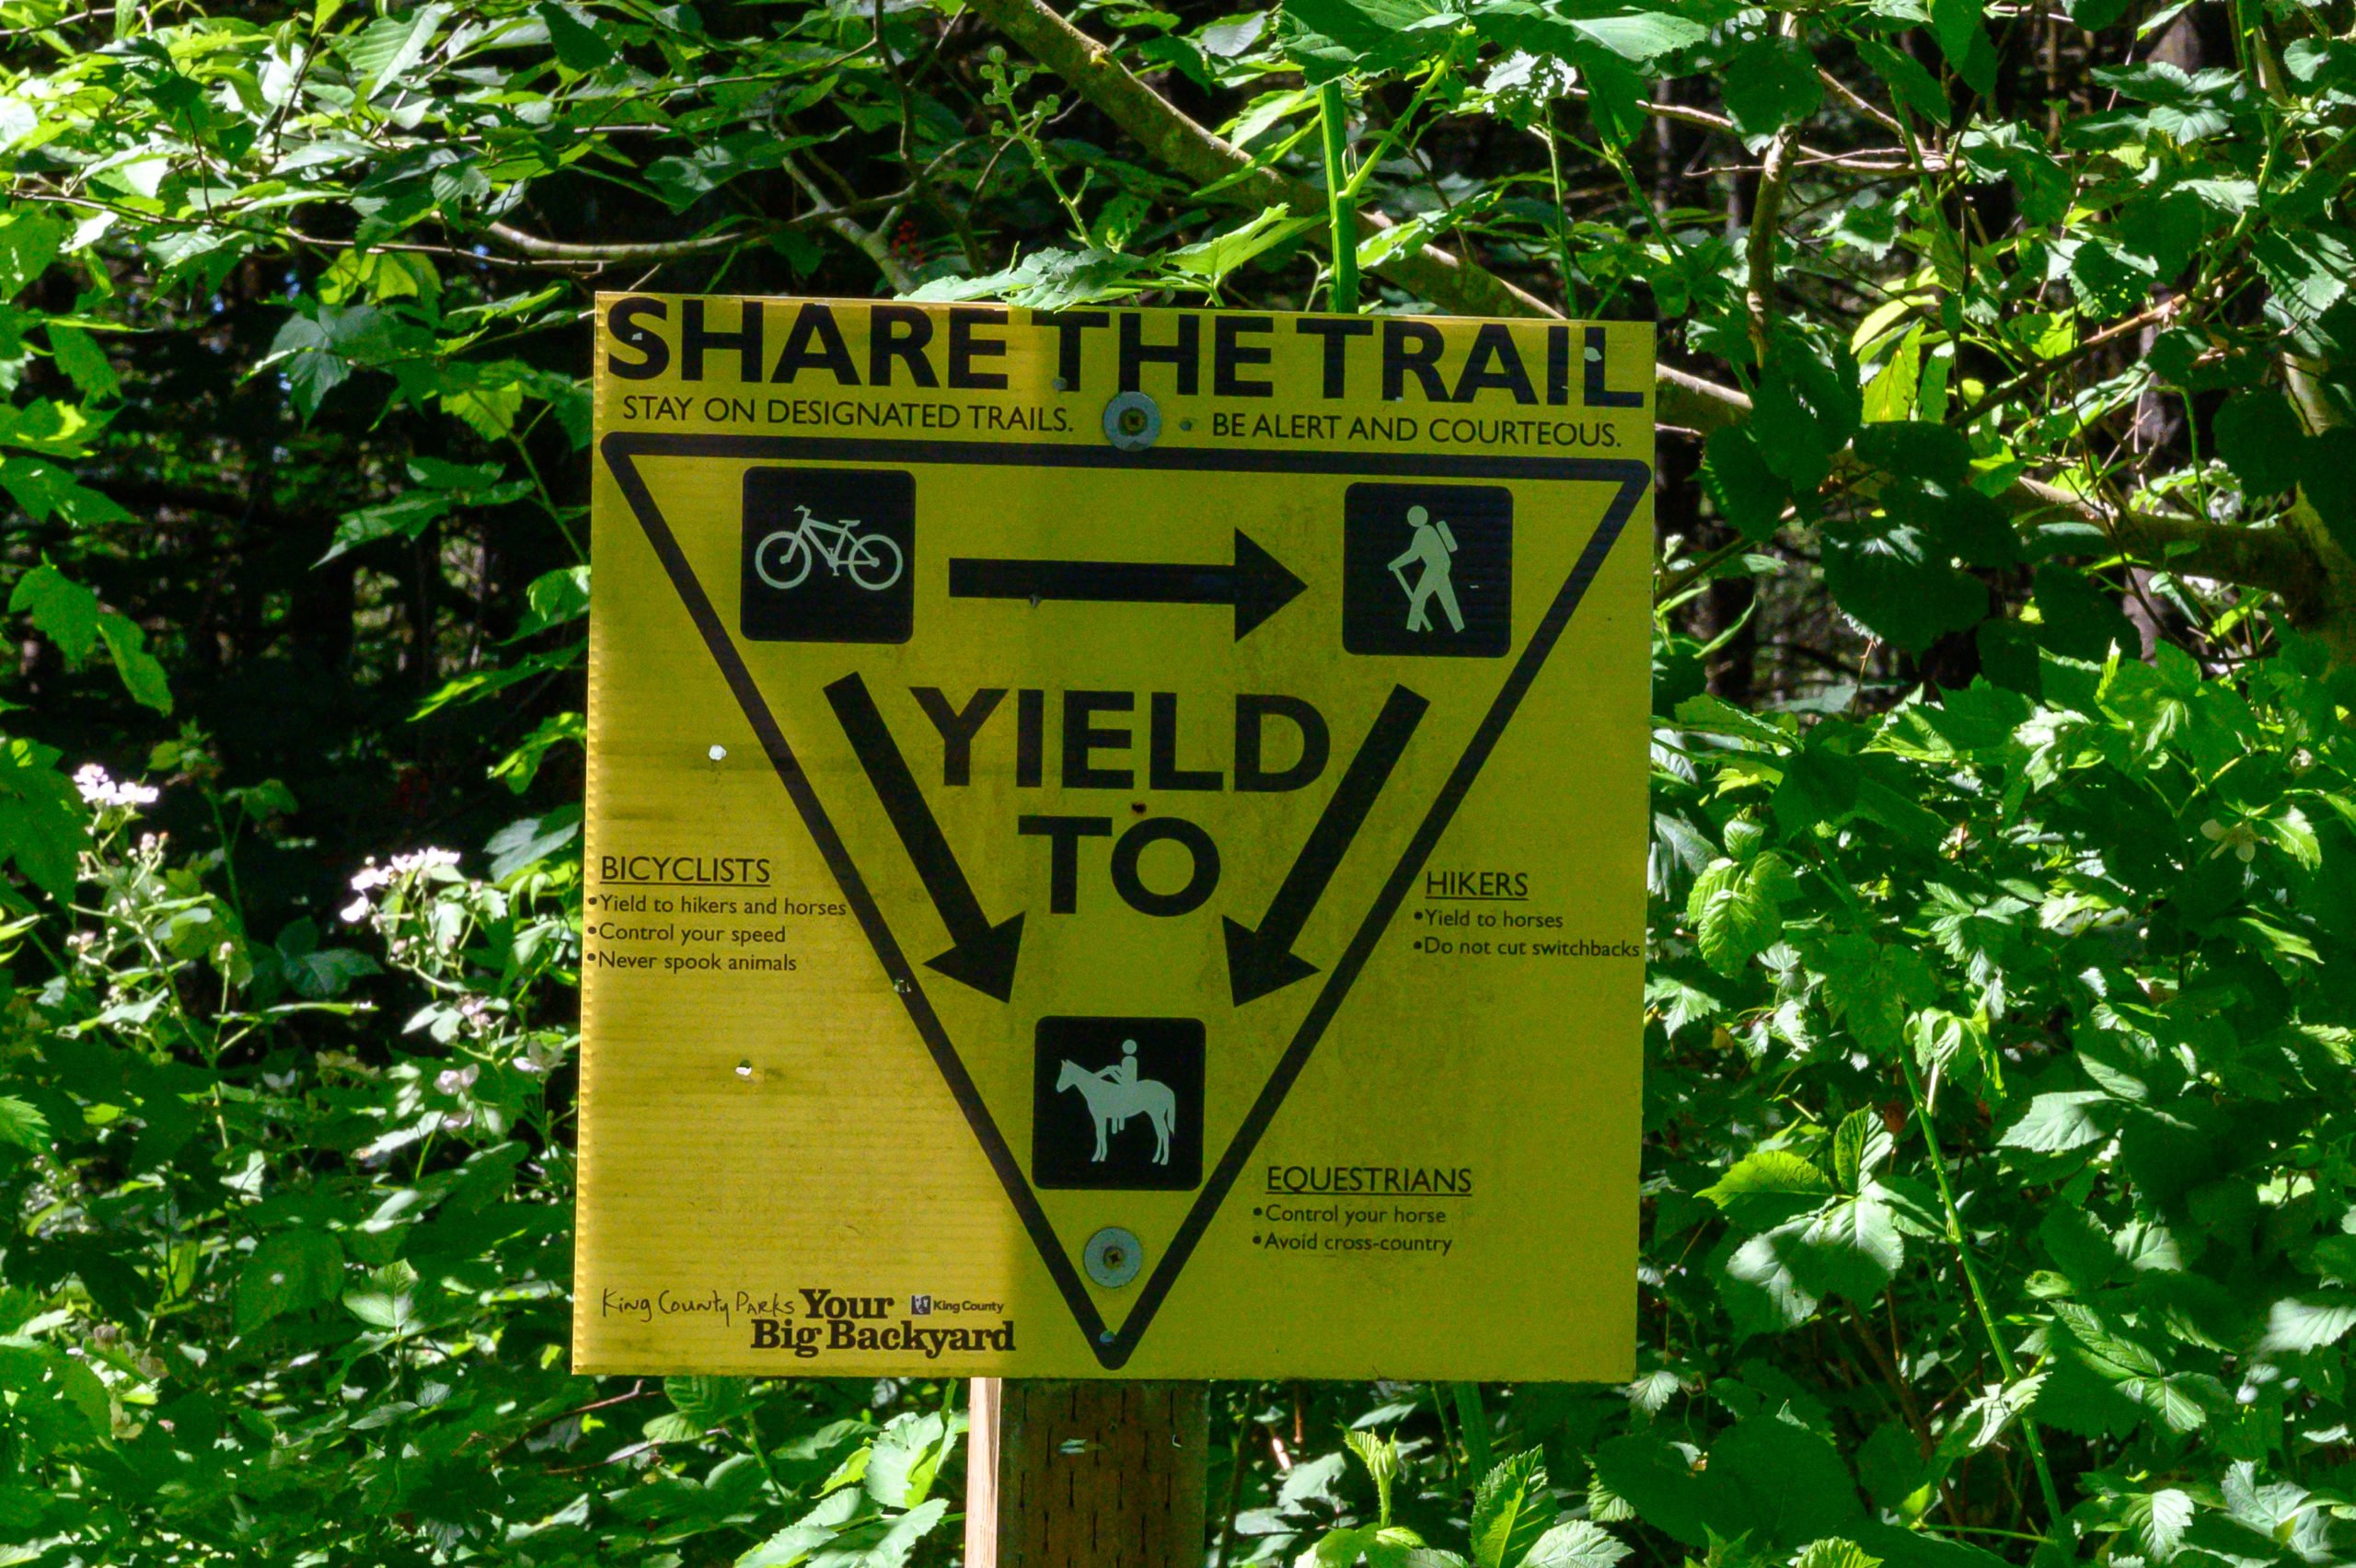
The Henry Ridge Open Space is a multi-use trail system. This means that you are sharing the trails within this natural space with bicyclists, horses, and other hikers. So yield to horses and move over for the bicyclists. I know the sign says bicyclists should yield to both hikers and horses, yet, I find as a hiker it is easiest for me to move out of the way.
Hiking the Gnomes Trail in Maple Valley, WA
I started my hike from the 279th Street Park, but if you choose to start from the Henry Ridge Open Space trailhead, the directions are the same once you reach the Once Upon a Time trail.
It’s important to note that not all of the trails are clearly labeled, so use this guide to help you navigate. Additionally, download an offline map from Google Maps for directions before leaving home.
Route 66 and the Once Upon a Time trail (left). You make a left onto the OUAT trail if coming from Stinger or a sharp right if coming from the 279th Park.
Starting from the Henry Ridge Open Space Trailhead
You’ll access the trailhead next to the road and continue straight (pass the Old Mike trail) until you reach the Stinger trail where you’ll make a right. Follow Stinger until you reach a wide gravel trail, this is Route 66, turn right on to the path. In about 20 feet, you’ll cross the road and make a left onto the Once Upon a Time trail (OUAT). From here the directions are the same as if you were starting from the 279th Street Park.
Starting from the 279th Street Park
Park alongside the 279th Street Park and then cross the road to the trailhead. This gravel path is called Route 66 on the map.
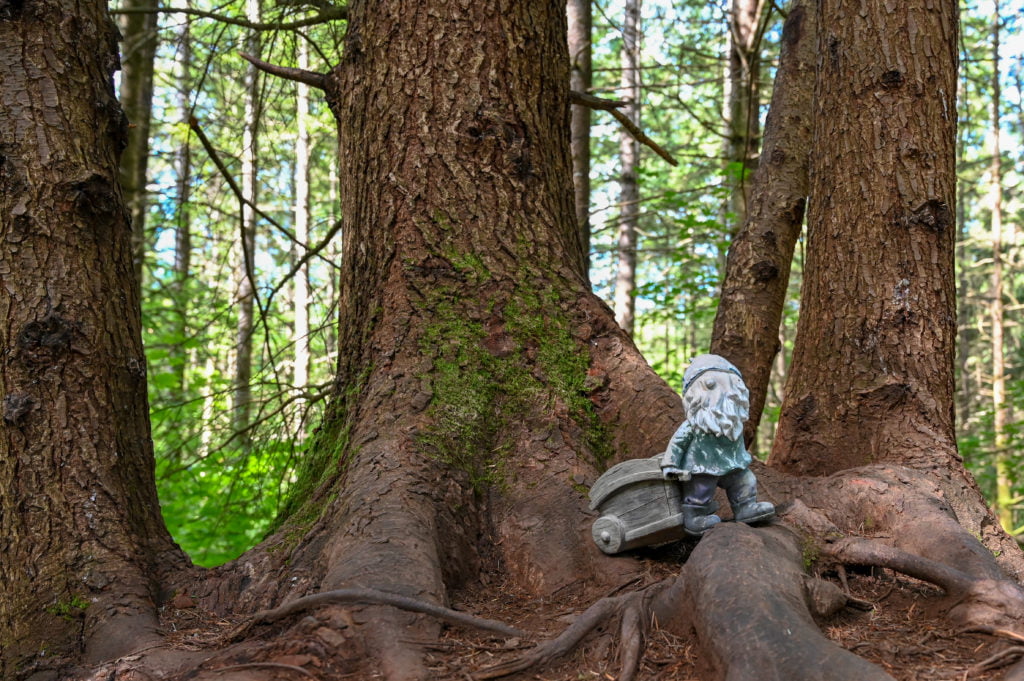
Follow Route 66 for less than a quarter-mile before making a sharp right onto the Once Upon a Time trail (OUAT). You’ll spot your first gnome shortly after starting this trail. I think he’s there to let you know you’re heading the right way.
This is the first gnome to greet you on your hike.
This portion of the hike is a dirt trail with rocks and roots here and there, but ample space to stop on the side to let people pass when needed. Enjoy the forest with its moss-covered trees and stumps left from larger trees that once grew there.
I liked this tree growing over the old stump.
The Derailer Trail and Two Choices
Eventually, you’ll come to a fork in the path, and if you look right, you’ll see a diamond-shaped sign and a sign above it that reads “Derailer.” You can go right or left here.
If you go right on the Derailer trail, you will follow the path as it loops around and links up with the Lorax trail. Make a right onto the Lorax trail. (Skip to the asterisk (*) past the directions for making a left to continue.) (The instructions from that point on are the same whether you make a right or left at the Derailer fork.)
If you go left at the fork where you see the Derailer trail sign, you will continue a short way down the trail before reaching another fork in the path. Make a right here to continue on the OUAT trail (Bad Wolf is to the left). In about 250 feet you’ll make another slight right onto the Lorax trail (I don’t recall seeing a sign). You’ll continue down the Lorax trail and soon pass the fork for the Derailer loop, just stay to the left.
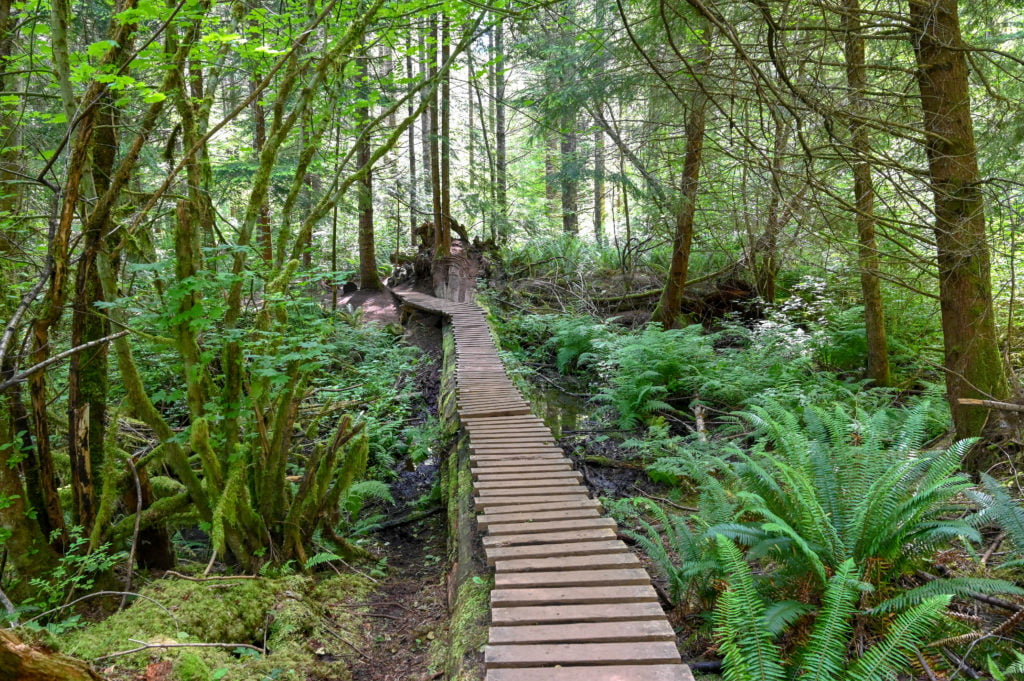
*Continue along the trail, and soon you reach a footbridge made out of a fallen tree. There are two bridges, I stuck with the larger one on the left, but both link you back to the same trail.
Cross the bridge and follow the path as it curves left; shortly up ahead, you’ll see the welcome sign for the Gnomes trail.
The Gnomes Trail
Take the Gnomes trail on the right and stay right to follow the trail’s loop. The Gnomes trail loop is around 0.5 miles.
At the entrance to the Gnomes trail, you’ll find a welcome area and a trailhead sign. Continue up the path enjoying the gnomes scattered everywhere. Make sure to look up in the trees and under shrubs. You could make it a game for the kids to see how many gnomes they can find.
Speaking of games, there is also a geocache hidden not too far from the entrance to the Gnomes trail. If you’ve never been geocaching, it is a lot of fun for kids and adults alike! You can download the app and look up geocaches near you to find more.
Click on the photos below to view a larger image. These are some of the signs that greet you near the entrance of the trail.
The Gnomes trail loop is a series of switchbacks curving right and left and then right and left again as it winds its way up, and then down, and then back up before looping you down and around to the main entrance of the Gnomes trail.
You see a huge variety of gnomes in the first part of the trail, there are even a few fairies, dwarfs, and I also spotted a troll. The gnomes appear to enjoy many of the same activities we do, such as camping, sports, gardening, and so on. You’ll have fun spotting all the unique gnomes along the way.
Here are some of the ones I found during my hike. Make sure to visit and discover your favorites too!
After the first series of switchbacks, you find yourself back near the main entrance, however, the trail curves right here and begins climbing up again. The gnomes will appear less and less as you continue along this portion of the trail.
You’ll pass another trail junction, make sure to stay left, and soon you’ll come to a “T” in the path where you’ll make a left onto what is called the Ogre trail. Soon you’ll see a fork on the right for the Ogre trail but continue straight and don’t turn right where you see the sign that reads “Ogre.”
You’re looping back, so you’ll want to stay left, and soon you will be back at the main entrance to the Gnomes trail. From this point on, you backtrack the way you came to return to your parking spot.
Useful Information to Know
There are no restrooms at either the parking areas/trailheads or anywhere along the trail. So make sure to take a pitstop before you come.
The hike is a little over 2 miles roundtrip, and it took me a little over an hour to hike it. If you have small kids or a large group, plan for it to take 1.5 to 2 hours for the roundtrip hike.
The Gnomes trail is an easy hike with minimal elevation gain, but it is narrow in spots with rocks and roots and overgrown bushes along the way. So wear the appropriate shoes, and if you have any mobility issues, you may want to bring a hiking stick.
The trail is too narrow in most spots to accommodate a stroller, so plan accordingly.
Dogs are allowed, but make sure to pack your poo out as there are no garbages along the trail. This goes for all trash. This trail system is within a neighborhood, and we must be respectful of the community and the trails.
Bring bug spray! The mosquitos were quite bad on the trails, and I sadly forgot to apply bug spray before leaving.
Download an offline map through Google maps of the area, and Google can give you walking directions for the trail. You can also use any favorite maps apps you might have, such as AllTrails or BackCountry Navigator, if you want to track your hike.
The Henry’s Ridge Open Space trails are designed in loops. So don’t panic if you do take a wrong path as it will link up with another one. There are multiple ways to get to the Gnomes Trail. I am only sharing a couple of options.
Recommendations for a Post Hike Treat
If you’d like something refreshing after your hike, why not head to Dairy Queen for a delicious ice cream treat or perhaps go through Gravity Coffee’s drive-through for a little pick-me-up for the ride home. I’ve marked both of these on the map at the beginning of this post. There are a ton of other options for food in the Maple Valley/Four Corners area if you want to grab a bite to eat.
Dairy Queen 23924 SE Kent Kangley Rd, Maple Valley, WA 98038
Gravity Coffee 23912 SE Kent Kangley Rd, Maple Valley, WA 98038
I’d love to hear from you if you have hiked the Gnomes trail and what you thought about it. If you have any questions, please feel free to send me an email or post them in the comments section below.
For more hikes in Washington read the following posts:
I love waterfalls! I’m not sure what it is about water cascading down rocks and over cliffs, but I can’t seem to get enough of it! Thankfully, here in the Pacific Northwest, we have no shortage of waterfalls. Snoqualmie Falls and Franklin Falls are a couple of my favorites, just a short drive from Seattle.
I especially love hiking to see waterfalls. The waterfalls are my reward at the end of the trail. You know, sort of like the pot of gold at the end of the rainbow, but without the actual gold. And speaking of rainbows, waterfalls are great places to see those too!
As a photographer, I enjoy capturing a waterfall’s beauty to share with others who might not get a chance to see it in person, or better yet, to inspire others to see it themselves! Waterfall photography is a skill I am still learning, but I wanted to pass along some tips I found especially useful when just beginning. Use the tips in this post as a foundation for developing your skills, and most of all, have fun!
What Kind of Camera Do You Need
You can use any camera to photograph waterfalls. However, if your camera doesn’t allow you to adjust your settings manually, you will be limited in the type of photograph you can get.
So in this post, I’m going to assume you have a DSLR camera, mirrorless camera, or some type of digital camera that allows you to manually change your ISO setting, aperture, and shutter speed.
I know some smartphones allow you to adjust some of these settings, so even if all you have is a smartphone or point-and-shoot camera, you can still apply many of these tips using the camera you currently own. I think getting out and using what you have now is better than not getting out at all.
What Kind of Lens Should You Use
I recommend you start with a wide-angle lens. I like to use my 24mm to 70mm zoom lens as it allows me a little flexibility on zooming in and cropping areas of my scene to achieve a different look.
If you have fixed lenses, then bring a wide-angle lens and also a telephoto lens and use both to see what you can capture with each. While it may seem like you should always try to photograph the entire waterfall, often you will find by zooming in or using a telephoto lens you can highlight one unique area of the waterfall that might be overlooked with a wide-angle shot.
Remember, you should have fun when you’re out photographing the world. Develop your eye, learn new techniques, but always have fun while doing it.
Additional Gear to Bring
Other gear you might want to bring would be a backpack for your camera and additional lenses, plus any snacks or water you might want. Another item that can be useful depending on the temperature you’re shooting in is a pair of gloves. Preferably ones that allow you to touch your smart phone or camera screen without removing them. I’ll also go over other gear you’ll want, such as filters, lens cloth, and waterproof clothing in the tips below.
12 Tips for Photographing Waterfalls
#1 Bring a Sturdy Tripod
A good tripod is necessary for photographing waterfalls, especially if you want to try to blur the water’s movement, rather than stop it. When using a tripod, you can slow your shutter speed down and capture the silky motion of the cascading water.
One other tip regarding the use of a tripod is to be mindful of where you place it. If you put it in a stream or at the edge of the waterfall’s flow, the vibrations from the water flowing around your tripod’s legs can cause blurry images. So keep that in mind when choosing where to set up your shot.
#2 Wear Water-Resistant Clothing
You will get wet while photographing waterfalls, so make sure to wear clothing that is water-resistant or waterproof. A good rain jacket and waterproof shoes will go along way in keeping you comfortable while photographing waterfalls.
#3 Pack a Lens Cloth
This one is also essential to remember to bring. Often, you will be close to the waterfalls you are photographing, and a lens cloth will be a lifesaver! Trust me, when your lens is covered in spray from the waterfall, it makes it hard to take that photo!
You don’t want to scratch your lens either by using your shirt, so it’s nice to have a lens cloth tucked in your pocket so you can easily pull it out whenever you need to wipe your lens off.
#4 Set Your ISO to the Lowest Setting
To capture the flow of water and not have the highlights in the water completely blown out, you need to set your ISO at the lowest setting on your camera. This will probably be around ISO 100, depending on your camera’s settings. You may even want to underdevelop your photos a little and then correct the exposure in post-processing to get the best results.
Where you might want a higher ISO is if you’re working in low lighting conditions, and you’re trying to freeze the water’s motion. Then you might want to use ISO 200 or ISO 400.
#5 Set Your Aperture to Capture the Details
In addition to setting your ISO to the lowest setting, you’ll also want a smaller aperture (also known as an f-stop). The aperture controls the amount of light reaching your camera’s sensor. A small aperture allows less light in but will enable you to capture more of the detail of your waterfall and surrounding scenery. Whereas, the opposite is true when using a wide aperture. A wide aperture allows more light in but has less of the scene in focus.
The higher the f-stop number (f/22), the smaller the opening and the least amount of light reaching the sensor. The lower the aperture or f-stop (f/2.8), the larger the opening and the more light entering your camera’s sensor. I suggest playing around with f-stops starting at f/11 through f/22 (or up to the highest f-stop your camera allows).
Sometimes you may want to have a wider aperture like an f/5.6 depending on what part of the scene you want in focus(or out of focus) or if you need to allow more light in to freeze the water’s motion. Other times, to achieve a longer exposure time (slow shutter speed), you’ll need a smaller aperture to let in less light. The more you experiment with your camera’s settings, the more you’ll learn and improve your photography skills.
#6 Setting Your Shutter Speed
You can adjust the shutter speed to create different effects when photographing waterfalls. You can freeze the motion of the water with higher shutter speeds, or you can slow it down and create a blurred, silky movement with longer exposure times. I recommend trying different shutter speeds to see which effect you prefer. There is no perfect shutter speed or aperture; it all depends on the look you want.
Experiment with your settings to see which effect you like the best. If, for example, you want to try freezing the motion of the water than start at a shutter speed of 1/200, this will partially freeze the movement, then try 1/500 to freeze the water’s action completely. You may need to use a larger aperture and increase your ISO to achieve this depending on the light in which you’re shooting.
#7 Bring the Right Filters
Two types of filters are handy to have when photographing waterfalls, polarizing filters, and a neutral density (ND) filter. The polarizing filter is useful when you’ve got a pool of water below your waterfall, and you want to capture what’s beneath the surface. The polarizing filter will reduce the glare and reflections on the water’s surface.
ND filters reduce the amount of light coming into the camera’s sensor. They make your camera think it’s darker than it is. You can purchase them in varying strengths depending on how much light you want to block. Although not a requirement for photographing waterfalls, they help you achieve the lower shutter speeds you need to capture the motion of the waterfall without blowing out the highlights.
If you think you’ll photograph waterfalls regularly, then consider purchasing one. All of the images I’ve shown in this article were shot without an ND filter. However, I also shot early in the morning, in a wooded landscape shaded from the sun. This is a good set to get started with, however if you’re looking for something a little less expensive you can always buy one to start with and then add on from there. Make sure you purchase the correct filter size to match your lens size.
You would not be able to achieve the low shutter speeds and retain the details in the waterfall if this were a bright sunny scene. The highlights will be completely blown out. ND filters are necessary when shooting waterfalls on a bright sunny day if you wish to slow the water’s motion.
#8 Get a Shutter Release Cord
Another helpful tool is a remote shutter release cord. They are useful when working with very low shutter speeds, as any amount of movement can blur your image. So by using a shutter release cord, you reduce the risk of camera shake when pressing down the shutter release button. This is the one I use with my Nikon and ask you can see they’re relatively inexpensive.
All of the images in this post were taken without a shutter release cord. So, you can certainly photograph waterfalls without them, but they are convenient to have and not all that expensive either. Plus, if you have any interest in astrophotography or night photography, you’ll definitely want one!
#9 Try Different Angles & Viewpoints
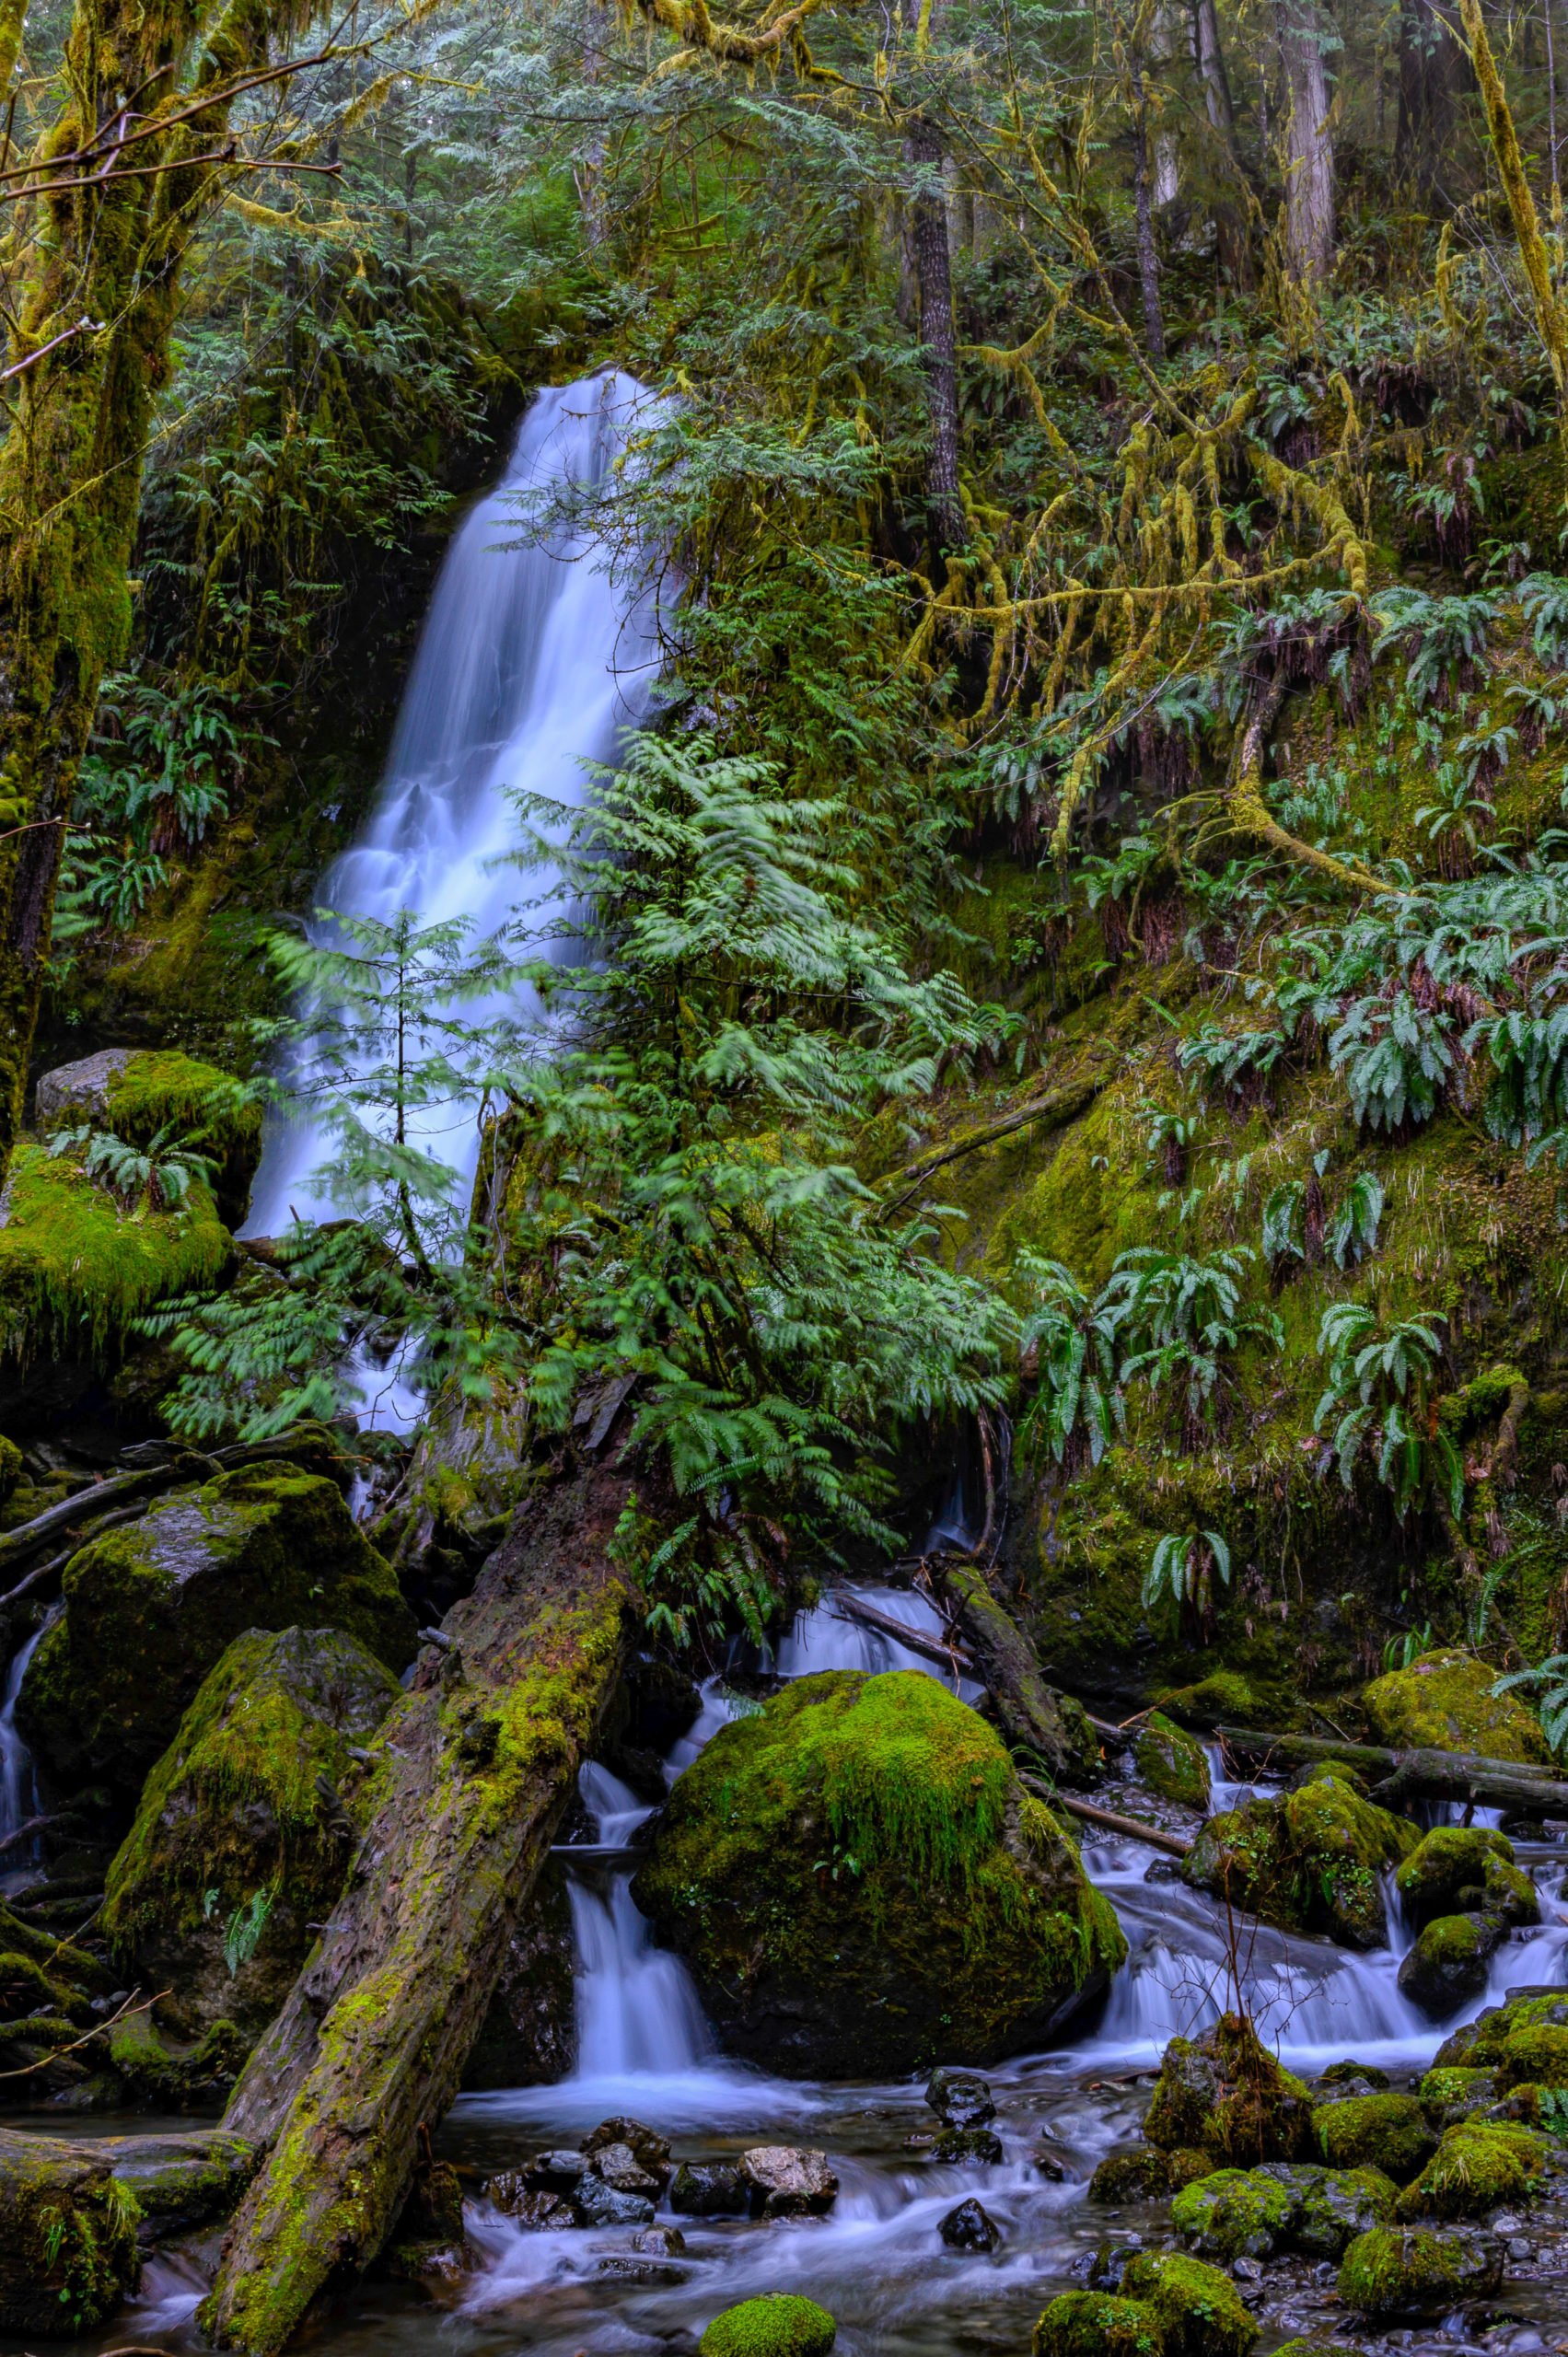
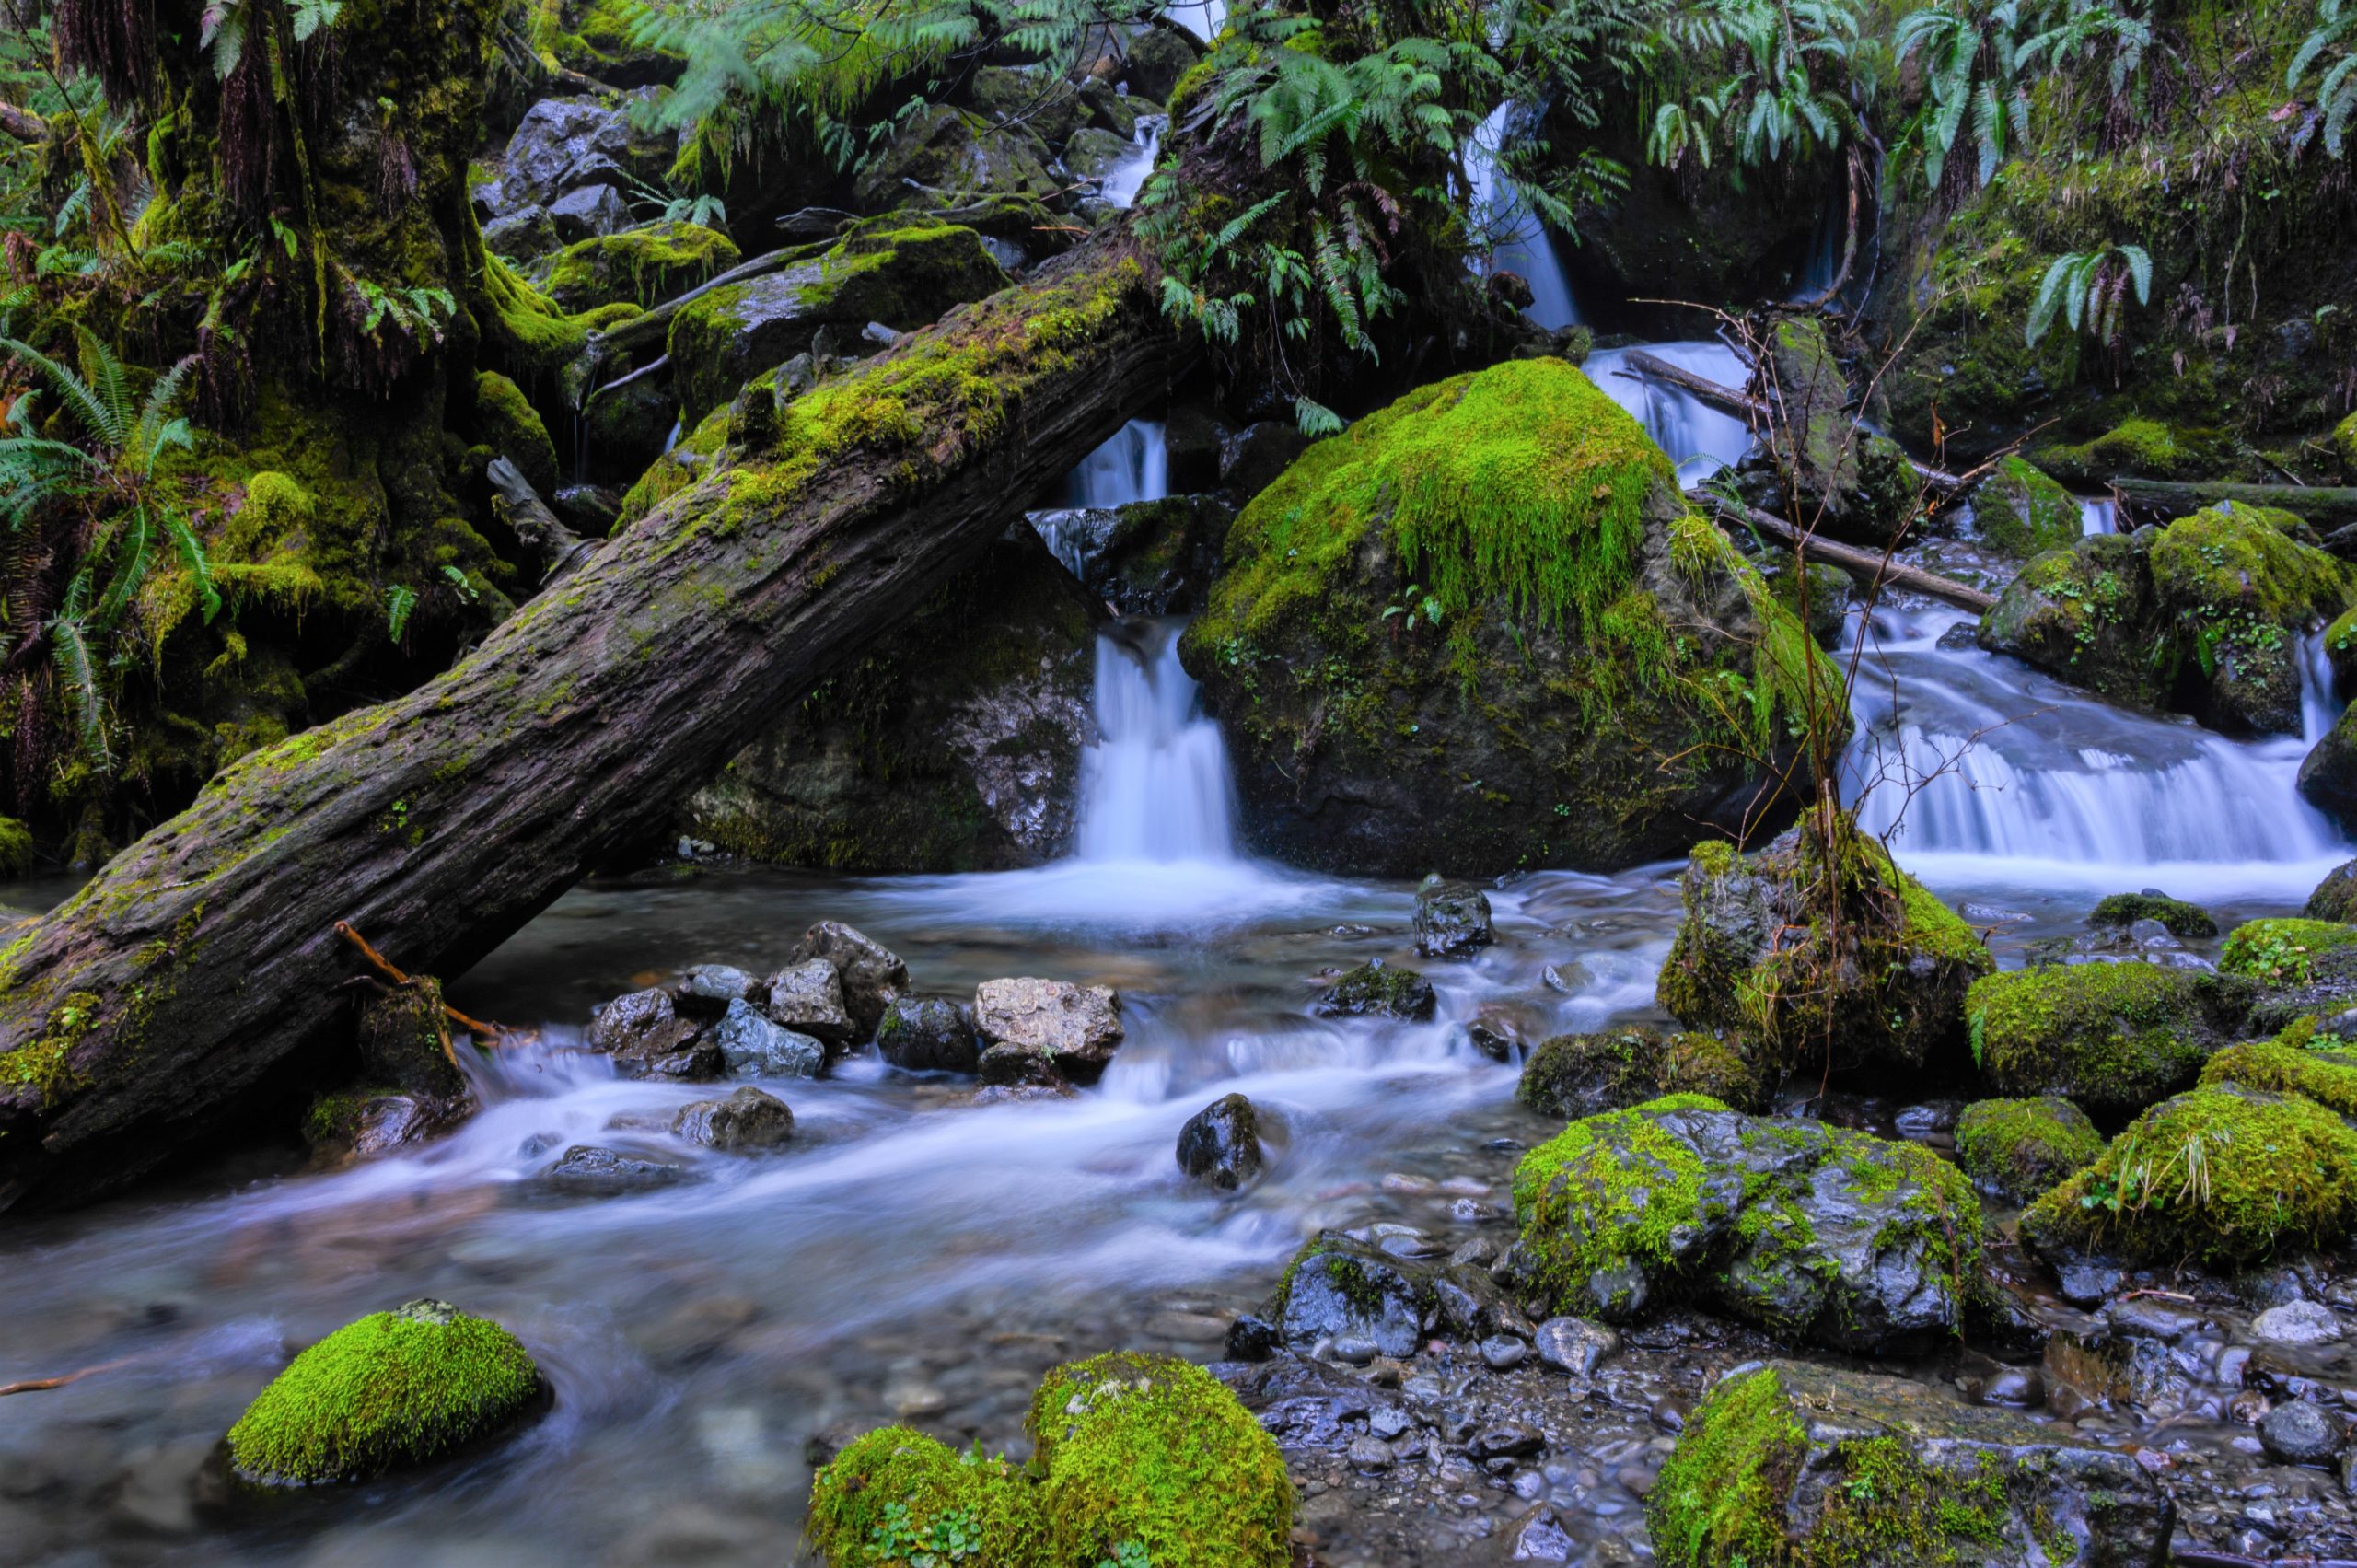
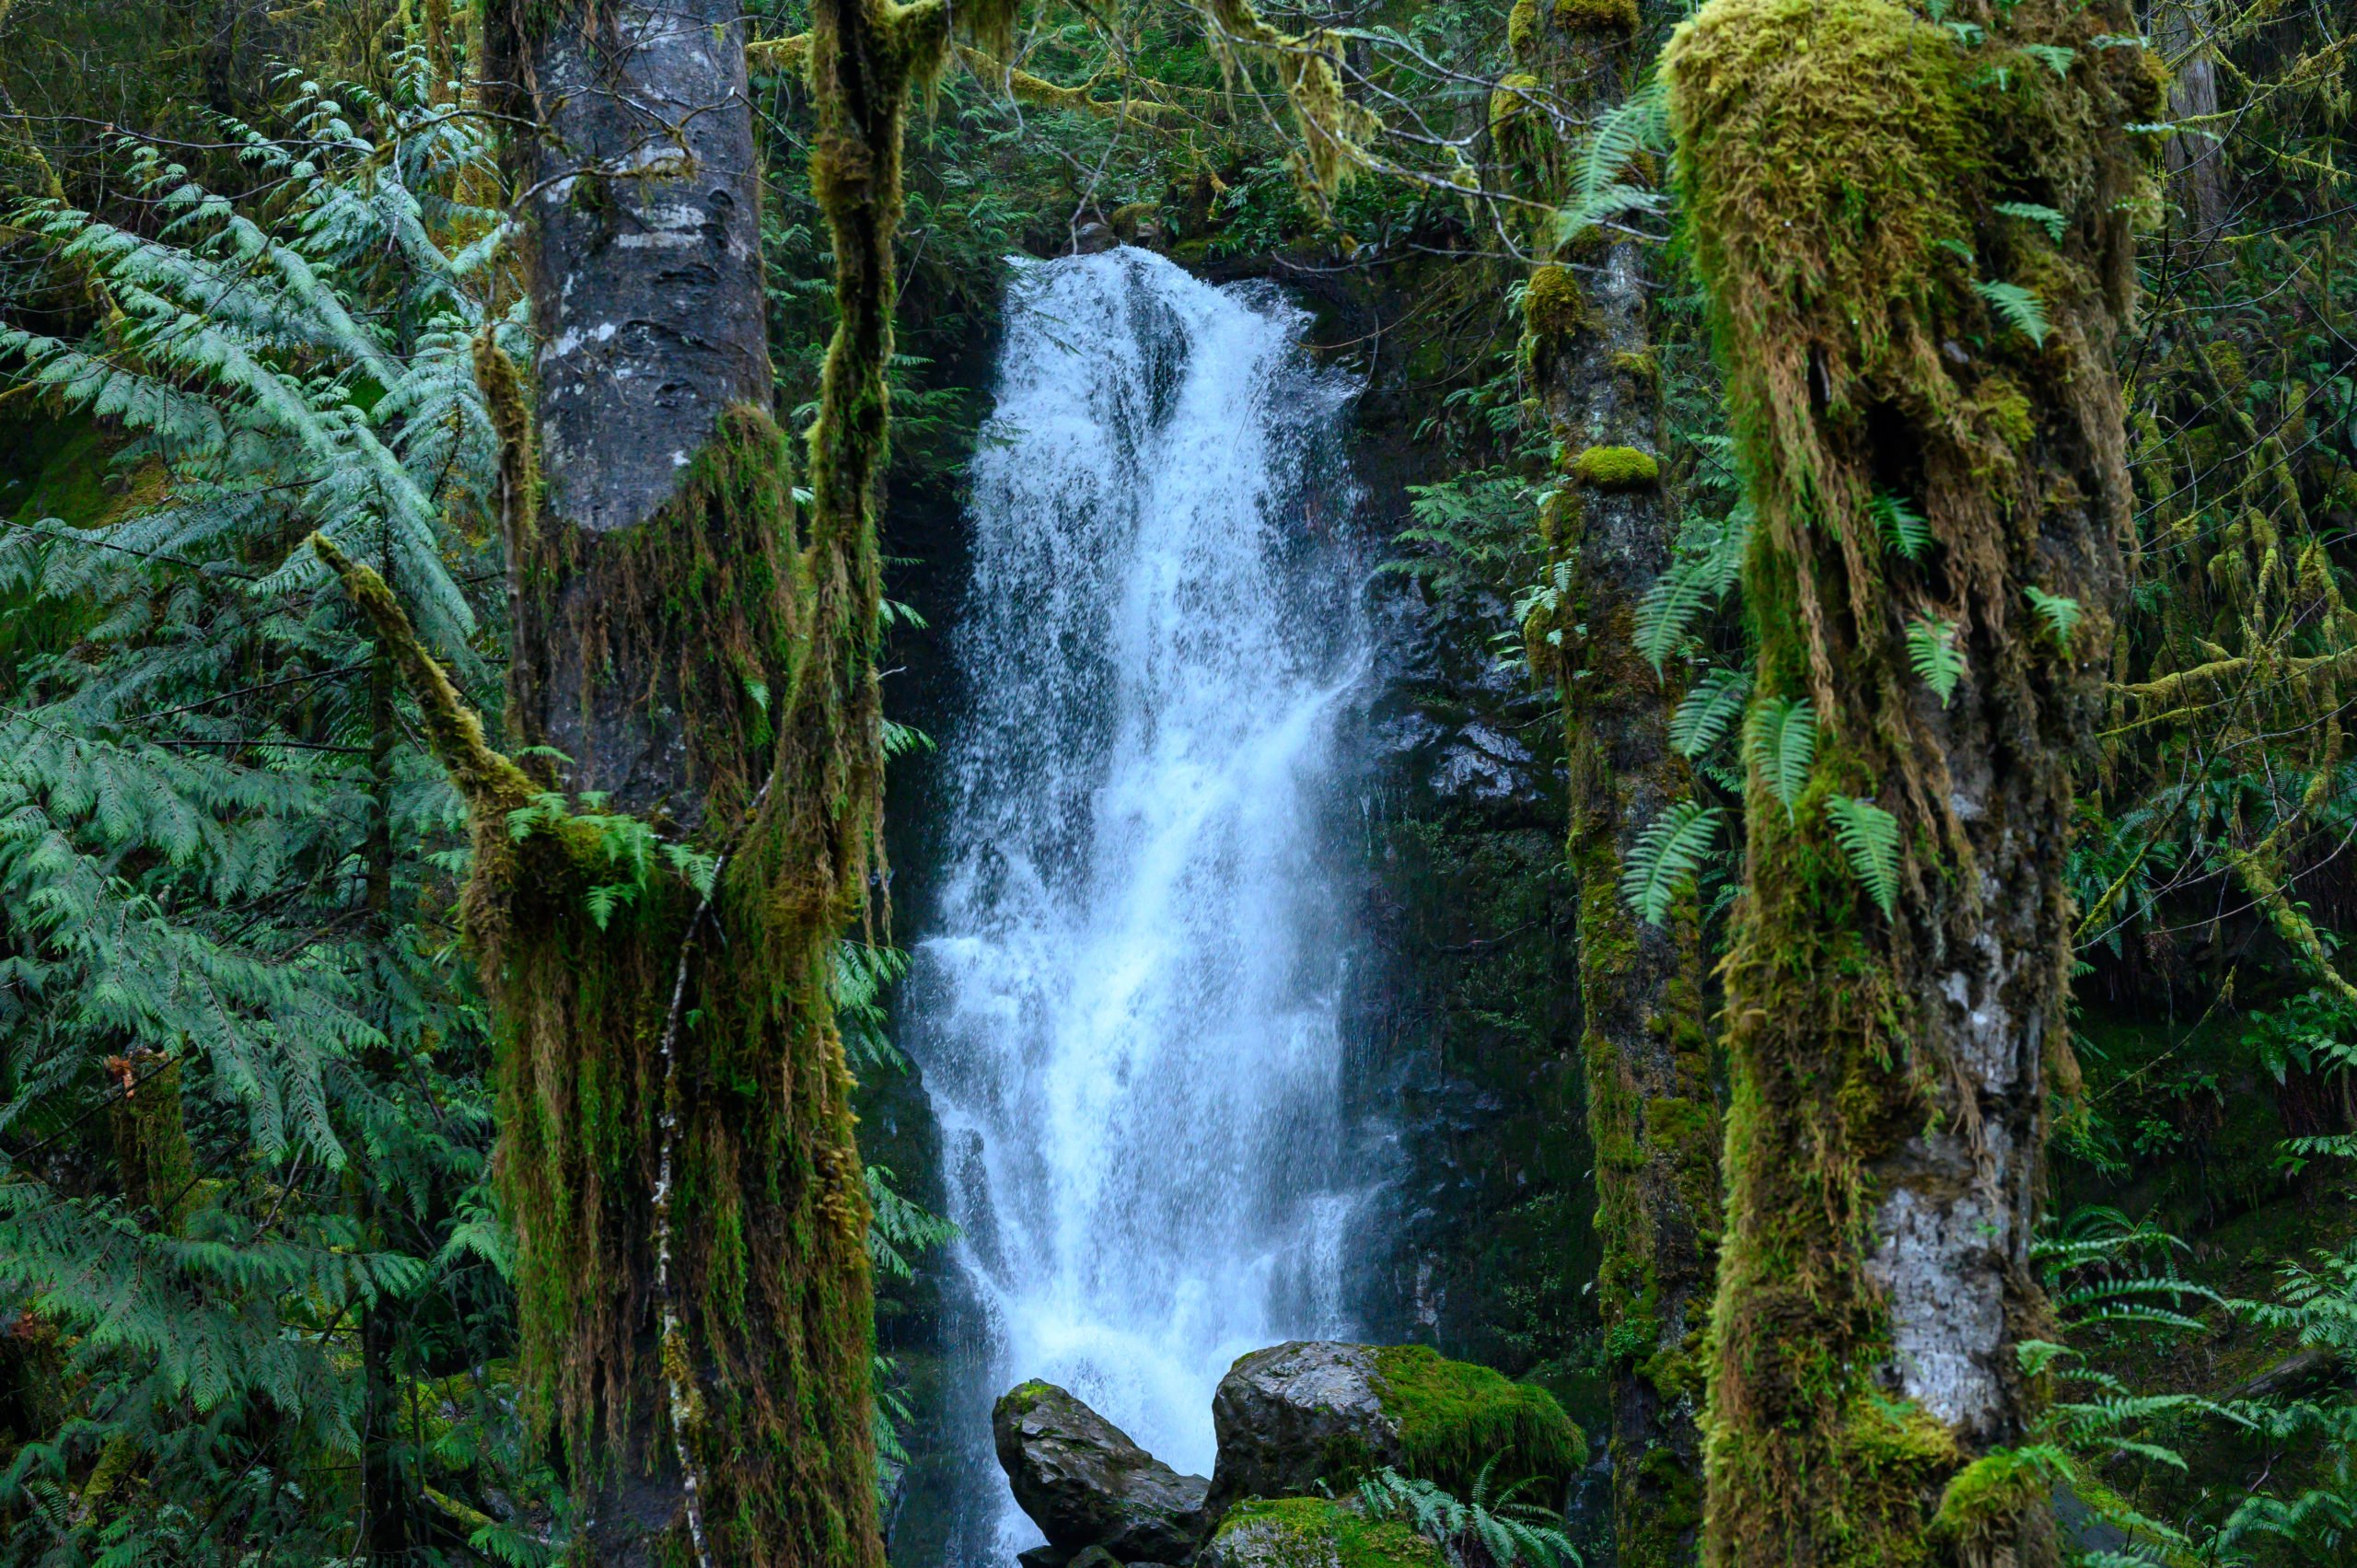
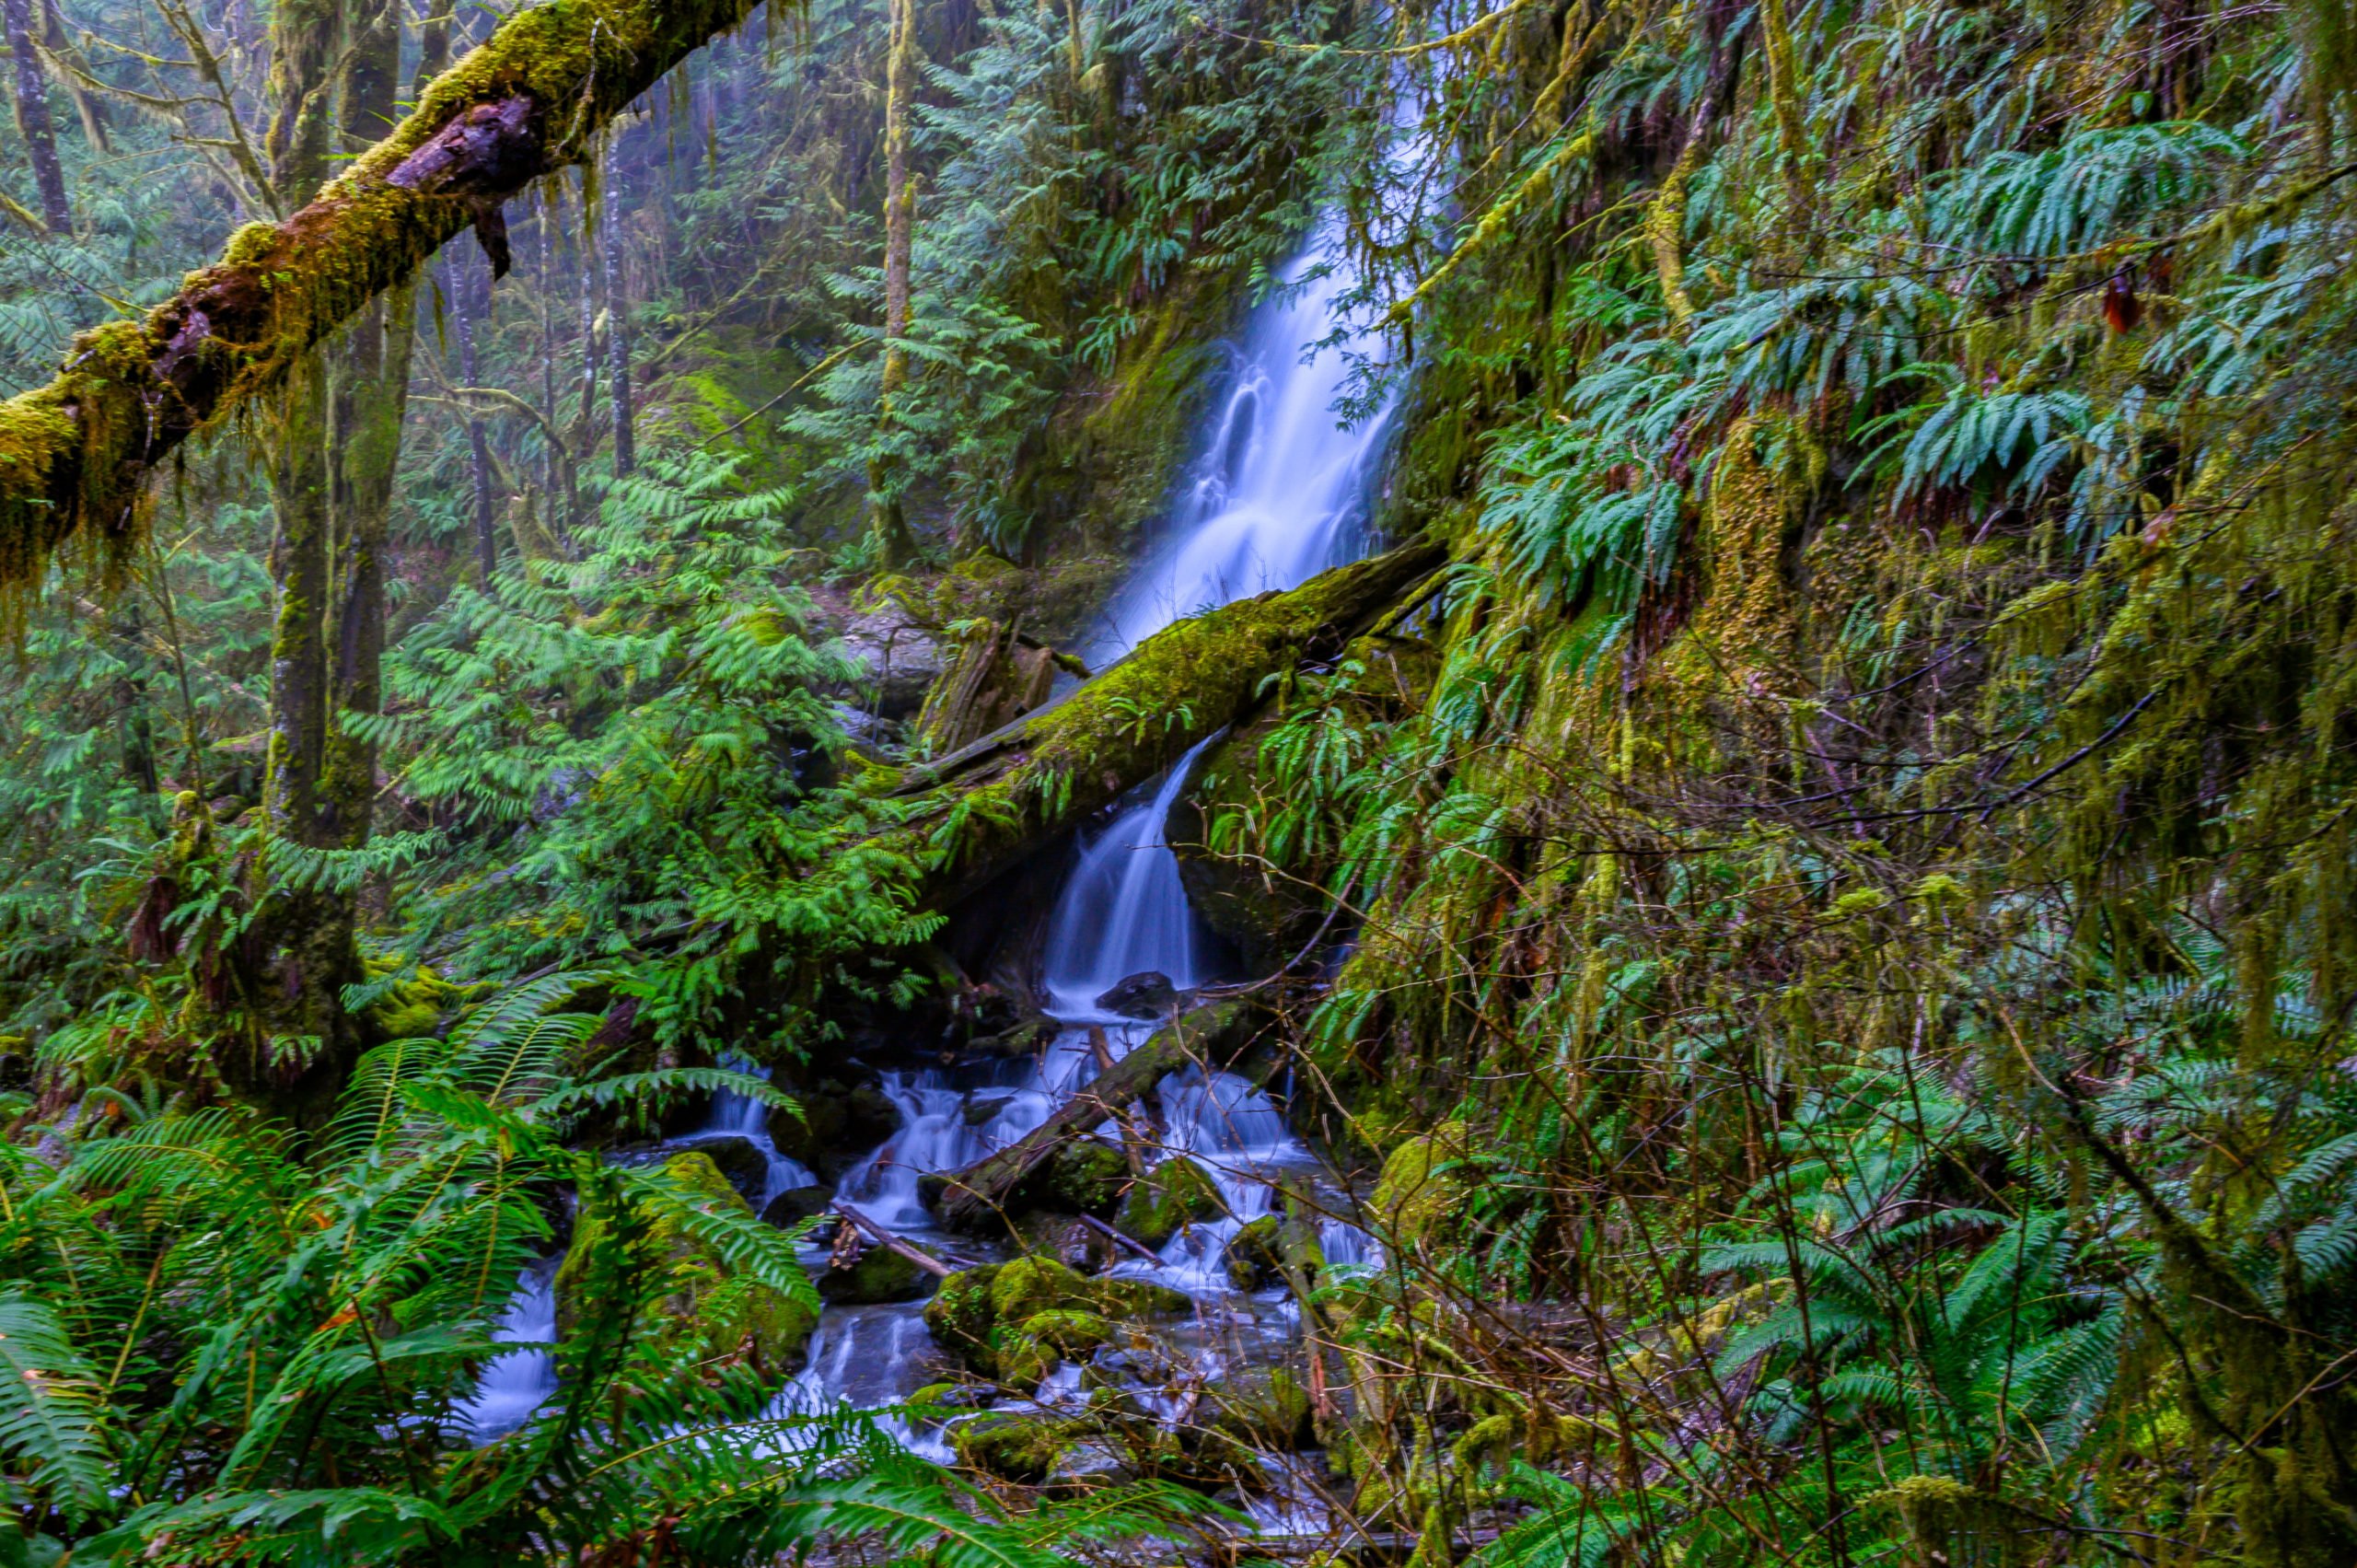
Play around with the various angles at which you can photograph your waterfall. All of the photographs in this article were taken at the same waterfall setting. At the beginning of the post, I included a photo of the overall scene I was working with. I did this so you could see examples of shooting a single scene from many different angles and viewpoints.
Try shooting down low, or finding a higher vantage point. Perhaps, swap out your wide-angle lens for a telephoto lens and try focusing on just one area rather than trying to capture the entire waterfall. No matter what you’re photographing, it is always good to try to see it from different angles and viewpoints.
Many times people will just walk up, center their subject, snap, walk away. However, if they took the time to compose their photo, choosing to highlight unique features in their scene, they would most likely create a more visually appealing photograph.
Take time to get low to the ground, or to climb that small hill close by, and discover a new way of viewing your subject. If you have a zoom lens, make sure to move it in and out to see what look you prefer. You might be surprised at what a difference cropping the scene in can make.
#10 Be Careful of the Slippery Conditions
This one should go without saying, but be careful when walking around a waterfall. Slippery when wet, is a condition that always applies to waterfalls. So while I recommend that you try to photograph all the available angles, only do so when it is safe. You don’t want to injure yourself or break your camera–now that would be bad!
#11 Shoot in RAW Mode
If possible, shoot in RAW mode as this enables you to capture the most detail in the highlights and shadows. This is important for post-processing as you can bring out those details later when you begin to “develop” your photo and correct any low-lighting and underdevelopment.
If your camera does not allow you to shoot in RAW, then just choose the highest JPEG setting it allows. Often cameras will have JPEG-Fine or JPEG-Normal, if that is the case with yours, choose JPEG-Fine or the highest quality available when RAW isn’t an option.
#12 Experiment & Take Notes
Use bracketing on your camera to take multiple photos at different exposures. Try different combinations of aperture and shutter speed to achieve the effect you desire.
Consider bringing a small pocket notebook with you and a pen to take notes about what settings you’re trying, what you’re learning, and maybe any ideas that come to you for future photoshoots.
Yes, modern cameras now record all your settings for you, but sometimes it’s nice to write it down for easy viewing in the field.
Final Notes on Photographing Waterfalls
Best Weather for Photographing Waterfalls
Often when photographing outdoors, we prefer sunny conditions, but when it comes to waterfalls, a cloudy day can often be a bonus! You see, if it is a little darker out, it helps achieve the lower lighting conditions needed to fully capture the details of the waterfall.
A calm day is also essential when photographing waterfalls. This helps keep your camera from shaking and limits the risk of blurred, out of focus images. If you have a long exposure and it’s windy, then the trees and shrubs and water in the scene will be blowing and end up blurred due to the slow shutter speeds.
No Perfect Setting
Remember, there’s no “right” shutter speed or aperture. However, some settings you can start with to freeze the water are a shutter speed of 1/200 and higher and then a wider aperture to let in more light. If you want to capture the silky motion of the waterfall, in addition to choosing the lowest ISO, try a smaller aperture, maybe f/16 and a 1-second shutter speed for a starting point. Then play around with the settings from there until you get the look you want.
Have Fun
Enjoy developing your photography skills (yes, I meant that as a pun). It is so much fun to try new things. When you look at your photographs later, it’s exciting to see what you’ve captured and to come up with ideas to try next time.
Remember, all the gear in the world won’t replace a good eye and regular practice. So learn to use what you have, and most of all, have fun doing it!
Go Chase Some Waterfalls!
Note: Travelffeine is reader-supported. This post contains affiliate links. When you make a purchase using one of these affiliate links, we get paid a small commission at no extra cost to you. And as always, all opinions are our own. Thank you!
Perhaps you’re like me, and you’ve put off choosing a travel credit card. Maybe you aren’t sure if they are worth the annual fees, or whether they give you any additional benefits over your current credit cards.
Well, I have been in the same boat as you. I’ve received the offers in the mail, and I’ve heard friends talking about their travel credit cards, but I never made the leap to get one myself. Now that I look back on all my travel, I realize I have missed out on a lot of miles and bonus travel rewards. So, this year, I decided I would do some research and decide on a travel credit card.
This article is the outcome of that research. I hope it helps you decide whether or not a travel credit card is right for you and helps you choose the best card based on your travel spending patterns.
Are Travel Credit Cards Still Beneficial in 2020
2020 is an entirely different year than any I have experienced, and I’m guessing you would probably say the same. You may have wondered whether or not it even makes sense to get a travel credit card this year. I mean, we haven’t really been able to travel yet this year. So what’s the use of a travel credit card if you can’t use it for travel?
Money.com answers this question and explains some of the travel benefits you can earn during this time when travel is limited. In their article on the Best Travel Cards in 2020, they explain that credit card companies are adapting to the current COVID-19 restrictions. Some are extending the eligible purchases window to give you more time to earn your sign-on bonuses. Many of them currently allow you to accrue bonus points for non-travel purchases such as groceries and streaming services.
As you can see, there are a variety of benefits you can still receive as well as accrue points for future travel based on your current non-travel purchases. Travel credit card companies are adapting to the present situation and providing incentives and options for future travel.
I’ve also listed some travel credit card options that allow you to accrue travel miles based on everyday purchases. These are an excellent choice during times like this when you are unable to make travel-related purchases.
Why You Might Want a Travel Credit Card
In case you’re not sure why you would want a travel credit card, here is a quick summary of some of the benefits they provide.
Earn travel rewards for purchasing you’re already making. Choose a travel credit card that rewards your everyday purchases, and you’ll get points to use on future travel for things you were going to buy anyway!
Get a complimentary companion fare. Some airline travel cards reward you with complimentary companion fares–all you do is pay the taxes and fees!
Ever wished you could use those nice airport lounges? Some travel cards give you access to over 1,000 airport lounges. That means a quiet place to rest, plug in your laptop, get complimentary hot coffee and snacks, and relax before your flight.
Get free upgrades on hotel rooms and flights. Travel cards allow you to get exclusive upgrades with partnered hotels, and some even allow you to receive complimentary upgrades on flights.
Most travel credit cards offer no foreign transaction fees, and let me tell you from experience–those really add up! Early on in my travels, I learned this lesson the hard way. I quickly switched to only using a card with no foreign transaction fees.
You get added protection when you travel. Travel credit cards offer a wide range of trip insurance coverage, lost luggage reimbursement, and even reimbursements for flight delays.
The main reason you might want a credit card is to accrue mileage points to use toward future trips. You’re already spending the money on travel and everyday expenses, why not be rewarded with even more while doing it!
Researching the Best Travel Credit Cards
Now that we’ve established why you might want one and that travel credit cards are beneficial even during this no-travel period, I want to quickly go over my research to find the best travel credit cards. I read numerous articles on this subject, specifically searching for the most up-to-date information for 2020 card options. I also looked over the travel credit card offers I received in the mail for comparison.
After reviewing all of the available options I narrowed them down based on the categories I thought would interest most people.
I’ve summarized my research into the following categories. Feel free to jump ahead and see my top picks for each group.
These are my top two choices for someone looking to get their first travel credit card but aren’t ready to pay the high annual fees charged for the more luxury credit cards. Perhaps you only travel a few times a year, and you’re not sure you could maximize all the benefits of the luxury cards. These travel cards are an excellent place to start. Both provide great travel benefits, even when compared with some of the “luxury” cards.
Currently, Chase offers new cardmembers 60,000 bonus points when you make $4,000 on purchases in the first three months after opening an account. Cardmembers also earn 2X points on travel and dining and 1 point per dollar spent on other purchases.
You can redeem your points through the Chase Ultimate Rewards site to receive 25% more return on travel-related purchases. Rewards earned with the Chase Sapphire Preferred card also give you a 1 to 1 point transfer with a variety of frequent flyer programs such as Southwest Airlines Rapid Rewards, United MileagePlus, and many others.
Other benefits include trip cancellation insurance, auto rental collision damage waiver, and trip reimbursement. They also offer exclusive bonuses for Door Dash and Lyft customers. Additionally, you can redeem reward points for other non-travel related purchases.
When used with Chase’s Ultimate Rewards program, you can get more bang for reward-buck with the Sapphire Preferred card than say the below Venture Rewards card. However, it is not as straight forward as some might prefer. See the Chase Sapphire Preferred website for more information on benefits and restrictions.
Quick Overview:
Low annual fee of $95
60,000 bonus points after spending $4,000 during the three months after initial sign-up.
2X points on travel and dining and 1X for all other purchases.
Extra redemption benefits through Chase Rewards as well as 1:1 point transfer with airline/travel partners.
No Foreign Transaction Fees
A variety of trip insurance and travel protection benefits
Primary car rental insurance.
Additional offers for cardmembers with DoorDash subscriptions or Lyft accounts.
The Capital One Venture Rewards travel credit card offers an easy way to earn points. There aren’t separate categories for earning miles. Instead, you earn 2X miles rewards for every dollar you spend on all purchases. New cardmembers get 50,000 bonus miles after spending $3,000 on purchases within the first three months after initial sign-up.
There are no foreign transaction fees with the Capital One Venture Rewards card. Cardmembers receive travel accident insurance, car rental coverage, and extended warranty protection on qualified purchases. Redeem reward points for flights, hotels, and even use them to pay for purchases on Amazon.com.
You can also transfer rewards points to a variety of travel partners such as EVA Air, Jet Blue, and Air France. Another benefit not offered by Chase Sapphire Preferred is the reimbursement of up to $100 for the Global Entry or TSA PreCheck application fee.
The Venture Rewards card is a good choice if you plan to use it for everyday spending vs. travel purchases. Its simple accrual and redemption of points will appeal to many who prefer to find their own travel deals rather than book through a specific travel site such as Chase Travel. Visit the Capital One Venture Rewards card website to learn more about additional benefits and restrictions.
Quick Overview:
Earn 2X miles rewards on all purchases.
Earn 50,000 bonus miles after spending $3,000 during the three months after initial sign-up.
No foreign transaction fees.
Low annual fee of $95
A variety of trip insurance and travel protection benefits
Transfer miles to other travel partners, redeem points for travel-related purchases and even use for non-travel purchases on Amazon.com
Receive up to $100 reimbursement for Global Entry/TSA PreCheck application fees.
Best Luxury Credit Cards
This category is best suited for frequent travelers—those that travel for business or work, rather than the vacation traveler. Review your travel needs to determine whether the high annual fees are worth the travel benefits you receive and what you will use.
The Chase Sapphire Reserve Card is similar in many ways to the Chase Sapphire Preferred Card. I highlight the extra benefits the Sapphire Reserve offers and where it might make sense to choose it over the Sapphire Preferred. If you want to look at an in-depth comparison of the two cards, I recommend reading this comparison done by The Points Guy.
The Chase Sapphire Reserve is a travel credit card designed with the frequent traveler in mind. As such, it has travel perks not seen on the lower-tier Sapphire Preferred card. Benefits such as complimentary access to over 1,000 airport lounges or complimentary room upgrades at luxury resorts worldwide.
Cardmembers also receive up to $100 every four years as reimbursement for the Global Entry or TSA PreCheck application fee. Additionally, Chase Sapphire Reserve cardmembers earn an annual $300 credit for travel purchases charged to your account each year. If you factor in the yearly $300 credit, then the $550 annual fee is only $250. Cardmembers who use Lyft will also receive 10X the points on Lyft rides vs. 5X with Chase Sapphire Preferred.
New cardmembers receive 50,000 in bonus points after spending $4,000 in purchases within the first three months of opening an account. Earn 3X points on travel and dining (2X on the Sapphire Preferred) and 1 point per dollar spent on other purchases. Redeem your points through the Chase Ultimate Rewards site to receive 50% more return on travel-related purchases (Sapphire Preferred was 25%). See the Chase Sapphire Reserve website for additional benefits and restrictions.
Quick Overview:
Annual fee of $550.
$300 annual travel credit.
Access to over 1,000 airport lounges worldwide.
Earn 50,000 bonus points after spending $4,000 during the three months after initial sign-up.
3X points on travel and dining and 1X for all other purchases.
Extra 50% redemption value when redeeming points through Chase Rewards
No Foreign Transaction Fees
A variety of trip insurance and travel protection benefits
Receive up to $100 reimbursement for Global Entry/TSA PreCheck application fees.
Earn 10X points on Lyft rides as well as extra benefits for DoorDash subscribers.
If you travel mostly in the U.S., another luxury card option to consider is the Amex Platinum card. It has a lot of the same benefits as the Sapphire Reserve, with a few rewards options not offered with the Sapphire Reserve. However, Amex cards are not as widely accepted internationally as Visa or Mastercard, so you may have to carry a second card with you as a backup.
Some of the benefits the Amex Platinum has over the Sapphire Reserve are an annual Uber credit up to $200, up to a $100 credit to Saks Fifth Avenue, gold status with Marriot Bonvoy and Hilton Honors, and a more extensive airport lounge network with access to over 1,200 airport lounges.
Currently, Amex offers 75,000 bonus points (usually 60,000) when cardmembers make $5000 in purchases within the first three months after sign-up. You’ll earn 5X points when booking flights and hotels directly through the Amex Travel site and 1X points for all other purchases. You’ll also receive an annual $200 airline fee credit to cover fees charged by participating airlines. See the American Express Platinum website for additional benefits and restrictions.
Quick Overview:
Annual fee of $550.
$200 annual airline fee credit to use towards baggage fees and in-flight beverage fees, etc.
$200 in annual Uber credits
$100 in Saks Fifth Avenue credits annually.
Access to over 1,200 airport lounges worldwide.
Earn 75,000 bonus points after spending $5,000 during the three months after initial sign-up.
5X points on travel and hotels booked directly through Amex Travel and 1X for all other purchases.
No Foreign Transaction Fees
A variety of trip insurance and travel protection benefits
Receive up to $100 reimbursement for Global Entry/TSA PreCheck application fees.
Excellent travel customer service and personalized travel planning with Amex Platinum Travel Counselors
Best Airline Credit Cards
Choosing an airline credit card will be a very subjective choice. It depends on which airline you tend to travel with the most. I list two options I would consider for an airline credit card based on my travel preferences. You will need to review both and see if either of these match up with your travel habits.
If you are a frequent flyer with Southwest Airlines, then consider getting the Southwest Rapid Rewards Priority card. This travel credit card has an annual fee of $149, but if you frequently fly with Southwest, the cost quickly pays for itself.
New cardmembers will receive 40,000 bonus points when they spend $1,000 during the first three months after opening an account. Cardmembers also receive 7,500 bonus points annually on their cardmember anniversary. Earn 2X points on all Southwest Airlines purchases and 1X points on all other purchases. Cardmembers also receive a $75 annual credit from Southwest, four upgraded boardings per year, 20% back on in-flight beverages and WiFi, and no foreign transaction fees.
Cardmembers can also earn up to 15,000 tier-qualifying points each year to use towards A-list status rewards like priority boarding and same-day standby flights. Another fantastic benefit of using a Southwest travel card is it allows you to earn points toward receiving your Southwest Airlines Companion Pass.
With a Companion Pass, you can bring a friend or family member for free (just pay taxes and fees) on any flight you take! That is an excellent benefit! Did you know Southwest now flies to the Hawaiian islands? Yup, you could become the most popular person at this year’s Christmas party. See the Southwest Rapid Rewards Priority card website for additional benefits and restrictions.
Quick Overview:
Annual fee of $149.
Earn 40,000 bonus points for new members after spending $1,000 in the first three months after sign-up.
Receive 7500 bonus points annually.
Earn 2X points on all Southwest purchases and 1X points on all other purchases.
$75 annual Southwest travel credit
Four upgraded boardings per year, plus 20% back on in-flight beverage and WiFi purchases
Earn up to 15,000 tier-qualifying points to help you achieve A-list status rewards.
If you live on the West Coast and frequently fly with Alaska Airlines, then consider the Alaska Airlines Visa Signature card. Currently, new cardmembers receive 40,000 bonus miles and one companion fare after making $2,000 in purchases during the first 90 days of sign-up. The current offer also includes a $100 statement credit.
Cardmembers also receive an annual companion fare every year on their account anniversary. The Alaska Famous Companion Fare means you only pay around $121 for a second companion ticket valid on Alaska flights book on alaskaair.com. You’ll also receive free checked bags for you and up to 6 guests on the same flight.
Earn 3X miles for every $1 spent on Alaska Airlines purchases and 1X miles for all other purchases. Cardmembers also get 50% off day passes at Alaska airport lounges and 20% back on all in-flight purchases when you pay with your Alaska Airlines Visa Signature card.
Although Alaska Airlines is primarily a West Coast-based airline, you can redeem mileage points to over 800 destinations worldwide on Alaska Airlines flights as well as with their global airline partners such as British Airways, Korean Air, and many others. Upgraded Points wrote a detailed article on the various ways you can redeem your Alaska miles.
Earn 40,000 bonus miles, an extra companion fare, and receive a $100 statement credit after making $2000 or more in purchases within the first 90 days of opening an account.
Earn 3X miles on all Alaska Airlines purchases and 1X miles on all other purchases.
Receive an annual companion fare on your cardmember anniversary each year.
Get 50% Alaska airport lounge day passes and 20% back on in-flight purchases.
No foreign transaction fees.
Best No Annual Fee Travel Credit Cards
I know for some people the biggest drawback to choosing a travel credit card has been the annual fees. Before my research, I would think, “why would I pay a credit card company just to use their credit card?” After doing a little homework on the subject, I can see that with the right card, the fee is quickly paid for in rewards benefits.
That said, I realize you might not be ready to pay an annual fee. So here are a couple of good choices for travel credit cards with no annual fee.
The VentureOne Rewards card is CapitalOne’s no annual fee counterpart to the CapitalOne Venture Rewards card I mentioned above. With the VentureOne Rewards card, you’ll earn 1.25X miles per dollar you spend on all purchases. New cardmembers will receive 20,000 bonus miles when they spend $1,000 during the first three months of opening an account.
One thing that makes this no fee card unique is that in addition to redeeming miles for statement credits, you can also transfer the miles to any of CapitalOne’s travel loyalty partners. This is typically only an option with travel credit cards charging annual fees. It can be a little complicated to learn when to use the statement credit and when to transfer the miles to a travel partner, but here is an article that explains some of the miles transfer options.
Cardmembers also receive rewards like travel accident insurance, extended warranty coverage, rental car coverage, and no foreign transaction fees. In addition to redeeming rewards for statement credits and transferring to travel partners, you can also use your rewards point on Amazon.com purchases. See the VentureOne Rewards website for more benefits and restrictions.
Quick Overview:
No Annual Fee
Earn 20,000 bonus miles after spending $1,000 on purchases within the first three months of opening an account.
Earn 1.25X miles on all purchases.
No foreign transaction fees.
Travel Accident Insurance
Car Rental Coverage
Transfer miles to other travel partners, redeem points for travel-related purchases and even use for non-travel purchases on Amazon.com
The Discover it Miles credit card is another option to consider when looking for a travel credit card with no annual fee. It offers a unique bonus to new cardmembers that I haven’t seen from other credit card companies. Instead of giving you a fixed bonus after you spend “x” amount of dollars, Discover offers a one-year unlimited bonus.
At the end of your first year, Discover matches all the miles you’ve earned for the entire year! So the more you spend, the more you get. The regular earnings rate is 1.5X miles for every dollar spent on all purchases and no foreign transaction fees. So this means in the first year you’ll effectively earn 3X miles for every dollar you spend.
Cardmembers can redeem their miles as a statement credit or have them deposited as cash in their bank account (one mile equals one cent). There are no blackout dates, no foreign transaction fees, your miles never expire, and you won’t lose your miles even if you close your account.
However, similar to American Express cards, Discover is also not as widely accepted internationally as Visa or Mastercard. Thus, you might need to bring a secondary credit card when traveling abroad. For more information on benefits and restrictions, visit the Discover it Miles card website.
Quick Overview:
No Annual Fee
Earn an unlimited first-year bonus. Get an unlimited miles match at the end of the first year for all miles earned.
Earn 1.5X miles on all purchases.
No foreign transaction fees.
Travel Accident Insurance
Car Rental Coverage
No minimum for redeeming miles.
Redeem for travel or cash.
Deciding Which Card is Right for You
Deciding which travel credit card is the right one for you is a personal choice. Review the sign-up bonuses and the regular earning of miles/points. For example, if you typically spend on everyday purchases (rather than travel) such as groceries, bills, and online shopping, then you might consider the CapitalOne Venture card over the Chase Sapphire Preferred.
If you’re a frequent flyer with Southwest, then considering that card is a no brainer. Perhaps you aren’t ready for an annual fee, then either the Discover it card or VentureOne Rewards card make great choices. You must analyze your spending and traveling habits to determine which travel card is best for you.
Some argue that to truly maximize all the available travel benefits, more than one travel credit card is needed. Many people have an “everyday” credit card that gives them the best rewards for everyday spending and then one that rewards them for travel purchases. Using two cards allows them to maximize rewards for both categories and provides even more significant travel benefits each year.
Credit Score & APR
Another important thing to consider is your credit score. The cards on this list require average to excellent credit scores to qualify. You might try an airline card or a cash rewards card for starters as you build up your credit score. Most of the travel credit cards will want a credit score of 650 or higher.
And one final point I want to make, these cards are not low APR credit cards. So if you aren’t prepared to pay off the balance each month I suggest you wait and consider getting a low interest rate card instead.
There are a variety of things to consider when getting a travel credit card. I hope this article narrows down which options to research when determining the one that is right for you. Whenever there is an opportunity to get free travel benefits, I think it’s worth looking into. I can’t believe it’s taken me so long to do it! Please let me know if you have any questions, and I will do my best to help!
Do you know someone who loves coffee? Buying gifts for others can be a challenge, especially when they seem to have “everything.” Here are some coffee gift ideas for the coffee lover in your life that they are sure to love! There is something for every coffee lover on this list, including that hard to buy for individuals. From gear to grinds, you’re sure to find the perfect gift!
Coffee Gear
I love getting new coffee gear. Yet, I often struggle to justify the purchase for myself. So I appreciate it when someone buys me coffee gear for a gift. Here are some of my coffee gear favorites and a couple that still on my wish list.
Electric Kettle
Purchasing an electric kettle was one of the best decisions I made. I bought it on a whim one day at my local department store, and I’ve never regretted it! That was about 15 years ago, and since then, I’ve had three different electric kettles. Things I love about electric kettles.
It’s fast and easy, and you don’t have to worry about remembering to shut off the stove.
You can choose which temperature best suits your brewing needs. This is important if you want to get the maximum flavor from your coffee beans.
I know this post is about coffee gifts, but an electric kettle is terrific if you are also a tea drinker! Black tea is best brewed at higher temperatures, such as 180-212 degrees Fahrenheit, whereas green tea is best at160-180 degrees Fahrenheit. With a variable temp kettle, you can set the perfect temperature for your tea.
Another perk many electric kettles have is the “keep warm” feature. This allows you to set your desired temp and keep it warm at that temperature for an extended period. You no longer need to reheat your water when you want that second cup. Now, it’s ready as soon as you lift the kettle.
Temperature Controlled Electric Kettles:
Thisglass tea kettlehas five temperature settings with colored lighting to signify the different temperatures. It also has a “keep warm” feature that will keep the tea kettle at the selected temperature for up two hours. This is nice for someone like me that often wanders off and forgets that I was boiling water for tea.
The Cuisinart CP-17 PerfecTemp kettleis one of the top-rated variable temperature electric kettles. It has 6 different temperature settings as well as a 30-minute keep warm function.
Gooseneck Electric Kettles:
If your coffee lover enjoys brewing pour-over coffee, then a gooseneck kettle will make a perfect addition to their kitchen. The long gooseneck spout gives greater control when pouring over coffee grounds or loose leaf tea.
The Bonavita 1.0L gooseneck kettle is one of the top-rated gooseneck kettles. Rather than provide pre-set temperature options, the Bonavita gooseneck kettle lets you manually set your exact desired temp. It also has a keep warm feature and a memory setting for your preferred temperature.
The COSORI electric gooseneck kettle is a beautiful little 0.8L kettle with a wide variety of temperature settings and a 100% stainless steel interior. It quickly heats water to the desired temp and can keep it there for up to 60 minutes.
Coffee Grinder
A coffee grinder makes a great gift! If your coffee lover doesn’t already have one, then I highly recommend purchasing them a coffee grinder. The ability to buy whole coffee beans and grind in batches allows for maximum flavor and freshness.
This Capresso burr coffee grinder is similar to the one I use, and I love how easy it is to adjust my coffee grind to suit my brewing needs. Although more expensive than a typical grinder, it allows for greater control over the size of your coffee grind. A burr grinder makes it easy to get the right coarseness, whether you’re brewing for a drip maker or an espresso maker.
The Krups Spice & Coffee Blade Grinderis a budget-friendly option. Although not as precise as a burr grinder, they also double as spice grinders (just clean well between uses). I started out using one a blade grinder and still use one for my spices.
Coffee Scale
There’s a science behind the perfect cup of coffee, and for those looking to up their coffee brewing skills, this allows them to measure the ideal coffee to water ratio. According to the National Coffee Association (yes, we’re that serious about coffee), the “golden ratio” is around 1-2 tablespoons of coffee per 6 ounces of water. This works out to be somewhere between a 1:15 to 1:17 coffee to water ratio.
Although they make scales designed explicitly for weighing coffee and weighing your pour-over brews, you can also use a regular kitchen scale. The main features that a person might want in a scale made for coffee brewing would be an option to disable the auto-off feature and also to weigh small amounts precisely.
So, if your coffee lover is an avid pour-over brewer, then consider the features of a coffee specific scale. Otherwise, one of these kitchen scales will work just fine. Plus, they are great for anyone who also likes to bake!
The Ozeri ZK14-AB Pronto kitchen scale is an excellent budget-friendly choice. It is battery operated. It does not have a way to disable the auto-off feature.
The Hario V60 coffee scale is specially made to weigh coffee and to weigh your pour-over coffee while you brew it. It also has a built-in timer for monitoring your brew and pour times.
A Milk Frother
This is a luxury item. Do you really need it? Perhaps not, but it is nice when you’re creating a latte at home to add that warm, foamy milk topping. Perfection!
I have used a variety of frothers over the years. You can choose from a simple wand frother or an all-in-one frother and warmer like this steamer or this frothing pitcher. These types of frothers also offer cold milk frothing which is wonderful when making a sweet cream cold brew or an iced macchiato at home.
Coffee Makers
This list of coffee makers goes beyond your traditional drip coffee maker. These are some coffee gift ideas for the coffee lover who likes to try new things.
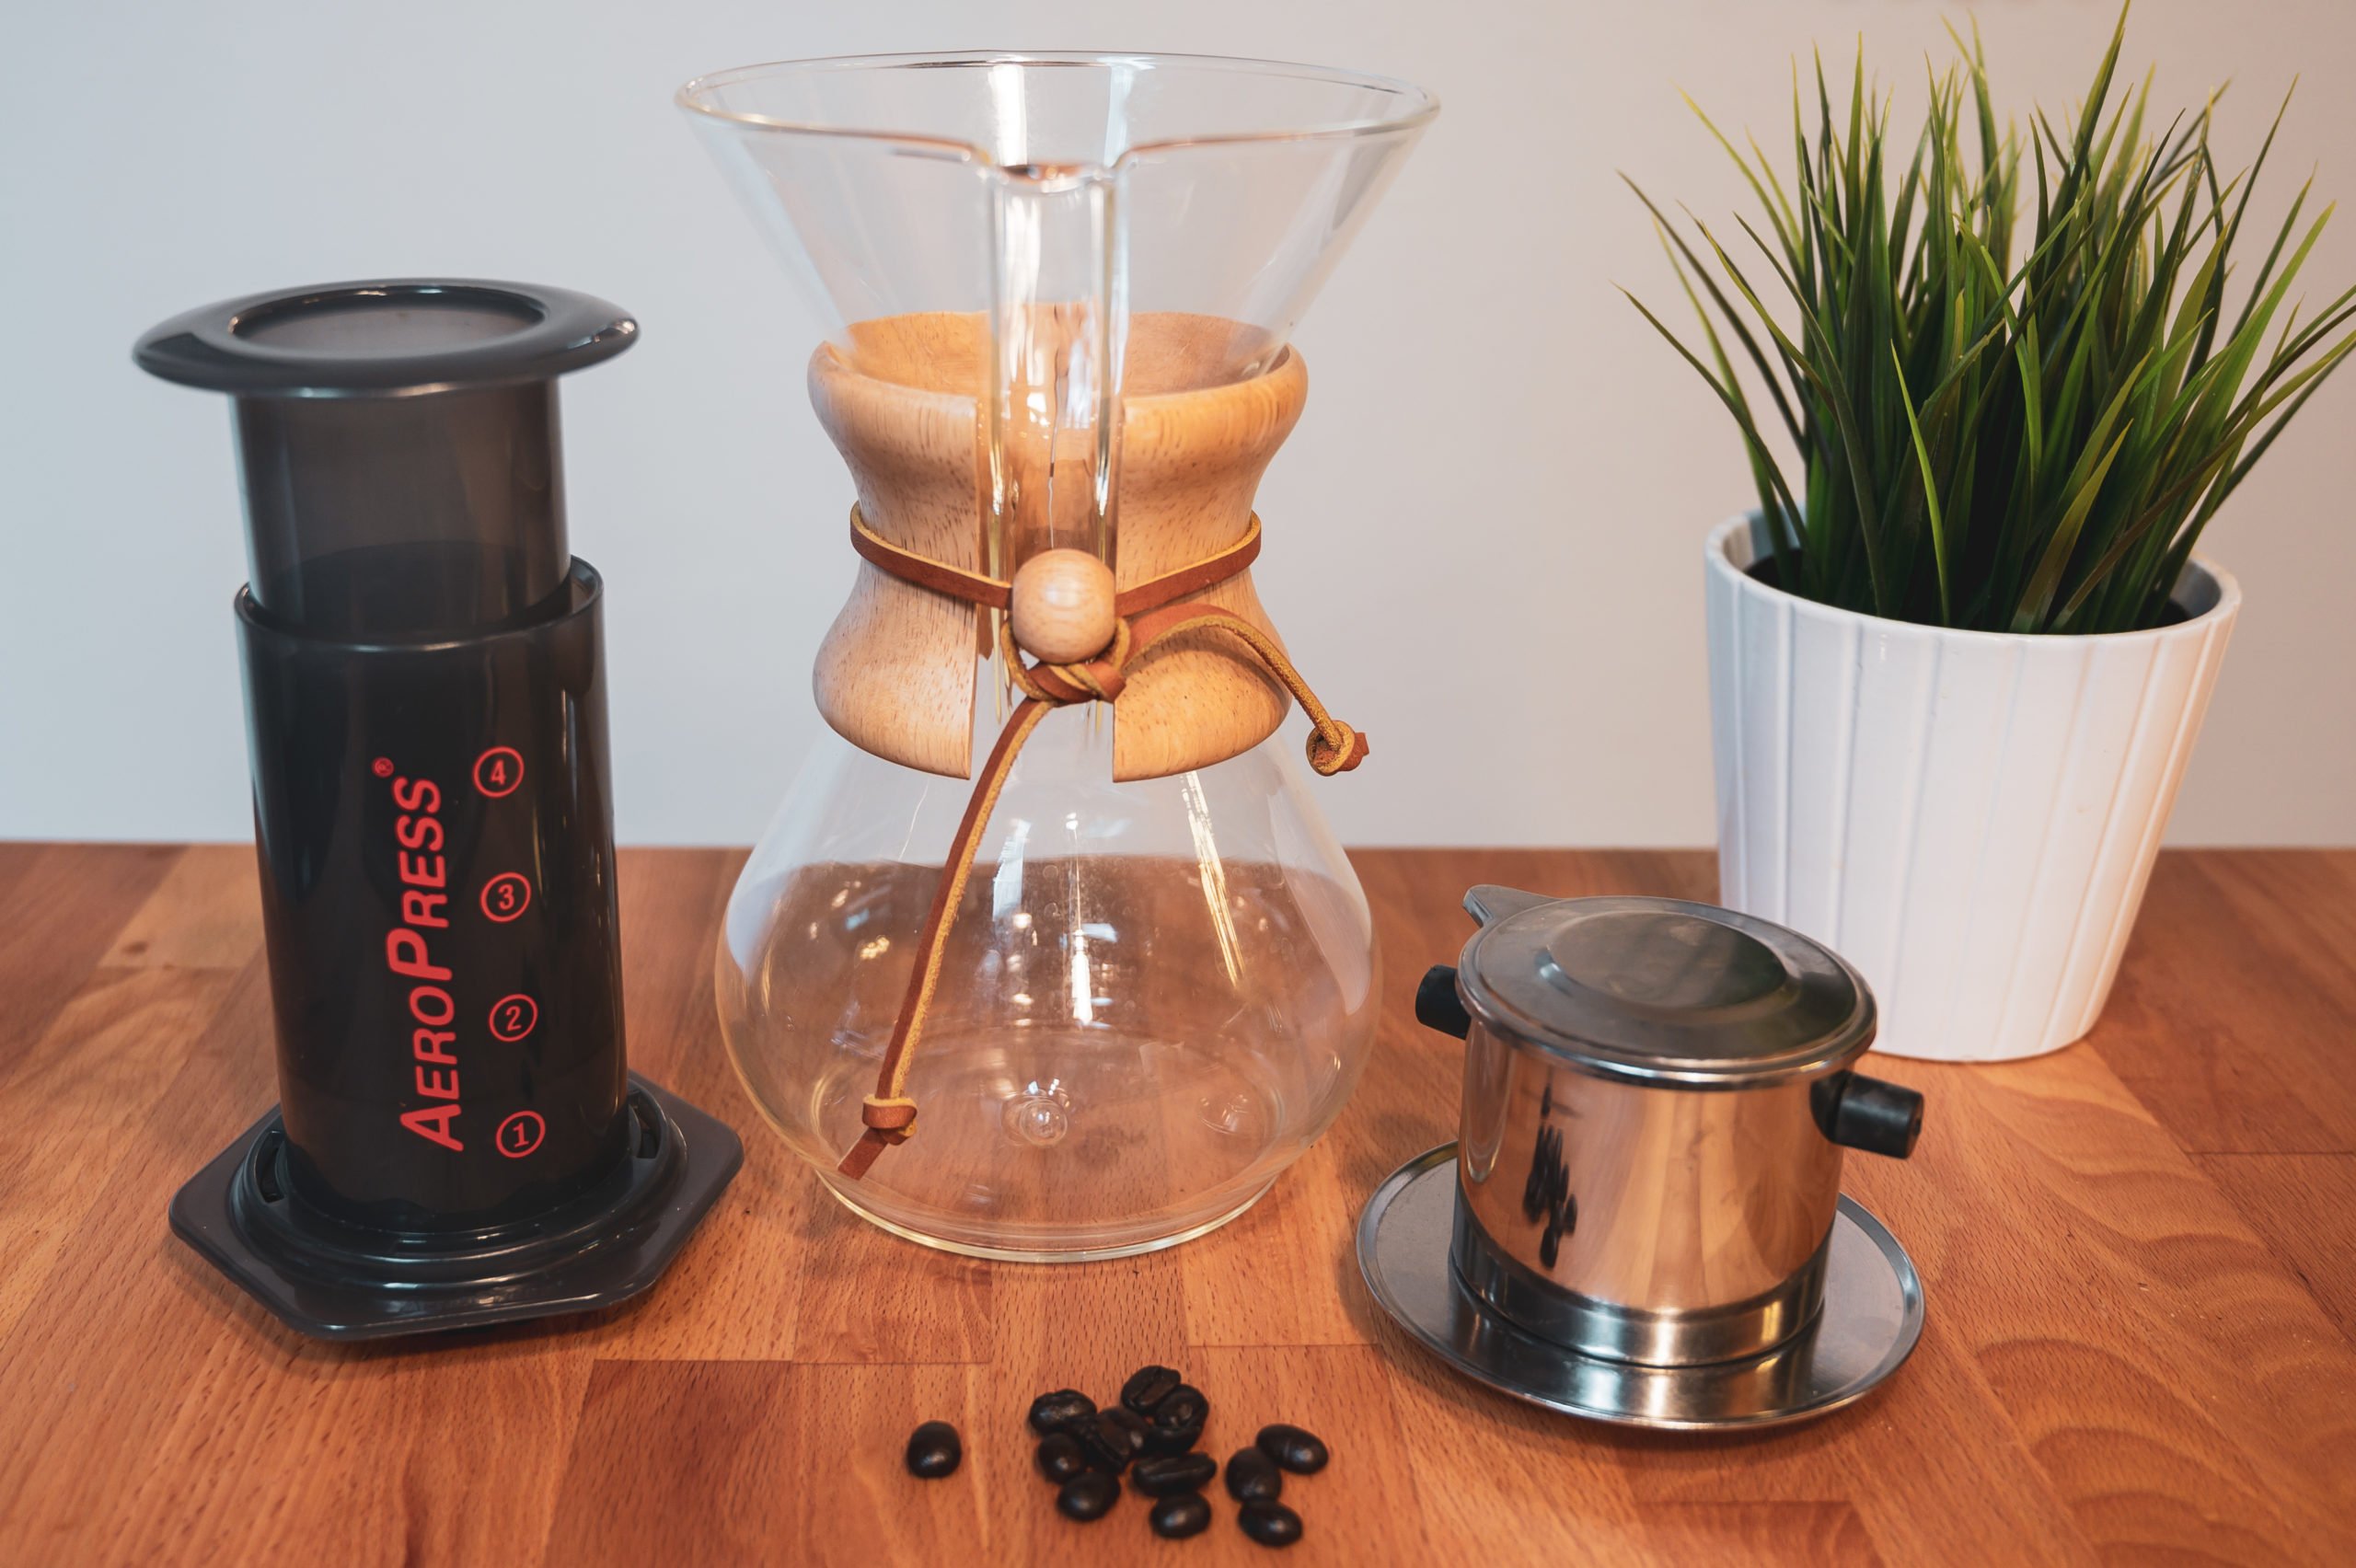
For the coffee lover who wants to explore coffee experiences from other cultures, this makes a great gift–and a great cup of coffee! Check out my recipe for how to make Vietnamese Coffee Three Ways. You just might discover your favorite way to drink coffee!
This is one of my most recent coffee-related purchases. Pour-over coffee makers brew a less acidic cup of coffee and extract more flavor from the coffee beans. I will say the name “Chemex” sounds very unappealing, but it makes a delicious cup of coffee! The Chemex coffee makers come in 6, 8, and 10-cup sizes. You also need to purchase these filters to use with your Chemex.
The AeroPress coffee maker was something I received as a Christmas gift, and I love it! At first, I was skeptical, but I was pleasantly surprised at what a flavorful cup of coffee this simple coffee maker produced.
Like the Chemex, the AeroPress also brews a less acidic cup of coffee than your traditional drip coffee maker. It works similarly to a French press, but without the bitterness and occasional sediment associated with a French press.
The Aeropress is excellent for travel. The one I received for a giftcame with a carrying bag and 350 microfilters. It is lightweight and compact, made in the USA and constructed of BPA-free plastic, thus no worries about it breaking during transport.
I saw that they also have this new travel design that comes with a mug, which also doubles as the carrying case for the AeroPress coffee maker.
Cold Brew Coffee Maker
I love cold brew coffee! I realize my low-acid coffee talk probably sounds like a theme at this point, but cold brew coffee also has a lower acidity than traditionally brewed coffee. Thus it’s easier on the stomach. Many people choose to drink cold brew for that very reason.
Now you do not need to purchase a cold brew maker to make cold brew coffee. You can of course also make it using a French press coffee makeror even a good old canning jar. However, if you know someone who likes to drink cold brew daily, then they may appreciate owning a dedicated cold brew coffee maker.
The Takeya cold brew coffee makermakes it easy to brew overnight and eliminates the need for straining your brew though paper filters or cheesecloth.
OXO’s cold brew coffee makerisa slightly more “upscale” option and is also highly rated. This cold brew maker is easy to use, and the pieces stack together to make it compact for storage when not in use.
Coffee
Let’s face it every coffee lover has one thing that always makes a great gift–coffee! Here are some great coffees beyond what you can buy at your local grocery store.
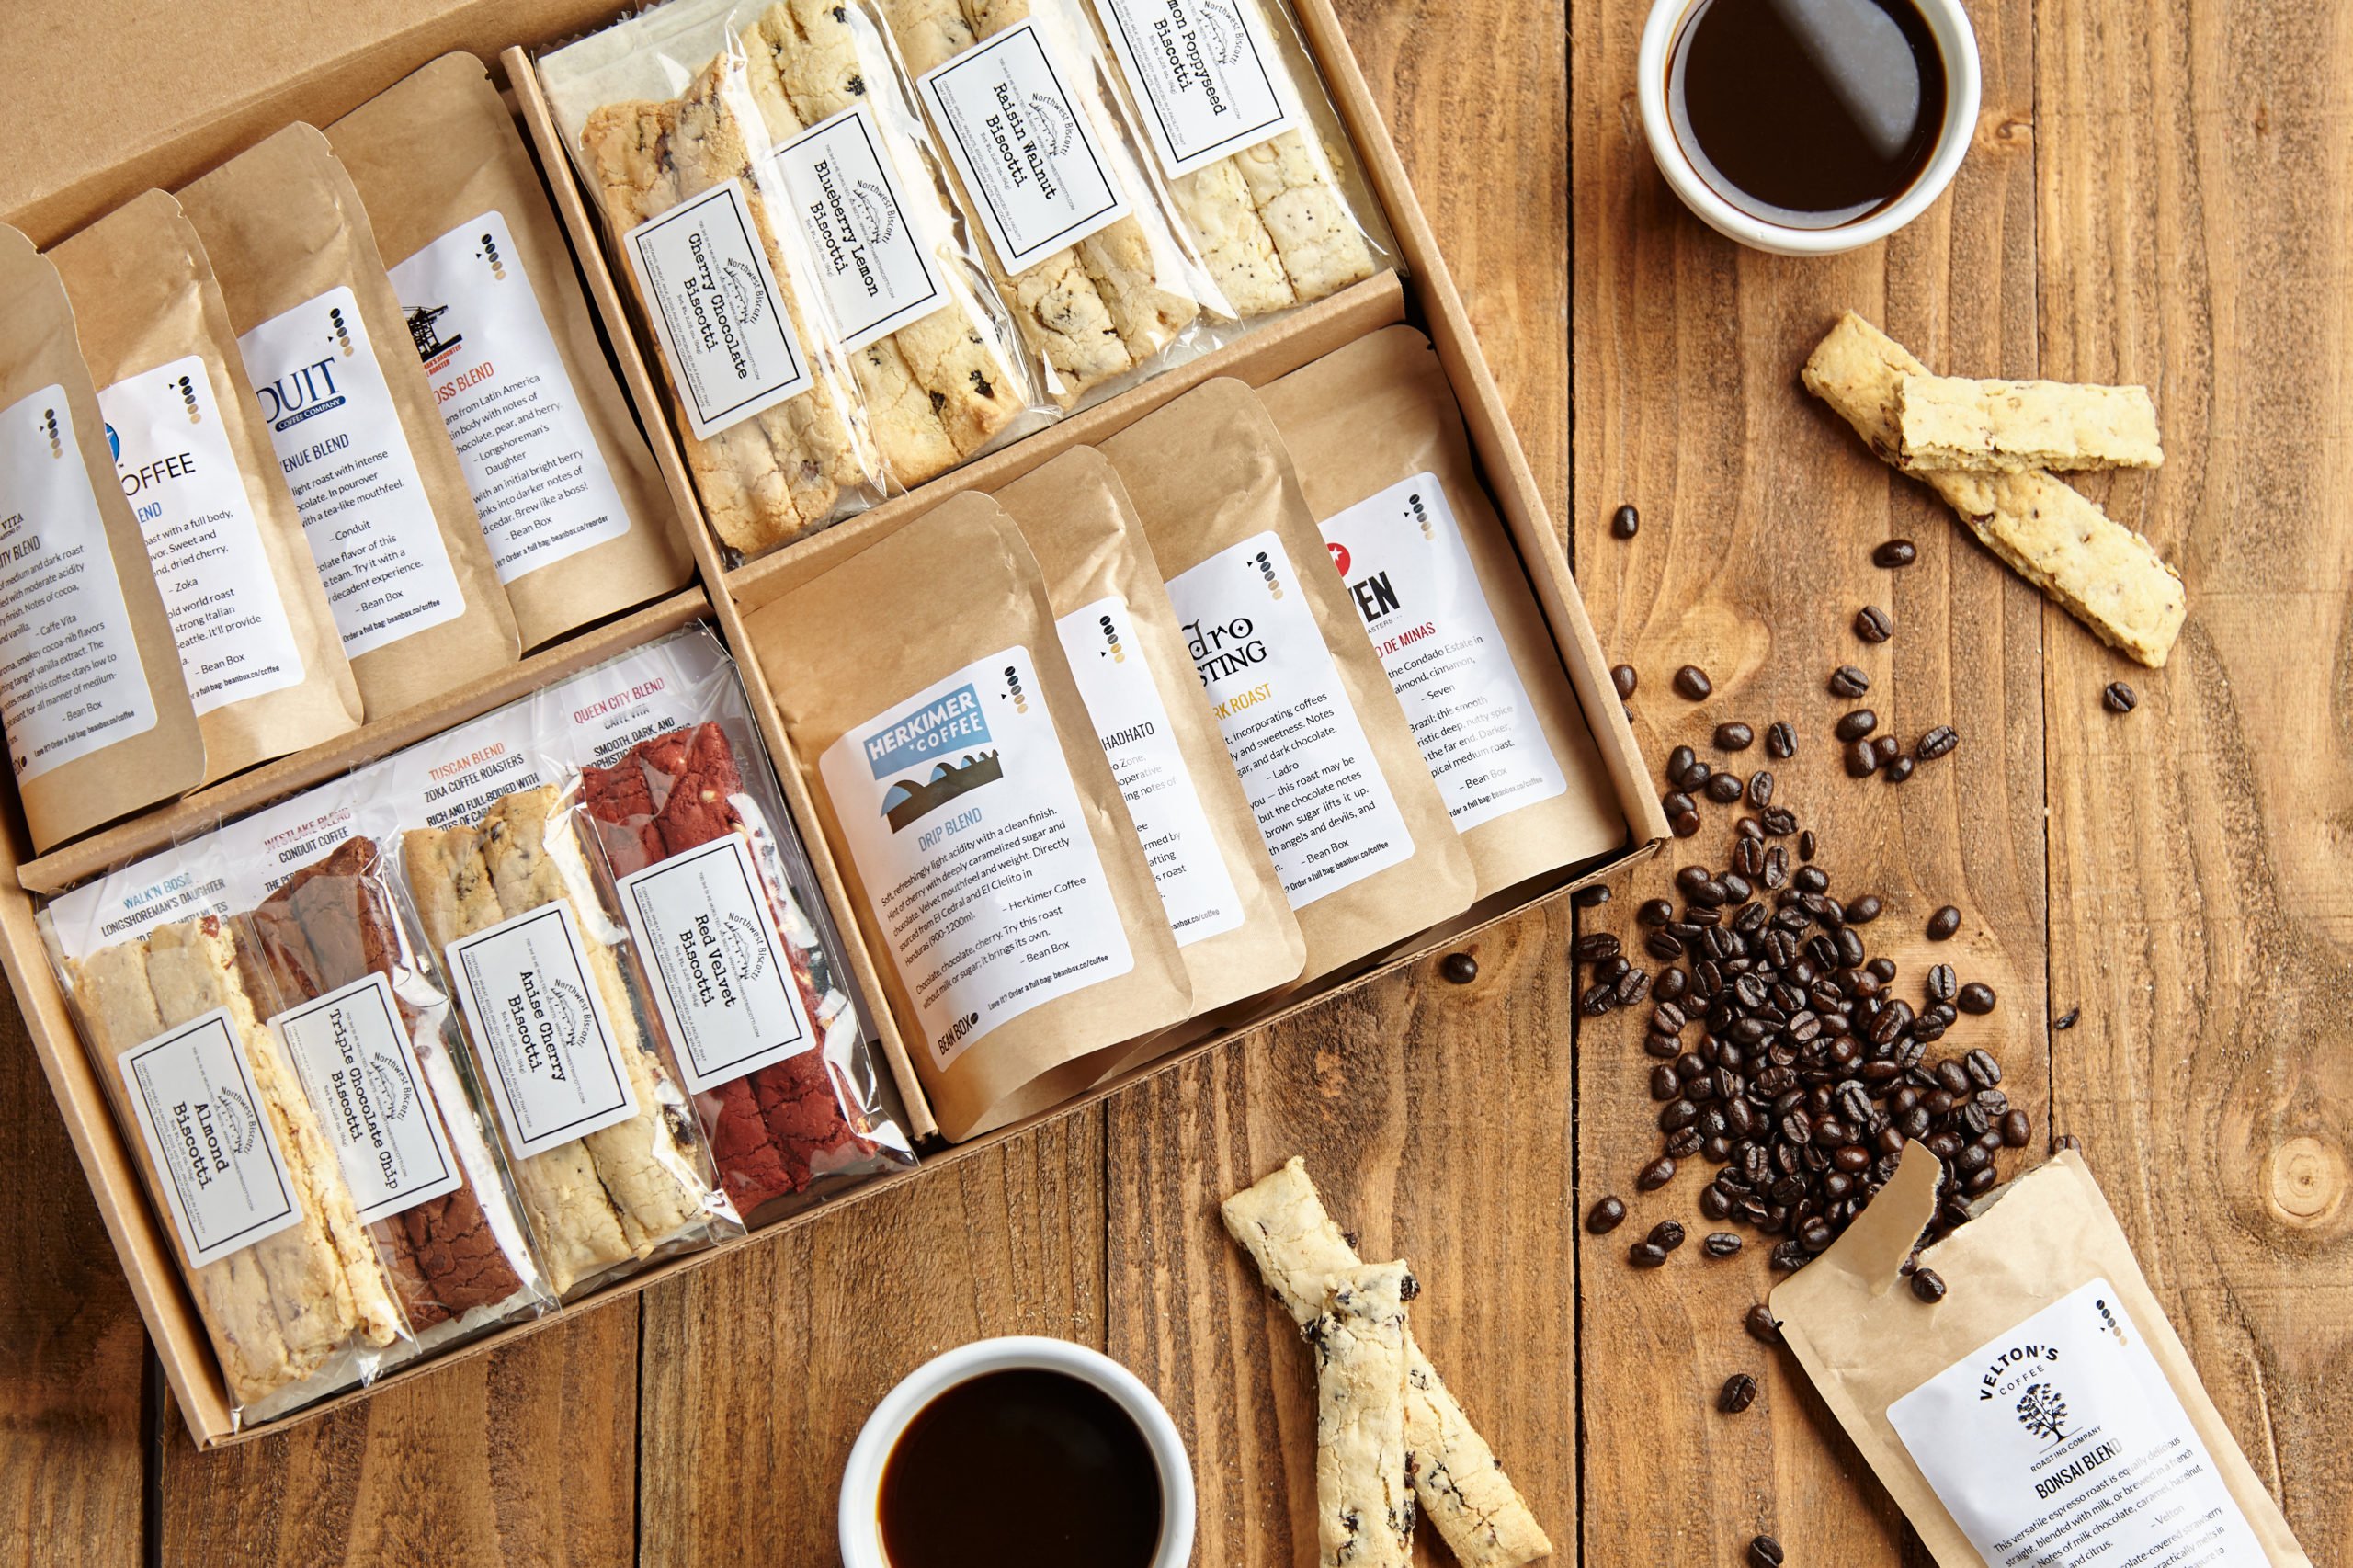
I love supporting local and independent businesses, and Bean Box checks both of these off for me. Plus, they sell excellent quality coffee. Win-win! You can read more about Bean Box in my article about artisan coffee roasters.
Bean Box works with 35 Pacific Northwest roasters (and counting) to bring you a huge variety of coffee flavors. If your coffee lover enjoys being surprised by their coffee or loves to try new things, Bean Box coffee is a perfect choice!
Trades of Hope is another fantastic company that supports artisan entrepreneurs and independent coffee growers. Your gift of coffee makes a significant impact on the lives of the coffee growers and their families in Guatemala.
If your coffee lover is a little more of a traditionalist and doesn’t necessarily want to sample unique flavors of coffee, then the Trades of Hope Natalia Blend Coffee is a great option. It is a high-quality medium roast coffee, perfect for your morning cup of coffee.
Altruistic Joe Coffee
Altruistic Joe is a veteran-owned small business selling delicious fresh roasted coffee. They also give back 20% of all their sales to deserving charities, so you can feel good about every purchase you make knowing it not only supports a veteran but also other worthy causes. Plus, their coffee is delicious! I recommend getting their sampler packor trying my favorite, the Big Iron Blend.
Why give a single bag of coffee when you can give a year of coffee! This is another excellent gift for the adventurous coffee lover in your life.
Bean Box offers a variety of monthly coffee subscriptions that you can personalize according to the type of roast your coffee lover prefers. Choose from the Bean Box Sampler, which allows your coffee lover to sample four different coffees each month. You can also purchase the Coffee of the Month subscription, where they’ll get one bag to sample each month.
Travel Mugs
While most coffee drinkers probably have more coffee mugs than they need at home, they may not have the perfect on-the-go mug. Travel mugs make great gifts as a good travel mug will keep your coffee hot (or cold) long after you’ve left the house.
Tervis is a Florida-based company that makes these almost indestructible travel mugs that are great for hot or cold beverages and are dishwasher safe! Choose from a variety of designs like this too cute Mary Poppins design or for the Friends fan in your life check out this Central Perk design. There is a vast selection from which to choose!
The Sea to Summit X-Mug is an excellent choice for hiking, motorcycle trips, and travel in general. It collapses, so it takes up almost no space, and I’ve used mine for eating oatmeal or drinking coffee. It is a versatile mug.
Coffee Gifts for the Sweet Tooth
I admit that I tend to prefer salty and spicy snacks rather than sweet snacks. However, I love all things coffee–including sweets! My favorites include chocolate-covered coffee beans, coffee ice cream, coffee candy, and coffee-flavored desserts (like this coffee cake or this coffee jelly).
Here are some great book choices all about coffee. Whether your coffee lover is a coffee aficionado or just a beginner looking to try new recipes, these books will make great gifts.
I give links to Amazon as most people have access to Amazon online. However, I recommend you also look at your local department store to see what deals they have. Another store you might consider is Bed Bath and Beyond.
If you sign up for their mailing list, you’ll receive a 20% off coupon each month to use toward fun purchases like coffee gear! I often find that their standard price combined with the coupon gives me the best deal anywhere, including when compared with Amazon.com.
Happy Caffeinating!
*Disclaimer: Travelffeine is reader-supported. When you buy via links on this site, we may earn an affiliate commission at no cost to you.
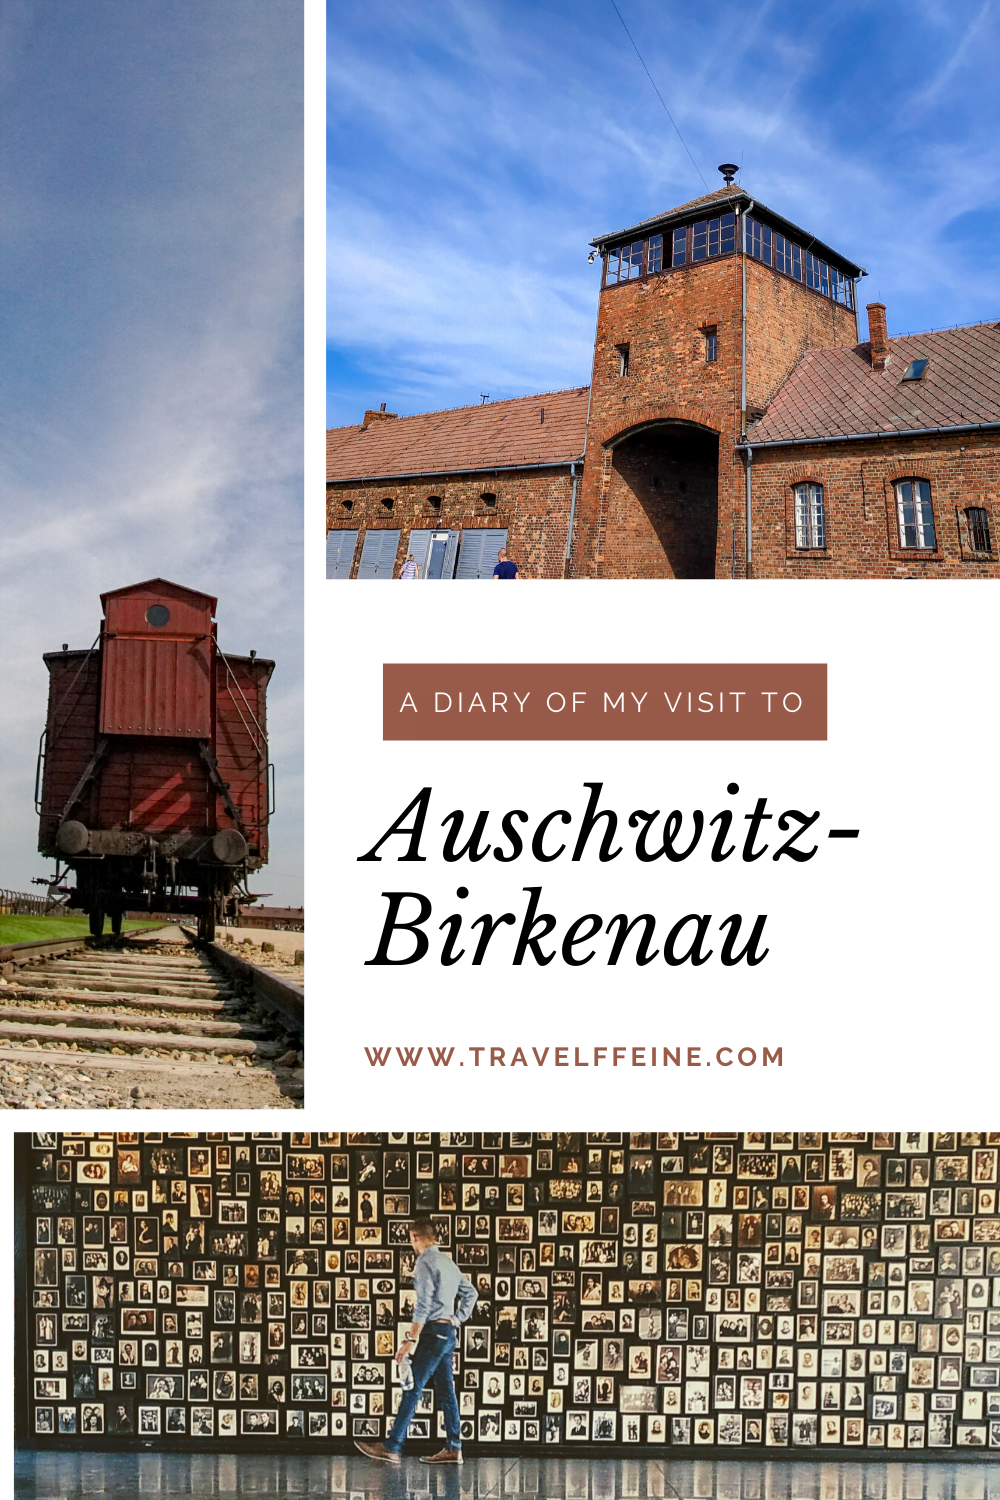
I tried to think of what I would write regarding my visit to Auschwitz. I have so many thoughts regarding WWII and on the subject of The Holocaust. There are so many studies on The Holocaust and so much history to cover that I knew I could not discuss it all or better express the facts already documented.
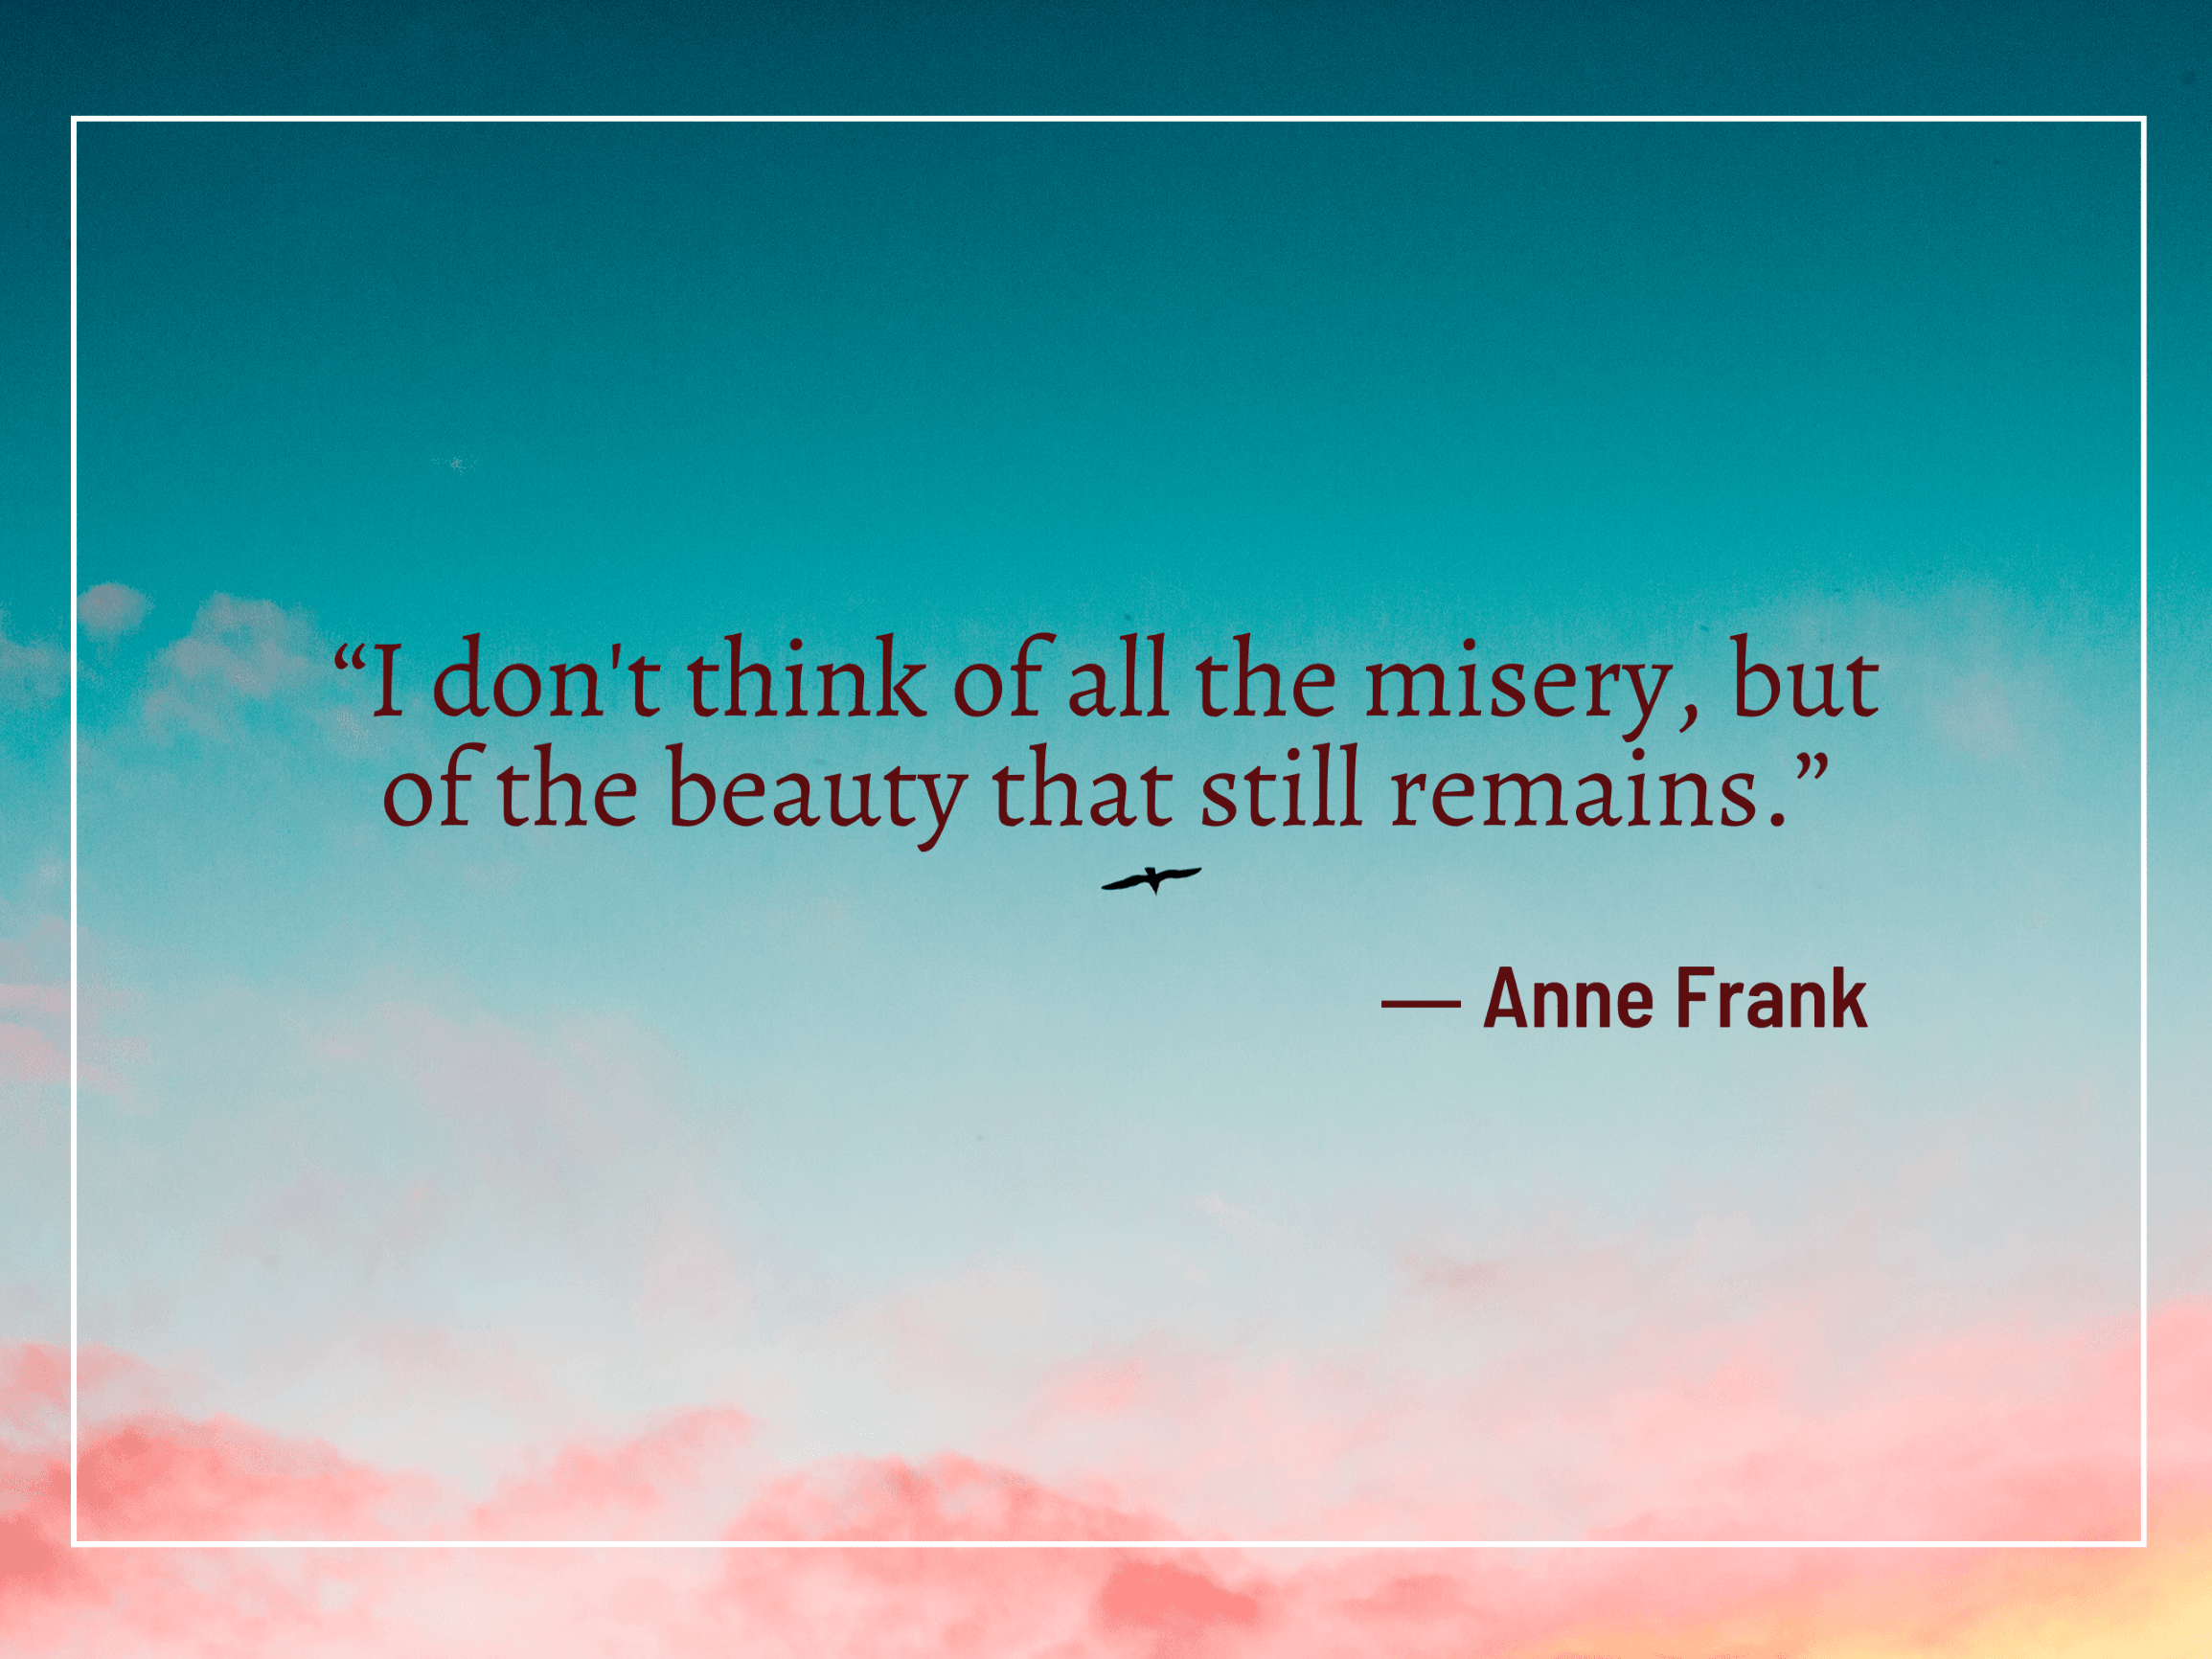
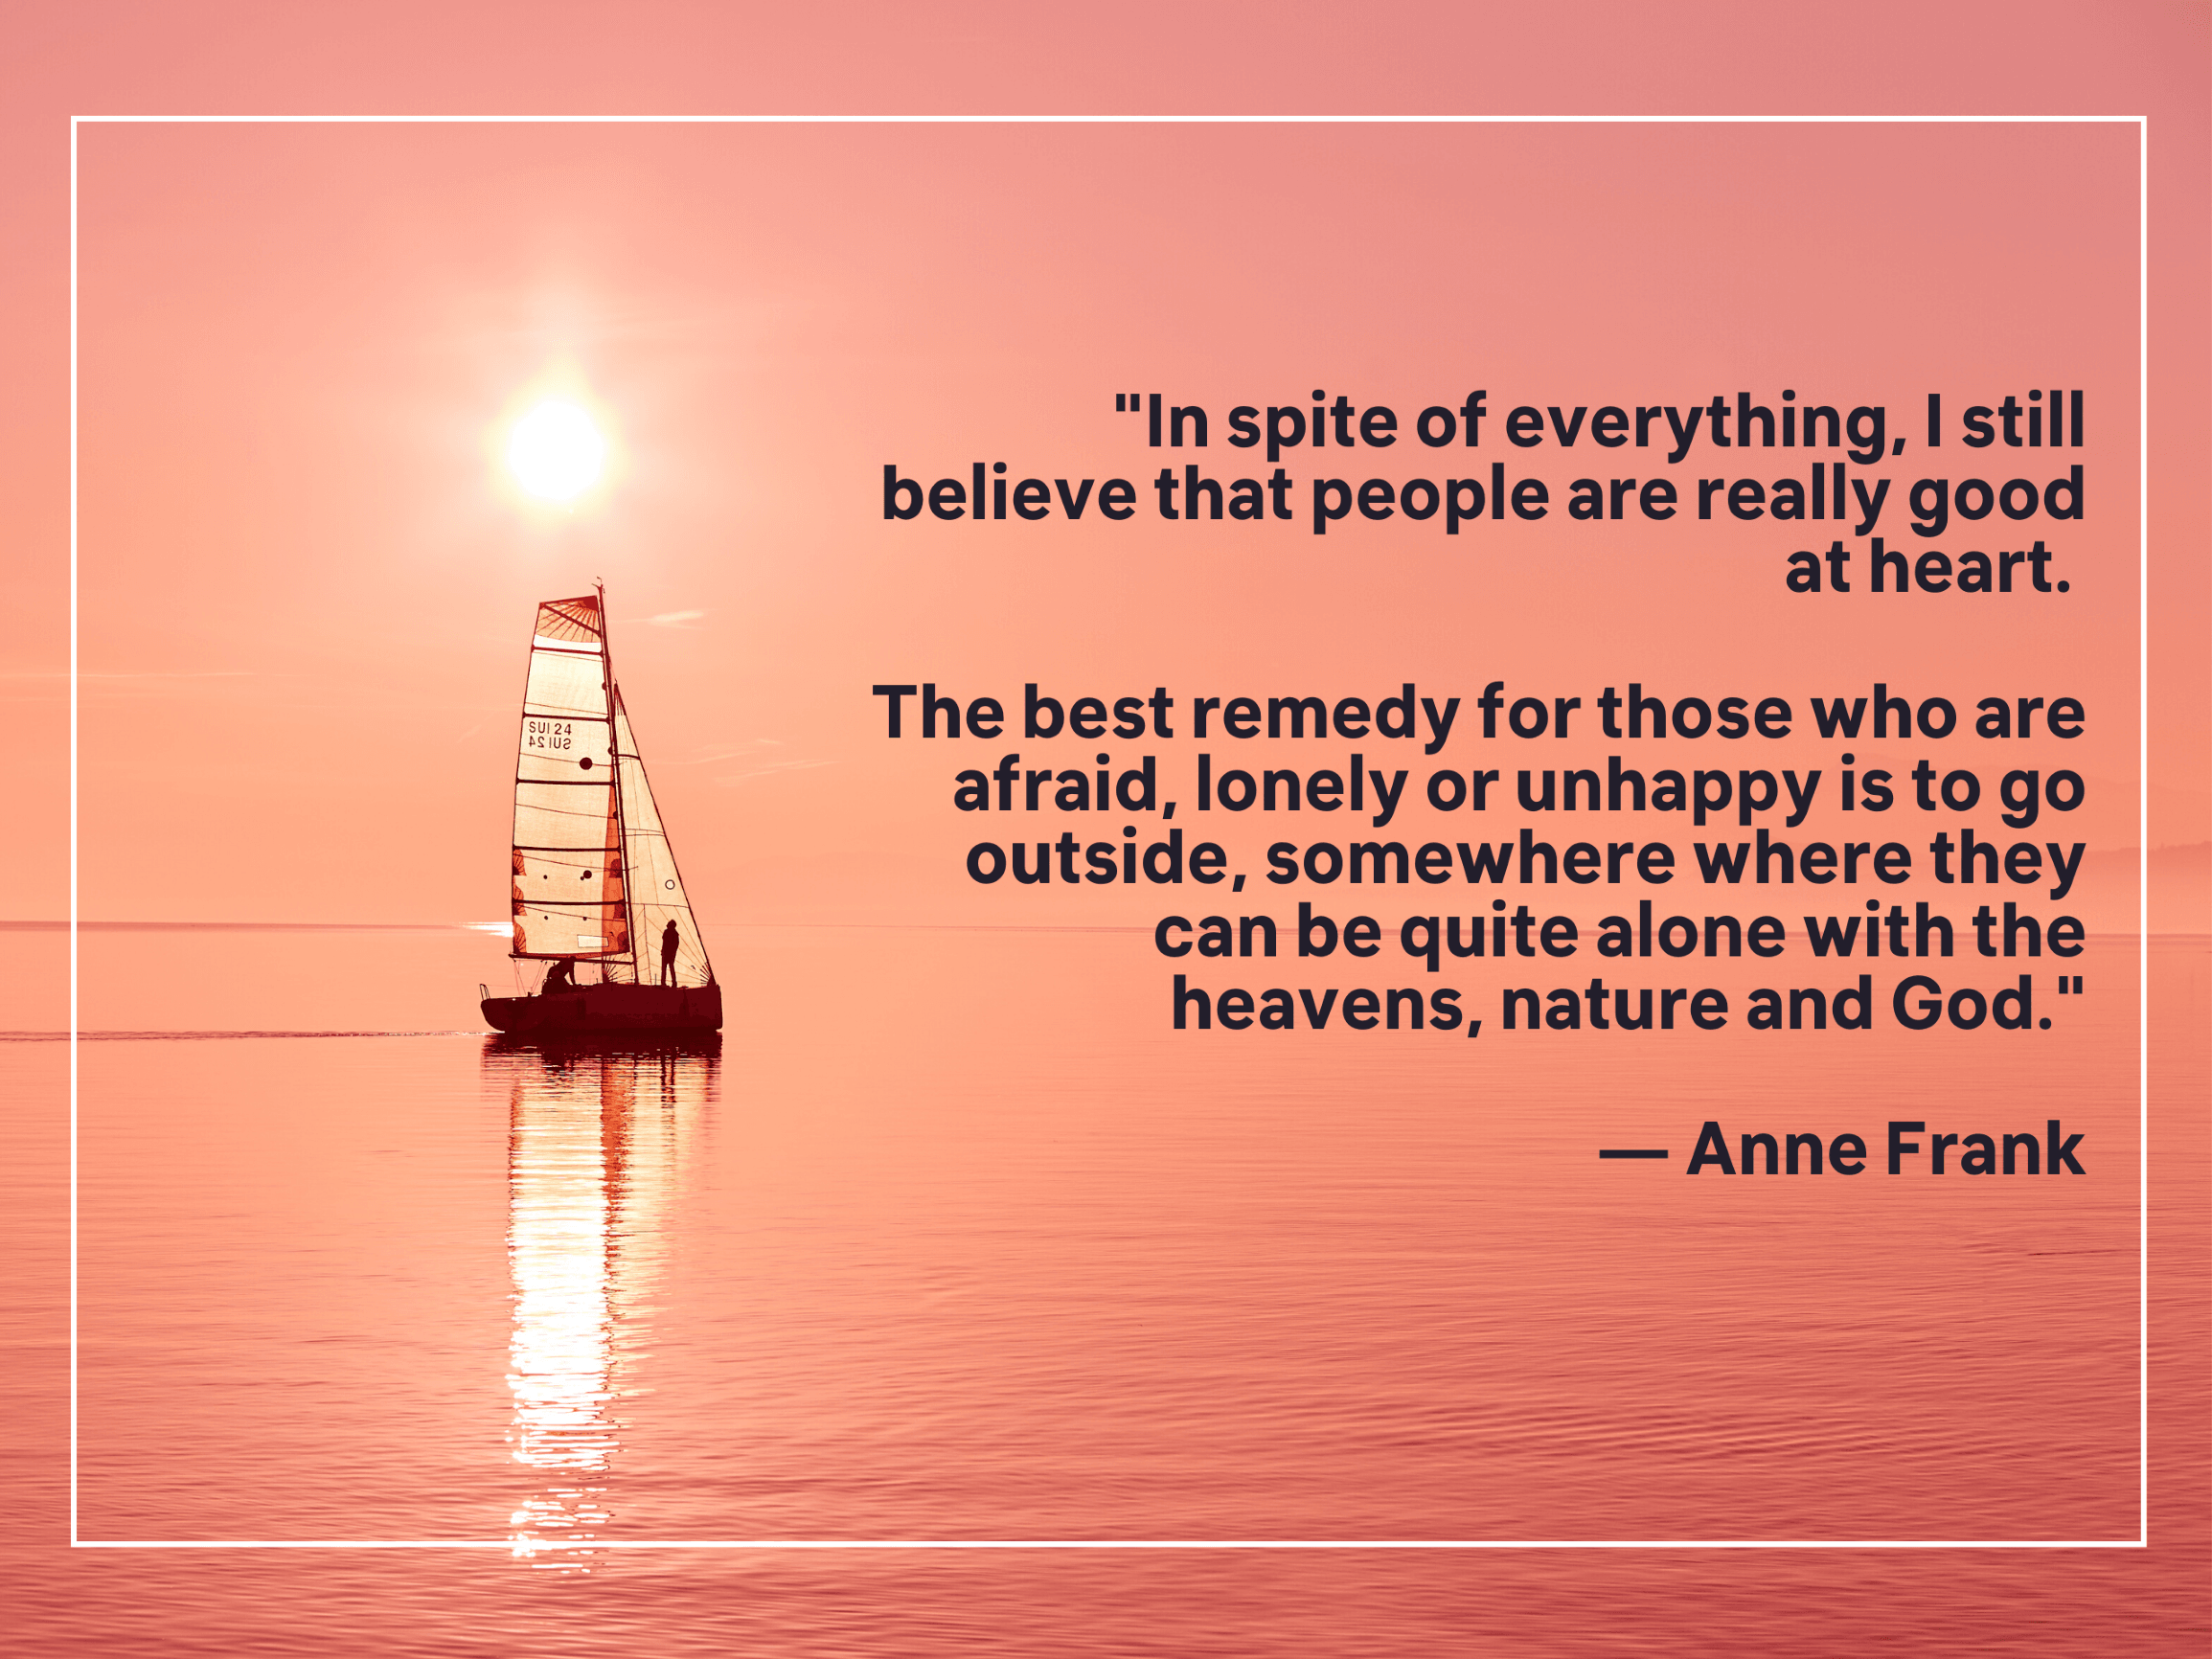
Before my trip to Europe, I listened to the full version of The Diary of Anne Frank. I also spent a few days in Amsterdam, where I visited the secret annexwhere Anne and her family and the others hid from the Nazis. It was very moving to read her diary and then to visit the place where she penned it.
After the Nazis discovered them, Anne and the other seven people in hiding were all sent to Auschwitz. Some transferred to other camps, and only Otto, Anne’s father, survived. So as I contemplated how to write about my visit to Auschwitz, it seemed fitting to write a diary of my day and the thoughts I had along the way.
I will also provide information on how to visit Auschwitz-Birkenau at the bottom of the page. I recommend if you get a chance to visit here, that you’ll take it. It is a place that will leave an imprint on your heart. A place all of us should remember and never forget.
Tuesday, September 18th, 2018
My day begins far too early for my liking. However, I get up when my alarm goes off at 4:45 a.m. I have somewhere to be. Today is the day I will check off another bucket list destination. I know some may consider it a strange one, but it is a place I’ve read about since I was a child. A place that seems too awful to be true. Today I will visit Auschwitz-Birkenau.
My friend Angela and I finish getting ready. We leave our Airbnb apartment in Krakow around 5:25 a.m. to meet our Uber driver. His name is Dmytro. He is nice, but nervous and keeps apologizing for every bump in the road. I assure him that we have rough roads where we come from too.
We arrive ahead of schedule, so we wait for the bus. Angela told me earlier she’s a little apprehensive about today as she thinks it will be horrible.
Which of course, what happened was horrible. It was something so awful that people need to remember it happened. The horrors of Auschwitz and The Holocaust showed us the evil side of human nature.
Yet, it also demonstrated the resilience of the human spirit. The hope and faith that is still here. And the willingness of humans to not only sacrifice their earthly possessions to help others but to also lay down their very lives for the cause of freedom.
Bus Ride to Auschwitz-Birkenau
As I ride the bus to Auschwitz, sitting in my padded blue seat, I think what the journey must have been like for the victims transported there. I watch the landscape as we zip past the fields, the small towns, and forests along the way. What was the scenery like almost 80 years ago when they brought the first prisoners to Auschwitz?
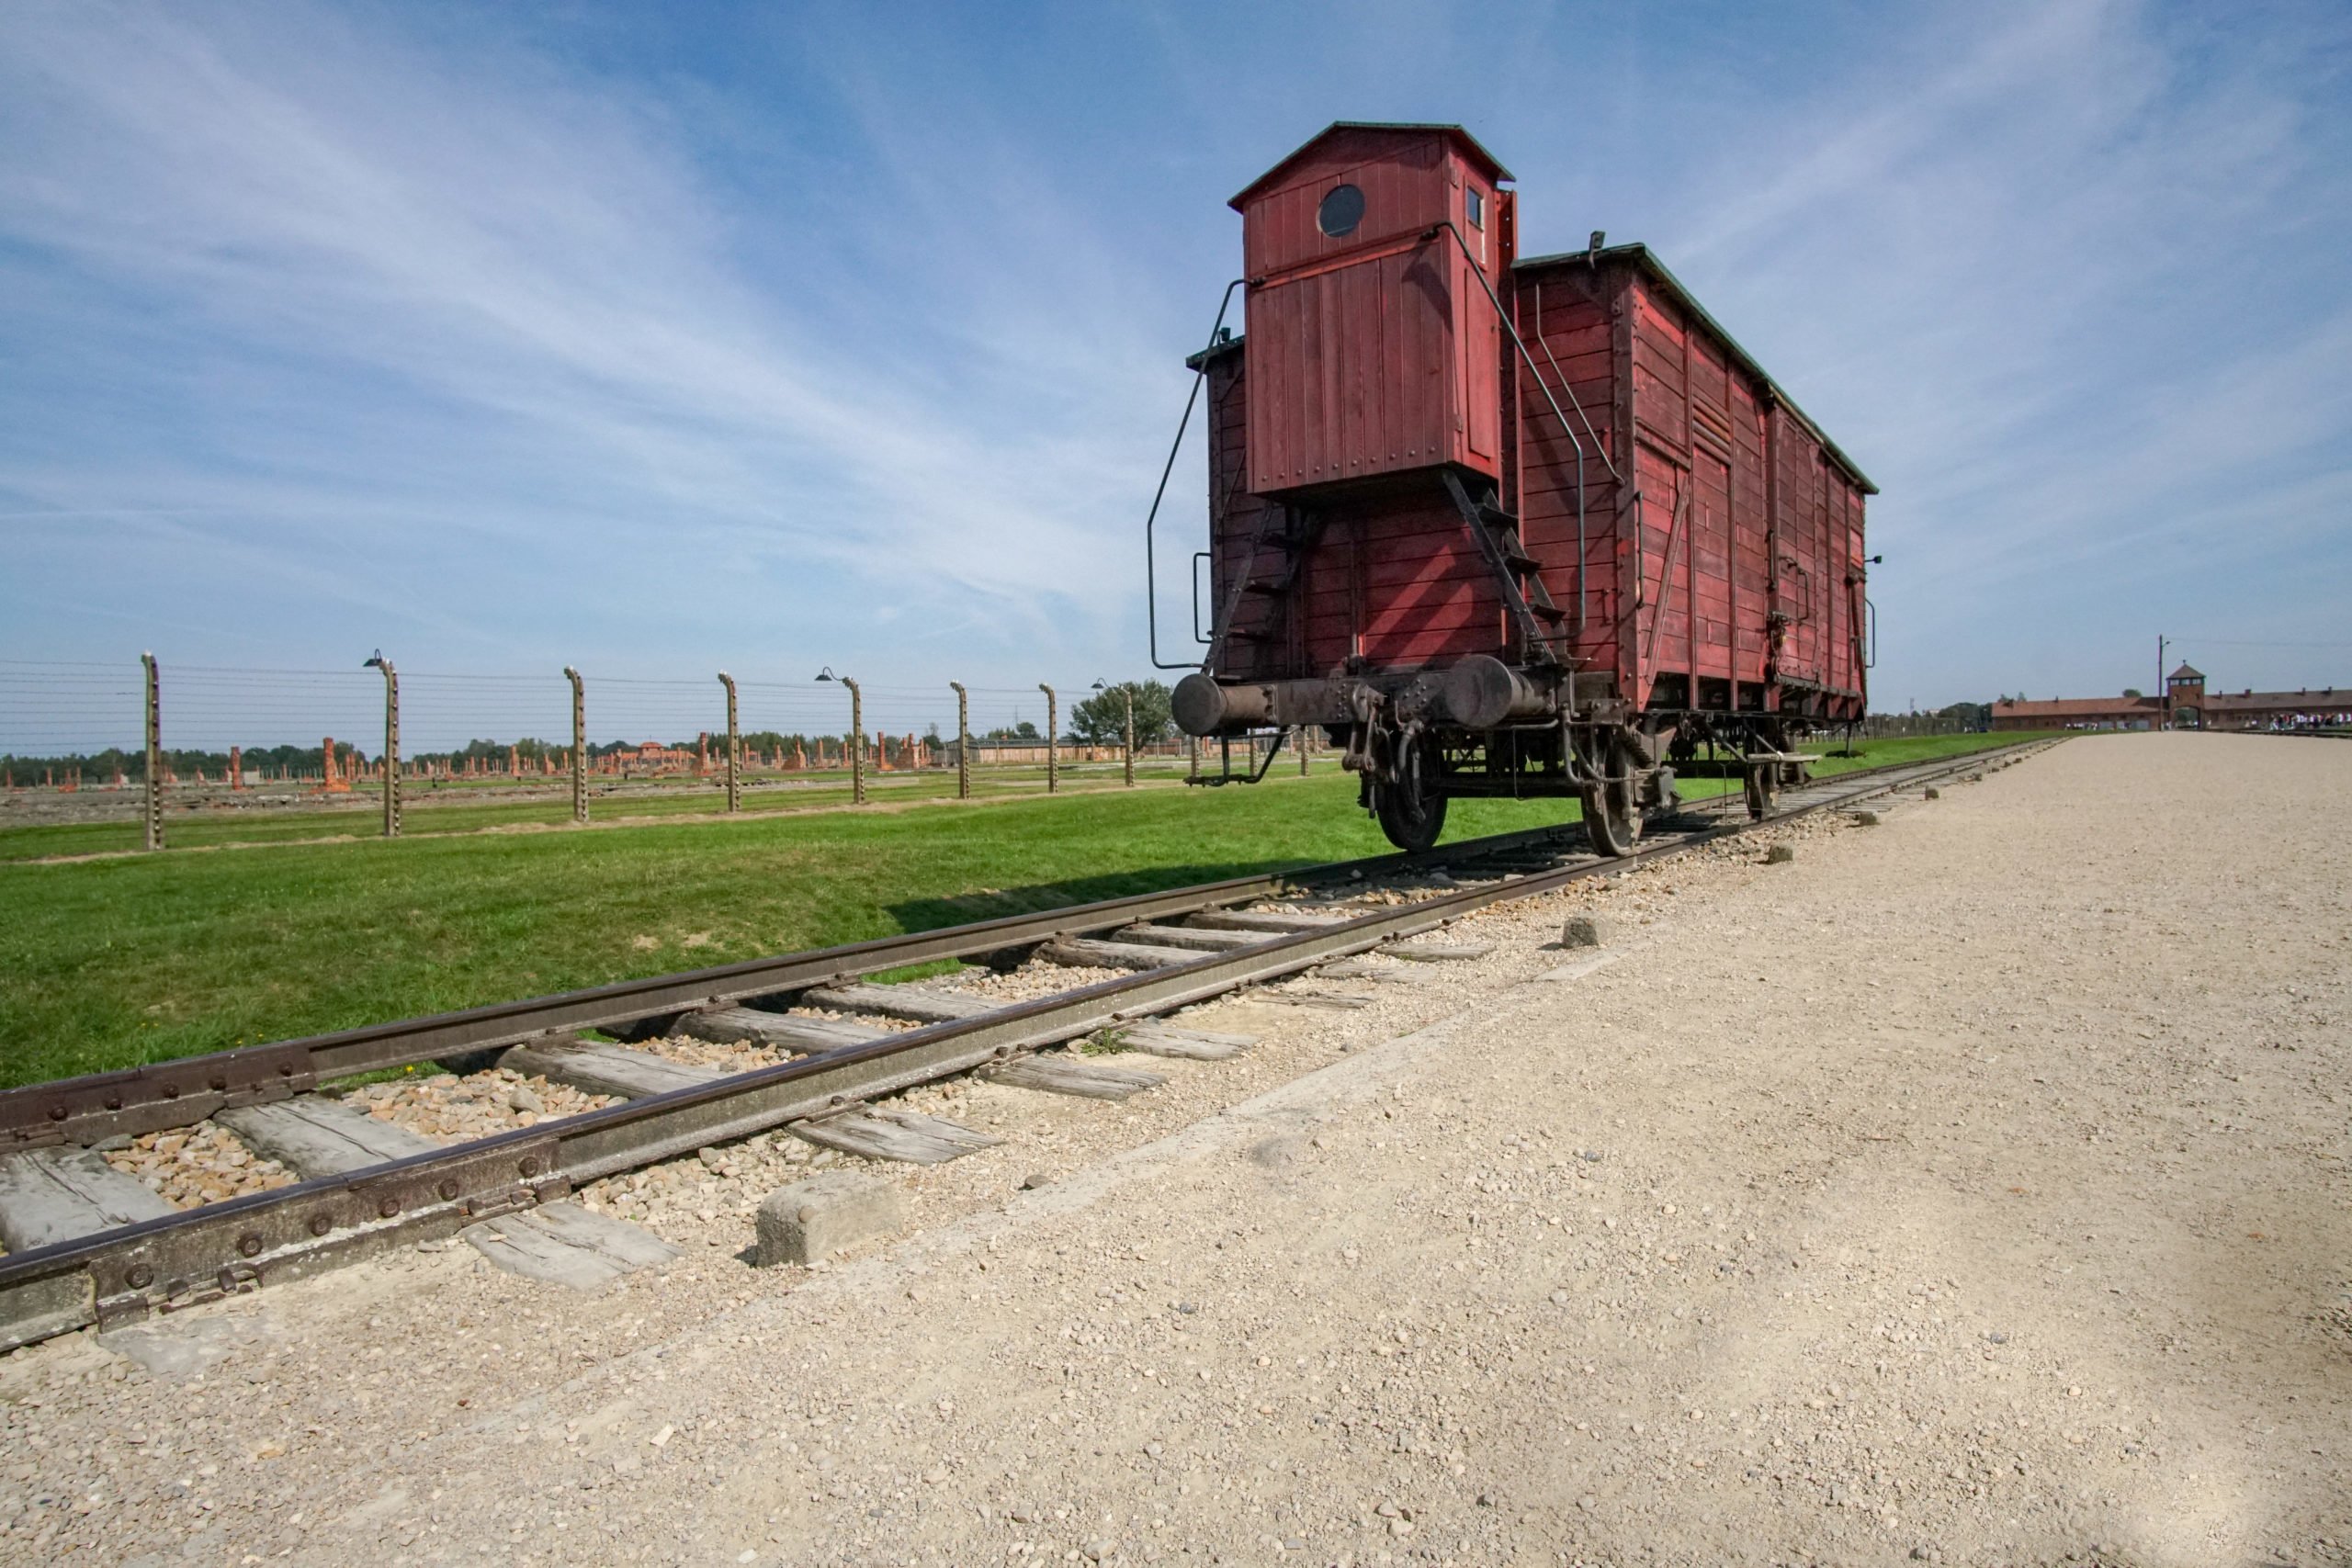
Later, I would see the train cars that brought the captives packed so tight they could hardly breathe. They didn’t have the luxury of a padded seat or windows to view the scenery. They were transported like cattle, worse than cattle. The Nazis packed 80-100 people to a train car with no windows, little to no food or water, and only a bucket to use as a toilet; many died during the journey. I cannot imagine it is too awful to consider.
Eating Breakfast in Auschwitz
The bus drops us off just outside the museum complex. We cross the parking lot, and I think about how I haven’t had breakfast and should eat as it will be a long day. I feel almost guilty about this. Even though most would consider my breakfast here mediocre at best, it would have been a royal feast for the prisoners at Auschwitz. I try not to think about this and instead eat my egg with toast and drink a cup of coffee.
I later learned that the prisoners at Auschwitz would work 11 hours of hard labor and receive around 1150-1400 calories per day. The food was so awful that in the beginning, it was hard for them to eat it, and later due to their starvation, they would eat food out of the garbage. I saw photographs of people who had lost over 50% of their body weight. They were living skeletons.
Waiting for Our Museum Tour
After eating breakfast, we walk through a security checkpoint on our way to a waiting area for our 9:00 a.m. tour group.
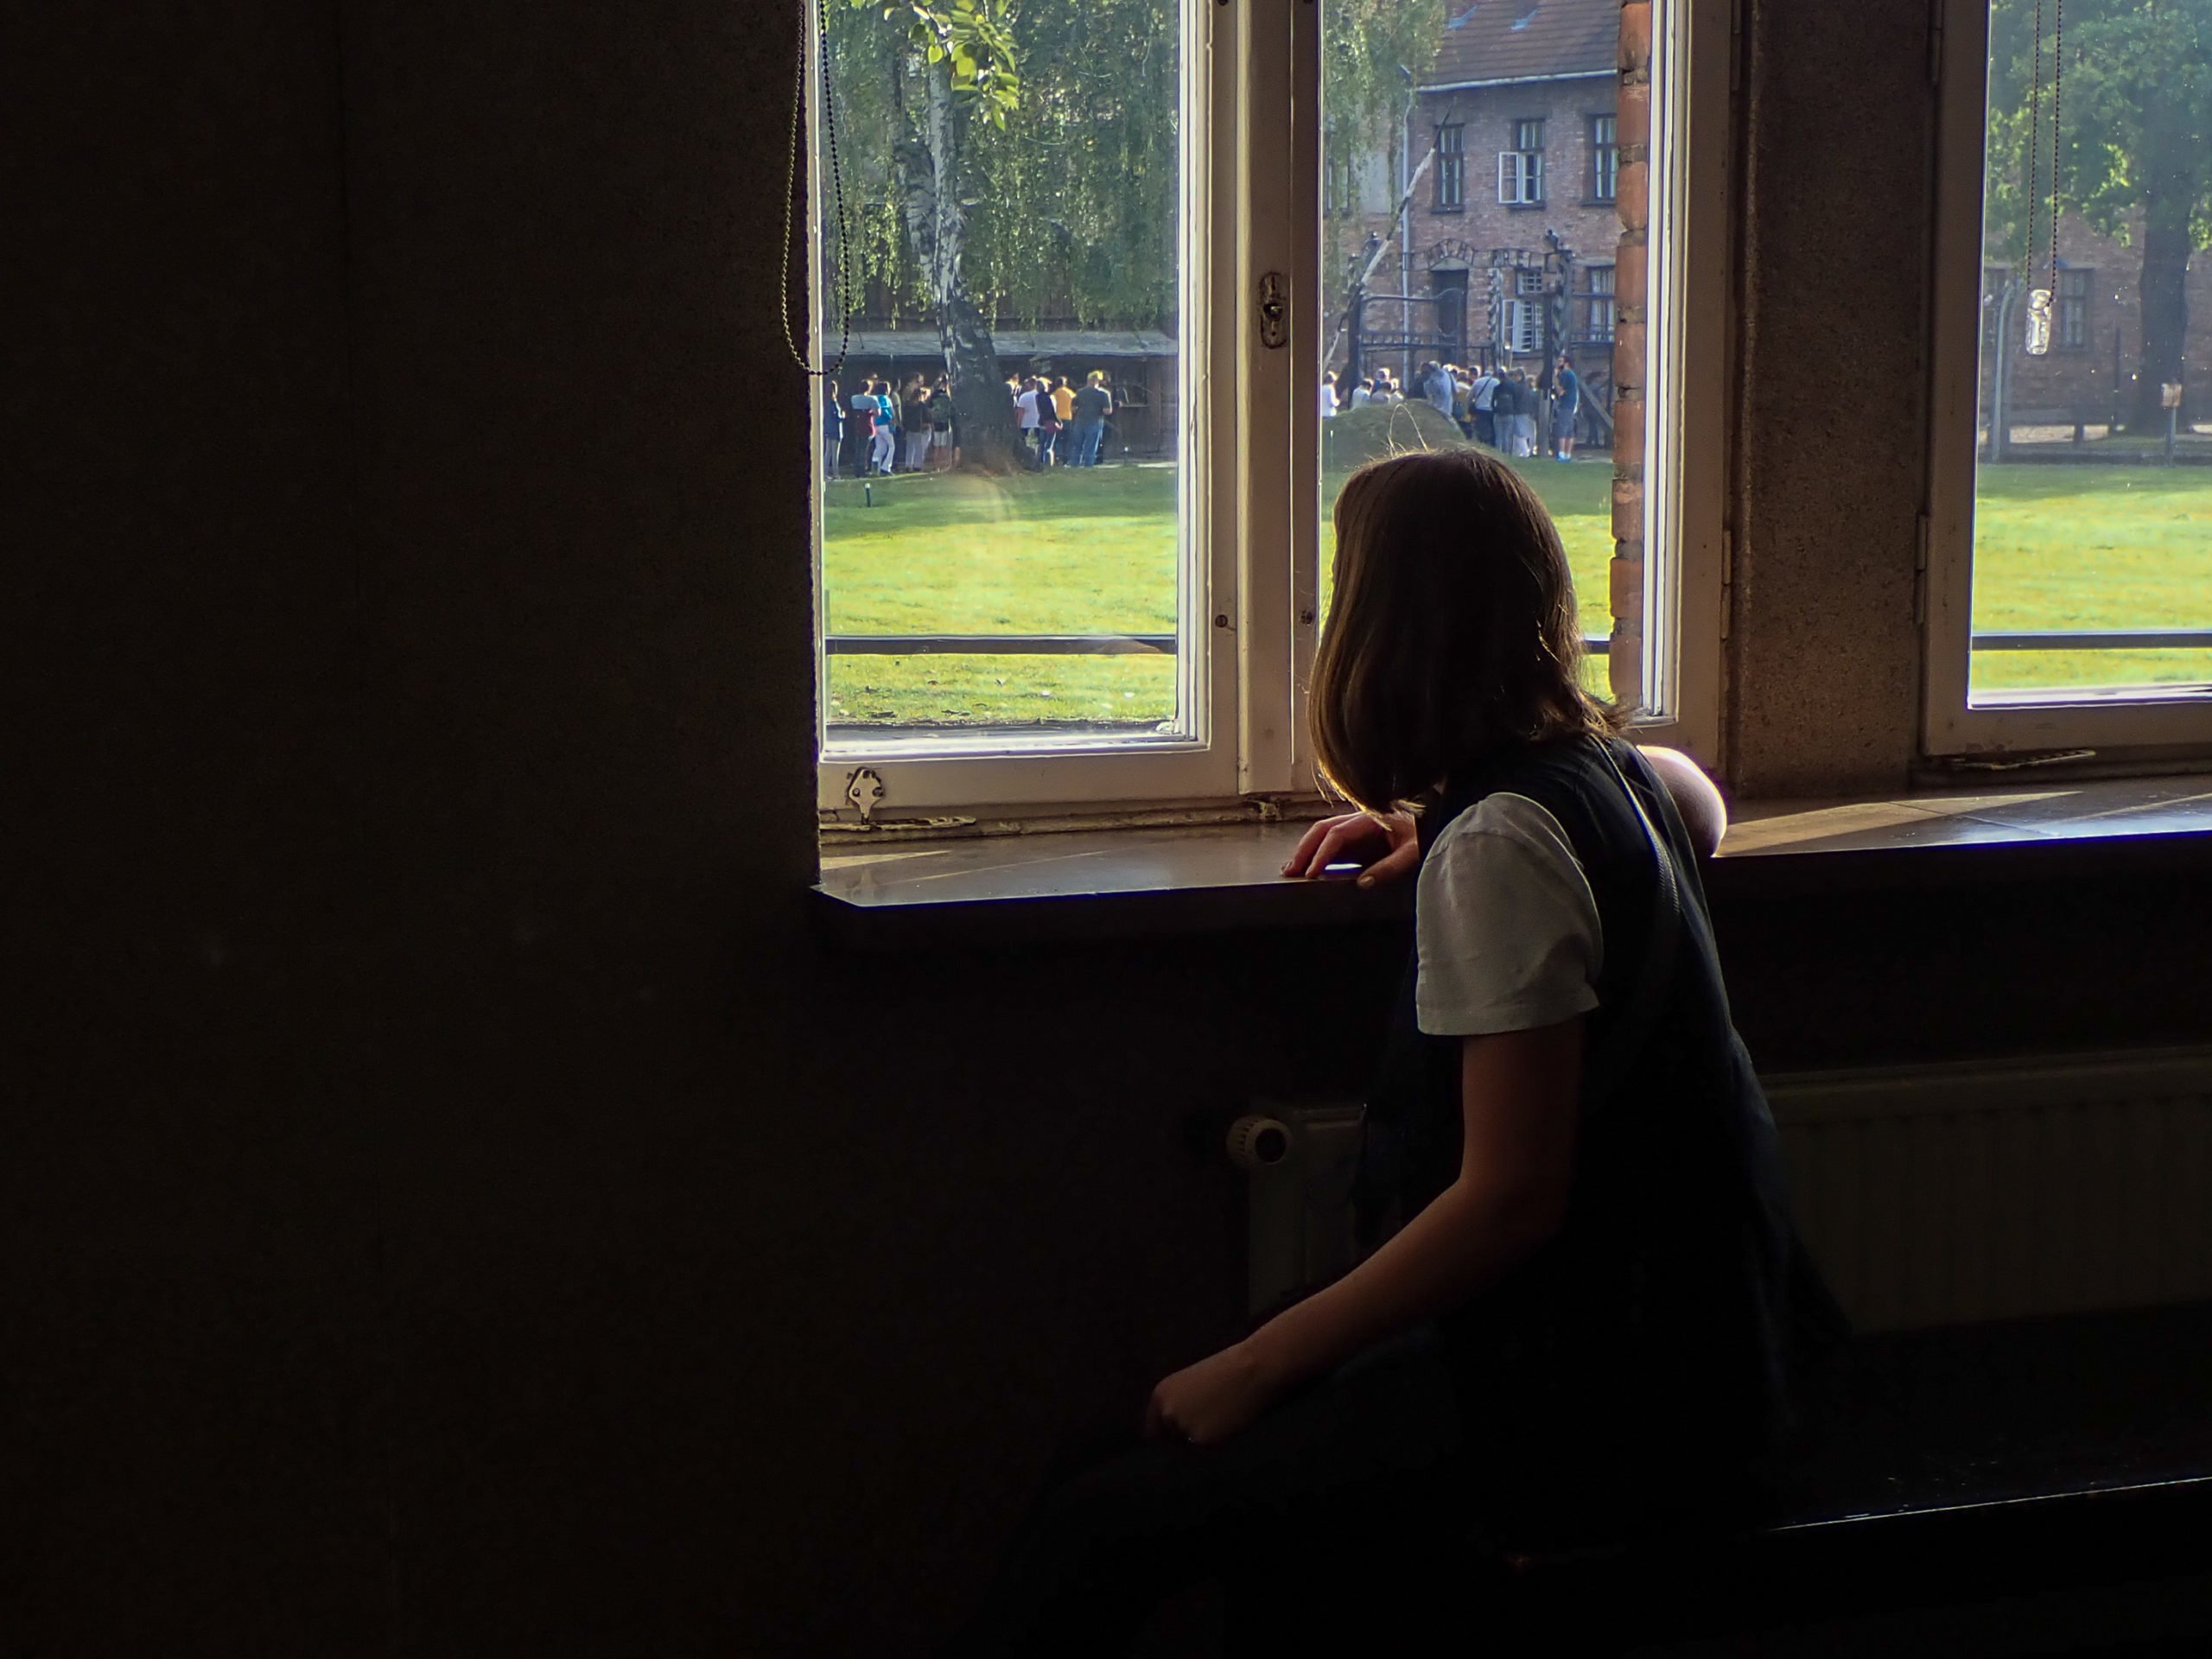
I find a seat by a window where I look out over the courtyard. It is a bright sunny day, hardly a cloud in the sky. It doesn’t feel dark and scary. There are hundreds of people milling around in tour groups, walking to and from the various barracks and buildings.
I look out over the grassy lawn to see the iconic gates that read “Arbeit Macht Frei” (“work sets you free”), and I think about the prisoners’ first glimpse of these gates and what they must have felt.
I try to imagine what it must have been like to arrive here on one of those trains. Indeed, I cannot grasp the agonizing journey that would have brought them here nor the atrocity of their fate.
Why It’s Important to Remember
No, try as I might, sitting there, looking out the window, as I wait safely for my tour, I could not grasp the horrors they went through.
However, I felt it was important to try. It is important to remember and never to forget. To accept what happened. Denying it does no one any good. It does not preserve the memory of those murdered, and it does nothing to respect the memory of those who gave their lives to stop these horrible crimes. We must remember and work to see that it is never again repeated.
And so I begin my tour, knowing I will hear the stories of things that are too terrible to imagine, but this isn’t fiction, this is the raw, unedited history of human depravity–and also the courage of the human spirit.
“Remember only that I was innocent and, just like you, mortal on that day, I, too, had had a face marked by rage, by pity and joy, quite simply, a human face!”
~Benjamin Fondane, murdered at Auschwtiz-Birkenau, 1944
Heroes of The Holocaust
It was these stories of courage that our guide tells us about during our tour at Auschwitz. She told us about Helena Plotnicka. A wife and mother of six kids. Helena sacrificed what little food her family had to leave food in the fields where she knew Jewish prisoners worked. She left it there for them to find.
Helena also worked to acquire medicines for the prisoners and would also leave these in the fields. Additionally, the prisoners would give her letters and correspondence explaining the conditions in the camp so she could help spread the word. Helena was later arrested and died in Auschwitz in 1944. She was one of many heroes that tried to fight the tide of evil.
Other heroes like Miep Gies, Victor Kugler, Bep Voskuijl & Johannes Kleiman from the Diary of Anne Frank. Corrie Ten Boom and her family, Oskar Schindler, and countless others, including the millions who sacrificed their lives during World War II to give hope and freedom to the victims of the Holocaust and the cause of freedom for all humanity. We must remember their sacrifice.
The Lies of the Nazis
Our guide explains that survivors would later recount the relief they felt upon arriving at Auschwitz. They came to Auschwitz believing if they worked hard, they would continue to live. The Nazis were fine with people knowing that they had work camps, but they hid the true identity of Auschwitz-Birkenau. They hid the fact of what it really was—a death sentence.
So they lied. Guards forced other prisoners to write postcards from Auschwitz telling their family that the conditions were better there and that they didn’t have to work as hard. Then these prisoners were murdered. Later the Nazis tried to destroy the evidence of the crematoriums and other documents that would connect them with their crimes.
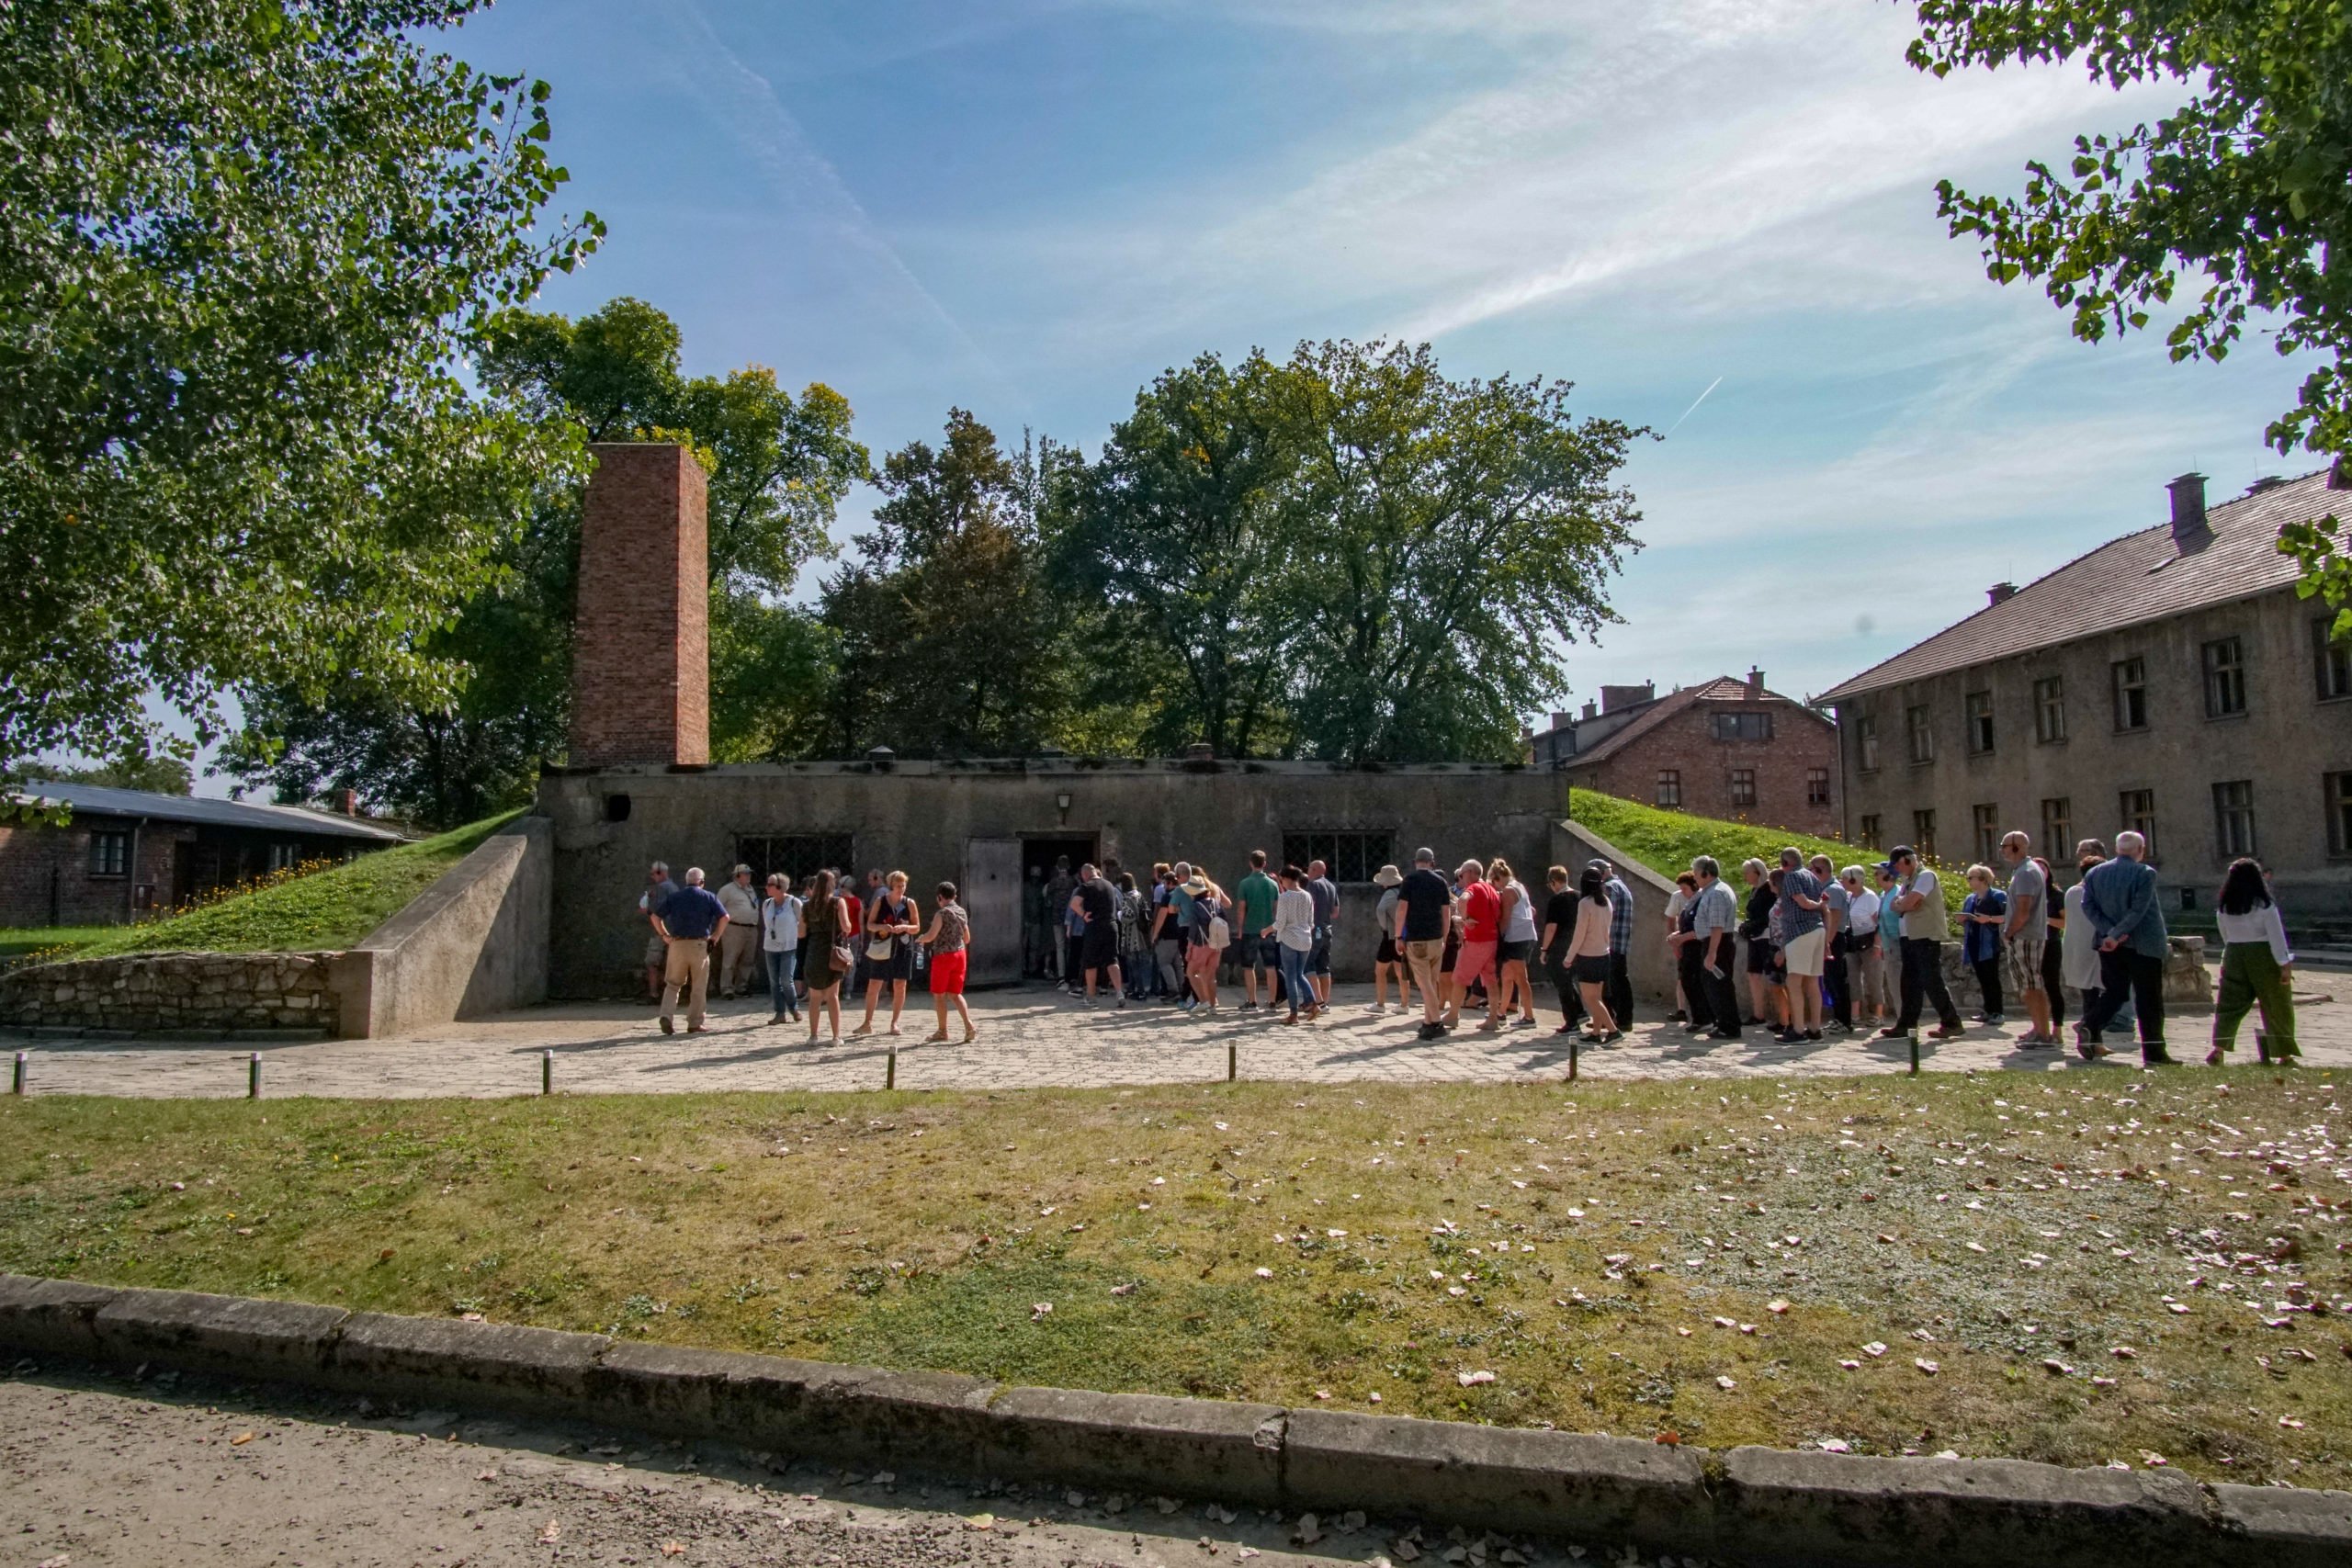
We saw piles of canisters once filled with Zyklon B. This gas, a type of cyanide, was used by the Nazis to exterminate millions in the gas chambers. Later our tour group walked inside one of these gas chambers. Fake showerheads placed on the ceiling perpetuated the lie that those entering were only taking a shower before moving to the barracks. Instead, they were sent to their deaths.
The Death Wall
Just before our break, we stop at the death wall. It’s an area where prisoners went through a series of steps that required them to undress and then walk naked to a wall where they were shot. Later the Nazis decided this was too slow of a process and thus came up with the idea of using gas chambers and crematoriums. They could only kill as many as they could burn; this turned out to be around 5,000 per day.
I saw the rooms with over two tons of human hair, the thousands of shoes, combs, pots, pans, and personal possessions left behind from the millions murdered. The Jews and other prisoners brought here thought they would leave someday, so they packed as many belongings as they could for the trip.
Upon arrival, they were told to leave their belongings in a pile and to remember where they left them as they would return to that spot. This was another lie. Instead, they went straight to a gas chamber, never to return.
Our Lunch Break
After almost 3 hours of touring Auschwitz, our guide announces that we’ll take a 40-minute break before continuing to Birkenau. 40 minutes. Just enough time to quickly eat the pb&j sandwiches we packed. We look for a place to sit in the shade to stay out of the burning sun.
It all seems surreal. One thing is for sure, I certainly won’t complain about the sun burning down on me, or how my back and feet are tired from so much standing and walking on the hard ground. These inconveniences are so inconsequential in the grand scheme of what occurred here. If complaining is wrong in normal circumstances, it seems almost sacrilegious now. Disrespectful, perhaps, is the sentiment I feel.
I look around at the other visitors lounging on benches and the grassy lawn outside the museum complex. Forty minutes doesn’t seem like a lot of time to digest what I’ve just seen and heard. Is there any amount of time that will make processing these horrors any easier?
Time is up, we board another bus and leave for Birkenau.
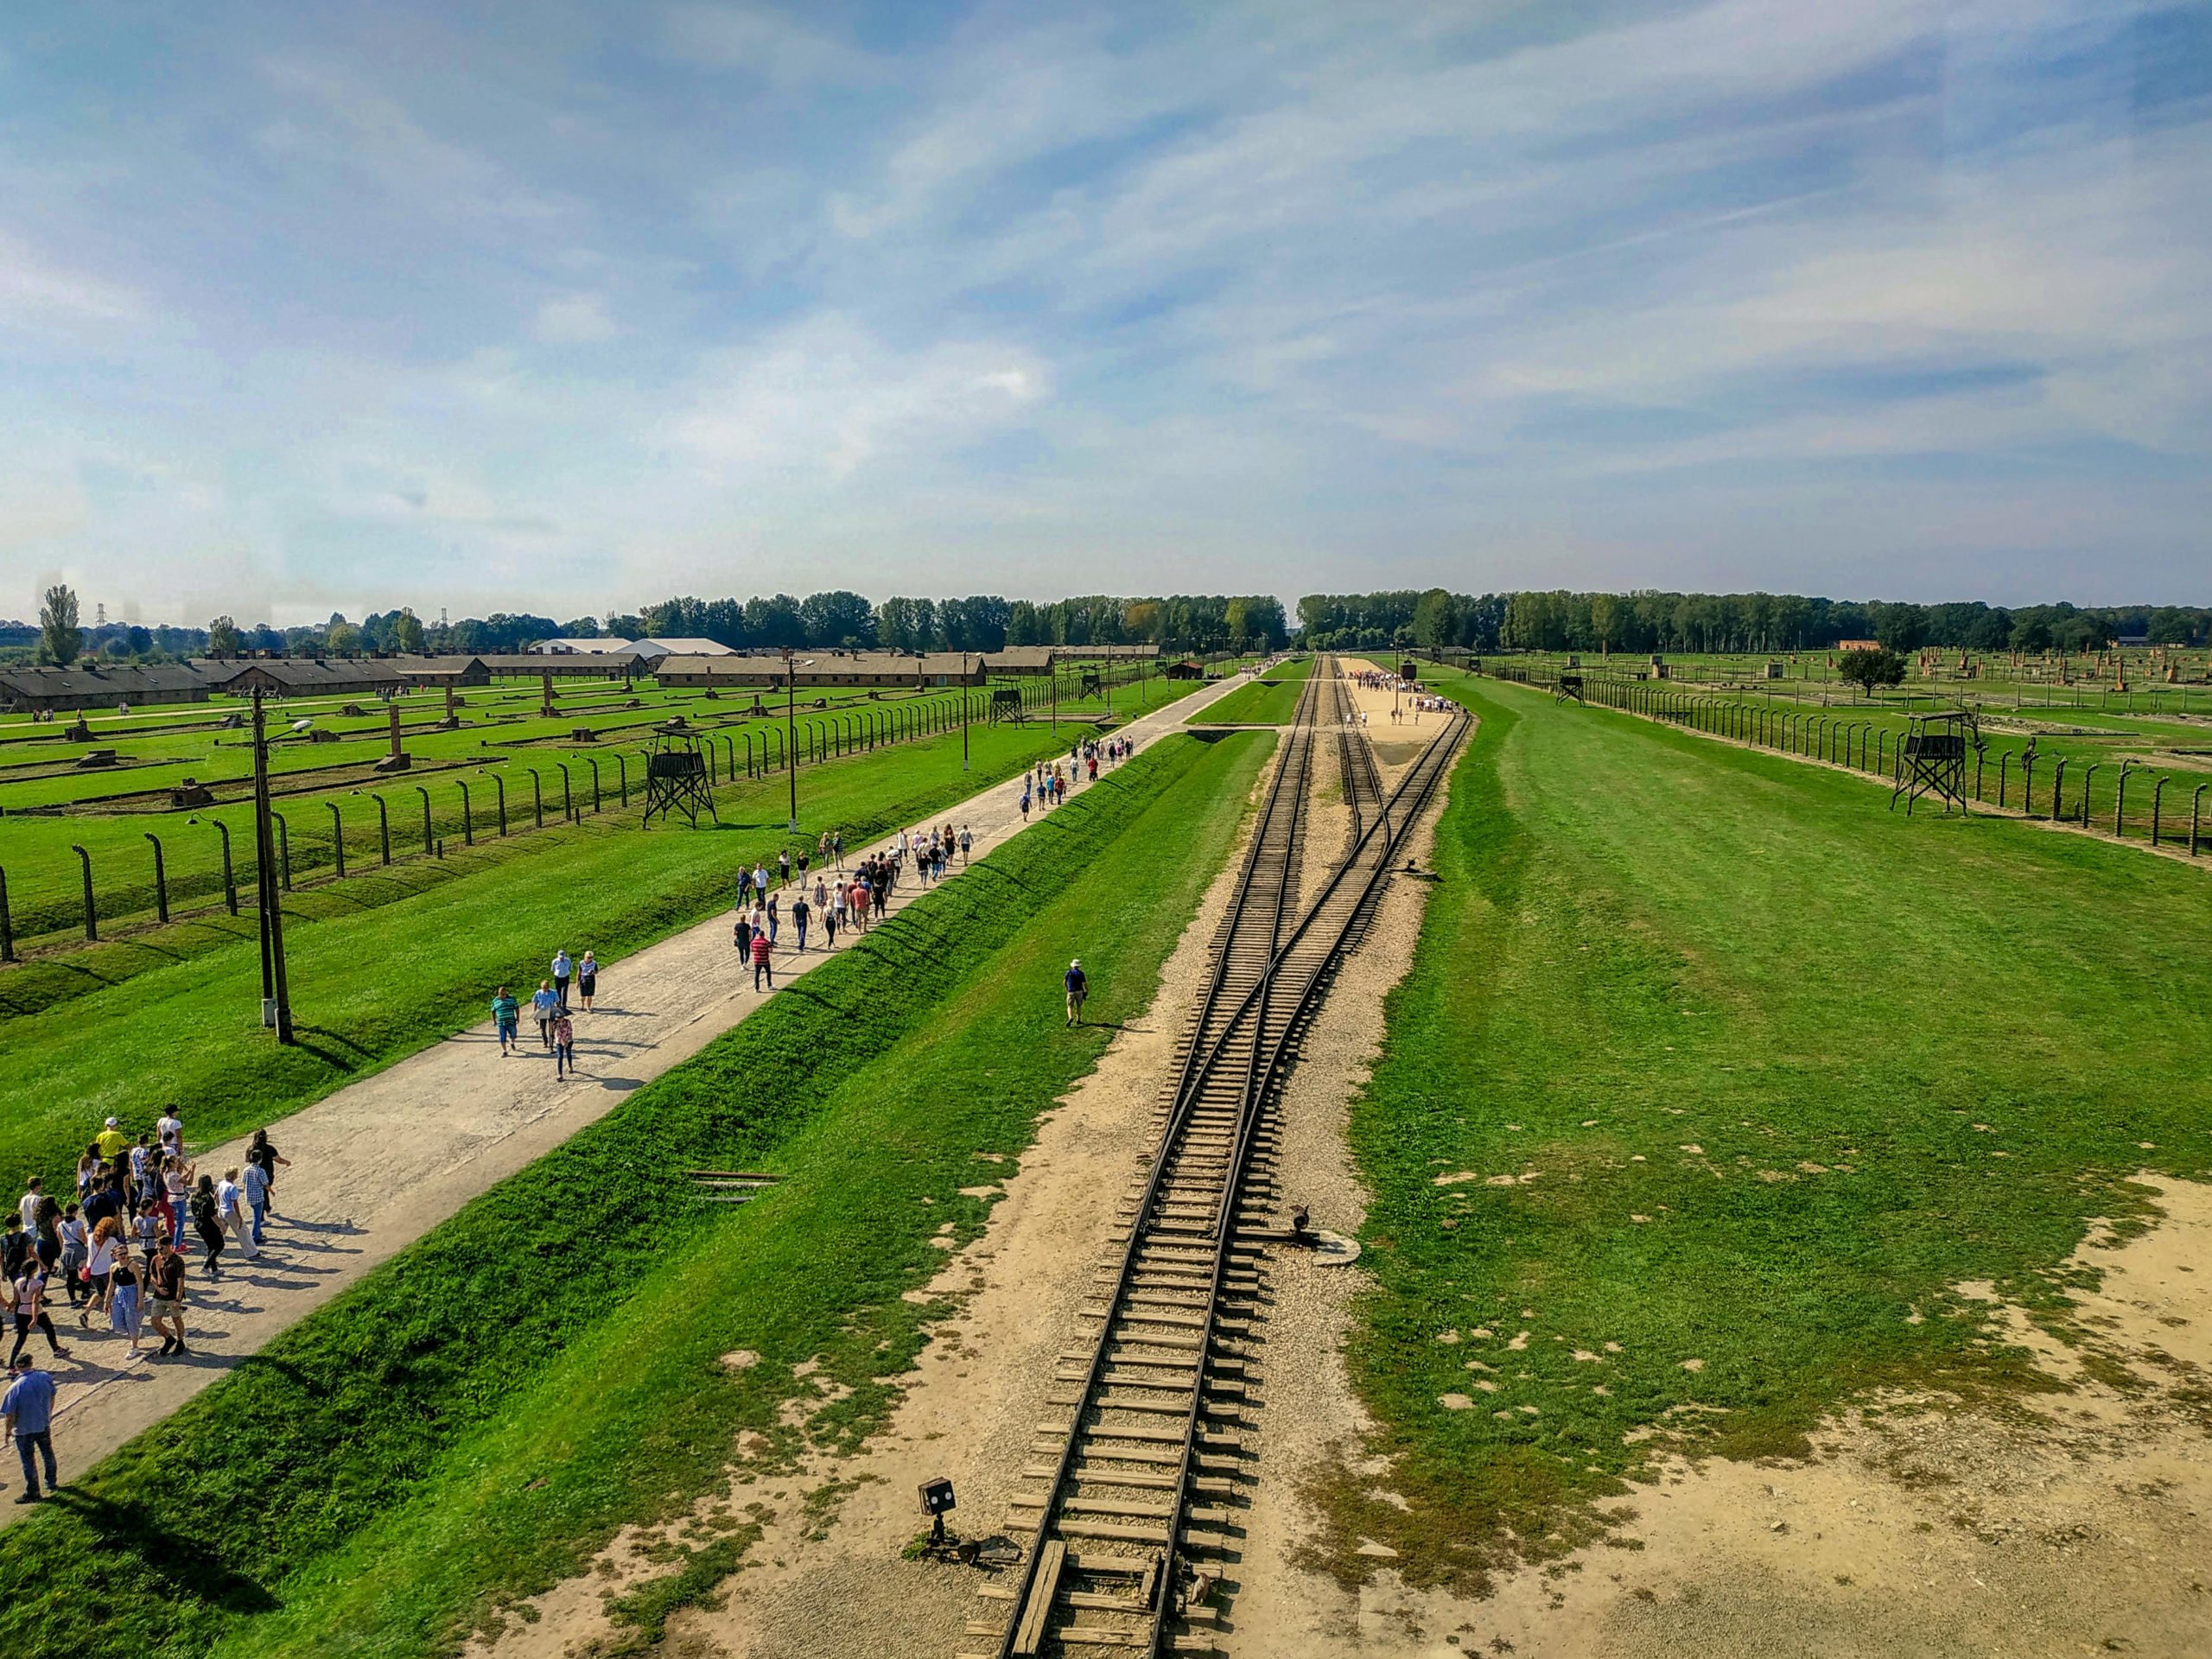
Auschwitz II-Birkenau
Birkenau, or Auschwitz II-Birkenau as it is also known, is a little over two miles from Auschwitz I and is shockingly massive. It is twenty times larger than Auschwitz I and designed for one purpose. Death. It was the largest of the death camps. They executed men, women, and children without regard for life.
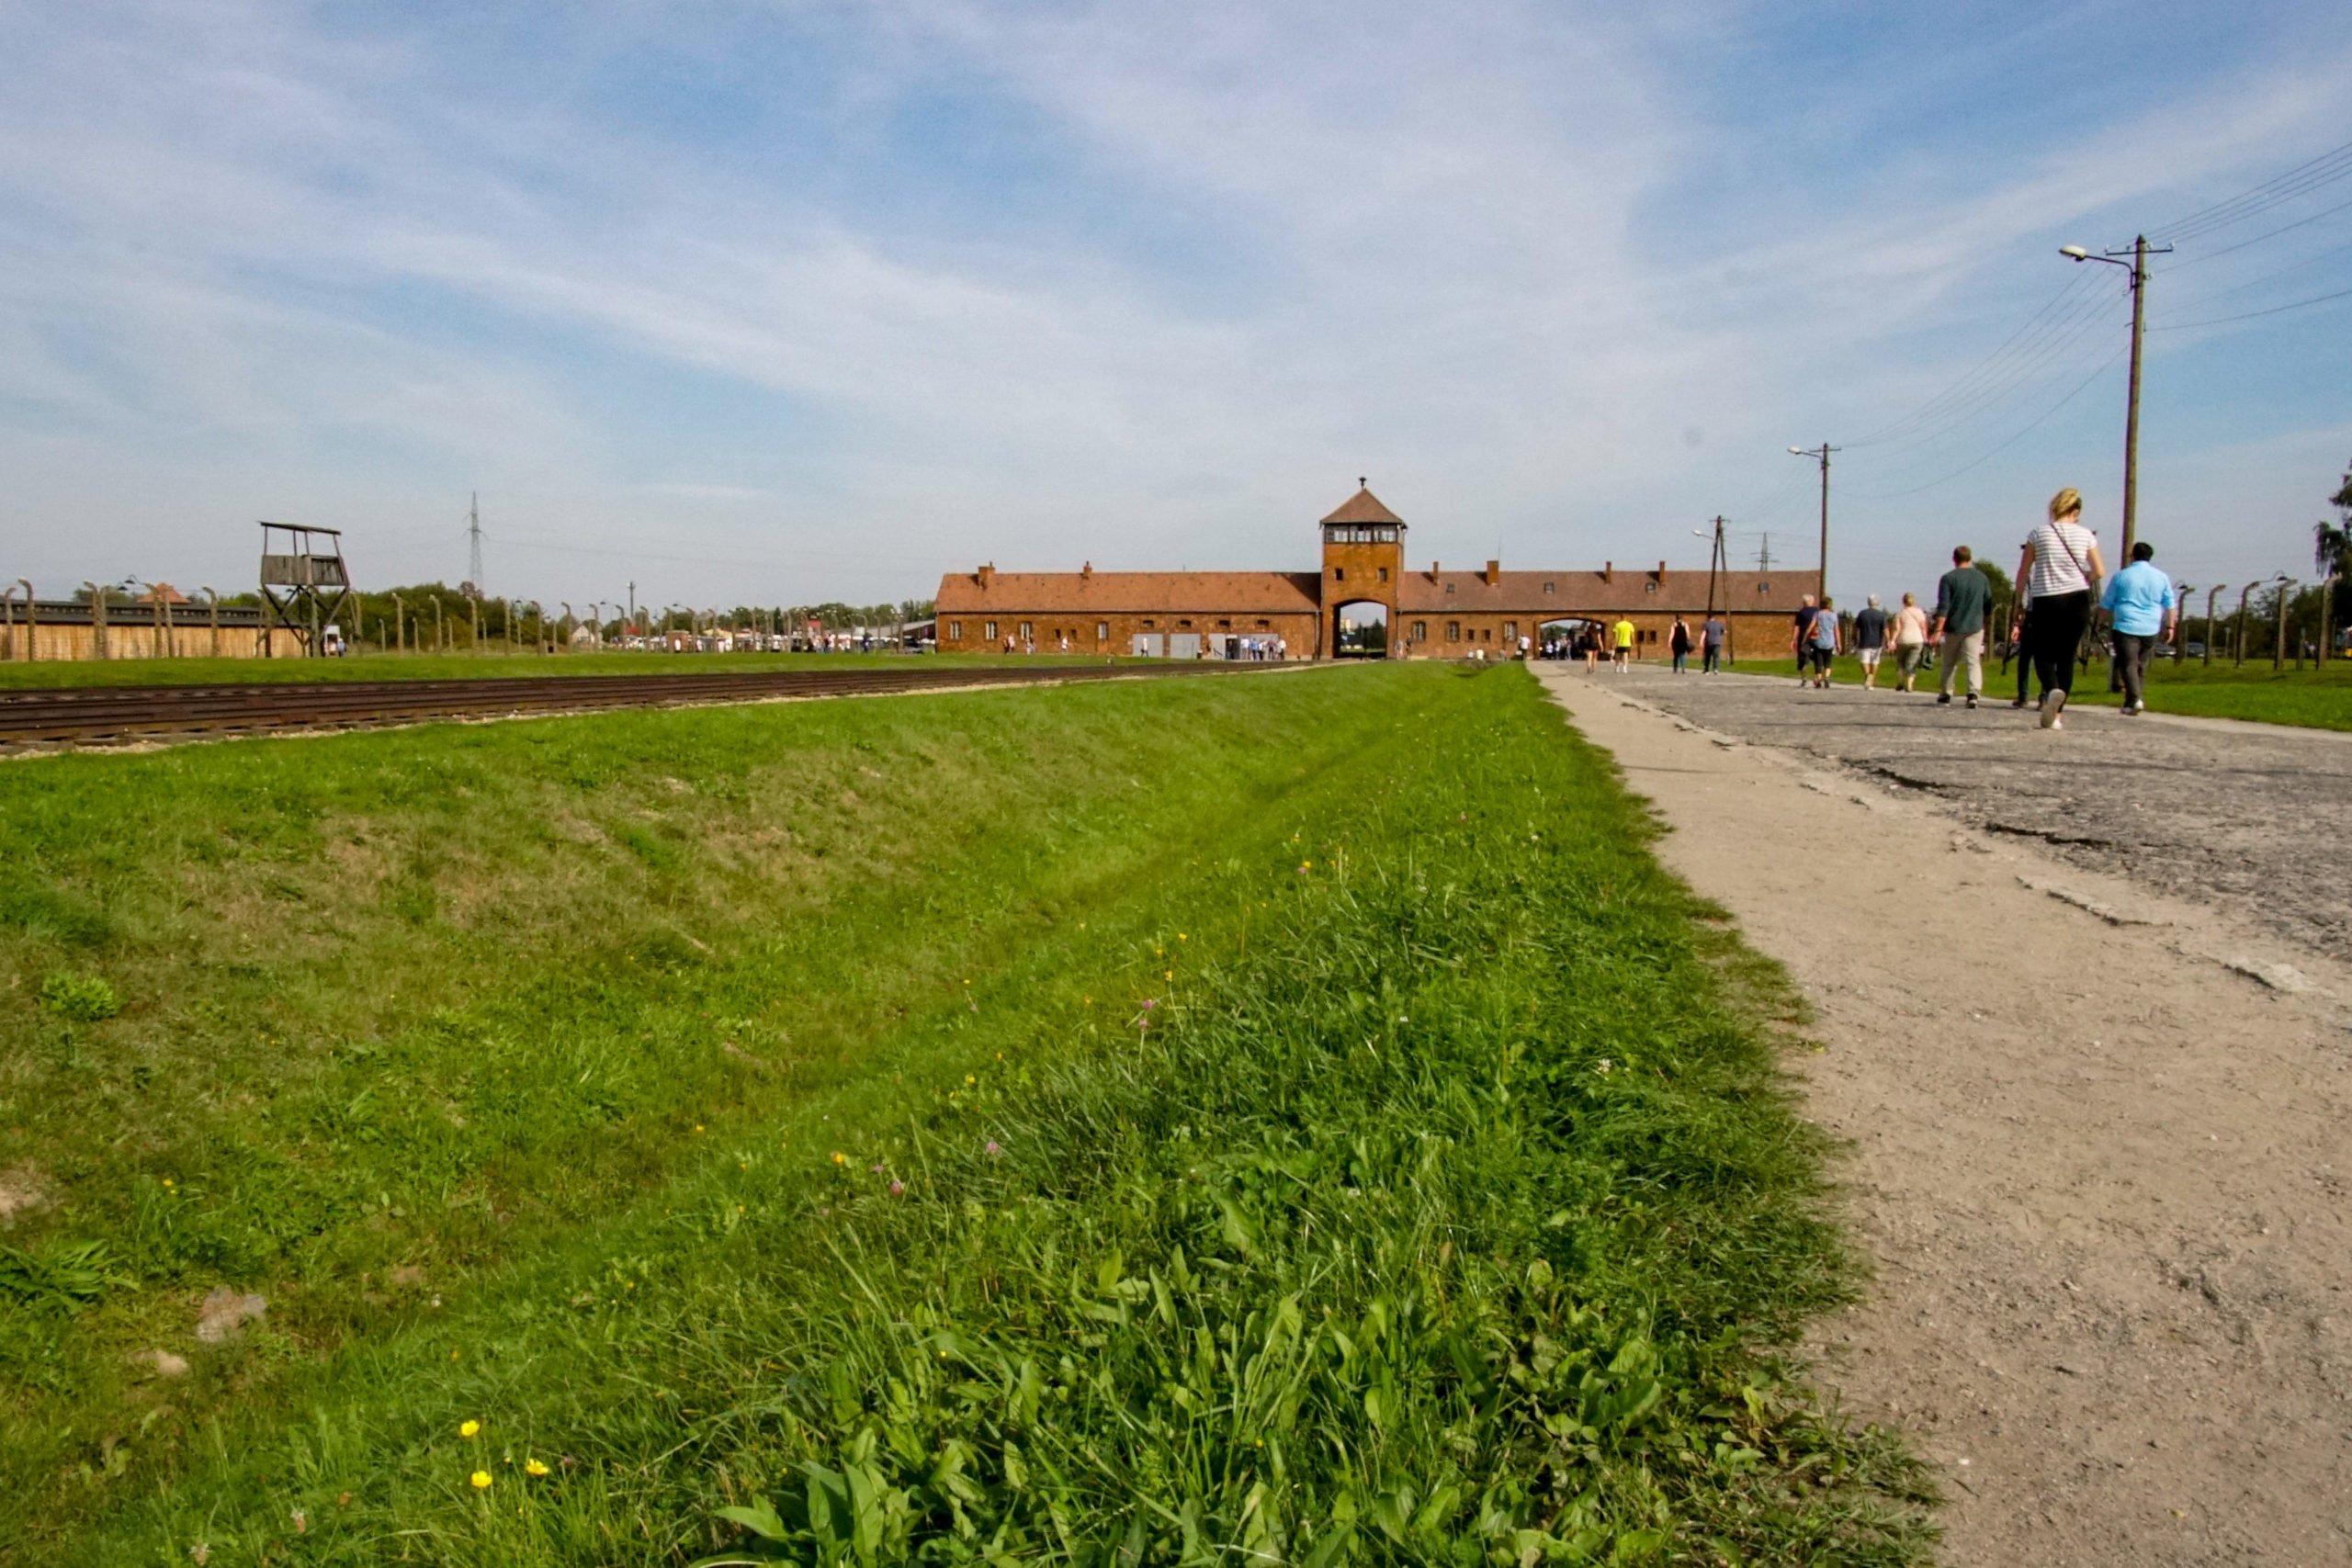
I cannot stop looking around in shock at how big this concentration camp is. We ascend to the top of the central guard tower or “death gate” at the entrance to the Auschwitz II-Birkenau concentration camp. We have an aerial view of Birkenau from here. It stretches out further than I can see.
On the left, I see barracks made of brick. I learn that the prisoners had to tear down homes and buildings in the nearby towns and then use them to build these brick barracks. They ran out of bricks, and so to the right, I see row after row of barracks made of wood.
There were over 300 buildings here during WWII. The barracks used to house prisoners had been designed as horse stables. They were not insulated and would have been awful both in the hot summer and in the freezing winters. Prisoners often had to sleep five or more to a bed. You can imagine the smells, the dirt and filth, and the hopelessness of the place.
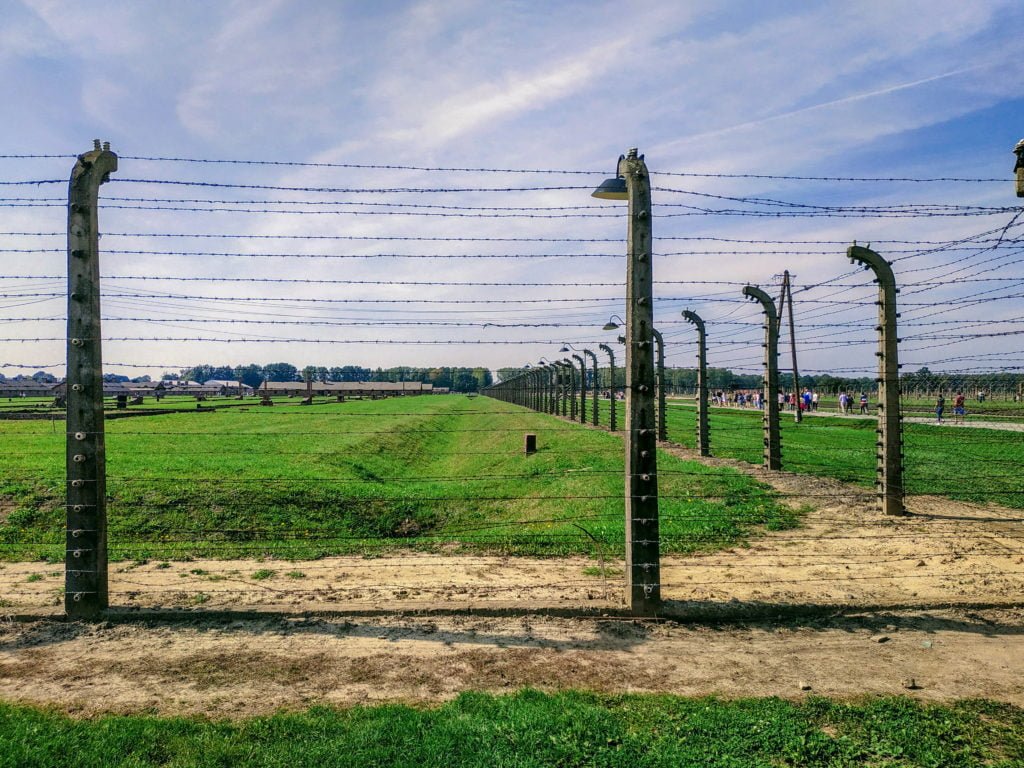
Electric barbed wire fences surrounding Auschwitz-Birkenau.
The Family Camp
We walked to a “family camp” where a select number of children were allowed to live. We see drawings from these children that show their perspective. The few that were allowed to stay in this camp were there for propaganda purposes to send out letters and postcards before meeting their fate.
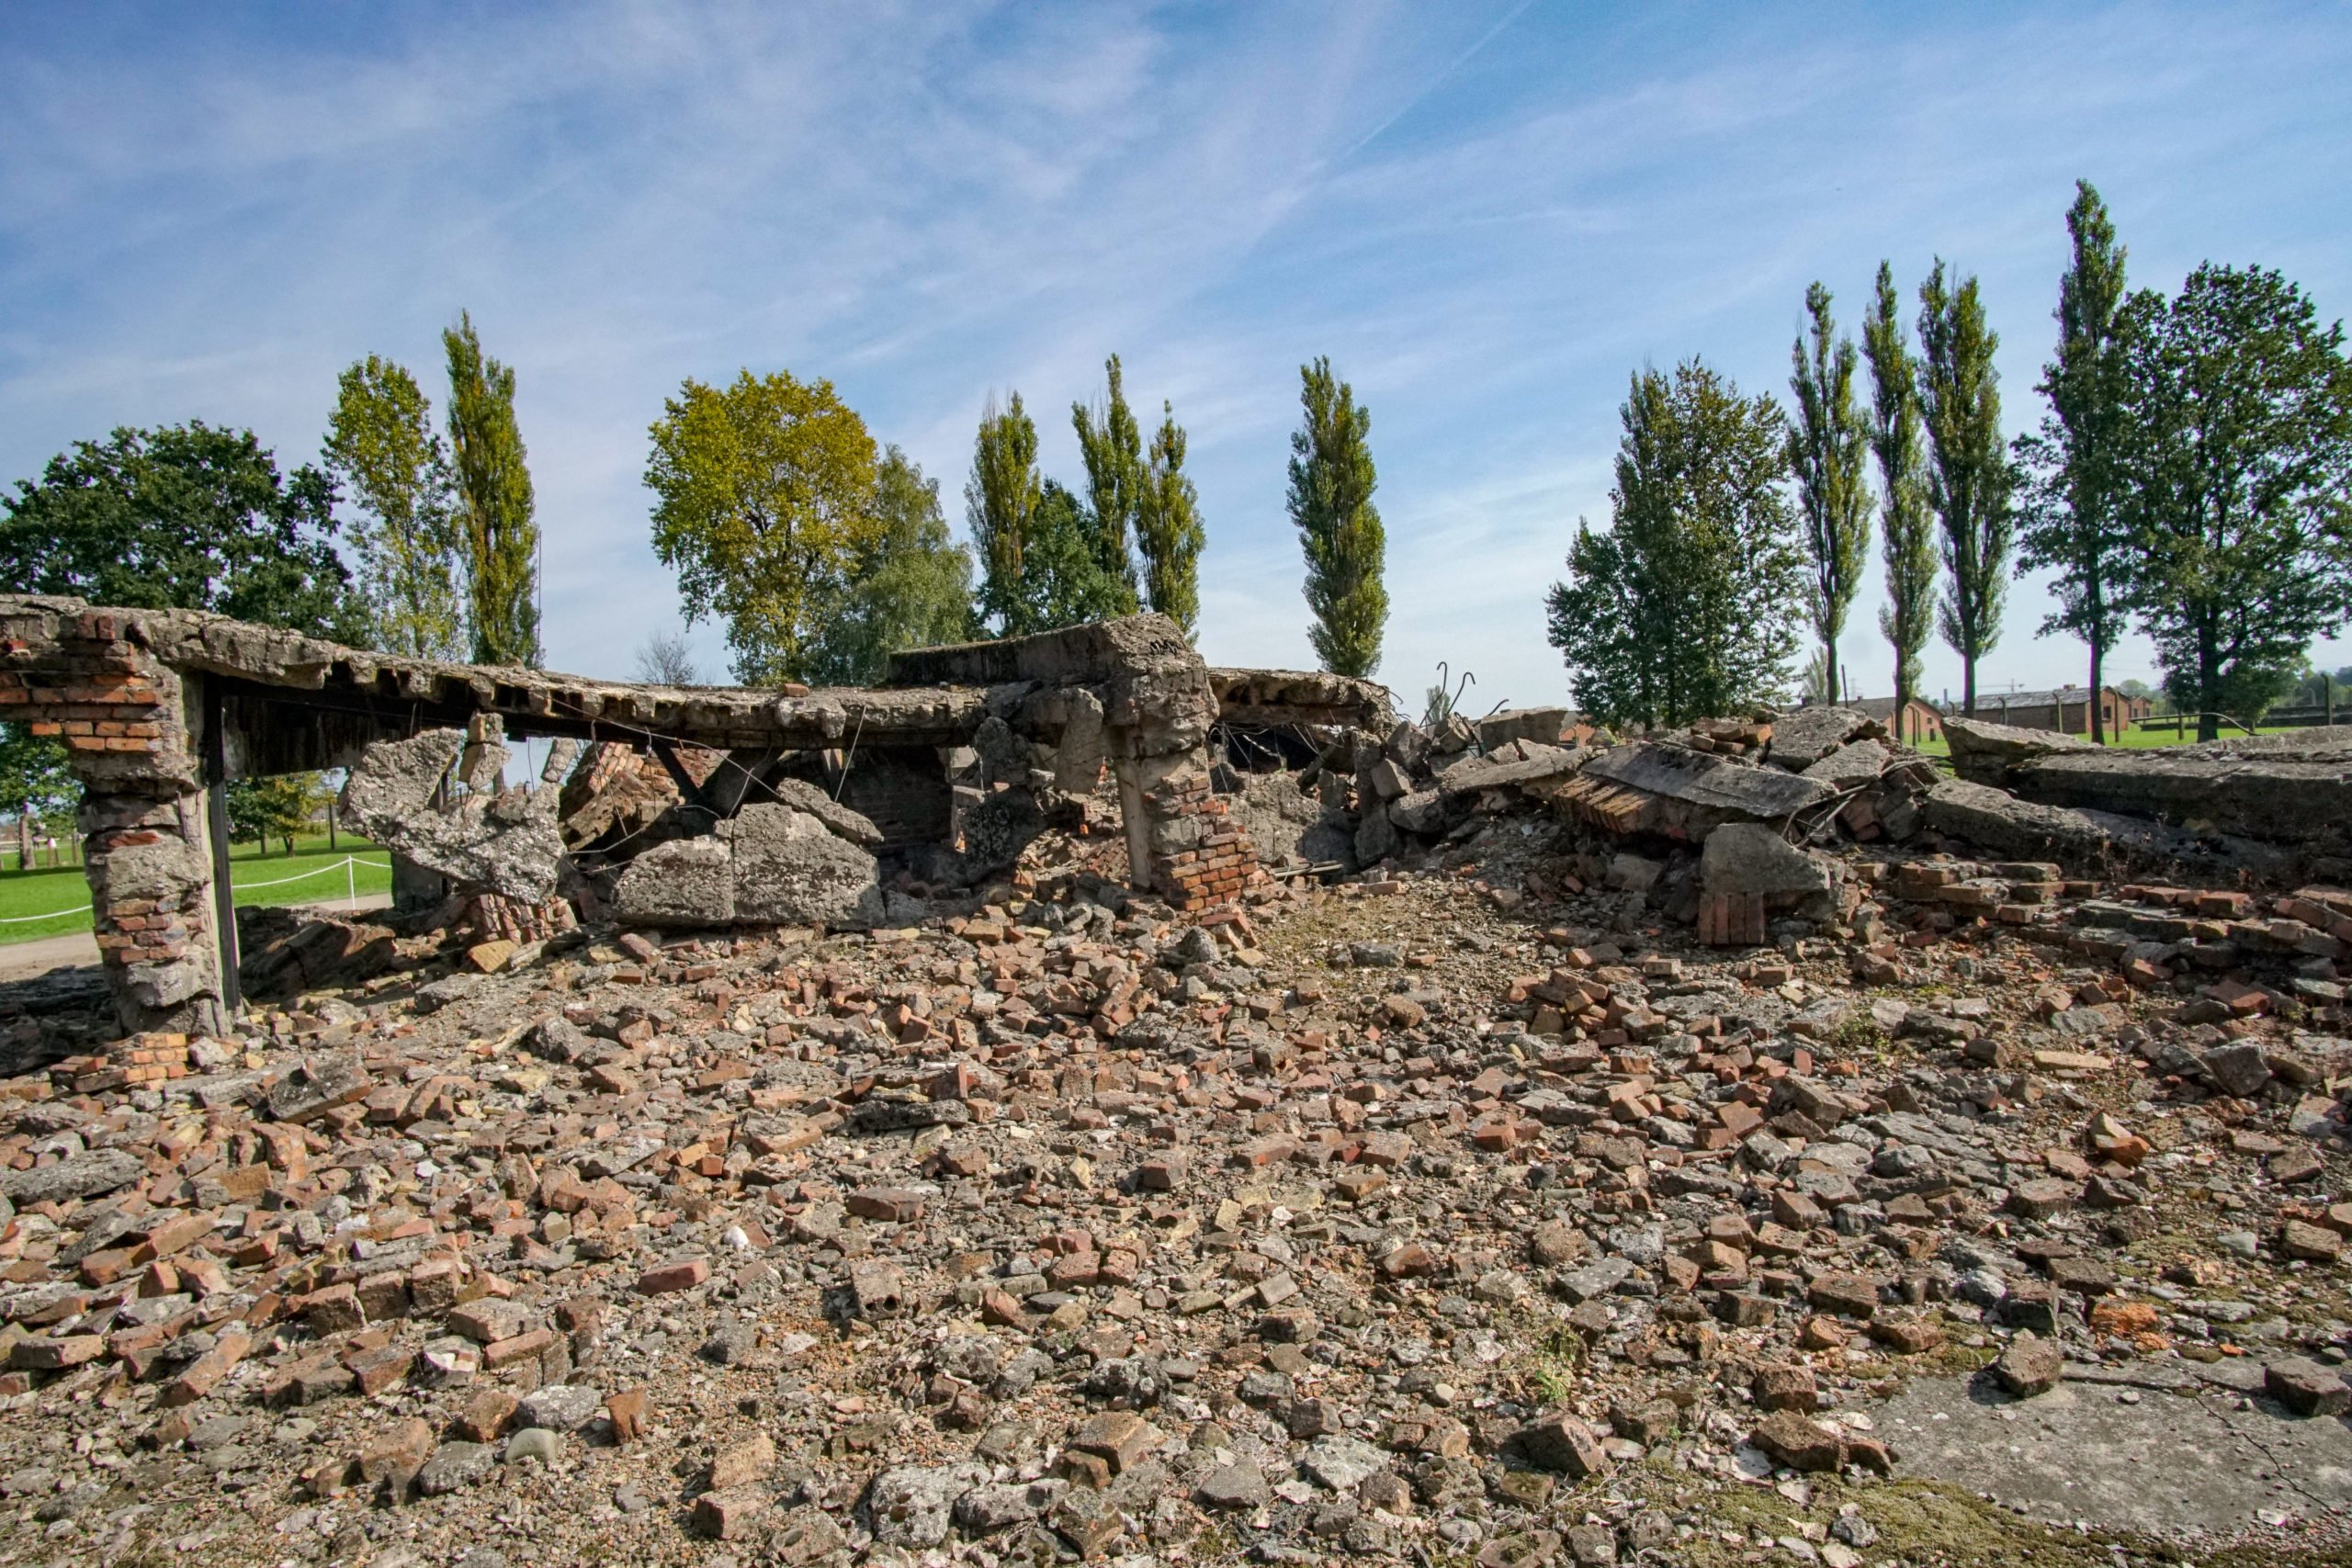
The Gas Chambers
Our guide takes us down the long stretch of train track that leads from the death gate to the unloading ramp where they forced prisoners into groups: women and children in one and men in another. They immediately killed some while others walked the long way to the gas chambers.
There were four massive gas chambers at Birkenau, and they crammed over 2,000 people into these at a time. Toward the end of the war, the Nazis expedited their killing and murdered anywhere from 5,000 to 6,000 people per day.
Dr. Mengele, also known as the “angel of death,” selected some of the prisoners for his twisted human experiments. He performed medical experiments on them without anesthesia. Twins and people with physical anomalies such as two different colored eyes were of particular interest to him.
We view the remains of two of the gas chambers and crematoriums. The Nazis tried to destroy these at the end of the war to hide the evidence of their crimes. It is hard to imagine, even as I stare out over the demolished gas chamber and crematorium, that such evil exists.
The horrors of The Holocaust and the actions of the Nazis are so unfathomable to me. This is not ancient history. This happened in the last 100 years. I know, too, that holocausts have occurred in other parts of the world. It is heartbreaking to consider.
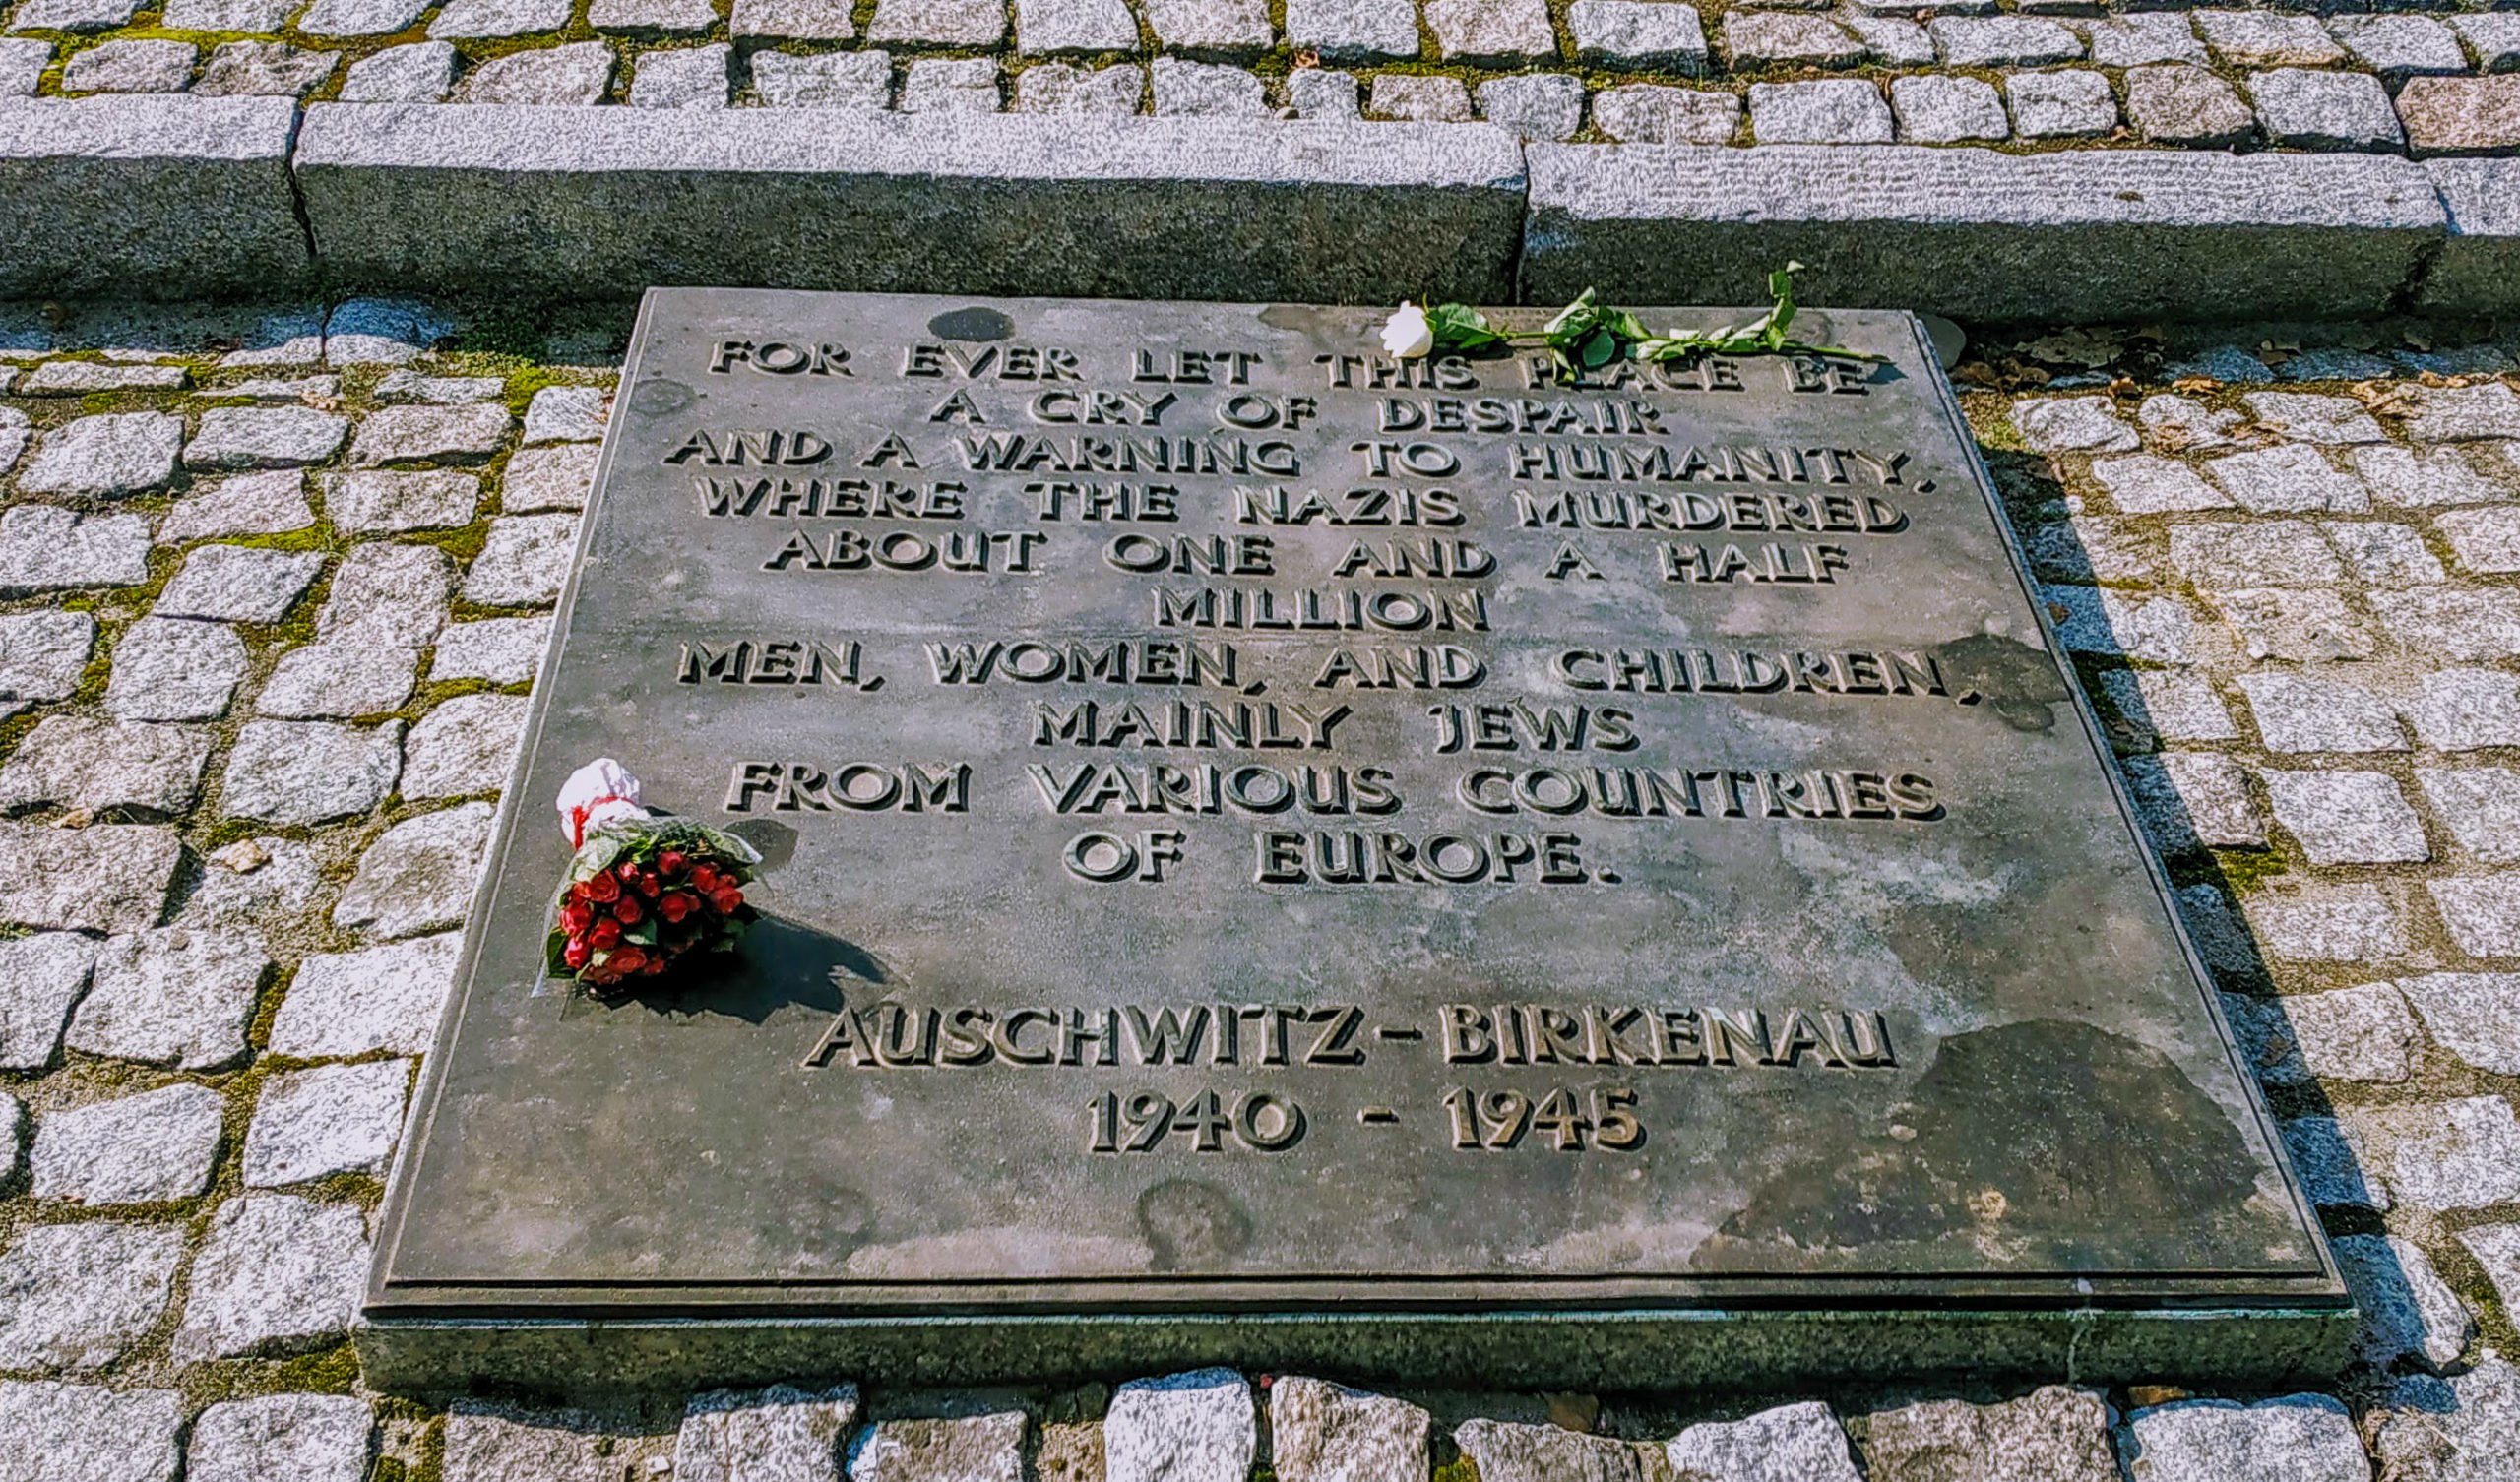
Individuals Not Just a Number
Over 1 million people died at Auschwitz-Birkenau. Most of these were Jews, but there were also other prisoners of war murdered here. The death toll for Polish Jews was particularly high. Around 3 million Polish Jews were killed, that’s half of all Jews killed during The Holocaust. Only about 10 percent of Poland’s Jewish population survived.
Our group walks to a building on the far side of the Birkenau concentration camp that has an important story to tell. The story of the victims before they came to the concentration camps before they were hunted down, back when their lives were healthy and happy.
In one area of the exhibit, there are enormous books on display that visitors can flip through and read name after name of those murdered during The Holocaust. There are over 4 million Holocaust victims listed with blank pages at the end for the names not yet recorded. These books are a tribute to those murdered. They have no graves and no tombstones. However, every life mattered, and everyone one of them was an individual with a name.
Photographs, Memories & Moments in Time
In another room, I see photos of some of these individuals. There are photographs with them at the beach, at the park, and hanging out with friends at dinner parties. They are photographs of kids at school, family portraits, young couples in love–people enjoying their lives. People like you and me.
In another room, home movies discovered after the war play on every wall of the room. I stood there watching people at concerts, on sailboats, with friends and family smiling and laughing. It was as if I had a time machine to go back and see them alive again. These movies brought their memories to life, and I saw my humanity reflected in their faces.
I, too have home movies and photographs, I also have people I love and a life I love. However, their lives were taken from them, and I still have mine. Children never to become adults, parents never to know parenthood, and grandparents robbed of the joys of grandchildren. This exhibit had the most significant impact on me.
A wall displaying photographs recovered from suitcases found after the war.
It is easy, due to the mass total of victims murdered, to view them as a number. However, it is essential to see them as individuals who loved and laughed–people like you and me.
As a teenager, I read the personal stories of the survivors and those that died. Knowing these people as individuals makes it easier to empathize, to relate. No, I can’t comprehend the horror they endured at the hands of the Nazis and others, but I know what it is to love, to laugh, to be scared, and to have dreams. Their stores teach me about courage, about love, and to never take life for granted.
Here is a short clip from the room displaying the home movies.
Life and Freedom are Gifts
That is the theme by which I try to live my life. To live life to the fullest and be grateful for everything. I am so blessed. I’m rich with love and family, friendship, opportunities to travel, and the ability to see the beauty in the simple. I am thankful that I still get excited over a beautiful flower, a fall leaf, and a snowflake.
We are not all survivors of a horrible event such as The Holocaust, but we all deal with hurt, the pain of loss, and death. I suppose it is this terrible and painful side of humanity that can also enhance the joy we can find in life. I think it should cause us to be more thankful for life and to embrace the joy amidst the pain.
Don’t stop living while you’re still alive. There are so many others whose lives ended too soon, those that never got to graduate high school, those that never learned to ride a bike, those that never got to marry, to have kids, or to wake up to another beautiful morning.
So be kind. Be humble. Help others and reach out to those that are hurting. Encourage. Share hope. Enjoy the simple things of life. Be grateful. Never, ever forget that all human life is precious!
And maybe, just maybe, in the tiniest way, by living our lives, we remember those who no longer are able to live theirs.
Visiting Auschwitz
Tour Options:
You have several options when planning a visit to Auschwitz. You can go with a tour group, or you can take a self-guided tour through the concentration camps.
The 6-hour study tour is what I took, and I highly recommend it. It allows for a slower pace to see both camps and provides more time for reflection. There are tours from 2.5 hours to 6 hours in length. If you choose to go with the self-guided option, just know that you can only enter at certain hours, usually early morning or late afternoon. You still need to reserve a self-guided tour, just as you would a guided tour.
The guided tours offer insightful commentary and information I feel one might miss by going on their own, but each person will have their reasons for choosing which type of tour they take.
Booking Online:
Make sure to book your tour in advance of your trip to Auschwitz as the tours do book up. Learn more about the different tours offered, book your tour, and get useful information regarding your visit on the museum’s website.
Food:
They have a cafeteria at Auschwitz I and a hotel across the street that also has a restaurant.
Getting There:
I booked a shuttle through Discover Cracow from Krakow to Auschwitz. If you are staying in Krakow, I highly recommend you consider using their service. It is incredibly affordable and easy to book.
The journey takes 1-1.5 hours—plan for your visit to the camps to take an entire day. Depending on which tour option you choose, it may take more or less time, however, given the solemnity of these memorial sites, it is good to give yourself time for some restful reflections rather than pack a bunch of sightseeing in afterward.
Additional articles for your visit to Krakow, Poland:
Krakow, Poland, is an incredible place to visit, and I loved my time there! One of the things I love about travel is arriving at a completely new destination, unsure of what to expect, and then leaving with a new fondness for that place in which only days before had been unknown to me.
Krakow was like that for me. There are so many memorable things to do in Krakow you cannot possibly see them all with only two or three days. This article provides an overview of Krakow’s highlights to help you create an itinerary for your adventure there.
Brief History of Krakow, Poland
Krakow dates back to the 11th century (possibly even earlier) and was once the capital of Poland. It was where the kings of Poland ruled from high above the city at Wawel Castle.
Explore the ancient fortifications dating back to the 15th century, the castle built in the 13th century, and the largest medieval square in Europe! Krakow is teeming with history and beauty. You do not want to miss visiting this extraordinary city!
Memorable Things to Do in Krakow
#1 Old Town (Stare Miasto)
Wander around Old Town (Stare Miasto in Polish) and admire the gorgeous architecture and cobblestone streets. Old Town is a great place to shop for souvenirs, get a bite to eat or even better, try some gelato (I recommend Lodziarnia Donizetti)! It is also the location for many of Krakow’s main attractions.
#2 Rynek Glowny (Main Market Square)
Rynek Glowny is the heartbeat of Krakow. It is a beautiful place to explore, and to spend an evening admiring the architecture and taking in the hustle and bustle of the square. Watch a street musician perform, take a horse and carriage ride along the Royal Road or just sit back and people watch.
Rynek Glowny is probably the most iconic space in Krakow and home to several of Krakow’s top sights. You’ll find Saint Mary’s Basilica, the Cloth Hall, Rynek Underground, and more located here.
Saint Mary’s Basilica
#3 Saint Mary’s Basilica
This beautiful Gothic cathedral rises on the edge of Rynek Glowny (Main Market Square). It is easily recognizable by its twin spires and red brick facade. You can tour the inside of the basilica and see the stunning wooden altar (at the time of this writing it is undergoing renovations).
You can also tour one or both of the towers. Choose from the Bugle Call Tower, the tallest of the two towers, or the Bell Tower and see the historic cathedral bells. Every hour in the square, you can hear the bells ring and a trumpeter playing St. Mary’s Bugle Call from the Bugle Tower.
Both towers offer you beautiful views of the square below and are my recommendation for the best bird’s eye view of the square. So grab your camera and a pair of comfy walking shoes (no elevator) and get ready to climb to the top.
#4 Cloth Hall (Sukiennice)
Krakow’s Cloth Hall was once the hub of international trade in Poland. It is the centerpiece of Rynek Glowny and now houses shops and an art museum. It is here you’ll find the Visitor’s Center and useful information for tours.
You can also tour the Rynek Underground museum located beneath the Cloth Hall. The Rynek Underground offers you a glimpse of what medieval Krakow was like — and it’s all below the historic Cloth Hall!
Krakow’s Cloth Hall
#5 Planty Park
Take a break in the shade of one of the many trees in Planty Park, and people watch from a park bench while enjoying this green space. Planty Park resides in the area that was once the moat from the medieval walls that encircled the city.
The moat was filled with soil to create Planty Park, which now encompasses Old Town (Stare Miasto) in an over 2-mile loop. If you’re looking for an excellent place for a morning run, this is it!
#6 Wawel Castle
Wawel Castle sits high atop Wawel Hill, and the castle complex includes a variety of attractions from which to choose. You’ll pay to see only the tours you’re interested in, such as the treasury, cathedral, royal apartments, etc.
You can also stroll the castle grounds and admire the gardens and architecture for free if you don’t have any interest in the tours.
There is a scenic viewpoint to one side of the castle complex that provides terrific views of the Vistula river and city. From here you can walk below and see a fire breathing dragon!
Wawel Castle complex
#7 Smok Wawelski
Don’t miss the fire-breathing dragon located alongside the Vistula river just below the Wawel castle grounds. You can even walk through the dragon’s den to reach this fire-breathing statue (the den is not stroller friendly or wheelchair accessible). Kids will especially love seeing the dragon breathe fire and will enjoy crawling through the cave, plus it’s free!
#8 Attend a Chopin Concert
Fredrick Chopin is one of Poland’s most celebrated composers and pianists. I love Chopin’s music, and since my trip to Poland wouldn’t include Warsaw (planning that for next time), Fredrick’s birthplace, I knew I wanted to attend a Chopin concert while in Krakow.
I booked my tickets at the Chopin Concert Hall. It is a small intimate setting and a beautiful way to spend an evening. I highly recommend it!
Wieliczka Salt Mine St. Kinga’s Chapel
#9 Wieliczka Salt Mines
The Wieliczka Salt Mines are a UNESCO World Heritage Site. These mines are incredible to behold. You will see chandeliers, statues, beautiful wall carvings, and more–all made from salt!
I don’t know where else you’ll have a better opportunity to learn about the history and importance of salt as well as to observe some of it’s more unusual uses.
Explore this medieval fortress of Krakow located just outside the historical Saint Florian’s Gate. The Krakow Barbican was built around 1499 and is an impressive example of human engineering. It was an impenetrable defense for the city and had underground passageways that led to the city gates. This fortified gateway helps display the diverse history of Krakow and the many facets of this stunning cultural city.
Krakow Barbican
#11 St. Florian’s Gate
This Gothic tower was the main entryway to the city of Krakow. It was one of the multiple gates along the city’s defensive walls. Where these walls and moat once stood is now home to Planty Park. The tower is about 110 feet tall and is a beautiful piece of architecture and history. I recommend you make time to explore this historic area of Krakow.
#12 Oskar Schindler’s Enamel Factory
The factory currently houses two museums, the Museum of Contemporary Art and Schindler’s Factory Museum. The Factory Museum gives an in-depth look at the effects of WWII on Krakow and the atrocities the Nazis committed against the Polish Jews.
#13 Kazimierz Jewish Neighborhood
This Jewish neighborhood once had over 3 million Jews who lived here. However, due to the extermination of the Jews during WWII, only about ten percent of them survived.
Plan to visit the Old Synagogue and the Galicia Jewish Museum to learn more about the lives of the Jewish community in Krakow before WWII. Also, make sure to visit the Ghetto Heroes Square and the monument dedicated to their memory.
In addition to the historical sites of the Kazimierz neighborhood, it is also a great place to shop. Explore its distinctive architecture and eclectic shops to find unique souvenirs to take back home.
#14 Eat Polish Food
Don’t miss trying authentic Polish food while in Krakow! I recommend trying Polish Sour Bread Soup (Zurek). I ate this at Bar Smak and loved it!
Another popular street food is a Krakow bagel (Obwarzanki Krakowski). These make good on the go snacks to fuel your busy day of sightseeing.
Zapiekana is another delicious street food to try. They are like open-face sandwiches, long baguettes cut in half traditionally topped with mushrooms, cheese, and your choice of sauces.
These are just some of my recommendations, be adventurous, and try something new!
#15 Church of Saint Peter and Paul
Saint Peter and Paul’s Church is in Old Town. This historic baroque cathedral was built during the 16th century. Outside the church, sculptures of the 12 apostles line the gated entrance.
Once inside the church, you can purchase an audio guide that tells you more about the church history and also the crypt beneath the church, which is open to tour as well.
Directly next to the Church of Saint Peter and Paul, is the 11th-century church of Saint Andrew. St. Andrew’s church is one of Krakow’s oldest. Take time to step inside this ancient cathedral and admire its architecture before moving on.
Saint Paul and Peter’s Church
#16 Auschwitz-Birkenau Concentration Camps
Last, but certainly not least, is something I feel should not be missed during a visit to Krakow. The Auschwitz-Birkenau concentration camps are not in Krakow, but rather near the city of Oswiecim. However, you can easily take a bus from Krakow to Auschwitz.
The journey takes 1-1.5 hours—plan for your visit to the camps to take an entire day. Depending on which tour option you choose, it may take more or less time, however, given the solemnity of these memorial sites, it is good to give yourself time for some restful reflections rather than pack a bunch of sightseeing in afterward.
Make sure to book your tour well in advance of your trip to Krakow as the tours do book up. You can take a self-guided tour, but only during certain hours of the day. I chose the 6-hour study tour and I highly recommend it! The guided tours offer insightful commentary and information I feel one might miss by going on their own, but each person will have their reasons for choosing which type of tour they take.
Suggested Itinerary for 3 days in Krakow
Day One: Visit Auschwitz, have dinner in Krakow and enjoy Rynek Glowny (Main Square) at night. Consider attending a Chopin Concert.
Day Two: Visit the Wieliczka Salt Mines in the morning, get some lunch and then see Saint Mary’s Basilica, visit the Cloth Hall, and then head to the Kazimierz neighborhood and have dinner there. Explore the area and do some souvenir shopping, then head to Schindler’s Factory Museum (it’s open until 8 pm most nights).
Day Three: Explore Old Town, tour Saint Paul’s Cathedral, Wawel Castle, see the dragon, and then take a relaxing stroll through Planty Park before heading to see Saint Florian’s Gate and the Krakow Barbican. You’ll still have time for shopping in the Main Square if desired.
Recommended Places to Eat
Moa Burger
Address: Mikołajska 3, 31-027 Kraków, Poland
Moa Burger has delicious and unique burger choices. I tried a burger with beets and pineapple on it, it was delicious, and I don’t even like beets!
Bar Smak
Address: Karmelicka 10, 33-332 Kraków, Poland
This is the place I tried the traditional Polish sour bread soup, and I loved it! Stop here if you want to try some authentic Polish food.
India Masala
Address: Mały Rynek 2, 31-041 Kraków, Poland
Delicious Indian food a short walk from Rynek Glowny in the heart of Stare Miasto.
Milkbar Tomasza
Address: Świętego Tomasza 24, 33-332 Kraków, Poland
This is another option when looking to try some traditional Polish food. They are a popular spot for breakfast and also serve delicious pierogis.
Cafe Camelot
Address:Świętego Tomasza 17, 33-332 Kraków, Poland
If you’re looking for a place to get some delicious coffee and dessert, look no further than Cafe Camelot. This Cafe is close to St. Mary’s Basilica.
Żarówka Cafe
Address: Floriańska 20, 31-021 Kraków, Poland
Żarówka Cafe is around the corner from Cafe Camelot and has a lovely outdoor seating area. Enjoy coffee, a sandwich, and dessert while giving your feet a rest.
Rynek Glowny (Krakow’s Main Square)
Tips for Getting Around Krakow
I was pleasantly surprised to discover how cheap it was to use Uber in Krakow. I tend to use public transportation for its cost-effectiveness and convenience. However, in Krakow, Uber was often more convenient (at least from where I was staying) and very affordable.
Plus, since I was traveling with a friend, we split the cost, which made it that much more cost-efficient. Obviously, as a solo traveler, you’d need to determine what makes the most sense for your budget, but always consider the time it will take you to get to/from a destination when weighing the cost vs. benefit of a service like Uber.
I also used the bus. Bus 304 is a good one for visiting the Wieliczka Salt Mines.
Where to Stay
I stayed in Old Town during my visit to Krakow. I loved being around the corner from the Main Square, Planty Park, and the various sights located in Old Town. It was a little further from the main bus routes or the bus station, but otherwise very conveniently situated to Krakow’s main attractions.
Old Town can get quite noisy at night though, so be aware of that, the Airbnb that we stayed at was above an area with restaurants below and needless to say people were out enjoying themselves until two or three a.m. If you’re not a light sleeper like myself, then perhaps this won’t be an issue for you. All in all, though, I’d stay there again for the convenience of being in Old Town.
In addition to Old Town, you may also want to consider staying in Kazimierz, it’s close to Schindler’s Enamel factory, and has a more eclectic feel than Old Town. It is also in a touristy area, though, so expect it to be busier. If you want to stay somewhere outside the main tourist area, but still in close walking distance to Old Town, then consider staying in Kleparz. Kleparz is just a short walk outside of Old Town, so you’re out of the touristy area, but close enough, you can easily walk there.
Final Thoughts
If you haven’t yet put Krakow on your list of places to visit, do it now. Once you visit, you’ll wonder what took you so long to go, and you’ll begin making plans to explore more of this unique country.
I first learned about the Wieliczka Salt Mines reading the book 501 Must-Visit Destinations. Upon viewing the photograph of the salt chandeliers in the book, I knew I needed to see them for myself. After touring the Wieliczka Salt Mines, I feel I gained a new appreciation for salt and miners in general.
Imagine a tour that combines history, salt, sculptures, miners, and royalty, all from a dark labyrinth beneath the earth. Well, that’s what you get on a tour through the Wieliczka Salt Mines. This guide will help you plan your trip to the mines so you can see the salt carved chandeliers, walk on floors made of salt, and even taste the salt for yourself.
Brief History of Wieliczka Salt Mines
The Wieliczka Salt Mines are over 900 years old and still in operation today. Their history spans kingdoms and world wars and various periods of technological advancement. They are an impressive example of ingenuity and creativity. There are nine levels to the mine, and they descend to a depth of 327 meters (over 1,000 feet). Your tour will allow you to see only 2% of the mine. After you complete your visit, you will realize the significance of that and the vastness of the Wieliczka Salt Mine. Thankfully you are always with a guide. Otherwise, it is easy to see how one could get lost amidst the labyrinths of salt carved tunnels.
The Tour Experience
First off, let me say, if you struggle from claustrophobia or a fear of dark places, you may want to reconsider visiting the mines.
Although there are plenty of open spaces within the mine, you will need to travel down (and back up) in a somewhat cramped elevator and, in my case –an extremely crowded elevator. Then you’ll descend a lot of stairs to go even deeper into the mine before your guide will take you along paved pathways and into the various chamber areas.
You’ll have your choice of two tours in the mine. The Miner’s Tour and the Tourist Route. Both of these tours are approximately 3 hours in length.
The Miner’s Tour
As the name suggests, it focuses more on the mining aspect of the Wieliczka Salt Mine. You receive working suits and miner’s gear before you’re taken on a mining adventure! You’ll get to “mine” for salt and learn firsthand about the life of a salt miner. This tour is not suited for those with disabilities, and children need to be ten years old and older and accompanied by an adult. Reservations are recommended for this route and can be made online.
The Tourist Route
This is the route I chose during my visit. The tour gives you an overview of the history of mining and the technological advancements over the years. There are various displays along the way to illustrate what mining would have looked like during the early years. You’ll also tour beautiful chapels carved by miners throughout the mine’s history. You’ll see saline lakes and admire the raw black salt used to carve the many sculptures, artwork, and chandeliers.
Our guide was very knowledgeable and had a great sense of humor. The pace of the tour is steady, but not too rushed. If you want more time taking photos, then move to the back of the tour group so you can take your pictures and then catch back up.
Looking down into St. Kinga’s Chapel.
St. Kinga’s Chapel
The highlight of the tourist route is a visit to St. Kinga’s Chapel. St. Kinga’s is the largest underground chapel in the world (there are 20 total chapels within the mine). You’ll descend stairs into this enormous space 350 feet underground. Everywhere you look, you see salt. You walk on floors made of salt and admire sculptures and chandeliers carved from rock salt. It’s stunning!
Please note that this tour requires you to descend 800 stairs. Children are allowed on the tourist route. If you have disabilities, please contact the mine ahead of time so they can create a specialized tour, as only certain portions are wheelchair accessible. Reservations are not required for the tourist route.
Luggage Storage
Plan to store your bags in the provided luggage lockers. Small purses (35cm x 20cm x 20cm or smaller) are allowed, but no large day bags—plan to pack your camera gear and jacket and leave the rest in your locker.
Tips on Touring Wieliczka Mine
Photographs
Due to the dim nature of the mine, you may find it challenging to take photographs. Try to steady yourself as best you can. A monopod or walking stick will help immensely (if you have one). The main thing is that you don’t rush taking your shots; otherwise, you will end up with blurry photographs. It is important to aim for in-focus shots, and then you can always edit later for brightness.
Eating
There is a cafeteria inside the mine with a variety of dishes, desserts, and beverages to choose from should you get hungry. Plus, how often can you say you ate lunch at over 400 feet underground?
How Much Time You Need
Each tour takes around 3 hours, plus any extra time you may spend eating in the cafeteria, or looking at souvenirs. So I recommend you plan for about 4 hours for your visit to the Wieliczka Mines. Additionally, you’ll want to factor in at least 1-hour round trip travel time getting to/from the mine.
What to Wear
Depending on which tour you choose, you will walk between 1-2 miles during your visit, so make sure to wear comfortable walking shoes. Additionally, the mines are around 57-60 degrees Fahrenheit, so you may also want to pack a light jacket.
Restrooms
There are two restrooms within the mine that your tour will take you past. Your tour guide will give everyone a chance for a break about midway through the tour, and then you’ll have an opportunity again toward the end of the tour.
Getting to Wieliczka Salt Mine
Most people visiting the Wieliczka Salt Mine come from Krakow’s city center. Wieliczka is on the outskirts of Krakow and takes 30-40 minutes by bus from Krakow’s touristy areas. You can take bus #304 to get there, and it lets you out just a short walk from the main entrance. The same bus route will return you to Krakow’s city center.
Another alternative to the bus is using Uber. My friend and I did this going to the mine and then took bus #304 when returning to our Airbnb. Uber is surprisingly affordable in Krakow, especially if you can split the cost with a traveling companion.
Hours of Operation
Make sure to check the Wieliczka Salt Mine website in advance to see what their current hours of operation are and plan accordingly.
Final Thoughts
A tour of the Wieliczka Salt Mines is certainly something you’ll never forget. It is an excursion the whole family will enjoy as long as you are prepared for it in advance. As mentioned before, the mine is dimly lit, and for those suffering from claustrophobia, you may not find it to be an enjoyable experience.
Visiting the Wieliczka Salt Mine is an adventure you are unlikely to experience anywhere else and I highly recommend it for any visit to Krakow.
One of the biggest expenses, when traveling, is our food budget. Hey, it’s one of the biggest expenses we have when we don’t travel! So it comes as no surprise that if you want to stretch your travel budget, a good place to start is with food. Here are some easy ways to save money on food and stretch your budget a little further when you’re traveling.
Top Ways to Save Money on Food While Traveling
Book a room with a kitchen
This is my favorite way to save money on food while traveling, particularly if I’m staying in one place for an extended period of time.
For example, when I go to Maui, I stay away from the large resort hotels and instead book a condo with a kitchen and an outdoor grill. This saves me a ton of money on eating out!
Even when staying in a place for only 2 or 3 nights, I try to book a room with a kitchenette. That way, I have a microwave and a mini-fridge, so I can still make simple meals from my room if needed.
Go to the grocery store
Grocery stores are a great way to save money on food while traveling. Whether you have a kitchen or not, you can purchase food to eat throughout your travels.
Fruit, snack bars, bread, peanut butter, nuts, bottled water, and so on are excellent options that save you money on food. Plus, many grocery stores also have a deli where they serve fresh salads and hot dishes too. This is another option that is cheaper than eating out. You can even purchase stuff for a picnic and turn it into an experience rather than just a meal.
Pack snacks and water
Often when I’m traveling, I will spend the entire day sightseeing. I’ll leave after breakfast and won’t return until late afternoon. One of the best ways I keep going and keep from getting hangry is to pack snacks and water in my day bag. This not only saves money on food and drinks, but it also makes sightseeing more enjoyable.
I’ve personally found that when my blood sugar dips down, I get tired and uninterested in seeing stuff. If I can take a short 10-minute snack break, it turns my energy level around, and I’m ready to go again for at least another couple of hours.
Pack a refillable water bottle or, as mentioned above, purchase bottled water at the grocery store and keep it in your room to take with you each day. This saves a lot of money vs. buying single bottles at a time.
Split meals with your traveling companion
If you’re traveling with another person, why not consider splitting a meal. My hubby and I do this when we travel and also when eating out near home. We’ve found that the portion sizes at most places are more than enough for two people to share. It’s a great way to save money and still have the experience of dining out.
Book hotels with free breakfast
Another easy way to save money on food while traveling is to book a room with breakfast included. This not only saves you money but also saves you time. It’s very convenient to get up in the morning, grab breakfast at the hotel, and then head out for the day. Some hotels even offer takeaway fruit options so you can have a snack for later.
Farmers Markets
Farmers markets are a fantastic way to support local farmers and artisans. I enjoy browsing these markets for homemade souvenirs as well as for food you might not find anywhere else. Often you’ll find seasonal fruit, baked goods, and a variety of food vendors. It’s a fun local experience that gives you a feel for the neighborhood you’re visiting.
Eat lunch rather than dinner
Okay, I’m not suggesting you need to skip dinner altogether, but rather than you eat lunch at a restaurant rather than dining in for dinner. Often, you can get the same menu for lunch as you would for dinner, but at lunch prices.
Many restaurants even offer lunch specials that come with a small appetizer and your main dish for much less than you would pay at dinner. Ask about specials before ordering.
Subscribe to our newsletter
No kitchen, no problem
If you’ve got a room with a coffee maker and a mini-fridge, you can still save money on eating in even if you don’t have a microwave or kitchen. I use the coffee maker to make oatmeal for breakfast and ramen noodles for lunch or dinner.
Additionally, if all I have is a mini-fridge, I purchase bread, peanut butter, and jam and make sandwiches to take on the go. Just make sure you don’t forget to pack a knife and some zip lock bags for your sandwiches. Bagels with cream cheese, yogurt, and bottled smoothies are also great options when all you have is a mini-fridge.
Eat where the locals go
If you eat at restaurants close to the main tourist attractions, you can be sure you are paying a higher price than if you were to go off the beaten path.
Try to find out where the locals eat. Ask around and take a little extra time to walk a few blocks out of the tourist areas. If you look in a restaurant and you notice a lot of locals, the chances are that it’s cheaper and that the food is good!
Eat with a local
Several websites and apps allow you to meet with a local and share a meal or take a cooking class in someone’s home. This provides you with a unique experience to get to know the local culture better and to make a new friend.
Couchsurfing has been around for a while now, and although primarily used to find cheap lodging, you can also use it to find someone to share a meal with or tour the city with a local. Karen from Wanderlustingk explains how to do this, and gives some useful tips for staying safe.
Travelingspoon is another excellent way to meet a local and learning to cook a regional dish. Although this isn’t the cheapest option, if you look at it as both a meal and an experience, it’s a pretty good deal. You will often spend as much on a meal at dinner as you will for the price of a cooking class through Travelingspoon. Prices generally start around $20 and up.
Also, make sure to ask around before your trip and see if anyone you know has any friends or relatives living in the destination you are visiting. I’ve done this before, and it is a great way to save money and also to meet someone who lives in your destination. They are an excellent resource for useful tips, recommendations, and history of the area you’re visiting.
Look for specials
Restaurants in many cities offer prixe fixe menus. These offer you an incredible fixed price on a three-course menu that includes your appetizer, main dish, and dessert. This is a great way to try a fine dining restaurant without spending a ton of money.
Also, look for restaurants offering brunch specials and weekly dinner specials. Many restaurants have once a week dinner specials where they serve a meal, say lobster, at a reduced rate.
Plan for special experiences
I understand that eating isn’t just about getting in your daily calories. Food can be an experience too. It’s a wonderful way to experience the local culture. So when you’re planning a trip, if you know, there is a particular food you want to try at your destination, plan ahead and pick out the best place to eat it. Then budget for it.
You can eat peanut butter and jelly sandwiches for most of your trip but then splurge on those special occasions. I try to save money on food while traveling, but I allow for a couple of unique dining experiences. This makes eating out more memorable.
I’ve splurged on Peking duck in Beijing (at lunch to save money), a five-course meal in Italy prepared by a prince (no kidding), and a fondue dinner in Switzerland (nothing is cheap there). I sacrificed eating out each day, to save for a few special meals.
Skip Starbucks
Okay, don’t worry, I’d never tell you to skip coffee, however planning to make coffee in your room will save you a lot of money. Pack a travel french press from or an Aeropress, then all you need is some hot water and ground coffee, and you’re good to go! You may also want to bring a collapsible mug or refillable bottle that works for both hot and cold drinks.
Even if you use the coffee maker at your hotel or Airbnb, you may want to purchase some local coffee beans at the grocery store or if you’re lucky enough–a local coffee roaster.
If you do plan to grab a cup of coffee at a cafe, order the roast of the day and get a drip coffee to save money. There are, of course, times where splurging on your favorite coffee is warranted. However, these are ways to save money on coffee for the rest of the time.
Suggested Meals You Can Make to Save Money on Food
Here are some ideas for foods you can make in your room. Make sure to plan ahead and pack utensils, refillable water bottle, and any coffee filters or gear you need. It may take a little extra planning, but it can save you hundreds of money during your trip.
Breakfast
Breakfast bars
Bagels
Toast
Eggs
Cereal
Oatmeal packets (I pack from home)
Fruit
Muffins/bakery items
Yogurt
Lunch/Dinner
Meats, cheeses and crackers from local grocery store or charcuterie
Peanut butter and jelly sandwiches
Instant noodles
Salads (from deli or produce section)
Snacks
Jerky
Nuts
Fruit
Snack bars
Final Thoughts and Tips
Here are a few final tips to save money on food while traveling.
Drink water with your meals. It’s amazing how much that one act can save you. I ask for lemon slices in mine and pretend it’s lemonade.
Get take-out vs. dining in. Take your food to the park, or plan a cozy meal in your room. These little changes can add up to significant savings.
Look for food trucks street food. You can try food you’d never eat at a restaurant and make fun memories doing it. Have you ever tried scorpion? I have, it tasted like salted popcorn. What about squid stuffed with a quail egg, okay, take it from me and skip that one. If those don’t sound appealing, never fear there are other less adventurous options at street food markets too. It’s a great way to try a bunch of different foods and eat cheap!
This guide isn’t about never eating out or splurging, but on saving money and intentionally choosing to spend it on experiences that will provide memories to re-live when you’re back home.
Last week I wrote an article about Anne Frank, her isolation, and the lessons we can learn from her. At the same time, I also finished the movie edition of the book A Beautiful Day in the Neighborhood by Mr. Rogers. It was out of this combination of reading and research that got me thinking about “the helpers.”
Today’s Coffee: Stemwinder Blend from Fundamental Coffee Roasters
Facebook
Twitter
Pinterest
Reddit
The Helpers
Mr. Rogers describes when, as a kid, he’d see scary things on the news, his mother would comfort him by telling him to “look for the helpers.”
I thought about the six helpers that aided Anne and the other seven people hiding in the secret annex. They were: Johannes Kleiman, Miep Gies, Jan Gies, Bep Voskuijl, Johan Voskuijl, and Victor Kugler.
These six people risked their lives to come to the aid of others. One of them, Victor Kugler, was asked after the war why he helped them, he replied, “They were my friends…” He didn’t need any other reason.
Throughout history, there have been so many helpers, and I cannot possibly list them all. A few of them are Harriet Tubman, Corrie Ten Boom, our veterans, Oskar Schindler, Martin Luther King Jr., Ida B. Wells, Frederick Douglass, Paul Rusesabagina, Elizabeth Fry, Mother Teresa, 9/11 rescue workers, our firefighters, police officers, medical workers, etc., etc.
There are so many helpers throughout the history of the world, and even now, if we look closely, we can still find them.
However, I think we must take it one step further. We can’t just look for the helpers. We must also be a helper. Each of us must rise to the occasion presented to us and choose to help those around us.
When asked “why,” I hope we respond “because they were my friends, my fellow humans and because they needed help.”
Recommended Reading
If you are a teacher, or a parent, you need to read A Beautiful Day in the Neighborhood. Fred Rogers’ insight and empathy for children is incredible! I highly recommend it!
I also recommend reading Anne Frank: the Diary of a Young Girl. If you have middle school age kids or older, read it with them. Then discuss the parallels between our current stay-at-home situation and Anne Frank’s isolation. Anne’s diary offers a powerful perspective and also provides solace in knowing Anne shared similar feelings that they might have right now.
Post a comment about a helper who inspired you or an idea for ways we can all be helpers.
Isolation can heighten feelings of anxiety and fear. It can cause us to lose perspective and to lose hope. During this time of isolation, due to COVID-19, my mind was drawn to the story of Anne Frank. Anne Frank was a girl who knew something about isolation. She understood, better than most, the fear, loneliness, and uncertainty isolation and the factors surrounding it can bring.
It is normal to feel anxious and fearful and even wonder when, or if life will ever return to normal. Often our sleep is disrupted due to our anxiety and worries about the future. Anne experienced all of those feelings.
When we are isolated, it is easy to focus only on the negative, rather than all the good that still exists. Anne is an excellent example of someone who never lost sight of the beauty of life. She didn’t let her troubles keep her from hoping and dreaming.
Her story holds encouragement for those of us dealing with our feelings of loneliness and fear. It is also something that might benefit students struggling with their grief over the loss of graduation, school, and interactions with their peers. We can empathize with Anne’s story and also gain a new perspective on our current situation.
Facebook
Pinterest
Reddit
Twitter
Mix
Anne’s Story of Isolation
Anne Frank: The Diary of a Young Girl, inspired me so much that during a recent trip to Europe, I visited the Anne Frank House in Amsterdam. I saw the room where she slept and the small desk where she wrote her diary. I tried to imagine living in this space, sharing the small bedrooms with a parent or a stranger for two years. It makes me a little bit claustrophobic just thinking about it.
I think of my own home compared with the space in the secret annex, almost half of it would fit in my bedroom alone.
Anne, along with many other children and families, hid in attics and secret rooms. They could not go outside or even look out without endangering their lives. They were in a forced isolation that makes my stay-at-home order look like a luxury vacation.
For over two years, Anne and her family hid in the secret annex. They could not go to the store or walk outside or contact anyone outside the annex. During the day, they couldn’t even flush the toilet and had to be extremely quiet when walking around.
During my tour at the Anne Frank House, I walked up the wooden staircase to the annex, and across the creaky wooden floors. I can tell you, moving around without making any noises, would have been very difficult!
The children could not attend school, play outside, go to parties, or talk to friends. Anne, her family, and those hiding with them no longer had the freedom to come and go as they pleased. They were utterly dependent on the help of those hiding them.
These people risked their lives to bring them food and news from the outside. They were the helpers and unsung heroes we can all aspire to become.
Learning from Anne Frank
So as I sit here at home, writing this at a desk by the window, I am thankful. Thankful that I can look outside and even walk outdoors. I can drive myself to the grocery store and walk around without fear.
Anne represents the Jewish people and the horrific events of The Holocaust; however, more than that, she symbolizes hope, faith, and human resilience. We can all relate to her because we all know what it’s like to doubt ourselves, to feel lonely and afraid, and to have dreams for a better life.
Anne Frank was a remarkable young woman. Although Anne would never live to see it, she accomplished a goal of hers while in isolation. The dream of being a published writer. She left a beautiful legacy, and there is so much we can learn from her life.
Here are several lessons from her diary that can teach us how to deal with times of isolation and inspire us to live fully.
To Never Lose Faith
Anne Frank had reasons to doubt the good in humanity. She had reasons to question God and her faith. However, she never stopped believing in God or in the good that still existed in the world.
Every Individual Matters
You matter. Your story matters. You never know the difference you can make if you’ll only share your unique gifts with the world.
“Look at how a single candle can both defy and define the darkness.” ― Anne Frank
“Everyone has inside of him a piece of good news. The good news is that you don’t know how great you can be! How much you can love! What you can accomplish! And what your potential is!” ― Anne Frank
Self-Doubt is Normal
We will all have self-doubts. That’s a part of life. However, moving forward, even when we’re afraid or don’t know if we’ll ever be “good enough” is what matters.
If you have something that makes your heart sing, then do it for you, and the joy it gives you. I am so glad that Anne didn’t stop writing for as long as she was still alive.
To Learn From Our Mistakes
This might be one of the greatest lessons to learn from Anne’s story and The Holocaust. We must remember what happened, learn from it, and prevent it from happening again.
“What is done cannot be undone, but one can prevent it happening again.” ― Anne Frank
The Benefits of Journaling
A diary is a great way to get our thoughts down and our feelings. It is useful for kids and adults alike. Often if we have a safe space, such as a diary, we have the freedom to express our feelings without fear of repercussions or reproach. Writing is freeing and therapeutic.
“The nicest part is being able to write down all my thoughts and feelings; otherwise, I’d absolutely suffocate.” ― Anne Frank
To Be Dreamers
Oh, what a kindred spirit I find in Anne. She had so many dreams, and I bet, given a chance, she would have accomplished every one.
Focus on The Positive
Anne taught us to focus on what we have to be grateful for, despite our troubles.
I don’t think of all the misery, but of the beauty that still remains. ― Anne Frank
Final Thoughts About Anne
Anne and her family went into hiding from the Nazis in July 1942. She was 13 years old. After two years of hiding in an annex over the warehouse where her father worked, they were captured by the Nazis and taken to concentration camps.
Anne went from the isolation of the annex to a concentration camp where she died at the age of 15. She loved to write and hoped to one day be a famous writer. Sadly, Anne never saw this come to pass. She never had the opportunity to return to school, to fulfill her dreams, or to see her diary published. Anne never had the chance to return to a normal life.
Perhaps, as a tribute to Anne, and to all those who lost their lives too soon, we can do our best to live our lives fully. Chasing our dreams, inspiring those around us, and always believing there is more good than bad to be uncovered.
Our isolation is temporary; eventually, children will return to school, and we will celebrate with family once again. Anne Frank never stopped dreaming while in isolation, and I know she would have lived life passionately given a chance.
So what about you? What will you do with your life?
Anne’s diary, from those two years in isolation, has inspired millions of people around the world! Anne did, in fact, live on after she was dead.
Recommendations for Books & Movies About Anne Frank
Books:
The Diary of a Young Girl by Anne Frank
Anne Frank’s Tales from the Secret Annex: A Collection of Her Short Stories, Fables, and Lesser-Known Writings by Anne Frank
Eva’s Story: A Survivor’s Tale By the Step Sister of Anne Frank by Eva Schloss
Anne Frank Remembered: The Story of the Woman WhoHelped to Hide the Frank Family by Miep Gies
Anne Frank: The Book, The Life, The Afterlife by Francine Prose