author.travelffeine.com

Category: Travel


“Twenty years from now you will be more disappointed by the things that you didn’t do than by the ones you did do. So throw off the bowlines. Sail away from the safe harbor. Catch the trade winds in your sails. Explore. Dream. Discover.”     — H. Jackson Brown, Jr.

  • Willis Creek Slot Canyon: A Fun & Easy Hike

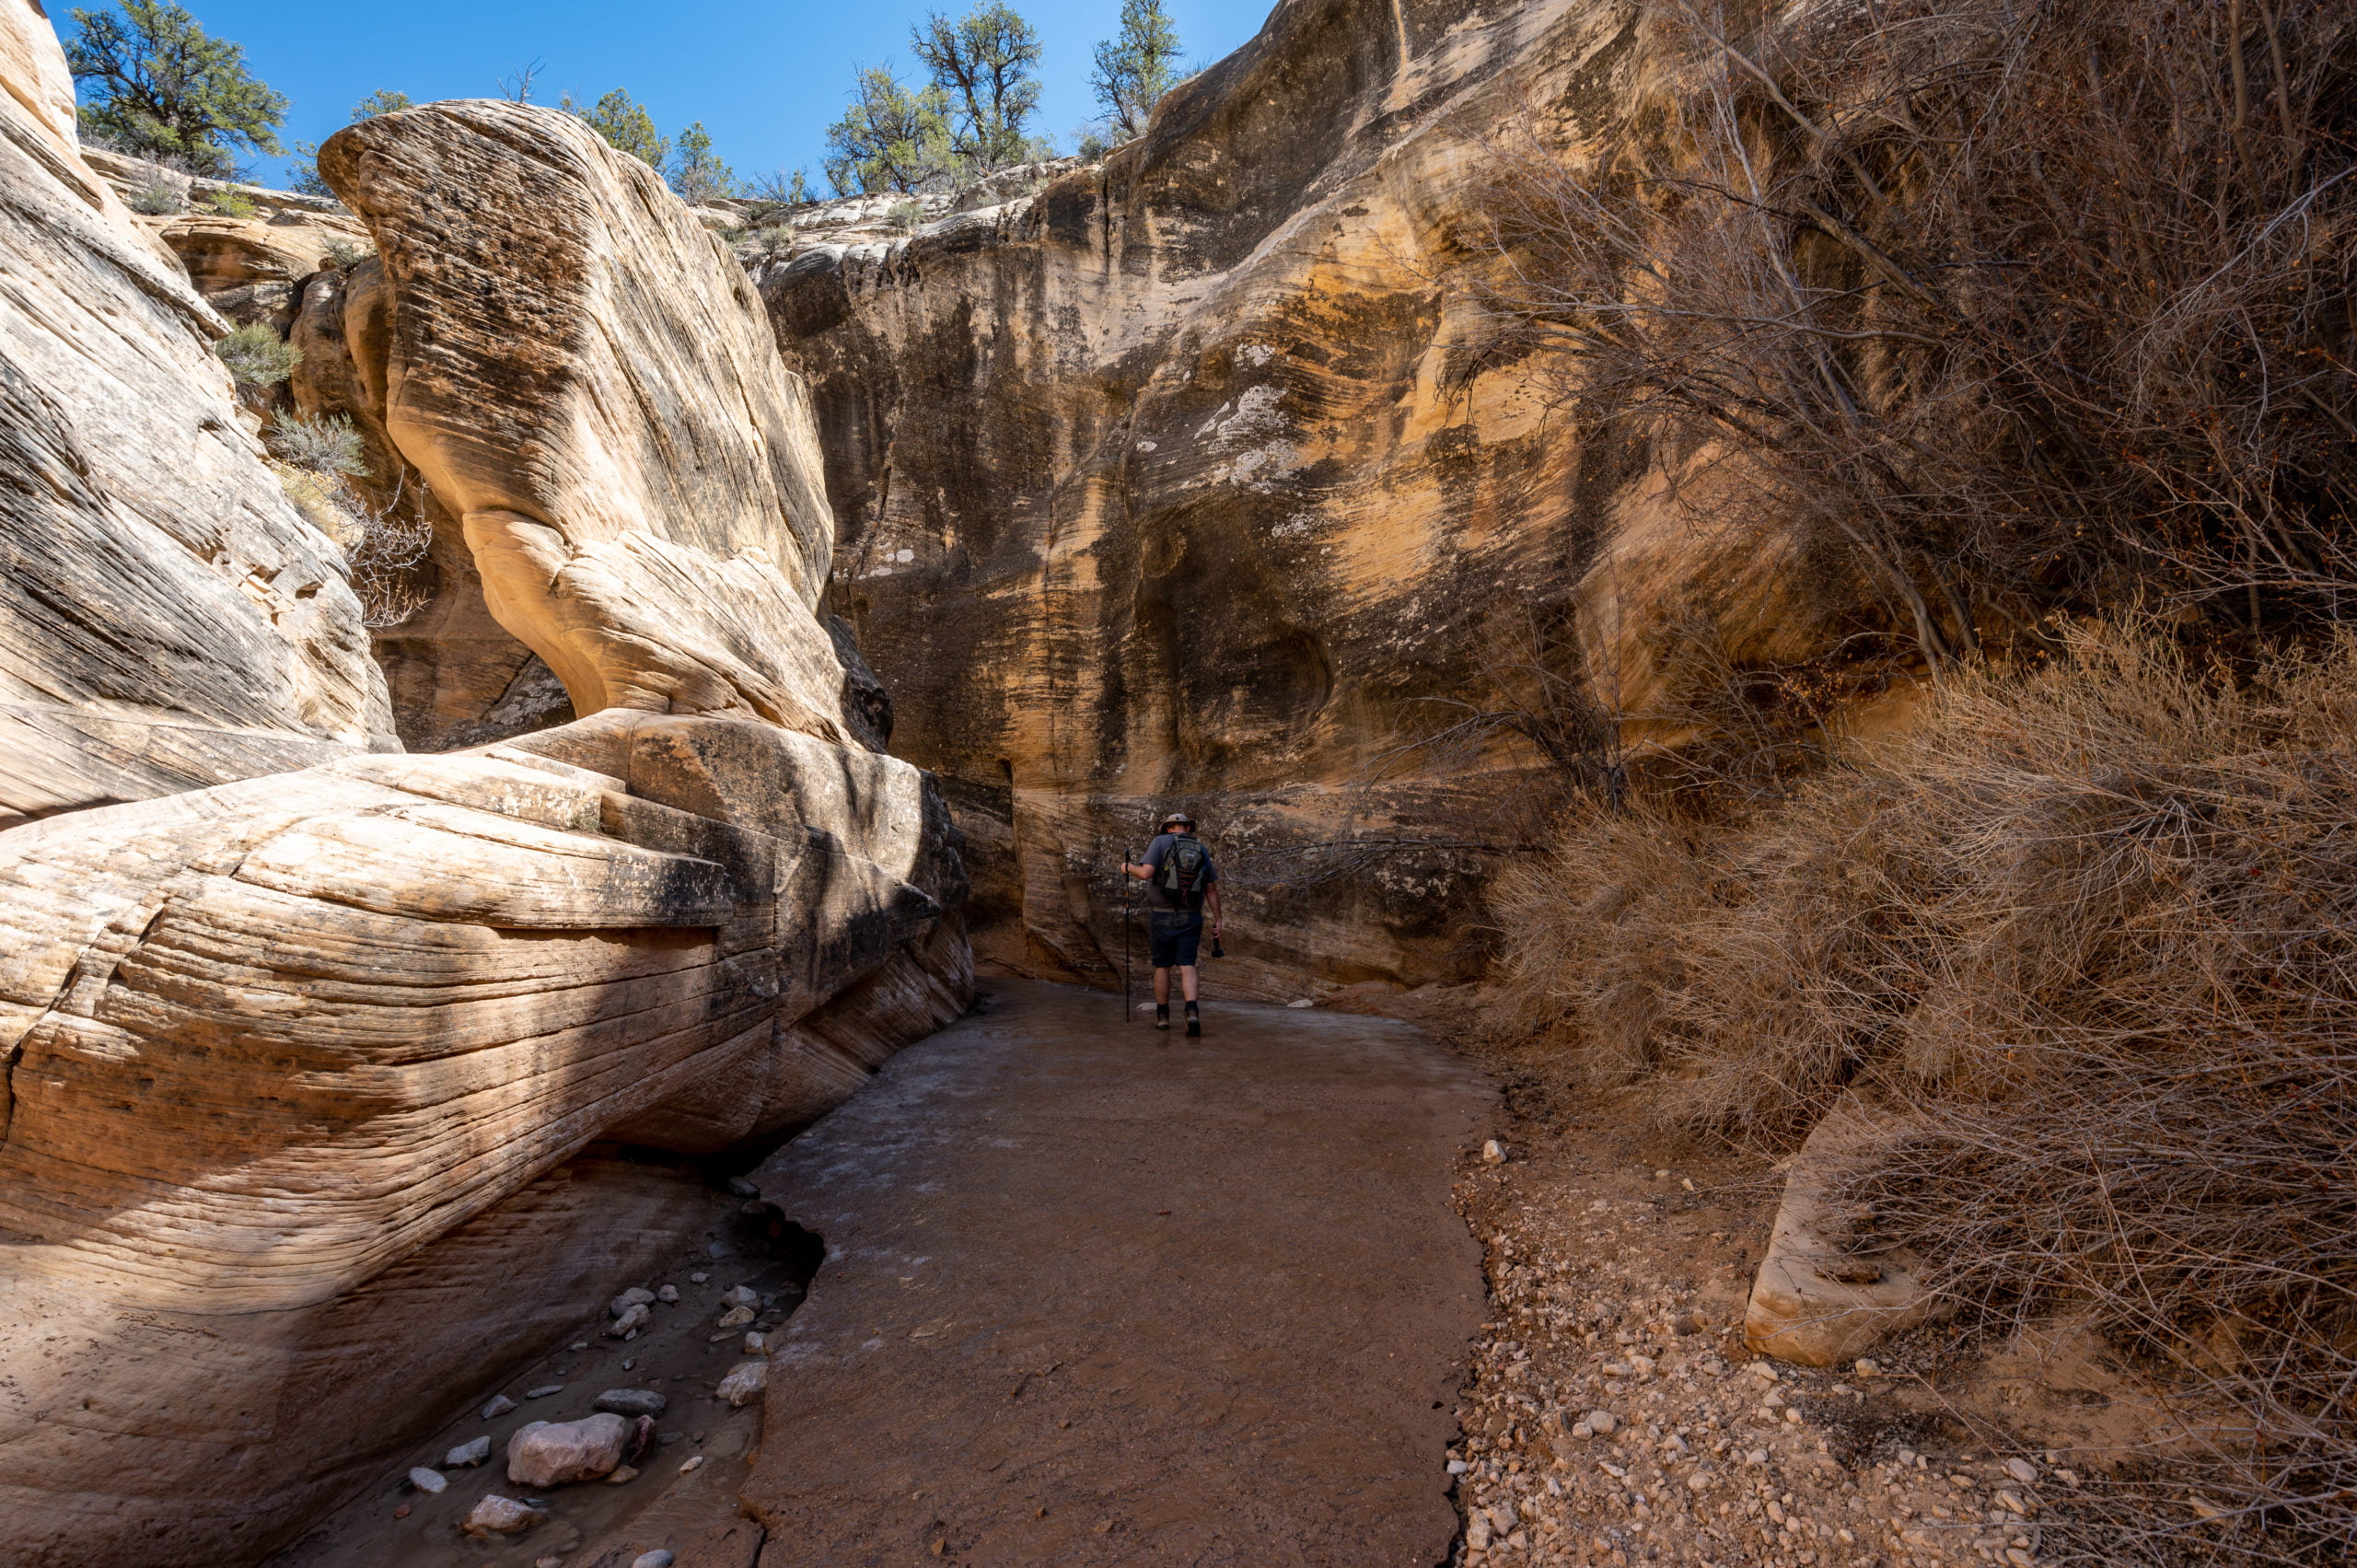
    If you want a fun and easy slot canyon that doesn’t require any big scrambles over rocks or narrow squeezes that require months of dieting to perform, then look no further than the Willis Creek Slot Canyon! The Willis Creek Slot Canyon is located in Utah’s Grand Staircase-Escalante National Monument. 

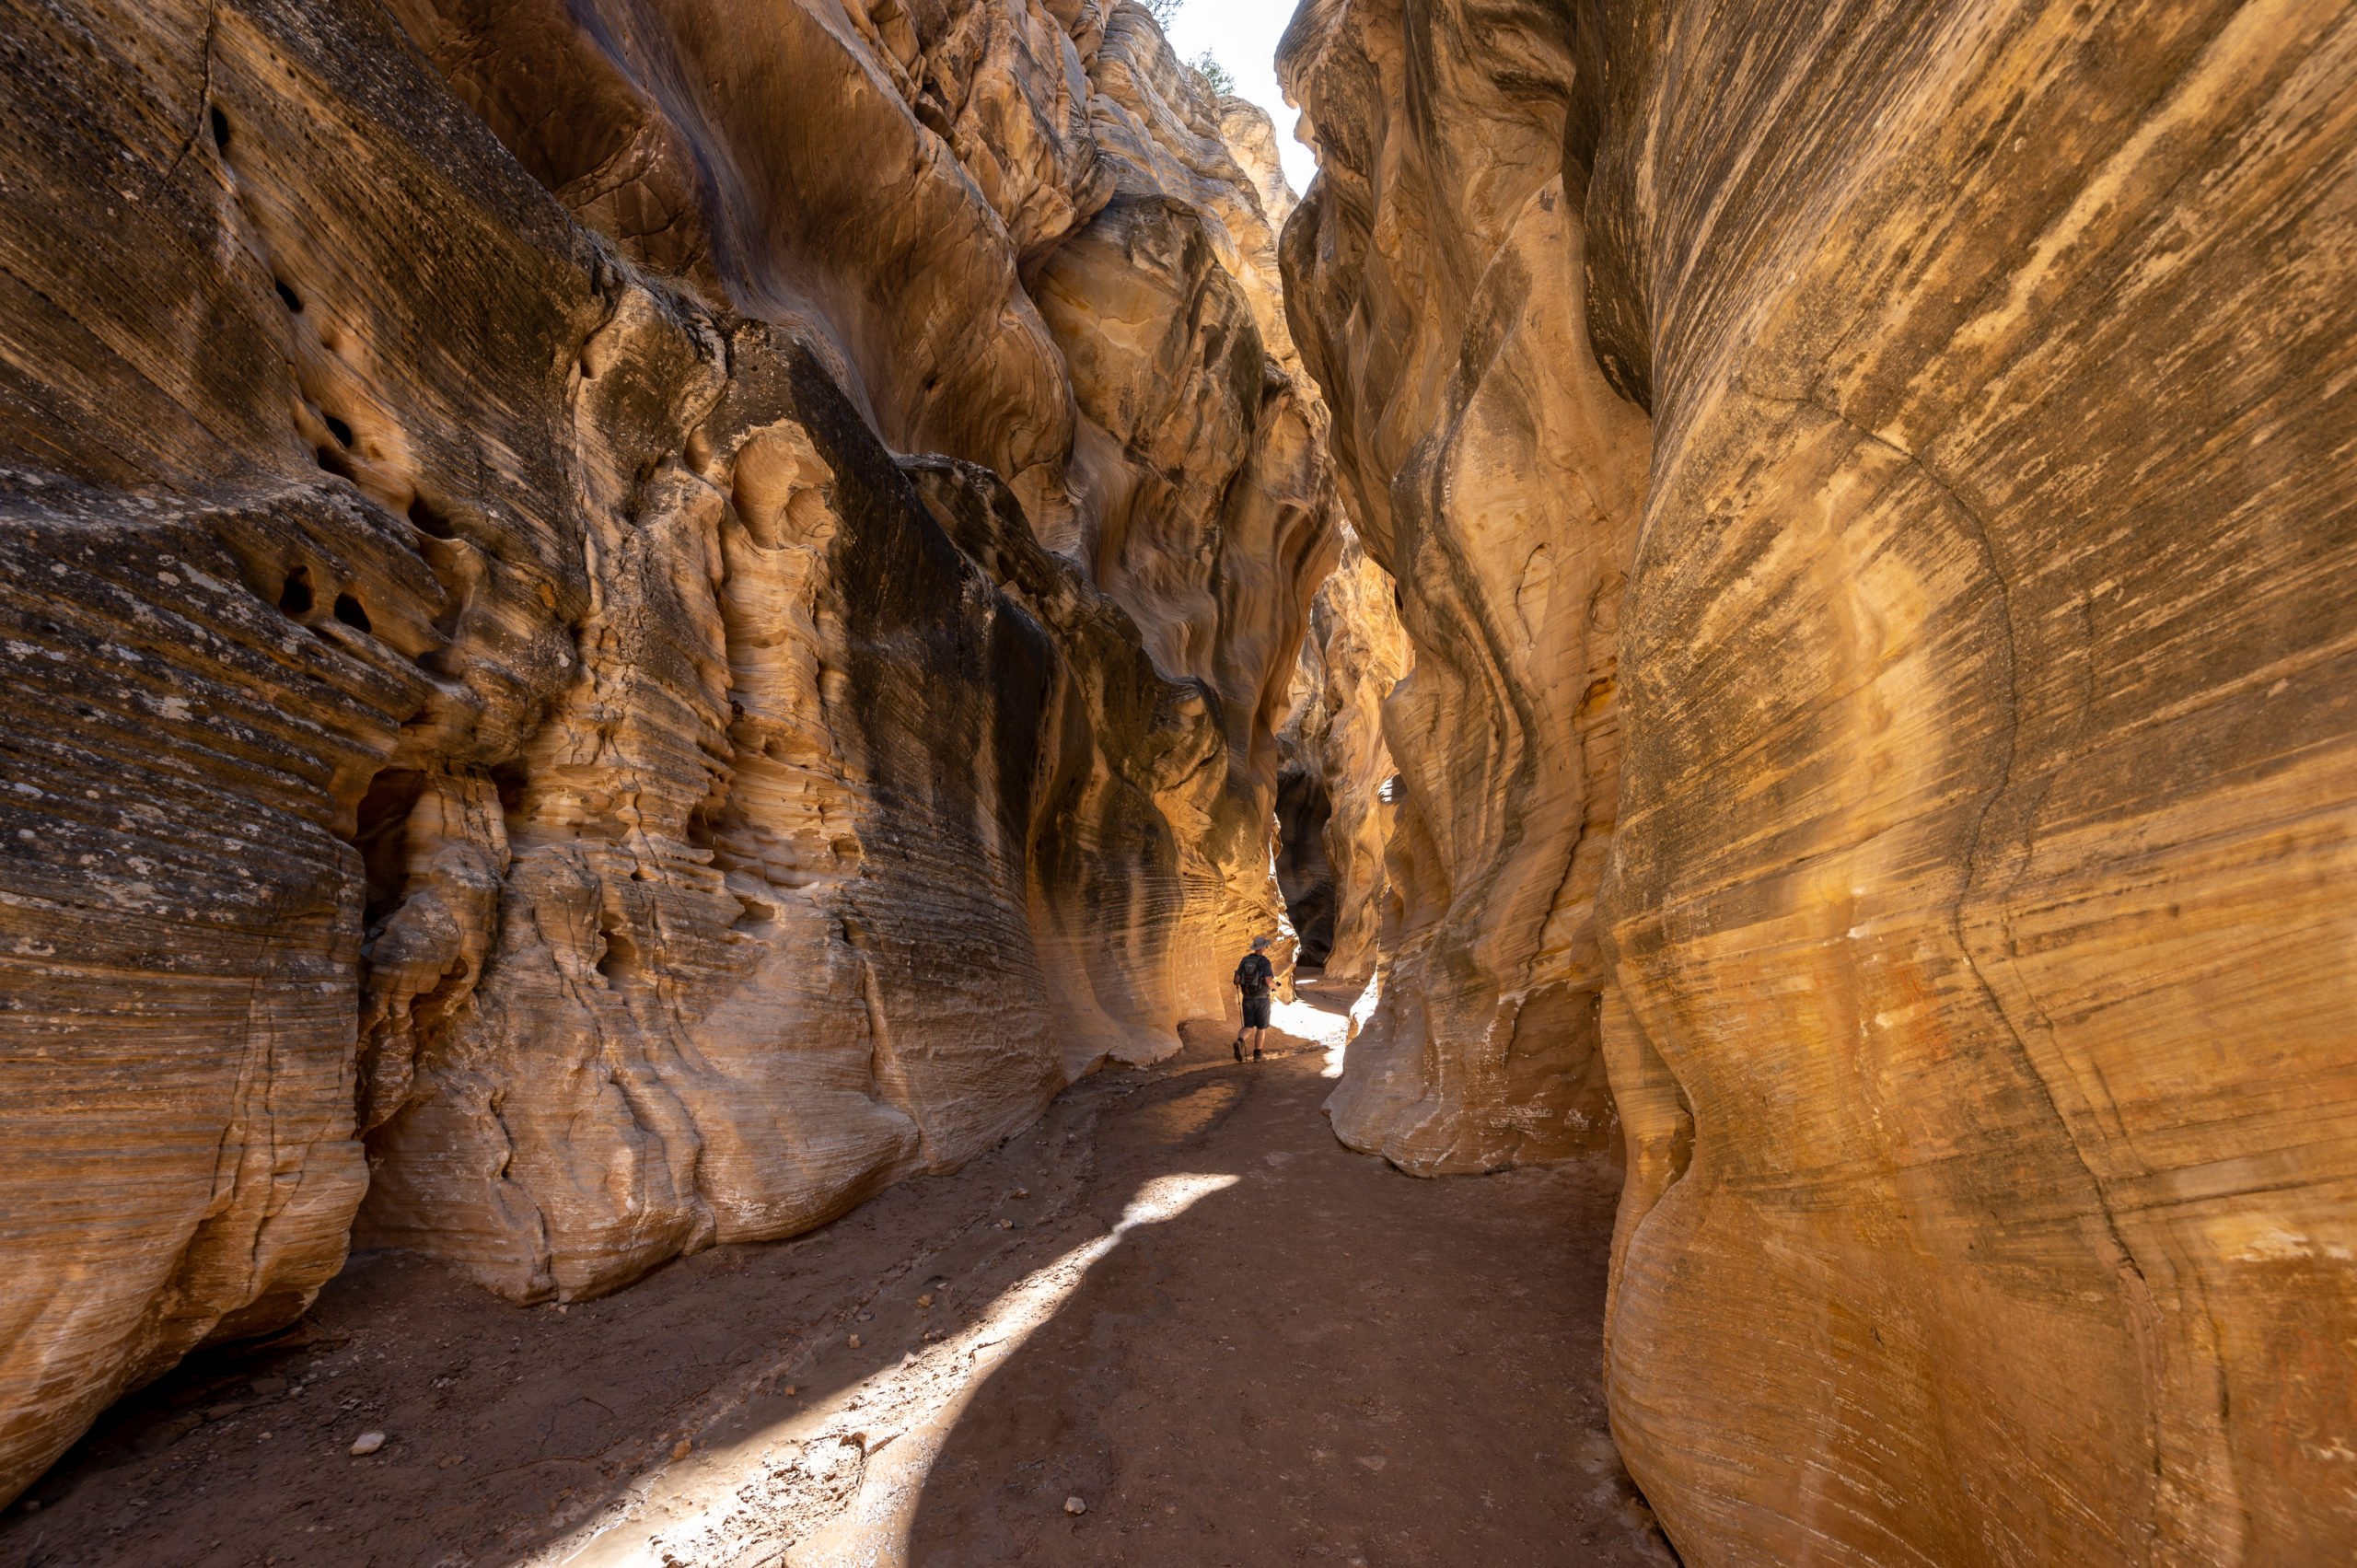
    This hike is perfect for families and anyone looking for a mostly flat slot canyon hike. I saw multiple families with young children, probably around the age of 5 or possibly younger doing this as well as older kids and teens.  It’s a beautiful and enjoyable slot canyon hike good for all ages.  

    We chose to do this hike on a day where we spent the morning at Bryce Canyon, but we still wanted a short hike to do that afternoon.  The Willis Creek Slot Canyon Hike is about 1-hour from Bryce Canyon National Park and only 30-minutes from Kodachrome Basin State Park. If you’re in the area, you’ll want to consider this fun hike!

    Getting to the Willis Creek Slot Canyon Trailhead

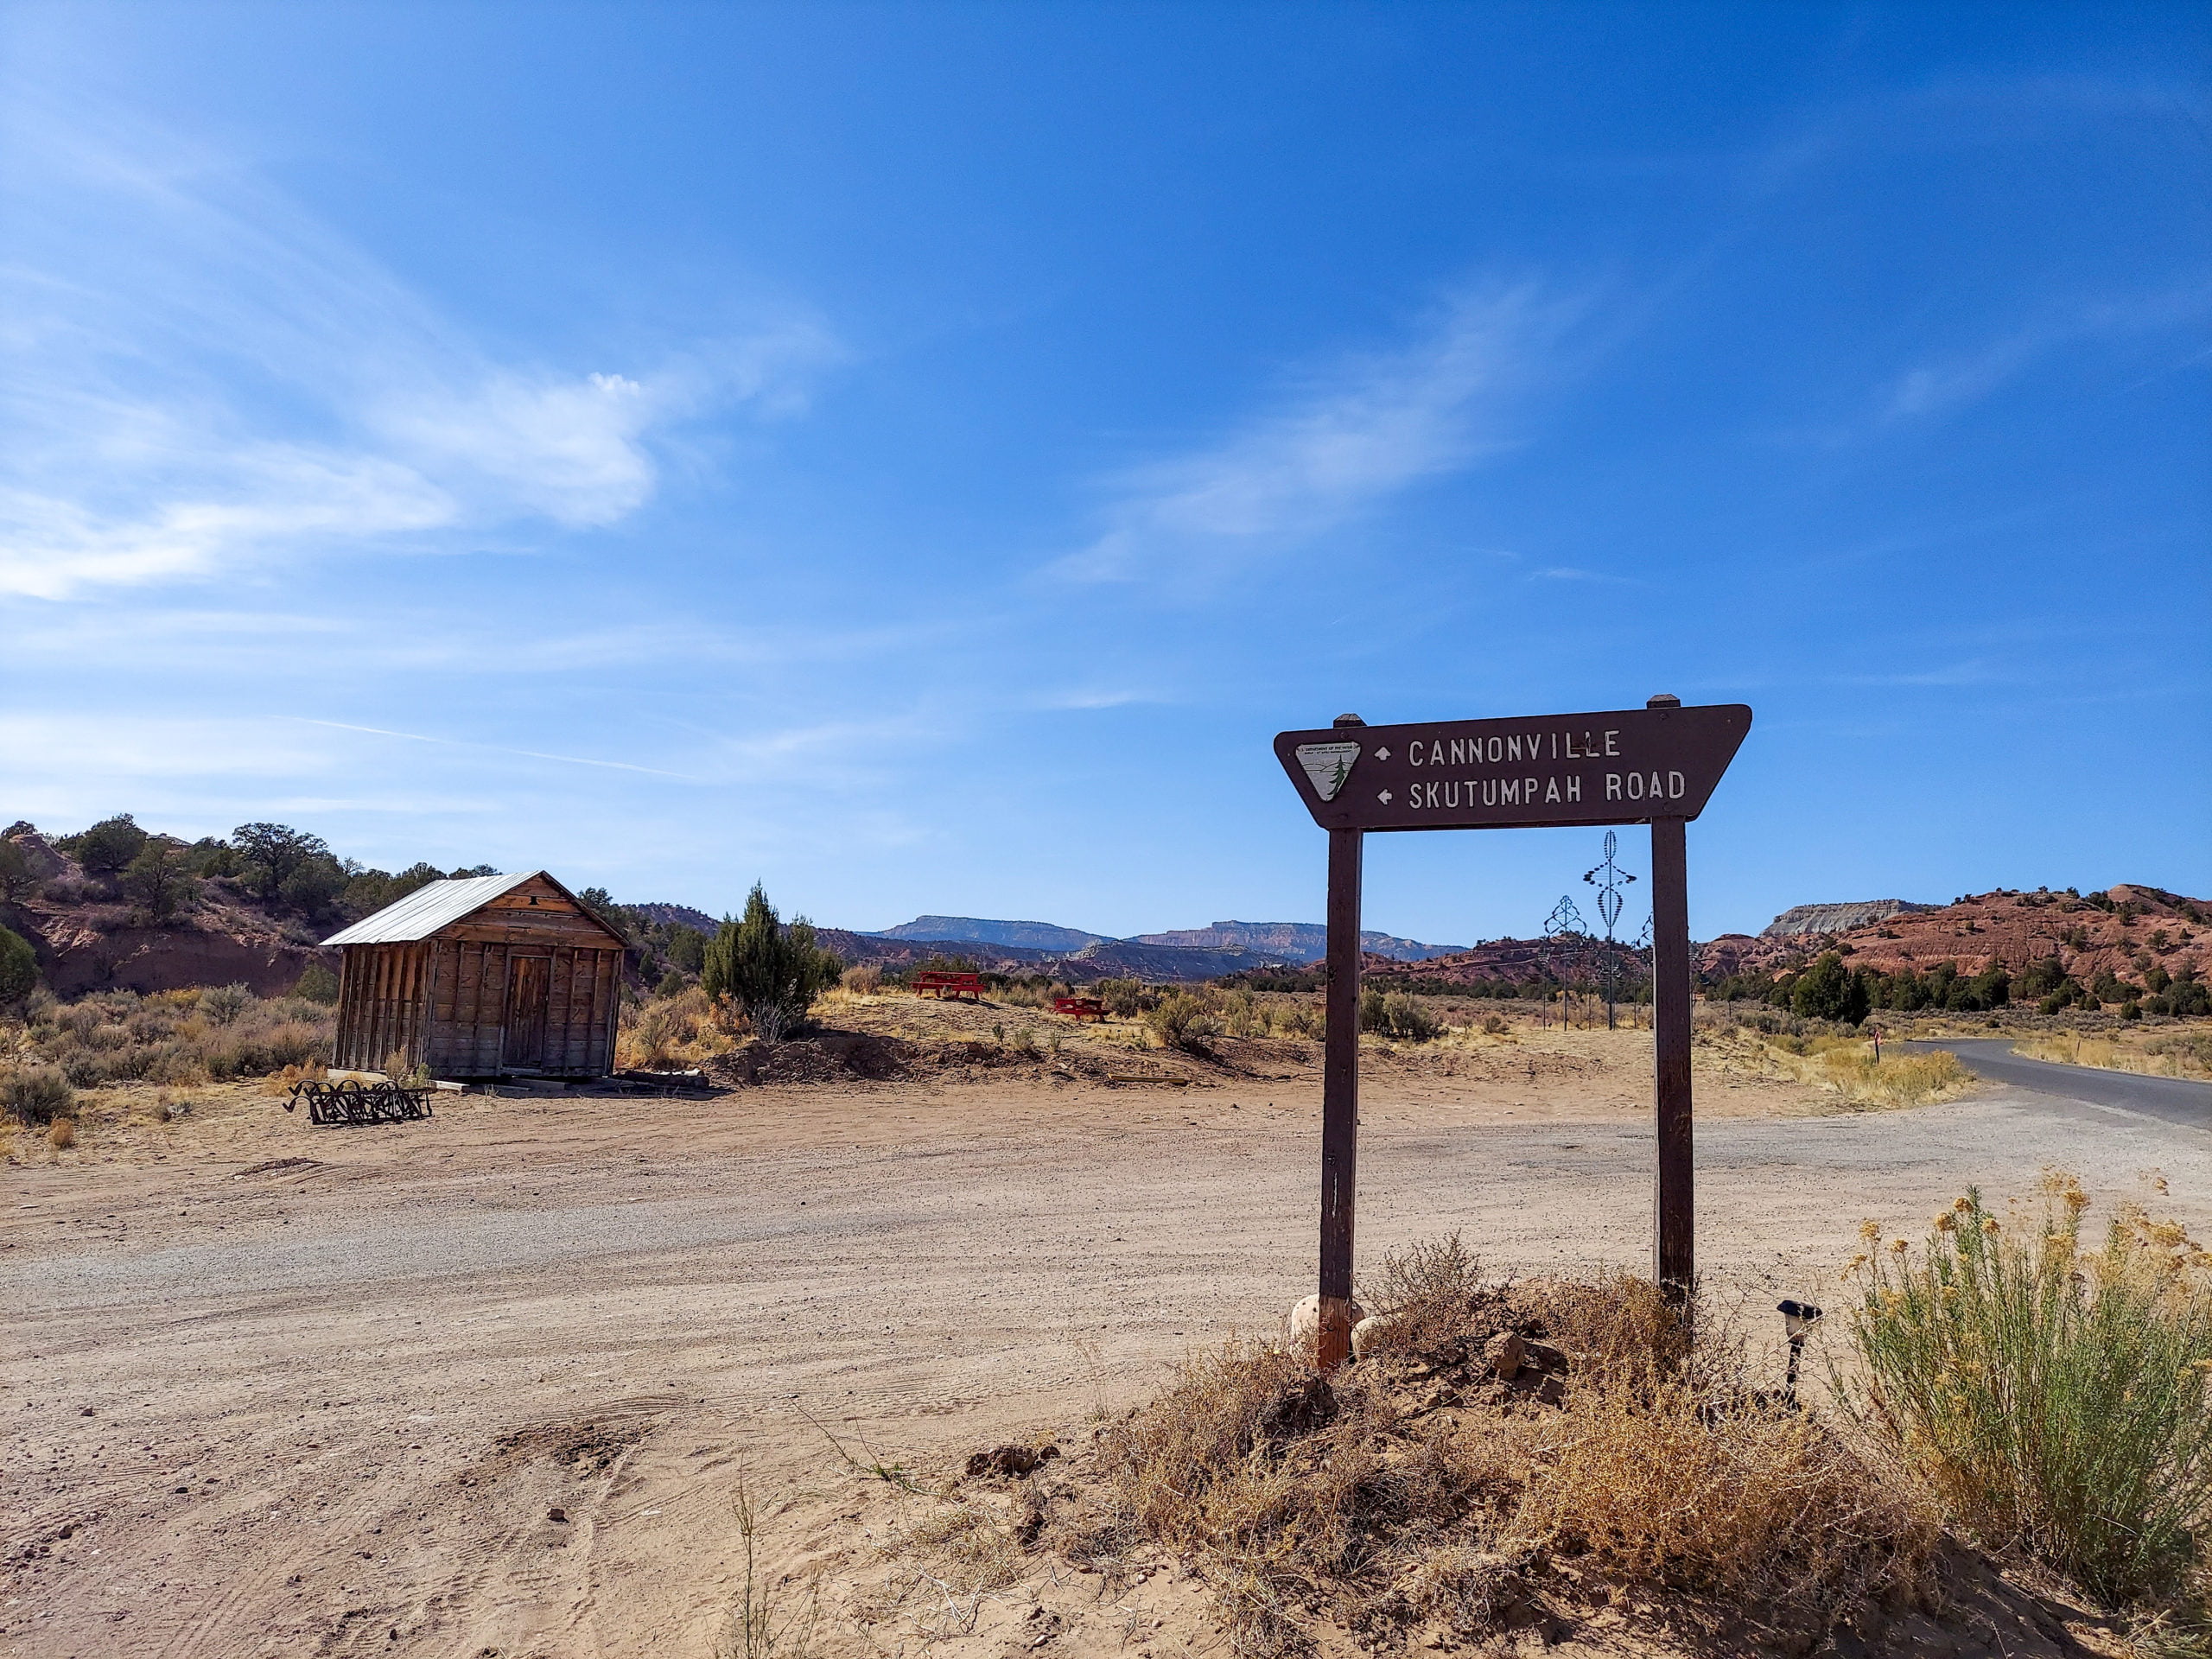
    The turn-off for the road to Willis Creek Slot Canyon is just outside the small town of Cannonville.  Stop at the visitor center in Cannonville to double-check road conditions.  If it has rained or will rain, then skip this hike.

    Directions:

    From Cannonville, head south on Kodachrome Road/Main Street for about 2.5 miles before it turns into Cottonwood Canyon Road. Take a right on BLM 500/Skutumpah Road.  Stay on BLM 500 for about 6.1 miles before arriving at the parking area for the Willis Creek Slot Canyon trailhead.  You will come to multiple forks in the road, but as long as you stay on BLM 500, you will arrive at the parking area after about 30-minutes of driving time.

    *I used Google Maps to navigate to the Willis Creek Slot Canyon trailhead and had no issues. However, I read reports online of others who had issues with Google Maps telling them to turn down private roads.  Perhaps Google fixed that issue? 

    About the Willis Creek Slot Canyon Hike

    Distance: ~2.8 round trip

    It’s approximately 1.4 miles one-way to the end of the slot canyon portion of this trail. We hiked to this point and then turned around.

    Difficulty: Easy

    It is a mostly flat, uneven, and rocky trail. Most people can navigate it without any issues.

    Duration of the Hike: 2 to 2.5 hours

    This will depend on how far you hike down the trail. We took around 2 hours to hike the 2.8 miles to the end of the slot canyon portion and back.

    Road Conditions: 

    The dirt road to the trail is rough but typically doable with a 2WD vehicle.  I saw everything from small cars, RVs, camper vans, and trucks on this road. It is a lot of washboard gravel road with some large potholes here and there.

    Make sure to check road conditions at the Visitor Center in Cannonville. If it has rained the day before your visit or will rain, save this for another day. When the sand on this road gets wet, it turns into a muddy mess you do not want to deal with. It’s also not safe to hike in slot canyons if there is the potential for a flash flood. You can also call the Visitor Center at 435-826-5640 for more information.
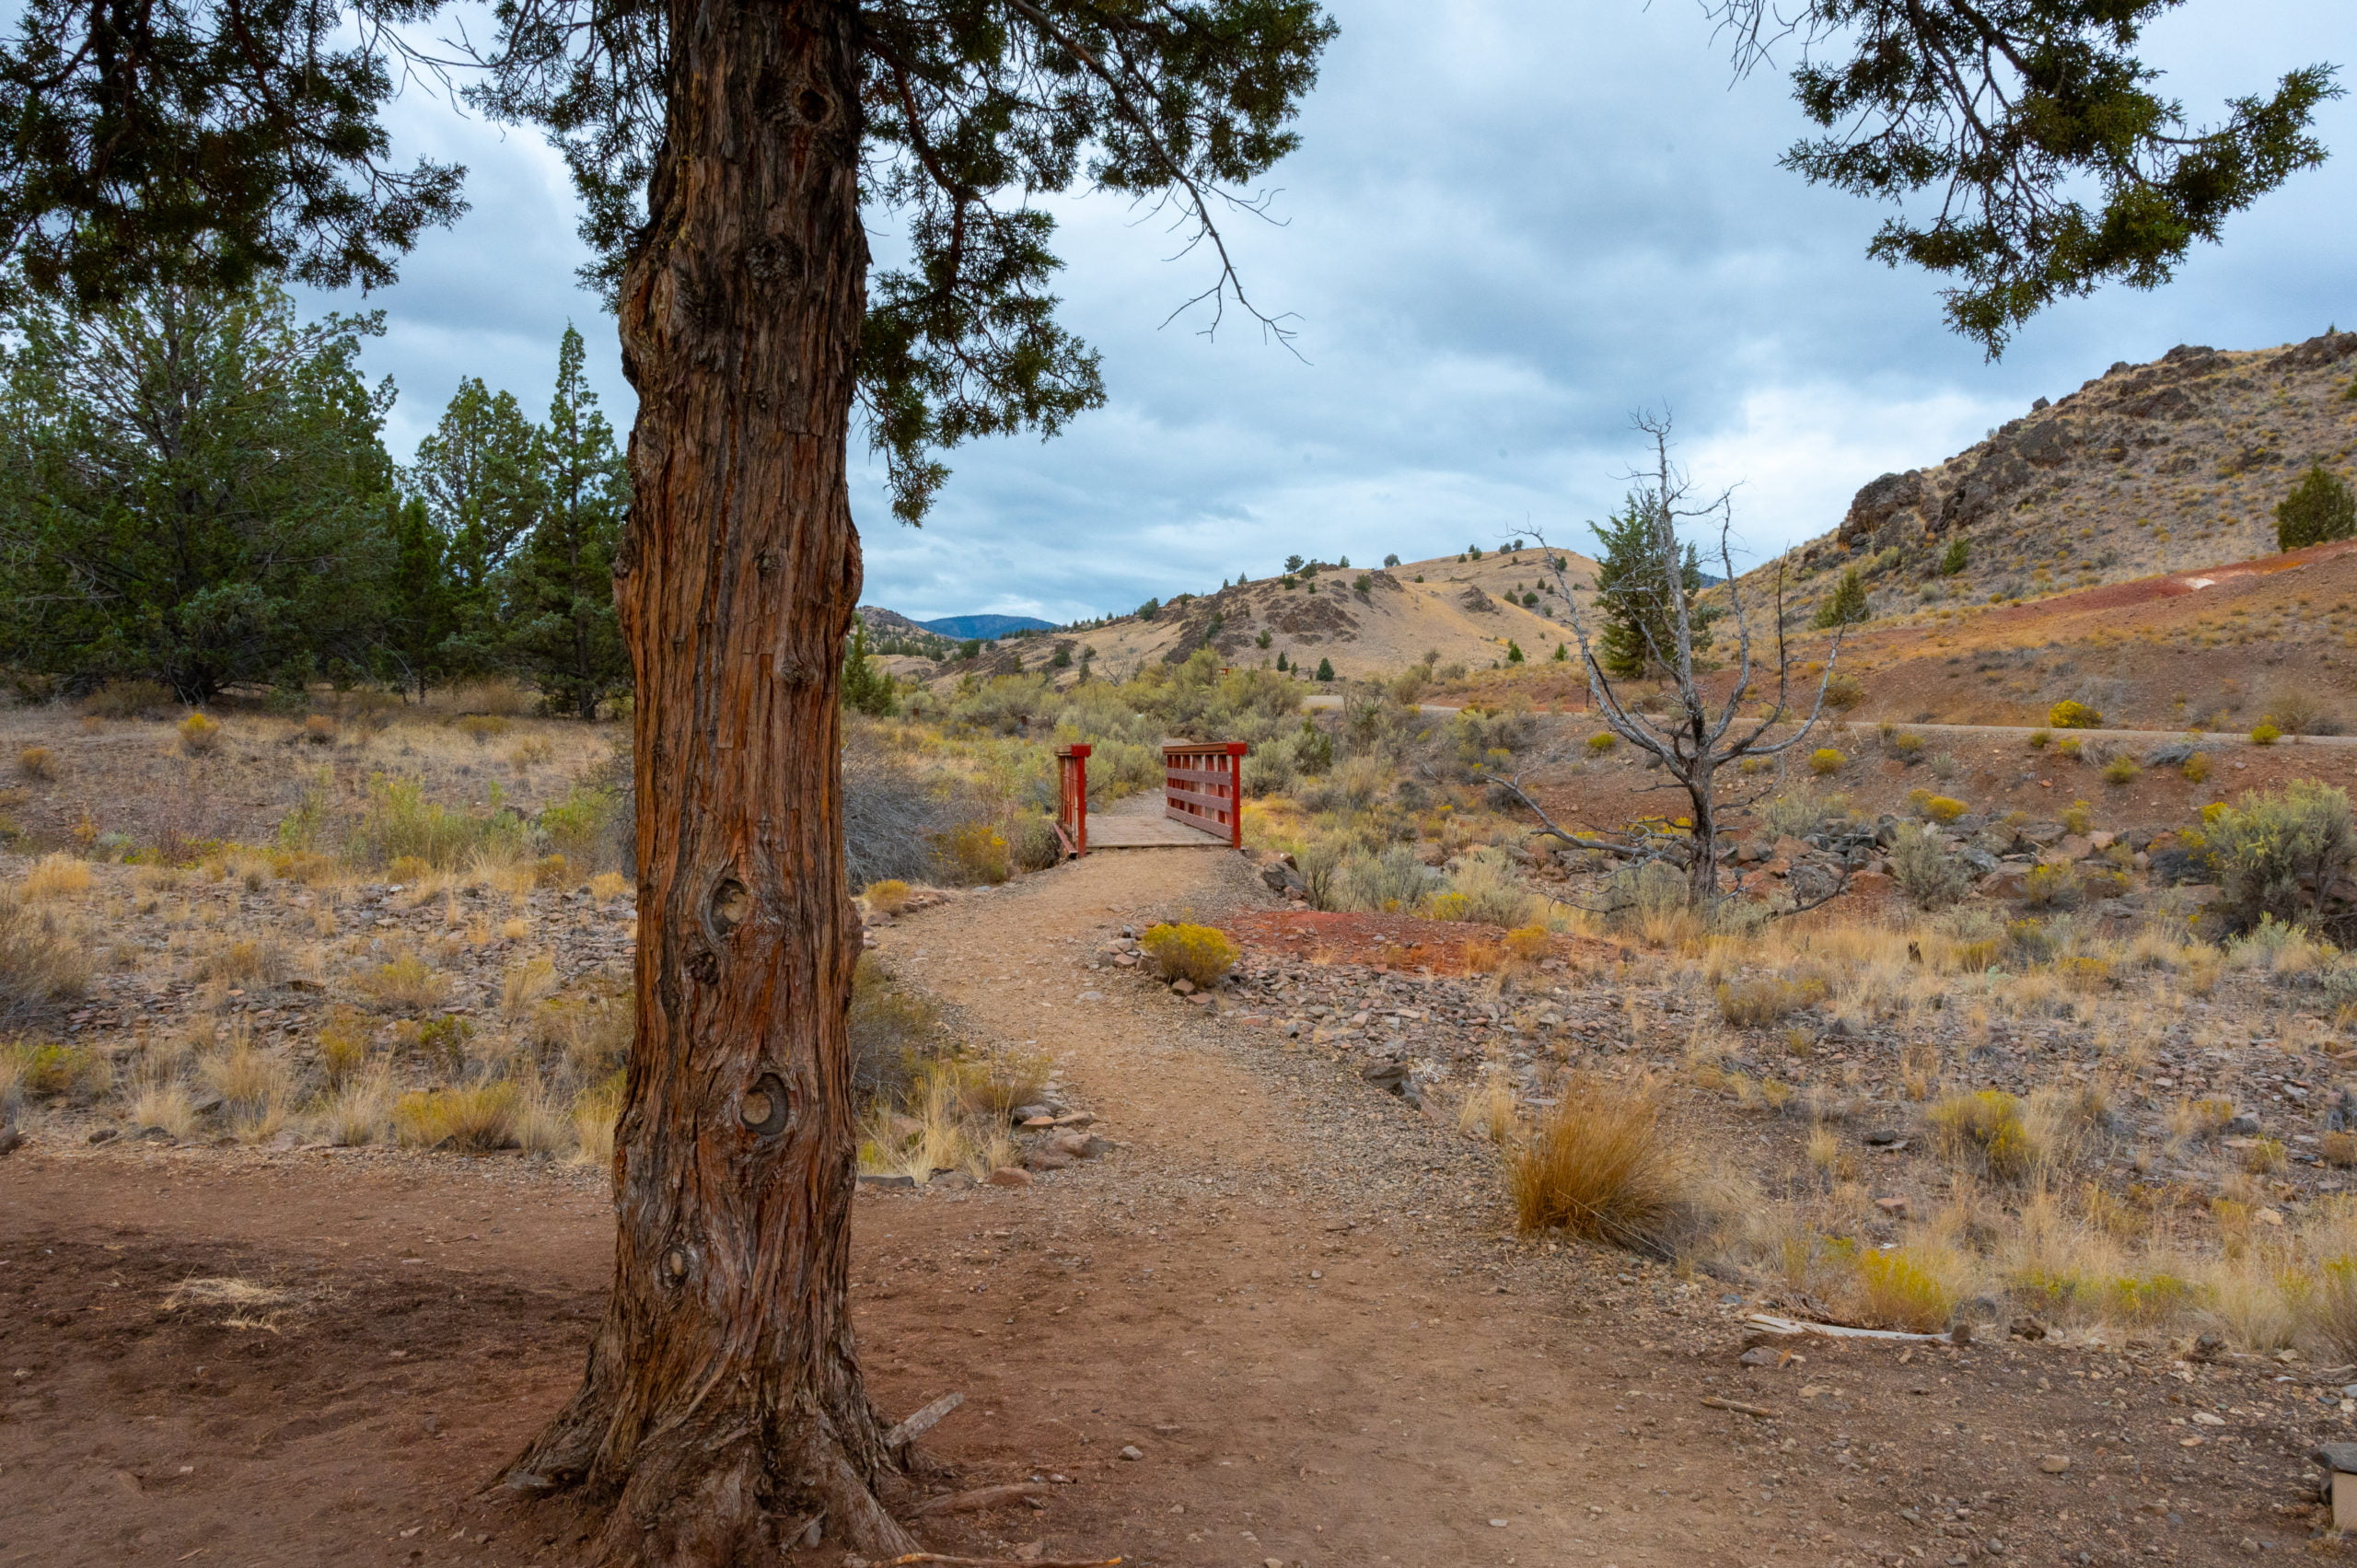
    The Trail:

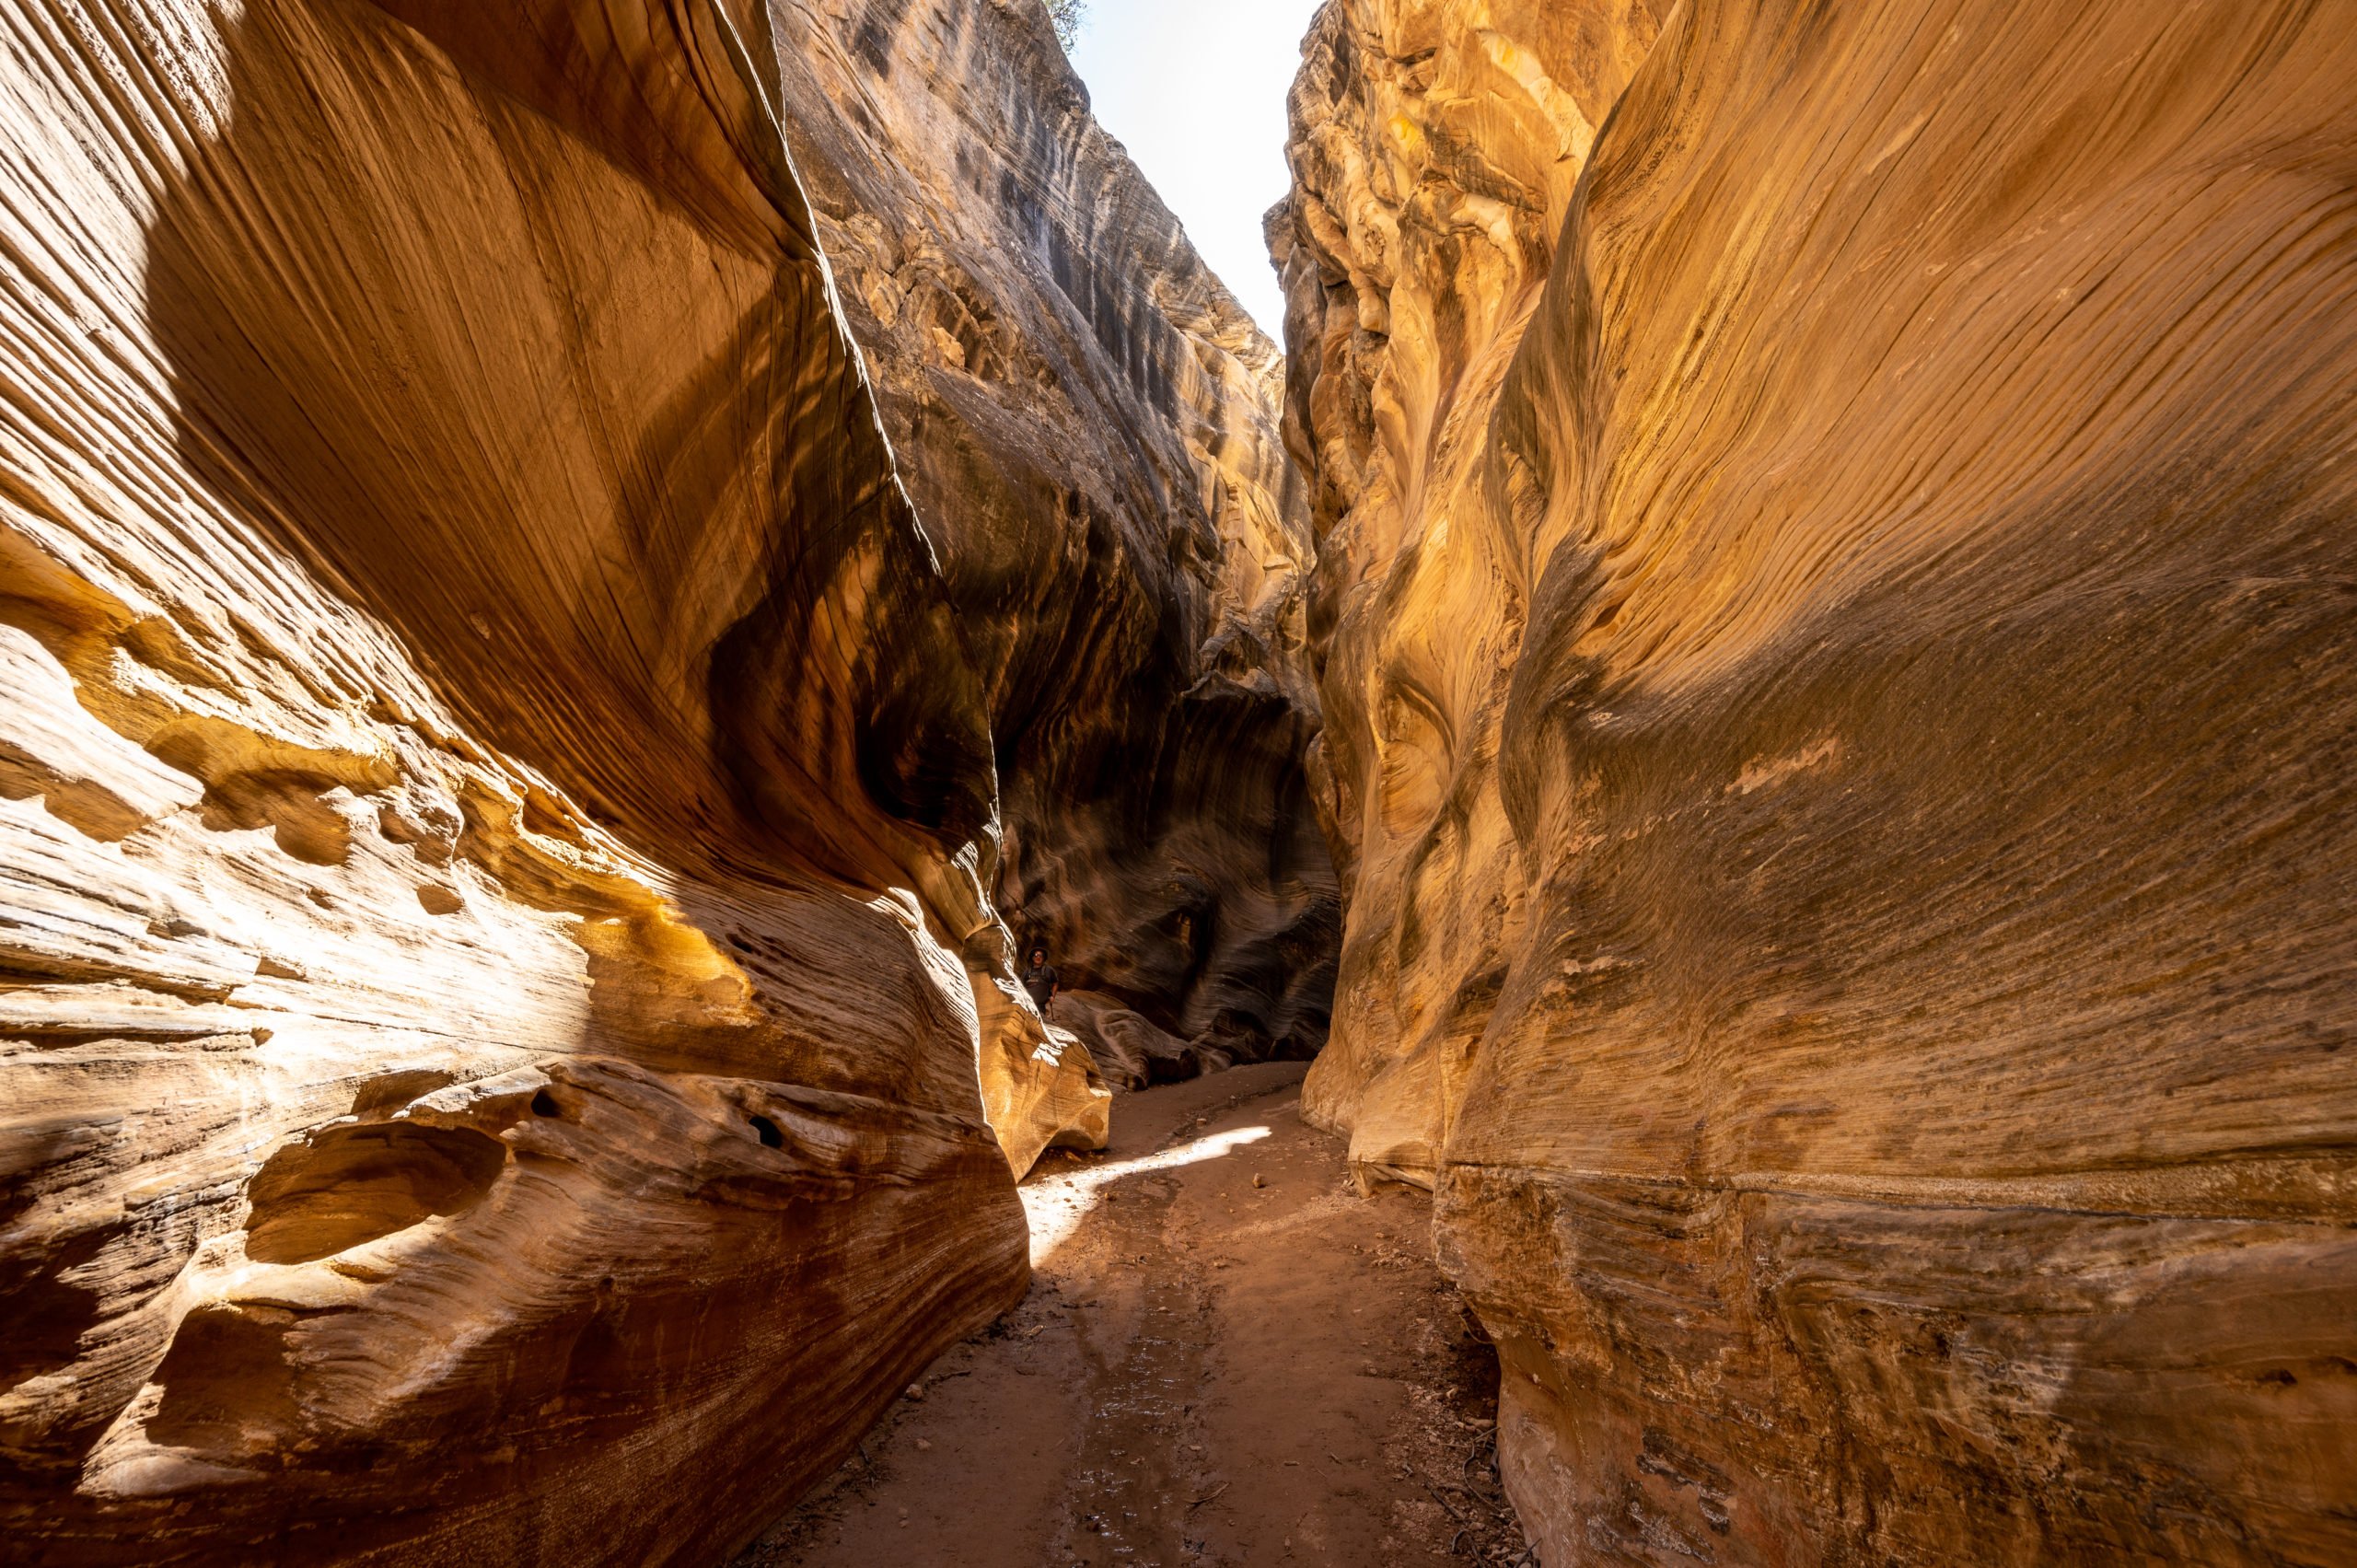
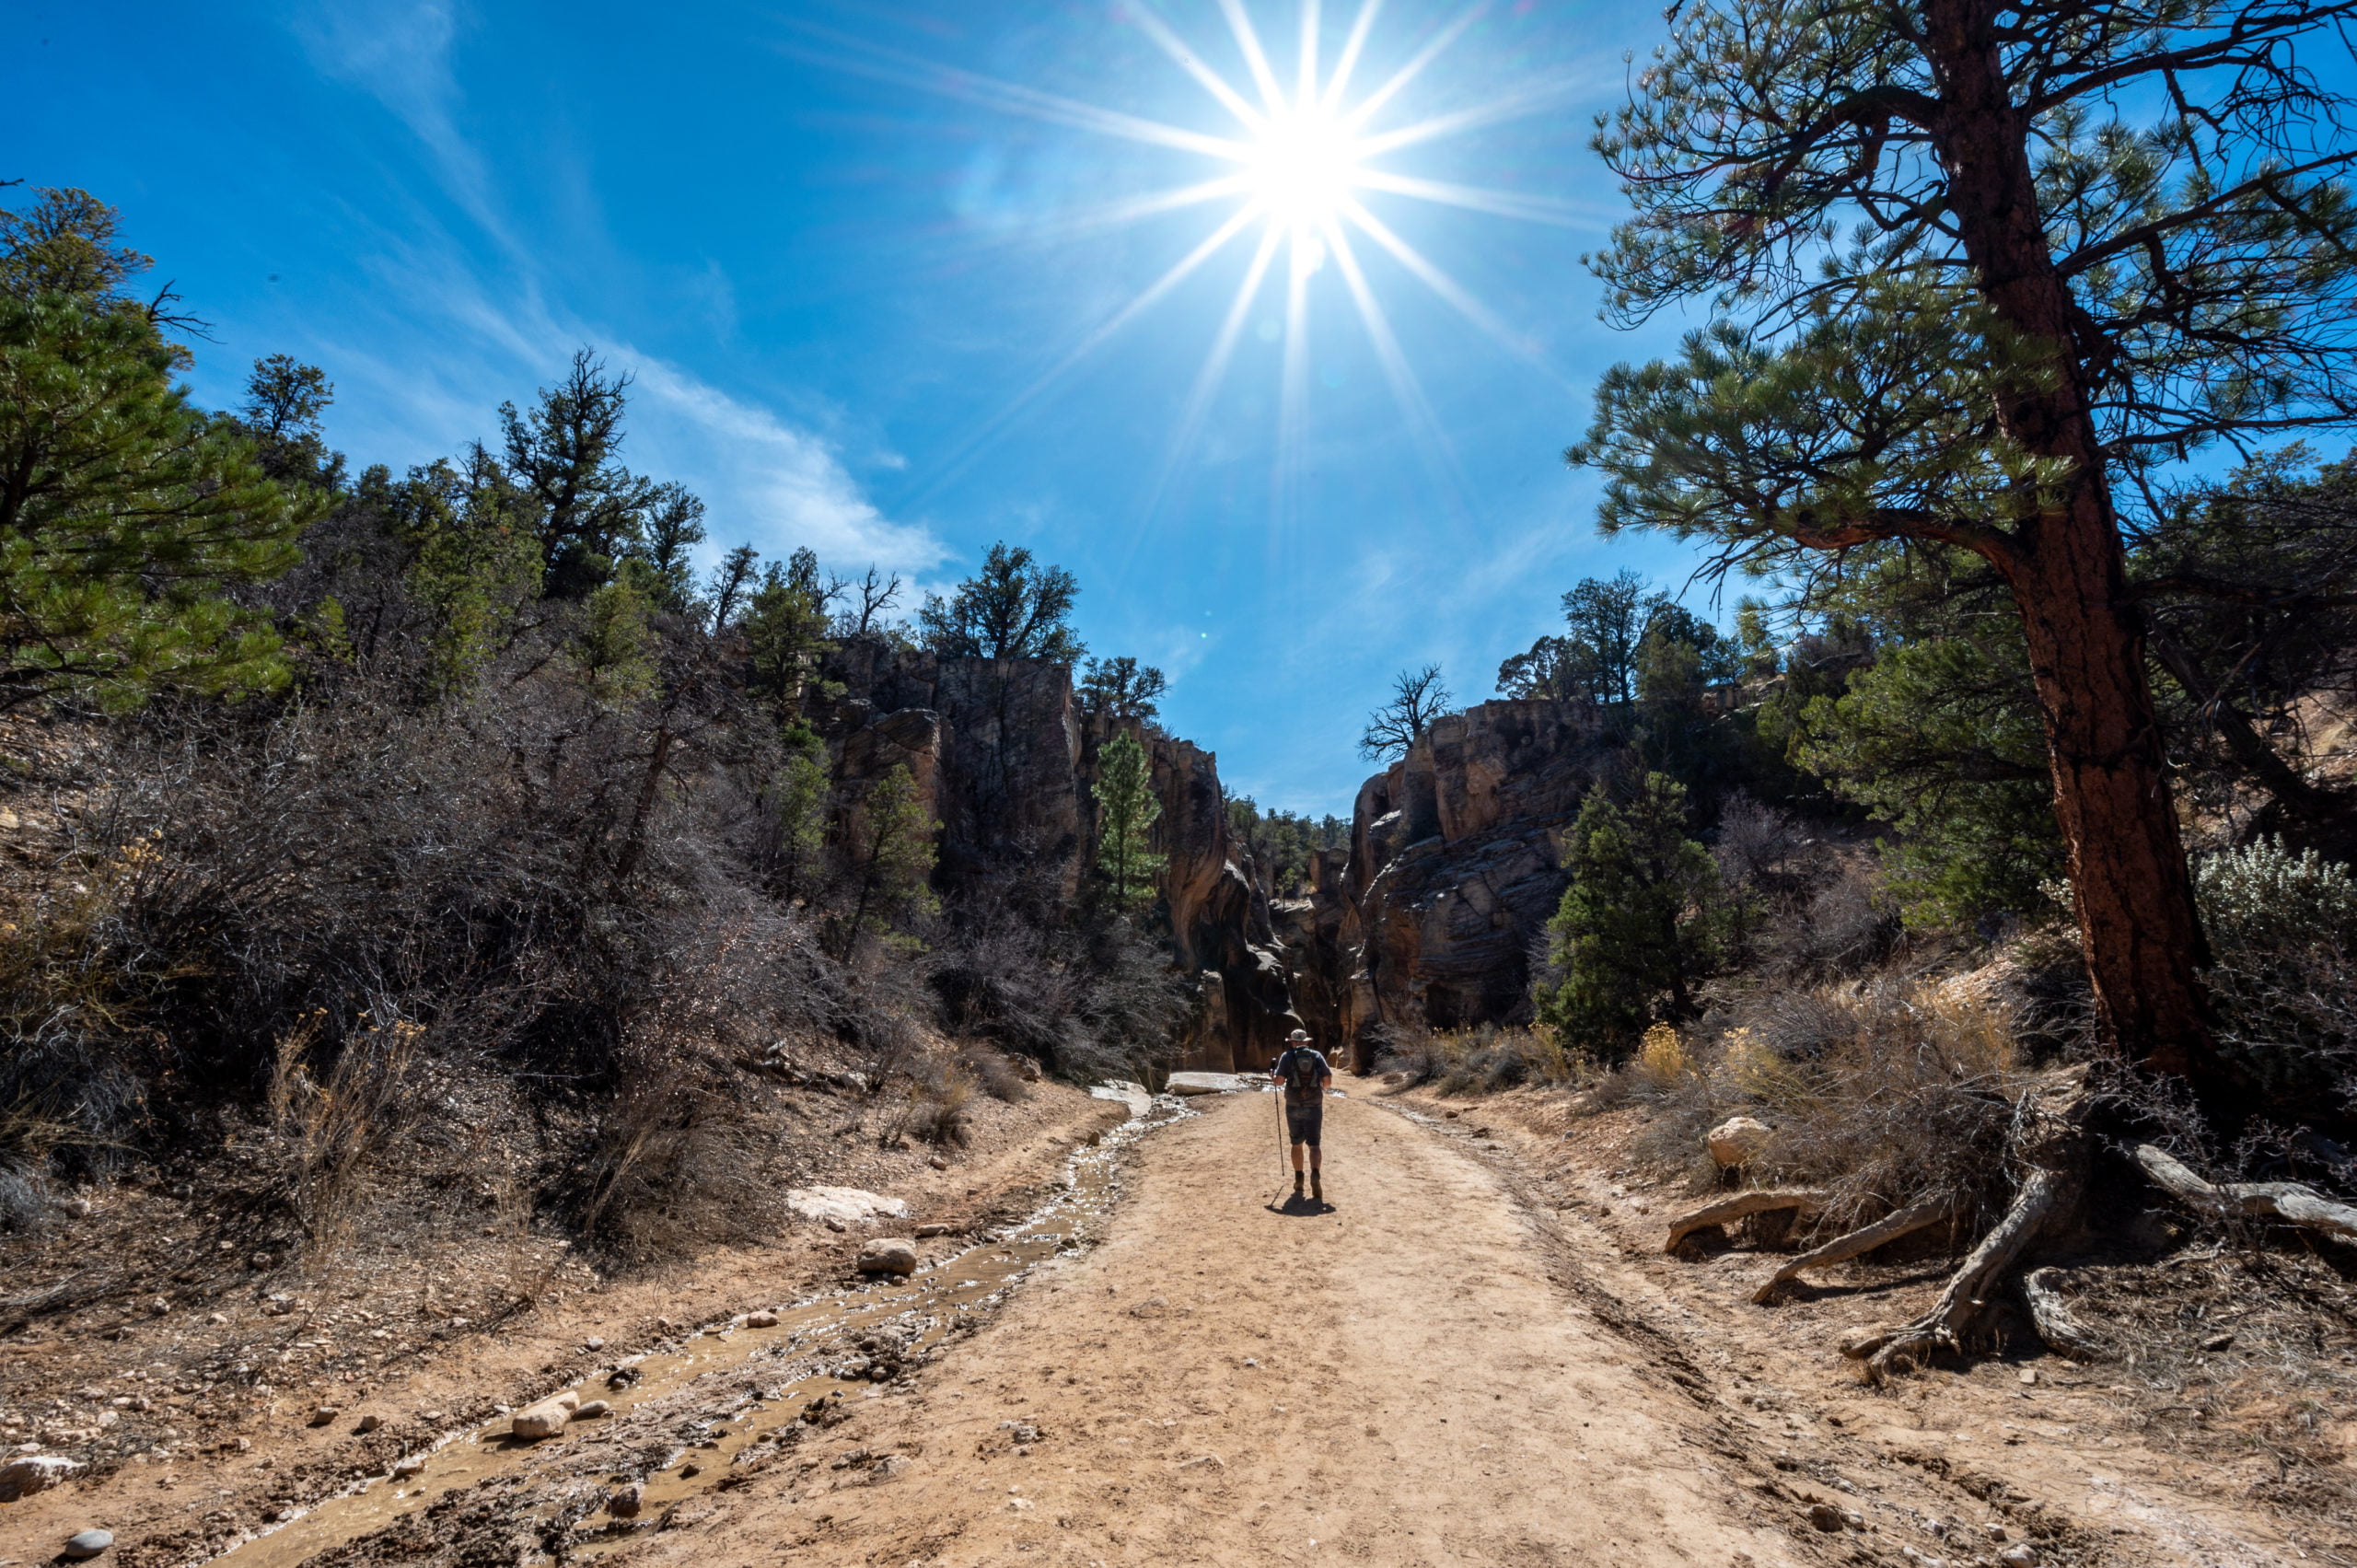
    The Willis Creek Slot Canyon trail starts across the road from the parking lot.  Follow the dirt path through some brush and down to the creek bed.  This is a mostly flat trail with very little elevation change.  You’ll hike through a small section of slot canyon before it opens up into a wide wash area which you’ll follow for approximately 10-minutes before you’ll wind around another bend and find both a small waterfall and entrance to the main Willis Creek Slot Canyon area.

    What to Bring

    Bring hiking poles, plenty of water, and a snack bar or two. Make sure to apply sunscreen before starting the hike. Although you’ll be inside a slot canyon or the majority of the hike, there are a couple of stretches out in the open sun where it gets really hot.

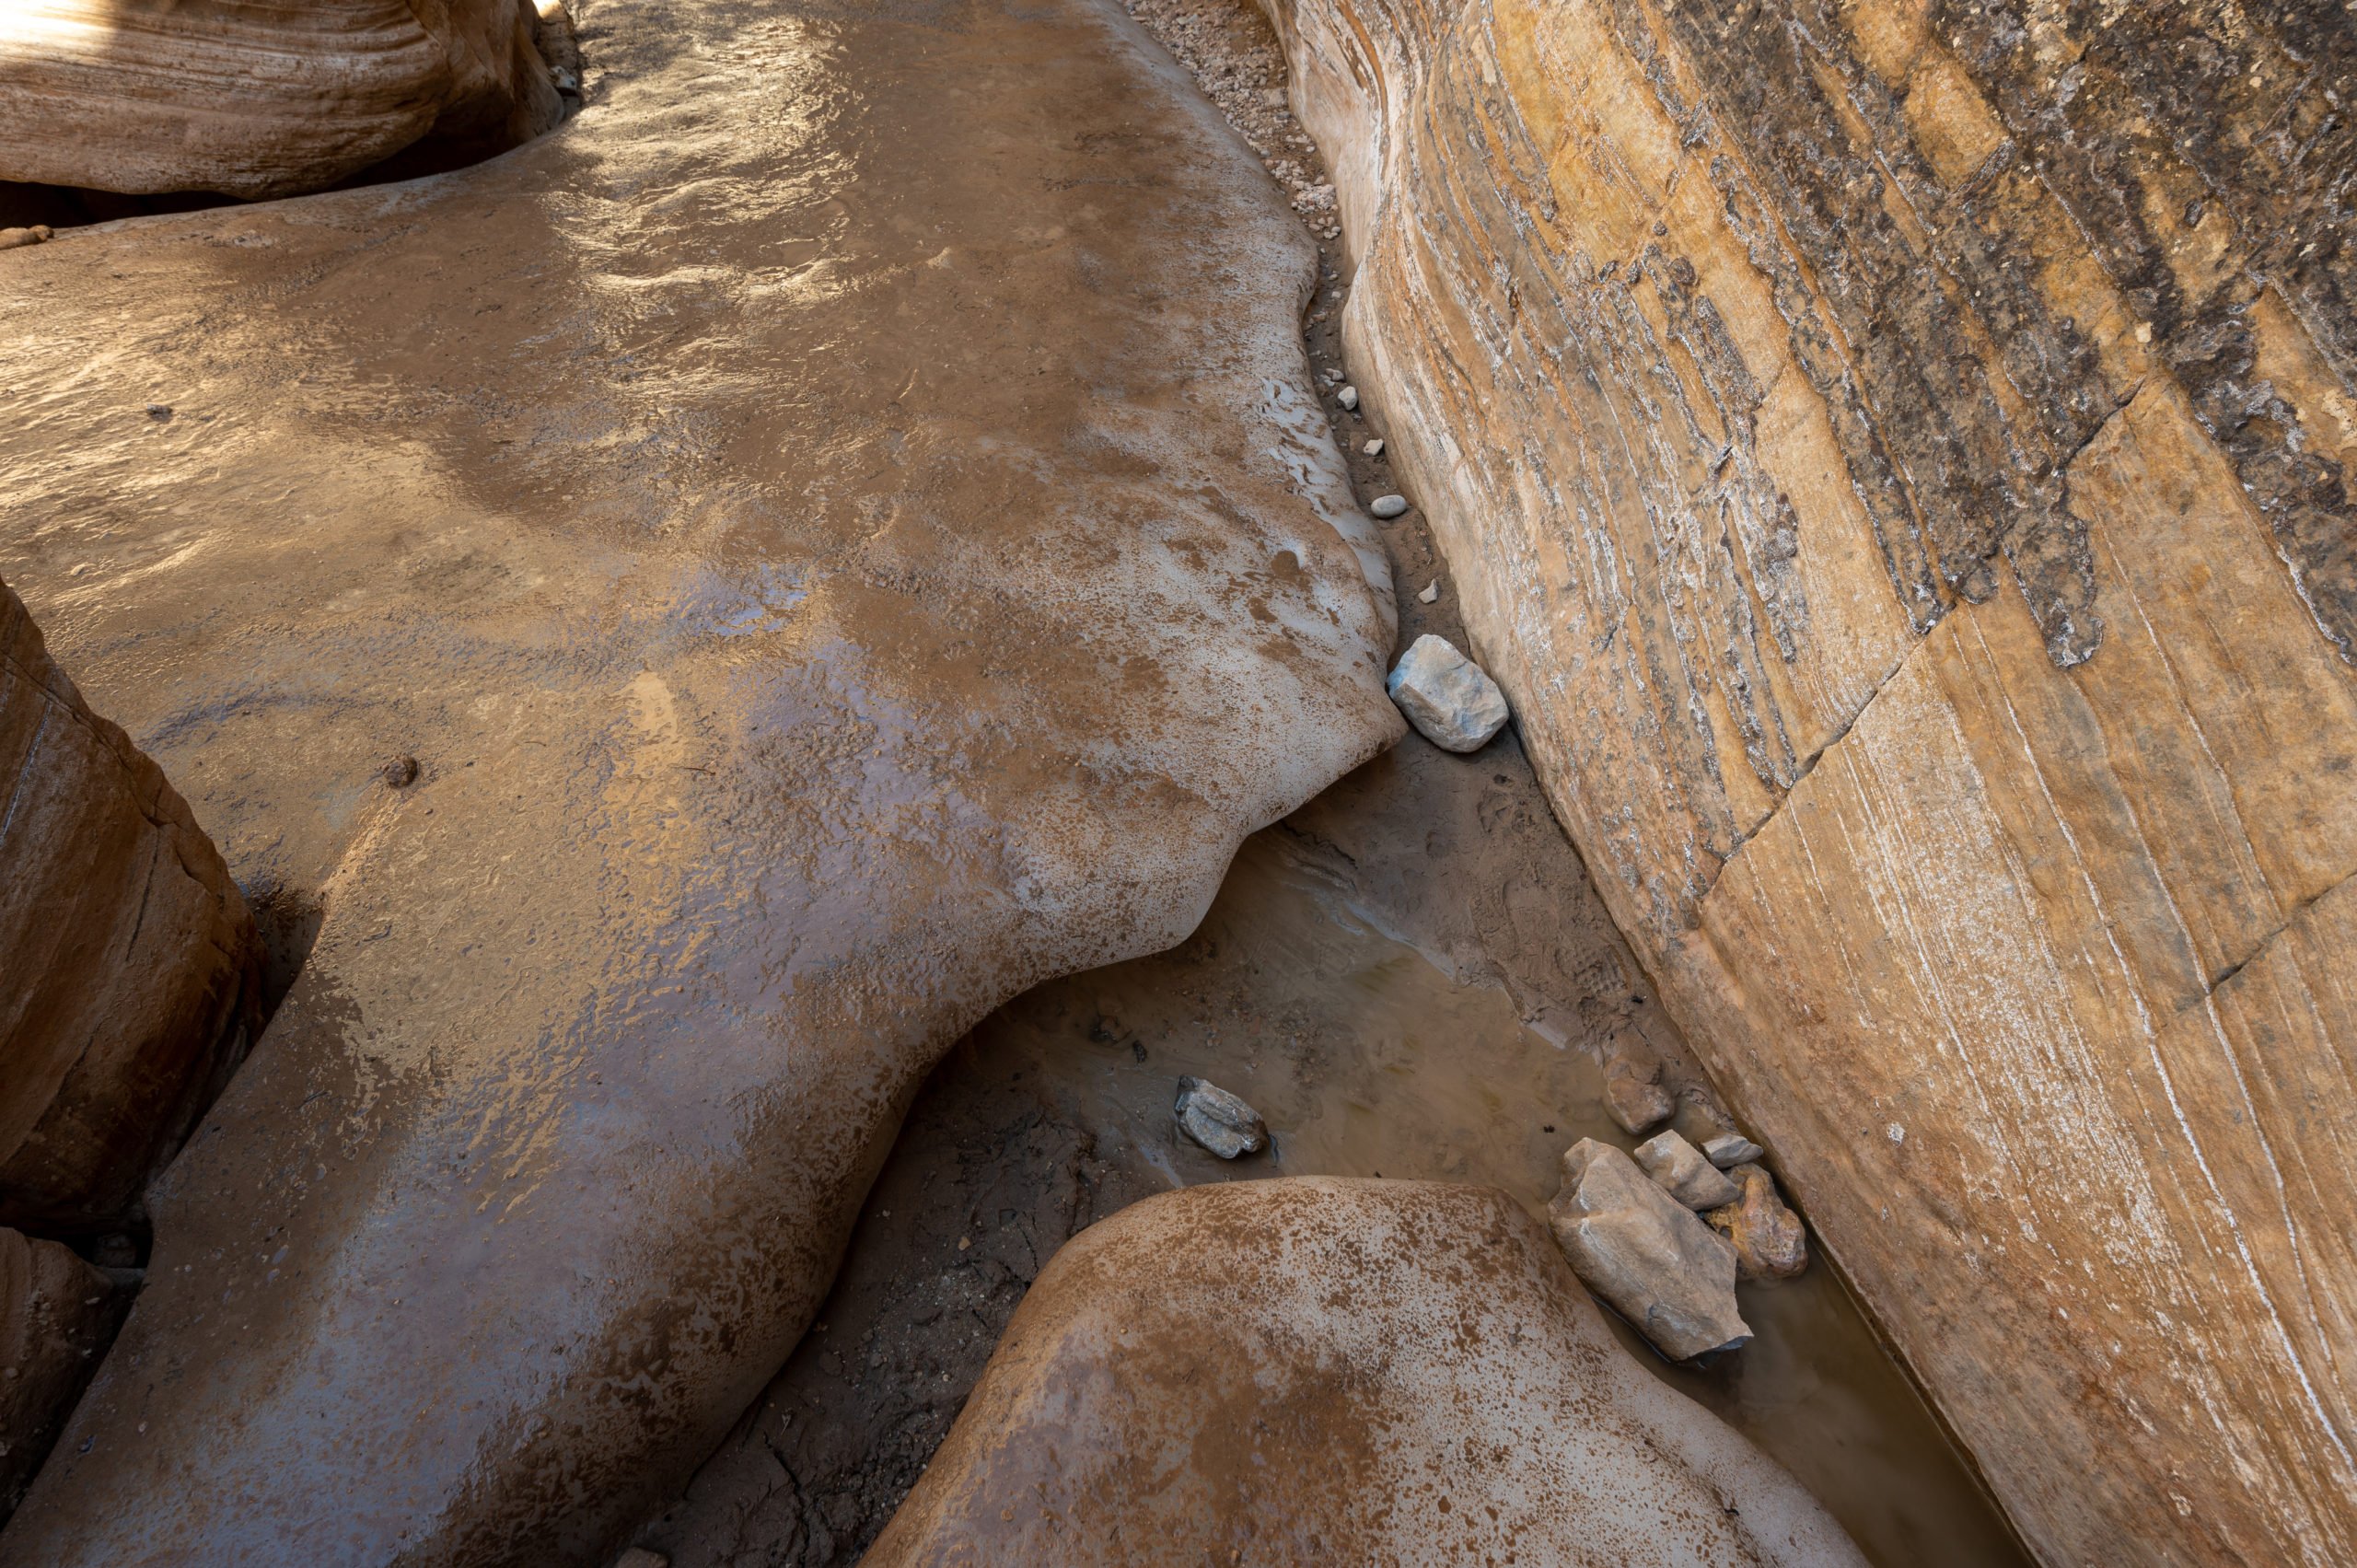
    Depending on when you visit, you will either encounter ice (we did in April), muddy conditions, or you’ll be walking through the creek water as you make your way through the slot canyon.  Because of this, you will want to consider wearing shoes that you’re comfortable getting wet.

    Things to See Nearby

    Closing Thoughts & Places to Eat Nearby

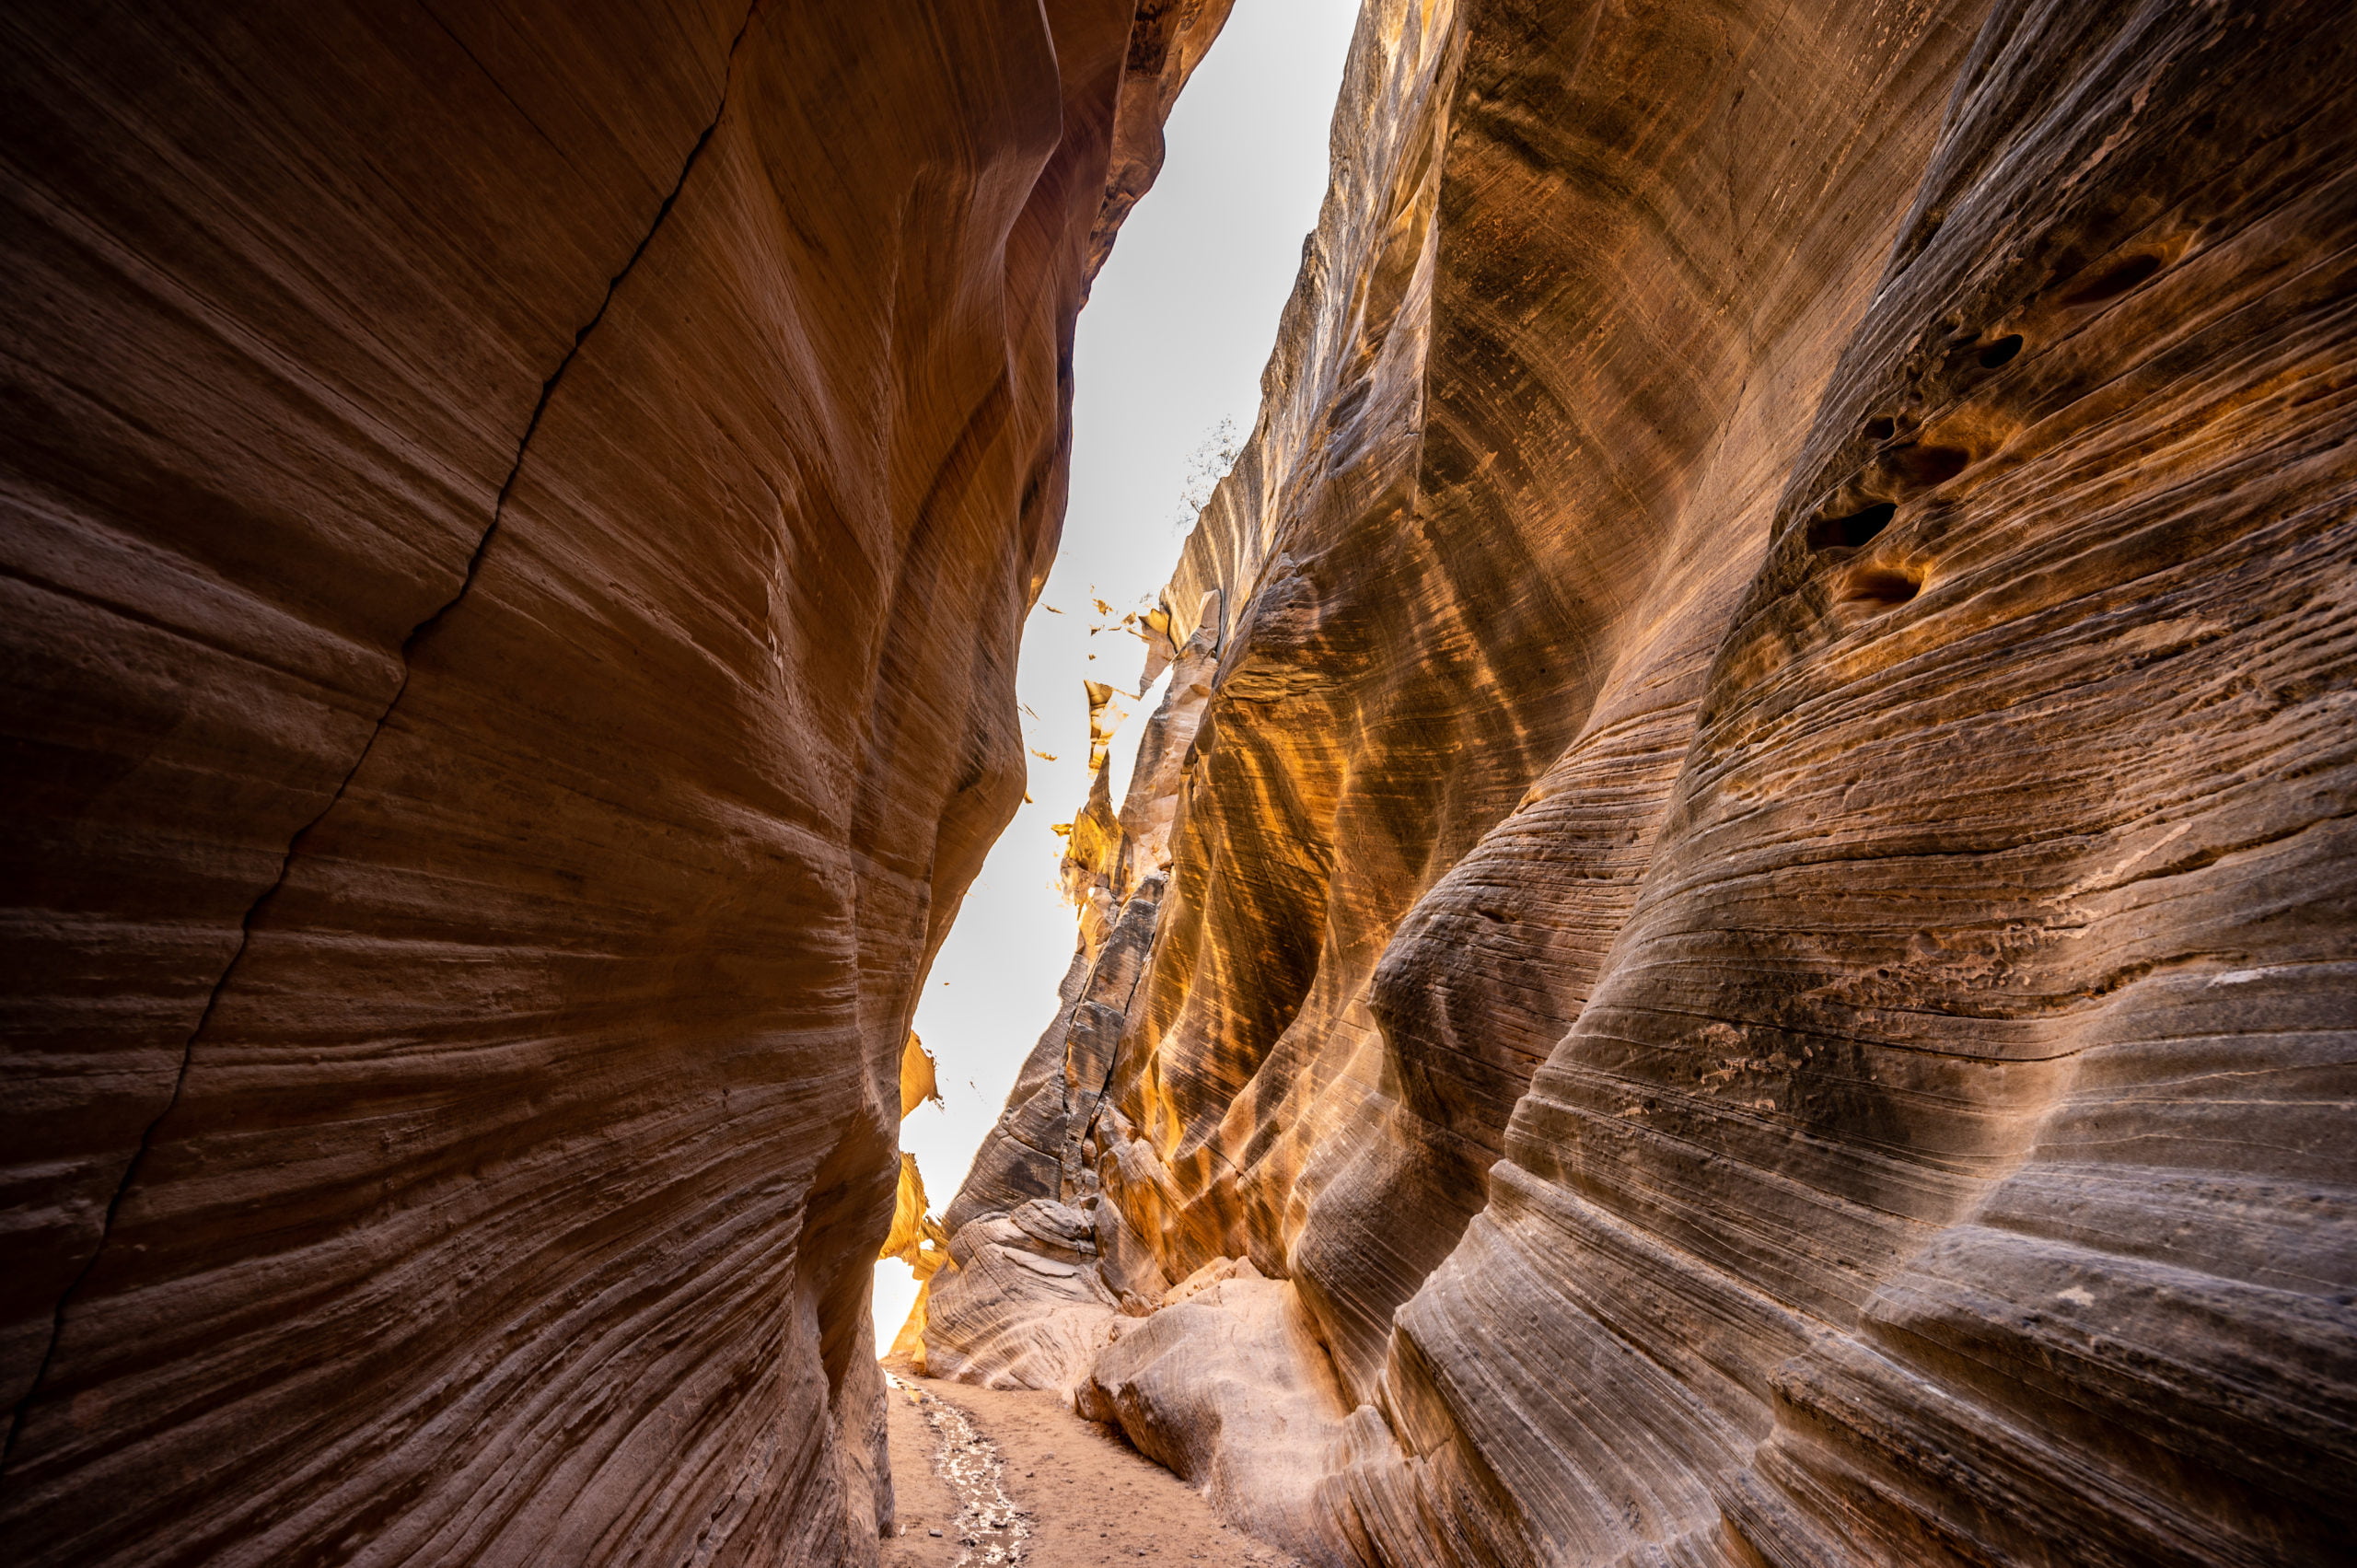
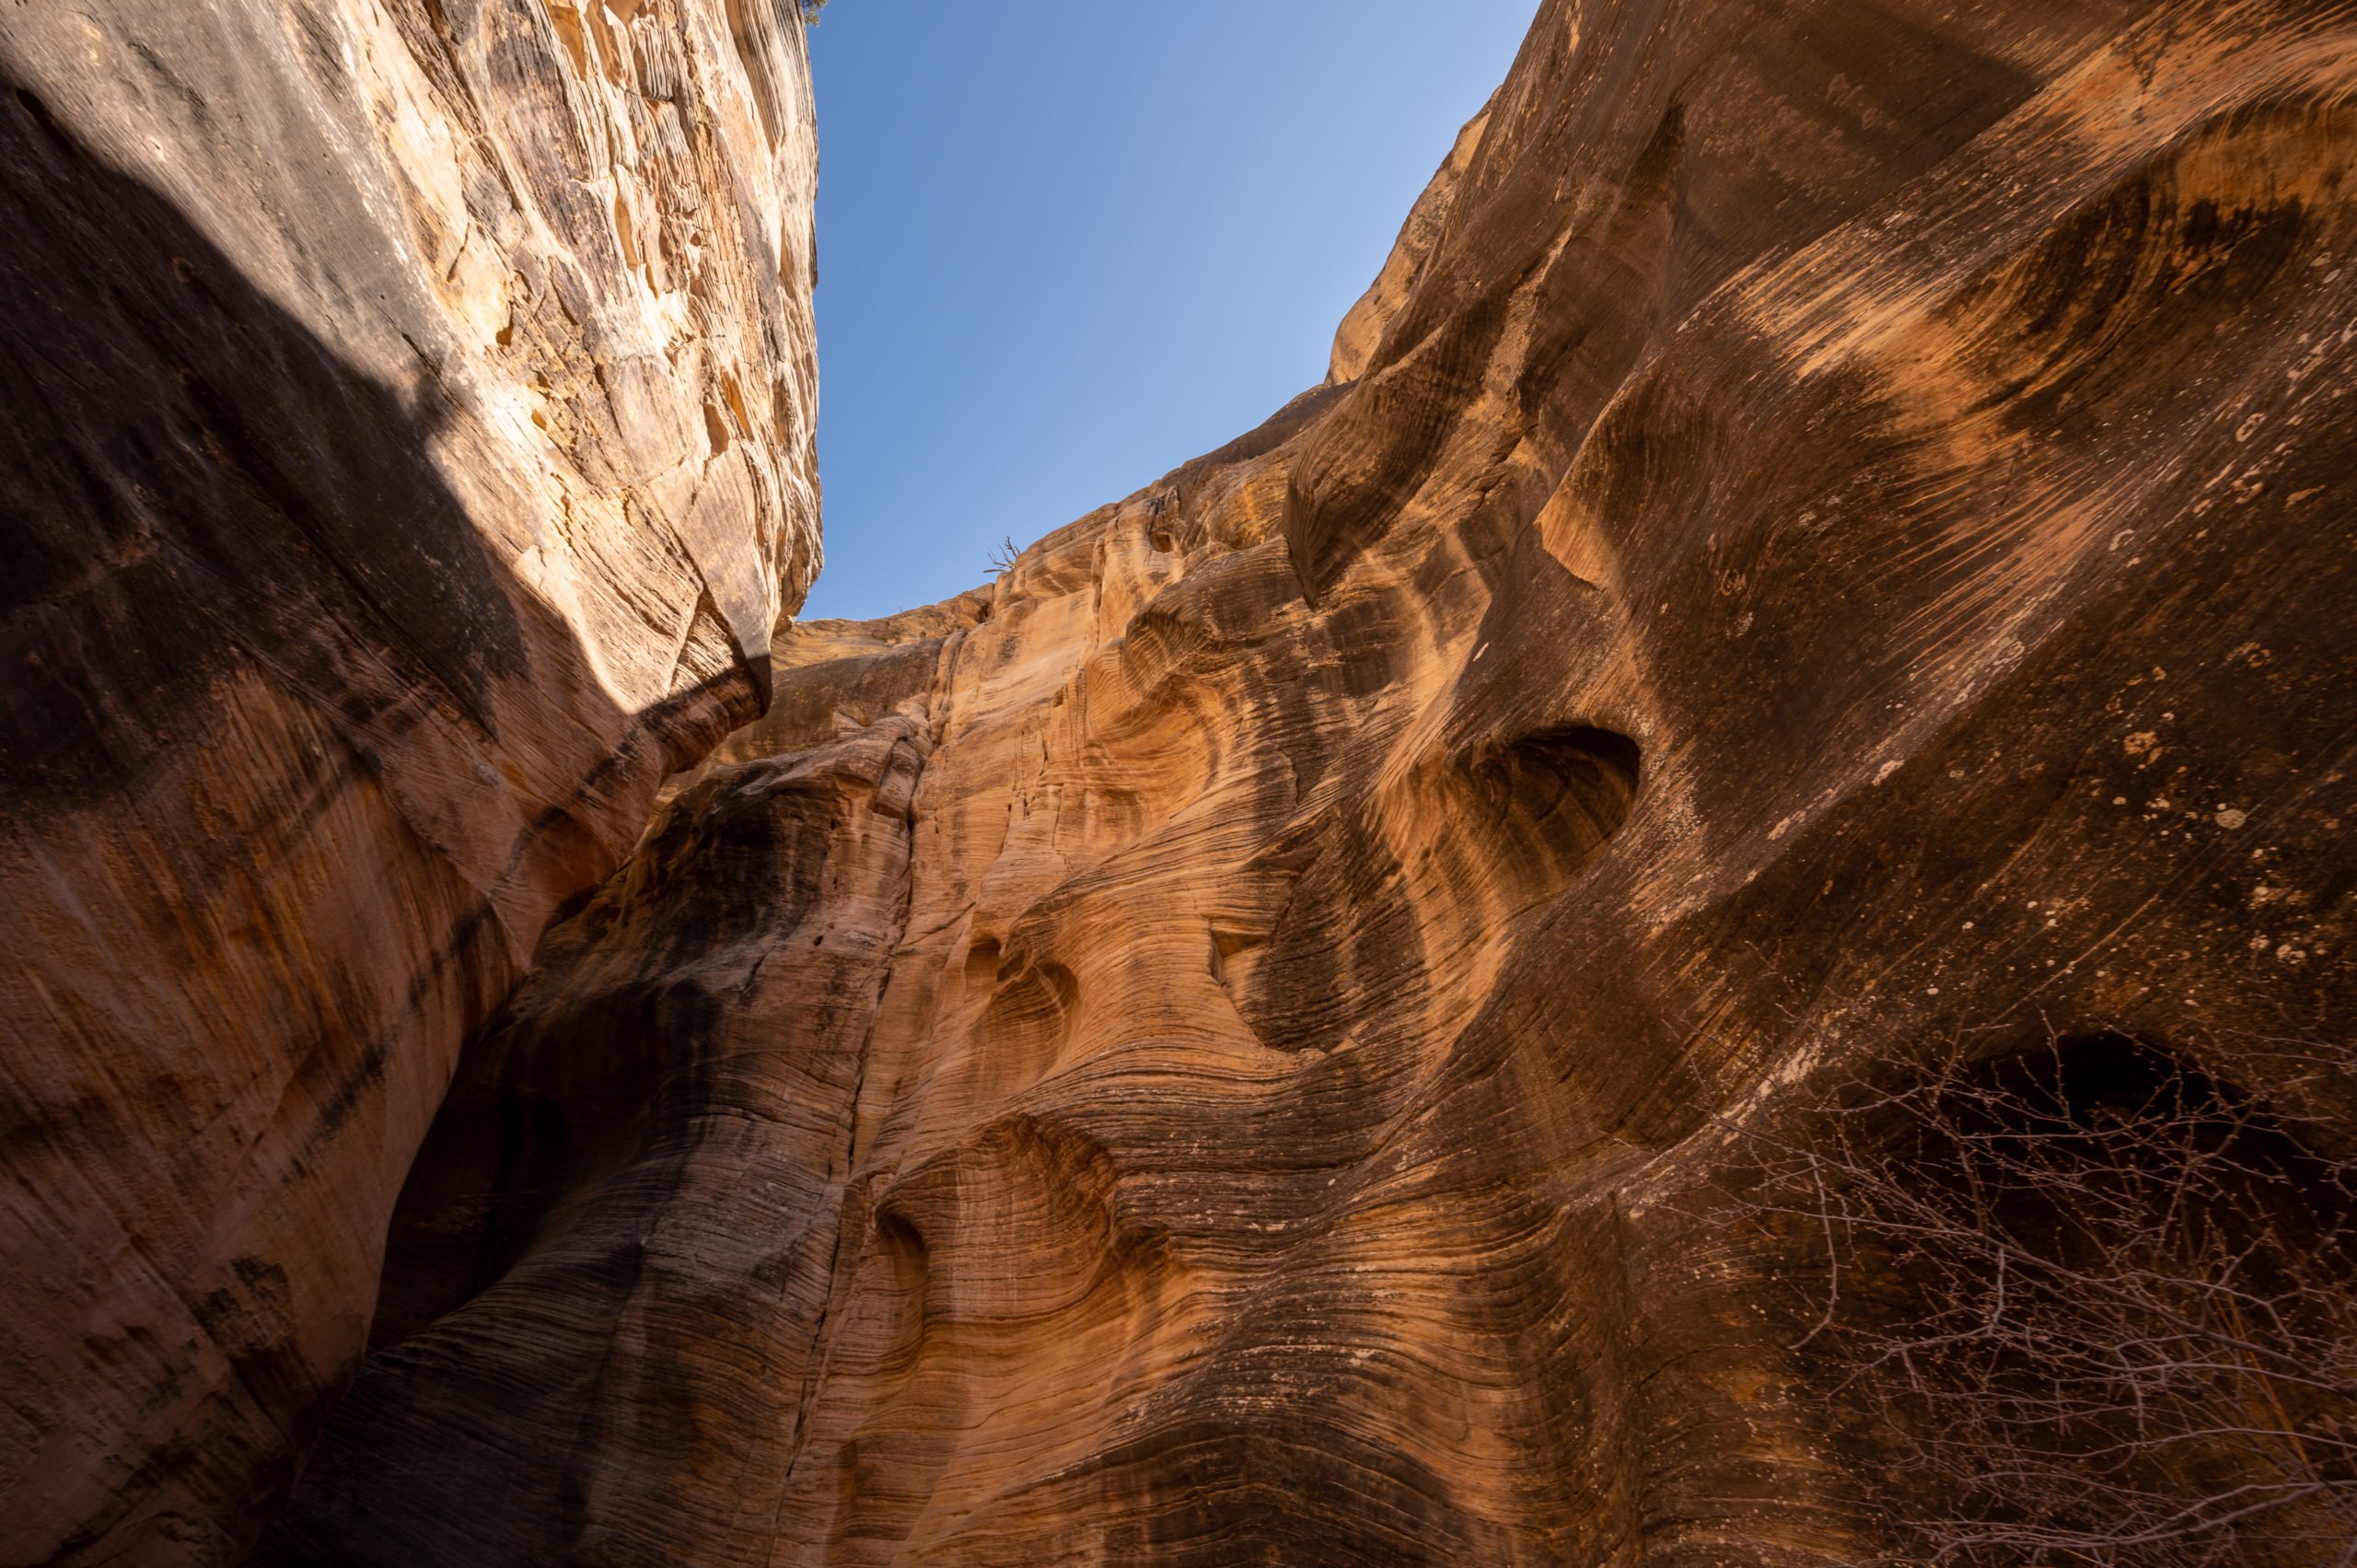
    Willis Creek Slot Canyon is an easy hike, good for kids and families or for someone who wants an easy but beautiful hike to add to their day.  This is another one of those hikes where it’s about enjoying the journey, not necessarily getting anywhere in particular.  Enjoy the shapes of the canyon as far as you want to go and then turn around and head back when you’re ready.

    We enjoyed this hike after a morning spent at Bryce Canyon and after a long day of hiking at Bryce the day before.  Sometimes you just want something fun and easy, or maybe you’re like us and need to work off that pie you ate for lunch. If you decide you want to do what we did and eat some really yummy cherry pie before your hike, check out Bryce Canyon Pines. Or maybe you need a pick-me-up before your hike, then stop at Bryce Canyon Coffee Co on your way. They have great coffee and friendly service too!

    If you want some dinner after your hike, then grab some BBQ at i.d.k. Barbecue in the town of Tropic, Utah. A warning though, lines can be ridiculously long here. We had to wait over an hour to place our order! The good news is your food is ready within 10-minutes of ordering.

    Other Articles You Might Be Interested In for Your Trip to Utah:

  • 5 Essentials You Need for Car Camping or SUV Camping

    Have you ever thought it might be nice to pull up to your campsite and not need to put up a tent? Perhaps you have visions of crawling into the back of your car and curling up in a cozy bed, all ready for you without any extra work.  Well, that’s exactly what I decided I wanted on my recent road trip where I tried camping in my SUV.  This is not to be confused with the typical type of car camping where you pack everything in your car and stay in a tent.  That is the type of camping I normally do, but I thought I would see how I liked actually sleeping in my car.  

    Below I share the five things I found to be extremely useful when camping in my SUV.  They were essential items I am so glad I purchased before I left for my trip and will continue to use in the future.  If you plan to try car camping or SUV camping, I highly recommend you consider getting these five things first!

    Facebook
    Reddit
    Twitter
    Pinterest

    5 Things You Need for Your First Car Camping Trip

    These are the main essentials I found to be helpful when camping in a car or SUV.  In the video above, I discuss some of these items and the pros and cons of my setup.  At the bottom of the article, I’ll also list a few “nice to have” options to consider getting in addition to these five essential items.

    1) Privacy & Shading When Car Camping

    Since you’re car camping and sleeping in your car, you will want to cover your windows with something to give you both privacy and shade from the sun and block lights from cars and other campers that might pass by your vehicle.  

    I purchased a roll of Reflectix from my local hardware store, and it was a lifesaver!  I cut out shapes to fit all of my windows, except the front windshield and the front side windows.  

    Covering the rear door windows and back windows of the vehicle with Reflectix made a HUGE difference!  It made my vehicle dark at night, and it also helped create some shade for my car during the day.  

    This was incredibly helpful since I was camping in the desert!  I started in Joshua Tree National Park and then went to Death Valley National Park and then on to Utah’s national parks.  So, having some extra shade was really nice!

    In addition to the Reflectix, I had these windshield pop-out shades for the front windows.  I also used a sheet strung across the backs of the two front seats to give me more privacy since the two front side windows did not have any Reflectix.  

    For future trips, I’d cut out Reflectix for those as well.  I forgot those when making my window cut-outs and ended up using the sheet, as you can see in the photo below, for an additional layer of privacy.  The sheet was easy to put up and take down.

    2) Lighting

    I purchased these LED light bulbs from my local hardware store, and I loved them! You can also purchase similar ones on Amazon if you can’t find them locally.  They have little clips that make them easy to hang in different areas, plus even if you decide to sleep in a tent, they work well for clipping to the ceiling of a tent.  They have a high setting and a low setting when you want it a little dimmer.

    I also purchased these Duracell LED lights that have a built-in stand so you can set it down on the ground or set it on the floor of your SUV when you’re getting ready for bed or just sitting in the car reading at night.  If you face it toward the Reflectix, it really brightens up the vehicle!  

    I made sure to shut off my dome light to my car during my trip as I didn’t want to take any chances that I’d accidentally leave a door open. Also, when using the SUV tent attachment (read more below in #5), the rear hatch is left open, and thus the light on the hatch door stays on unless you shut off all dome and ceiling lights. So if your dome lights are turned on, your battery will most likely be dead by morning.

    3) Organization System

    This is a must when camping in your car! I felt like it was even more necessary than when I went tent camping. Each day, I’d need to move stuff from the rear passenger seats to my car’s front seats to lay down the rear seats and get ready for bed.  Then the next day, it would get moved back.  Needless to say, things got moved around a lot.  When it was just me, I could still lose track of things, but I pretty much knew where I kept everything.  However, when my husband later joined me on the trip, the organization became an even greater issue.  

    Totes

    Having totes to keep your food, electronics, and other miscellaneous supplies organized in will really help!  Label totes for one thing, such as a tote labeled “food” or a tote labeled “electronics” and so on.  That way, if you’re traveling with someone else, everyone will know where specific items go, and then when you need them, you’ll know where to find them.

    Zip Lock Bags

    I love zip lock bags.  I always bring these when I travel, whether it’s a trip abroad or a road trip close to home. There always seems to be a need for these.  When camping in your car, you might use these to contain food items like sugar or trail mix, or PB & J sandwiches. You can also use them to keep extra batteries, USB cables, headphones, etc.

    Cube Organizers

    These cube organizers for traveling are also great when camping in your car or SUV. I used them for clothing items as well as keeping certain electronics together.  For example, in one of mine, I put all my GoPro gear, chargers, gimbal, batteries, etc.  Then I always know where my GoPro accessories are.  “Oh, it’s in the green organizer.”  This sounds simple, but it really saves you a lot of time looking for things.

    Shoe Bags

    The last thing that sort of falls under organization is shoe bags. I use these when I travel to keep my shoes from getting my clean clothes dirty.  However, they are also useful for carrying extra shoes, like flip-flops (don’t forget to pack those for your trip around camp), and I also sometimes use them to store socks in.  So it makes socks easier to find rather than rummaging through a duffel bag.

    4) Portable Power for Car Camping

    You’re essentially living in your car when you’re car camping or SUV camping.  This means you’ll need some way to charge your camera batteries, cell phone, laptop, and any other miscellaneous electronics you travel with.  I purchased the Jackery Portable Power Station Explorer 300 before my trip, and I loved it!  

    I was able to charge my Nikon batteries, GoPro batteries, cell phone, laptop, drone batteries, and even power my little coffee grinder when I needed some freshly ground coffee beans.  

    You can charge the Jackery in the car when you are driving, or if you’re like me, you’ll probably want the occasional stay at a motel to take a real shower and feel a little more “human.”  Let’s face it, camping in your car is still camping.  

    Many of the campgrounds in the National Parks do not have showers, so eventually, you’ll need something.  So when considering your charging needs, you can plan to use a small generator like the Jackery and then use stays at a motel or KOA for extra charging as needed.

    If you plan to bring a portable shower and stay off-grid for longer periods of time where you won’t be driving (or staying at a motel) to charge your Jackery, then you might also consider purchasing one of their solar panels, which will charge your Jackery without needing to run your vehicle. 

    5) Airflow & Ventilation

    One thing you’ll notice if you crawl into the back of your car or SUV and close all the doors is how quickly things can get stuffy, and you’ll most likely find yourself wanting some airflow, especially if it is warm out. 

    Fans

    I used this rechargeable fan which, believe it or not, was really nice to have in the desert heat.  Even the small amount of air blowing on you at night when it’s hot will really help! Plus, it also has a built-in LED light. I liked that I didn’t need batteries for it either. I never had to recharge it on my trip, so it lasted a pretty fair amount of time between charges.

    Bug screen covers

    I purchased two different types of these, and I’ll admit, neither was perfect.  Getting ones that fit your vehicle just right can be a challenge.  The first set I purchased has larger holes which are nice as it allows more air in.  However, I also have to believe they could potentially allow some bugs in too. The second set was a thin, tight mesh material with perhaps too little ventilation as it didn’t seem to let much airflow in.  

    That being said, if it is really hot, you’re going to want some airflow; these allow you to keep your windows rolled down about halfway to allow airflow but keep the bugs out. You can see them in the photo above on the windows on either side of the sheet I had strung across the rear seats.

    SUV Tent for Car Camping

    The last item that I tried on this trip was an SUV tent attachment.  This turns your SUV into a tent.  It gives really nice airflow and also provides easy rear entry and access to your sleeping area.  This was nice because in my MDX, once I close the rear hatch, I can’t open it. I have to crawl out the side door when I want to get out again.  So with the SUV tent, you can unzip it like you would a tent and climb out the back.  As I mentioned before, if you use this, make sure to shut off your dome lights since the rear hatch is open when the SUV is attached.

    Napier sells this SUV Family tent which attaches to the back of your vehicle and can also be used as a traditional tent on its own.  It’s a bit pricey, but it would allow for a couple to sleep in the back of their vehicle while the kids or other companions slept in the tent portion.  It also has the added benefit of being used as a sitting area during the day to read or take a break from the sun.  So although pricey, depending on your needs, you may want to consider it.

    I used the Napier Sports Cove SUV tent, and it worked very well and was easy to set up. I’d say it takes about 5-minutes to attach to the vehicle and probably about the same to take it down.  I also demonstrate how it attaches to the vehicle and how easy it is to get in and out of the car in my video.

    Car Camping Wishlist Items: “Nice to Have”

    After taking my first maiden voyage of camping in my SUV, there are some changes I think I’ll make for future trips.

    One simple item I want to invest in is a mini-fridge.  I looked at these before I left but decided I wasn’t ready to spend the money.  However, trying to keep fresh ice in the cooler while spending almost a month in the desert was a little bit of an inconvenience.  With a mini-fridge/electric cooler made for cars, I can charge it in the car or use my Jackery to run it.  This eliminates my need to purchase ice.

    The other thing I plan to make before I take another SUV camping trip would be a platform for the bed.  I’ve seen lots of builds by people online (like this one), and I want to create something that would allow me to organize my belongings underneath my bed, thereby eliminating the need for me to move things around each day from the rear seats to the front seats to put my bed down.  With storage under the bed area, I could leave the bed in place during the entire trip.  That would be really nice!  

    If I planned to spend more time camping on BLM land, where typically you have no bathrooms or privacy, then I would consider getting one of these instant shower shelters.  You can use them for showering, changing, and I’ve read some people place a porta-potty in them for a makeshift restroom.

    Final Thoughts

    So there you have it!  These are things I highly recommend when car camping or SUV camping. You may also want to consider adding some of the wishlist items before you take your first car camping trip.  

    I know I don’t go into all of the gear I used, but you can rest assured I had my coffee camping gear with me!  Plus, I used RISE oat milk and almond milk as both don’t need to be refrigerated until after opening.  This is very convenient for storing!

    If you are a seasoned car camper and want to share what you have found useful when camping in your car, please drop your insights in the comments below.  I’d love to hear from you!

    Happy Camping!


    *Disclaimer:
    Travelffeine is a reader-supported blog. When you buy via links on this site, we may earn a small affiliate commission at no cost to you. 
  • Mesa Arch at Sunrise: A Photographer’s Experience

    Mesa Arch is a pothole arch in Canyonlands National Park.  Although the hike out to the arch is relatively uninteresting, the arch and the view at the overlook make for a big payoff with minimal effort.  And if you decide to hike out to Mesa Arch to see the sunrise, you will be doubly rewarded!  Sunrise at Mesa Arch is an unforgettable experience worthy of the loss of sleep.

    My Sunrise Experience at Mesa Arch

    My hubby and I stayed at a motel in Moab, Utah. Moab is a common starting point for many of the area’s attractions, such as Arches National Park, Canyonlands National Park, Dead Horse Point State Park, and many other hiking and recreational opportunities.  It’s about a 45-minute drive from Moab to the Mesa Arch trailhead, and I wanted to be at Mesa Arch at least an hour before sunrise.

    This meant getting up at 4 a.m.!  I’m fine with getting up at 6 a.m., I do that almost every day, but for some reason, any time before that just seems wrong.  However, I knew that photographing Mesa Arch at sunrise was a popular activity, and I would not be alone.  If I had any hope of getting a spot in front of the arch, I needed to sacrifice a little sleep to make it happen.  My hubby is a good sport and was willing to sacrifice his sleep as well.

    As we made our way up the winding road to Canyonlands National Park, we had one vehicle in front of us, and soon I had another behind.  All I could think about was that I had to get there to get a spot!  I had read other articles that talked about spots filling up even 2 hours before, but I was not ready to get up at 3, so I hoped (and prayed) that 1 hour before would be enough.

    We arrived in the dark at the parking lot for the trailhead, with one other car following close behind.  There were already a few cars in the lot, so I quickly grabbed my gear, put on my headlamp, and headed down the trail, walking as quickly as possible. 

    Hiking to Mesa Arch

    The hike to Mesa Arch is only .50 miles (out and back), and so it takes around 15 minutes to hike to the arch.  We visited the day before, so I could walk the trail in the daylight and get a feel for the area before visiting in the dark.  I recommend you do this if you plan to photograph the sunrise.  Not necessary, but helpful.

    About the Hike:

    • Length: 0.50 miles (loop option or out and back)
    • Time to hike to the arch: ~ 15-20 minutes
    • Trail: First half of the trail is a wide dirt trail, then turns into more uneven terrain with some rock and stairs. Look for the cairns for help staying on the trail.
    • Difficulty: Easy

    This hike is good for all ages, but it is not wheelchair accessible. Most people (including kids) can hike this trail with relative ease. 

    Important to Know: 

    Mesa Arch is set on the edge of an overlook that drops down 1200′ into the canyon below.  Please keep your kids close by and be careful when getting close to the arch, as it is a long way down on the other side!

    1-Hour Before Sunrise

    I reached Mesa Arch a little over an hour before sunrise.  There were only two other photographers there. I was so relieved!  Since they were first, I asked them where they were setting up, and then I chose a spot to the left of them.  However, before I really had time to set up my tripod, a fourth photographer arrived and placed her tripod right next to mine.  

    PHOTOGRAPHY TIP

    Set up your tripod as soon as you get there, get your legs placed as wide as you need them because once other photographers arrive you may not have the room to change this. Also, the ground in front of Mesa Arch is rocky and uneven, so you’ll want to adjust your tripod legs to allow you the freedom to move your tripod height up and down as desired. All this needs to be done before you are crowded out by other photographers. 

    This was the main mistake I made, and I was somewhat restricted with my shots because of it.  If this happens to you, you can always take your camera off the tripod and try some shots that way. If they don’t turn out, you can delete them, but you’ll most likely get some keepers. 

    Also, after you get your shot from the front of Mesa Arch, try moving around and capturing it from various angles. You might be surprised at which photos turn out to be your favorites.

    45-Minutes to Sunrise

    About 15-minutes after I arrived, there were around 10 photographers, with most of the prime spots filling up fast.  One latecomer had the tenacity to ask if he could squeeze in between the two photographers who had been at Mesa Arch when I arrived.  They graciously allowed him to, but I wouldn’t expect this.  For most photographers, if they’ve made the effort (and sacrifice of sleep and coffee) to get there and get a spot, and you slept in, they’re going to be pretty territorial and expect you to find your own place on the edges.

    While we were waiting, the photographer next to me, who was from Indiana, told me about a scene a friend of his observed during his visit to Mesa Arch.  He said two guys actually took to fighting right in front of the arch because one of them wanted a spot in front. Let’s not forget that there’s a 1200 ft cliff on the other side, either! So, yeah, I guess things can get a bit ugly. Personally, I blame it on a lack of sleep and coffee.

    30-minutes to Sunrise

    With only 30-minutes to sunrise, all the main spots in front of Mesa Arch were filled shoulder to shoulder with photographers.   Then a row started forming behind me.  When the sun did finally start coming up, I’d be so busy taking photos I wouldn’t realize I had people behind me leaning over me. I raised up only to bump into the person behind me.

    Honestly, the crowd is part of the experience. Everyone had to get up early to get there before sunrise, which means we’re all a tiny bit crazy, and we all love seeing beautiful displays of nature.

    Go-Time: Sunrise at Mesa Arch

    Things quiet down a little bit as the sun starts to peek over the La Sal Mountains. Everyone is waiting with anticipation as it finally breaks from behind the mountain range and casts its warm glow over the canyons below.  The sun reflects off Mesa Arch, first starting as a subtle glow and then intensifying into a beautiful bright orange arc of glowing rock.  The layers of shadows in the White Rim canyon below are a stunning backdrop to the glowing Mesa Arch.

    The sound of shutters fills the air as if the paparazzi had just spotted some celebrity. Every photographer furiously tries to capture this beautiful sight.  People with cell phones peer over the photographers’ shoulders to capture this moment, too; others walk along the fringes trying not to get in the view of the cameras. Some just came to see it. They stand back in awe, with no “device” in hand. They stand there capturing it with their eyes and mind.  It was such a beautiful experience!

    10-Minutes After Sunrise

    I look around, and almost every photographer I had just stood shoulder to shoulder with has vanished.  They packed up and headed off, most likely for coffee. However, I stay. I love golden hour, and the light and shadows in the canyon are too good to pass up. 

    I came to photograph Mesa Arch at sunrise, but here’s a little tip: the glow remains even after sunrise, and the lighting that bathes the canyon is incredible!  So, if you really, really can’t make it for the actual sunrise, then get here as soon after as possible, and you’ll enjoy a relatively un-crowded view and still get to see some gorgeous light.

    What to Bring When Visiting Mesa Arch for Sunrise:

    • Pack layers. Depending on what time of year it is, it might be fairly cold in the morning.  We were there in April, and I wore gloves, a warm hat, and a sweatshirt and jacket.  By the time we left, around 8:00 a.m. I no longer needed the gloves, hat, or jacket.
    • Water. Even though this is a short hike, it’s still a good idea to bring a bottle of water and a snack.
    • Trekking Poles. If you have any issues with uneven ground, these are a good idea. Also, in a pinch, a trekking pole can be used as a monopod for your camera.
    • Headlamp. Very useful when arriving in the dark. A headlamp with a red light is also a nice plus if you plan to arrive to photograph at twilight or plan to do any night photography.

    Photographers:

    • Camera
    • Lenses (A wide lens is needed as everyone stands relatively close to the arch. I shot with a 14-30mm lens.)
    • Extra Batteries
    • Tripod
    • Dust cleaner for your lens. It gets windy here and dusty. Learn from my mistake and dust off the front of your lens mid-shooting to keep it clear of dust particles on your images.
    • Shutter Release Cable (optional)

    The Night Before Your Hike to Mesa Arch

    Make sure to charge all your batteries the night before and put a fully charged battery in your camera before going to sleep.  Pack your bag with all your essentials and layout your warm clothes and things you’ll want to bring.  If you’re like me, your brain doesn’t function at optimal levels that early in the morning.  So having it all ready to go the night before really helps!

    Getting Your Coffee Fix On the Go

    We brewed a quick cup of hot coffee in the hotel for the drive to Mesa Arch, which was the bare minimum to get me by.  I also pack a large bottle of cold brew in our cooler, which I drank after photographing the sunrise.  Having cold brew with me when I’m on a road trip is a must! 

    Coffee Tip: Always keep a bottle of cold brew in your cooler.

    Because I’m often getting up early, I don’t always want to take the time to heat water (if I’m camping) and brew a cup of coffee. With cold brew, I can get my caffeine fix quickly before anyone else gets hurt. Really it’s a safety measure for anyone traveling with me.  

    I love using oat milk or almond milk when I travel as it doesn’t need refrigerated until after opening.  I make quick cold brew lattes like this vanilla oat milk cold brew using bottled cold brews, it takes one minute to make, and I’m ready to go!

    Getting to Mesa Arch in Canyonlands National Park

    Mesa Arch is located in Canyonlands’ Islands in the Sky section of the park, a 30-minute drive from Moab, Utah.

    From Moab  

    Take US-191 N for about 11 miles.  Then turn left onto UT-313 W. Continue on this road all the way into Canyonlands National Park and until you see signs for the Mesa Arch parking lot and trailhead (about 20 miles). 

    Parking

    The parking lot is not very big, so during the day, it fills up quickly.  However, I noticed that even during busy times, there seems to be a regular coming and going of vehicles because it is such a short hike.  If it is full and there don’t seem to be any spots opening up, then continue driving toward the Grand View Point Overlook and stop at Mesa Arch on your way back.

    Tip: There is a great overlook across the street from the visitor center and there are water filling stations at the visitor center as well. Make sure to stop here!

    With Extra Time

    The Islands in the Sky portion of Canyonlands National Park is really a beautiful place with gorgeous views from above.  It also has the Shafer Canyon Road, a 4×4 road you can drive into the canyon, but it’s recommended you have a high clearance full off-road vehicle or motorcycle for this.  

    With extra time in the area, make sure to also visit Arches National Park and Dead Horse State Park.  This is a beautiful area of Utah that you can easily spend a week (or more) exploring. However, even with only 2-4 days, you can see a good portion of these three parks.

    Final Thoughts Regarding Mesa Arch

    I know getting up early is not fun for most of us, but Mesa Arch at sunrise really is an incredible experience.  For me, it wasn’t just the gorgeous sunrise and observing the glow of the sun on the arch. It was the crowd of people experiencing it with me, the anticipation, and the hike in the dark.  I chatted with people from all over the country, Indiana, New York, Florida, and even a fellow Seattlite was two shoulders down from me.  It was a way to connect with fellow humans and with nature.  

    It’s also such an easy hike, and it provides gorgeous views that often are only found on hikes that take miles of uphill climbing to reach.  Again, if you can’t make it there by sunrise, then I highly recommend you try coming as soon after sunrise as possible.  The lighting for the hour and even two hours after is beautiful!  

    Even if you arrive at Canyonlands National Park later in the day and are unable to visit for sunrise, you’ll still want to visit Mesa Arch. It is an interesting natural feature, and the overlook there offers spectacular views.

    Have you visited Canyonlands National Park?  If so, I’d love to hear about your experience.  If not, I hope you’ll add it to your travel bucket list.

    Happy Exploring!

  • An Amazing Day Trip to Haleakala National Park

    A visit to Maui wouldn’t be complete without exploring Haleakala National Park and Upcountry Maui.  The drive through Maui’s Upcountry is a gorgeous ride up winding roads with incredible ocean views below.  As you rise higher and higher, you soon find yourself looking down on the clouds.  It is an incredible experience!  You feel as though you’re looking down on the entire world below, a view often only seen from an airplane, and yet, here you are, feet on the ground as you stare in amazement at the unique, almost Mars-like landscape around you.  Once again, you’re reminded of what a magical place Maui is.

    Getting to Haleakala National Park

    It takes an average of 1.5- 2 hours for most visitors to drive to Haleakala’s Summit. This,  however, doesn’t take into account additional stops along the way in Upcountry Maui, stops for shopping and food.  I recommend leaving no later than 10 a.m. to have plenty of time to stop at a few places in the Upcountry as well as take in a couple of day hikes in Haleakala National Park. You want time to take it slow and enjoy the views along the way.

    Average Travel Times to Haleakala’s Summit Building:

    • Makawao’s Rodeo General Store: ~ 1 hour
    • Kula Market Place: ~ 45 minutes
    • Lahaina: ~ 2 hours
    • Kihei: ~ 1.5 hours

    The Drive to Haleakala: Stops Along the Way

    One of the best parts about the drive to Haleakala is driving through Maui’s Upcountry.  If you’ve never been, you will most likely leave, considering a stay there during your next visit to Maui.  I love being by the ocean when I stay in Maui, but the beauty and views in the Upcountry are too incredible to miss! On a clear day, you look down on the island of Maui, across lush fields dotted with eucalyptus trees, avocado trees, palm trees, and other gorgeous flowering plants.  I feel like I’m driving through paradise as I climb up to Haleakala.

    First Stop in Maui’s Upcountry: Makawao

    Anytime I visit Maui’s Upcountry, I always come to Makawao.  I love stopping at the Rodeo General Store.  I wander the aisles looking for unique finds and locally sourced products.  It’s here I’ve found some of my favorite coffee, locally grown fruit, and fun finds like Grandpa Joe’s lilikoi cotton candy.  The staff is always helpful and friendly, and it is frequented by the locals, which gives it that homey feel rather than a place designed for tourists.

    On my last visit, I was on a hunt for lilikoi (passionfruit), which I had discovered when one fell from a tree during our hike at Waihee Ridge Trail. After trying it, I knew I had to find more!  We drove to Makawao since we knew Maui’s Upcountry is where much of the produce on the island is grown.  Sure enough, we found lilikoi at Makawao’s Rodeo General store.  

    We spoke with one of the employees who had a daughter attending the University of Washington.  I told him about my hunt for lilikoi, and he suggested some other fruit to try too.  He helped me pick out strawberry papaya and some ice cream bananas.  I love sampling new fruits wherever I go; it’s how I discovered mangosteen during our visit to Thailand.

    Another great place to visit when in Makawao is the Komoda Store & Bakery. Go in and purchase some malasadas for your road trip to Haleakala.  You may want to grab some milk at the general store too.  

    Makawao has many fantastic local shops, so spend 30 minutes to an hour browsing the shops on Baldwin Avenue before continuing to Haleakala. Better yet, plan to come back another day and spend the afternoon exploring the Upcountry even more.

    Rodeo General Store
    3661 Baldwin Ave
    Makawao, HI 96768

    Komoda Store & Bakery
    3674 Baldwin Ave
    Makawao, HI 96768

    Next Up: Kula, Hawaii

    Kula is another beautiful town in Upcountry Maui. I love the gorgeously manicured lawns, the sweeping island views, and best of all, locally sourced goodies!  I recommend visiting the following three local businesses in Kula, Hawaii, during your day trip to Haleakala. If you have extra time to spare, I highly recommend exploring more as there are many great choices in Upcountry Maui.

    Maui Upcountry Jams and Jellies

    It was during my hunt for all things lilikoi that I stumbled upon Maui Upcountry Jams and Jellies.  We were in Kula when I came across Maui Upcountry Jams and Jellies’ website, which listed “lilikoi curd and lilikoi jelly.”  I knew I had to go!  

    I thought Google must have led us astray when visiting their storefront, but after a quick phone call with Jan, the owner of Maui Upcountry Jams and Jellies, I found Google was correct. The storefront is in a residential neighborhood tucked behind a row of houses. 

    Jan helped us choose a variety of jams and jellies, and syrups. Oh, did I mention, she also has lilikoi syrup, and it is amazing! Afterward, she helped box and package our purchases to mail them home without any of them breaking.  Our package arrived home in perfect condition, ready to eat.

    I recommend you buy all the jams, jellies, syrups, and sauces while you’re in Kula and then ship them home from the post office in Kahului, Hawaii.  We spent around $14 to ship ours home to Washington State, and it is a much cheaper option than purchasing on the Maui Upcountry Jams and Jellies website, which has a fixed shipping cost to the mainland of $48!  So, stop in her shop when you’re in Kula and purchase a bunch to stock up on for home. You’re going to thank me later!

    Maui Bees

    Another great place to buy locally sourced foods is at Maui Bees in Kula, Hawaii.  Depending on what day you visit, you might even be able to get lunch on the farm.  In addition to honey, they sell other foods from the farm as well as gluten-free goodies. I love their honey!  The first kind I tried was their Macadamia Nut honey. It has such a wonderful, different flavor than the clover honey I’m used to back home.  It was love at first bite!  I highly recommend it, and if you’re like me, you’ll come home and order more from their online store.  They offer free shipping for all orders $99 and over.  

    Kula Market Place

    The Kula Market Place is a great source for more locally sourced crafts, food, and gifts. There is a small grassy area in front of the market with a picnic table.  The Kula Market Place is next door to the Kula Lodge, so if you consider staying in Kula during your visit to Maui, you might want to check them out!  Also, notice the faded sign along the fence that borders the Kula Market Place and the Kula Lodge. Unless you want to do dishes for the rest of your life, you might want to think twice about taking any of their avocados.

    With Additional Time in Upcountry Maui

    I listed just a few stops in Maui’s Upcountry on your way to Haleakala. However, you could easily spend an entire day in Upcountry alone.  You will find more ideas of things to do in Upcountry Maui in my post Sunrise at Haleakala National Park: Don’t Miss It!

    Some tours I recommend with more time in Upcountry:


    Make sure to look up hours of operation for any businesses and tours in Upcountry Maui you plan to visit. Many of them have odd hours and days when they are open, so you want to check ahead of time to make sure they’re open before driving up.

    The Winding Road to Haleakala

    Your climb continues after leaving Kula, and this is where the road really starts to get those twists and turns Maui seems famous for.  It may not have as many curves as the Road to Hana, but it definitely does a good job competing. 

    You’ll soon enter a free-range area for cattle. Please drive carefully as cows are frequently found standing in the middle of the road!  You do not want to hit a cow, trust me. Besides the damage, it will do to your car and the cow, you could also be responsible for paying for the cow out of pocket if your insurance does not cover these types of accidents.  So take it slow and enjoy the ride!

    There are several pull-offs during the drive up to Haleakala, and I recommend you pull off at one or two of them and enjoy the views.  The rolling green hills dotted with cattle and heather bushes are beautiful.  You might even be lucky enough to catch a rainbow during your drive.  Remember, the joy is in the journey, so stop when it suits you and make the most of it.

    Arriving at Haleakala National Park

    When you enter Haleakala National Park, you’ll pass by a small ticket booth, and if you’re in the park during normal business hours, a ranger will be in the booth to answer any questions, take your money, and provide you with a map of the park.

    It costs $30 for a 3-day park pass at Haleakala National Park.  You can also purchase (or use) an Annual Parks Pass for $80 that is good for all U.S. National Parks.

    After passing through the park entrance, you’ll drive about another 5 minutes before coming to the Haleakala Park Headquarters and Visitor Center.  You can stop here to talk to a ranger and also use the restroom.  There aren’t any other restrooms until you get to Visitor Center near the summit.

    Recommended Hiking Trails for a Day Trip to Haleakala

    There are three hiking trails I recommend for your day trip to Haleakala.  With limited time I think these three trails give you great views and provide you with a good overview of the Haleakala shield volcano. Continue reading for more information on each of these.

    • Leleiwi Overlook Trail
    • Pa Ka’oao Trailhead
    • Keonehe’ehe’e Trailhead

    Leleiwi Overlook: Don’t Miss this Short Hike!

    A day trip to Haleakala doesn’t give you much time for long hikes or in-depth exploring.  However, this doesn’t mean you have to miss out on incredible views or hikes in this unique terrain.  The Leleiwi Overlook trail is only 0.15 miles but gives you incredible views inside the volcano.  It’s your first opportunity to look down on this Mars-like terrain and imagine what it must have been like as an active volcano.   Really, don’t miss this stop. It’s well worth the short hike!

    Haleakala Visitor Center & Hiking Trails

    The Haleakala Visitor Center near the summit is another great place to stop and enjoy more spectacular views with a couple of great hiking options.  There’s a large parking lot at the Visitor Center as well as restrooms. Even if the visitor’s center is not open, it’s worth stopping here to take in the view and do a little hiking.

    Pā Ka’oao Trailhead

    The Pa Ka’oao trailhead is to the right of the Haleakala Visitor Center. Follow the sidewalk path, and you’ll see a sign for it near the overlook area.  It is a very short but rocky uphill climb, and soon you’re rewarded with sweeping views of the crater floor.  You can also see the sliding sands trail to the far right as it winds its way down into this shield volcano. 

    If you want to come up for the sunrise but want to skip the crowds at the observatory, consider hiking to the viewpoint for Pa Ka’oao to watch the sun come up.  Sunrise at Haleakala is an unforgettable experience.

    view from pa ka'oao trail overlook
    Views from the Pa Ka’oao Trail Overlook.

    Keonehe’ehe’e Trailhead

    Walk to the opposite side of the parking lot from where you found the Pa Ka’oao trailhead, and you’ll find the Keonehe’ehe’e Trailhead near the road.  This is also known as the Sliding Sands trail.  With only a day trip to Haleakala, you won’t have time for a long hike into the crater, but depending on the time of day, you can plan for a short hike down this sandy trail. It gives you a new perspective on Haleakala, and there’s something special about walking into a volcano.  

    Make sure to pack plenty of water and some snacks for the hike.  Although the trail might not look steep, the sand makes it a lot harder to hike than a normal hardpacked dirt trail. So plan for it to take longer than you think for the hike in and especially the hike back out.

    The Summit at Haleakala

    After spending time hiking and enjoying the views at the Haleakala Visitor Center, continue up the road all the way to the summit.  There you’ll find an observatory (not open to the public) and the Haleakala Summit Building, which you can walk up to from the parking lot.  There you’ll find the official elevation sign of 10,023 feet!  

    I later told my Dad about driving to over 10,000 feet on Maui, and he was surprised. He didn’t realize Maui had a mountain that tall.  I think this is common with a lot of people who’ve never visited Maui.  They think beaches and swimming, not cold, windy, over 10,000 feet elevation climbs!  

    There is a small trail above the parking lot, which you can hike from the Summit Building all the way around to the opposite side.  I recommend you take the time to do this as it provides you with the highest views in the entire park and some great photo opportunities.  If you’re staying for the sunset, consider scoping out a spot before it gets too crowded.  Most people line up in front of the Summit Building or along the railing to the right.

    Sunset at Haleakala

    My first visit to Haleakala was to watch the sunrise.  This required getting up in the middle of the night and driving over an hour from our condo in Kahana to arrive at the summit before the sun came up.  It was freezing at the top, and I remember sitting there bundled in blankets sitting on the rock wall with other tourists as we anxiously awaited the sunrise. It was a spectacular scene and a memory I’ll never forget.

    That being said, watching the sunset at Haleakala was also amazing, and guess what? I didn’t have to get up in the middle of the night to do it!  A day trip to Haleakala is the perfect opportunity for you to watch the sunrise at Haleakala.  You have a lot of options for where you watch the sunrise from. You can watch it on the summit at 10,023 feet. This is where most people view it, or you can drive down below the summit until you find a place to park and watch. 

    That’s what we did.  This was partly due to my hubby needing to get back to our condo to finish some work before midnight. However, as the sun started to dip down and the brilliant colors started casting over the mountain, we knew we had to stop. We pulled off and set up our camera gear and enjoyed watching the gorgeous reds and oranges as the sun dipped below the clouds. It was just the two of us, and it was perfect.

    Final Tips for Visiting Haleakala National Park

    Avoiding Elevation Sickness

    There is a good chance you will feel the effects of the change in altitude during your drive to the summit.  It’s important to stay hydrated during your drive up and during any hiking. Also, bring snacks as this will help with the effects of the altitude.  I personally felt lightheaded and a little nauseous, and I found that drinking water and eating the fresh coconut we’d packed really helped!  

    This article explains other ways to deal with altitude sickness, and it recommends eating foods rich in potassium, such as bananas or avocados.

    elevation sickness sign

    Dress for Colder Weather

    Most people don’t think of cold weather when they think of going to Maui.  However, when you’re standing at over 10,000 feet, and the wind is biting your face and hands, you are going to be thankful for extra layers!  It gets cold on Haleakala.  They occasionally even get snow!  When I visited for the sunrise, I wore base layers for skiing, jeans, coat, and hat. Additionally, I wrapped myself in a blanket, and still, I felt cold!

    Even visiting in the evening, it was only around 40 degrees when I was there, and with the wind chill, it felt a lot colder. Make sure to pack a jacket (and sweatshirt) for hiking at Haleakala, and absolutely if you plan to visit for the sunrise or sunset, bring plenty of layers.  You’ll be happy to have gloves too, so I’d toss those in when packing for your trip.

    What to Pack

    Plenty of water, snacks, sandwiches (if you’ll be there during meal times), layers of clothing, a jacket, hat, gloves, hiking shoes, tripod, and camera gear. There are no food services within Haleakala National Park. So you need to bring any drinks and food with you.  If you stopped at the Rodeo General Store in Makawao on your way up, then you should be set!  Make sure to wear comfortable shoes for hiking. The trails at Haleakala are very rocky. Flip flops are not appropriate footwear for hiking here.

    Finally, remember to drive slowly, both going up and going back down.  The cows are in the road both day and night, so this is especially important when you’re driving back down Haleakala in the dark.  Also, watch out for Hawaii’s state bird, the nēnē. The nēnē is a medium-sized goose that sometimes crosses the road inside Haleakala National Park. They are an endangered species, so do your best to protect them and their habitat.

  • An Incredible One Week Oregon Road Trip

    This one-week Oregon road trip explores some of the unique and lesser-known places to see in Oregon State. I wrote this itinerary based on my own road trip leaving from Seattle.  Customize as needed to guide you from your home to each of these places to see in Oregon.  I think one week is enough time to see each of the features listed on this Oregon road trip itinerary. However, some might complete it in less time, and others might prefer a slower pace.  For example, my hubby and I did all of the things listed on this itinerary, except the side trip to Crater Lake, in 4 nights and 5 days of driving.

    Oregon Road Trip Summary

    • Time Needed to Complete: About 1 week
    • Leaving From: Seattle, WA
    • Type of Activities: Hiking, Camping, Photography, Drone Photography, Exploring Oregon’s Natural Wonders
    • Approximate Total Miles (if leaving from Seattle): ~1400 miles

    Map of This Oregon Road Trip

    Click on the map to get driving directions to each location, feel free to customize according to your start/end points. 

    Overview of Stops on this Oregon Road Trip

    • The Alvord Desert

    • Oregon’s Painted Hills

    • Smith Rock State Park

    • Crater Lake

    • In-N-Out Burger (Yes, this is considered to be an important stop on this road trip.)

    The Alvord Desert

    This remote section of Oregon State is rugged and beautiful! Enjoy the drive through sagebrush dotted hills, deep canyons, mountain views, and gravel roads leading to the middle of nowhere.  Relax in the Alvord Hot Springs, embrace your inner race car driver, and soak in the desert sun. This is a destination for the adventurous! It is a highlight on this Oregon road trip itinerary and is a stop you won’t soon forget! Read my post Exploring Alvord Desert and Hot Springs in Oregon for more tips on planning your adventure here.

    The easiest way to navigate to the Alvord Desert is using the Alvord Desert Hot Springs address and then going into the desert from there.

    Alvord Desert Hot Springs
    36095 E Steens Rd
    Princeton, OR 97721

    *Optional Add-On: A day spent exploring Steens Mountain. There are beautiful hikes and viewpoints at Steens Mountain which borders the Alvord Desert. If the weather is good, consider spending the day exploring the scenic Steens Mountain Loop Road.  However, as with the Alvord Desert, prepare for driving on unpaved gravel roads with rugged terrain and little cell service.  

    Oregon’s Painted Hills

    Oregon’s Painted Hills is just another in this state’s selection of unique destinations. These brightly colored hills located in the John Day Fossil Beds National Monument are the result of ancient volcanic activity.  You’ll journey past rolling farmlands and suddenly find yourself surrounded by hills painted in bright reds and yellows. They really are an unusual find amongst the ranches and green pastures. This Oregon road trip stop surprised me as I never realized Oregon had so many fascinating natural features. I was left with a greater appreciation for this beautiful state.  Read Visiting Oregon’s Unique Painted Hills for more information on how to get there.

    John Day Fossil Beds National Monument- Painted Hills Unit
    37375 Bear Creek Rd
    Mitchell, OR 97750

    Smith Rock State Park

    You will love the rugged beauty of Smith Rock State Park. It’s craggy rock cliffs, sweeping vistas, and beautiful river walks winding through the park. If you’re into rock climbing, hiking, or mountain biking, this is the park for you! Smith Rock State Park was a favorite stop of mine along this Oregon road trip. We only spent a few hours here, but I could have spent days photographing its beauty and exploring all the trails. Read more about our hike at Smith Rock State Park: Misery Ridge Loop Trail.

    Smith Rock State Park
    Terrebone, Oregon 97760

    Crater Lake

    My hubby and I did not stop at Crater Lake on this latest Oregon road trip due to our time constraints. However, if you’ve got a week to make this road trip and you’ve never visited, then I recommend you include it in your route.  

    Just a word of warning before you go, the journey to Crater Lake is not for the faint of heart. You drive up the mountain with nail-biting drop-offs. Keep your eyes on the road, and soon you’re rewarded with gorgeous views of this volcanic lake.  It is such a unique natural setting that everyone should see it at least once.  I visited years ago on another road trip with a friend, and its gorgeous blue waters are a beautiful sight to behold. 

    Read the Department of Interior’s blog on 12 Things You Didn’t Know About Crater Lake for further inspiration. You can also visit the Crater Lake National Park website for information on road conditions, where to stay, and what’s open.

    Crater Lake Observation Station
    Rim Drive
    Crater Lake, OR 97604

    In-N-Out Burger

    If you’re from California, you might not understand why an In-N-Out Burger is highlighted as a stop along this Oregon road trip.  However, if you’re a Washingtonian like me, who loves In-N-Out, you’ll get it.  There are no In-N-Out Burgers in Washington State and it was only recently that we had the option in our neighbor state of Oregon.  So, I knew that no road trip to Oregon would be complete without including at least one stop at In-N-Out!  If you’ve never had In-N-Out then you’re missing out! 

    I love their cheeseburger with a strawberry milkshake.  Sometimes I ask for it animal style which means they give me a yummy grilled onion relish in place of the raw onion on the regular cheeseburger.  One of the things I love about In-N-Out Burger is their consistency.  I know no matter which location I stop at I will get a consistently good burger at consistently low prices.  Just trust me on this, and give them a try.  I’m starting to salivate just thinking about them, so I’d best move on.

    This is the address for the location we stopped at on this road trip.

    In-N-Out Burger
    6280 Keizer Station Blvd
    Keizer, OR 97303

    Final Thoughts & Tips

    Download an offline map of Oregon before your road trip. Since a lot of this road trip passes through Oregon’s remote areas, there is little to no cell service near many of these destinations.  Having an offline map is a huge help, especially when navigating places like the Alvord Desert.  Also, a printed road atlas is never a bad idea either, but at a minimum, have the offline map.

    Pack road trip essentials like extra water, road tunes, snacks, a good spare tire, jumper cables, an emergency kit, and a portable charger for electronic devices.  Also, make sure to keep your car fueled up as gas can be few and far between in some of these areas.  The Alvord Desert is the most remote of the destinations, so make sure to read my guide for visiting there and my tips for preparing for the trip. You may also want to read AAA’s guide to road trip car maintenance to make sure your car is ready for your trip.

    Places to Stay
    We camped at Alvord Desert, and then stayed in a hotel in Princeton for our visit to Oregon’s Painted Hills, and also stayed in a hotel in Redmond, Oregon for our visit to Smith Rock State Park.  There are two campgrounds at Crater Lake National Park open only in the summer. Check 
    the park’s website ahead of time for the latest information and how to reserve a spot.

    Talk to locals if you are unsure about areas that are okay to drive in, or for information about weather conditions, and places to see.  Locals know their area and are usually more than happy to share their first-hand knowledge.

    This Oregon road trip itinerary really highlights the variety found in this state. Prior to this road trip, most of my visits to Oregon were relegated to the coast, which is beautiful. However, there is so much more to Oregon than just its coastline.  I think you will be surprised to discover the natural beauty and unique volcanic features along this Oregon road trip.  

    Happy Exploring!

  • Exploring Alvord Desert and Hot Springs in Oregon

    On a recent road trip to Oregon State, I mapped out a route to explore areas of Oregon I’d never traveled to before.  The first destination was the Alvord Desert and Alvord Hot Springs.  The drive out to the Alvord Desert felt like I was driving to the middle of nowhere (I guess I kind of was).  It was unexpected to discover this playa with its natural hot springs bubbling up in the far southeast corner of Oregon State. 

    This area of Oregon is remote and rugged. It was beautiful to camp out under the desert sky and see the billions of stars above, to watch the sunrise across the desert landscape, and to pretend I was a rally racer as I zigzagged my way across the desert.  It was a unique experience and one I recommend you try for yourself!

    About the Alvord Desert

    The Alvord Desert is a 12-mile long by 7-mile wide playa.  A playa is a dried-up lake bed. So at one time, there used to be an almost 100-mile wide lake here!  That’s pretty cool! This dried up desert basin is now covered with cracked earth, and the occasional rain the region gets is moved across the playa by the wind. This creates small pools and also a muddy sticky surface you don’t want to drive across.

    Additionally, the Alvord Desert is rich in geothermal resources and has several hot springs surrounding it.  The Alvord Hot Springs is the most developed and easiest to access.  Also, it’s important to note that not all hot springs are safe for humans.  The Alvord Hot Springs is funneled into the soaking pools with a temperature regulator to ensure it never gets too hot.

    Getting to the Alvord Desert

    You can drive to the Alvord Desert either from the north, coming from Burns and New Princeton via Hwy 76, or coming from Fields when arriving from the south end. 

    If coming from Hwy 76, you’ll turn onto the Folly Farm Rd/Fields-Denio Road and drive about  40 miles on an unpaved, rough gravel road. Plan to take this portion of the journey slowly as there are a lot of washboard areas along the road. It takes about an hour to get there from the turnoff on Hwy 76.

    If coming from the town of Fields, it is about 22 miles on the Fields-Denio Road, about 10 of which is unpaved. This is definitely the easier of the entrances due to having less unpaved road to travel on.

    Alvord Desert Access:

    The two easiest places to enter the desert floor are either via Frog Springs (there are pit toilets here), or you can pay the Alvord Hot Springs to use their private access road.  It was $10/vehicle at the time of my visit. Contact them ahead of time for current costs. 

    *Please note that the Frog Springs access is probably best suited for an SUV or other high-clearance vehicle. It really depends on how much traffic or rain the area has received. It seemed fine when we went, even for a car, but this isn’t always the case. Check conditions for yourself and then decide based on your vehicle and comfort level.

    Alvord Hot Springs: 36095 E Steens Rd, Princeton, OR 97721

    Camping Options

    Camping in the Alvord Desert Playa

    You can camp in the Alvord Desert for free using public access roads such as Frog Springs.  However, if you choose to access the desert via the Alvord Hot Springs property, you pay a fee to use their access road. Camping in the desert is still free, but you pay them to use their road. 

    Frog Springs has pit toilets and a desert map with other information on rules and restrictions in the Alvord Desert Playa.  If you’re in a car and are concerned about low-clearance levels when driving, you may want to pay the access fee and use the Alvord Hot Springs road instead.  The Frog Springs road can get a little rougher for entry.

    If camping in the Alvord Desert, “pack it in, pack it out” is the motto of the desert. Leave it the way you found it. Make sure to bury human waste in a small hole 6-8 inches deep and at least 200 feet from the water. That is the policy according to the Bureau of Land Management.

    tent in desert at sunset
    The ground is white from the mineral deposits due to geothermal activity.

    Camping Tips for the Alvord Desert:

    Camp toward the outer perimeter, be aware during the day of where you park too. You don’t want someone speeding across the desert to hit you.  Due to the dust kicked up when driving, it can obscure visibility, and that, combined with the highspeed of those racing in the desert, can make it hard to see. We parked off to the side away from the areas we could clearly see people racing.

    If you know it’s going to rain, I recommend forgoing camping in the Alvord Desert.  Since the playa is flat, water can move from one side of the desert to the other very quickly. I read reports of people who went to sleep on dry ground, and in the night, the winds blew water from the opposite side of the desert to their campsite, and they woke up to find themselves stuck in the mud.  Be aware of weather conditions.
     
    It also gets very windy in the Alvord Desert, and there is very little to shield you from the wind. You may want to position your tent next to your car and use it as a shield from the wind if possible.  
    sleeping in car sunrise in the desert
    You can also plan to sleep in your car if it’s too windy or cold.

    Camping at Alvord Hot Springs

    If you pay to camp at the Alvord Hot Springs, you can access the desert via their road at no extra cost. You also have unlimited access to the hot springs for the duration of your stay.  Additionally, they have garbage and recycling options as well as a heated restroom. There is no potable water or showers, though. They do sell some supplies in the reservations office during business hours. 

    Campsites: 

    There is a gravel parking lot on your left after you drive through the Alvord Hot Springs entrance.  You can park here and camp in your vehicle or pitch a tent directly in front of the rocky parking area in the dirt.  However, they also have numbered campsites you can find on a road that goes past the office building.  

    These are the best choice for tent camping and trailer camping as it feels less like a parking lot and more like actually camping in the desert.  Book these ahead of time, as they fill up, and then you’re left with the parking lot option. At the time of our visit, it was $20 for a one-person campsite and $40 for 2-8 people.

    Bunkhouses:

    Besides campsites, Alvord Hot Springs also offers bunkhouses with beds to rent on a nightly basis. Bring your own linens and pillows as these are not provided.  Think of it as camping, but without the tent and you get a bed too. You still need to provide everything else.

    Visiting the Alvord Hot Springs

    Whether you choose to camp at the Alvord Hot Springs campground or not, consider visiting the hot springs for a warm soak in a rustic but beautiful setting.  Since we camped at Alvord Hot Springs, we had access to the hot springs for a full 24 hours. We chose to visit the hot springs in the morning before our trek into the desert, and it was a beautiful time of the day for a soak. We also had the hot springs to ourselves, which made it feel more remote and special.

    There are no showers at the Alvord Hot Springs, so keep that in mind when planning your trip.  There is a restroom by the reservation office, and there is a small changing area on the backside of the hot springs where you can hang your towels. This is not a luxury spa. It is very bare-bones.  Rustic. However, it is a unique experience that I felt added to our day spent in the desert.

    Also, it’s important to note, towels are not provided, and clothing is optional.  So, if you are visiting the hot springs with your family, you may want to check at the hot springs first to make sure it’s empty or that people are wearing clothing. 

    During my visit, it seemed easy enough to use the hot springs when others weren’t around. The evening was the busiest time as visitors who paid only for road access, and hot springs access came in off the desert for a soak and then left again later that night.

    Spending the Day in the Alvord Desert Playa

    After our soak in the hot springs, we packed up our stuff and headed down the access road to the Alvord Desert. We spoke with the woman in the office before leaving, who advised us to drive straight a way out before turning to the left or right as there is an area mainly to the left when facing the desert that is a runoff for the hot springs and your car can easily become stuck.

    Quick side note: You’ll get an access code when you pay at the reservation office to open a lock on the chain blocking access to the private desert road.  

    We made sure to drive only where the ground appeared dry and where there were clear signs that others had driven there as well.

    You do not want to get stuck in the desert.  I read of people doing that, and it sounds like an awful experience. It is expensive to get a tow in this remote area, and you don’t have many options.  So play it safe, don’t drive where it’s muddy, and stick to the areas toward the inner part of the desert rather than the outer corners.

    Things to Do in the Alvord Desert

    Race Across the Desert

    This is why many people come here.  It’s an open area that is ideal for racing. Landspeed records have been made here.  However, I don’t recommend you come here and drive as fast as you can. It is dangerous, and people have died in the Alvord Desert from racing accidents.

    You don’t really have to drive that fast for it to feel fast.  I was cruising across at 35 mph, and it felt way faster!  It’s a strange experience to have no frame of reference, no lines, and no road.  It feels a little unsettling and also oddly fun.

    cloud of smoke from desert racer
    The dust cloud from a distant car racing across the desert.

    Fly Drones

    This is a great area where you can safely fly your drone. If you want to practice with your drone in an area with no power lines or buildings, or obstructions, you’ve come to the right place. Obviously, maintaining the same safety, you would flying a drone anywhere else.  Don’t fly over crowds, don’t fly higher than the FAA guidelines, always keep it within line of sight, and so on.

    Camp

    As mentioned above, camping in the desert is a fun experience. You have incredible stargazing at night as well as the unique experience of camping in an open playa. 

    Remote Control Toys

    Another fun thing to bring with you is remote-controlled vehicles. If you have kids, they will enjoy racing these without any obstructions.

    Bicycling

    Yep, I know it seems strange, but people actually come here and cycle in the desert.  I’m not sure I want to do it, but others seem to enjoy it.

    sunrise Alvord Desert
    Sunrise over the Alvord Desert.

    Watch the Sunrise

    This was probably my favorite experience, to watch the sunrise over the desert. Well, sunsets are pretty gorgeous here too, but I guess there’s something about seeing the sun as it rises and covers the playa floor with color. The crisp morning air and a cup of fresh coffee combined with the sunrise is a pretty perfect way to start the day!

    Watch Kite Boarding and Kite Buggies

    One of the unique things I saw here were people on kite buggies. They’re little go-karts attached to a sail, which the rider controls to harness the wind and propel them across the desert. Land sailing and kiteboarding are similar activities people also enjoy here. If you have the opportunity to try it, you should.

    Stargazing

    Bring a telescope or binoculars for stargazing. Even if you don’t have these tools, you’ll still enjoy outstanding views of the stars. The Alvord Desert has very low light pollution, so the stars seem to jump out everywhere as far as you can see.

    Where Can you Drive

    There are some areas of the Alvord Desert that are privately owned. I worried about going where we weren’t supposed to, but it wasn’t an issue for us. We had plenty of room to explore and never came across an area that seemed off-limits. When I asked the woman at the Alvord Hot Springs reservation office, she indicated I didn’t need to worry about it, that their family-owned most of the land not managed by the government.

    Most of the private land is in the western section of the desert, so if you’re concerned about driving into the private land areas, try to stay on the east side of the desert.  You can read more on BLM’s website as well as see their maps for the boundaries. However, I wouldn’t overthink it too much. You can clearly see where other people are congregating and driving.

    Tips for Enjoying Your Visit

    Food

    Make sure to stop at The Fields Station for an amazing milkshake, and if you’re hungry, they serve up some pretty great burgers and breakfast too!  They are the closest gas station and convenience store to the Alvord Desert.  It takes about 30 minutes to drive from the Alvord Desert to the Fields Station.

    Bring food, plenty of water, and a camping stove if you plan to camp. Bring your usual camping gear and supplies, and if you need anything extra, make sure to stop in Burns or Fields first.

    Fuel

    Make sure you fuel up before you make the last stretch out. For most travelers, this probably means fueling up in Burns.  Other than the Fields Station, there are no other gas stations close by, and the station in Fields closes early. 

    The Fields Station near the Alvord Desert
    Stop at the Fields Station for a delicious milkshake! I had one for breakfast!

    Check Tires

    The gravel road leading to the Alvord Desert is rough with a lot of washboard areas.  It was a really rough ride coming from the North off Hwy 78.  Make sure your tires are in good condition and properly aired up.  Take it slow and watch out for traffic. 

    Finding Your Way

    Drop a pin on Google Maps for whichever access road you use so you can point your car in that direction when returning from a day spent driving in the desert.  The desert is wide open and can be a little disorienting, so having a pin to help point you in the direction you need to go to leave can be useful.  

    The cell service is intermittent in this remote part of Oregon, so download an offline map of Oregon before your road trip to the Alvord Desert.  

    Weather

    Make sure to check the weather ahead of time. Do not camp in the playa if it is raining, or even if it has recently rained before your arrival.  You don’t want to risk getting stuck in the mud! Also, make sure to pack warm layers for the evenings and sleeping at night as it is cold in the desert at night and in the morning. It is also very windy at times, and other than during the day when it was sunny, I was thankful to have warm layers for walking around.  The best time of year to visit is from May to October during the dryer and warmer months.

    What to Pack

    Bring a swimsuit and towel if you plan to visit the Alvord Hot Springs.  You’ll also want sunglasses, sunscreen, and lots of water!  As mentioned above, you’ll need to bring y our own food, although, if you get a chance either on the way to the desert or on your way home, make sure to stop in at The Fields Station for a milkshake and some food!

    Final Thoughts On Visiting the Alvord Desert

    Unless you’re coming with a group and bringing cars for racing, or motorcycles, etc., I don’t think you’ll necessarily want to spend more than a day here.  I began to get a little bored after a while. We drove in the desert, we flew the drone, we sunbathed for a while, and then it felt like we’d pretty much done the desert thing.  I guess it really depends on what you’re planning to do while you’re here.

    Visiting the Alvord Desert was truly an interesting experience and one I recommend. However, it is a bit of a journey getting here, so plan ahead, make sure to bring good road trip music, and plan to play a few road trip games to pass the time getting there.

    Related Articles You Might Enjoy


    Have fun, playa! (sorry, couldn’t resist)

  • Smith Rock State Park: Misery Ridge Loop Trail

    On a road trip to Central Oregon, hubby and I spontaneously decided to stop at Smith Rock State Park near Bend, Oregon.  I am so glad we did!  This 600+ acre park is beautiful!  The river winds its way through the park, with volcanic rock formations towering alongside it.  It’s no wonder it’s considered Oregon’s top rock climbing destination.  For those looking for exceptional views and a gorgeous natural setting, you’ve come to the right place!

    We arrived mid-afternoon as we’d visited Oregon’s Painted Hills that morning. Since we didn’t have much time to spend at Smith Rock, we wanted a hike that would give us the best feel for this massive park.  So we chose the Misery Ridge Loop Trail.  It was the best decision we made, and I highly recommend you hike it when you visit Smith Rock State Park!

    About Misery Ridge Loop Trail

    Trail Length: ~ 4.0 miles (loop from Welcome Center)

    Elevation Gain: ~ 1000 feet

    Trail Difficulty Rating: Moderate

    Features: Towering volcanic rock formations, sweeping landscapes, river walk, scenic views, wildlife

    Entrance Fee: There is a $5 day-use parking fee. 

    Restrooms: There are restrooms near the Welcome Center as well as portable toilets at the bottom of the Chute Trail near the Crooked River Bridge.

    Open Hours: Dawn to Dusk

    Getting to Smith Rock State Park

    Smith Rock Welcome Center: 10087 NE Crooked River Drive, Terrebonne, OR 97760

    Smith Rock State Park is located just outside the small town of Terrebonne in Central Oregon.

    Approximate Drive Times:

    • 6 hours from Seattle, Washington
    • 3 hours from Portland, Oregon
    • 40 minutes from Bend, Oregon

    Smith Rock’s Misery Ridge Loop Trail

    Overview of Hiking the Misery Ridge Loop

    I love a hike with variety, and I absolutely love loop trails.  I get to see something new for the whole hike without needing to retrace my steps!  The Misery Ridge Loop Trail knocked it out of the park!   I had multiple viewpoints of Crooked River on my way up the steep switchbacks along Misery Ridge and incredible views of the entire valley at the summit. 

    A little further down the trail, still at the top, I got new views of the valley in addition to the infamous “Monkey Face.”  I enjoyed coming down the backside of Misery Ridge with up-close views of Monkey Face and Crooked River.  I saw rock climbers up close and enjoyed seeing geese, ducks, and cranes along the river.  It was the perfect way to spend an afternoon!

    Parking was full near the Welcome Center, so we parked in the overflow parking lot just inside the park gates. We paid the $5 day-use fee, grabbed our gear, and headed out!  We found a trail that made its way along the ridgeline in the direction of the Welcome Center.  There are excellent viewpoints here as well as picnic areas and a kid’s play area. So, if you find yourself short on time or unable to do a hike, consider stopping here and walking along the ridge for some great photo opportunities and spaces to soak it all in.

    Beginning Our Hike: The Chute Trail

    The path along the upper ridge takes you past the Welcome Center to an Overlook area where you make a left onto a wide path to begin your descent into the canyon. Stay right to take the steeper but shorter Chute Trail. This dirt trail brings you to the bottom, where you’ll cross the Crooked River Bridge. There are porta-potties near the bridge which are your last chance to use a restroom for this hike.

    Misery Ridge Trail

    After crossing the Crooked River Bridge, you’ll head to the right, where you’ll see a trail sign for the Misery Ridge Trail.  I know, with a name like that, you’re beginning to wonder what you’ve got yourself into!

    This is where you begin a series of switchbacks as you make your ascent to the summit. It’s less than a mile to the top, and there’s no rush, so hike at your own pace and take as many breaks as needed.

    You’ll see a few climbers at Red Wall about midway to the summit. Make sure to stop, turn around once in a while, and enjoy the sweeping views of the river as it winds its way through the canyon. These views are going to make you smile, and soon you’ll be done with your steep ascent and can rest and take it all in!

    Misery Ridge Summit

    We made it! That steady climb the entire way up Misery Ridge was worth it!  After getting to the top, head a little to the left for a wide rocky area with outstanding views of the valley below! Look down victoriously at the switchbacks you climbed and enjoy a little break as you soak it all in. When I arrived at the summit, I couldn’t help smile as I saw the reward for my efforts. It felt like I could see all of Smith Rock State Park and all of Central Oregon!

    Monkey Face

    After enjoying the views, make your way to the trail at the summit, and you’ll soon see a sign for Misery Ridge Trail. Follow this trail west for about 5 minutes and soon you’ll see glimpses of Monkey Face. You’ll also be rewarded with more sweeping views of Crooked River snaking its way through the valley. Feel free to walk closer to Monkey Face for some great photos and also to catch a glimpse of climbers on their way to the top of this iconic rock formation. They’ve sure earned that view!

    *Even if you decide not to make the Misery Ridge Loop and instead go back the way you came, don’t miss the extra little bit of hiking to see Monkey Face before you do.

    Misery Ridge Trail to Mesa Verde Trail

    After your break near Monkey Face, you’ll find your way back to the main Misery Ridge Trail and see where it begins to descend back down toward the river on the west side. Hike down a series of switchbacks and you’ll pass a small rock cave, which I, of course, couldn’t help crawling into. As you get close to the base of Monkey Face, you’ll connect with the Mesa Verde Trail, where you’ll head left. Make sure to glance toward the rocks along the left and look for climbers. You’ll see them scattered everywhere! Also, keep an eye out for trail runners. We were passed twice on the loop by the same runner!

    The River Trail

    After about a half-mile along the Mesa Verde Trail, you’ll come to the River Trail. You’ll continue straight (to the left) to stay on the River Trail.  The trail stays close to the river as you follow its winding path back around the towering rock formations. You’ll continue on this trail admiring the scenery from the ground level that you once gazed on from above. In about a mile, you’ll find yourself back at the Crooked River bridge. From here, you’ll retrace your steps back up the Chute Trail and to the top. 

    Tips & Important to Know

    Weather

    Smith Rock State Park is open year-round.  We visited in October, and the weather was perfect! Light jackets were great to have where it was windy at the top, but overall, I didn’t find I really needed mine. However, if you come in the summer, expect it to be hot, so start early if possible as temperatures can get as high as 100°F. In the winter, temperatures will often reach below freezing, and you’ll might see snow. So wear the appropriate clothing.

    Water

    Make sure to pack plenty of water. You work up quite a thirst hiking that first mile. This is even more important if you hike during the hotter months. I always say you’ll never regret bringing too much water, but you’ll certainly regret not having enough!

    Snacks

    It’s always a good idea to bring snacks to help fuel your body through a hike. Plus, there are some great resting areas within Smith Rock. You might even want to plan a picnic for after your hike.

    Snakes

    Yep, you read that right. There are snakes in Smith Rock State Park. Thankfully, we did not see any during our hike! There are rattlesnakes as well as bull snakes, garter snakes, and other non-venomous varieties.  Obviously, it’s the rattlers you really want to watch out for.  They are often found in tall grass, rocky caves, under rocks, and so on. If you encounter one, do your best to slowly walk away from it, giving it plenty of space. They aren’t typically aggressive and want to get away from you as much as you do them (well, pretty close to as much).

    Miscellaneous

    Bring trekking poles if you have them, as these are useful when you begin your steep descent down the backside of Misery Ridge. The dirt and loose rocks can make this a slippery trail to descend, and poles are nice to have.  The River Trail also allows for mountain bikers, so make sure to watch out and give them the right of way.

    Maps

    If the Welcome Center is open, you can pop in and ask for a trail map for the entire Smith Rock State Park.  However, if they’re not open, or you’d rather use your mobile device, you can use this online brochure and map of Smith Rock State Park.

    Final Thoughts About Smith Rock

    My hubby and I are moderately healthy. Truth be told, we’ve got some extra pounds from all our recent 2020 sedentary living, but we had no issues hiking this trail. We both took breaks as needed and made sure to hydrate often. We did not rush at all, and I stopped and took a TON of photos! 

    That being said, it took us 3 hours to hike from the trail near the Welcome Center and back.  If we had hiked this straight through without any breaks and zillions of photo stops, it most likely would have only taken 2 hours.  The ascent up the Chute Trail is the most strenuous (IMHO), and it’s only about 3/4 of a mile. If you are in reasonable physical shape, you should be able to do this hike, and I think you’ll be glad you did!

    In closing, if you ever find yourself in Central Oregon near Bend, then you need to visit Smith Rock State Park!  With over 600 acres, there is a lot to see and do.  There is rock climbing, mountain biking, horseback riding, and hiking all within this one park!  If I were a local, I can tell you this would be one of my go-to parks.  I loved my visit here!

    Happy Hiking!

  • Waihee Ridge Trail: A Local Favorite on Maui

    Waihee Ridge Trail in Maui is a gorgeous hike with lush jungles, eucalyptus forests, waterfalls, and stunning ocean views. It should definitely be on your list of things to do when visiting Maui, Hawaii. Hiking gives you a unique perspective on the place you’re visiting. You meet locals along the way, and it is a great way to connect and meet people in a non-tourist setting.  I notice this when I am hiking back home as well. I meet visitors to our state and chat with them about their visit and where they are from. Connecting with others through nature and travel, it’s a beautiful thing!  

    During my latest visit to Maui, I hiked Waihee Ridge Trail with my hubby, and we loved it! It was a beautiful hike and offered a pretty decent workout too!  I  absolutely recommend you try it on your next visit to Maui.  Below you’ll find all the info you need to get to the trailhead and prepare for hiking Waihee Ridge Trail.

    About the Waihee Ridge Trail

    Trail Length: 5.0 miles (roundtrip)

    Elevation Gain: ~ 1500 feet

    Trail Difficulty Rating: Moderate

    Features: Lush foliage, waterfalls (from a distance), ocean views, eucalyptus trees, and flowers

    Getting to Waihee Ridge Trail

    The Waihee-Waiehu area is to the northwest of Kahului, and the trailhead is about 10 miles from the Kahului city center. If you’re coming from Lahaina, plan to take about 1 hour to drive to the trailhead. If you come from Kihei, it will most likely take around 35 minutes.

    Take HI-30 E and Kahekili Hwy (Hwy 340) to Maluhia Rd. You’ll drive through the town of Wailuku to connect with the Kahekili Hwy. After about 6 miles on the Kahekili Hwy, you’ll make a left on to Maluhia Rd. Look for the Mendes Ranch on the right side of the road, and this is where you’ll make a sharp left onto Maluhia Rd.  Maluhia Rd is a narrow road, so drive slowly and watch out for oncoming traffic. It’s about a mile on this road to the main trailhead parking lot. 

    Note: there is a parking area when you first turn off onto Maluhia Rd, continue past this to the main trailhead. You may find some people parking here on busy days, but I’d check first at the main trailhead parking. 

    I recommend using Google Maps for turn-by-turn directions from where you’re staying in Maui. You can click on the map below to get driving directions from your starting point.

    My Experience Hiking Waihee Ridge Trail

    My hubby and I left early from our condo in Kahana, grabbing coffee and breakfast at our favorite local coffee shop, Hawaiian Village Coffee.  It is about an hour’s drive from our condo to the Waihee Ridge Trailhead. Although we could drive north and around the top of Maui, due to the narrow roads and nail-biting drop-offs in that section, we chose to drive south to Ma’alaea and then up through Wailuku.   

    Waihe’e (pronounced [why-HEH-eh]) Ridge Trail popped up on my radar when searching for new activities and areas to explore during our latest visit to Maui.  It is highly rated, and I love a hike with a view, so I added it to our list of to-do’s, and I am so glad I did!

    At the Trailhead Parking Lot

    We arrived at the main trailhead parking lot around 8:00 a.m., and the parking lot was a quarter full. There are two porta-potties on one side of the parking lot closest to the trailhead. I used one of them before our hike and found it to be clean (for a pit toilet) with a hand sanitizer dispenser inside as well. 

    There is a small gate you walk through to begin the hike, and after that, begins a very steep hike up a paved trail. It appears it was a road at one time, perhaps to access the water holding tanks we passed.  This initial steep climb was probably the steepest part of the whole hike!  At least it felt that way. It definitely gets the heart going right out of the gate (pun intended). 

    If you find yourself short of breath going up this initial steep ascent, then turn around as I did and enjoy the view behind you as you climb up to the main trail.

    concrete path with ocean views

    Hitting Dirt

    The steep paved portion of the trail ends and forks to the left, and soon you’re under a canopy of pine, guava, and eucalyptus trees. We passed through another hiker’s gate with a warning sign letting hikers know of cross-contamination dangers between islands. We only visited Maui, so we felt assured that our shoes would not carry the Rapid Ohai’a Death fungus.

    Rapid Ohai'a Death fungus sign

    As we weaved through the forests, we came to a bench that made a great resting point and viewpoint as we looked across at the Makamaka’ole Falls. After that initial steep ascent up the paved portion, the trail incline levels out a bit, and there is a nice mix of steady incline and flat trail for catching one’s breathe.

    Makamaka’ole Falls

    I enjoyed all the beautiful plants around me. We saw mushrooms, ferns, multiple species of trees, and flowers. It was so fun getting to see plants that are different than mine back home.

    Viewing Platform 3/4-mile Mark

    About a mile up the trail, we came to another viewpoint with a wooden platform. There was a beautiful Norfolk pine next to it and a gorgeous view of the emerald valley below.  We could see many clouds near the top where we were hiking, but we remained hopeful that things would clear by the time we got to the top.

    Maui canyons

    1.5-mile Marker

    We passed beautiful koa trees and noticed small areas where they are replanting native plants and encouraging the local fauna’s growth.  At around the 1.5-mile marker, we come along a small eucalyptus forest. I think these trees are so pretty with their twisted red and gold bark. 

    It is during the first 1.5 miles of trail that you’ll enjoy nice interludes of shade from the sun.  However, after you pass the eucalyptus trees at the 1.5-mile marker, you’ll cross a field and begin your final ascent. This portion of the trail had very little shade covering, and it is also the portion of the trail we found to be the muddiest and most difficult to maneuver.  There were deep ruts and slick mud where the trail was steep.  

    We saw a few people who chose to hike this trail with their bare feet. I don’t know whether that gave them an advantage over my tennis shoes or not, but I do know you wouldn’t want to try hiking the Waihee Ridge Trail in flip flops!

    Waihee Ridge Trail ridgeline

    2.0-Mile Marker

    At the 2.0-mile mark, I’ll be honest, but I thought to myself, “I’ve probably already seen the best of the views.” As the trail took us further inland, I realized we probably wouldn’t have much better viewpoints, but that didn’t matter. We were almost there! Plus, it allowed us to continue to stop and look below at where we’d come. We chatted with other hikers as we passed and even met a woman celebrating her 40th birthday by running the trail!

    The End of the Waihee Ridge Trail

    The top of Waihee Ridge Trail

    We arrive at the “top” and find a wooden platform with a picnic table. The clouds had not fully lifted. However, we could still enjoy the lush foliage around us and chat with various hikers and listen to the congratulatory greetings for those who succeeded in making it all the way.

    ocean view below

    Really, the hike down was even better as I didn’t have to stop to turn around to enjoy the views below.  Plus, I feel it’s always easier on the way back as you know what to expect and how far you really have to go.  Although we were sweating profusely, we both had such a wonderful time hiking the Waihee Ridge Trail.  It was a great way to start our day!

    a hiker coming up some trail stairs

    We smiled and told people “just a little further” as we passed. I was happy we chose to come earlier in the day as it was already feeling hot as we hiked down, and it wasn’t even noon yet!  

    Make sure to use the provided shoe cleaners outside the hiker’s gate near the trailhead parking lot. I love that they provided these!  I wish we had these at our trails near Seattle, as it is so useful!

    shoe cleaning station

    Tips for Hiking Waihee Ridge Trail

    • Wear comfortable hiking shoes or at least tennis shoes. The trail gets steep and muddy in places, and you’ll want something with a little grip.
    • Bring plenty of water! The Waihee Ridge Trail is a steady climb up for 2.5 miles in humid conditions. You will not regret having too much water, but you will certainly regret not having enough.
    • Bring a snack.  There’s a nice picnic area at the top, as well as a few spots along the way that make for a nice snack break. You’ll be happy to have the extra energy.
    • Check the Weather. This area of Maui gets a lot of rain, so check ahead and plan to come when it’s sunny. I would not recommend hiking this in the rain or after any heavy rain due to the upper trail’s slick and muddy nature.
    • Plan to come earlier in the day. The earlier you come, the more enjoyable your experience. I prefer to hike when it’s cooler. You could come later in the day before sunset, and I would also imagine that it would also be a nice time to hike this trail.hiker on trail with views

    Things to Do Nearby

    If you want more ideas for things to do near Waihee Ridge Trail, read my post on 7 Fun Things to Do in Kahului Before Your FlightYou’ll see the Waiehu golf course on the list. You would have seen this golf course from your view on the Waihee Ridge Trail. It’s a beautiful public golf course located along the ocean. They have reasonable prices, and it’s a fun way to spend a few hours with friends, even if you aren’t “golfers.”

    If you want some delicious Thai food, I recommend Thai Mee Up at the food truck lot across from Costco. If you’re not feeling like Thai food, they have lots of choices from the many food trucks located there.

    Perhaps you need to cool down? Then why not grab some shave ice at the best place on the island! Ululani’s Hawaiian Shave Ice on Dairy Road is my favorite shave ice spot when visiting Maui.

    Happy Hiking!

  • Post-COVID Travel: My First Experience Flying in 2020

    In this post, I want to update those of you who haven’t flown post-COVID on what has changed and what hasn’t. I also want to let those of you who might be concerned about wearing a mask for extended periods of time know what it was like from my perspective and tips I found helpful.

    Please keep in mind this was my first flight in 2020, and my experience is with flying Hawaiian Airlines from Seattle to Maui. Not every airport is the same, and each airline might have slightly different procedures.

    If you’re interested in planning your own trip to Hawaii, you can read about my experience on how I skipped the 14-day quarantine in Hawaii.

    What is Mask Anxiety

    Mask anxiety is a general term someone gave to the anxiety many people feel when wearing a face mask.  There are different levels of anxiety and discomfort mask-wearing produces. They cause some people to feel trapped, dizzy, disoriented, and can even produce full-on panic attacks for others. People that have claustrophobia, asthma, ADHD, and anxiety disorders often struggle with mask anxiety.

    I have minor claustrophobia, which, as it turns out, caused me anxiety when wearing a mask.  I didn’t really realize what was going on until recently when I came across the term “mask anxiety” in an online article.  That’s when a light bulb went off, and I realized, oh, so that’s what it is.  

    My face would sweat, and I struggled to concentrate; I felt like I couldn’t get enough air. It was very uncomfortable when I first went grocery shopping while wearing a face mask. Thankfully, over time, I found masks that work better for me, and I’ve now become somewhat used to wearing one when shopping.

    However, I knew it would be much longer than just 1-2 hours for my flight to Maui.  This caused me some anxiety, and I began to think about canceling my trip. That right, there should tell you something because I LOVE Hawaii!  Instead of giving in to my fears, I decided to do some research to find ways to make wearing a mask easier.

    3 Tips to Reduce Mask Anxiety

    #1 Find a face mask that is comfortable to wear and easy to breathe in.

    Don’t wear a mask that is too tight as this can not only make it hard to breathe, but I read that it can also pull on your ears and jaw and potentially cause TMJ problems that will lead to headaches. 

    I tried neck gators, cotton masks, thick masks with inserts, and disposable masks. I found that most were too thick and difficult for me to breathe in. Through a process of elimination (I wore each at home first), I chose a disposable mask for my flight.  I also brought extras to keep in the rental car, condo, day bags, etc.  

    #2 Build up to wearing a face mask all day. Start in 30-minute increments at home.

    This was a great tip I read online from a dive instructor.  She said students who struggled to wear the breathing apparatus in their mouth were sent home with one to practice with.  They would wear them for incremental periods of time to build up their tolerance and comfort.  That made total sense to me, as I recall my first diving lesson in the pool and how I felt like I couldn’t breathe. When, of course, I had oxygen flowing directly into my mouth and lungs.

    #3 Add a calming scent to the inside of your mask. 

    I chose cinnamon, but some might like lavender or mint. I took a cinnamon stick and rolled it up inside my mask the day before my flight. It worked perfectly! It wasn’t too strong but left a subtle cinnamon smell, which I found comforting.  You could also try a pack of spearmint gum as some find peppermint to be calming. You can use any smell you find to be relaxing and calming. Just make sure it’s not so strong it gives you a headache.

    The Day of Our Post-COVID Flight

    8:00 a.m. Masks On

    We got a ride with Uber to the airport at 8:00 a.m. Our mask-wearing starts now, as you must wear a mask when taking an Uber or other rideshare service.

    Security Screening at the Airport:

    The post-COVID airport experience at Seatac International Airport was pretty much the same as every other flight we’ve taken there. The main difference was that everyone wore masks.  Security lines were the same, slightly longer perhaps as they make them zigzag more to improve social-distancing.  This time we didn’t take out any electronics, which was new for me, as typically, I have to remove my laptop and camera before going through security.  We placed all our bags and shoes, etc., in bins and then walked through the screening checkpoint.

    Eating at the Airport:

    In case you’re wondering, yes, you can still eat when waiting for your plane.  You remove your mask while you eat/drink and then replace it again.  It is the same procedure we follow here in Washington state when eating in a restaurant.  Quite a few people were eating at their seats while waiting for their plane to depart. 

    One thing that was different was how many of the businesses in the airport have closed.  Due to the limited amount of travel, they haven’t had enough business to stay open.  You may want to pack extra snacks in case you arrive at an airport and nothing is open.  This is one aspect of traveling post-COVID that we experienced both at the airport and in the towns. Expect that you’ll have limited dining options.

    Our Flight with Hawaiian Airlines

    Boarding the plane also felt pretty much the same, except that they scan your forehead temperature at the gate. Other than that, I felt it was pretty typical of every other boarding experience I’ve had.

    Another thing that is different is the meal and snack service. This was done at the very beginning of all of our flights, and there were no other meals or snack services provided for the duration of the flight.  They passed out the meal within the first hour of the flight. That means for the rest of the flight, nothing else is provided.  On our flight to Hawaii, they did pass through the cabin late into the flight carrying some water bottles for those that needed them.  However, on our flight to Seattle, they did not do this.

    Everyone who eats or drinks removes their masks while they are “actively” eating or drinking. They announce this over the intercom, “please keep your mask on when you are not actively eating or drinking.”

    Mask is briefly removed around 10:30 a.m. 

    I removed my mask while I ate my meal and then put it back on when I finished. I sat next to a young man who chose not to eat. He kept his mask on for the entire flight.  That is one thing to note. You will most likely be seated next to strangers. To me, this didn’t matter since everyone is already on an enclosed plane together, and the air is filtered. However, if that concerns you, be aware that airlines are now booking every seat and no longer trying to space people out as they once were.

    Arriving at the Airport in Hawaii

    Our forehead temperature is once again scanned upon arrival at the airport in Hawaii. Temperature checks seem to be a regular part of post-COVID travel.  We had a connecting flight in Oahu, and our temperature was scanned both there and in Maui.   We proceed through a COVID-19 testing checkpoint where we show our I.D. and negative COVID-19 test results as well as the QR code issued by Hawaii’s Safe Travels site.  You can read more about our post-COVID travel experience to Hawaii in this post.

    8:00 p.m. Mask is Finally Removed

    Due to our connecting flight in Oahu, our travel time to Maui was much longer than normal.  I was apprehensive about this initially, as I didn’t know if I could handle 10+ hours wearing a mask.  After getting our rental car and finally removing our masks, we had worn them continuously for almost 12 hours, with only small breaks for eating. 

    How I felt after wearing a mask for 12 hours.

    I did okay during the flight to Oahu, however by the time we boarded our flight for Maui, I had a headache.  I think this is a fairly common side effect of long-term continuous mask use.  My hubby also complained of a headache.  I did my best to take deep breaths once my mask was off, and by the time we arrived at our condo an hour later, my headache was gone.

    I am glad I faced my fear and anxiety over wearing a mask for a long day of travel. We had a wonderful trip to Maui, and I would regret not having gone.  I am also sort of glad that we had a connecting flight as it showed me that I could, in fact, wear a mask for 12 hours if I really had to.  It also gives me more appreciation for those that work in jobs that require them to wear a mask all day long. You make it look easy!

    Final Thoughts About Flying Post-COVID

    If you are concerned about being in enclosed spaces with other people, seriously consider whether you are ready to fly.  I personally take all the precautions I normally would before a flight.  This includes packing hand sanitizer (which they also handed out on the plane), taking Airborne or Emergen-C before my flight and after my flight.  I’ve been flying for years now, and I’ve always understood that flying and traveling put me at risk to catch airborne viruses. So I do my best to mitigate the risks while still enjoying my love of travel.

    Not everyone is ready to do that, and I respect that decision. That is why I want to let people know how my experience was so you can decide for yourself whether you are ready to fly or not.

    If you have any other questions about my flight or travel experience post-COVID that I didn’t cover here, please let me know.

    Safe Travels!

  • Visiting Oregon’s Unique Painted Hills

    On a recent road trip to Central Oregon, we took a small detour to see Oregon’s Painted Hills.  I’d read about them, and they reminded me a little of the South Dakota Badlands.  I didn’t realize I had anything like that so close to home, so I wanted to check them out. After taking this short road trip to Oregon, I will say that I have a newfound appreciation for Washington’s neighbor state. It has more natural variety than I previously realized, and it left me wanting to explore more of it in the future.

    Prineville, Oregon: Our gateway to Oregon’s Painted Hills

    We left the Alvord Desert and drove about 4.5 hours to the town of Prineville, Oregon.  Our first glimpse of the town of Prineville was from up above the town. It appeared like an oasis in the desert, green and lush.  I wondered what the first settlers along the Oregon Trail must have felt when they first saw this area. 

    Only an hour away, Prineville is a great choice for travelers needing to spend the night before heading on to the Painted Hills.

    After checking into our hotel, we decided to grab some dinner as we had skipped lunch, and were on the verge of getting hangry, so food was a priority!  We read reviews about an authentic Mexican restaurant with great food, so we headed to Tacos Toledo Mi Tiendita. It is a tiny little restaurant mainly used for takeout, but there are two tables for indoor seating.  

    I was ready to order everything on the menu!  Instead, I ordered a tamale (I love tamales!), 5 authentic tacos (no Tex-Mex stuff), a Chile Relleno, and hubby ordered a pambazo with chips and salsa.  I loved everything I ordered!  The pambazo is like a breakfast sandwich. It has potatoes, cheese, and chorizo inside.  

    After dinner, we drove around Prineville and liked what we saw.  They have beautiful historic buildings and the Bowman Museum, which tells the history of the area from the time of the first settlers. The town felt like a nice blend of history and progress.

    Driving From Prineville to Oregon’s Painted Hills

    The next morning we got up early, ate breakfast at the hotel before checking out, and then headed for the Painted Hills.  It is about a 1-hour drive from Prineville to reach the Painted Hills in the John Day Fossil Beds National Monument.

    I enjoyed the drive as it was a mixture of farmland, lakes, and trees.  The drive passed quickly, and soon we were turning off on a small narrow road that passed by more farms while also catching our first glimpses of the Painted Hills. 

     After about a 10-minute drive on this road, we came to the John Day Fossil Beds National Monument entrance.  This is where the road turns to gravel.  It’s nothing too bumpy, though, not at all like our drive to Alvord Desert, where the road was much rougher.  Any car should handle the gravel roads at the Painted Hills. Just take it slow.

    The Painted Hills at John Day Fossil Beds National Monument

    Shortly after entering the National Monument boundary via the gravel road, you’ll come to a fork in the road where you can go left to the Visitor Center or right to continue to the trails and to see the Painted Hills.  If you need to use the restroom, then head to the Visitor Center as that is the only restroom facility at the Painted Hills.

    Trails at the Painted Hills

    Continuing up the dirt road past the turnoff for the Visitor Center, you’ll come to the Painted Overlook. This is the first trail in a series of trails within the Painted Hills park area. You’ll also pass the Carroll Rim Trail parking area on your way to the Painted Overlook parking lot.

    • The Painted Overlook (0.5-mile roundtrip) 
    • Carroll Rim Trail (1.6 miles roundtrip)
    • The Painted Cove Trail (0.25-mile boardwalk trail + overlook)
    • The Red Scar Knoll Trail (0.25-mile trail)
    • The Leaf Hill Trail (0.25-miles roundtrip)
    The Painted Overlook is a 0.5-mile roundtrip gravel path to an viewpoint.  There is a bench on one section of the trail with sweeping views of the painted hills below.  At the beginning of the trail, there are some signs with information regarding the area’s volcanic formation.
    painted hills overlook trail
    The wide gravel path at the Painted Overlook trail.

    The 0.25-mile roundtrip Painted Cove Trail follows a wooden boardwalk before connecting to a dirt path.  Make sure to read the signs along the trail that explain how these unique painted hills came to be. 

    person walking on boardwalk at painted cove in the painted hills
    The wooden boardwalk at the Painted Cove trail.

    At the end of the boardwalk (when starting counterclockwise) leads to a fork in the trail.  You can go left to walk up to an overlook or right to continue the loop.  I recommend walking up to the overlook as it provides great views of the painted hills below and a really neat icy blue lake.

    the painted cove trail overlook
    The view from the Painted Cove trail overlook.

    The Red Scar Knoll Trail (also known as Red Hill trail) is another short trail (.25 mile roundtrip) that leads to a dark red hill on one side and yellow on the other. The trail takes you over a small bridge where it forks straight and to the left where you can view the red side first. 

    Then, retrace your steps back to the main trail and continue as it goes around the hill and brings you to a viewing area of the yellow side of the hill. The red and yellow colors found in the painted hills is due to the blend of iron and magnesium.  The hills are rusting!

    red scar knoll trail viewpoint
    The yellow side of the red scar knoll.

    The Leaf Hill Trail (Leaf Fossil Trail) leads you to a hill where fossilized leaves of genus Metasequoia, the Dawn Redwood, were found. Although it is fascinating that these great trees once lived here, the actual hill and trail were a bit underwhelming.

    Leaf Fossil Hill
    Scattered fossils at the Leaf Fossil Hill trail.

    Time Spent Visiting the Painted Hills

    We spent approximately 2 hours exploring the Painted Hills.  Visiting all of the trails, except the Carroll Rim Trail. We planned to do it last, but the parking lot was full upon our return. Deciding we’d probably seen what there was to see anyway; we left without hiking that trail.

    My recommended trails:

    • The Painted Overlook: This had nice views of the hills we passed while driving up to the Overlook.
    • The Painted Cove Trail: I liked being so close to the Painted Hills as well as the small overlook that let me see the pretty lake and painted hills below.
    Just Okay: The Red Scar Knoll trail was just okay, in my opinion. I did think it was interesting that it is red on one side and yellow on the other, and it is short enough that it won’t take you very long to complete.
    Could have skipped: The Leaf Hills trail was the most boring one of them all.  You could see a bunch of scattered pieces of rock, which may have been fossils, but really, if you are looking for a trail to skip, this is one I felt sort of like “meh” afterward.

    Getting to Oregon’s Painted Hills

    From Prineville, Oregon
    Take US-26 E for about 43 miles before turning left onto Bridge Creek Rd/Burnt Ranch Rd. Follow Bridge Creek Rd for another 5.5 miles before turning left onto Bear Creek Rd. Bear Creek Rd is a gravel road. Follow signs in the park to either the trails or the Visitor Center.

    From Mitchell, Oregon

    Take US-26 W for 3.6 miles, then turn right onto Bridge Creek Rd/Burnt Ranch Rd. Follow Bridge Creek Rd for another 5.5 miles before turning left onto Bear Creek Rd. Bear Creek Rd is a gravel road. Follow signs in the park to either the trails or the Visitor Center.

    Tips for Your Trip

    Fuel up in Prineville or Mitchell, depending on which direction you’re coming from. The only restroom is at the Visitor Center and picnic area near the Painted Hills entrance. Go left at the fork in the gravel road and follow the signs to the Visitor Center. I did not see any other restrooms in the park.

    Bring a jacket, depending on what time of year you visit (we came in the fall), it can get windy and cold.  We were happy we had our rain jackets with us as well as sweatshirts. I also recommend bringing snacks and drinks as there is nothing inside the National Monument area.

    Happy Trails!