author.travelffeine.com

Category: Travel


“Twenty years from now you will be more disappointed by the things that you didn’t do than by the ones you did do. So throw off the bowlines. Sail away from the safe harbor. Catch the trade winds in your sails. Explore. Dream. Discover.”     — H. Jackson Brown, Jr.

  • 6 Travel Books to Inspire Artists & Travelers Alike

    I love books, and as you already know, I also love travel!  So it won’t be surprising to hear that I  love to read travel books. I also love art. Whether it’s photography, painting, or beautiful sculptures, it is something that brings me joy.  I believe that everyone has a creative side, and when we allow ourselves time to do creative things, it inspires and energizes us.  

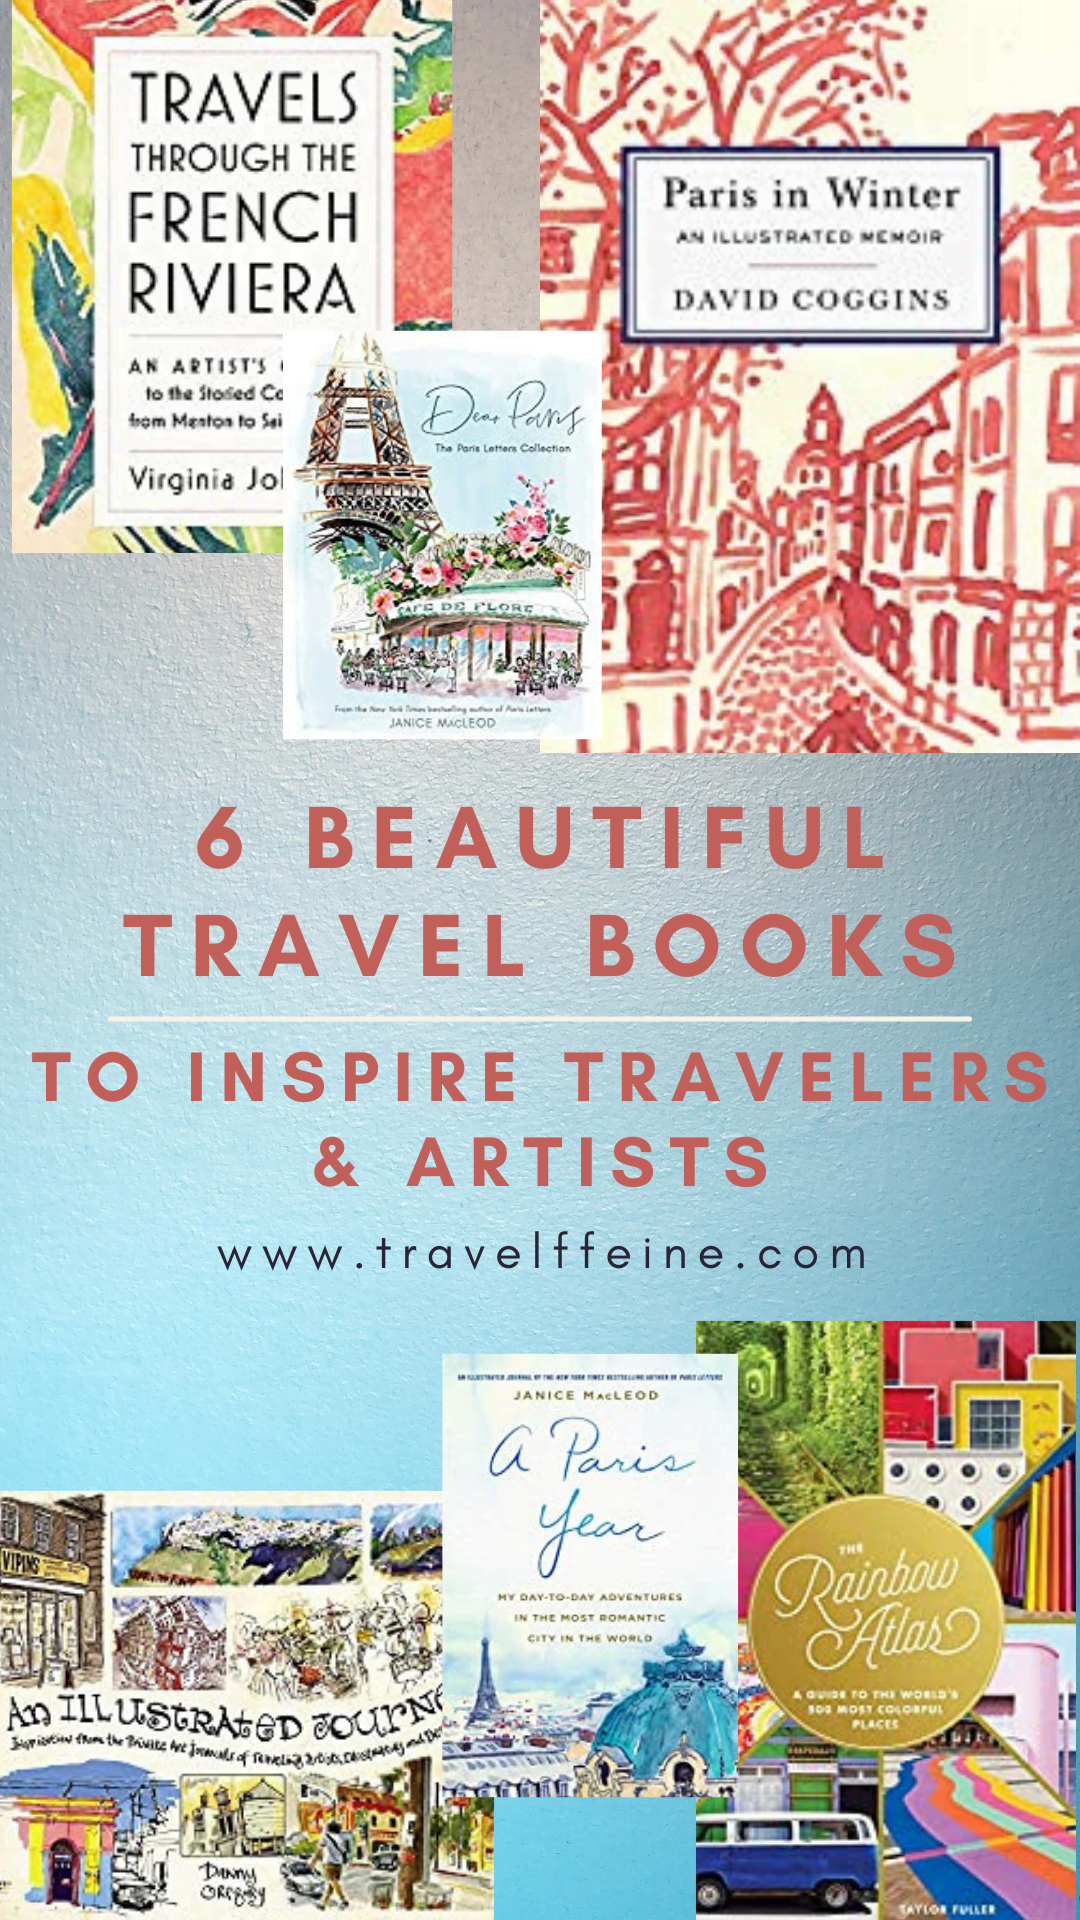
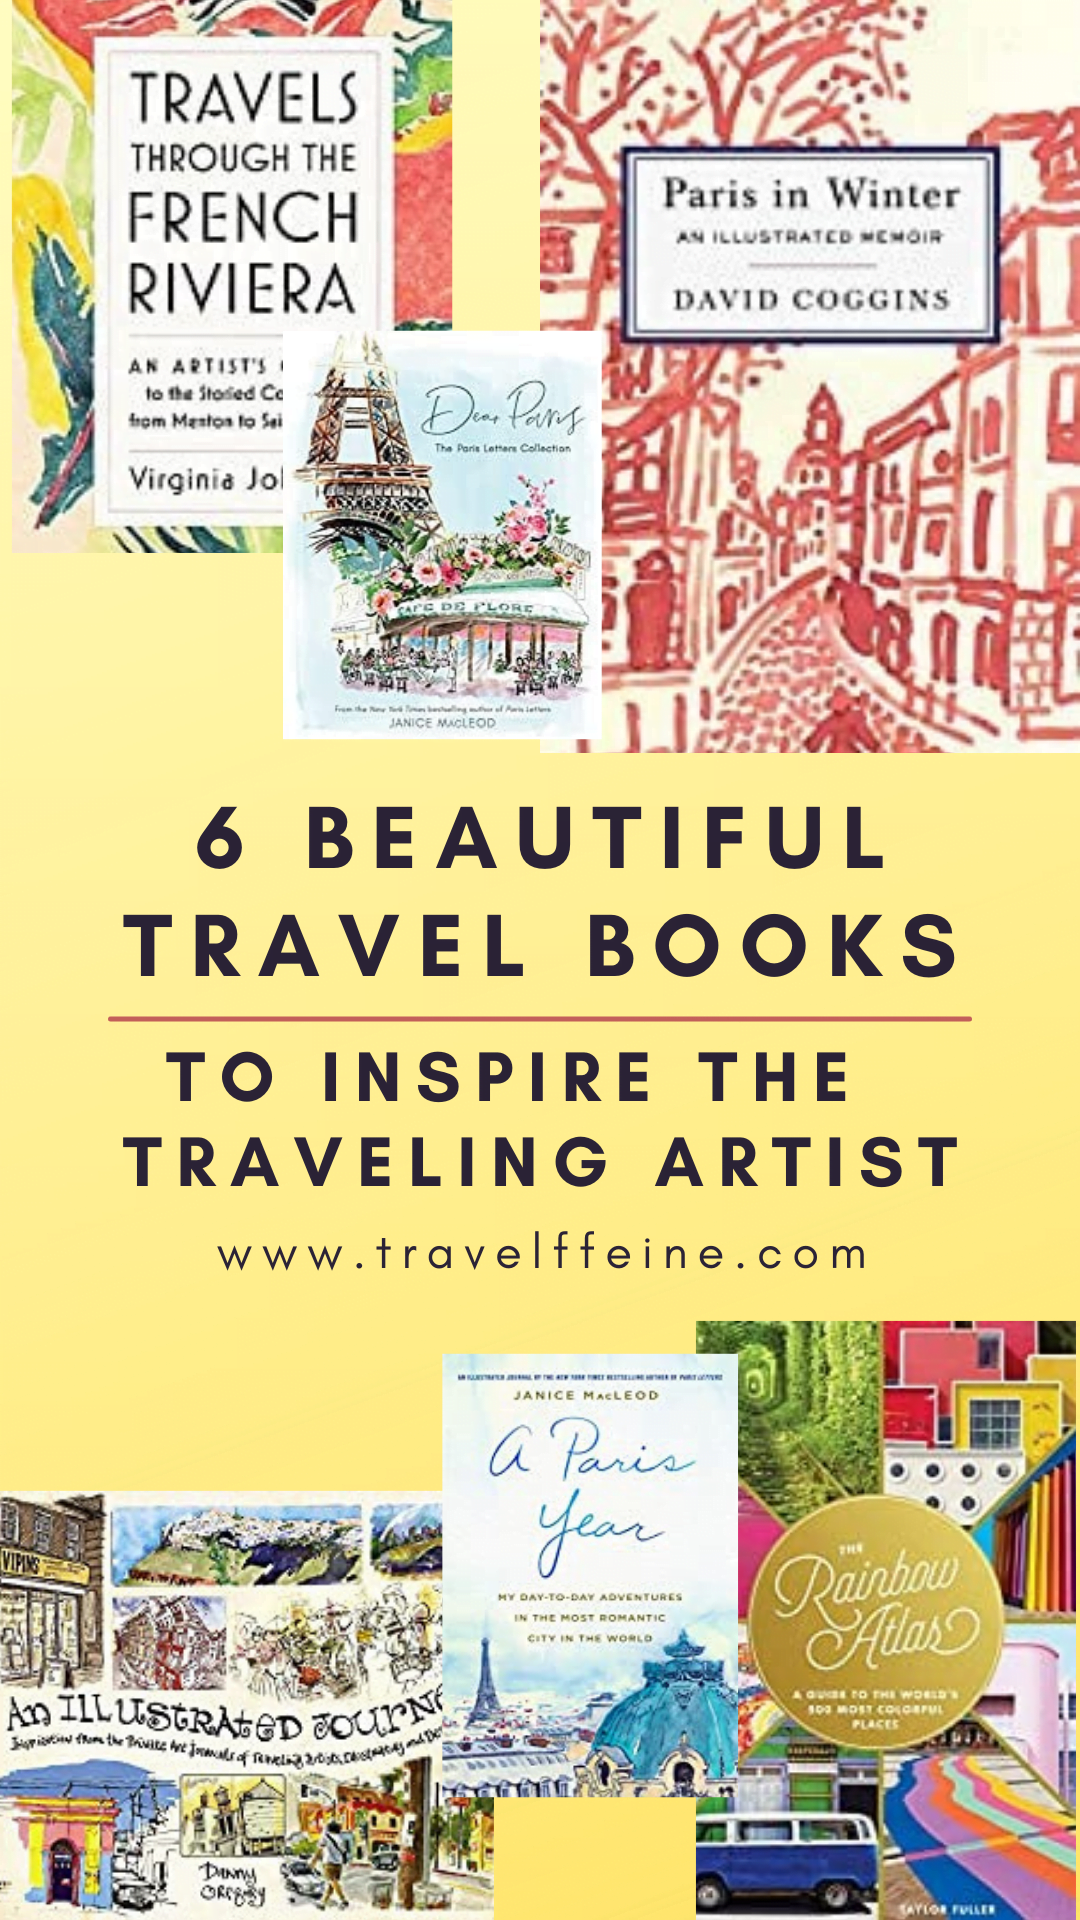
    These six travel books combine my love of travel and my love of art. Each book inspired me with new places to explore, restaurants to try, and museums to visit. They also gave me great ideas for using sketches and photographs to create artistic travel journals. The use of drawings, paintings, and pictures combined with written notes creates a travel journal that makes each experience easier to recall and relive.

    Each of these travel books are beautiful to look at and will delight both lovers of travel and art. If you are an artist, you might even find that you begin thinking about designing your next trip around your art. There are so many wonderful ideas in these books of places to see and ways to use travel as a conduit for your art. 

    Perhaps you don’t identify as an “artist” that’s okay too, if you enjoy looking at art and discovering new things, you will find something in each of these books to inspire you too.

    Who should read these books?

    Do you love to travel?
    Do you enjoy looking at art?
    Are you an artist?
    Do you want to create art or find inspiration?
    Do you enjoy reading about beautiful and exciting destinations?

    If you answered yes to any of these questions, then you should read these books. If you answered yes to more than one of these questions, I’d rush to your nearest library or buy one today. These books are easy reading, beautiful to look at, and inspiring to read.

    1) Paris in Winter: An Illustrated Memoir

    Travel Book Paris in Winter

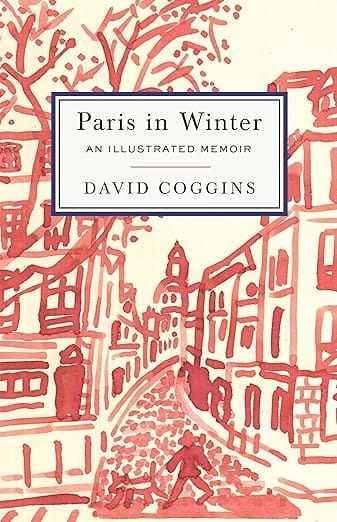
    In Paris in Winter: An Illustrated Memoir, David Coggins takes you on his annual winter trip to Paris. Each chapter is a different year, and another winter spent exploring Paris with his family. Paris In Winter is an example of luxury travel, fine dining, art museums, and shopping. 

    Paris in Winter is a journal and sketchbook in one. It’s filled with simple paintings that accompany the written memory Coggins is attempting to capture. The mood, the smells, the sounds he heard, and funny snippets of conversations with his family.

    It reads like a stream of consciousness journal in which the author shares his notes and watercolor sketches of individual moments. You don’t get a continuous story, but instead, you peer into his journal and see how he captures the essence of that particular memory—a moment he did not wish to forget.

    I also use this style of notetaking when I travel. I create short, bullet-point style references to help me recall what I did that day and the moments I don’t want to forget. Often I’m too tired at the end of the day to write pages of detailed notes. So this shorthand style of journaling helps me to capture the moments.

    The addition of drawings, paintings, and even photographs to your travel journal can enhance future recall when rereading your journal and make it a more interesting read.

    Paris In Winter leaves me with a long list of museums to visit the next time I’m in Paris. It also leaves me feeling just a little bit hungry as I read his descriptions of their sumptuous meals. There is something about Paris that calls people back to it year after year. Wander the streets with the Coggins family and get lost in the finer things of this magical city.

    2) Travels Through the French Riviera: An Artist’s Guide to the Storied Coastline, from Menton to Saint-Tropez

    Travels through French Riviera

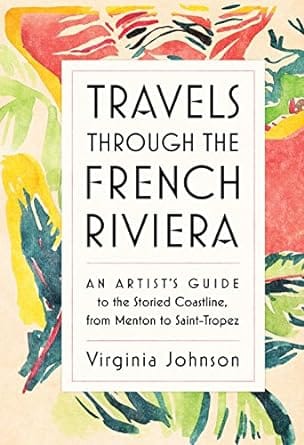
    Reading Travels Through the French Riviera: An Artist’s Guide to the Storied Coastline, From Menton to Saint-Tropez by Virginia Johnson is like reading a storybook for adults. The brightly colored pages with pictures and text bring the feeling of the Riviera to the reader as you journey along the coastline with the author. I could almost feel the warmth of the sun as I imagined myself enjoying gelato along the waterfront.

    Travels Through the French Riviera is not “just” an art book and a travel book in one. As you read it, you feel like you’re taking a stroll through a French town with a friend. Johnson guides you through these beautiful French towns that were once artistic retreats for artists such as Picasso and Chagall. You learn of the art history in each town and her go-to spots for inspiration. 

    In addition to giving you detailed itineraries for each village, Johnson also provides a list of the best places to buy art supplies and what she uses as a traveling artist. If you want a personal artist retreat mapped out for you, then you need to read Travels Through the French Riviera.

    I’ve yet to visit the French Riviera, but after finishing this book, I’m excited to plan a trip to explore this beautiful region and delve into its artistic history. A month here would be perfect for seeing all of the towns. However, one could easily create an enjoyable 2-week itinerary by using this book as a guideline.

    If you’re interested in art, art history, and travel, this is the book for you! Painter or photographer, poet, or writer, Travels Through the French Riviera will inspire you to take a journey that feeds your creative soul.

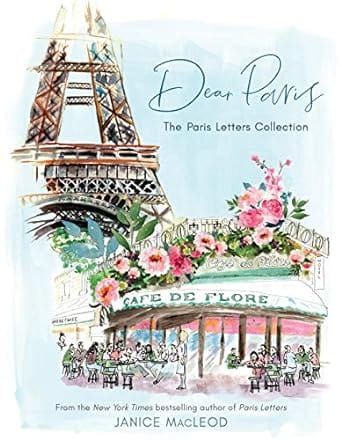
    3) Dear Paris: The Paris Letters Collection

    Dear Paris book

    A Little Background

    I first read Janice MacLeod’s book Paris Letters: A Travel Memoir about Art, Writing, and Finding Love in Paris on a flight to Europe when I’d visit Paris for the first timeI enjoyed the humor she infused in her story of how she came to live in Paris. It describes her desire to live abroad, how she came up with a budget and a plan to do it, and how the experience changed her life. She used her painting skills to help pay for her stay in Paris, making both a dream to travel and get paid for her art a reality. 

    One of the ways she did this was through a letter subscription she sold to her Etsy subscribers.  She’d paint a letter and handwrite a note about her experiences as a newcomer to Paris and then copy and mail these to her subscribers. I loved this idea and have contemplated doing something similar with my photographs. 

    7 Years Later

    As I read her book Paris Letters, I imagined how the painted letters looked. So when I saw she published a book filled with them, I jumped at the chance to purchase it!  Dear Paris: The Paris Letters Collection is a beautiful book filled with a compilation of some of her best-painted letters. The ones presented in the book are only a fraction of what she sent over an almost eight-year period.  

    As you flip through the pages, you will find yourself living vicariously through Janice as she shares what it’s like for her to move to Paris. She shares her experiences about the language barrier, her favorite cafe, and the beauty she uncovers in this remarkable city.  Dear Paris is also a book about dreams and the beautiful life we can have if only we take the first step (or perhaps flight).

    If you’ve ever visited Paris, Dear Paris will be a walk down memory lane, you will envision the same places she sees, and it will be a beautiful way to relive your memories there. If you’ve never been, this may be one of the best ways to “visit” until you can. Dear Paris is a travel book worthy of being left on your coffee table for repeated glances and visits to Paris.

    4) A Paris Year: My Day-to-Day Adventures in the Most Romantic City in the World

    A Paris Year book

    I know I already mentioned her other two travel books on Paris, but I felt this one also deserved a place on the list.  In A Paris Year, Janice fills the book with artwork, photographs, and various clippings and written notes describing her life in Paris throughout every season of the year.

    It’s less a daily journal and more a book filled with musings, historical references, and all things Paris. Each page represents a day of the year, and it reads like an insider’s guide to living in Paris. She discusses the various markets, bookstores, her favorite art stores, local restaurants, and life in Paris from the view of a foreigner. 

    A Paris Year looks at what it’s like to move from the States to Paris for one year. Where you’d shop, what the seasons would be like, holidays celebrated, and more. If you’ve ever wanted to live in Paris, this book is only going to increase that desire further. 

    You’ll feel like you’re living a year in Paris along with Janice as she purchases bread at the local bakery, sips coffee at the cafe around the corner, and bonjours her way around Paris. It’s another beautiful book to inspire both artists and travelers, but especially anyone who loves Paris.

    5) An Illustrated Journey: Inspiration From the Private Art Journals of Traveling Artists, Illustrators and Designers

    Illustrated Journey traveling artist book

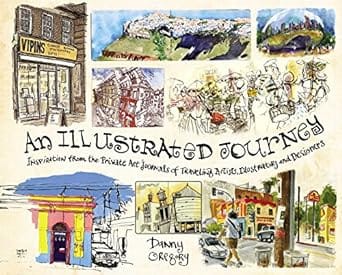
    Danny Gregory worked with 40 artists, illustrators, and designers worldwide to create An Illustrated Journey. What makes An Illustrated Journey unique as a travel book is its art-focused approach to travel. Each artist, illustrator, or designer describes how drawing changed their view of travel.  Gregory mentioned how he now plans his travel based on his artwork. Rather than it being a secondary factor, it is now his primary reason to travel.

    An Illustrated Journey is not only a travel book it’s also an art community. This travel book is a little different than the other ones on this list as it focuses on art first and its influence on travel. Gregory writes how each artist began drawing while traveling, and it “has made them more deeply in love with both.” Now, he continues, “they travel because they draw, rather than vice versa.”

    Each artist interviewed in the book gives examples of their drawings and shares their favorite places and pens and paper. They share the ways they immerse themselves in their art, whether at home or abroad. They offer tips for getting started drawing, creating the habit, and encouragement to persist for its life-changing benefits.

    An Illustrated Journey is chock full of inspiring ideas for artists. It makes a great coffee table book for flipping thru and looking at the variety of sketches and paintings from around the world. 

    This travel book is for the current artist, aspiring artist, and traveler who has never even thought of drawing in their travel journal. It’s a call to begin seeing your world thru a new lens. Its artistic spirit is contagious, and you might find yourself ordering a travel journal and pens before your next big adventure. I know I did.

    6) The Rainbow Atlas: A Guide to the World’s 500 Most Colorful Places

    Rainbow Atlas travel photography

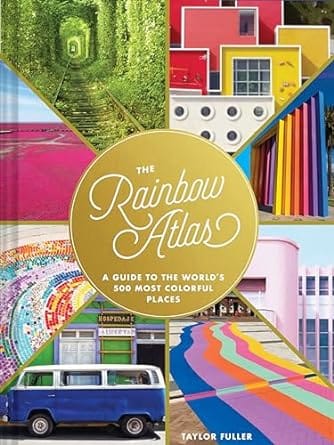
    The Rainbow Atlas: A Guide to the World’s 500 Most Colorful Places by Taylor Fuller (along with other Instagram collaborators) is full of beautiful photographs of some of the most colorful places in the World. If you want a book to inspire you as a traveler or an artist, this book will do both, and you can use it as a bucket list guide to inspire your next travel destination. 

    As a photographer, I love finding ways to create photographs that resemble paintings. This book provides plenty of inspiring material.

    As a traveler, I love seeing unique places so different from my home, and this book is full of colorful destinations I would love to see in person and explore the culture and customs of each colorful area. 

    For painters and sketch artists, this book offers inspiration for your creations as well as muse-worthy destinations. And for anyone stuck at home right now and unable to travel, it gives gorgeous, brightly-colored photos to uplift and entertains your visual senses. The Rainbow Atlas is another beautiful book worthy of your coffee table. 

    I want to make one small comment regarding the images in the book. As a photographer and traveler, I’ve visited a number of these destinations. In person, they may not be as vivid as represented in this book. This can occur due to post-editing, as well as the settings when photographed. 

    For example, colors tend to pop more on a bright sunny day with a blue sky for the backdrop vs. an overcast day when grey skies tend to mute colors. So if by chance you visit and you think, “Hey, this doesn’t look like the image in the book,” you’ll know why. However, they are still gorgeous destinations, so will you really be disappointed? I doubt it.

    Closing Thoughts on Travel Books and Artistic Inspiration

    One of the reasons I love reading books about travel is because I can’t always travel. Reading travel books and watching movies about travel adventures is my way of traveling when I can’t leave home. I wrote the article 15 Inspiring Things to Do When You Can’t Travel to help you find ways to infuse your life with travel even when you’re at home.

    Lastly, take time to explore your creative side. It is an essential part of being a human, and I think you’ll find it both relaxing and energizing. You may spark a passion you’d long forgotten or find a new one to pursue. Life is about discovery.

    I’d love to hear your thoughts if you read any of the above books and what you thought. If you have any particular ways you mix your art with travel, I’d love to hear about that as well!

    Bon Voyage!

    Note: Travelffeine is reader-supported. This post contains affiliate links. When you make a purchase using one of these affiliate links, we get paid a small commission at no extra cost to you. And as always, all opinions are our own. Thank you!

    6 Travel Books Inspiring Artists and Travelers
    6 Travel Books Artists and Travelers
  • Top 7 Things To Do at Cape Disappointment State Park

    Cape Disappointment State Park is at the southwestern tip of Washington State, where the Columbia River meets the Pacific Ocean. It is a stunning stretch of coastline that, contrary to its name, does not disappoint.

    I don’t know why it took me so long to explore this beautiful stretch of coast in my home state, but now that I’ve been there, I’m looking forward to a return trip.  In this article, I share some of the top things to do at Cape Disappointment State Park, plus tips for what to see along with info on camping and accommodations in the park in case you want to extend your visit.

    Why is it Called Cape Disappointment

    Cape Disappointment isn’t the only name given to this area. The Chinook Tribe called the region Kah’eese, and Spanish explorer Bruno de Heceta referred to the Columbia River as San Roque.  However, when British trader John Meares came to the area searching for the Columbia River, he mistakenly believed it was only a bay. So, he was “disappointed.” Therefore he named the area Cape Disappointment, and that name stuck. 

    Ironically, we now know he did find the mouth of the Columbia River.  So, had he realized this, it might have been named Cape Discovery instead.  Perhaps there’s a life lesson here.  Sometimes, we think a dream or goal attained will look a certain way; our success will be obvious. When it doesn’t look the way we believe it should, we often give up, when in fact, we are at the precipice of a great discovery. If only we’d give it a second look and not give up so quickly. 

    Maybe, or maybe I’m looking too deeply into John Meares’ disappointment. It’s interesting to see things through the lens of hindsight if only Meares could see what we see today.

    Columbia River bar

    Columbia River Meets the Pacific Ocean

    Although John Meares named Cape Disappointment due to his erroneous assessment that he did not find the Columbia River, this stretch of coast has undoubtedly led to many sailors’ disappointment.

    This is one of the most hazardous stretches of coastline in the world. Where the Columbia River meets the Pacific Ocean, it creates a “bar.” This is a huge sandbar that changes due to the waves, strong currents, and ocean tides.

    Hundreds of shipwrecks have occurred here, and even today, a Columbia River Bar Pilot is required to guide large ships through this treacherous bar crossing. It is interesting to see in person the distinct line created where these two massive bodies of water collide. 

    Read this in-depth article to learn more about how the jetties were created and the two lighthouses in the area.  This region is full of fascinating history!

    Cape Disappointment Lighthouse Waikiki Beach

    Top 7 Things to Do at Cape Disappointment

    Cape Disappointment State Park is over 2,000 acres in size. You will certainly have no shortage of things to do during your visit here. Below I list what I think are the top 7 things to do here. You can see a lot in one day, but with two nights, you’ll enjoy a more relaxed visit with time to soak it all in.

    1) Beaches

    Beaches are always at the top of my list of to-dos.  I love the water! These three beaches at Cape Disappointment State Park are my top choices for your first visit here. They are great for flying kites, building sandcastles, looking through driftwood, seeing the lighthouse, and watching the surf.

    Benson Beach

    From the main entrance to the campground area, at the three-way stop, take a left onto North Jetty Road and drive past Waikiki Beach to find the parking area for Benson Beach near the end of the road. There is also a trail to the beach near the campground amphitheater in Loop A. 

    This two-mile stretch of beach is vehicle-free.  I know that might sound strange for me to mention that, but actually, most of the Long Beach peninsula is open to vehicles.  So it’s nice to know you and your family can explore Benson Beach without worrying about a car driving up behind you.

    Benson Beach
    Benson Beach as seen from the North Head Lighthouse trail.

    Waikiki Beach

    I know you probably thought Waikiki Beach was only in Hawaii. Me too!  It turns out Washington State also has a Waikiki Beach. If you’ve ever seen the photographs of the enormous waves crashing below the Cape Disappointment lighthouse, this is the beach where those photographs were taken.  The winter storms that hit this part of the coastline are pretty epic.  You most likely won’t catch any wave action like that during the summer but visit October through March, and you’ll have a good chance of seeing this firsthand.

    If you camp in the D Loop area, it’s a short walk to Waikiki Beach. You can also drive to the parking area via North Jetty Rd. There is a lot of parking space, some with views facing the Cape Disappointment Lighthouse. Watch the sunset here while enjoying a warm cup of clam chowder.  That’s what I did! I also saw kids and families building forts out of driftwood on the beach. It looked like a great way to spend a couple of hours creating memories, and there certainly is no shortage of driftwood here!
    Waikiki Beach
    Waikiki Beach in the morning.

    Beard’s Hollow

    You may have seen Beard’s Hollow viewpoint on your drive to the main entrance of Cape Disappointment State Park. Drive south about a half-mile past the viewpoint to a turnoff and parking lot for the Beard’s Hollow trailhead. Take the paved path straight ahead of the parking lot to access Beard’s Hollow and the beach.  The path to the right leading over the wooden bridge is for the Discovery Trail. Beard’s Hollow beach allows vehicles, so please be aware as you’re dipping your toes in the surf and sand.

    Isn’t this the perfect kite for the beach?

    2) Metal Detecting

    Cape Disappointment State Park is 1 of around 50 Washington State Parks that allow metal detecting.  You’ll need to complete this form and bring your metal detector. Cape Disappointment has about 240 acres of beach area designated for metal detection.

    3) Trails

    Whether on foot or by bicycle, Cape Disappointment has a lot of great trails. 

    The following trails are accessible from the Cape Disappointment campground.

    • Mackenzie Head
      0.5 mile (roundtrip) This short trail leads you to an old WWII battery and information boards describing its historical significance. It also has a nice view of the forest and ocean. Head toward the main A Loop campground area, and you’ll find a small parking area on the left about 0.5 miles along Fort Canby Rd. 
    • Coastal Forest Loop Trail
      The entrance to this loop trail is near Cafe D. You can take a shorter 0.5-mile loop or the longer 1.5-mile loop. If you take the longer loop trail, there is a 0.1-mile trail with a view of Baker Bay. This trail is typically wet and muddy, so come prepared.
    • North Head Trail
      This 3.0 mile (roundtrip) hike starts opposite the road from the Mackenzie Head trail and ends at the North Head Lighthouse trail area.

    These hikes require driving to the trailhead parking areas:

    • Bell’s View 
      This paved 0.5 mile (roundtrip) trail takes you to beautiful views of the coast as well as passing by more WWII outposts. Learn about the history and the incredible winds that hit this coastline in this short, informative hike. 
    • Beard’s Hollow
      The trail to Beard’s Hollow is a nicely paved trail within Cape Disappointment State Park, suitable for bikes and wheelchairs.  I am not sure of the actual mileage of this trail. It was a 10-minute leisurely pace to the beach along this mostly flat trail, and I’d guess maybe 0.3 miles each way.
    • Discovery  Trail
      Starting from the North Head Lighthouse Parking area, this 7.3 mile (one-way) trail takes you to the town of Long Beach, with lots of beautiful views along the way. (You can also start this trail from the Beard’s Hollow Parking area, shortening the hike to 6.3 miles. However, I think this trail is best on a bike — see #6.)

    4) History

    In addition to seeing WWII sites along the trails, you can also visit Fort Canby and explore what’s left of this historical site. You can also tour the Lewis & Clark Interpretive Center and learn about two of our most famous explorers–Lewis and Clark! 

    The Lewis & Clark Interpretive Center is worth a stop, even if you aren’t sure about the historical exhibits.  Why? Because of the views!  The path in front of the interpretive center is one of the best spots in Cape Disappointment State Park to see where the Columbia River meets the Pacific Ocean.  It also offers a much closer view of the Cape Disappointment Lighthouse. 

    Fort Canby
    Fort Canby

    I think we stood along the viewpoint area in front of the Lewis and Clark center for at least 30 minutes, just seeing what we could see.  We watched double-crested cormorants as they searched for food, diving from the cliffs to the water and back again. Then we counted the 100’s of boats just past the line in the water created by the convergence of the Columbia River and the Pacific Ocean. 

    If that weren’t enough, though, the Interpretive Center is full of fascinating history and facts about lighthouses and early explorers.  The upper floor is free and worth taking a look around, and it has huge windows with views of the lighthouse and ocean.  

    Additionally, you can pay $5 to see the entire exhibit, which starts on the basement level. There is a wonderful video about Lewis & Clark’s incredible 4,000+ mile journey to come to their stopping point at Cape Disappointment.  I heard a small boy exclaim to his parent as he watched the video, “That’s here, that’s where we are!”  I saw history made real to him as he watched the video about Lewis & Clark’s journey.  That’s what it’s all about!

    Lewis & Clark Interpretive Center

    244 Robert Gray Drive Ilwaco, WA
    Ilwaco, WA 98624-8624

    Phone: (360) 642-3029

    5) Lighthouses

    Cape Disappointment State Park has two lighthouses within its borders.  This stretch of coastline was so dangerous they built not one but two lighthouses! I love looking at lighthouses. Their architecture and beautiful locations never disappoint (see what I did there). 

    During my visit, I learned that lighthouses were the original GPS. They not only emit light to keep ships from running ashore, but each one is uniquely painted, and they each emit a specific light pattern.  Sailors use these two distinguishing features to help them know where along the ocean they were. Pretty cool, right!

    Cape Disappointment Lighthouse 

    This is the lighthouse you see in the photos taken from Waikiki Beach.  It gets the huge waves crashing at its base during the winter. You can no longer access the lighthouse, but you can see it from both Waikiki Beach and in front of the Lewis & Clark Interpretive Center.

    North Head Lighthouse 

    Constructed in 1898 after continued shipwrecks along this rocky coast demonstrated the need for a second lighthouse.  The North Head Lighthouse is still used to aid in navigation today. It was currently closed for tours during my visit, but I’m optimistic it will reopen to the public again soon. The paved trail to the lighthouse is a beautiful walk, and you pass by the guesthouse for the Lighthouse Keeper.  You can stay here by reserving it online through the WA State Parks website.  Now wouldn’t that be a unique experience!

    North Head Lighthouse Cape Disappointment

    6) Cycling

    There are plenty of paved roads within the main campground areas for families to enjoy biking in a low-traffic area.  However, for a real adventure, consider cycling the Discovery Trail.  

    The Discovery Trail is a mostly paved 8.5 mile (one-way) trail that stretches from Cape Disappointment State Park to the town of Long Beach!  There are viewpoints along the route, historical markers, and even art sculptures to enjoy.  It is a beautiful trail, and even if you don’t feel like making the entire 16-mile round trip consider cycling at least a portion of the trail.  Here is a trail map that gives you an overview of the Discovery Trail route.

    Start the trail from the North Head Lighthouse parking area and ride toward Long Beach as far as you feel like, or if you have someone to drop you off, you could do a one-way shuttle. You could start in Long Beach and then cycle south back to Cape Disappointment State Park. No matter what you choose, you’ll enjoy this beautiful trail!

    crab on Beard's Hollow Beach

    7) Fishing

    You can go fishing and boating at Cape Disappointment State Park.  Although, if it were me, I think I’d try my hand at crabbing.  There were so many Dungeness crabs washed onshore here it made me hungry! 

    Fishing from the shore is allowed, but you can also bring a boat if you have your own. The Baker Bay Boat Launch is next to Cafe “D,” just across from the park’s main entrance. 

    Make sure to have all the appropriate licensing required for boating and fishing. Plus, you’ll want to check with the Washington Department of Fish & Wildlife to see what is currently open and allowed.  Some years the biotoxin levels close fishing here. 

    North Head Lighthouse Keeper's House

    Accommodations at Cape Disappointment

    Camping

    The best tent campsites are sites 1-180 toward the rear of the park.  There are a few tent sites in the D Loop near the main entrance, but these have less privacy and more road noise.  We ended up staying in one of these and could hear the loud ship horns and road traffic throughout the night.  There are also a lot of RV campsites, including those with full hookups.

    Rentals

    In addition to campsites, Cape Disappointment State Park also has cabinsyurts, and two vacation houses for rent. 

    Getting to Cape Disappointment State Park

    Cape Disappointment is a little over a 3-hour drive from Seattle, Washington, and a 2-hour drive from Portland, Oregon.

    You’ll either take Hwy 101-S from the Seattle area or Hwy 101-N if coming from the south/Oregon.

    For some reason, Google directions take you to the general area of Cape Disappointment State Park rather than to the entrance of the park.  So, the easiest way to get to the campground entrance and park’s pay station for Cape Disappointment State Park is to navigate to Cafe “D,” located directly across from the park’s main entrance.

    Cafe “D” Address: 243 Robert Gray Dr, Ilwaco, WA 98624

    Besides being a waypoint to the entrance of the park, Cafe “D” also offers Wi-Fi, miscellaneous camping supplies you may have forgotten, as well as ice cream cones and coffee.

    Cape Disappointment Sign

    ADA Accessibility

    The following had paved trails and parking areas suitable for walkers and wheelchairs.

    • The North Head Lighthouse trail
    • Lewis & Clark Interpretive Center and viewing area that looks at Cape Disappointment Lighthouse
    • Bell’s View
    • Beard’s Hollow (the paved trail ends at the beach)
    • Beard’s Hollow Viewpoint (parking area with an overlook)
    North Head Lighthouse Trail

    Restaurants to Try Near Cape Disappointment

    The Chowder Stop (Makes great chowder and can easily pack it to go too.)

    The Chowder Stop
    203 Bolstad W, Long Beach, WA 98631

    42nd Street Cafe and Bistro (Amazing breakfasts here, plus they serve beignets!)

    42nd Street Cafe
    4201 Pacific Way, Seaview, WA 98644

    The DEPOT Restaurant (If you eat out only once, make it The DEPOT Restaurant. Reservations required, but they can often squeeze you in same day if you call ahead.)

    The DEPOT Restaurant
    1208 38th Pl, Seaview, WA 98644

    Roots Drive-Thru Coffee (This is small coffee shop is in Ilwaco just outside the park boundary. It’s a quick drive in the morning to get your coffee fix!)

    Roots Coffee
    111 First Ave N, Ilwaco, WA 98624

    Weather at Cape Disappointment

    The weather at Cape Disappointment could be the best reason to call it such a name. It is the stormiest stretch of coastline, with hurricane-force winds during the winter and unrelenting rain. If you plan to tent camp here, I highly recommend you look ahead to the weather forecast before deciding to come. 

    I do not enjoy tent camping in the rain.  Rain and wind at Cape Disappointment can make tent camping miserable or, should I say, “disappointing.” You may decide a cabin or hotel in town would be better if your forecast appears to be stormy and grey.

    I used my new Coleman 4-Person Pop-Up Tent, and it did fine with the light rain we received early in the morning, however anything more, and we’d have had wet gear, I think. So plan to spray your tent ahead of time with waterproofing spray and pack some waterproof jackets for exploring.

    Sunset by Cape Disappointment Lighthouse

    Final Thoughts

    I loved visiting Cape Disappointment State Park! There is so much to do along the Long Beach Peninsula outside the park too. Washington State has some of the most beautiful coastline. I enjoy every opportunity I get to explore it.  I hope you will get a chance to visit here soon. Let me know if you have any questions regarding this area or if there’s a favorite activity here that I missed. 

    Here are a few articles that might interest you:


    Note: Travelffeine is reader-supported. This post contains affiliate links. When you make a purchase using one of these affiliate links, we get paid a small commission at no extra cost to you. And as always, all opinions are our own. Thank you!


    Happy Exploring!

    Cape Disappointment State Park
    North Head Lighthouse at Cape Disappointment
  • Hiking to the Fire Wave at Valley of Fire

    The Fire Wave at Nevada’s Valley of Fire State Park is a gorgeous sandstone formation. With its swirling patterns of reds, pinks, and white, the Fire Wave makes for beautiful landscape photography.  In less than a 1-hour drive from Las Vegas, you enter a photographer’s paradise. Plus, for those looking for an alternative to “The Wave” in Utah, the Fire Wave at Valley of Fire makes a great choice! No special lotto is required. 

    The Fire Wave trail was one of my favorites during my day trip to Valley of Fire State Park. Below I share my experience hiking to the Fire Wave, plus information on an alternate route I discovered while hiking to the Pastel Canyon. 

    Getting to the Fire Wave Trailhead

    From Las Vegas, take I-15 N to Exit 75. After exiting, follow signs for Valley of Fire. It is about another 12 miles along the Valley of Fire Highway before you reach the entrance station for the park.  It takes about 1-hour to drive there from Las Vegas.

    After entering the park, and paying the park entrance fee, continue straight for about 2.5 miles. Make a left onto Mouse’s Tank Rd (you’ll see signs for the Visitor Center and White Domes). Continue up Mouse’s Tank Road for almost 5 miles before coming to Parking Lot 3 (P3 on the map). 

    The trailhead starts from the parking area on the right when heading north toward White Domes. Park in the gravel parking lot on the righthand side of the road. If that lot is full, you can check the parking lot on the opposite side of the road.

    About the Fire Wave Trail

    Trail Length: 1.5 miles (roundtrip)

    Elevation Gain: ~ 236 feet

    Trail Difficulty Rating: Easy

    Features: Colorful Sandstone and limestone, swirling wave-like sandstone rock formation, desert landscape and native plants

    Entrance Fee: There is a $15 day-use park fee per vehicle ($10 for NV plates)

    Restrooms: There are no restrooms at the trailhead. You can stop at the Visitor Center on the way to the trail.

    Open Hours: Sunrise to Sunset

    What to Bring

    Lots of water! This trail has only a small portion of shade at the beginning of the hike when you descend the sandy trail. After that, you are completely exposed to the sun for the rest of the hike. The Park rangers have closed this hike during extreme temperatures due to many hikers needing to be rescued for heat-related illnesses.

    I own a collapsible water bottle like the one below, and it’s great for traveling! You can easily stow it when you don’t need to keep water in it, and they’re great to bring to the airport and then fill up at the water fountain.

    Sunscreen. Make sure to apply sunscreen before the hike. Although the hike itself probably only takes about 1-hour, you are totally exposed to the sun. 

    Sunglasses and hat. Don’t forget your sunglasses. They are sunscreen for your eyes.  Also, a hat or some form of shade for your head is a good idea.

    Trekking Poles: If you’re unsteady on uneven ground, you may want to bring some hiking poles. 

    Overview of the Fire Wave Trail

    The trail to the Fire Wave is mostly flat. The first part of the trail has an initial descent, but after that, it is mostly a flat, rocky, and sandy trail. The trail is well marked in the beginning. However, after your initial descent, you’ll want to continue straight and look for the few trail markers scattered along the rocky stretch leading to the Fire Wave.  Chances are you won’t be alone, so you can also look ahead for other hikers.

    hiking trail marker

    Hiking to the Fire Wave

    The start of the trail is on the far side of the gravel parking area. It is a sandy trail leading you toward these giant red rocks rising above the desert. This rock formation is a guide for you to know which side of the road the trail starts on and guide you on your return hike to the parking lot.

    The trail curves around to the right of the giant red formation, and you follow it down a hill before it curves back around and to the right. From this point on, it is pretty much a straight hike to the Fire Wave.

    Start of Fire Wave Trail

    Follow the striped sandstone that makes up most of the trail. You’ll see a few trail markers scattered along this way, but mostly I looked for the direction other hikers were taking to keep me on track. 

    beautiful red rock near fire wave - Copy

    In about 20-minutes from the start of the trail, you’ll arrive at The Fire Wave. It is beautiful to see it sweeping before you and swirling around like a giant stone wave frozen in time. 

    You can hike down onto the Fire Wave or climb to the top for a better vantage point. You’ll probably need to get in line to do this, but be patient, and you’ll get your chance. Most people come and find a place to sit along the wave, admiring this unique and beautiful landscape. The red, pink, and white hues pop against the blue sky.  Most won’t stay too long as the sun is unrelenting here in the desert. 

    Hydrate for the Return Hike

    After enjoying the view and taking as many photo ops as you wish, head back toward those huge red rocks that mark the beginning of the trail. 

    If you’re like me, you’ll be surprised at how hot it gets and how an easy hike quickly becomes more difficult due to the heat. Drink some water, and then drink some more! It’s that final ascent where you’ll need to push yourself, but then you can return to the air-conditioned car and continue to more gorgeous hikes during your day at Valley of Fire State Park. 

    The Fire Wave is one of the most popular hikes, but make sure to take time for at least one more. My pick would be the White Domes Loop Trail. 

    looking back over trail

    Pastel Canyon – An Alternate Route to the Fire Wave

    Although I think the main trailhead is the best way to hike to the Fire Wave, there is one other way you can reach it. I discovered it when I was hiking to the Pastel Canyon.  This short, unmarked trail takes you through a small canyon with striped rocks colored in pastel pinks and yellows. 

    If you continue along the wash that winds through the small canyon, you’ll soon come to a bend where if you look to your left, you’ll most likely see people standing around on top of the Fire Wave! Yep, with only about a 10-minute walk from the road through the Pastel Canyon and wash, you will arrive on the opposite side of the Fire Wave.  You can walk over and up the Fire Wave, where you’ll then see the large red rocks in the far distance that mark the start of the main trailhead.

    Outer Edge of Fire Wave in the distance
    You can see the edges of the Fire Wave in the distance.

    If you can’t find parking at the Fire Wave trailhead or prefer the flattest and shortest route, you might look to see if there is any parking at the Pastel Canyon.  Just note there is no official parking here, only a small pull-out big enough for around 5-6 cars. 

    The Pastel Canyon is worth the quick stop, even if you don’t hike to the Fire Wave from here.  It only takes about 10-minutes total to walk to the small canyon and admire its beautiful hues. There are no signs, though, so you’ll need to add it to your Google Maps. It is about 4 miles up the Mouse’s Tank Road and before you arrive at P3.

    Final Thoughts on Planning Your Visit

    There are no restaurants or food amenities inside Valley of Fire State Park. Make sure to plan ahead and bring lots of water, at least 1-gallon per person, for your day at Valley of Fire State Park. You will also want to bring snacks and a picnic lunch.  Please read my article on how to plan the perfect day trip to Valley of Fire and get tips on camping here as well as other hikes to do.

    Have a “rocking” day! (Sorry just had to throw that pun in there.)

    Note: This post contains affiliate links. When you make a purchase using one of these affiliate links, we get paid a small commission at no extra cost to you.

  • Valley of Fire State Park: A Perfect Day Trip From Las Vegas

    Valley of Fire State Park is magnificent with its red and pink striped rock formations.  It is home to the Fire Wave, pastel-colored slot canyon, Elephant Rock, mountain sheep, and other plants and animals. It’s full of historical and cultural history too! It has many hiking options to choose from as well as a gorgeous scenic drive.

    Valley of Fire State Park makes for a perfect day trip from Las Vegas! Although one could easily spend a couple of days here, in this article, I share my tips for what to see and how to prepare when you only have one day at Valley of Fire.

    About Valley of Fire State Park

    Valley of Fire State Park spans almost 42,000 acres. It features beautiful red Aztec sandstone, multiple types of limestone, and shale. It is also home to a variety of wildlife and desert plants. It is home to roadrunners, lizards, coyotes, foxes, and desert tortoises, to name just a few of the creatures that live here .  Valley of Fire State Park is also home to mountain sheep. I saw both rams and female mountain sheep during my visit.  They are so majestic as they climb with ease on what appears to me to be sheer rock faces.

    Valley of Fire History

    According to information in the park, the area was once inhabited by the Basket Maker people and later the Anasazi Pueblo farmers.  They have found examples of rock art and other evidence suggesting they lived here from 300 BC to 1150 AD.  Additionally, the park has well-preserved petroglyphs dating back almost 4,000 years!

    Park Fees

    Valley of Fire is a part of Nevada’s State Parks system.  If you have a National Parks Pass that will not work here at Valley of Fire.  The entrance fee for vehicles with non-Nevada plates is $15 per vehicle. For vehicles with Nevada plates, it is $10.

    Hours of Operation

    Open daily from sunrise to sunset. 24-hour access is given to those camping at one of the campgrounds inside the park.

    Overlook near White Domes trail

    Park Amenities

    Camping

    There are two campgrounds at Valley of Fire State Park. With only a total of 72 campsites, these campgrounds fill up fast during the peak seasons.

    In addition to the entrance fee, there is a per night camping fee.  It is $25/night for non-NV vehicles and $20/night for Nevada vehicles. RV camping with utility hookups costs an additional $10/night.

    If you can get a campsite, I highly recommend it! You’ll have more time to explore the park, plus you get to experience sunrise and sunset and see how the sun’s light illuminates the fiery red rocks the park is named for.

    All campsites are first-come-first-served, so you need to plan to get there early to get a spot! I arrived around 10 a.m., thinking I was early enough. Boy, was I wrong!  There was already a line to enter the park, and the ranger at the entrance station told me the camping spots were full.  

    Tip: You can also camp for free on Bureau of Land Management (BLM) land located outside the park boundaries, you will see RVs parked on the BLM land as you drive toward the park along the Valley of Fire Hwy after exiting off I-15 N.

    When I visited Valley of Fire, I was on a road trip to see some Southwest National Parks. While doing this, I tried SUV camping for the first time.  I considered camping on the BLM land outside of Valley of Fire, however, due to the fauna in the desert, there is next to no privacy, and since BLM land has no amenities like a bathroom, I opted for staying in Las Vegas instead.

    White Domes Trailhead
    White Domes Trailhead

    Wi-Fi

    Valley of Fire is one of the few parks I’ve found with Wi-Fi for purchase. I did not use it during my visit, so I can’t say how well it works. Cell data is very spotty inside the park, so if you plan to stay here longer than one day, you may find it useful to pay for one of their Wi-Fi plans.

    Picnic Areas

    There are no restaurants or food amenities within the park, so make sure to bring picnic supplies for your day trip to Valley of Fire State Park. There are small briquette BBQ grills at the picnic areas, so you can BBQ  while enjoying the view. Peanut butter and jelly sandwiches are always a good go-to option for hiking that doesn’t require a cooler.  

    Bring lots of water, Gatorade, and drinks for your day trip here. I tend to go with what’s easy.  So I stick with PB & J sandwiches or bring meat and cheese snackables.  Snack bars are also nice to have during your hikes, and make sure to hydrate! This is especially important if you visit during the summer as it gets hot here!  You are in the desert, so the heat brings its own element of challenge to hikes that would be easier if not for the heat.

    Tip: One of the best picnic areas I found in the park is the Seven Sisters picnic area. It has good shade, BBQ grills, and great views!

    Best Time of the Year to Visit Valley of Fire

    Spring: I visited in late spring, and it was beautiful! The morning air was still cool, but by the afternoon, the temps were in the upper 80’s. When you’re hiking in the open with no shade, even springtime heat can begin to take its toll.

    Summer: This is probably the busiest time to visit Valley of Fire State Park. It is also the hottest time of the year, with highs between 100 degrees and even sometimes reaching as hot as 120 degrees F! If you visit in summer, plan to get an earlier start than normal and bring lots of water and sunscreen!

    Fall: Temperatures in the fall can range anywhere from the mid-60s to the low 90’s.  It’s closer to summer temperatures in the Pacific Northwest.  

    Winter: Temperatures can get as low as freezing during the winter, but typically the daytime temps are mild and are often in the mid-70s.

    Make sure to pack lots of water and sunscreen!

    Welcome to Las Vegas Sign

    Getting to Valley of Fire State Park

    Valley of Fire State Park is only a 1-hour drive from Las Vegas.  It is about 55 miles outside of Las Vegas off Interstate 15. Take I-15 N to Exit 75. After exiting, follow signs for Valley of Fire. It is about another 12 miles along the Valley of Fire Highway before you reach the entrance station for the park.  

    If you’re staying closer to Henderson, NV, you can also access Valley of Fire via Northshore Road (highway 167) through the Lake Mead National Recreation Area. However, be aware that there is an additional National Park Recreation Fee of $25 per vehicle.  The fee gives you access to the Lake Mead National Recreation Area for 7 consecutive days.  It is a separate fee from the entrance fee at Valley of Fire State Park.

    Two Entrance Stations:

    If you drive up I-15, you will arrive via the West Entrance Station.  There are maps and restrooms here.  If you come before the pay station opens, there are self-pay envelopes you can complete in the little parking area to the right.  Make sure to have exact cash if paying using the envelopes.

    If you come via Lake Mead, then you’ll enter the East Entrance Station.  This station is closest to Elephant Rock.  It also has maps and restrooms in the parking area by the entrance.

    Giant Red Rocks that Mark the beginning of the Fire Wave trail

    Things to See During Your Visit

    There are more stops and hikes to do at Valley of Fire than you will want to do with only one day to spend here.  Below is a list of the main stops within the park. I also provide a suggested one-day itinerary below, as well as a Google Maps itinerary you can download for your trip.  Make sure to download an offline map of the area before your drive to Valley of Fire.

    • Beehives (Quick photo stop from the parking area. ~5 min)
    • Atlatl Rock (Short walk and some stairs to climb to see these well-preserved petroglyphs. ~ 15 minutes)
    • Visitor Center/Ranger Station (look up times) (good for info and additional hikes for longer stays)
    • Mouse’s Tank Trail (0.75-mile roundtrip, sandy trail with petroglyphs ~ 1 hour)
    • Rainbow Vista (This 1-mile hike is along a sandy trail, best suited for the coolest part of the day as there is also no shade.)
    • Fire Wave (1.5 miles round trip to photogenic rock wave)
    • Pastel Canyon (0.25-mile unmarked trail through the short canyon to see pastel striped rocks. ~10 minutes)
    • White Domes (1.25-mile loop. Scenic loop trail where movies like Star Trek Generations and The Professionals were filmed. There’s also a picnic area here.)
    • Seven Sisters (Great picnic area)
    • Elephant Rock (quick stop by East Entrance)

    Scenic Drive: Even if you’re unable to do the hikes listed above, you make sure to drive Mouse’s Tank road (later becomes White Domes Road) for an incredibly scenic drive. It is gorgeous driving both up and back down, and there’s a high chance you’ll also see mountain sheep during your drive.

    In the one-day itinerary below, I share what I think are the best stops for your first trip here.  Remember, depending on when you visit, the weather may be very hot.   You might be surprised by how the heat affects your stamina, especially if you come from a milder non-desert area.  I realized this after visiting Joshua Tree and Death Valley the week before I came to Valley of Fire. I found I could not pack as much into my day as I might in a cooler environment.

    Suggested One-Day Itinerary to Valley of Fire State Park

    Try leaving Las Vegas by 8:00 a.m. or before.  The earlier you get there, the better your daytime heat and also the more time you’ll have before the crowds come.  Make sure to bring your picnic lunch, snacks, water, and other drinks to stay hydrated and fueled for your hiking and sightseeing.  Also bring extra sunscreen and a sunhat of some sort is also a good idea.  This itinerary assumes you’re starting at the West Entrance Station.

    Arriving at Valley of Fire State Park

    Arrive at Valley of Fire State Park by 9:00 a.m., pay the entrance fee, and make the quick stop for a photo of the beehive rocks.

    Beehives

    This is a quick photo opportunity of some rocks that look like, you guessed it, beehives! It’s a quick stop on the right side of the road. Unless you’re really running behind, you might as well stop. Probably only 5-minutes to hop out and snap a few photos and hop back in the car!

    Fire Wave
    The Fire Wave at Valley of Fire State Park.

    Valley of Fire Visitor Center

    After leaving the Beehives, continue straight until you see the (left) turn for the Visitor Center and Mouse’s Tank Road.  The Visitor Center is a good place to stop and use the restroom and learn more about the desert environment at Valley of Fire State Park. 

    After your pit stop at the Visitor Center, continue up Mouse’s Tank Road. This is the most scenic drive in the park, well worth the drive alone! 

    The Fire Wave – 1.5 miles roundtrip

    You’ll pass several stops as you make your way up to Parking Lot 3 (P3). The parking for the Fire Wave is on the right side of the road. The trail also starts on the right side. The Fire Wave is the longest hike on this itinerary, and it is also the most popular. I recommend getting it out of the way while it is cooler and before the crowds come. This hike will not disappoint! Plan 1-2 hours for this stop.

    Sometimes during the summer, they close this trail due to a high number of heat-related emergency calls. The desert is no joke, so make sure always to have plenty of water with you and do your best to stay out of the sun during the hottest part of the day.

    White Domes – 1.25-mile loop

    After your hike to the Fire Wave, continue up Mouse’s Tank Road, and soon it turns into White Domes Road. You’ll follow the road all the way to the end, where you’ll find parking and a picnic area for the White Domes trail area. You may want to take a snack break or have a picnic here either before or after completing the White Domes loop trail.

    The return loop makes a gradual ascent back and around to the parking area. The steepest part of the hike is that initial descent. This hike is a beautiful one, don’t let the steep sandy descent stop you as the trail levels out at the bottom, and you get a nice cool slot canyon to hike through before popping back out onto the trail. This stop takes 2-3 hours.

    Picnic Stop

    You can either have your picnic lunch at the White Domes picnic area or hop back in the car for what I think is the best picnic spot in Valley of Fire. You’ll drive back down to the main road (near the Visitor Center). At the “T” intersection for the main road, make a left, then drive about a mile where you’ll come to the Seven Sisters picnic area.  This picnic area has good shade, large spaces, and BBQ grills too! Make sure to look for mountain sheep along your drive. 

    Elephant Rock
    Elephant Rock

    Elephant Rock

    After you’ve had lunch, continue along the main road toward the park’s east entrance. You’ll see a parking area by the entrance station. Park here for the short walk back to Elephant Rock. It’s a 0.3-mile hike there and back from the parking area to Elephant Rock.  You’ll follow the trail that goes alongside the highway. There is also a longer 1.2-mile loop that takes you up and around Elephant Rock. Please do not climb on the rock itself.  It is fragile, and they want to preserve this as long as possible for future visitors to see.

    Atlatl Rock

    After visiting Elephant Rock, return the way you came, heading back toward the West Entrance. It’s about 5.5 miles from Elephant Rock to the Atlatl Rock Parking lot. From the road, you can see Atlatl Rock with its staircase rising above the desert.

     The petroglyphs at Atlatl Rock date back to almost 4,000 years and are so well preserved they are worth this short stop. If it’s busy, you may need to wait in line to go up the stairs to see the petroglyphs. 

    By this time, you will most likely be ready to head back to Las Vegas to get some dinner and enjoy a relaxing evening in the city and possibly an In-N-Out burger on the way back.

    With Extra Time

    If you have time or want to add to your one-day itinerary, then you might consider adding one of the following short hikes to your itinerary.

    Mouse’s Tank Trail, 0.75 miles. This is a sandy trail with no shade. It features more ancient petroglyphs.

    Rainbow Vista – 1-mile hike, also sandy and hot, leads to a viewpoint of the rocky terrain. I do not recommend doing this during the hottest part of the day. It’s not worth it.

    An optional 10-min stop on the way to the Fire Wave: The Pastel Canyon

    This is an optional quick stop you can add to your one-day itinerary on the way to the Fire Wave. It only takes about 10-minutes to walk to this short but beautiful pastel-colored canyon and back again.  There is no designated parking lot and only a small pullout on the right side of the road that fits 2-3 cars.  You begin hiking on the right, following the rocky wash to a very short canyon with beautiful striped rocks of varying hues of reds and pinks. 

    Please read my article on hiking to the Fire Wave for tips on visiting it from this trail. (5-10 minute stop at Pastel Canyon unless using this as an alternate route to the Fire Wave)


    Now to get that In-N-Out Burger…

  • Coleman 4-Person Pop-Up Tent Gear Review

    Imagine driving up to your campsite, getting out of your vehicle, and setting up your tent in less than a 1-minute.  You are now free to go about your day and enjoy your campsite and its surroundings.  Sounds too good to be true, right?  Well, actually, it’s totally possible with the Coleman 4-Person Pop-up Tent!  It’s so easy you can have your kids set it up and still be done in a minute!  Plus, it’s entertaining when you camp with a group and your tent is up in less than a minute, and you get to sit there watching them spend 10 minutes setting theirs up.  That’s worth the purchase of the tent all on its own!

    Okay, jokes aside, as with every purchase, there are pros and cons. I’ll discuss what led me to purchase this tent and what I like and don’t like about it.  If you’re in the market for a new tent, then continue reading to decide if the Coleman 4-Person Pop-up Tent is right for you.

    My History of Tent Purchases

    Over the years, I’ve gone through a few tents. I started with a cheap dome tent that was probably rated for 4 people but really fit two comfortably. Then I upgraded to a Wenger 4-person tent with shoe ports, little corner pockets, and a place to hang a lantern in the center.  It also had better airflow than my cheaper dome tent.

    Bigger Must Be Better

    One day I decided it might be nice to have a tent you could stand up in, perhaps even use cots in and sleep more than two people. So I purchased a large 6-person tent, and we began using it for our annual camping trips with the nieces and nephews. My hubby and I tried the tent for when it was just us, and although it is nice to be able to stand up in the tent and sleep on cots, the time it took to set it up coupled with the amount of time we actually spent inside the tent didn’t make it worth it for us. For a large tent, it’s easy enough to set up, and it works great when we have a large group. However, for the two of us, it just wasn’t the right fit.

    Bitten by the Backpacking Bug

    Soon though, I got the backpacking bug, and my hubby and I purchased an REI Passage 2 tent.  After backpacking the Northern Loop at Mount Rainier, we never did any serious backpacking after that; although there are still plans to do a portion of the PCT, they have yet to materialize.  Even so, we found that we loved our new REI Passage 2 tent.  It is easy to set up with only two poles. It takes about 5 minutes to have it up and ready to go. Because of this, we continued to use our backpacking tent for our regular camping needs for almost a decade.  It also works great when we’re off-roading on our motorcycles.

    Because we often camp with groups, it also allowed us to fit our tent and the larger group tents into one campsite as ours had such a small footprint.  Then this year, I decided it would be nice to have a little more space. Space to keep our bags with us in the tent and a larger area for sleeping.  However, I still wanted something quick and easy to set up. So as I began my research, I came across the Coleman 4-Person Pop-up Tent. 

    The Coleman 4-Person Pop-up Tent

    I started reading about the Coleman 4-Person Pop-up Tent, and to be honest pop-up tents make me think of something you bring to the beach.  It sounded a little too good to be true that I’d actually camp in one.

    However, the promise of an instantaneous setup lured me in.  Plus, at less than $80, it seemed like a risk I was willing to make. So I went ahead and ordered it for an upcoming camping trip with friends.  When it arrived, I was anxious to see it in action, so I opened it inside the house.  Sure enough, within about 10 seconds, the tent was up and ready to crawl into!

    It was a lot of fun when we went camping with our friends because not only were we set up in under a minute, but when it came time to take down the tent, it only took about 2-minutes, thus leaving us with plenty of time to give our good-natured friends some fun (albeit childish) “haha, look who’s done with their tent first” comments. It’s the little pleasures in life.

    Coleman 4-Person Pop-up Tent Dimensions

     According to Coleman, the tent dimensions are as follows:

    • 9 ft. 2 in. x 6 ft. 6 in.
    • 3 ft. 4 in. center height

    You can fit a queen size air mattress inside the tent.  They show four people sleeping in it width-wise.  I am a little under 5’9, and I can sleep width-wise. However, if you’re 6′ and above, your head and feet would be hitting the tent. That is unless you’re able to lie completely still while sleeping.  I don’t know anyone like that, though, so I recommend lying lengthwise.  That is how my hubby and I used it, and that gives you plenty of space plus lots of room for your gear with only two people.

    You could also sleep to “average-sized” adults and two kids comfortably.  I think four adults under 6 ft could, of course, make it work, but it’ll be cozy! Watch my YouTube video for more information on the size and shape.

    Pros and Cons of the Coleman 4-Person Pop-Up Tent

    Coleman 4-Person Pop-up Tent

    After camping in the Coleman 4-Person Pop-up Tent, these are some of the pros and cons I’ve discovered.

    Easy Set-up

    This is by far the biggest “pro” for purchasing a pop-up tent. It takes less than 30-seconds to unzip the tent case, remove the straps, and voila! The tent is ready to go!

    Fast Storage

    Initially, putting away a pop-up tent can be challenging for most people. I know it was for me. You feel like you’re wrestling some unwieldy creature that keeps trying to get away from you. However, with practice putting your pop-up tent away should only take 1-2 minutes to do.

    The Downside

    Well, putting it away, as I just mentioned, can be a challenge. However, probably the main downside for some would be the shape of the pop-up tent. Most tents come in a long round shape that makes them good for backpacking or shoving into tight spaces in the back of the car. The Coleman 4-Person Pop-up Tent packs into a large disc shape. This makes them pretty much a no-go for backpacking. There is a smaller Coleman 2-Person Pop-up Tent option that might work for this or cycling, but again, I think it would be hard to pack due to the disc shape. 

    Packing the Car

    It also means you need to rethink how you pack your car.  Normally I might put the tent in first with some of my longer items like camping chairs. However, due to its disc shape, I ended up putting it in last and laying it on top of my other camping gear.  Also, if you have a small trunk space, you might have to carry it behind your front seats as it’s possible the disk might not fit in your trunk.  You’ll want to measure this ahead of time to make sure.

    Summer to Early Fall: Seasonal Use

    This is not a 4-season tent, probably not even a 3-season tent, and although I have yet to try it in the rain, I doubt it would do well in heavy rain.  However, for a summer camping experience, it works great.  

    We first camped in our Coleman 4-Person Pop-up Tent in late May on the Olympic Coast. We were sleeping on a thin backpacking-style air mattress and a blanket underneath for a layer between us and the cold ground. It was cold and damp in the morning and evenings, and the sides of the tent felt a little wet from dew.  We, however, stayed dry and warm in our sleeping bags. 

    Tent Footprint

    The Coleman 4-Person Pop-up Tent does not come with its own footprint. They also don’t appear to sell one specifically made for it.  I purchased a cheap tarp that was roughly the same dimensions as the tent floor. Make sure you don’t purchase one that is too big. Otherwise, it will collect water.  I learned that lesson early on as a kid.

    Coleman 4-Person Pop-up Tent Disc

    Review Summary for the Coleman 4-Person Pop-Up Tent

    So, to summarize this review. I really enjoy the simplicity of the Coleman 4-Person Pop-up Tent. It makes car camping so easy! If you’re looking for a tent for summer camping and maybe late spring and early fall, then the Coleman 4-Person Pop-Up Tent is worth considering. 

    You can purchase the tent by click on this link or the photo below.

    We will continue to use ours for weekend car camping trips when we want a little more space than our tiny backpacking tent. I think we’ll also bring it for road trips when we’re only camping for a night or two. It will make set-up and takedown much quicker when we need to get back on the road.

    I recommend spraying the tent down with Scotch Guard or some other type of waterproofing spray.  I always do this with outdoor gear and wouldn’t even consider camping in the rain in this tent without it. 

    All in all, I am happy with my purchase. If you have any questions regarding this tent or the camping gear I use, please let me know. Also, if you’ve used this tent or the 2-person version, I’d love to hear what you think about it.

    Happy Camping!

    Note: This post contains affiliate links. When you make a purchase using one of these affiliate links, we get paid a small commission at no extra cost to you.

  • Coffee Memories: Road Trips and Coffee

    My husband was reading my post “Bucket Lists & Good Friends,” and he paused on the picture of my friend and me in front of our tent and said, “I like this photo!” Then he says, “Hey, your shirt says coffee on it!” I said: “What? That’s funny! That was my nightshirt.” And then we both started laughing and talking about my obsession with coffee and how it’s been going on a lot longer than we both realized.

    After he pointed out my coffee shirt, it triggered a memory from that road trip that I hadn’t thought about in a long time. This memory only further confirmed my love of coffee. As if there was any doubt.

    U.S.A. Road Trip Plans: A Short Overview

    Recently graduated from high school, my friend and I began planning a road trip around the U.S. We made a huge list of all the places we’d like to see, and we used books to do it!  I know, how archaic! This was long before Google and still a few years away from Mapquest (does anyone still use Mapquest?) 

    We bought a road atlas and mapped out all the stops we’d make along our journey.  Our trip took a life of its own, and soon we had a route mapped out that took us around the entire country!  We decided we could save up to take a little over 2 months off to make this happen. Thus the adventure began.

    Road Trip Car Coffee Maker – Important Decisions

    Before leaving on our road trip, I purchased a coffee maker that allowed you to brew your coffee in the car using the car’s adapter/cigarette lighter.  Hey, I was going on a 2-month road trip, on a budget, with a friend that doesn’t drink coffee! (I know it’s a sore point in our relationship, but I try to overlook it.) Going without coffee was not an option, and with my limited budget, I didn’t think I could afford to purchase one every day.  Thus my purchase of a portable coffee maker.  It looked a lot like this one. Now of course I would have brought my Aeropress but then I would have missed out on creating this “fun” memory.

    Starting Out

    Our route had us working our way through Washington and along the Oregon coast before continuing down along the California coastline. In a matter of a couple of days, we were in California. This meant a lot of driving and very little sleep.  We ended up getting a hotel in Crescent City after sleeping in the car the night before and driving on very little sleep. This hotel was also our first encounter with a cockroach.  Needless to say, I don’t think I slept very well here either.

    So after leaving Crescent City, we drove for probably less than an hour before discovering beachside camping near the small town of Orick, California. Warm sunshine and waves beckoned us to stop and enjoy it!

    We spontaneously pulled over and decided to camp here.  The stretch of beach used to be open to camping. There weren’t any assigned spots. You just found a parking spot, paid a few dollars, and pitched your tent on the beach.  It was great! We spent the rest of the day relaxing in the sun, spending time walking along the water, and listening to the waves.

    Funnily enough, this was also the only time we used our tent during our 2-month road trip.  The rest of the time, we slept in our car, at friends or families scattered along our route, or at the occasional motel.  

    Beach camping in California
    The photo that triggered this memory. And the tent that was used only once.

    Beach Camping & Coffee

    The next morning, I awoke to the sound of the ocean. We discovered the night before that we lacked fire-making supplies (and skills), so I knew boiling water over a fire to make coffee was out of the question. Good thing I have a portable coffee maker sitting in the car, all ready to brew coffee! What better way to spend the morning than sipping coffee and staring out watching the waves roll in.  

    I trudged through the sand and found my coffee supplies, I filled the maker with water, and soon I had a delicious pot of coffee brewing–no fire required!  It was wonderful. I walked back to the beach and enjoyed my coffee while waving to our camping neighbors, who were making their cowboy coffee over the fire.  Boy, did I feel superior with my high-tech car coffee!  

    Soon, it was time to pack up and hit the road.  So we put our tent away, packed up the car, and prepared to leave.  The funny thing is, when I brewed my coffee earlier, well, I didn’t turn the car on to do it. Whoops! Needless to say, our car battery was dead.  

    I can tell you this, if I had coffee before I went to make coffee that morning, my brain would not have been so fuzzy, and I would have thought to turn the car on.  So I blame this on not having enough coffee, not on the actual making of said coffee.

    Some campers who were parked nearby gave our car a jumpstart, it was probably our camping neighbors who made their coffee over the fire. Now, who’s the superior one! Okay, I don’t remember who it was exactly, but I imagine they sat there quietly smiling and enjoying their coffee. Sometimes the simple way is the best way.

    What Ever Happened to my Car Coffee Maker?

    Remembering this gave me a good laugh. Then, I was also a little sad, as I remembered that my coffee maker mysteriously disappeared after that trip. I never saw it again.  And my friend Moe says she doesn’t know what happened to it, but I have my suspicions… I’ve come a long way since this trip and now have a variety of ways that I make coffee while camping, and I have never run my car battery dead making coffee again.

    latte art in a cup

    Coffee-Infused Memories

    This is just one of my many memories that involve coffee. Others include sipping coffee on the lanai in Maui or at a cafe in Prague.  Even better are the memories with loved ones no longer here, like coffee with my Grandpa.  He liked it, black, very black. I would sneak milk into mine when he wasn’t looking.  I tried to be tough and drink his sludge, er coffee, but it was a little too strong for my taste. It didn’t really matter, though. I was with my Grandpa sharing our love of coffee as he told me stories of his youth. Coffee, much like food, brings people together.   

    I like to think that I’m creating a sensory memory by combining moments with friends, family, and life while drinking coffee.  That down the road, I’ll smell a certain blend and will be transported to a beautiful moment in time. Yes, I admit, I enjoy drinking coffee because it’s delicious, but the added benefit of creating memories and special moments is pretty great too!

     
    What are some of your favorite memories that involve coffee? I’d love to hear about them!
     
    Off to grab another cup!
     
    Note: This post contains affiliate links. When you make a purchase using one of these affiliate links, we get paid a small commission at no extra cost to you.
  • Exploring Sunrise: Mount Rainier’s Northeast Corner

    Sunrise sits at 6,400 ft. elevation, making it the highest point accessible by car in Mount Rainier National Park. Second only to Paradise as the most visited area of the park. There is a good reason people come here. It provides stunning views of Mount Rainier, hiking trails for all abilities, a huge meadow full of wildflowers, and a perfect place to watch (you guessed it) the sunrise!  Whether you spend the day or camp in this northeast corner of Mount Rainier National Park, you will leave full of wonder and beauty.

    Getting Here

    Mount Rainier has four main entrance stations from which to enter this large National Park. Sunrise is accessed from the northeast White River Entrance Station. Get directions for all the entrances to Mount Rainier National Park here.

    sunrise at Mt Rainier

    When to Visit Sunrise

    Due to its high elevation, Sunrise gives visitors a limited window of time to enjoy its beauty. Typically you can access it from late June through the first part of October. The Sunrise Lodge and Visitor Center is only open from July to early September.

    Try to come as early in the day as possible to avoid the crowds. Even on a weekday, the parking lot can fill up around noon.  The weekends are especially busy, so get an early start to avoid long lines at the park entrance and to ensure a parking spot.

    Things to Do at Sunrise

    Hiking

    There are so many hiking options that leaving from Sunrise. Here are a few favorite day hikes I recommend.

    • Frozen Lake Loop – 3.0 mi (Great place to spot mountain goats.)
    • Fremont Lookout – 5.6 mi (Old fire lookout with spectacular views.)
    • Shadow Lake Loop – 3.0  (An easy hike starting on the south side of the parking lot — opposite the Sunrise Lodge.)
    • Dege Peak – 4.0 mi (Hike to over 7,000 feet with 360-degree views!)
    • Sunrise Nature Trail Loop – 1.5 mi (Short hike that’s easy enough for younger kids too.)

    A few easy overnight backpacking options:

    Note that these backpacking options require a wilderness permit.  The good news is you can now reserve your spot and get your wilderness permit at Recreation.gov. This makes planning a lot easier!

    • Sunrise Camp near Shadow Lake (This is an easy overnight option for beginners and kids. It’s only 1.3 miles from the Sunrise Visitor Center. No potable water, but you can filter water from Shadow Lake or pack it in. It has vault toilets.)
    • Berkley Park (It’s only a 4.5-mile hike to Berkley Park, you’ll need to get a permit to camp here, there are bear poles for hanging your packs and a creek to filter water from (no potable water). There is also a primitive outdoor toilet.  Make sure to take time to hike up to Grand Park from here and admire its beauty and perhaps spot a bear or two.
    Yakima Park
    Yakima Park as seen from the main trail. Sunrise Lodge is in the distance.

    Watch the Sunrise

    I know it seems a little cliche to watch the sunrise at Sunrise, but there’s a reason they name these areas what they do. Here you’ll see the morning light as it first touches the top of Mount Rainier. It’s like a spotlight shining down and illuminating its snowcapped peak.  You can also watch from Sunrise Point just a short drive below Sunrise and enjoy the deeper colors that develop over the Cascade range.  If you’re feeling ambitious, consider hiking to Dege Peak for sunrise and enjoying the unobstructed 360-degree views.  Plus, you’ll get to stare at Mount Rainier for the entire hike back!

    Look for Wildflowers

    Walk the trails along Yakima Park (meadows in front of the lodge and visitor center). You don’t have to walk very far to enjoy the variety of wildflowers that grow here. Take a right and follow the wide path near the main restrooms, and in only about 5-minutes of walking, you’ll soon have the meadow on both sides with sweeping views of Yakima Park and the Sunrise Day Lodge.

    Look for Wildlife 

    It used to be fairly common to see cinnamon-colored black bears roaming the meadows at Yakima Park. I haven’t seen one in years, but if you hike up to the ridge either via Sourdough Ridge, Dege Peak, or Frozen Lake, you’re almost guaranteed to see some mountain goats and possibly a marmot or two.  Listen for their chatter as they tell other marmots of your approach.

    Visit the Sunrise Day Lodge

    Make sure to go inside the Sunrise Day Lodge and look at gifts and souvenirs. You can also purchase something to eat and chat with a Park Ranger.  If the Sunrise Visitor Center is open, you can learn more about Mount Rainier and the Sunrise area. The Sunrise Lodge is only open from July to early September. 

    Sunrise Day Lodge
    The Sunrise Day Lodge.

    Enjoy Having a Picnic With a View

    The Sunrise Picnic Area is a gorgeous place to enjoy a meal with your family. My family once celebrated my niece’s birthday here, and it was such a fun way to create memories together.  The picnic area at Sunrise also sports incredible views of Mount Rainier.  There are lots of picnic tables to choose from! Head past the Sunrise Day Lodge and make a right in front of the restrooms, then follow the wide path as it curves left, soon you’ll see a small trail on the right that leads to the picnic area.  Follow the labyrinth of small trails for more picnic options to choose from.

    Camping Near Sunrise

    Visiting Sunrise at Mount Rainier is a perfect way to spend a day, but I highly recommend you spend a night or two camping here for the full experience. The White River Campground, only a 25-minute drive away, is the closest campground to Sunrise.  It makes a great base for exploring the northeast corner of Mount Rainier National Park. 

    You can even hike to Sunrise from White River Campground. This takes about 3 hours roundtrip to do, or if you’re traveling in a group, you could always have someone drop hikers off at Sunrise and then hike back down to White River.  This is a fun idea if you’re camping with a family.

    Other Hikes Near Sunrise

    • Naches Peak Loop Trail (Gorgeous loop hike that takes you past alpine lakes, meadows, and forests.)
    • Tipsoo Lake Loop (Easy, mostly flat 0.5 mile loop around Tipsoo Lake, good for reflection photos and views of Mount Rainier.)
    • Emmons Moraine Glacier. (See my article on camping at White River Campground for more information on this hike.
    Mount Rainier at Sunrise

    Mount Rainier Webcams

    Perhaps you’re unable to make the trip up to Mount Rainier right now, or maybe you want to take a peek to see whether or not the mountain is out.  Whatever the case may be, Mount Rainier National Park has several webcams set up in the different areas of the park that allow you to see what’s happening on the mountain. 

    I personally love looking up at Camp Muir and Camp Schurman and seeing the tents for those making the trek to the summit.  It’s such an adventure they are embarking on and one I’ve secretly thought about doing.  Perhaps, you have to. Well, these webcams can give you a sneak peek into the mountaineering experience.

    Mount Rainier is such a beautiful place. It holds a special place in our hearts who live near it, and I believe everyone who visits will leave feeling a connection with its beauty and grandeur.

    So much mountain to explore, so little time!

  • Hike to Mount Rainier’s Dege Peak For 360° Views

    If you want a hike with 360-degree views of Mount Rainier, Mount Adams, Mount Baker, and the North Cascades, but with minimal effort, then consider hiking to Dege Peak. 

    Dege Peak is one of the less crowded trails from the Sunrise Visitor Center at Mount Rainier.  Most of the people I saw were headed toward the Burroughs Mountain or Frozen Lake trails. Once I passed the turn-off for the Sourdough Ridge Nature Trail,  I only saw about 10 people on my way to and from Dege Peak.  On a clear day, you have wonderful views, and along the way, you might even be fortunate enough to spot mountain goats, marmots, elk, or even bears!

    Getting Here: Which Mt Rainier Entrance to Use

    Mount Rainier has four main entrance stations from which to enter this large National Park. For this hike, you’ll enter the east side of the park using the northeast White River Entrance Station. Get directions for all the entrances to Mount Rainier National Park here.

    Two Ways to Access the Dege Peak Trailhead

    Sunrise Point

    You can begin this hike from the Sunrise Point parking area or Sunrise Visitor Center. If you start from Sunrise Point, it is 1.0 mile shorter round-trip (3.0 vs. 4.0 miles) than starting from the Sunrise Lodge parking lot, but there are no restroom facilities, and you have around an 800 elevation gain vs. 600 from Sunrise.

    Getting to the Trailhead:  Park at Sunrise Point parking lot.  From the west end of the parking lot, look for trail signs for the Sourdough Ridge Trail.  You’ll start your hike to Dege Peak here, and at about 1 mile in, you’ll come to the trail junction for Sunrise and Dege Peak. Make a right here. It’s just another .3 miles from the junction to Dege Peak summit.

    Sunrise Lodge and Visitor Center

    I prefer to start the hike to Dege Peak from the main Sunrise parking lot. There are restroom facilities here (there are none at Sunrise Point). Plus, with the Sunrise Lodge, there’s the ability to purchase a snack or drink before/after your hike.  You can also shop for souvenirs to remember your visit to Mount Rainier or buy gifts to take home. If this is your first visit to Mount Rainier, you’ll definitely want to spend some time at Sunrise exploring the meadow area and visiting the Sunrise Lodge and Visitor Center.

    Getting to the Dege Peak Trailhead: Follow the broad path next to the bathrooms (you walk past the Sunrise Lodge, and you’ll see the path on your right). From there, you hike up the dirt path, and soon you come to a large sign with a map of the Sunrise area trails. Follow the trail on the right side of the signs as it climbs up, and soon you come to a “Y” in the trail. Go right (away from Mount Rainier) for Dege Peak.

    About Dege Peak Trail – Starting from Sunrise Lodge

    Trail Length: ~ 4.0 miles (from Sunrise Lodge)

    Elevation Gain: ~ 606 feet

    Approximate Hiking Time: 2 hours (round trip)

    Trail Difficulty Rating: Easy to Moderate
    Overall I would rate this hike as easy. Even kids should be able to do this hike with minimal difficulty. However, I give it an easy to moderate rating given its exposure to the sun.  I hiked this on a hot summer day, and there is almost no shade for the entire hike.  In the summer, the heat combined with the elevation gain nudges this hike into the moderate range.

    Features: 360-degree views, stunning views of Mount Rainier, wildflowers, wildlife, lake views, and multiple glacier views

    Entrance Fee: There is a $30 single-vehicle entry fee good for 7-day consecutive use. 

    Restrooms: There are restrooms just past the Sunrise Day Lodge and snacks and drinks at the Lodge. Potable Water just outside the Sunrise Lodge entrance.

    How to Pronounce Dege

    Dege Peak was named after James Henry Dege, a notable businessman from Tacoma, Washington. During my visit here, I heard a variety of pronunciations. The two most common pronunciations were “deh-gay” or “day-gay.” The Park Ranger at the Sunrise Lodge pronounced it like “day-gay,” so perhaps that’s the correct one.

    What to Bring on the Hike

    • Water (I only brought 16 ounces and wished I had 32, so bring plenty, especially on a hot day.)
    • Bug Spray (The bugs were pretty bad, so make sure to apply before you hike and possibly during too.)
    • Hiking Boots (I hiked in running shoes, but the rocky areas made this a little uncomfortable for my feet, plus hiking boots are good for ankle support.)
    • Trekking Poles (I didn’t use these, but they would be helpful in the rocky areas and last 200 yards or so to the summit.)
    • Sunscreen (This hike is really exposed to the sun.)
    • Sunglasses (Sunscreen for the eyes.)
    • Snacks (Or possibly a picnic lunch for the summit.)
    • Camera (You’ll definitely want a photo or two!)

    Important to Know: Sunrise Parking lot is at 6,400 ft elevation and Dege Peak Summit is at 7,006. If you are not used to being at higher elevations you might get a little dizzy. Make sure to hydrate and snack during your hike to help avoid any elevation sickness symptoms.

    Hiking to Dege Peak

    I drove up to Mount Rainier that morning and settled into my campsite at White River Campground before driving up to Sunrise.  It was a gorgeous day, with clear skies and warm weather.  Warmer than I expected!  By noon it was already 77 degrees at Sunrise!

    I grabbed my camera and a bottle of water (later, I realized I should have brought two bottles), put on a bit of bug spray, and headed for the trailhead.  It was almost 1:00 p.m. when I started up the broad path just past the Sunrise Lodge.

    I stopped at the “Y” trail intersection to take a few photos of Mount Rainier and the meadow.  As I began hiking up the trail toward Dege Peak, I was chased by a very persistent wasp.  This is not the first time I was chased by a wasp while hiking at Mount Rainier.  During my hike to Spray Falls, I also had to flee for my life for a long way down the trail. 

    Perhaps “flee for my life” is overly dramatic, but it was a little traumatizing for me.  I won’t get into all my childhood run-ins with bees, but one only needs to watch My Girl once to realize these small creatures also come with a dark side.  I jest, but needless to say, although I love honeybees, I am less a fan of wasps. 

    Multiple times along my hike to Dege Peak, I was chased by bees. One even began circling me over and over again.  When I returned home, I did a little research and discovered bees and wasps alike are attracted to bright colors. Red, in particular, is perceived as a threat. What color do you think my favorite hiking shirt is?  Yep! You guessed it– bright red! I guess I may need to find a new favorite hiking shirt after learning this new information. 

    Sourdough Ridge Nature Trail

    Onward and upward.  Soon, I reach the ridgeline and turn off for the Sourdough Ridge Nature Trail.  The nature trail goes to the left, and Dege Peak continues to the right. The Sourdough Ridge Nature Trail is a great option if you’re hiking with smaller kids and want a shorter hike that still offers beautiful views of Mount Rainier. The loop only takes about 1-hour to complete and is mostly flat.

    Wildlife Viewing Opportunities

    Make sure to stop and look over the ridgeline along this section of the Dege Peak trail, as you’ll often spot wildlife below.  I saw a lonely mountain goat (pictured above) during my hike. (To my dismay I did not see any lonely goatherds.)

    I talked to another couple who frequently hikes at Mount Rainier, and they told me how they once hiked to Dege Peak, and at the top, they looked over the edge and saw a bear splashing around in the lake below!  What an unforgettable memory!  They also mentioned seeing elk here as there is an elk path that leads down the backside of Dege Peak.  So make sure to bring a camera and stop to look for wildlife during your hike.

    Sunset Point Trail Junction

    I continued along the ridgeline with views of Dege Peak in front and Mount Rainier at my back. I didn’t worry too much about taking photos of Mount Rainier on the hike up, as I knew I’d be looking at it the whole way back down and have plenty of opportunities to photograph it then.

    After the initial climb to the ridgeline, the trail flattens out for a long stretch before you dip down again and come to a fork in the trail.  This is the turnoff for the Sunrise Point parking area and where you’ll pop out should you start your hike there instead of at Sunrise. From here, it’s only 0.3 miles to the summit.

    The trail narrows and gets rockier as it begins a steady climb back up.  Soon the trail curves sharply to the left for the final 200 yards or so to the summit.  At this curve, there are nice views of the Sunrise Point parking area and Sunrise Lake. 

    Dege Peak Summit

    I begin the final rocky climb to the summit and stop at every tiny shade spot possible.  My water is now warm rather than cold, but I still appreciate having it!  I get to the top, and there is one group leaving as I arrive.  I have the entire summit to myself unless you count the 100’s of moths, flies, bees, and mosquitos who seem to think they own this place!  Sadly, the bugs were so bad during my visit that I didn’t hang around very long.  I took a few photos, admired the view in all directions, and headed back down the trail.  I didn’t pack any bug spray with me. Otherwise, I would have reapplied it at the summit.

    Bugs aside, the views at the top of Dege Peak are fantastic!  You are at over 7,000 feet from here and with minimal effort!  The summit would make a great picnic spot on a day when the bugs aren’t as bad. 

    The hike took me around 2 hours 10 minutes, and that’s with a lot of stops for photos and chats with other hikers.  I think most will complete it in around 2 hours, but with kids, you could plan for up to 3 hours and go at a leisurely pace.

    Now to enjoy staring at Mount Rainier for the hike back to Sunrise.

    Final Thoughts About Hiking to Dege Peak

    This trail typically has fewer hikers than the other trails in the area. The climb up is a gradual one, and during the summer, you have gorgeous wildflowers that line the path.  The trail is dusty, and as I mentioned, there is very little shade. Definitely remember to apply sunscreen and bug spray before heading out. 

    For a slightly longer hike, start from Sunrise and follow the route outlined in this post, but on the return hike to Sunrise, take the Sourdough Nature trail to the right along the ridgeline. You’ll follow the ridgeline before you loop down and to the left to Sunrise again. This adds a little over a mile of mostly flat terrain and about 45-minutes more hiking time.

    I bought a Klondike bar at the Sunrise Lodge.  The hot sun along the hike to Dege Peak and back left me wanting something cold to drink (filled up with potable water just outside the lodge) and a cold treat before heading back to camp.

    If you stay at White River Campground, consider hiking to Emmons Moraine Glacier from the campground and planning to hike the Naches Peak Trail the following day. I love hiking the Naches Peak Loop Trail! It has beautiful lakes, mountain views, and wildflowers everywhere!

    Do you have a favorite hike at Mount Rainier National Park?  I’d love to hear about it.  This place is like a second home to me, and I’m always interested in learning about new trails and hikes I haven’t discovered.


    Happy Trails!

  • The Best Viewpoint to Watch the Sunrise at Bryce Canyon

    Plan to get up early at least one morning to watch the sunrise at Bryce Canyon National Park.  Morning light is the best time to see the Bryce Canyon Amphitheater. You will be amply rewarded for your lack of sleep as you see the first rays glimmering over the tops of the hoodoos and bathing them in a gorgeous glow of light.  The yellows and reds seem to sparkle, and the whole canyon comes alive!  

    In this post, I tell you my pick for which viewpoint to see the sunrise at Bryce Canyon, as well as two other options that make my top 3 choices for watching the sunrise when visiting Bryce Canyon National Park.

    My Pick for Watching the Sunrise at Bryce Canyon

    Although there are several options for watching the sunrise at Bryce Canyon, Inspiration Point was my first choice when deciding where to photograph the sunrise during my visit. I love getting up to see the sunrise. There’s something special about greeting the beginning of a new day. Morning light is also one of the best times for photography.  This is especially true at Bryce Canyon!  The canyon glows in the morning light, and the hoodoos are on full display, whereas later, they will be encompassed by the afternoon shadows.

    Why Choose Inspiration Point?

    I like that Inspiration Point has multiple designated viewpoints along the half-mile climb to the top.  You get a closer look at the canyon from the lower viewpoint, then as you make your way to the upper viewpoint, you also pass a midpoint viewing area for an additional perspective.  

    Inspiration Point is also less busy at sunrise.  Most people generally head for Sunrise Point, which is a good option, but a more crowded option.  By choosing Inspiration Point, I was the first person there, and there was only a total of 6 of us up there for the entire sunrise!  This made it a very leisurely and enjoyable way to photograph the sunrise and enjoy the views.

    Inspiration Point allows you to look to the right toward Bryce Point and the left at Sunset Point and Sunrise Point.  The smaller crowds, expansive views, along with the multiple viewpoints are why I chose Inspiration Point for my first option to photograph the sunrise at Bryce Canyon.

    Getting to Inspiration Point

    • Trail Length: 0.6 miles (one-way)
    • Hiking Time: ~10 minutes to upper Inspiration Point
    • Elevation Gain: ~ 140 feet
    • Trail Difficulty Rating: Easy (It’s a little steep at the top, but it’s a wide trail and a short hike.)
    • Features: 3 different viewpoints of the Bryce Canyon Amphitheater, it’s also situated along the Rim Trail for those looking for a longer hike. It is wheelchair accessible to the lower viewpoint. 
    • Restroom Facilities: Yes. There are pit toilets alongside the parking lot.

    Tips for Photographing the Sunrise at Inspiration Point

    What Time to Arrive

    45-minutes before sunrise

    I typically try to get to a destination at least 1-hour before sunrise. However, 45-minutes was plenty of time at Inspiration Point during my visit in spring.  With 1-hour, you are assured of having the first pick of spots, even in the summer.

    What to bring?

    • Camera
    • Wide-angle lens
    • (A smartphone camera works too!)
    • Tripod
    • Flashlight (For the hike up in the dark.)
    • Warm Layers (Gloves & a hat were really nice to have in the spring.)
    • Hiking Poles (This hike is short but steep at the upper viewpoint, so hiking poles are handy to have.)

    Upper Viewpoint

    What to expect?

     There is a railing around the upper viewpoint so bring a tall tripod, or you’ll need to hold your camera to avoid the railing in your shots.  

    You are at a higher elevation, so the weather is typically colder than you would expect before the sun comes up. I visited in April, and there was still snow in spots along the trail. The Rim Trail to Bryce Point was also closed due to snow.  

    If, for some reason, you arrive and upper Inspiration Point is crowded, then walk back down the trail for a slightly lower vantage.  There is plenty of room along this trail for you to find a spot to watch the sunrise.  Be careful, though, as only the designated viewpoint areas have a railing. Keep small kids away from the canyon edge and watch your step, especially in the dark.

    I think this is fairly well-known, but no drones are allowed in any of the U.S. National Parks. However, while I visited, someone put a drone in the air at Inspiration Point, and a ranger was there within 5-minutes.  I have no idea how the ranger knew about it so quickly, but they did.  I think they only gave the person a warning, but I assume you could be fined, so I wouldn’t take any chances.

    Sunrise at Bryce Canyon

    Photography Tips

    Photograph it from various vantage points and angles.  I didn’t get a chance to scout out Inspiration Point the day before. Instead, I went directly to the upper viewpoint to set up my tripod for the sunrise.  Then I later photographed it from the midpoint and lower viewpoint.  Walk around the upper viewpoint and try some views on both the left and right sides of Inspiration Point.  Use trees and vegetation to create depth and interest.  

    Try shots from up high and down low.  Also, stick around a little while after the sunrise as the glow in the canyon gets brighter, and the colors really start to come out. 

    More Great Options for Watching the Sunrise at Bryce Canyon

    My other top choices for watching the sunrise at Bryce Canyon are Sunrise Point & Bryce Point. Both of these have gorgeous views! I especially liked the view from Bryce Point. Partly I think, because the viewing platform jutted out, and it felt like I was suspended over the canyon.  The trail to Bryce Point is completely paved, so although a little steep in spots, it is wheelchair accessible.  There are also restrooms at both Sunrise Point and Bryce Point.  Sunrise Point is popular for a good reason. It gives you sweeping views over the Queen’s Garden trail and canyon and makes a great (and popular) choice for photographing the sunrise at Bryce Canyon. 

    What to do After Watching the Sunrise

    After watching the sunrise at Bryce Canyon, you are ready to hike into the canyon and see it up close!  The morning light (and temperatures) make it the perfect time to hit the trails.  If you only have time for one hike in Bryce Canyon, I recommend the Navajo Loop Trail & Peekaboo Loop combination hike.  My hubby and I loved this hike, and it was the perfect way to see the canyon up close after viewing it from above at Inspiration Point.  It really added to the experience to see it from a birds-eye-view first to the ground level.

  • Navajo Loop Trail & Peekaboo Loop Hike: The Best of Bryce Canyon

    Bryce Canyon National Park is a gorgeous park worth spending a couple of days (minimum) exploring.  The Peekaboo Loop and Navajo Loop Trail combo is one of the best, if not “the” best option for sampling all that is Bryce Canyon, National Park.  Gaze up at the hoodoos as they tower over you, walk through an alpine forest and experience the Wall of Windows up close in all their glory. If you only have time for one hike in Bryce Canyon, this should be it!

    About the Hike

    This hike combines both the Navajo Loop Trail and the Peekaboo Loop Trail into a mini figure-8 combination loop. Depending on when you hike this trail, portions of it may be closed due to ice.  Bryce Canyon is at over 9,000 feet in elevation. It often has snow that lasts into late spring.  I visited in early April, and the Wall Street portion of the Navajo Loop Trail was closed due to ice.  

    • Trail Length: ~5 miles (roundtrip) 
    • Hiking Time: 3-5 hours (This really depends on how many photo stops you make, snack breaks, and overall pace.)
    • Elevation Gain: ~ 1580 feet
    • Trail Difficulty Rating: Moderate
      The National Park System rates this trail as “strenuous.” I found it to be moderate compared to other hikes I’ve done. However, I will say the heat certainly adds an element of difficulty to the hike, so I can see why they would give it a strenuous rating when factoring in elevation change and weather.
    • Features: Close-up views of hoodoos, the Wall of Windows, pine forest, and opportunities to walk through natural “doorways.”
    • Restroom Facilities: Yes. There are restrooms in the parking lot at the trailhead, and there is also one restroom on the Peekaboo Trail near the junction for the Bryce Point Trailhead.  This restroom is only open during the summer.

    What to Bring

    Water.  Do not take this hike or any hike in Bryce Canyon without bringing ample water. The temperatures here can be intense. It may start cold, but by afternoon, you’ll be very thankful to have enough water to drink. I always say you never regret having too much water!

    Trekking Poles.  A hiking pole or two will be handy for the steep descents/ascents and the loose sand and rock that make up the trail. Trekking poles are useful for anyone with knee problems.  My hubby had a bad flare-up with his knee bothering him, and his trekking poles were the only thing that made it possible for him to complete the hike.

    Sunscreen.  You will want to reapply during the hike. Trust me.

    Snacks. It’s always good to carry a little extra energy for the hike.  There are many great spots to sit and enjoy the views and have a little lunch break if you want to pack sandwiches and have a picnic among the hoodoos.

    Important Information:

    Hike this combination trail as early as possible.  It gets hot during the middle of the day, and the Navajo Loop Trail, in particular, gets incredibly busy!  Don’t allow the crowds to scare you off, though. Once you get on the Peekaboo Loop Trail, the crowds thin out considerably! When you are hiking back up the steep switchbacks of the Navajo Loop trail, you will be so happy you got an early start! 

    Plus, parking fills up at the Sunset Point parking lot, so the sooner you get here, the better. You can also park outside Bryce Canyon and take the park shuttle.

    Bryce Canyon Parking & Trail Map

    Here is a link to a map that gives you an overview of where the parking lots are located and the trailheads.  For this hike, you’ll want to park at the Sunset Point parking area. If you’re taking the Bryce Canyon Shuttle, you will also get off at the Sunset Point shuttle stop. Follow signs from the parking lot to the Navajo Loop Trailhead. It’s near the Sunset Point overlook area.

    Hiking the Navajo Loop & Peekaboo Loop Trails

    I hiked this trail in April.  I got up early to watch the sunrise at Inspiration Point and then drove to the Sunset Point Parking lot closest to the Two Bridges entry for the Navajo Loop Trailhead. My hubby was with me, and we ate a quick breakfast in the car before packing some water and snacks for the hike. 

    We started the hike a little after 9:00 a.m.  It was still cold out when we left, so we wore layers, which we removed about halfway through the hike. Due to Bryce’s high elevation, you experience both mountain weather and desert weather.  We started our days at freezing temps and then, by late afternoon, hovered near 80 degrees. 

    The Navajo Loop Trailhead

    Make sure to enjoy the Sunset Point overlook before starting the Navajo Loop Trail.  Chances are when you return to this spot, you’ll want to grab a bite to eat and relax, so take the time now while you’re still full of energy!

    We made our way down the first series of switchbacks before coming to a small viewing area near the turn-off to the Wall Street section of the Navajo Loop Trail.  Unfortunately, Wall Street was closed due to icy conditions, so we continued down the trail on the left side.

    The next series of switchbacks is beautiful and similar to the switchbacks on the Wall Street portion (see photo above), however not as narrow. You’ll pass by the “Two Bridges” before popping out from among the hoodoos and into the tree line.  

    A Fork in the Road: Queen’s Garden & Peekaboo Trail

    This trail continues a short way down from the Two Bridges before coming to a “T” in the trail. This is where you’ll have the option to go left for the Queen’s Garden Loop or head right to continue to the Peekaboo Loop Trail. 

    If you come down Wall Street, you pop out a little below this sign; however, the direction you go is the same. Go right for the Peekaboo Loop Trail. The left will take you back to the Queen’s Garden Loop and also the Navajo Loop Trail, which returns you to the top where you started.

    Peekaboo Loop Trail

    As you continue to the right, follow the connector trail as it crosses a big open section with pine trees and juniper bushes scattered around.  After about .25 miles, you come to another sign for the official start of the Peekaboo Loop Trail.  

    This trail is shared by both foot traffic and people on horseback. We followed the sign pointing to the right for foot traffic, which had us hiking the Peekaboo Loop Trail counterclockwise. After hiking it this way, I believe this also points you in the direction to give you the best views and vantage points straight ahead. Plus, I felt this half was the more interesting of the Peekaboo Loop Trail.

    From here, the trail quickly climbs back up into the hoodoos.  The Navajo Loop and Peekaboo Loop Trails take you down to the canyon floor, back up above, back down again, and finally back to the top where you started.  So prepare yourself for the ups and downs, but also know you will see so much beauty that it will all be worth it in the end.  This combo loop trail could quite possibly end up on your list of favorite hikes of all time.

    I did my best not to stop every 5 seconds to take a new photo, but it was still probably about every 30 seconds!  My hubby is a good sport and goes with the flow.  Both of us were enthralled by the variations in color and shapes of the hoodoos as we hiked along the Peekaboo trail.  It’s a lot of fun pointing out different shapes in the hoodoos, much like cloud gazing.  We’d say, “do you see that gnome over there?” Or “look at that elephant trunk!”  Kids will also enjoy finding “creatures” among the hoodoos.

    Nature’s Doorways

    It wasn’t too long after hiking up the Peekaboo Loop Trail that we walked through our first “doorway,” or perhaps “window” is a better word to use.  It’s like nature created a live polaroid for us to enjoy.  As we walked toward it, the light was so bright that we couldn’t see the view on the other side.  However, as we walked through the small tunnel, the view “developed” before our eyes.  I don’t know why I love these as much as I do, but I was excited to walk through each one.  I think we walked through three of these on the Peekaboo Loop Trail.

    A Tricky Washout

    The trail descends through another series of switchbacks similar to the Wall Street section on the Navajo Loop Trail, and briefly, you’re back among the trees. A washout area forked to the right, and we took a short snack break here.  This was probably a good thing, as two hikers came by and started walking to the right up the wash, not realizing they were no longer on the trail.  We let them know the trail was on their left, they thanked us and continued on their way.  I think this was the only part of the Peekaboo Loop Trail where one could get off track. However, you would figure it out pretty quickly if you did accidentally miss the trail.

    The Wall of Windows

    Almost immediately after your descent through the short switchbacks, the trail heads back up, and we hike toward the Wall of Windows. We loved this section of the trail as we gazed up at the towering Wall of Windows.  It looked so small earlier this morning as we peered down at it from Inspiration Point, and now here we were right next to it!  There are many great points along this section to take photographs of the Wall of Windows and the view of the hoodoos in the canyon below.

    Bryce Point Trailhead – The Halfway Point

    After leaving the Wall of Windows, you descend into the tree line and out of the hoodoos.  Soon you pass the trail which takes you to Bryce Point.  Bryce Point is another starting point for those who want to hike the Peekaboo Loop Trail without hiking the Navajo Loop Trail.  The Bryce Point trail was, however, closed due to snow when we visited in April. At this point, you are now about halfway through your hike around the Peekaboo Loop Trail.

    Trail Restrooms

    Not long after you pass the trail for Bryce Point, you come to a shaded resting area with a sign on the right for restrooms.  These are closed from fall to spring.  The main trail continues past the sign for the restrooms.  There is also an area here where people on horseback can let the horses take a water break. 

    Back in the Hoodoos

    I’ll admit, the section of trail after leaving the Wall of Windows was probably my least favorite of the whole Navajo and Peekaboo Loop Trails.  It was a lot of walking through trees without a lot of scenic viewpoints. You do get a good amount of shade here, though, which you will soon miss when you pop back out above the treeline and into the hoodoos.

    Soon, you’re admiring hoodoos, and there’s another “window” to walk through and more beautiful views to look forward to before you begin your descent back to the start of the Peekaboo Loop Trail. There is very little shade along this section of the trail.

    Once back at the start of the Peekaboo Loop, retrace your steps (heading left) back to the fork for the Navajo Loop Trail and Queen’s Garden Trail and begin your climb back up to Sunset Point.

    Alternative Hiking Options

    Shorter Hike Option: For those who aren’t up to the longer Navajo Loop combined with the Peekaboo Loop, hike the Navajo Loop on its own for a shorter option.  You won’t see the Wall of Windows up close or walk through the “doorways” carved in the rocks, but you still get a sense of the grandeur of the hoodoos and their colorful features.  Plus, you also walk through a small section of the pine forest.  

    Longer Hike Option: For those wanting an even longer option, consider the “one hike to rule them all,” which combines the Navajo Loop Trail, Peekaboo Loop Trail, and the Queen’s Garden Trail! I still recommend starting at the Navajo Loop trailhead by Sunset Point and following the directions for the Navajo Loop & Peekaboo Loop combo listed above before exiting out via the Queen’s Garden Trail. 

    This gets the steeper portion of the loop out of the way on the descent.  Then, you come up the Queen’s Garden Trail and end near Sunrise Point when you return. You take the paved footpath from here back to the Sunset Point parking lot.  This is the easier option for the ascent. This figure 8 hike is considered a strenuous hike and is around 6.4 miles round-trip.

    Sunrise Recommendation

    To complete your scope of Bryce Canyon, I recommend watching the sunrise at either Sunrise Point or my choice, which was Inspiration Point.  I watched the sunrise at Inspiration Point and then drove over to the trailhead for the Navajo Loop Trail. I think the morning hours are the best time to experience Bryce Canyon’s hoodoos as the sun causes them to glow red and orange.

    At Inspiration Point, I looked out over the Bryce Canyon Amphitheater and saw the Wall of Windows far below. Later, as I hiked next to the Wall of Windows, it gave me a greater appreciation for the scale of Bryce Canyon.  My hubby and I said to each other, “remember this morning when the Wall of Windows looked so far away?”  It was a neat way to spend the day going from a bird’s-eye-view to the ground level.

    More Articles You Might Enjoy


    If you hike the Navajo Loop Trail and Peekaboo Loop Trail, I’d love to hear your thoughts about the hike and your visit to Bryce Canyon.  I loved my time here and would like to go back to explore it and the surrounding area more.

    Happy Hoodoo Hunting!