author.travelffeine.com

Category: Travel Stories

Travel misadventures, stories, and journals of our adventures. Be inspired, have a laugh, and join in on the fun!

  • Hiking the Naches Peak Trail at Mt Rainier

    If you’re looking for a hike that is suitable for all ages, has alpine lakes and fantastic views of Mt Rainier, then look no further!  This hike has it all, and it’s a loop, so you never have to see the same view twice. Naches Peak Trail is perfect for families. I hiked this with a group of 10 people, ages ranging from 6 to 56 years old. The hike takes around 2-3 hours, depending on your pace and how many breaks you take. The Naches Peak Trail will reward your efforts with beautiful views and fun memories!

    Getting to the Trailhead

    Enter Mt Rainier National Park along Highway 410. Coming from the west side, it will take about 1 hour from Enumclaw to reach the Naches Peak Trail. At the junction for Highway 410 and 123 make sure to stay left and follow signs to Chinook Pass. It is about a 5-minute drive past the junction to the first parking area at Tipsoo Lake. You will see a sign for Tipsoo Lake and then the parking lot on your left.

    There are multiple parking areas you can use to access the Naches Peak Trail. Since it is a loop, you will return to whichever parking area you started from.

    The largest parking area is at Tipsoo Lake. There are restroom and picnic facilities at this parking lot. However, if the parking lot is full, don’t worry, continue down the road and you will pass another parking area on the left. And if that is full continue driving just a little further down the way to a parking area on the right and on both sides of the road near the Mt Rainier National Park sign that also doubles as a bridge for the Naches Peak Trail.

    Naches Peak Trailhead: Starting Your Hike

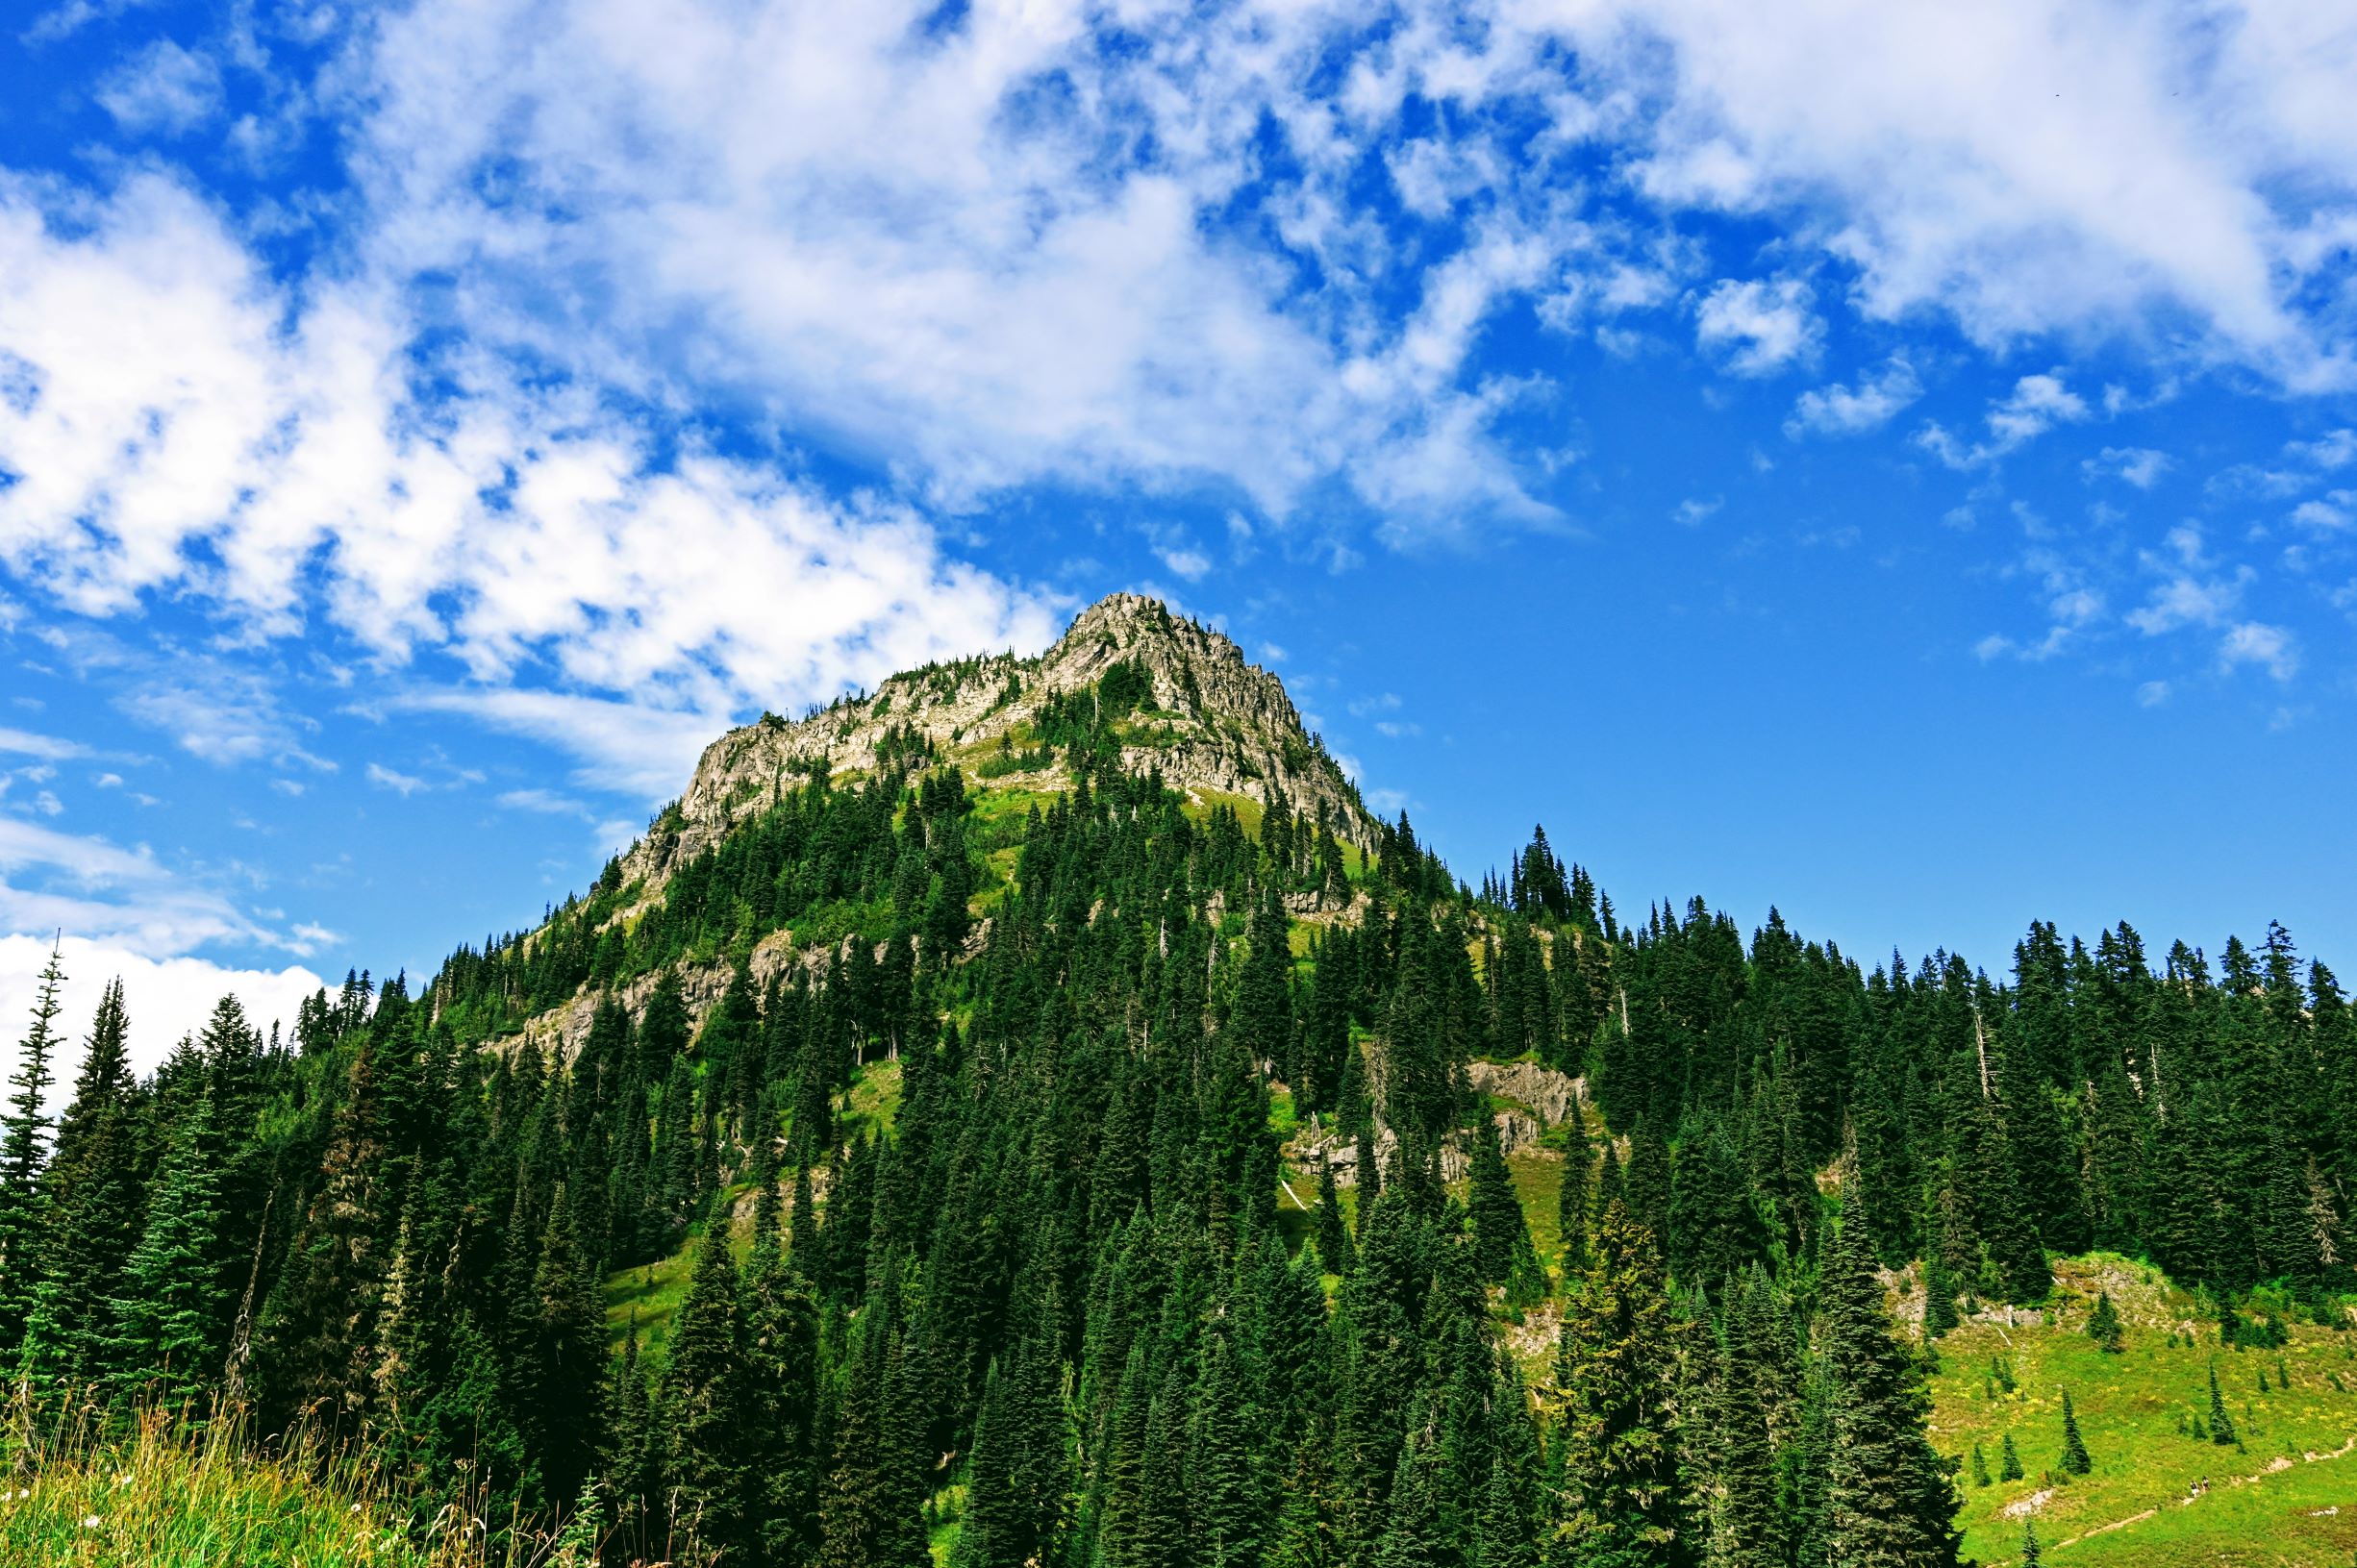
    We started our hike by Tipsoo Lake. We parked in the Tipsoo Lake parking lot and found the trailhead at the far right corner of the parking lot (when facing away from the road). I recommend hiking this loop in a clockwise direction as this gives you beautiful views of Mt Rainier facing you, rather than at your back.

    The trail has a gradual ascent that continues steadily up before once again leveling out. There are shaded areas along the way to stop and take breaks.  Soon you will reach a flat area and see the parking area along the road I mentioned in the “Getting to the Trailhead” section. 

    Walk across the Mt Rainier National Park sign that doubles as a bridge. If you’re ambitious, you could have someone run down to the road and take a picture of you standing above the sign.  However, we had a large group, so we just kept on moving!

    Shortly after crossing the highway you have views of the mountains and trees that stretch out for miles.  It warmed my heart to hear the “oohs and ahhs” that came from the mouths of my 6-year-old nephew and 8-year-old niece. They said, “Oh, wow, this is beautiful!” And they were right.

    Watching young children delight in the beauty of nature makes me smile.  I feel that nature is therapeutic, and we can all use time away from the fast pace of life (and from our electronics).

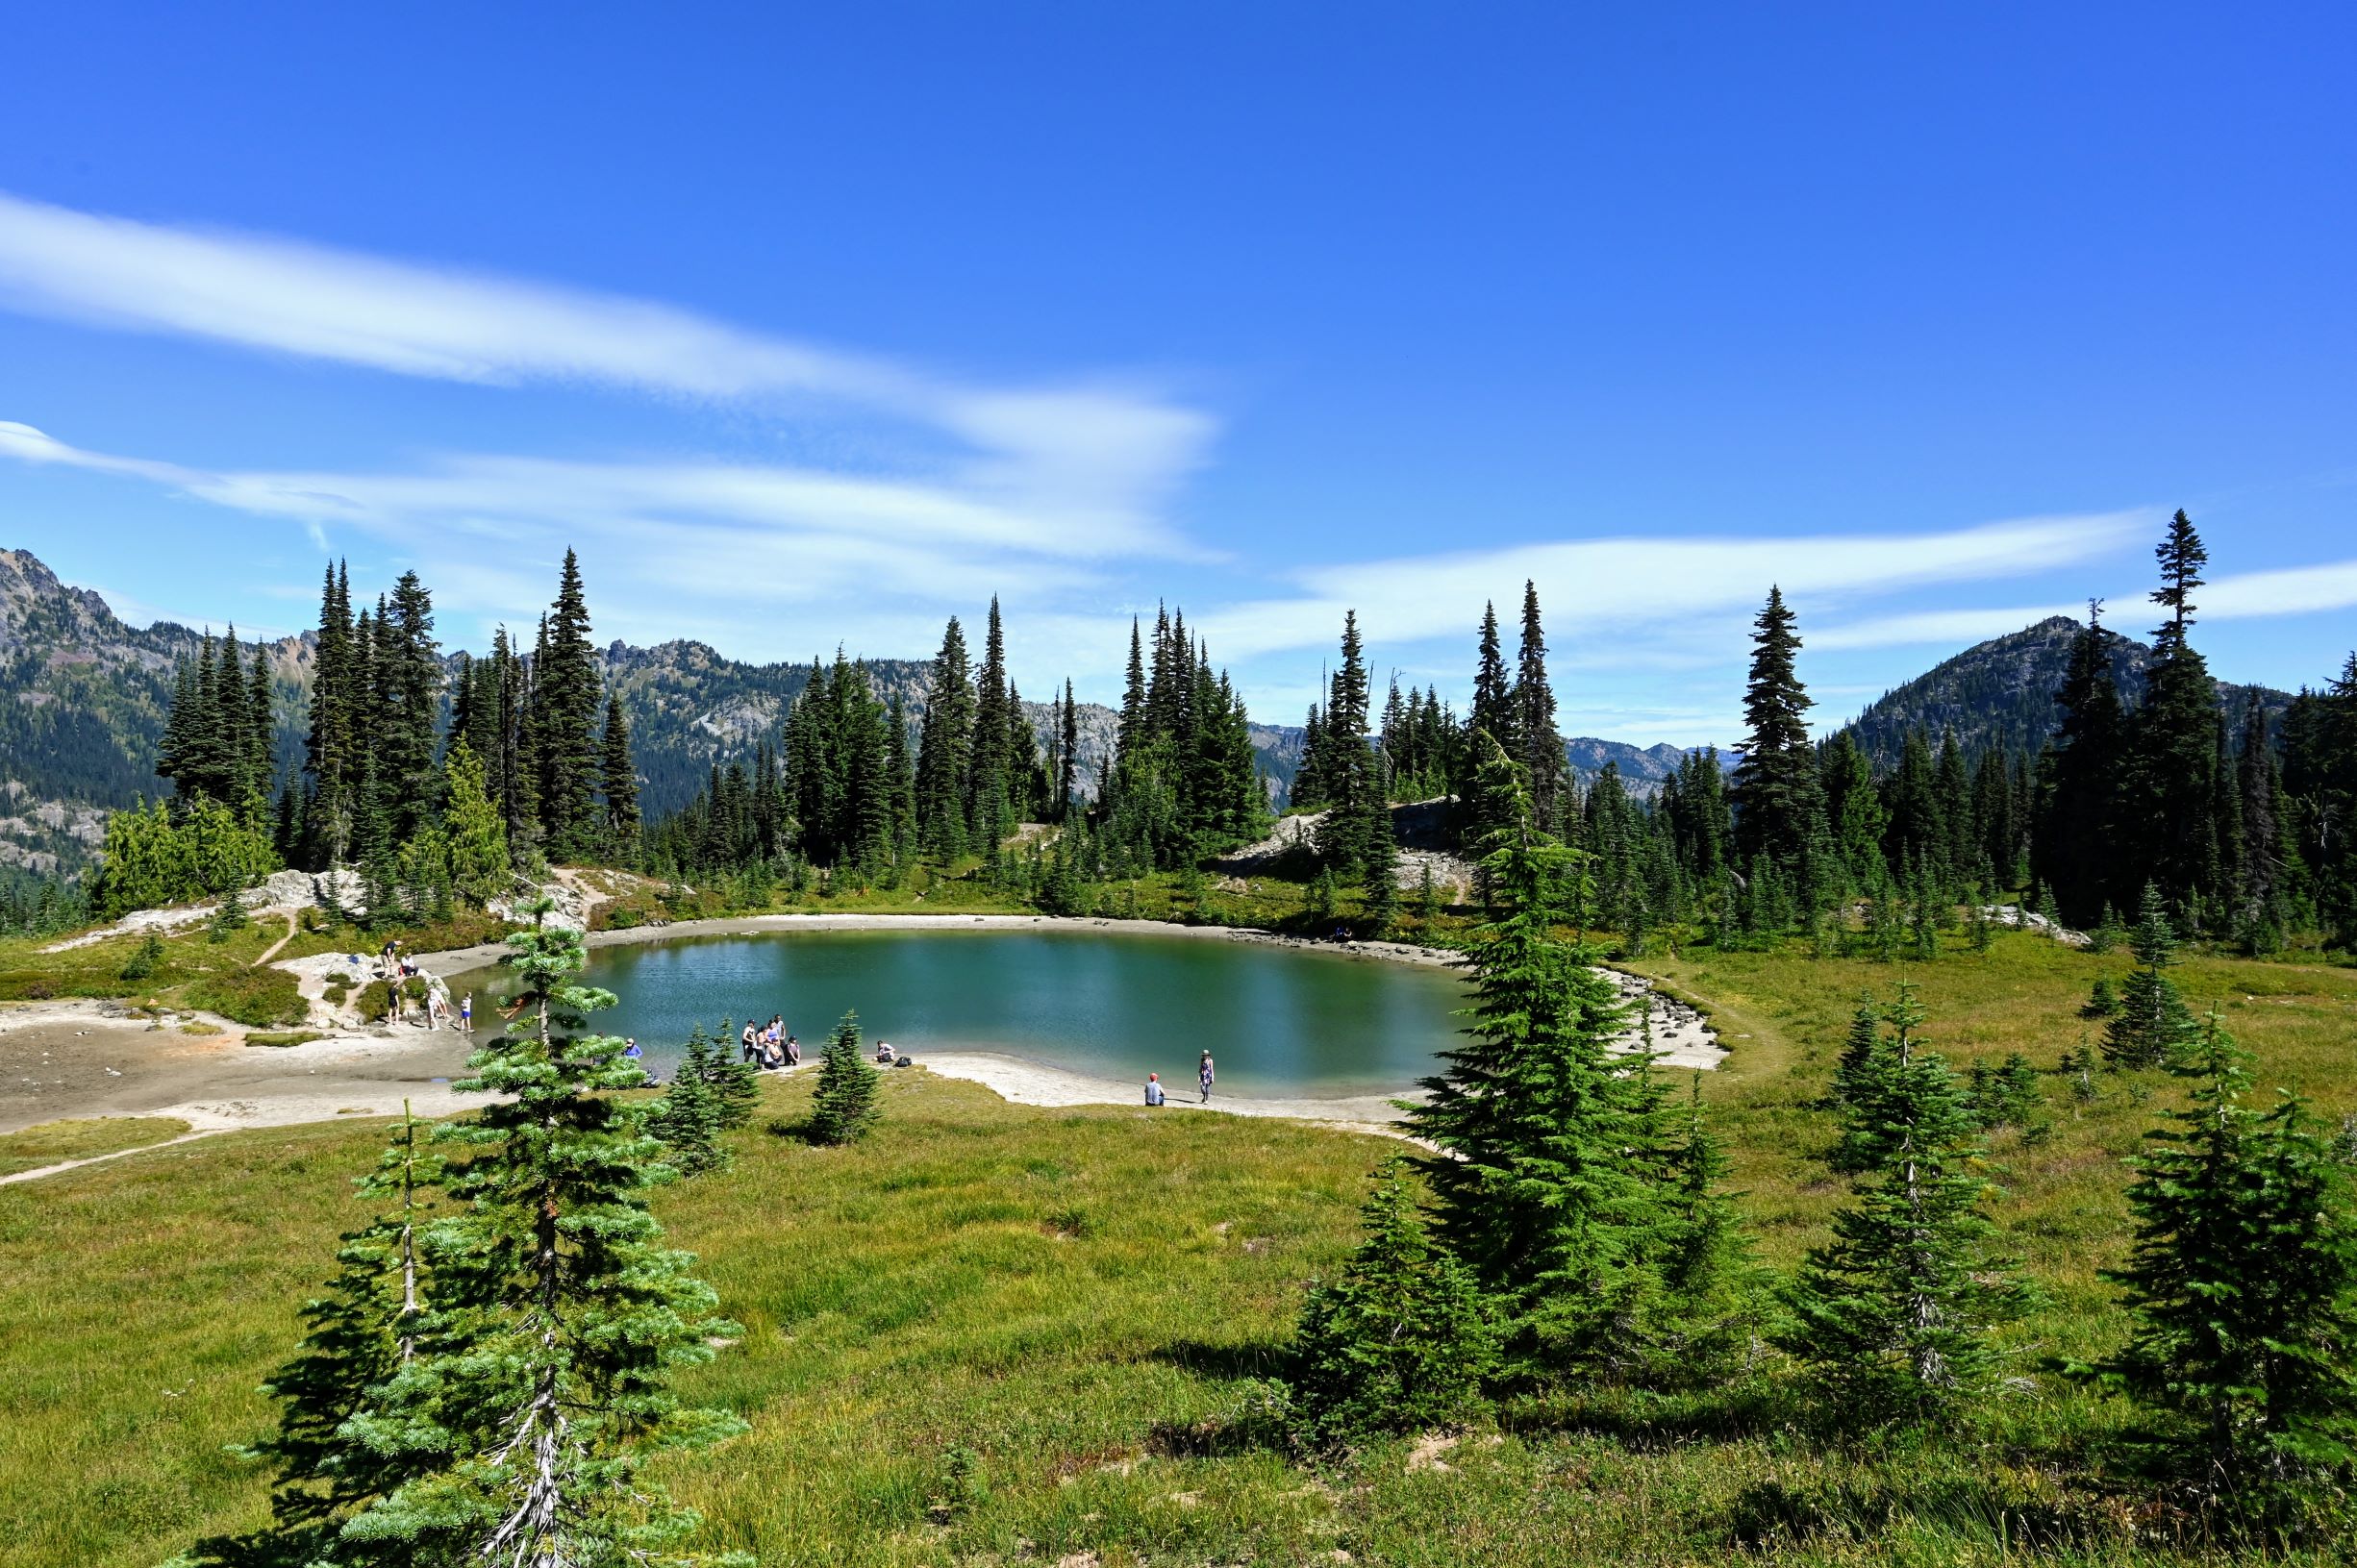
    The hike continues uphill, at a gradual grade, and soon you are rewarded with a flat area to take a refreshing break alongside this alpine lake.

    After resting, continue climbing past rolling hills, rocky mountainsides and if you’re lucky, colorful wildflowers (July thru August is best for this).

    The trail reaches another viewing area of the mountains spread out in front of you. Feel free to take another break here if you want before following the path as it curves to the right. Continue the gradual climb up for about another 5-10 minutes before reaching the below viewpoint of Dewey Lake.

    Lunch Break Near Dewey Lake

    This is about the halfway point in your hike, and it makes an excellent place for a lunch break! There is a small trail that leads to some rocks on the left side (when facing the lake) that make perfect benches to sit on. Our group enjoyed our lunch stop here. And everyone was re-energized for the rest of the hike.

    After you finish your break, continue down the trail, and you will come to a fork in the path. This is part of the Pacific Crest Trail that takes you down to Dewey Lake. If you’re not in a hurry and don’t mind adding another 2 miles to your hike, then take a left and hike down to this beautiful lake. Otherwise, continue straight to stay on the Naches Peak Trail. 

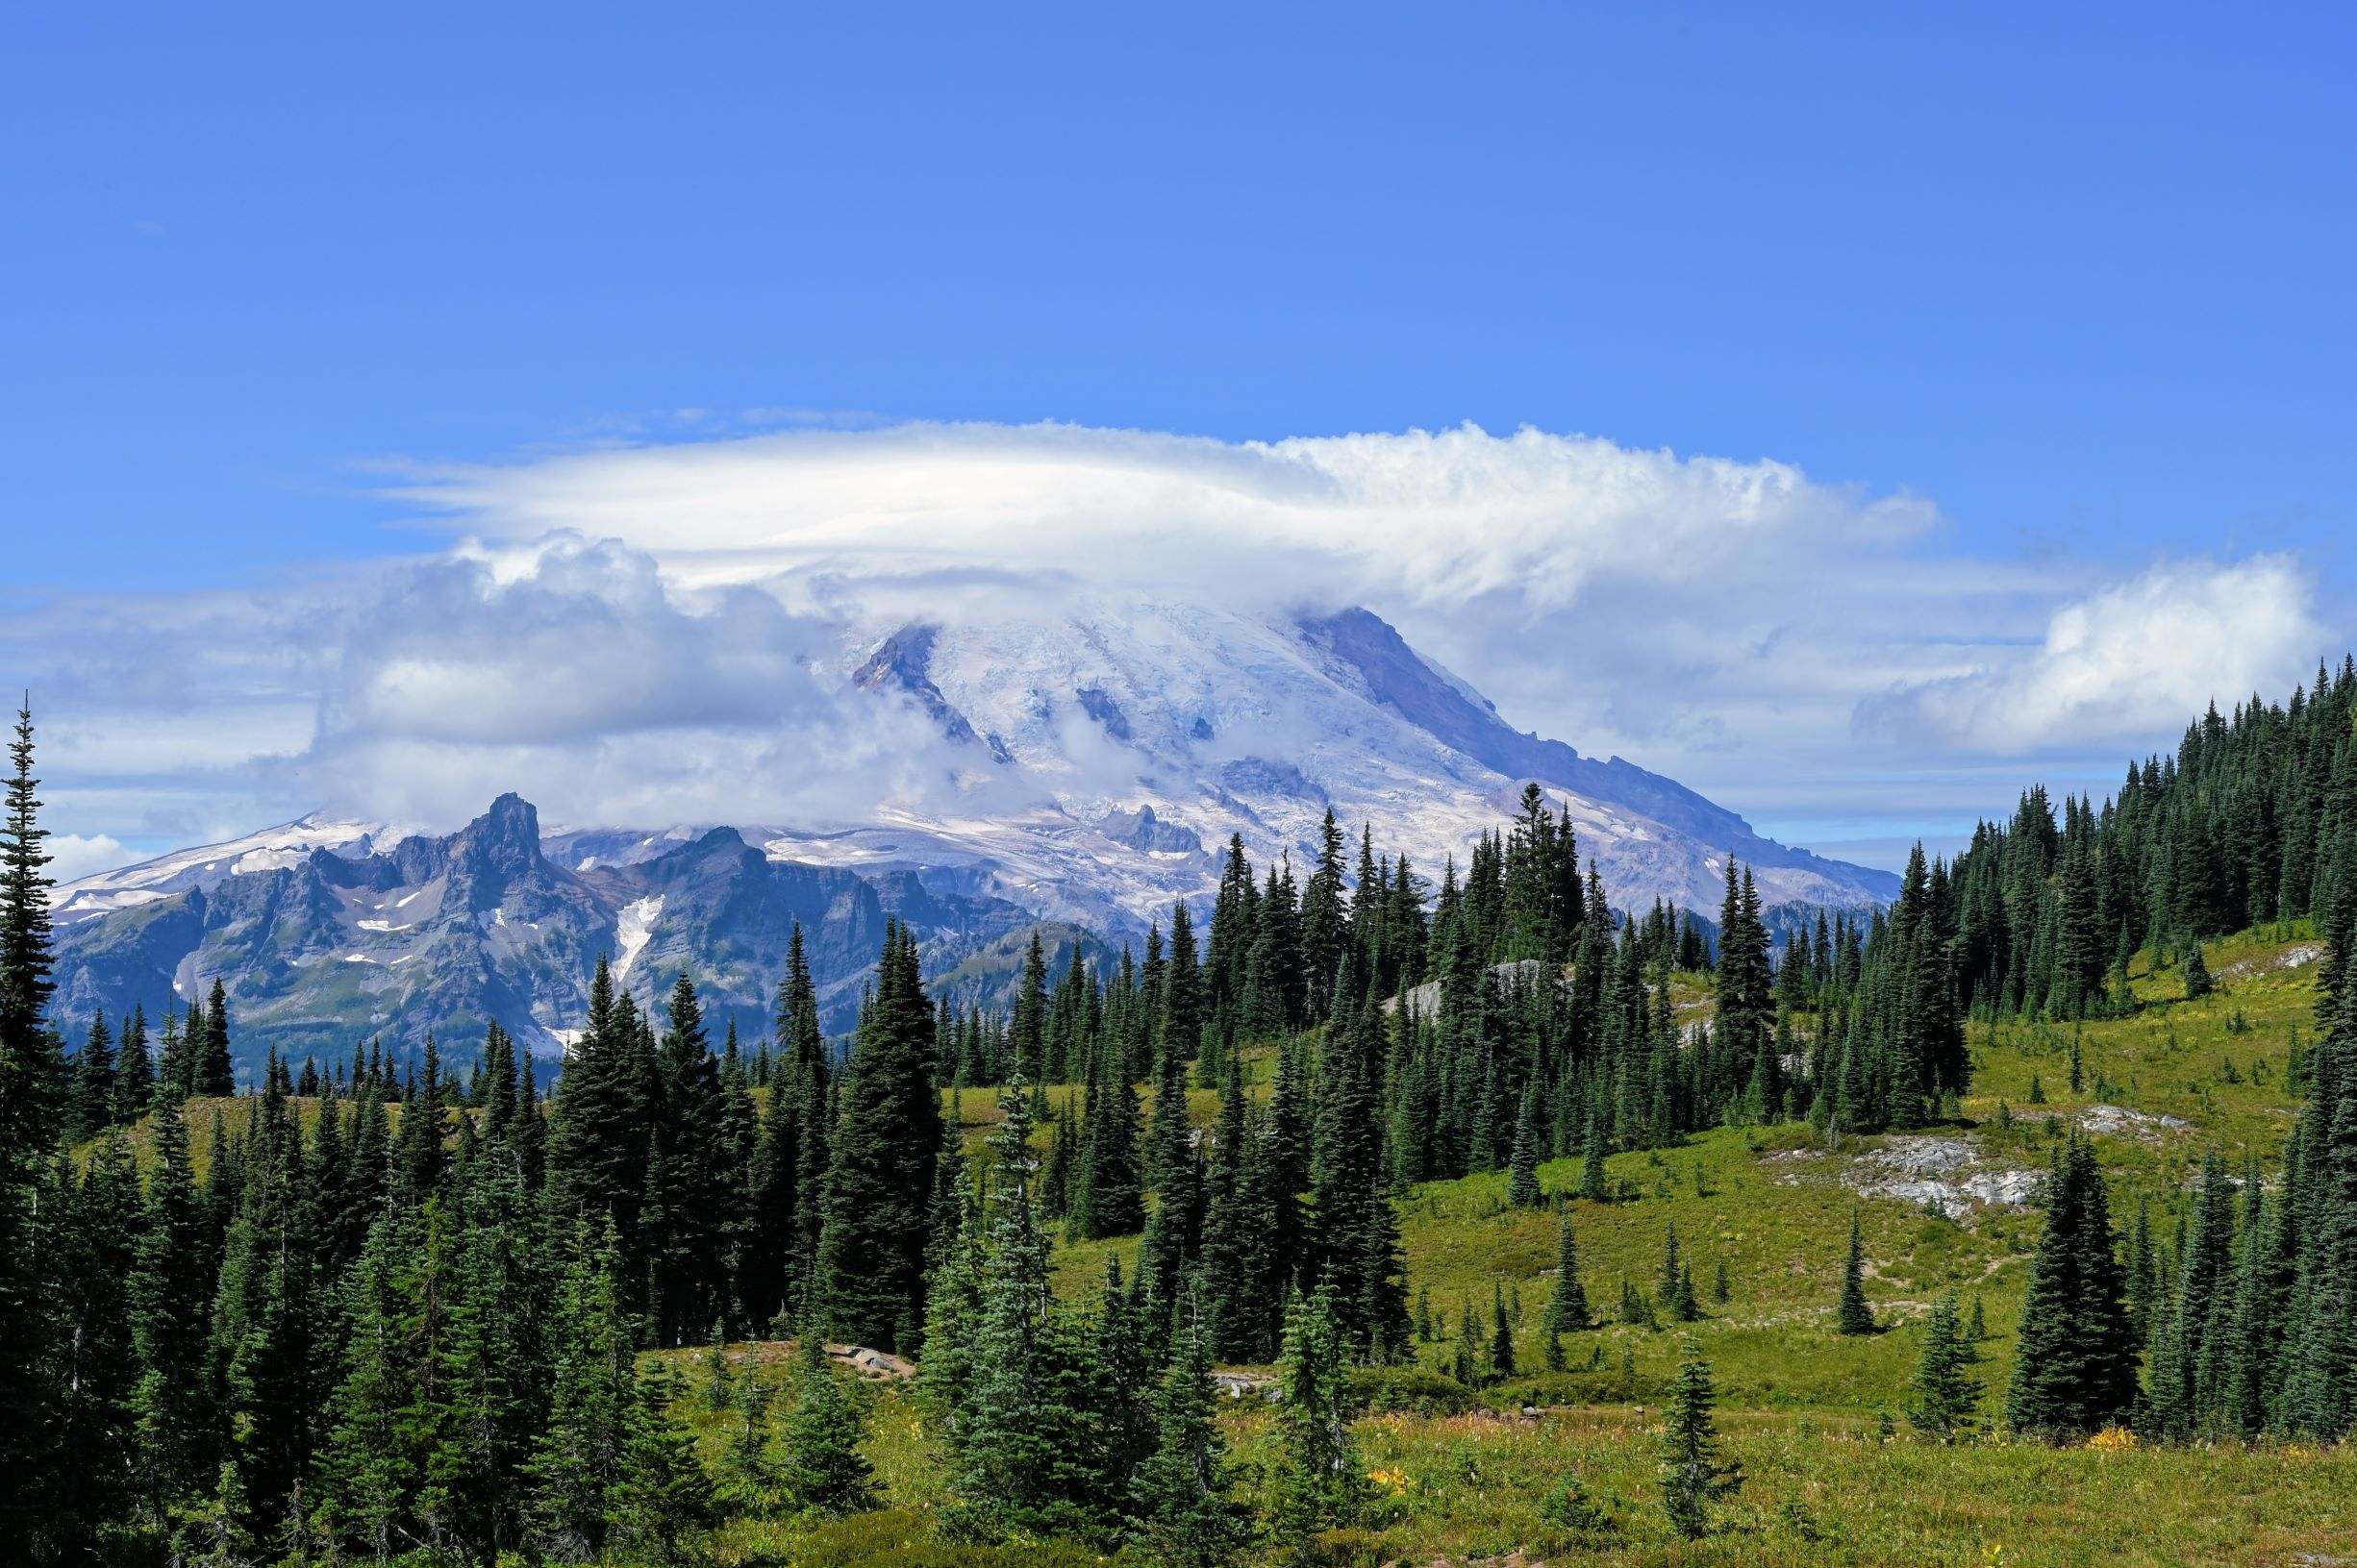
    Soon you will see why I recommended hiking this clockwise. If you’re lucky, you’ll have a clear day with unobstructed views of Mt Rainier. We had some clouds around the top during our hike, but it was still such a beautiful view!

    This part of the trail is mostly flat with a slight downhill slope. The Naches Peak Trail will continue its gradual descent as you return to Tipsoo Lake. There are lots of rocks and roots on the trail so watch your step. Poles are not required, but are helpful, especially if you have any problems with mobility or balance.

    You eventually make your way down to Highway 410 again, where you will need to cross the road to re-connect with the trail and return to your parking area. You have now come full circle on the Naches Peak Trail! And in case you missed it when you started your hike, make sure to look up, that’s Naches Peak your viewing!

    Important Things to Know

    • You need to purchase a Northwest Forest Pass to park at the trailhead. This pass is different than your National Parks pass or the State Parks Discovery Pass. You can buy a day pass or an annual pass, depending on your needs.
    • Part of this trail is along the Pacific Crest Trail, and part of this is in the Mount Rainier National Park. That means dogs are allowed on the trail, only in the portion of the PCT, but not within Mount Rainier National Park. So it is best to leave Fido at home for this hike. 
    • Pack plenty of water, snacks and perhaps even a picnic lunch, depending on your group. 
    • Naches Peak Trail is a very popular trail, so practice proper trail etiquette and be prepared to yield the path to faster hikers when it makes sense.
    • Set the hiking pace to the slowest person in your group.  Make sure everyone has fun and can go at a comfortable pace. 

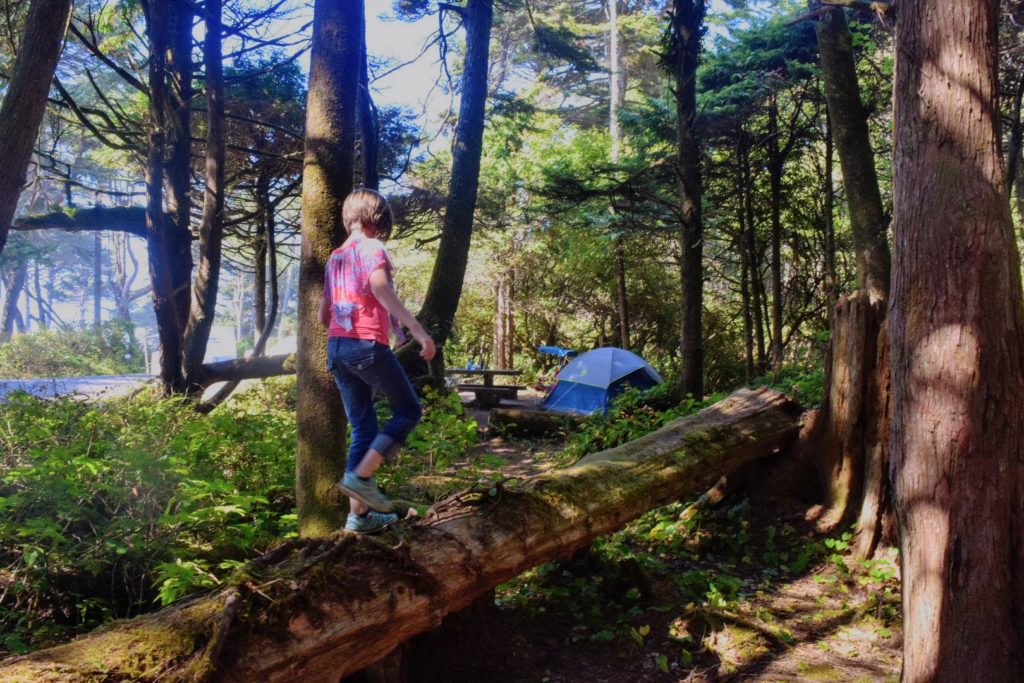
    Mount Rainier is one of my favorite places to camp and hike here in the Seattle area. It is like a second home to me.  If you want to extend this hike and make it a weekend excursion, then consider staying at White River Campground, this area of Mount Rainier is truly remarkable!

    Happy Hiking!

  • Exploring Kanazawa Japan in One Day on a Bike

    I knew nothing about visiting Kanazawa prior to my first trip to Japan. However, I am so happy I included it in our 14-day itinerary there as it was a favorite stop on our journey! 

    Kanazawa dates back to the 1500s and is fortunate enough to have been spared a lot of the destruction caused by WWII. So the city remains well preserved. Walk back in time when samurais ruled, and temples had secret trap doors, geisha wandered the streets and ancient castles governed from their high defensive positions. You will find all of this and more in Kanazawa, Japan.

    In this article, I share the things we did during our day of sightseeing in Kanazawa, as well as additional options you can choose if you have extra time.

    Getting Your Bike

    Kanazawa is relatively flat, and because of this, it makes a perfect place to explore on foot or a bicycle. There are bike rentals for use throughout the city. Machi-Nori is the company that provides these bicycles, and you will see their name on the bike rental stations. You can also search for their stations on Google Maps to find the various locations. I provide a map at the bottom of the page that marks the closest options to the sights listed in this article.

    You pay 200 yen (about 2 USD), and you receive a code that unlocks the bikes from a locking bike rack. Check the bike back in at another bike station in less than 30 minutes, and you don’t pay anything extra!  It is a very affordable way to get around the city. Because Kanazawa is reasonably flat and the attractions densely located, it is easy to bike from destination to destination. 

    There are enough bicycle checkpoints that we never had to pay more than the initial 200 yen. It’s not too crowded, and the traffic isn’t bad if you stick to the side roads.  I wouldn’t try bicycling in Tokyo, but it was so much fun to do in Kanazawa. Read Misadventures in Kanazawa Japan, to learn more about our bicycling experience. It’s all fun and games until someone doesn’t get a bike!

    One Day Itinerary in Kanazawa, Japan

    This one-day itinerary is full of interesting sights, but it isn’t so packed that you feel rushed. Bicycling to all of the stops adds in a care-free element that makes the journey between stops an adventure! And the gardens you visit on this one-day itinerary provide a peaceful place for a relaxing stroll.

    First Stop: Kenroku-en Garden

    Find a bicycle rental and then you’re ready for the first stop of the day. Kenroku-en Garden connects to Kanazawa Castle and Park. There are multiple bicycle rental stations close by, making it easy to check one in and out before and after your visit. 

    Kenroku-en is one of the “Three Great Gardens of Japan.” It is a vast garden, immaculately cared for, with unique trees and beautiful views. There is also a tea-house dating back to the 1700s in the garden. This garden is worth the stop! Kenroku-en can get very busy, but by starting here in the morning, you will beat most of the crowds.  Plan to spend at least 1 hour strolling through the grounds, visiting the different buildings, ponds and more.

    Kanazawa Castle and Park

    Next stop is Kanazawa Castle & Park. They offer free guided tours by the ticket desk, and I highly recommend getting a guide.  They are extremely knowledgeable and make the whole tour far more interesting. Without knowing the history, you miss out on so much. It’s just a quick walk around an empty castle, but with a tour guide, you take a trip through history.  Learn about how they got the rocks that they built the foundation out of and the advanced engineering that went into this historic castle. You will leave feeling amazed at the human ingenuity and technology from so many centuries ago.  

    Lunch Break

    After you complete your tour of the castle and wander around the park for a while, it’s an excellent time to take a lunch break.  There are a lot of wonderful udon noodle restaurants close by, so walk to one in the direction of your next stop and enjoy a much-deserved break! A hearty meal of homemade udon noodles and perhaps a side order of tonkatsu will fill you up and keep you going the rest of the day!

    tonkatsu and udon noodle soup

    Myōryū-ji (Ninja Temple)

    Myōryū-ji (Ninja Temple) (Ninjadera) is your next stop. There aren’t any bicycle rentals for a few blocks, so you may need to return your bike to the nearest rental facility and walk the rest of the way. Also,  I recommend that you make reservations in advance, before your arrival in Kanazawa.  

    However, if you were unable to do this, sometimes they will have same-day reservations, so it is still worth calling or stopping by. If they have spots available, they will fit you into one of their groups.  They offer tours in English. No photography is allowed; however, it is a fascinating temple tour with hidden doors and traps. You’ll feel like you’re on the set of a martial arts movie.  

    Before finding the next bike rental station, you may want to stroll through the Nishi Chaya District before continuing to the next stop. It is only about a 5-minute walk from Myōryū-ji . You can admire the beautiful architecture from the Edo-period as you make your way to the home of one of the samurais who lived during this period.

    Nomura Clan Samurai Home

    Find the nearest bike rental station and continue riding to the Nomura Clan Samurai Home. This home is an example of a samurai home during the Edo-period that spanned from the 1600s to 1800s. Walk thru the house and use your imagination to picture how this wealthy samurai family must have lived.  The size of the home and proximity to the castle were relative to the samurais rank. It is a fascinating period in Japanese history, and Kanazawa is a great place to explore this.

    Optional Sightseeing Stops if You Have Time:

    Higashiyama Higashi Chaya District: If you aren’t too tired after your day of sightseeing, take some time in the evening to visit this old part of town. There are many traditional tea houses you can visit, watch geisha performances or shop for beautifully crafted souvenirs. You could plan to have dinner here and combine it with some evening sightseeing. Higashi Chaya is another well-preserved section of the old city. It is worth seeing if you feel up to it!

    Omicho Market: If you like markets, this one is not too far from Kanazawa Castle. It closes around 5:00 p.m. though so you’d have to make an effort to squeeze it into your day of sightseeing. However, I don’t feel like it is something you will regret if you miss it.  Japan is full of wonderful markets, such as the one in Kyoto and the many choices in Tokyo. So I would not miss out on the other sights listed in this article to make time for this market.

    Dinner

    If you want to try something other than traditional Japanese food, Spice Box Indian Restaurant is delicious! It is a small restaurant though, so reservations are recommended. If you’ve never tried Indian dosas, they are yummy! Kind of like a burrito with a thin, crispy wrapping and filled with potatoes and vegetables in a curry sauce. My husband became a new fan favorite after eating his first one here.indian dosas

    Getting Around Kanazawa, Japan

    We used bikes and walked around Kanazawa. It is a compact city that is easy to navigate without the use of other transportation methods.  However, they do have a bus system you could also use if that better suits your needs.

    If you are biking or walking, I recommend downloading Google Maps before your trip.  If you have Google Maps for navigation and a SIM card with a data plan, you are set!  You can also stop at the top-notch Kanazawa Station and get a tourist map at their tourist information center.

    Take pictures of the maps at the bicycle rental stations so that you have an easy way to see where all the various checkpoints are across the city.

    There are bicycle stations near all the major attractions.  I think the furthest we walked was a few blocks. Click on the map below to open up Google Maps to all the stops listed here for one day in Kanazawa, as well as the closest bicycle rentals.

    Map of Kanazawa, Japan

    Getting to Kanazawa Japan

    Depending on where you are coming from, there are many train options when traveling to Kanazawa, Japan. If you’re coming from Kyoto or Tokyo, you will have high-speed train options allowing you to reach Kanazawa within 2-3 hours.

    We came from the town of Takayama, stopping in Shirakawa-go on the way. To go this route, you will need to take the bus, and it takes around 3-4 hours from Takayama to Kanazawa and about 2-3 hours if you’re coming from Shirakawa-go.  There are approximately 10 round trip buses that leave daily from Kanazawa to Shirakawa-go. If you have an extra day, you could even make a day trip there from Kanazawa.

    And I would always recommend to anyone visiting Japan to purchase the JR Rail Pass.  Purchasing the JR Rail Pass was one of the best decisions we made for our two week trip to Japan. It will save you a lot of money and time in booking individual train tickets. There are a few rules you need to know, such as which trains require advance seat reservations, but instructions are included with your rail passes. You can also use the Japan Official Travel App or Japan Travel App to navigate their public transportation system.

    Final Tips for Visiting Kanazawa, Japan

    Kanazawa is worth the stop during your trip to Japan. Especially for anyone who loves history, architecture and beautiful gardens.  And of course, anyone who enjoys a good bike ride too! You will have fun exploring this beautiful city. To me, Kanazawa had a lovely laid back feel of a local town back home.  It was a great way to spend a day, and I am so glad we didn’t skip this unique city!

    Plan to spend at least one night in Kanazawa and as mentioned earlier, it makes a great base to take a day trip to the historic town of Shirakawa-go.

    Give yourself around 1-2 hours at each attraction I have listed, and you will have plenty of time not to feel rushed when going from site to site.

    Please enjoy reading Misadventures in Kanazawa and if you’re looking for ways to stretch your travel budget just a bit further, why not check out 6 Ways to Save Money While Traveling.

    またね! (until next time!)

  • Our Misadventures in Kanazawa, Japan

    A Little Background

    During a recent visit with my mom-in-law, my hubby told his Mom about a funny mishap we had in Kanazawa during our trip to Japan.  His Mom enjoyed the story and suggested to me that I write about our travel, “misadventures.”

    You know the travel mishaps, near-disasters, those “uh oh, I lost my cool” moments that you laugh about later when you’re back home again.  This side is rarely seen on social media because it isn’t always “pretty.” Well, pretty or not, the truth is, when you travel, not everything is going to go according to your tidy little plan. So with that in mind, I am starting this series about the “behind the scenes” misadventures that I have experienced during my travels.

    Quick Note about Kanazawa

    We loved our time in this interesting city.  There is an ancient castle, samurai houses, ninja temple, and beautiful gardens. The city of Kanazawa is laid out in a way that is great for exploring on foot or as mentioned in this post, on bicycles! This one day itinerary for Kanazawa describes all the fascinating sights you can see when you visit.

    Misadventures in Kanazawa, Japan

    My husband and I were on a trip to Japan.  It was our first visit to Kanazawa and we were attempting to use the public bicycle transportation system.  We enjoy riding bikes and loved the idea of using this system to see the various tourist attractions around the city. There are bicycle rental stations scattered around the city near all the main tourist attractions. You pay 200 yen (about 2 USD) and are given a code that unlocks the bikes from a locking bike rack.

    As long as you check the bike in at another bike station in less than 30 minutes, you don’t have to pay any extra!  It is a very affordable way to get around the city. And the great thing about Kanazawa is that it is a reasonably flat city.  So it is easy to bike from destination to destination, and there are enough bicycle checkpoints that we never had to pay more than the initial 200 yen.

    girl on public bike in Kanazawa Japan
    Me at one of the bike stations in Kanazawa.

    We were walking when we spotted one of these of the bike stations. The only problem was, there was only one bike available, and there were two of us.  So we looked on the map they provided that showed the locations of other bike rental stations, and we saw that there was one located at a bus station not too far from us.

    My husband rented the one available bike and decided that he could ride ahead and make sure to get a bike at the other station before anyone else could get to it first.  I would walk there and meet him. This sounded like a reasonable plan.  That is until I watched him bike down the street and turn a corner only to disappear from view.

    Technology Gone Awry

    Usually, this wouldn’t be an issue, but one thing both he and I hadn’t thought about before he raced off, was that he was the only one with internet on his phone. He is a tech geek, and so he had our phones tethered together so that he only needed to purchase one SIM and one cell phone plan while we were in Japan.  And since we were normally always together, this had never been an issue.  That is until now.

    As soon as he rode down the street and turned out of view, I looked down at my phone. At that moment, I realized I no longer had the internet.  Which meant, I could no longer look up directions to navigate myself to the bus station we were meeting at.

    Which Way Did He Go?

    I hurried to the end of the road and made a right where I had seen him turn.  He was nowhere to be found.  I walked down the street a bit further thru a narrow lane with houses on each side — still nothing.  Well, now I was getting irritated with him.  How could he have just run off and left me like that! He and I were going to have a friendly chat when I finally met up with him!

    There were too many options for streets he might have turned down, and I didn’t want to get lost. So I turned around and made my way towards the main road we had been on before coming to the bike station.

    Language Learning to the Rescue

    I remembered the general direction of the bus station, so I walked up to the main road and then turned in the direction I knew the bus station to be.  A little while after turning down the main road, an older Japanese gentleman came walking by.  I excused myself and politely asked him if he could tell me where the bus station was.

    Now, thank God I had taken the two weeks before the trip to listen to my Pimsleur Japanese Language CDs. And thankfully I remembered the phrase to ask where the nearest bus station was!  It saved my bacon in this instance.  The man told me where to go (thankfully with hand gestures as I couldn’t understand everything he said). I thanked him and then made my way to the bus station with the information he provided.

    Now up to this point, I had an internal monologue inside my head of how I was going to let my hubby “have it” for abandoning me. Yes, it was an overly dramatic monologue. However, after getting some sense of direction and talking to the nice Japanese man, my spirit was picking up.

    The Meeting Spot

    Soon enough, I turned down another street, and just a little way up the road on the right was the bus station.  I saw the bicycle rack, but I didn’t see my hubby anywhere! And to be honest, that irritation I felt earlier, it morphed into full-on anger now!  I mean, isn’t the first rule that you wait at the designated meeting spot?! And yet, here he was nowhere to be seen, and I had no way of reaching him! So my internal monologue was going full speed ahead now, and he was going to get a severe tongue lashing when I saw him!

    man at bike station in Kanazawa, Japan.
    My hubby at a bike station.

    Back Together Again

    Well lucky for him he road up just a few moments after I arrived.  He realized his mistake and began searching for me. After not finding me, he circled back to the bus station to wait. So instead of giving him the planned tongue lashing, instead, I gave him a dramatic description of my being left alone. As we talked, I realized he, of course, had not meant to lose me and had tried to find me after realizing his mistake. My anger quickly defused, and we got our bikes and headed on our merry way!

    In spite of a rocky start, we had a lovely day riding around the city of Kanazawa.  Thankfully I did not let this silly event ruin the day. And although at the moment, it did not feel that funny, we now laugh about it. We also discussed what the protocol would be, should we ever get separated like that in the future.

    Emergency Protocol When Traveling

    This is something I would recommend you do if you’re ever traveling with someone else or in a group.  Know where to meet if you are separated or unable to reach the other person. This is a good idea even at home, have an emergency plan in place, just in case!

    Conclusion

    So there you have it, my hubby road off and left me, but a crash course in Japanese saved the day.  It shows how even a small amount of language learning may come in far handier than you’ll ever know! Also, these things happen, tempers flare, and pressure is turned up when traveling. Shake it off, talk it out and move on and enjoy your trip.  Then laugh about it when you get home.  You will find these are the moments you remember the most. I have learned a lot thru travel, and learning to adjust to change is an important lesson!

    I hope you enjoy these posts and I’d love it if you’d share some of your own misadventures with me.  You know, now that we can all laugh about them.

    さようなら (sayonara!)

  • 13 Fun Things to do at Kalaloch Campground

    If you are looking for a campground close to Seattle, look no further than Kalaloch Campground.  This campground is sure to become your family’s favorite getaway destination.  Long weekend? Summer vacation?  Head to Kalaloch Campground. It is the perfect Northwest getaway.  

    You’ve got miles of sandy beaches, piles of driftwood for building forts, tide pools for exploring the sea life, whale watching (depending on the time of year) and so much more!  And who doesn’t love waking up to the sound of the ocean? Keep reading as I share my favorite things to do when camping at Kalaloch Campground and why I keep returning year after year.

    1) Explore the Tide Pools

    This is one of my favorite things to do, even now as an adult.  I didn’t grow up near the ocean, so when I moved to Seattle at age 18, I had my first experience exploring tide pools.  The ocean fascinates me.  It is a beautiful “world” that we have barely explored. I know kids and adults alike will get excited seeing the sea anemones, colorful starfish, and barnacles in the many tide pools found at Kalaloch. You’ll see tiny crabs crawling out from under rocks, and you might even see the occasional sea otter foraging for food by the tide pools!

    2) Make Sandcastles on the Beach

    Okay, what’s a trip to the beach without time spent building sandcastles? I happen to believe that no trip to the beach is a success unless your suitcase comes home with a little sand in it.

    3) Visit the Tree of Life at Kalaloch Campground

    The Tree of Life is one of the unique treasures found at Kalaloch Campground. It is a beautiful tree suspended above the ground with its roots growing down below.  I’m not sure how long it can continue to hang on against the eroding soil around it, but while it is here, you definitely need to check it out!

    Tree of Life at Kalaloch Campground

    4) Watch the Sunset on the Beach

    Sunsets on the beach are beautiful at Kalaloch Campground. You have a vast sandy beach that reflects the light of the setting sun and casts orange and red light across the crashing waves.  I love watching the sunset over the ocean.  Whether I am here or in Maui, I’m a sucker for a good sunset!

    Oh, and in case you’re wondering, sunrises on the beach at Kalaloch are also spectacular! Cotton candy pinks mixed with baby blues reflected off the sand while the sunlight shimmers on the water. You feel the ocean breeze blowing in your face, and the glow of the sun warms you.  Yep, sunrises here are pretty great too!boy walking on beach at sunset

    5) Hiking at Kalaloch Campground

    The Kalaloch Creek Nature Trail connects to Kalaloch Campground. It is a short walk thru the beautiful wooded area surrounding the campground. The hike is less than a mile and is accessed from the campground’s Loop A.  Follow signs and be very careful when crossing Highway 101.

    The rangers also offer guided hikes depending on the time of year you go.  So definitely check in with them to see what is happening while you’re there.  I think it is fun for adults and kids alike to go on a guided walk with a ranger who knows the area. You learn fun facts and interesting information about the local habitat.

    6) Fly Kites on the Beach

    Plan ahead and pack your kite!  Now sing along with me: “let’s go fly a kite, up to the highest heights…”  Okay, if you haven’t seen the original Mary Poppins, stop reading now, watch it and then come back and finish reading this post.  Flying kites is such a fun family activity, and the beach in front of Kalaloch Campground is perfect for this at low tide. You will have a huge sandy beach to fly your kites to your heart’s content!

    flying a kite on the beach at Kalaloch

    7) Go Stargazing

    One benefit of taking a family vacation away from the city is viewing the stars at night. Away from light pollution, you begin to see the vast sea of stars above you.  Grab a blanket and some hot cocoa and find an open spot to admire these twinkling lights. We have made trips to Kalaloch just for this purpose. 

    My husband loves stargazing, so we bring a small telescope, along with our cameras and tripods and practice our astrophotography. You can stargaze at the Kalaloch Campground day-use parking lot, or if it’s low tide, then the beach makes a great place to bring your thermos of cocoa and blankets.  Just don’t forget your flashlights!

    8) Build a Fort on the Beach from Driftwood

    There is so much driftwood on the beaches surrounding Kalaloch campground, and with some teamwork and ingenuity, perhaps you will build yourself a fort that is discussed inside family circles for years to come! Come on, think big!

    9) Watch Whales Migrating

    Depending on the time of year you can watch grey whales migrating from the beach in front of Kalaloch Campground.  It is so much fun to watch them breach and see water shoot up from their blowholes.  Bring some binoculars so you can enjoy them close up. Typically the months of May, October, and November are the best months to watch grey whales at Kalaloch. However, believe it or not, we got to see them once during a camping trip at the end of August!  So you never know!

    10) Build a Bonfire on the Beach

    Who doesn’t love a good bonfire on the beach? This is the only time you can use driftwood for your fires.  You are not allowed to bring driftwood off the beach to use for your campfire, but you can use it on the beach. So bring your marshmallows and supplies for s’mores and enjoy a bonfire on the beach. Check with the rangers at Kalaloch Campground earlier in the day to make sure there are no fire restrictions during your stay.

    And of course, practice safety and make sure to extinguish your fire before leaving.  Be careful to cover all the hot coals with sand so that no one accidentally steps on them, during their nightly stroll on the beach.

    11) Wake up to Sunlight Streaming thru the Trees

    This is one of the joys of camping. Waking up to the sounds of birds, the smell of fresh air and sunlight streaming in thru the trees.  It says, “it’s going to be a great day!” Everyone starts stirring around; you grab a cup of coffee as you get the fire going for breakfast; it is a magical time in the stillness of the morning.

    Sunlight thru trees at Kalaloch Campground

    12) Biking Around Kalaloch Campground

    If you have the room to bring bikes, this is something fun that kids will enjoy.  Biking around Kalaloch campground.  It is something I see no matter where I go camping.  Kids off on their own adventure just cycling around the campgrounds with the carefree hearts that camping brings. They have huge smiles on their faces, and they are usually laughing and talking with each other.  I have even witnessed young kids who are just learning to ride their bikes for the first time.  It is fun for both them and their parents.

    13) Hanging out at the Campsite

    One of the things kids love to do is hang out at their campsite and explore the area surrounding it. Climbing trees, playing hide-and-seek and of course playing in the tents. I love watching their happy faces as they enjoy being outdoors. It makes the work involved in planning a camping trip all worth it!

    girl exploring area by campsite at Kalaloch Campground

    Important Information for Camping at Kalaloch Campground

    Make reservations in advance! This is a favorite campground for people who live in the Seattle area, and it fills up quick during the summer months. So plan ahead and reserve your campsite months in advance, if possible.  I booked our campsite in May, for an August visit.  The reservation period is from May to September, and you can reserve your spot online during this time frame. During the off-season, they don’t accept reservations. During this time, campsites are assigned on a first-come-first-served basis.

    You can purchase firewood at Kalaloch Lodge which is about a 1/2 mile from Kalaloch Campground. They also have a small store where you can buy snacks, drinks, and miscellaneous supplies you may have forgotten to pack.

    Always check the tide charts posted at the campground when making plans for your daily activities.  You never want to get caught on the beach during high tide.  Besides the strong currents, there are lots of large trees and driftwood that could easily knock a person out if you were to be hit by one.  So know when low tide and high tide are and stay safe!

    Getting to Kalaloch Campground

    Kalaloch Campground is located off Highway 101 about  34 miles from the town of Forks, Washington. It is around 3-4 hours drive time from Seattle. Depending on where you’re coming from you will either head north thru Bremerton and over to Highway 101 or south thru Olympia, cutting over to Highway 101.  I find driving south past Olympia and then cutting over to Highway 101 around Montesano is the quickest way for me.

    Kalaloch Lodge Address is: 157151 US-101, Forks, WA 98331 (Kalaloch campground is about a half-mile north from the lodge.)

    Conclusion

    No matter what you decide to do when visiting Kalaloch Campground, there is a lot to occupy your time and so many fun ways to create wonderful memories with your family. If you need more ideas for things to do near Kalaloch Campground check out these awesome beaches near Kalaloch.

    Happy Camping!

  • Road to Hana: An Unforgettable Maui Day Trip!

    The Road to Hana is one of the best day trips you can take while in Maui.  No Maui itinerary would be complete without including the road to Hana. The drive is an adventure in itself. It has 620 curves in its short 52 miles!  You will see gorgeous waterfalls, hike thru dark lava caves, walk across black sand beaches and so much more!

    How to Plan for the Road to Hana

    Plan the whole day for your drive to Hana. Make sure and get up early to beat the crowds and tour buses. You won’t regret getting an early morning start when you have one of the many waterfalls all to yourself. Also, the sooner you go up, the more time you have to enjoy all the stops along the way and still be able to make it down before dark.  I think you’ll find, it’s a road you prefer to drive in the daylight.  So first things first, fuel up!  There is only one gas station in Hana, so fuel up before heading up the mountain.

    Getting to Hana

    It’s about 1 hour to mile marker zero from Lahaina and around 40 minutes from Kihei.  The beginning of the road to Hana starts just outside the town of Haiku. Haiku is where my recommended supply stop, Jaws Country Store, is located. You can use the embedded map below to get driving directions from your hotel or condo and plan for how long it will take you to get to the starting point. Even though it may only take around 3 hours to drive straight to Hana from West Maui, you will be making lots of stops along the way, which is why you need to plan for this to take up your whole day. And I can’t stress enough how important it is you get an early start!

    What to Pack

    If you are prone to motion sickness, I would recommend bringing Dramamine and riding up front if possible. Pack a picnic lunch (see my recommended stop below) as well as extra water and snacks. You have a full day ahead of you and it’s good to be prepared for any delays or emergencies that could come up. I also like to wear my swimsuit underneath a pair of shorts and a t-shirt, that way I am always ready to jump in the next swimming hole that tickles my fancy. Additionally, some of the hikes are best suited to strap-on sandals or tennis shoes, so bring something good for hiking as well as your flip-flops.

    Road to Hana Packing Guide
    Swimsuits
    Rain Jacket
    Sunglasses
    Tennis Shoes or Strap-on Sandals
    Sweatshirt
    Hat (sun protection)
    Flip-flops
    Drinks/Water
    Dramamine
    Cameras
    Bug Spray
    Hairbrush/comb
    Towels
    Snacks
    Smartphone
    Sunscreen
    Picnic Lunch *Jaws Country Store on the map
    *Optional Change of Clothes (for dinner that evening)

    Self-Driving Guide

    I have included some of my favorite stopping points along the road to Hana on this Google Map. You may also want to download a self-driving guide from the app store. Shaka Guide or GyPSy Guide to Hana are both excellent app choices. You can download these to your phone for offline use. This saves battery and you will avoid losing connection in case your cell service doesn’t work on the road to Hana. These apps are great as they will not only recommend areas of interest along the road to Hana, but they will also give you historical information that you would otherwise miss on your own.

    Stops Along the Road to Hana

    How to use this map: Click on the star to the right of “Road to Hana” to add this to your own Google Maps. You can also click on the icon to the left of “Road to Hana” for a drop-down menu of all the places I have marked on the map. Click on any of the icons on the map to pull up driving directions and specific information.

    Jaw’s Country Store

    This one is actually before the official start of the road to Hana, however, it is a great place to pick up that picnic lunch I mentioned before. It is the perfect one-stop shop to begin your drive to Hana.  Chances are you missed breakfast in your effort to get an early start.  No problem!  Jaw’s Country Store has you covered!  Get your coffee fix and breakfast while you pick out your picnic lunch for later today.

    Twin Falls Maui Waterfall

    I stopped here on my very first trip to Maui and although I had a lot of fun here, I recommend you skip this on your way up to Hana. There are so many great waterfalls along the road and this one takes a bit of time walking to it and back. It can also get busy with tour buses stopping here.  So continue past it and instead stop if you have time on the way back and want to see one more waterfall and swimming hole.

    Garden of Eden

    I stopped here with my husband on our first trip to Hana and we had the whole place to ourselves (thanks to an early start). It was such a beautiful garden to wander thru, admiring the views, the bamboo “forest” and an array of native plants. They have chairs you can lounge in and relax before returning to your drive to Hana. It was well worth the stop!

    Kaumahina State Wayside

    This is a great rest area to stop and use the restroom. Enjoy the scenic viewpoint and stretch your legs before continuing on your journey to Hana.

    Ke’anae Lookout

    This stop is a small detour off of the road to Hana, but I think it is well worth the extra effort.  Turn off the Hana Highway on to Ke’anae Road and follow the road all the way to the end where you will turn around and come back the same way when you are finished.  Make sure to stop at the different viewing areas to watch the waves crash against the shore.  Towards the end of Ke’anae Road, you will find the Lanakila Ihiihi O Iehowa Ona Kava church, it is the only building to survive the massive tsunami that wiped out this village in 1946.

    Take time to read the plaques posted that share information about this historic event. This short, beautiful detour, is full of historical significance.  Oh and in case you didn’t take a bathroom break at Kaumahina State Wayside, they do have public restrooms.  There is also a food stand where you can get banana bread and shave ice in case you need a snack.

    Keanae Church on the road to Hana
    The historic Lanakila Ihiihi O Iehova O na Kaua Church.

    Ching’s Pond

    If you’ve been anxious to go for a swim, here’s your chance.  If you can handle the “refreshing” (aka very cold) water at Ching’s pond it is a beautiful spot for a quick swim and waterfall photo opp. This is a popular swimming hole with locals and visitors alike.  The climb down is a little steep, so I recommend wearing your strap-on sandals or sneakers for the climb down. This is a fun stop on the road to Hana and I think it’s worth the icy plunge! Don’t expect to spend too much time here though, it’s more of a quick jump in, take photos, get back to the car and warm up, kind of stop.

    Pua’a Ka’a State Wayside & Falls

    The Pua’a Ka’a State Wayside is another great rest area stop along the road to Hana.  There are restrooms and picnic tables, not to mention more waterfalls, making this a great option to eat that picnic lunch you brought.  Eat lunch and enjoy the waterfalls (and lots of feral cats roaming around) before continuing towards Hana.

    Waterfalls on the road to Hana
    Exploring the Pua’a falls after our picnic lunch.

    Hana Lava Tube

    This was one of my favorite stops on the Road to Hana.  I mean, how often do you get a chance to walk thru a cave that was carved out by hot lava?  You get a chance to experience the darkness of the lava tube as well as discover some interesting facts about what has learned to live in these dark tunnels. This will be a fun stop for adults and kids alike!

    Waianapanapa State Park

    You definitely cannot miss stopping at Waianapanapa State Park!  This beautiful state park is famous for its black sand beach.  It also has a blowhole, multiple hiking trails, and campground. Stop here and enjoy the blowhole, take photos of this gorgeous stretch of coastline and if you want, go for a swim off the black sand beach. Just be careful as there are no lifeguards and the waves are big and the currents often strong, so use caution! Additionally, you can take the short paved trail to the Wainapanapa caves.  Wainapanapa State Park is your last stop before reaching Hana.

    black rock beach at Wainapanapa State Park in Hana
    The black sand beach at Wainapanapa State Park.

    Hana

    You made it! Pat yourself on the back! Now check out this town that had a highway named after it.  If you need more snacks or drinks for the trip back, try Hasegawa General Store or the Hana Ranch Store. For most people who drive the road to Hana, this is where they turn around to head back down the mountain.

    However, for some, they have one more stop on their list– the Pools of O’heo or the Seven Sacred Pools. Now I only recommend doing this, if you left early enough in the day, as it adds a little over 1-hour round trip drive time from Hana. Plus another 30-minute round trip hike to see the pools and then any additional time should you decide to swim (conditions permitting).

    Tip:To see the Seven Sacred Pools at Ohe’o before the crowds arrive, drive all the way here first, then see all the sights in reverse order back down.  Better yet, camp at Wainapanapa State Park (reservations required) or snag a first come first serve site at Kipahulu Campground.

    Pools of Ohe’o (aka Seven Sacred Pools)

    To get to the Kipahulu Visitor Center, and the trailhead for the Kūloa Point Trail which takes you to the Pools of Ohe’o, you will need to drive about 40 minutes past Hana.  You will also need to pay an entrance fee for Haleakala National Park. If you plan to see the sunrise in Haleakala National Park, make sure to hang on to your receipt and as long as you go during the 3-days your receipt is good for, you won’t need to pay the entrance fee a second time.  This, of course, works the other way as well, if you just visited Haleakala for the sunrise, and have a valid receipt, you can use that here and avoid paying another entrance fee.

    Driving Back Down

    Hopefully, you started your day early enough that you are now driving back with some daylight to spare.  Either way, make sure to take it slow, watch out for pedestrians and be mindful of the locals who live on these roads.  They tend to drive a lot faster and know the roads much better than we do.  So if you see them wanting to pass, and can give them any space, go ahead, but otherwise, don’t worry, when they feel they can pass they will, whether you pull over or not.  Once you have made it all the way back down, you can then officially congratulate yourself for surviving the road to Hana!

    Tip: Plan ahead and reserve a table at Mama’s Fish House for dinner, it will make a wonderful ending to your day.  Just don’t forget to reserve ahead of time and to pack that *optional change of clothes I listed.

    Safety Tips for the Road to Hana

    Fuel up in Paia before beginning the drive to Hana.  There is one gas station in Hana, but it’s going to cost you! It makes a lot more sense to fuel up before starting your drive. Plus, it’s always a good idea to start any road trip on a full tank of gas.  If you get to Hana or take the extra trip to the Pools of Ohe’o, check your fuel levels then, and you can decide whether you need to fuel up again before making the drive back.

    Drive carefully and pull over when it is safe to do so to let other drivers pass.  Locals who live off the Hana Highway are often on their way to work or on their way home, so give them preference. Do your best to get an early start for your drive to Hana so you can make the return trip before dark.

    Swim with caution. There are some fun spots for swimming, but this area gets a lot of rain and the currents can be dangerous.  So if in doubt, stay out.

    When parking on the side of the road and walking to see waterfalls, exercise caution and watch out for vehicles.  And the same applies when you are in your car, watch out for fellow pedestrians and take it slow around the 600+ curves as you never know what’s on the other side.

    Final Thoughts on the Road to Hana

    Driving the road to Hana and seeing the sunrise at Haleakala are both day trips that shouldn’t be missed on your visit to Maui.  They are worth the extra effort. Just plan ahead and remember, the road to Hana is about the journey, not the destination. And what a journey it is!

  • Mercer Slough SUP & Kayak Adventure

    My husband and I recently purchased a couple of these Body Glove inflatable SUPs on sale at Costco. The flexibility and compact storage features of owning an inflatable appealed to us.  We could throw these in the trunk of the car and be on our way! I started researching some good beginner spots to try them out at.  We weren’t sure how inflatables would handle, so we wanted to go someplace with calm waters.  I narrowed it down to Lake Sammamish & the Mercer Slough.

    We tested them first on Lake Sammamish.  In the beginning, I felt unstable, however, I quickly learned where to stand and got my “sea legs” back. Soon I had a big grin on my face as I enjoyed being out on the water.  After two hours, we packed up our SUPs and headed home with plans to try them out on the Mercer Slough the next day.

    Stand up paddleboards on Lake Sammamish
    Lake Sammamish

    Mercer Slough Nature Park

    We tried to find parking at Enatai Beach Park; however, it was around 11 a.m. on Memorial Day, so we knew our chances were slim.  We headed to find parking next to the Mercer Slough instead.  As luck would have it, there was plenty of parking at the Sweyolocken Boat Launch.  We aired up the SUPs one at a time from the back of our SUV.

    During that time (about 10 minutes), I had already been bitten at least once by a mosquito.  I quickly regretted forgetting to bring bug spray.  Thankfully, a family was getting ready to put their kayaks in the water who remembered their spray.  They very generously lent me their bug spray and the dad told me that later in the year there would be swarms of mosquitoes.  So note to self, only come early in the season!

    On The Water

    We slid the paddleboards into the water and waded in a little past our ankles. With a slight shove off we went out from the boat launch into the slough.  We then had a decision to make, left would take us towards Bellevue and right would take us into Lake Washington.  We decided to go left and explore the canal.

    The Mercer Slough is an excellent area for beginners as the water is calmer here and you are more protected from the wind due to the trees and vegetation on either side.  Additionally, only non-motorized boats are allowed in the Mercer Slough. So this made it easier to practice on our new paddleboards as no jet skiers or boats were driving by creating waves like we had at Lake Sammamish.

    Mercer Slough canal and bridge
    A bridge that links Mercer Slough trails

    Mercer Slough Wildlife

    The Mercer Slough is one of Lake Washington’s largest remaining wetlands. One of the great things about the Mercer Slough Nature Park is all of the wildlife you will see along your journey.  We saw great blue herons swooping down and catching fish in their beaks, green herons walking along the water’s edge, frogs hopping on lily pads, ducklings and goslings learning to swim with their families and turtles sunbathing.  It felt like an adventure down a jungle river rather than paddling in the middle of an urban center!  We passed multiple families and groups both in kayaks and on stand up paddleboards.  It was a great way to spend the afternoon.

    Turtles sunbathing in the mercer slough
    Turtles sunbathing

    Getting to the Mercer Slough

    Here are a couple of the places you can park to enjoy the Mercer Slough.

    Enatai Beach Park, 3519 108th Ave SE, Bellevue, WA 98004.
    This park has a swimming area off of Lake Washington as well as a boathouse that rents kayaks and canoes.  It is a great place to spend the day with the family. Plus you can access the Mercer Slough by paddling down Lake Washington a short way before entering the slough.

    Sweyolocken Boat Launch, 3000 Bellevue Way SE, Bellevue, WA 98004.
    This dirt parking lot has direct access to the Mercer Slough. There is also one honey bucket portable restroom should you need it.

    Additionally, if there are those in your party who don’t want to go out on the water, there are miles of trails in the Mercer Slough Nature Park that they can go walking on while you SUP or kayak.  They can even wave at you along the way from various spots.

    *Please note that there is construction going by parking lots at the Sweyolocken Boat Launch and the Mercer Slough Nature Park parking lot right off of I-90. 
    Paddleboarding in the mercer slough
    Paddling thru the Mercer Slough

    Final Thoughts

    Make sure to pack the following: life jacket and whistle (both required by WA law), sunscreen, bug spray, drinks, lunch or snacks (there are a couple of places along the canal you can pull your SUP or kayak out of the water to have a picnic), a hat for further sun protection, hand sanitizer and a waterproof bag to carry it all in.  Plus if you have a waterproof camera or case, there are some great picture opportunities along the way. We paddled through the Mercer Slough for around 3 hours and wished we had brought more to drink with us and perhaps some PB&J sandwiches.

    There were areas in the water where the vegetation was very thick, so it was harder to paddle thru it. Kayaks seemed to have an easier time crossing the dense vegetation. I worried I might get stuck, but I just sat down on my paddleboard and passed without a problem.

    The Mercer Slough is a great place to spend a few hours paddling around and enjoying the wetland’s wildlife.  Kids and adults alike will enjoy the adventure.  Check it out and let me know how you enjoyed it.

    And if you’re looking for more local activities, why not check out the Snoqualmie Falls for a quick, but beautiful hike.

    Happy paddling!

  • What I Learned on my First Trip to Thailand

    I had a lot of questions before my first trip to Thailand. Would it be challenging to get around? How much of the Thai language would I need to know? Would I get tired of the food? Is it cheap to travel to Thailand?  So here is a quick rundown of all the things I learned after my first trip to Thailand. I hope it will help you prepare and perhaps help relieve some of your concerns.

    Airline Luggage Requirements

    Our international flight to Thailand was on EVA Air. We also used both Air Asia & Bangkok Airways for domestic flights within Thailand.  We had a 15lb weight limit for our combined personal item & carry-on luggage for two of the flights. Our plane to Sukhothai was the most limiting with a weight limit of 11lbs. However, everyone checked their bags as the aircraft wasn’t large enough to store luggage on board.

    So, as you can see, you are very limited to how large your luggage can be as well as the weight limits.  We found that even with our backpacks, we had to check our luggage due to their severe weight restrictions.

    And since you need to check your luggage, why not plan by packing full-size sunscreen, and bug spray.  You will be so glad you did! Sunscreen is quite expensive in Thailand and this way you will make sure you have the brand you prefer. Just make sure to put your liquids inside a sealed bag, to avoid any possible leaks from ruining your clothes. I also carry extra ziplock bags just in case!

    Recommended Luggage

    Packing lighter is freeing, you aren’t burdened down with a bunch of stuff that you won’t need or extra weight that you will inevitably regret carrying.  When I first started traveling, I made the mistake of overpacking. Thankfully I have learned along the way that I don’t need a pair of jeans for every day or 4 pairs of shoes.  Try packing light, and I think you will discover just how freeing it can be!

    I use the Osprey Porter 46 backpack. During a 2 1/2 month trip to Europe, I traveled on Ryanair, Easyjet, AirFrance Hop! & Norwegian Air and never had any issues bringing it on board as a carry-on. And in Thailand, I highly recommend you have a backpack.  Having a backpack will come in very handy when disembarking long tail boats and boarding the ferries that will take you from island to island.

    red osprey backpack

    The Language

    You can get by just knowing your basic greetings and thank you words in Thai.  They speak English everywhere we traveled, and they even spoke other languages, thanks in part to the large tourist population from around the world.  Spanish, French, Russian, and Chinese were all languages in addition to English that I heard Thai people speak. I was so concerned about not knowing the language, but after my visit to Thailand, I discovered I was worried for no reason.

    Thai Words to memorize:

    If you are a man, you will end each phrase by saying, “khrap.” And if you are a woman, you will complete each sentence by adding “kha” to the end.

    • Hello: Sawasdee (sounds like sah wah dee) So for example, if you are a man, you will say: Sawasdee khrap, and if you are a woman, you will say Sawasdee kha. Sometimes the “r” in khrap isn’t pronounced.
    • How are you?: sabai dee mai? (sounds like suhbye dee my) You can respond with Sabai dee (good) if asked this.
    • Thank you: khap khun (sounds like cop coon), then add khrap or kha (male/female ending)
    • I don’t understand: mai khao jai (sounds like my cow jai)

    One final custom you will observe is the wai.  Thai’s use the wai to show respect and as a way of saying thank you.  You press your palms together in front of you with your fingers pointing up to the chin and then dip your head in a bow, lowering your eyes.  Then return looking forward and smile.

    There are different levels of wai’s depending on whether someone is considered of “lower status” than you or “higher” or for monks, but I wouldn’t worry too much about it. Always try to return a wai. Your smile and attempt to respect their local customs will be appreciated, even if you don’t get it exactly right.

    Getting Around

    Grab Taxi is Thailand’s form of Uber, and it is a convenient way to get around.  Download the app before your trip to Thailand, and you can use it to get from the airport to your hotel. We used it in Bangkok, Chiang Mai, and Phuket.  A lot of the smaller areas do not use it though.  In Chiang Mai, the red taxi trucks (songthaew) are also very cheap and an easy way to get around.

    The drivers ask you where you want to go and as long as your stop is along their current route, they will take you.  If not just ask another one until you find a driver going your way. We used Grab most of the time as it allows you to pay with your credit card via the app, thus eliminating the need to use cash.

    Red Truck Taxi Songthaew

    Thai Culture

    • Thais appreciate cleanliness.  One custom is to take your shoes off before entering a home (or hotel room for that matter).  Why track the dirt and grime from the streets into your house?
    • Thai royalty is revered, and you must always be respectful around any monuments to their royalty or any discussion of their royalty.  I think most people would do this intuitively, but I read about travelers getting fined for rude remarks regarding the King. So obviously for some, it needs to be spelled out.
    • Smile. Thailand is called the land of smiles. They smile because they are friendly, and they also smile to help put others at ease and “save face.”  You should do the same.  Smile when bartering a deal with the local tuk-tuk driver or roadside vendor.  Smile when you can’t understand the language, or you forget how to say thank you in Thai.  It is incredible how trans-formative a smile can be.

    Food

    The food is great! Let’s face it, that’s a big reason why people travel to Thailand, it’s one of the reason’s we did for sure!  So the fact that Thai food is fantastic is not what I learned when visiting Thailand.  What I learned, is that if you need a break from Thai food (I know hard to believe) that they have lots of other options!  Options will, of course, depend on where you are staying.

    The cities will have the most variety.  We had Mexican in Bangkok, Korean, and delicious burgers in Chiang Mai, and we had American style bacon at almost every hotel breakfast!  Plus for those of you who prefer fast food, there are lots of options for that too.

    Pictures of food in Thailand

    Cash or Credit Card

    One quick note regarding payments.  You will want to withdraw enough money from an ATM to cover expenses for a week or so and reduce the ATM fees you might need to pay.  ATM’s in Thailand, typically charge around $7 per transaction.  So unless your credit card refunds you the withdrawal fees, this can add up.  And cash is the most widely used form of payment throughout Thailand.  Most places do not accept credit cards, so be prepared to pay in cash.

    Costs

    • Food: There were just two of us, and we would each have one dish, plus dessert and drinks, and it still would only cost around $10 – and we were stuffed full! One person could quickly get a meal for around $3.
    • Transportation: Grab rides usually cost $2-$10 each way. Taxis are similar in price.
    • Accommodations: You have many choices ranging from hostels to luxury hotels.  Prices range $8 and up depending on where you stay.  At our hostel in Bangkok, we had a private room with a private bathroom and a balcony, and it was about $20.
    • Attractions: The price of each attraction will vary.  In Bangkok, for example, you might spend $17 for a ticket to the Golden Palace or around $5 for visiting Wat Arun.  Then you have more expensive attractions, like watching a Muay Thai match that will cost about $150.  In Chiang Mai, you might take a tour to an elephant nature park which can cost $200-$300.
    There are many options, no matter what your budget.  And you can’t beat free–like lounging in a hammock by the beach or taking a hike like this Chiang Mai hike.  Even on a tight budget, you will have a fantastic time in Thailand.
    Swing by the water in Koh Lanta Thailand

    Conclusion

    If you’re considering a trip to Thailand, but worried about not speaking the language, or about how you’ll get around or even about what to eat, don’t worry!  Thailand has you covered!

    The only thing stopping you now is booking your flight!  If you need help with that too, please feel free to contact me or check out this article on how to book your flight. And to help you plan out your itinerary, check out this three week Thailand itinerary.

    See for yourself why everyone who visits Thailand falls in love with it!
  • Hiking in Chiang Mai: Facing My Spider Fears

    I love mixing in outdoor activities when I travel.  National Parks and mountains surround Chiang Mai so hiking in Chiang Mai was top on my list of things to do during my visit. I knew that we didn’t have enough time to do any longer hikes. So I looked to see if there were any hikes we could reach by either walking from our hotel or via a quick taxi ride. That’s when I read about this Chiang Mai hike to Wat Pha Lat.

    Wat Pha Lat is a Buddhist temple and monastery.  The hike is called the Monk’s trail, and you will see trees wrapped by monk’s ribbon all along your walk to Wat Pha Lat.  It only takes about 40 minutes to reach the temple. The path has ample shade, and you will pass some small waterfalls and resting spots on your way.

    Monks ribbon wrapped around a tree

    Getting Here: 

    You will want to make sure your driver understands that you want to go to the trailhead.  We booked a Grab from our hotel. We gave the driver the address to the trailhead, but we still needed to explain that we didn’t want to drive to the Temple.

    There is a road you can take to drive up there, but that defeats the purpose of hiking. It was only a 10-minute ride to the trailhead from our hotel at BED Nimman in Chiang Mai.

    Trailhead Address: Unnamed Rd Tambon Su Thep, Amphoe Mueang Chiang Mai, Chang Wat Chiang Mai 50200, Thailand

    The Hike

    You will find a sign at the trailhead showing the route to Wat Pha Lat.  I didn’t find the map to be that useful for me.  Just follow the main trail.  I found it to be reasonably intuitive.  Plus there are usually other hikers on the path to help guide you, should you have any questions. There are also a few viewpoints along the way, and if you happen to be there when the smog isn’t too bad, you will be rewarded with views of Chiang Mai below.

    Chiang Mai Monk's Trail hiking sign

    Since the hike to Wat Pha Lat is such an easy one, it makes a good one for families too.  So don’t be too concerned if you have kids, as you can quickly stop to take breaks on the way up if needed.  I saw quite a few families making their way up and down the trail.  It will make for beautiful memories and stories to tell about their hike thru the Chiang Mai jungle.

    When you arrive at Wat  Pha Lat you will come to a small bridge, and there will be signs about a coffee stand, you will see a small waterfall as well as a bunch of rocks that make for great resting spots for enjoying the views.

    Waterfall in Chiang Mai

    Remember that you have now entered a Buddhist monastery so you will notice signs everywhere asking you to be quiet and respect the temple areas. You are, however, free to wander around and explore the temple grounds.

    We finished walking around the temple and decided to go back to the trail and follow it up to a small creek we saw.  We watched some little fish swimming in the stream and looked at tadpoles (at least that’s what we think they were). Then we went back to the trail.

    Chiang Mai Monk's Trail Temple

    My Spider Fears Confronted:

    That is when we noticed this enormous spider suspended in its web above us!  This picture does not do it justice as it was HUGE!  I had done my best up to this point, to not think about there being spiders here in Thailand.  In fact, before the trip, I purposely chose not to research spiders in Thailand because I didn’t want to know!

    So needless to say, my arachnophobia kicked in, and I let my husband know he was free to stay there and take pictures, but I was going to move down the trail a bit.

    Giant Thailand Spider

    After he finished, he came over to show me the photos (which I had no interest in seeing), and that’s when he looked above my head and said “oh my goodness!”  I of course panicked, and sure enough, suspended over my head was another one of these giant spiders!

    So I took off and decided to wait on this little bridge we had passed, it seemed safe enough. I checked over my head, and couldn’t see any more spiders, so I stood there waiting and doing my best not to bolt down the mountain at full speed!

    bridge at Chiang Mai

    I told myself, it was probably like our garden spiders back home. They are big and scary looking, but for the most part harmless.  Now, of course, our garden spiders aren’t the size of my palm!

    Before seeing the spiders, I had enjoyed my visit very much, but ignorance is bliss, and since I was now fully aware of what lurked in the trees, I was not too eager to stay any longer than I had to.  We quickly made our way down the mountain.

    Getting Back to Chiang Mai:

    You may not have cell service at the trailhead. But don’t panic! You can walk down the road until you do and then call a Grab taxi to pick you up.  Or if you wait at the trailhead, a red songthaew (red truck taxi) will usually arrive dropping off hikers.

    We waited about 2 minutes before one pulled up at the trailhead. We told the driver where we were staying and then she told us the price.  I believe it was 100 THB total for my husband and me.

    Red Truck Taxi Songthaew

    You sit in the back of the truck on benches. It is a very inexpensive and easy way to get around Chiang Mai.  You may want to use them for traveling around the city or to other sites, such as to see Wat Phra That Doi Suthep.

    The songthaew taxis try to collect passengers that want to go to the same general area. So if you stop and ask a songthaew driver for a ride and they won’t take you, it is most likely because you don’t fall along their route.  So don’t be discouraged, ask the next red truck taxi you see and you will find one that is willing to take you.

    Where to Grab Lunch:

    After your hike, I am sure you will be hungry.  I highly recommend trying out one of these dining options:

    KOBQ: A fabulous Korean BBQ restaurant. Make sure to try their Korean fried chicken, it was amazing!

    Address: 202 เอ็น พาร์ค Tambon Su Thep, Amphoe Mueang Chiang Mai, Chang Wat Chiang Mai 50200, Thailand

    Beast Burger: If you are looking for a fabulous burger, look no further!  Their balsamic cheesesteak burger was one of the best I have ever eaten! Make sure to check the time as they close between lunch and dinner for a short 2 1/2 hour break.

    Address: Nimmanhemin Soi 17 Suthep, Tambon Su Thep, Amphoe Mueang Chiang Mai, Chang Wat Chiang Mai 50200, Thailand

    Cheesy Burger at Burgermaster

    Final Thoughts on hiking to Chiang Mai’s Wat Pha Lat (Monk’s Trail):

    There are many options for hiking in Chiang Mai, but if you are short on time, this is an easy hike you can do first thing in the morning before it gets too hot and still have ample time for sightseeing afterward.  Wat Pho Lat was a refreshing change of pace. It is a peaceful and beautiful area. A perfect setting to relax after your hike up the hill.

    You can continue up the trail and hike to Doi Suthep (this is a much longer and more challenging hike). However, I recommend enjoying the tranquil setting of this jungle temple. It is a respite from the busy city below. If someone told me that I would see giant spiders while hiking in Chiang Mai, I am not sure I would have gone. But I am so glad that I did! I enjoyed my visit to this temple more than all the other temples in Chiang Mai. And that’s even with the spider!

    Check out my full 3-week itinerary to Thailand for more inspiration. And in case you prefer something longer or to hire a guide, Trip Advisor offers some additional options for hiking in Chiang Mai.

    Elephant Wall Decoration

    Here’s to seeing new places & facing your fears!

  • Best Thai Massage in Bangkok & Coffee Bar

    If you’re looking for a great coffee or an amazing Thai massage in Bangkok, look no further! Stand Alone Coffee Bar & Spa combines an amazing Thai massage spa with an incredible coffee house! If they were to add an Air BnB rental into the mix, I am not sure I’d ever leave!  They have a fabulous coffee bar and two doors down is the Stand Alone Spa & Massage. It is located in a residential neighborhood and is a relaxing and quiet space.

    Stand Alone Coffee Bar:

    The coffee bar has a full menu, so if you’re hungry try a burger and fries or some pasta or whatever suits your fancy.  However, I would probably wait to eat until after your massage.

    In addition to the gorgeous industrial-style interior, the coffee bar also has an outdoor space for lounging.  I tried the cold brew and it was bold and flavorful.  In addition to their menu and coffee choices, they also roast their own coffee beans which are available for purchase.  Check out their business page at Stand Alone Coffee Bar.

    Location: Bangkok, Khwaeng Chom Phon, Khet Chatuchak, Krung Thep Maha Nakhon 10900, Thailand

    Hours: 7:30 a.m. – 9:30 p.m.

    Stand Alone Coffee Bar Massage Bangkok

    Stand Alone Spa & Massage:

    As I mentioned above, the spa and massage are separate from the coffee bar, you exit the coffee bar and walk to the other end of the building and you will find the spa.  We did not have reservations, as we had just wandered over to try a coffee before walking to the spa next door.  However, they were able to get my husband and me in for a one hour traditional Thai and foot massage.

    Previous Thai Massage Experiences:

    Now let me backtrack a little to tell you, this was our last day in Thailand before heading back home. We already had a Thai massage at the Wat Pho Thai Massage School (would not recommend it, you can read a little about my experience at 2 Days in Bangkok).

    Then we tried a traditional Thai massage again in Chiang Mai (this was much better than at the massage school, however, it still felt mechanical and just didn’t “wow” me). My husband got another massage on the beach in Phuket, which he said was good.  But up to that point, I was just feeling a little “meh” with regards to Thai massages.

    You see, I get deep tissue massages regularly at home and love them.  I have scoliosis and a lot of back pain, so they really help me manage my spinal health.  So when coming to Thailand I had been so excited at the prospect of getting 1-hour massages for less than $20!  Then I had a couple of massages and they just weren’t as good as I had expected.  That was until I got my massage at Stand Alone Spa & Massage.

    Massage Experience at Stand Alone Spa & Massage:

    The woman who gave me my massage was strong and firm and did a wonderful job of balancing stretching and pressure to create a massage that felt both relaxing as well as therapeutic. Honestly, I was so sad that this was my last day in Bangkok, as I would have gone back for another one the next day!

    And what is more incredible, it was the cheapest out of the four massages we had while in Thailand!  They have a special going where it is only 200 THB for a one hour Thai & foot massage. Please visit Stand Alone Spa & Massage for more information.

    Location: วิภาวดี​รังสิต​20​ Soi Chom Phon, ​, Khet Chatuchak, Krung Thep Maha Nakhon 10900, Thailand

    Hours: 10:00 a.m. – 9:30 p.m.

    I highly recommend Stand Alone Coffee Bar & Stand Alone Spa & Massage.  If you are in Bangkok and need a respite from the hustle and bustle of the city don’t miss this hidden gem. For a full trip itinerary to Thailand, check out What to See in Thailand For Your First Trip.

  • How to Spend a Rainy Day in Lisbon

    How to Spend a Rainy Day in Lisbon

    Weather in Lisbon is usually sunny and warm.  However, the fact is that the weather can be unpredictable.  And chances are, if you travel enough, you will run into a rainy day or two.

    This happened to me on my recent trip to Lisbon so I thought I’d share a few ideas with you, just in case!

    Starting with one of my favorite spots here are a few ideas on how to spend a rainy day (or two) in Lisbon.

    1) Jeronimos Monastery

    Jeronimos Monastery Lisbon Portugal
    Across the street from Jeronimos Monastery.

    The Jeronimos Monastery was amazing!  I wasn’t sure what to expect and since I had seen a lot of churches across Europe I didn’t know whether it would be more of the same or something different.  It was beautiful!

    Limestone archway with carvings in monastery
    The limestone carvings are so intricate and are everywhere!

    You can easily spend an hour or more depending on your interests.  I found it to be architecturally beautiful and inside the cloister, you can walk around under the covered area and still get to view all the beautiful carvings.  The details that have been carved into every part of this building were so beautiful and intricate.

    Cloister at Jeronimos Monastery Lisbon
    The cloister is the one uncovered area, but easily viewed without getting wet.

    You are also able to go into the upper balcony area of the church, which was a really nice change.  Most cathedrals I’ve toured only allow you to come in on the floor level, so it was really nice to be able to come in and see it from above.

    large room with painted tiles in Jeronimos Monastery Lisbon
    This room had a couple of paintings as well as some pretty tile work along the walls.

    You can then also walk around below – to do this you have to actually exit the monastery and go back out to where you entered, don’t go get back in the line, but just exit and then make a quick left into the entrance for the church.

    Jeronimos Monastery cathedral ceiling in Lisbon
    Down on the cathedral floor if you look at the far back you can see the balcony area that is also open to tourists.


    2) Eat Pasteis at Pasteis de Belem

    Pasteis from Pasteis de Belem in Lisbon
    Oh what a beautiful sight! A wonderful plate of pasteis all for me! (Okay, I shared a couple)
    No matter what the weather in Lisbon is like, you have to eat pasteis while you’re here! We tried pastel de nata at 4 different places during our visit to Lisbon.  However, the pasteis (plural form of pastel de nata) at Pasteis de Belem were hands down the winners!  This is in large part due to the fact that they are making them fresh, so when they come to you they are still hot, fresh out of the oven.

    They have a yummy vanilla flavor and when topped with the cinnamon (cinnamon is a must) and some powdered sugar this seemingly simple treat transforms into something so delicious, that you may find yourself eating say 6 in one setting! (Not that I would know anything about that.)

    Pasteis de Belem napkin holder
    They started making these in 1837!
    Girl eating Portuguese custard in Lisbon
    These make me happy!!
    Freshly baked trays of pasteis de nata in Lisbon
    Freshly baked trays of pasteis de nata.

    3) LX Factory

    An outdoor art piece that looks like a bee in Lisbon's LX Factory
    This was some art we passed in the LX Factory area.
    This is an old warehouse district that has been turned into an area of art shops, bookstores, cafes and such.  Ler Devagar is a really cool bookstore at the LX Factory that has lots of seats for reading and its own cafe!  They sell both new and used books and have a fairly large selection of English books to choose from as well.

    It’s fun to roam the different levels and flip through the books.  Find a cozy spot by a window and just watch the rain while sipping a nice hot coffee.  You might even find yourself a little happy that the weather in Lisbon is rainy.

    Artsy bookstore in Lisbon Portgual
    Looking down from the second floor area.

    4) Time Out Food Market

    I didn’t end up making it here.  I really wanted to, but with the weather and how our day went we ended up eating at a great cafe in the LX Factory district and never made it here.  However, I did ride by it on the bus and it is fully enclosed inside a huge warehouse building, so it would be a great place to go roam the various food vendors, sit at a cafe stand or even take a cooking class.  It would make a great choice for a rainy day destination.  So next time I’m in Lisbon and it’s raining, I’ll check it out.
    People with umbrellas in the rain
    Make sure to grab a window seat and enjoy the view from someplace warm and dry!

    Other Ideas:

    The mall. Yes, I know it’s not the most exciting destination, but trust me, you can have a lot of fun window shopping, trying on clothes and if you want even take in a movie.  The movies in Portugal are played in their original languages, so if it is an English speaking movie, it will be played in its original English format with Portuguese subtitles.  Our airport driver really liked this as he said it helped him learn English faster.

    So there you go, here are a few ideas on how to spend a rainy day in Lisbon.  Sometimes when you see the forecast of rain, you get discouraged and you don’t know what to do, but trust me as long as you keep a sunny outlook (sorry had to go there) a rainy day need never ruin your vacation fun.

    USEFUL INFO:

    Getting Around Lisbon, Portugal:

    Purchase 24 hour transit passes or single-use passes from any metro station (including at the Lisbon airport). There are also some local stores that sell it as we purchased ours from the newspaper store by our hotel.  There is also a Lisboa Card which is a sightseeing pass, we didn’t use these on our trip, however, you can check it out and see whether or not it makes sense for your visit.

    Uber in Lisbon: https://www.uber.com/cities/lisbon/

    Uber was incredibly affordable and often cheaper and more efficient than using public transportation.

    Jeronimos Monastery, Praça do Império 1400-206 Lisboa, Portugal

    Website: http://www.mosteirojeronimos.gov.pt/en/

    LX Factory, R. Rodrigues de Faria 103, 1300-501 Lisboa, Portugal

    Website: http://lxfactory.com/en/homepage-en/

    Time Out Market, Av. 24 de Julho 49, 1200-479 Lisboa, Portugal
    Website: https://www.timeoutmarket.com/lisboa/en/

    For further details on my time at Jeronimos Monastery, the LX Factory and my visit to Lisbon and Sintra, check out Things to Do in Lisbon & Day Trip from Lisbon to Sintra.

    Planning a trip there soon? Check out the Lisbon weather forecast.
    Keep Looking on the Sunny Side!