My husband was reading my post “Bucket Lists & Good Friends,” and he paused on the picture of my friend and me in front of our tent and said, “I like this photo!” Then he says, “Hey, your shirt says coffee on it!” I said: “What? That’s funny! That was my nightshirt.” And then we both started laughing and talking about my obsession with coffee and how it’s been going on a lot longer than we both realized.
After he pointed out my coffee shirt, it triggered a memory from that road trip that I hadn’t thought about in a long time. This memory only further confirmed my love of coffee. As if there was any doubt.
U.S.A. Road Trip Plans: A Short Overview
Recently graduated from high school, my friend and I began planning a road trip around the U.S. We made a huge list of all the places we’d like to see, and we used books to do it! I know, how archaic! This was long before Google and still a few years away from Mapquest (does anyone still use Mapquest?)
We bought a road atlas and mapped out all the stops we’d make along our journey. Our trip took a life of its own, and soon we had a route mapped out that took us around the entire country! We decided we could save up to take a little over 2 months off to make this happen. Thus the adventure began.
Road Trip Car Coffee Maker – Important Decisions
Before leaving on our road trip, I purchased a coffee maker that allowed you to brew your coffee in the car using the car’s adapter/cigarette lighter. Hey, I was going on a 2-month road trip, on a budget, with a friend that doesn’t drink coffee! (I know it’s a sore point in our relationship, but I try to overlook it.) Going without coffee was not an option, and with my limited budget, I didn’t think I could afford to purchase one every day. Thus my purchase of a portable coffee maker. It looked a lot like this one. Now of course I would have brought my Aeropress but then I would have missed out on creating this “fun” memory.
Starting Out
Our route had us working our way through Washington and along the Oregon coast before continuing down along the California coastline. In a matter of a couple of days, we were in California. This meant a lot of driving and very little sleep. We ended up getting a hotel in Crescent City after sleeping in the car the night before and driving on very little sleep. This hotel was also our first encounter with a cockroach. Needless to say, I don’t think I slept very well here either.
So after leaving Crescent City, we drove for probably less than an hour before discovering beachside camping near the small town of Orick, California. Warm sunshine and waves beckoned us to stop and enjoy it!
We spontaneously pulled over and decided to camp here. The stretch of beach used to be open to camping. There weren’t any assigned spots. You just found a parking spot, paid a few dollars, and pitched your tent on the beach. It was great! We spent the rest of the day relaxing in the sun, spending time walking along the water, and listening to the waves.
Funnily enough, this was also the only time we used our tent during our 2-month road trip. The rest of the time, we slept in our car, at friends or families scattered along our route, or at the occasional motel.
The photo that triggered this memory. And the tent that was used only once.
Beach Camping & Coffee
The next morning, I awoke to the sound of the ocean. We discovered the night before that we lacked fire-making supplies (and skills), so I knew boiling water over a fire to make coffee was out of the question. Good thing I have a portable coffee maker sitting in the car, all ready to brew coffee! What better way to spend the morning than sipping coffee and staring out watching the waves roll in.
I trudged through the sand and found my coffee supplies, I filled the maker with water, and soon I had a delicious pot of coffee brewing–no fire required! It was wonderful. I walked back to the beach and enjoyed my coffee while waving to our camping neighbors, who were making their cowboy coffee over the fire. Boy, did I feel superior with my high-tech car coffee!
Soon, it was time to pack up and hit the road. So we put our tent away, packed up the car, and prepared to leave. The funny thing is, when I brewed my coffee earlier, well, I didn’t turn the car on to do it. Whoops! Needless to say, our car battery was dead.
I can tell you this, if I had coffee before I went to make coffee that morning, my brain would not have been so fuzzy, and I would have thought to turn the car on. So I blame this on not having enough coffee, not on the actual making of said coffee.
Some campers who were parked nearby gave our car a jumpstart, it was probably our camping neighbors who made their coffee over the fire. Now, who’s the superior one! Okay, I don’t remember who it was exactly, but I imagine they sat there quietly smiling and enjoying their coffee. Sometimes the simple way is the best way.
What Ever Happened to my Car Coffee Maker?
Remembering this gave me a good laugh. Then, I was also a little sad, as I remembered that my coffee maker mysteriously disappeared after that trip. I never saw it again. And my friend Moe says she doesn’t know what happened to it, but I have my suspicions… I’ve come a long way since this trip and now have a variety of ways that I make coffee while camping, and I have never run my car battery dead making coffee again.
Coffee-Infused Memories
This is just one of my many memories that involve coffee. Others include sipping coffee on the lanai in Maui or at a cafe in Prague. Even better are the memories with loved ones no longer here, like coffee with my Grandpa. He liked it, black, very black. I would sneak milk into mine when he wasn’t looking. I tried to be tough and drink his sludge, er coffee, but it was a little too strong for my taste. It didn’t really matter, though. I was with my Grandpa sharing our love of coffee as he told me stories of his youth. Coffee, much like food, brings people together.
I like to think that I’m creating a sensory memory by combining moments with friends, family, and life while drinking coffee. That down the road, I’ll smell a certain blend and will be transported to a beautiful moment in time. Yes, I admit, I enjoy drinking coffee because it’s delicious, but the added benefit of creating memories and special moments is pretty great too!
What are some of your favorite memories that involve coffee? I’d love to hear about them!
Off to grab another cup!
Note: This post contains affiliate links. When you make a purchase using one of these affiliate links, we get paid a small commission at no extra cost to you.
In this post, I want to update those of you who haven’t flown post-COVID on what has changed and what hasn’t. I also want to let those of you who might be concerned about wearing a mask for extended periods of time know what it was like from my perspective and tips I found helpful.
Please keep in mind this was my first flight in 2020, and my experience is with flying Hawaiian Airlines from Seattle to Maui. Not every airport is the same, and each airline might have slightly different procedures.
Mask anxiety is a general term someone gave to the anxiety many people feel when wearing a face mask. There are different levels of anxiety and discomfort mask-wearing produces. They cause some people to feel trapped, dizzy, disoriented, and can even produce full-on panic attacks for others. People that have claustrophobia, asthma, ADHD, and anxiety disorders often struggle with mask anxiety.
I have minor claustrophobia, which, as it turns out, caused me anxiety when wearing a mask. I didn’t really realize what was going on until recently when I came across the term “mask anxiety” in an online article. That’s when a light bulb went off, and I realized, oh, so that’s what it is.
My face would sweat, and I struggled to concentrate; I felt like I couldn’t get enough air. It was very uncomfortable when I first went grocery shopping while wearing a face mask. Thankfully, over time, I found masks that work better for me, and I’ve now become somewhat used to wearing one when shopping.
However, I knew it would be much longer than just 1-2 hours for my flight to Maui. This caused me some anxiety, and I began to think about canceling my trip. That right, there should tell you something because I LOVE Hawaii! Instead of giving in to my fears, I decided to do some research to find ways to make wearing a mask easier.
3 Tips to Reduce Mask Anxiety
#1 Find a face mask that is comfortable to wear and easy to breathe in.
Don’t wear a mask that is too tight as this can not only make it hard to breathe, but I read that it can also pull on your ears and jaw and potentially cause TMJ problems that will lead to headaches.
I tried neck gators, cotton masks, thick masks with inserts, and disposable masks. I found that most were too thick and difficult for me to breathe in. Through a process of elimination (I wore each at home first), I chose a disposable mask for my flight. I also brought extras to keep in the rental car, condo, day bags, etc.
#2 Build up to wearing a face mask all day. Start in 30-minute increments at home.
This was a great tip I read online from a dive instructor. She said students who struggled to wear the breathing apparatus in their mouth were sent home with one to practice with. They would wear them for incremental periods of time to build up their tolerance and comfort. That made total sense to me, as I recall my first diving lesson in the pool and how I felt like I couldn’t breathe. When, of course, I had oxygen flowing directly into my mouth and lungs.
#3 Add a calming scent to the inside of your mask.
I chose cinnamon, but some might like lavender or mint. I took a cinnamon stick and rolled it up inside my mask the day before my flight. It worked perfectly! It wasn’t too strong but left a subtle cinnamon smell, which I found comforting. You could also try a pack of spearmint gum as some find peppermint to be calming. You can use any smell you find to be relaxing and calming. Just make sure it’s not so strong it gives you a headache.
The Day of Our Post-COVID Flight
8:00 a.m. Masks On
We got a ride with Uber to the airport at 8:00 a.m. Our mask-wearing starts now, as you must wear a mask when taking an Uber or other rideshare service.
Security Screening at the Airport:
The post-COVID airport experience at Seatac International Airport was pretty much the same as every other flight we’ve taken there. The main difference was that everyone wore masks. Security lines were the same, slightly longer perhaps as they make them zigzag more to improve social-distancing. This time we didn’t take out any electronics, which was new for me, as typically, I have to remove my laptop and camera before going through security. We placed all our bags and shoes, etc., in bins and then walked through the screening checkpoint.
Eating at the Airport:
In case you’re wondering, yes, you can still eat when waiting for your plane. You remove your mask while you eat/drink and then replace it again. It is the same procedure we follow here in Washington state when eating in a restaurant. Quite a few people were eating at their seats while waiting for their plane to depart.
One thing that was different was how many of the businesses in the airport have closed. Due to the limited amount of travel, they haven’t had enough business to stay open. You may want to pack extra snacks in case you arrive at an airport and nothing is open. This is one aspect of traveling post-COVID that we experienced both at the airport and in the towns. Expect that you’ll have limited dining options.
Our Flight with Hawaiian Airlines
Boarding the plane also felt pretty much the same, except that they scan your forehead temperature at the gate. Other than that, I felt it was pretty typical of every other boarding experience I’ve had.
Another thing that is different is the meal and snack service. This was done at the very beginning of all of our flights, and there were no other meals or snack services provided for the duration of the flight. They passed out the meal within the first hour of the flight. That means for the rest of the flight, nothing else is provided. On our flight to Hawaii, they did pass through the cabin late into the flight carrying some water bottles for those that needed them. However, on our flight to Seattle, they did not do this.
Everyone who eats or drinks removes their masks while they are “actively” eating or drinking. They announce this over the intercom, “please keep your mask on when you are not actively eating or drinking.”
Mask is briefly removed around 10:30 a.m.
I removed my mask while I ate my meal and then put it back on when I finished. I sat next to a young man who chose not to eat. He kept his mask on for the entire flight. That is one thing to note. You will most likely be seated next to strangers. To me, this didn’t matter since everyone is already on an enclosed plane together, and the air is filtered. However, if that concerns you, be aware that airlines are now booking every seat and no longer trying to space people out as they once were.
Arriving at the Airport in Hawaii
Our forehead temperature is once again scanned upon arrival at the airport in Hawaii. Temperature checks seem to be a regular part of post-COVID travel. We had a connecting flight in Oahu, and our temperature was scanned both there and in Maui. We proceed through a COVID-19 testing checkpoint where we show our I.D. and negative COVID-19 test results as well as the QR code issued by Hawaii’s Safe Travels site. You can read more about our post-COVID travel experience to Hawaii in this post.
8:00 p.m. Mask is Finally Removed
Due to our connecting flight in Oahu, our travel time to Maui was much longer than normal. I was apprehensive about this initially, as I didn’t know if I could handle 10+ hours wearing a mask. After getting our rental car and finally removing our masks, we had worn them continuously for almost 12 hours, with only small breaks for eating.
How I felt after wearing a mask for 12 hours.
I did okay during the flight to Oahu, however by the time we boarded our flight for Maui, I had a headache. I think this is a fairly common side effect of long-term continuous mask use. My hubby also complained of a headache. I did my best to take deep breaths once my mask was off, and by the time we arrived at our condo an hour later, my headache was gone.
I am glad I faced my fear and anxiety over wearing a mask for a long day of travel. We had a wonderful trip to Maui, and I would regret not having gone. I am also sort of glad that we had a connecting flight as it showed me that I could, in fact, wear a mask for 12 hours if I really had to. It also gives me more appreciation for those that work in jobs that require them to wear a mask all day long. You make it look easy!
Final Thoughts About Flying Post-COVID
If you are concerned about being in enclosed spaces with other people, seriously consider whether you are ready to fly. I personally take all the precautions I normally would before a flight. This includes packing hand sanitizer (which they also handed out on the plane), taking Airborne or Emergen-C before my flight and after my flight. I’ve been flying for years now, and I’ve always understood that flying and traveling put me at risk to catch airborne viruses. So I do my best to mitigate the risks while still enjoying my love of travel.
Not everyone is ready to do that, and I respect that decision. That is why I want to let people know how my experience was so you can decide for yourself whether you are ready to fly or not.
If you have any other questions about my flight or travel experience post-COVID that I didn’t cover here, please let me know.
On a recent road trip to Central Oregon, we took a small detour to see Oregon’s Painted Hills. I’d read about them, and they reminded me a little of the South Dakota Badlands. I didn’t realize I had anything like that so close to home, so I wanted to check them out. After taking this short road trip to Oregon, I will say that I have a newfound appreciation for Washington’s neighbor state. It has more natural variety than I previously realized, and it left me wanting to explore more of it in the future.
Prineville, Oregon: Our gateway to Oregon’s Painted Hills
We left the Alvord Desert and drove about 4.5 hours to the town of Prineville, Oregon. Our first glimpse of the town of Prineville was from up above the town. It appeared like an oasis in the desert, green and lush. I wondered what the first settlers along the Oregon Trail must have felt when they first saw this area.
Only an hour away, Prineville is a great choice for travelers needing to spend the night before heading on to the Painted Hills.
After checking into our hotel, we decided to grab some dinner as we had skipped lunch, and were on the verge of getting hangry, so food was a priority! We read reviews about an authentic Mexican restaurant with great food, so we headed to Tacos Toledo Mi Tiendita. It is a tiny little restaurant mainly used for takeout, but there are two tables for indoor seating.
I was ready to order everything on the menu! Instead, I ordered a tamale (I love tamales!), 5 authentic tacos (no Tex-Mex stuff), a Chile Relleno, and hubby ordered a pambazo with chips and salsa. I loved everything I ordered! The pambazo is like a breakfast sandwich. It has potatoes, cheese, and chorizo inside.
After dinner, we drove around Prineville and liked what we saw. They have beautiful historic buildings and the Bowman Museum, which tells the history of the area from the time of the first settlers. The town felt like a nice blend of history and progress.
Driving From Prineville to Oregon’s Painted Hills
The next morning we got up early, ate breakfast at the hotel before checking out, and then headed for the Painted Hills. It is about a 1-hour drive from Prineville to reach the Painted Hills in the John Day Fossil Beds National Monument.
I enjoyed the drive as it was a mixture of farmland, lakes, and trees. The drive passed quickly, and soon we were turning off on a small narrow road that passed by more farms while also catching our first glimpses of the Painted Hills.
After about a 10-minute drive on this road, we came to the John Day Fossil Beds National Monument entrance. This is where the road turns to gravel. It’s nothing too bumpy, though, not at all like our drive to Alvord Desert, where the road was much rougher. Any car should handle the gravel roads at the Painted Hills. Just take it slow.
The Painted Hills at John Day Fossil Beds National Monument
Shortly after entering the National Monument boundary via the gravel road, you’ll come to a fork in the road where you can go left to the Visitor Center or right to continue to the trails and to see the Painted Hills. If you need to use the restroom, then head to the Visitor Center as that is the only restroom facility at the Painted Hills.
Trails at the Painted Hills
Continuing up the dirt road past the turnoff for the Visitor Center, you’ll come to the Painted Overlook. This is the first trail in a series of trails within the Painted Hills park area. You’ll also pass the Carroll Rim Trail parking area on your way to the Painted Overlook parking lot.
The Painted Overlook (0.5-mile roundtrip)
Carroll Rim Trail (1.6 miles roundtrip)
The Painted Cove Trail (0.25-mile boardwalk trail + overlook)
The Red Scar Knoll Trail (0.25-mile trail)
The Leaf Hill Trail (0.25-miles roundtrip)
The Painted Overlook is a 0.5-mile roundtrip gravel path to an viewpoint. There is a bench on one section of the trail with sweeping views of the painted hills below. At the beginning of the trail, there are some signs with information regarding the area’s volcanic formation.
The wide gravel path at the Painted Overlook trail.
The 0.25-mile roundtrip Painted Cove Trail follows a wooden boardwalk before connecting to a dirt path. Make sure to read the signs along the trail that explain how these unique painted hills came to be.
The wooden boardwalk at the Painted Cove trail.
At the end of the boardwalk (when starting counterclockwise) leads to a fork in the trail. You can go left to walk up to an overlook or right to continue the loop. I recommend walking up to the overlook as it provides great views of the painted hills below and a really neat icy blue lake.
The view from the Painted Cove trail overlook.
The Red Scar Knoll Trail (also known as Red Hill trail) is another short trail (.25 mile roundtrip) that leads to a dark red hill on one side and yellow on the other. The trail takes you over a small bridge where it forks straight and to the left where you can view the red side first.
Then, retrace your steps back to the main trail and continue as it goes around the hill and brings you to a viewing area of the yellow side of the hill. The red and yellow colors found in the painted hills is due to the blend of iron and magnesium. The hills are rusting!
The yellow side of the red scar knoll.
The Leaf Hill Trail (Leaf Fossil Trail) leads you to a hill where fossilized leaves of genus Metasequoia, the Dawn Redwood, were found. Although it is fascinating that these great trees once lived here, the actual hill and trail were a bit underwhelming.
Scattered fossils at the Leaf Fossil Hill trail.
Time Spent Visiting the Painted Hills
We spent approximately 2 hours exploring the Painted Hills. Visiting all of the trails, except the Carroll Rim Trail. We planned to do it last, but the parking lot was full upon our return. Deciding we’d probably seen what there was to see anyway; we left without hiking that trail.
My recommended trails:
The Painted Overlook: This had nice views of the hills we passed while driving up to the Overlook.
The Painted Cove Trail: I liked being so close to the Painted Hills as well as the small overlook that let me see the pretty lake and painted hills below.
Just Okay: The Red Scar Knoll trail was just okay, in my opinion. I did think it was interesting that it is red on one side and yellow on the other, and it is short enough that it won’t take you very long to complete.
Could have skipped: The Leaf Hills trail was the most boring one of them all. You could see a bunch of scattered pieces of rock, which may have been fossils, but really, if you are looking for a trail to skip, this is one I felt sort of like “meh” afterward.
Getting to Oregon’s Painted Hills
From Prineville, Oregon Take US-26 E for about 43 miles before turning left onto Bridge Creek Rd/Burnt Ranch Rd. Follow Bridge Creek Rd for another 5.5 miles before turning left onto Bear Creek Rd. Bear Creek Rd is a gravel road. Follow signs in the park to either the trails or the Visitor Center.
From Mitchell, Oregon
Take US-26 W for 3.6 miles, then turn right onto Bridge Creek Rd/Burnt Ranch Rd. Follow Bridge Creek Rd for another 5.5 miles before turning left onto Bear Creek Rd. Bear Creek Rd is a gravel road. Follow signs in the park to either the trails or the Visitor Center.
Tips for Your Trip
Fuel up in Prineville or Mitchell, depending on which direction you’re coming from. The only restroom is at the Visitor Center and picnic area near the Painted Hills entrance. Go left at the fork in the gravel road and follow the signs to the Visitor Center. I did not see any other restrooms in the park.
Bring a jacket, depending on what time of year you visit (we came in the fall), it can get windy and cold. We were happy we had our rain jackets with us as well as sweatshirts. I also recommend bringing snacks and drinks as there is nothing inside the National Monument area.
Do you want stunning views of Mount Rainier and the surrounding mountain ranges but without a long hike? Then look no further than Suntop Lookout. Suntop Lookout was built in 1933 as a fire lookout and also served as a U.S. Army Aircraft lookout site during WWII. It is one of the only fire lookouts in the area that I know of that you can drive all the way up to see. That is, if the gate is open, I’ll explain more about that below. However, suffice it to say, even if the gate is closed, it’s a short hike to incredible panoramic views!
Getting to Suntop Lookout
From the town of Enumclaw, head east on SR 410 for about 24 miles. About 6 miles after you pass through the town of Greenwater, you’ll make a right onto Forest Service road 73 (FS 73). It is the first right after passing the winter chain-up area.
Follow FS 73 for a little over a mile before you make a left on to FS 7315. Continue up forest road 7315 for about 6 miles before reaching Suntop Lookout.
*Please note that the gate to Suntop Lookout may be closed about a mile below the lookout. If this is the case, you’ll need to park below the gate and hike up the road or the trail just below the gate.
Recreational Pass Required
A Northwest Forest Pass is required to visit the Suntop Lookout and picnic area. I did not see a pay station along the road either, so you’ll want to purchase your recreational pass before driving up. You have the option to buy a $5 day pass or a $30 annual pass.
What Kind of Vehicle Do You Need?
Road Conditions:
The road to the Suntop Lookout is a mostly flat gravel road. However, there are some very deep potholes and in one section of the road, some pretty deep grooves created by water rushing down the mountain.
Cars
I recommend you have an AWD vehicle or one with some ground clearance. That said, I did see people up there with minivans and small sedans.
Motorcycles
This is the option my hubby and I chose. It is easy to swerve around potholes and makes for a fun ride unless, of course, you’re stuck behind a car choking on dust. Okay, even then, we have fun! If you have a road-licensed dual-sport or motorcycle set up for off-road riding, this is a great option. I even saw a couple of Harley riders up here. However, I wouldn’t recommend a street bike.
One thing to consider when riding up on your motorcycle is that if the gate is closed, you will need to hike up the rest of the way in your gear. Plan ahead and make sure you have boots and clothing you’ll feel comfortable hiking in. We did it with our gear, but it was hot and less than ideal, but do-able.
Mountain Bikes
This area is very popular with mountain bikers. We saw some people who had their bikes transported to the gate, and then cycled to the top from there and then back down. However, others made the entire ride up, which I thought was pretty impressive! From what I have learned, there are a bunch of excellent mountain biking trails in the area near Suntop Lookout.
Best Time to Visit Suntop Lookout
Summer & Fall:
Summer and early fall are when most people will want to visit Suntop Lookout. The road is typically free from snow during this portion of the year and, therefore, the most accessible. It is also a drier and more pleasant time of the year to visit Suntop.
Spring:
Depending on the snowpack from winter, the road will most likely still have snow. My hubby and I tried riding our motorcycles up one year over Memorial Day Weekend and hit snow about 2 miles below the summit. It depends on the year, but if you want to be able to drive all the way up, or at least to the gate, then summer would be my recommendation for when to come.
Winter:
I have not attempted visiting Suntop Lookout during the winter, but I read that it is a popular snowshoe and cross-country ski destination. Many people snowshoe or ski up the road in the winter. You will need chains and an AWD vehicle to access the sno-park during winter.
Hiking to Suntop Lookout When the Gate is Closed
If you find the gate across the road on your way up to Suntop, don’t worry, it’s only a short hike to the top from here. From the gate, you have two options for hiking to Suntop: walking up the road or taking the trail. Either option will take around 30-40 minutes at a slow, steady pace before reaching the top.
Walking Up the Road
If you hike up the road, you’ll have an easy but steady incline to the top. Hiking the road is my recommendation if you have any mobility issues that might make it hard when walking on a narrow trail with lots of loose rocks. The road has less shade on hot days, so make sure to bring a bottle of water before making the walk up. It is about 0.8 miles to walk from the gate to the Suntop Lookout via the gravel road.
Jake is hiking up the trail just past one of the Mt Rainier viewpoints you’ll see along the way.
Hiking the Trail to Suntop Lookout
There is a trailhead just below the gate on the left side of the road (when facing the gate). It is only a 0.5-mile hike to the lookout via the trail. The trail to Suntop is narrow, and there are a lot of loose rocks along the path. I would still classify the hike up the trail as easy. However, due to the narrow trail, loose rocks, and sometimes steep incline, I think it is best for individuals without mobility issues and are in reasonable shape. I also recommend bringing hiking poles. That said, I passed small children and families along this trail that appeared to be traversing it without issue.
When hiking up the trail, you’ll pass a small, rocky trail shortly before reaching the top. This trail is a shortcut to one of the best views of Mount Rainier along this hike. The little trail leads you up to the road where you can get unobstructed views of Mount Rainier before continuing to the lookout. You can also choose to stay on the main trail, which will curve around and lead you to the lookout first. Then, before heading back to your vehicle, you can walk down the road from the lookout to see gorgeous, unobstructed views of Mt Rainier.
Jake was walking the short walk down the road from the restrooms at Suntop to the unobstructed views of Mt Rainier.
Advantages of Each Option
The advantage of the trail is that it is a slightly shorter hike up, and you have a little more shade on sunny days. The advantage of the road is that it is wide, mostly flat, and provides plenty of room for groups to pass and take breaks as needed.
The road to the Suntop Lookout is also a popular mountain biking route, so you may encounter mountain bikers coming down either the road or the single track trail. There isn’t much room to get out of the way when they come down the path, but do your best to pull over where it is safe to let them pass.
What’s At the Top?
Restrooms:
You’ll be happy to know that there is a vault toilet just below the lookout and adjacent to the picnic area.
Picnic Tables:
There are picnic tables just past the vault toilets. There is also another picnic table near the lookout. It is a beautiful place to sit and enjoy a picnic lunch with a view.
Views at Suntop Lookout
Hike up to the lookout for 360-degree views of Mount Rainier and the surrounding mountain ranges. Mount Rainier is only 10 miles to the south, and on a clear day, you’ll enjoy views of the central Cascades, Olympic Mountains, and just maybe (and with the aid of binoculars) get to see Mount Baker! If you’re lucky enough to visit when there’s a forest ranger present, you may get a chance to see inside the lookout. However, even if it is closed up when you visit, the views from the lookout are worth the trip!
Suntop Lookout Photography
Suntop lookout is an excellent spot for sunrise and sunset photos. Look at the forecast the week you want to visit and then see if you can plan for a day with clear skies. Both sunrise and sunset will provide stunning photo opportunities with the gorgeous colors of the sun reflecting off snow-capped Mount Rainier. After dark, you can practice your astrophotography and enjoy stargazing at the summit.
What to Bring for the Hike
Picnic Lunch & Snacks: Although it’s a short hike, you might as well make the most of it by enjoying a picnic at the top.
Water: Water is always a good idea. It gets hot at the summit during the summer, so having some extra water with you will help!
Bug Spray: The mosquitoes weren’t bad when we visited. However, they can be depending on the time of year, so I’d bring bug spray just in case.
Hiking Poles: These are especially useful if you hike up the narrow trail.
Layers: Depending on what time of year you visit, you may want to bring extra layers. If you chose to come up for the sunset, you’d need layers for when the sun goes down as it can get quite cold.
Downloaded Offline Map: I always like to have an offline map when I’m going off-road just in case I lose my way.
Recreational Parking Pass: A Northwest Forest Pass is required at Suntop Lookout.
Things to Do Nearby
Places to Eat
Greenwater Outfitters: 58410 WA-410 east, Enumclaw, WA 98022
Enjoy lunch at Greenwater Outfitters or pop in for some delicious ice cream.
Wapiti Outdoors: 58414 WA-410 E, Enumclaw, WA 98022
Stop in at Wapiti Outdoors for some fantastic coffee and ice cream. If you’re lucky to visit during huckleberry season, make sure to try a huckleberry milkshake. They also have a great selection of t-shirts and outdoor gear.
Naches Tavern: 58411 WA-410, Enumclaw, WA 98022
If you’re looking for a bite to eat and something cold to drink after a day of hiking, stop in at the Naches Tavern.
Camping
Dispersed Camping:
Dispersed (free) camping is allowed in the Mt Baker-Snoqualmie National Forest around the Suntop Lookout area. There are no toilets provided. Follow “leave no trace” principles and clean up your site before leaving. In addition to dispersed camping off of FS-73, if you travel 5 miles past FS-73 on SR-410, you’ll come to NF-7160. Make a right here, and you’ll find more dispersed camping by the Ranger Creek Airstrip.
There are also so many other great trails in the area, such as Snoquera Falls, Skookum Flats Trail, and many more. Plus, you are a short drive to the White River entrance at Mount Rainier National Park. Why not make it a weekend adventure! I love visiting the Sunset visitor center at Mount Rainier and camping at the White River campground.
Here are a couple of articles to get you started planning.
The Spray Park trail and Spray Falls have been on my list of hiking to-dos for years. The Spray Park trail checks off all my hiking favorites. It has an alpine lake (Mowich Lake), waterfalls, stunning views, and wildflowers. Plus, I get to see snow in August! It is easy to see why this trail and area of Mount Rainier is so popular. So when I read that the road to the trailhead parking lot was open, I knew I had to go!
I’ll tell you about my experience hiking to Spray Park and also give some tips and advice on what to bring. Make sure to read over the Know Before You Go, What to Pack, and Additional Tips sections before your trip as they will help you be a little better prepared than I was my first visit here.
It may take some extra effort to get to this corner of Mount Rainier, but Mowich Lake and the surrounding area is known for its stunning beauty and outstanding hikes, and it is well worth the effort!
Here’s a video montage that gives an overview of my hike to Spray Falls. You can continue reading about my day below as well as my tips for what to know and how to get there. You can also click on the links above to jump to each section.
My Experience Hiking to Spray Park & Spray Falls
The Drive Up
I leave my house around 6:45 a.m. I have 2 hours to go before I reach the Mowich Lake parking lot. It is a Tuesday morning, so I hope that it won’t be too busy when I arrive.
As I drive through the small town of Wilkeson, I think how it looks like a set from an old western. I make a mental note to come back another day to explore the town.
After passing through Wilkeson (which has the last gas station along this route), I pass through the town of Carbonado and eventually cross the anxiety-inducing Fairfax bridge. It is a one-lane bridge suspended high above the canyon, and honestly, it looks a bit rickety, but I go ahead and trust its stability and cross it safely.
Where the Pavement Ends
Not long after Fairfax bridge, the pavement ends. It’s less than 17 miles to the parking lot on this stretch of dirt road, but it will take me almost an hour to get there. I am in an SUV, but even so, I keep my speed around 20-25 for most of the road. There is a section that is labeled “30 mph,” and it is still very rough.
Additionally, I am driving in the direction of the sunlight, so it hits my dirty windshield as I go in and out of the shadows, making it difficult to see. This part of the drive up is the hardest, but on a clear day, the views of Mt Rainier help to pass the time.
This is one of the views on the drive to Mowich Lake.
I pass by the Paul Peak Trailhead and pay station, I already have an annual national park pass, so I do not need to stop. I’ve only got another 5 miles to go before arriving at the Mowich Lake Parking area.
It’s about 8:30 a.m. when I reach the Mowich Lake parking lot. I count at least 20 cars already parked here, but there is still plenty of parking spaces available. I gather my gear and make a quick stop at the pit toilets. They are clean and include hand sanitizer. I grab my camera bag, which doubles as my day pack and head to the trailhead.
Hiking to Spray Falls and then on to Spray Park
I walk to the Spray Park trailhead just past the pit toilets, and I notice the trail sign says it’s only 6.0 miles roundtrip to Spray Park. My guidebook and other online sources state that it is 8.0 miles roundtrip. The distance you hike depends on how far into Spray Park you want to go. There is no “you’ve arrived” sign, you hike as far into the meadow as you feel like before returning. The further up you go, the better the views.
The trail gradually descends into the forest, and soon I cross a small creek. I love the sound of the water as it makes its way over the rocks. The sights, sounds, and smells of the forest are comforting, and it makes me smile. It feels so good to get away and unplug!
My view while at the Eagle Cliff viewpoint.
Eagle Cliff Viewpoint
At about 1.5 miles into the hike, I come to the Eagle Cliff viewpoint. Make sure to stop here, it’s only an extra 100 feet of trail, and on a clear day, it has some beautiful views of Mt Rainier. I enjoy a mostly clear view of the mountain during my stop.
After taking some photos, I continue along the main trail, and about .25 mile past Eagle Cliff, I come to the junction for Eagle’s Roost camp. The campground goes to the right, but the trail for Spray Falls and Spray Park continues on the left. I follow the sign for “water .10 mile,” and soon, I cross another wooden bridge and look up to see a series of small cascading waterfalls flowing over mossy rocks. It’s so beautiful.
Shortly after this creek crossing, I arrive at the trail junction for Spray Park and Spray Falls. I head right to take the path toward Spray Falls as I want to stop and see the falls before heading up to Spray Park.
A series of small cascading waterfalls shortly before the Spray Falls trail junction.
Spray Falls
I’ve seen photos of Spray Falls, and many of them showed people right next to the waterfall. However, I’m not sure what time of the year they visited as this was not possible during my hike here. There was so much water coming down the mountain that I was unable to cross the rushing water to get unobstructed views of the falls.
I was disappointed but unwilling to risk getting my camera gear wet or worse for a better shot. I will try again at a different time when there isn’t so much water rushing down the mountain.
Spray Falls in the distance.
Spray Park
I make my way back to the main trail and start my climb up to Spray Park. The trail sign at the Spray Falls junction says it’s .8 miles to Spray Park. This is where the trail rating turns from “easy” to “moderate.”
I read somewhere that there is only a 600-foot elevation gain for the hike to Spray Falls. However, the hike to Spray Park has a 1700 foot elevation gain. It feels like the majority of that is in this .8 mile hike to the entrance of Spray Park.
As I climb upward, I’m serenaded by the sounds of Spray Falls in the distance. Soon though, I no longer hear the falls as I continue my climb up to Spray Park. “Slow and steady wins the race,” I tell myself, and soon I arrive at a log footbridge, which marks the entrance into Spray Park.
The entrance to Spray Park at Mt Rainier.
I chat with a dad and daughter who stop by the log bridge for a break. They offer to take a photo for me with my phone, which is nice as typically, I don’t get pictures of myself on these solo excursions. We realize, though, as we stop that the mosquitoes are worse here, and no one wants to linger here too long. Soon the dad and daughter leave to continue their hike into Spray Park.
I take a few photographs, and eat a snack and then continue following the trail up. It winds its way through some scattered trees and maintains a steady, but not too steep climb upward. Soon I get views of Mount Rainier on the right and views of Mt Pleasant and Hessong Rock on the left.
A photo a fellow hiker volunteered to take with my phone.
Alfred Hitchcock’s “The Birds”
I see a hiker headed my way, and I move to the side to let her pass. As she passes, she tells me there are more beautiful views to come–but, she says, the mosquitoes are “ferocious!” Yes, that was the exact word she used.
She said they get “much worse.” She planned to eat lunch further up in Spray Park, but the mosquitoes were so bad she decided to hike back to Mowich Lake. Great! I thought glumly, as I tend to be a bug magnet. If there’s one bug in the room, it’s going to find me! Now, I wish I’d have brought the can of bug spray with me so I could re-apply.
Despite the warning, I continue hiking further into Spray Park, hoping to find “the view.” I love the wildflowers dotting the meadow with beautiful colors!
The Spray Park trail continues upward, surrounded by wildflower.
A little further up, I chat with another dad and daughter on their way back to Mowich Lake. The dad said he’s hiked this trail before and saw seven bears, but this time not a single one. They did get to see some goats, though, so that sounded pretty neat! I love meeting people on the trail and seeing others out enjoying nature and life. I say my goodbyes to the dad and daughter and continue hiking a bit further into Spray Park.
It’s Lunch Time, and I’m on the Menu
It’s about a quarter to noon, and I’m hungry, so I decided to stop for a quick lunch break. I put my bag on the ground to get my water and sandwich, and as I do, a swarm of mosquitoes lands on my backpack. There’s not even any blood for them to get out of my pack!
Of course, they land on me as well, and I do my best to swat them off while trying to take a quick drink and a bite to eat. (Again, if only I’d have brought the bug spray with me!) This lesson will stick with me for about a week as the swelling and itching finally dissipate.
It’s like Alfred Hitchcock’s movie The Birds, except replace birds with mosquitoes and you’d have a pretty accurate description of my experience.
I quickly zip my bag up and decide I too will not be lunching here. I put my pack on, take a few more photos while the mosquitoes make a lunch break out of me, and then decide I’ve got my views for the day. I’m heading back. I couldn’t stop for 5 seconds without being attacked. It just isn’t enjoyable any longer. I did, however, enjoy the views and beautiful flowers. I even saw a patch of snow, but the bugs…
The Bee & The Magic Hat
I descend back into the trees, and soon I pass the junction to Spray Falls and continue toward Mowich Lake. It’s around the Eagle Cliff viewpoint that a bee decides it wants to chase me. I try to ignore it, I wave my hand at it, it flies towards my face, and I try to swat it away without making it angry. It does not want to leave me alone!
So, I start running. I figure if I run a little way down the trail, it will lose interest. Nope. It did not. It kept coming at me. The last thing I want right now is to get stung by a wasp.
I hear voices up ahead, and I jog toward them, a man and woman come into view, and I say, do you have a hat? I have a bee chasing me. The woman says, “a hat?” “Oh, you mean to swat at the bee?” I say, yes! So the man graciously takes his hat off, and you know what? As soon as he takes his hat off, the bee flies away! I am not kidding!
It was quite funny, and we all laughed about his “magic hat.” Then they tell me a story of when they were hiking years ago, and a bee flew up his wife’s nose! It sounded like a horror story to me, but she lived, although she did get stung. I am very thankful the bee left me, but I still heard phantom buzzing noises for a while after I continued down the trail.
Spray Park trail with views of Hessong Rock.
The Flat Tire
It takes about an hour for me to hike back to the Mowich Lake Campground from Spray Park. I am tired and a little hungry, but happy to be away from the mosquitoes. As I walk over to my car, I discover that I have a flat tire. I must have run over something on the way up.
I make a stop at the restrooms before changing my tire. As I’m walking back to the car, the dad and daughter duo that I spoke with earlier about seeing the goats spot me and say hi and ask me about my hike.
We chat for a bit, and then I walk over to change my flat tire. I’ve never actually changed a tire on my SUV before. It takes me a little bit to figure out how to lower the tire from underneath the vehicle. I do that, but I am not sure how to now detach it from the cable it is on.
I decided to ask the man I chatted with moments before for help. They were driving past my vehicle to leave for home when I stopped them to tell them about my situation. The man quickly parks his truck and very graciously helps me get the spare tire out from underneath the vehicle and then proceeds to change my flat tire. I am so thankful he stayed to help too as he mentioned the lug nuts were on really tight, and he had a hard time getting them loosened. I am so grateful for the kindness of strangers!
Mowich Lake is a beautiful, clear alpine lake.
Conclusion to My Hiking Experience
I made it home safely but stopped in Wilkeson to air up my spare tire as it also appears to be losing air. All in all, between being eaten alive by mosquitoes, chased by a bee, and getting a flat tire, I’m not sure I’d do it again if I had to pick those exact circumstances, but I don’t regret going either.
So would I recommend you make the trip to Mowich Lake? Absolutely! The hike to both Spray Falls and Spray Park is beautiful, the wildflowers are stunning, and Mowich Lake is a serene alpine lake accessible by car. I would not want to discourage anyone from going, only to suggest you plan ahead and don’t forget to pack bug spray for the hike!
In addition to applying bug spray in the parking lot, next time I will also bring it with me on the hike. Read my tips on what to pack and how to be better prepared than I was before leaving home.
Getting to the Spray Park Trailhead
The trailhead for Spray Park is in the northwest corner of Mount Rainier National Park in the Mowich Lake campground. As I previously mentioned, you’ll have an almost 17 mile stretch of gravel road leading up to the parking area. The road ends at the parking lot for the Mowich Lake campground. Whether you’re coming from Seattle, Tacoma, or Bellevue, the drive will take approximately 2 hours.
From the town of Wilkeson, you’ll drive south on Highway 165 for about 9 miles before coming to a fork in the road. Stay to the right of the fork and continue south toward Mowich Lake. Soon after the road turns into a dirt road, continue along this main road, and in about 9 miles, you’ll come across the Paul Peak Trailhead and pay station. Stop here if you do not already have a National Parks pass.* You only have about another 5 miles to go from the pay station before you reach Mowich Lake. The road ends in the parking lot.
*Please note the Washington Discovery Pass and the Northwest Forest Pass are not the same things as the National Park pass, you need to pay an entrance fee to be within the Mount Rainier National Park boundary. Purchase online ahead of time or stop at the pay station mentioned above.
Know Before You Go
Best Time of the Year to Go: July to October
The road to the Mowich Lake parking lot and Spray Park trailhead is typically only open from mid-July to October.
Fees: $30 for a 7-day park pass/$55 for an annual park pass
You can purchase your national park pass ahead of time online, or you can stop at the pay station on the way up. The pay station is at the Paul Peak trailhead. You will see signs telling you to stop and pay. If you already have a pass, just keep going up the road.
Road Conditions: The last 17 miles of the drive to the trailhead parking area is on a dirt road.
The road is rough and has potholes and washboard conditions along the way—plan for this section of the road to take about one hour to complete. Recommended speeds range from 15-30 mph, depending on the conditions and the vehicle you are driving in. Cars and SUVs alike will have no issue making it. Just take it slow. On a clear day, you’ll have views of Mt Rainier for the drive up.
Fuel Up: Make sure to fuel up your vehicle ahead of time.
The town of Wilkeson is your last stop for fuel on the drive up.
No Cell Service: There is no cellphone service in this area of the park.
Most people will lose cellphone signal in one of the small towns like Wilkeson before you ever hit the dirt section of the road. Let someone know of your hiking plans, so in case of an emergency, they will know where to look. This is always a good idea when hiking in the mountains.
No Pets: Pets are not permitted on any of the trails within Mount Rainier National Park.
No Potable Water Provided: There is no potable water for the Mowich Lake trailheads or campground.
You need to bring enough drinking water with you or a filtration system to filter lake or creek water.
Check the Park’s Website for Alerts:Always check with the park to find out if there are any alerts for road closures or weather alerts you need to be aware of before your trip.
What to Pack for Your Hike
Bug spray: Do not leave home without it! Bugs are notoriously bad at Spray Park, read my experience below, and make sure to apply and re-apply as necessary. You may also want to bring a mosquito net for your head.
Layers: I hiked this on a warm August day and didn’t need more than my t-shirt, but I still packed a sweatshirt just in case. Depending on what time of year you are here, you may need more layers, and in case you’re ever stranded on a hike, the extra layer may be a lifesaver.
Water: There is no potable water, so make sure to pack enough water for your hike, lunch break, and for the ride back down the mountain.
Food: Make sure to pack snacks and food to keep your energy up. I like to bring snacks I can eat on the go and then a sandwich for my lunch break.
First aid kit: It’s always good to have a first aid kit with you, in addition to that I also like to make sure I have moleskin when I’m hiking or backpacking, just in case I or someone in my group gets a blister.
Buff/Bandana: I like the buff I purchased at REI as you can use it as a bandana, hat, face mask, or neck gator. A bandana will also work for most of those situations too.
Bear spray: You are hiking in bear country, and your odds of seeing a bear while hiking to Spray Park is pretty good. So I recommend bringing bear spray, and if you’re by yourself, consider also getting a bear bell or calling out now and again to announce yourself.
Hiking/Trekking Poles: These are optional, but useful for crossing small creeks and for keeping your balance over the rocky terrain and roots on the trail.
Sturdy Hiking Shoes: You may want hiking boots, or you may feel comfortable with good trail shoes. Either way, make sure they’re comfortable and give you enough support. Then pack a pair of flip flops for, after the hike, I always find my feet like to breathe after a hike.
Prepare for the drive: Roadside Tools
Make sure your car is equipped with the necessary emergency roadside tools and make sure you know how to use them. Bring a tire pressure gauge, jumper cables, and a portable air compressor if you have one.
Additionally, I recommend you check your tire pressure before leaving town and also make sure your spare tire is properly aired up.
Spray Falls Hike Overview
Distance: 4.0 miles, round trip
Difficulty Level: Easy
Approximate Hiking Time: 1.5 hours to 2.5 hours
The hike to Spray Falls is a mostly level hike with some smaller rolling hills. There is no significant elevation gain for this hike. The trail is narrow for most of the hike, and there are a lot of roots and rocks embedded in the path. If you have significant issues with your balance, the trail might not be a suitable choice. However, for most people, including families with children, this hike should be a relatively easy hike accomplished in a few hours.
Hiking to Spray Falls
Start at the trailhead for Spray Park. You’ll find the Spray Park trailhead on the right, just past the pit toilets at the Mowich Lake Campground. The trail gradually descends into the forest, and soon you’ll cross a small footbridge over Lee Creek. At about .2 miles into the hike, you’ll come to a trail junction for the Wonderland Trail. Continue to follow the trail signs for Spray Park.
About 1 mile past this trail junction, you’ll come to the Eagle Cliff viewpoint. You’ll see a small trail sign pointing to the right. It is only 100 feet off the main trail. I recommend stopping here for a quick look. On a clear day, you’ll have incredible views of Mt Rainier and the Mowich glaciers.
After stopping at the Eagle Cliff viewpoint, continue on the main trail for about .25 miles where you’ll arrive at another trail junction. The trail sign will point right for Eagle’s Roost Camp, and to the left, it shows water .10 miles. Stay to the left of the fork to continue to Spray Falls.
Soon you’ll reach the trail junction for Spray Falls. You’ll see a sign that points to the right for Spray Falls viewpoint .10 miles. Take the trail on the right and follow this until it ends at the viewing area for Spray Falls.
Retrace your steps to return to Mowich Lake, or continue to Spray Park if you prefer a longer and more challenging day hike.
Spray Park Hike Overview
Distance: 6.0-8.0 miles, round trip
Difficulty Level: Moderate
Approximate Hiking Time: 3.5 hours to 5 hours
The hike to Spray Park is moderately challenging. However, I feel if you’re in reasonable shape, it should be one you can manage with relative ease. For some comparison, if you’ve ever hiked to Poo Poo Point, I find the uphill gain to be similar to Spray Park. The real uphill climb starts at the junction for the Spray Falls viewpoint. This is where the trail switches from easy to moderate difficulty.
The trail is narrow for most of the hike, and there are lots of rocks and roots and a variety of creek crossing, so I recommend sturdy hiking shoes and hiking poles will also be helpful, especially if you have troublesome knees.
The park trail sign shows 6 miles roundtrip; however, my guidebook shows 8 miles roundtrip. That is because Spray Park is a large area, and how far you choose to hike into Spray Park will determine how long your hike is.
Hiking to Spray Park
Follow the directions above for Spray Falls until you reach the junction for Spray Park and Spray Falls. From the junction for the Spray Falls viewpoint, the trail sign shows .8 miles to Spray Park. This distance brings you to the beginning of Spray Park. You’ll know when you’ve reached it as you come into an open area and begin moving outside of the treeline into an alpine meadow.
You’ll soon have views of Hessong Rock and Mount Pleasant to your left and views of Mount Rainier to your right. You can hike an additional mile or so further to see more viewing areas, depending on how you feel or how far you wish to go.
Depending on the time of year that you go, if you hike far enough into Spray Park, you will come to the area known as Seattle Park. Snowfields often surround this area, and I’ve read in the earlier months that hikers often get lost in the snowfields. I was here in August during a heatwave, so that wasn’t an issue, but be cautious and play it safe if you come when it is snowy, it’s better to turn around than to get lost.
After enjoying your time in Spray Park, head back the way you came to Mowich Lake campground.
Camping near Spray Park
You have a couple of campground options if you want to turn your day hike into an overnight trip.
Mowich Lake Campground
Mowich Lake campground is a walk-in, tent sites only, first come first served primitive campground. The walk from the parking lot to the campsites is a short one, though, and they provide a wheelbarrow to help you carry your supplies from the car. The tent sites are set around a dirt circle, and there is no privacy between campsites. Bear boxes are provided for your food and gear.
What this campground lacks in amenities and privacy, it makes up for in beauty and location. Mowich Lake is a gorgeous alpine lake! You can bring your SUP or kayak and enjoy time in this serene mountain setting. It is also a fantastic base camp for hiking trails in the area.
Fee: There is no fee to camp here. Campers self-register at the campground, and no wilderness permit is required.
No Fires Allowed
Pit Toilets
No Potable Water (You must pack your water in, or bring a filter to filter lake or creek water.)
Eagle’s Roost Camp
This backcountry camp is an excellent place for a beginner backpacking trip or an overnight family backpacking trip. The camp is located about 2 miles from the Mowich Lake campground, and it takes approximately one hour to hike there. There are seven campsites with bear poles provided for hanging your gear. Remember, you are in bear country, so make sure to take the necessary steps to keep yourself safe.
No Potable Water (You must pack your water in, or bring a filter to filter lake or creek water.)
Additional Tips for your Trip & Other Articles You Might Enjoy
Come during the week to avoid the crowds. If you do come on a weekend during July and August, plan to arrive early in the morning. This gives you the best chance to get a parking spot and completing the hike before the crowds come.
Sometimes it is easy to think “I’m not going that far” and, therefore, not perform vehicle checks you might otherwise do for a more extended road trip. However, anytime you’re going to drive up a mountain or be out of cell service range, it’s good to make sure you are adequately prepared! Also, make sure to let someone at home know where you’re going and what your hiking plans are, just in case of an emergency.
Other articles for things to do in Mount Rainier National Park:
Are you feeling a little stir-crazy? Do you need a good day hike to shake off some winter blues? Well, that’s how I felt after what seemed to be a never-ending winter and a cold and rainy start to our summer in Seattle. I was ready to get outside and soak in the beautiful sunny day we finally had. So I headed for one of my favorite waterfall hikes close to home, the Twin Falls hike near North Bend, Washington.
The Twin Falls trail is a beautiful path that winds its way along the river and through the trees (sorry no Grandma’s house) before leading you to spectacular waterfall views! I’ll tell you all you need to know to get there and as well as some tips, so you don’t extend your hike further than you want to.
Useful Things To Know Before Getting Started
You need a Discover Pass to park at the trailhead for the Twin Falls hike.
Bring bug spray, depending on what time of year you visit the mosquitoes can be quite bad.
Twin Falls is a popular trail, so if you plan to go on a weekend, be prepared for crowds and limited parking. I recommend you come on a weekday if possible, and try to get an early morning start. Even on a weekday during the summer, the parking lot is often full by noon.
There are pit toilets with hand sanitizer provided.
I found it easy to follow social distance guidelines along this hike. However, on crowded days, you may want to wear a mask when passing other hikers if you are unable to follow social distancing guidelines.
Hiking the Twin Falls Trail
The Twin Falls trail is about 3 miles round trip from the trailhead to the Upper Falls Viewpoint.
If you have ever hiked the Franklin Falls trail near Snoqualmie Pass, I will share my thoughts on a comparison of the two. I have hiked the Twin Falls trail and Franklin Falls trail multiple times. I love the ability to get up close to the waterfall at Franklin Falls, but I think Twin Falls is the prettier hike. You get more access and views of the river along the way, plus the forest opens up a lot more than with the Franklin Falls trail.
That said, Franklin Falls is the easiest of the two trails. So depending on your physical shape or the age of those hiking with you, be aware that hiking to Twin Falls is the more challenging hike.
It is still a fairly easy to moderate hike, but you will have some steep inclines along the way, and over 100 stairs to descend and ascend to see both waterfall viewing areas. Take it slow, there are lots of places for breaks along the way and enjoy the journey!
Starting at the Main Trailhead
Starting from the main trailhead, you will begin your hike with almost immediate views of the river below. If you’re itching to dip your toes in the water, don’t worry, you’ll have plenty of opportunities to do that later along the hike. Follow the trail as it winds its way down a hill and into the forest. You’ll soon cross a little bridge (above photo). After you cross the bridge, you’ll reach an area with easy access to the river.
There are several stops along the way with good river access. Huge boulders are separate the river into small pools. These are good for dipping one’s feet in to cool off on a hot summer day or letting the dogs have a little fun splashing around.
Benches With a View
As you continue along the trail, you’ll hike through narrow parts where the foilage crowds the path on either side. Then you’ll come into large open areas with giant trees looming all around. Make your way up a series of switchbacks before arriving at a resting point. You’ll climb a steep switchback to arrive at a set of benches that offer your first glimpse of the upper falls.
The benches are a beautiful place to stop and rest. There is usually a breeze blowing here, so in the summer, it is a refreshing place to sit and cool off. However, in the colder months, you may wish to bundle up or only stop for a short break if it’s really windy.
The Big Tree by the River
When you’ve finished resting at the benches, follow the trail as it descends back down into the forest. Near the bottom of the hill, you’ll come across a huge tree looming tall, not too far from the river’s edge. Stop to take photos with the big tree and if you want you can also take another break by the river. I just love all the beautiful trees along this trail!
Lower Falls Viewpoint
After you leave the big tree, continue hiking upward to where it levels off, and before long, you’ll see some stairs that fork off to the right. These stairs will take you down to the Lower Falls viewpoint.
This viewpoint, in my opinion, is the best one along the trail. So make sure to either stop on your way to the Upper Falls Bridge or hike down to it on your way back. Whichever you choose, you don’t want to miss it! I know hiking down and back up over 100 stairs may not seem worth the effort, but I assure you, it is!
Upper Falls Viewpoint & Turnaround Area
As you pass the stairs to the Lower Falls viewpoint, you’ll soon see a large bridge zigzagging through the trees. There’s a clearing on the bridge providing views of the valley on one side, and the upper falls on the other. If you want to continue past this point, you can hike a little further up to a small viewing area with a slightly closer view of the upper falls.
The wooden bridge viewing area for the upper falls.
From here, you will turn around and head back in the direction you came. If you were to continue past this viewpoint and up the trail, it would take you to the John Wayne Trail/Iron Horse Trail that leads to the alternate trailhead I mention in the “Getting Here” section.
Warning: Don’t make the mistake of passing the upper falls viewing area and thinking the trail will loop you back to the main trailhead. I had a few families who started to pass me going further up the trail, and I asked them if they had parked at the Homestead Valley Road trail or not. They had not, but mistakenly thought the trail continued on and somehow lead them back to the main trailhead off Exit 34. There is no need to hike further (unless you want to) once you’ve seen the Upper Falls.
Enjoy your hike back to your car, and if you didn’t take time to stop near the river, the walk back is a great time to do it. I enjoyed having a snack break there, listening to the rushing water, and smiling as I saw a family further up the river enjoying their time together.
Getting to the Twin Falls Trailhead
The Main Twin Falls Trailhead: SE 159th St, North Bend, WA 98045
Take I-90 east to exit 34
Turn right off the exit ramp onto 468th Avenue SE
Drive about half a mile and make a left onto SE 159th Street.
Follow the road until it dead-ends in the Twin Falls parking lot. (You will need a Discover Pass to park here.)
Alternate Hiking/Parking Option:
If the main Twin Falls trailhead parking is full, you can also hike to the falls coming from the opposite direction. The hike will be different than what I describe below, but if you drive out there and discover the main trailhead is full, this gives you an alternate option.
Take I-90 east to exit 38
Turn right off the exit onto SE Homestead Valley Road. Drive about 0.10 miles and make your first right, you’ll see a sign for Olallie State Park that lists various trails
Follow this dirt road for a little over a quarter-mile, stay left as you pass two forks in the road along this route.
You will park near the trailhead junction for Iron Horse Trail.
Follow the Iron Horse Trail (may also see signs for John Wayne Pioneer Trail) for about a third of a mile before it connects with the Upper Twin Falls trail.
Once you reach the Upper Twin Falls and the big bridge, you’ll just need to hike a little further down where you’ll find stairs on your left, leading you to the Lower Falls viewing area.
Read the following articles for more waterfall fun:
**Update** The Gnomes Trail has relocated to 25719 Maple Valley Black Diamond Rd SE, Maple Valley, WA 98038. This is also the parking area for the Maple Valley Farmers Market. Read my updated post on the NEW Gnome Trail here.
Facebook
Pinterest
Reddit
Twitter
Email
If you’re looking for a fun, family-friendly hike, then look no further than the Gnomes Trail in Maple Valley, WA.
Explore this whimsical trail located within Henry’s Ridge Open Space. Henry’s Ridge Open Space is a network of trails that extend within the Maple Valley and Ravensdale areas.
The Gnomes Trail is an easy 2-mile roundtrip hike suitable for all ages. The trail is mostly flat and has a very mild elevation gain of only about 150 feet. I saw people of all ages and fitness levels hiking this trail. So if you are new to hiking or have younger kids, the Gnomes Trail is a great place to start.
Getting to the Gnomes Trail
There are two starting points for the Gnomes Trail in Maple Valley.
279th Street Park: Maple Ridge Way SE, Maple Valley, WA 98038
Henry’s Ridge Open Space: 253rd PI SE, Maple Valley, WA 98038
I chose to start my hike at the 279th Street Park. However, you can also start the hike from the Henry’s Ridge Open Space trailhead off of SE 281st Way and 253rd Place SE.
Click on the map and see the two trailhead parking areas as well as the mapped trail routes. I recommend downloading the Google Map for offline use before leaving for your hike.
Google Maps will give you walking directions from whichever parking area you choose to start the hike. Google Maps displays the trail and shows you which path to take. You can refer to the map all along the way to make sure you’re on the right track.
Parking for the Gnomes Trail
Whether you choose to start from the 279th Street Park or Henry’s Ridge Open Space, just know that there is only street parking at both trailheads.
I found the 279th Street Park to have less traffic and more parking areas than at the trailhead for Henry’s Ridge Open Space. You can always go to one, and if you can’t find parking, then try the next trailhead. Refer to the above map for directions.
Sharing the Trail
The Henry Ridge Open Space is a multi-use trail system. This means that you are sharing the trails within this natural space with bicyclists, horses, and other hikers. So yield to horses and move over for the bicyclists. I know the sign says bicyclists should yield to both hikers and horses, yet, I find as a hiker it is easiest for me to move out of the way.
Hiking the Gnomes Trail in Maple Valley, WA
I started my hike from the 279th Street Park, but if you choose to start from the Henry Ridge Open Space trailhead, the directions are the same once you reach the Once Upon a Time trail.
It’s important to note that not all of the trails are clearly labeled, so use this guide to help you navigate. Additionally, download an offline map from Google Maps for directions before leaving home.
Route 66 and the Once Upon a Time trail (left). You make a left onto the OUAT trail if coming from Stinger or a sharp right if coming from the 279th Park.
Starting from the Henry Ridge Open Space Trailhead
You’ll access the trailhead next to the road and continue straight (pass the Old Mike trail) until you reach the Stinger trail where you’ll make a right. Follow Stinger until you reach a wide gravel trail, this is Route 66, turn right on to the path. In about 20 feet, you’ll cross the road and make a left onto the Once Upon a Time trail (OUAT). From here the directions are the same as if you were starting from the 279th Street Park.
Starting from the 279th Street Park
Park alongside the 279th Street Park and then cross the road to the trailhead. This gravel path is called Route 66 on the map.
Follow Route 66 for less than a quarter-mile before making a sharp right onto the Once Upon a Time trail (OUAT). You’ll spot your first gnome shortly after starting this trail. I think he’s there to let you know you’re heading the right way.
This is the first gnome to greet you on your hike.
This portion of the hike is a dirt trail with rocks and roots here and there, but ample space to stop on the side to let people pass when needed. Enjoy the forest with its moss-covered trees and stumps left from larger trees that once grew there.
I liked this tree growing over the old stump.
The Derailer Trail and Two Choices
Eventually, you’ll come to a fork in the path, and if you look right, you’ll see a diamond-shaped sign and a sign above it that reads “Derailer.” You can go right or left here.
If you go right on the Derailer trail, you will follow the path as it loops around and links up with the Lorax trail. Make a right onto the Lorax trail. (Skip to the asterisk (*) past the directions for making a left to continue.) (The instructions from that point on are the same whether you make a right or left at the Derailer fork.)
If you go left at the fork where you see the Derailer trail sign, you will continue a short way down the trail before reaching another fork in the path. Make a right here to continue on the OUAT trail (Bad Wolf is to the left). In about 250 feet you’ll make another slight right onto the Lorax trail (I don’t recall seeing a sign). You’ll continue down the Lorax trail and soon pass the fork for the Derailer loop, just stay to the left.
*Continue along the trail, and soon you reach a footbridge made out of a fallen tree. There are two bridges, I stuck with the larger one on the left, but both link you back to the same trail.
Cross the bridge and follow the path as it curves left; shortly up ahead, you’ll see the welcome sign for the Gnomes trail.
The Gnomes Trail
Take the Gnomes trail on the right and stay right to follow the trail’s loop. The Gnomes trail loop is around 0.5 miles.
At the entrance to the Gnomes trail, you’ll find a welcome area and a trailhead sign. Continue up the path enjoying the gnomes scattered everywhere. Make sure to look up in the trees and under shrubs. You could make it a game for the kids to see how many gnomes they can find.
Speaking of games, there is also a geocache hidden not too far from the entrance to the Gnomes trail. If you’ve never been geocaching, it is a lot of fun for kids and adults alike! You can download the app and look up geocaches near you to find more.
Click on the photos below to view a larger image. These are some of the signs that greet you near the entrance of the trail.
The Gnomes trail loop is a series of switchbacks curving right and left and then right and left again as it winds its way up, and then down, and then back up before looping you down and around to the main entrance of the Gnomes trail.
You see a huge variety of gnomes in the first part of the trail, there are even a few fairies, dwarfs, and I also spotted a troll. The gnomes appear to enjoy many of the same activities we do, such as camping, sports, gardening, and so on. You’ll have fun spotting all the unique gnomes along the way.
Here are some of the ones I found during my hike. Make sure to visit and discover your favorites too!
After the first series of switchbacks, you find yourself back near the main entrance, however, the trail curves right here and begins climbing up again. The gnomes will appear less and less as you continue along this portion of the trail.
You’ll pass another trail junction, make sure to stay left, and soon you’ll come to a “T” in the path where you’ll make a left onto what is called the Ogre trail. Soon you’ll see a fork on the right for the Ogre trail but continue straight and don’t turn right where you see the sign that reads “Ogre.”
You’re looping back, so you’ll want to stay left, and soon you will be back at the main entrance to the Gnomes trail. From this point on, you backtrack the way you came to return to your parking spot.
Useful Information to Know
There are no restrooms at either the parking areas/trailheads or anywhere along the trail. So make sure to take a pitstop before you come.
The hike is a little over 2 miles roundtrip, and it took me a little over an hour to hike it. If you have small kids or a large group, plan for it to take 1.5 to 2 hours for the roundtrip hike.
The Gnomes trail is an easy hike with minimal elevation gain, but it is narrow in spots with rocks and roots and overgrown bushes along the way. So wear the appropriate shoes, and if you have any mobility issues, you may want to bring a hiking stick.
The trail is too narrow in most spots to accommodate a stroller, so plan accordingly.
Dogs are allowed, but make sure to pack your poo out as there are no garbages along the trail. This goes for all trash. This trail system is within a neighborhood, and we must be respectful of the community and the trails.
Bring bug spray! The mosquitos were quite bad on the trails, and I sadly forgot to apply bug spray before leaving.
Download an offline map through Google maps of the area, and Google can give you walking directions for the trail. You can also use any favorite maps apps you might have, such as AllTrails or BackCountry Navigator, if you want to track your hike.
The Henry’s Ridge Open Space trails are designed in loops. So don’t panic if you do take a wrong path as it will link up with another one. There are multiple ways to get to the Gnomes Trail. I am only sharing a couple of options.
Recommendations for a Post Hike Treat
If you’d like something refreshing after your hike, why not head to Dairy Queen for a delicious ice cream treat or perhaps go through Gravity Coffee’s drive-through for a little pick-me-up for the ride home. I’ve marked both of these on the map at the beginning of this post. There are a ton of other options for food in the Maple Valley/Four Corners area if you want to grab a bite to eat.
Dairy Queen 23924 SE Kent Kangley Rd, Maple Valley, WA 98038
Gravity Coffee 23912 SE Kent Kangley Rd, Maple Valley, WA 98038
I’d love to hear from you if you have hiked the Gnomes trail and what you thought about it. If you have any questions, please feel free to send me an email or post them in the comments section below.
For more hikes in Washington read the following posts:
I tried to think of what I would write regarding my visit to Auschwitz. I have so many thoughts regarding WWII and on the subject of The Holocaust. There are so many studies on The Holocaust and so much history to cover that I knew I could not discuss it all or better express the facts already documented.
Before my trip to Europe, I listened to the full version of The Diary of Anne Frank. I also spent a few days in Amsterdam, where I visited the secret annexwhere Anne and her family and the others hid from the Nazis. It was very moving to read her diary and then to visit the place where she penned it.
After the Nazis discovered them, Anne and the other seven people in hiding were all sent to Auschwitz. Some transferred to other camps, and only Otto, Anne’s father, survived. So as I contemplated how to write about my visit to Auschwitz, it seemed fitting to write a diary of my day and the thoughts I had along the way.
I will also provide information on how to visit Auschwitz-Birkenau at the bottom of the page. I recommend if you get a chance to visit here, that you’ll take it. It is a place that will leave an imprint on your heart. A place all of us should remember and never forget.
Tuesday, September 18th, 2018
My day begins far too early for my liking. However, I get up when my alarm goes off at 4:45 a.m. I have somewhere to be. Today is the day I will check off another bucket list destination. I know some may consider it a strange one, but it is a place I’ve read about since I was a child. A place that seems too awful to be true. Today I will visit Auschwitz-Birkenau.
My friend Angela and I finish getting ready. We leave our Airbnb apartment in Krakow around 5:25 a.m. to meet our Uber driver. His name is Dmytro. He is nice, but nervous and keeps apologizing for every bump in the road. I assure him that we have rough roads where we come from too.
We arrive ahead of schedule, so we wait for the bus. Angela told me earlier she’s a little apprehensive about today as she thinks it will be horrible.
Which of course, what happened was horrible. It was something so awful that people need to remember it happened. The horrors of Auschwitz and The Holocaust showed us the evil side of human nature.
Yet, it also demonstrated the resilience of the human spirit. The hope and faith that is still here. And the willingness of humans to not only sacrifice their earthly possessions to help others but to also lay down their very lives for the cause of freedom.
Bus Ride to Auschwitz-Birkenau
As I ride the bus to Auschwitz, sitting in my padded blue seat, I think what the journey must have been like for the victims transported there. I watch the landscape as we zip past the fields, the small towns, and forests along the way. What was the scenery like almost 80 years ago when they brought the first prisoners to Auschwitz?
Later, I would see the train cars that brought the captives packed so tight they could hardly breathe. They didn’t have the luxury of a padded seat or windows to view the scenery. They were transported like cattle, worse than cattle. The Nazis packed 80-100 people to a train car with no windows, little to no food or water, and only a bucket to use as a toilet; many died during the journey. I cannot imagine it is too awful to consider.
Eating Breakfast in Auschwitz
The bus drops us off just outside the museum complex. We cross the parking lot, and I think about how I haven’t had breakfast and should eat as it will be a long day. I feel almost guilty about this. Even though most would consider my breakfast here mediocre at best, it would have been a royal feast for the prisoners at Auschwitz. I try not to think about this and instead eat my egg with toast and drink a cup of coffee.
I later learned that the prisoners at Auschwitz would work 11 hours of hard labor and receive around 1150-1400 calories per day. The food was so awful that in the beginning, it was hard for them to eat it, and later due to their starvation, they would eat food out of the garbage. I saw photographs of people who had lost over 50% of their body weight. They were living skeletons.
Waiting for Our Museum Tour
After eating breakfast, we walk through a security checkpoint on our way to a waiting area for our 9:00 a.m. tour group.
I find a seat by a window where I look out over the courtyard. It is a bright sunny day, hardly a cloud in the sky. It doesn’t feel dark and scary. There are hundreds of people milling around in tour groups, walking to and from the various barracks and buildings.
I look out over the grassy lawn to see the iconic gates that read “Arbeit Macht Frei” (“work sets you free”), and I think about the prisoners’ first glimpse of these gates and what they must have felt.
I try to imagine what it must have been like to arrive here on one of those trains. Indeed, I cannot grasp the agonizing journey that would have brought them here nor the atrocity of their fate.
Why It’s Important to Remember
No, try as I might, sitting there, looking out the window, as I wait safely for my tour, I could not grasp the horrors they went through.
However, I felt it was important to try. It is important to remember and never to forget. To accept what happened. Denying it does no one any good. It does not preserve the memory of those murdered, and it does nothing to respect the memory of those who gave their lives to stop these horrible crimes. We must remember and work to see that it is never again repeated.
And so I begin my tour, knowing I will hear the stories of things that are too terrible to imagine, but this isn’t fiction, this is the raw, unedited history of human depravity–and also the courage of the human spirit.
“Remember only that I was innocent and, just like you, mortal on that day, I, too, had had a face marked by rage, by pity and joy, quite simply, a human face!”
~Benjamin Fondane, murdered at Auschwtiz-Birkenau, 1944
Heroes of The Holocaust
It was these stories of courage that our guide tells us about during our tour at Auschwitz. She told us about Helena Plotnicka. A wife and mother of six kids. Helena sacrificed what little food her family had to leave food in the fields where she knew Jewish prisoners worked. She left it there for them to find.
Helena also worked to acquire medicines for the prisoners and would also leave these in the fields. Additionally, the prisoners would give her letters and correspondence explaining the conditions in the camp so she could help spread the word. Helena was later arrested and died in Auschwitz in 1944. She was one of many heroes that tried to fight the tide of evil.
Other heroes like Miep Gies, Victor Kugler, Bep Voskuijl & Johannes Kleiman from the Diary of Anne Frank. Corrie Ten Boom and her family, Oskar Schindler, and countless others, including the millions who sacrificed their lives during World War II to give hope and freedom to the victims of the Holocaust and the cause of freedom for all humanity. We must remember their sacrifice.
The Lies of the Nazis
Our guide explains that survivors would later recount the relief they felt upon arriving at Auschwitz. They came to Auschwitz believing if they worked hard, they would continue to live. The Nazis were fine with people knowing that they had work camps, but they hid the true identity of Auschwitz-Birkenau. They hid the fact of what it really was—a death sentence.
So they lied. Guards forced other prisoners to write postcards from Auschwitz telling their family that the conditions were better there and that they didn’t have to work as hard. Then these prisoners were murdered. Later the Nazis tried to destroy the evidence of the crematoriums and other documents that would connect them with their crimes.
We saw piles of canisters once filled with Zyklon B. This gas, a type of cyanide, was used by the Nazis to exterminate millions in the gas chambers. Later our tour group walked inside one of these gas chambers. Fake showerheads placed on the ceiling perpetuated the lie that those entering were only taking a shower before moving to the barracks. Instead, they were sent to their deaths.
The Death Wall
Just before our break, we stop at the death wall. It’s an area where prisoners went through a series of steps that required them to undress and then walk naked to a wall where they were shot. Later the Nazis decided this was too slow of a process and thus came up with the idea of using gas chambers and crematoriums. They could only kill as many as they could burn; this turned out to be around 5,000 per day.
I saw the rooms with over two tons of human hair, the thousands of shoes, combs, pots, pans, and personal possessions left behind from the millions murdered. The Jews and other prisoners brought here thought they would leave someday, so they packed as many belongings as they could for the trip.
Upon arrival, they were told to leave their belongings in a pile and to remember where they left them as they would return to that spot. This was another lie. Instead, they went straight to a gas chamber, never to return.
Our Lunch Break
After almost 3 hours of touring Auschwitz, our guide announces that we’ll take a 40-minute break before continuing to Birkenau. 40 minutes. Just enough time to quickly eat the pb&j sandwiches we packed. We look for a place to sit in the shade to stay out of the burning sun.
It all seems surreal. One thing is for sure, I certainly won’t complain about the sun burning down on me, or how my back and feet are tired from so much standing and walking on the hard ground. These inconveniences are so inconsequential in the grand scheme of what occurred here. If complaining is wrong in normal circumstances, it seems almost sacrilegious now. Disrespectful, perhaps, is the sentiment I feel.
I look around at the other visitors lounging on benches and the grassy lawn outside the museum complex. Forty minutes doesn’t seem like a lot of time to digest what I’ve just seen and heard. Is there any amount of time that will make processing these horrors any easier?
Time is up, we board another bus and leave for Birkenau.
Auschwitz II-Birkenau
Birkenau, or Auschwitz II-Birkenau as it is also known, is a little over two miles from Auschwitz I and is shockingly massive. It is twenty times larger than Auschwitz I and designed for one purpose. Death. It was the largest of the death camps. They executed men, women, and children without regard for life.
I cannot stop looking around in shock at how big this concentration camp is. We ascend to the top of the central guard tower or “death gate” at the entrance to the Auschwitz II-Birkenau concentration camp. We have an aerial view of Birkenau from here. It stretches out further than I can see.
On the left, I see barracks made of brick. I learn that the prisoners had to tear down homes and buildings in the nearby towns and then use them to build these brick barracks. They ran out of bricks, and so to the right, I see row after row of barracks made of wood.
There were over 300 buildings here during WWII. The barracks used to house prisoners had been designed as horse stables. They were not insulated and would have been awful both in the hot summer and in the freezing winters. Prisoners often had to sleep five or more to a bed. You can imagine the smells, the dirt and filth, and the hopelessness of the place.
Electric barbed wire fences surrounding Auschwitz-Birkenau.
The Family Camp
We walked to a “family camp” where a select number of children were allowed to live. We see drawings from these children that show their perspective. The few that were allowed to stay in this camp were there for propaganda purposes to send out letters and postcards before meeting their fate.
The Gas Chambers
Our guide takes us down the long stretch of train track that leads from the death gate to the unloading ramp where they forced prisoners into groups: women and children in one and men in another. They immediately killed some while others walked the long way to the gas chambers.
There were four massive gas chambers at Birkenau, and they crammed over 2,000 people into these at a time. Toward the end of the war, the Nazis expedited their killing and murdered anywhere from 5,000 to 6,000 people per day.
Dr. Mengele, also known as the “angel of death,” selected some of the prisoners for his twisted human experiments. He performed medical experiments on them without anesthesia. Twins and people with physical anomalies such as two different colored eyes were of particular interest to him.
We view the remains of two of the gas chambers and crematoriums. The Nazis tried to destroy these at the end of the war to hide the evidence of their crimes. It is hard to imagine, even as I stare out over the demolished gas chamber and crematorium, that such evil exists.
The horrors of The Holocaust and the actions of the Nazis are so unfathomable to me. This is not ancient history. This happened in the last 100 years. I know, too, that holocausts have occurred in other parts of the world. It is heartbreaking to consider.
Individuals Not Just a Number
Over 1 million people died at Auschwitz-Birkenau. Most of these were Jews, but there were also other prisoners of war murdered here. The death toll for Polish Jews was particularly high. Around 3 million Polish Jews were killed, that’s half of all Jews killed during The Holocaust. Only about 10 percent of Poland’s Jewish population survived.
Our group walks to a building on the far side of the Birkenau concentration camp that has an important story to tell. The story of the victims before they came to the concentration camps before they were hunted down, back when their lives were healthy and happy.
In one area of the exhibit, there are enormous books on display that visitors can flip through and read name after name of those murdered during The Holocaust. There are over 4 million Holocaust victims listed with blank pages at the end for the names not yet recorded. These books are a tribute to those murdered. They have no graves and no tombstones. However, every life mattered, and everyone one of them was an individual with a name.
Photographs, Memories & Moments in Time
In another room, I see photos of some of these individuals. There are photographs with them at the beach, at the park, and hanging out with friends at dinner parties. They are photographs of kids at school, family portraits, young couples in love–people enjoying their lives. People like you and me.
In another room, home movies discovered after the war play on every wall of the room. I stood there watching people at concerts, on sailboats, with friends and family smiling and laughing. It was as if I had a time machine to go back and see them alive again. These movies brought their memories to life, and I saw my humanity reflected in their faces.
I, too have home movies and photographs, I also have people I love and a life I love. However, their lives were taken from them, and I still have mine. Children never to become adults, parents never to know parenthood, and grandparents robbed of the joys of grandchildren. This exhibit had the most significant impact on me.
A wall displaying photographs recovered from suitcases found after the war.
It is easy, due to the mass total of victims murdered, to view them as a number. However, it is essential to see them as individuals who loved and laughed–people like you and me.
As a teenager, I read the personal stories of the survivors and those that died. Knowing these people as individuals makes it easier to empathize, to relate. No, I can’t comprehend the horror they endured at the hands of the Nazis and others, but I know what it is to love, to laugh, to be scared, and to have dreams. Their stores teach me about courage, about love, and to never take life for granted.
Here is a short clip from the room displaying the home movies.
Life and Freedom are Gifts
That is the theme by which I try to live my life. To live life to the fullest and be grateful for everything. I am so blessed. I’m rich with love and family, friendship, opportunities to travel, and the ability to see the beauty in the simple. I am thankful that I still get excited over a beautiful flower, a fall leaf, and a snowflake.
We are not all survivors of a horrible event such as The Holocaust, but we all deal with hurt, the pain of loss, and death. I suppose it is this terrible and painful side of humanity that can also enhance the joy we can find in life. I think it should cause us to be more thankful for life and to embrace the joy amidst the pain.
Don’t stop living while you’re still alive. There are so many others whose lives ended too soon, those that never got to graduate high school, those that never learned to ride a bike, those that never got to marry, to have kids, or to wake up to another beautiful morning.
So be kind. Be humble. Help others and reach out to those that are hurting. Encourage. Share hope. Enjoy the simple things of life. Be grateful. Never, ever forget that all human life is precious!
And maybe, just maybe, in the tiniest way, by living our lives, we remember those who no longer are able to live theirs.
Visiting Auschwitz
Tour Options:
You have several options when planning a visit to Auschwitz. You can go with a tour group, or you can take a self-guided tour through the concentration camps.
The 6-hour study tour is what I took, and I highly recommend it. It allows for a slower pace to see both camps and provides more time for reflection. There are tours from 2.5 hours to 6 hours in length. If you choose to go with the self-guided option, just know that you can only enter at certain hours, usually early morning or late afternoon. You still need to reserve a self-guided tour, just as you would a guided tour.
The guided tours offer insightful commentary and information I feel one might miss by going on their own, but each person will have their reasons for choosing which type of tour they take.
Booking Online:
Make sure to book your tour in advance of your trip to Auschwitz as the tours do book up. Learn more about the different tours offered, book your tour, and get useful information regarding your visit on the museum’s website.
Food:
They have a cafeteria at Auschwitz I and a hotel across the street that also has a restaurant.
Getting There:
I booked a shuttle through Discover Cracow from Krakow to Auschwitz. If you are staying in Krakow, I highly recommend you consider using their service. It is incredibly affordable and easy to book.
The journey takes 1-1.5 hours—plan for your visit to the camps to take an entire day. Depending on which tour option you choose, it may take more or less time, however, given the solemnity of these memorial sites, it is good to give yourself time for some restful reflections rather than pack a bunch of sightseeing in afterward.
Additional articles for your visit to Krakow, Poland:
Krakow, Poland, is an incredible place to visit, and I loved my time there! One of the things I love about travel is arriving at a completely new destination, unsure of what to expect, and then leaving with a new fondness for that place in which only days before had been unknown to me.
Krakow was like that for me. There are so many memorable things to do in Krakow you cannot possibly see them all with only two or three days. This article provides an overview of Krakow’s highlights to help you create an itinerary for your adventure there.
Brief History of Krakow, Poland
Krakow dates back to the 11th century (possibly even earlier) and was once the capital of Poland. It was where the kings of Poland ruled from high above the city at Wawel Castle.
Explore the ancient fortifications dating back to the 15th century, the castle built in the 13th century, and the largest medieval square in Europe! Krakow is teeming with history and beauty. You do not want to miss visiting this extraordinary city!
Memorable Things to Do in Krakow
#1 Old Town (Stare Miasto)
Wander around Old Town (Stare Miasto in Polish) and admire the gorgeous architecture and cobblestone streets. Old Town is a great place to shop for souvenirs, get a bite to eat or even better, try some gelato (I recommend Lodziarnia Donizetti)! It is also the location for many of Krakow’s main attractions.
#2 Rynek Glowny (Main Market Square)
Rynek Glowny is the heartbeat of Krakow. It is a beautiful place to explore, and to spend an evening admiring the architecture and taking in the hustle and bustle of the square. Watch a street musician perform, take a horse and carriage ride along the Royal Road or just sit back and people watch.
Rynek Glowny is probably the most iconic space in Krakow and home to several of Krakow’s top sights. You’ll find Saint Mary’s Basilica, the Cloth Hall, Rynek Underground, and more located here.
Saint Mary’s Basilica
#3 Saint Mary’s Basilica
This beautiful Gothic cathedral rises on the edge of Rynek Glowny (Main Market Square). It is easily recognizable by its twin spires and red brick facade. You can tour the inside of the basilica and see the stunning wooden altar (at the time of this writing it is undergoing renovations).
You can also tour one or both of the towers. Choose from the Bugle Call Tower, the tallest of the two towers, or the Bell Tower and see the historic cathedral bells. Every hour in the square, you can hear the bells ring and a trumpeter playing St. Mary’s Bugle Call from the Bugle Tower.
Both towers offer you beautiful views of the square below and are my recommendation for the best bird’s eye view of the square. So grab your camera and a pair of comfy walking shoes (no elevator) and get ready to climb to the top.
#4 Cloth Hall (Sukiennice)
Krakow’s Cloth Hall was once the hub of international trade in Poland. It is the centerpiece of Rynek Glowny and now houses shops and an art museum. It is here you’ll find the Visitor’s Center and useful information for tours.
You can also tour the Rynek Underground museum located beneath the Cloth Hall. The Rynek Underground offers you a glimpse of what medieval Krakow was like — and it’s all below the historic Cloth Hall!
Krakow’s Cloth Hall
#5 Planty Park
Take a break in the shade of one of the many trees in Planty Park, and people watch from a park bench while enjoying this green space. Planty Park resides in the area that was once the moat from the medieval walls that encircled the city.
The moat was filled with soil to create Planty Park, which now encompasses Old Town (Stare Miasto) in an over 2-mile loop. If you’re looking for an excellent place for a morning run, this is it!
#6 Wawel Castle
Wawel Castle sits high atop Wawel Hill, and the castle complex includes a variety of attractions from which to choose. You’ll pay to see only the tours you’re interested in, such as the treasury, cathedral, royal apartments, etc.
You can also stroll the castle grounds and admire the gardens and architecture for free if you don’t have any interest in the tours.
There is a scenic viewpoint to one side of the castle complex that provides terrific views of the Vistula river and city. From here you can walk below and see a fire breathing dragon!
Wawel Castle complex
#7 Smok Wawelski
Don’t miss the fire-breathing dragon located alongside the Vistula river just below the Wawel castle grounds. You can even walk through the dragon’s den to reach this fire-breathing statue (the den is not stroller friendly or wheelchair accessible). Kids will especially love seeing the dragon breathe fire and will enjoy crawling through the cave, plus it’s free!
#8 Attend a Chopin Concert
Fredrick Chopin is one of Poland’s most celebrated composers and pianists. I love Chopin’s music, and since my trip to Poland wouldn’t include Warsaw (planning that for next time), Fredrick’s birthplace, I knew I wanted to attend a Chopin concert while in Krakow.
I booked my tickets at the Chopin Concert Hall. It is a small intimate setting and a beautiful way to spend an evening. I highly recommend it!
Wieliczka Salt Mine St. Kinga’s Chapel
#9 Wieliczka Salt Mines
The Wieliczka Salt Mines are a UNESCO World Heritage Site. These mines are incredible to behold. You will see chandeliers, statues, beautiful wall carvings, and more–all made from salt!
I don’t know where else you’ll have a better opportunity to learn about the history and importance of salt as well as to observe some of it’s more unusual uses.
Explore this medieval fortress of Krakow located just outside the historical Saint Florian’s Gate. The Krakow Barbican was built around 1499 and is an impressive example of human engineering. It was an impenetrable defense for the city and had underground passageways that led to the city gates. This fortified gateway helps display the diverse history of Krakow and the many facets of this stunning cultural city.
Krakow Barbican
#11 St. Florian’s Gate
This Gothic tower was the main entryway to the city of Krakow. It was one of the multiple gates along the city’s defensive walls. Where these walls and moat once stood is now home to Planty Park. The tower is about 110 feet tall and is a beautiful piece of architecture and history. I recommend you make time to explore this historic area of Krakow.
#12 Oskar Schindler’s Enamel Factory
The factory currently houses two museums, the Museum of Contemporary Art and Schindler’s Factory Museum. The Factory Museum gives an in-depth look at the effects of WWII on Krakow and the atrocities the Nazis committed against the Polish Jews.
#13 Kazimierz Jewish Neighborhood
This Jewish neighborhood once had over 3 million Jews who lived here. However, due to the extermination of the Jews during WWII, only about ten percent of them survived.
Plan to visit the Old Synagogue and the Galicia Jewish Museum to learn more about the lives of the Jewish community in Krakow before WWII. Also, make sure to visit the Ghetto Heroes Square and the monument dedicated to their memory.
In addition to the historical sites of the Kazimierz neighborhood, it is also a great place to shop. Explore its distinctive architecture and eclectic shops to find unique souvenirs to take back home.
#14 Eat Polish Food
Don’t miss trying authentic Polish food while in Krakow! I recommend trying Polish Sour Bread Soup (Zurek). I ate this at Bar Smak and loved it!
Another popular street food is a Krakow bagel (Obwarzanki Krakowski). These make good on the go snacks to fuel your busy day of sightseeing.
Zapiekana is another delicious street food to try. They are like open-face sandwiches, long baguettes cut in half traditionally topped with mushrooms, cheese, and your choice of sauces.
These are just some of my recommendations, be adventurous, and try something new!
#15 Church of Saint Peter and Paul
Saint Peter and Paul’s Church is in Old Town. This historic baroque cathedral was built during the 16th century. Outside the church, sculptures of the 12 apostles line the gated entrance.
Once inside the church, you can purchase an audio guide that tells you more about the church history and also the crypt beneath the church, which is open to tour as well.
Directly next to the Church of Saint Peter and Paul, is the 11th-century church of Saint Andrew. St. Andrew’s church is one of Krakow’s oldest. Take time to step inside this ancient cathedral and admire its architecture before moving on.
Saint Paul and Peter’s Church
#16 Auschwitz-Birkenau Concentration Camps
Last, but certainly not least, is something I feel should not be missed during a visit to Krakow. The Auschwitz-Birkenau concentration camps are not in Krakow, but rather near the city of Oswiecim. However, you can easily take a bus from Krakow to Auschwitz.
The journey takes 1-1.5 hours—plan for your visit to the camps to take an entire day. Depending on which tour option you choose, it may take more or less time, however, given the solemnity of these memorial sites, it is good to give yourself time for some restful reflections rather than pack a bunch of sightseeing in afterward.
Make sure to book your tour well in advance of your trip to Krakow as the tours do book up. You can take a self-guided tour, but only during certain hours of the day. I chose the 6-hour study tour and I highly recommend it! The guided tours offer insightful commentary and information I feel one might miss by going on their own, but each person will have their reasons for choosing which type of tour they take.
Suggested Itinerary for 3 days in Krakow
Day One: Visit Auschwitz, have dinner in Krakow and enjoy Rynek Glowny (Main Square) at night. Consider attending a Chopin Concert.
Day Two: Visit the Wieliczka Salt Mines in the morning, get some lunch and then see Saint Mary’s Basilica, visit the Cloth Hall, and then head to the Kazimierz neighborhood and have dinner there. Explore the area and do some souvenir shopping, then head to Schindler’s Factory Museum (it’s open until 8 pm most nights).
Day Three: Explore Old Town, tour Saint Paul’s Cathedral, Wawel Castle, see the dragon, and then take a relaxing stroll through Planty Park before heading to see Saint Florian’s Gate and the Krakow Barbican. You’ll still have time for shopping in the Main Square if desired.
Recommended Places to Eat
Moa Burger
Address: Mikołajska 3, 31-027 Kraków, Poland
Moa Burger has delicious and unique burger choices. I tried a burger with beets and pineapple on it, it was delicious, and I don’t even like beets!
Bar Smak
Address: Karmelicka 10, 33-332 Kraków, Poland
This is the place I tried the traditional Polish sour bread soup, and I loved it! Stop here if you want to try some authentic Polish food.
India Masala
Address: Mały Rynek 2, 31-041 Kraków, Poland
Delicious Indian food a short walk from Rynek Glowny in the heart of Stare Miasto.
Milkbar Tomasza
Address: Świętego Tomasza 24, 33-332 Kraków, Poland
This is another option when looking to try some traditional Polish food. They are a popular spot for breakfast and also serve delicious pierogis.
Cafe Camelot
Address:Świętego Tomasza 17, 33-332 Kraków, Poland
If you’re looking for a place to get some delicious coffee and dessert, look no further than Cafe Camelot. This Cafe is close to St. Mary’s Basilica.
Żarówka Cafe
Address: Floriańska 20, 31-021 Kraków, Poland
Żarówka Cafe is around the corner from Cafe Camelot and has a lovely outdoor seating area. Enjoy coffee, a sandwich, and dessert while giving your feet a rest.
Rynek Glowny (Krakow’s Main Square)
Tips for Getting Around Krakow
I was pleasantly surprised to discover how cheap it was to use Uber in Krakow. I tend to use public transportation for its cost-effectiveness and convenience. However, in Krakow, Uber was often more convenient (at least from where I was staying) and very affordable.
Plus, since I was traveling with a friend, we split the cost, which made it that much more cost-efficient. Obviously, as a solo traveler, you’d need to determine what makes the most sense for your budget, but always consider the time it will take you to get to/from a destination when weighing the cost vs. benefit of a service like Uber.
I also used the bus. Bus 304 is a good one for visiting the Wieliczka Salt Mines.
Where to Stay
I stayed in Old Town during my visit to Krakow. I loved being around the corner from the Main Square, Planty Park, and the various sights located in Old Town. It was a little further from the main bus routes or the bus station, but otherwise very conveniently situated to Krakow’s main attractions.
Old Town can get quite noisy at night though, so be aware of that, the Airbnb that we stayed at was above an area with restaurants below and needless to say people were out enjoying themselves until two or three a.m. If you’re not a light sleeper like myself, then perhaps this won’t be an issue for you. All in all, though, I’d stay there again for the convenience of being in Old Town.
In addition to Old Town, you may also want to consider staying in Kazimierz, it’s close to Schindler’s Enamel factory, and has a more eclectic feel than Old Town. It is also in a touristy area, though, so expect it to be busier. If you want to stay somewhere outside the main tourist area, but still in close walking distance to Old Town, then consider staying in Kleparz. Kleparz is just a short walk outside of Old Town, so you’re out of the touristy area, but close enough, you can easily walk there.
Final Thoughts
If you haven’t yet put Krakow on your list of places to visit, do it now. Once you visit, you’ll wonder what took you so long to go, and you’ll begin making plans to explore more of this unique country.
At the end of my senior year in college, I received a scholarship to study the Mandarin Chinese language in China for one semester. At the end of my semester, my friend Angela met me in Beijing, where we started our one-month travel around China.
This would be our first international trip together (unless we count Canada), and we were both excited to be going on this adventure together! This post is about our misadventures in China and, specifically, our trip to Harbin, China.
About Harbin, China
One of the final places we visited during our one month travel in China was Harbin. Harbin is in northeastern China, in the Heilongjiang province. It is known for its cold weather. How cold, you ask? Well, considering one of its nicknames is the “Ice City,” you can guess it gets pretty cold.
According to Travel China Guide, “The snow season can last as long as half a year. Harbin weather in January is the coldest with temperatures dropping to -38C (-36F), while it is just 20C (68F) on average in summer.” So, there you have it–it’s cold! They can build entire ice villages and not worry about them melting for months.
It was because of their cold weather that I wanted to visit. Well, not the cold weather, but rather the Harbin Ice Festival. The Harbin Ice Festival started over 36 years ago and is now the world’s largest ice festival. They construct entire buildings out of ice to create a life-sized ice village. They also add colorful lights to the ice sculptures to create a magical ice wonderland. It is awe-inspiring! Here are some photos from a BBC article about the Harbin Ice Festival.
Moe and I were visiting in mid-December, so we knew there was little chance that we’d get to see any of the ice sculptures since the festival doesn’t kick off until January. However, with our flight back to the States leaving in a week, this was our only chance to see it. So, with hopes of seeing some ice sculptures, and intent on exploring a new city, we boarded a plane to Harbin.
The Misadventures Begin
Our misadventures in Harbin start with our flight. To begin with, the flight left one hour late (not unusual when flying in China). Then, 20 minutes before landing in Harbin, they announced we were diverting to Qingdao for an emergency landing. O-K. However, 30-minutes before landing in Qingdao, we’re informed that we are diverting to a different airport.
We land in a dark and deserted airport and we are told the emergency landing is due to bad weather in Harbin. So now our plane sits in a dark, empty airport, in who-knows-where, China.
The Chinese passengers start chatting with each other. They also thought it was strange and didn’t sound too happy about it. They began making phone calls to family in Harbin, and from what I could understand (from my limited Chinese vocabulary), the people they phone in Harbin had no idea why the plane wouldn’t have come straight there as the weather was okay–no storms.
This photo was taken through the airplane window while waiting on the empty runway.
Here’s an audio file of our experience as we sat on the plane.
To hear the reports that there appeared to be no reason why they didn’t take us straight to Harbin, was not exactly comforting. So we sat there, contemplating why we landed in this deserted airport while listening to the frustration of our fellow passengers. Thankfully, about 30 minutes later, we continue to Harbin as planned.
I’ll still never know why we landed on that empty runway, and I guess it doesn’t matter. It was all part of the adventure!
Exploring Harbin
We have only one full day in Harbin, so we have to limit our sightseeing activities and maximize the time we have. We got up early that morning and started our day by visiting the Saint Sophia Cathedral. This former Russian Orthodox church is over 100 years old. It is now an art gallery. When I stood there looking up at the cathedral, I felt like perhaps I’d taken the wrong flight and landed in Russia. The cathedral really stands out among the surrounding architecture.
Saint Sophia Cathedral
After exploring the Saint Sophia Cathedral, we walked to Zhaolin Park. We watched the workers cutting large blocks of ice with which to build the massive ice structures for the upcoming Harbin Ice Festival. Although we couldn’t go inside the park, we saw a lot of the buildings being constructed as we walked around the park.
We continued walking to Stalin Park on the banks of the frozen Songhua River. The Songhua River is used to supply the ice needed to make the enormous ice sculptures for the ice festival. The workers come to the river and then carve out huge blocks of ice, which they then use to create ice bricks to form the buildings. Although we would love to have seen the actual ice festival, it was still fascinating watching the behind the scenes construction that goes into creating it.
People were out walking on the frozen Songhua River. You can also take horse-drawn carriage rides across the river. During the Harbin Ice Festival, in addition to the horse-drawn carriage rides, they have dog sleds, ice swimming, and other activities on the Songhua River.
The frozen Songhua River.
An Afternoon Adventure
After returning to our hotel, we made arrangements to have a taxi take us to our next stop, the Harbin Siberian Tiger Park. I love tigers, and this is one of Harbin’s recommended attractions, so we decided to check it out.
The drive to the Siberian Tiger Park was about a 30-minute drive outside of Harbin. Our driver turned off the highway and then turned down a side road before turning around to find the right road to the Siberian Tiger Park. It’s never a good sign when your taxi driver isn’t sure where your destination is.
We turned down a dirt road with tall brush on both sides. This excursion was starting to feel very remote. I guess I should have considered that they wouldn’t keep a bunch of Siberian tigers in the middle of town. The taxi driver lets us out at the main entrance, we pay him and then see about purchasing our tickets.
Subscribe to our newsletter
Harbin Siberian Tiger Park
We paid for the standard tour before heading to the waiting room inside. You can choose a variety of experiences, including purchasing live chickens and goats that are fed to the tigers while you watch. We skipped that. Instead, we’re taking a small bus tour that drives us through the park, where the tigers roam freely.
As we wait for our tour, I overhear two men conversing in Mandarin Chinese. One of the men (who appears to be Chinese) tells the other man (who I later learn is from India) that I am probably Russian. A little annoyed, I reply (in Mandarin) that I am not Russian, that I am an American.
The Chinese man is shocked that I understand what he is saying. He comes over, apologizes, and then asks where I learned to speak Chinese–and thus begins our conversation.
Now, if I were in the U.S. and had overheard a stranger talking about me, I would be annoyed, but I wouldn’t say anything. However, after almost four months in China, I’ve learned that privacy and social boundaries are a Western luxury.
On almost a daily basis, in China, I was asked the following questions: Where did I live? Was I married? Did I have kids? How much money did I make? These are all questions in the U.S. we would never ask a stranger, but, in China, it is completely acceptable.
So at this point during my time in China, I embraced the culture of saying whatever you want to strangers, and I didn’t hold back on correcting this man when he referred to me as Russian. Later, I learned what a blessing in disguise this initial interaction with these men would be.
Our tour bus at the Harbin Siberian Tiger Park.
The Siberian Tiger Tour
It is time for our tour. We leave the warm confines of the waiting area and board a small bus. There are large windows on every side so you could view the tigers from your seat.
These are such beautiful creatures!
We wait while another SUV, a different package experience than ours, drove out to feed the tigers. One of the Siberian tigers walked up to the SUV, and its head came above the passenger window! I was in awe at how massive these beautiful creatures were. They are stunning!
Getting to see the tigers up close through the windows of the tour van was a great experience. However, there was also a section of the tour that you could walk through, that had animals in small cages. Some of them looked injured and others malnutritioned, including a liger, which of course, made me think of Napoleon Dynamite–“It’s pretty much my favorite animal…”
All in all, I loved seeing these gorgeous creatures, but it’s not an excursion I recommend. All in all, I felt the animals were not receiving proper care.
Here kitty, kitty!
Almost Stranded in Harbin, China
It was getting dark as we finished the tour, and since we were the final tour of the day, everyone headed outside to leave for home. I saw a taxi driver, and I ran over to him to ask if we could get a ride, he let me know he was waiting for someone else. I went to another taxi driver, but he was also waiting for someone else.
It was at this point I realized we had no way to get back to our hotel. Just when I felt a little panic starting to creep in, the two men I conversed with earlier, offered to give us a ride back to town in their car. Thank God! There was no way we could walk back to town in the dark, not to mention we wouldn’t even know how to find our way there.
We packed into their car and thanked them profusely for their generous offer. The Chinese man explained that there were no taxis that came there, except the ones reserved to take the employees home. We would have been stranded at the Harbin Tiger Park if they had not offered us a ride.
Me and the two men who befriended us on our car ride back to Harbin.
On the way back to town, we learned that the other man was there on business from India. The Chinese man was his business contact and host during his stay. The man from India told Angela and me that if we thought China was crowded, then we really needed to take a trip to India!
They dropped us off in town, and Moe and I stopped to eat dinner before walking to our hotel. This wasn’t the first misadventure of our trip to China. Thankfully it was the last.
Other Misadventures in China
There was the time we visited a remote Shaolin temple, only to learn there weren’t any “official” taxi drivers to take us home. We had to bargain with a man in a van for the ride back to our hotel. We joked with each other about what our moms would think. They taught us never to take rides with strangers; yet, here we were riding with one for over an hour. He turned out to be an amiable and helpful driver who gave us a good tip about which train to take the next day.
Then, of course, there was the time in Xi’an when we couldn’t find a taxi anywhere (typical problem there) and had to take a ride with a rickshaw driver who thought he was a NASCAR driver. Then on top of it, he tried to take advantage of us on the price! So he and I got into an argument on the street, which then drew a crowd, and eventually Moe and I just walked off, paying him the originally agreed-upon amount.
Sometimes, these misadventures were frustrating, even a little scary, but in the end, they always taught us more about ourselves and our fellow humans. Perspective is all you need to change a misadventure to an adventure.
My friend Angela standing outside the Saint Sophia Cathedral.
Kindness of Strangers
Those two men, who gave us a ride in Harbin, were just a part of many acts of kindness I have been fortunate enough to receive during my travels. I was relieved and grateful for their generosity. I knew we had angels watching over us that day in Harbin. Otherwise, we might have become an ice festival exhibit, “ode to ignorant tourists.”
It is a reminder that we should practice kindness, no matter where we are. You never know what struggles a person might be dealing with–especially when they’re in an unfamiliar place. Your act of kindness might make all the difference. I know that was the case for Moe and me in Harbin. I’m glad those men thought I was Russian, and I’m happy I spoke up, even though it went against my usual inclinations.
I can say, looking back on my time in China, I experienced things I’d never experienced before. I did and said things I wouldn’t normally have back home. However, it was all part of the adventure (or often misadventure), and it changed me for the better. That’s what traveling does. It opens you up to new things, new people, and a new way of thinking. You grow and develop a better understanding of the world outside your comfort zone. I am better for having traveled.
China wasn’t the last of my misadventure fun with Angela, read Misadventures in Normandy France to learn more about our travels together.
Have an Adventure!
Lorem ipsum dolor sit amet, consectetur adipiscing elit. Ut elit tellus, luctus nec ullamcorper mattis, pulvinar dapibus leo.
 As if there was any doubt.
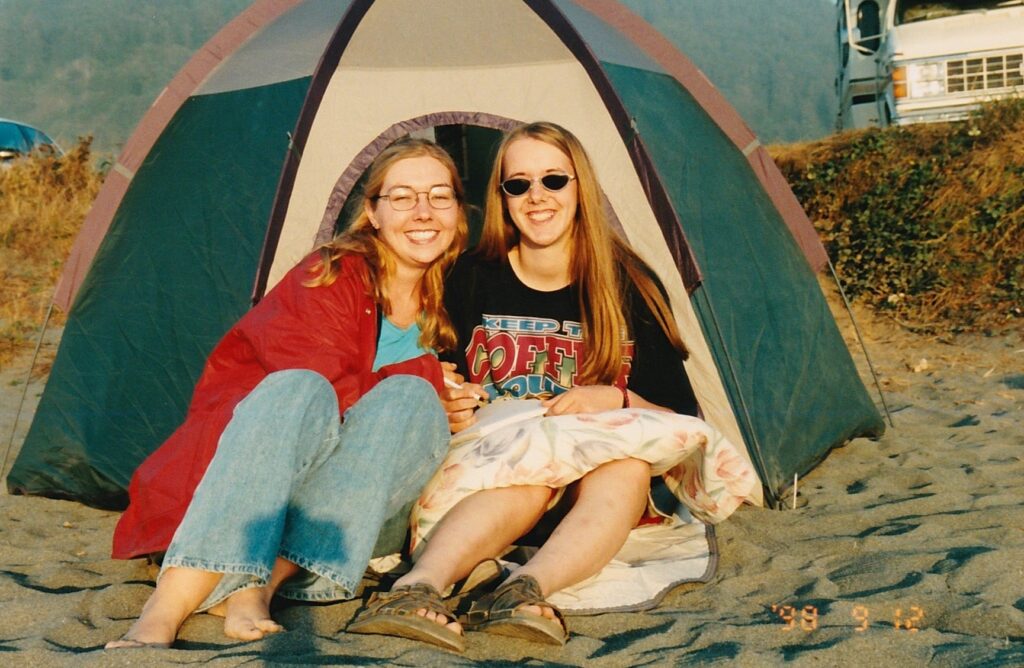

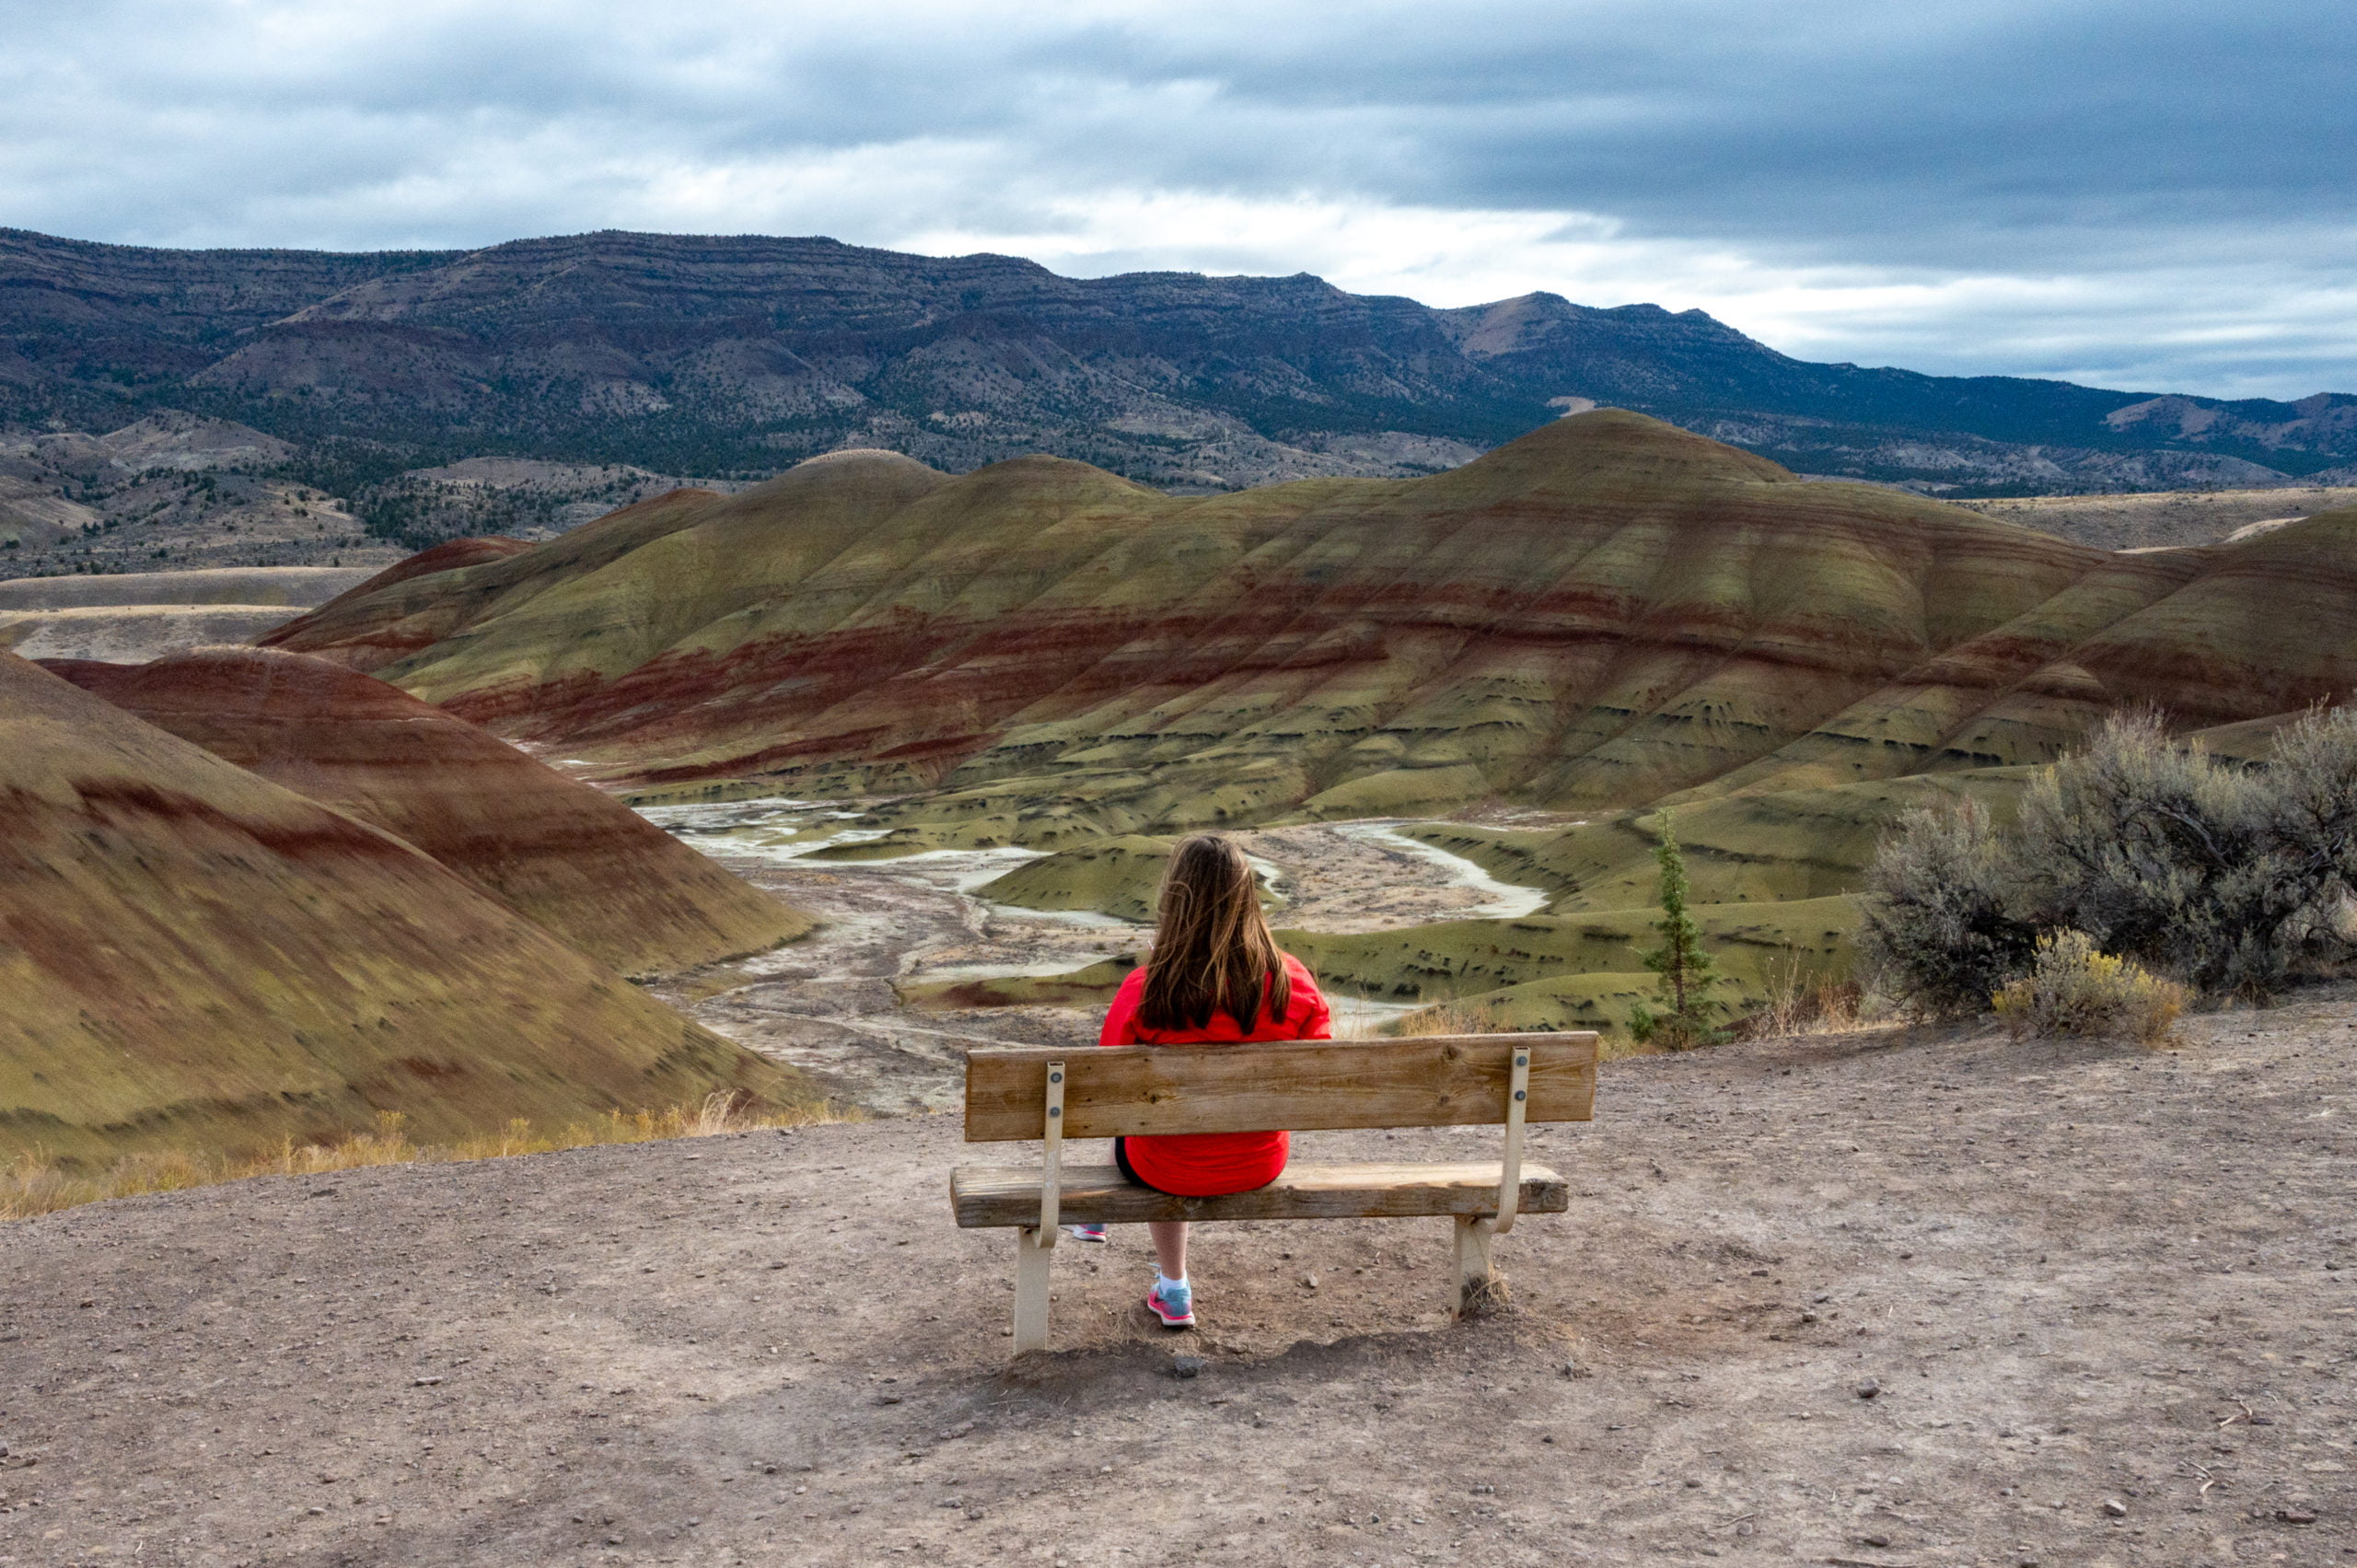
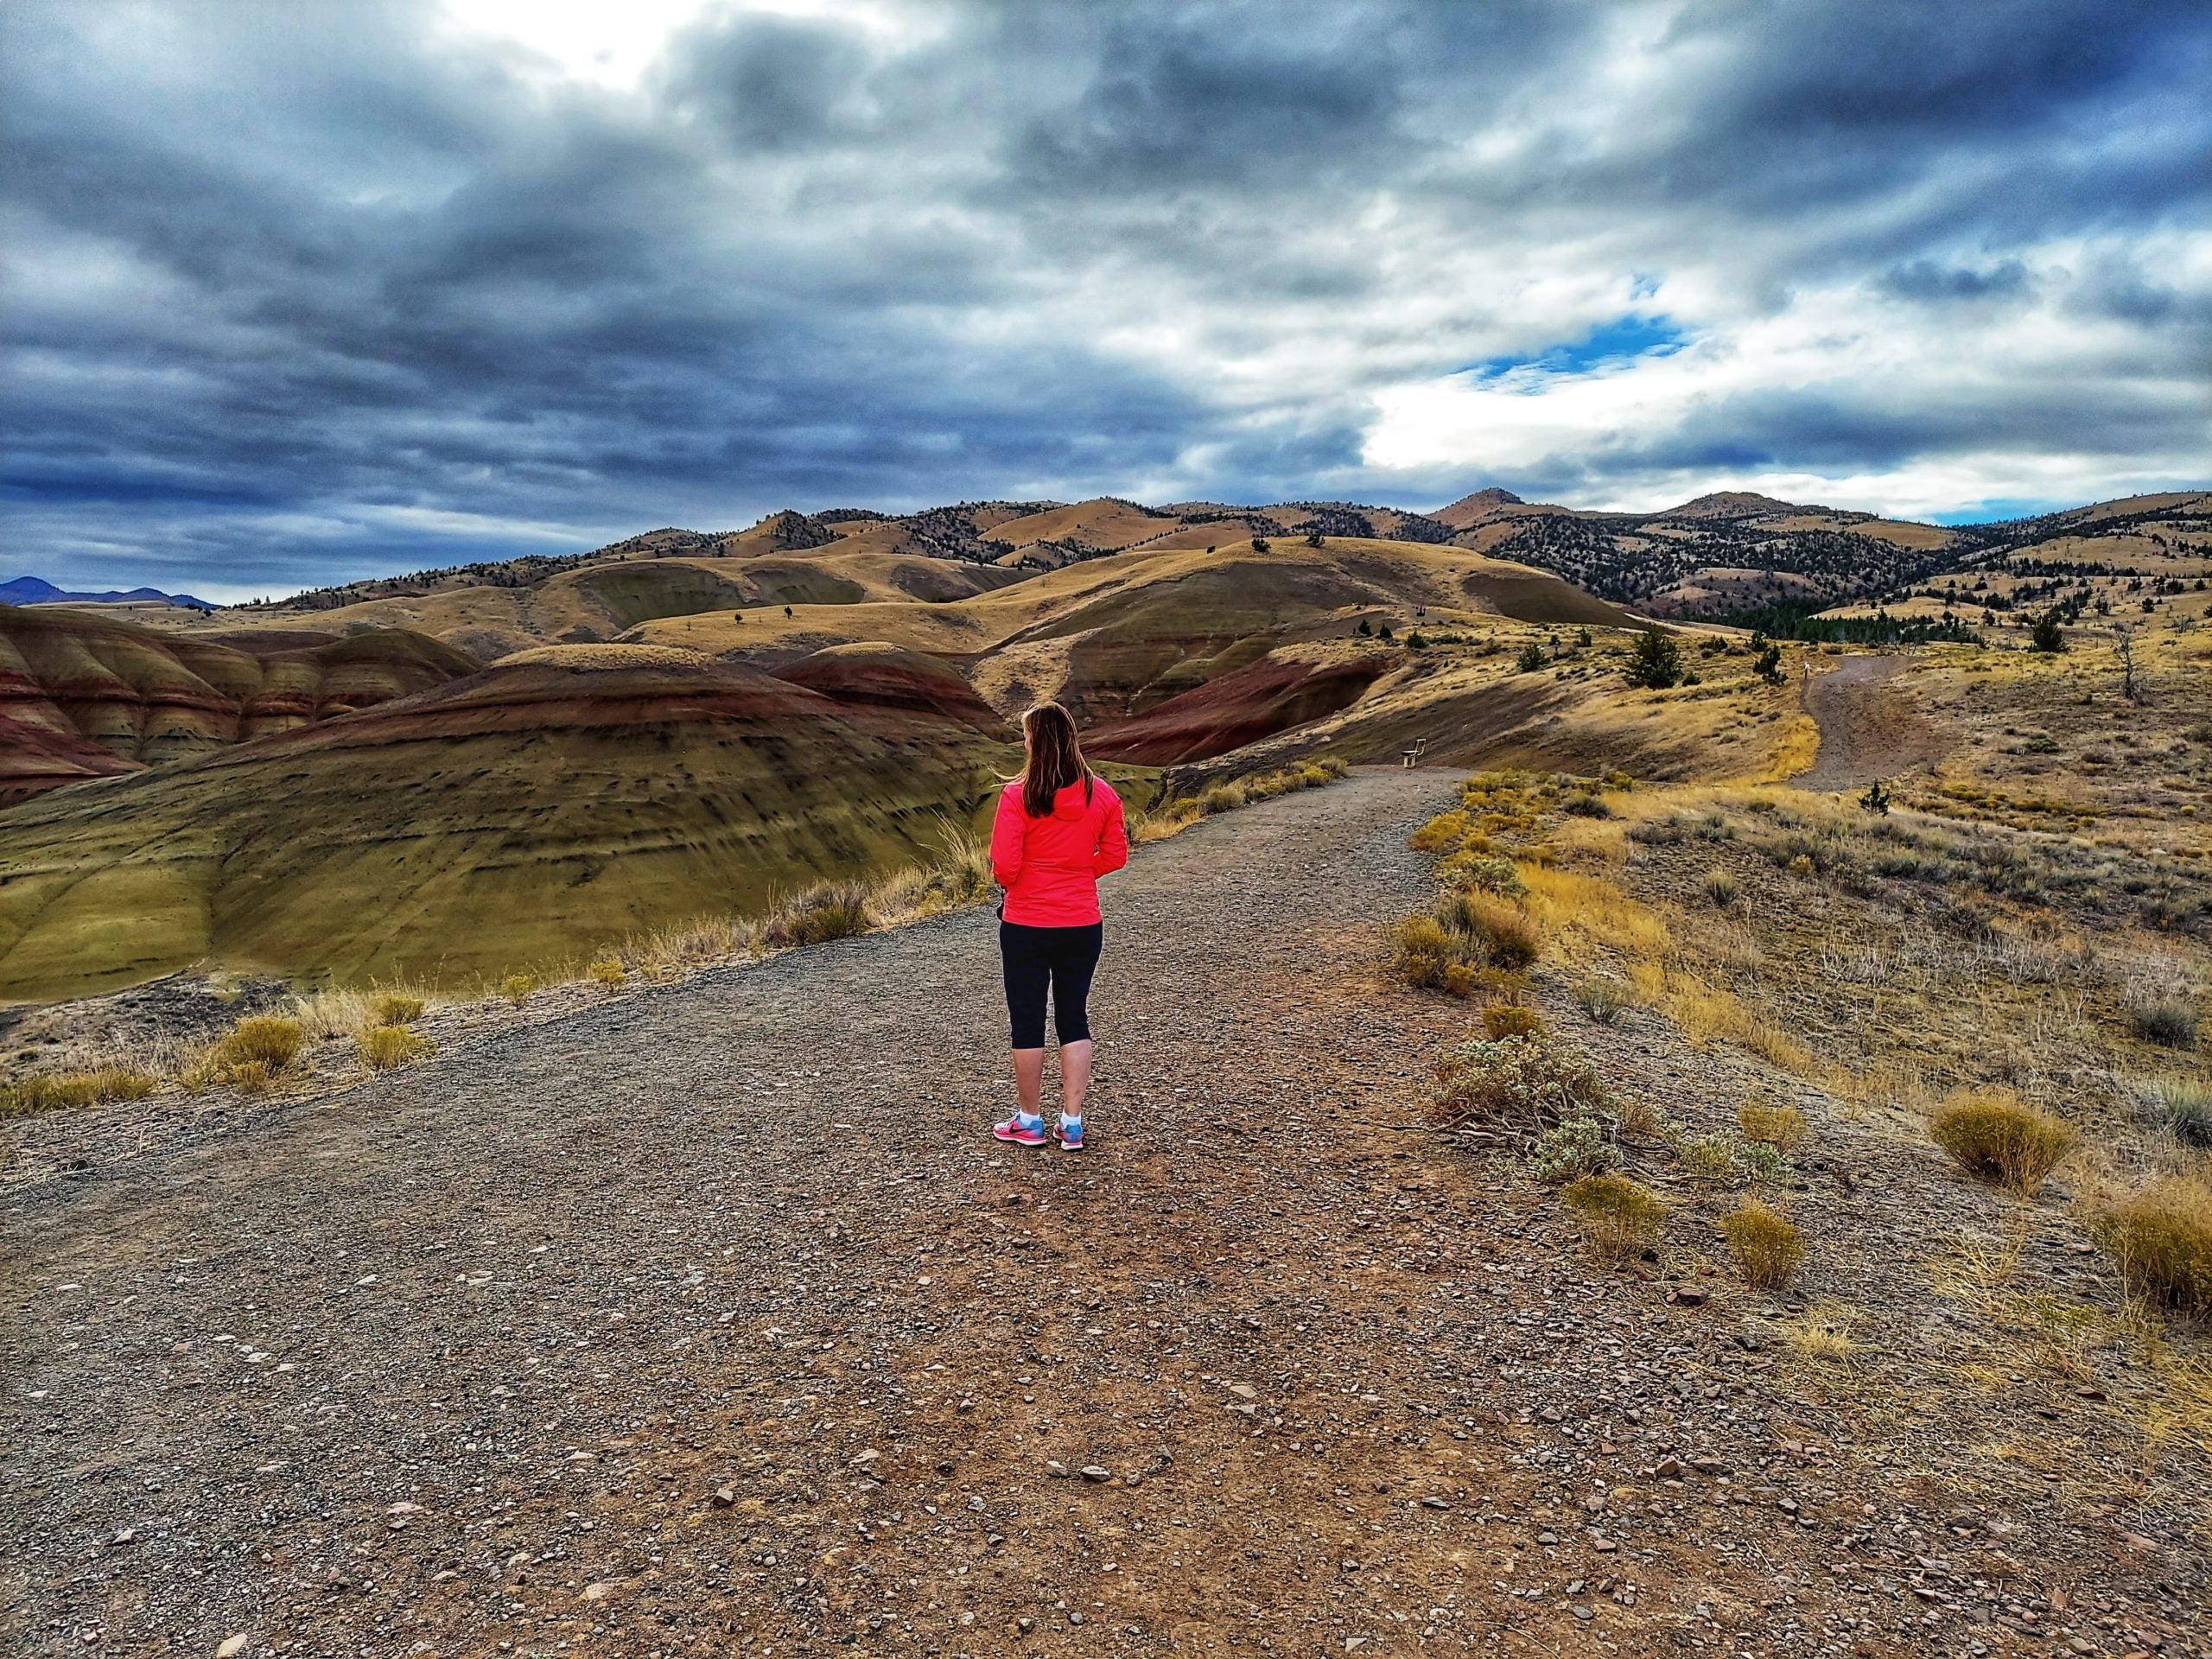
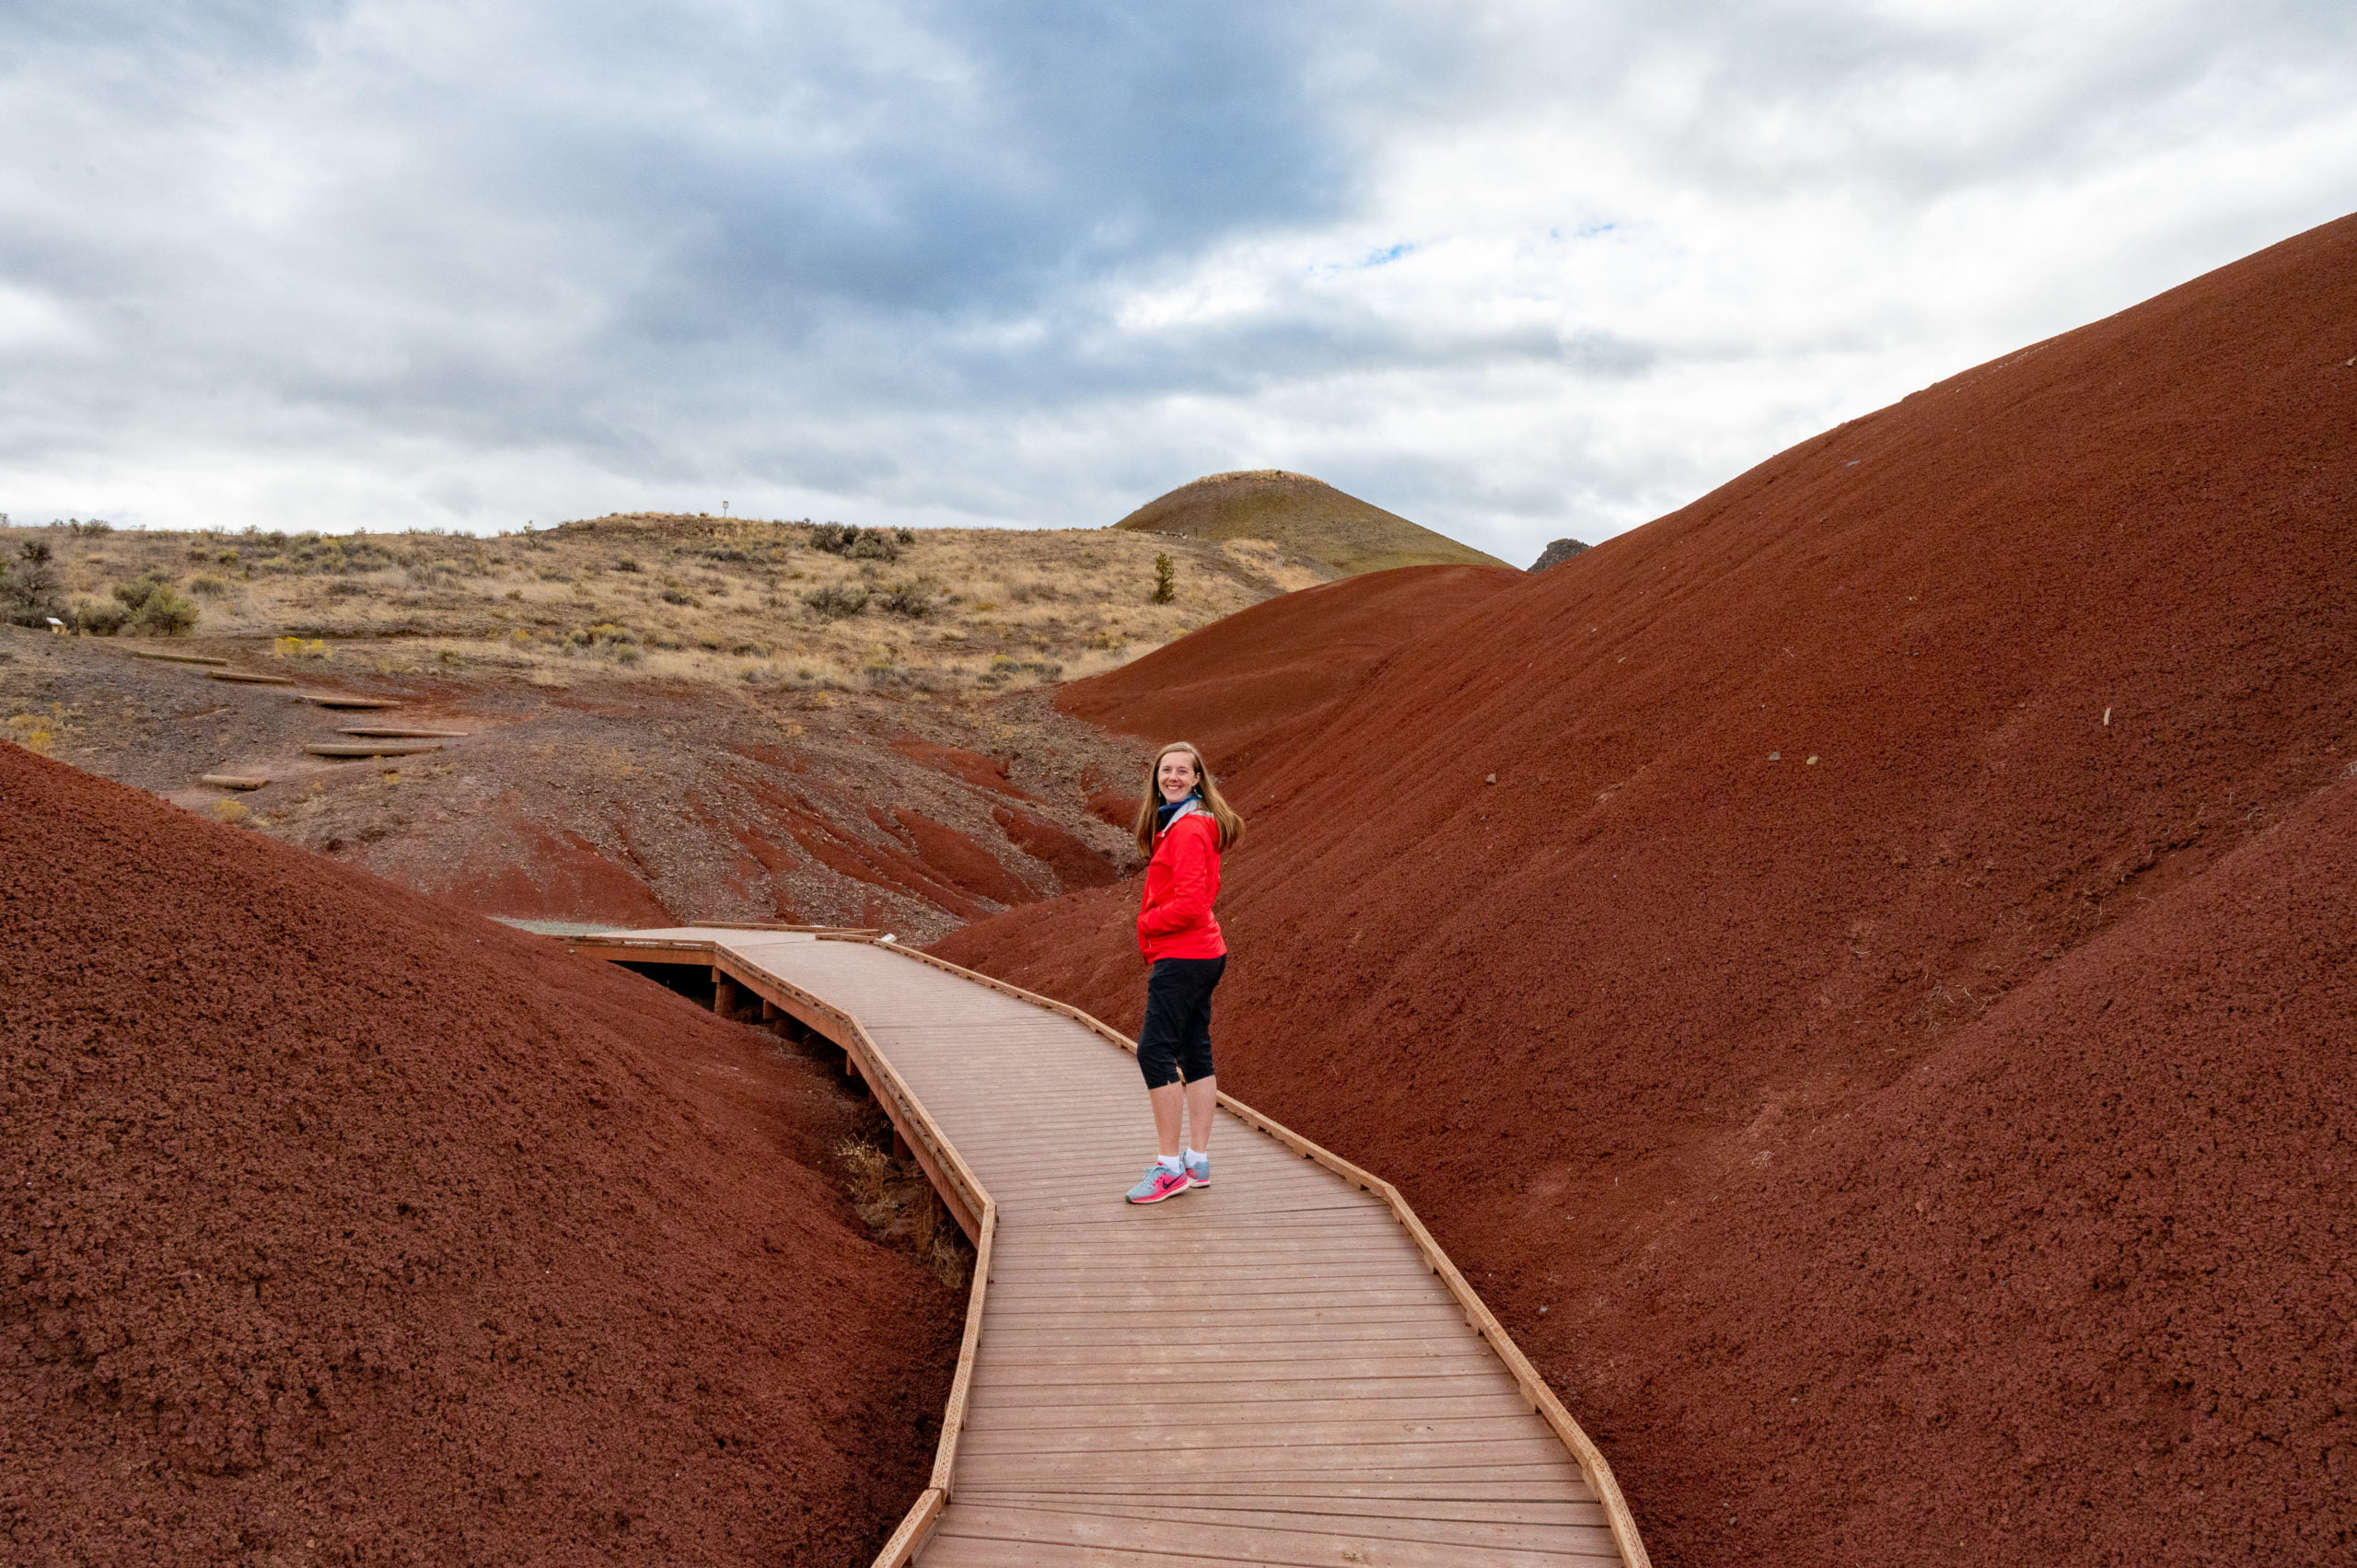

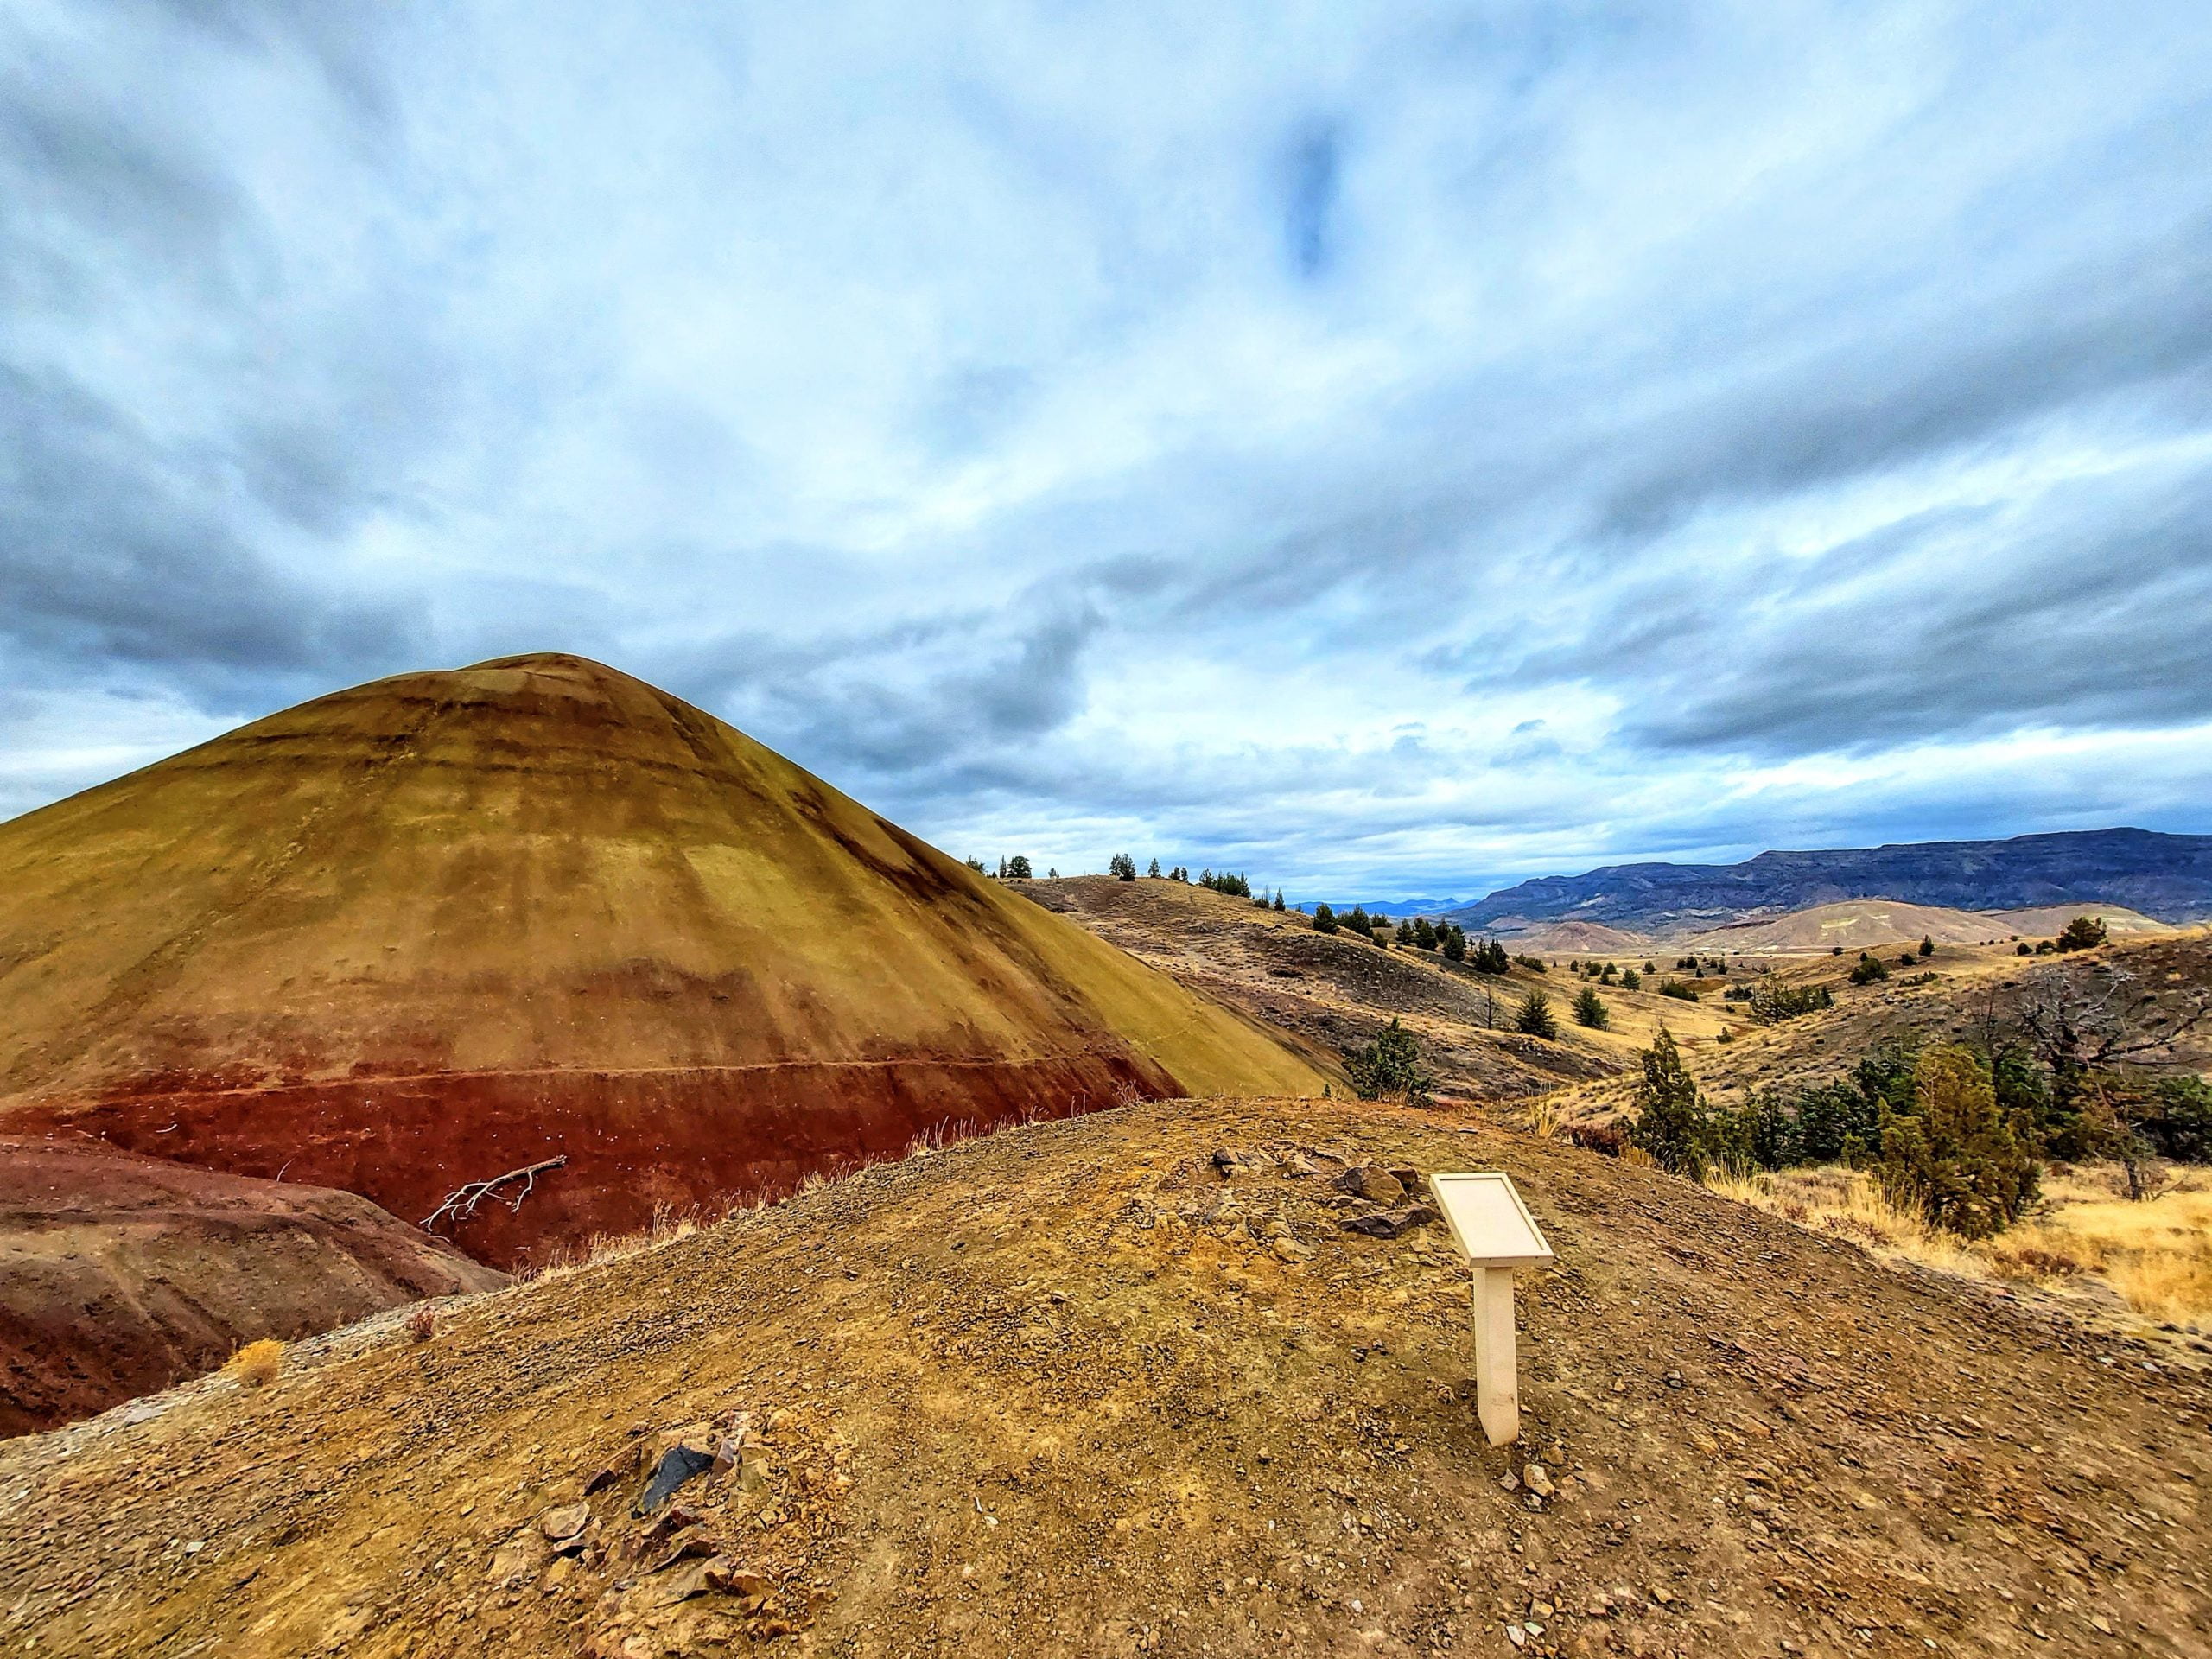
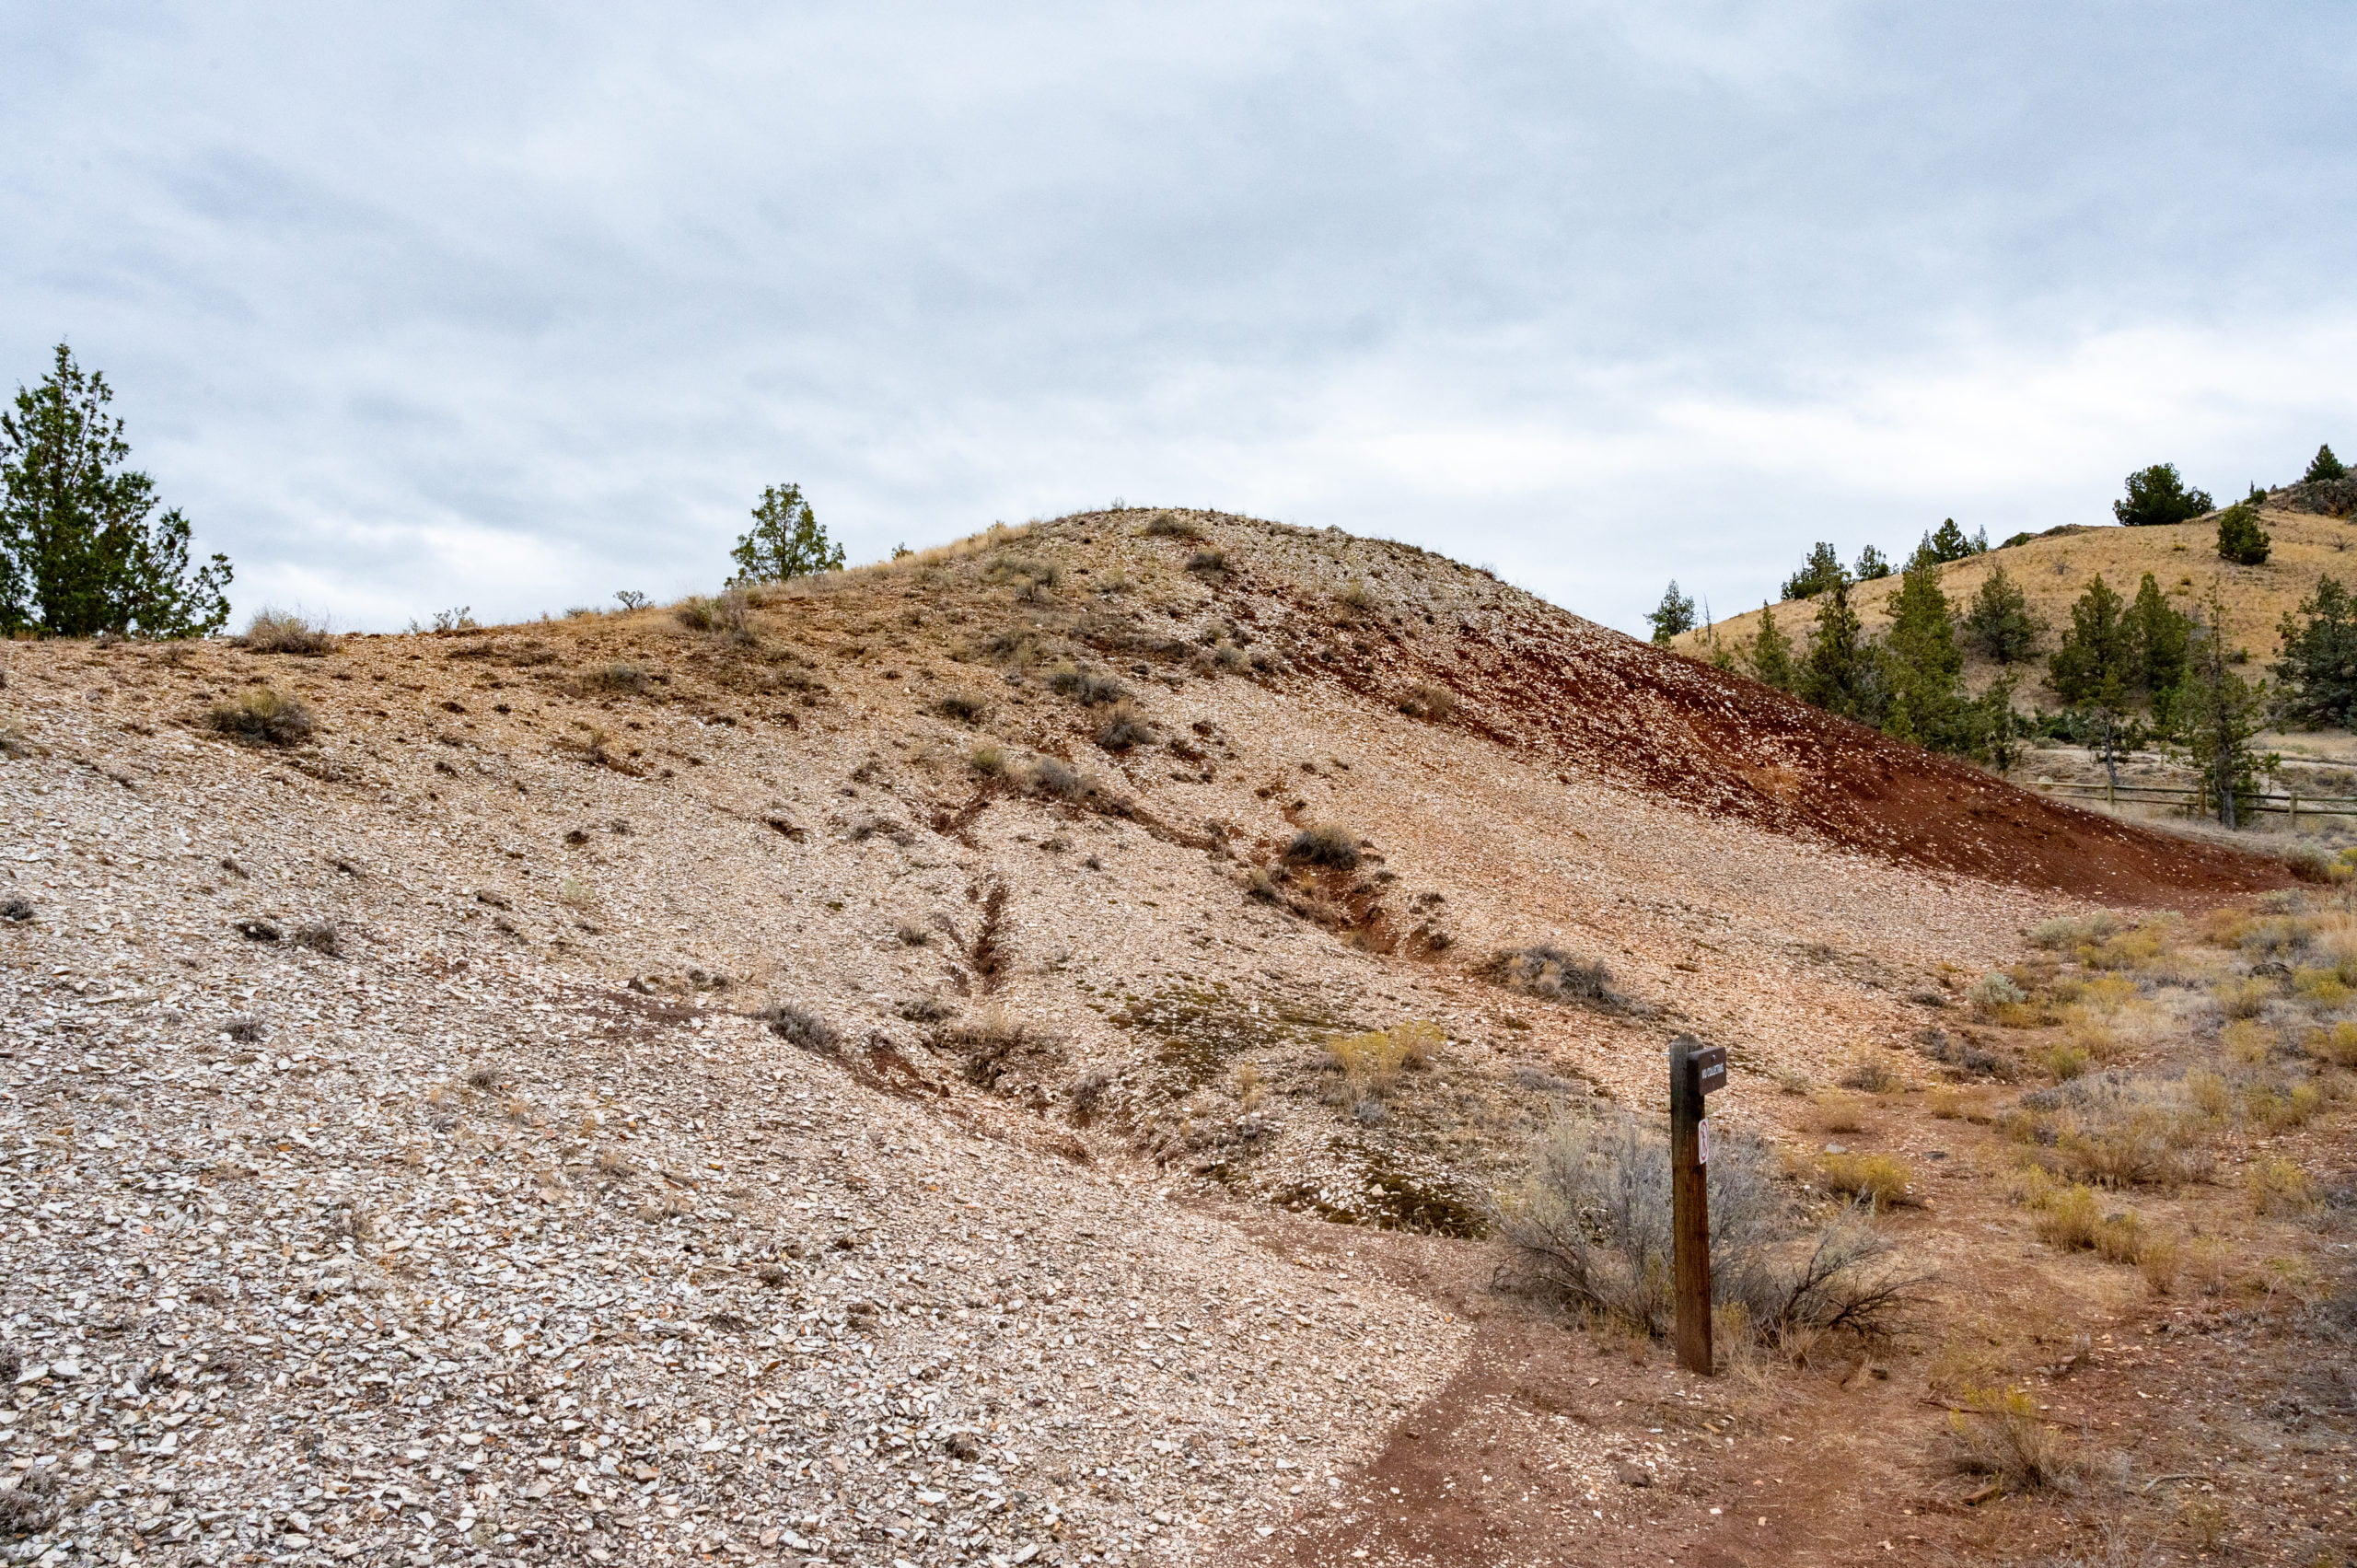
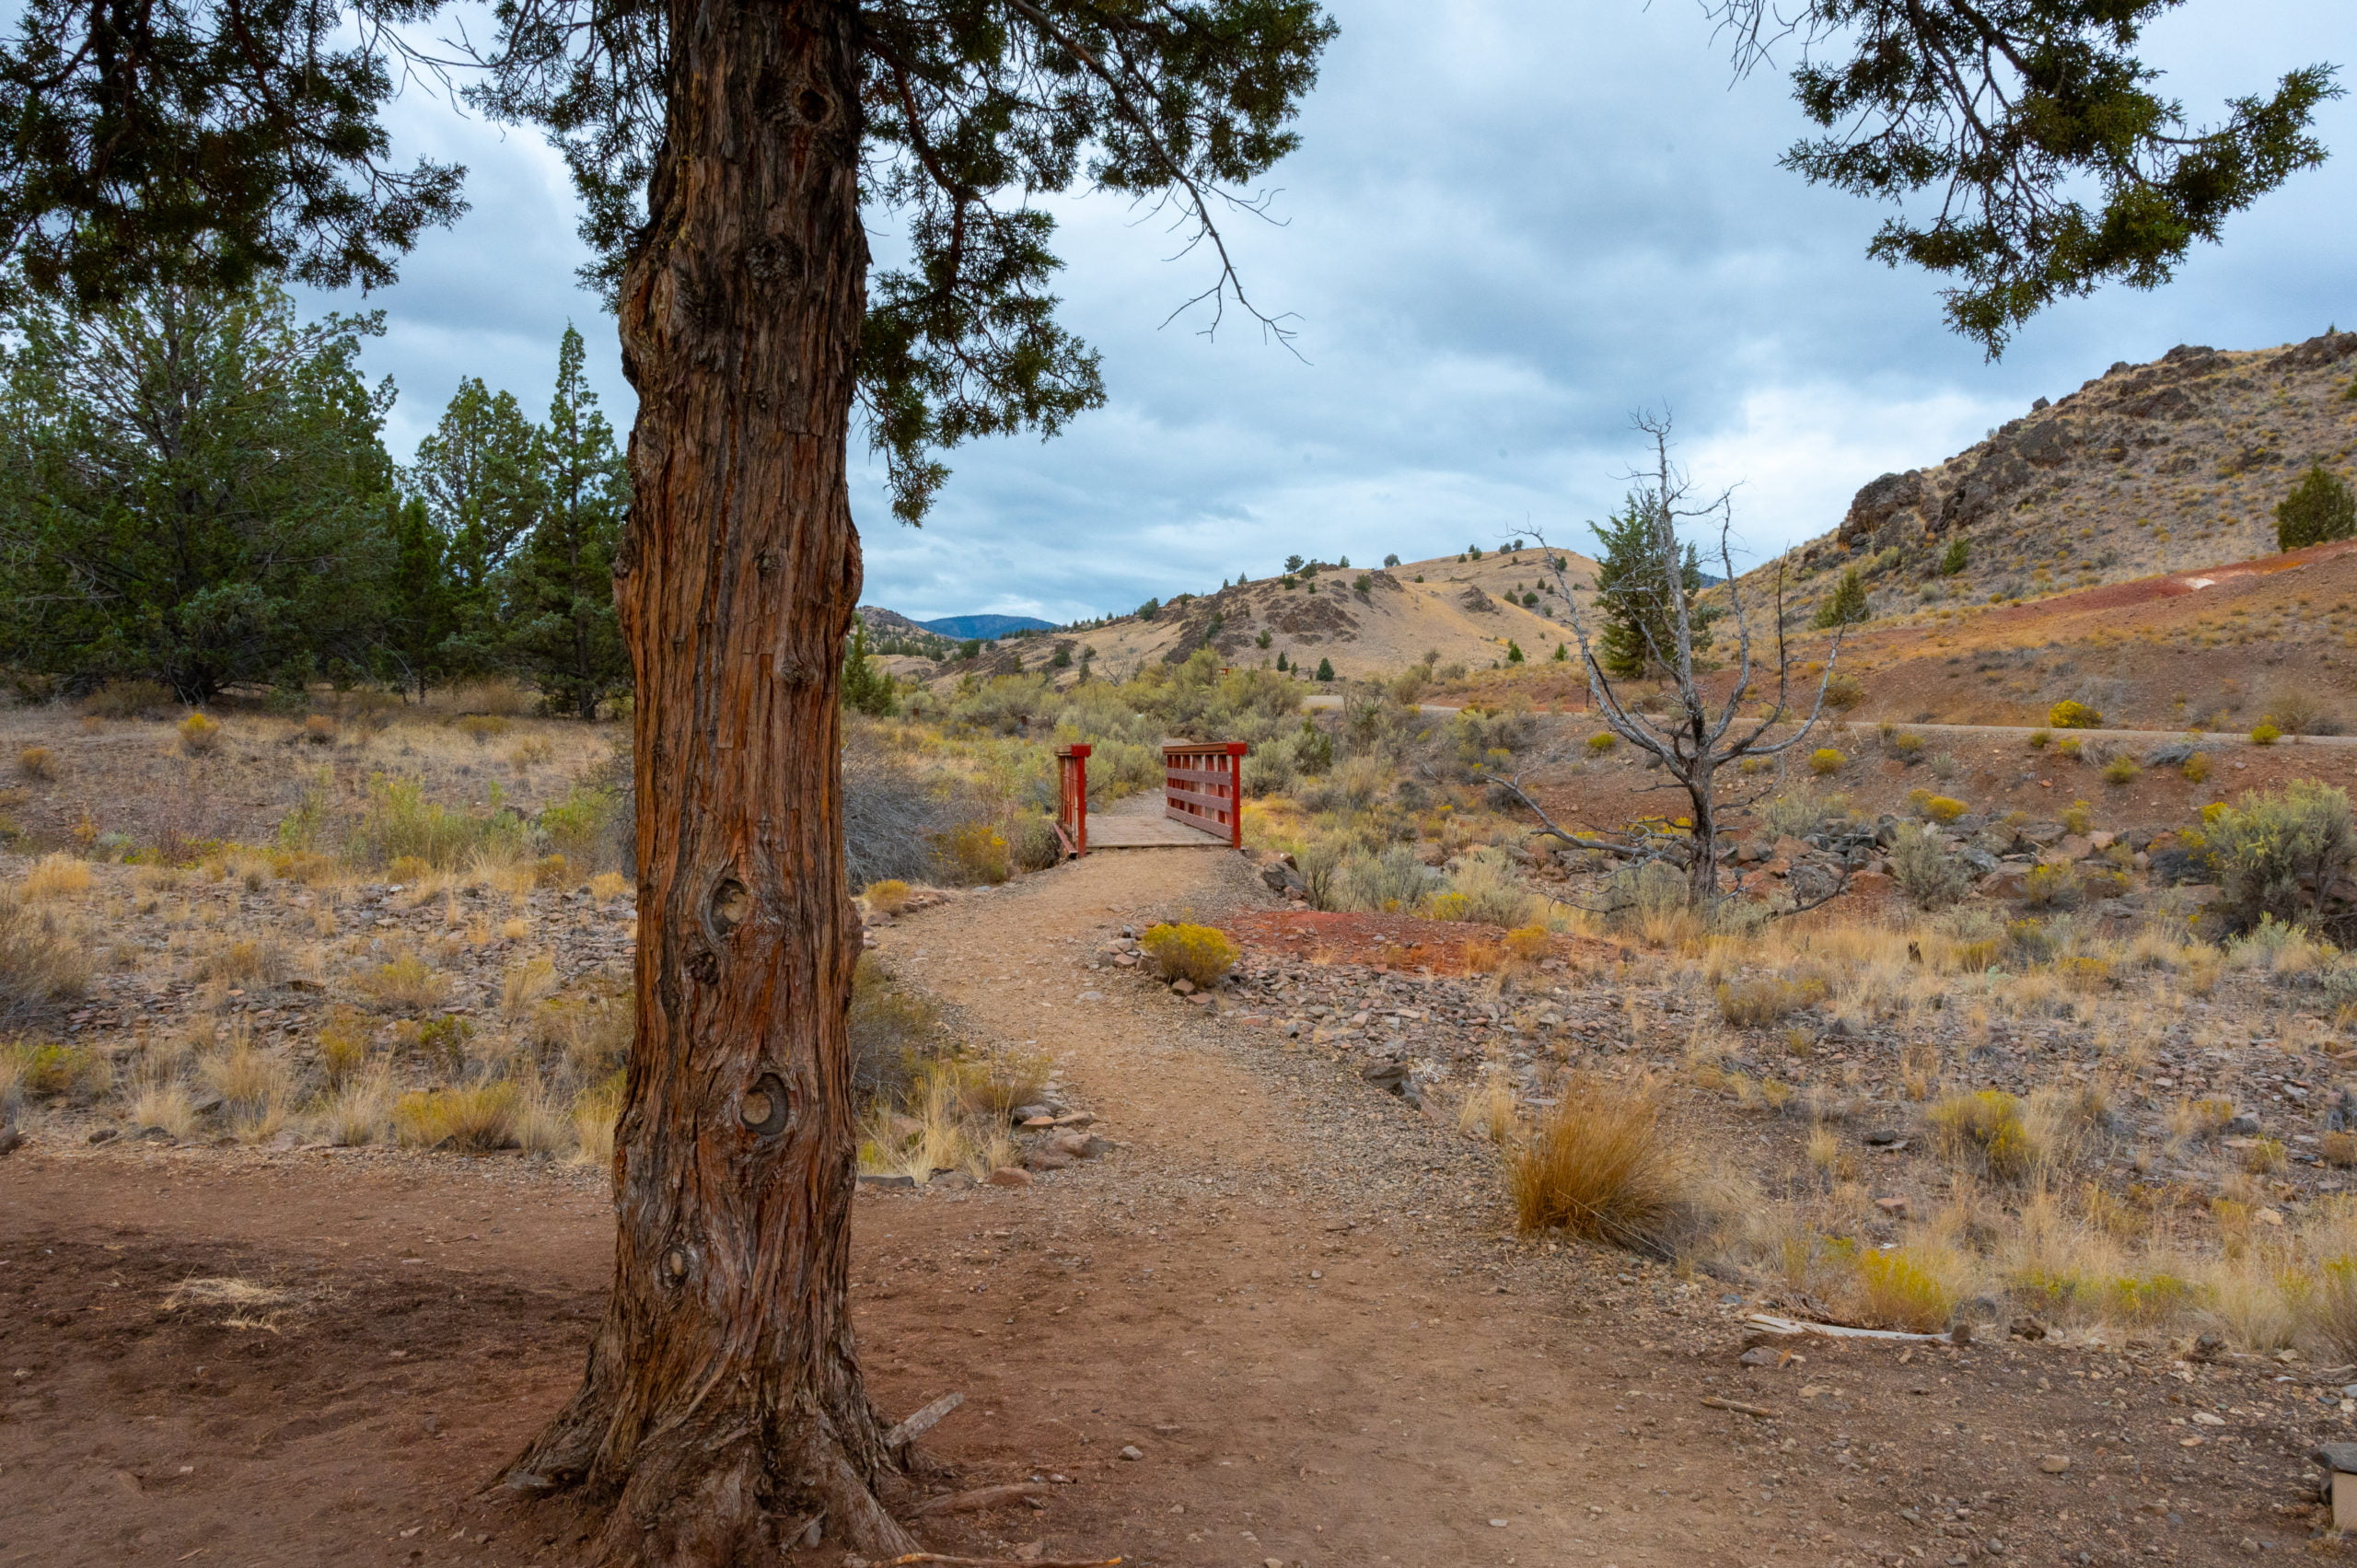
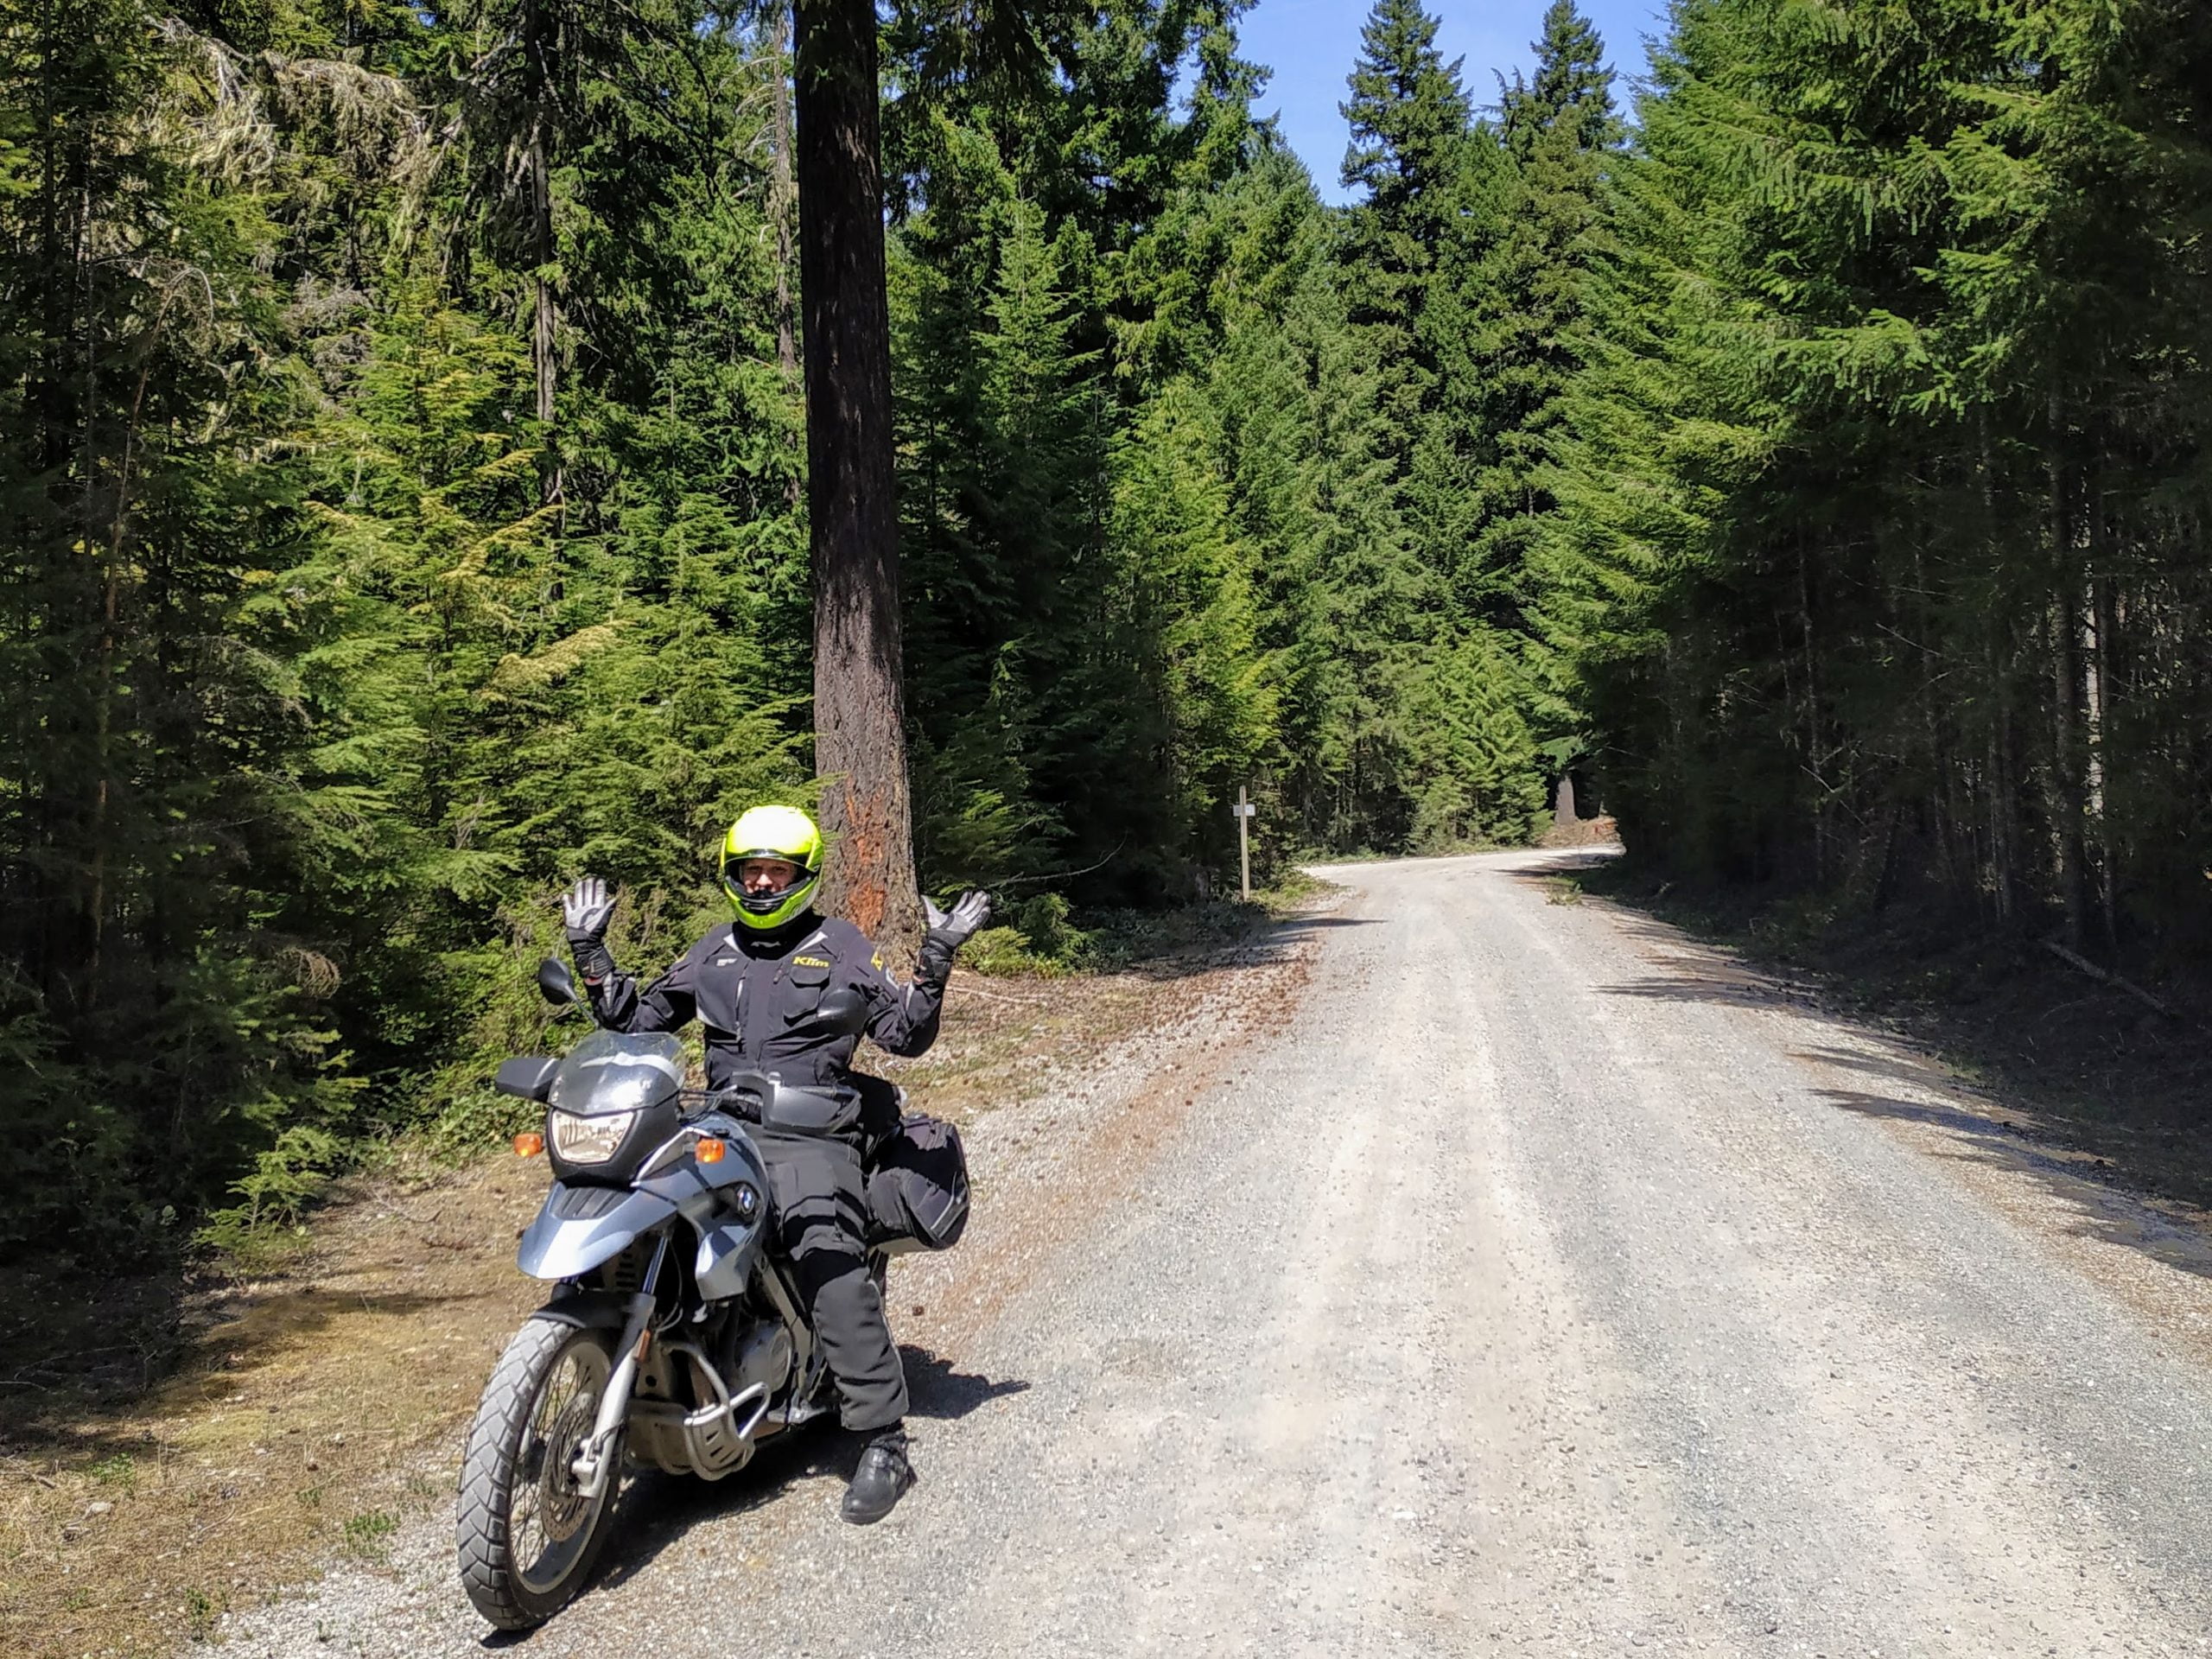
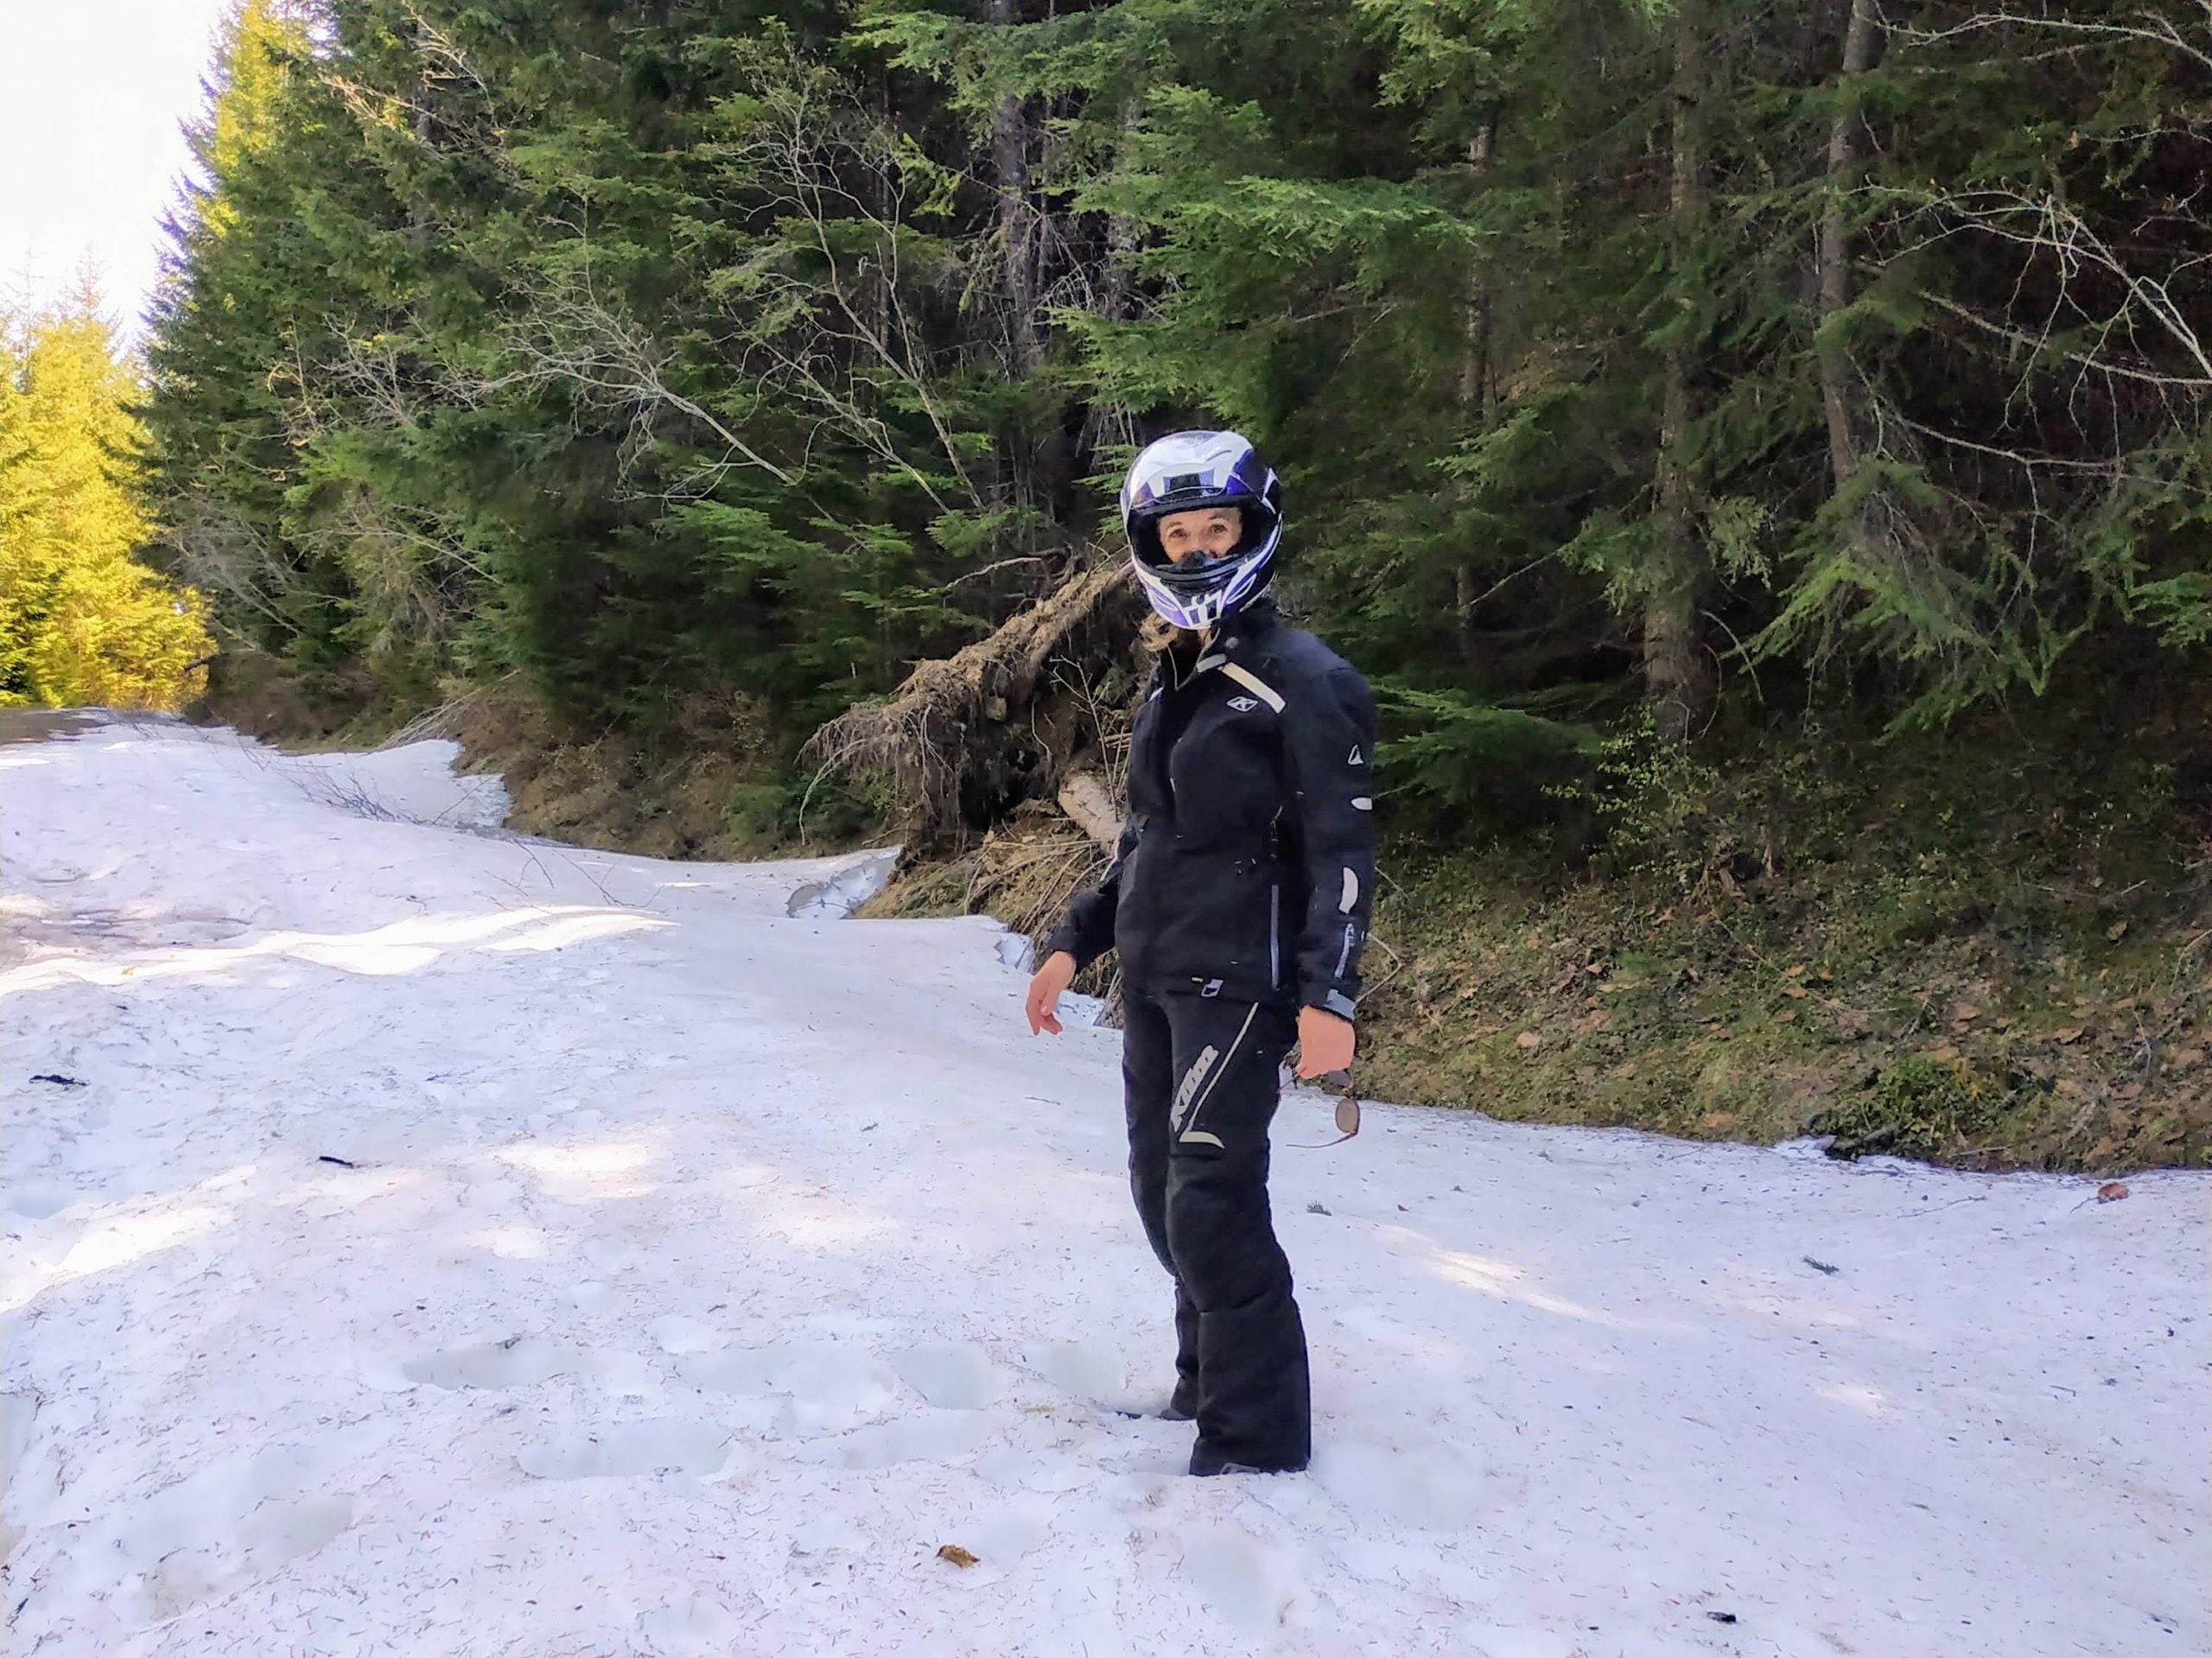
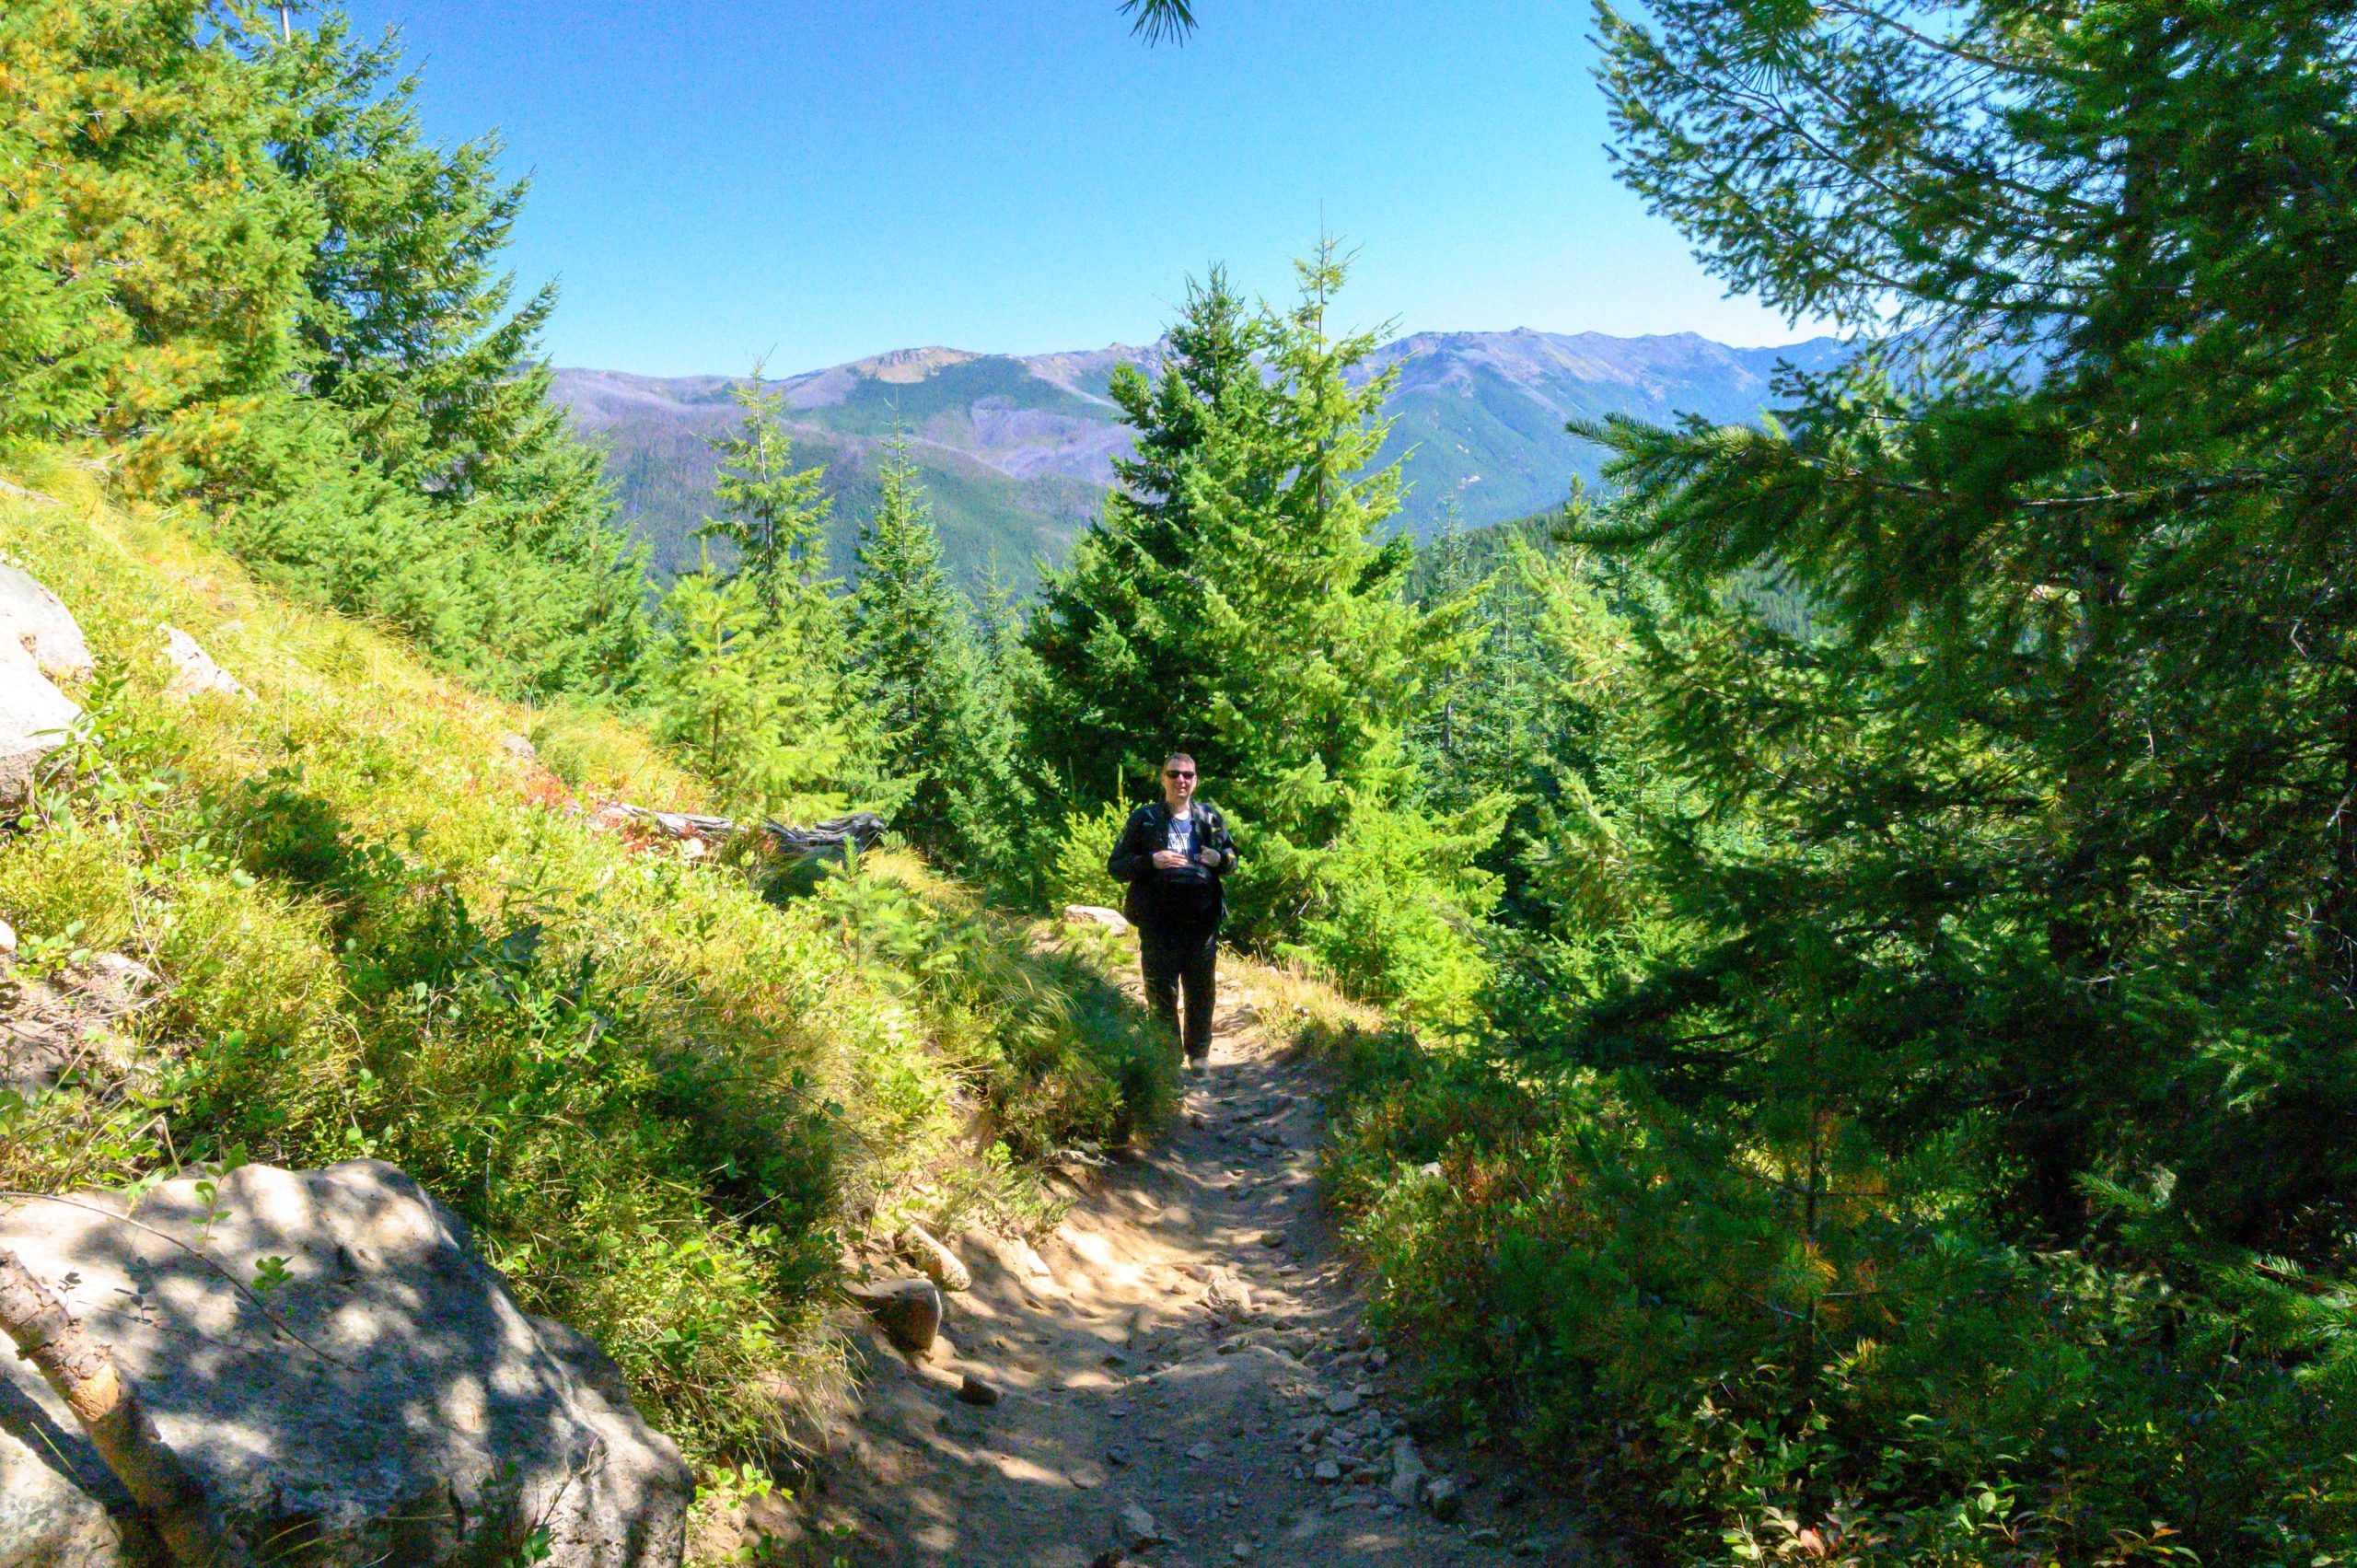
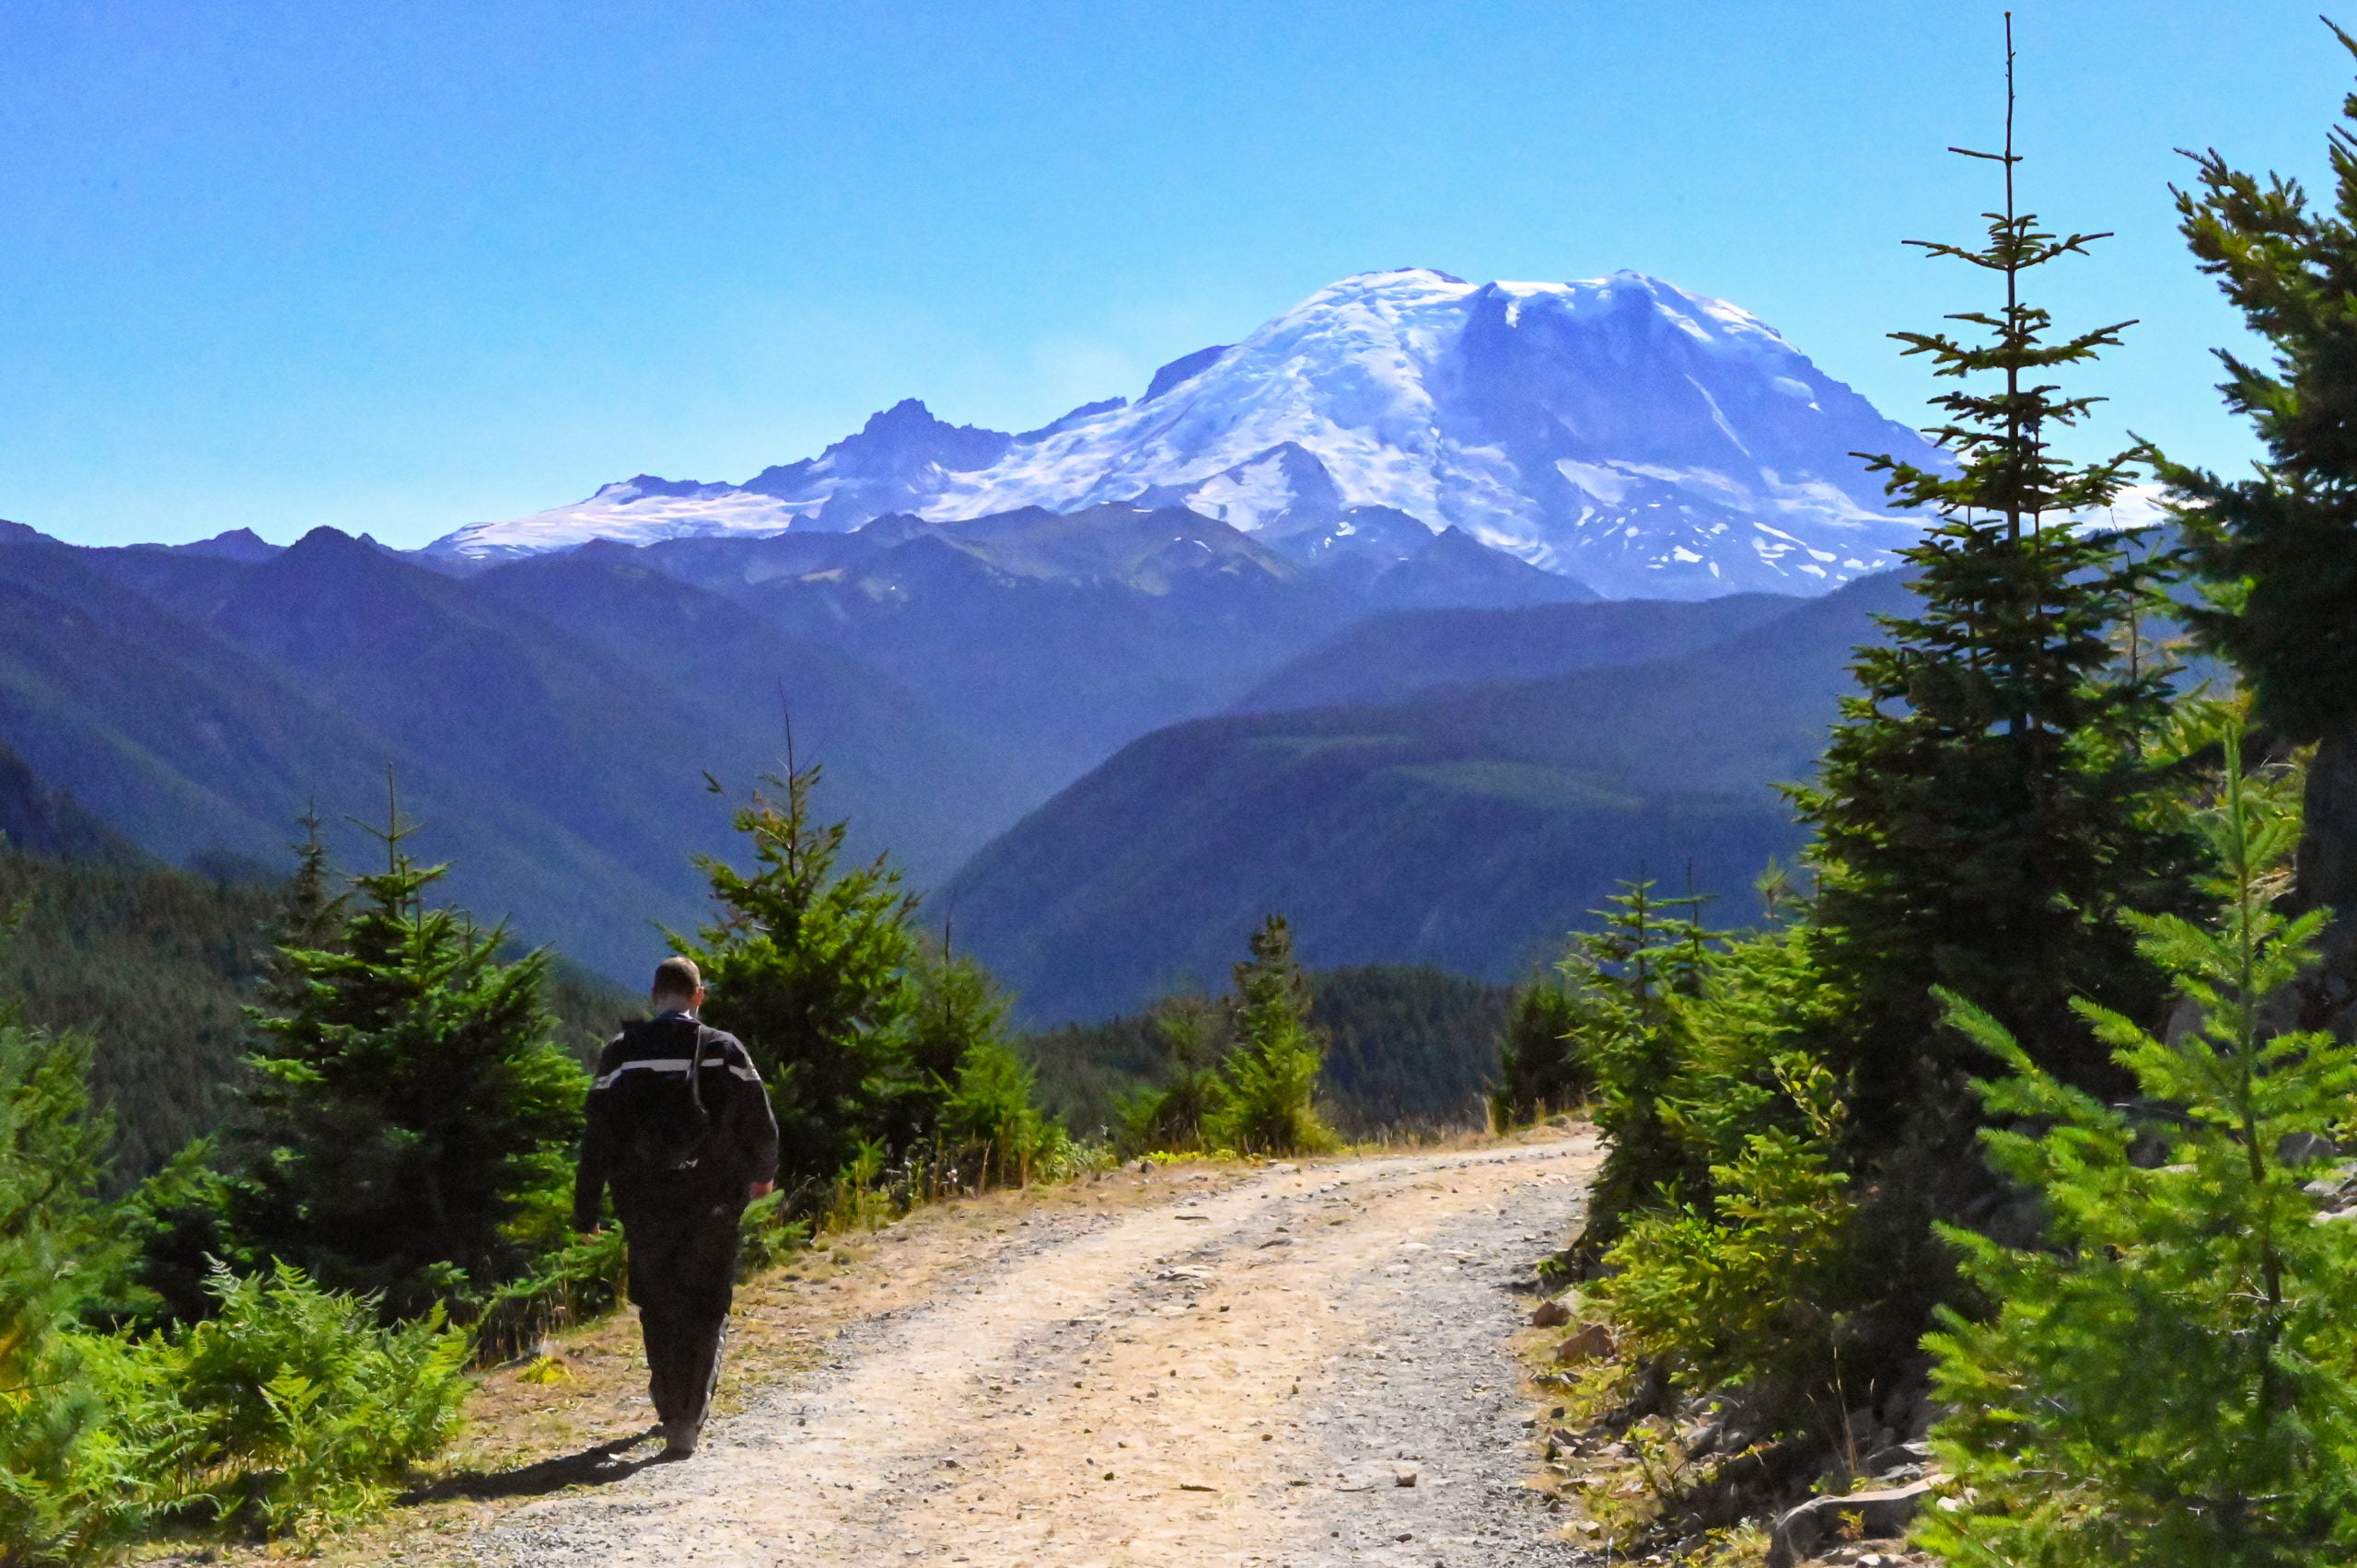
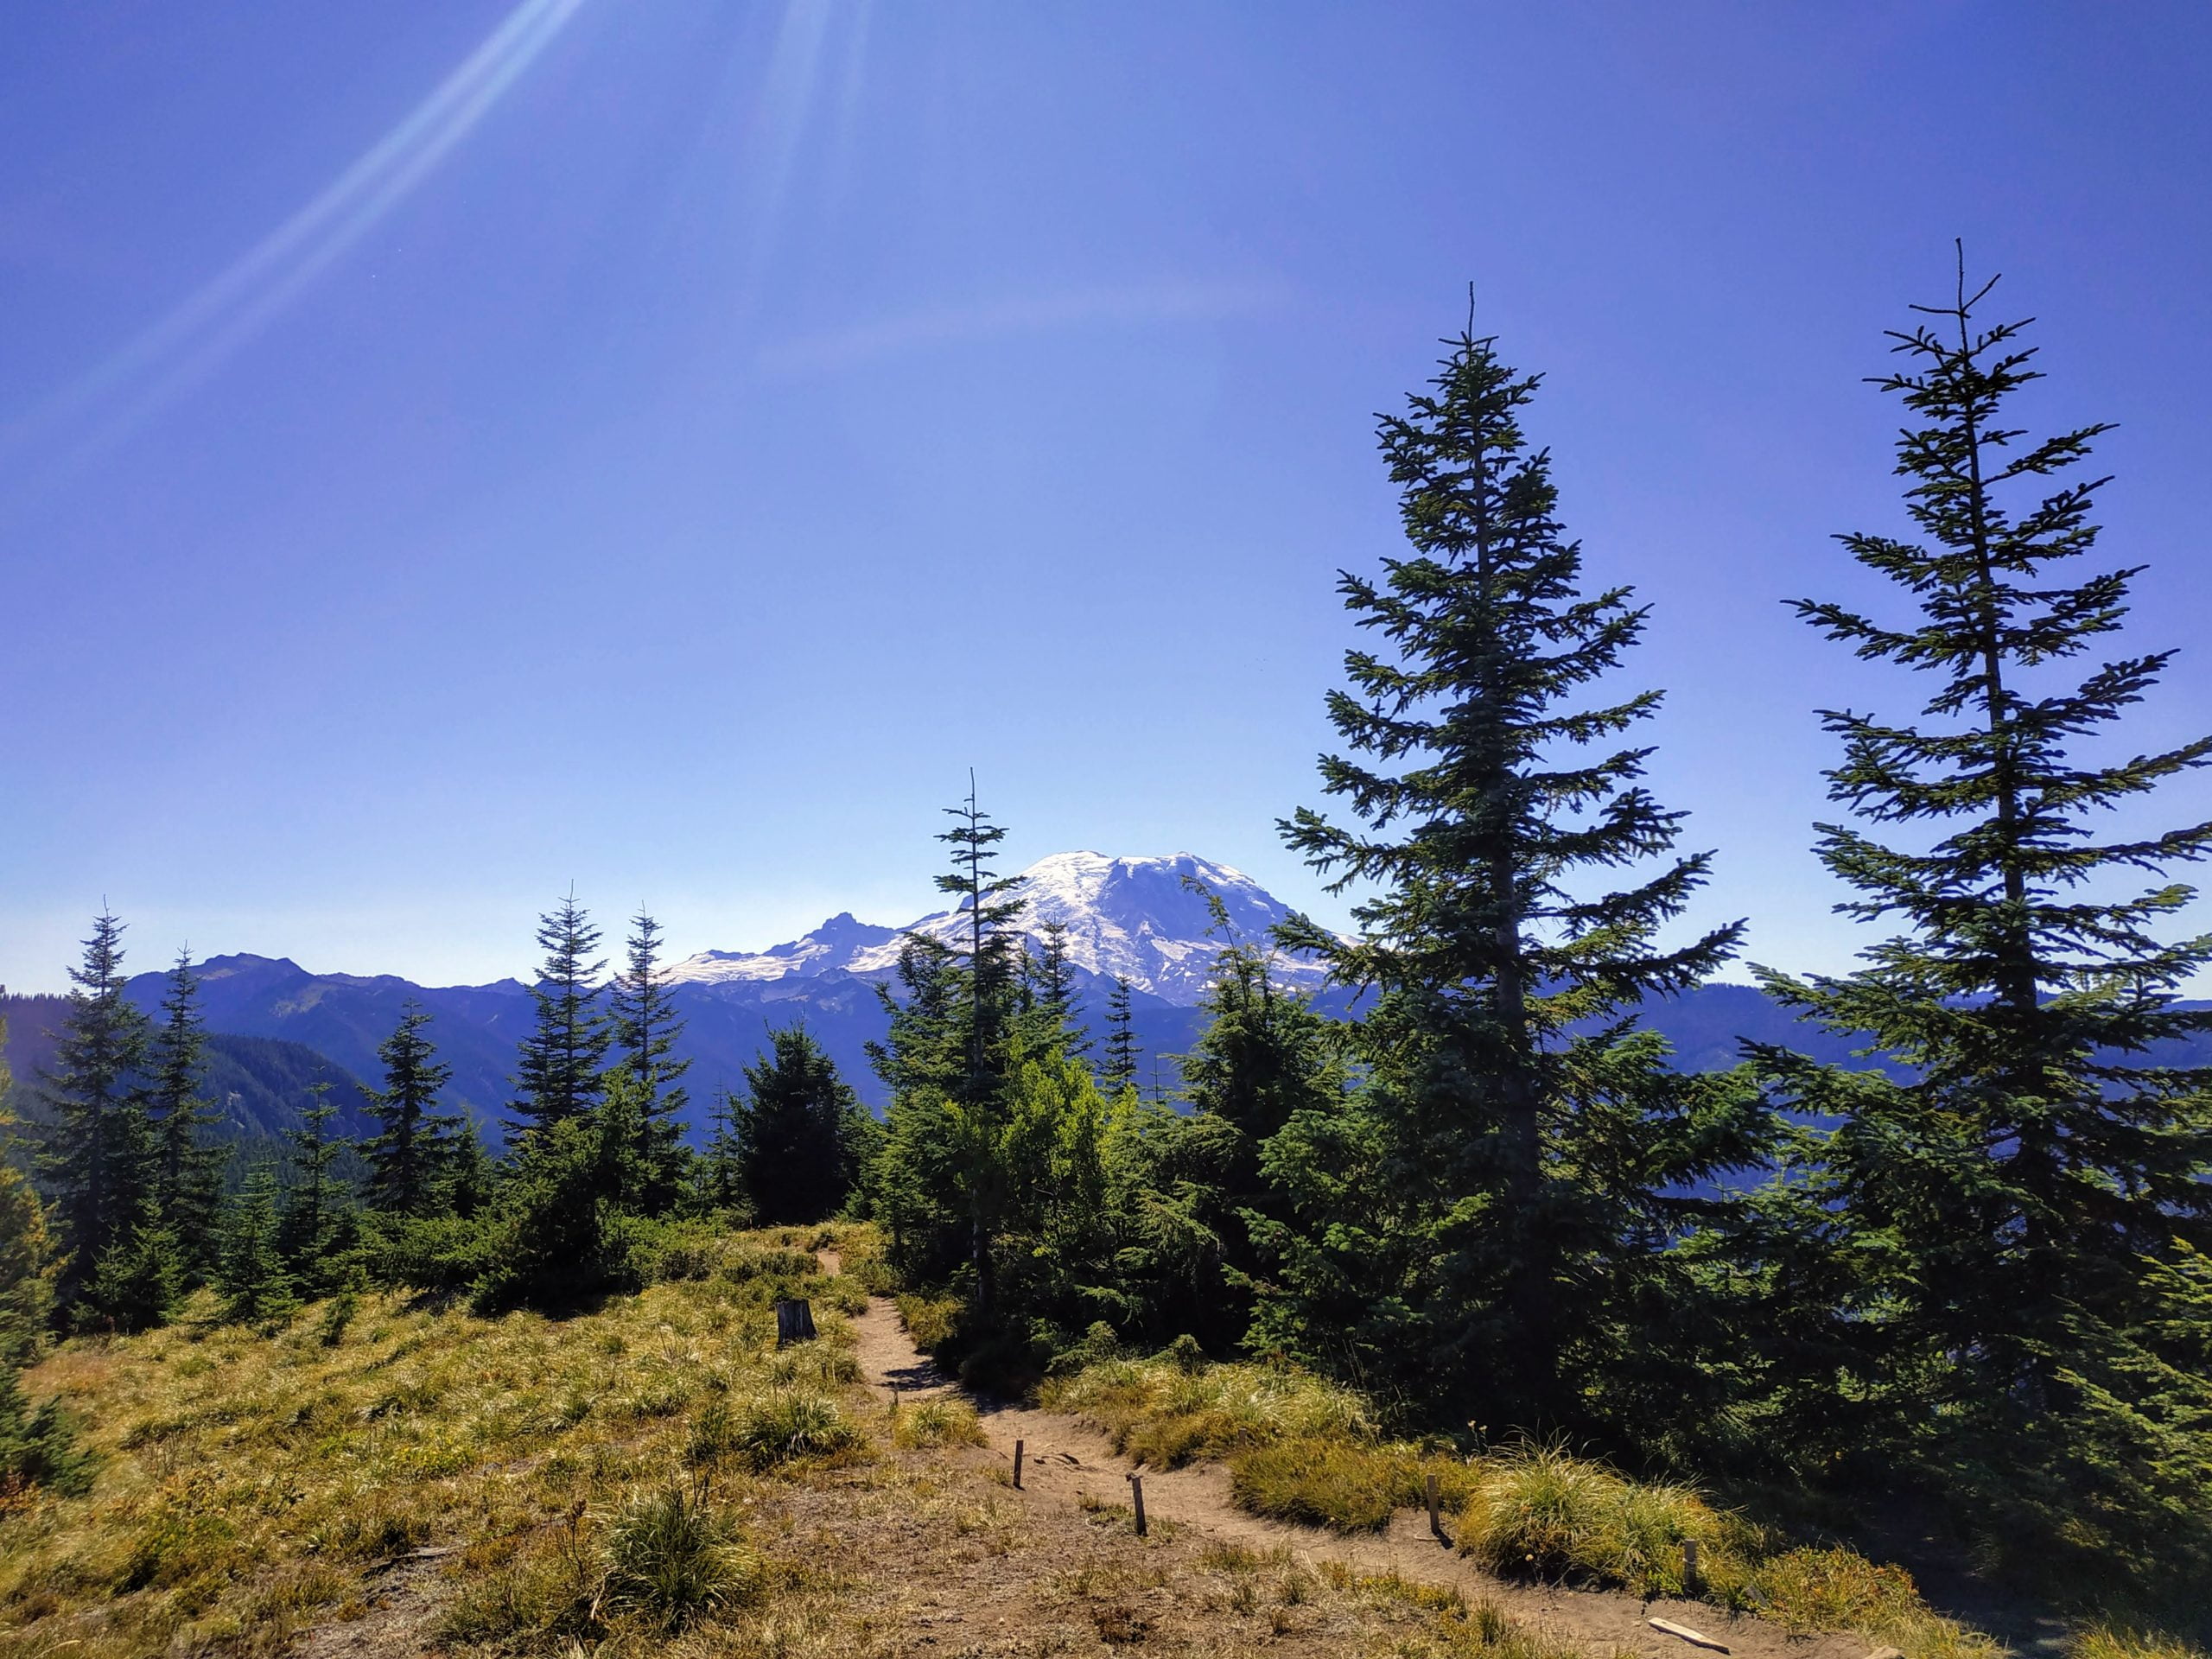
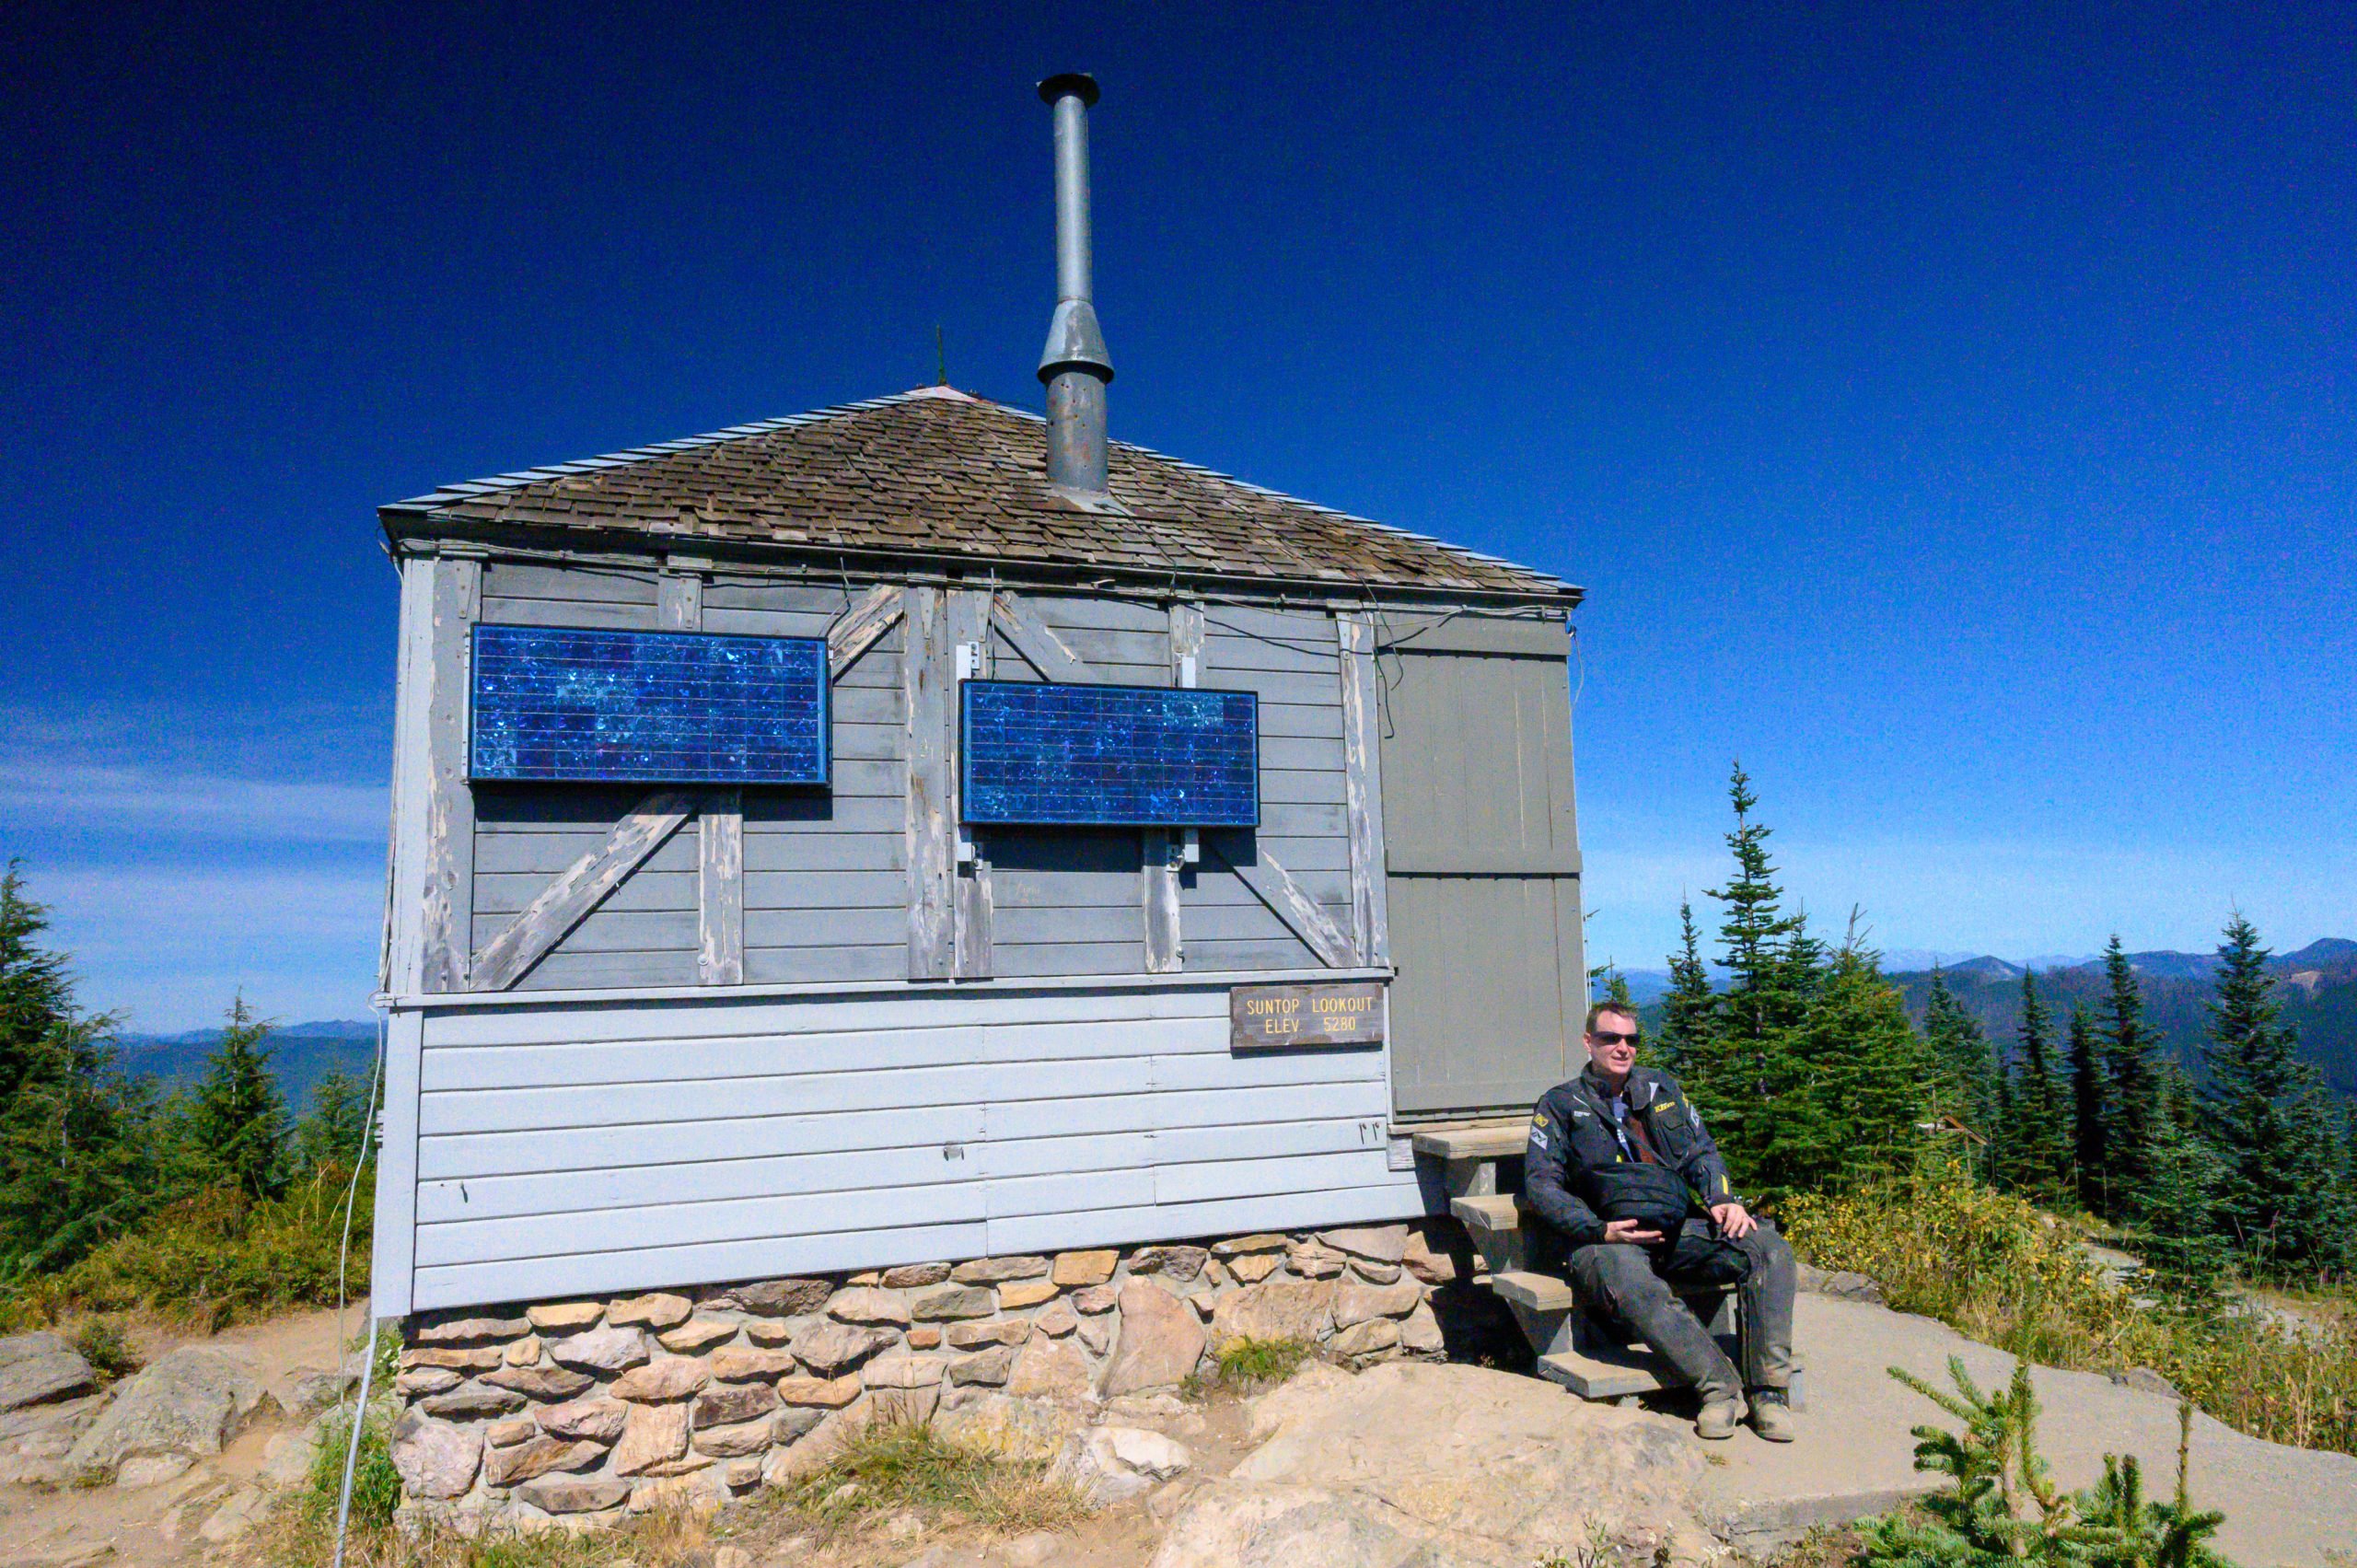
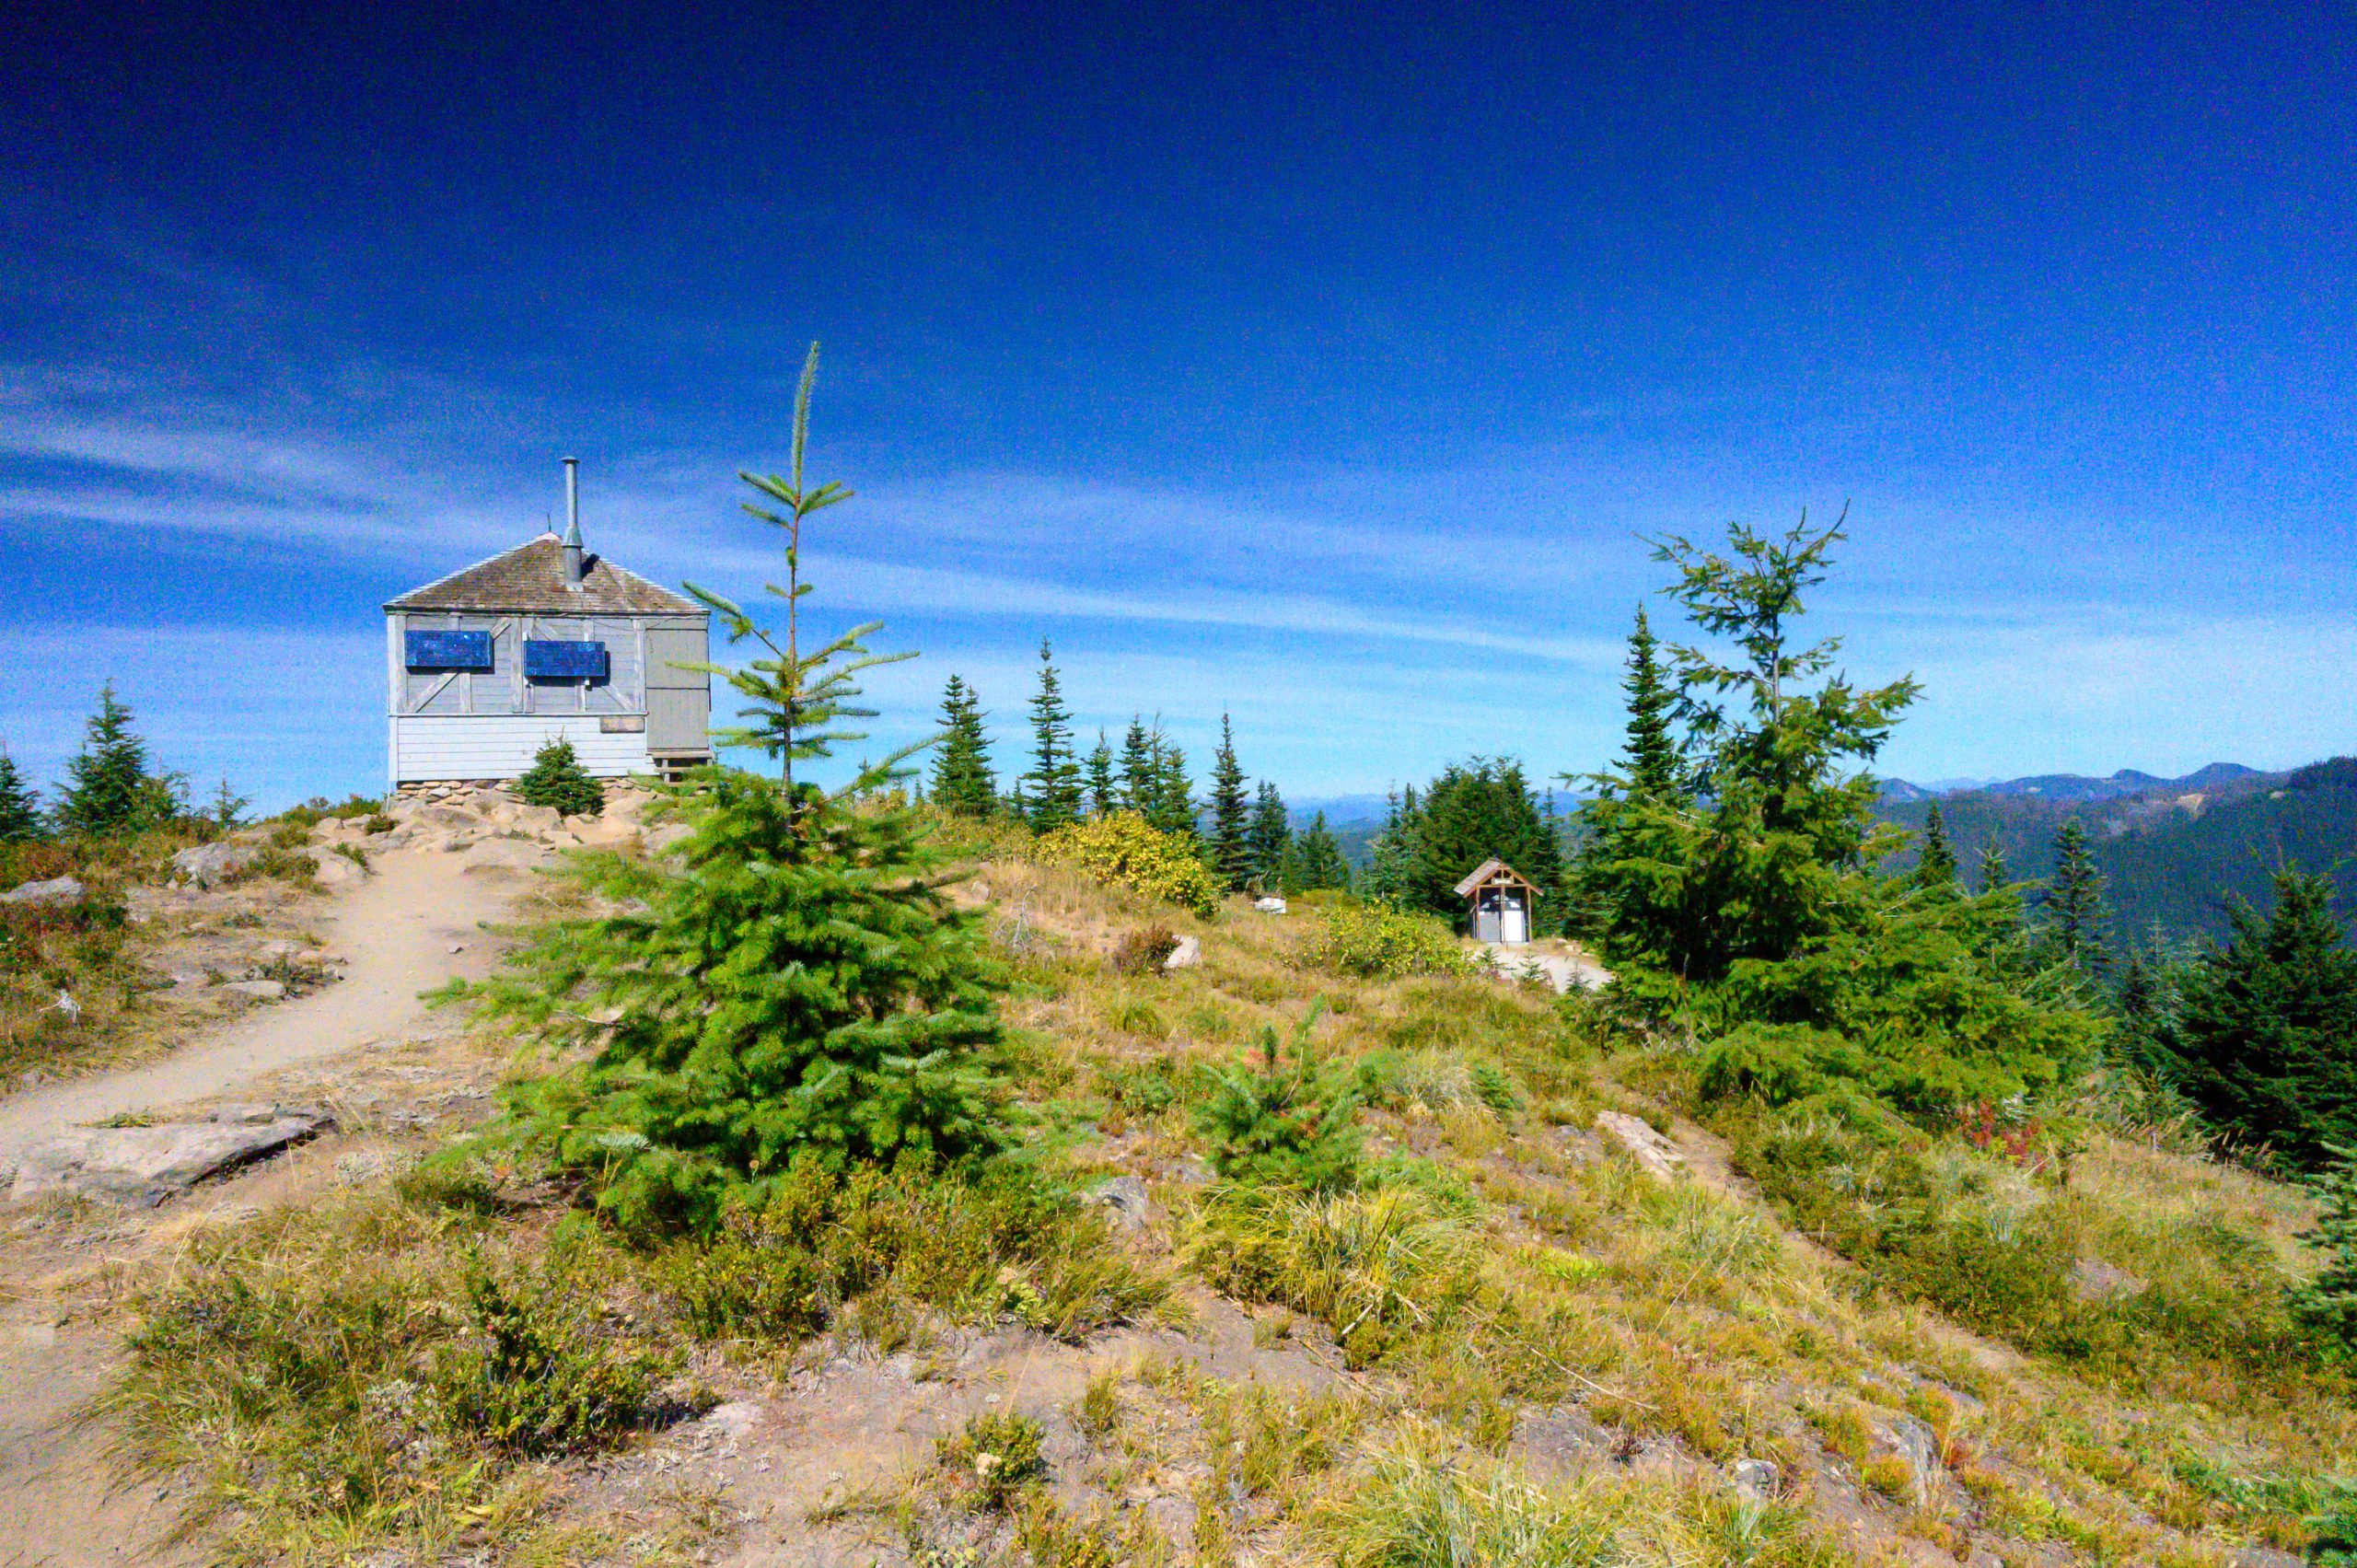
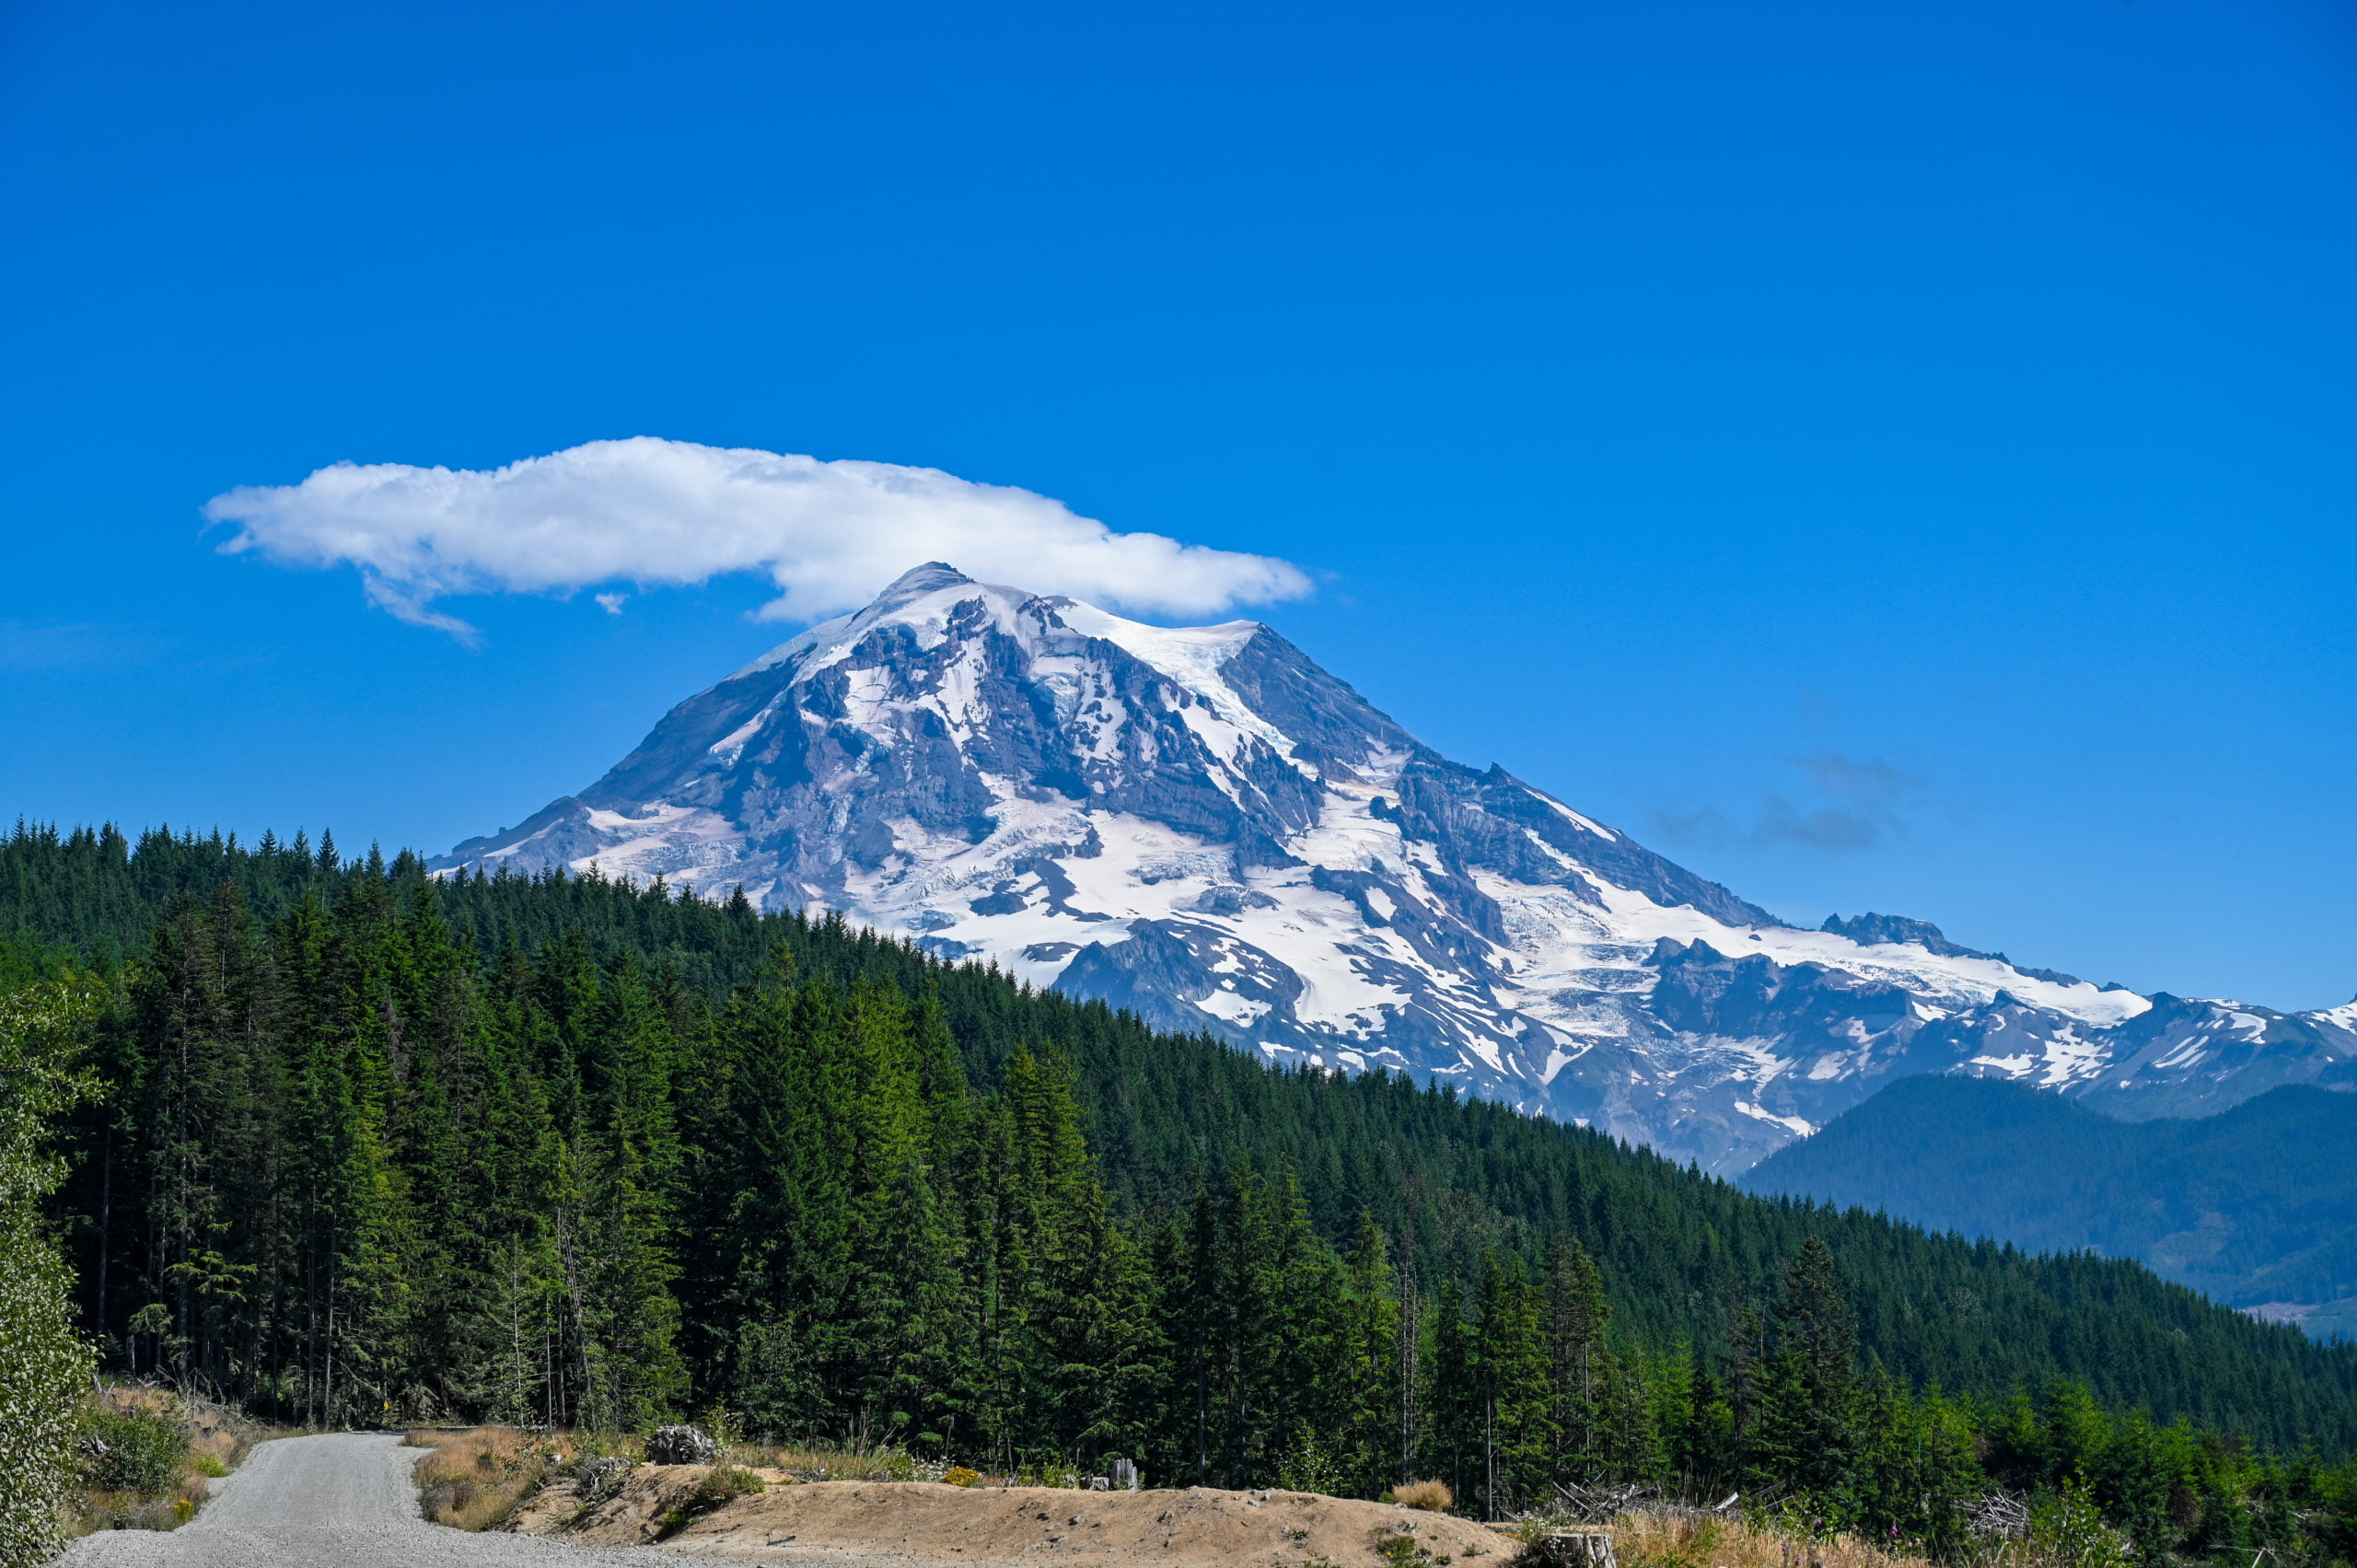
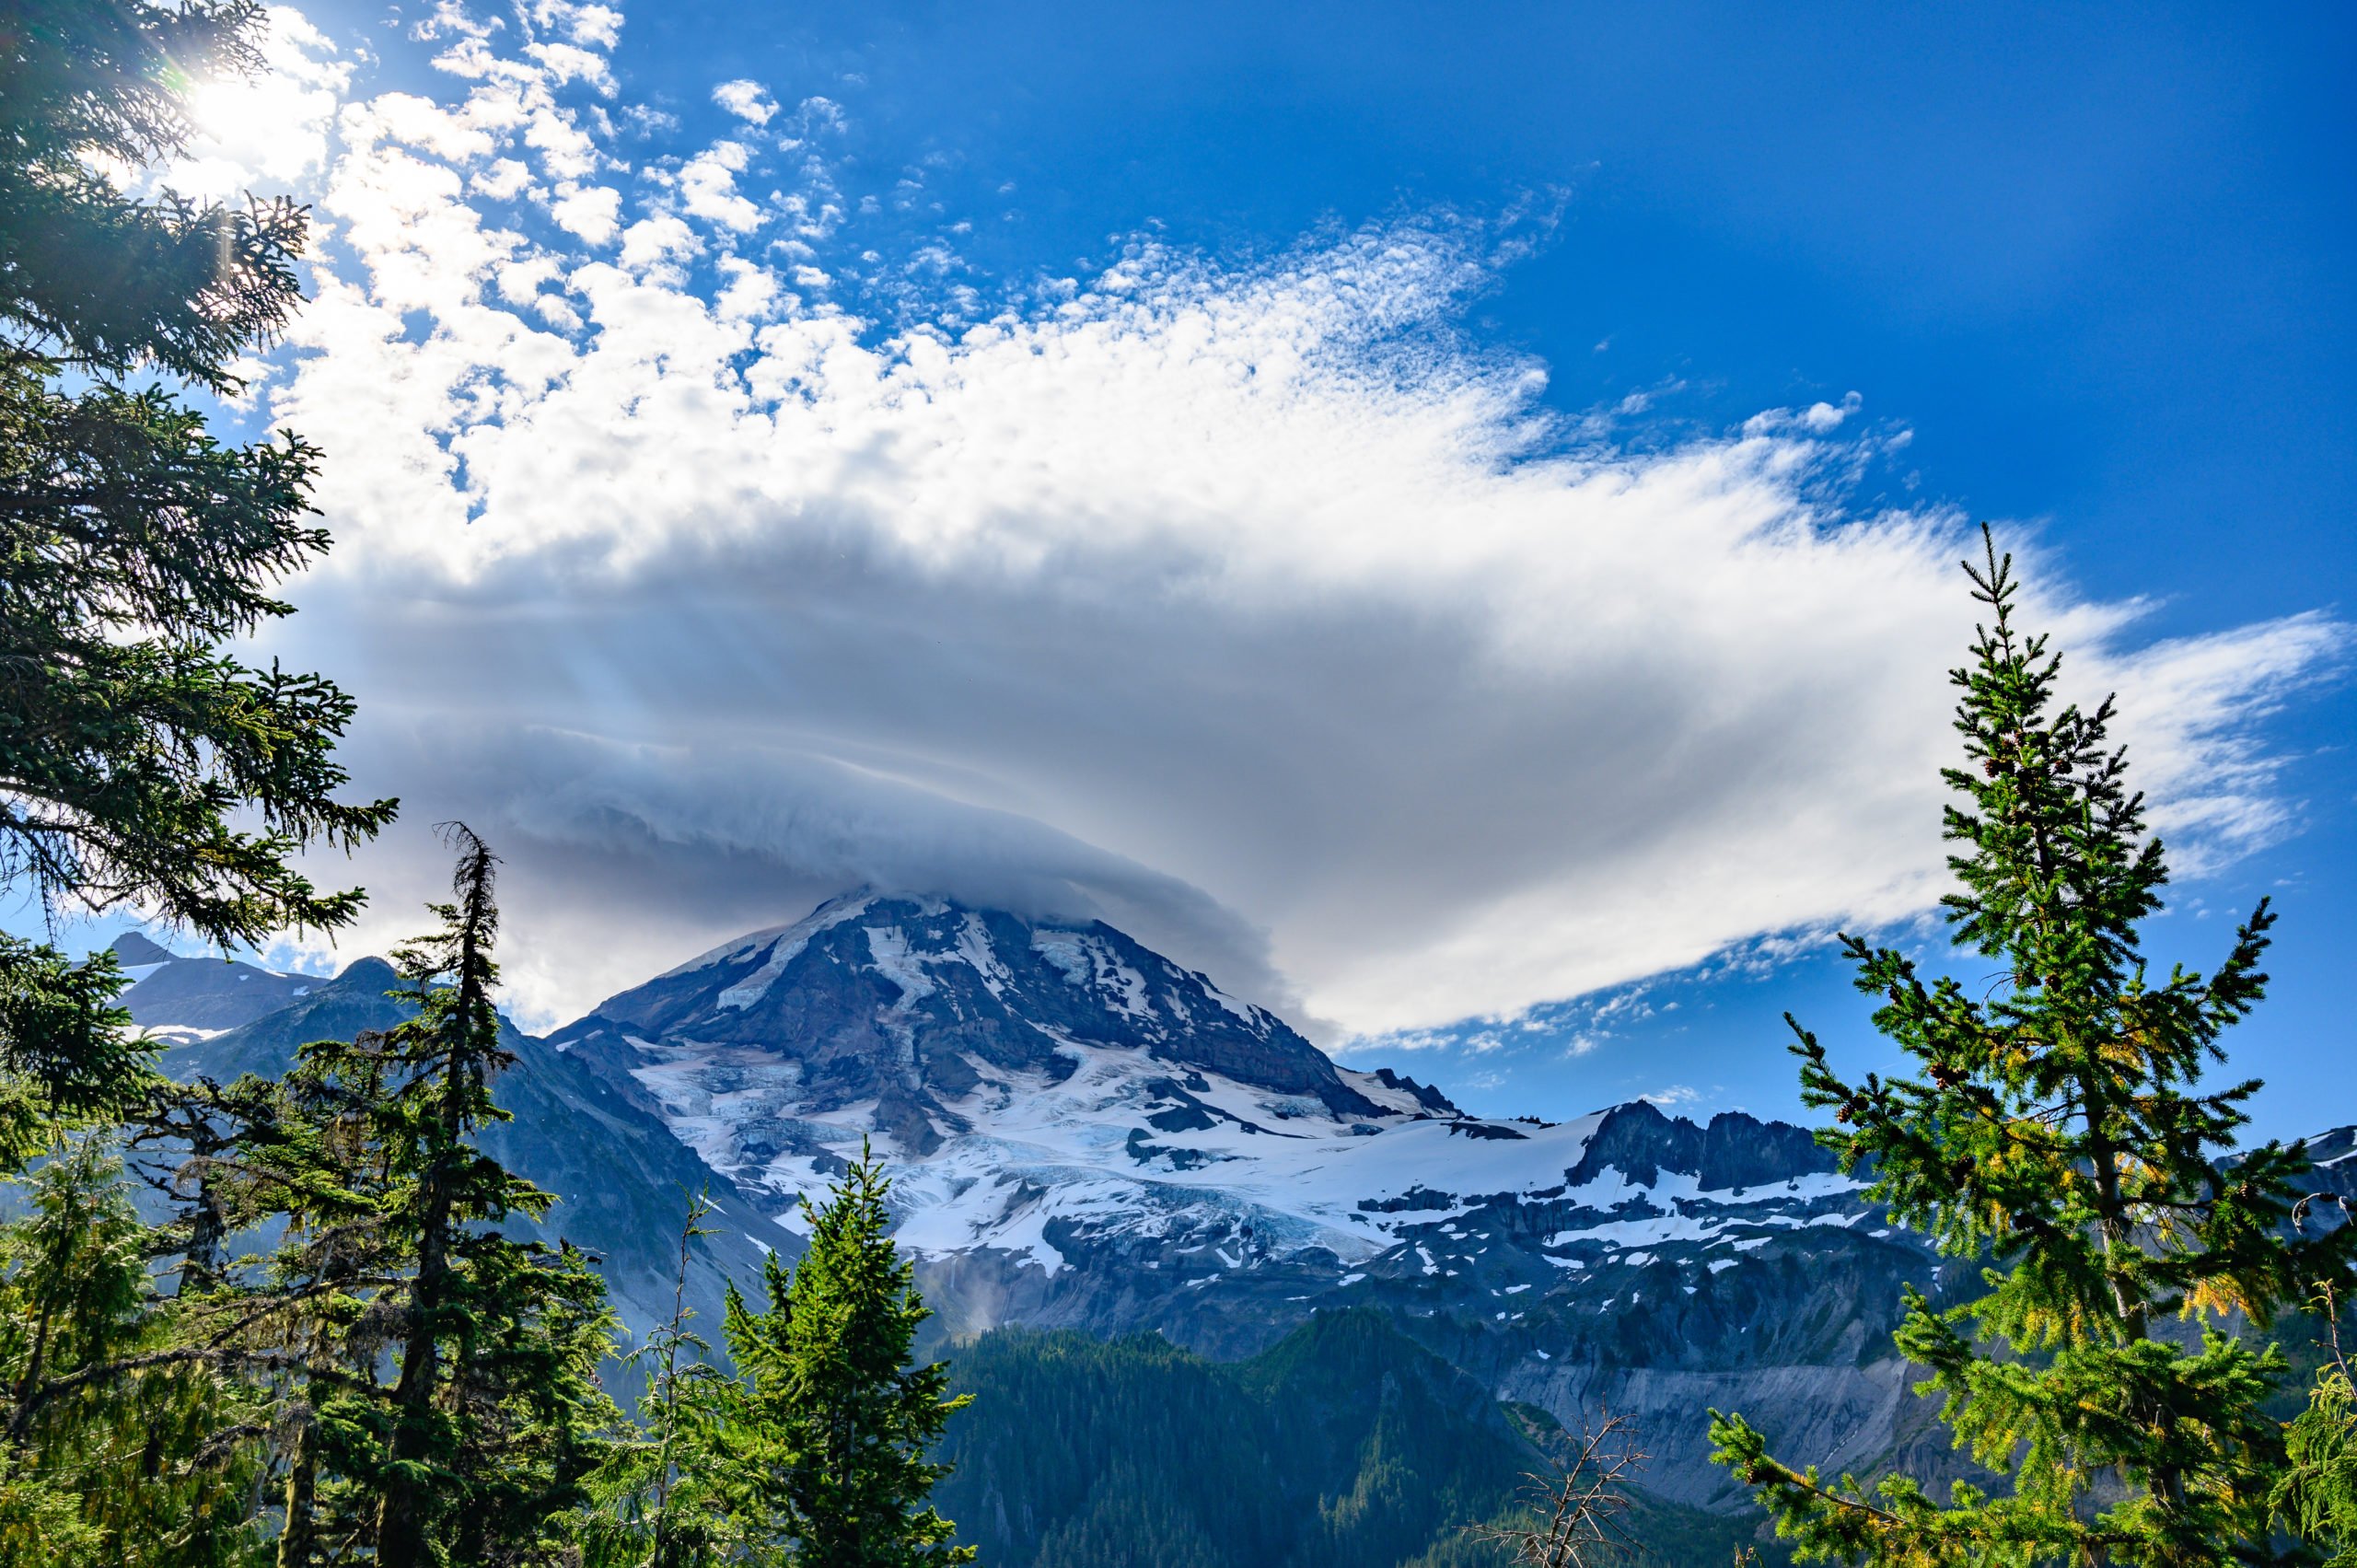
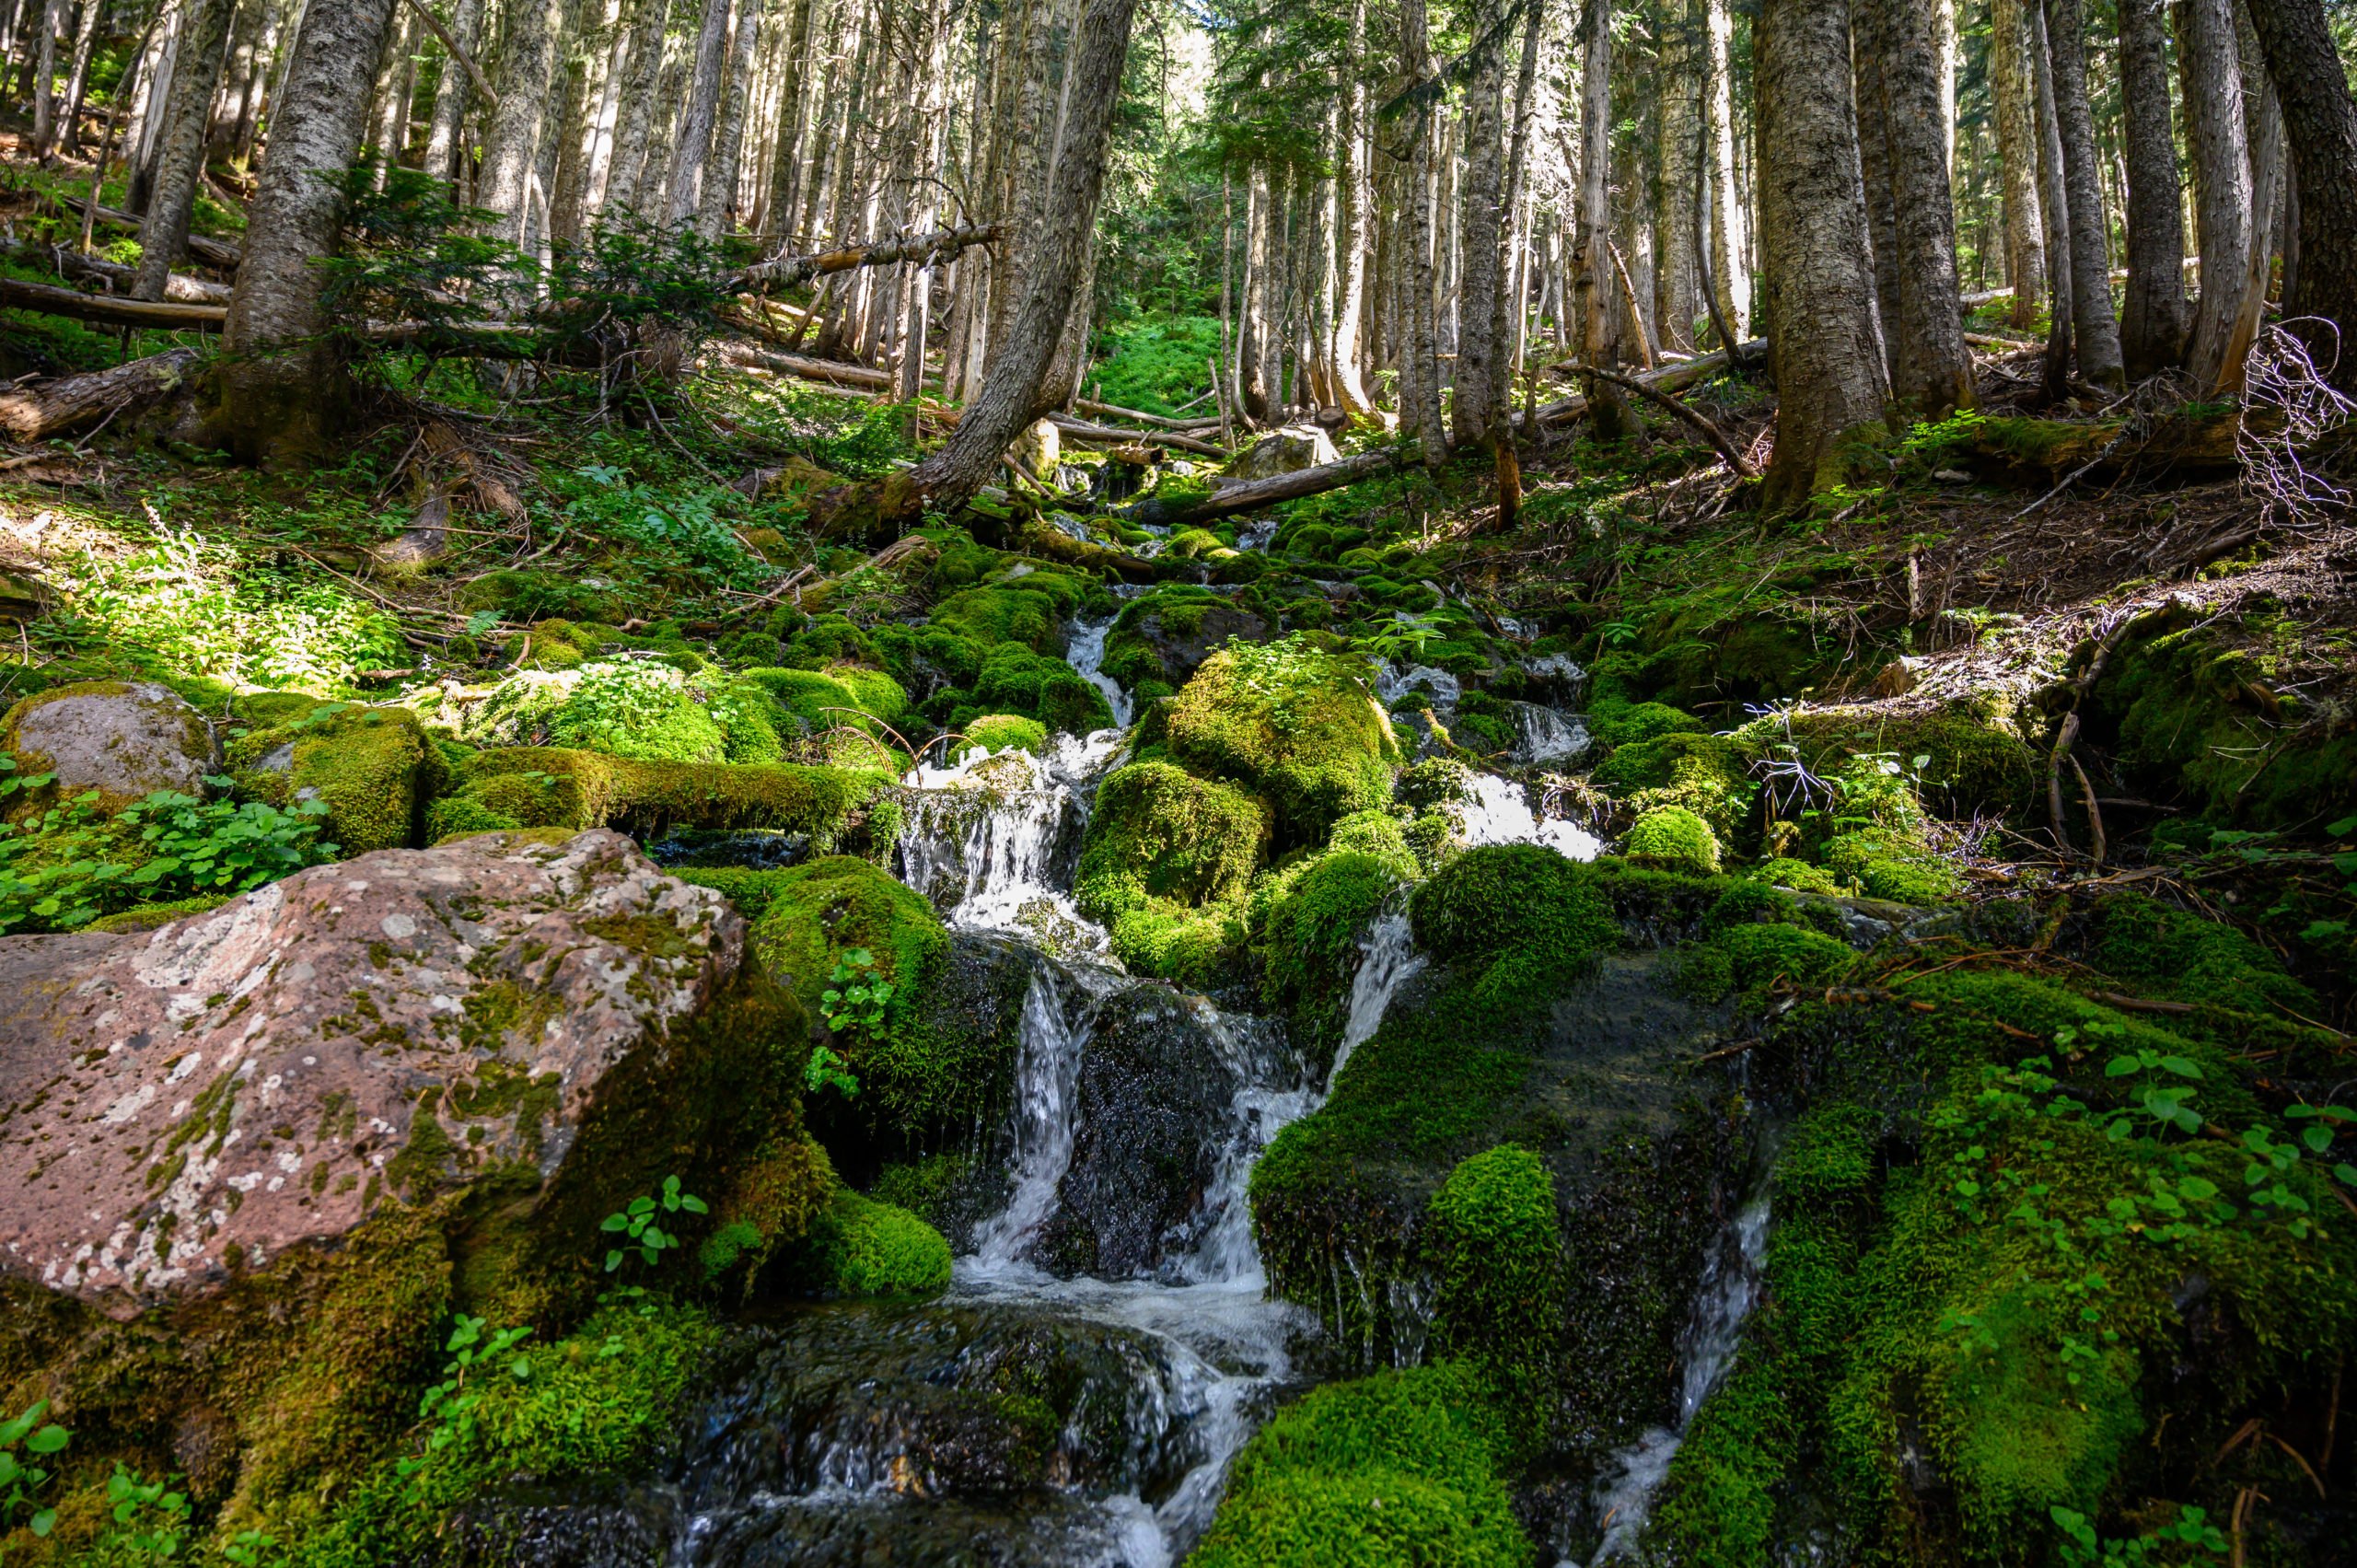
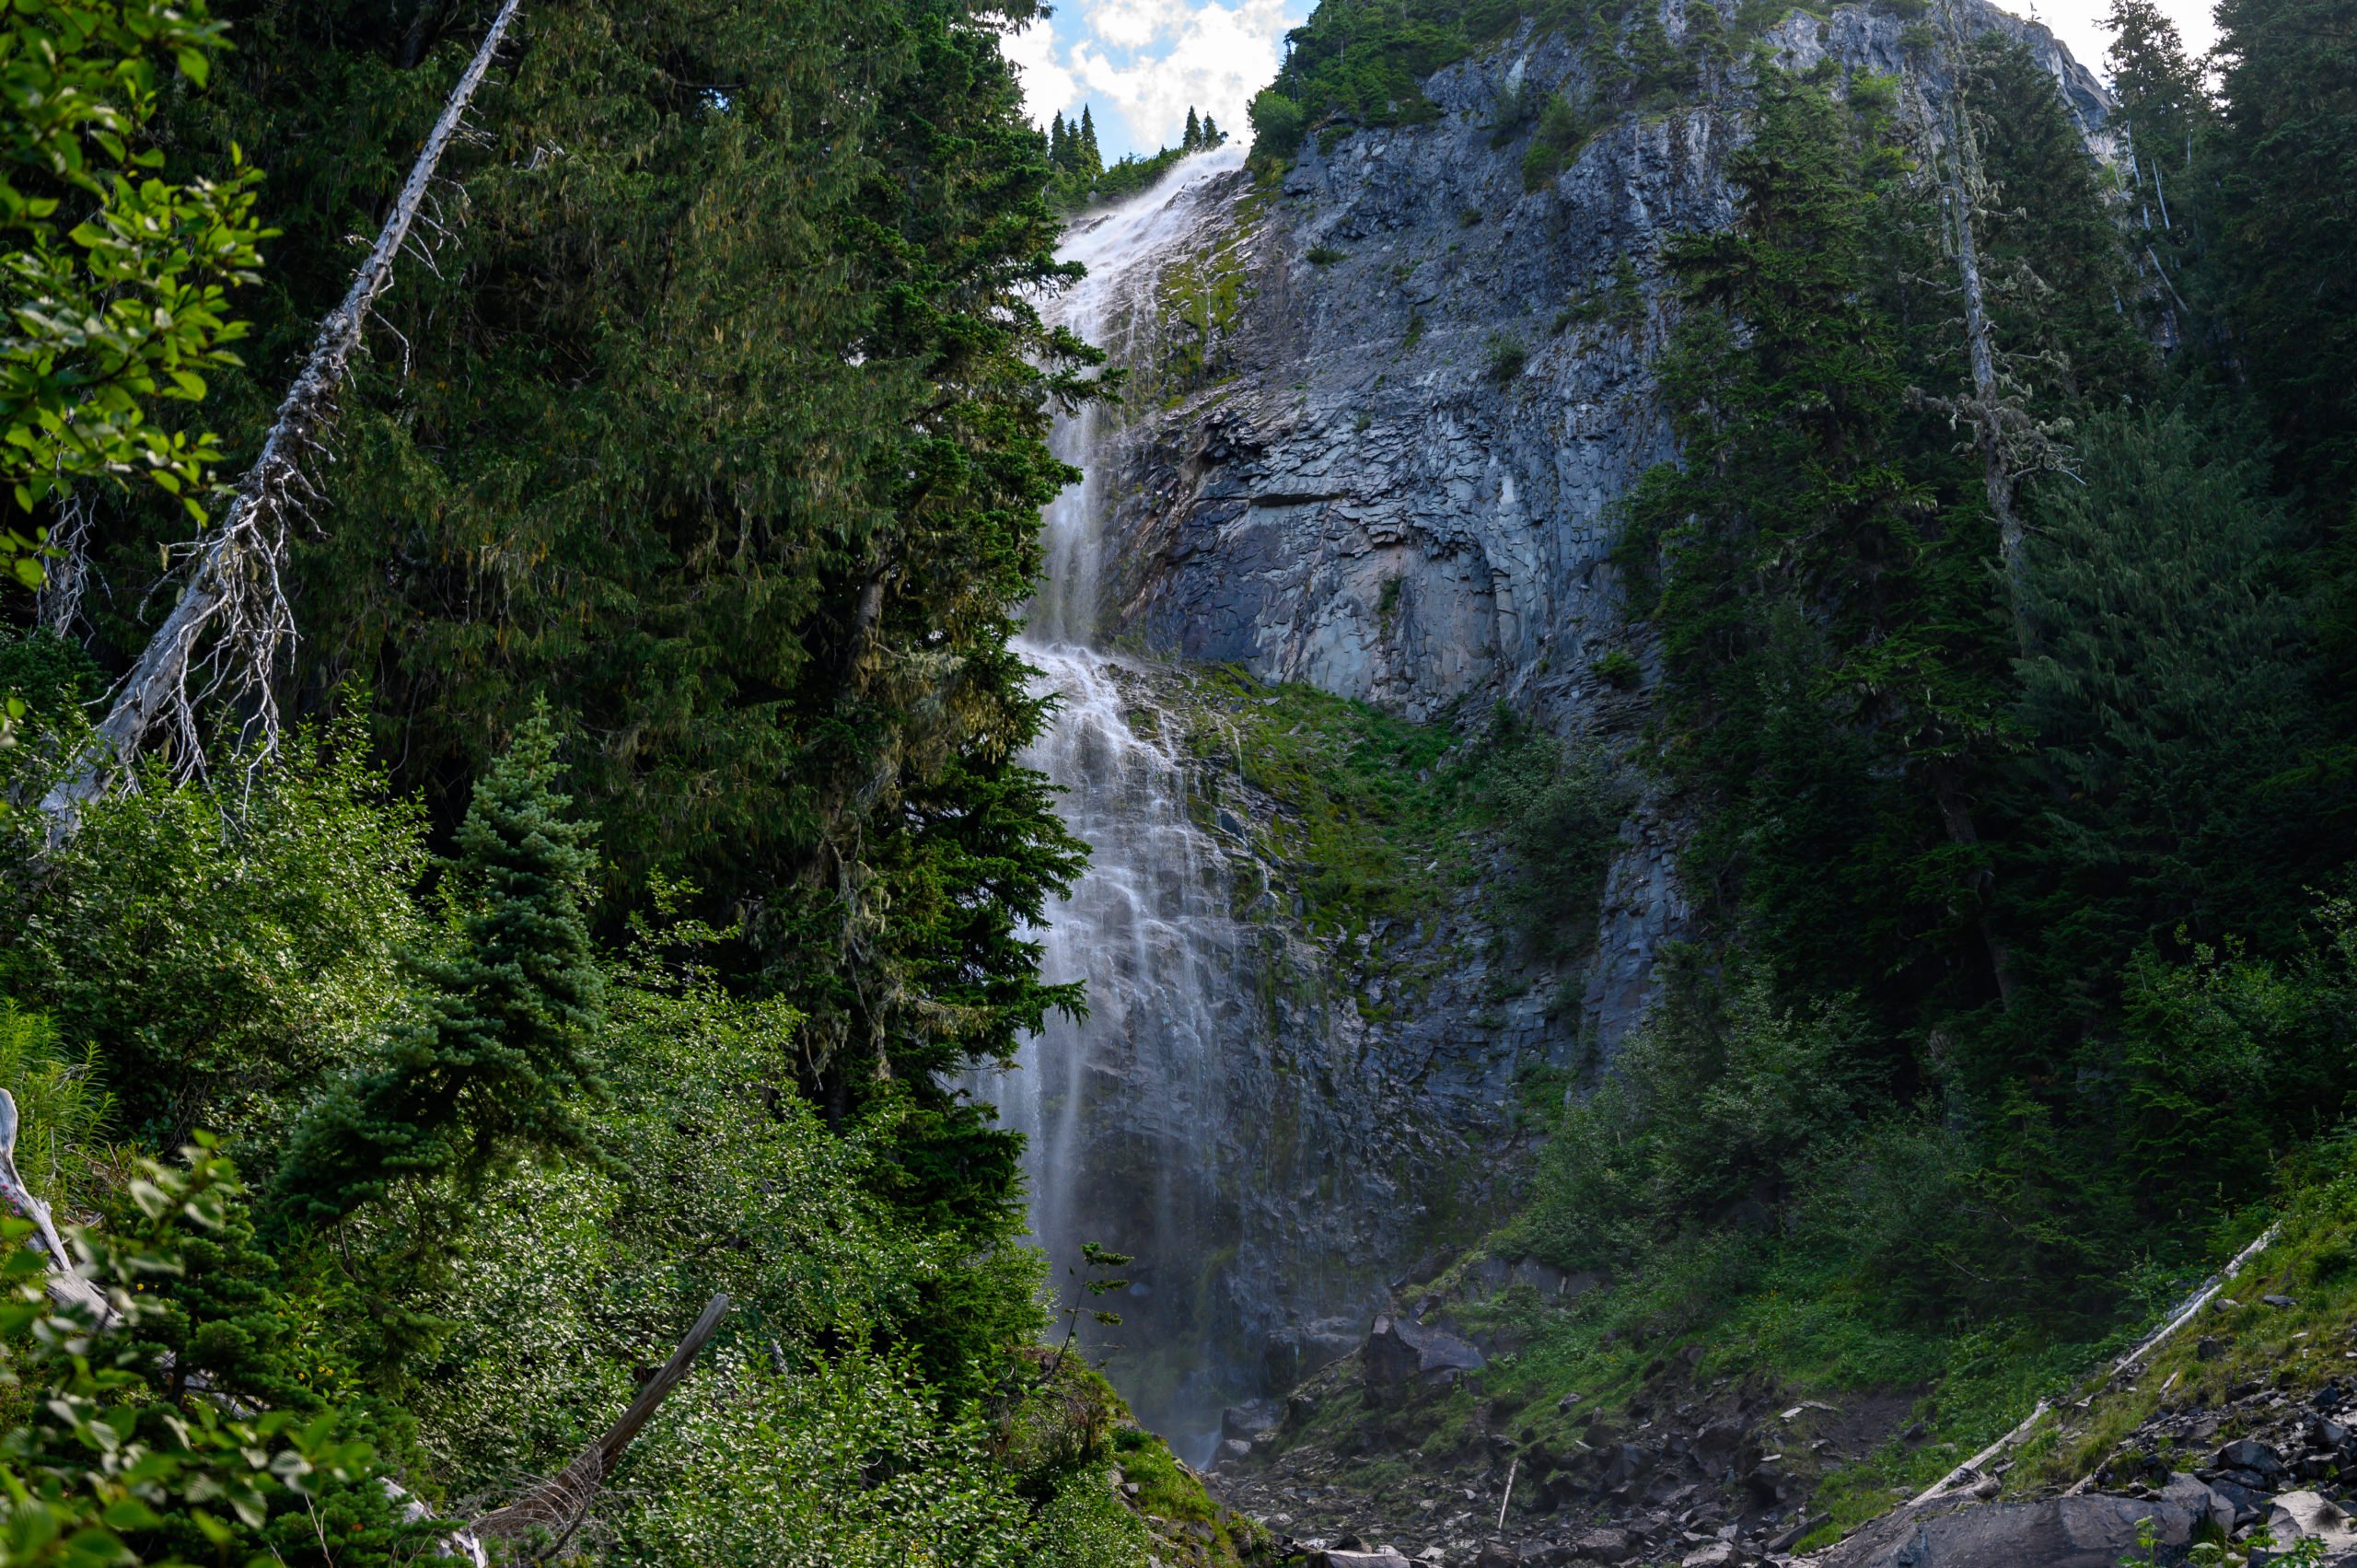
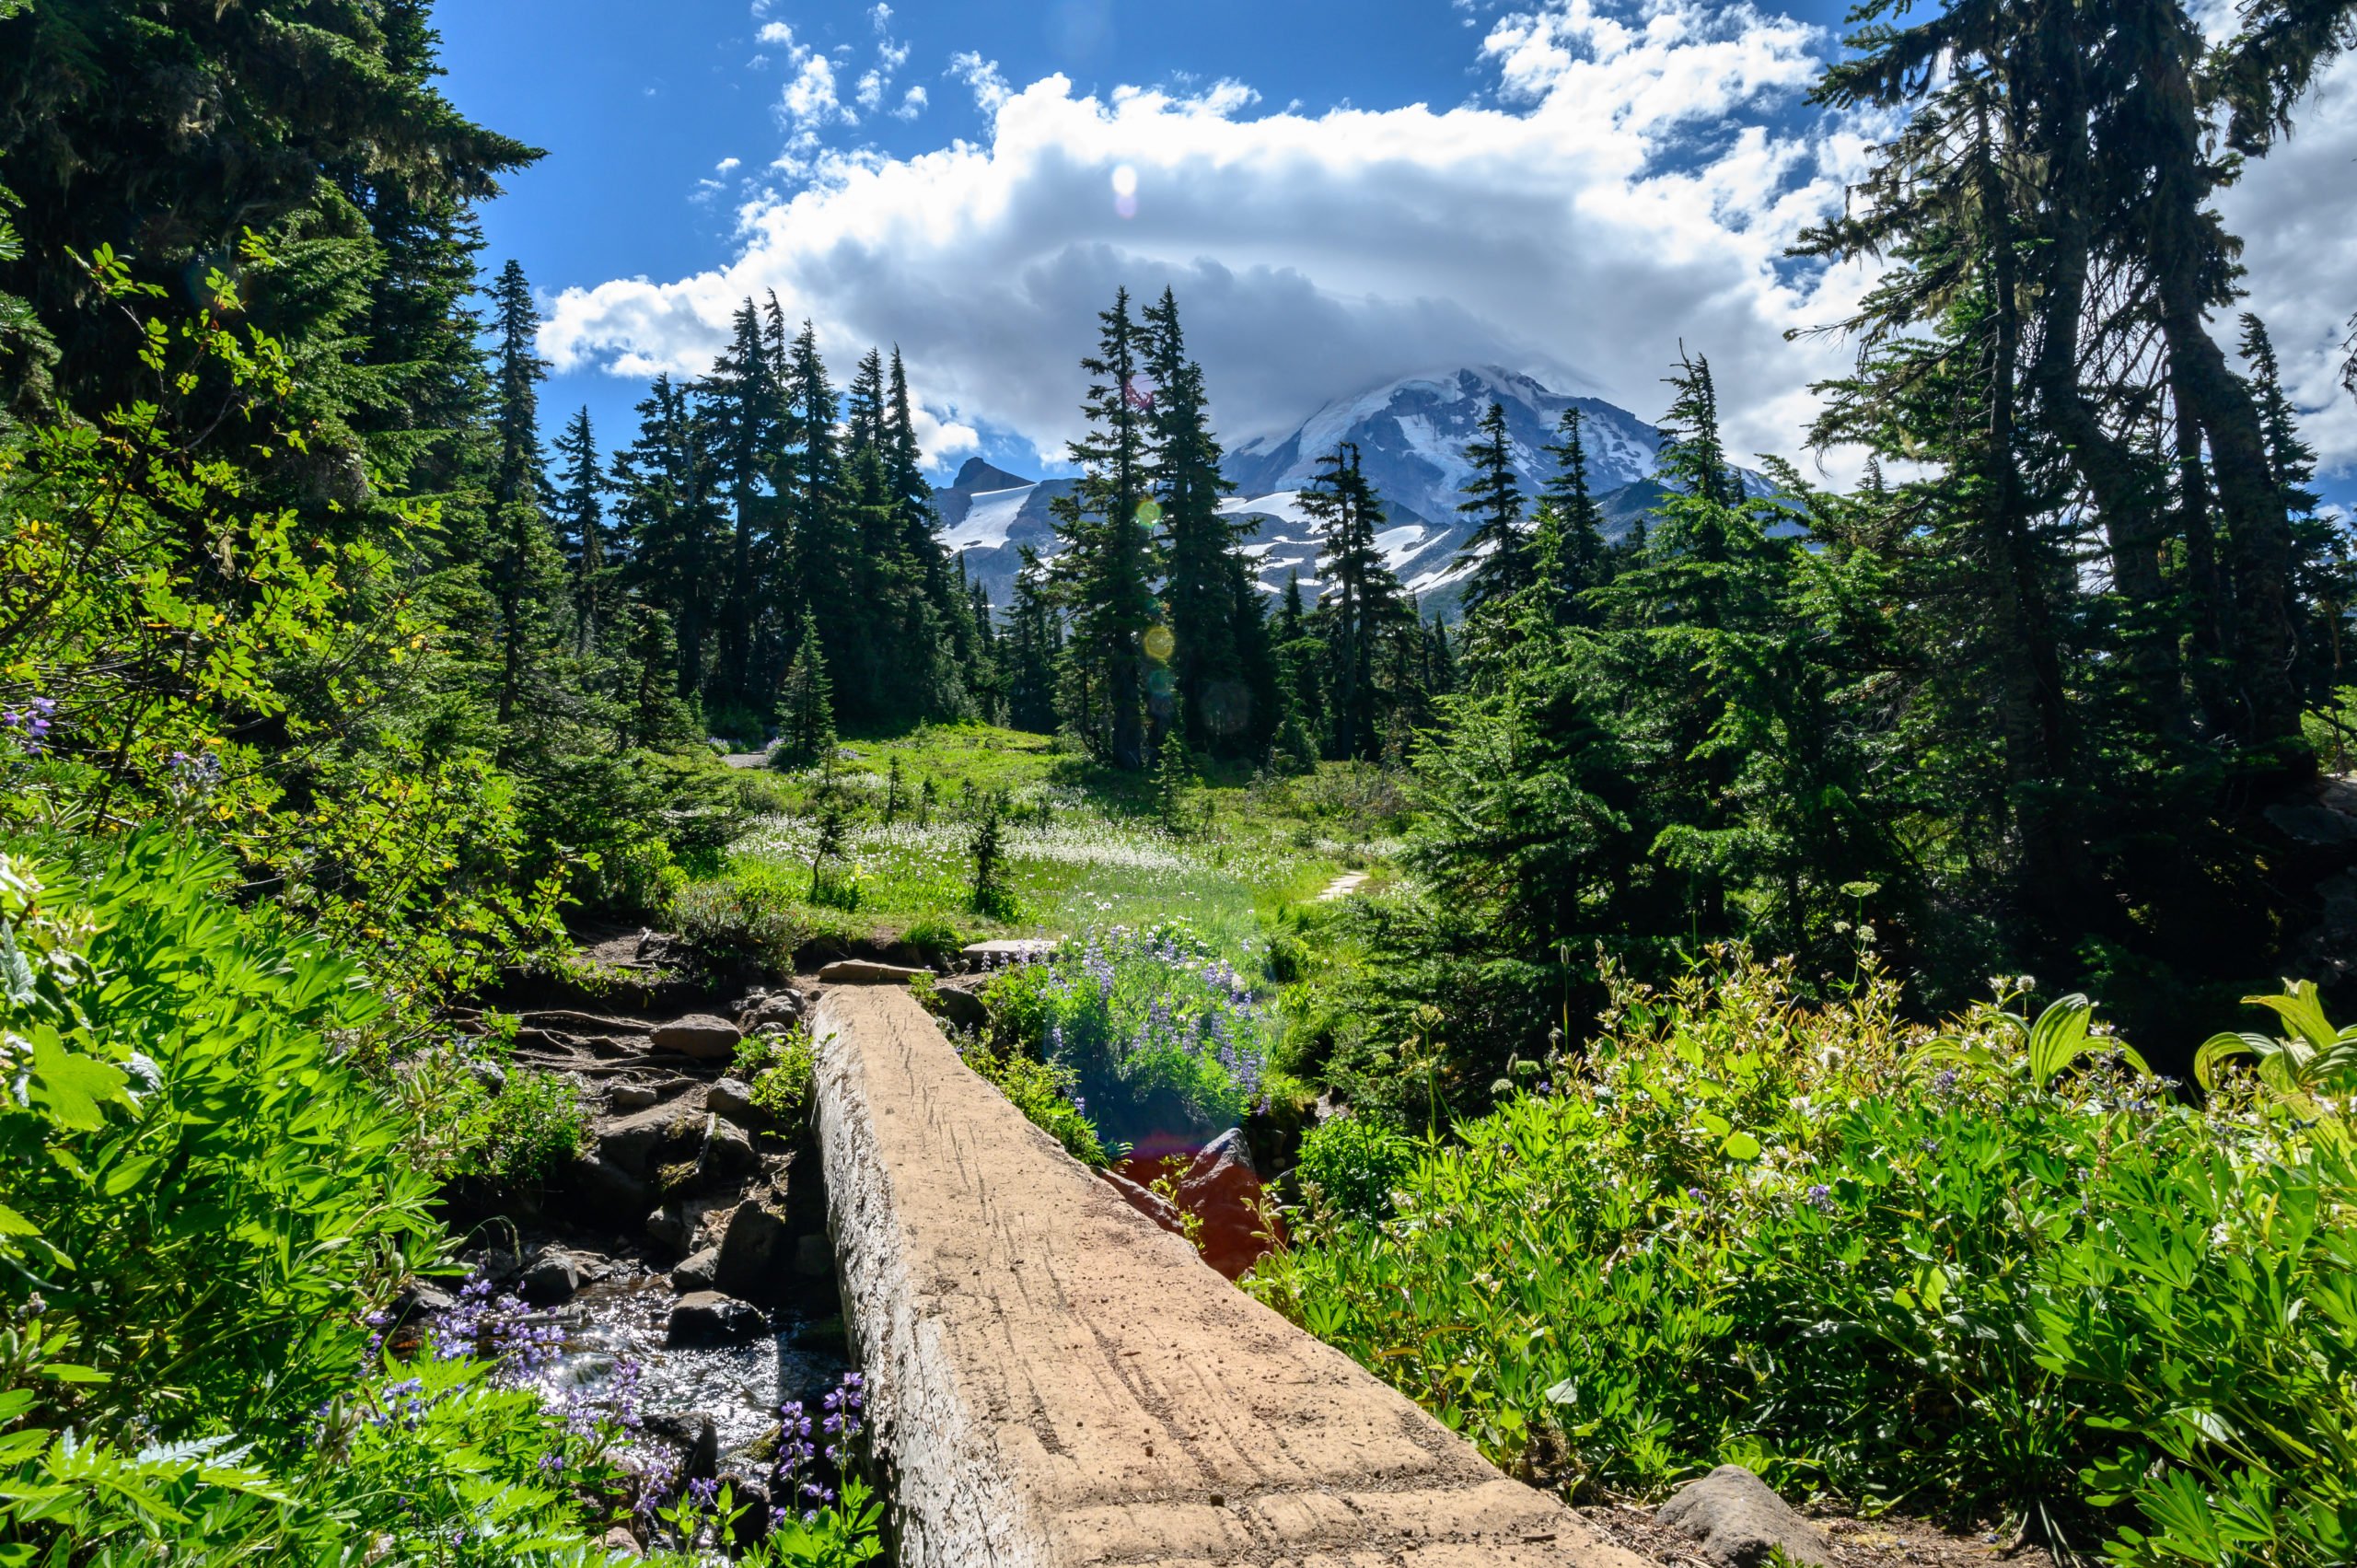
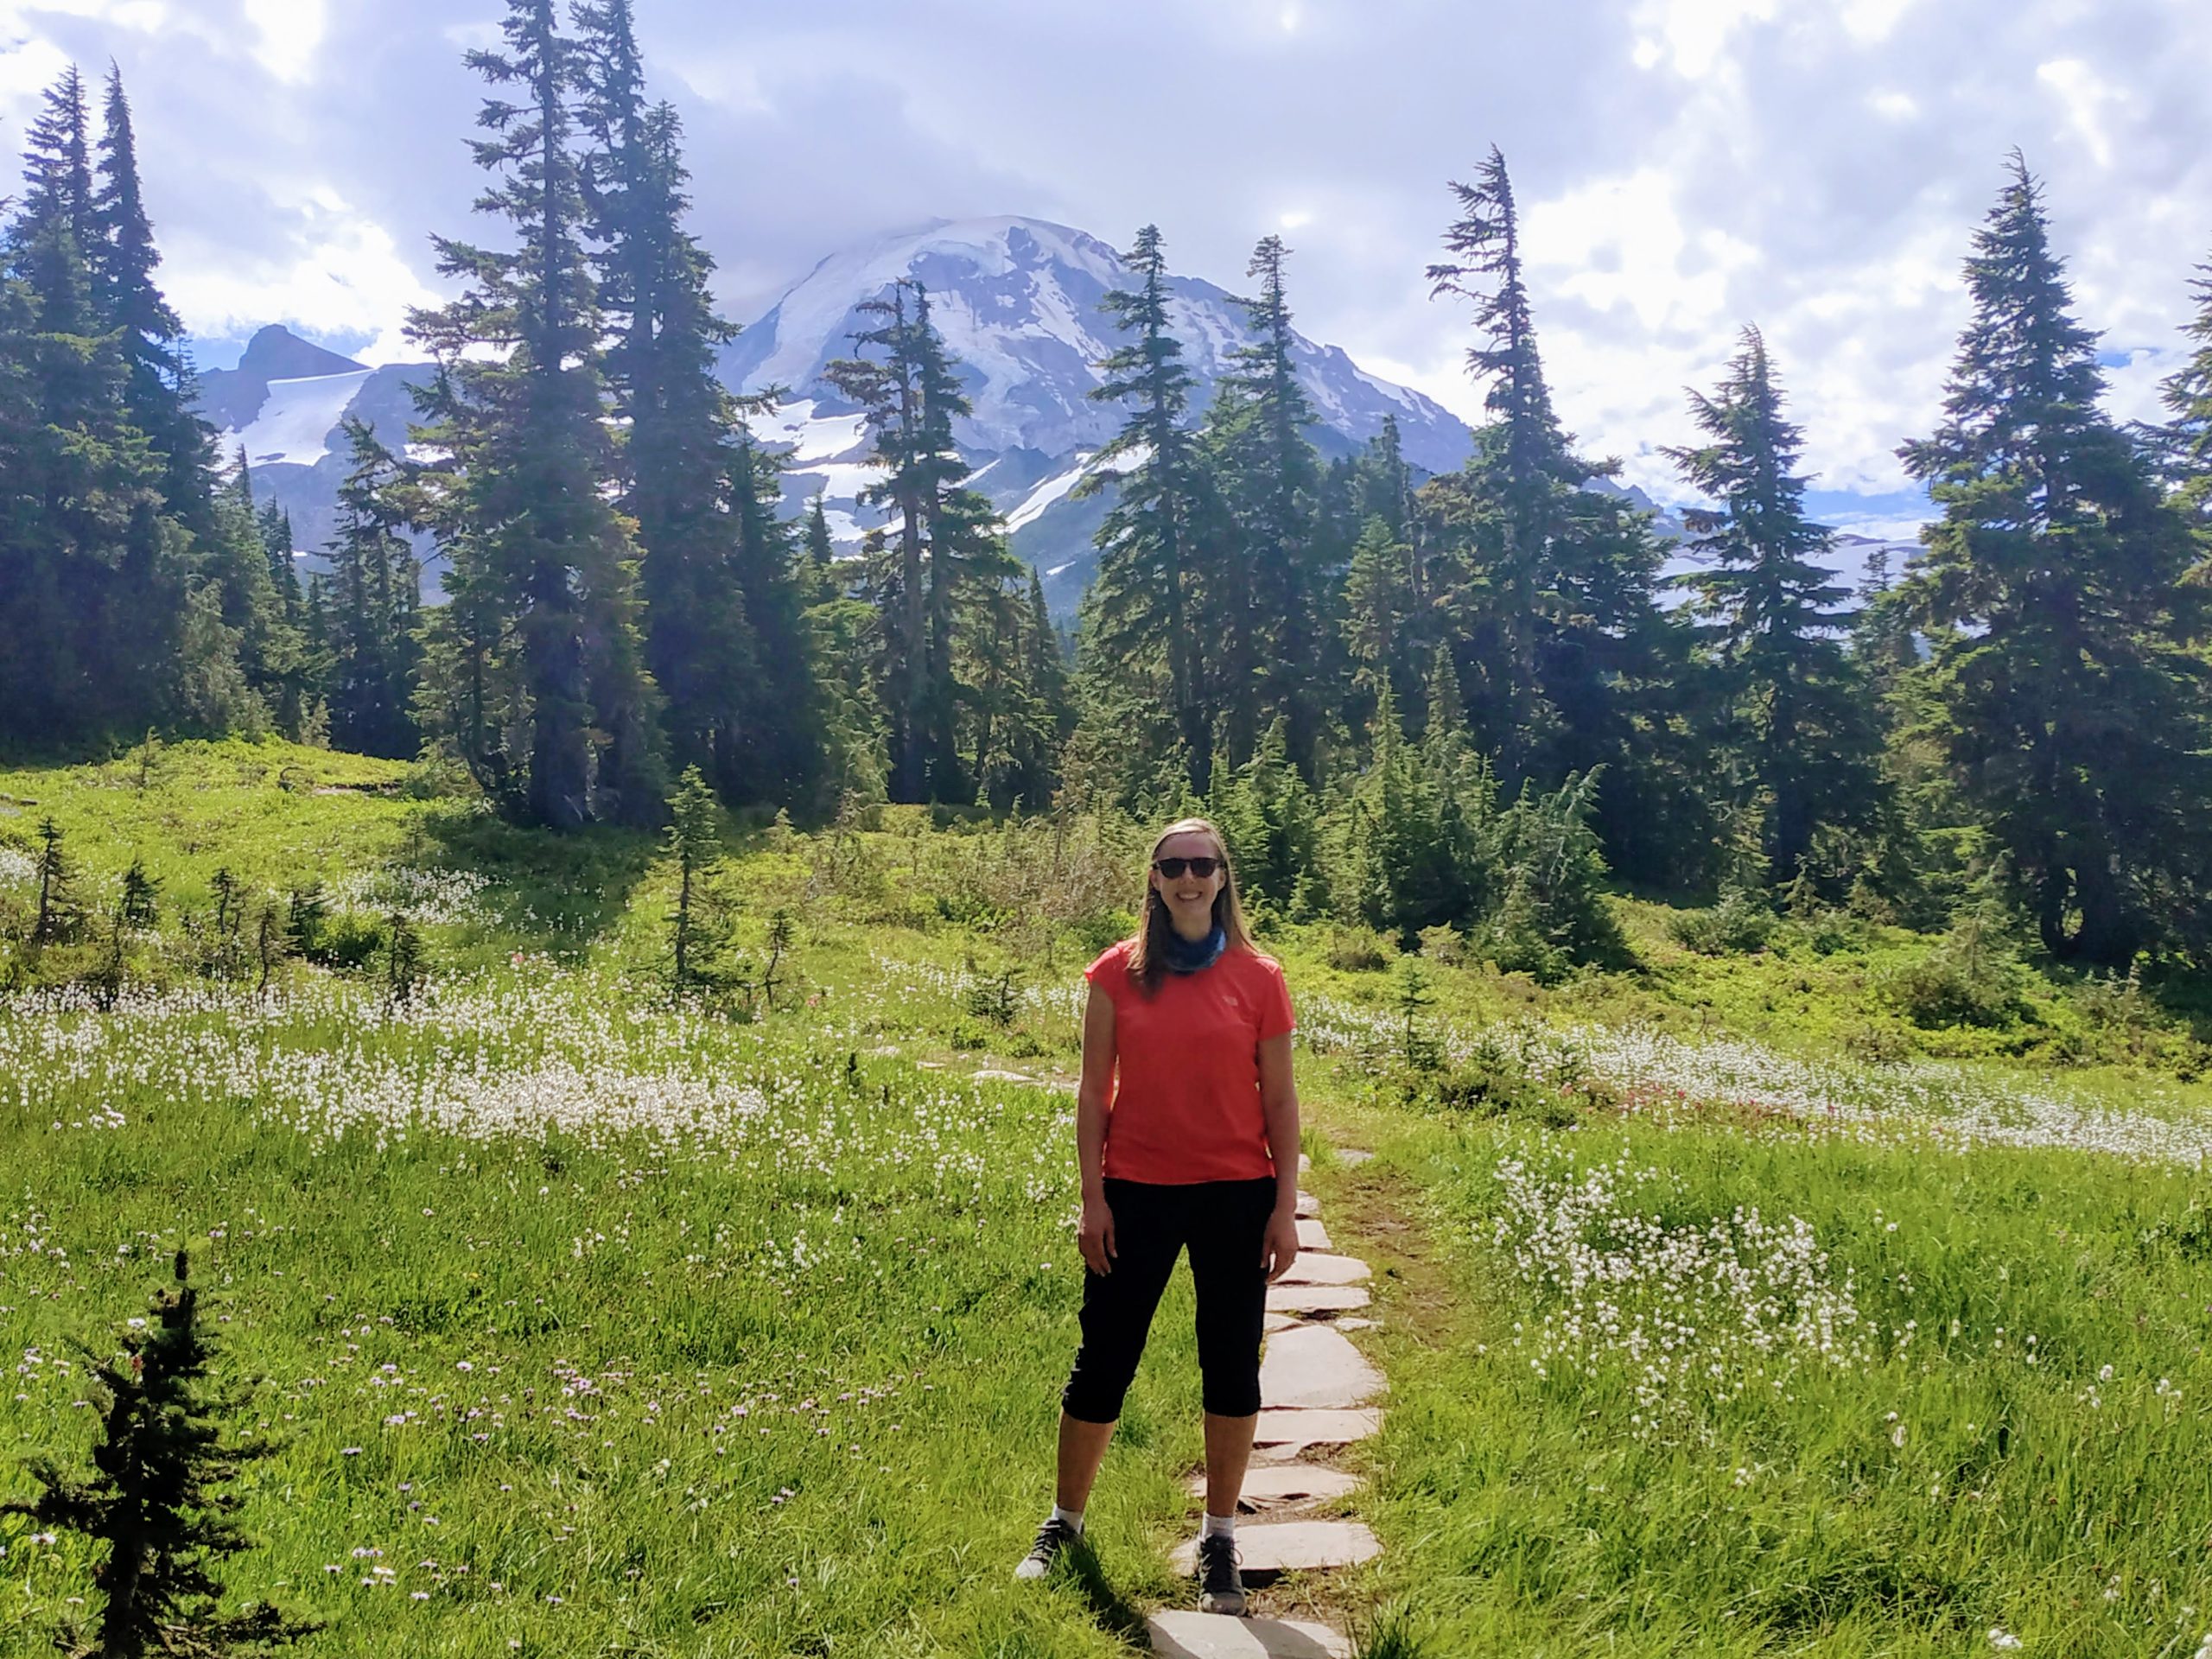
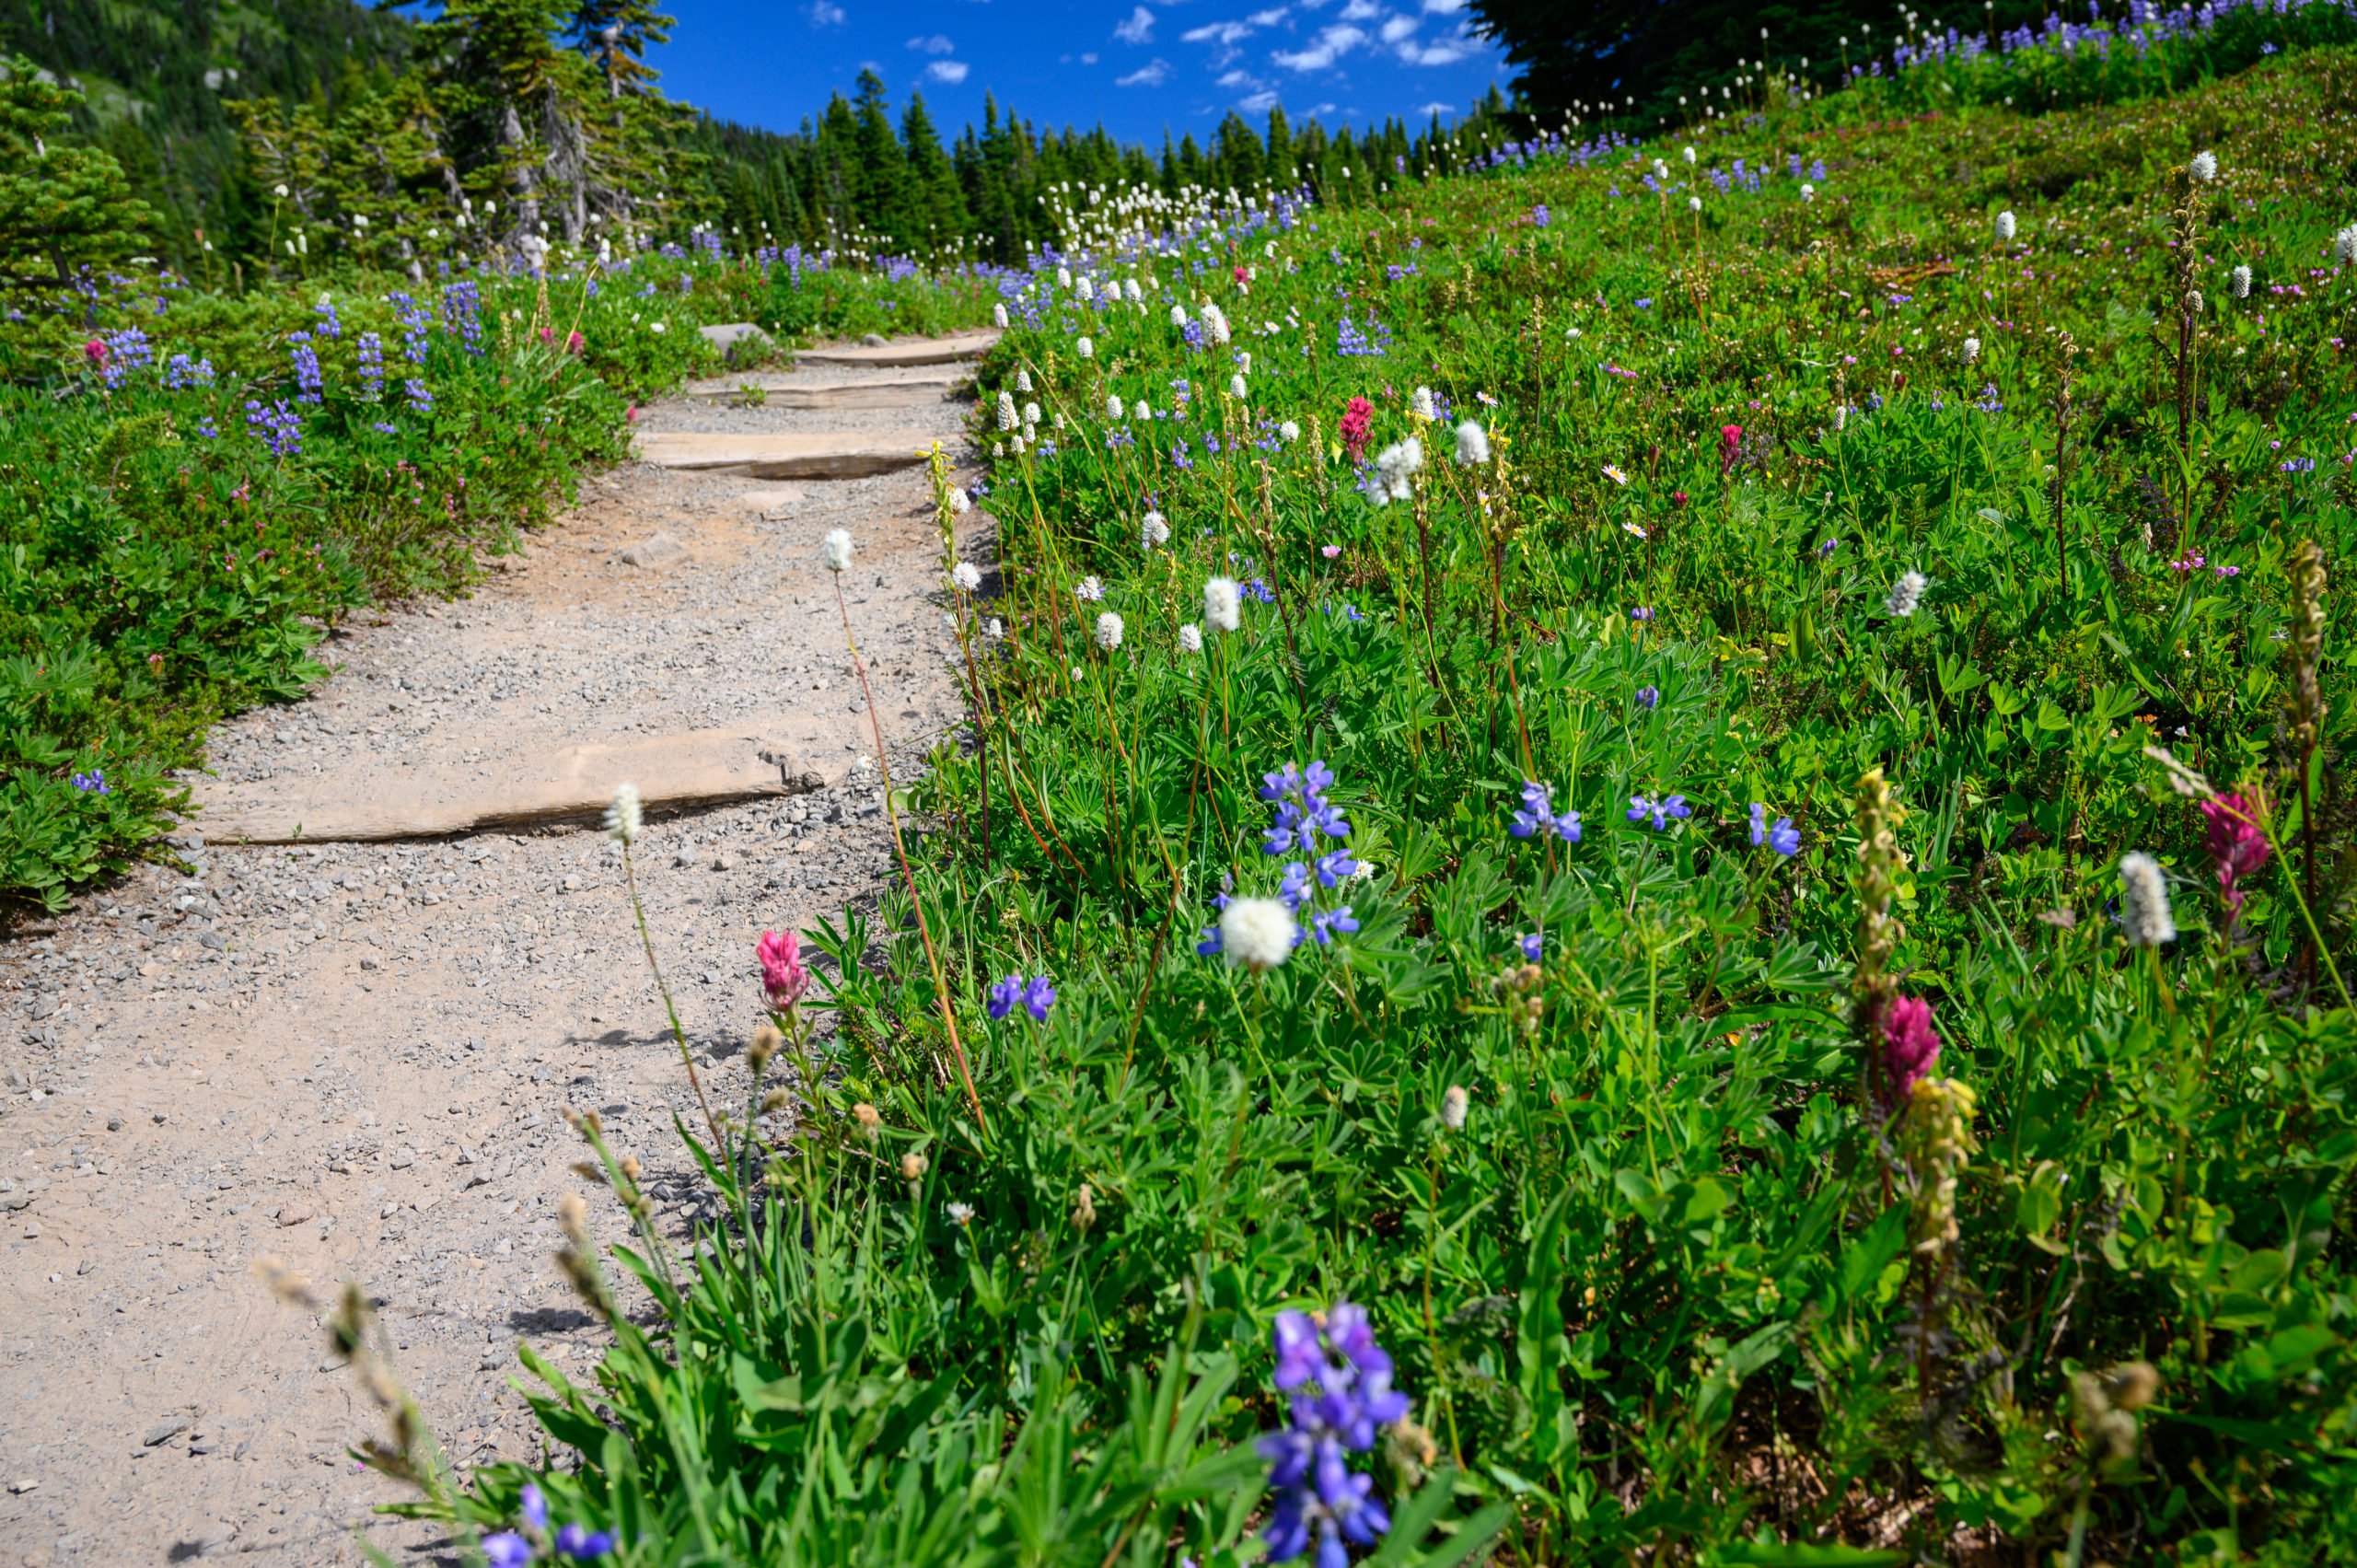
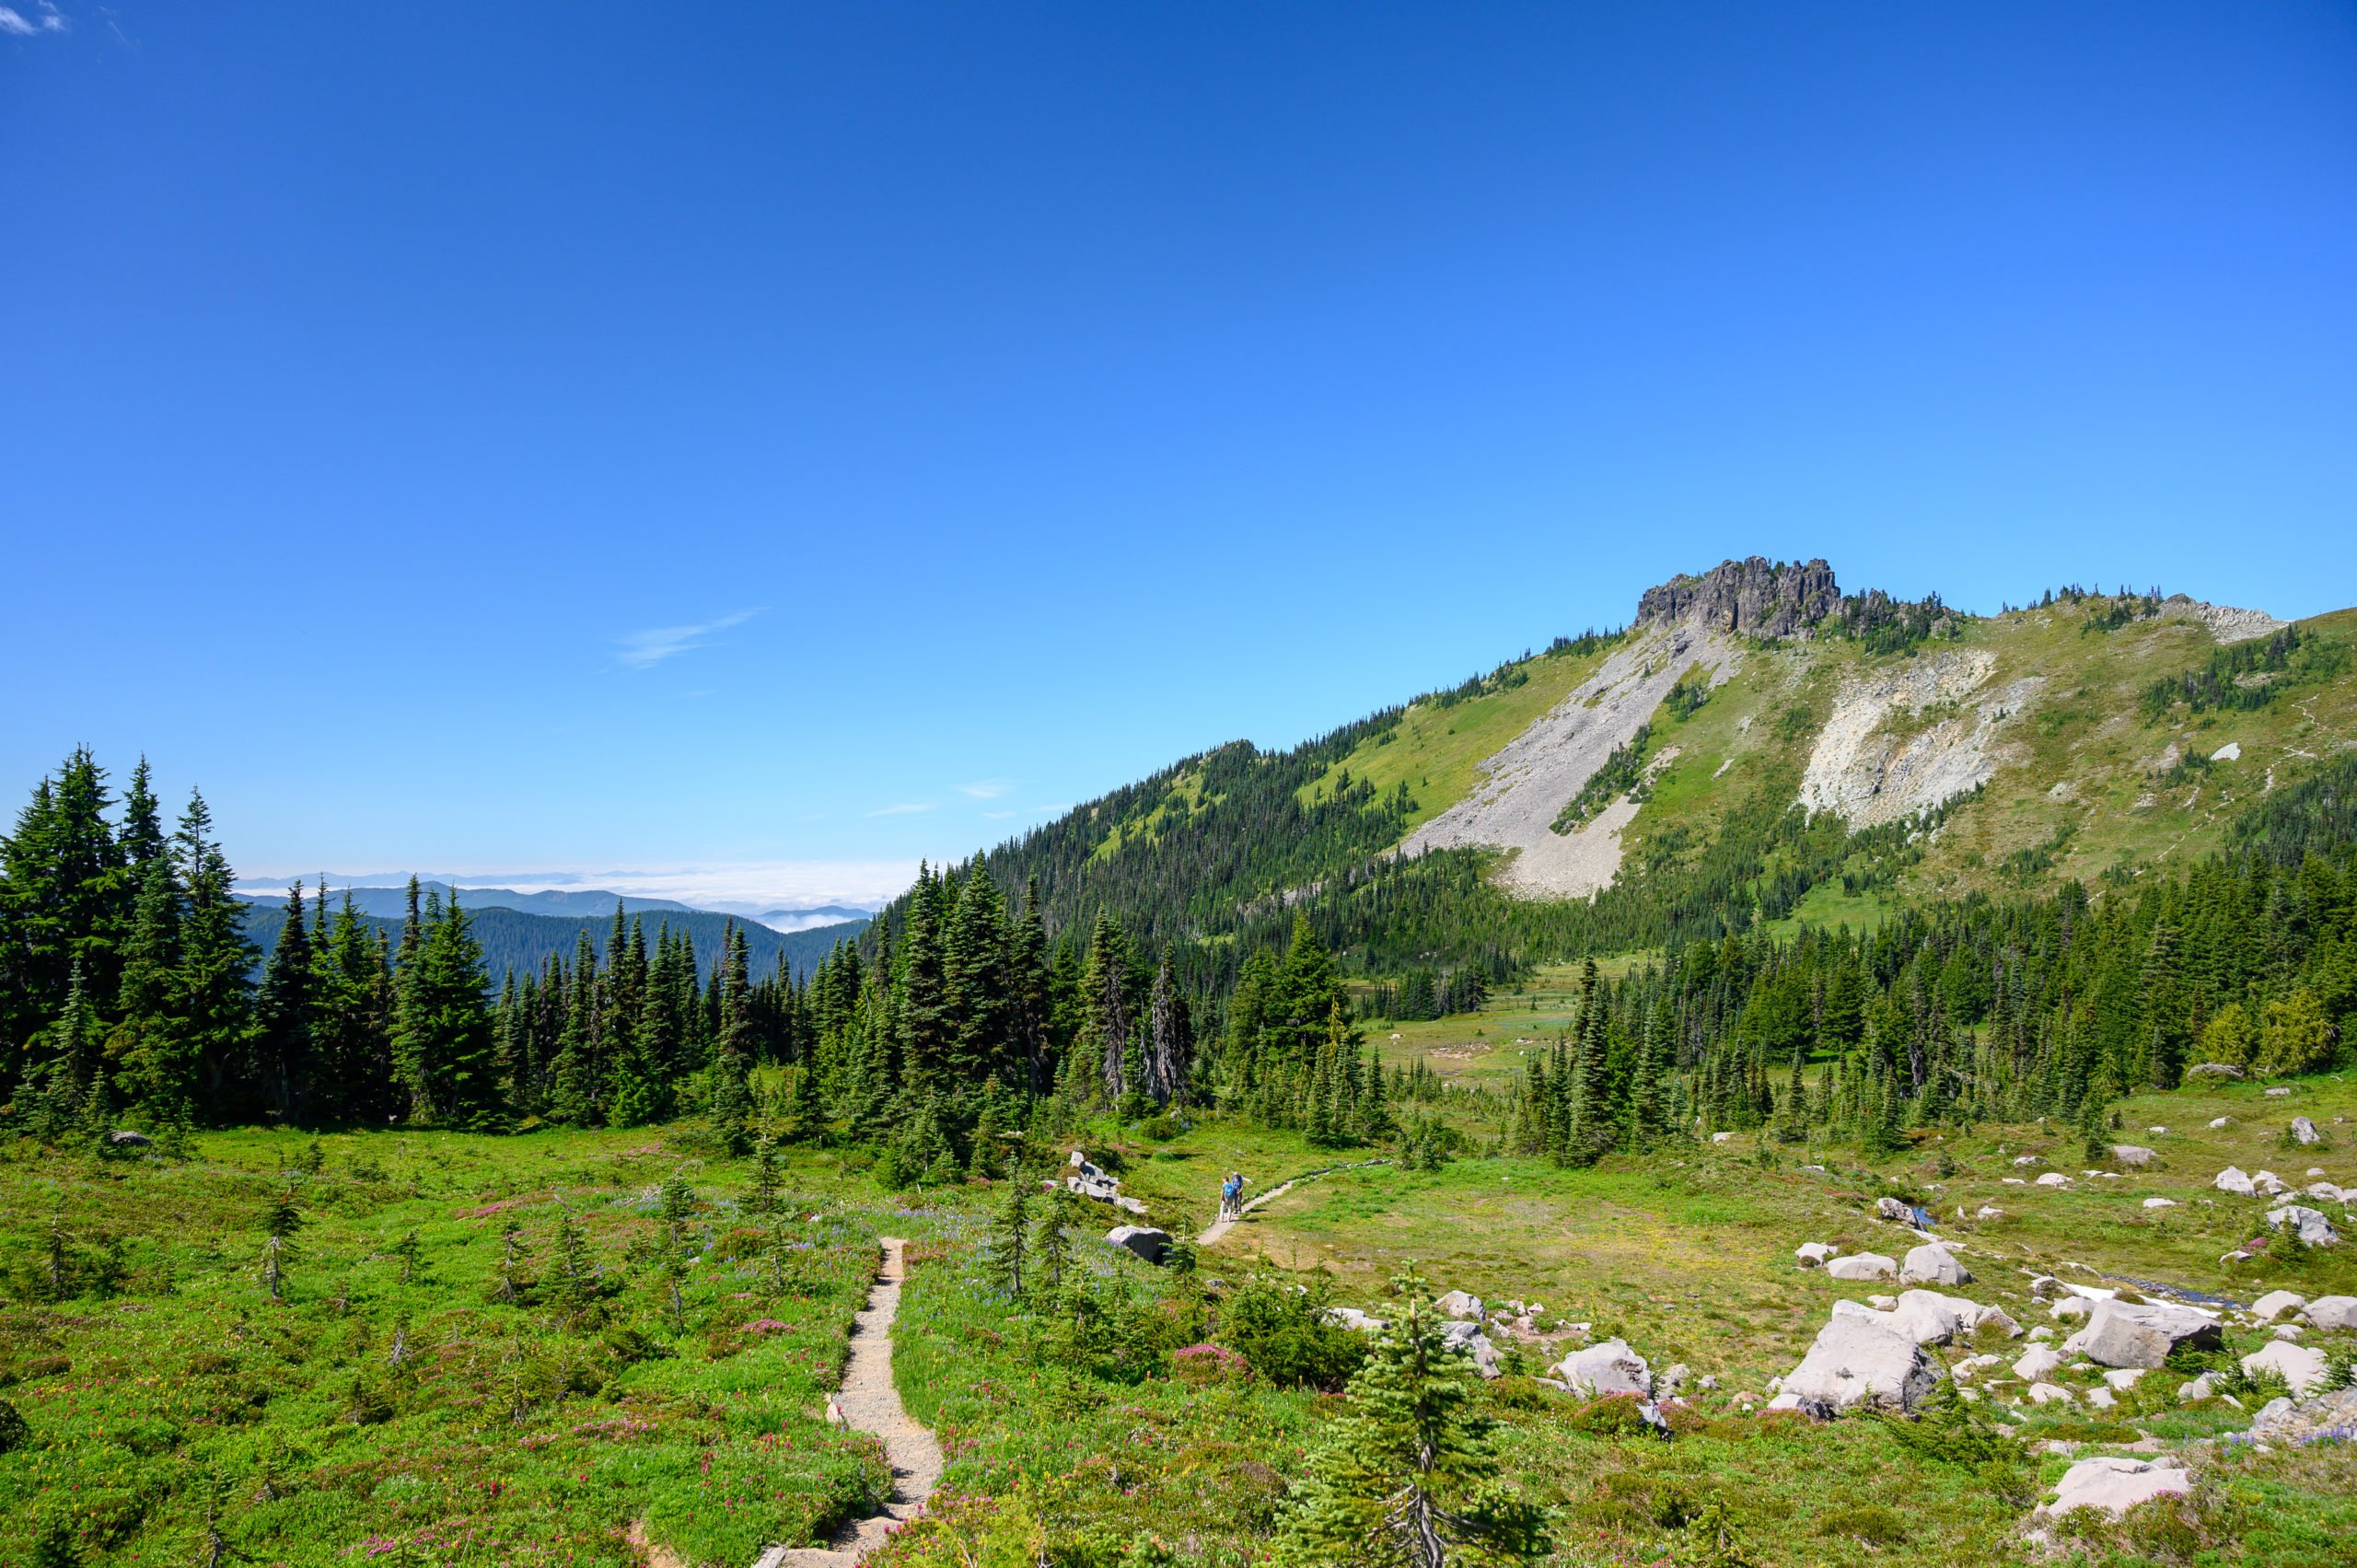
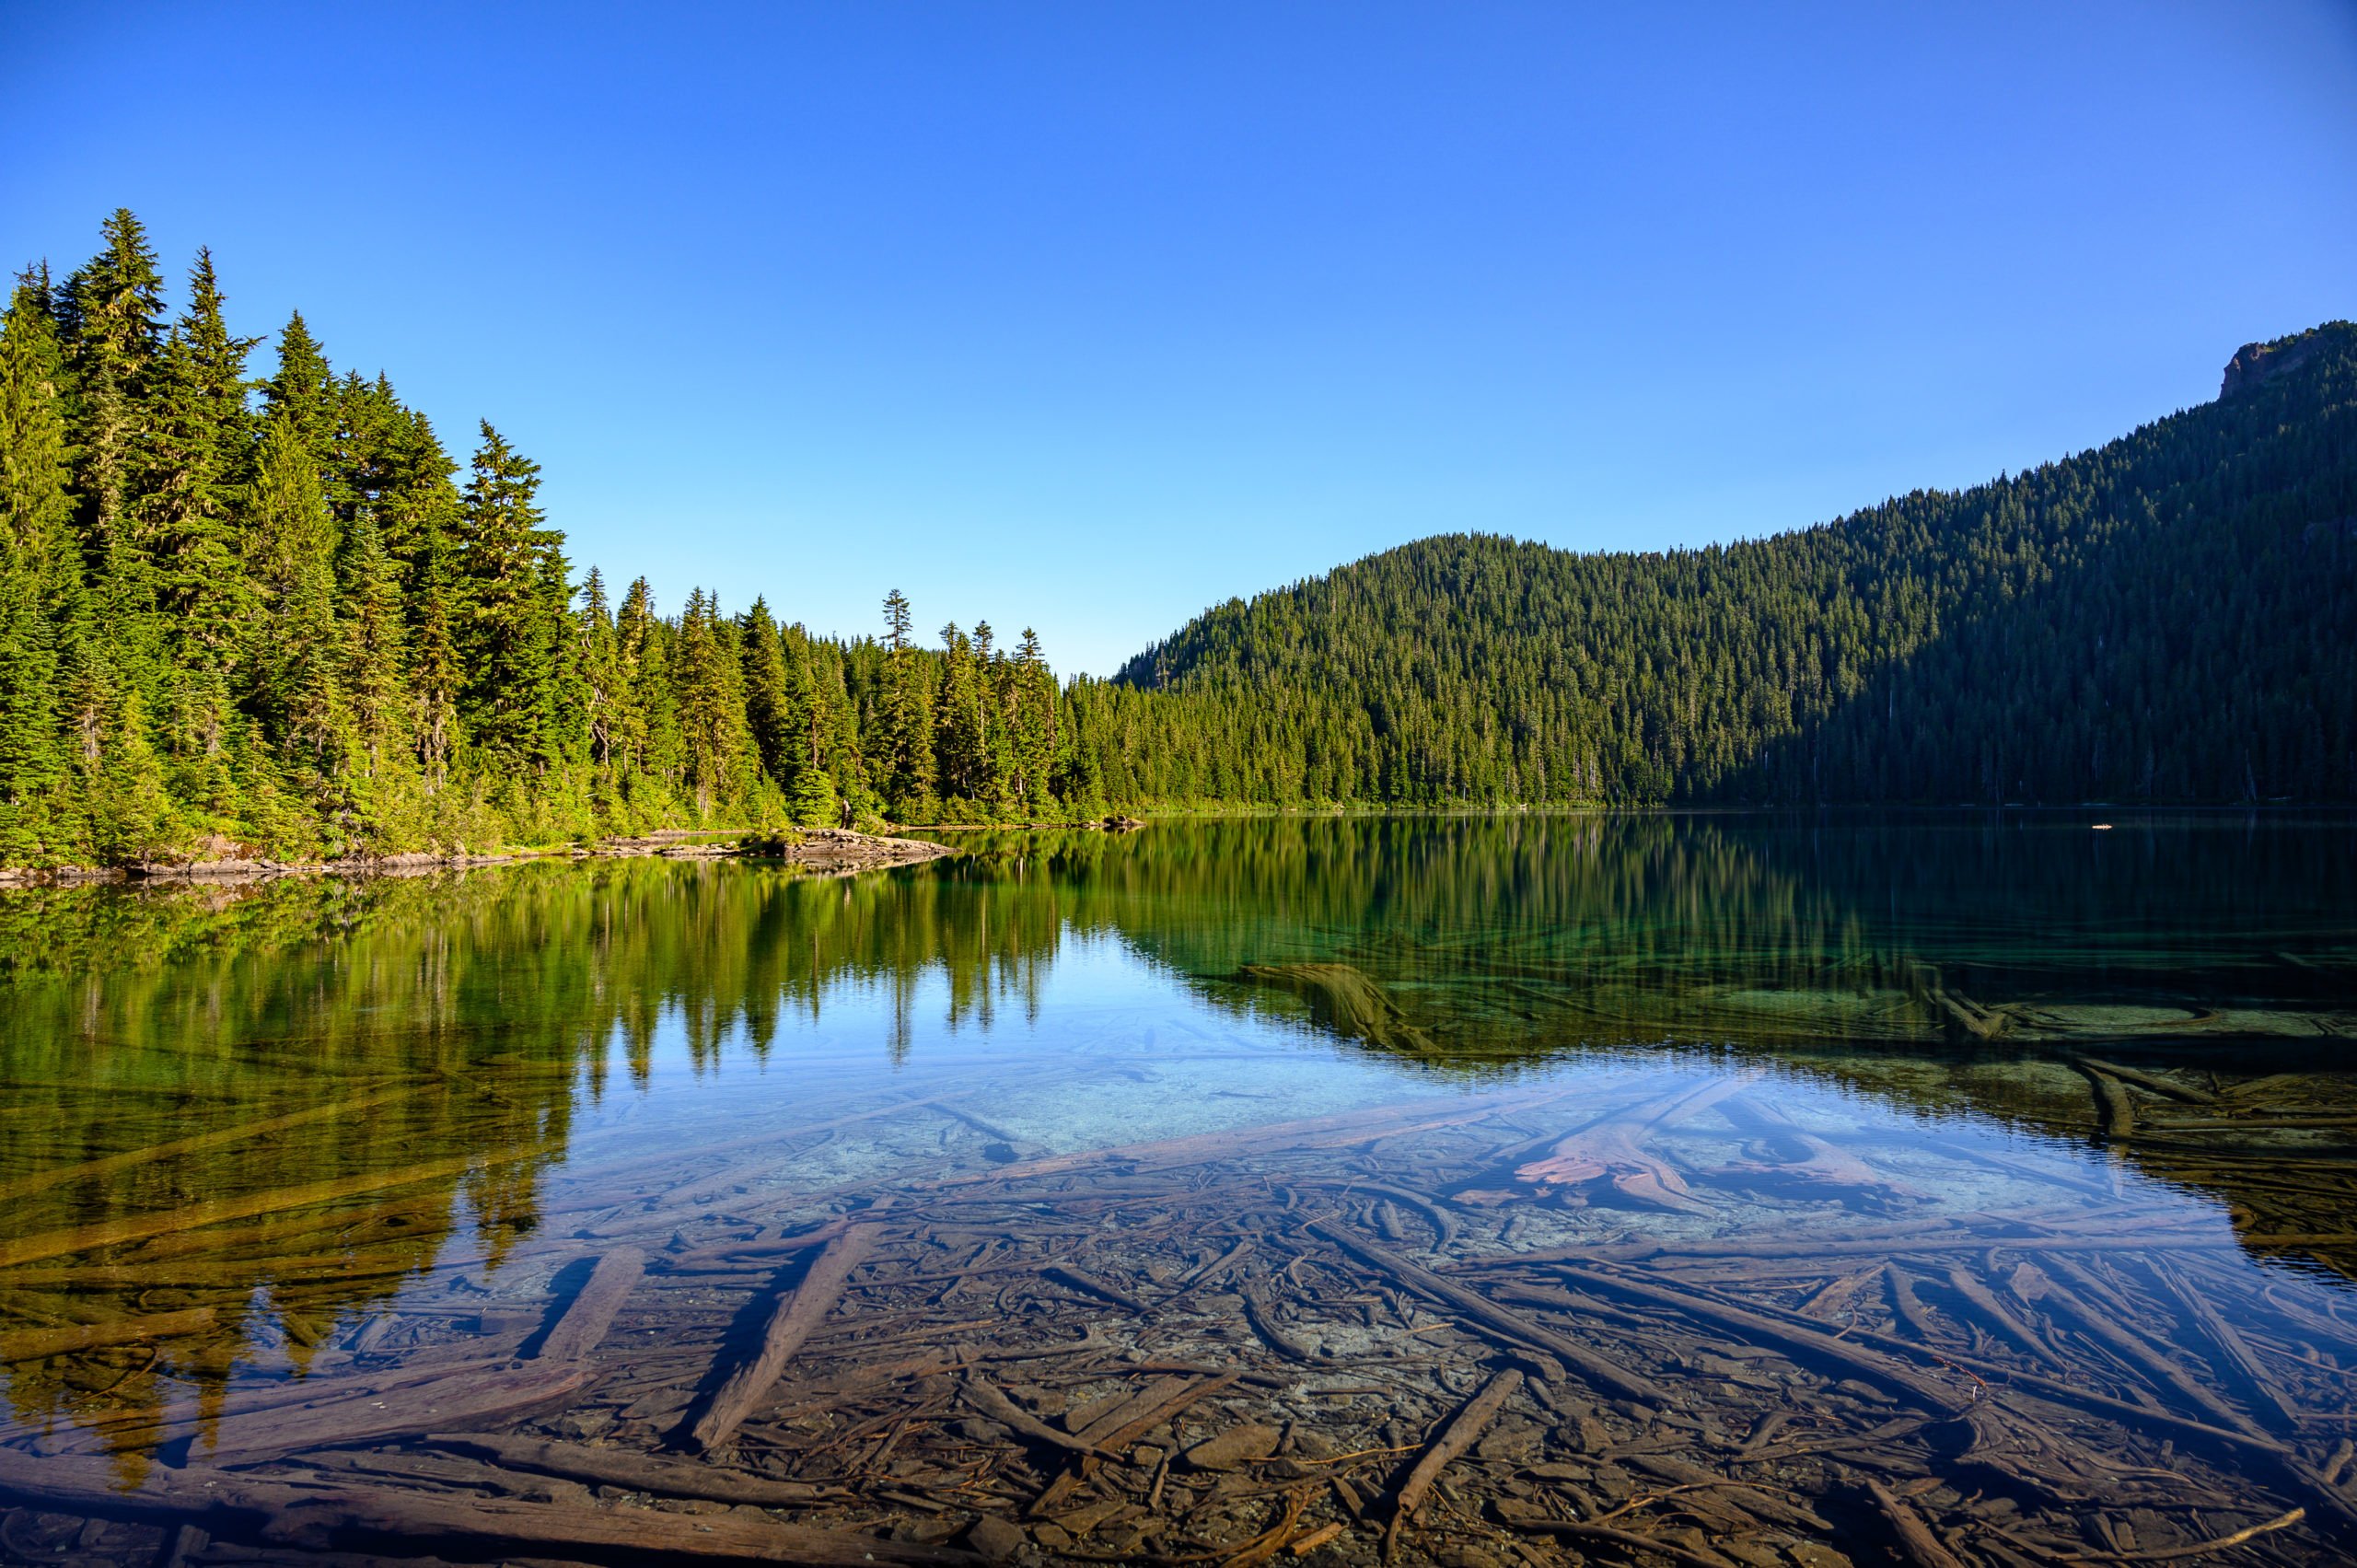
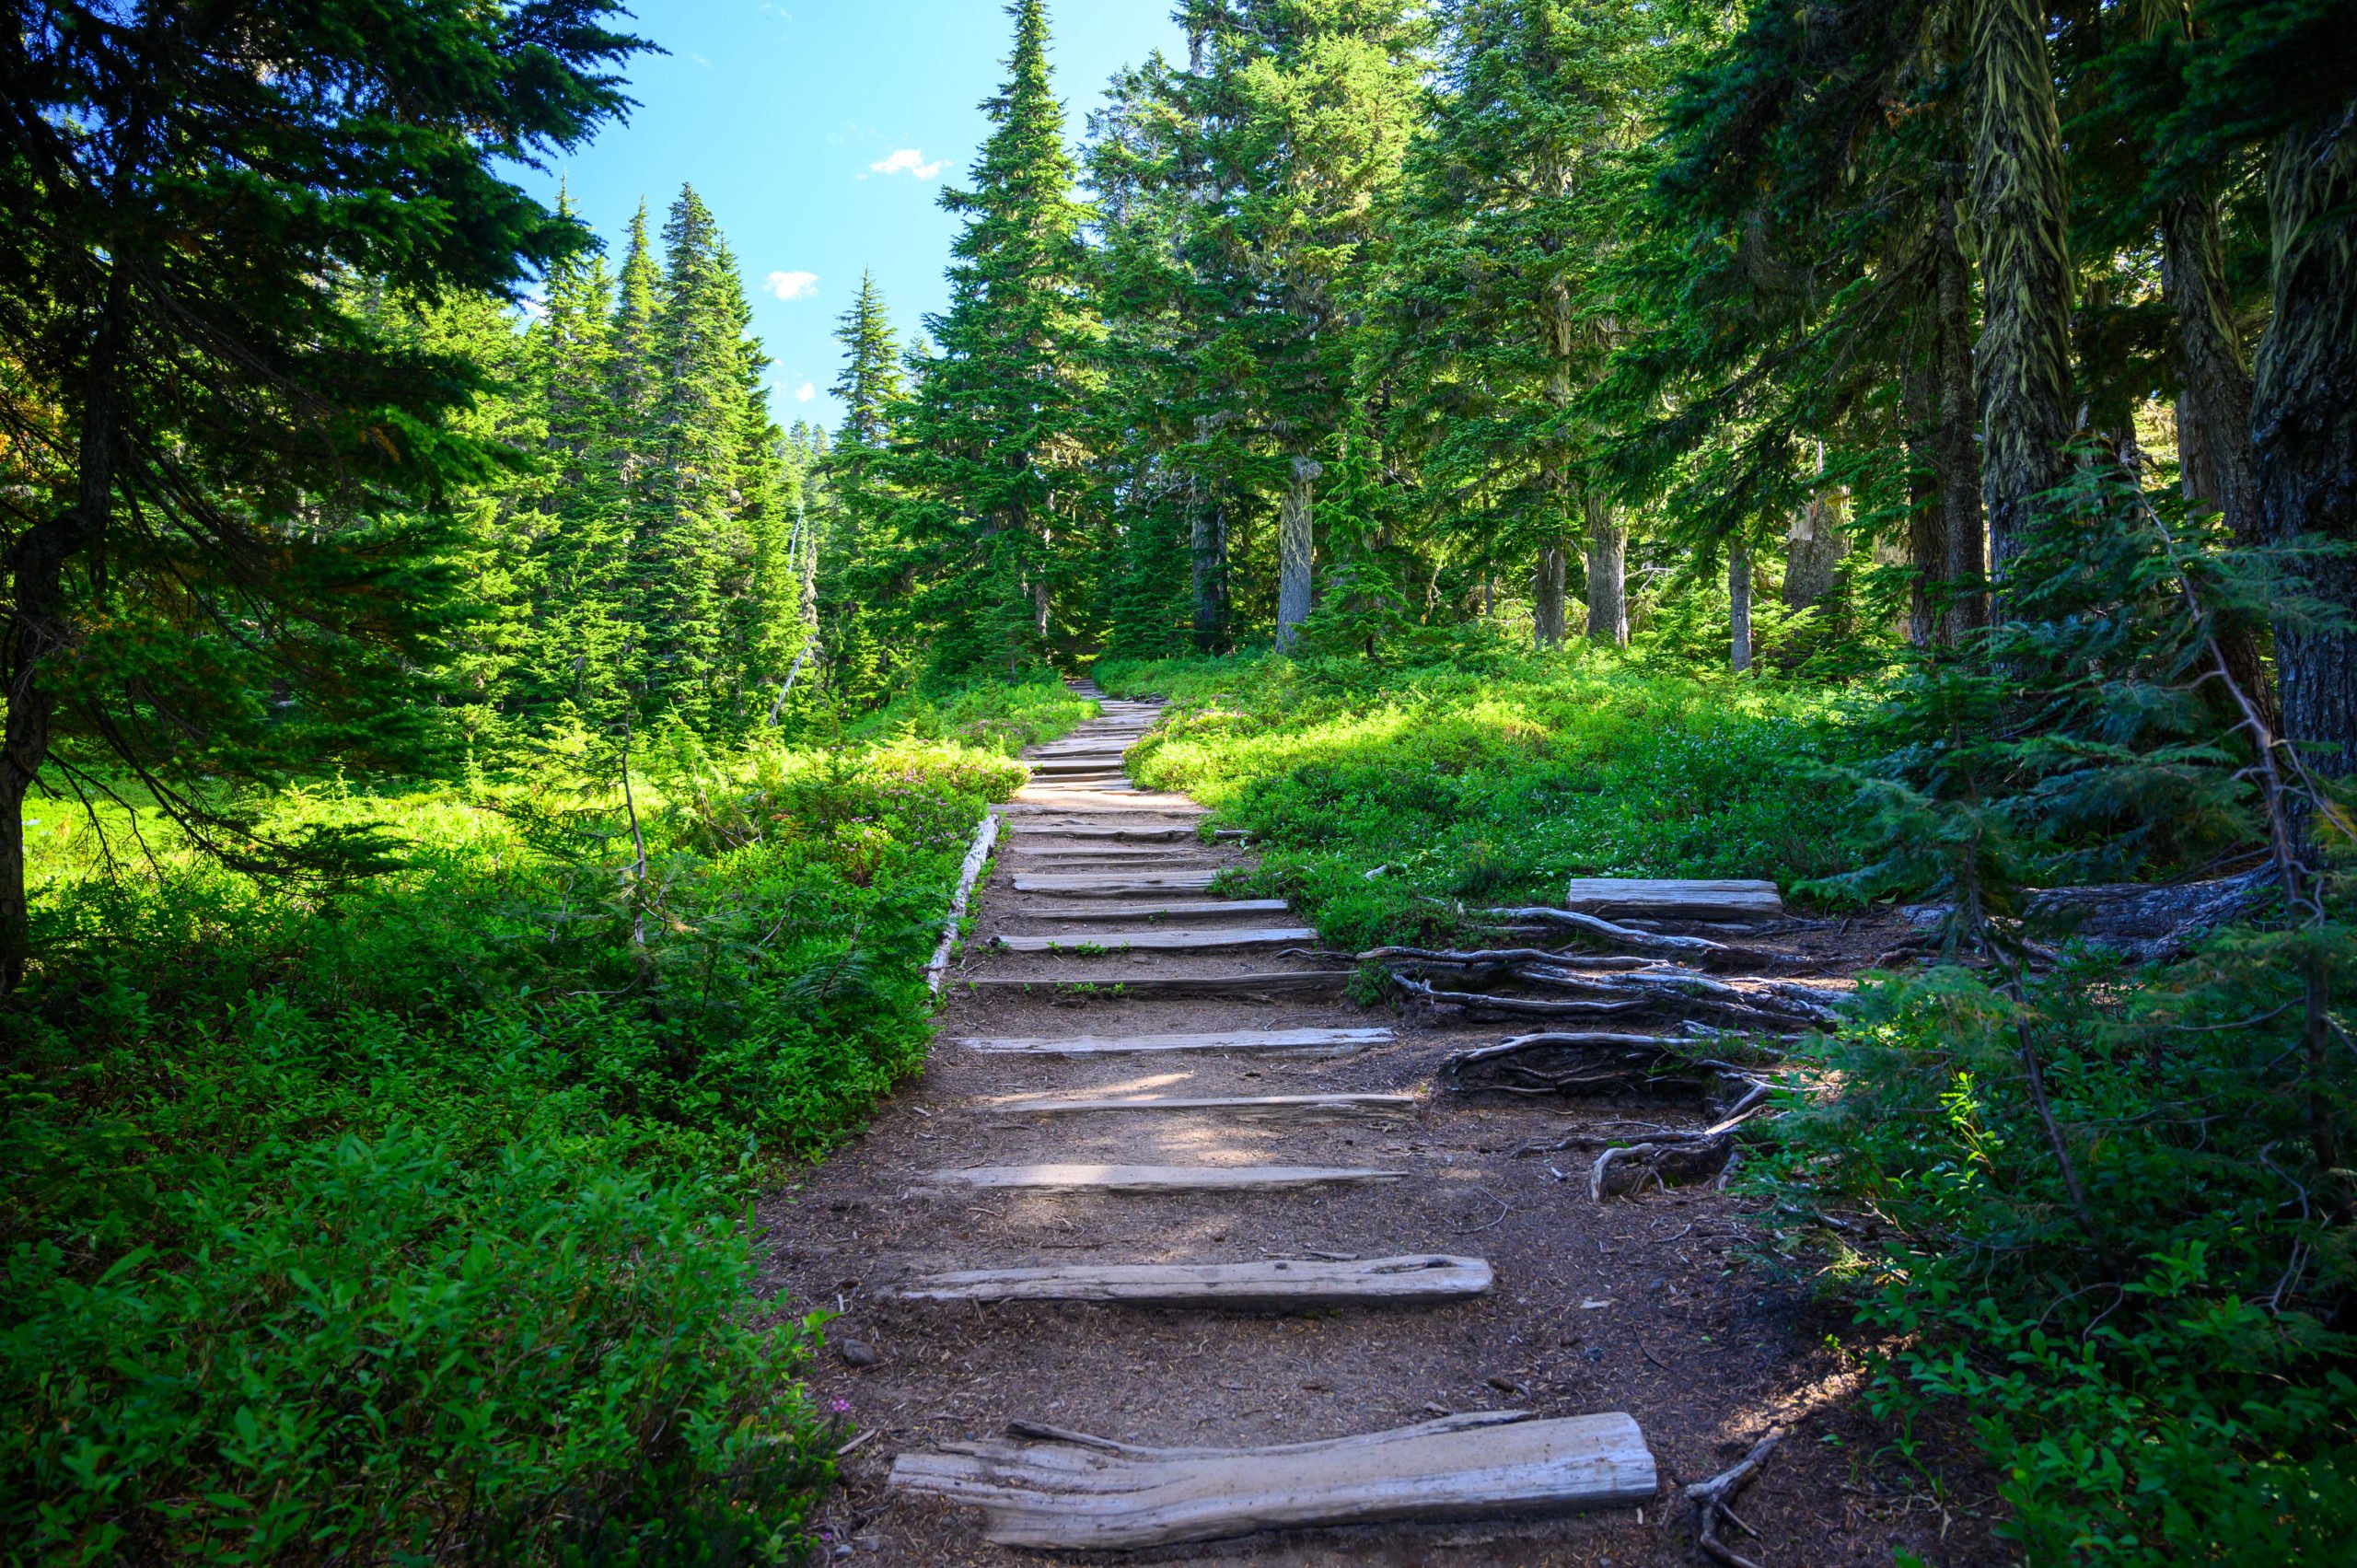
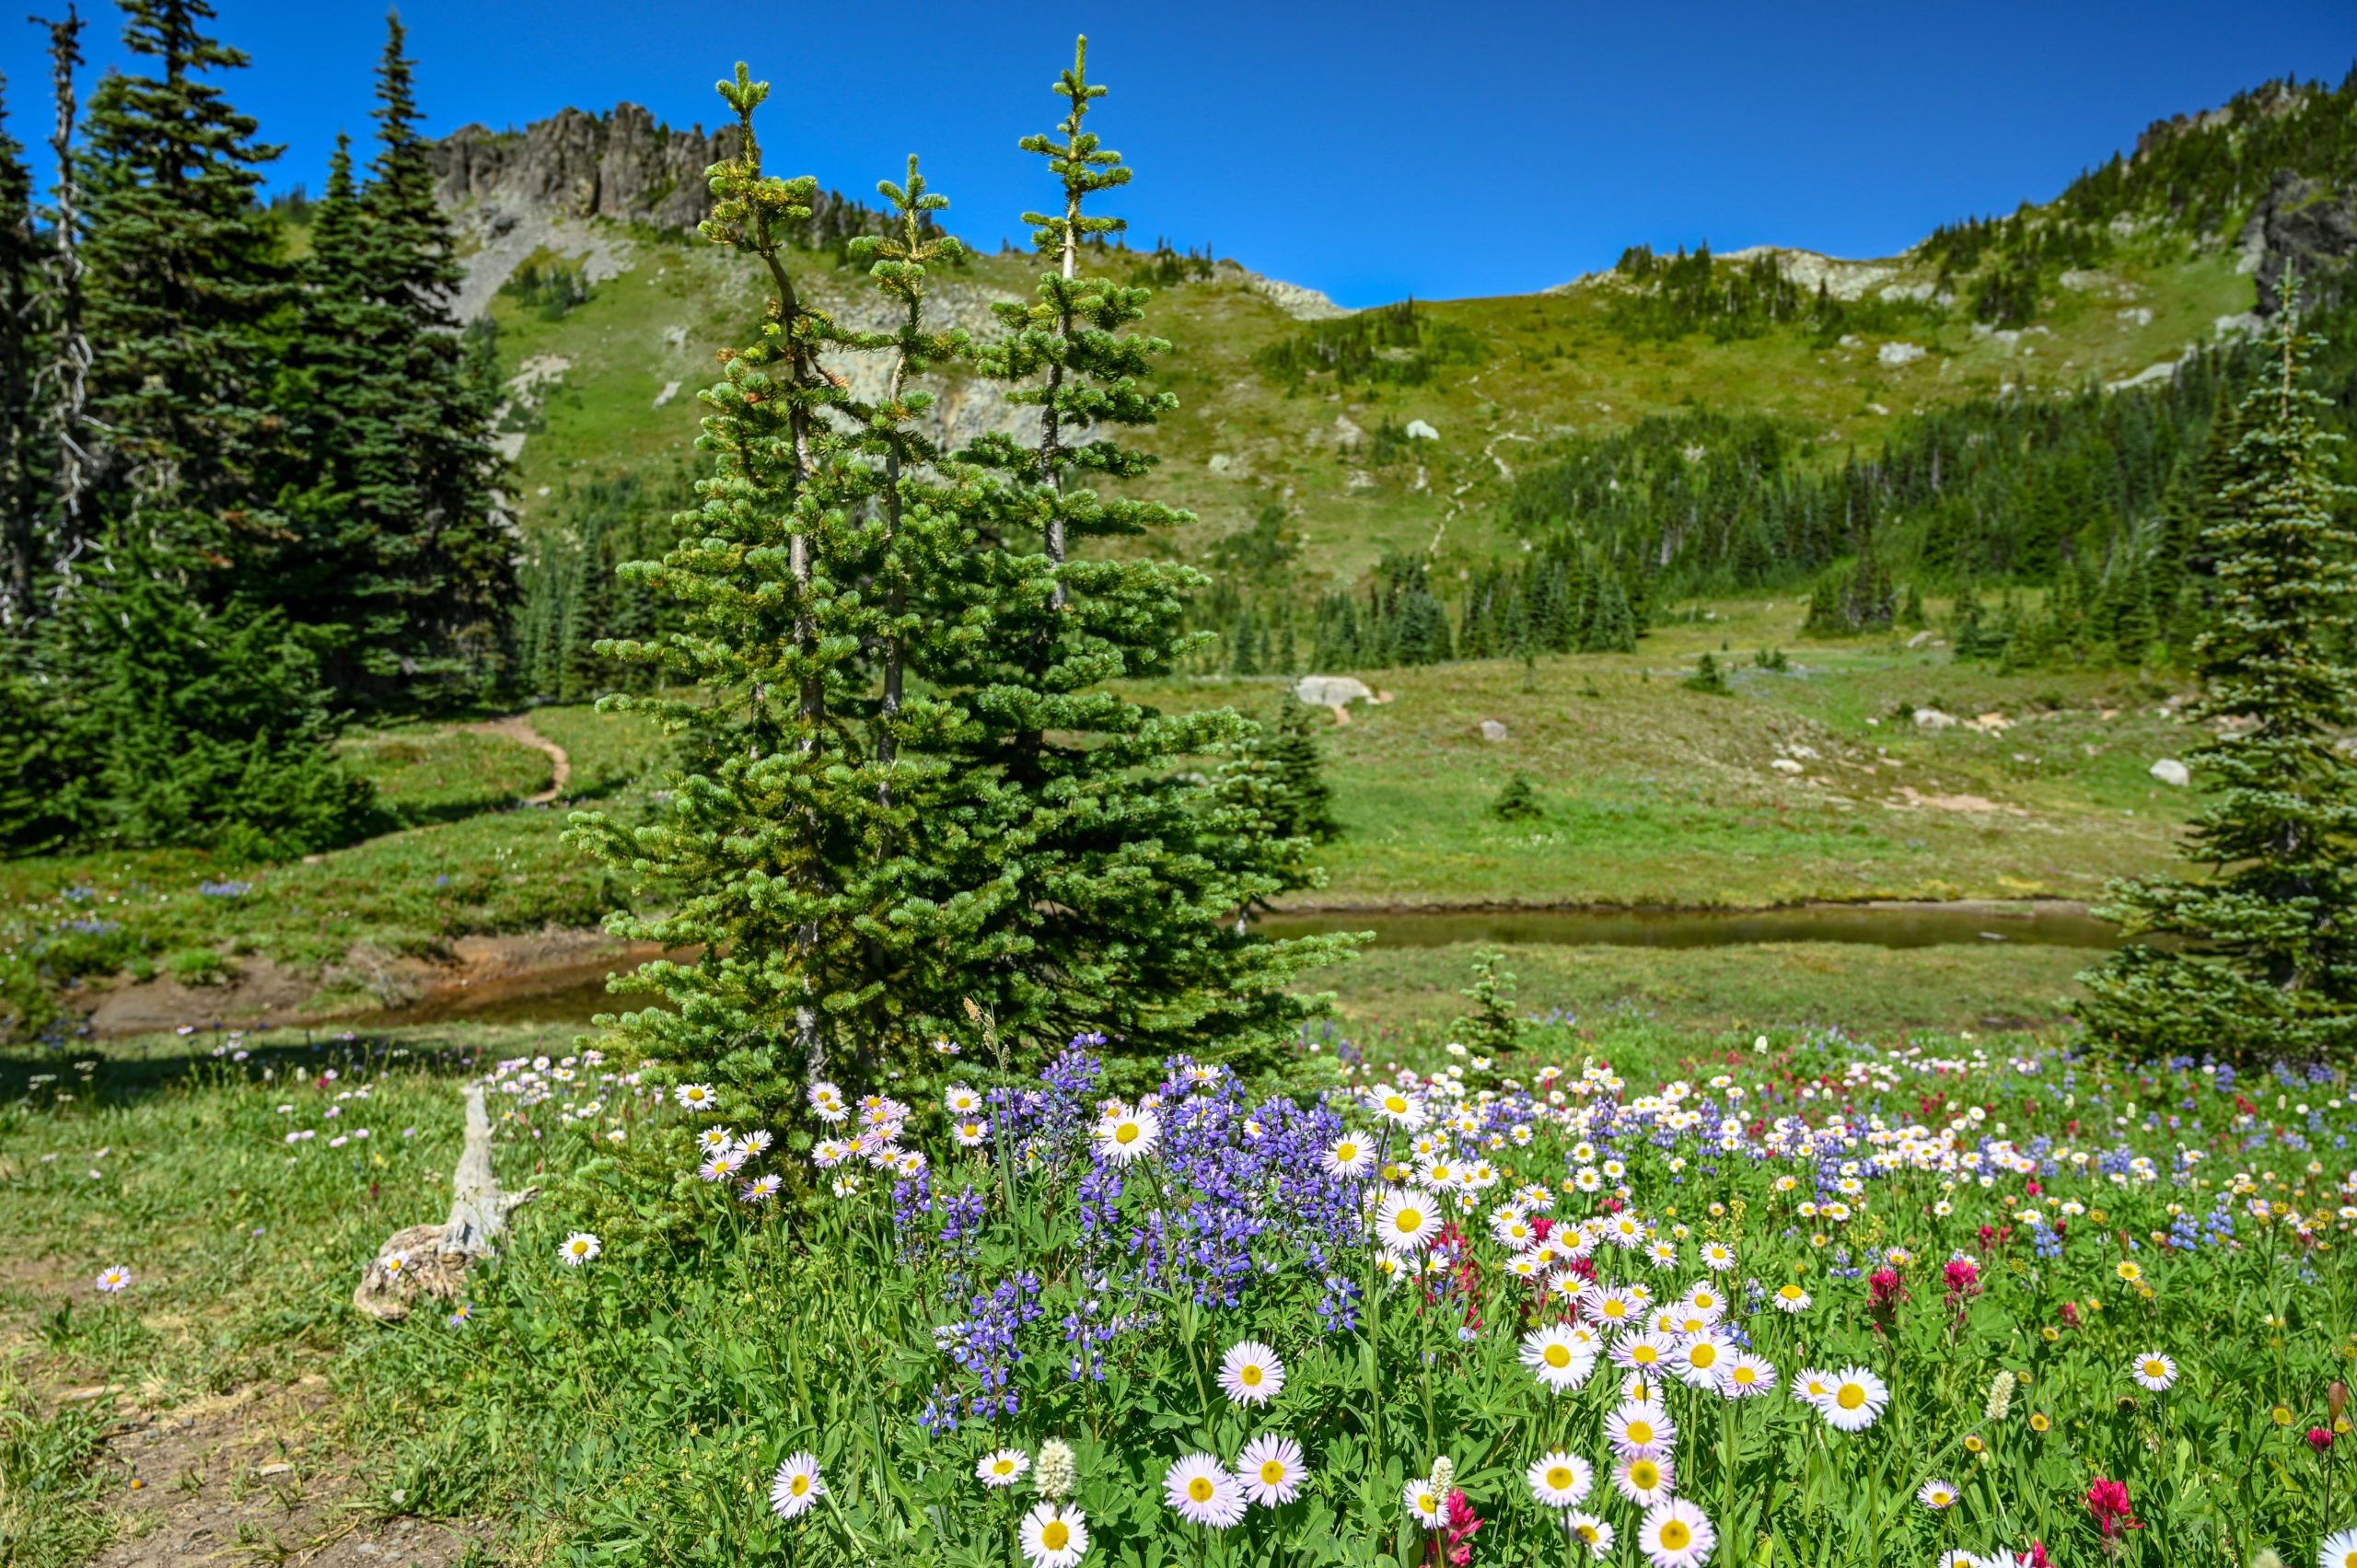
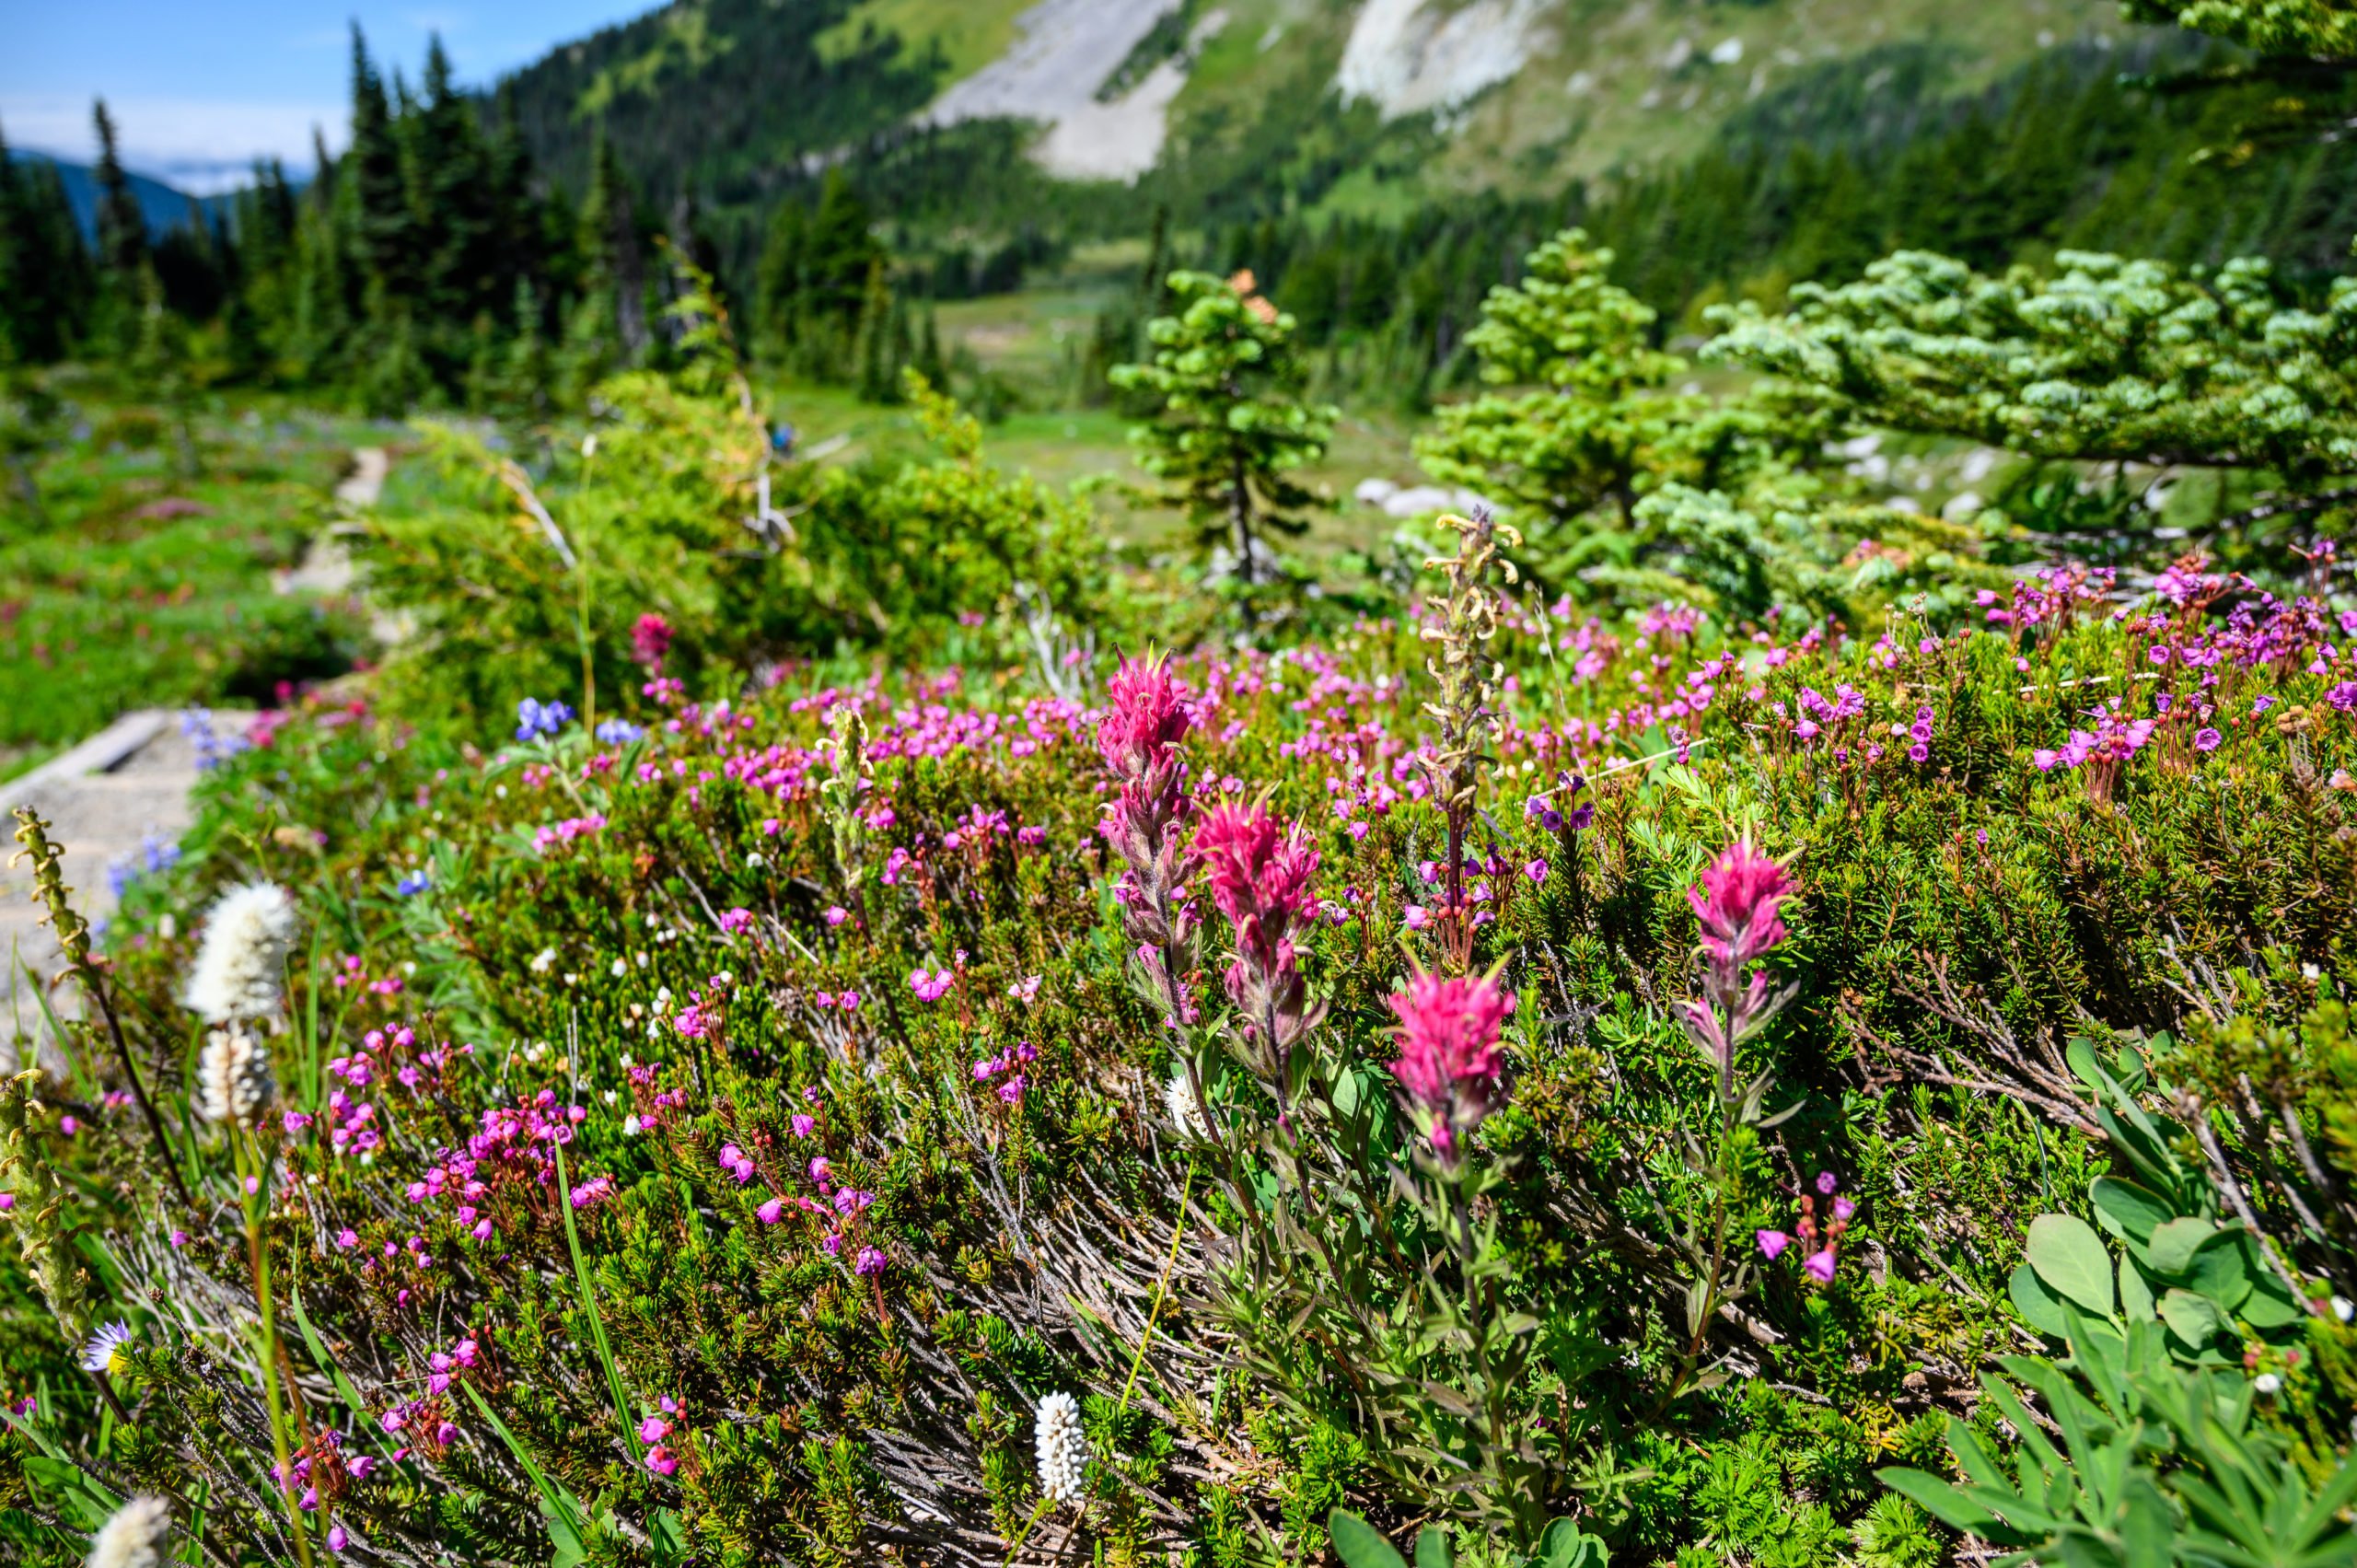
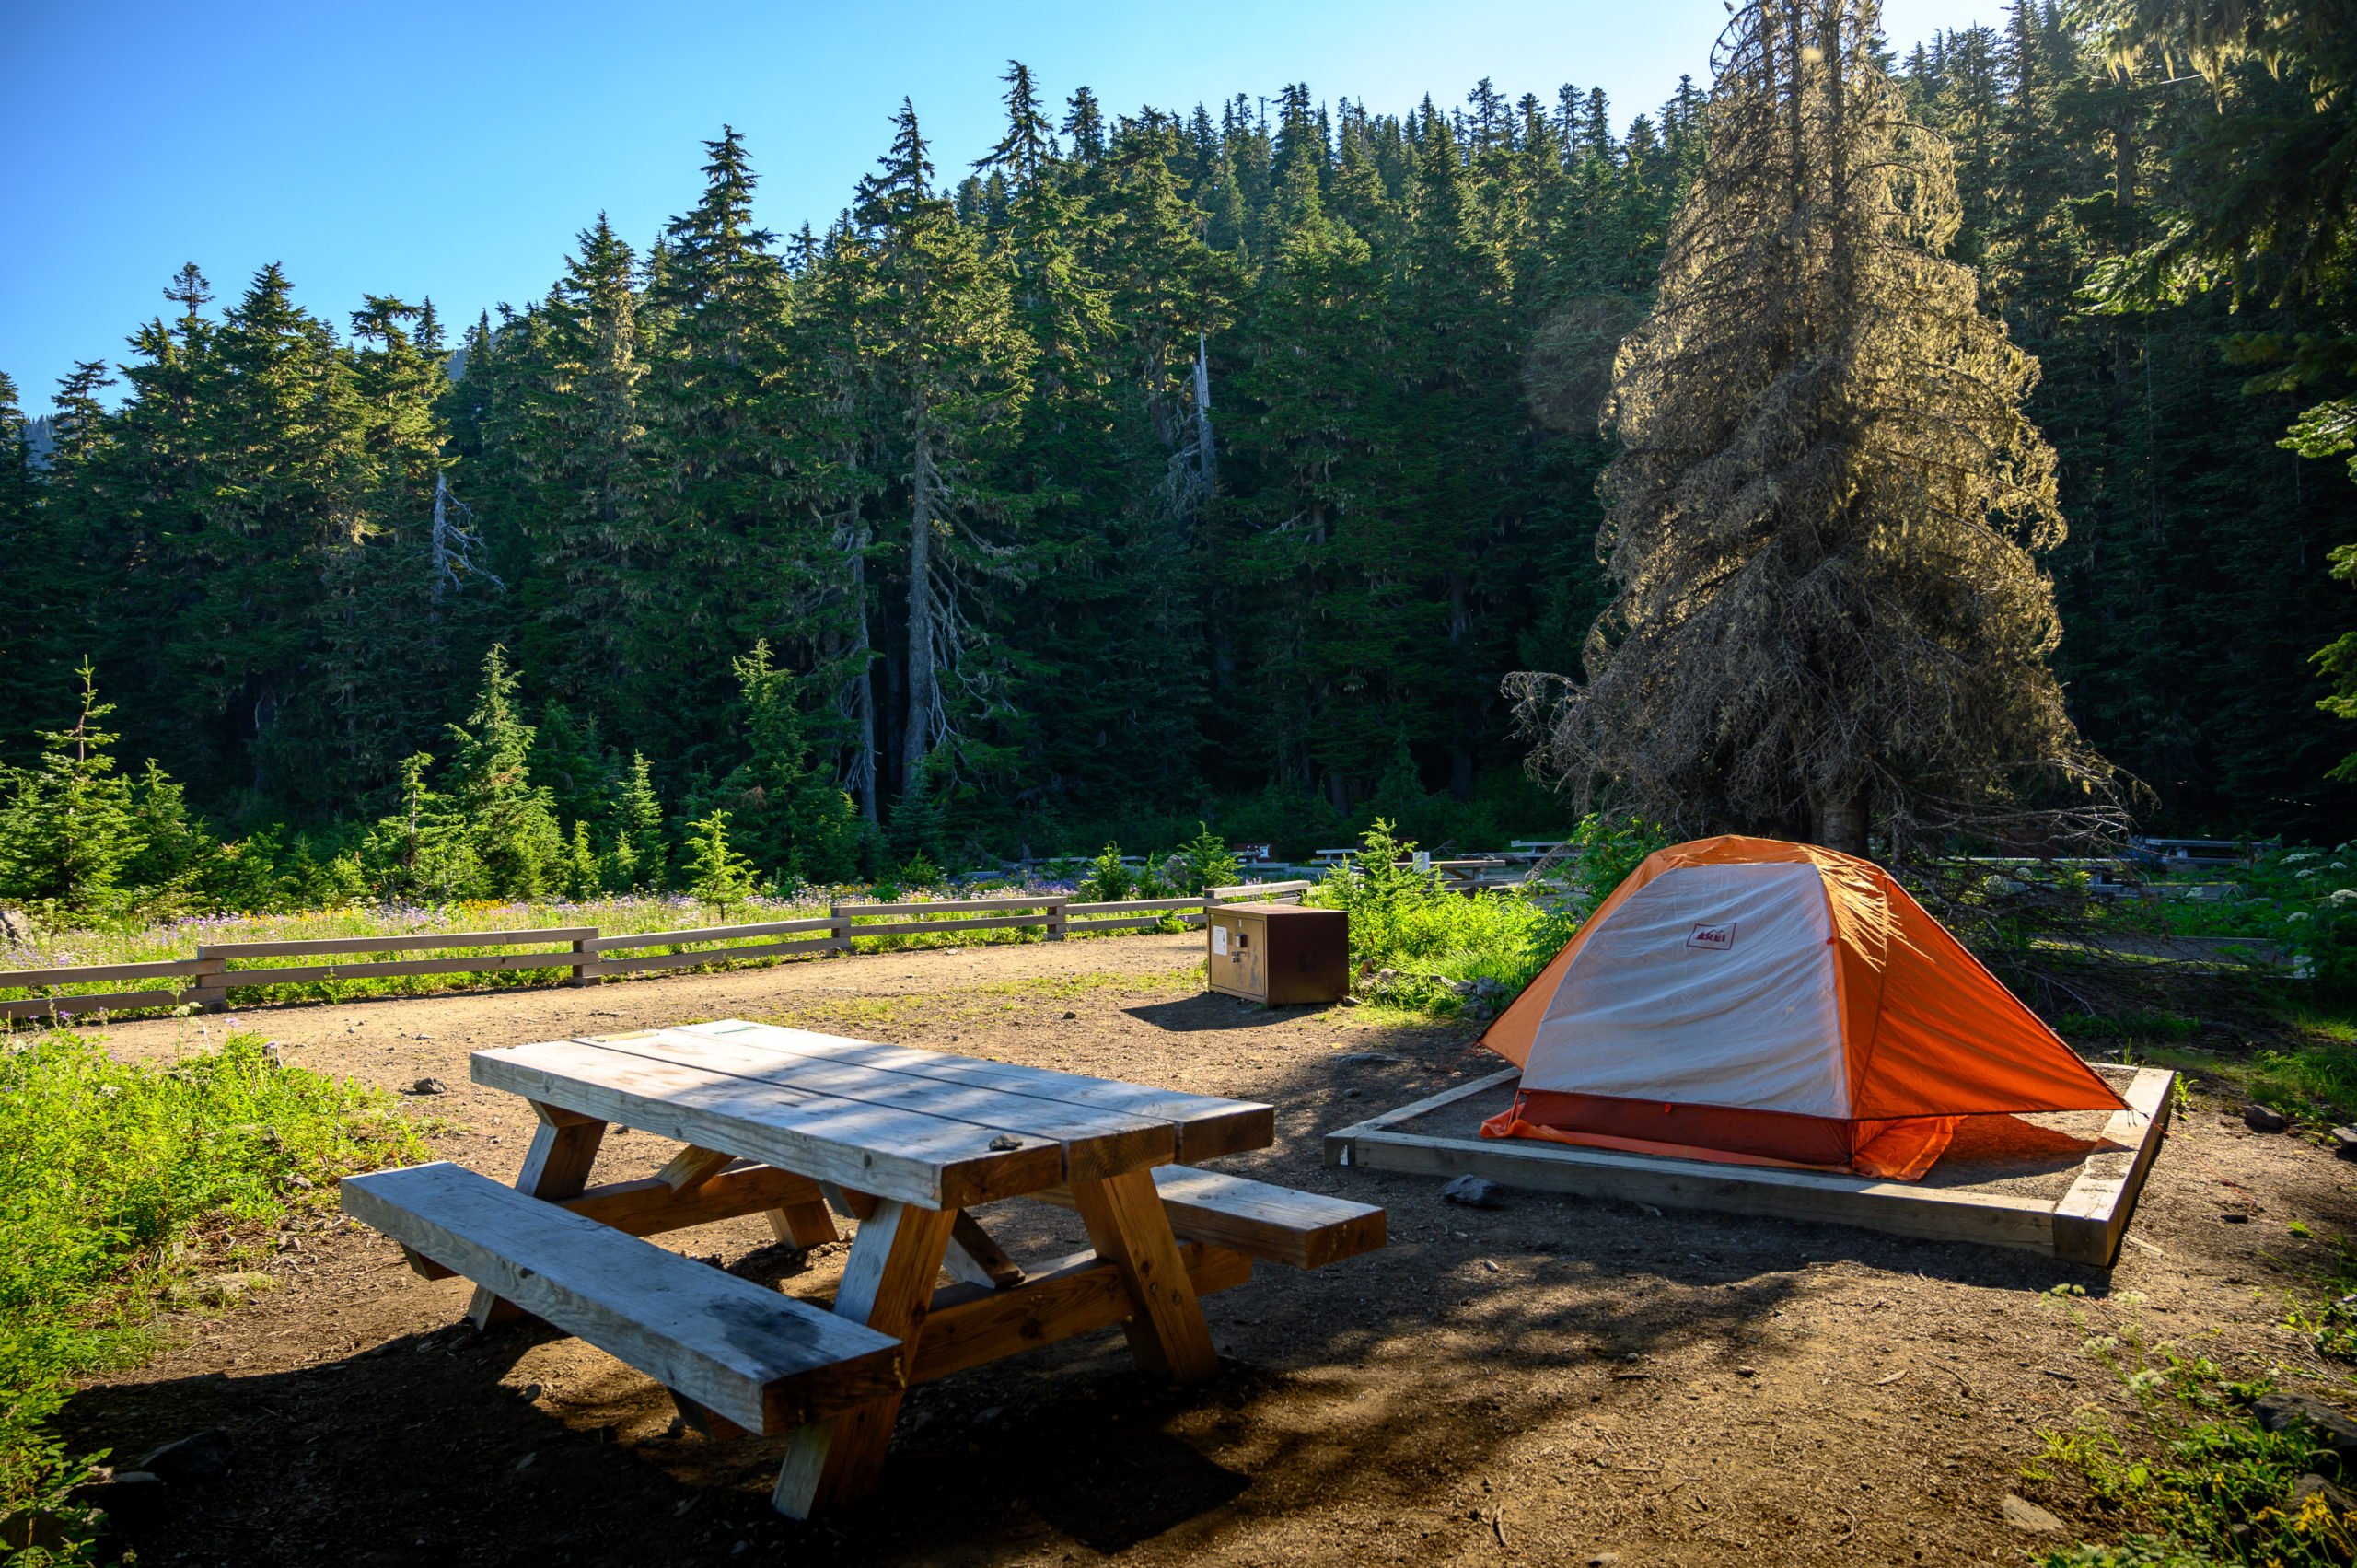


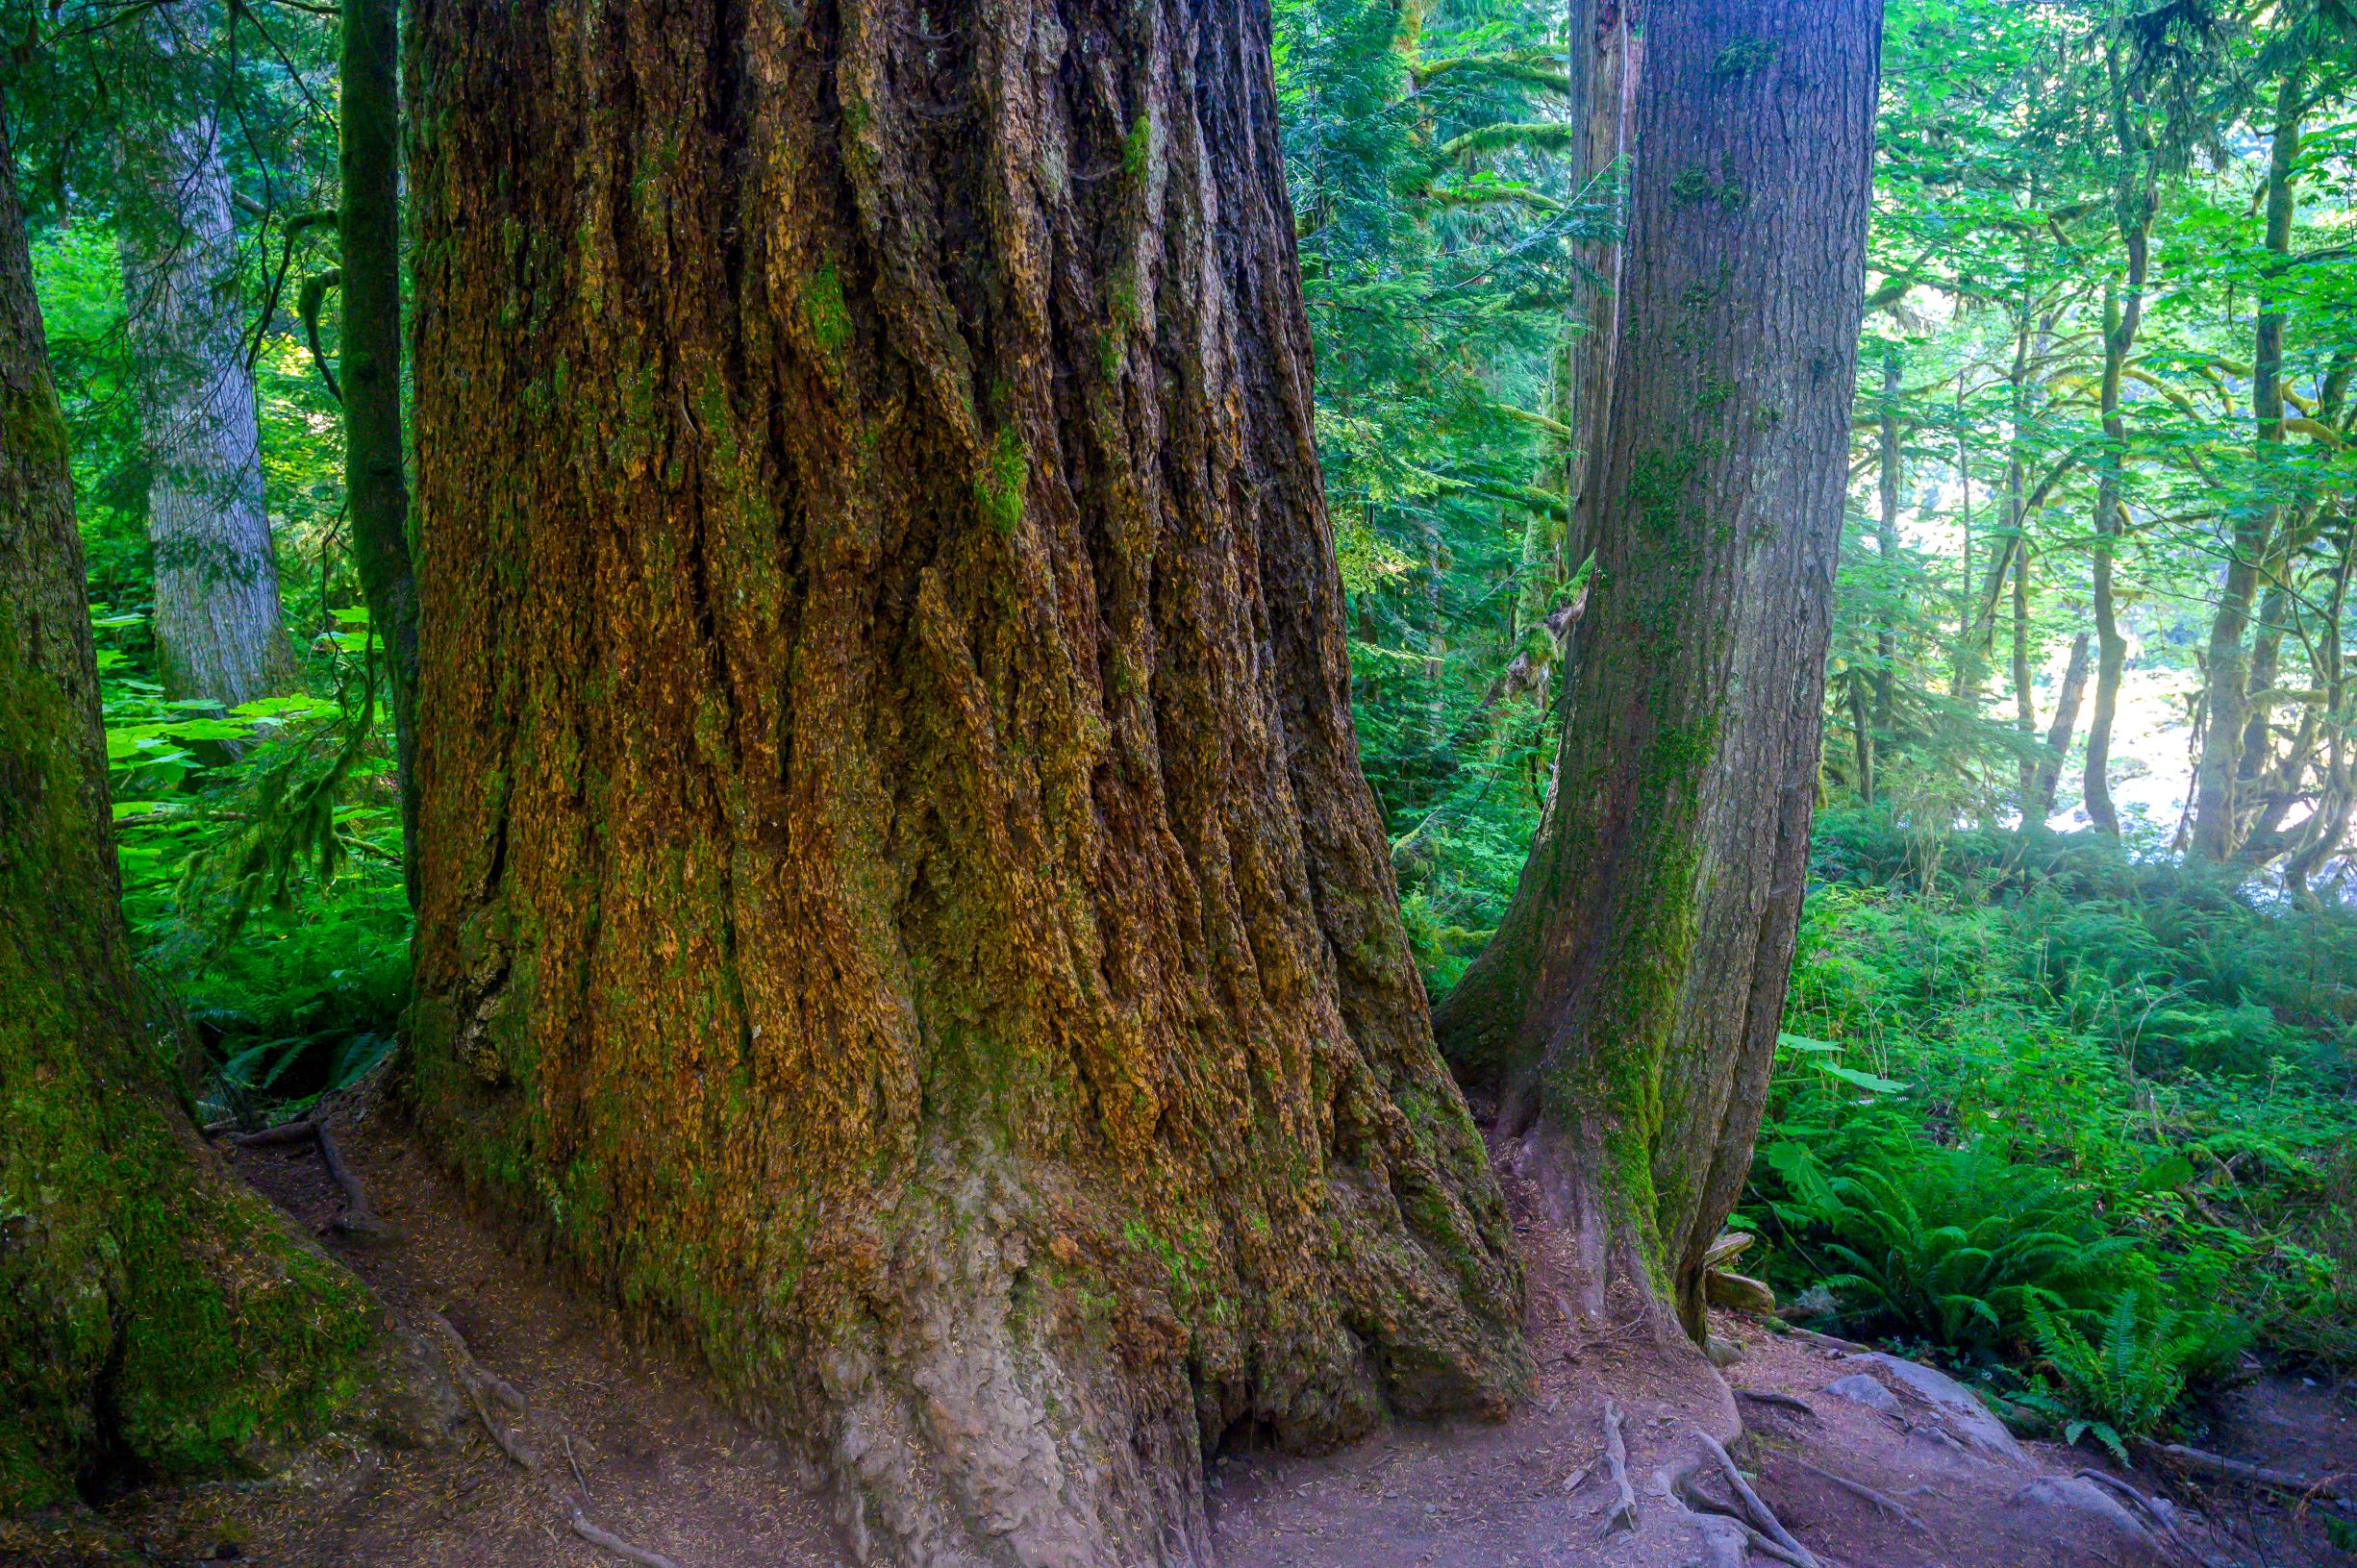
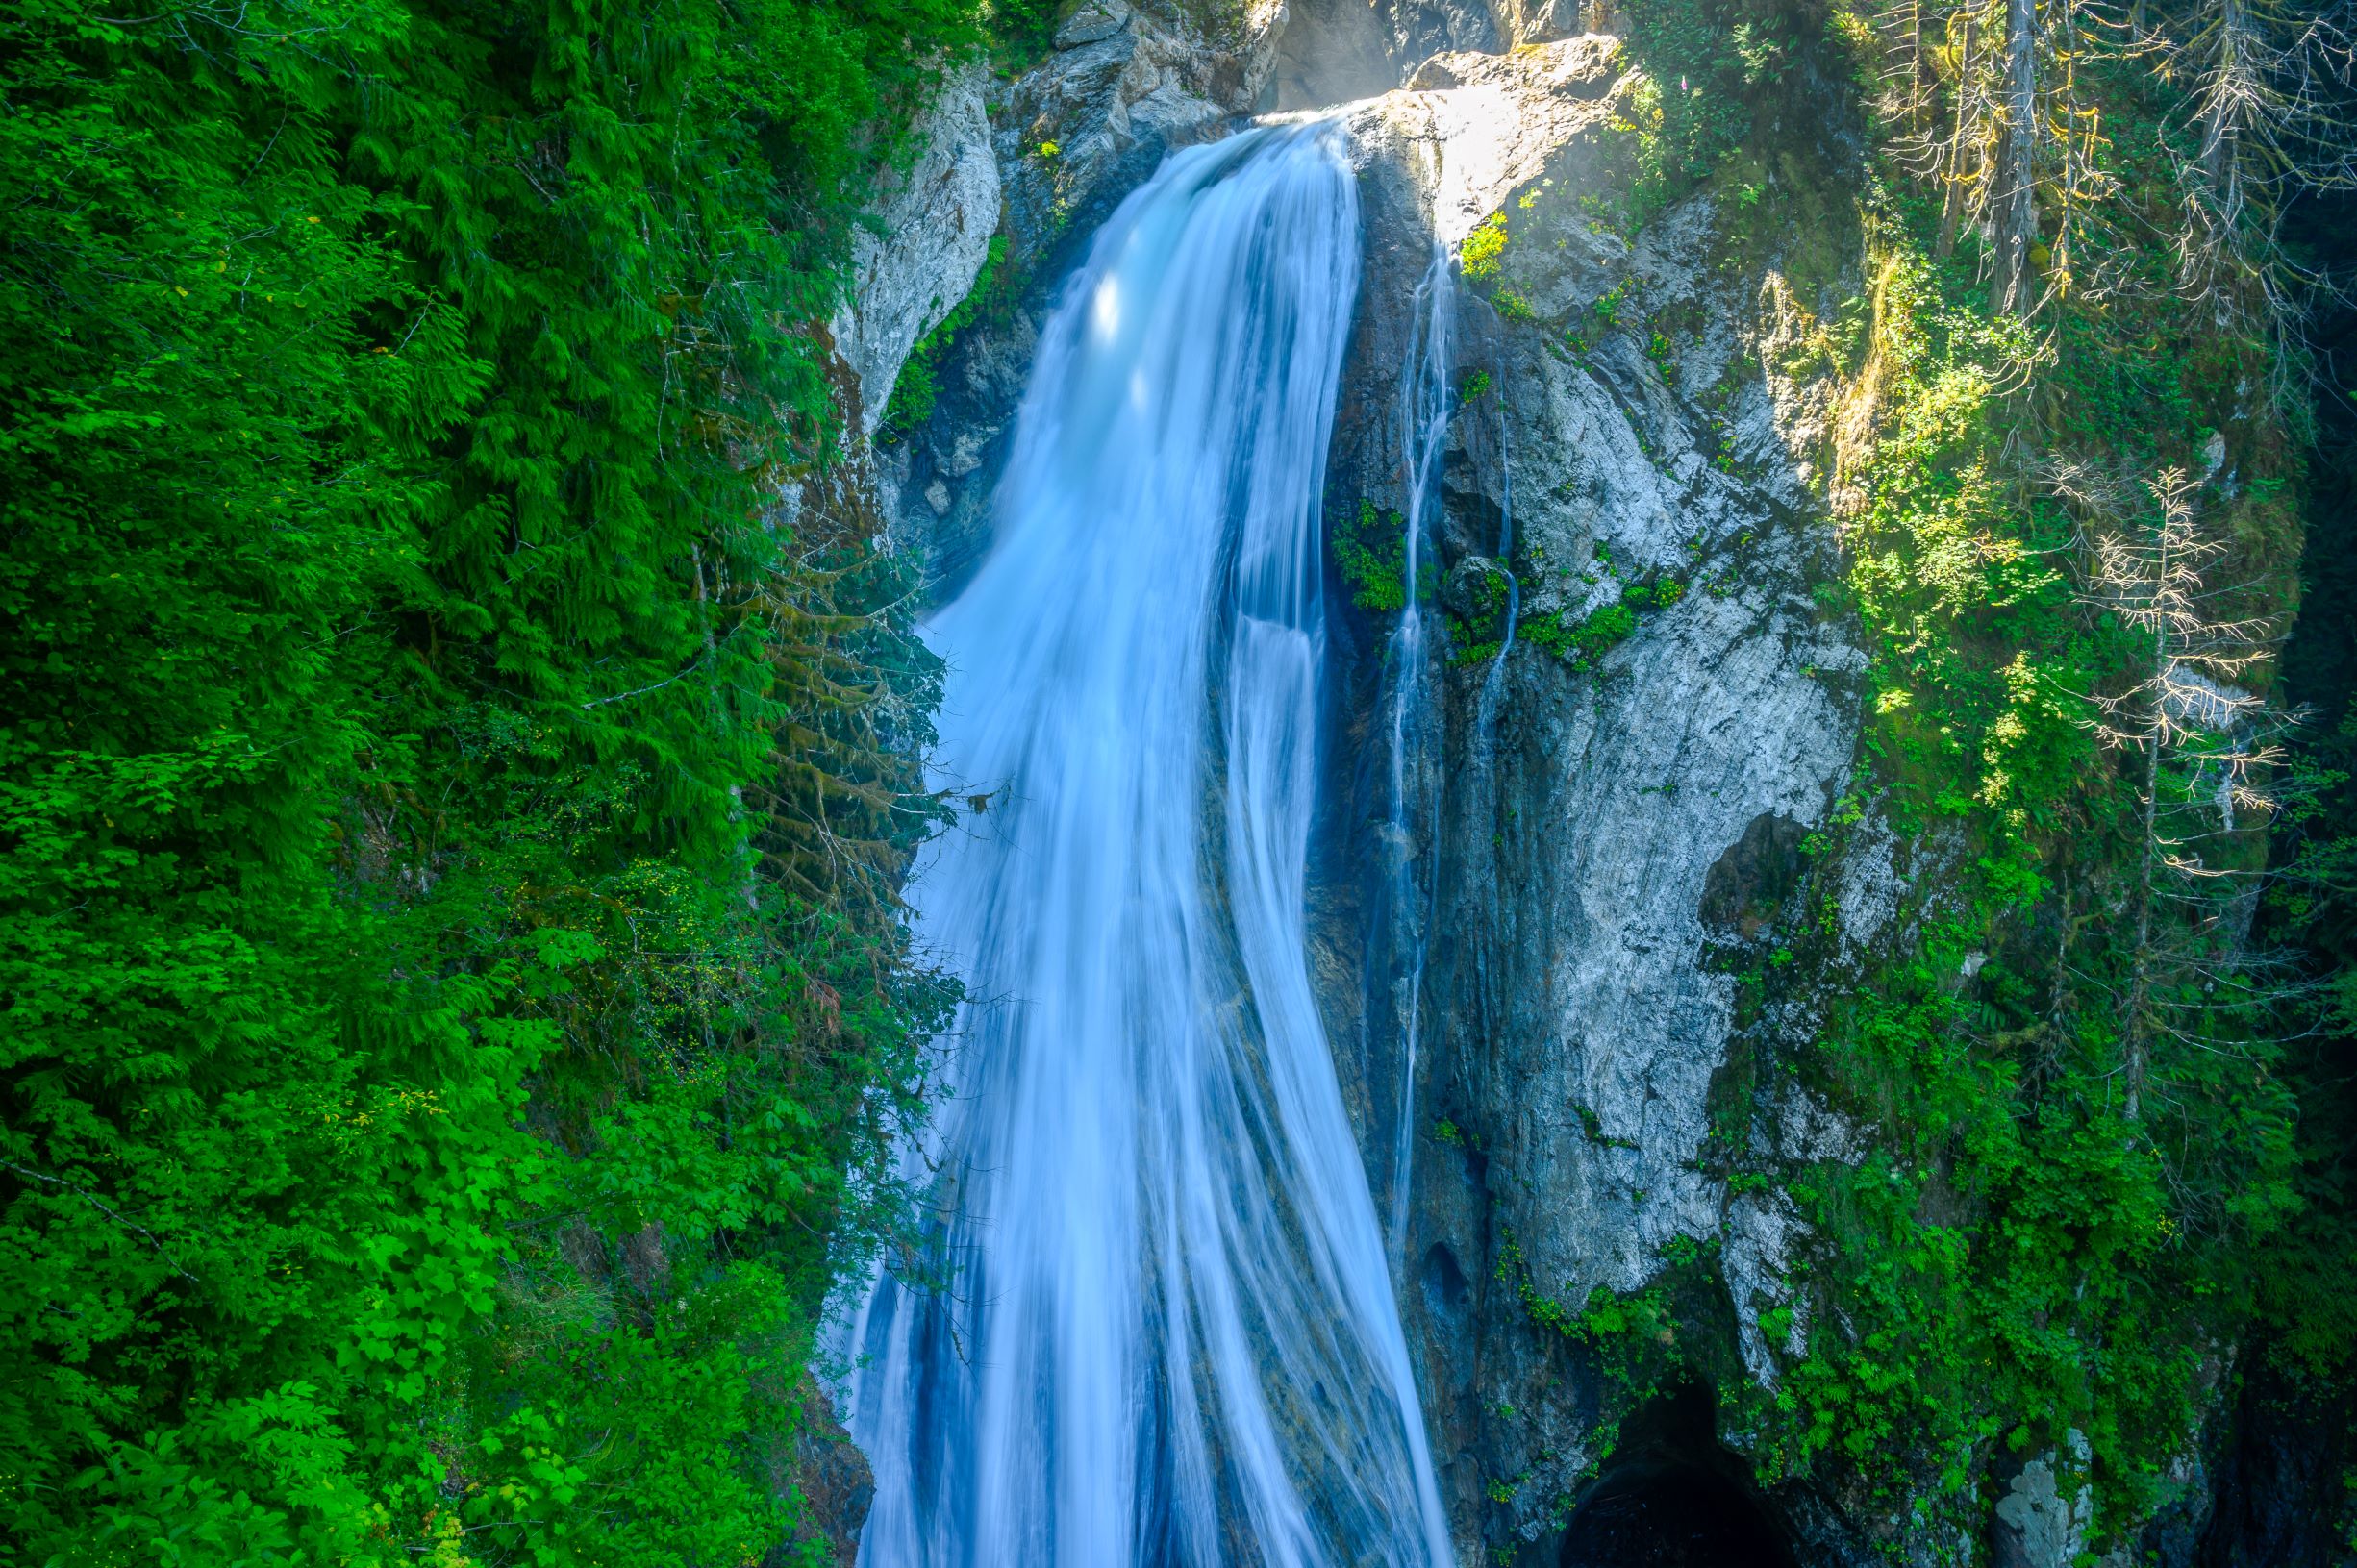

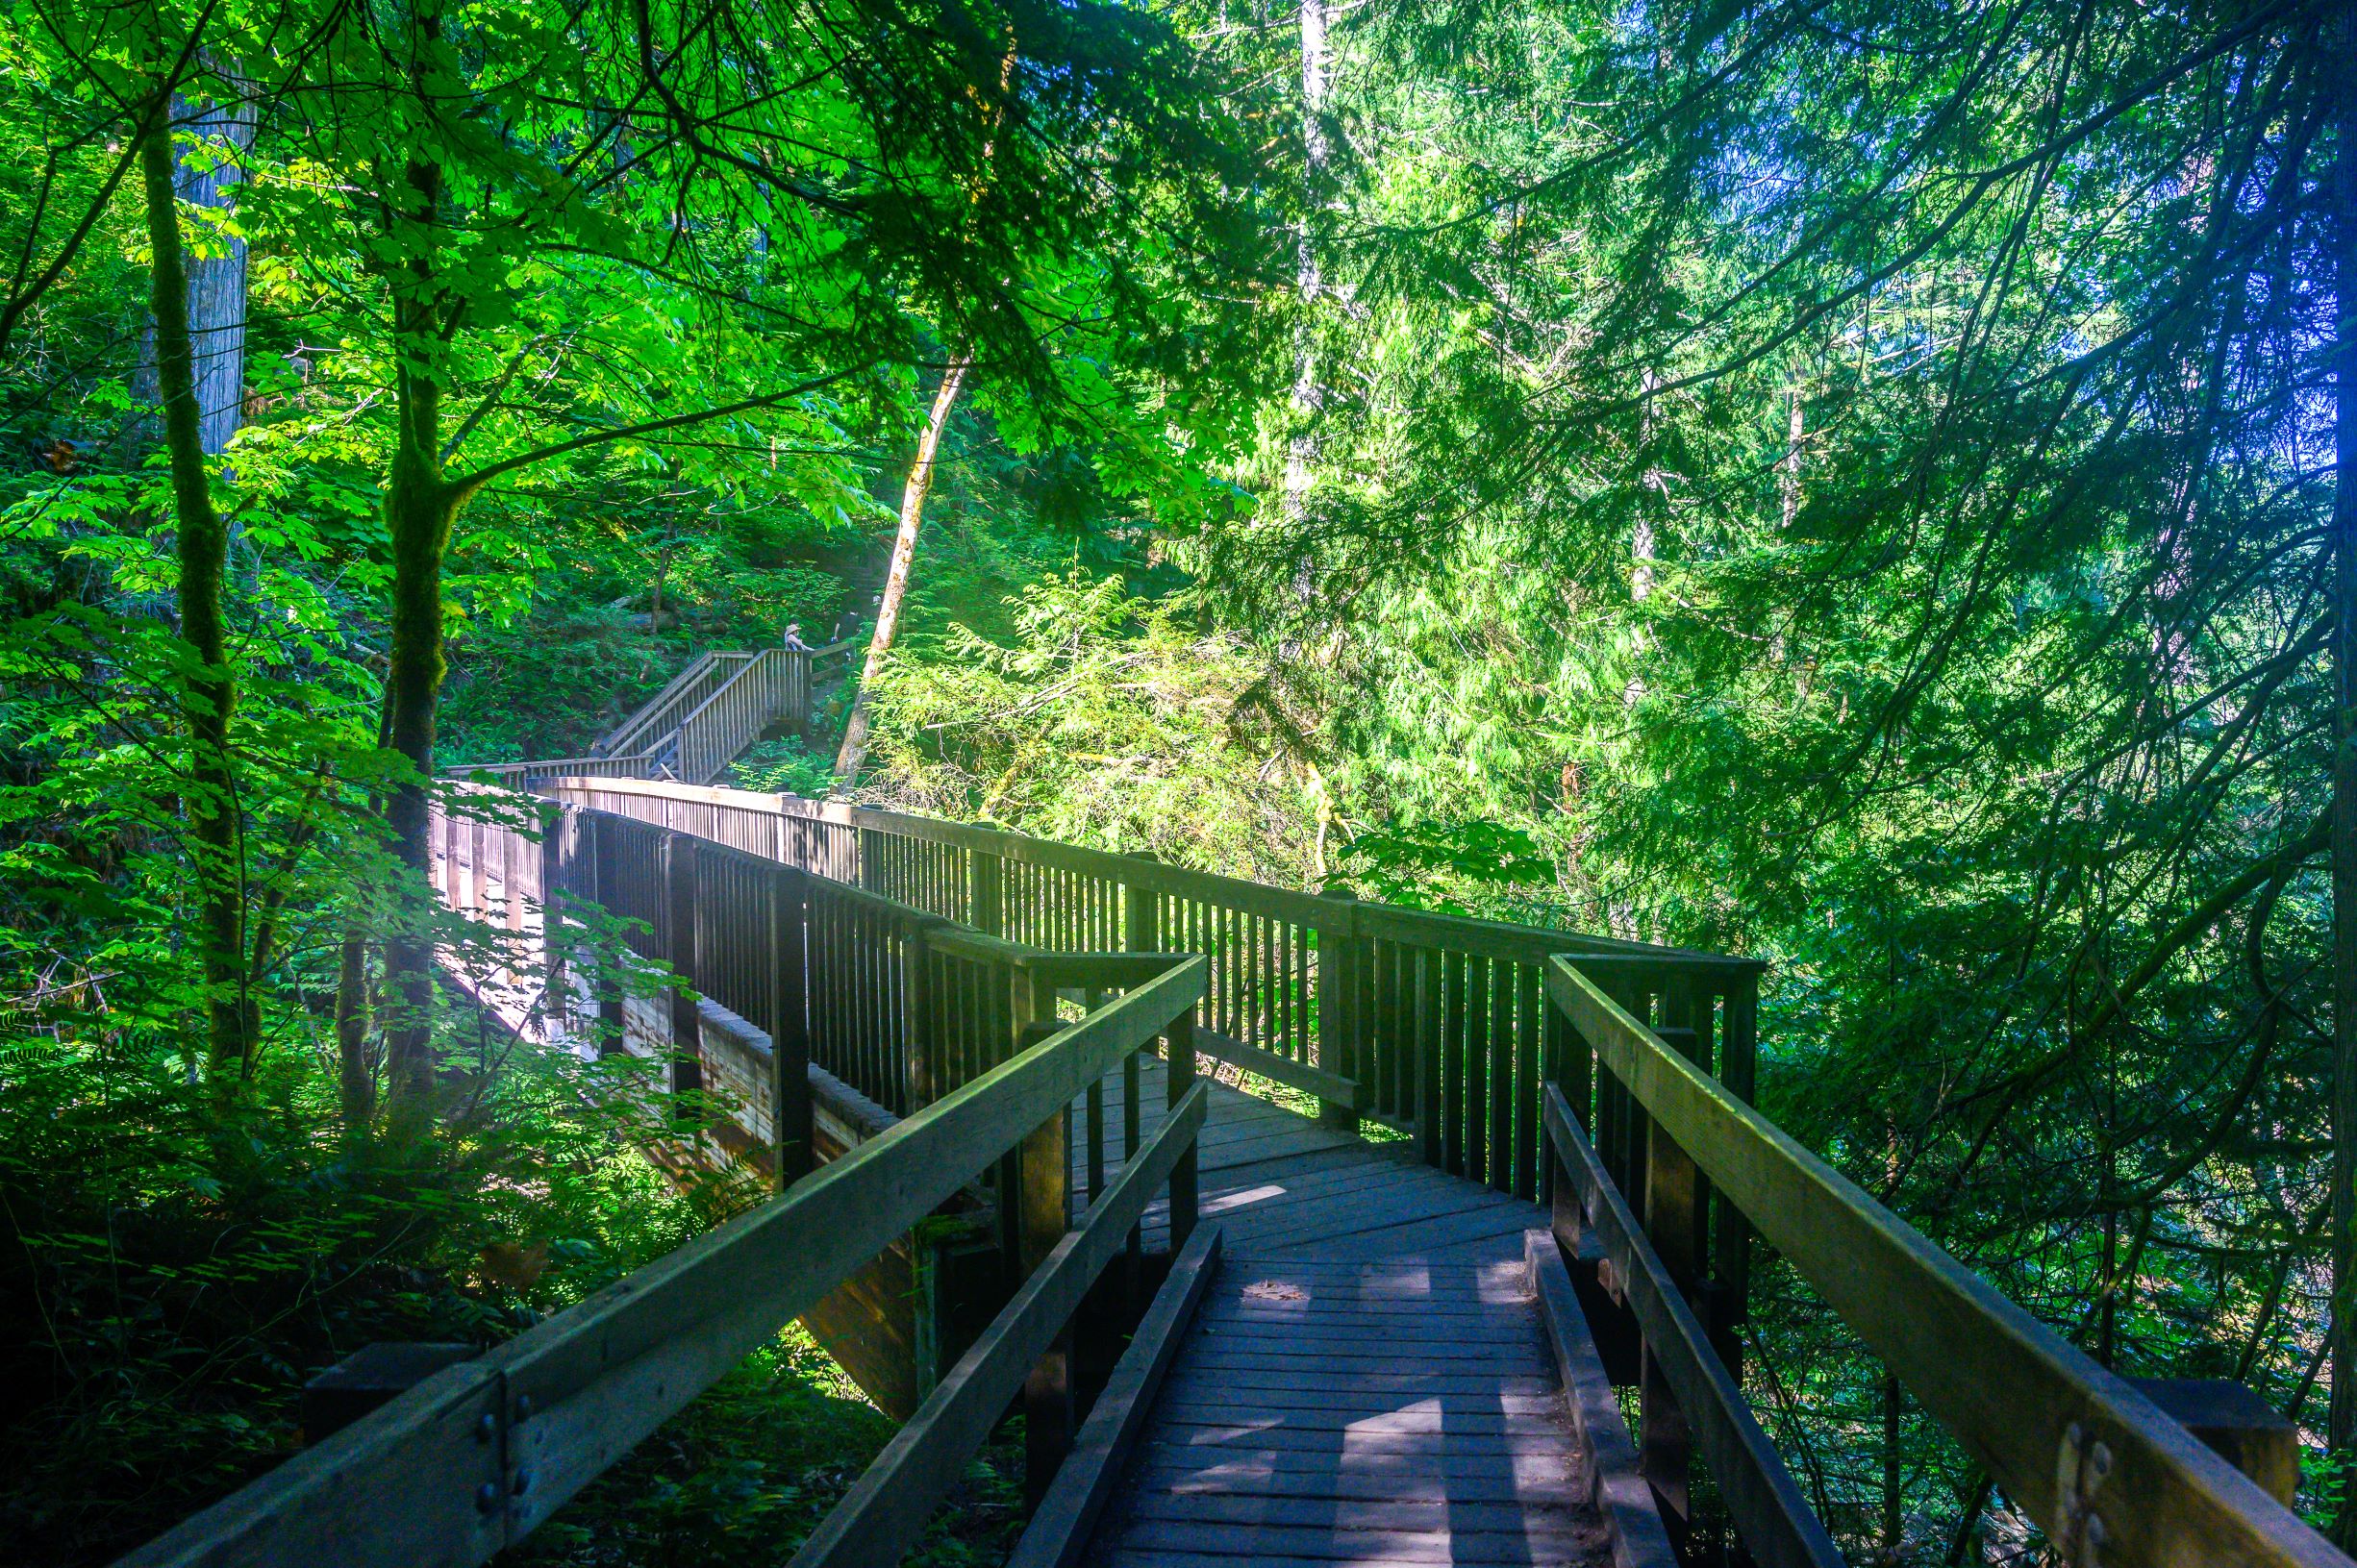
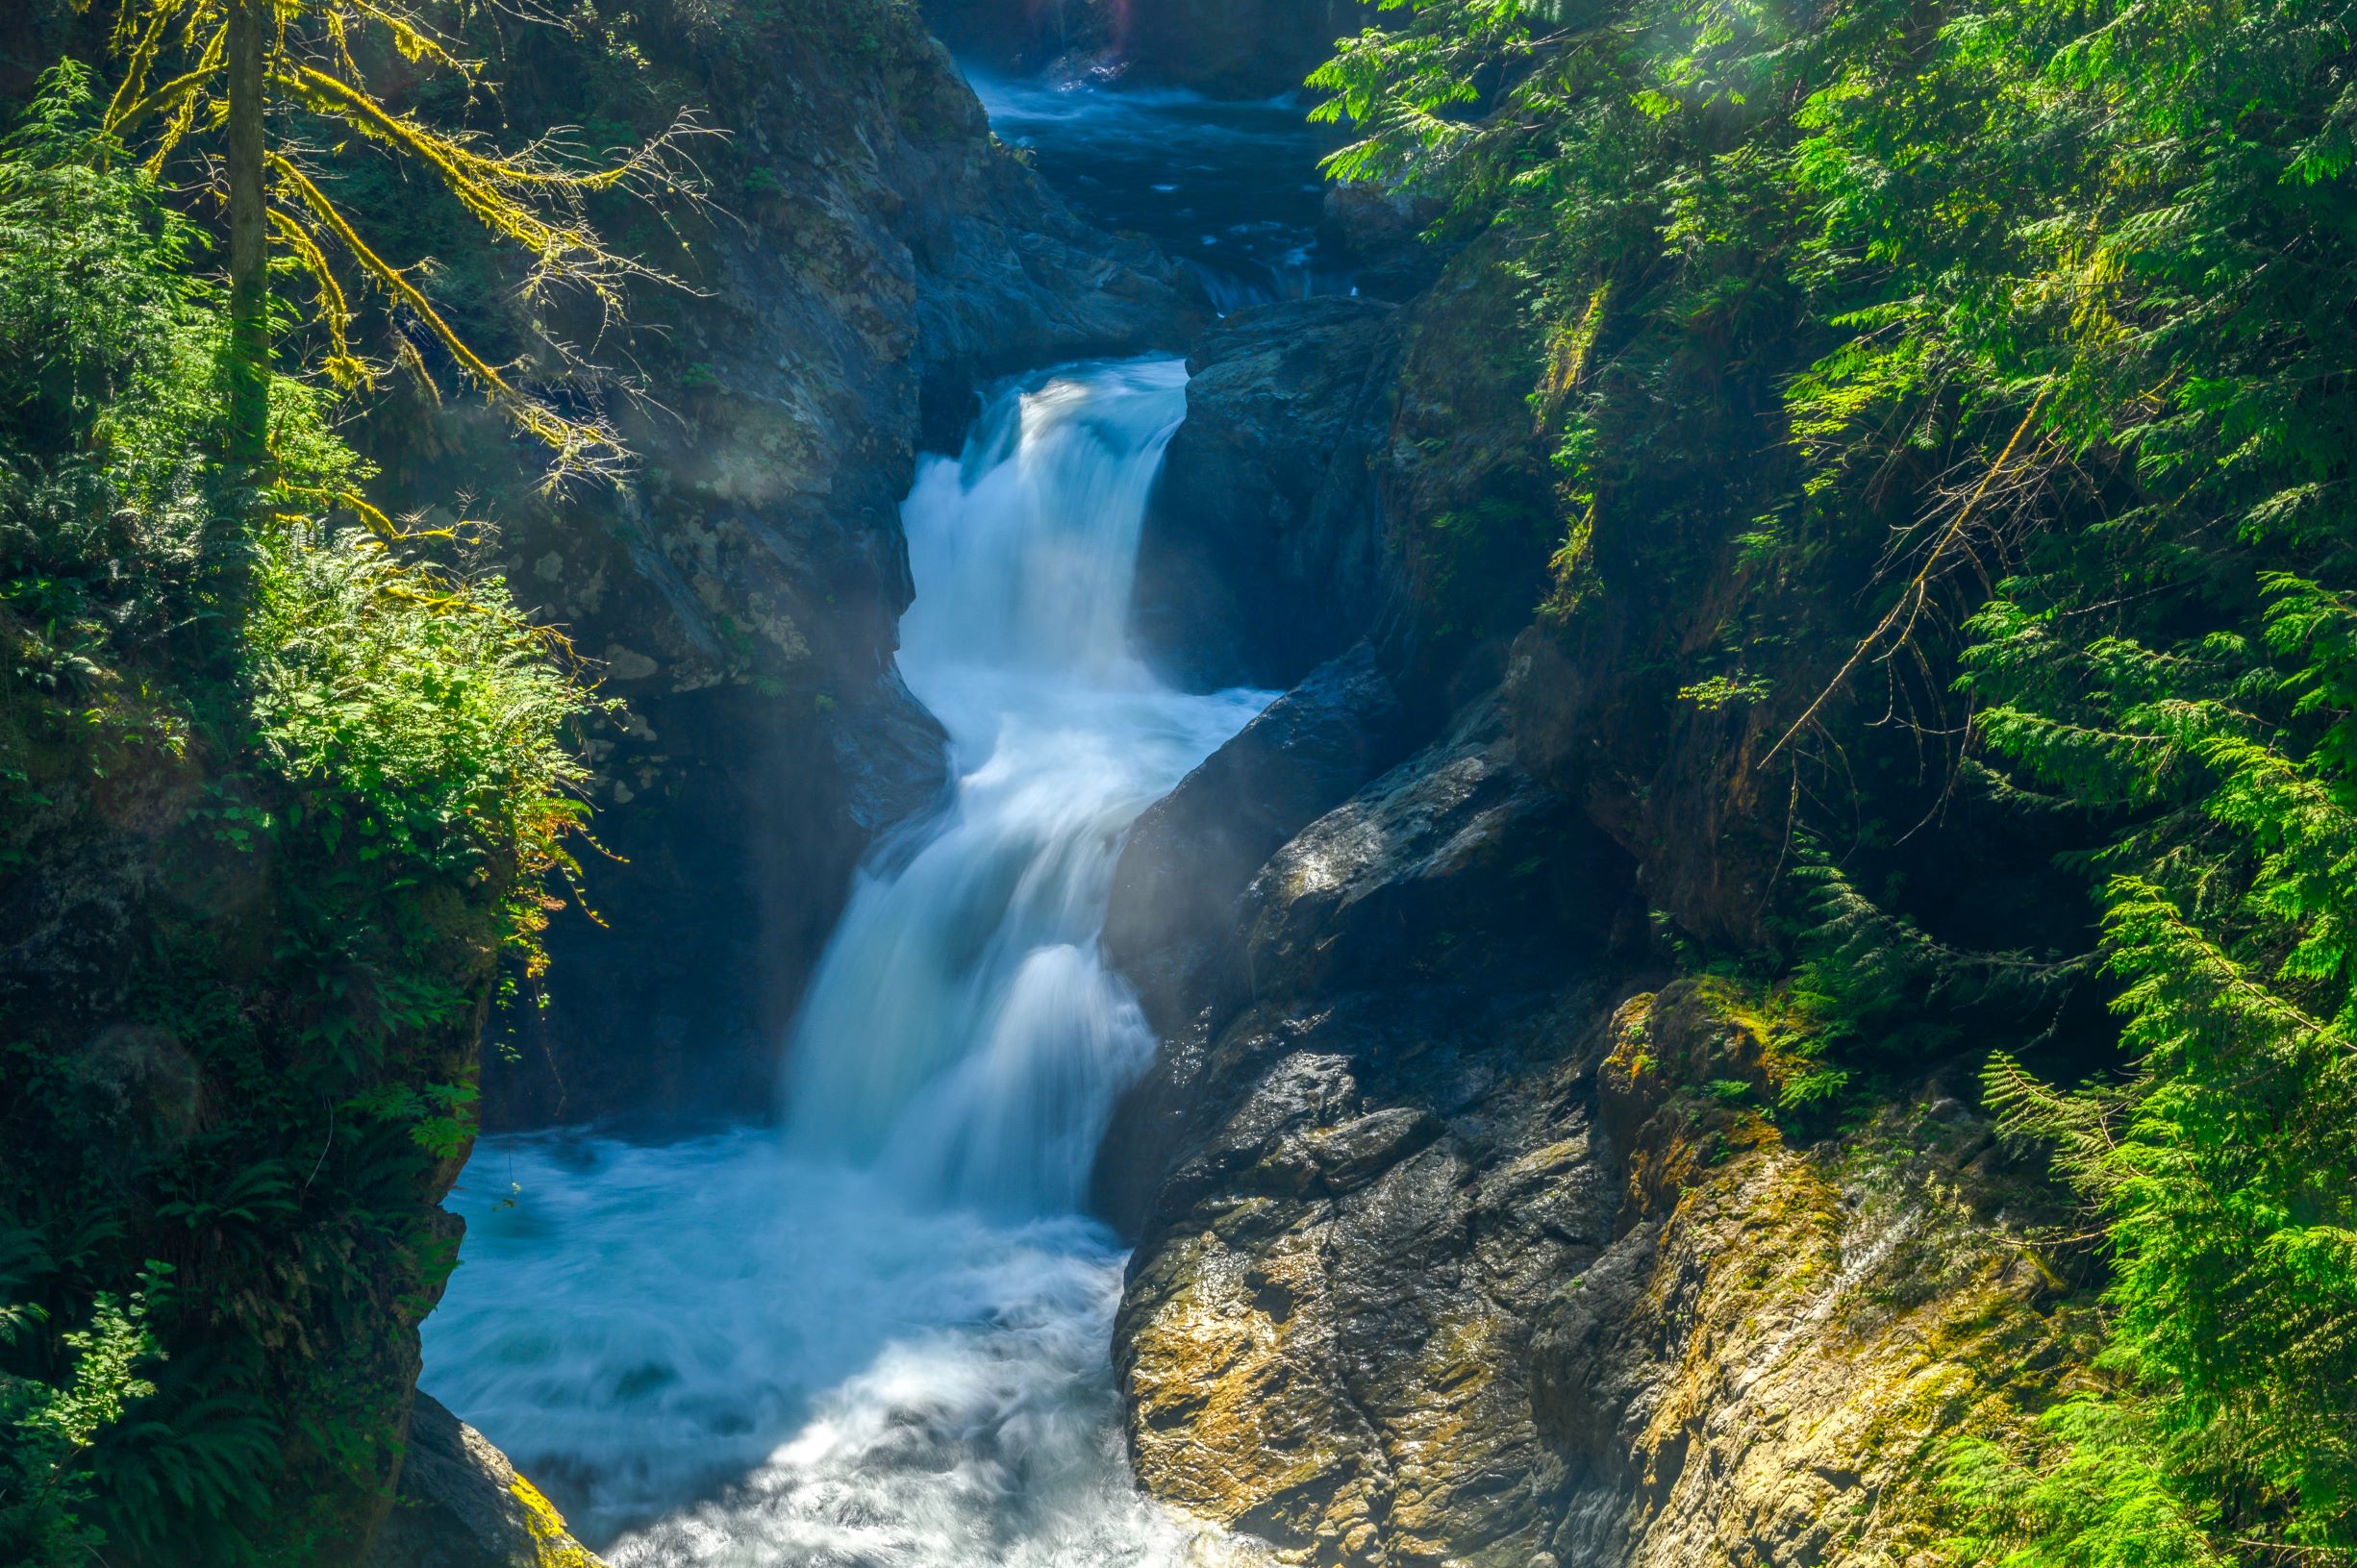
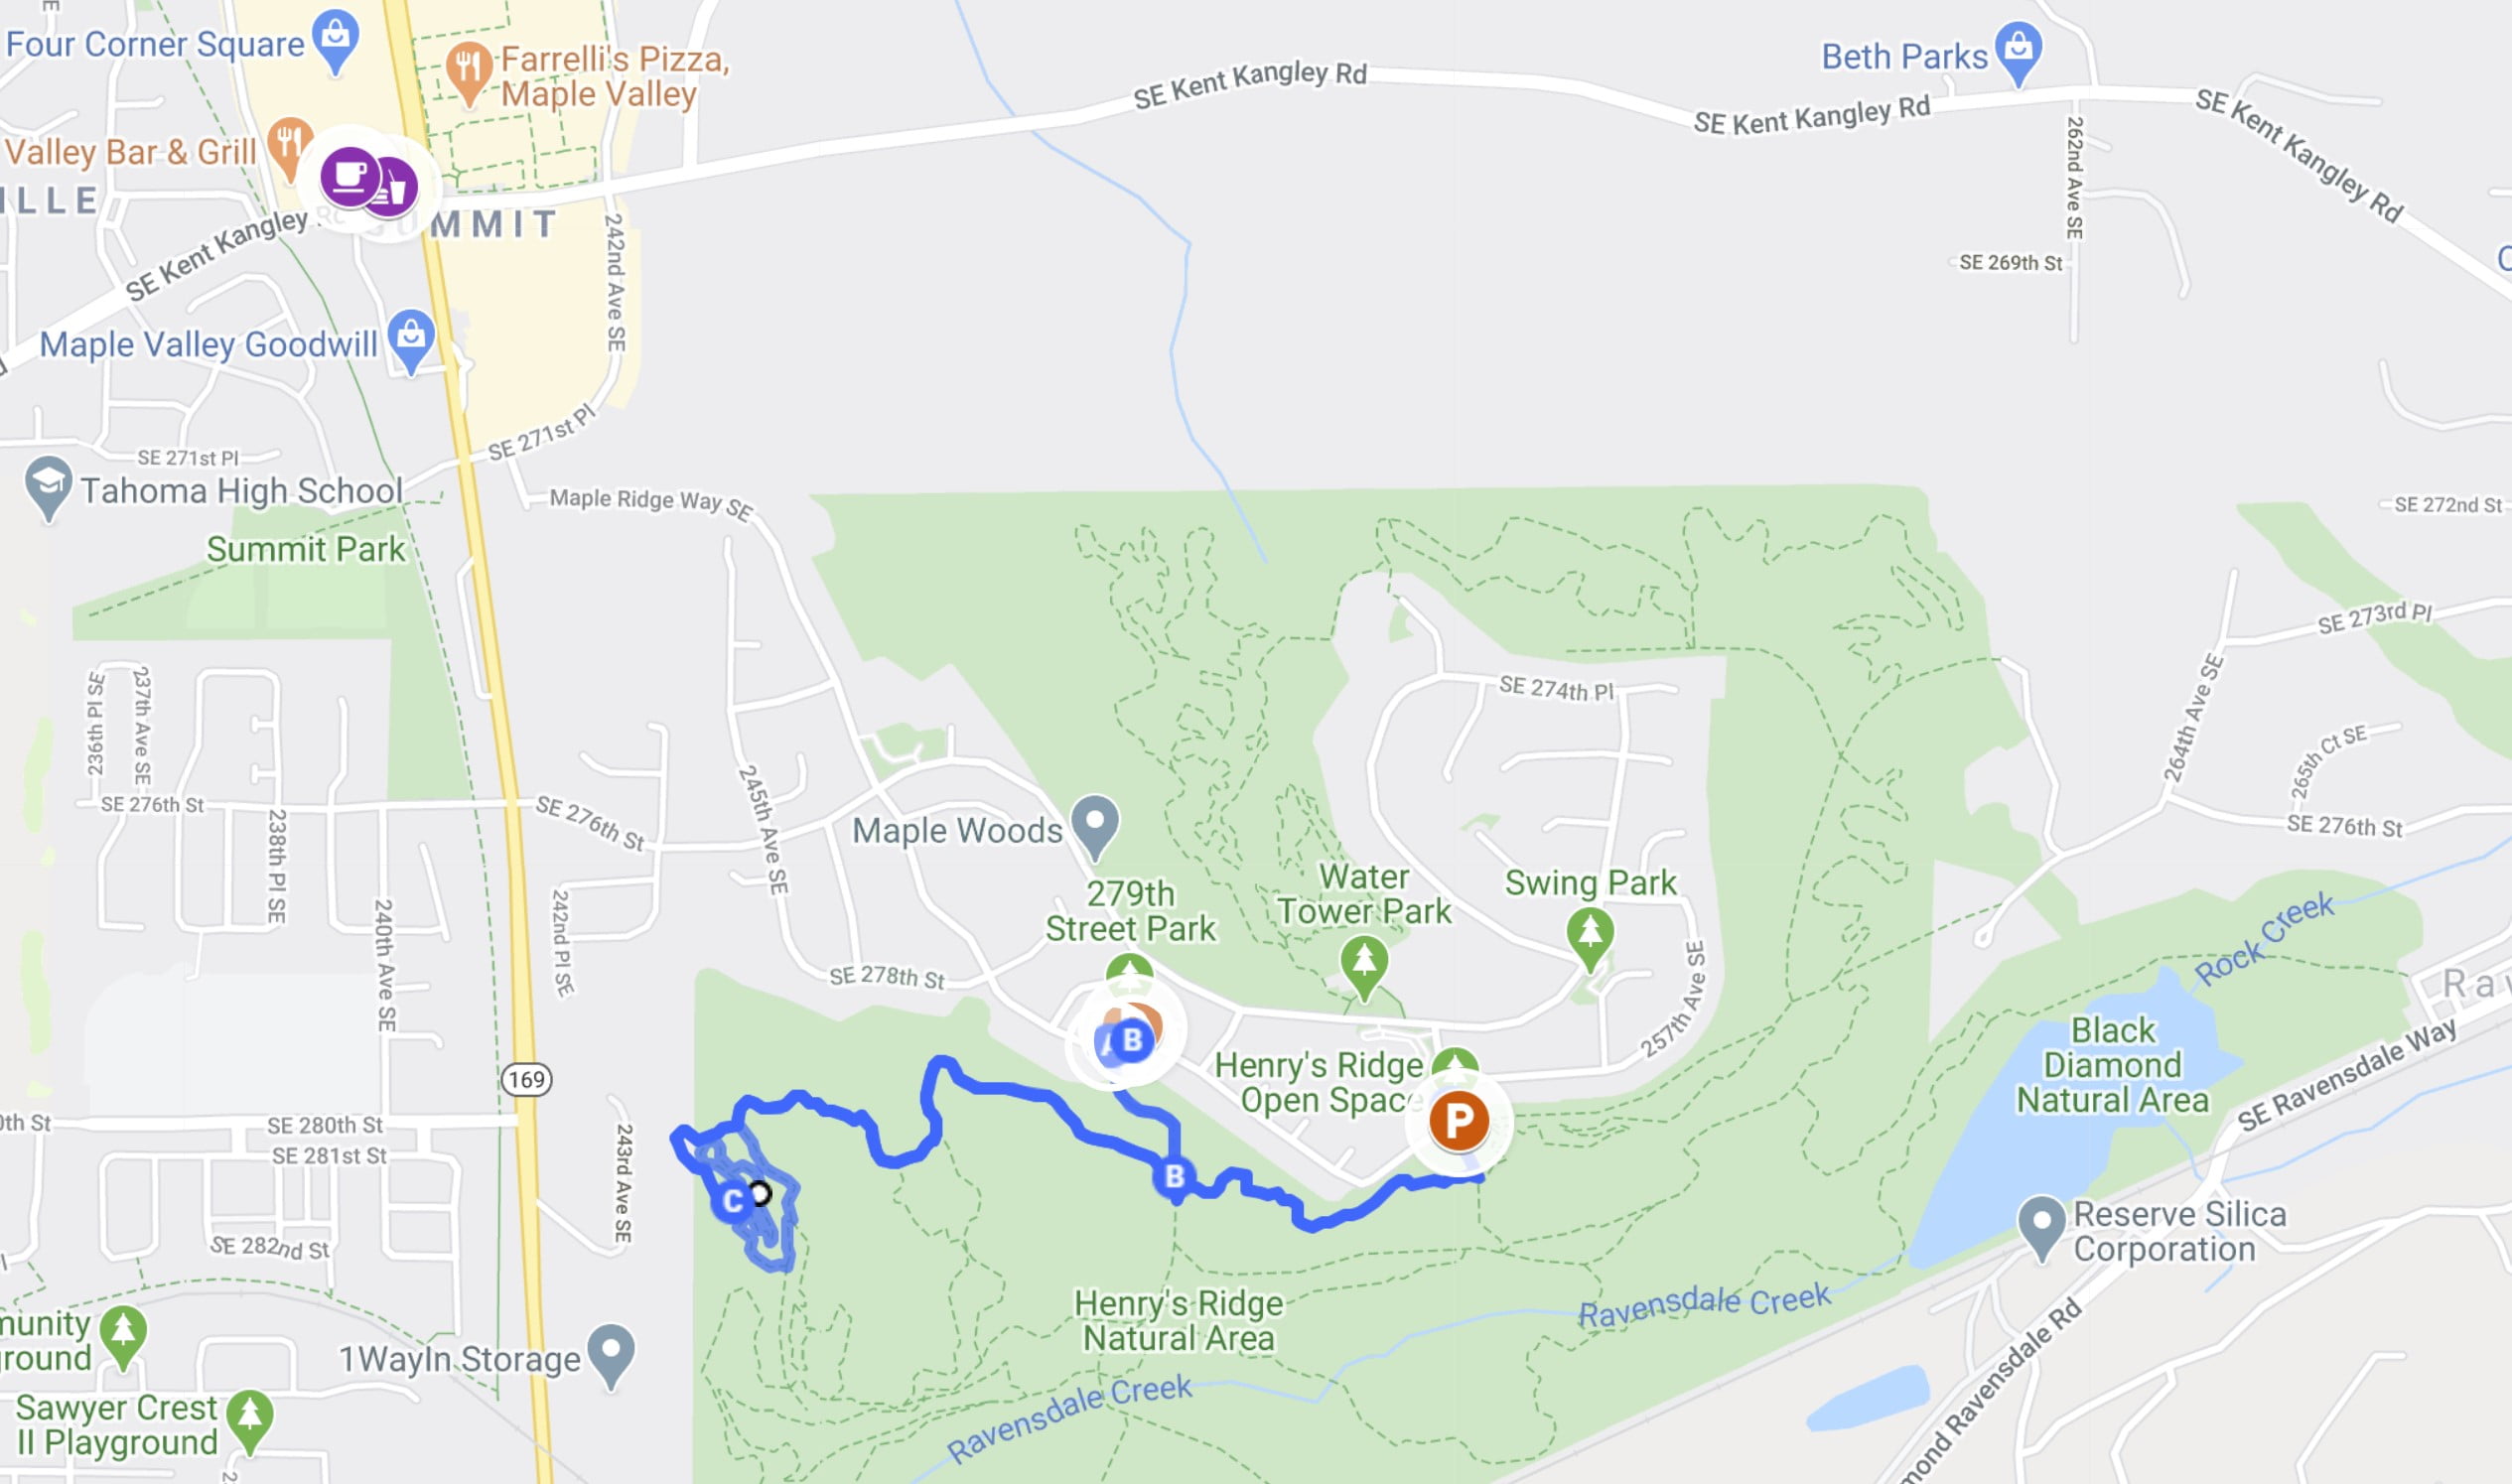
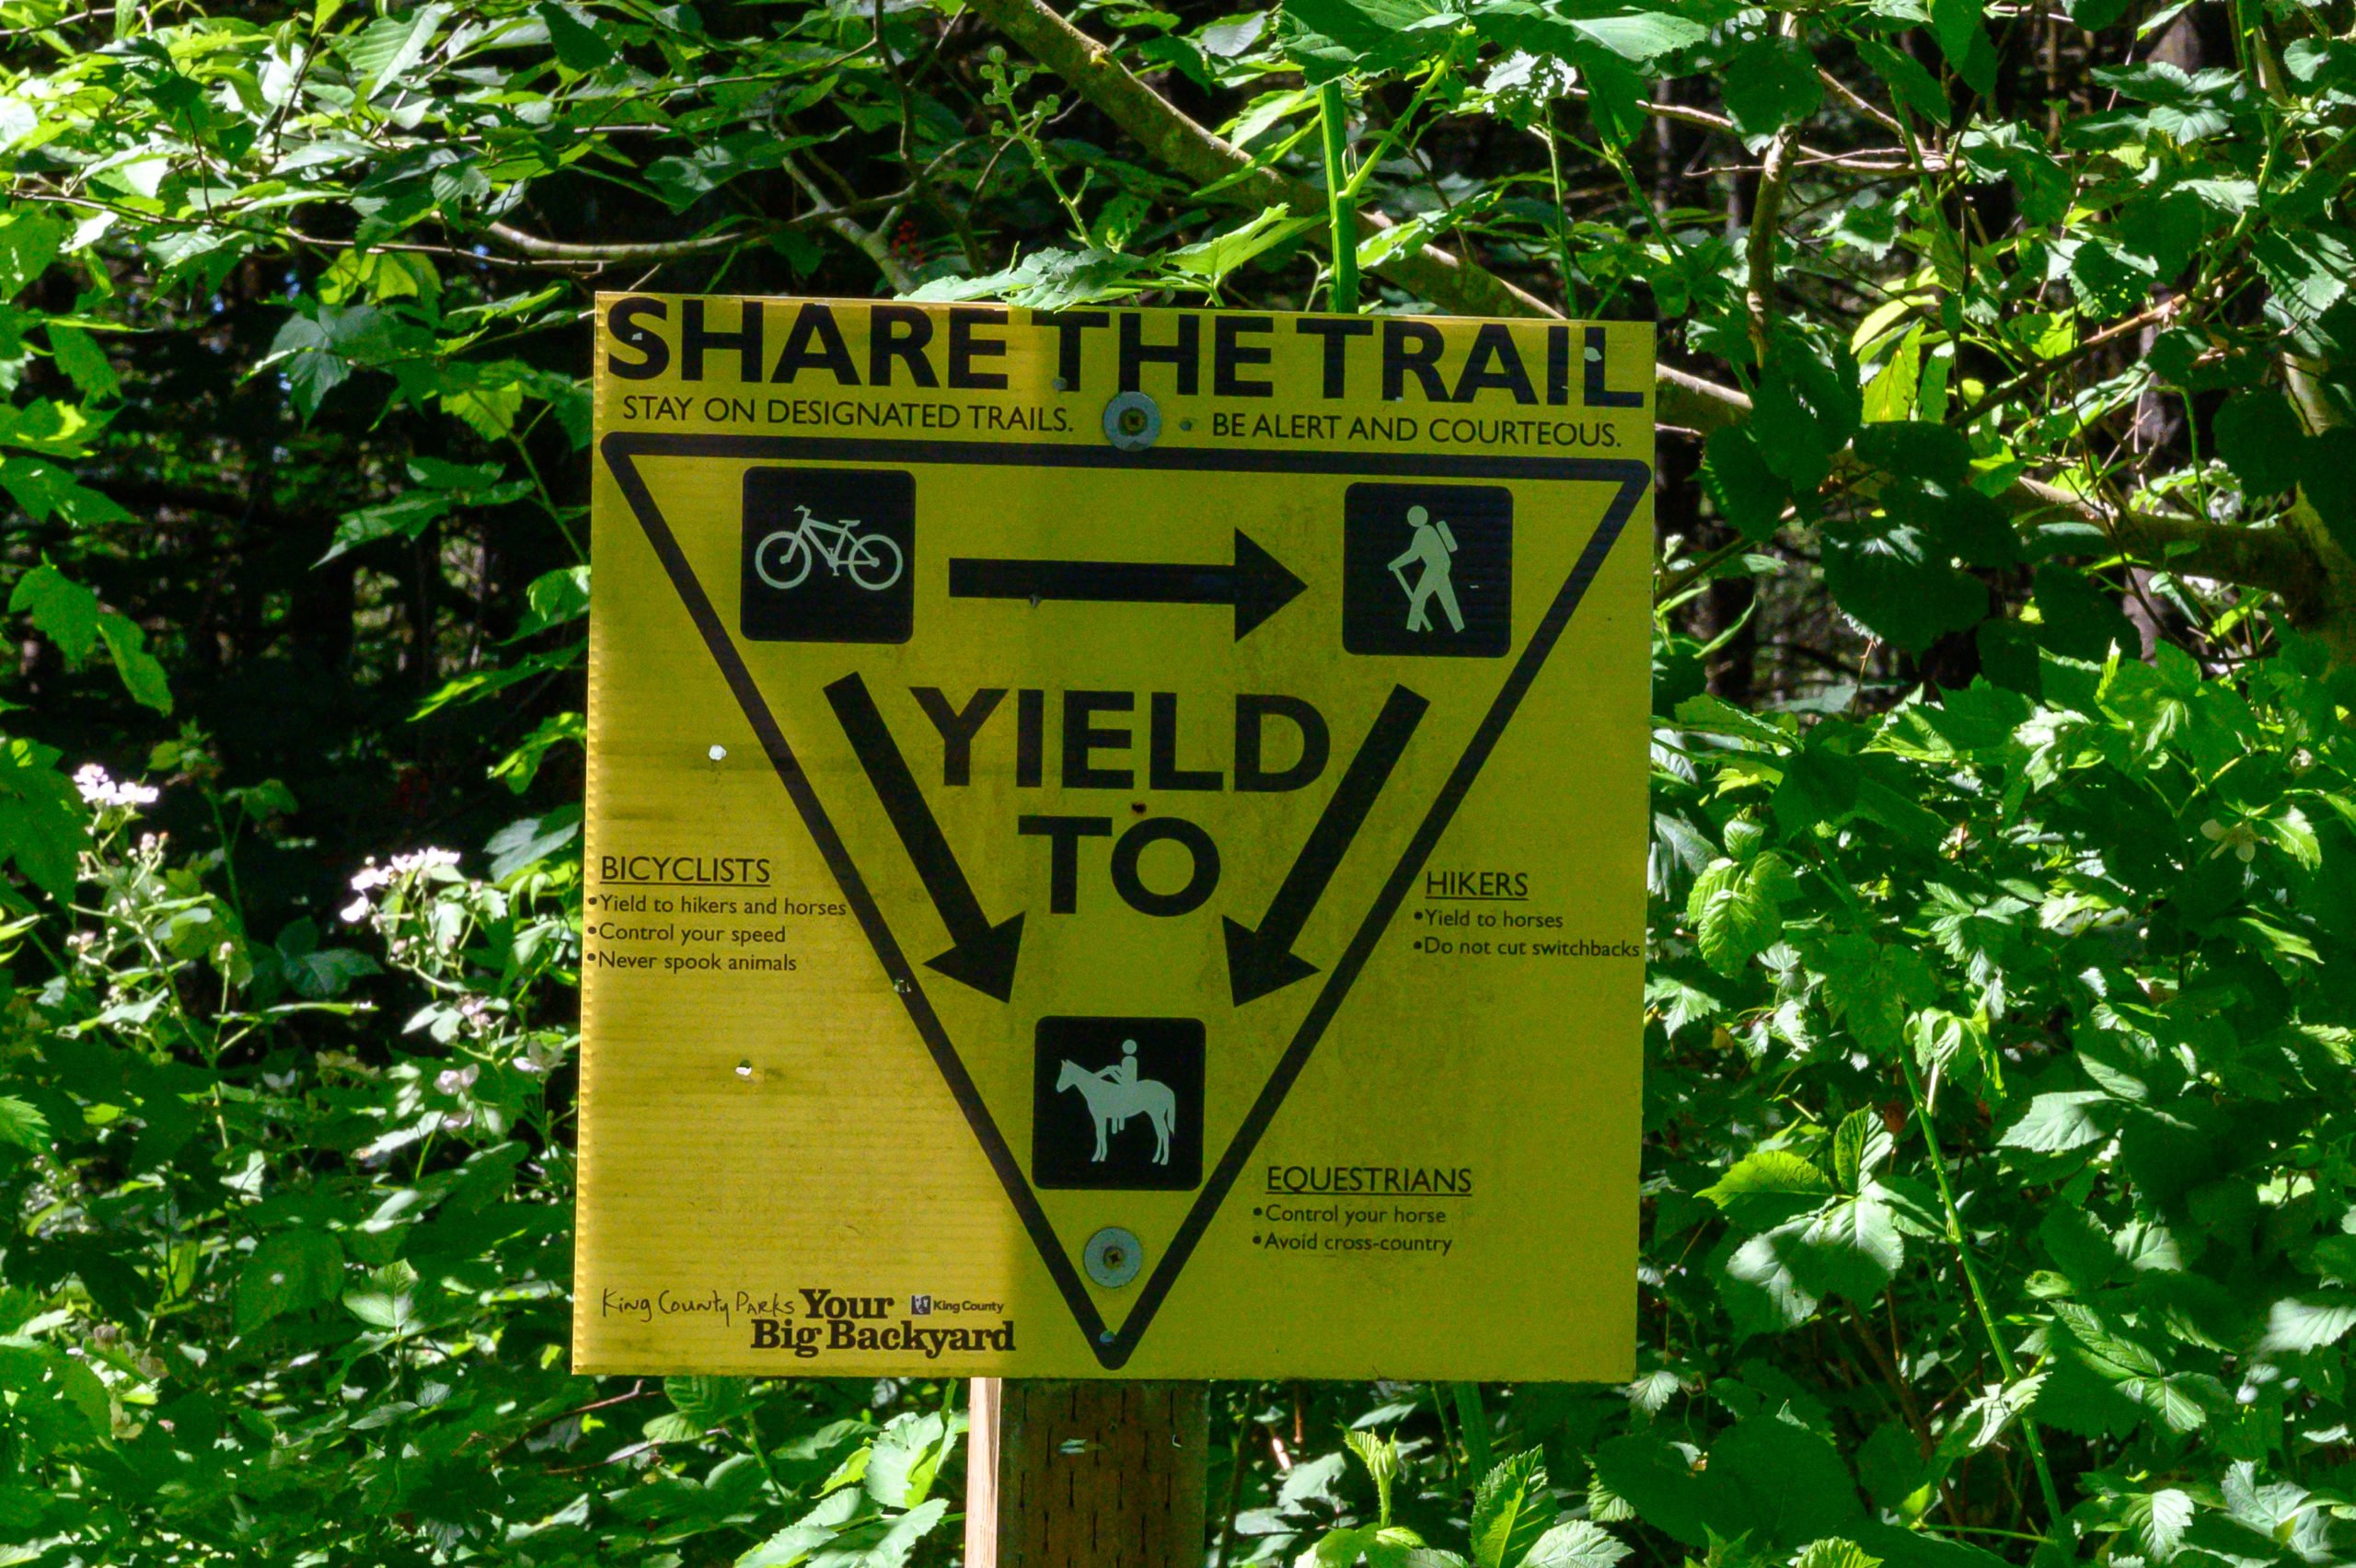

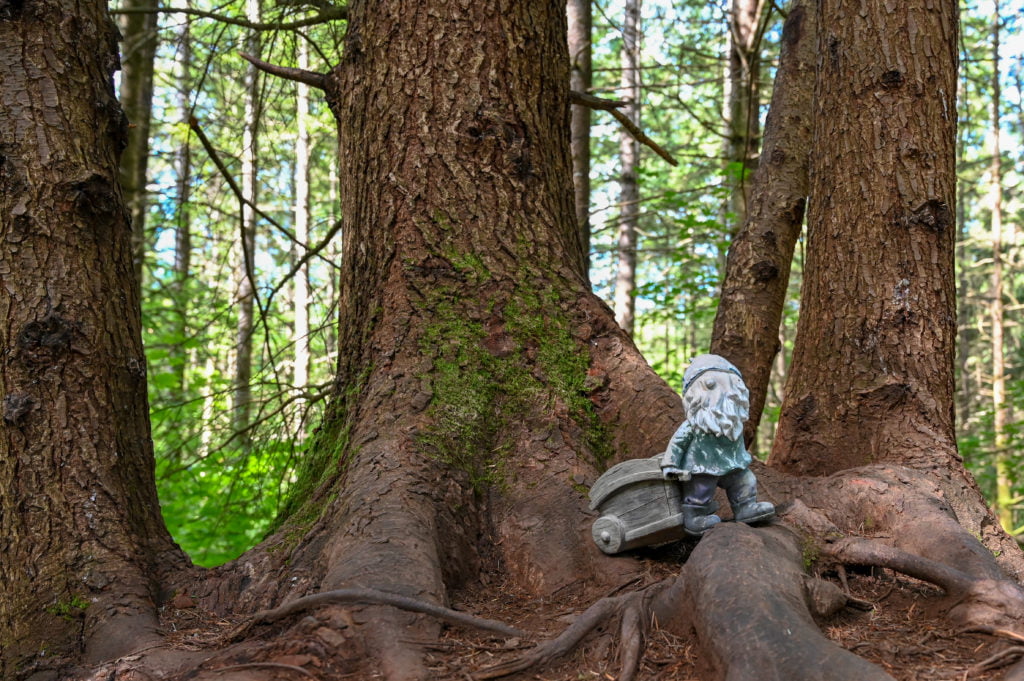
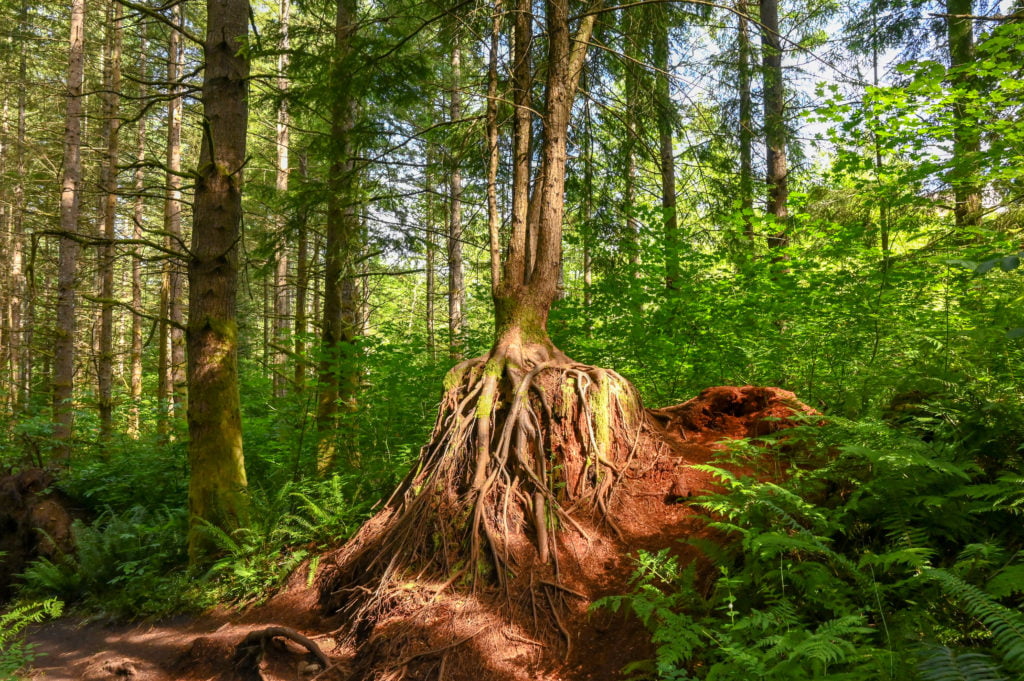
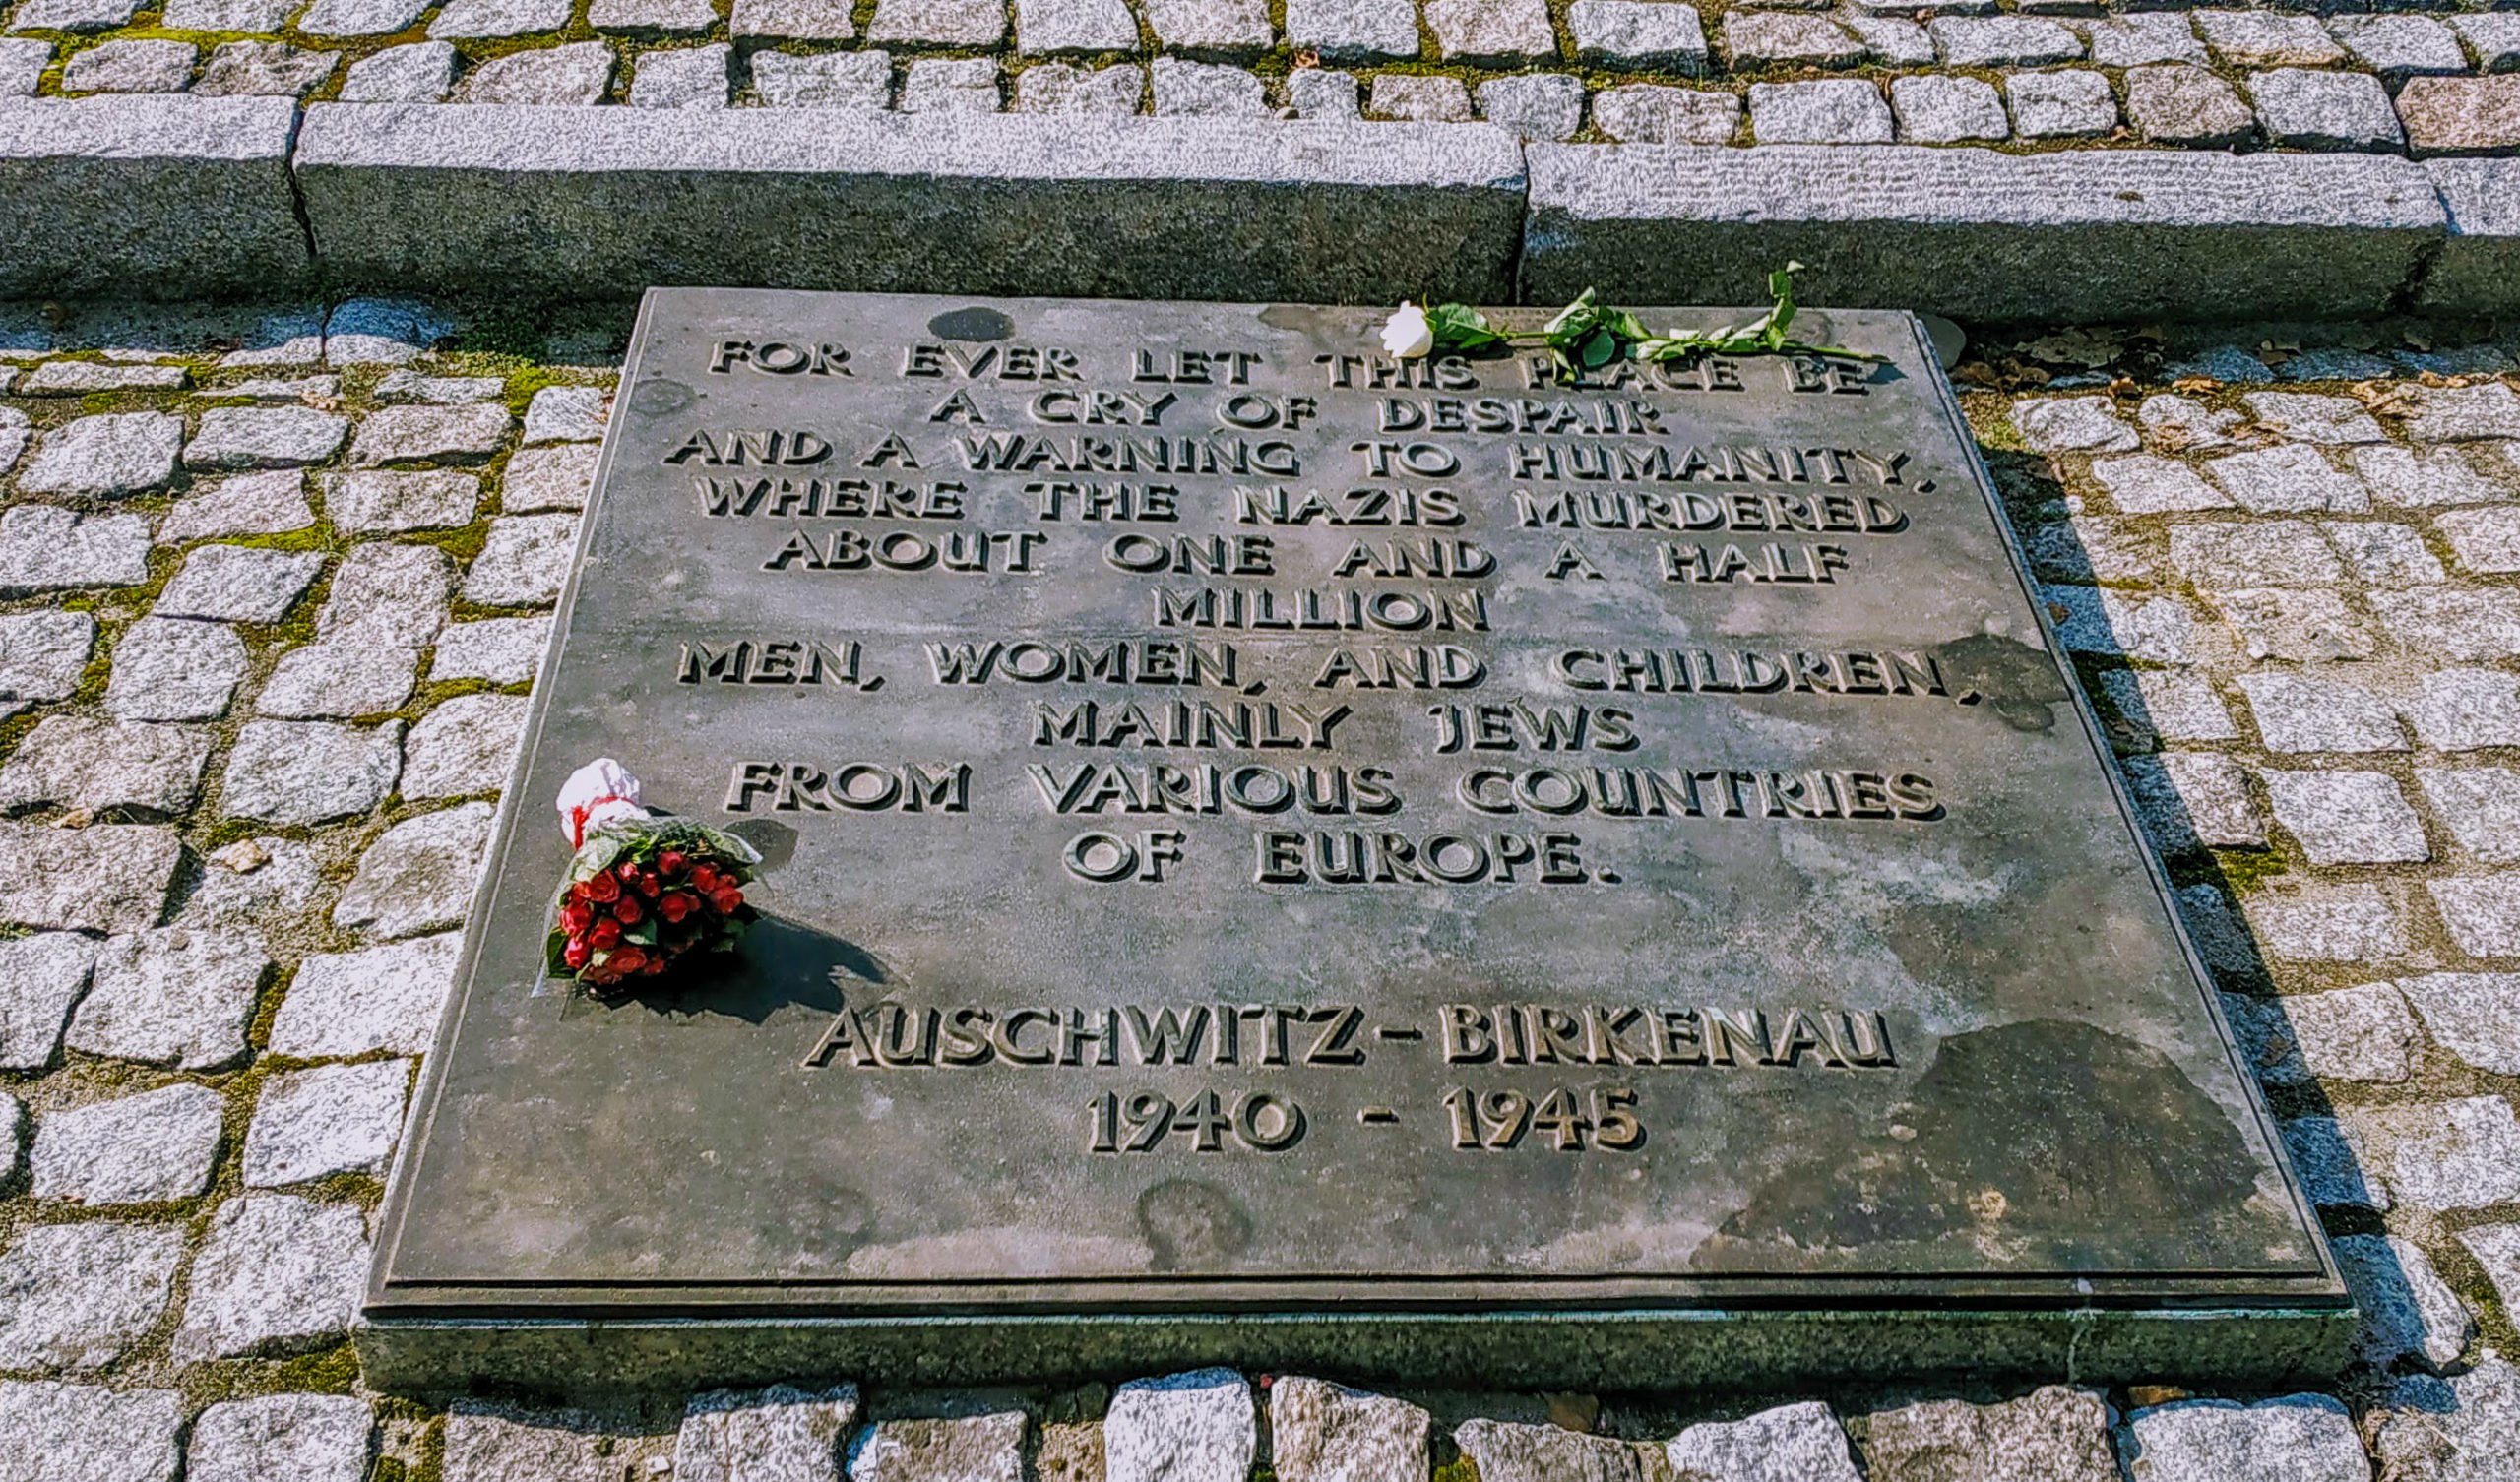
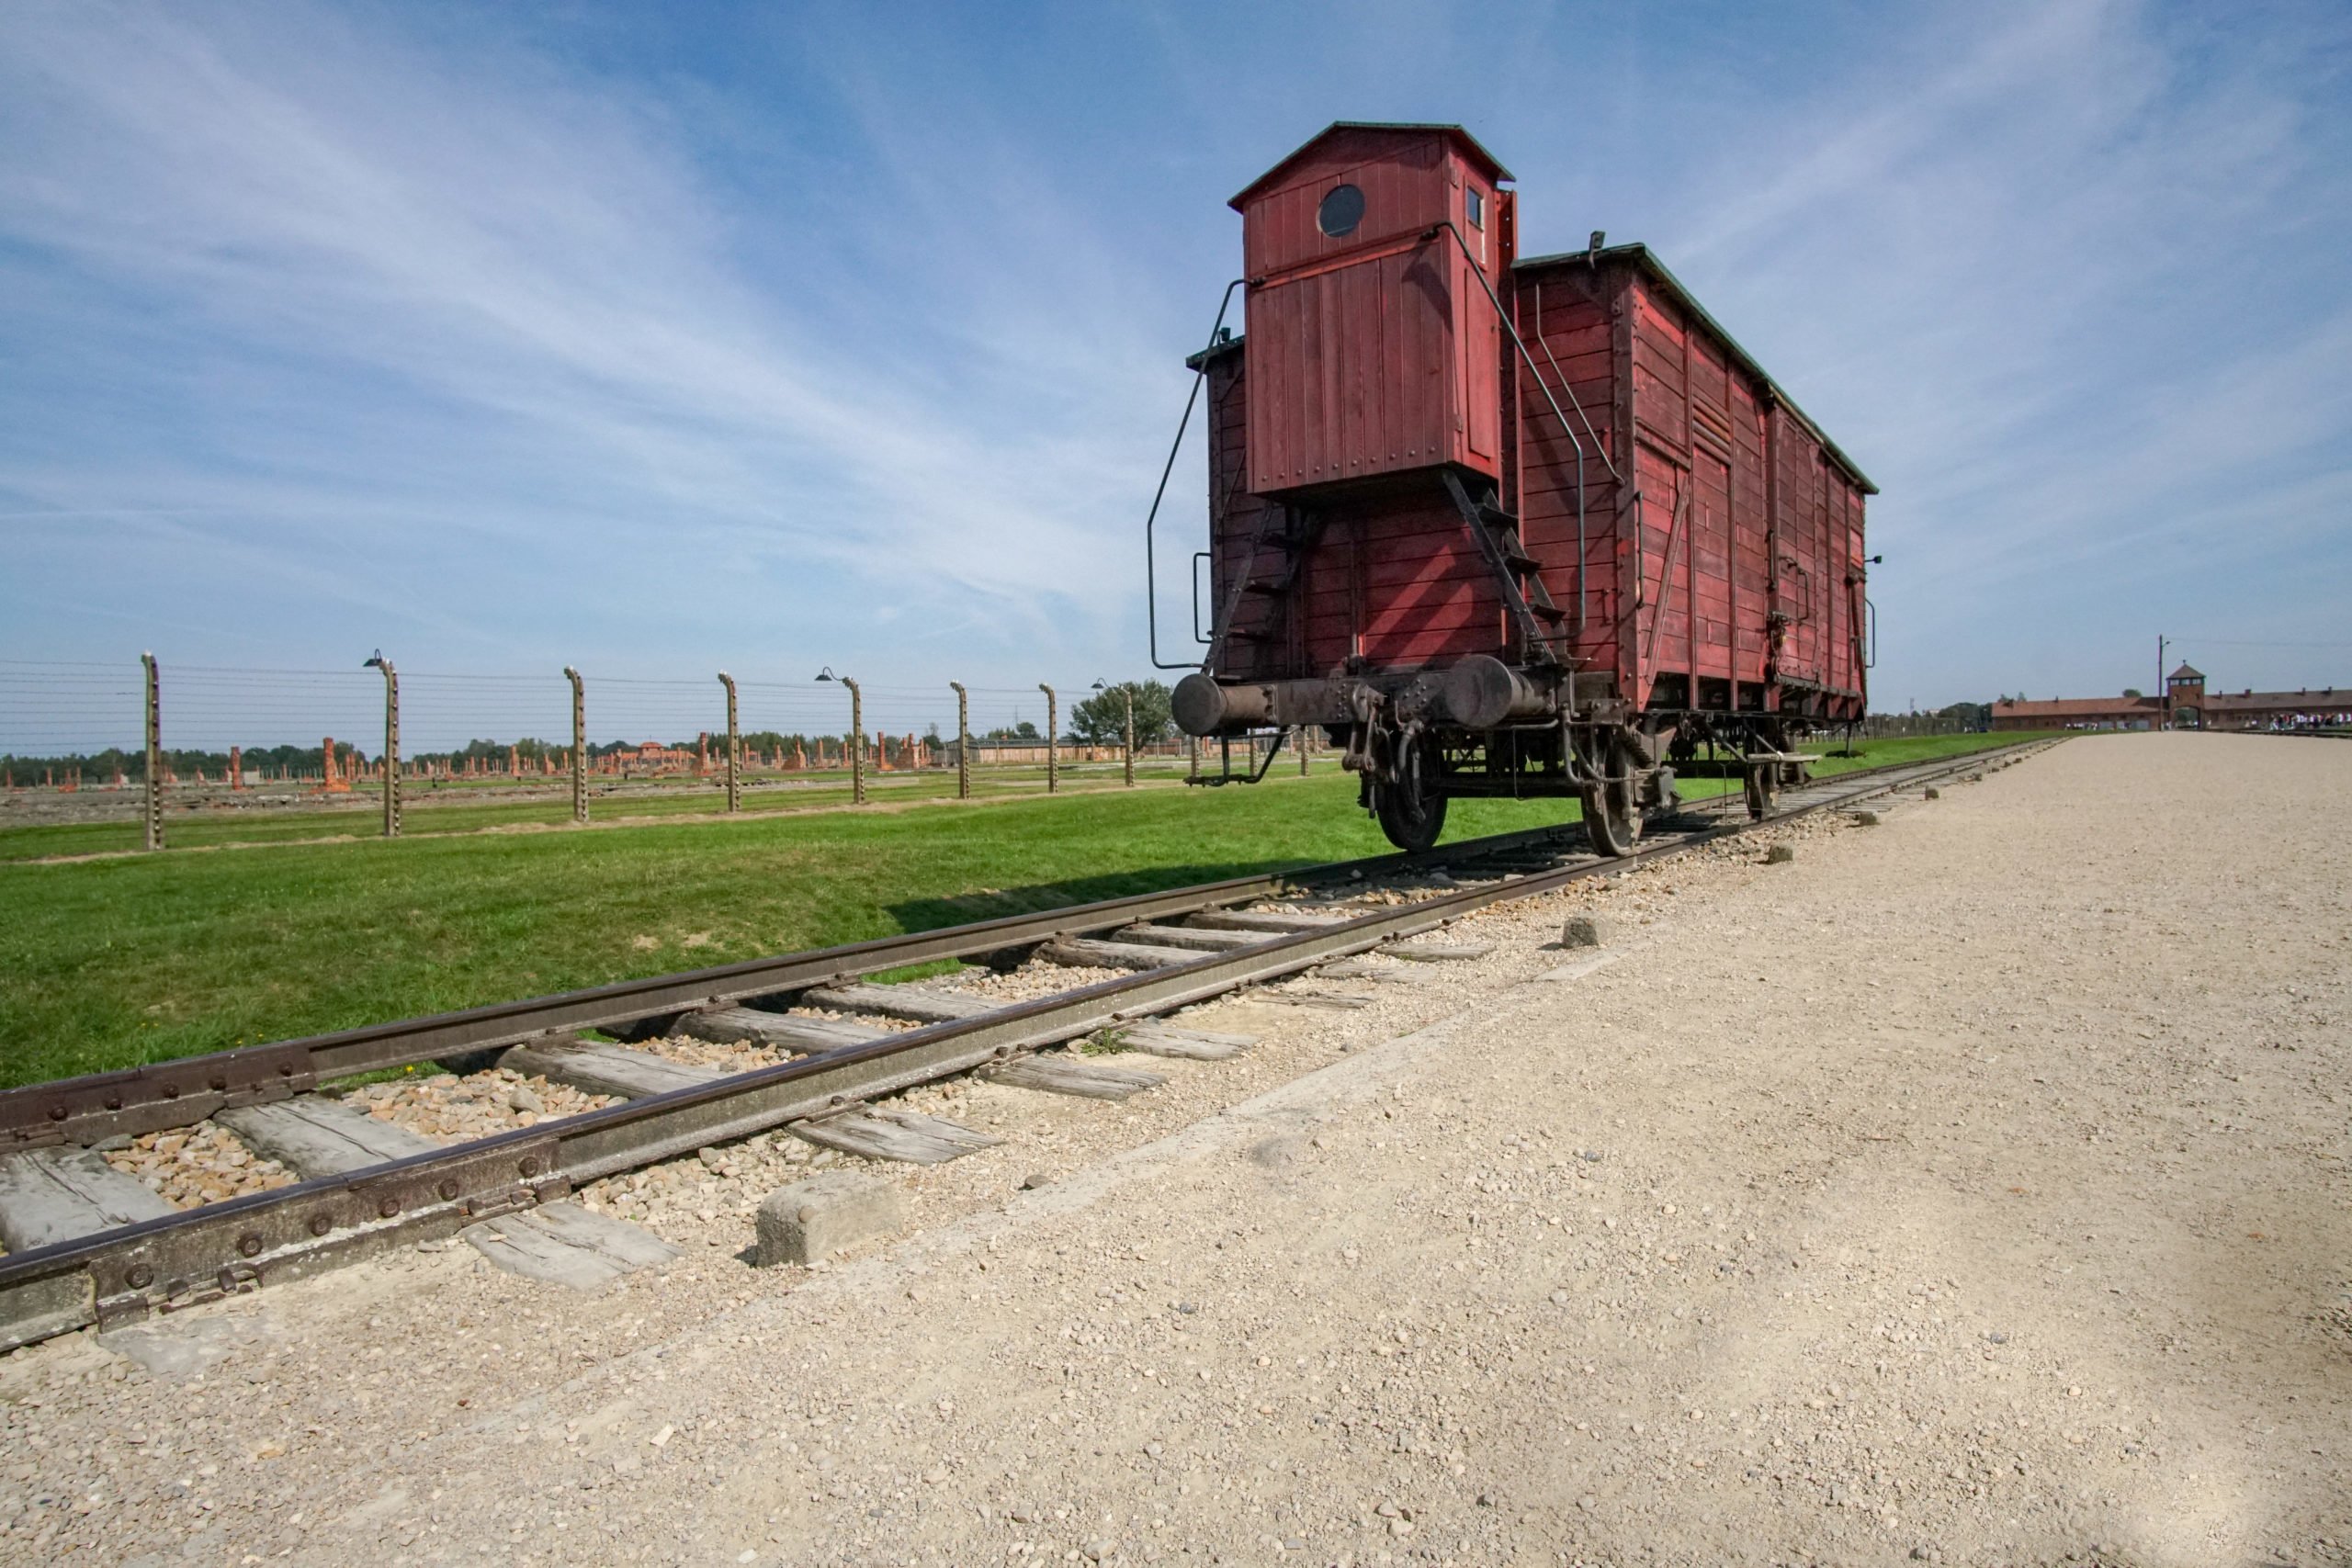
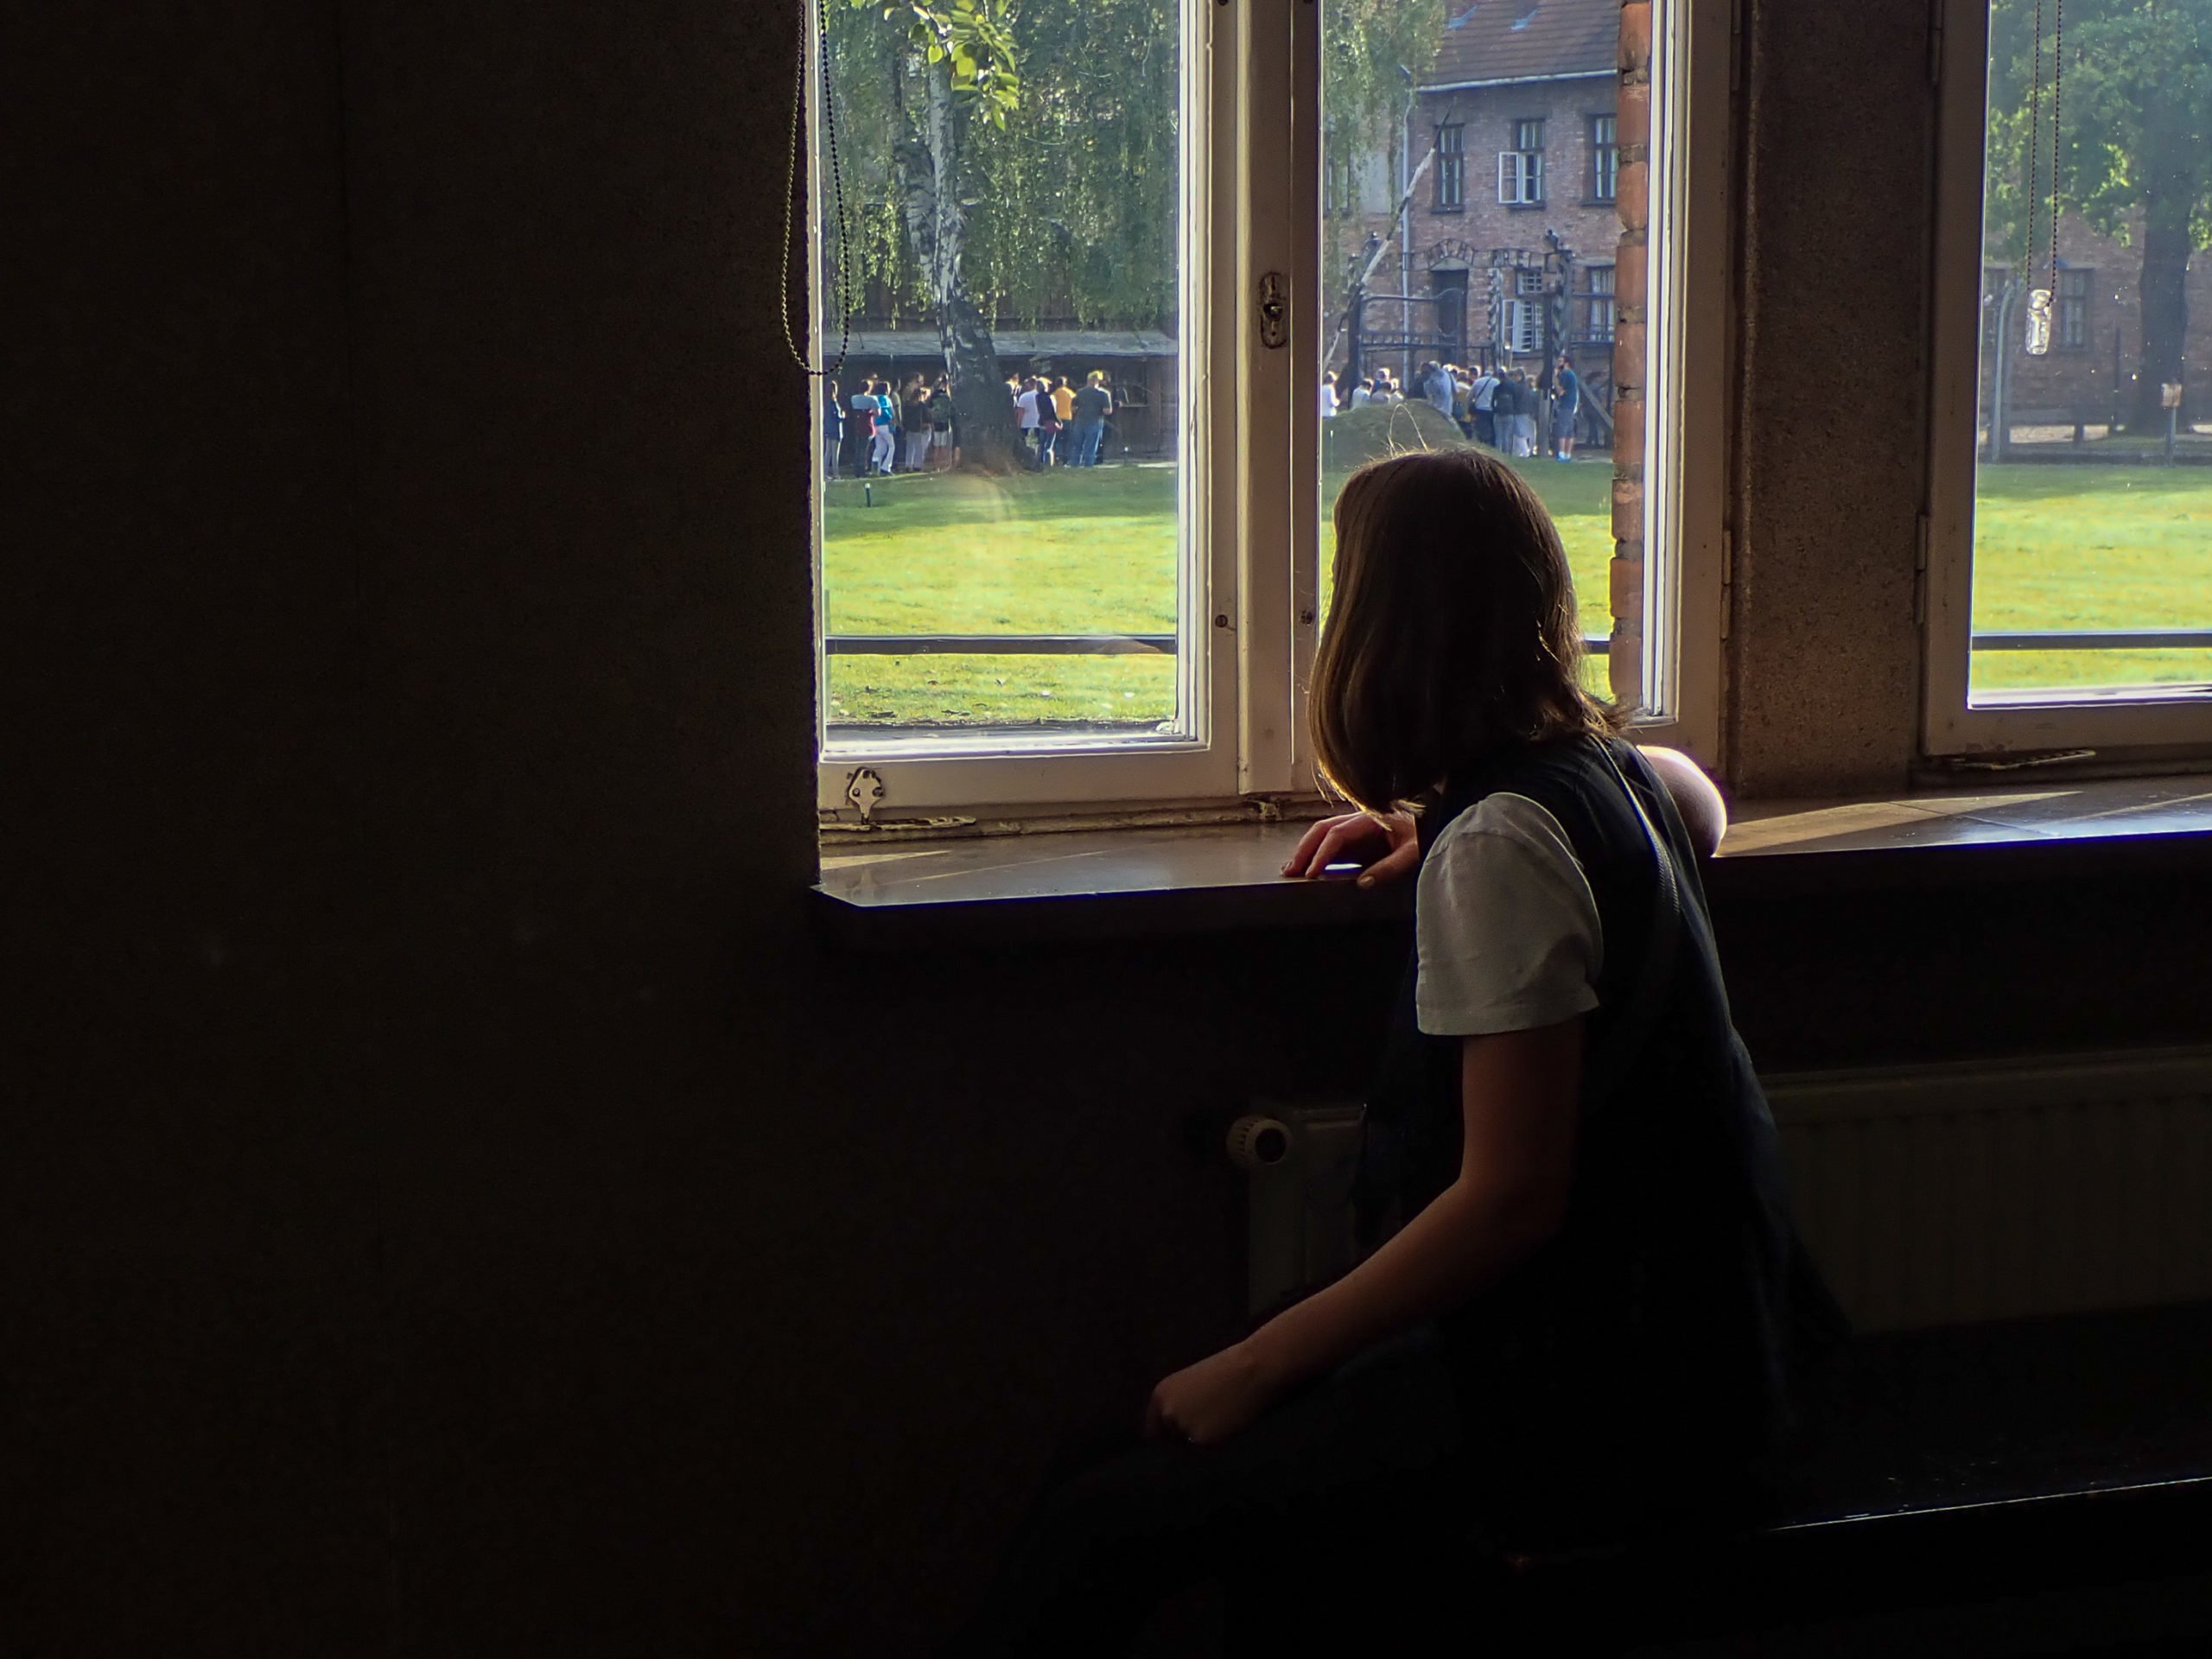

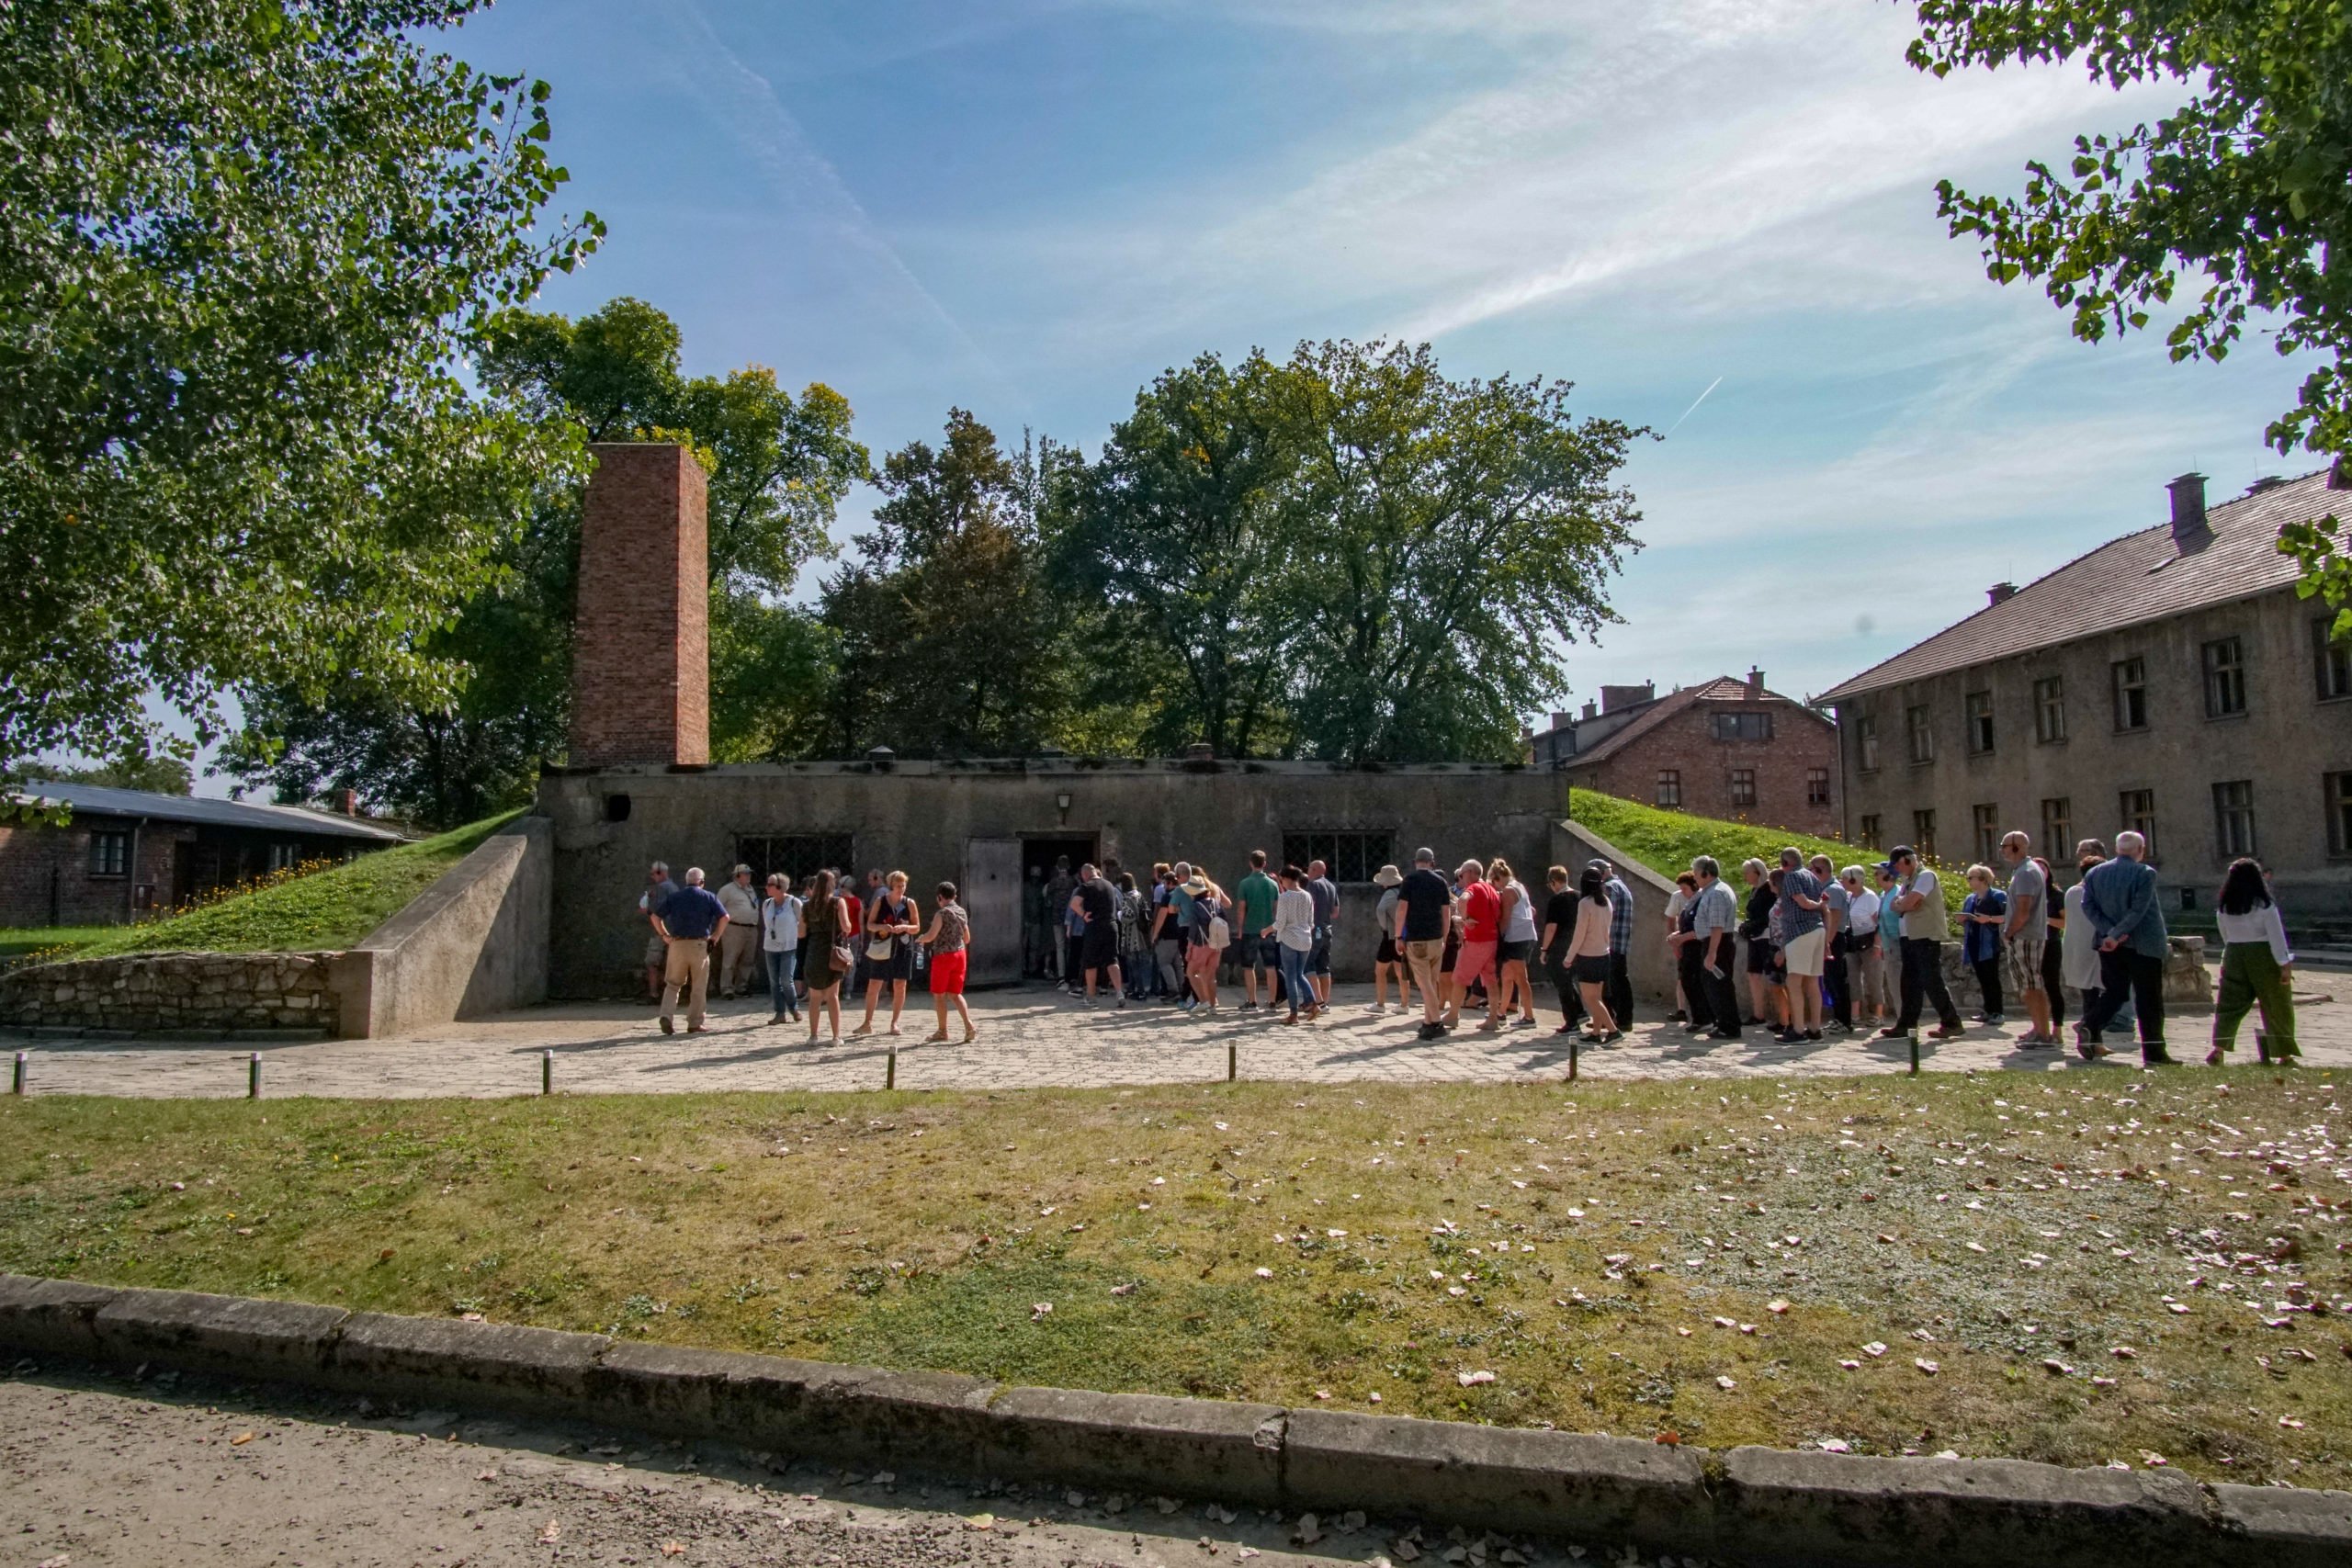
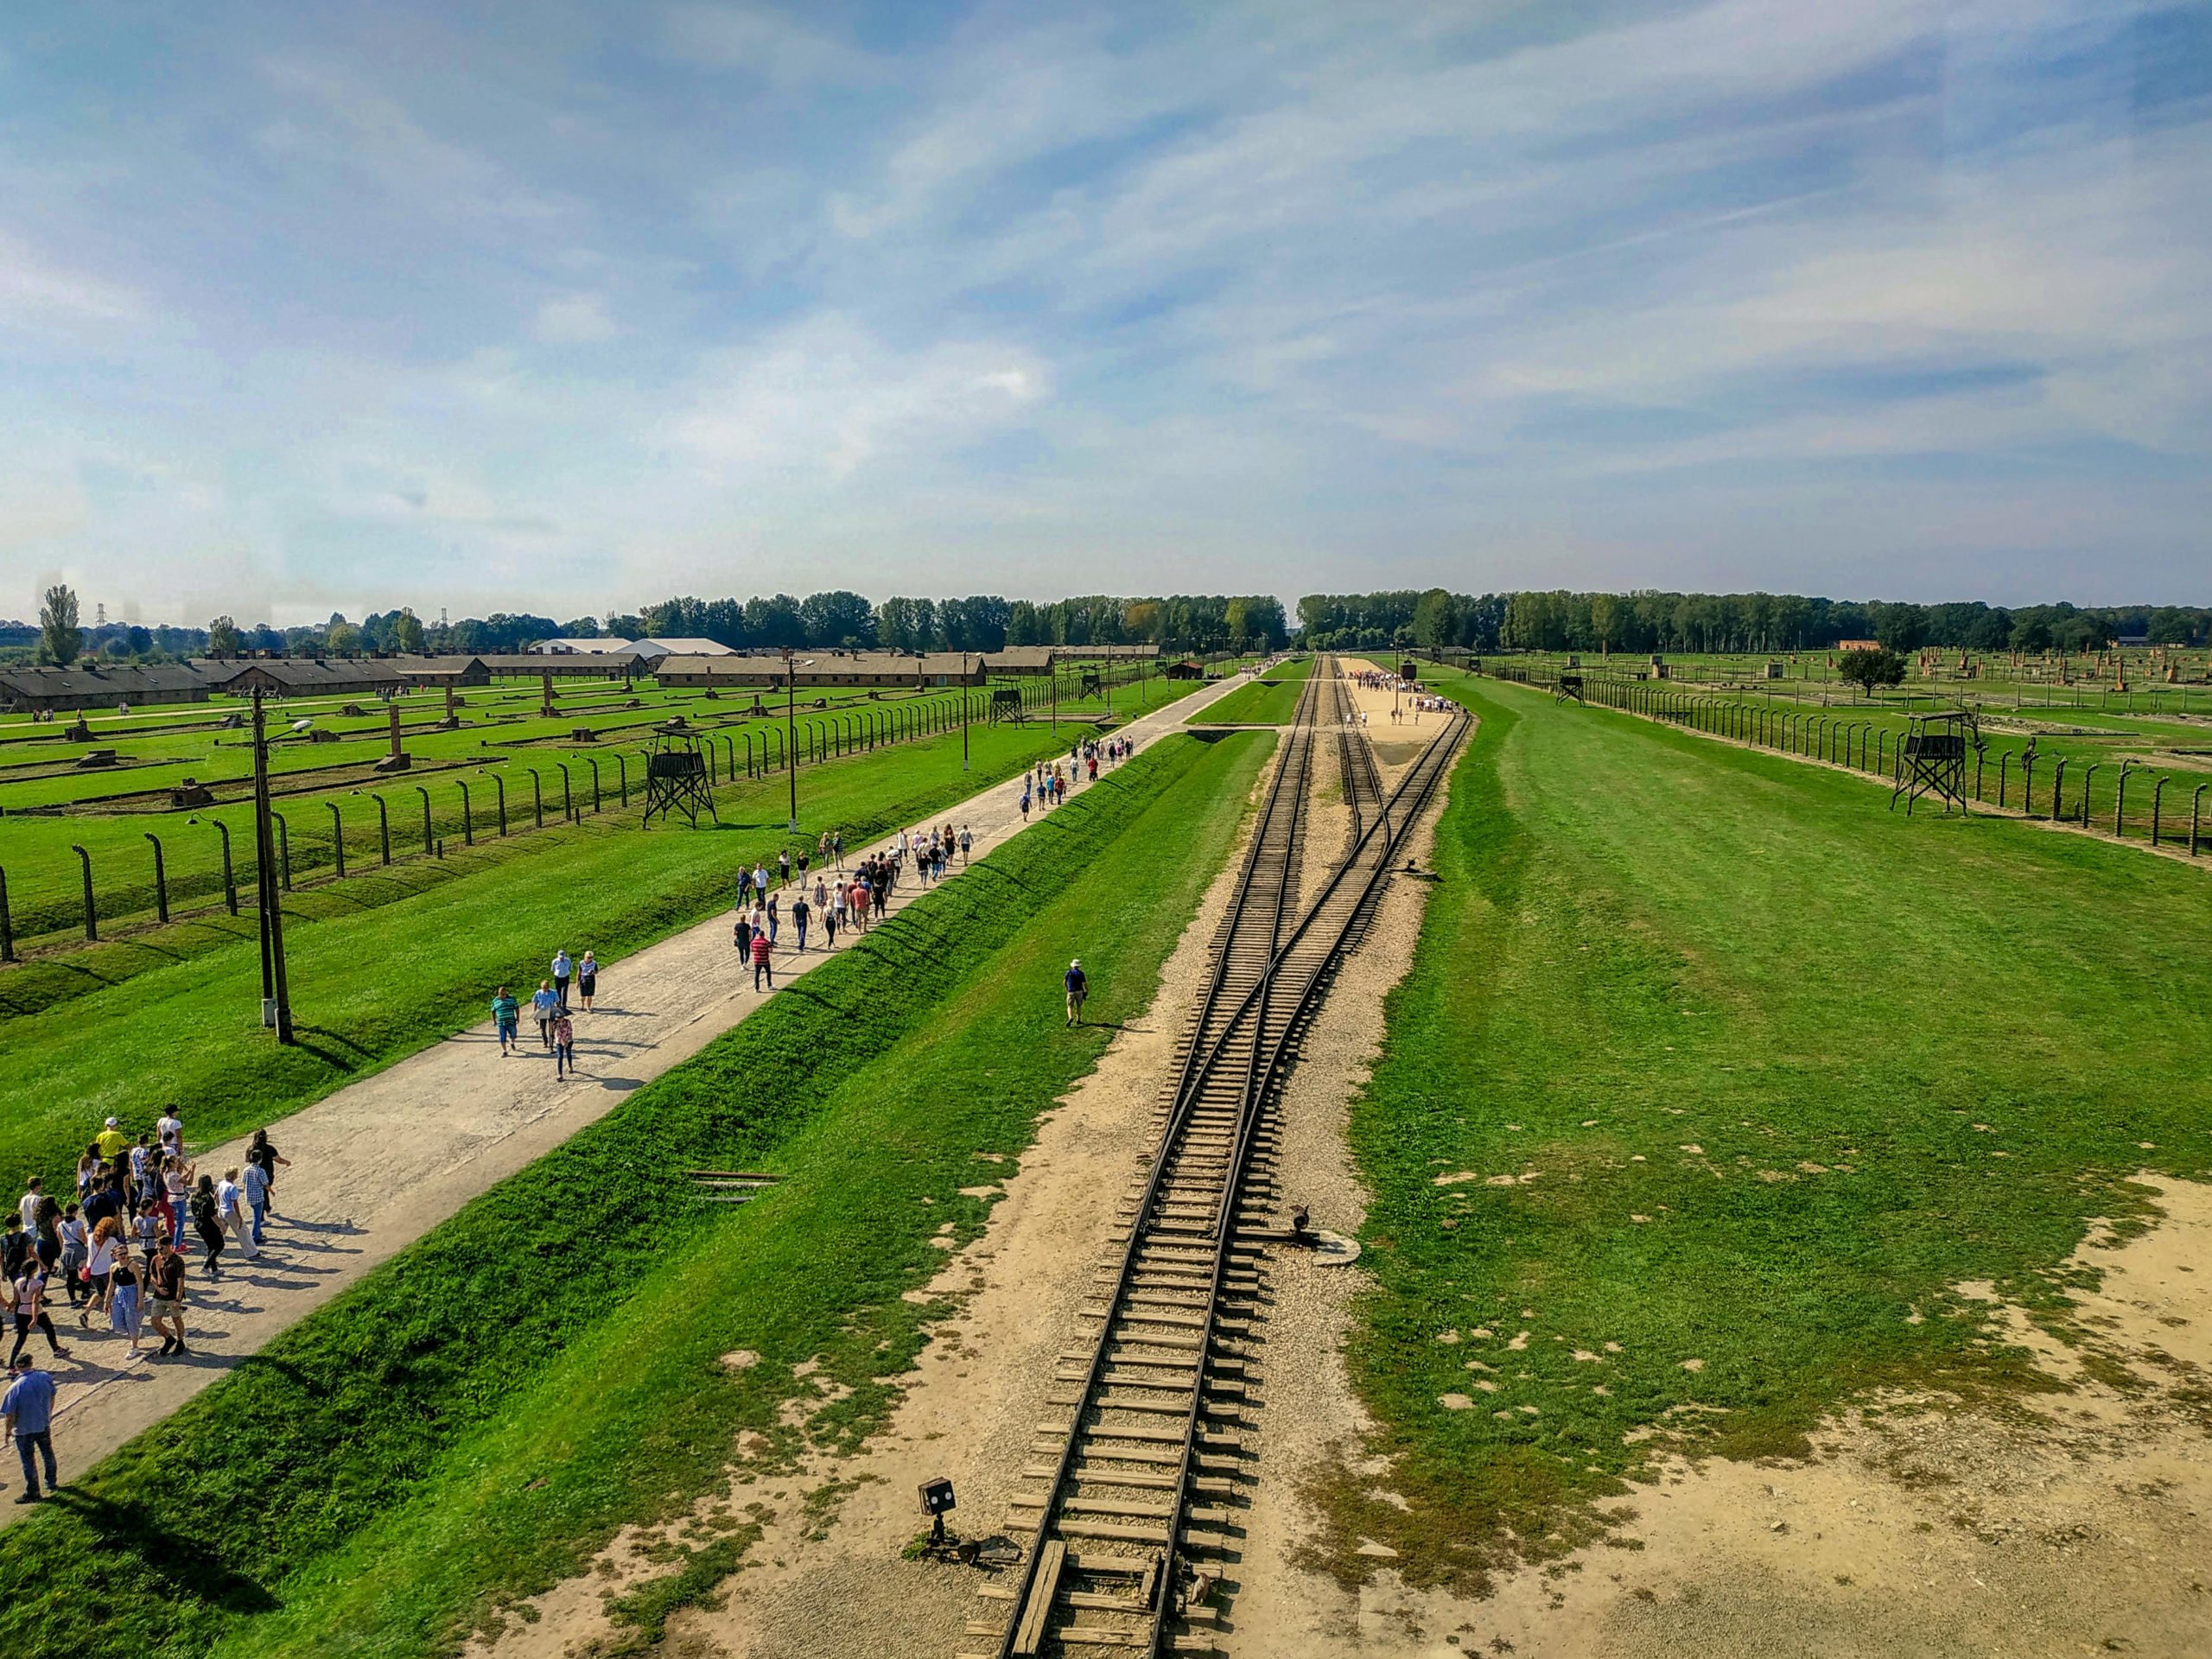
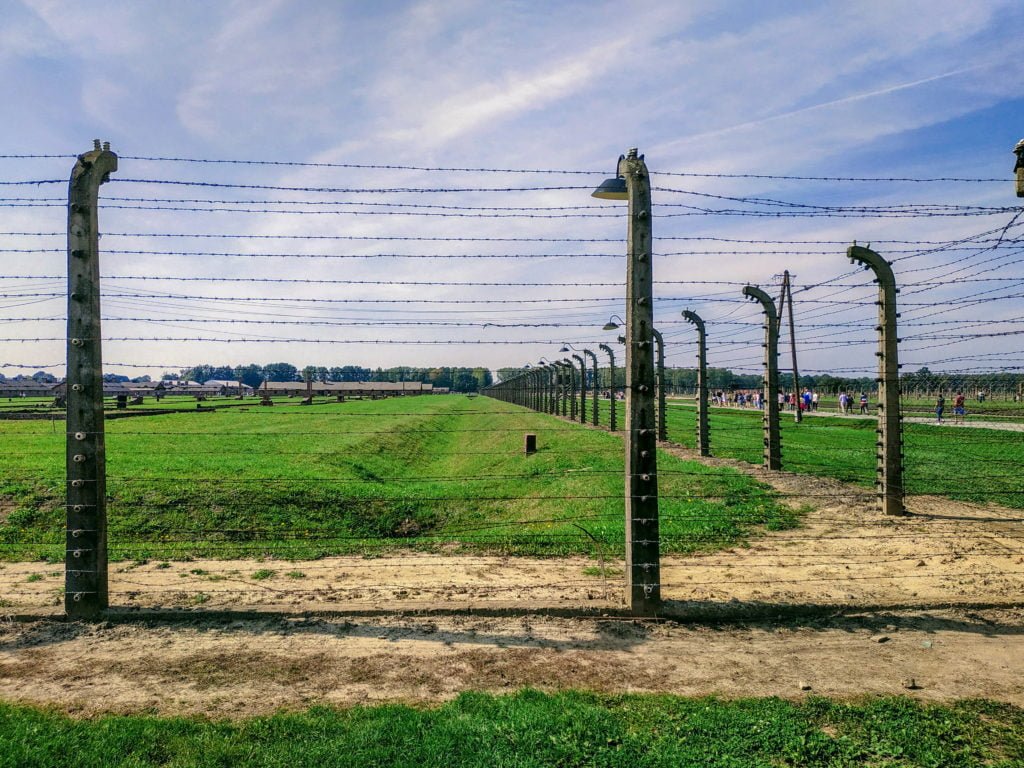
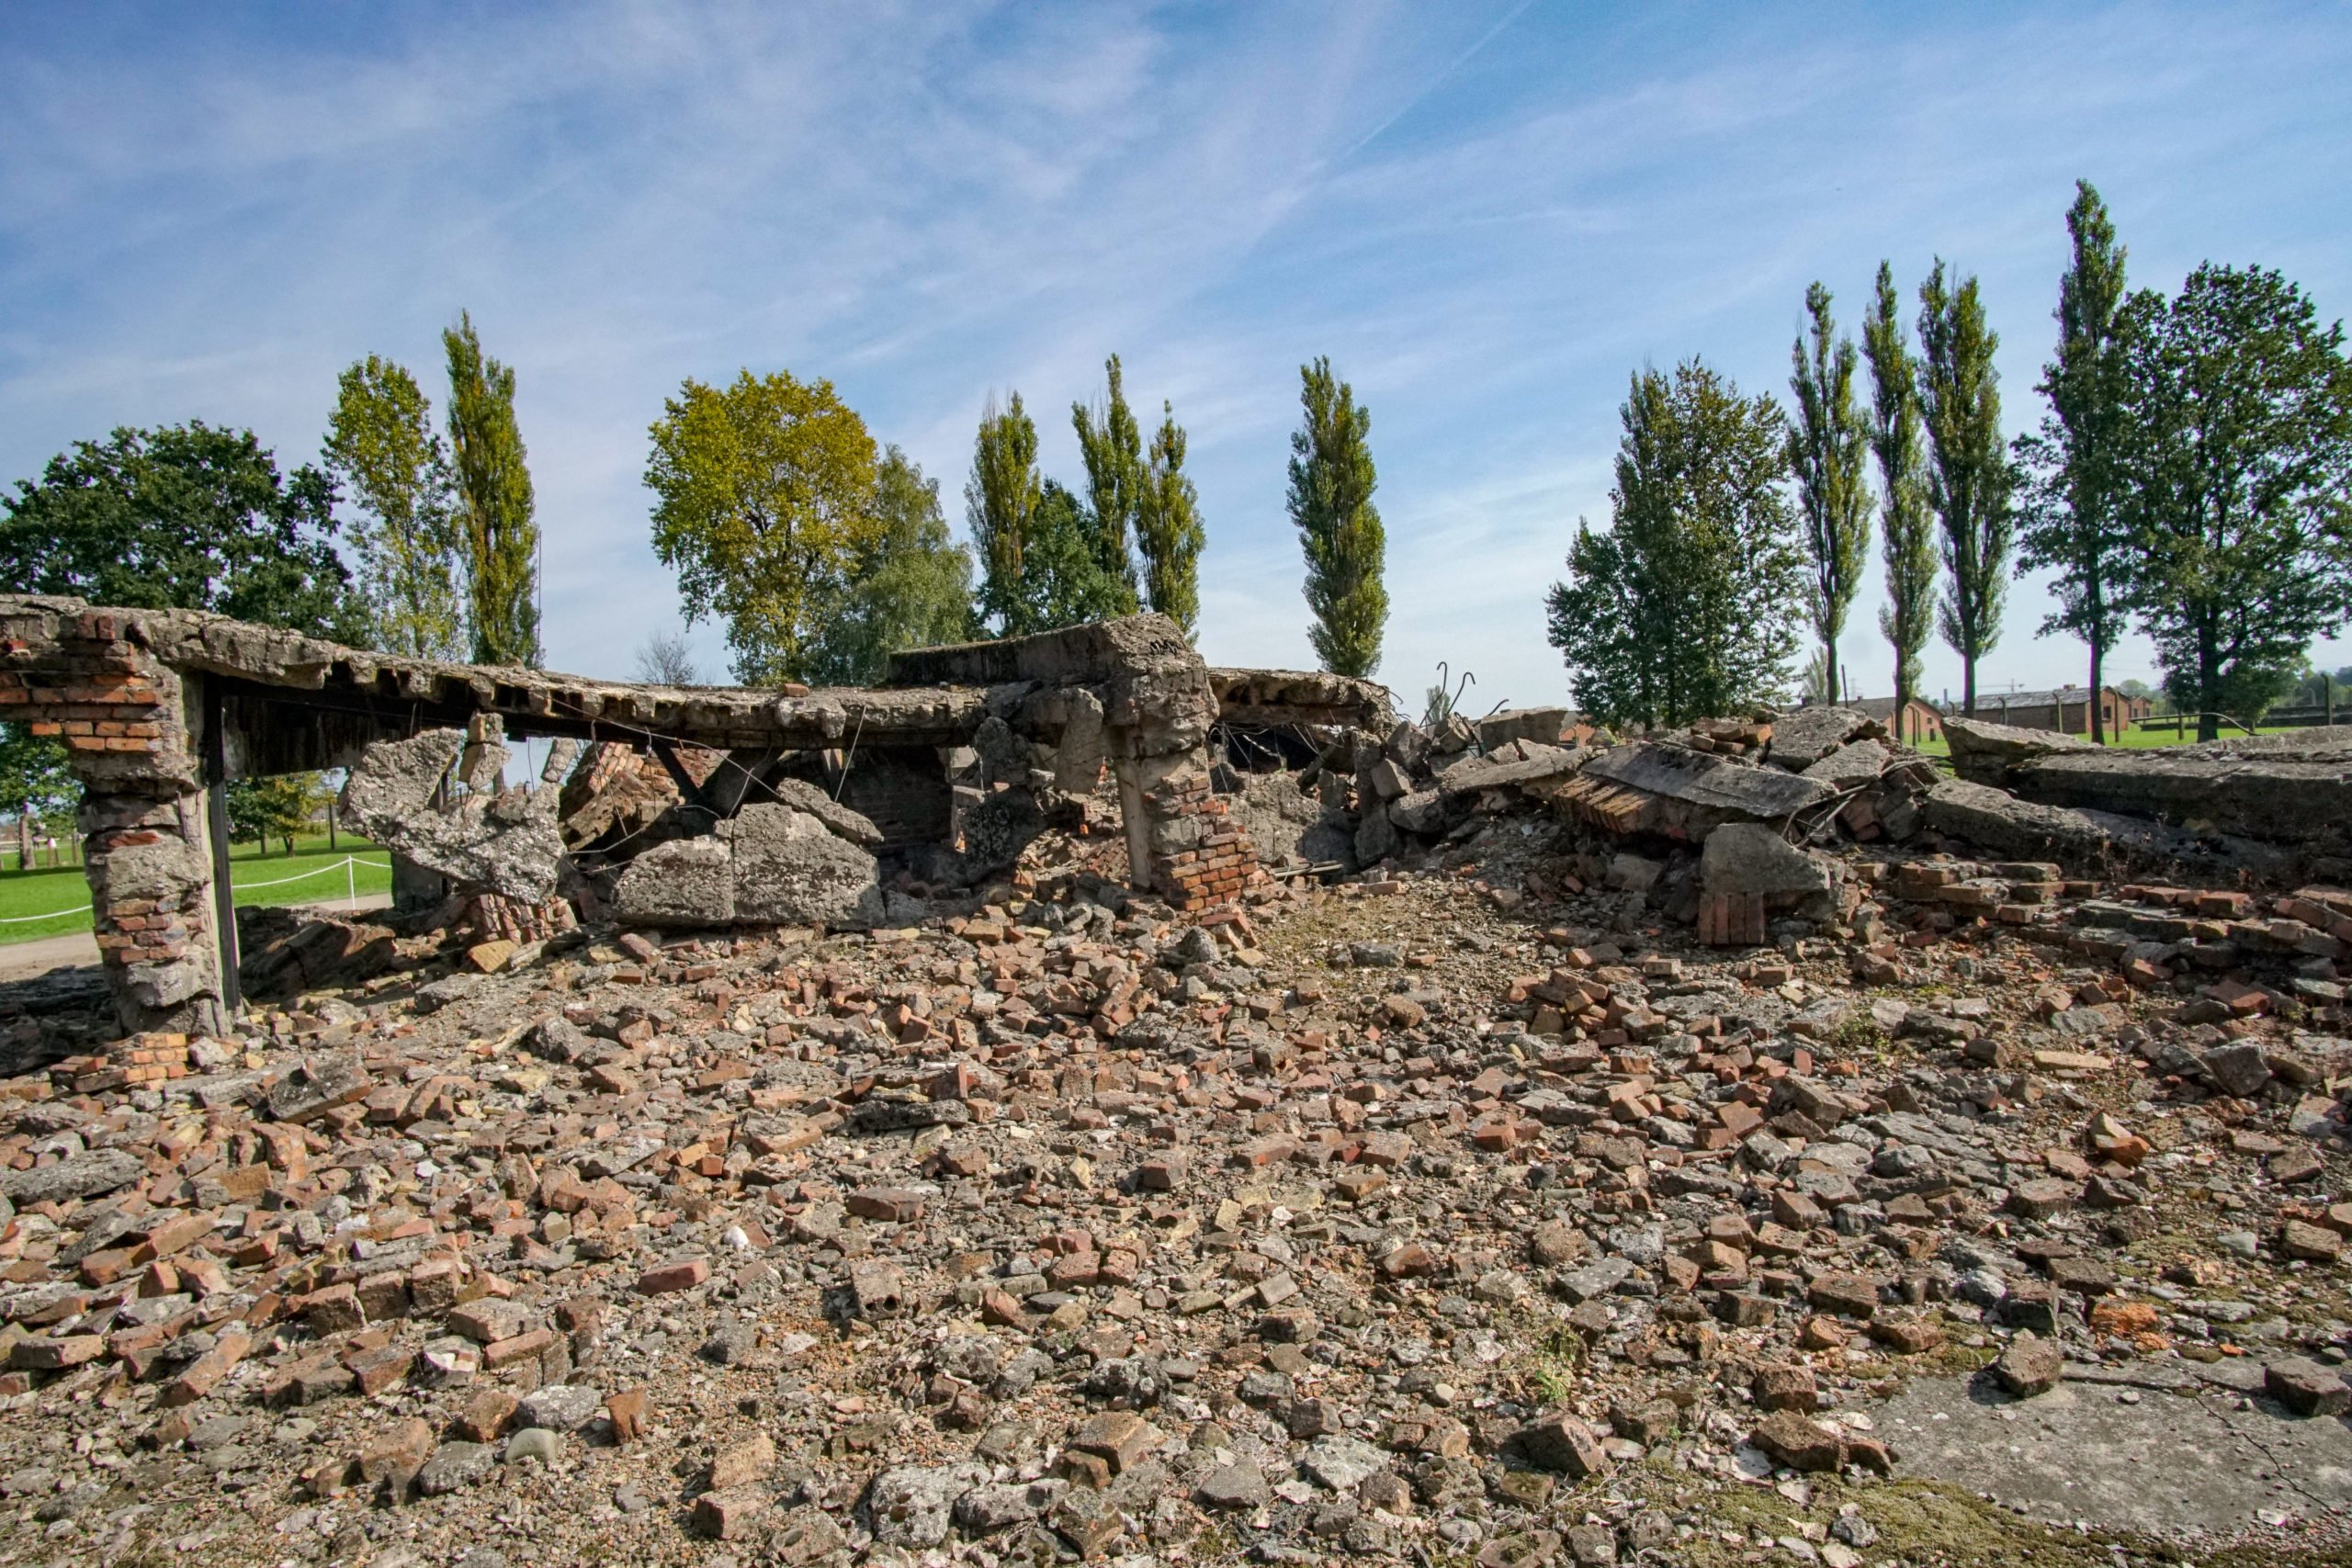

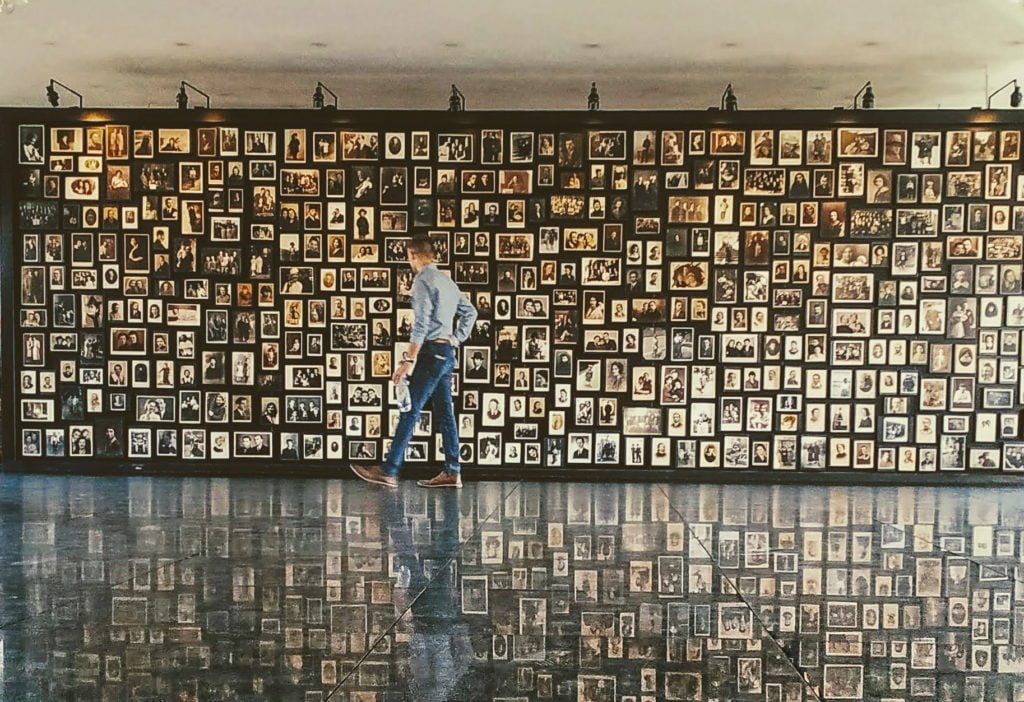
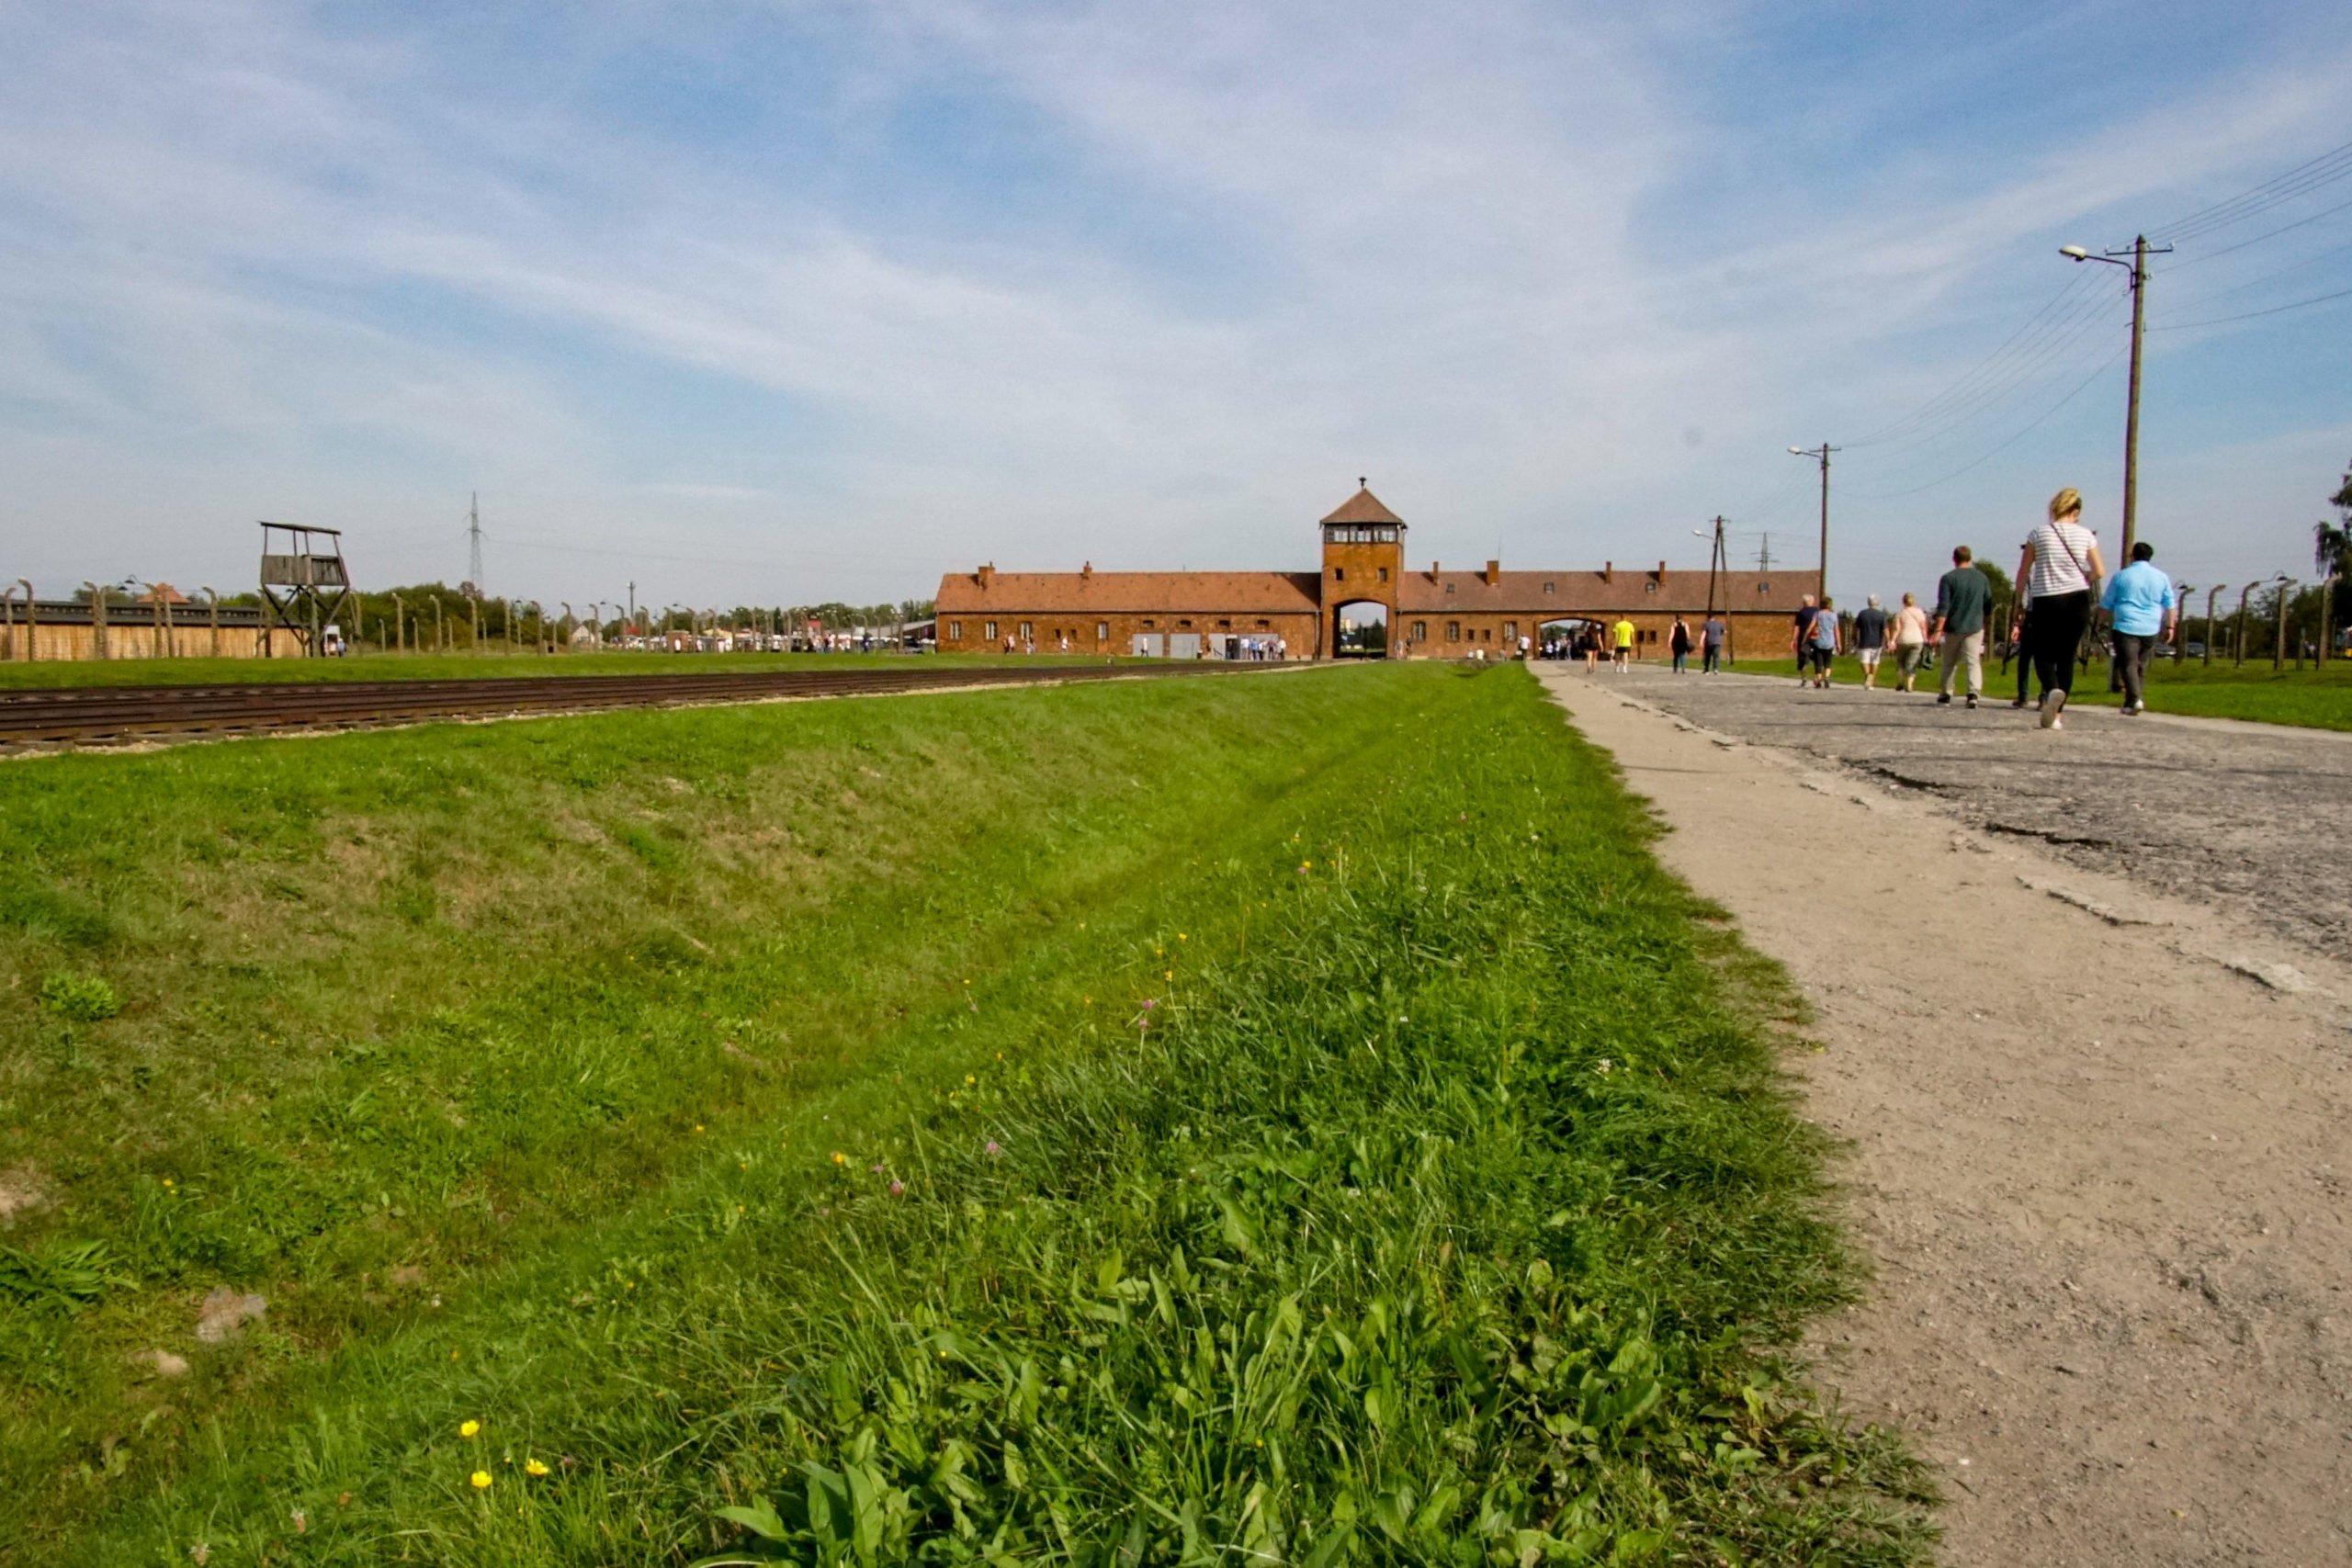
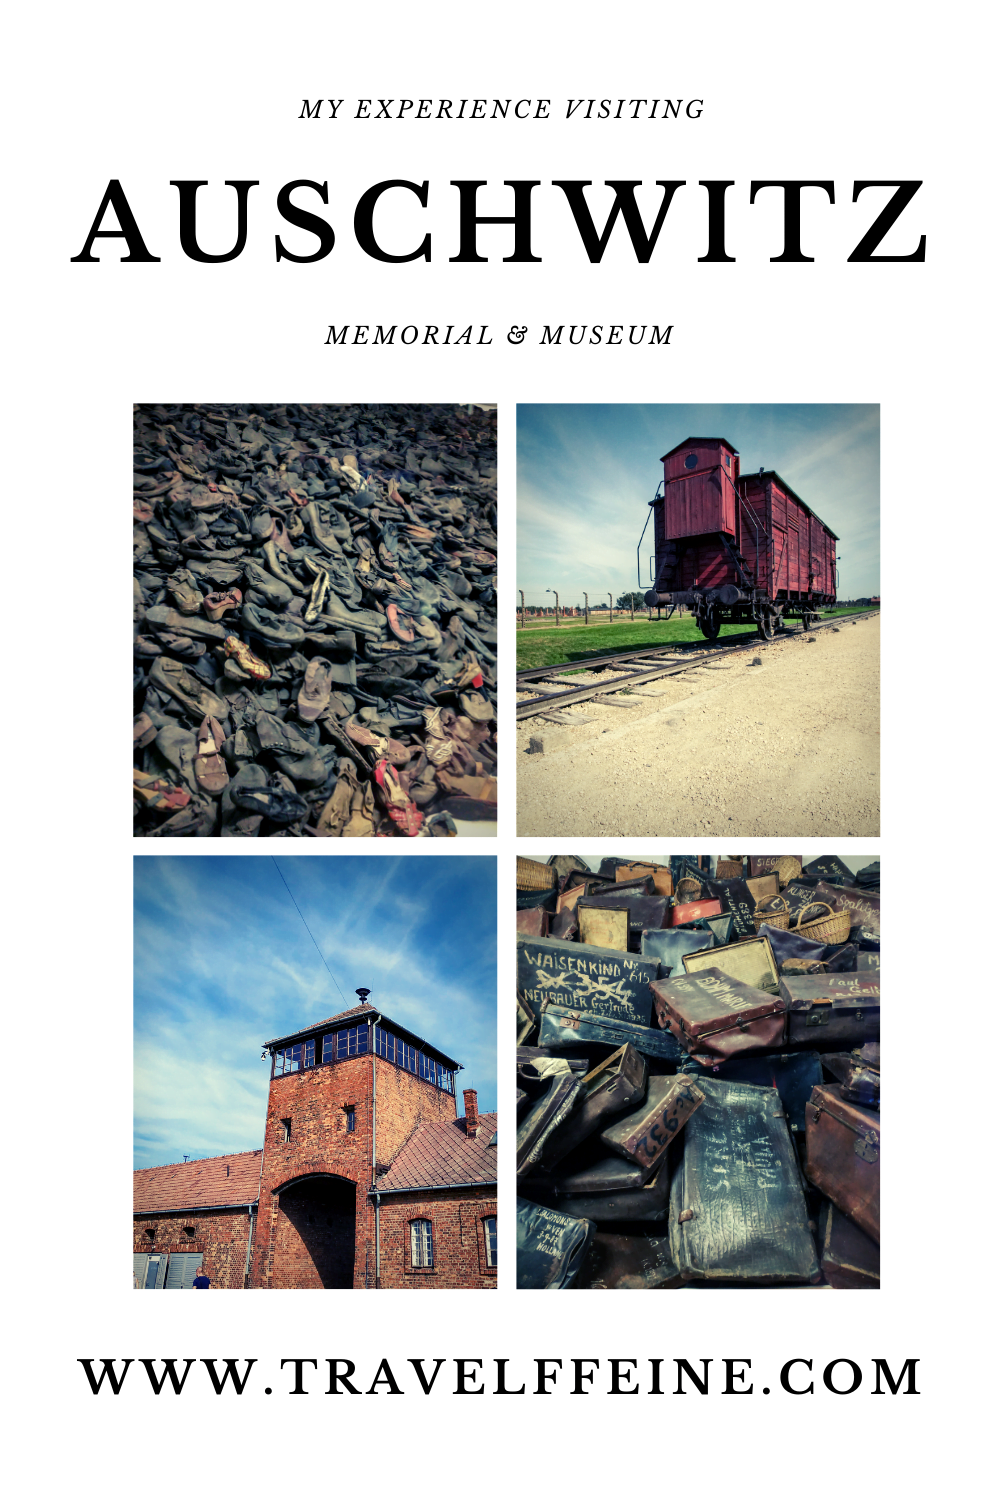
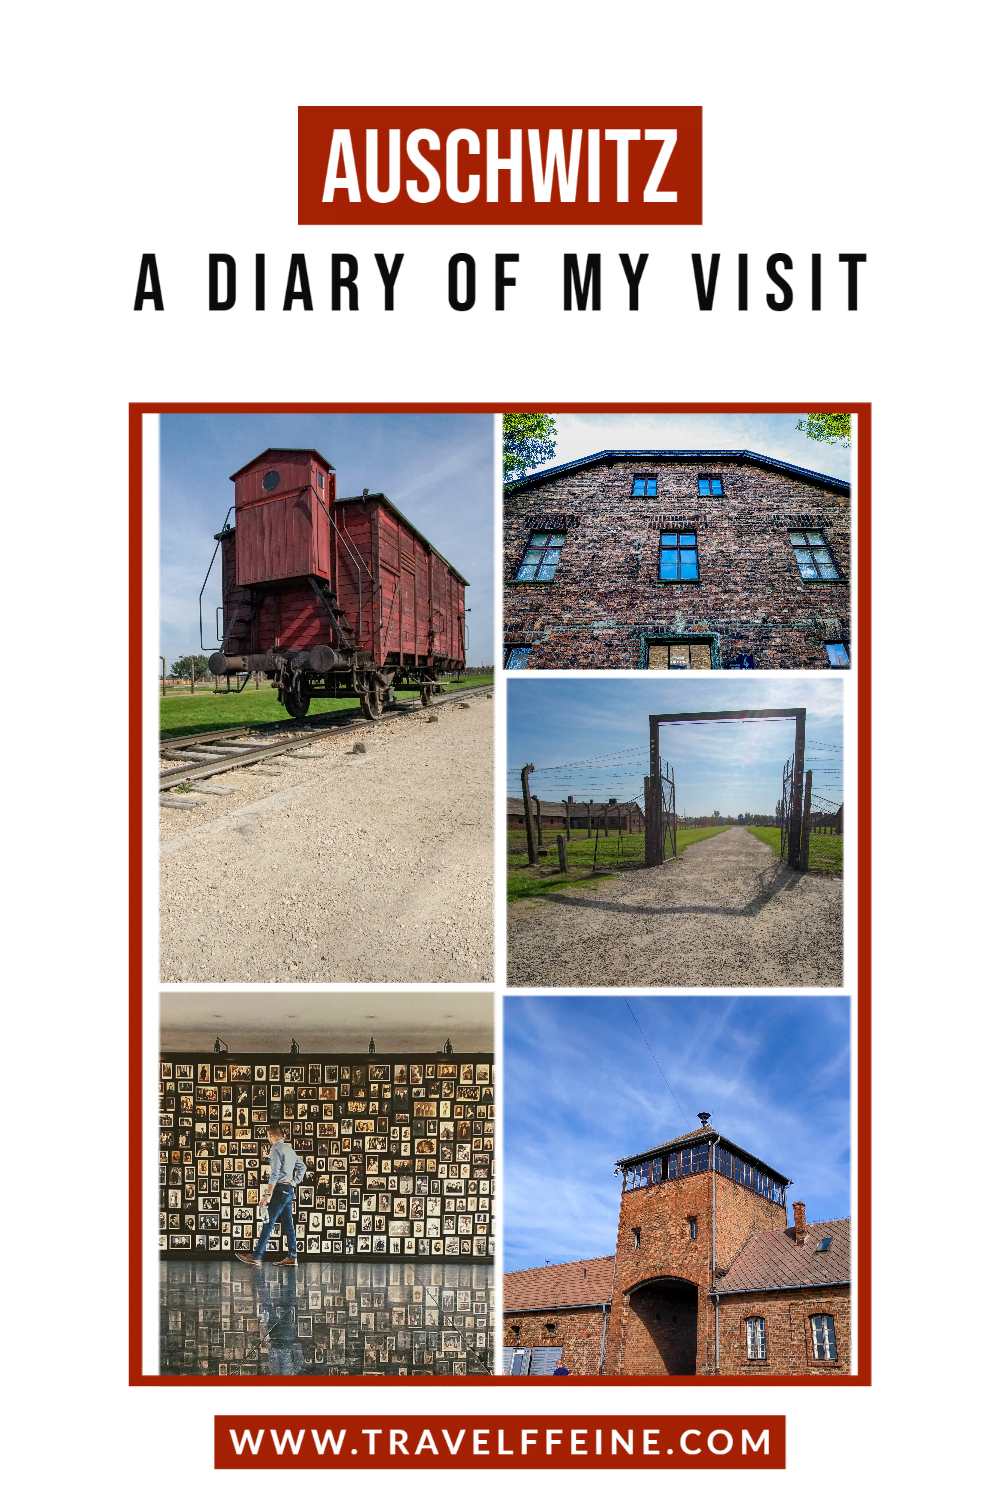
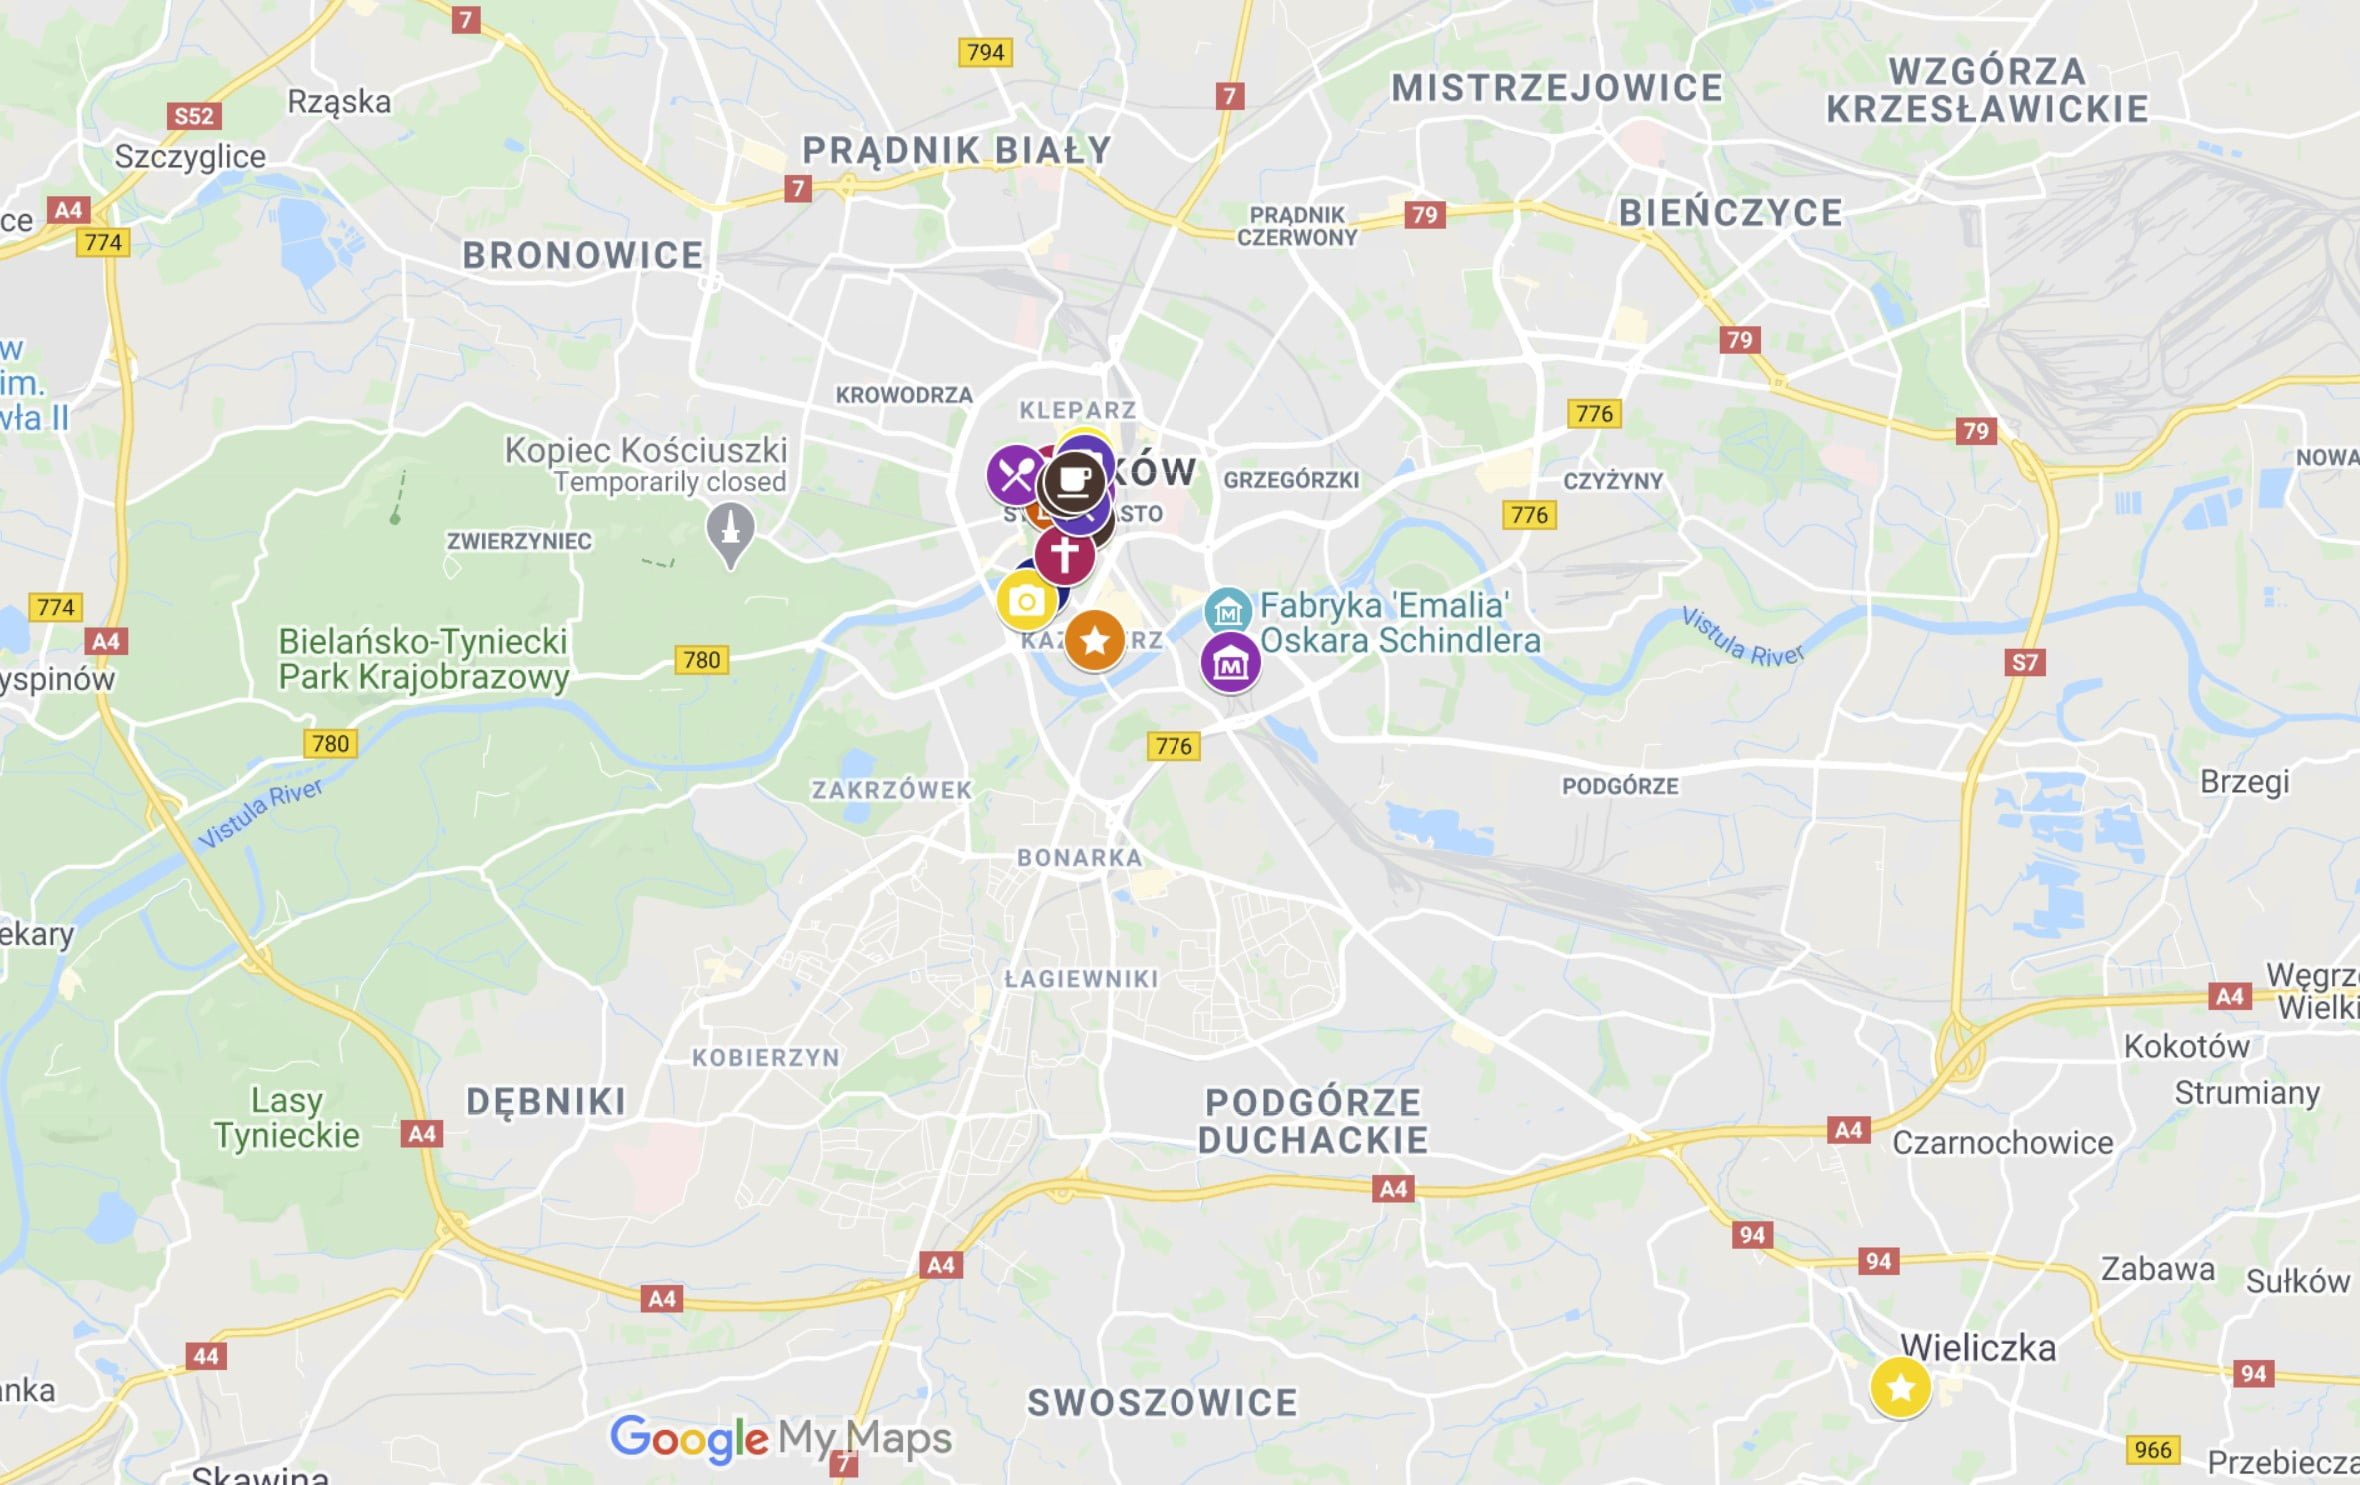
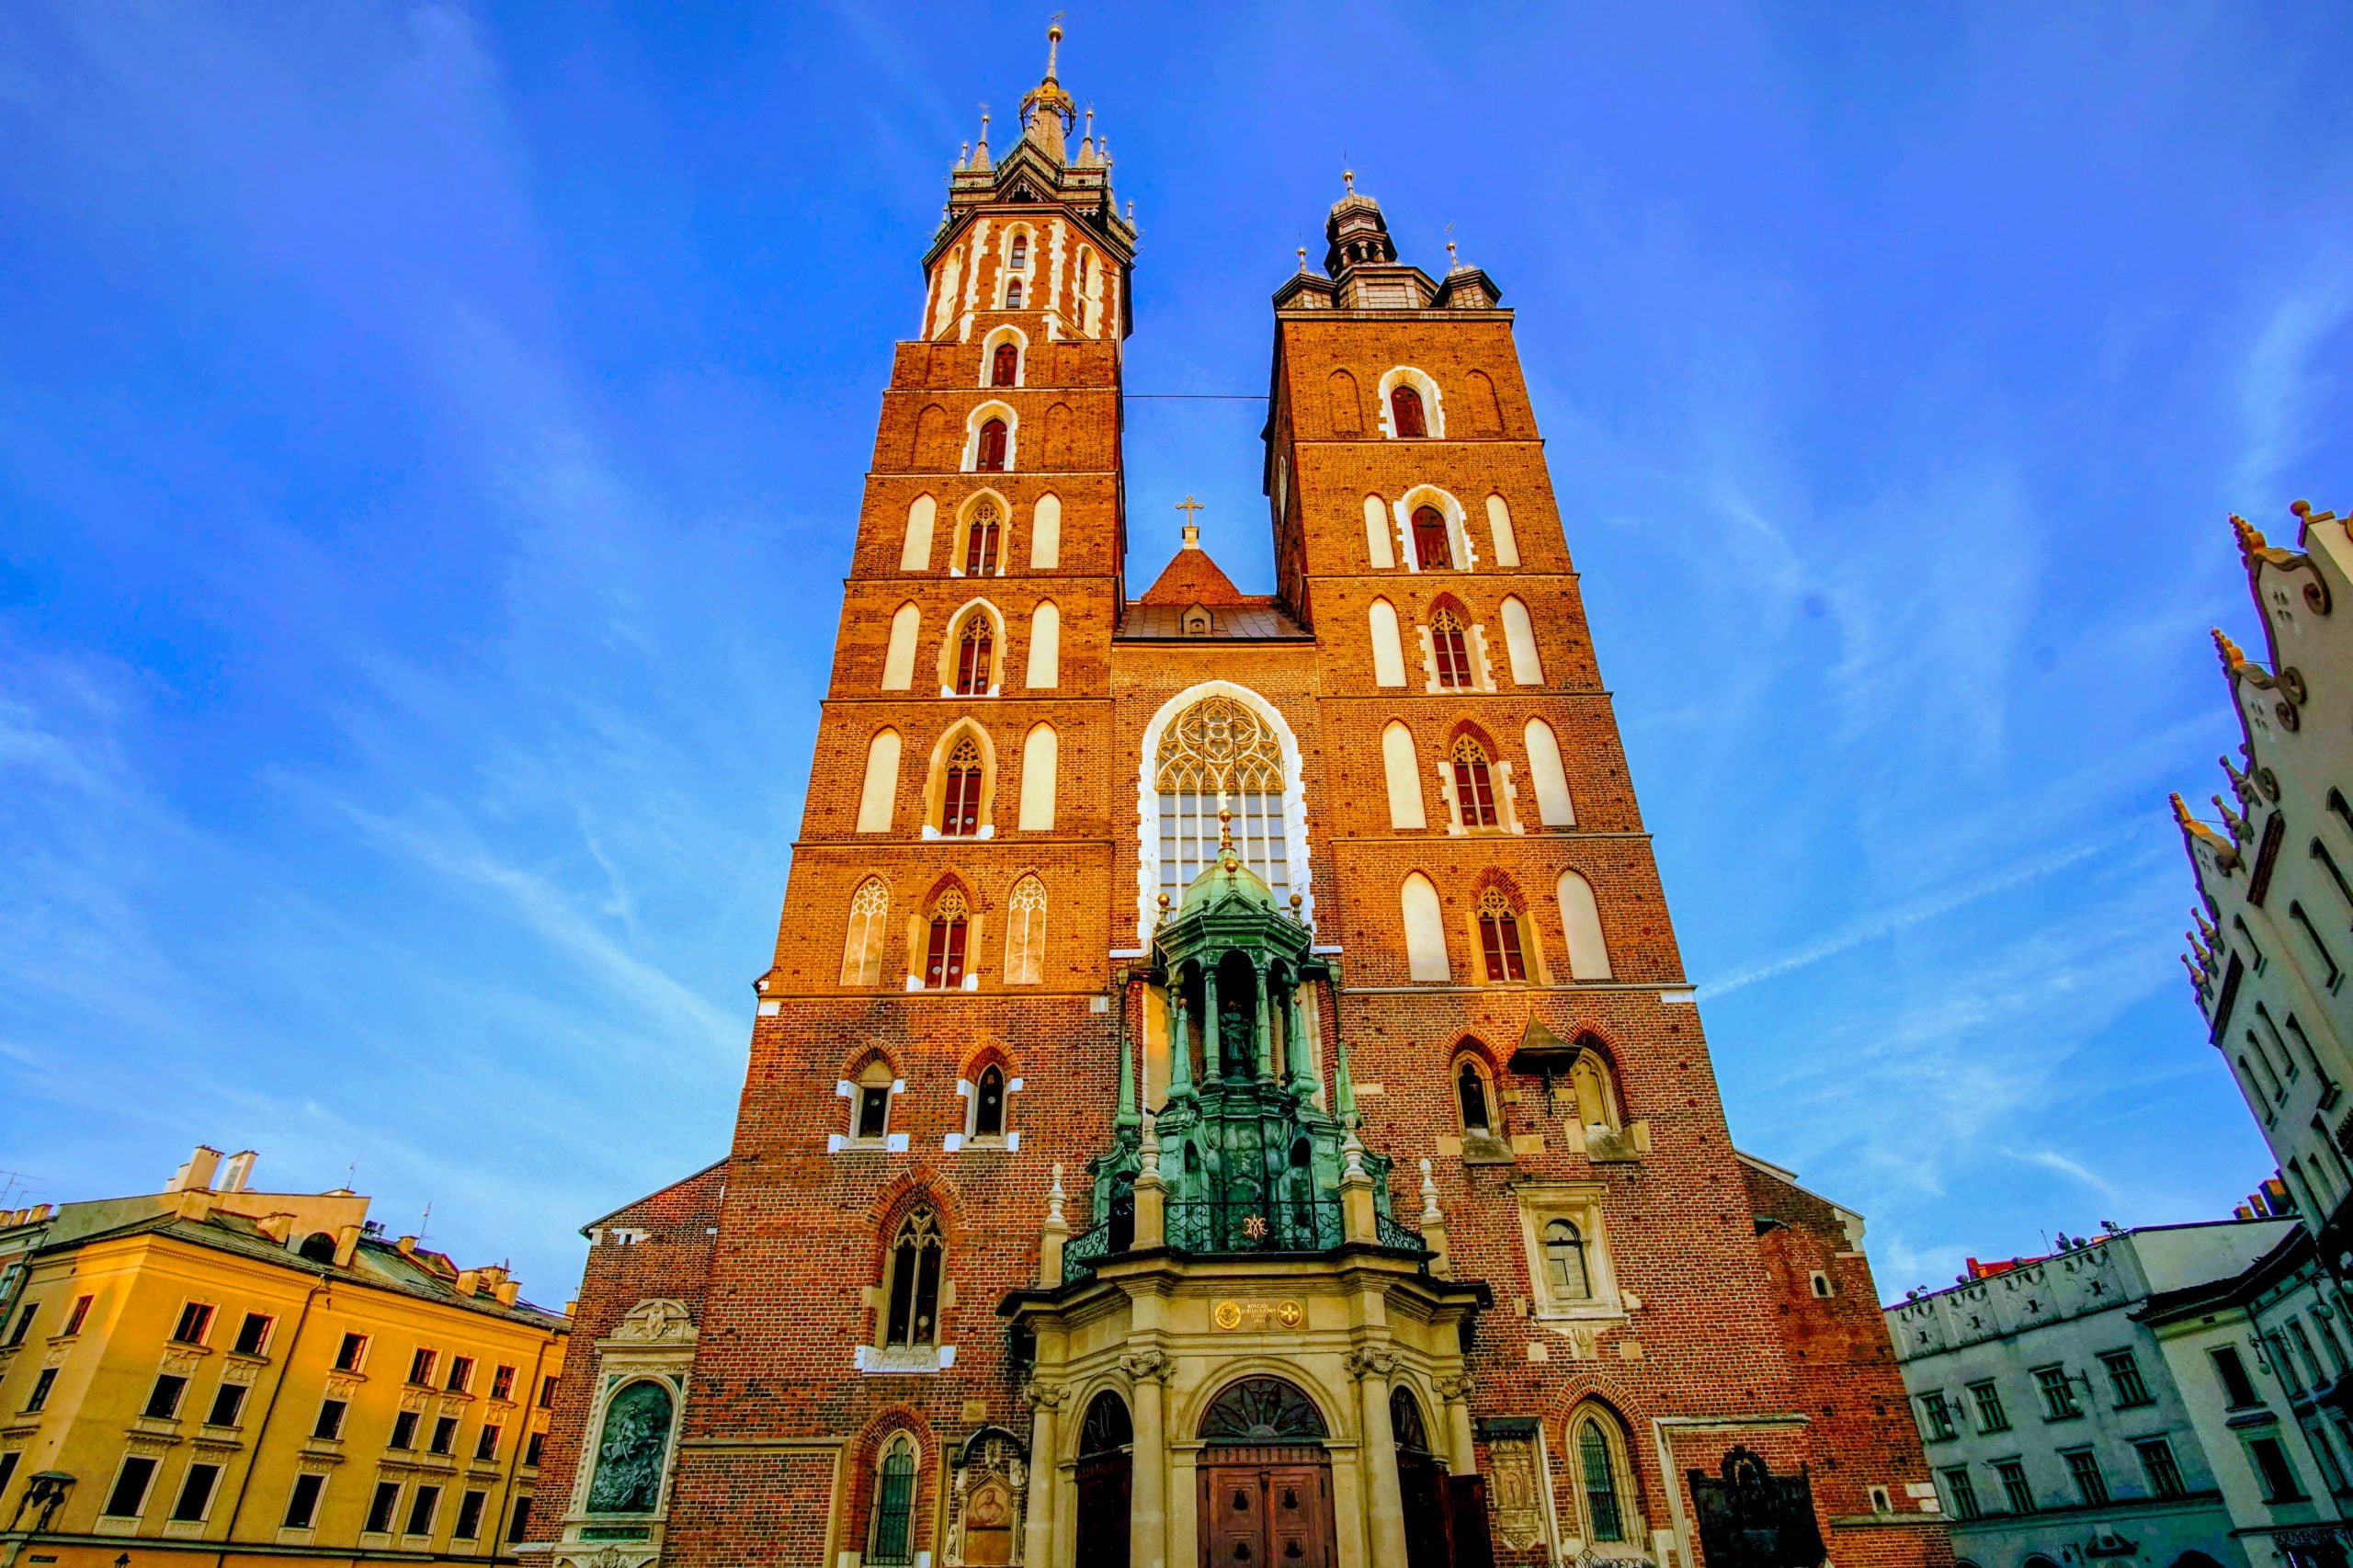

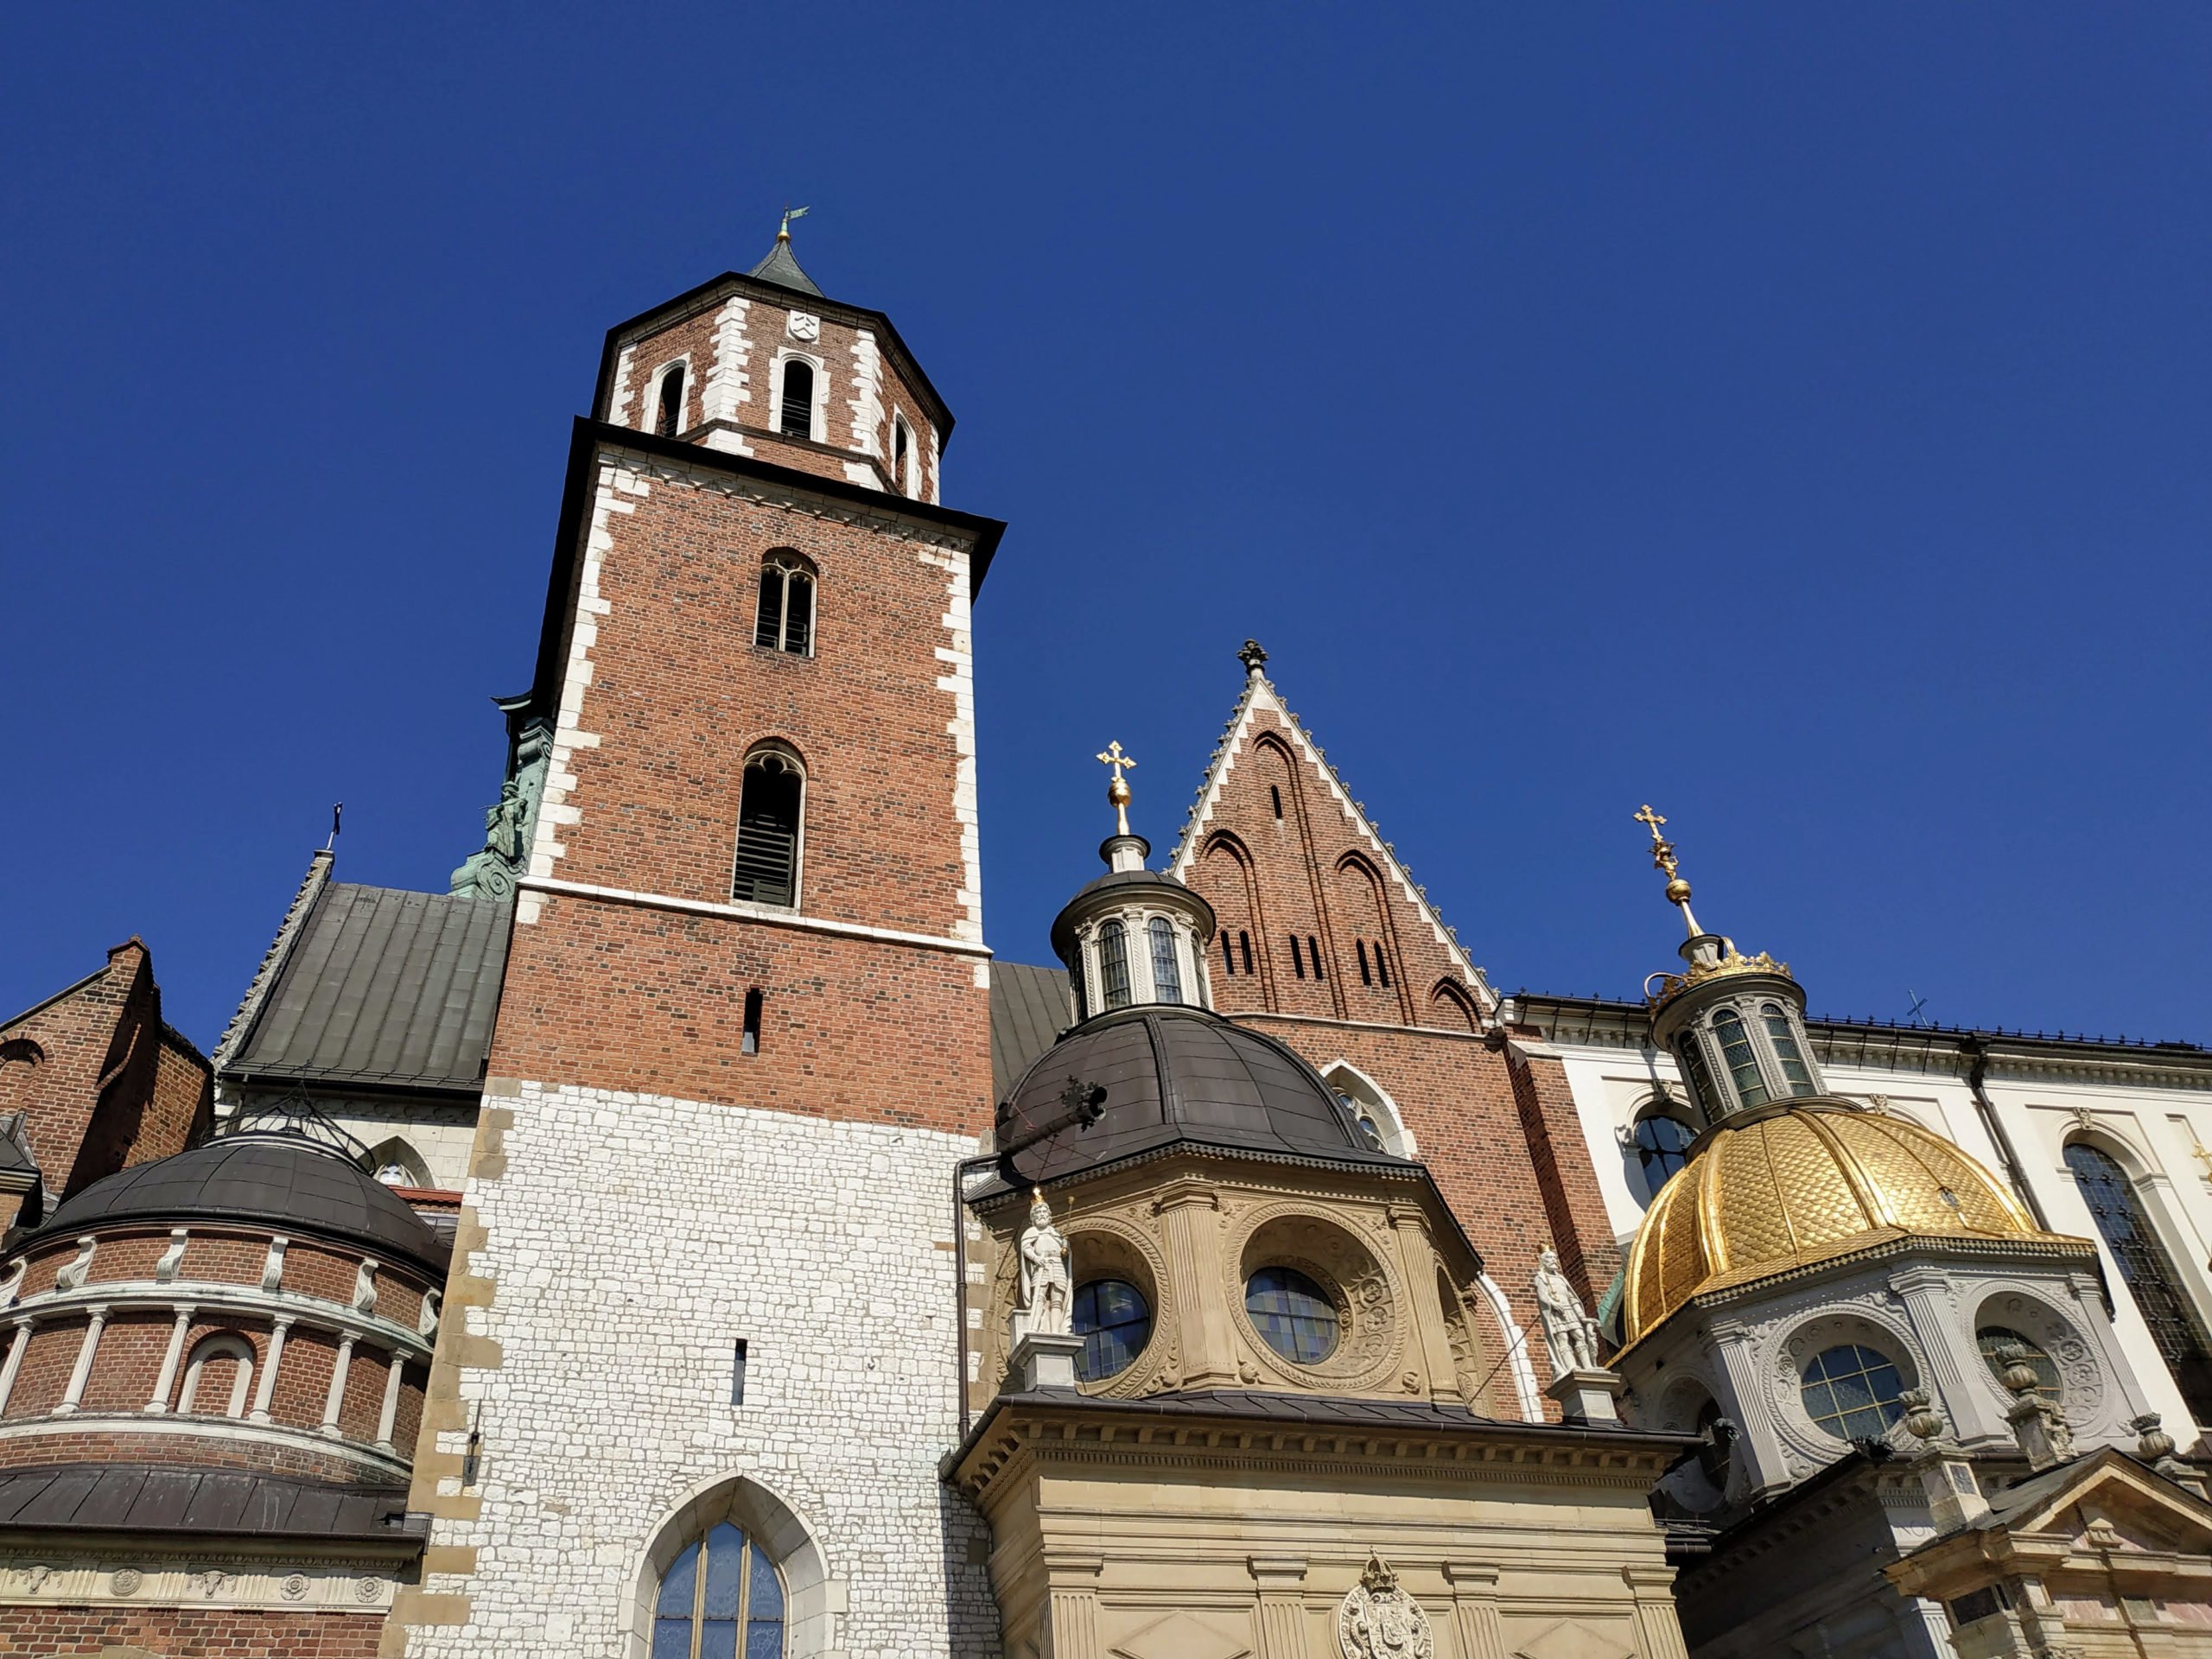
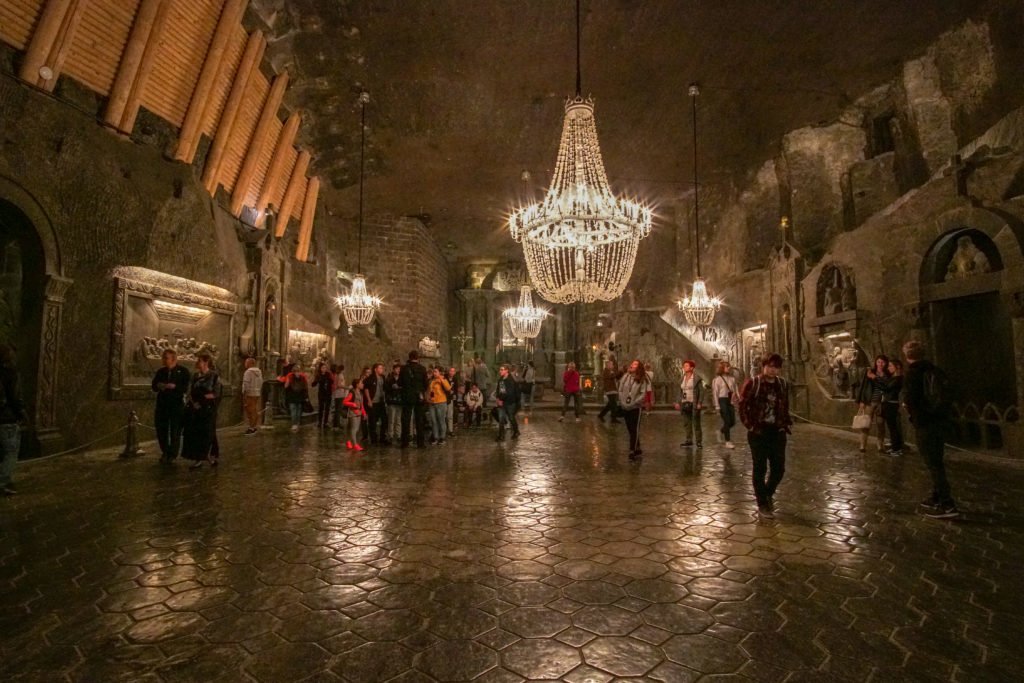


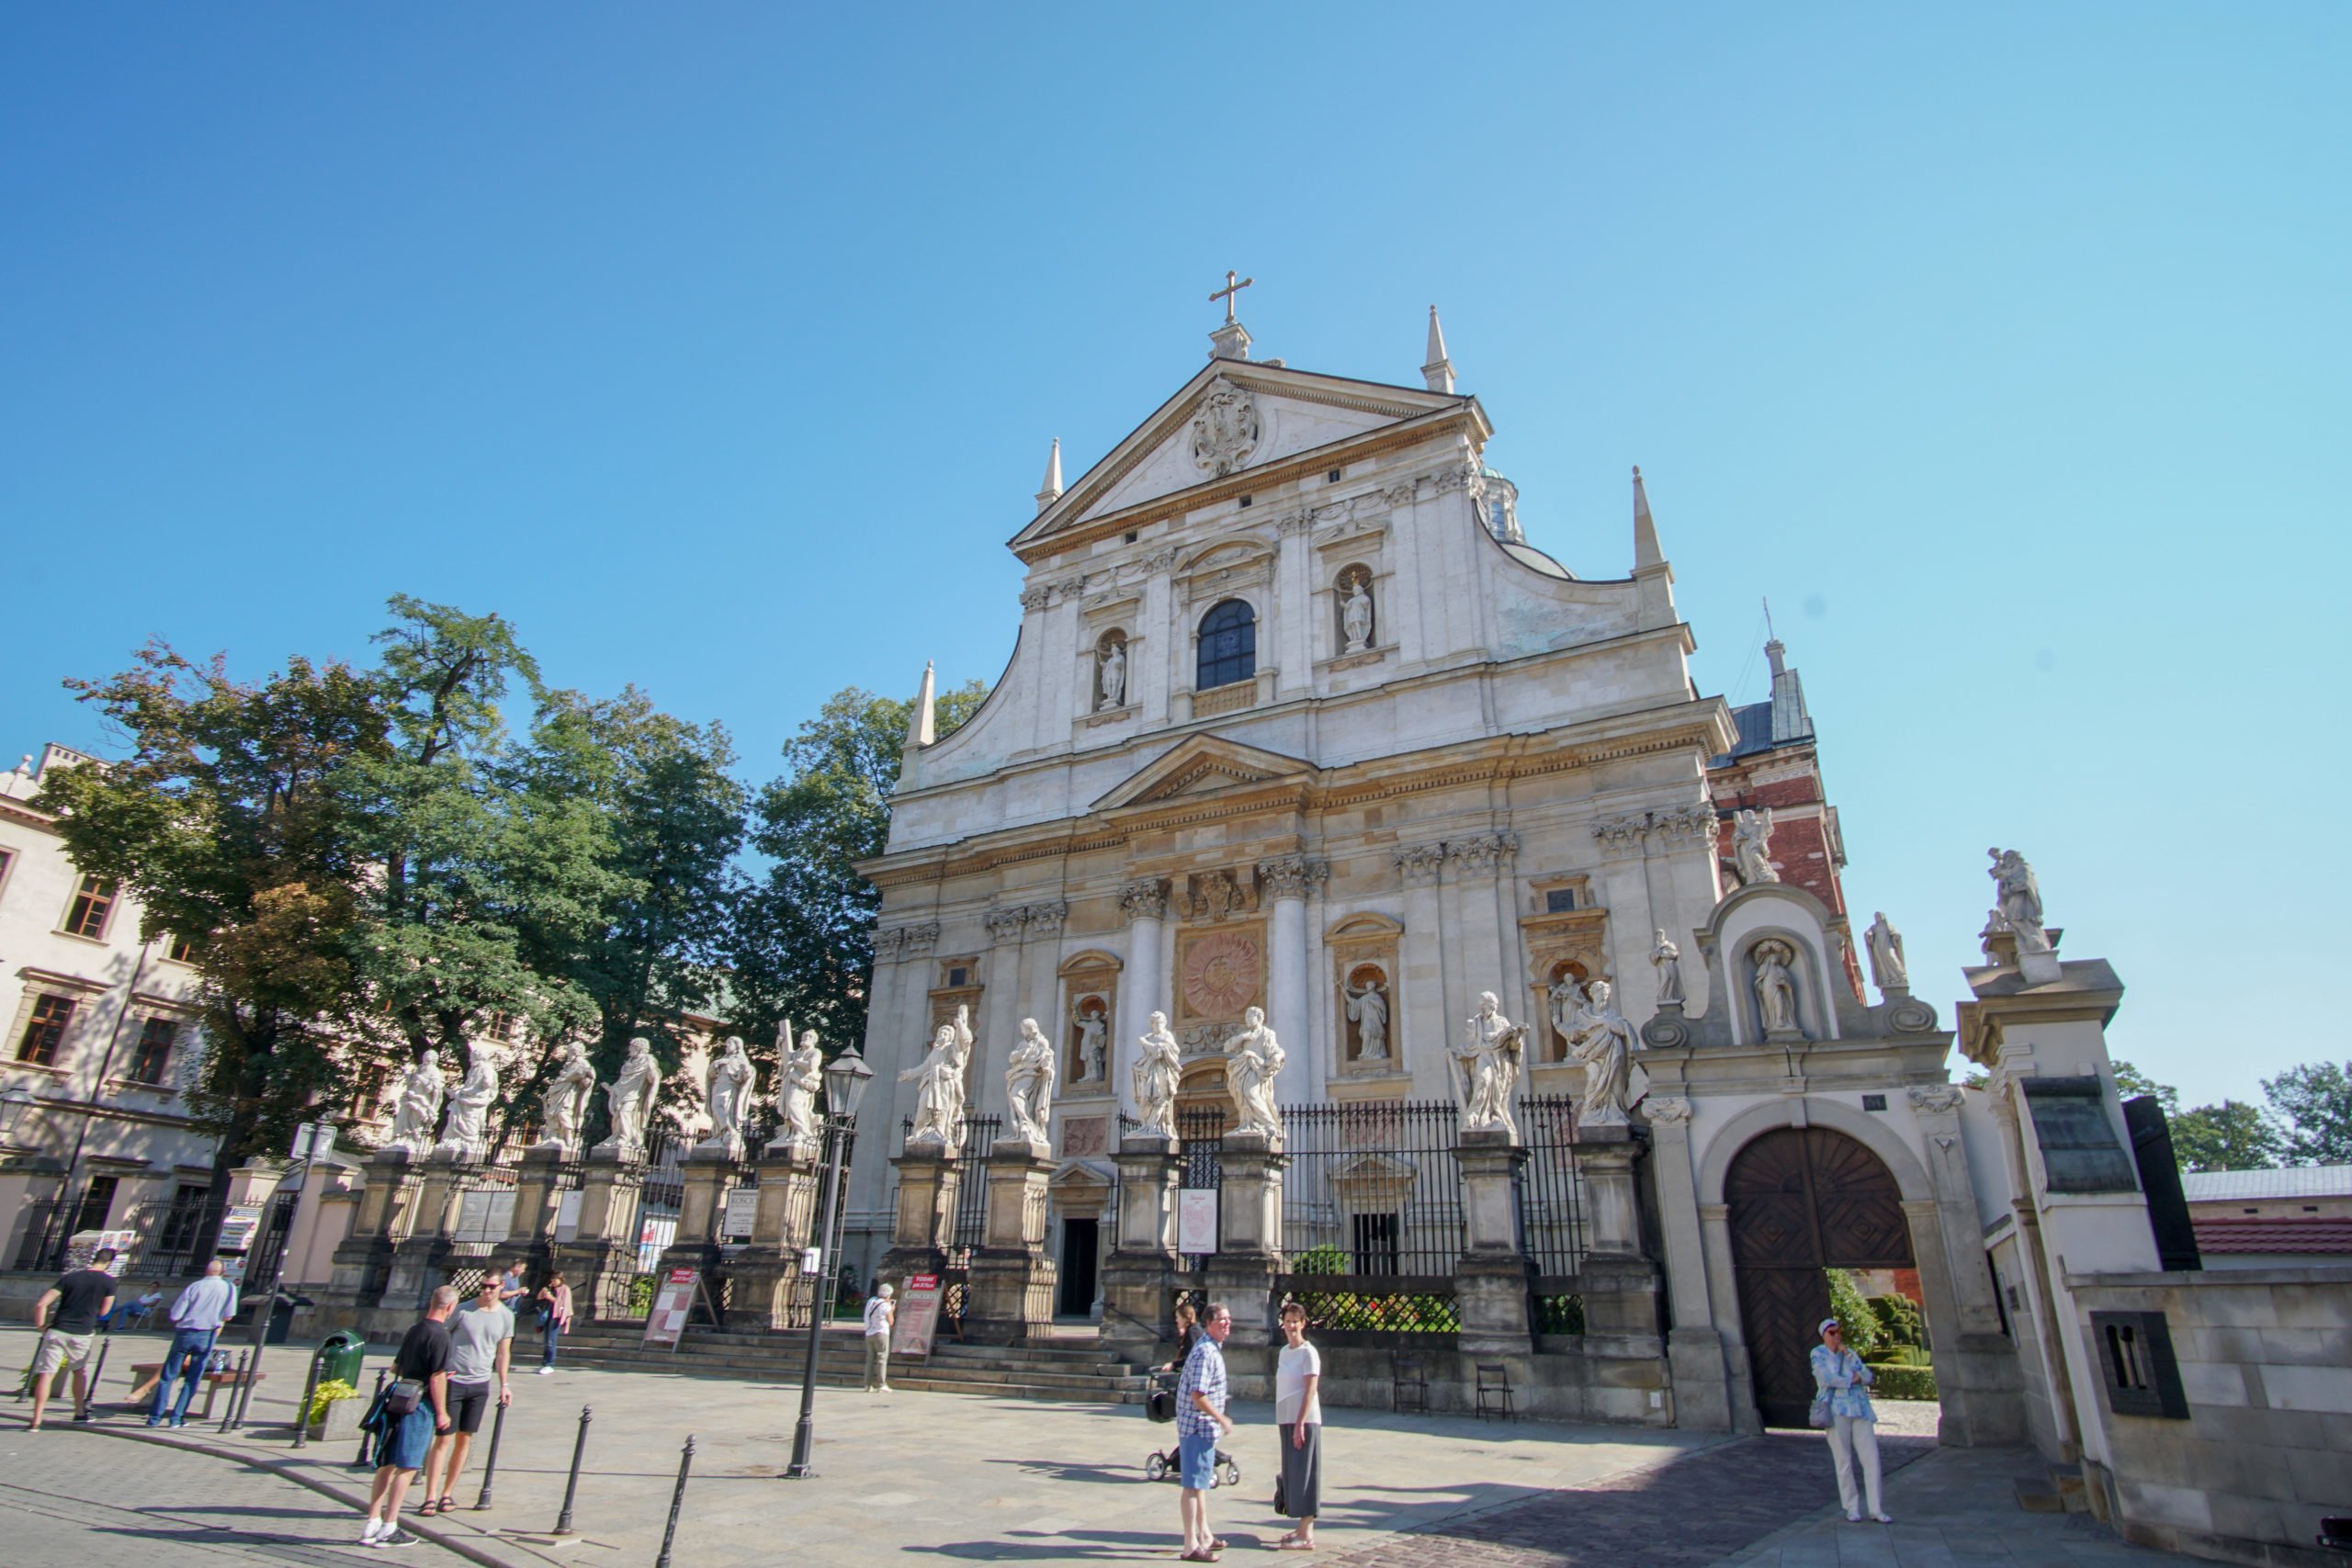
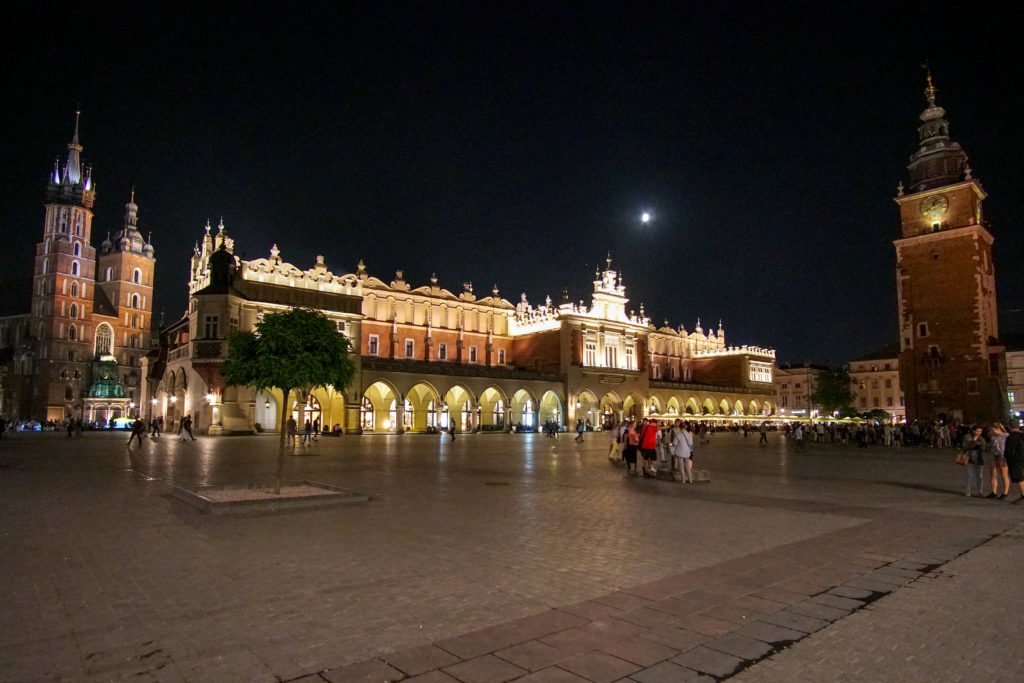

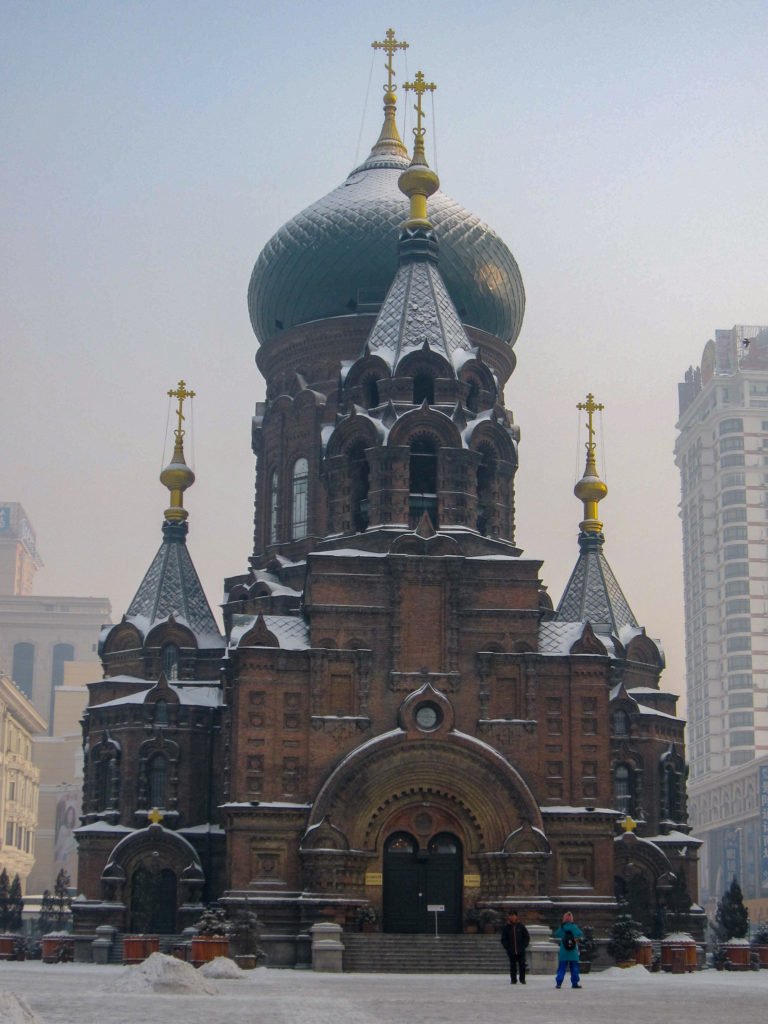


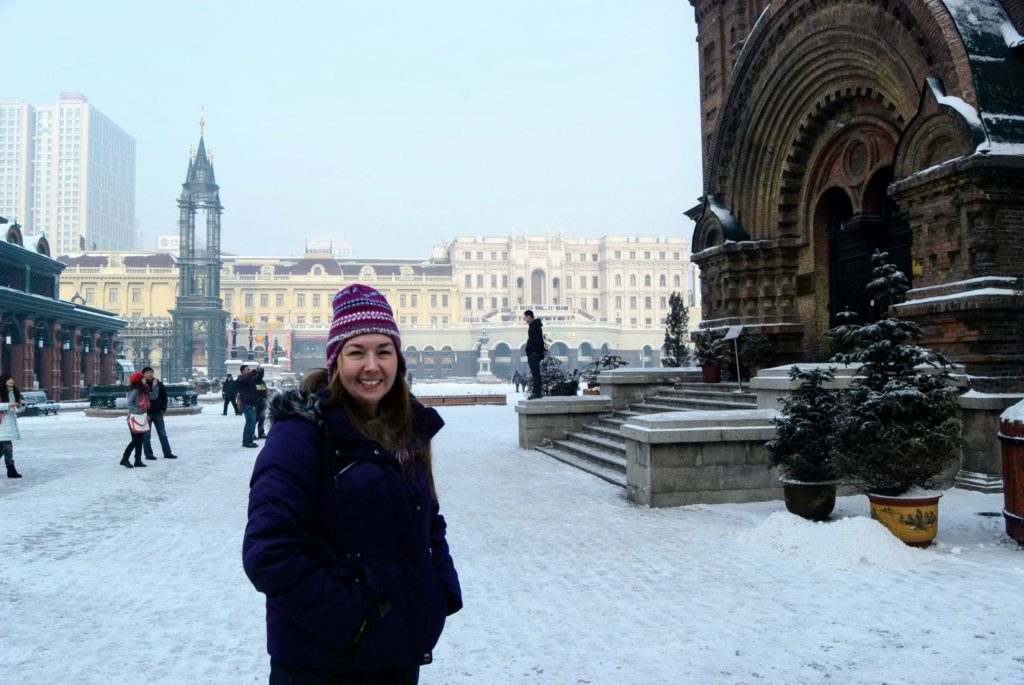


 Lorem ipsum dolor sit amet, consectetur adipiscing elit. Ut elit tellus, luctus nec ullamcorper mattis, pulvinar dapibus leo.