author.travelffeine.com

Category: Washington State

Explore the beauty of Washington state. Washington has such a diverse natural setting with deserts, rainforests, islands, and everything in between. There is a vast array of natural settings to explore as well as unique cities and towns.

  • Exploring the New Gnome Trail in Maple Valley

    The New Gnome Trail was created after the original Gnomes Trail needed a new location. The private neighborhood in which the original Gnomes Trail was accessed became too busy with outside traffic, so the neighborhood wanted it moved. It was previously in the Henry Ridge Natural Area, and with the help of the community, they moved the gnomes to the New Gnome Trail, almost two miles away from the original site.  Now that is a community in action!

    I love that the community came together to preserve this fun trail for future gnome hunters. The new path is much easier to find than the original Gnomes Trail, and there is ample parking here. 

    The New Gnome Trail is at 25719 Maple Valley Black Diamond Rd SE, Maple Valley, WA 98038The Maple Valley Farmers Market uses the parking area from May through September, so if you come on a weekend during those months, be prepared for a crowded parking lot.  I visited in early Spring, and there were only three other cars there, with plenty of parking right next to the main trailhead.

    About the New Gnome Trail

    Trail Length: 0.7 miles (roundtrip)

    Elevation Gain: ~ 75 feet

    Trail Difficulty Rating: Easy

    Time Needed: 30 minutes to 1-hour

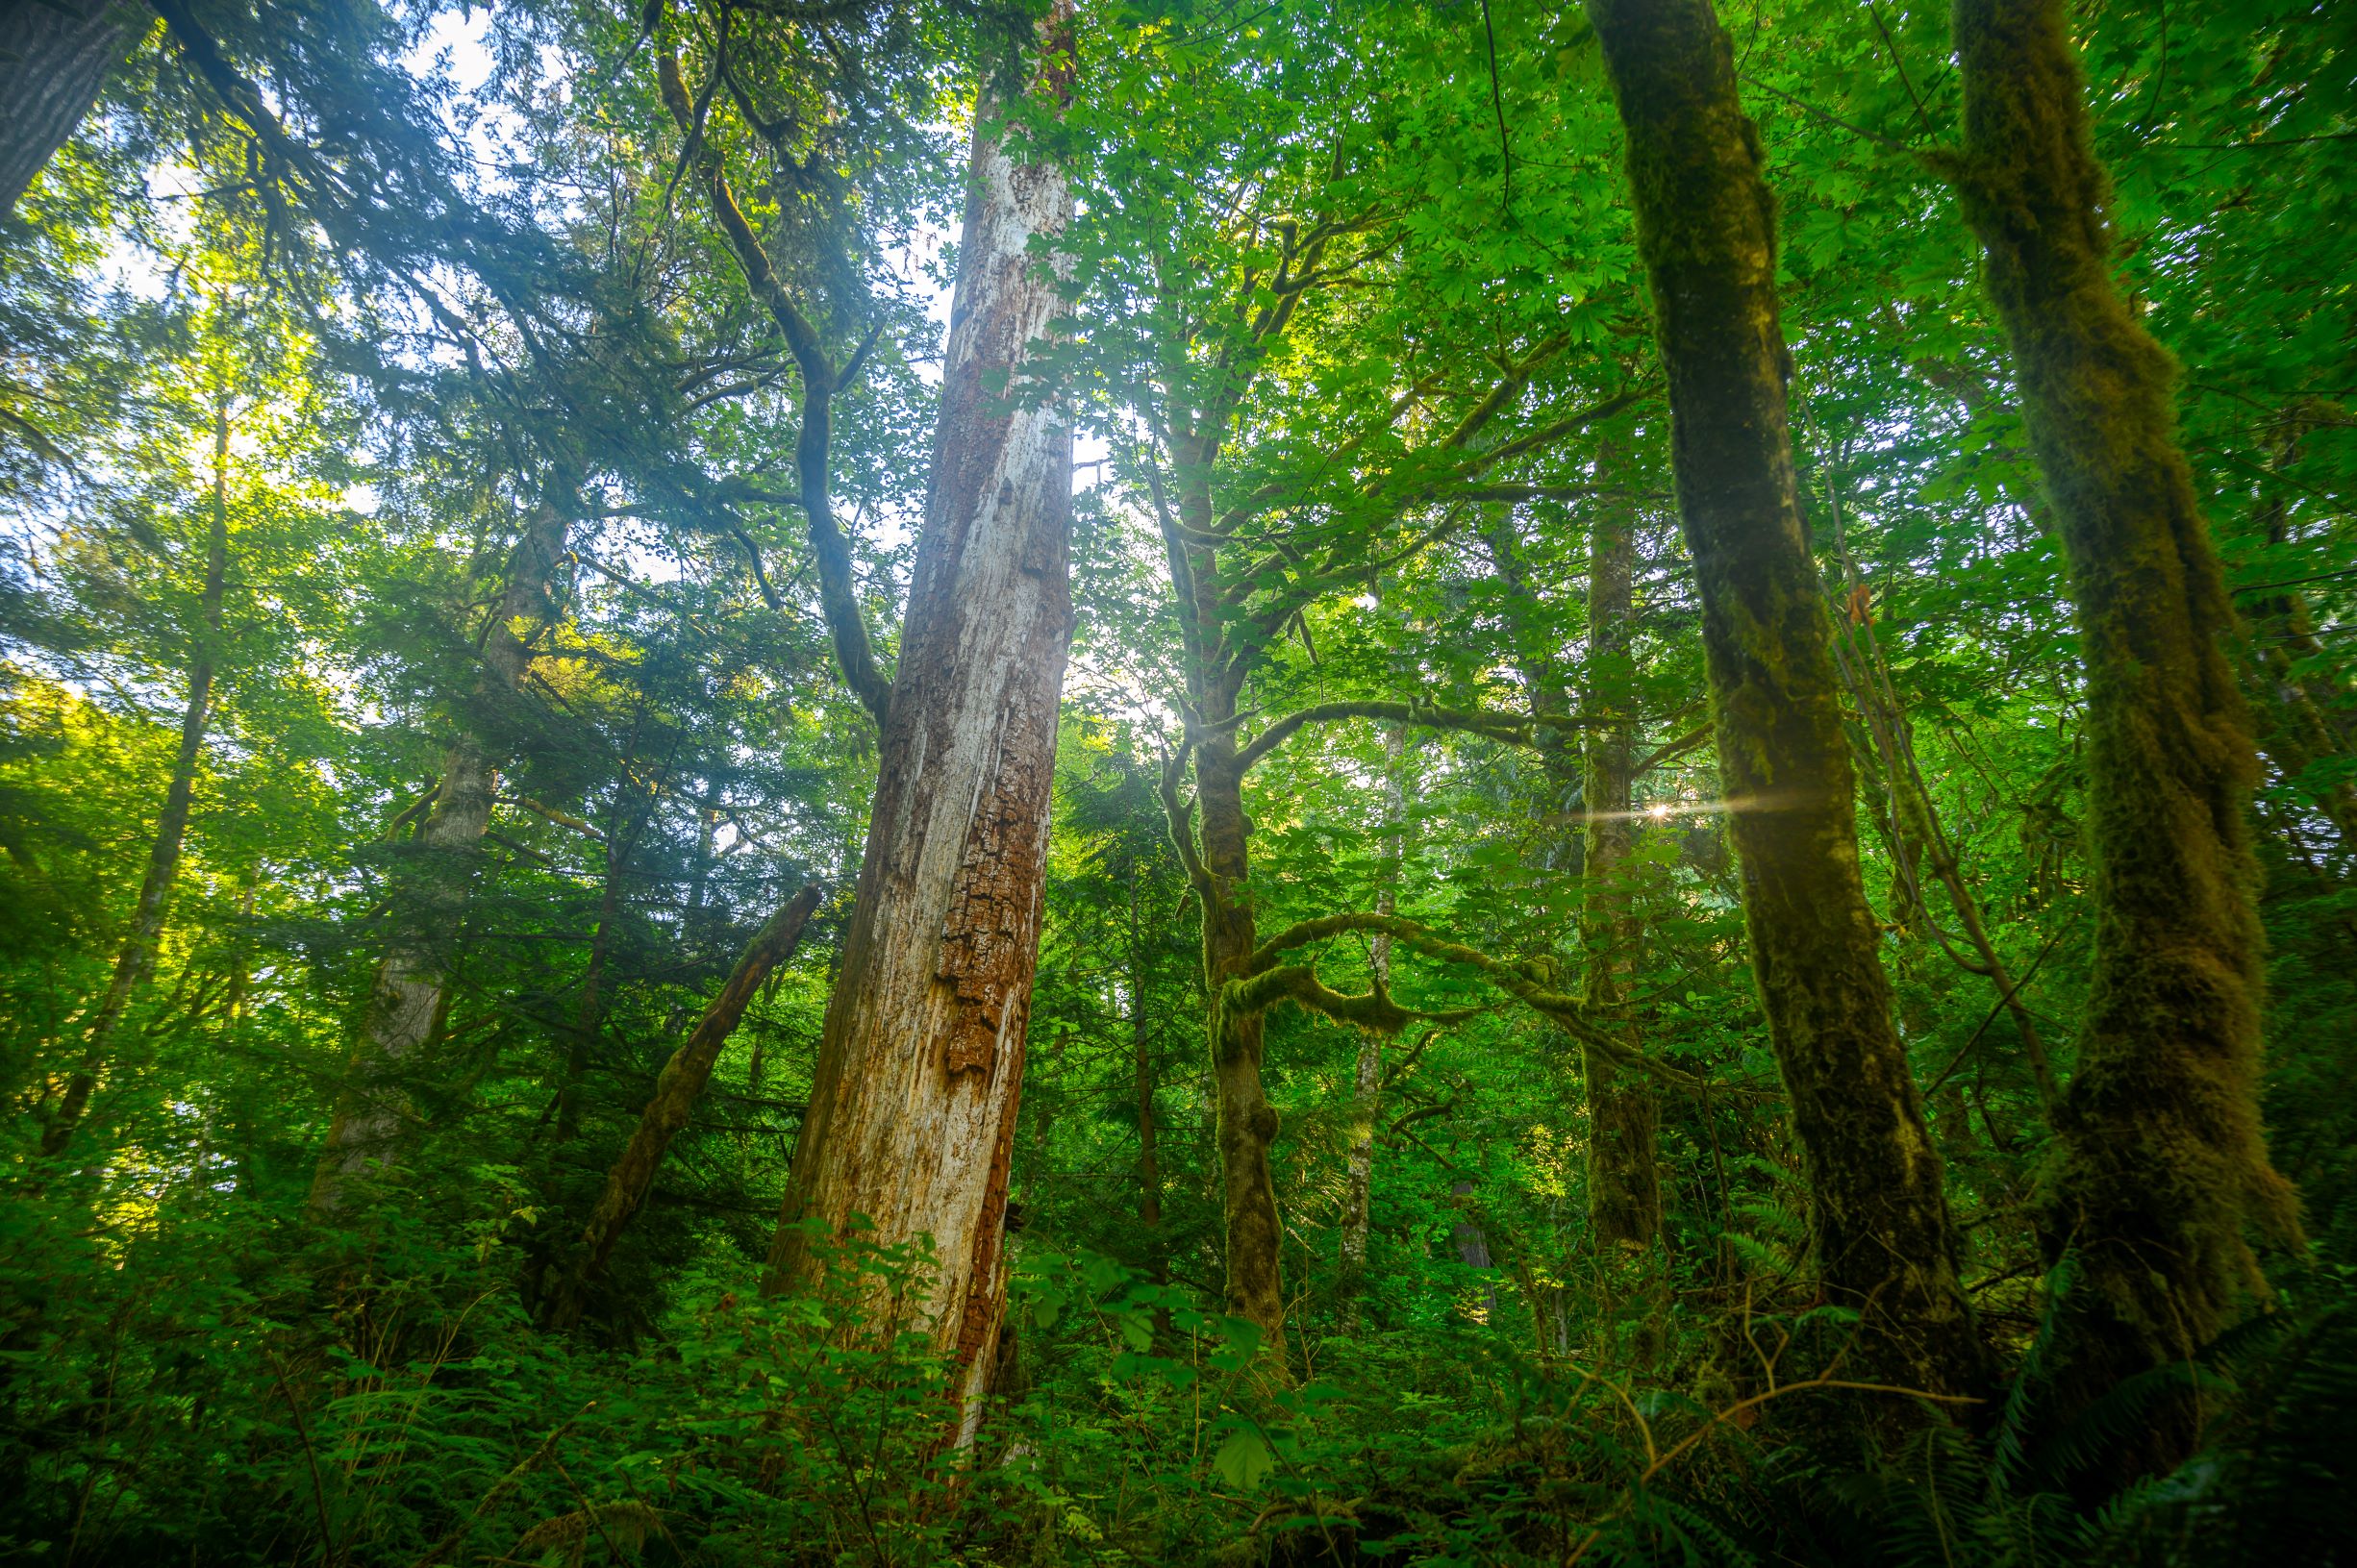
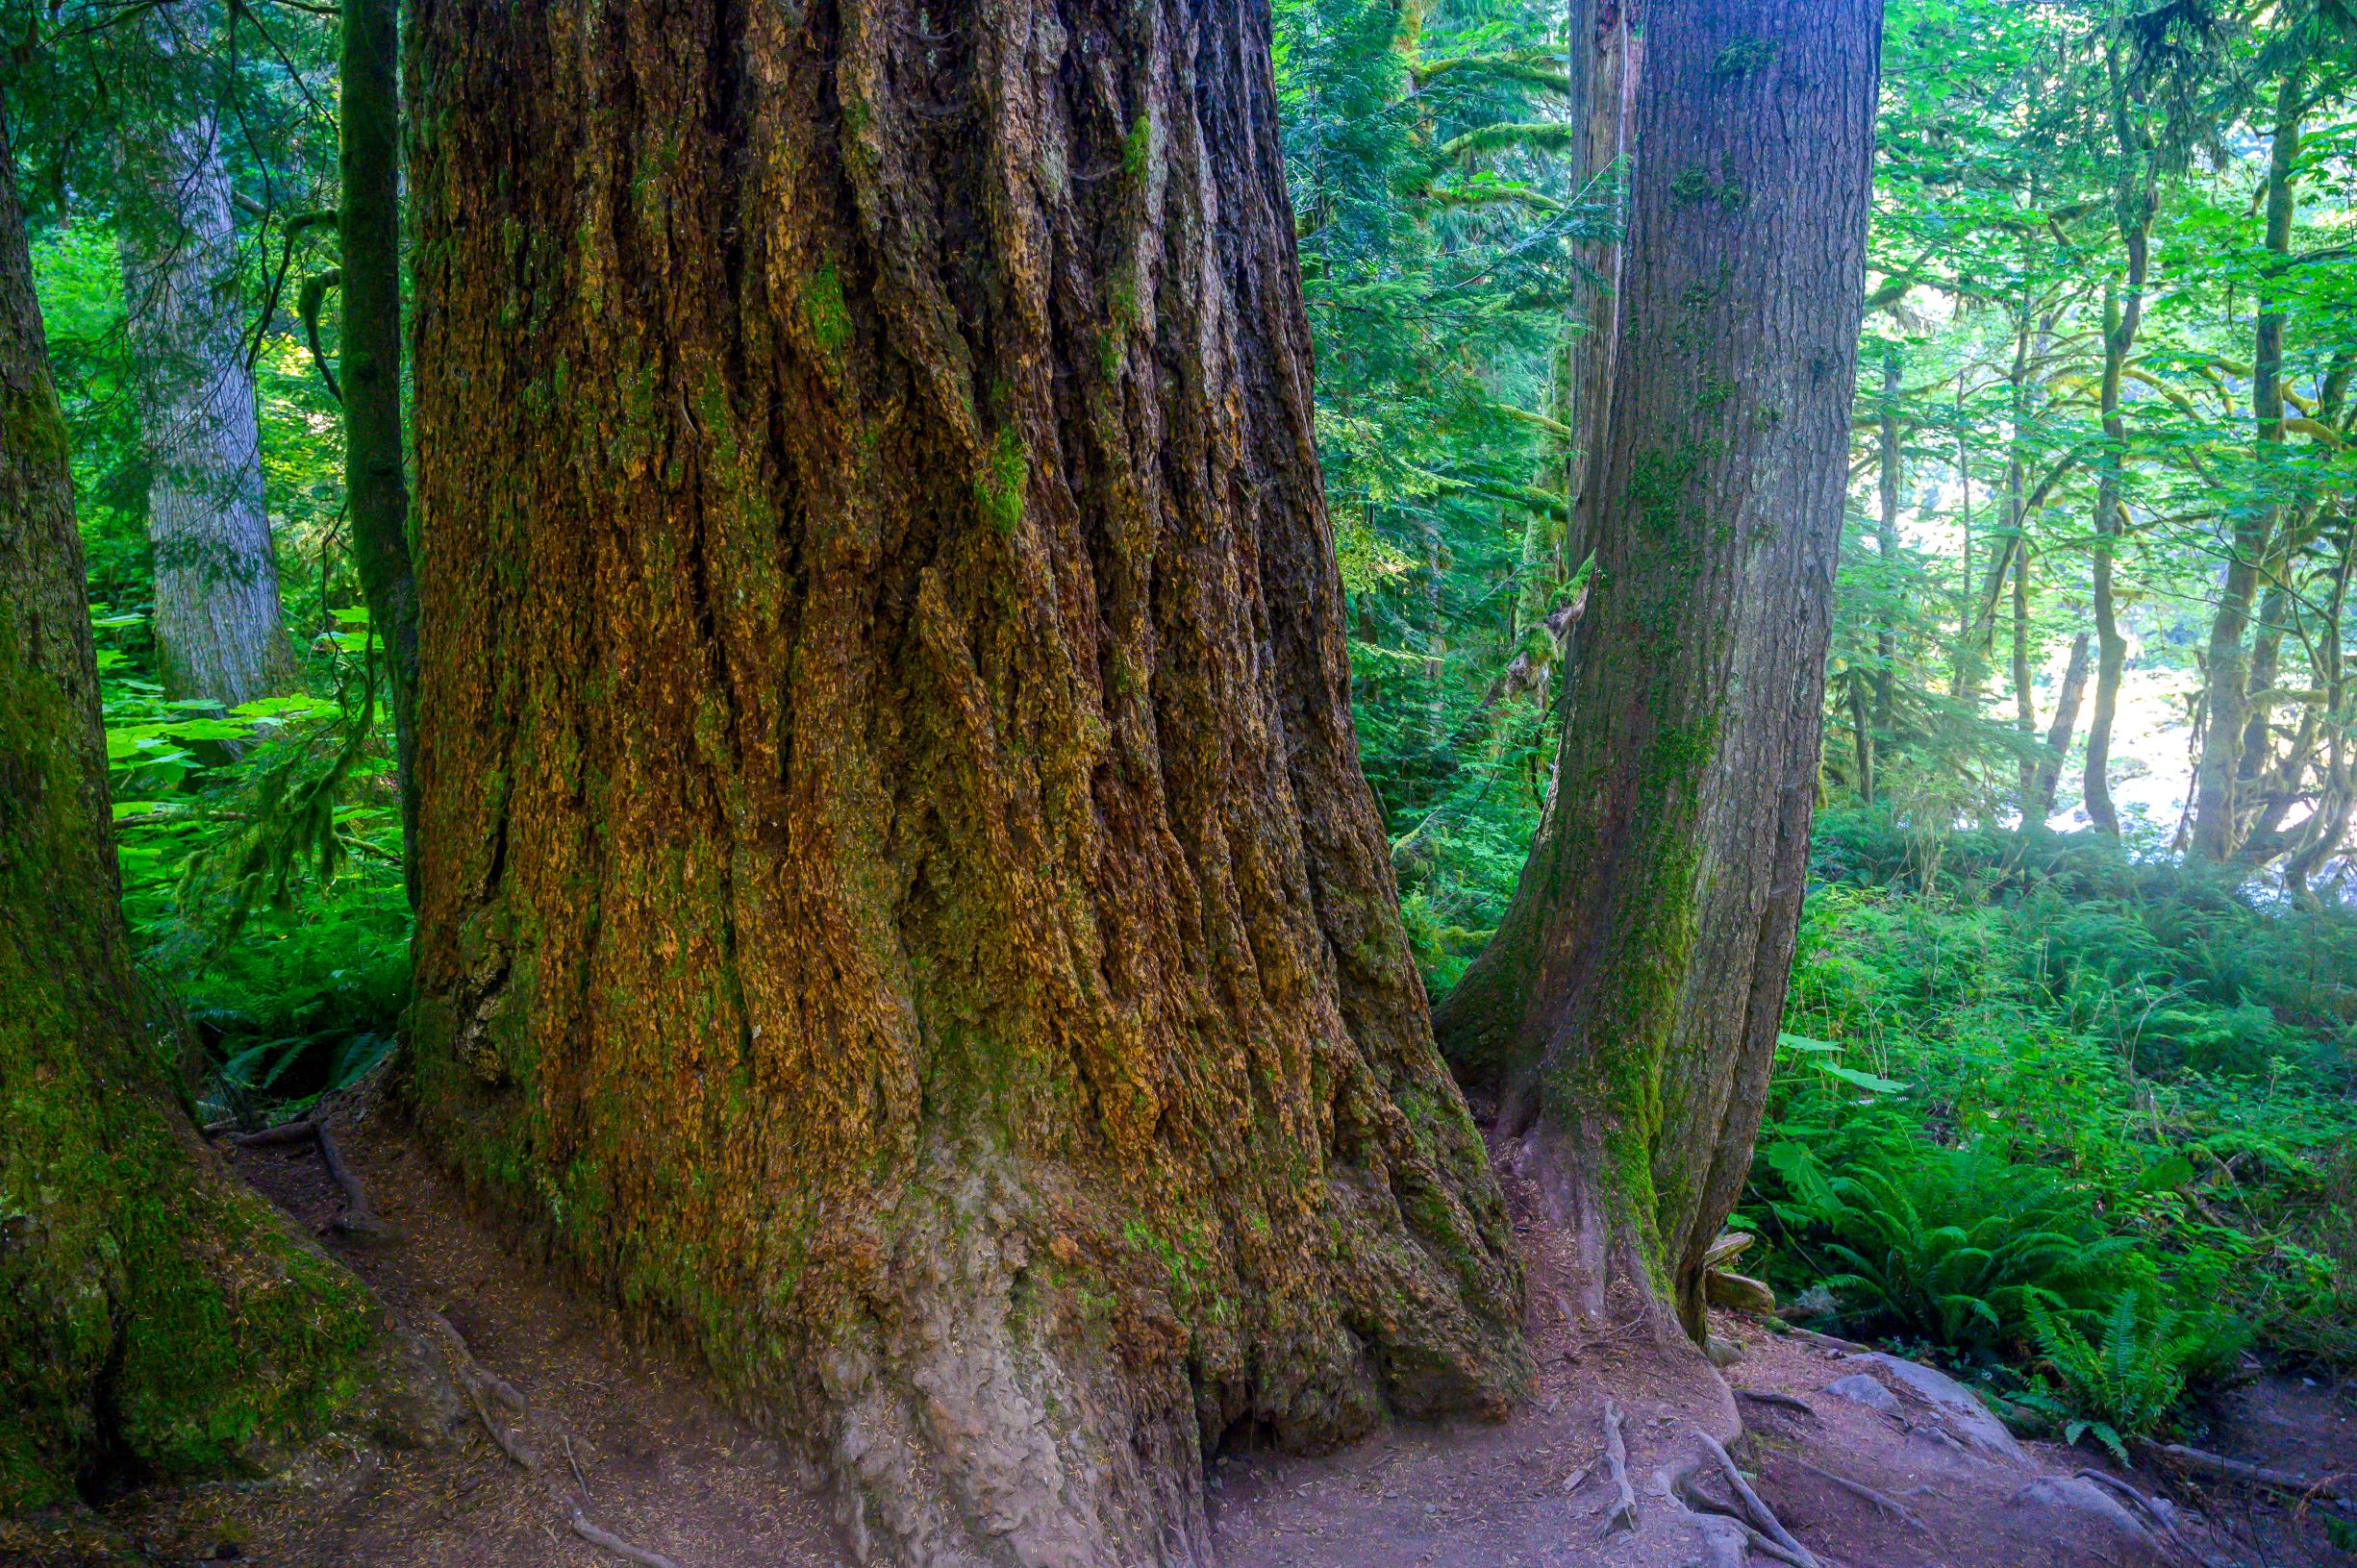
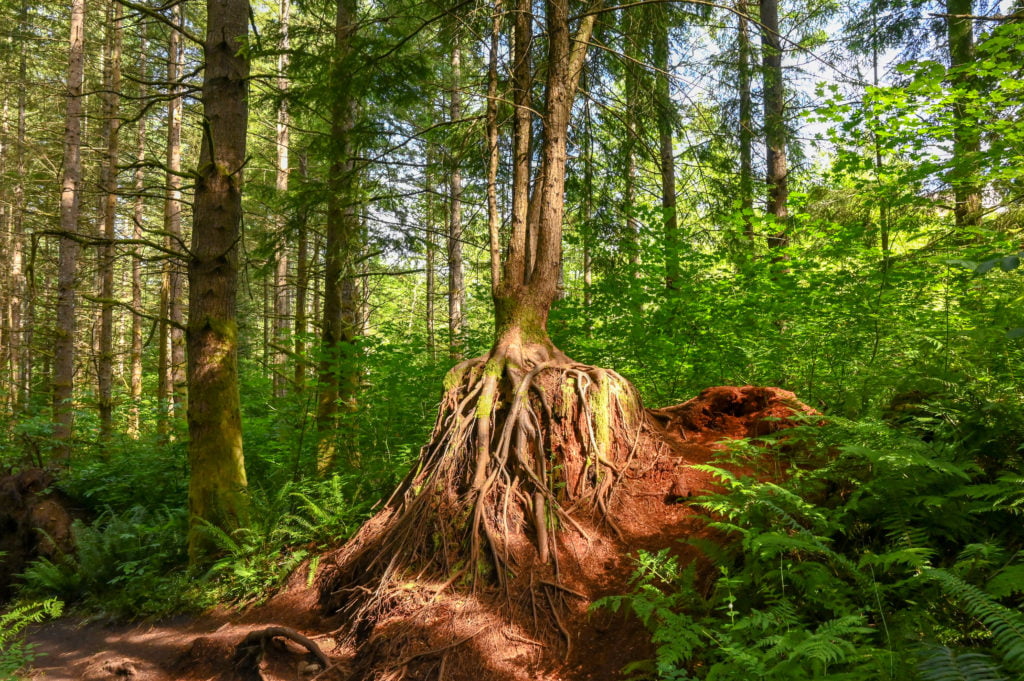
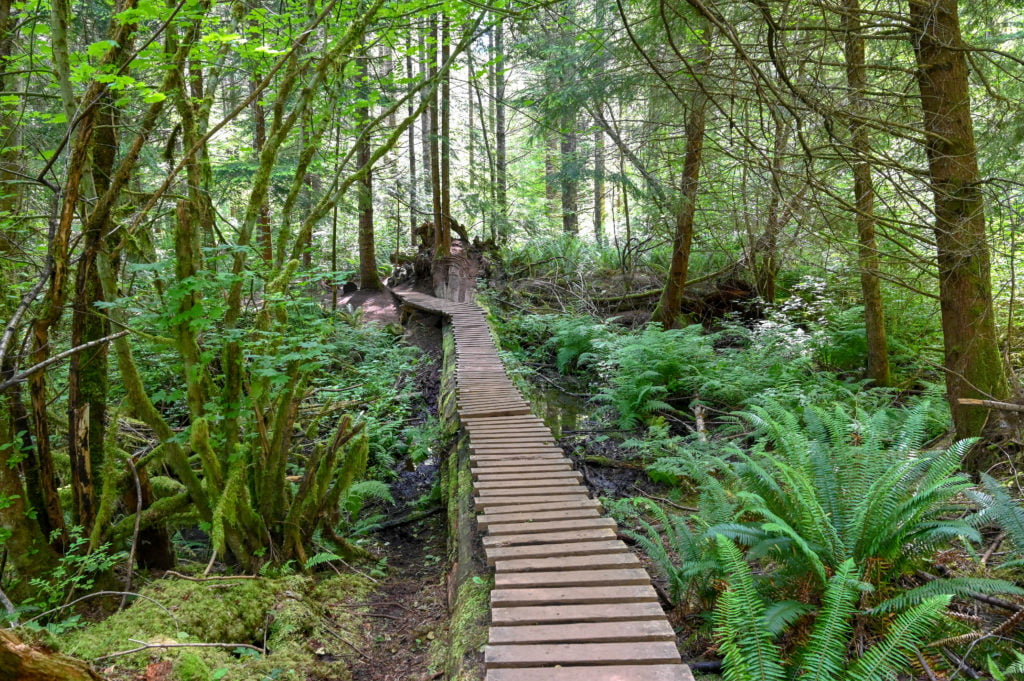
    Features: Gnomes hidden all around the trail, mossy trees and beautiful forest foliage, an easy walk in the woods, good for small kids

    Additional Facilities: Portable restrooms are available near the entrance by the covered picnic area. There are also some picnic tables and benches in this area of the parking lot.

    The New Gnomes Trail: Getting to the Trailhead

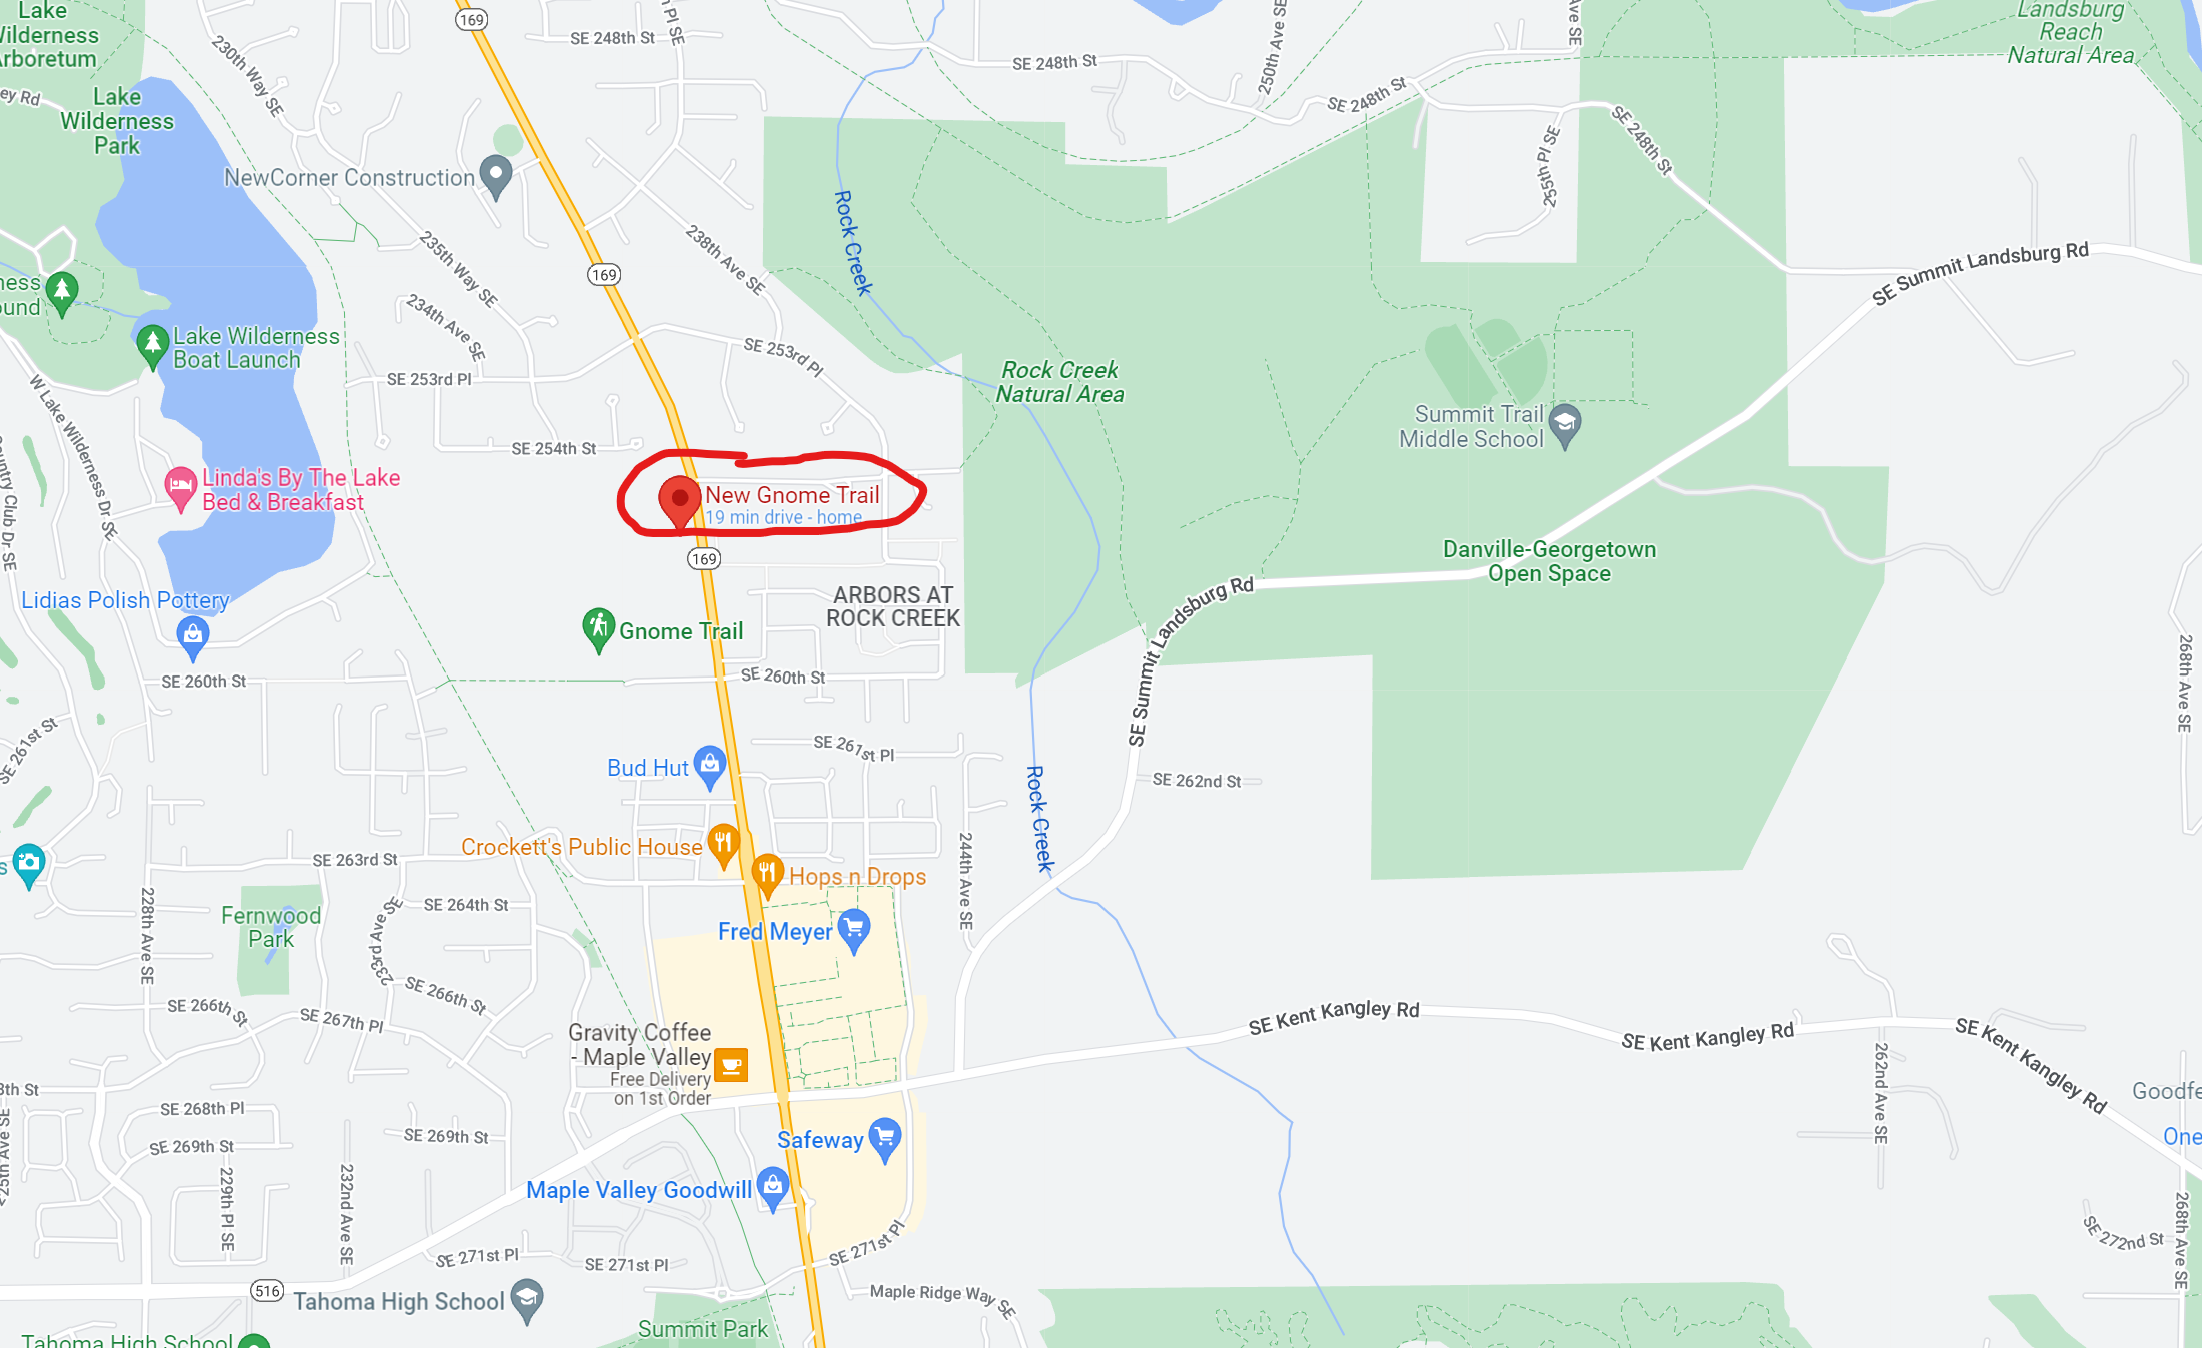
    Address: 25719 Maple Valley Black Diamond Rd SE, Maple Valley, WA 98038

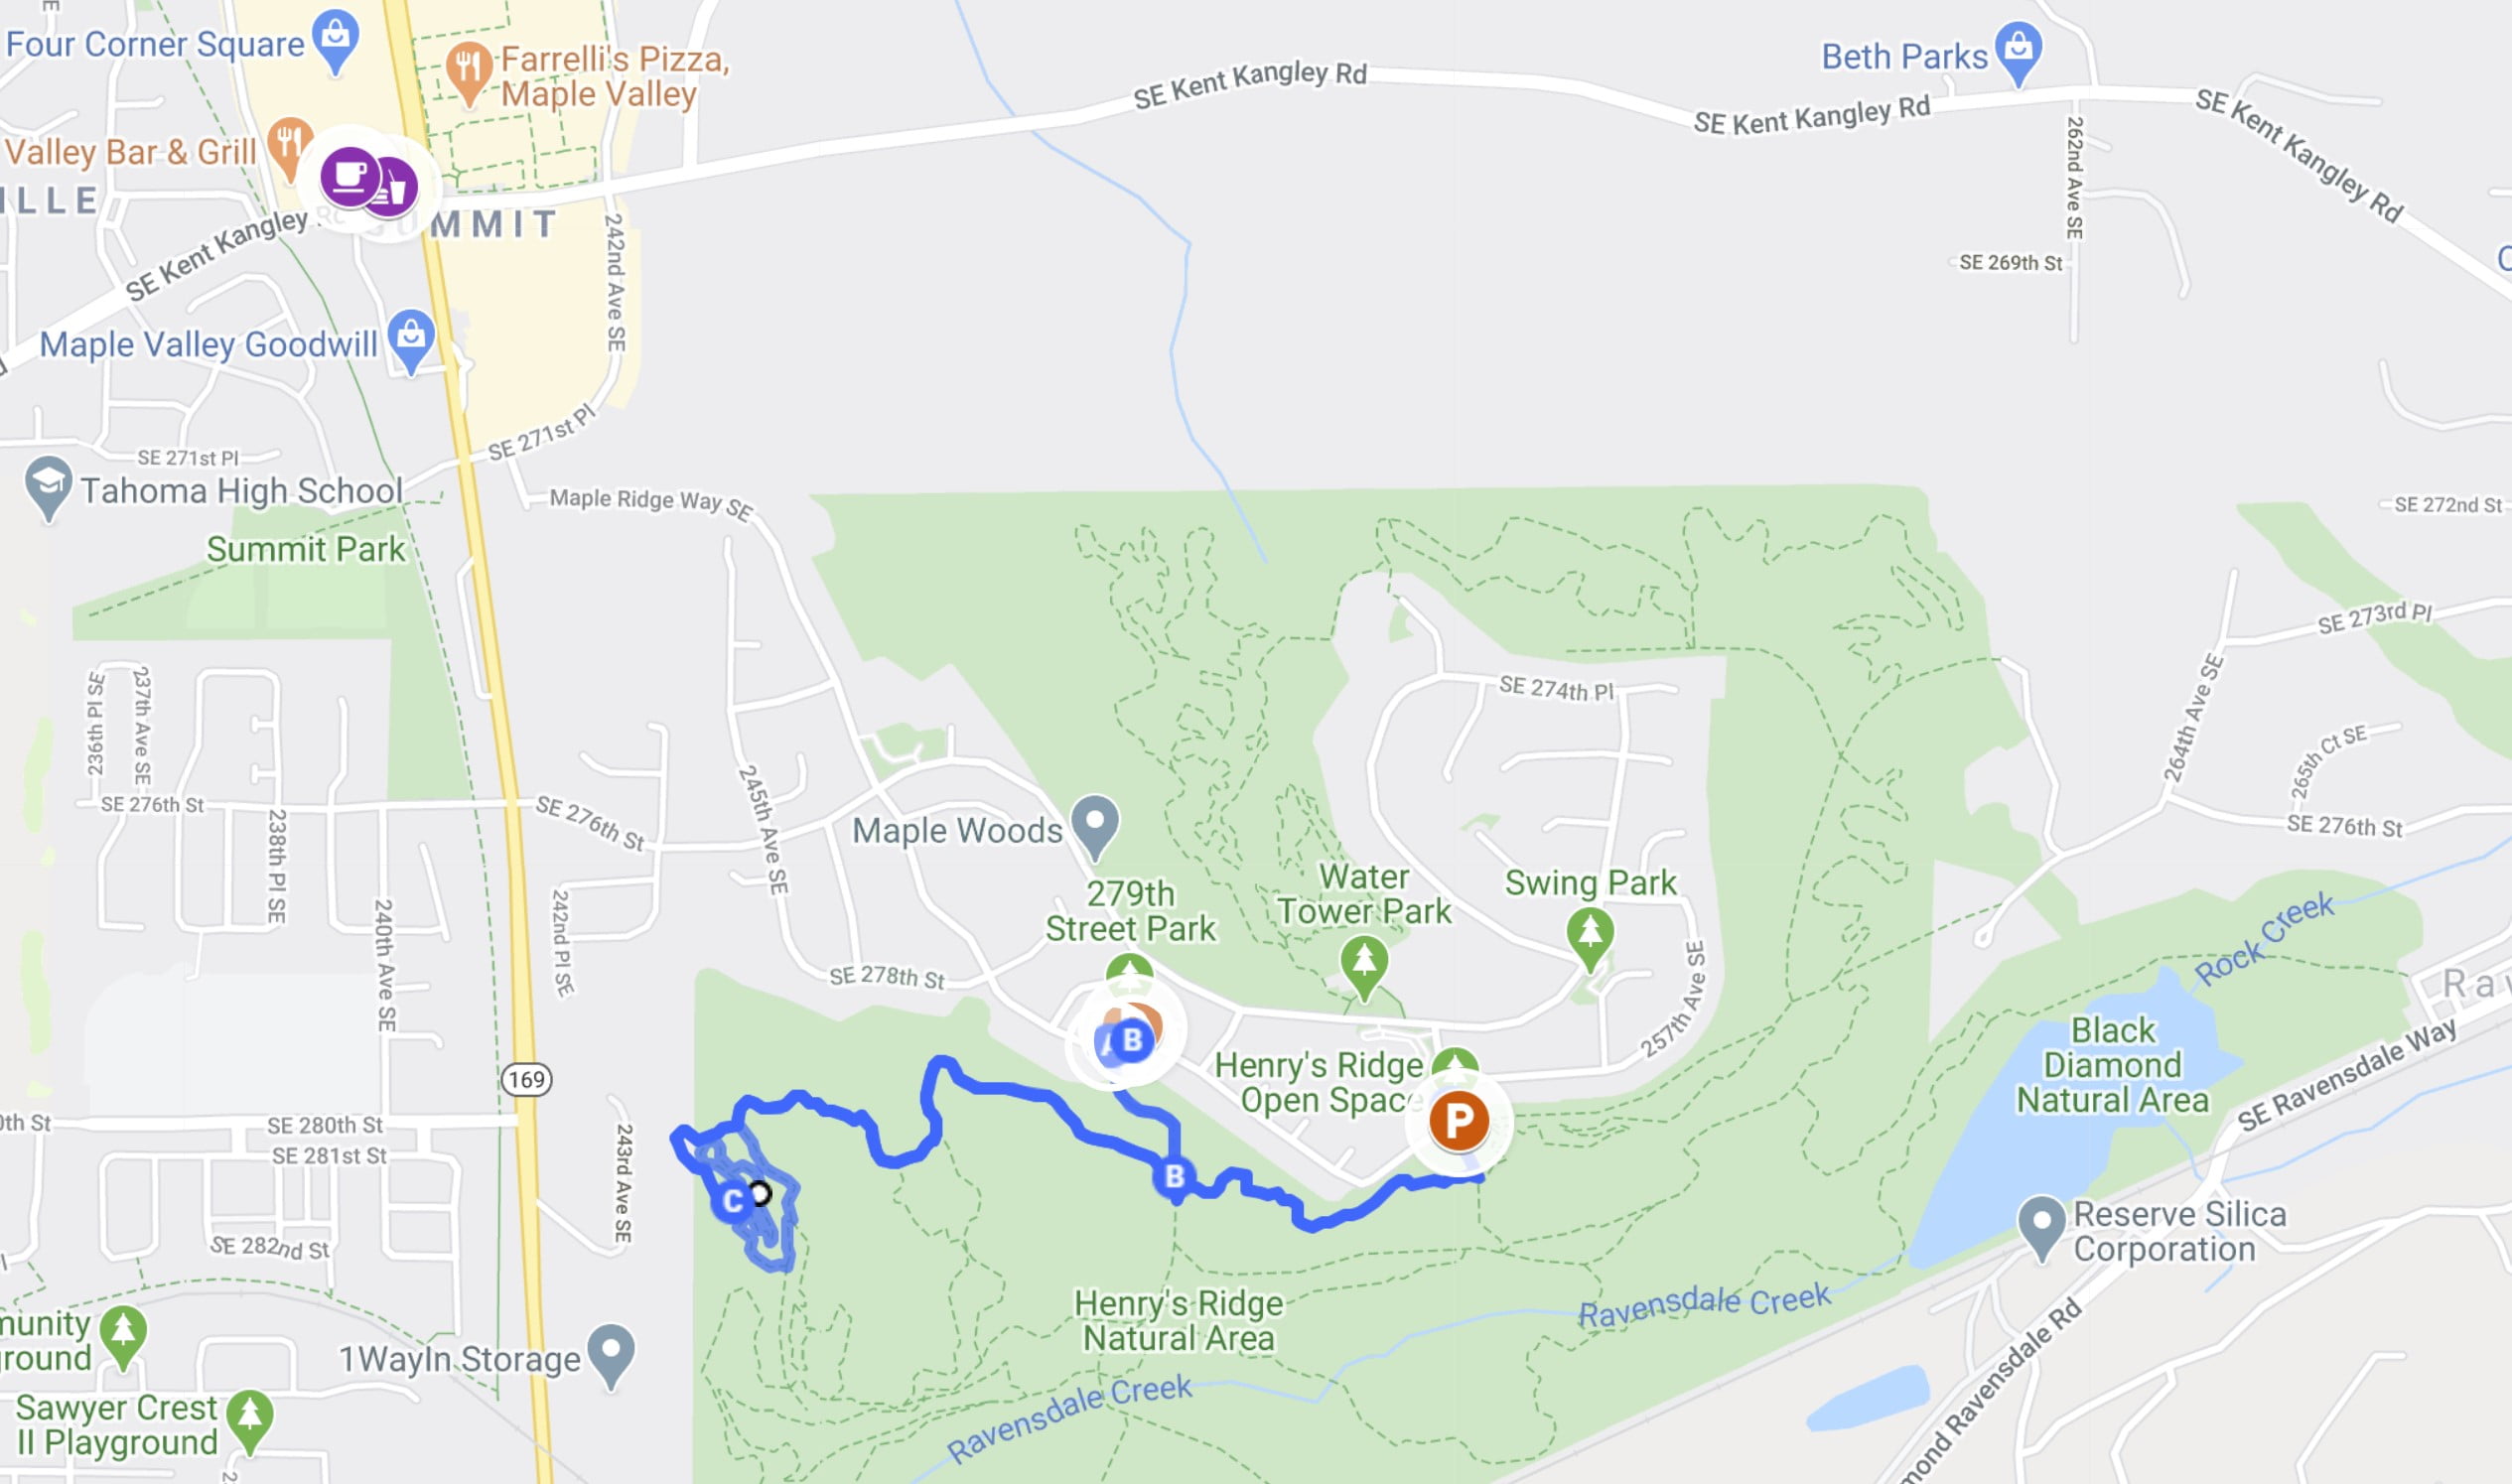
    As you enter the parking lot, make a right and follow the one-way signs toward the back of the parking area, where it curves around and to the left. Here you will see the main trailhead on the right and parking to your left.

    There is another entrance further south from the main northwest entrance, referred to as the “Market entrance.” However, the northwest entrance is the primary entrance, and all directions in this post are from the northwest entrance.

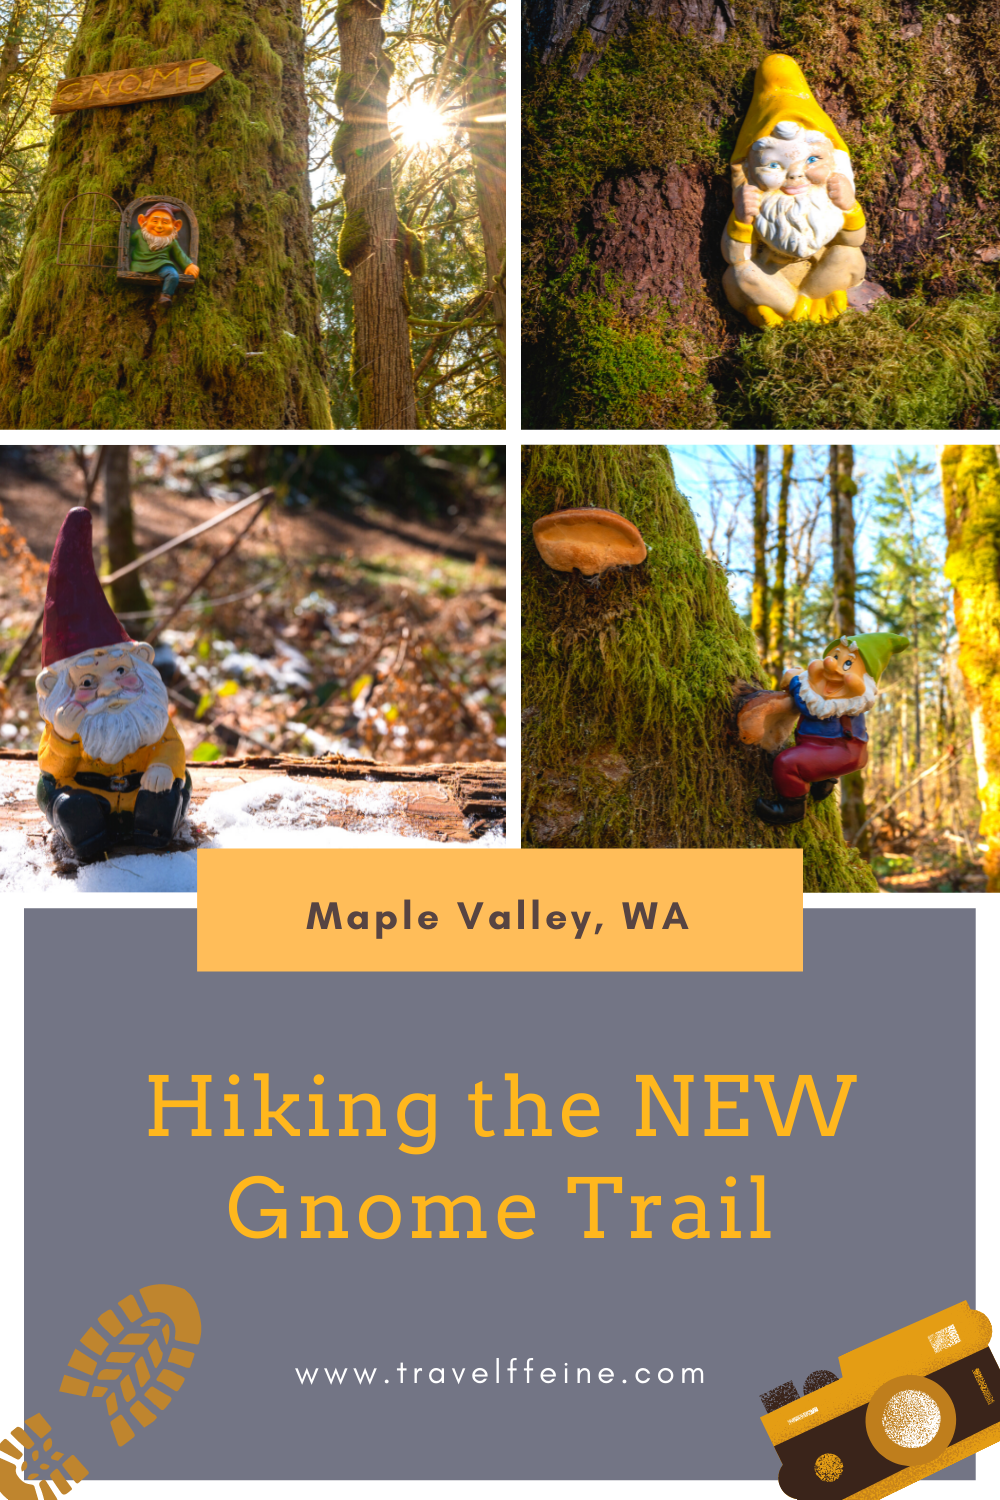
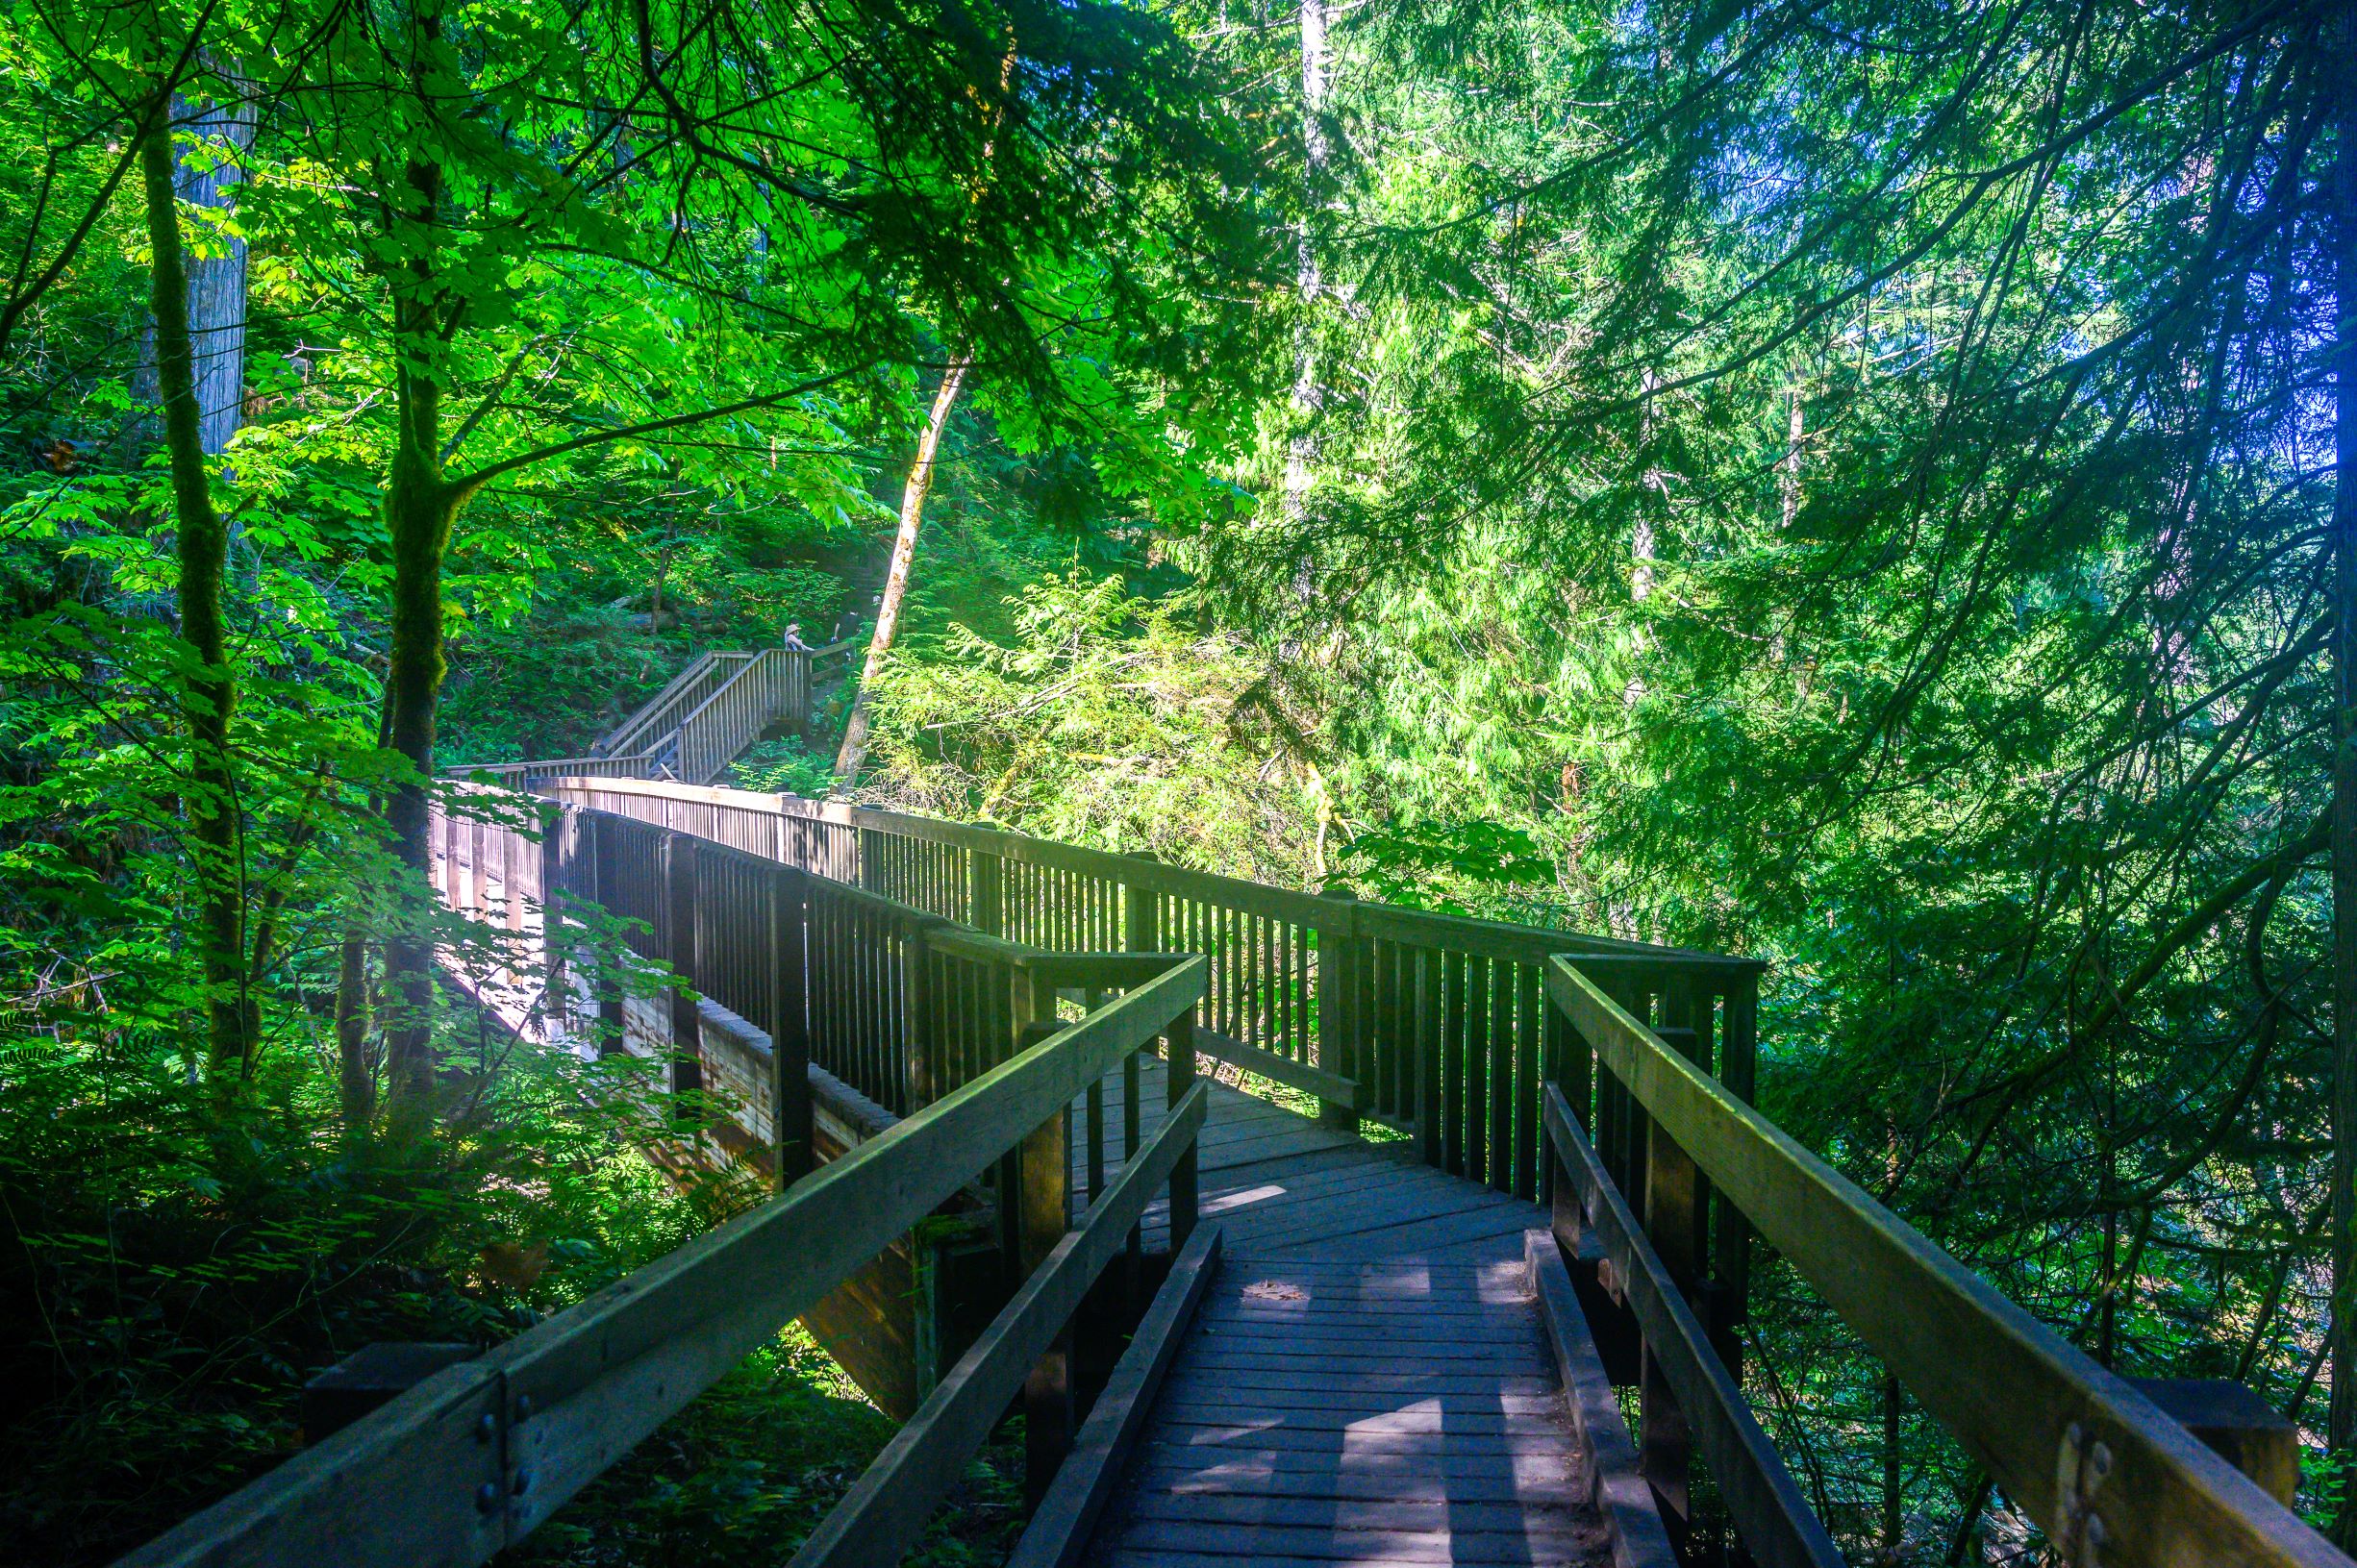
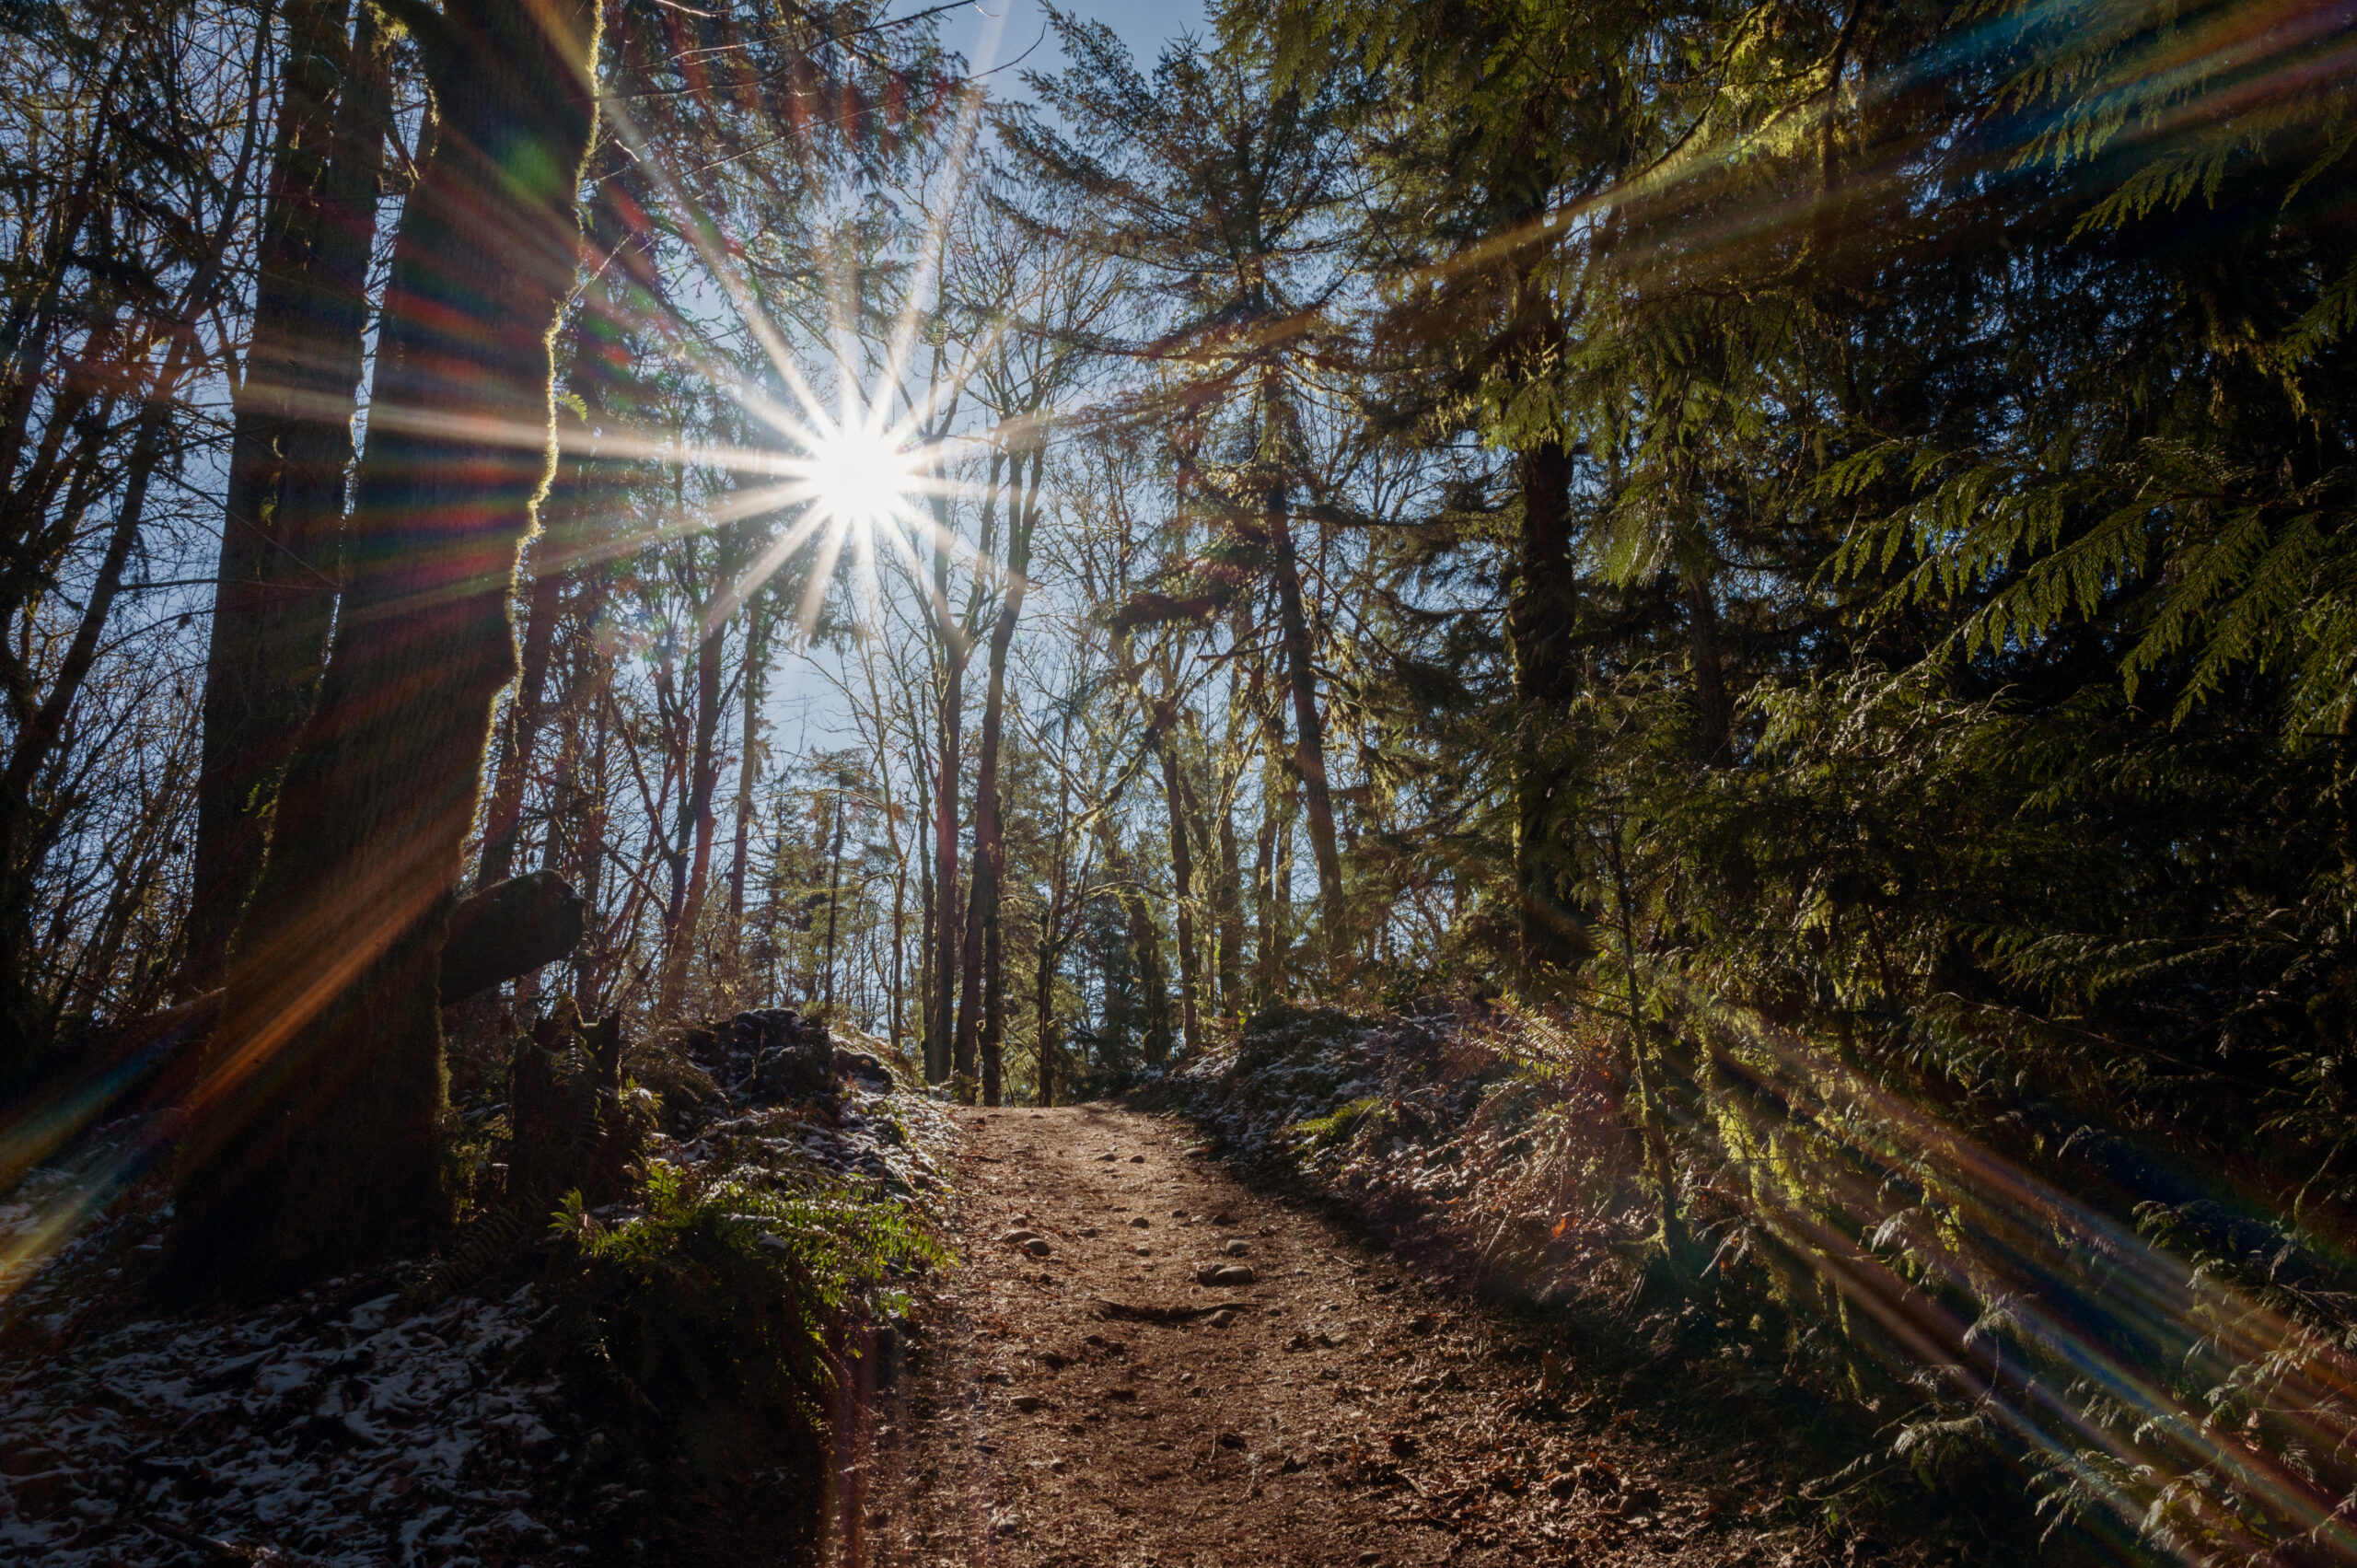
    Hiking the New Gnome Trail

    Begin at the main northwest trailhead entrance. Walk about 20 feet, and you come to a “Y” in the trail. Stay left at the Y, and you should see a couple of Gnome trail signs on the trees on both sides of this path. 

    Continue up a short steepish hill.  This is the only hill along the New Gnome Trail.  At the top of the hill, you’ll come to a “T.” Take a left here to continue to the Gnomes Trail Loop. 

    short hill to T in the trail

    Beginning the Gnome Loop

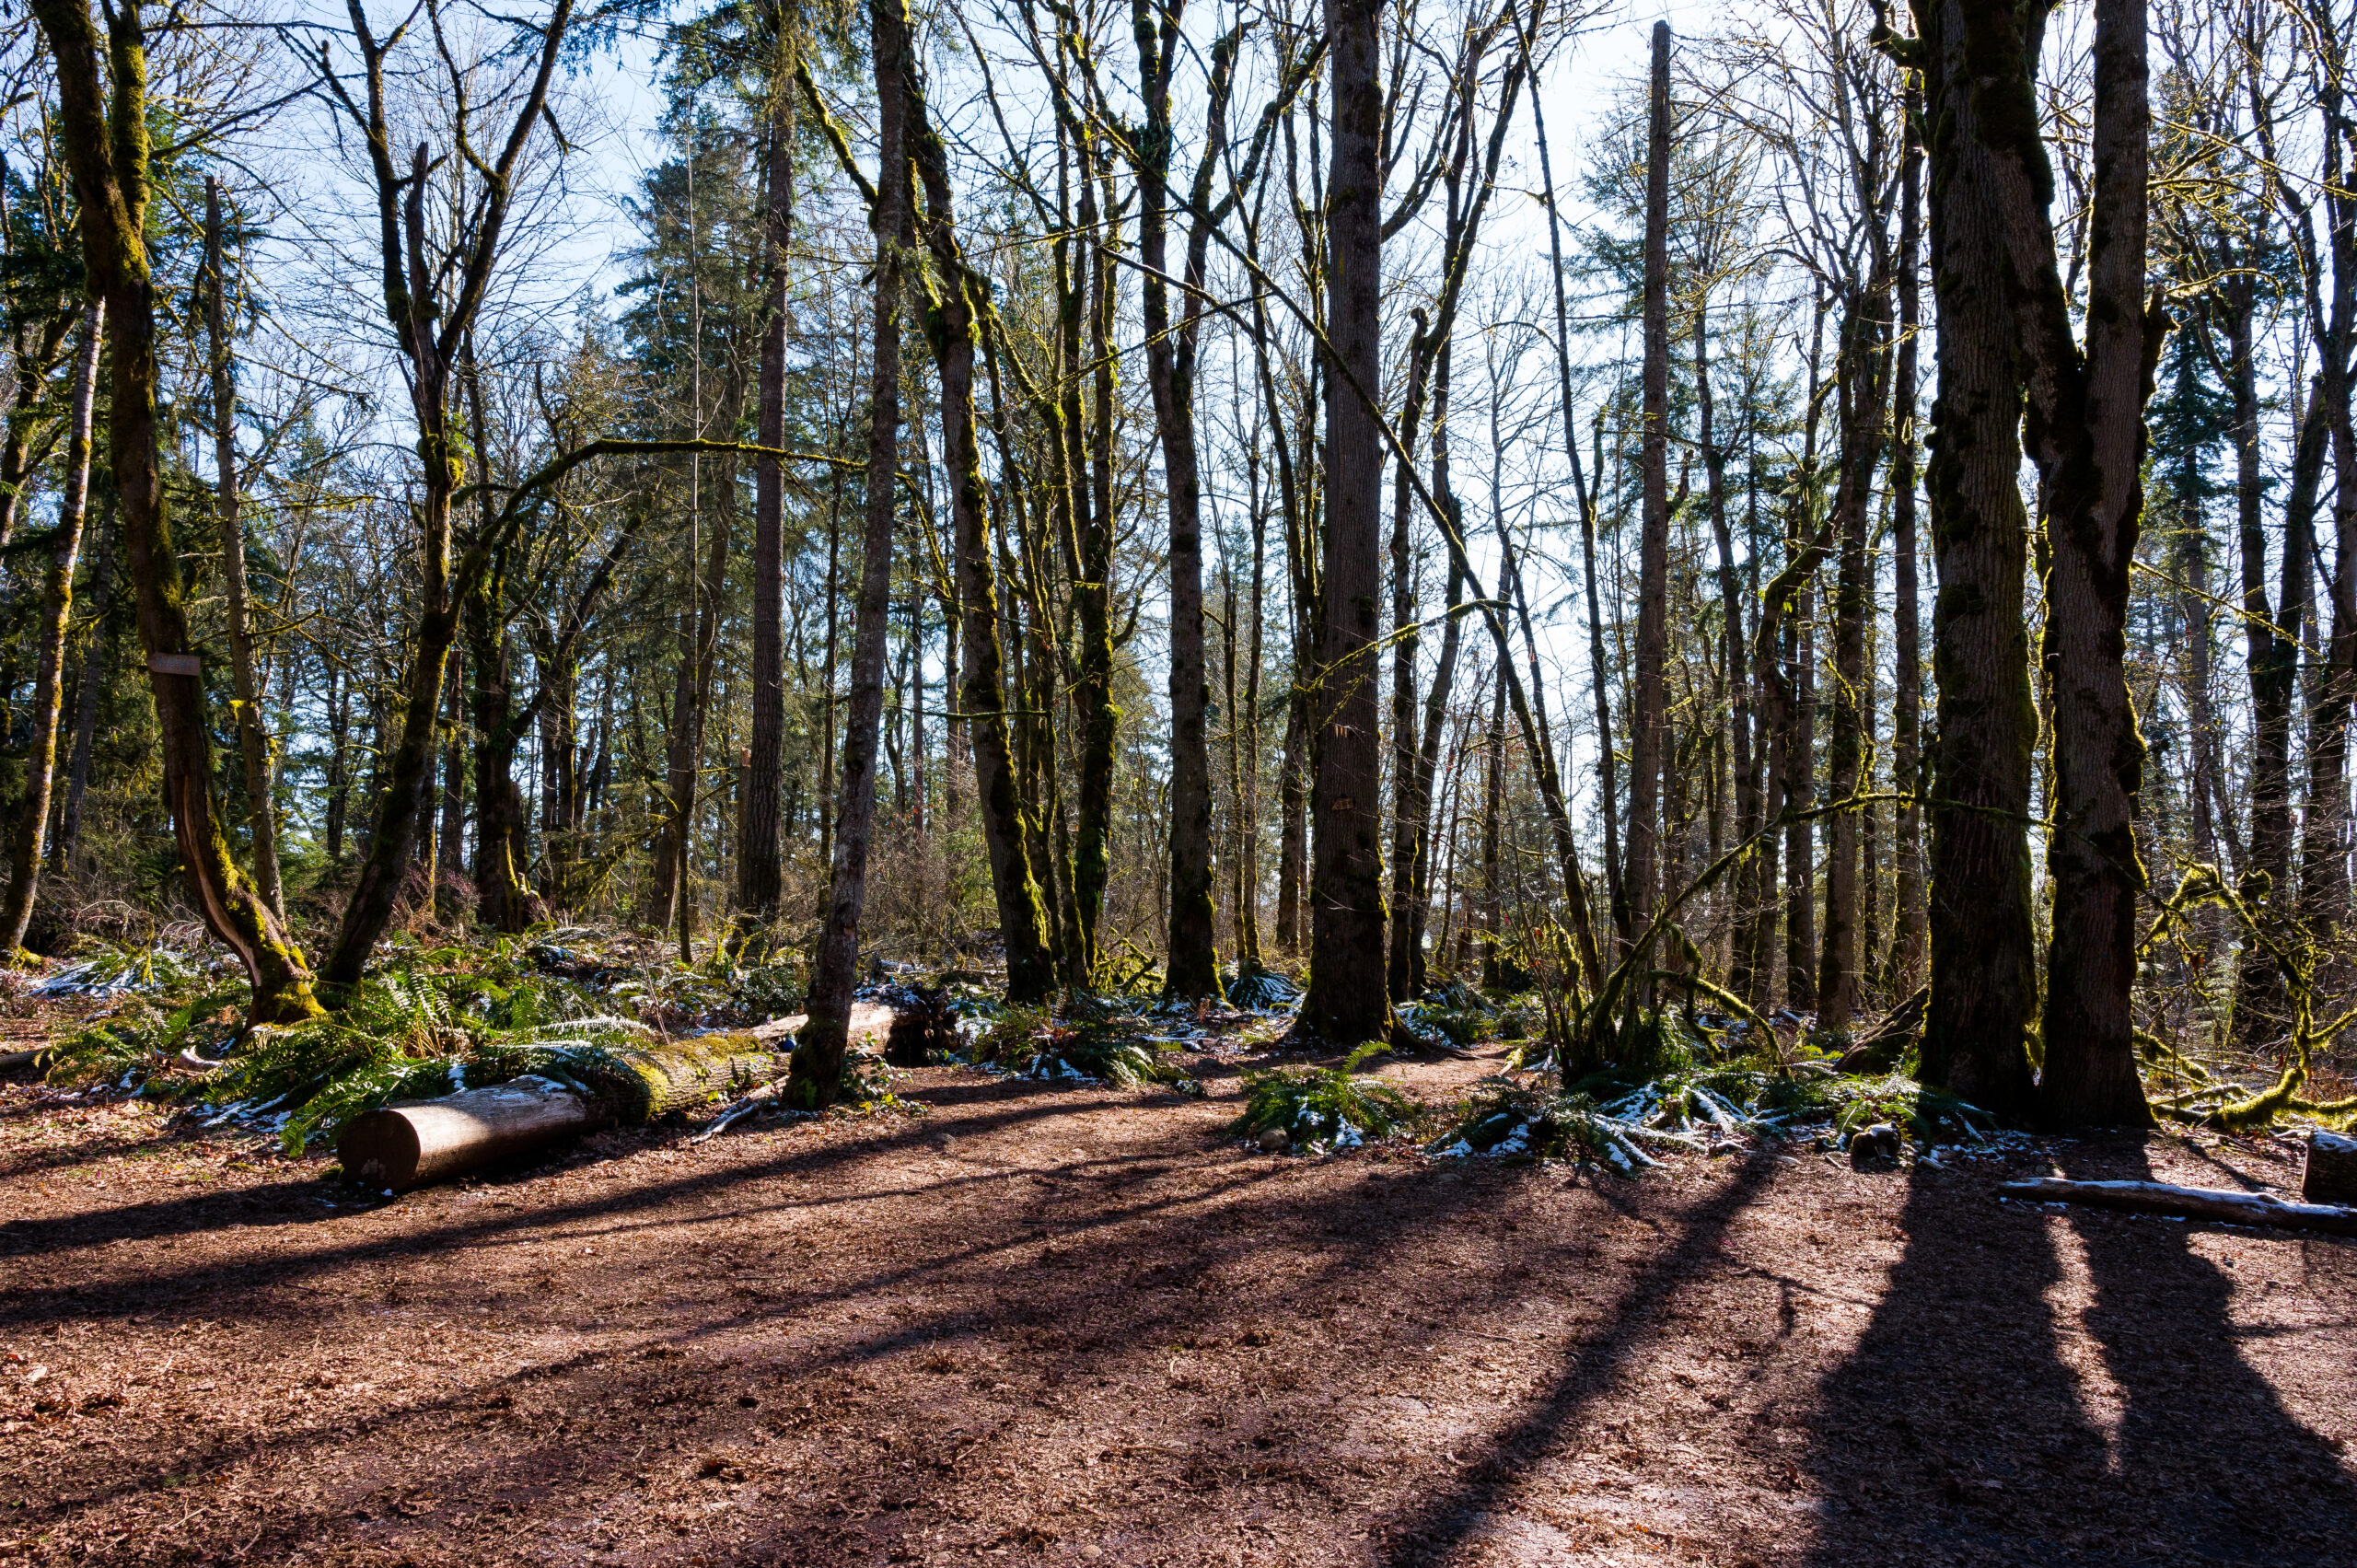
    In about .10 miles, you will arrive at a clearing with multiple paths.  Go right here to begin your loop.  You will return to this clearing after completing the loop.

    The Clearing with three paths

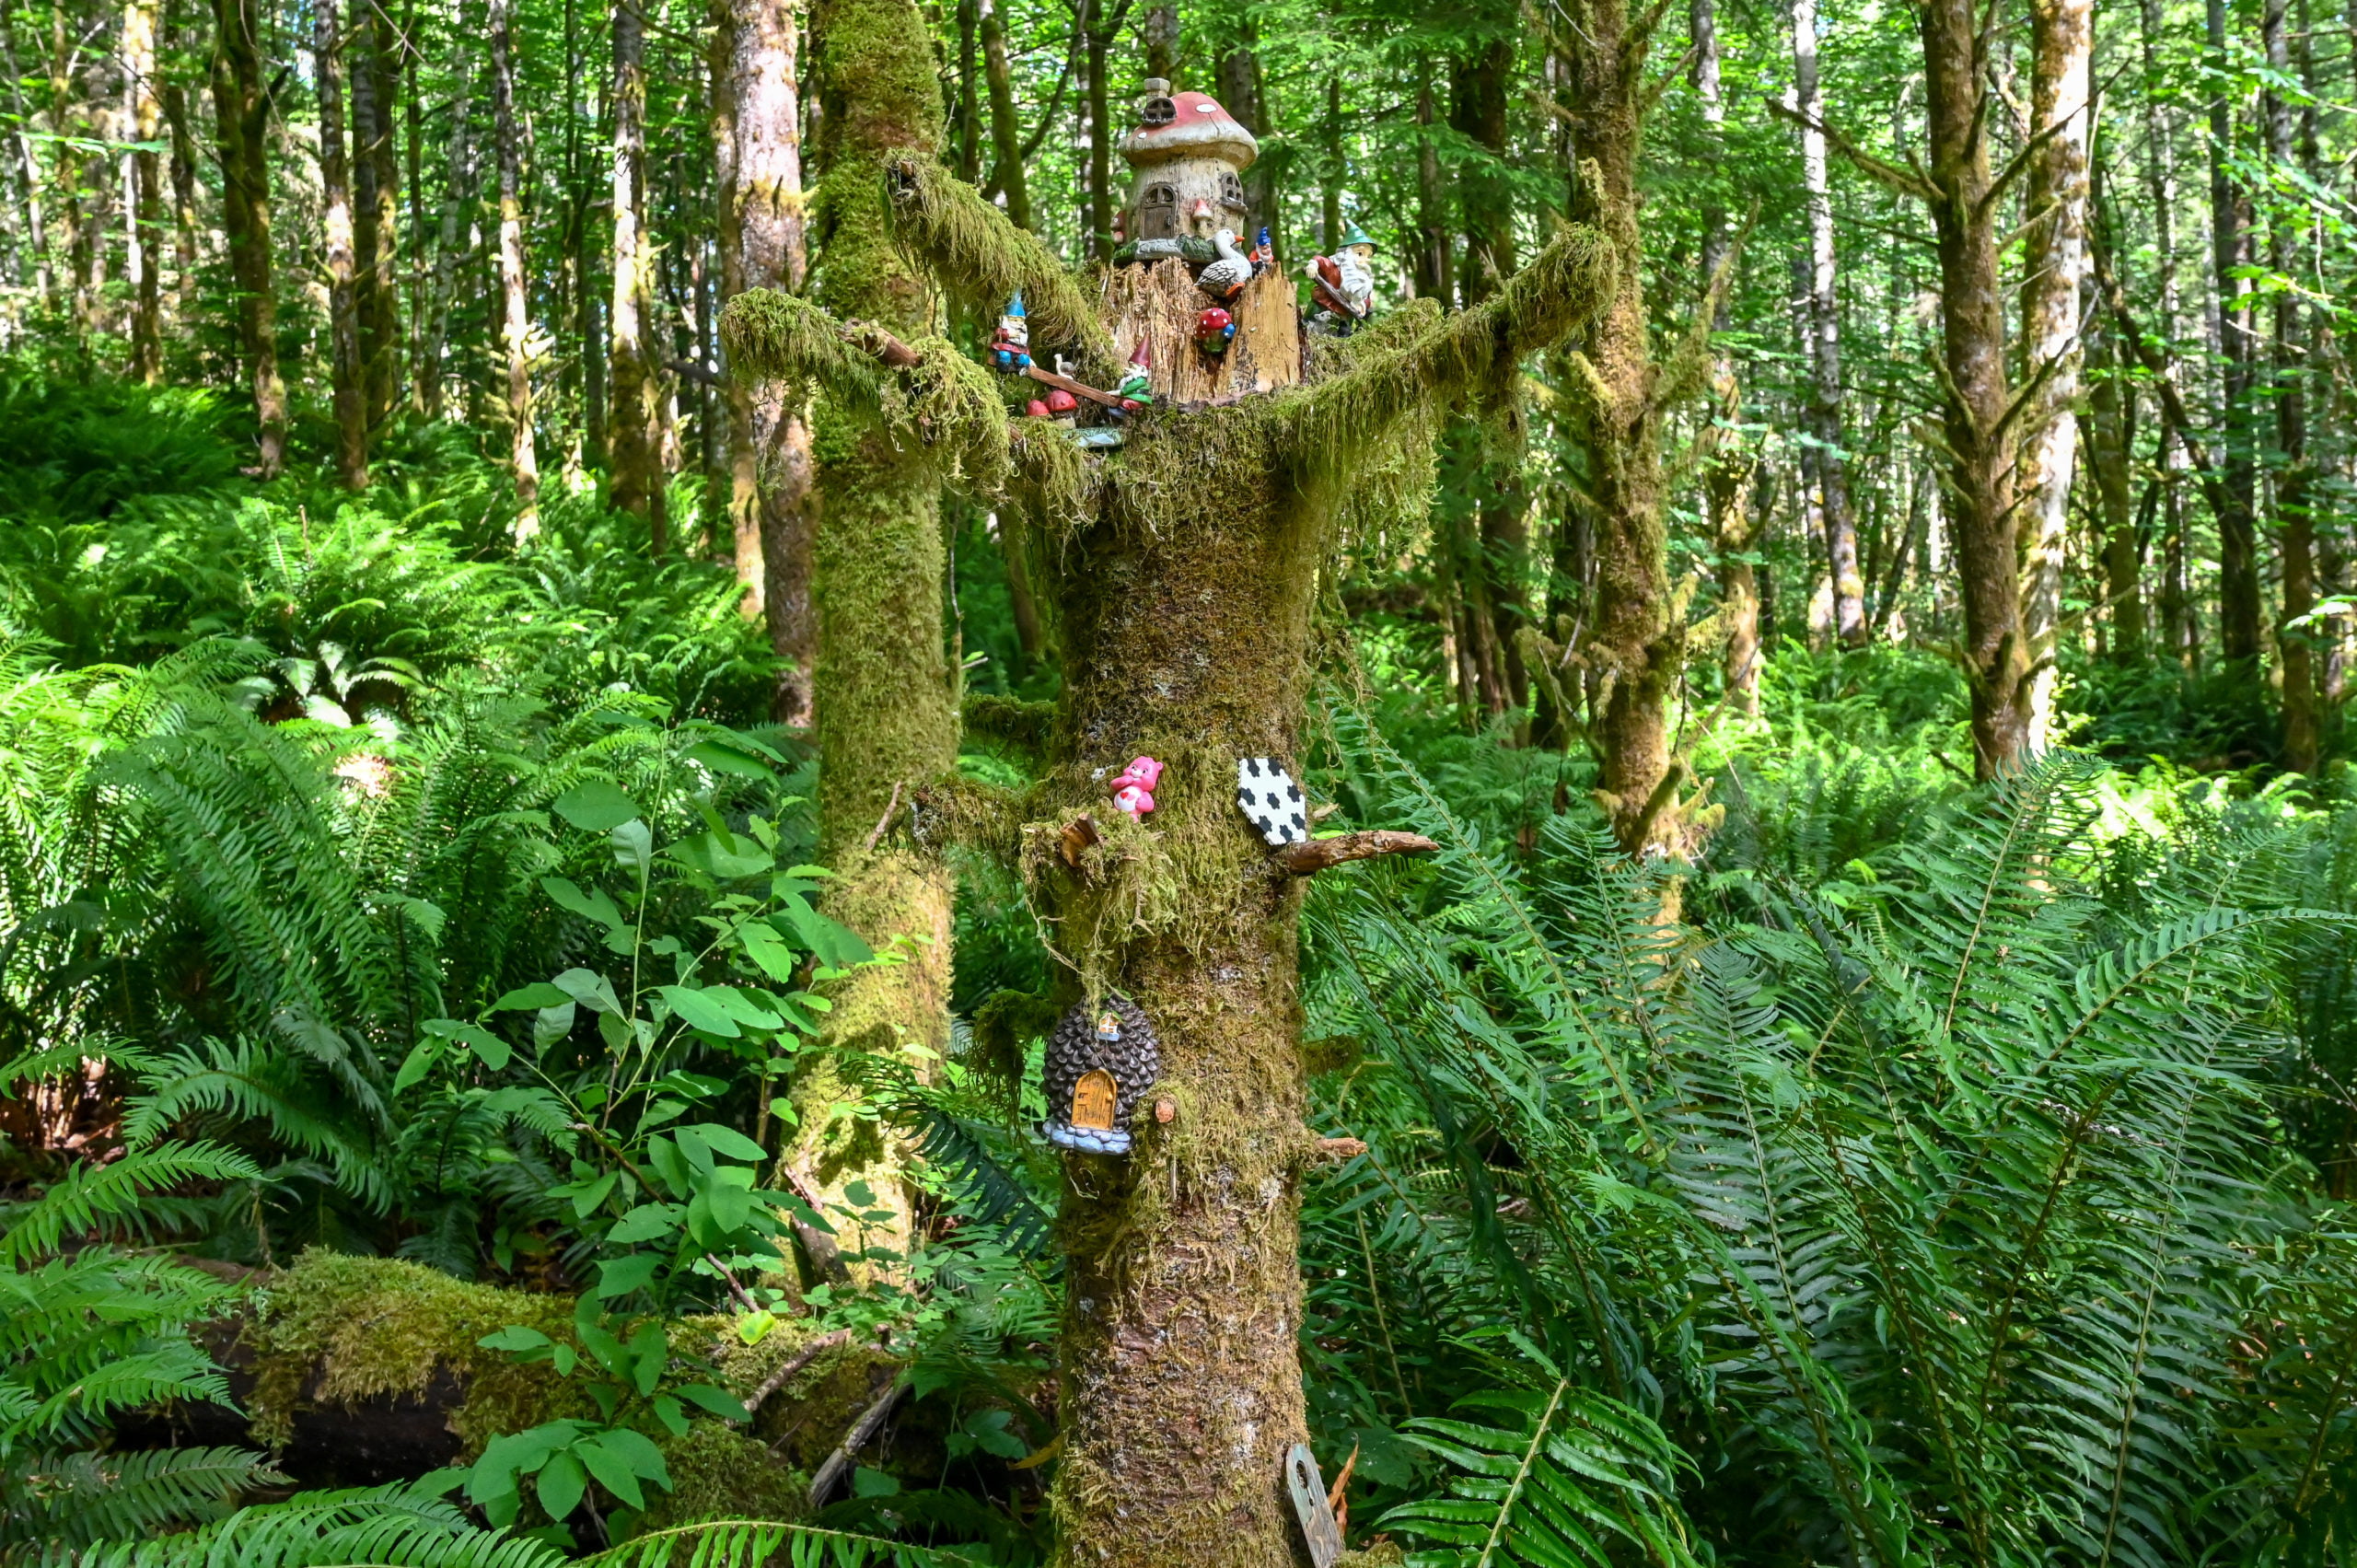
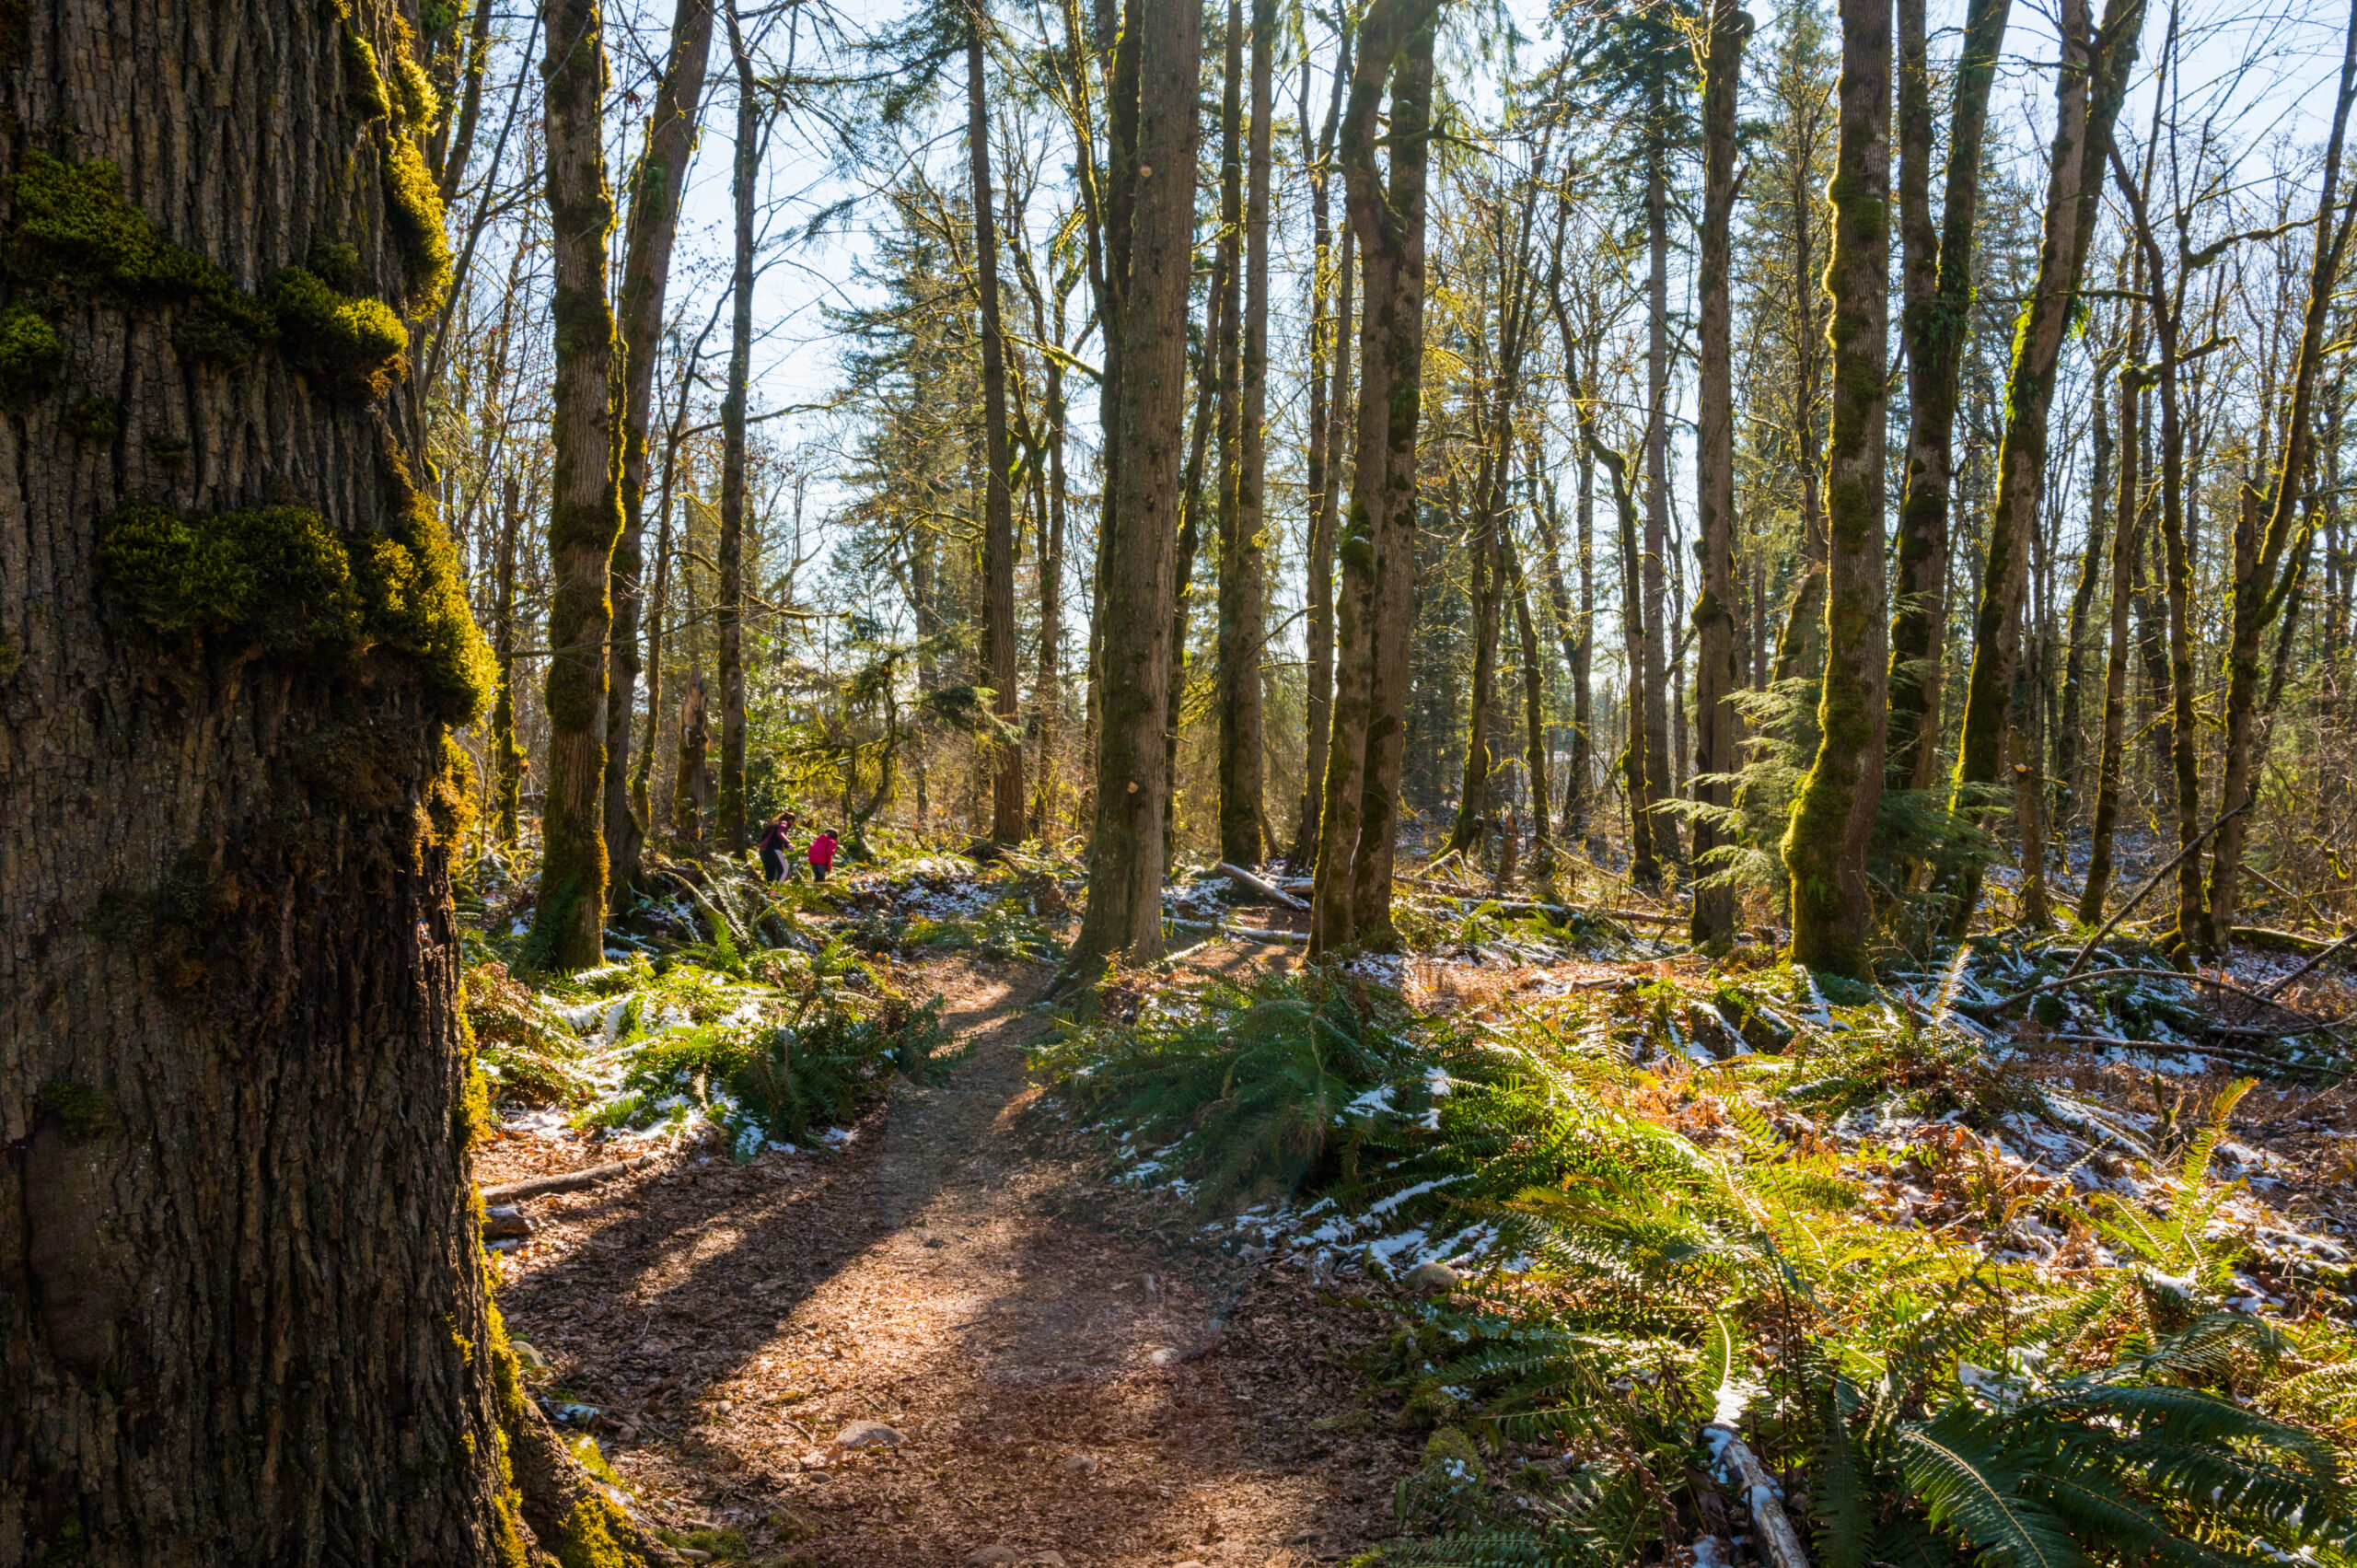
    After taking the path on the right, continue straight, and soon the path will curve to the left as it loops back around. If you’re lucky, no one will have bothered the Bob Ross-looking tree gnome, and you can use it as your marker to veer left (see photos below).

    You will also see a smaller path that continues straight and passes around a cluster of trees. However, this is just a side path. You can take it if you want, and if you do, make sure you make left turns to bring you back to the main loop.  This, however, is not a part of the main trail loop.  

    There are a lot of small trails, all shooting off the New Gnomes Trail. The main route is typically the widest and most worn-looking. To stay on the main trail, you’ll take a left at this spot and follow the path.

    The Gnome Graveyard

    After turning left and following the curve of the loop, continue to go left as it curves around. Soon, you come across the gnome “graveyard.” You know you’ve almost completed the loop when you reach this point. Soon after passing the gnomes graveyard you’ll come back to the clearing and continue straight to return the way you came and back to the parking area.

    gnome graveyard

    Summary of New Gnome Trail Directions

    • At the “Y” (starting at the main northwest trailhead) go left.
    • At the “T” at the top of the short hill, turn left.
    • When you reach the clearing with three paths, the parking lot and market will be to your left, straight ahead is the exit to the Gnome Loop, and to the right is the entrance to the loop.  Go right.
    • After turning right walk a short way before the path curves to the left. You will also see a smaller trail that leads straight.  Turn left here to stay on the main path.
    • Continue to follow this main trail as it curves left each time. When you come across the Gnomes “graveyard” you’ll know you almost finished the short loop.  Soon after passing the “graveyard”, you’ll arrive at the clearing again.  Head straight to go back the way you came and return to your car.

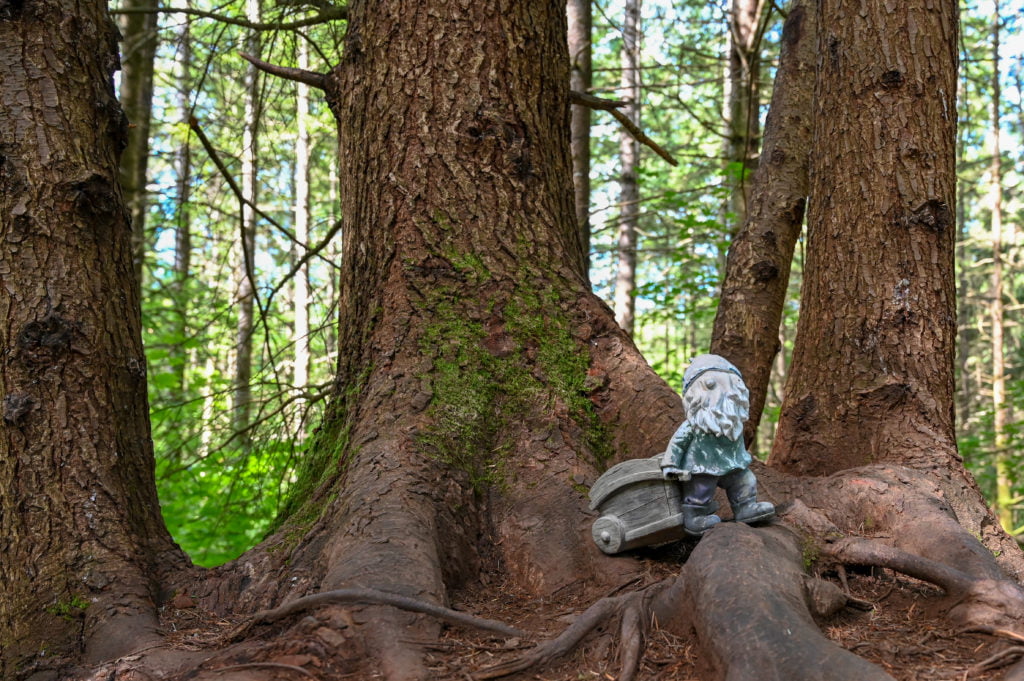
    Some of My Favorite Gnomes

    Comparing the Original Gnomes Trail to the New Gnome Trail

    The Original Gnomes Trail was more of a hike than the New Gnome Trail. I preferred the original’s length as I felt like I got more of a hiking experience from it. The New Gnome Trail feels more like a meander in the woods. I liken it to an Easter egg hunt but for Gnomes. Kids will love it!

    The New Gnome Trail is one of the most kid-friendly trails I know of.  It is excellent for kids ten years old and younger.  I think kids older than that may get bored or not find it challenging enough.

    However, if you are bringing older kids that prefer a longer hike, there are many offshoots to the New Gnome Trail to extend your hike.  At the “T” in the trail at the top of the short hill where I said to make a left, you can take a right instead, and the path will take you as far as Lake Wilderness!  

    A Mom and Daughter walking the new gnome trail

    Contributing to the New Gnome Trail

    There is one more way you can enjoy and contribute to the New Gnome Trail. By bringing your own gnome to leave for others to enjoy. The New Gnome Trail was vandalized shortly before my visit and many of the gnomes had been damaged or moved. So other hikers and fellow gnome collectors have joined together to restore the gnomes living here. 

    I know some in the community come and take the gnomes to repaint after they are too weathered and others come with their kids and have fun adding their own additions to the trail. It is an interactive and ever-changing trail.

    Vandalism

    Also, on the note of vandalism, this community as well as its law enforcement officers do their best to discourage and prevent vandals. Unfortunately, that is not always possible.  There are some reports of hikers having their cars broken into while parked here.  I did not have any issues during my visit, but it does happen. Make sure you don’t leave any valuables in sight or anything a vandal might consider worth breaking in to get.

    Final Thoughts

    This trail is perfect for kids ten and younger and anyone who loves gnomes. It is less of a hike and more of a fun stroll in the forest where gnomes and fairy creatures abide. Parking is free, and there is fun for all! I spent around 30-minutes hiking the New Gnome Trail, and if you were here with kids who wanted to follow all the little trails to find more hidden gnomes, you could give it up to one hour.

    Happy Gnome Hunting!

    Other Articles You May Enjoy


    Note: Travelffeine is reader-supported. This post contains affiliate links. When you purchase using one of these affiliate links, we get paid a small commission at no extra cost to you. And as always, all opinions are our own. Thank you!

     
    Hiking the NEW Gnome Trail
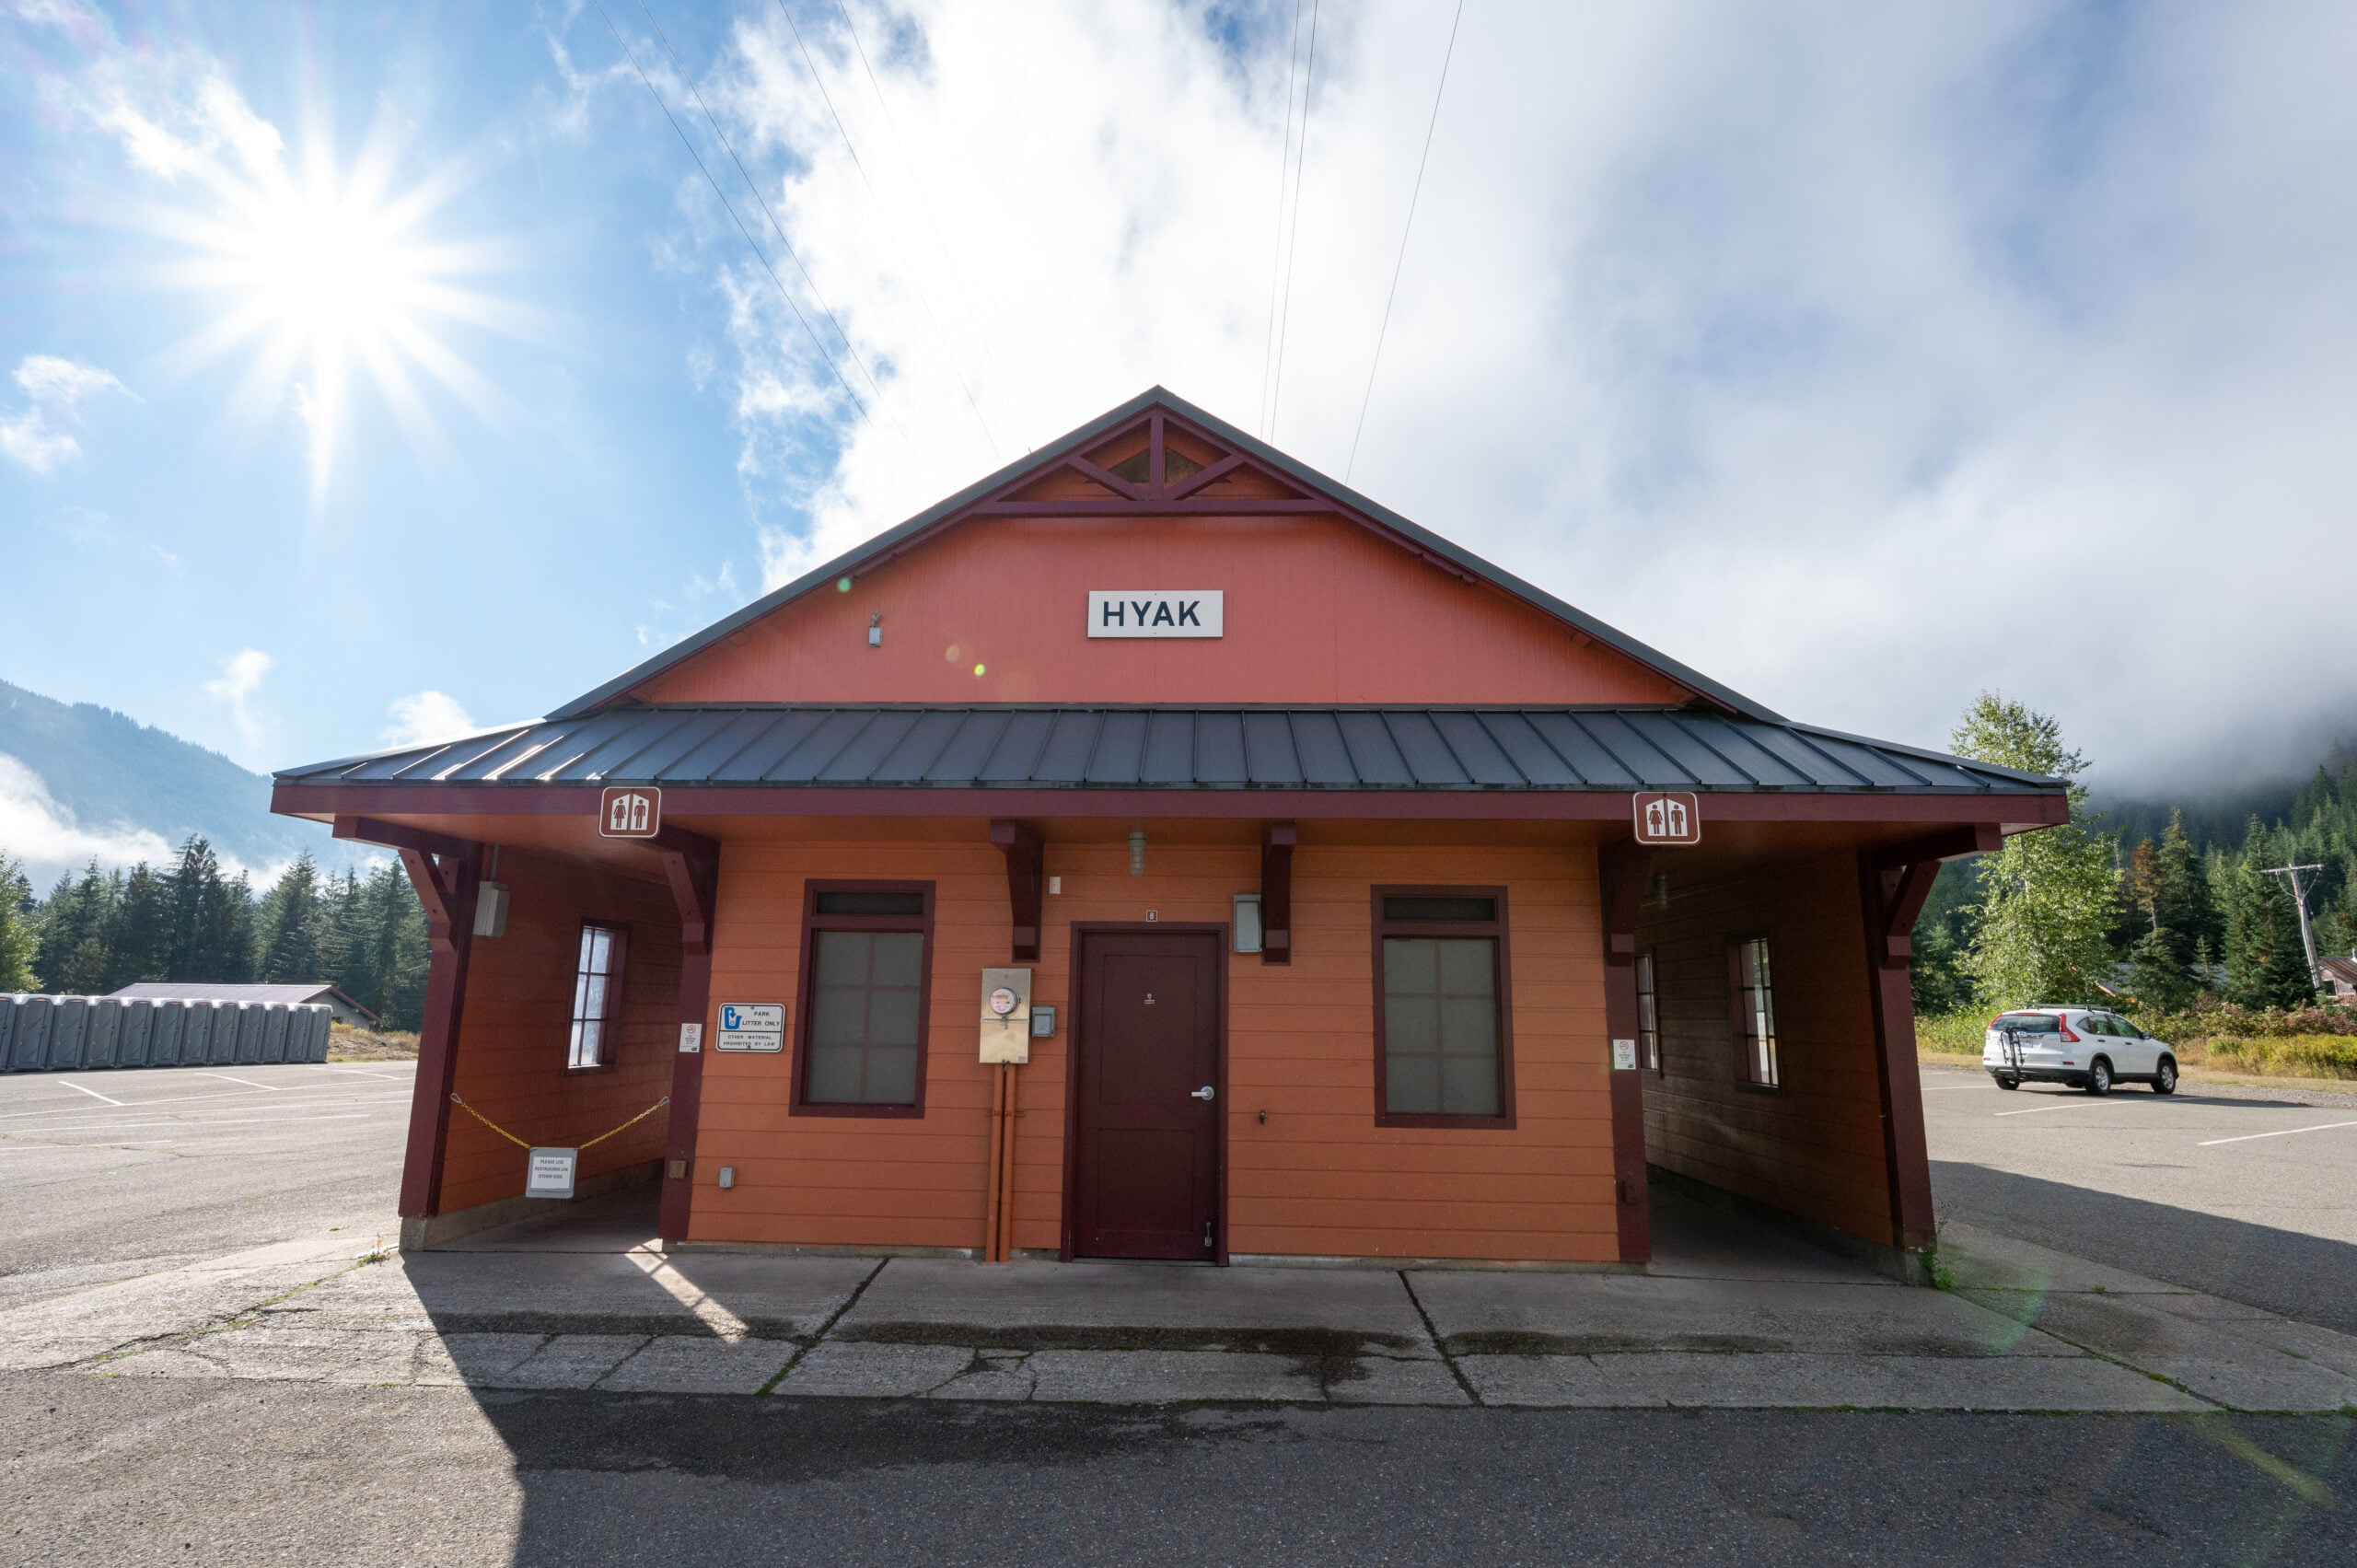
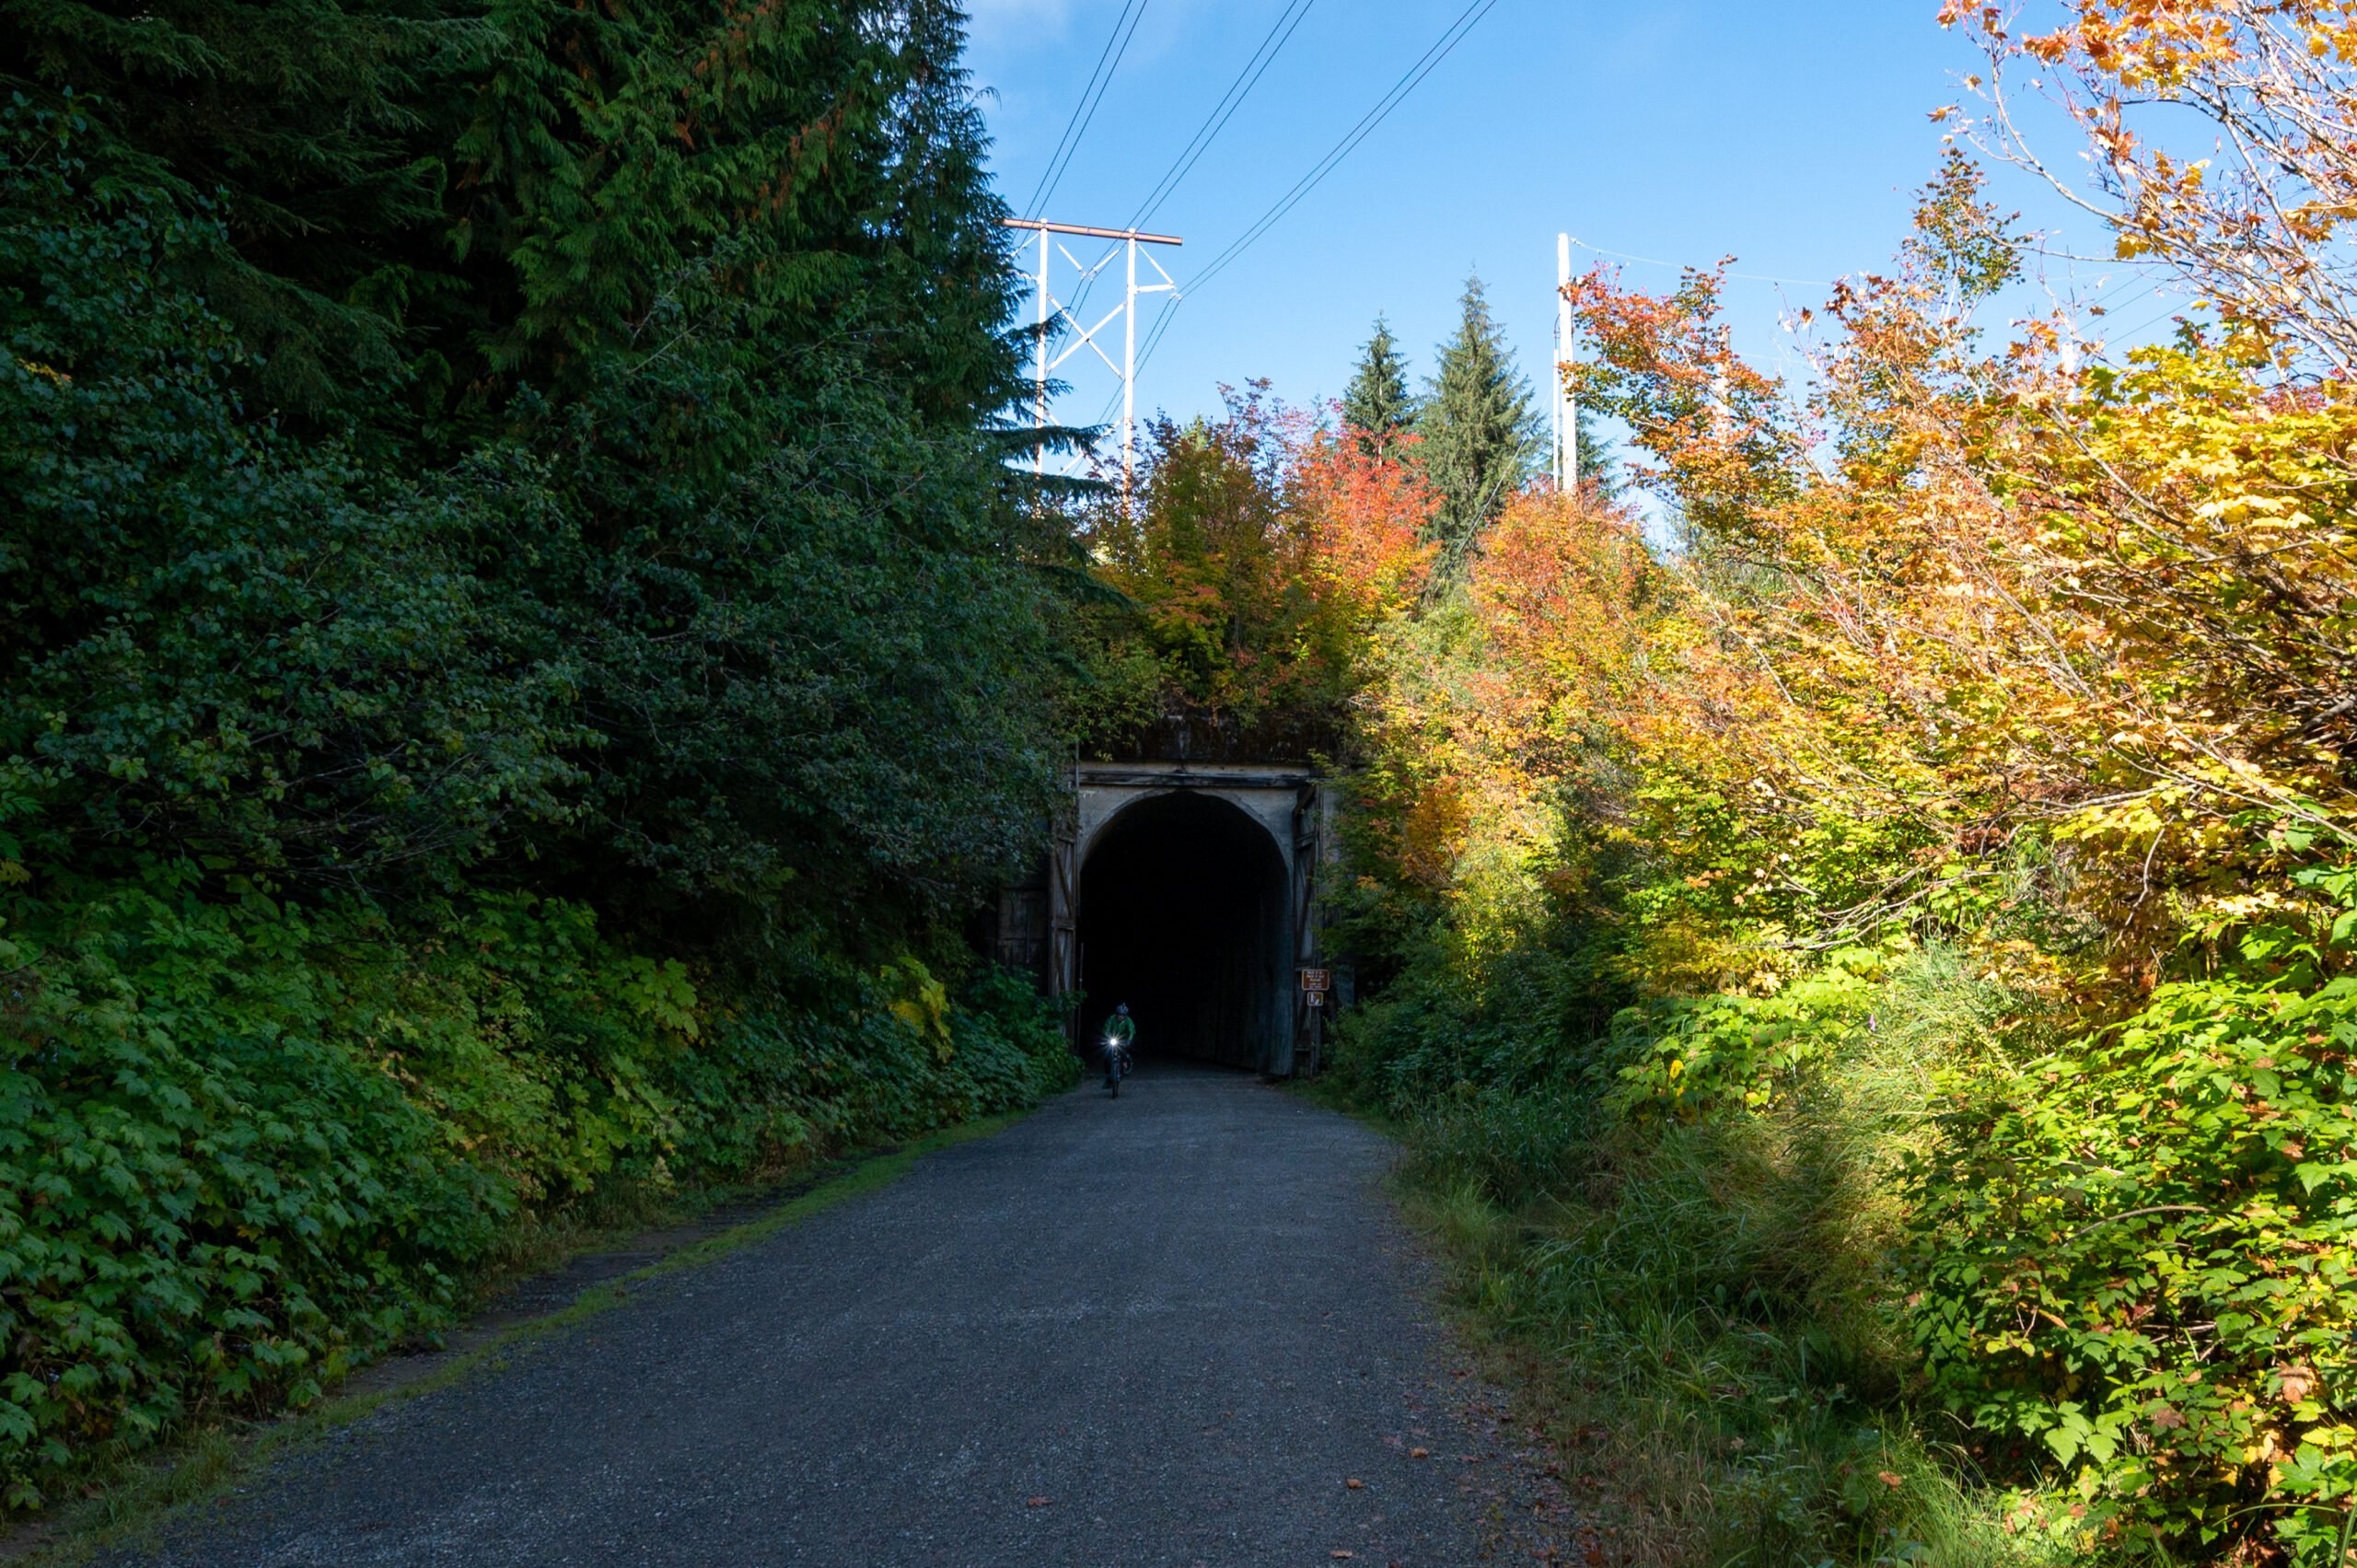
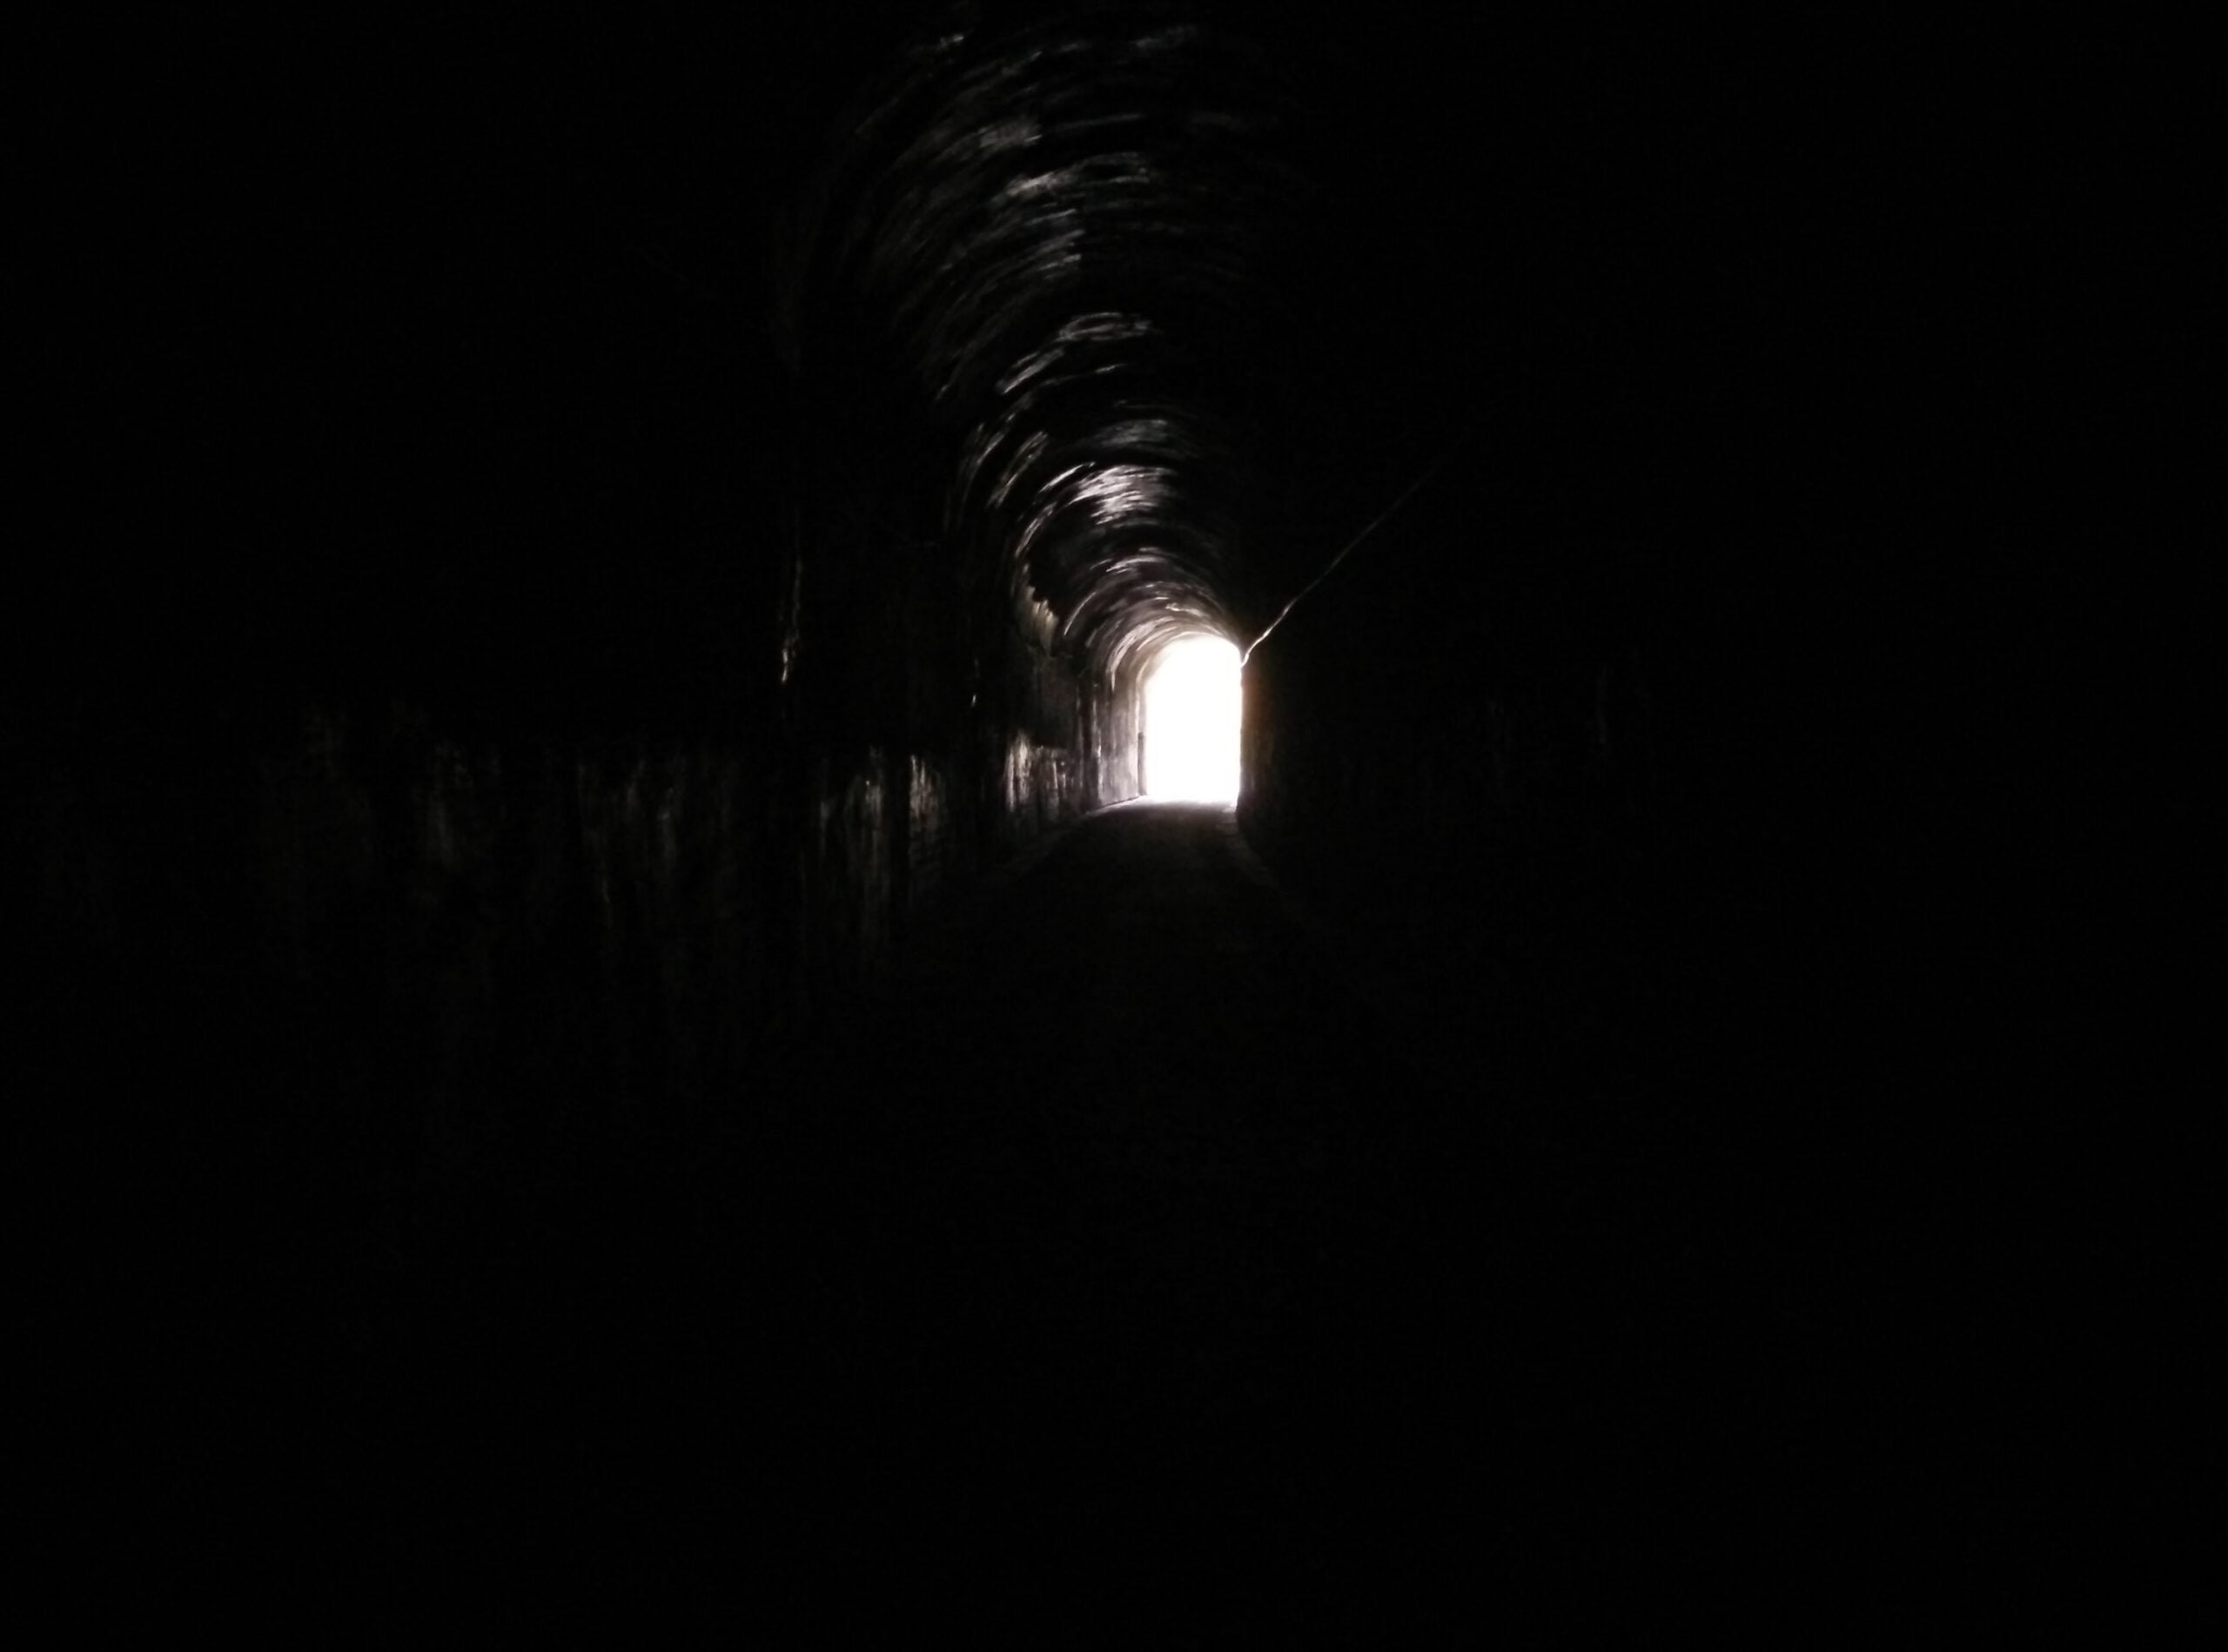
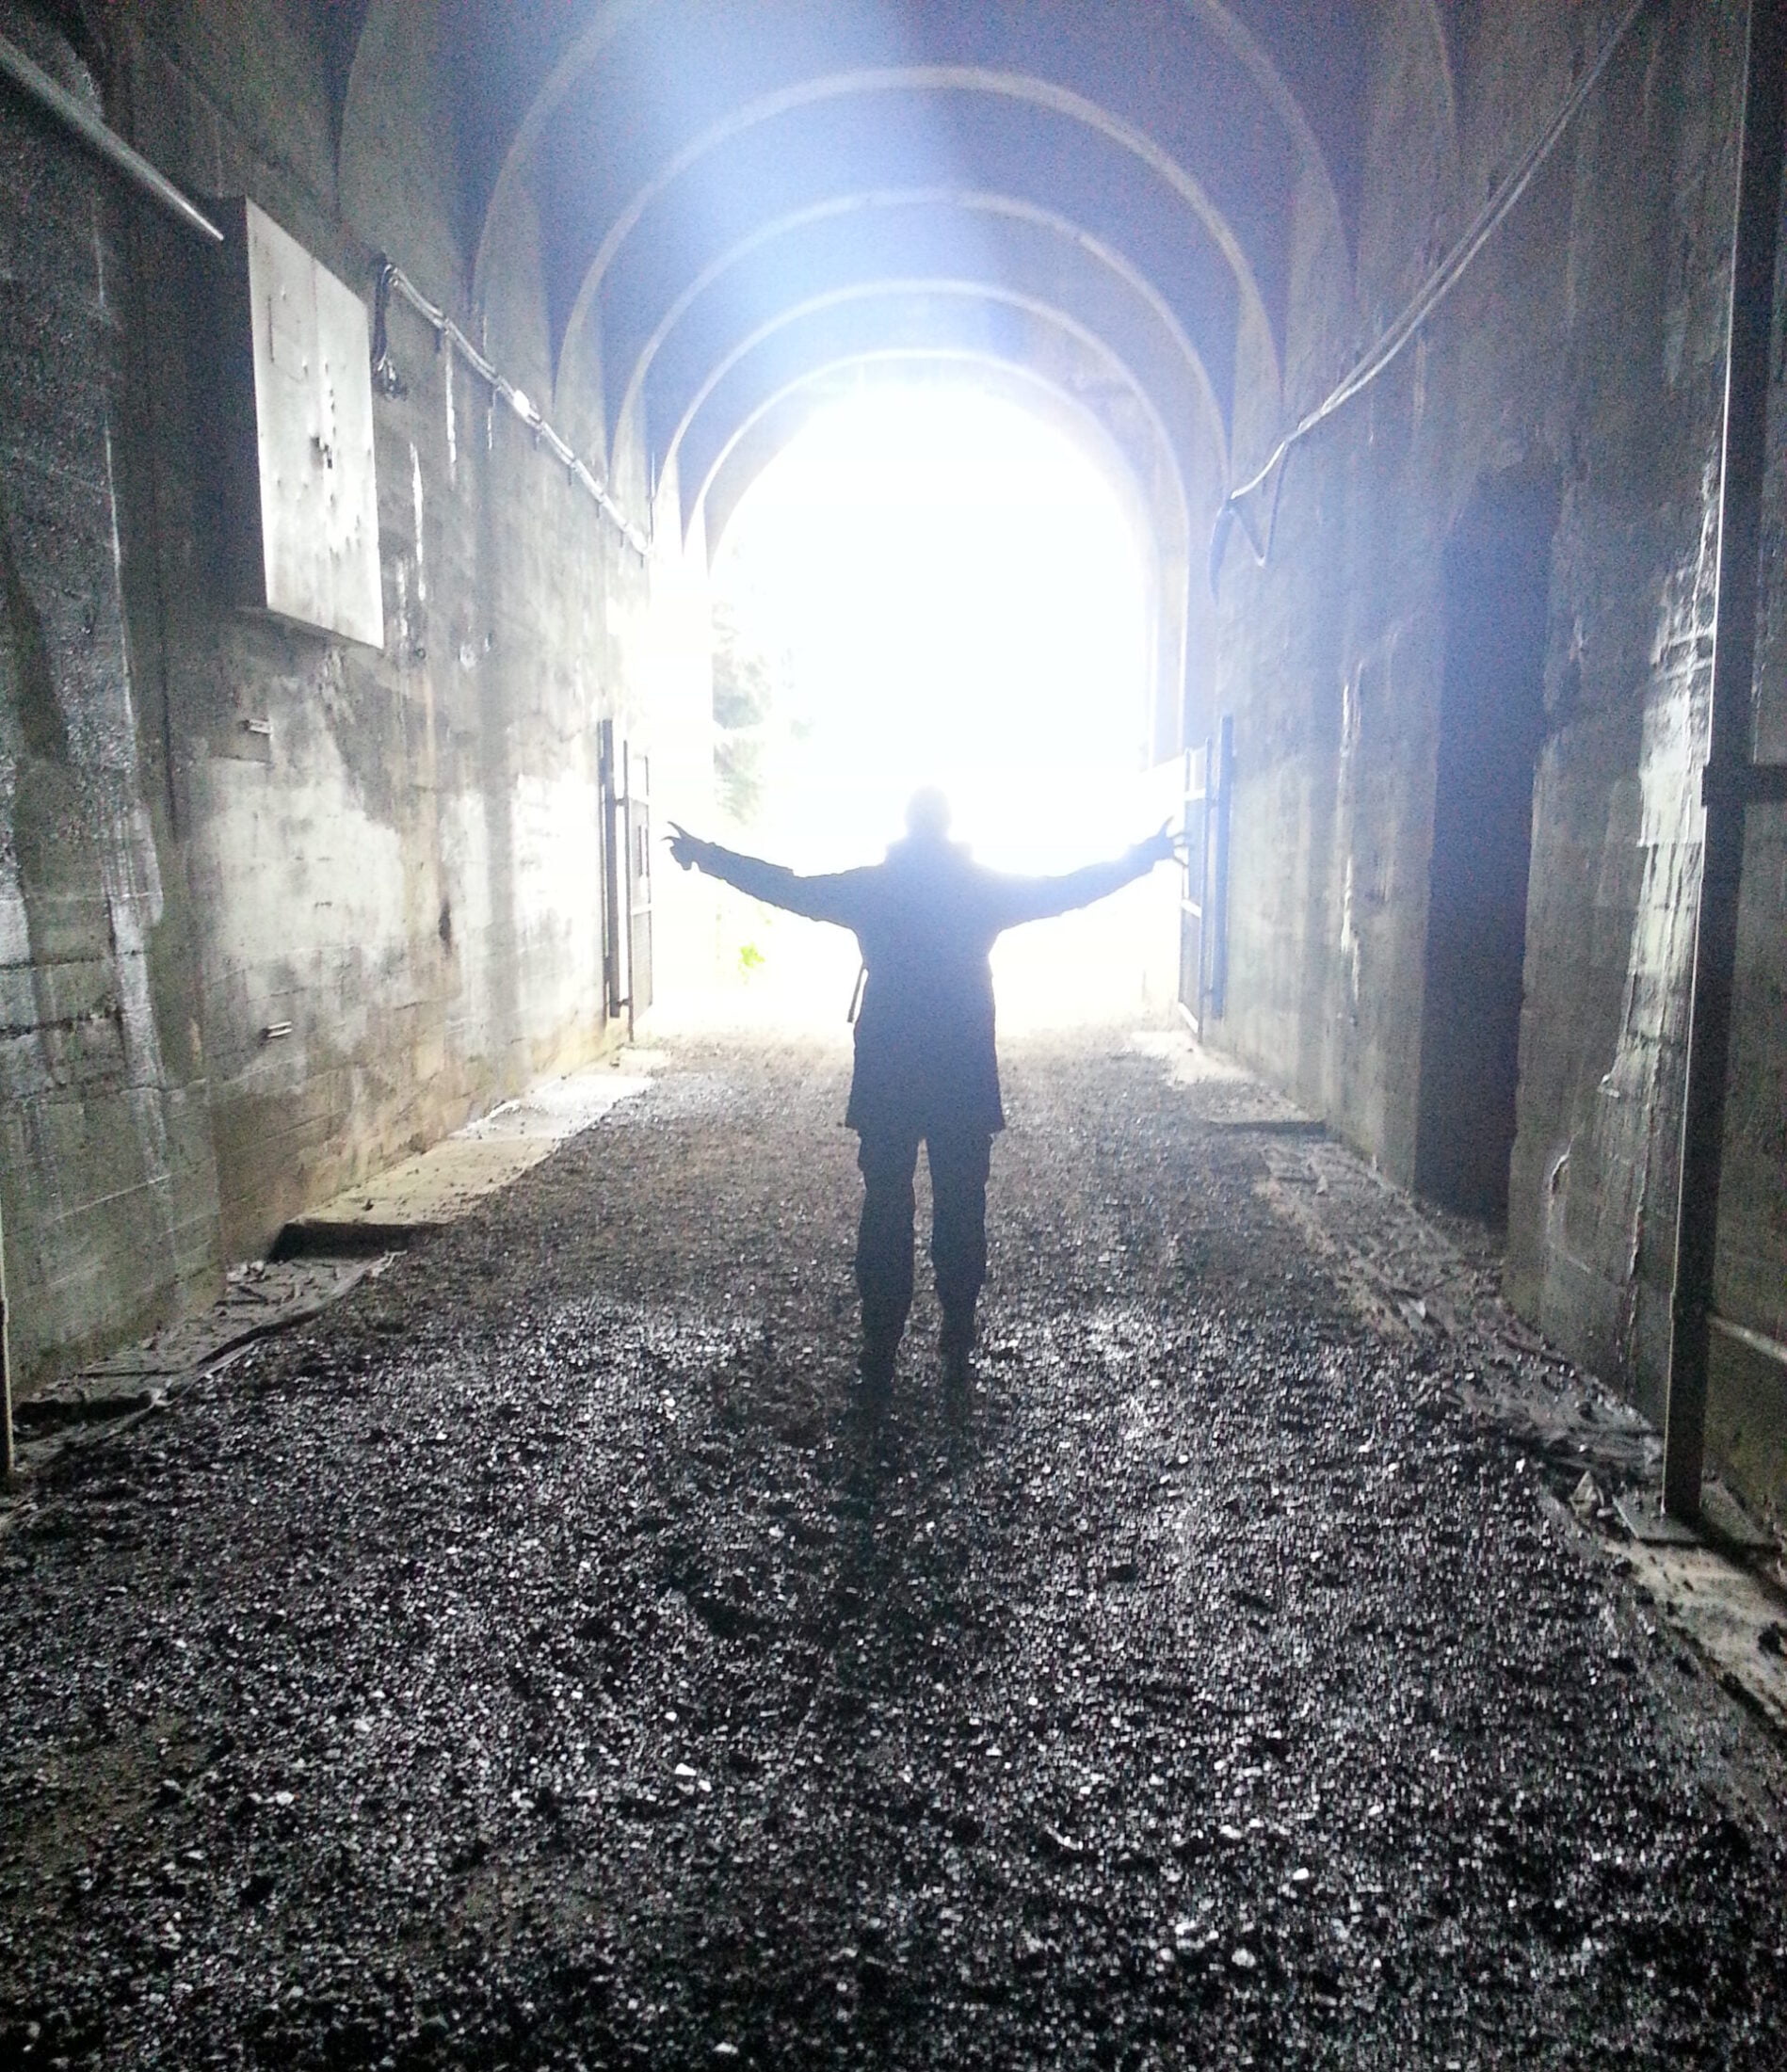
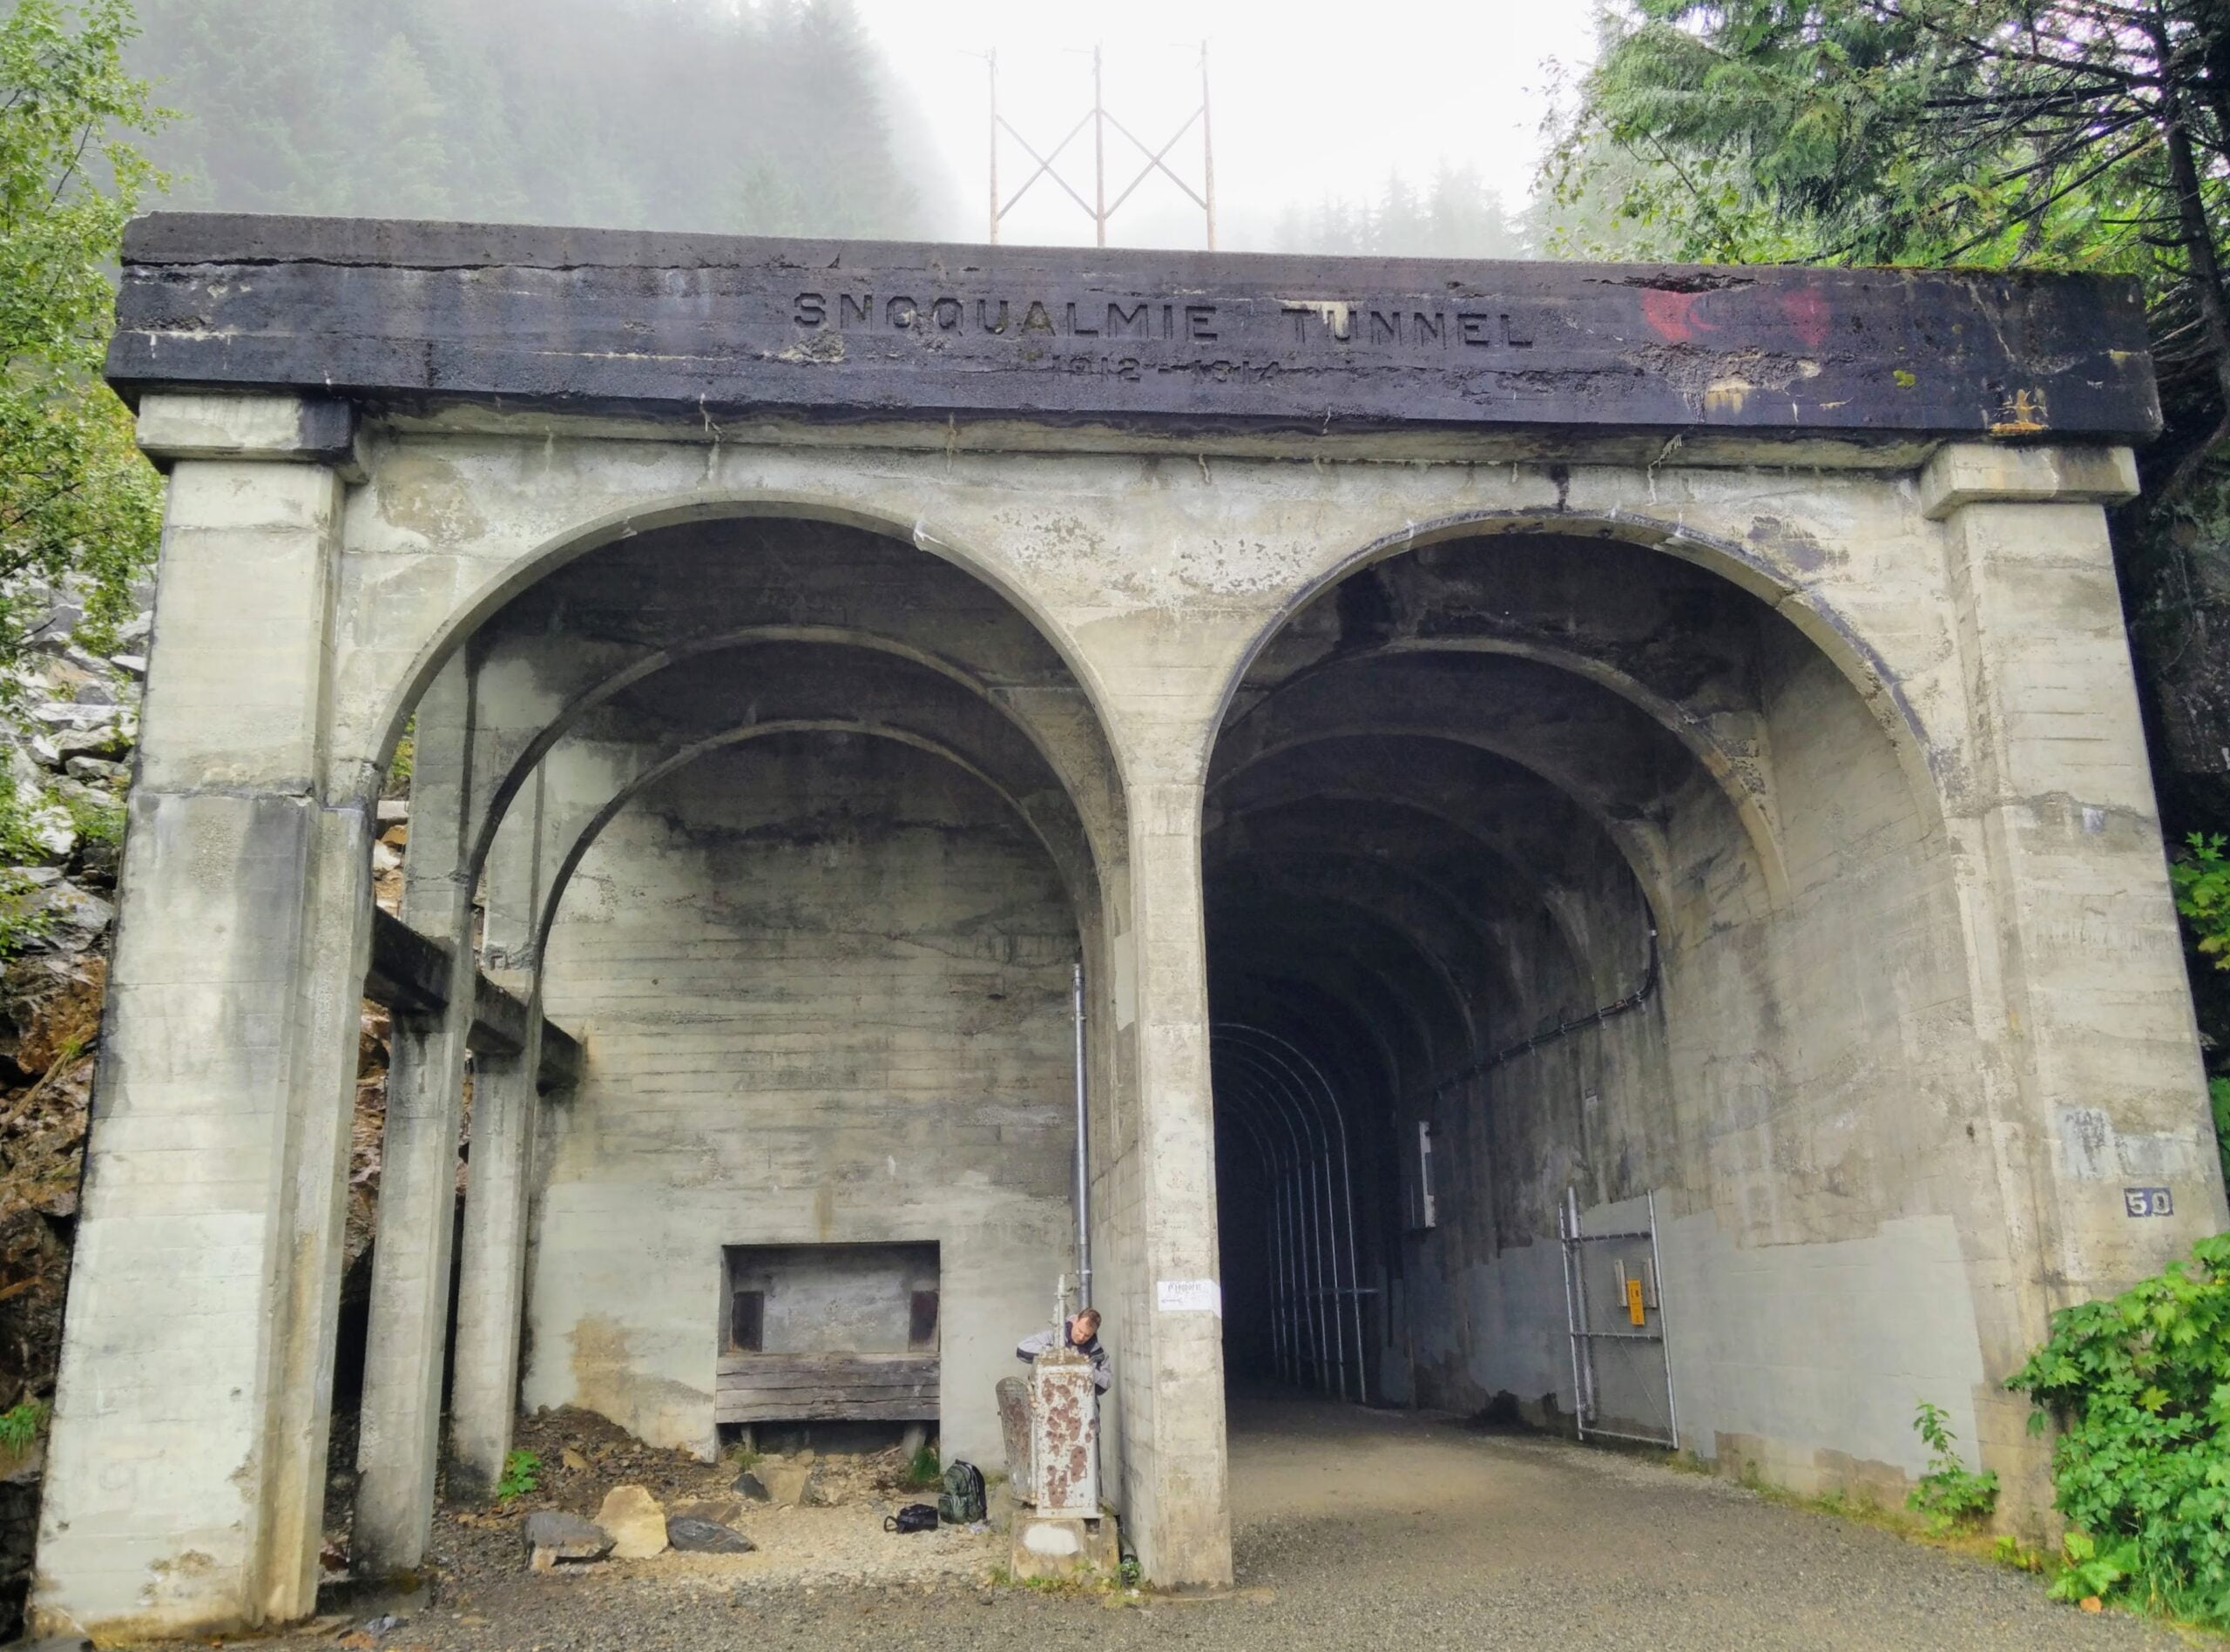
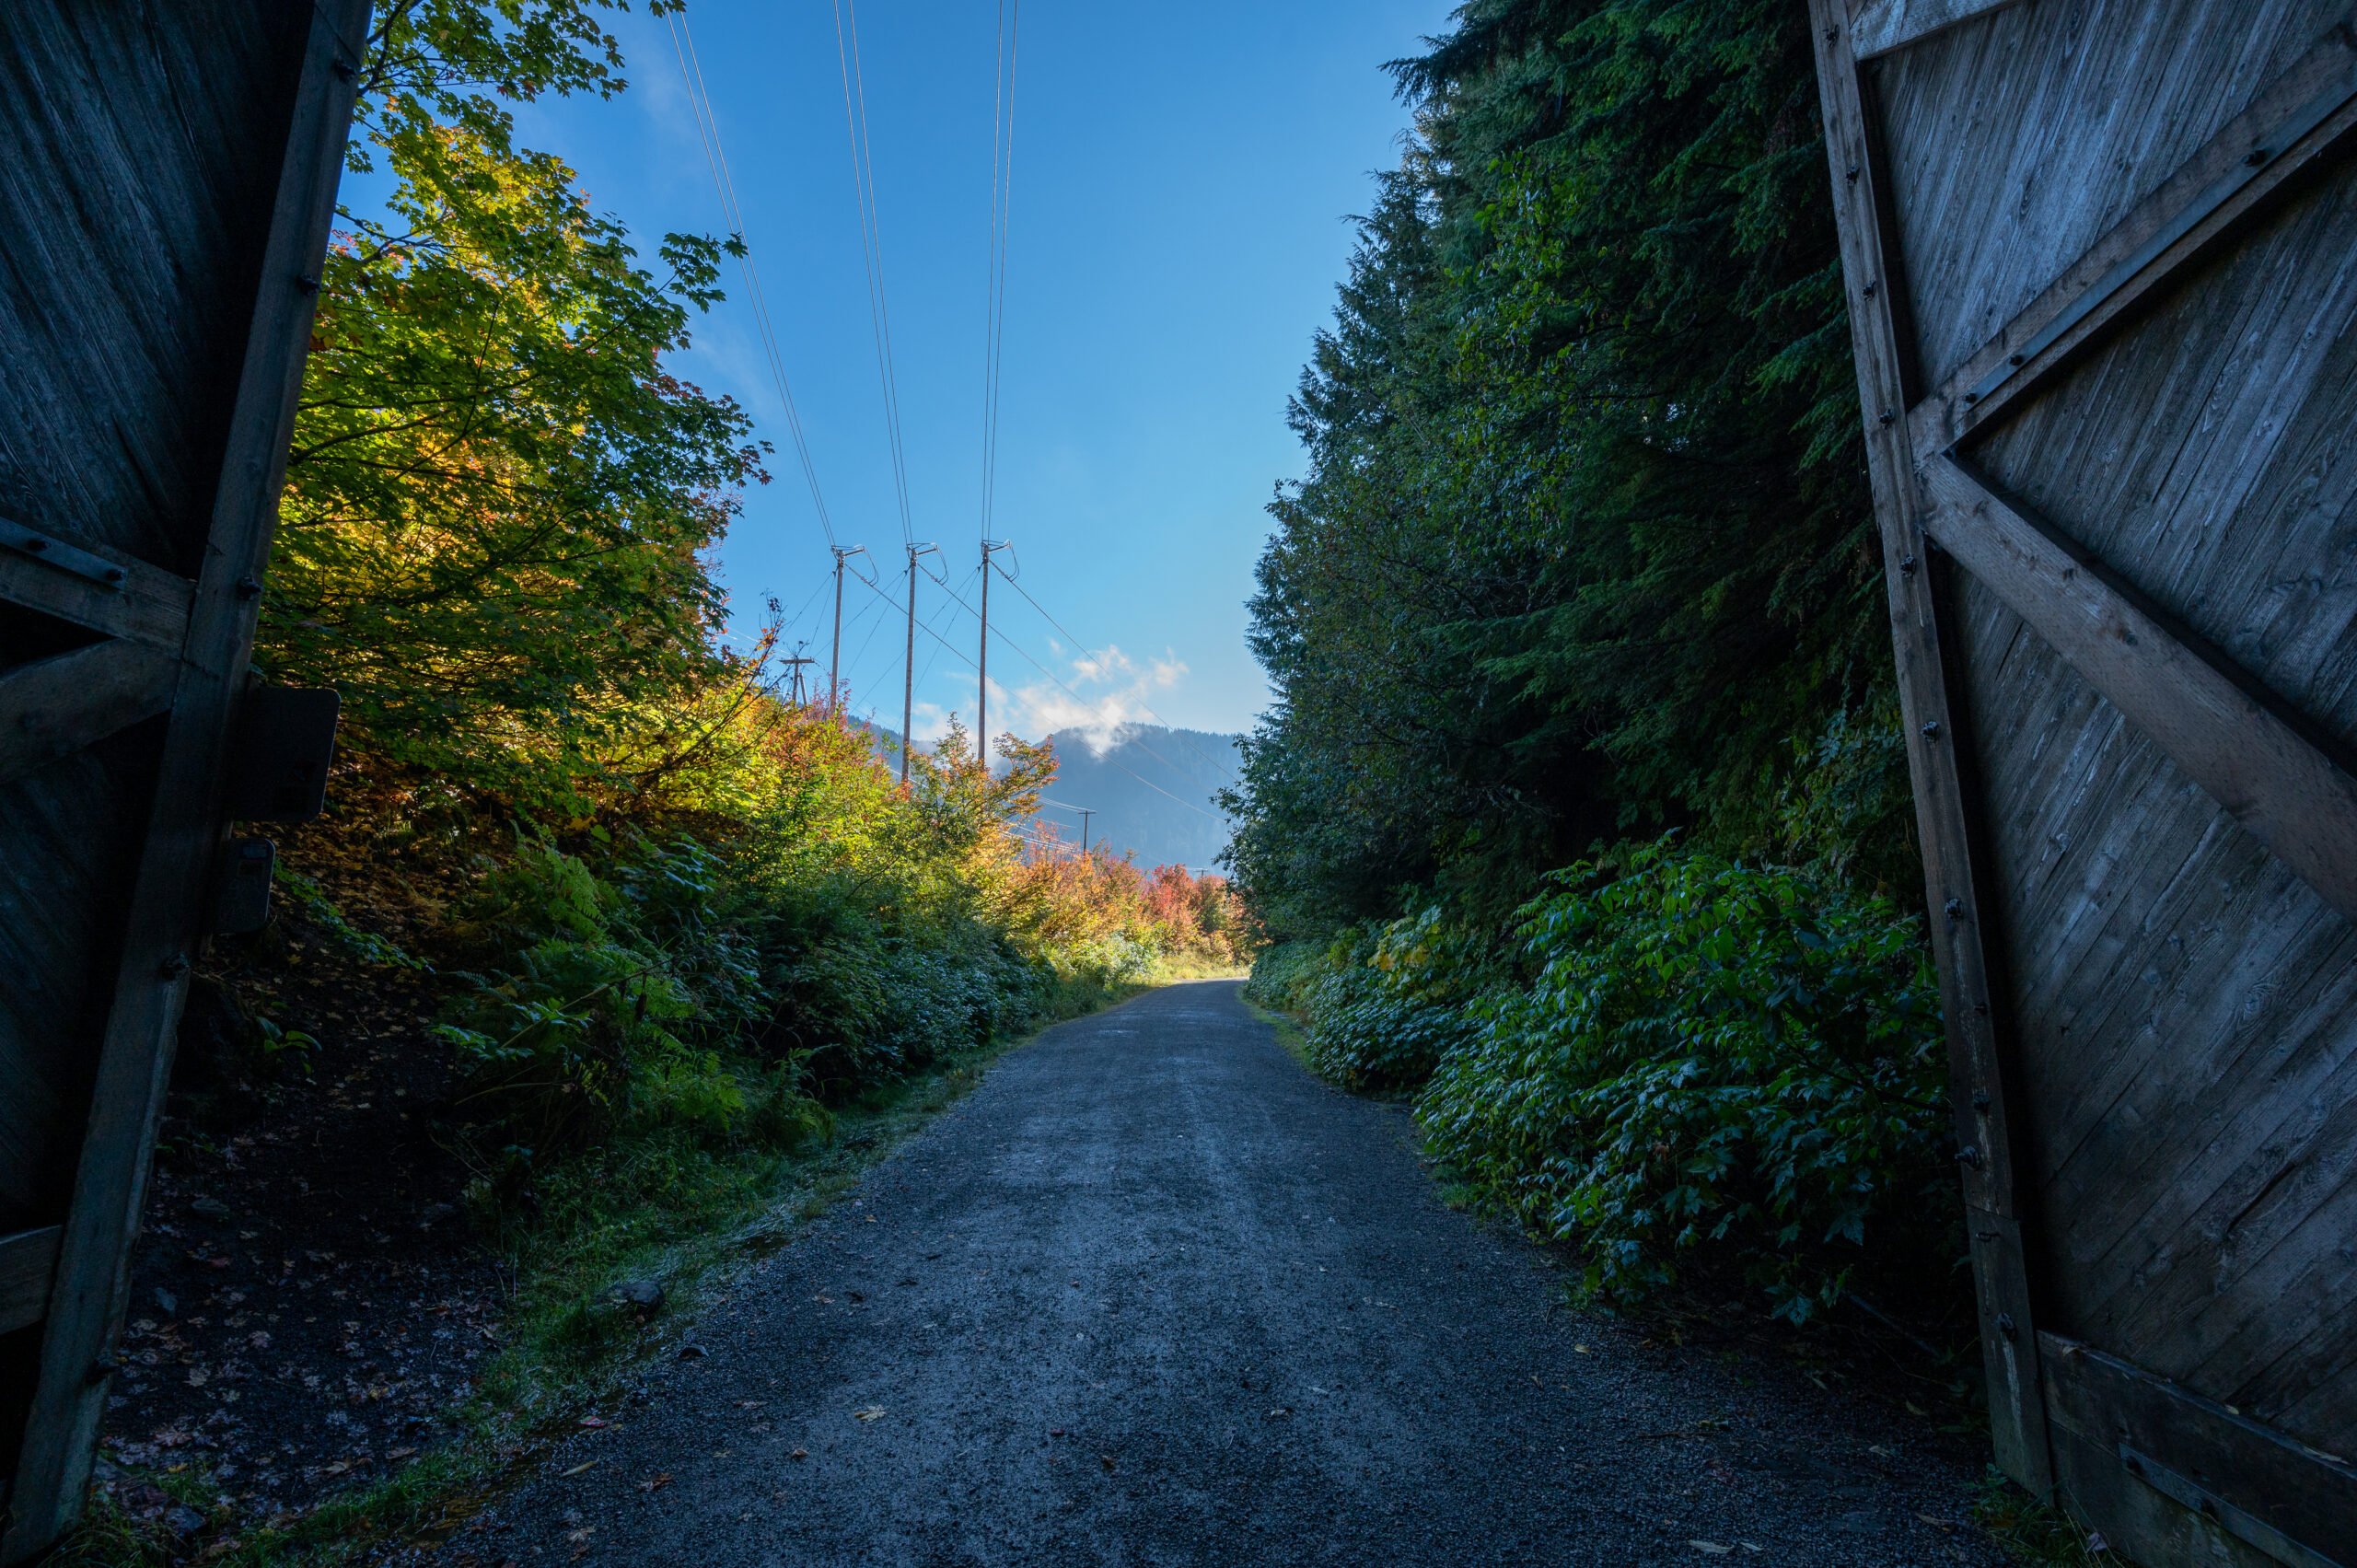
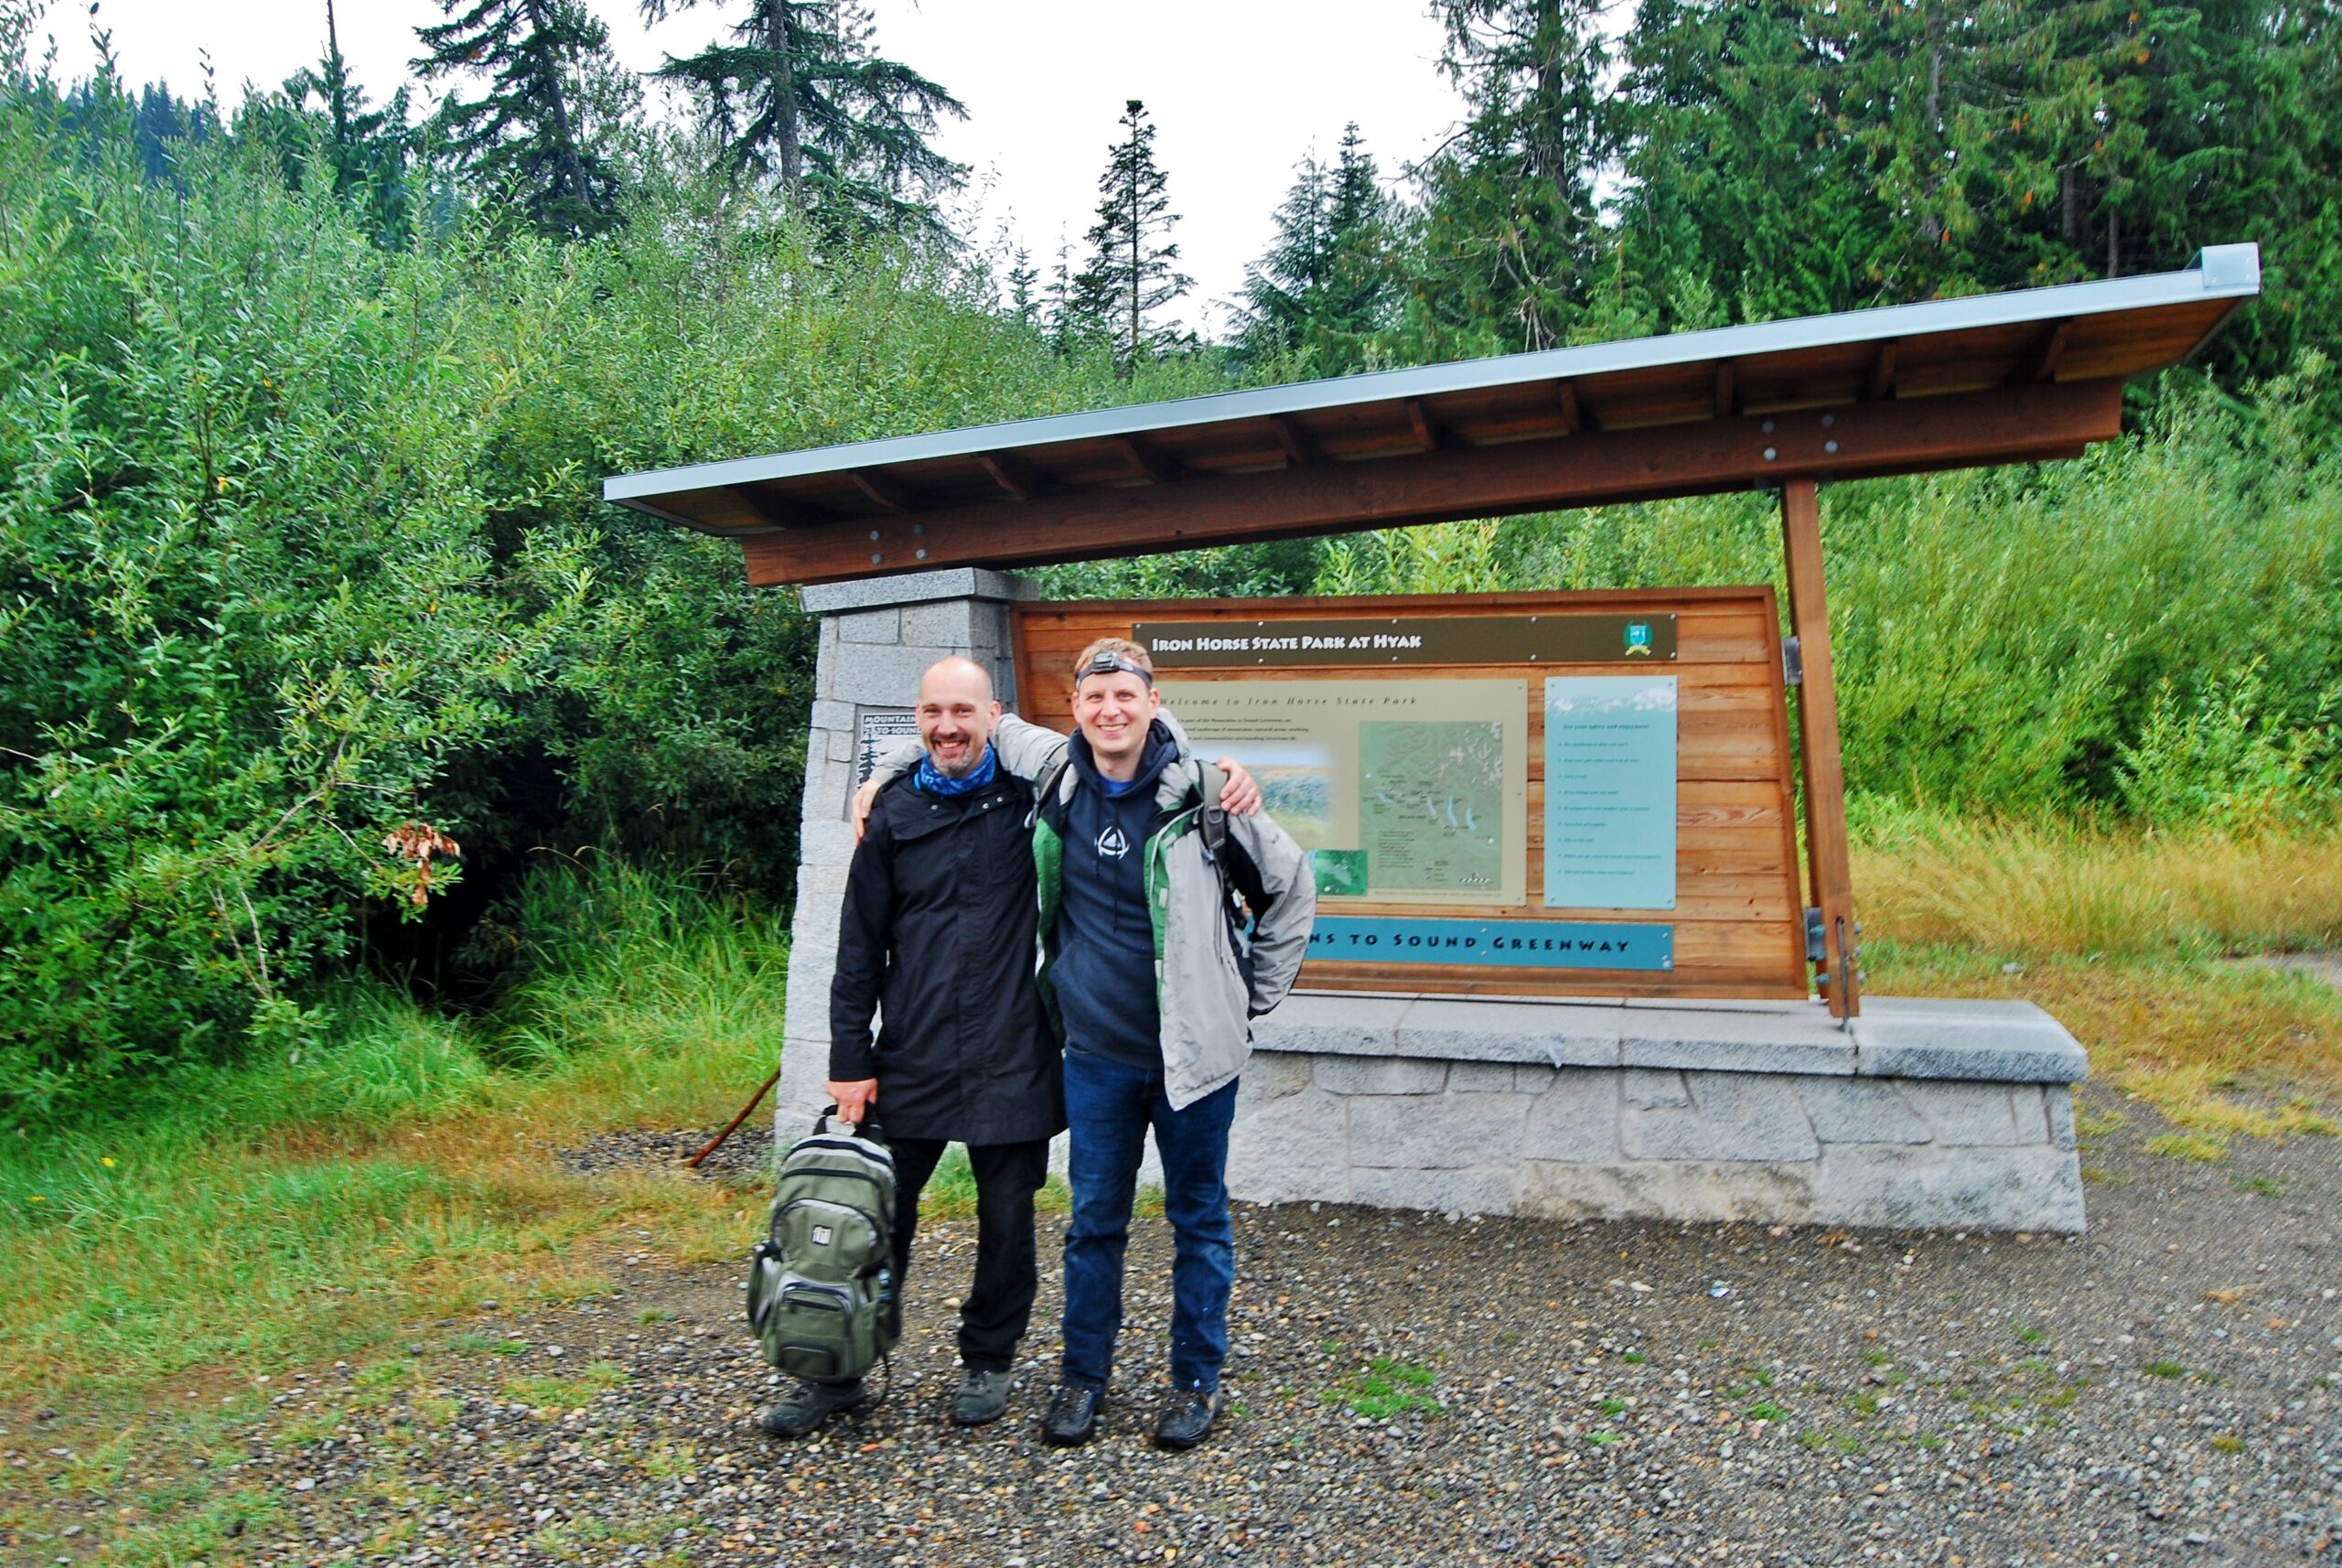
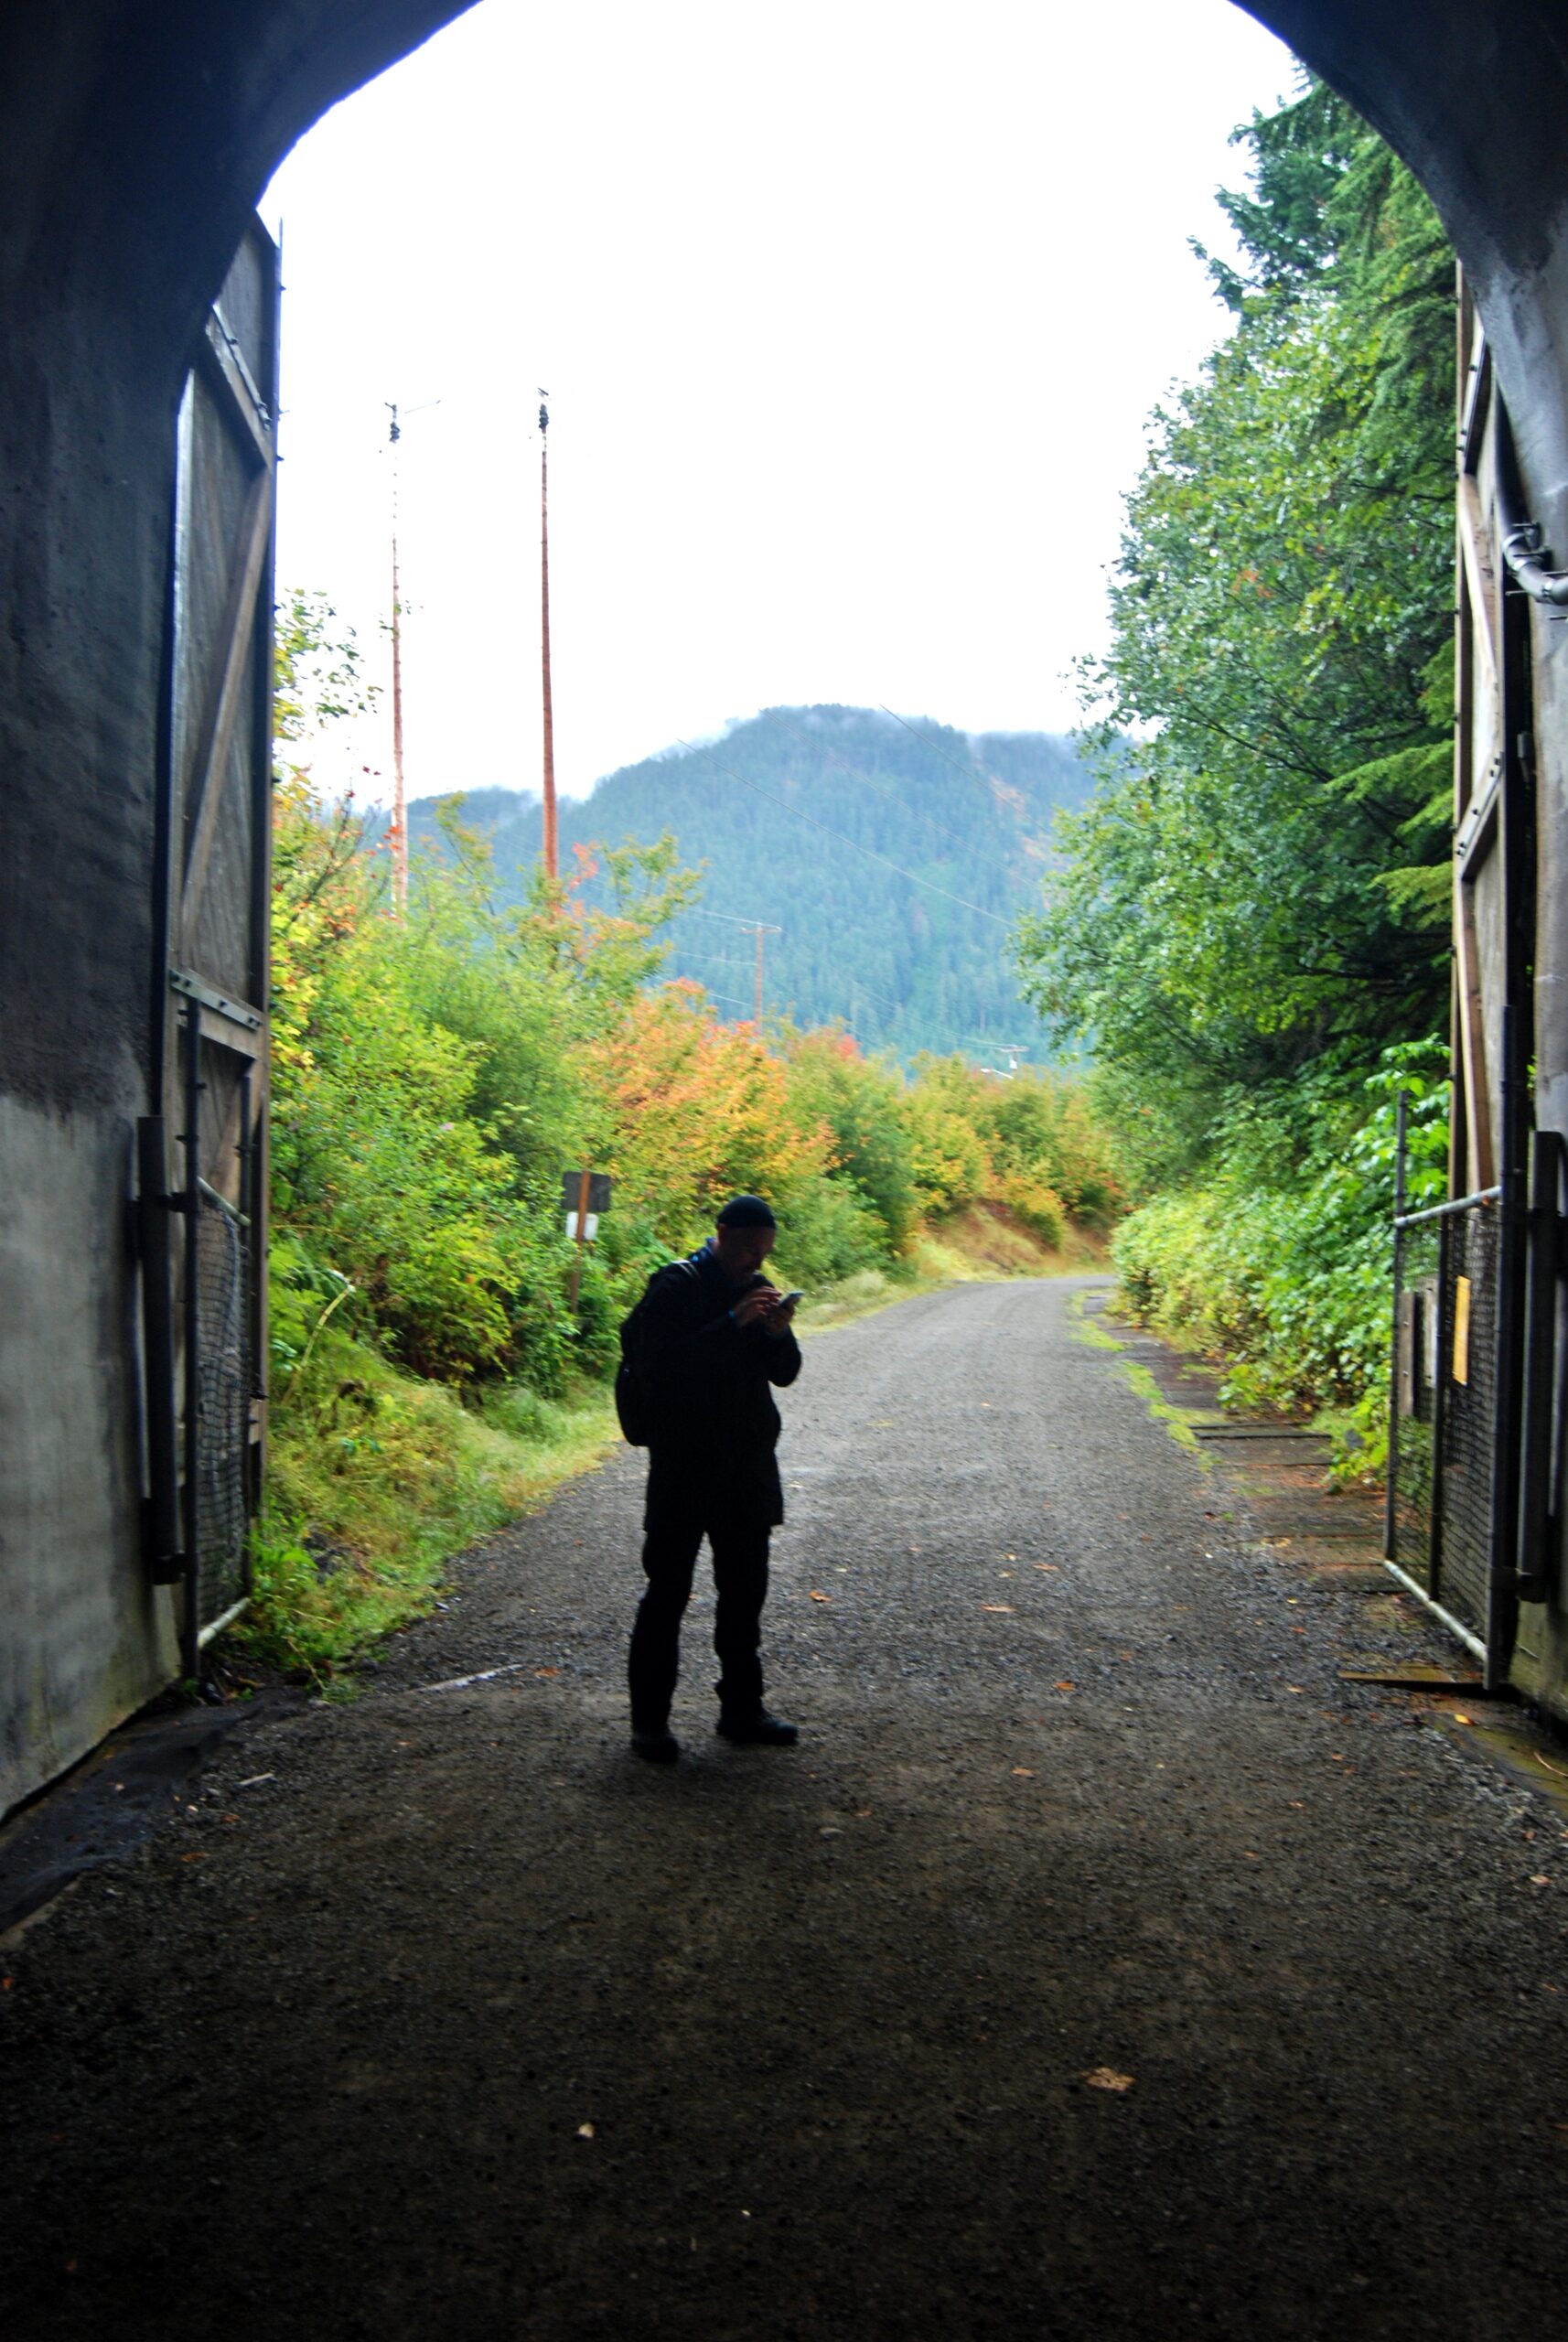
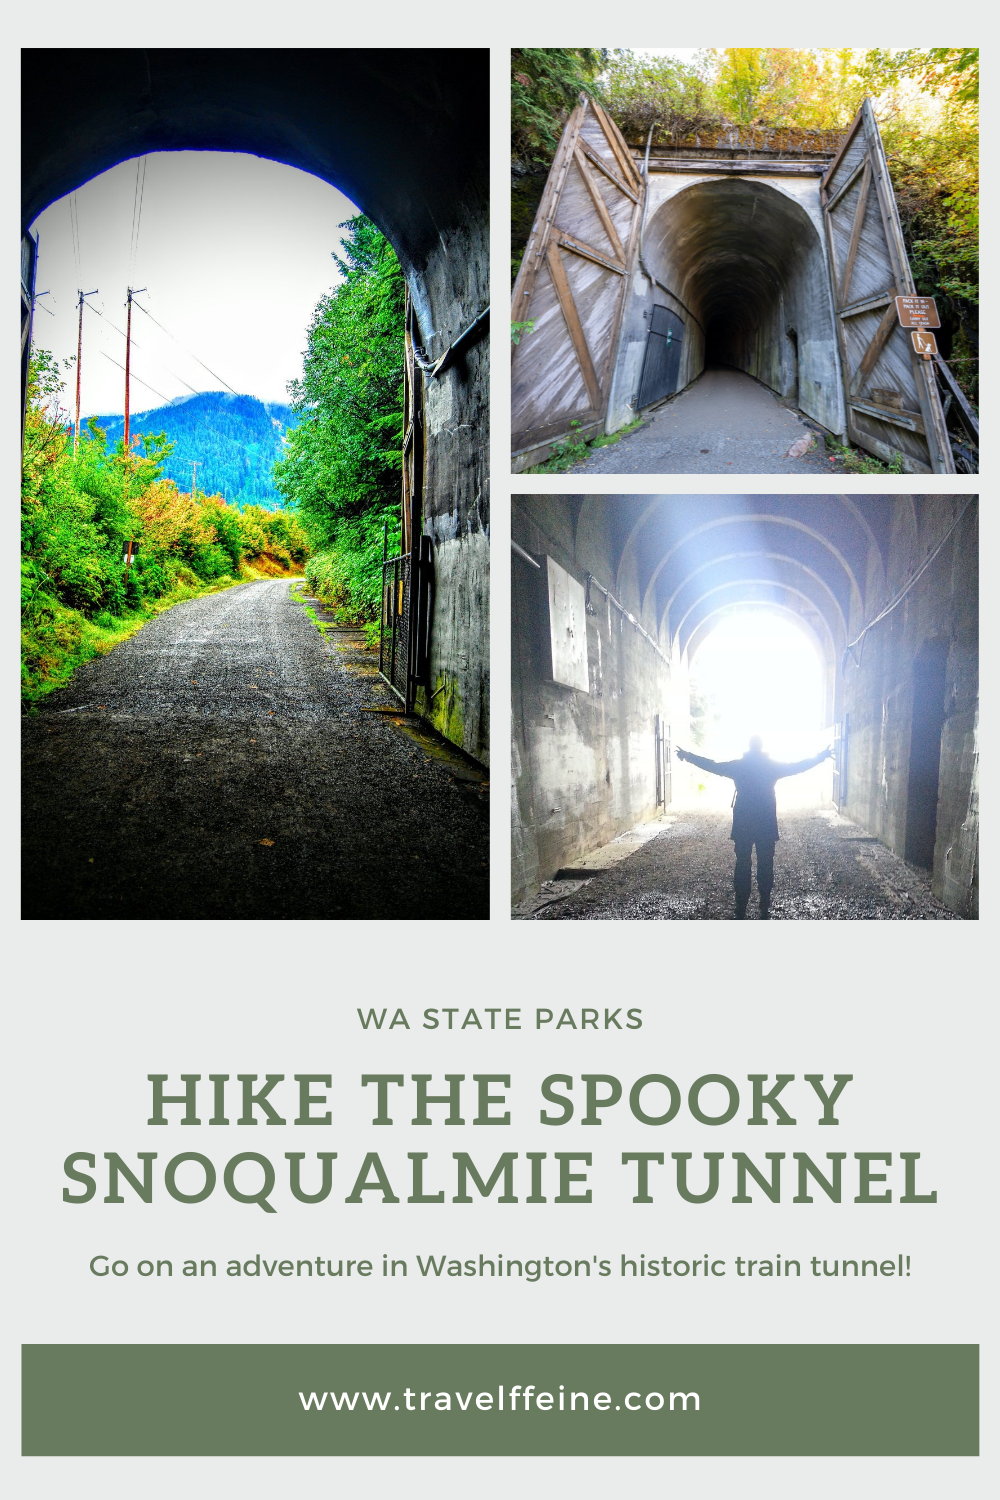
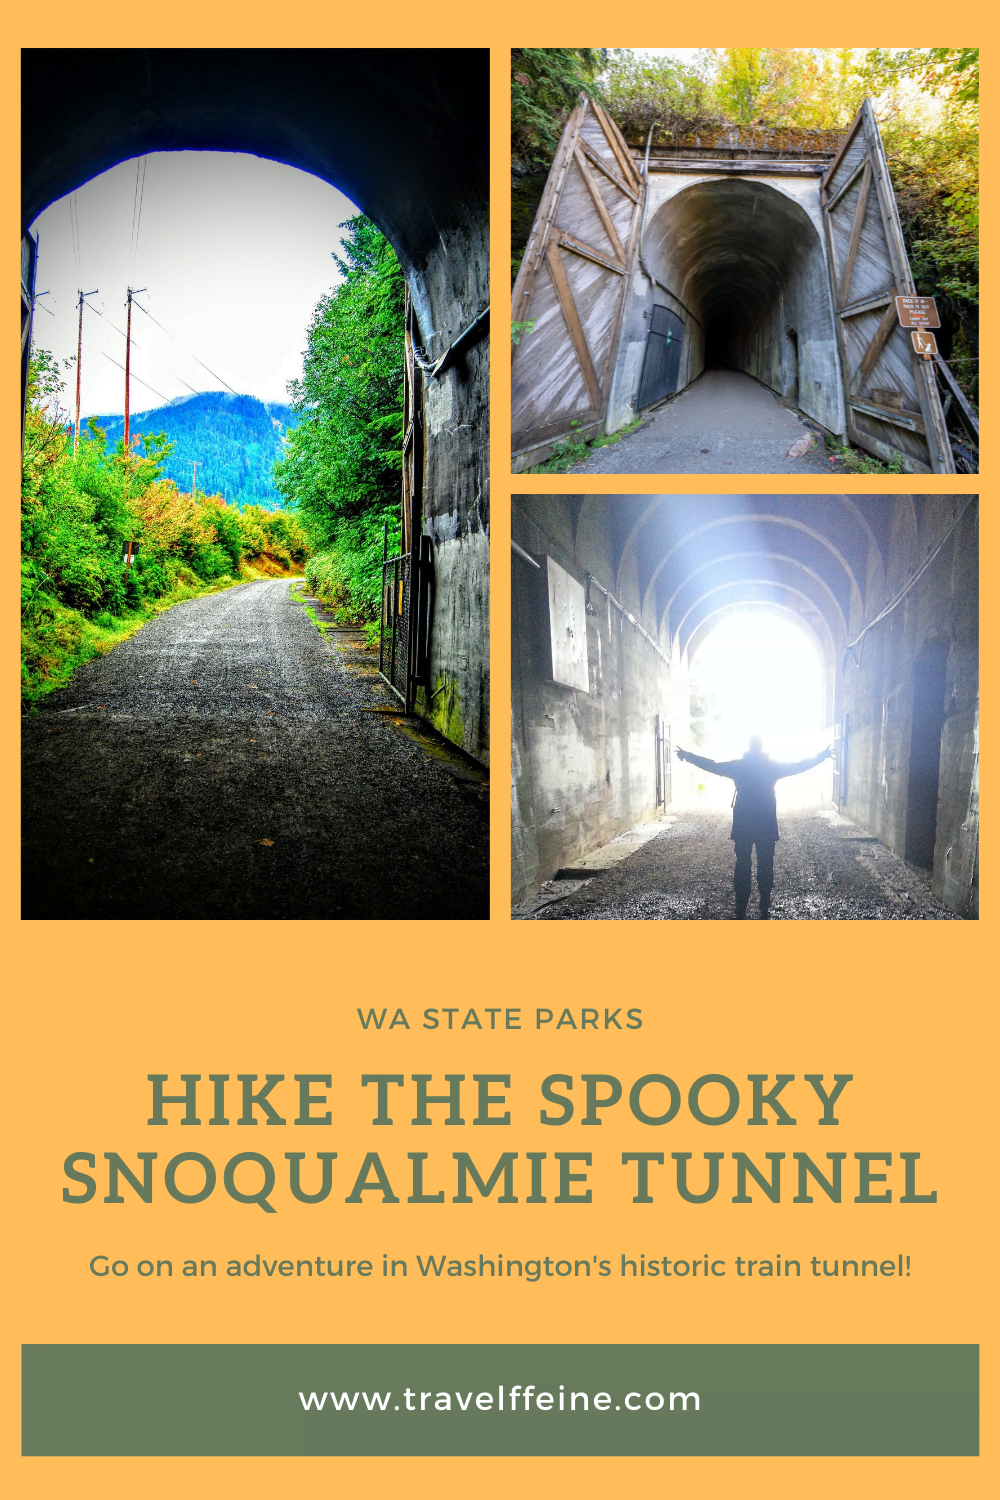
  • The Historic Snoqualmie Tunnel: A Spooky Adventure!

    If you’re looking for an easy trail that offers a unique and spooky experience, then you need to hike the Snoqualmie Tunnel Trail.  The Snoqualmie Tunnel is 2.3 miles long (one way), and it is a part of the Iron Horse Trail, sometimes referred to as the John Wayne Pioneer Trail. 

    Your journey is in almost total darkness the entire way, and this makes for a spooky adventure! As everyone walks into the dark tunnel, there are often whoops and hollers as people listen for an echo and begin experiencing walking in almost total darkness. 

    There might be a few scary movie reenactments or tales of ghost stories, or better yet, others pretend they are walking into the Mines of Moria on an epic quest. The Snoqualmie Tunnel trail is suitable for all ages and can be done either on foot or a bicycle.

    Interesting Facts About the Snoqualmie Tunnel

    • It’s the longest tunnel open to non-motorized traffic in the U.S.
    • This same path was once used as a footpath by the Native Americans before it became a railway that ran from Seattle to Chicago.  Ironically, it is now, once again, a footpath.
    • The Snoqualmie Tunnel is a part of the John Wayne Trail that follows the old Milwaukee Railway line.  You could go from Seattle to Chicago in 45 hours!

    Exploring the Snoqualmie Tunnel

    One of the great things about the Snoqualmie Tunnel is that it is good on even the rainiest of days.  That’s what first prompted me to hike this trail.  My brother was visiting, and we usually went hiking during his visits, but it happened to be one of the rainiest summers we’d had in a long time in the Seattle area.  

    After researching some ideas for things to do in the rain, I found an article online that mentioned the Snoqualmie Tunnel.  Eureka! We packed our raincoats, headlamps, flashlights, water, and snacks and drove toward Snoqualmie Pass.

    Hyak Parking Lot Restroom Bldg

    At the Trailhead Parking Area

    There is a building with a “Hyak” sign in the parking lot with restrooms inside. There are also a couple of information boards regarding trails in the area and a parking fee dropbox in case you don’t have a Discover Pass.

    After grabbing our gear, we headed for the trail. The sign in the parking lot said it is 0.4 miles to the Snoqualmie Tunnel entrance. The wide gravel path is lined with blackberry bushes and trees, some of which were starting to show the fall colors.

    The Tunnel Entrance

    Soon you arrive at the entrance to the Snoqualmie Tunnel.  The great tunnel doors tower above you as you look up and into the darkness. At this point, you want to make sure everyone has fully charged batteries in their flashlights and phones. Put on your headlamps and get out your flashlights as you step into the dark. Almost immediately, you will notice the coolness and dampness of the tunnel compared to the outside temperature. Enter if you dare.

    Snoqualmie Tunnel Cyclist

    Walking Through the Snoqualmie Tunnel

    After walking into the tunnel and getting further from the light at the entrance, we turned off our flashlights to fully experience what it’s like to walk in total darkness.  It is an experience you won’t forget! It is odd and feels a little disorienting.  Quickly we began having fun running in the dark and waving our lights around. We’d put them under our chins and make scary faces. We had so much fun hiding from each other and turning our lights off for this new experience of walking in the dark. 

    I recommend you try this during your hike as it is a fun and strange experience.  However, I don’t recommend it for long periods as other hikers and cyclists pass through the tunnel and need to see you.  You may even want to wear some reflective clothing or a backpack with reflectors to help cyclists coming through the tunnel see you in advance.

    There are small alcoves and pipes, and the sound of dripping water is constantly heard.  Although the Snoqualmie Tunnel is only 2.3 miles one-way, it feels much further when you’re walking in the dark with no views of the outside. There is a small bend halfway thru, and after that, you see a small light at the end of the tunnel.  It’s okay, go toward the light!

    Dark tunnel with a light at the end
    tunnel silhouette

    On the Other Side

    As you reach the end of the tunnel and come outside you’ll see a picnic area with a tables a little further up the trail. This makes a good place to stop for a snack and talk about your experience with your group.  There is also a pit toilet here, but to be honest, I’d only use it if you absolutely have to. 

    After enjoying a snack and a break, it’s time to return to the darkness. The way back will seem even darker I think, but now you know what to expect.  Have fun and enjoy the experience!

    Snoqualmie Tunnel Exit Other side

    About the Snoqualmie Tunnel Trail

    Trail Length: 5.4 miles (roundtrip from the parking area)

    Trail Difficulty Rating: Easy (flat, gravel path)

    Features: Walk or bike in darkness through a historic train tunnel that goes through the mountain. Listen to water dripping down, examine the tunnel walls and create your own adventure!

    Entrance Fee:Washington Discover Pass is required to park here or purchase a one-day parking pass for $10 in the main parking area for the trailhead.

    Restrooms: There are restrooms at the trailhead parking area. There is also a pit toilet on the other side of the tunnel.

    Open Hours: 8 a.m. to Dusk (May to November)

    Different Names: The area is sometimes referred to by other names. Iron Horse State Park trail area, John Wayne Pioneer Trail, and the most recent name change to the Palouse to Cascades State Park Trail.

    Who Is This Hike Good For?

    It’s a flat trail, so it is suitable for all ages and abilities. However, if you have anyone who is seriously afraid of the dark, it’s best to leave them out on this hike. Except for the light from your flashlights, you are walking in darkness for over 2 miles. 

    If you love spooky adventures and enjoy something a bit different, this will be one you enjoy!  This hike is not about the views, it’s about the experience of walking in darkness through a mountain for over 2 miles.  It really is what you make it.


    What to Bring

    • Headlamp
    • Flashlights (with spare batteries)
    • Jackets
    • Sweatshirt/layers
    • Gloves
    • Hat
    • Water
    • Snacks
    • Reflective gear
    • Discover Pass or cash for parking pass
    Looking out the entrance of Snoqualmie Tunnel

    When is the Best Time to Go

    Rain or Shine the Snoqualmie Tunnel makes a great adventure.  The trail is open May through October and closes for the winter. Due to the snow and ice the area receives, it is not safe during this season.

    Since you are walking inside a tunnel in the dark, the weather outside won’t matter all that much! I hiked this on a rainy day because it was raining, and I wanted to go for a hike without being in the rain.

    I have friends that hiked this on a really hot day in the summer so they could go somewhere cool, and it is certainly cool inside the Snoqualmie Tunnel! It is chilly inside, and there is water dripping down, so no matter when you hike it, you’ll want to bring a jacket, sweatshirt, or other layers and perhaps even gloves and hats depending on the time of year.  I’ve hiked this in early September, and I appreciated having gloves and a hooded jacket.

    friends at trail sign

    Getting to the Snoqualmie Tunnel Trailhead

    From Seattle, take I-90 East toward Snoqualmie Pass. Take Exit 54 for WA-906 and Hyak. Make a right off the exit ramp, then take a left at the next stop sign onto WA-906. Drive about 0.4 miles before making a right onto NF-906.  Then take the first right into the parking area; you’ll see signs for the State Park and Hyak.

    Google MapsIron Horse State Park – Hyak Trailhead, Iron Horse Trail, Snoqualmie Pass, WA 98068

    Final Thoughts & Tip for a Second Hike

    Although this hike is not about the views, you will not soon forget this experience of walking through a mountain in the dark. After you finish your adventure, if you find you’re still up for another hike, check out the scenic Gold Creek Pond Trail. It’s an easy 1.2-mile loop that packs in stunning views! You’ll find the trailhead on the other side of I-90 from the Snoqualmie Tunnel trail. Read my post, Gold Creek Pond: A Short Hike With Beautiful Views, for more information on getting there and what to expect.

    Happy Adventures!

    Travelffeine is reader-supported. If you purchase using links provided in this post, we may receive a small commission at no additional cost to you. 

    tunnel entrance
    Snoqualmie Tunnel
    Historic Tunnel
  • Top 7 Things To Do at Cape Disappointment State Park

    Cape Disappointment State Park is at the southwestern tip of Washington State, where the Columbia River meets the Pacific Ocean. It is a stunning stretch of coastline that, contrary to its name, does not disappoint.

    I don’t know why it took me so long to explore this beautiful stretch of coast in my home state, but now that I’ve been there, I’m looking forward to a return trip.  In this article, I share some of the top things to do at Cape Disappointment State Park, plus tips for what to see along with info on camping and accommodations in the park in case you want to extend your visit.

    Why is it Called Cape Disappointment

    Cape Disappointment isn’t the only name given to this area. The Chinook Tribe called the region Kah’eese, and Spanish explorer Bruno de Heceta referred to the Columbia River as San Roque.  However, when British trader John Meares came to the area searching for the Columbia River, he mistakenly believed it was only a bay. So, he was “disappointed.” Therefore he named the area Cape Disappointment, and that name stuck. 

    Ironically, we now know he did find the mouth of the Columbia River.  So, had he realized this, it might have been named Cape Discovery instead.  Perhaps there’s a life lesson here.  Sometimes, we think a dream or goal attained will look a certain way; our success will be obvious. When it doesn’t look the way we believe it should, we often give up, when in fact, we are at the precipice of a great discovery. If only we’d give it a second look and not give up so quickly. 

    Maybe, or maybe I’m looking too deeply into John Meares’ disappointment. It’s interesting to see things through the lens of hindsight if only Meares could see what we see today.

    Columbia River bar

    Columbia River Meets the Pacific Ocean

    Although John Meares named Cape Disappointment due to his erroneous assessment that he did not find the Columbia River, this stretch of coast has undoubtedly led to many sailors’ disappointment.

    This is one of the most hazardous stretches of coastline in the world. Where the Columbia River meets the Pacific Ocean, it creates a “bar.” This is a huge sandbar that changes due to the waves, strong currents, and ocean tides.

    Hundreds of shipwrecks have occurred here, and even today, a Columbia River Bar Pilot is required to guide large ships through this treacherous bar crossing. It is interesting to see in person the distinct line created where these two massive bodies of water collide. 

    Read this in-depth article to learn more about how the jetties were created and the two lighthouses in the area.  This region is full of fascinating history!

    Cape Disappointment Lighthouse Waikiki Beach

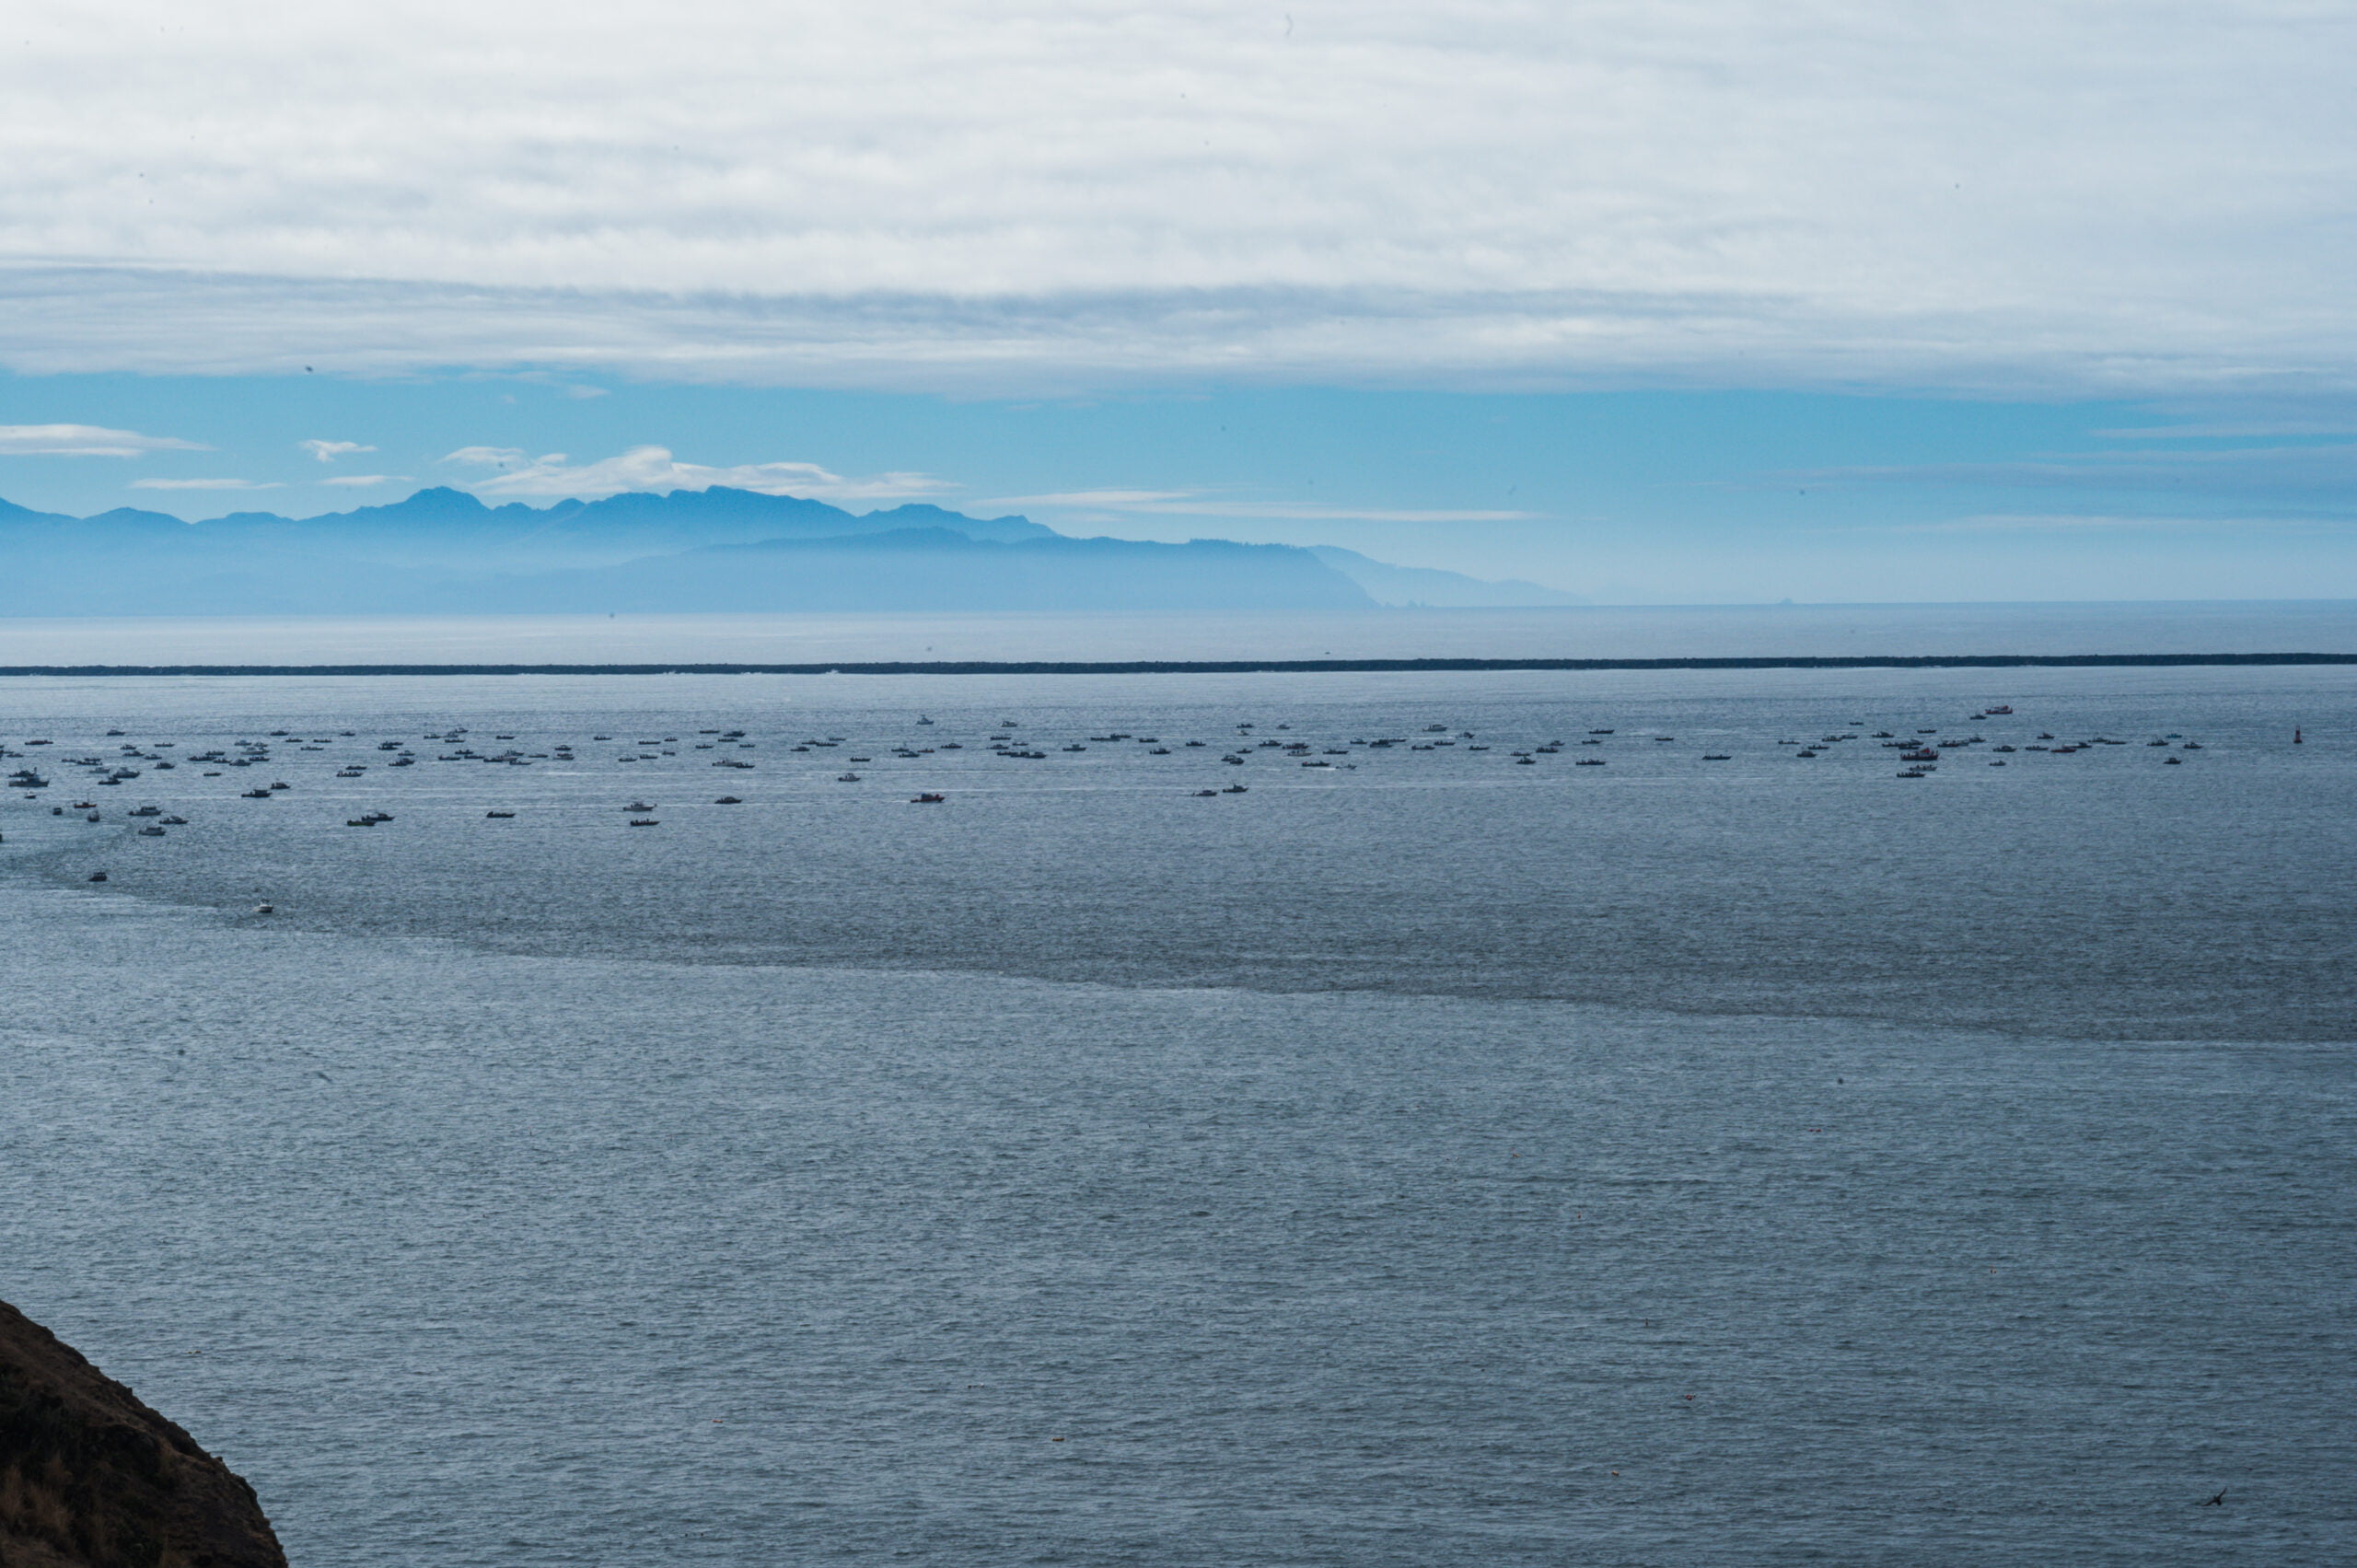
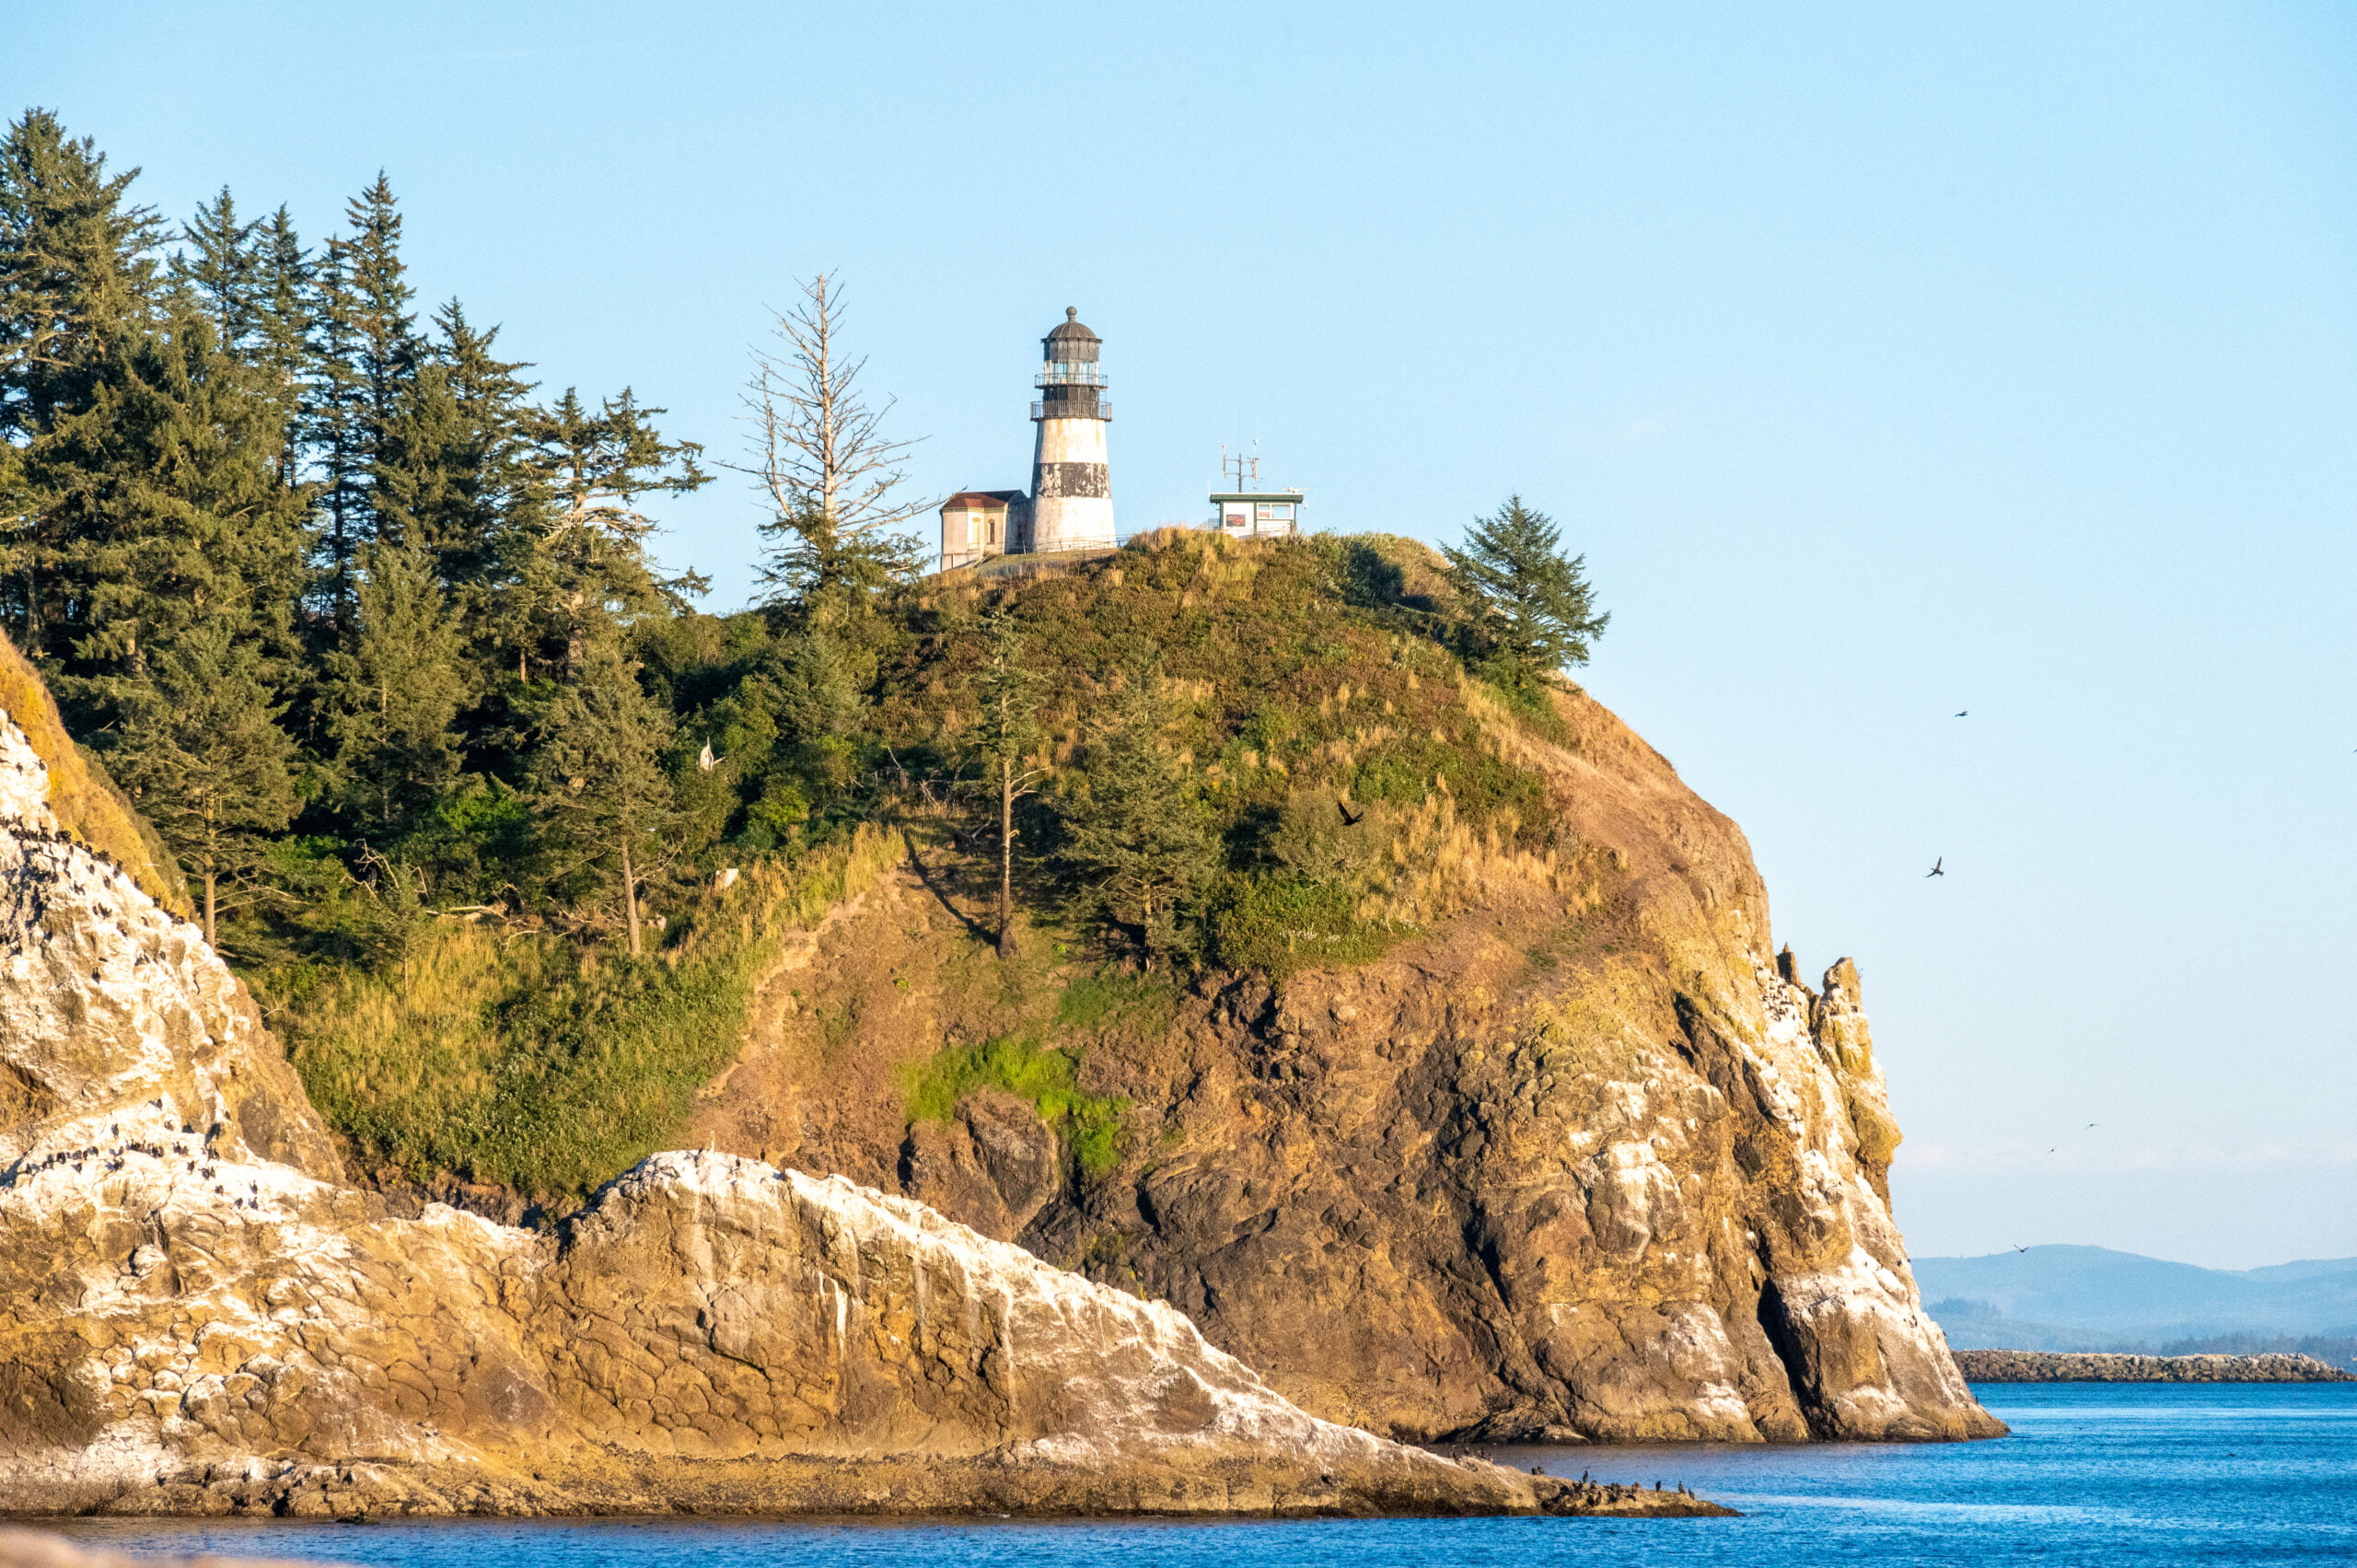
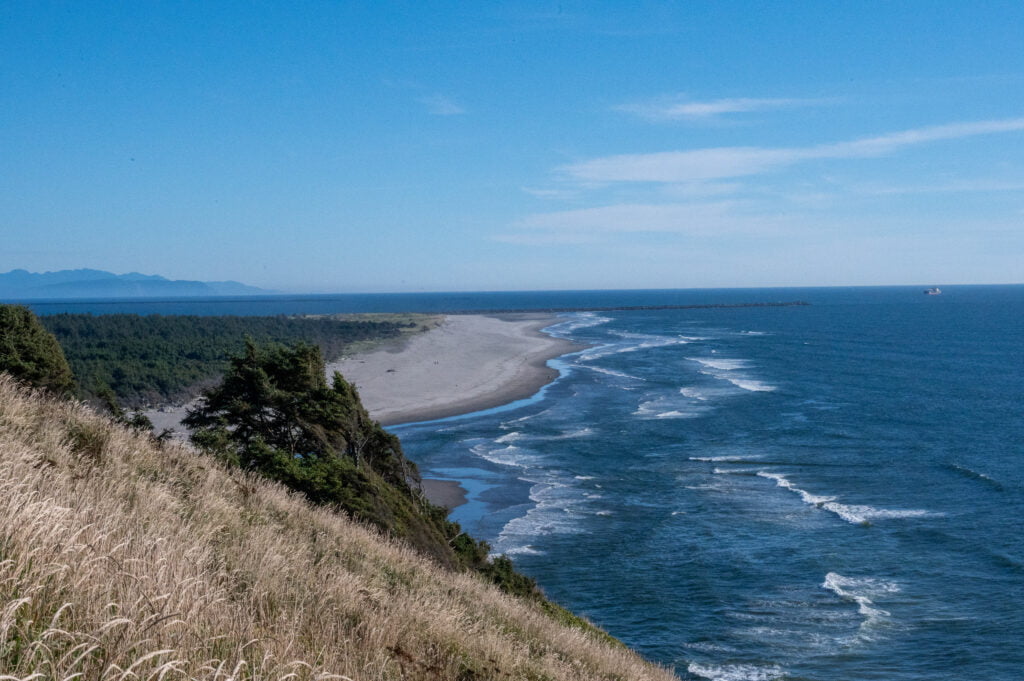
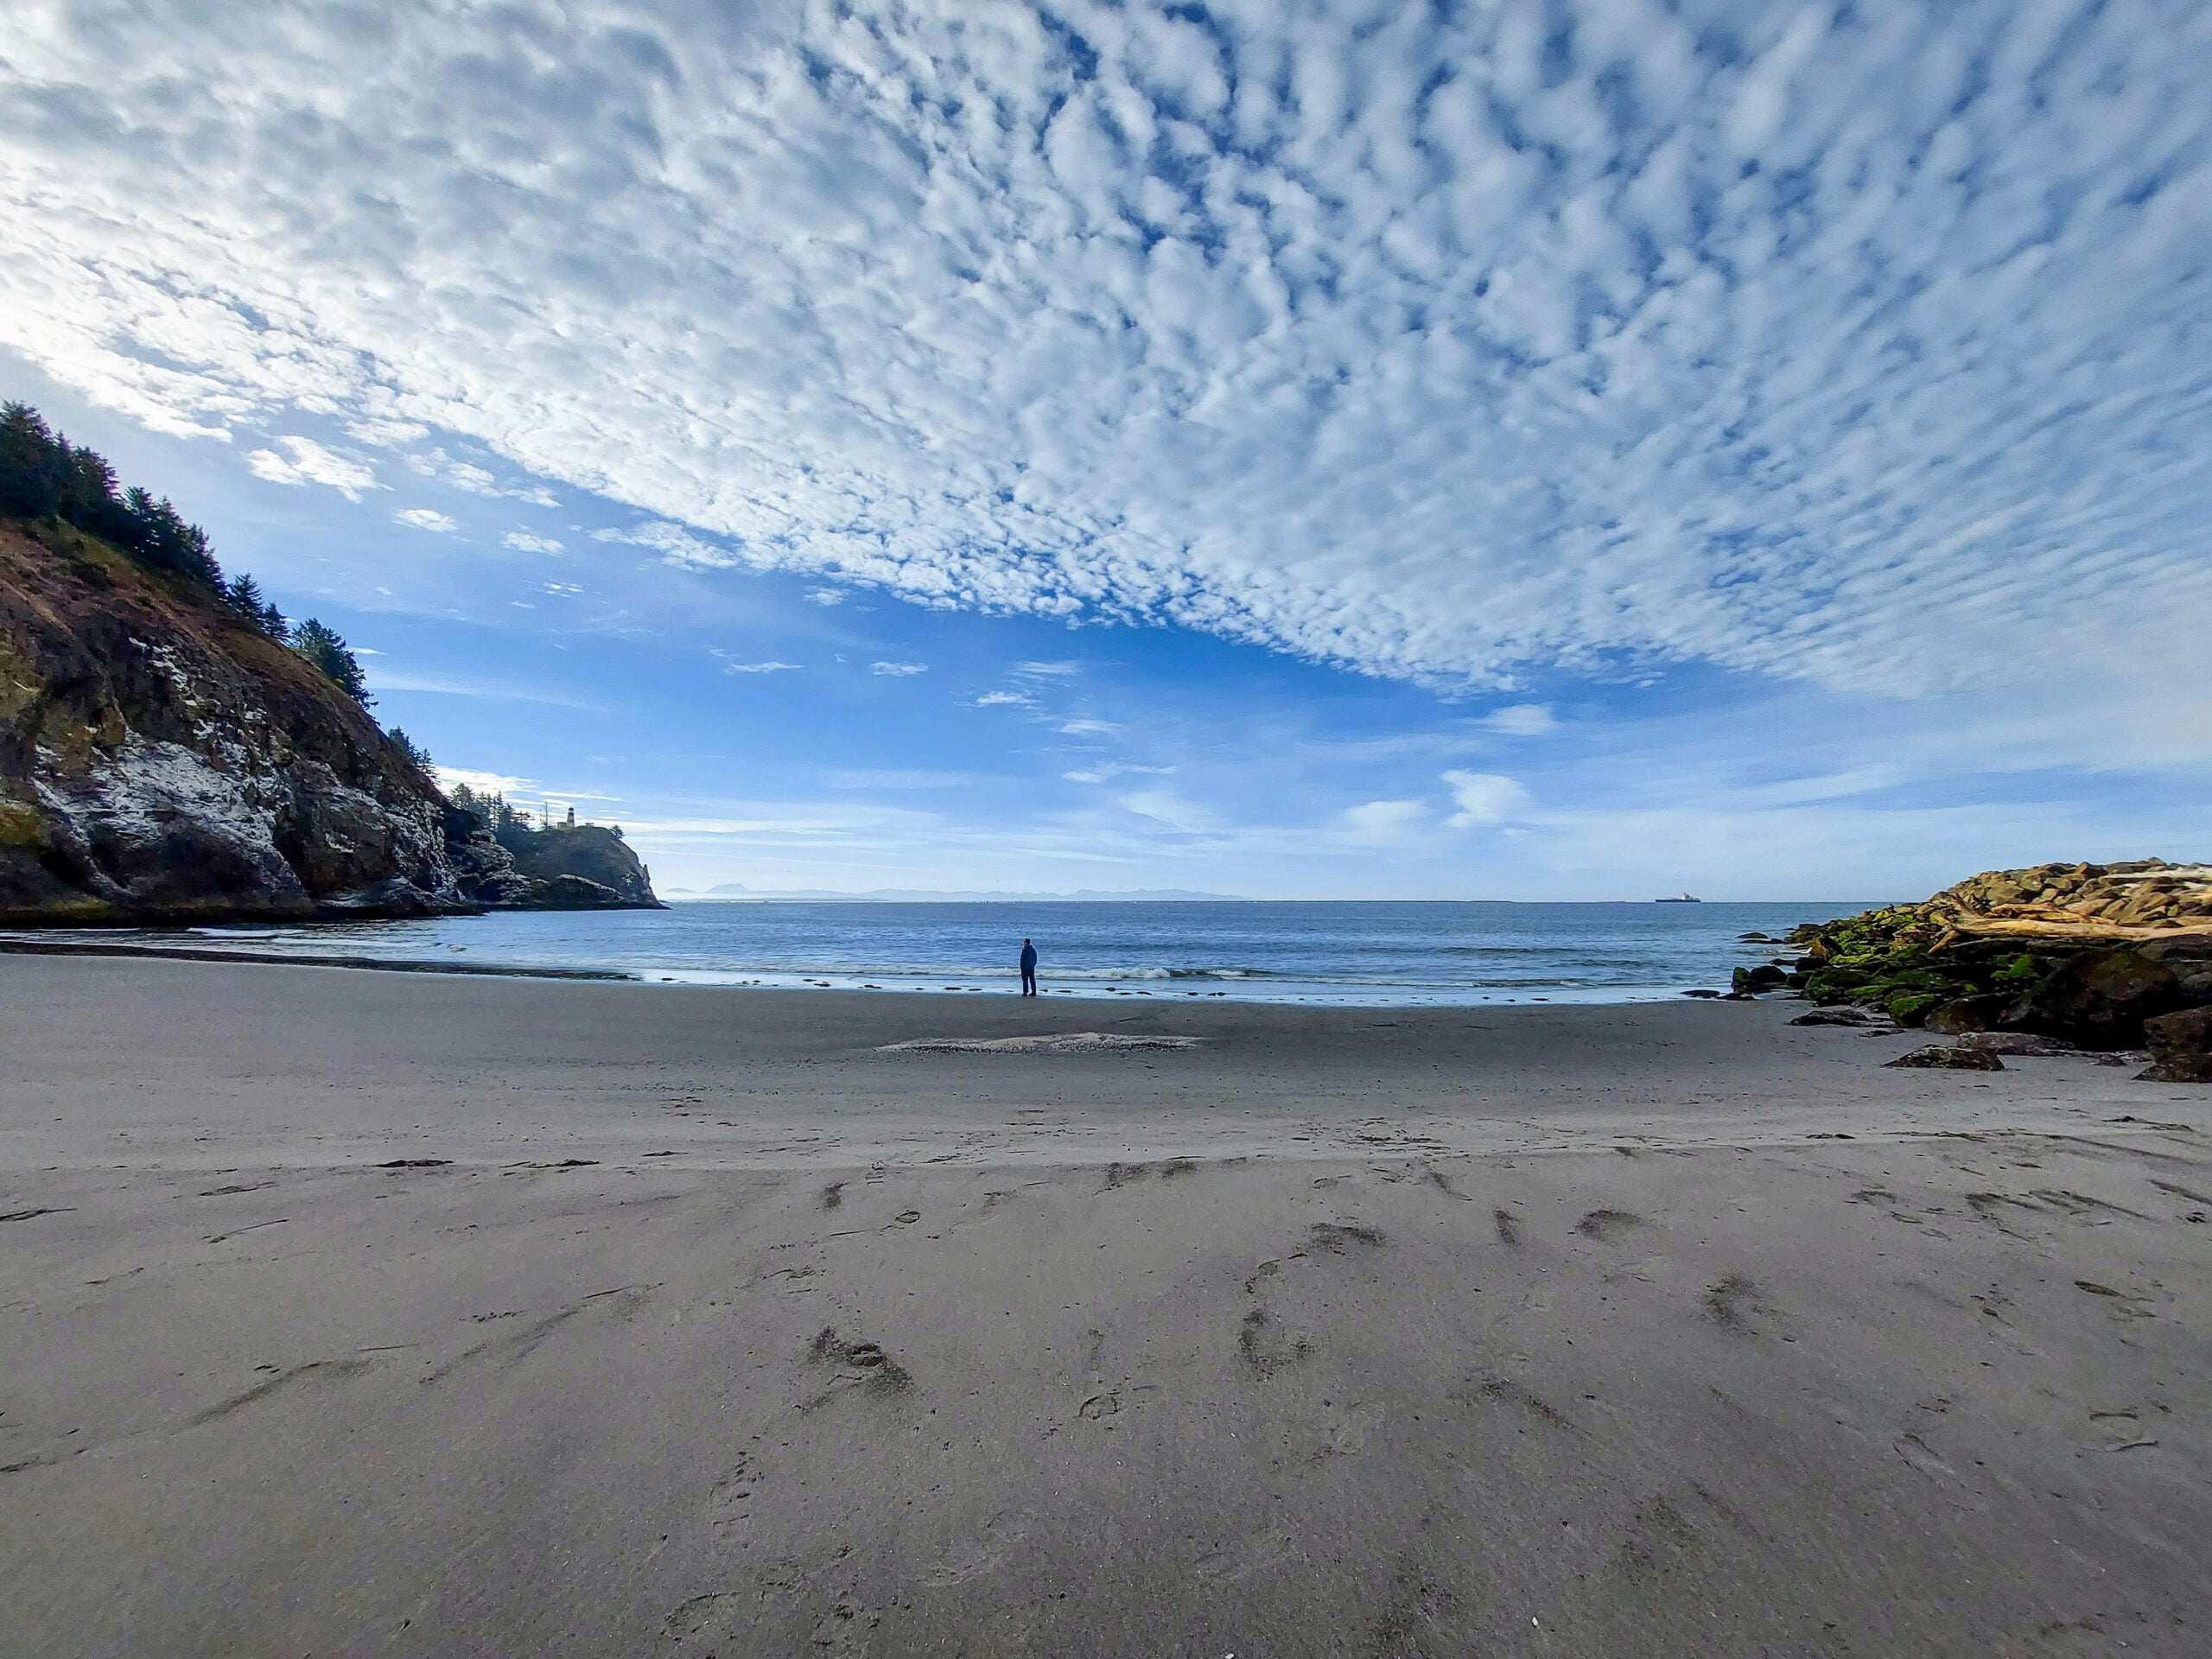
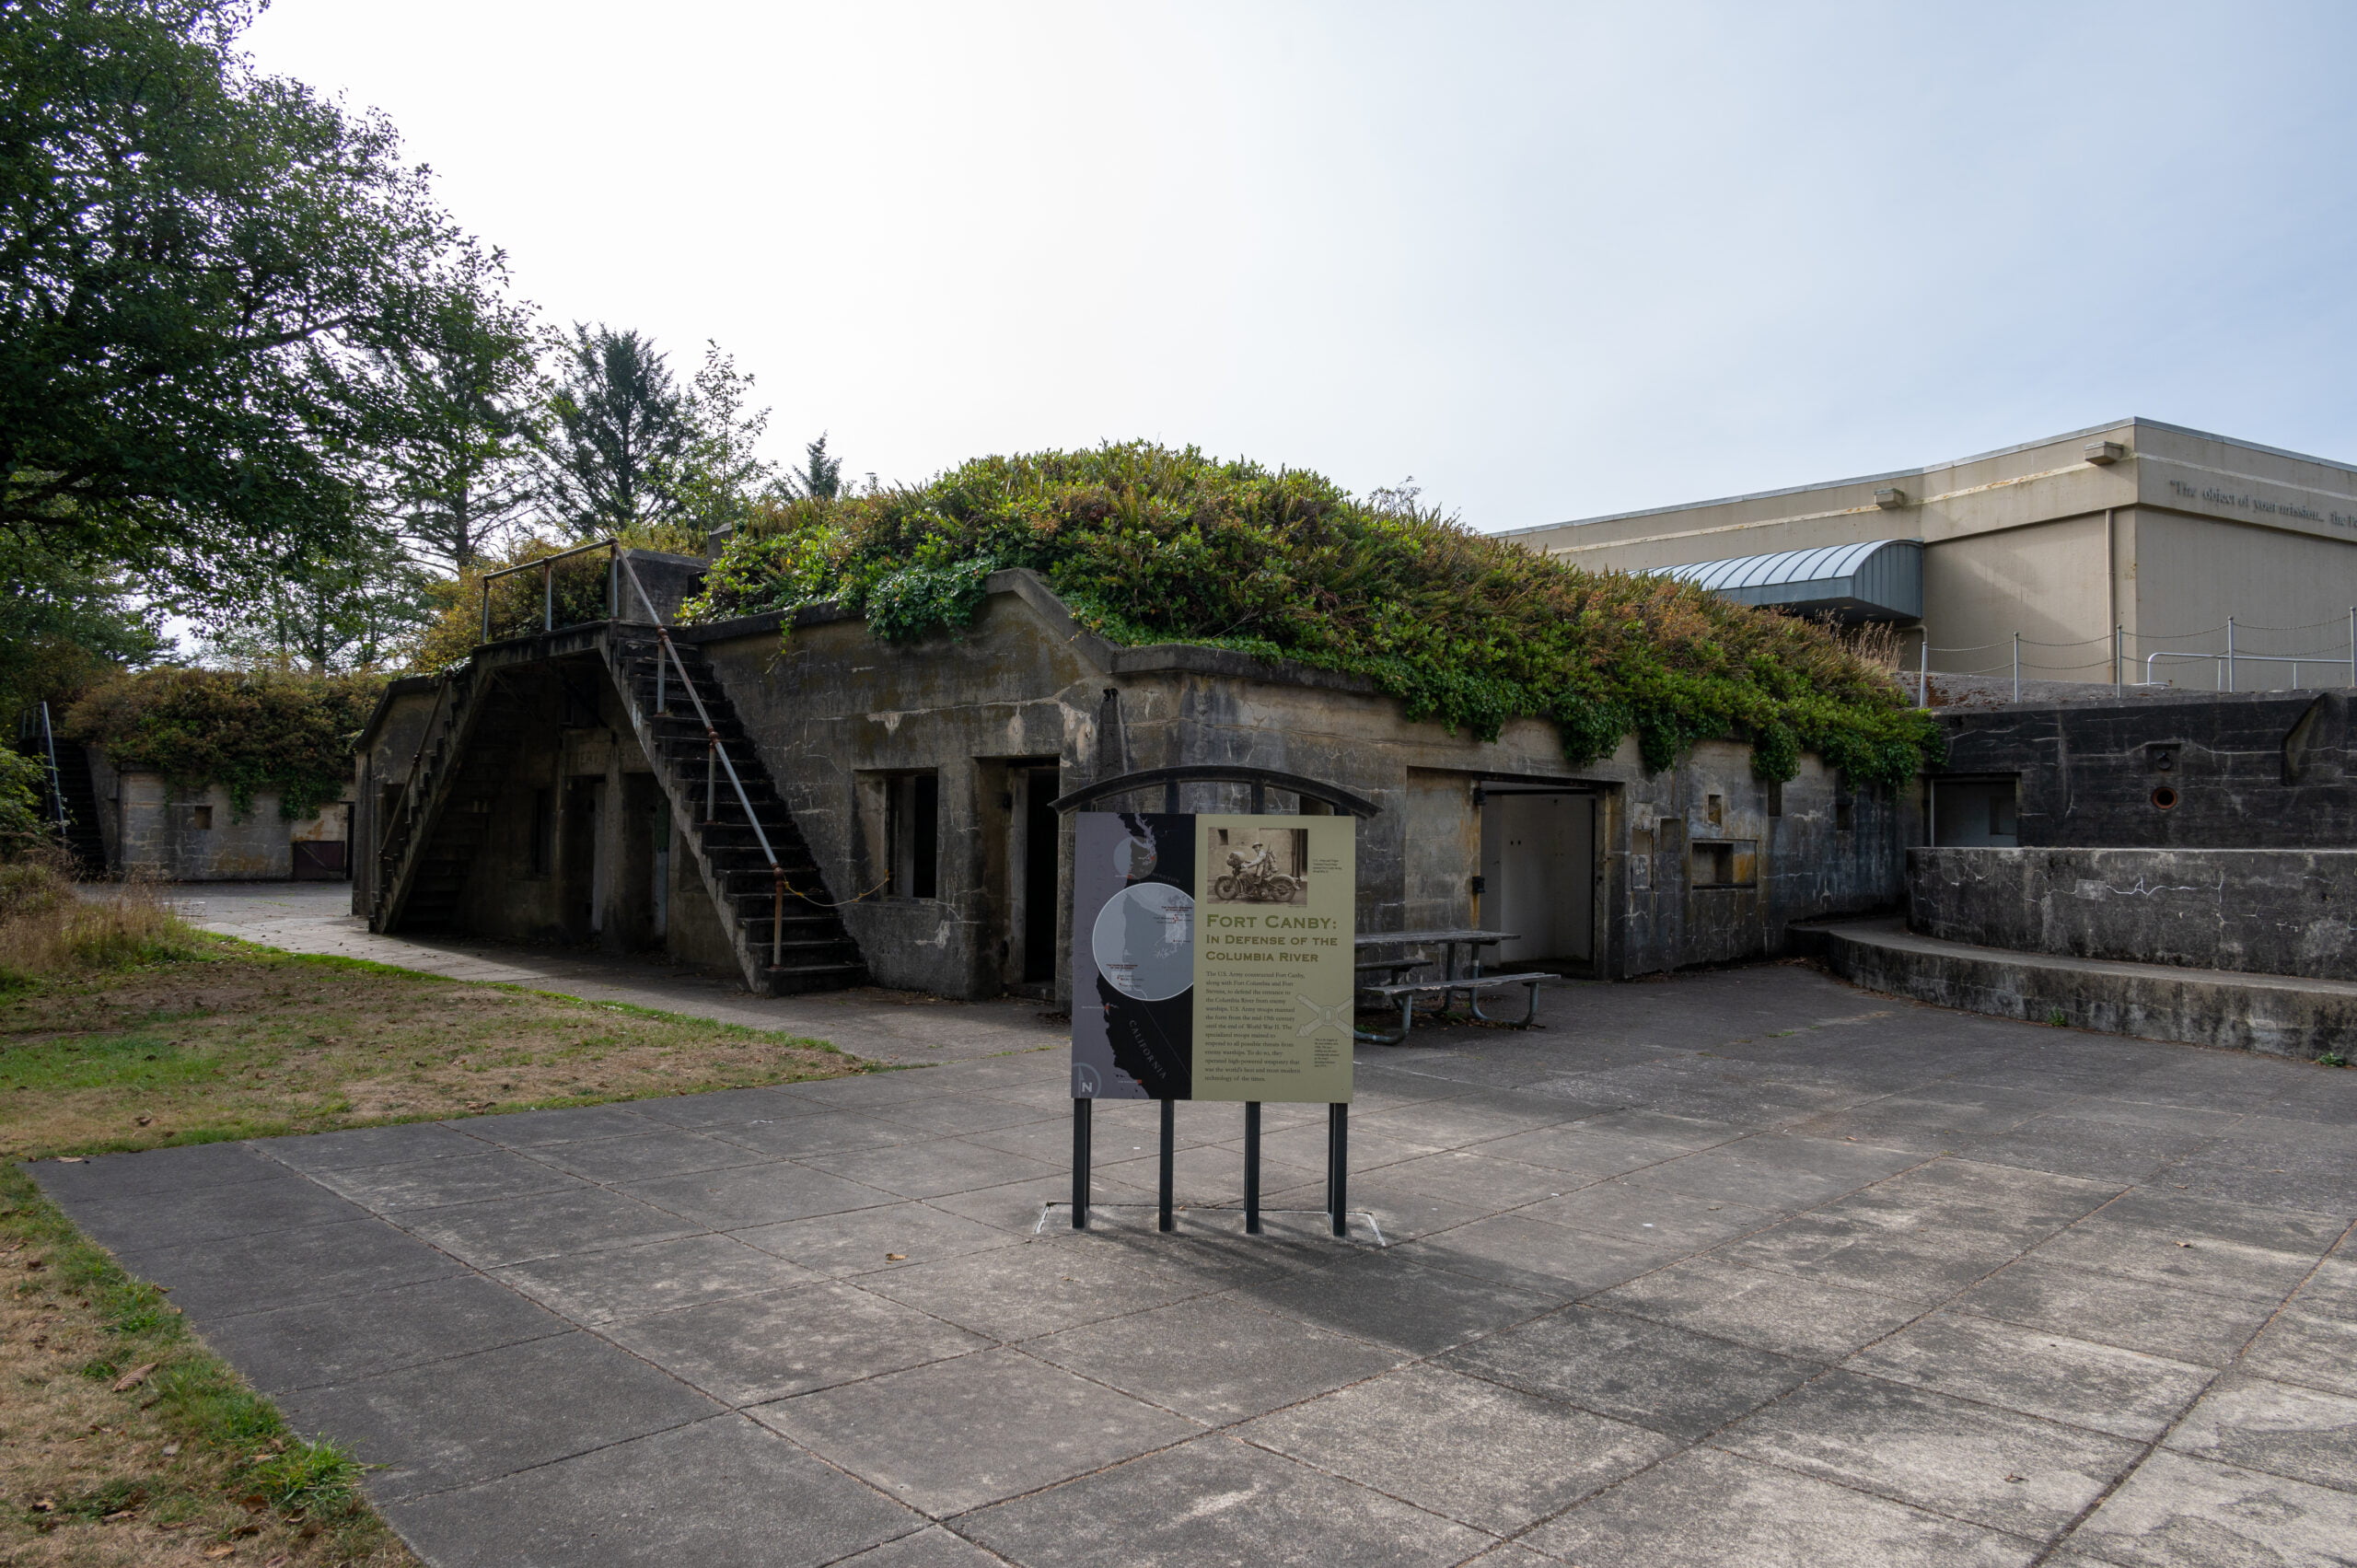
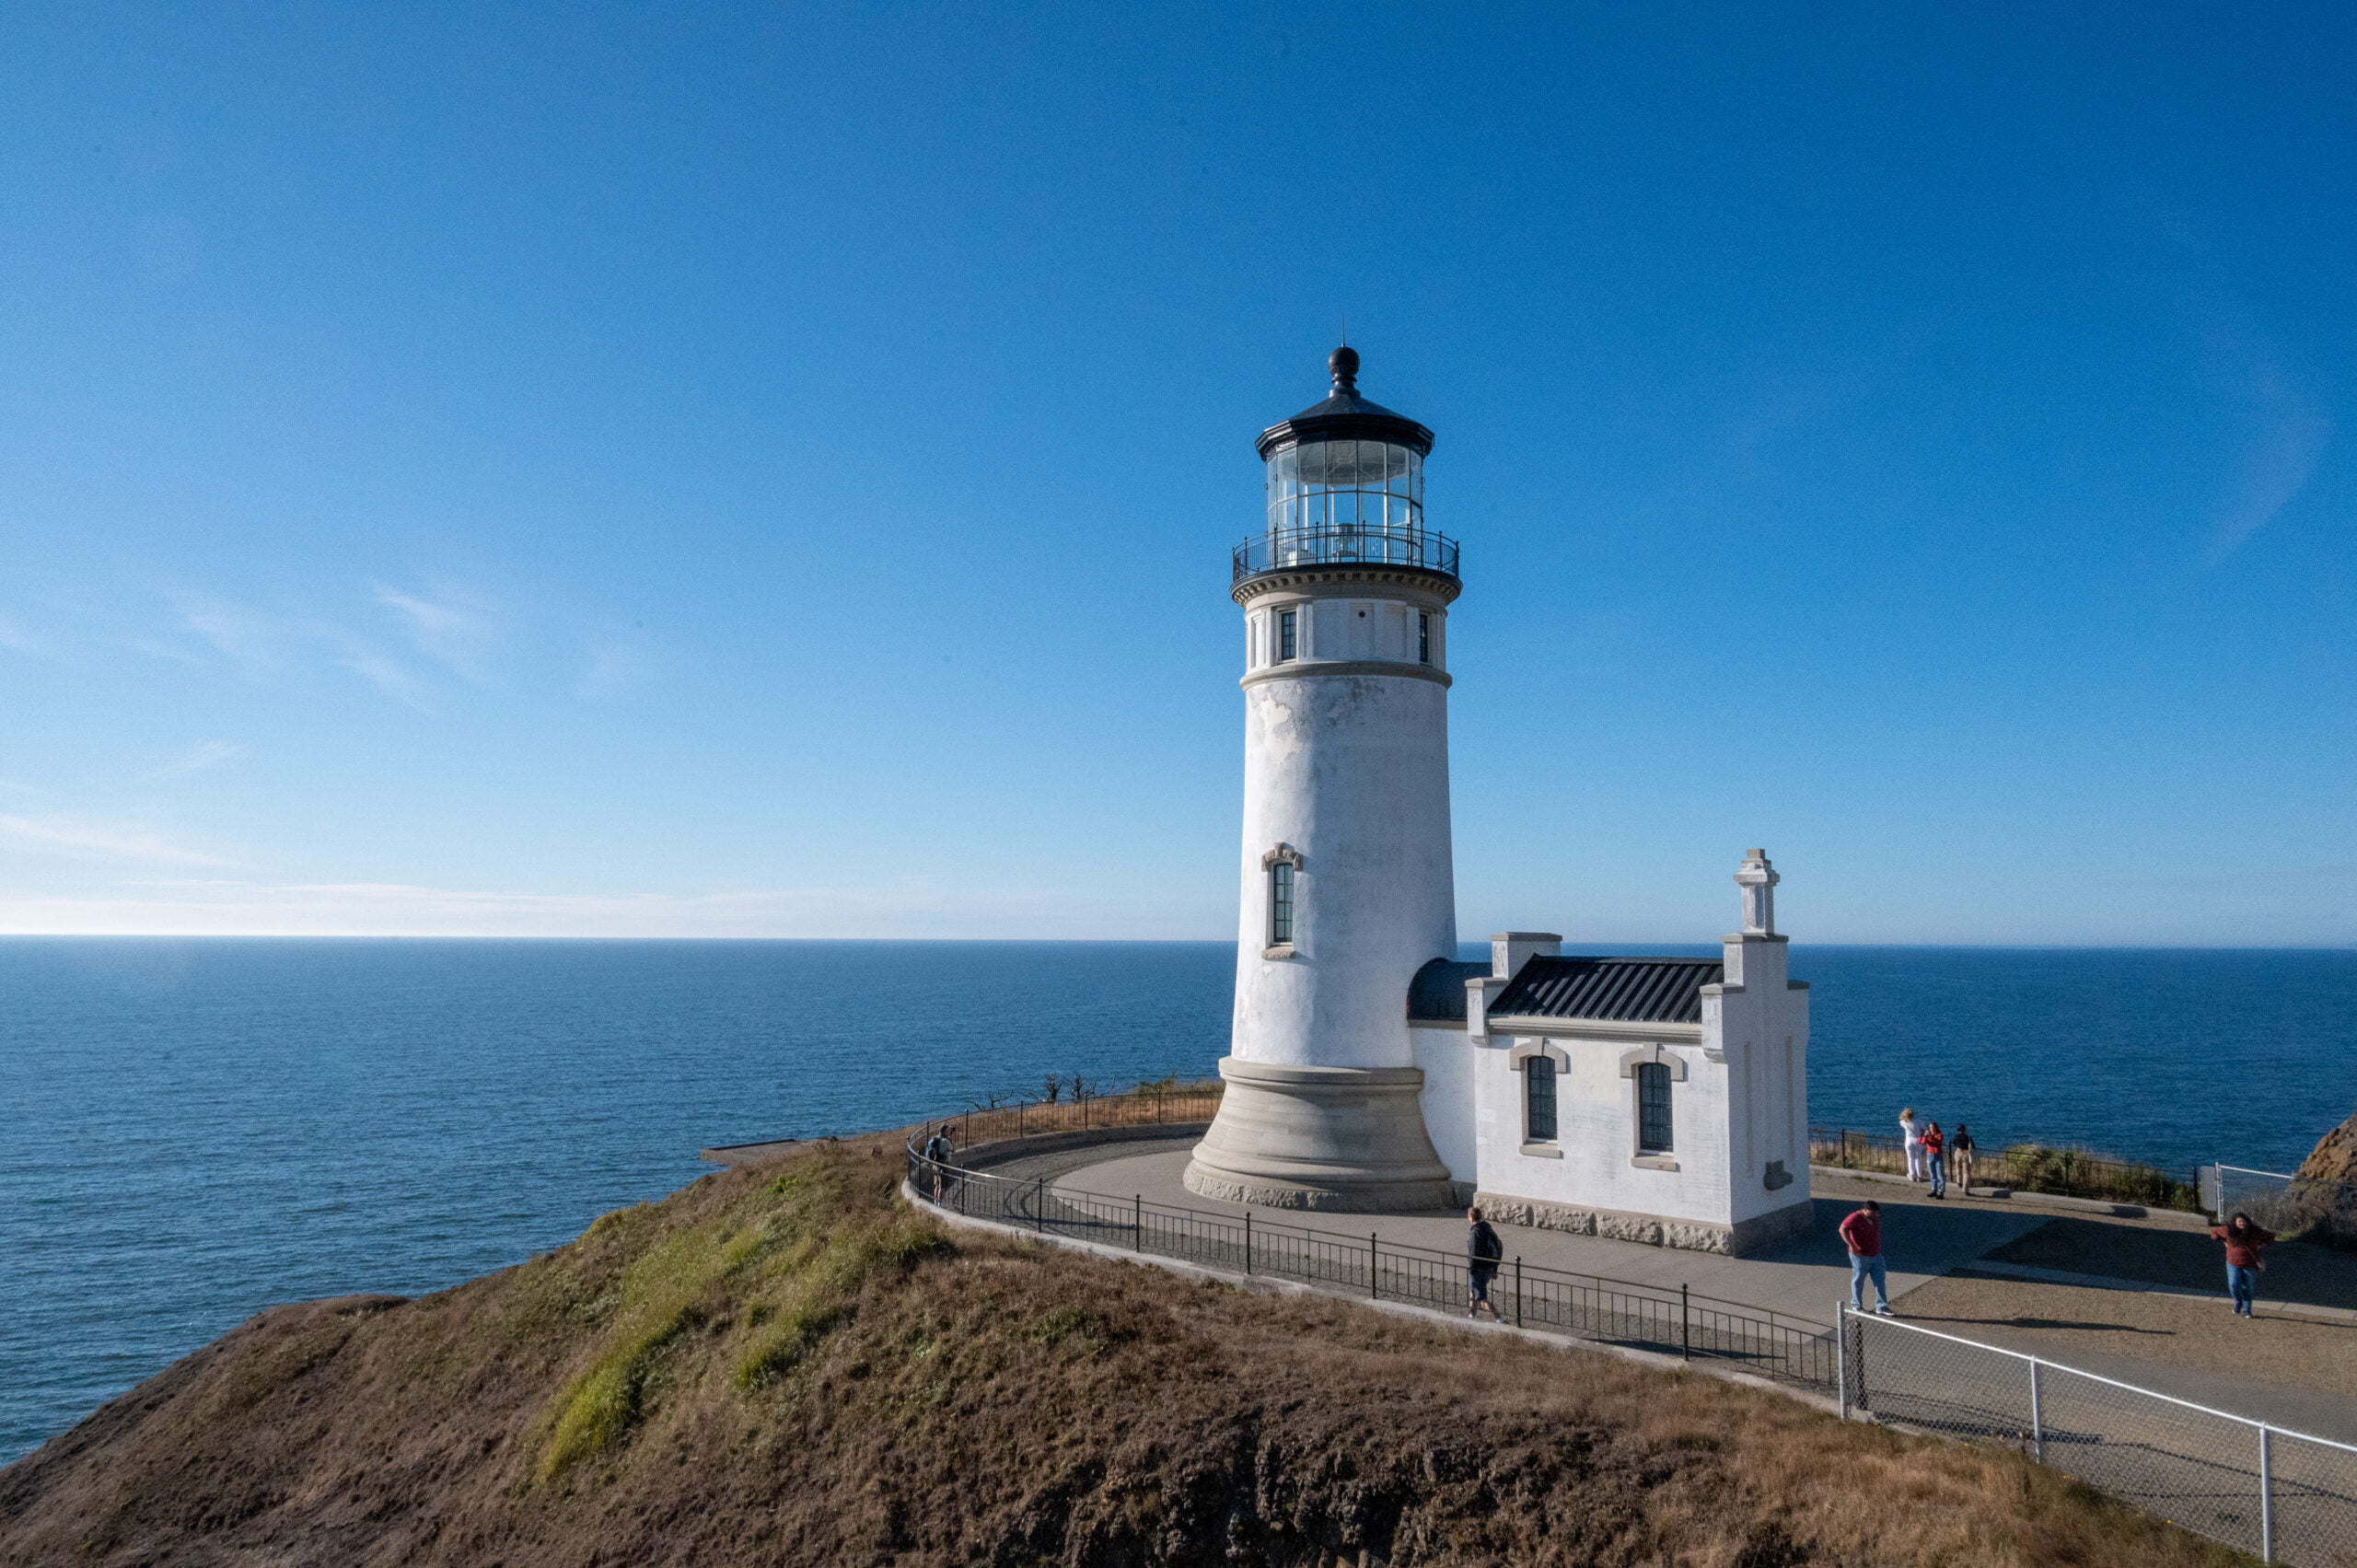
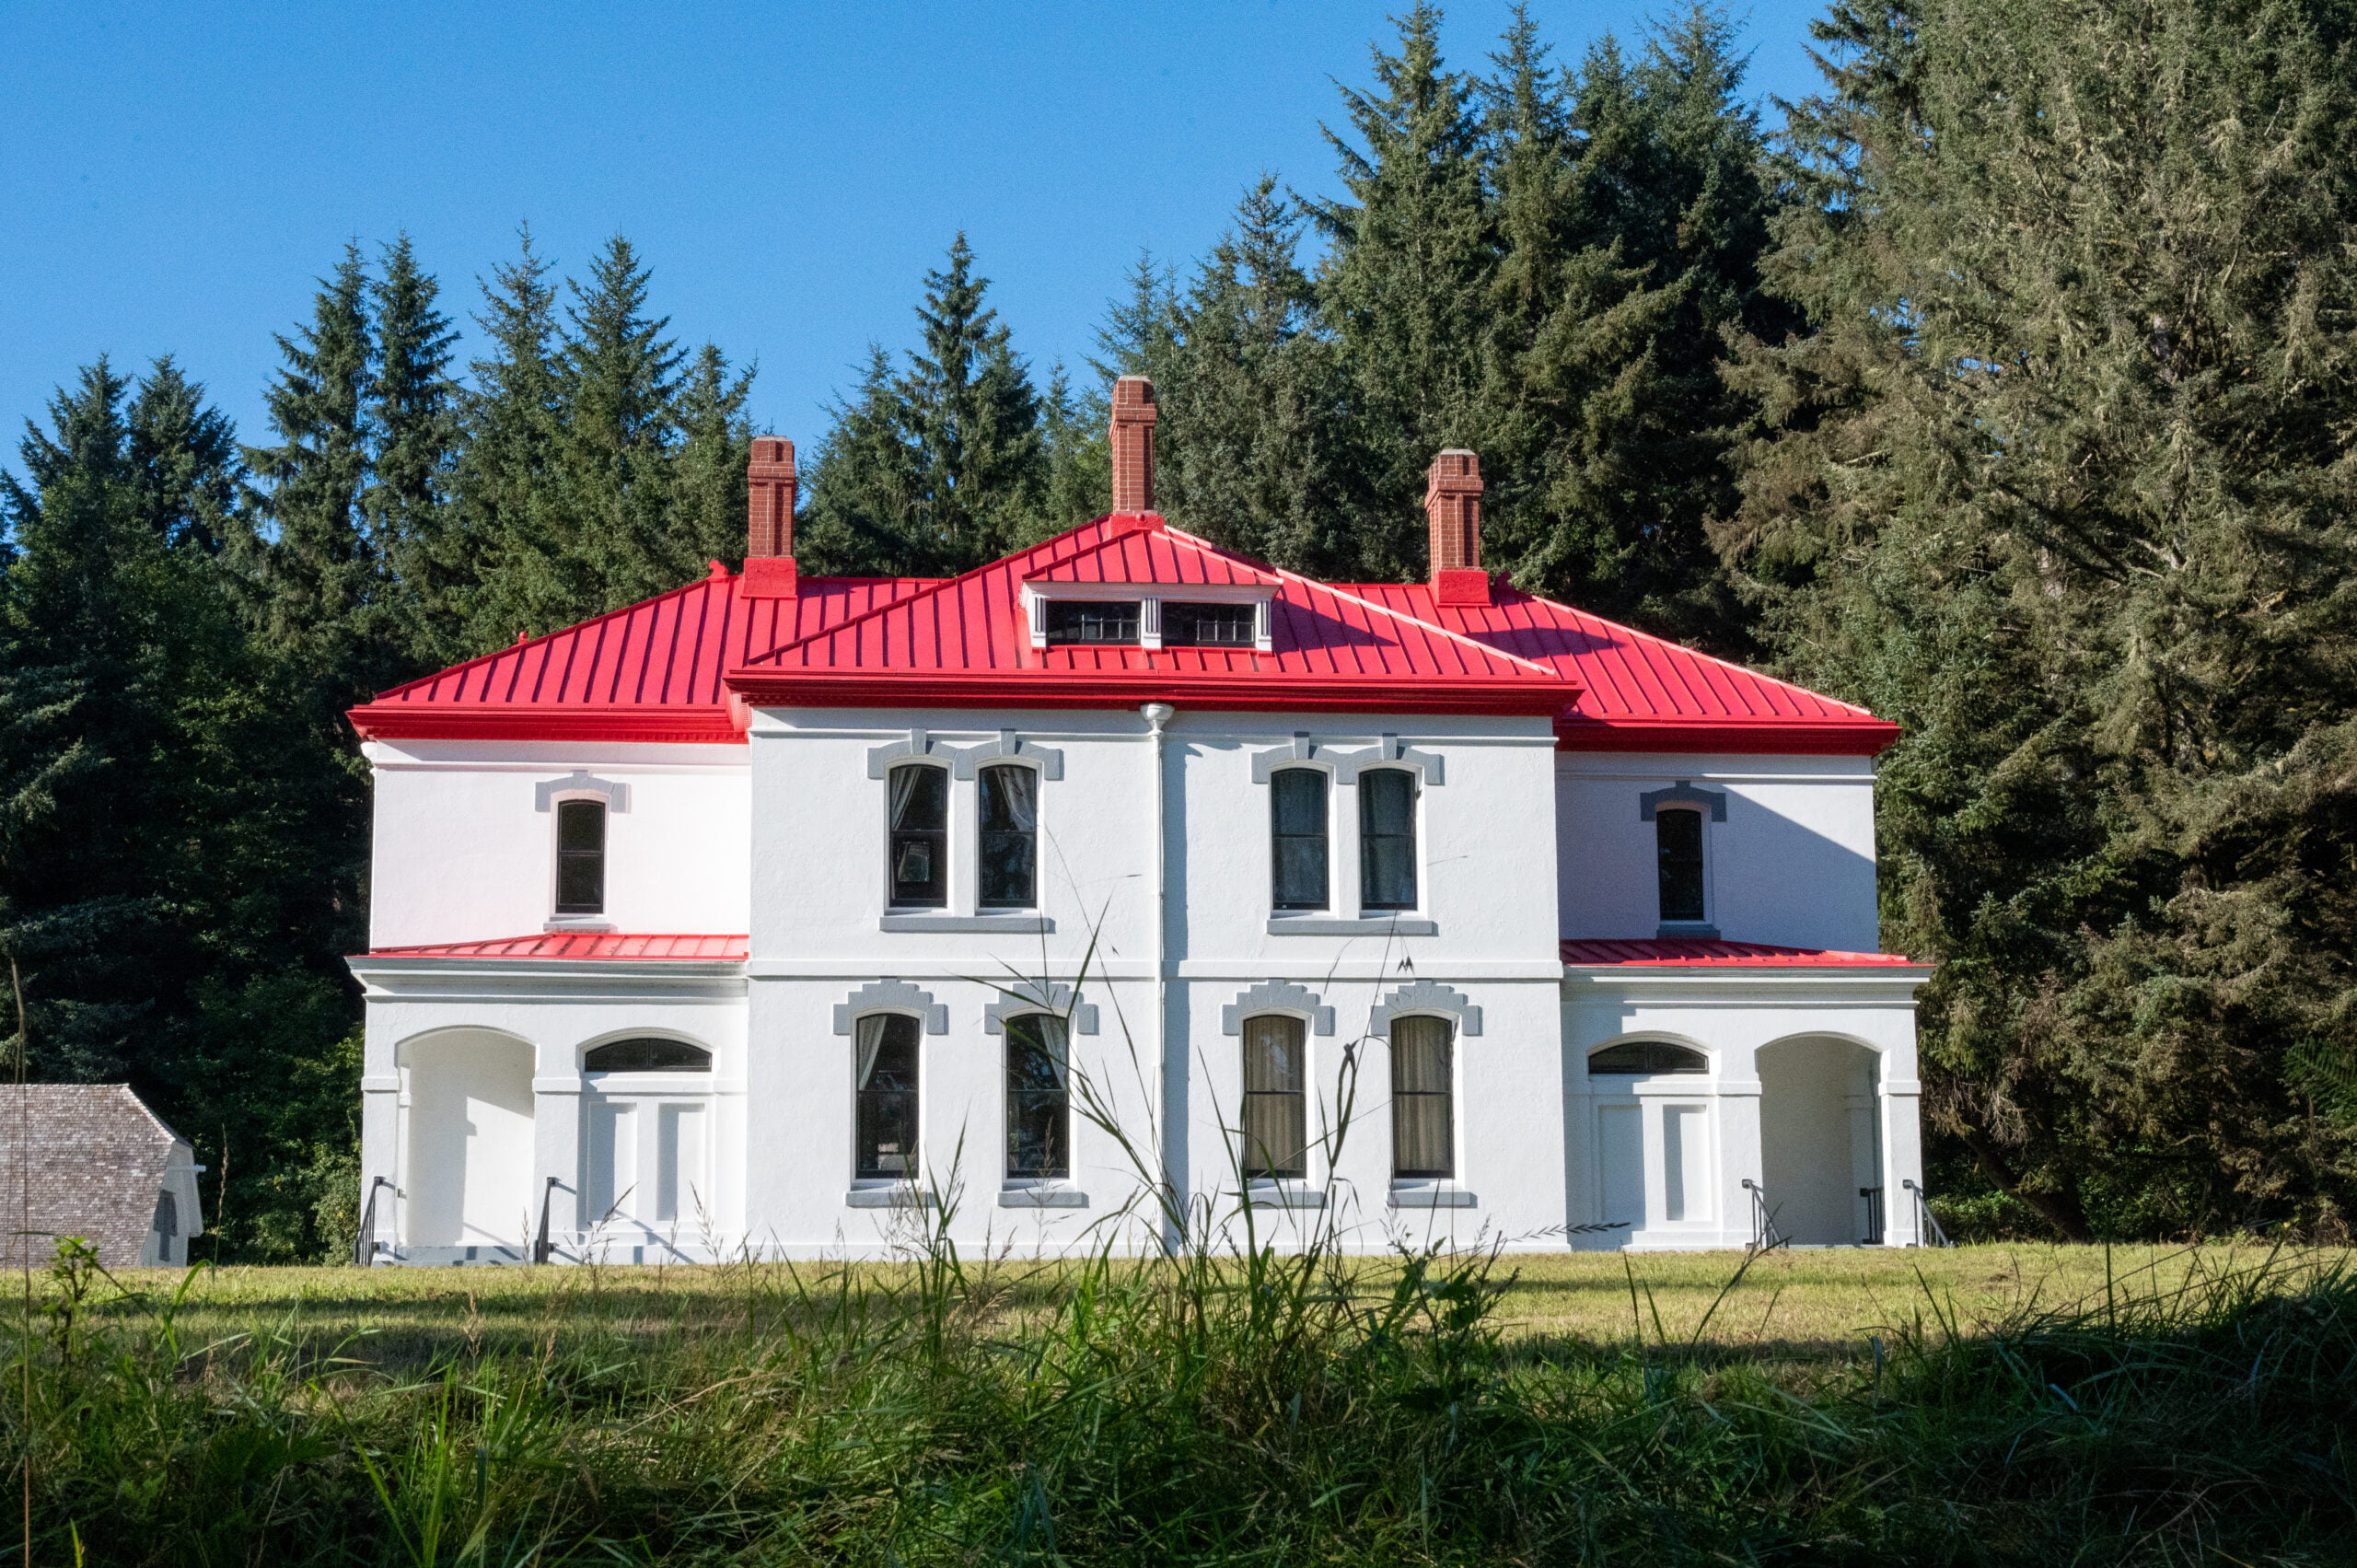
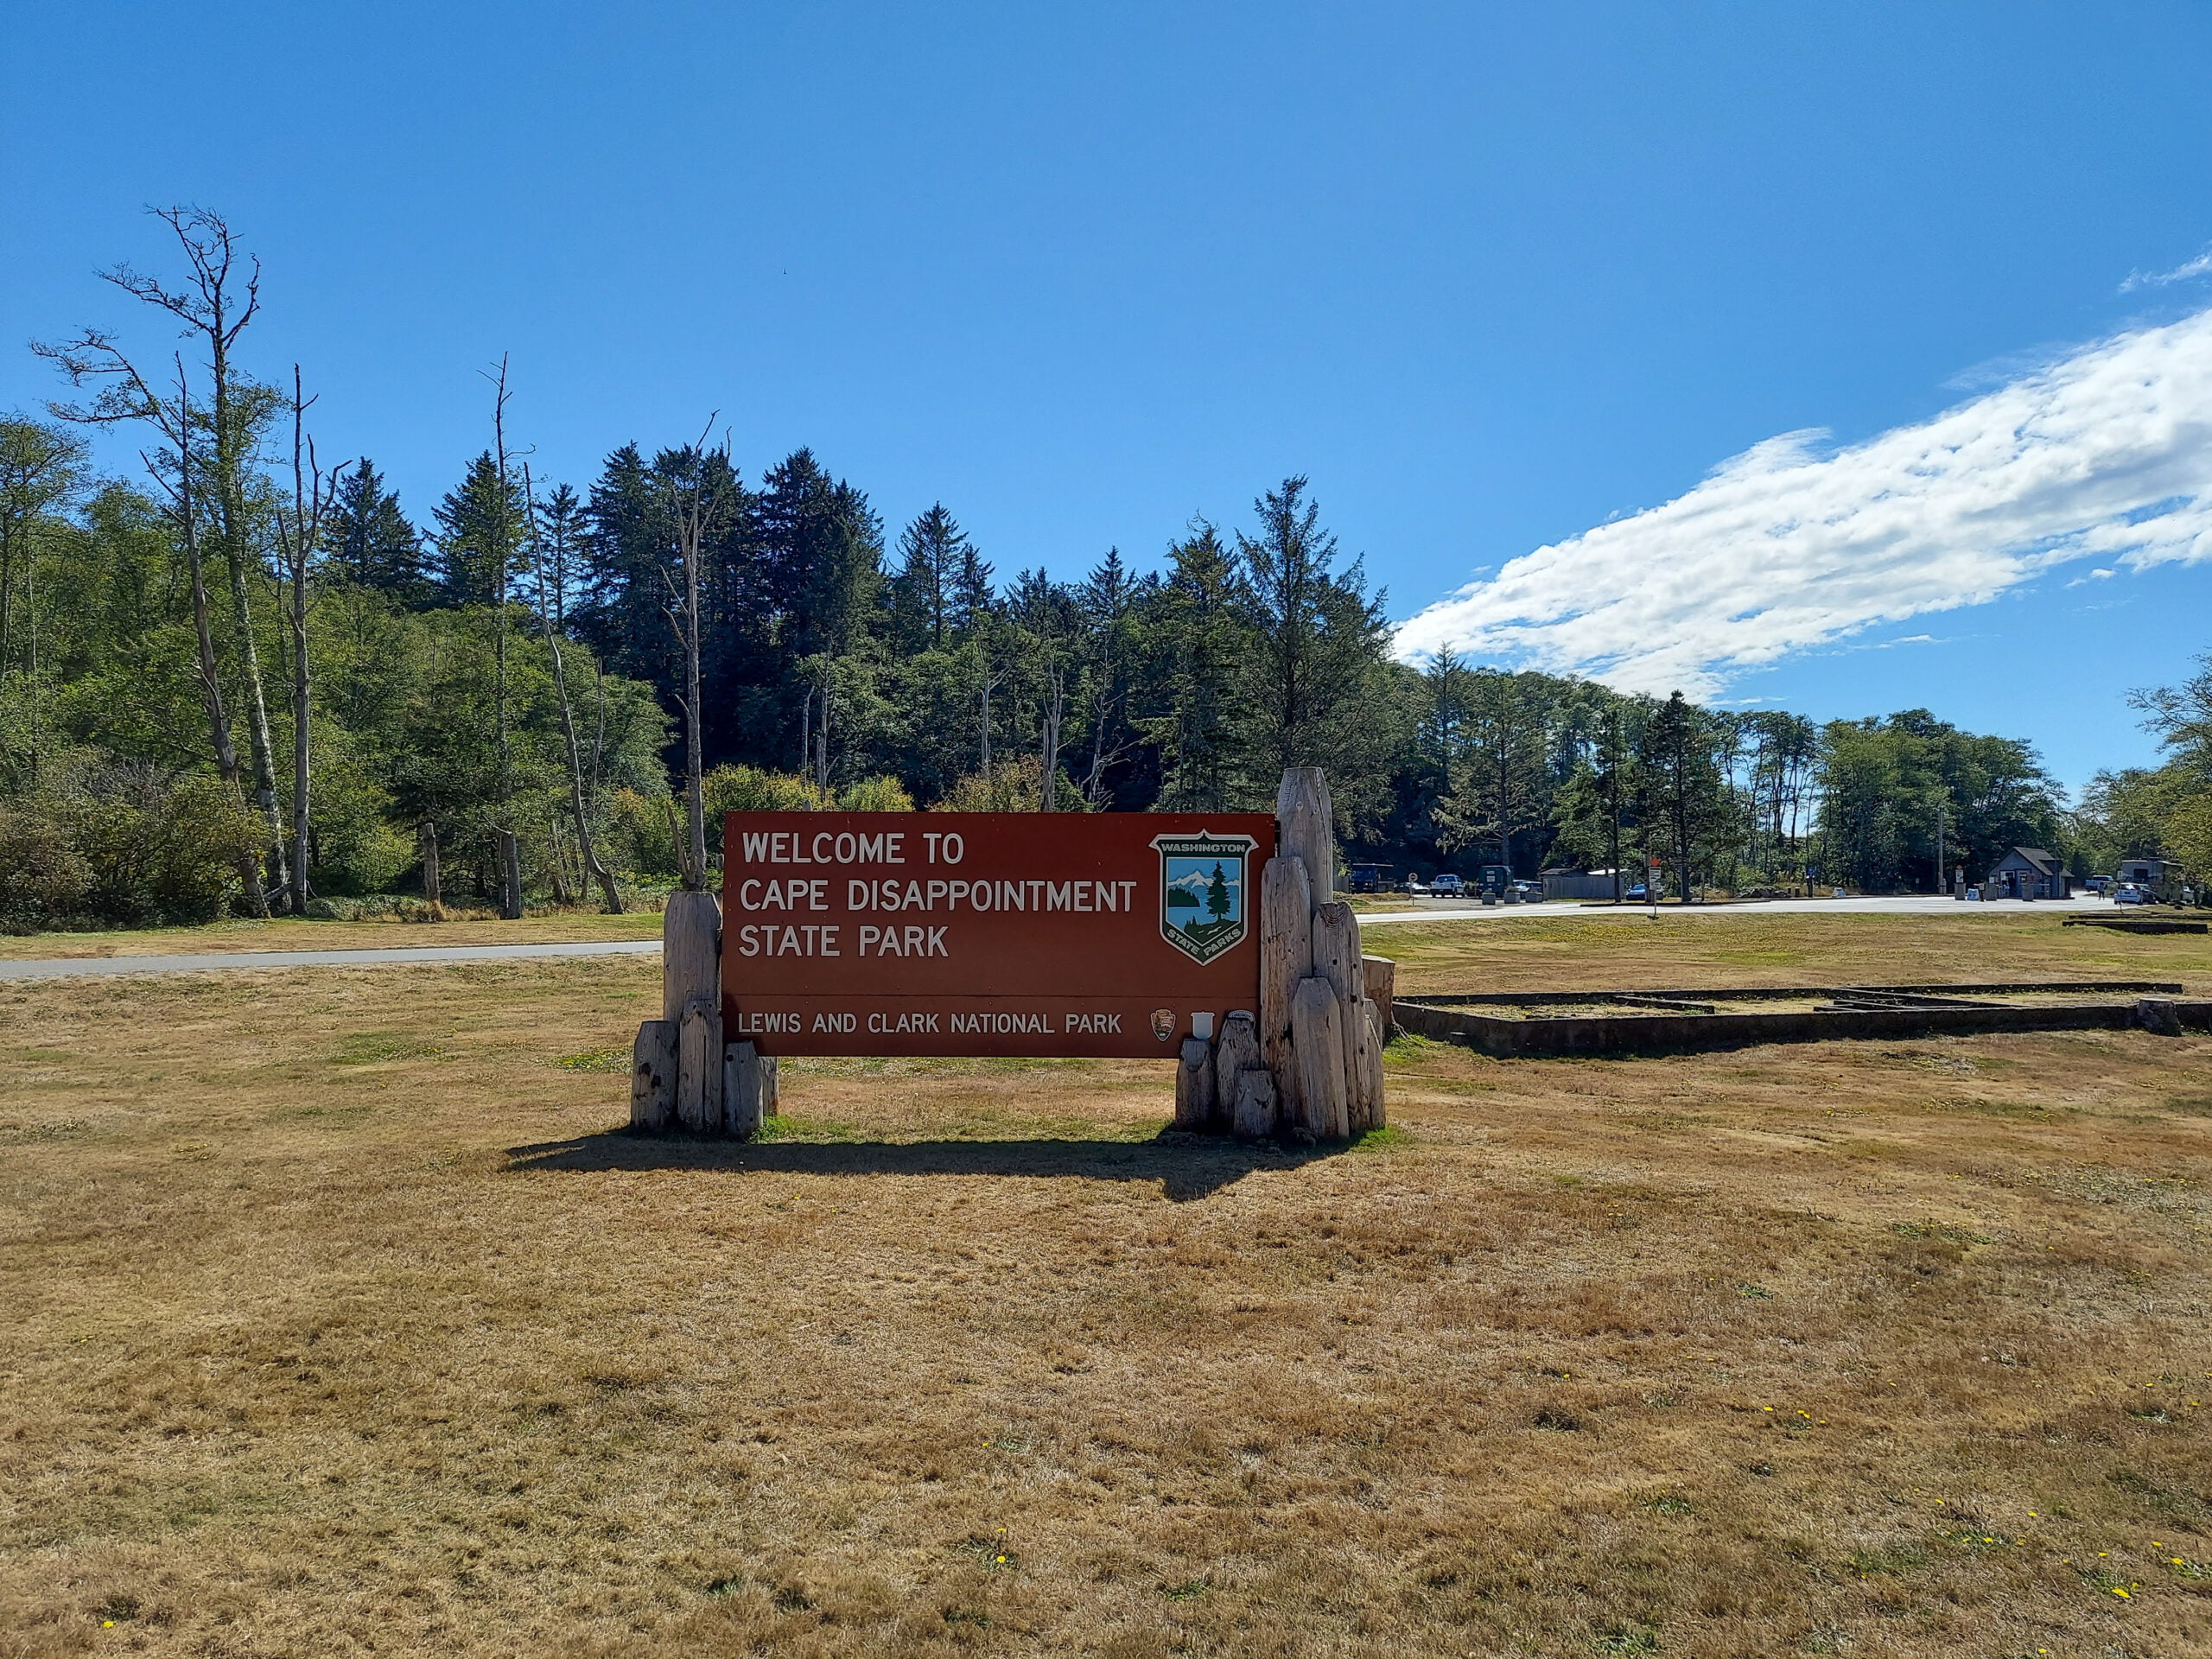
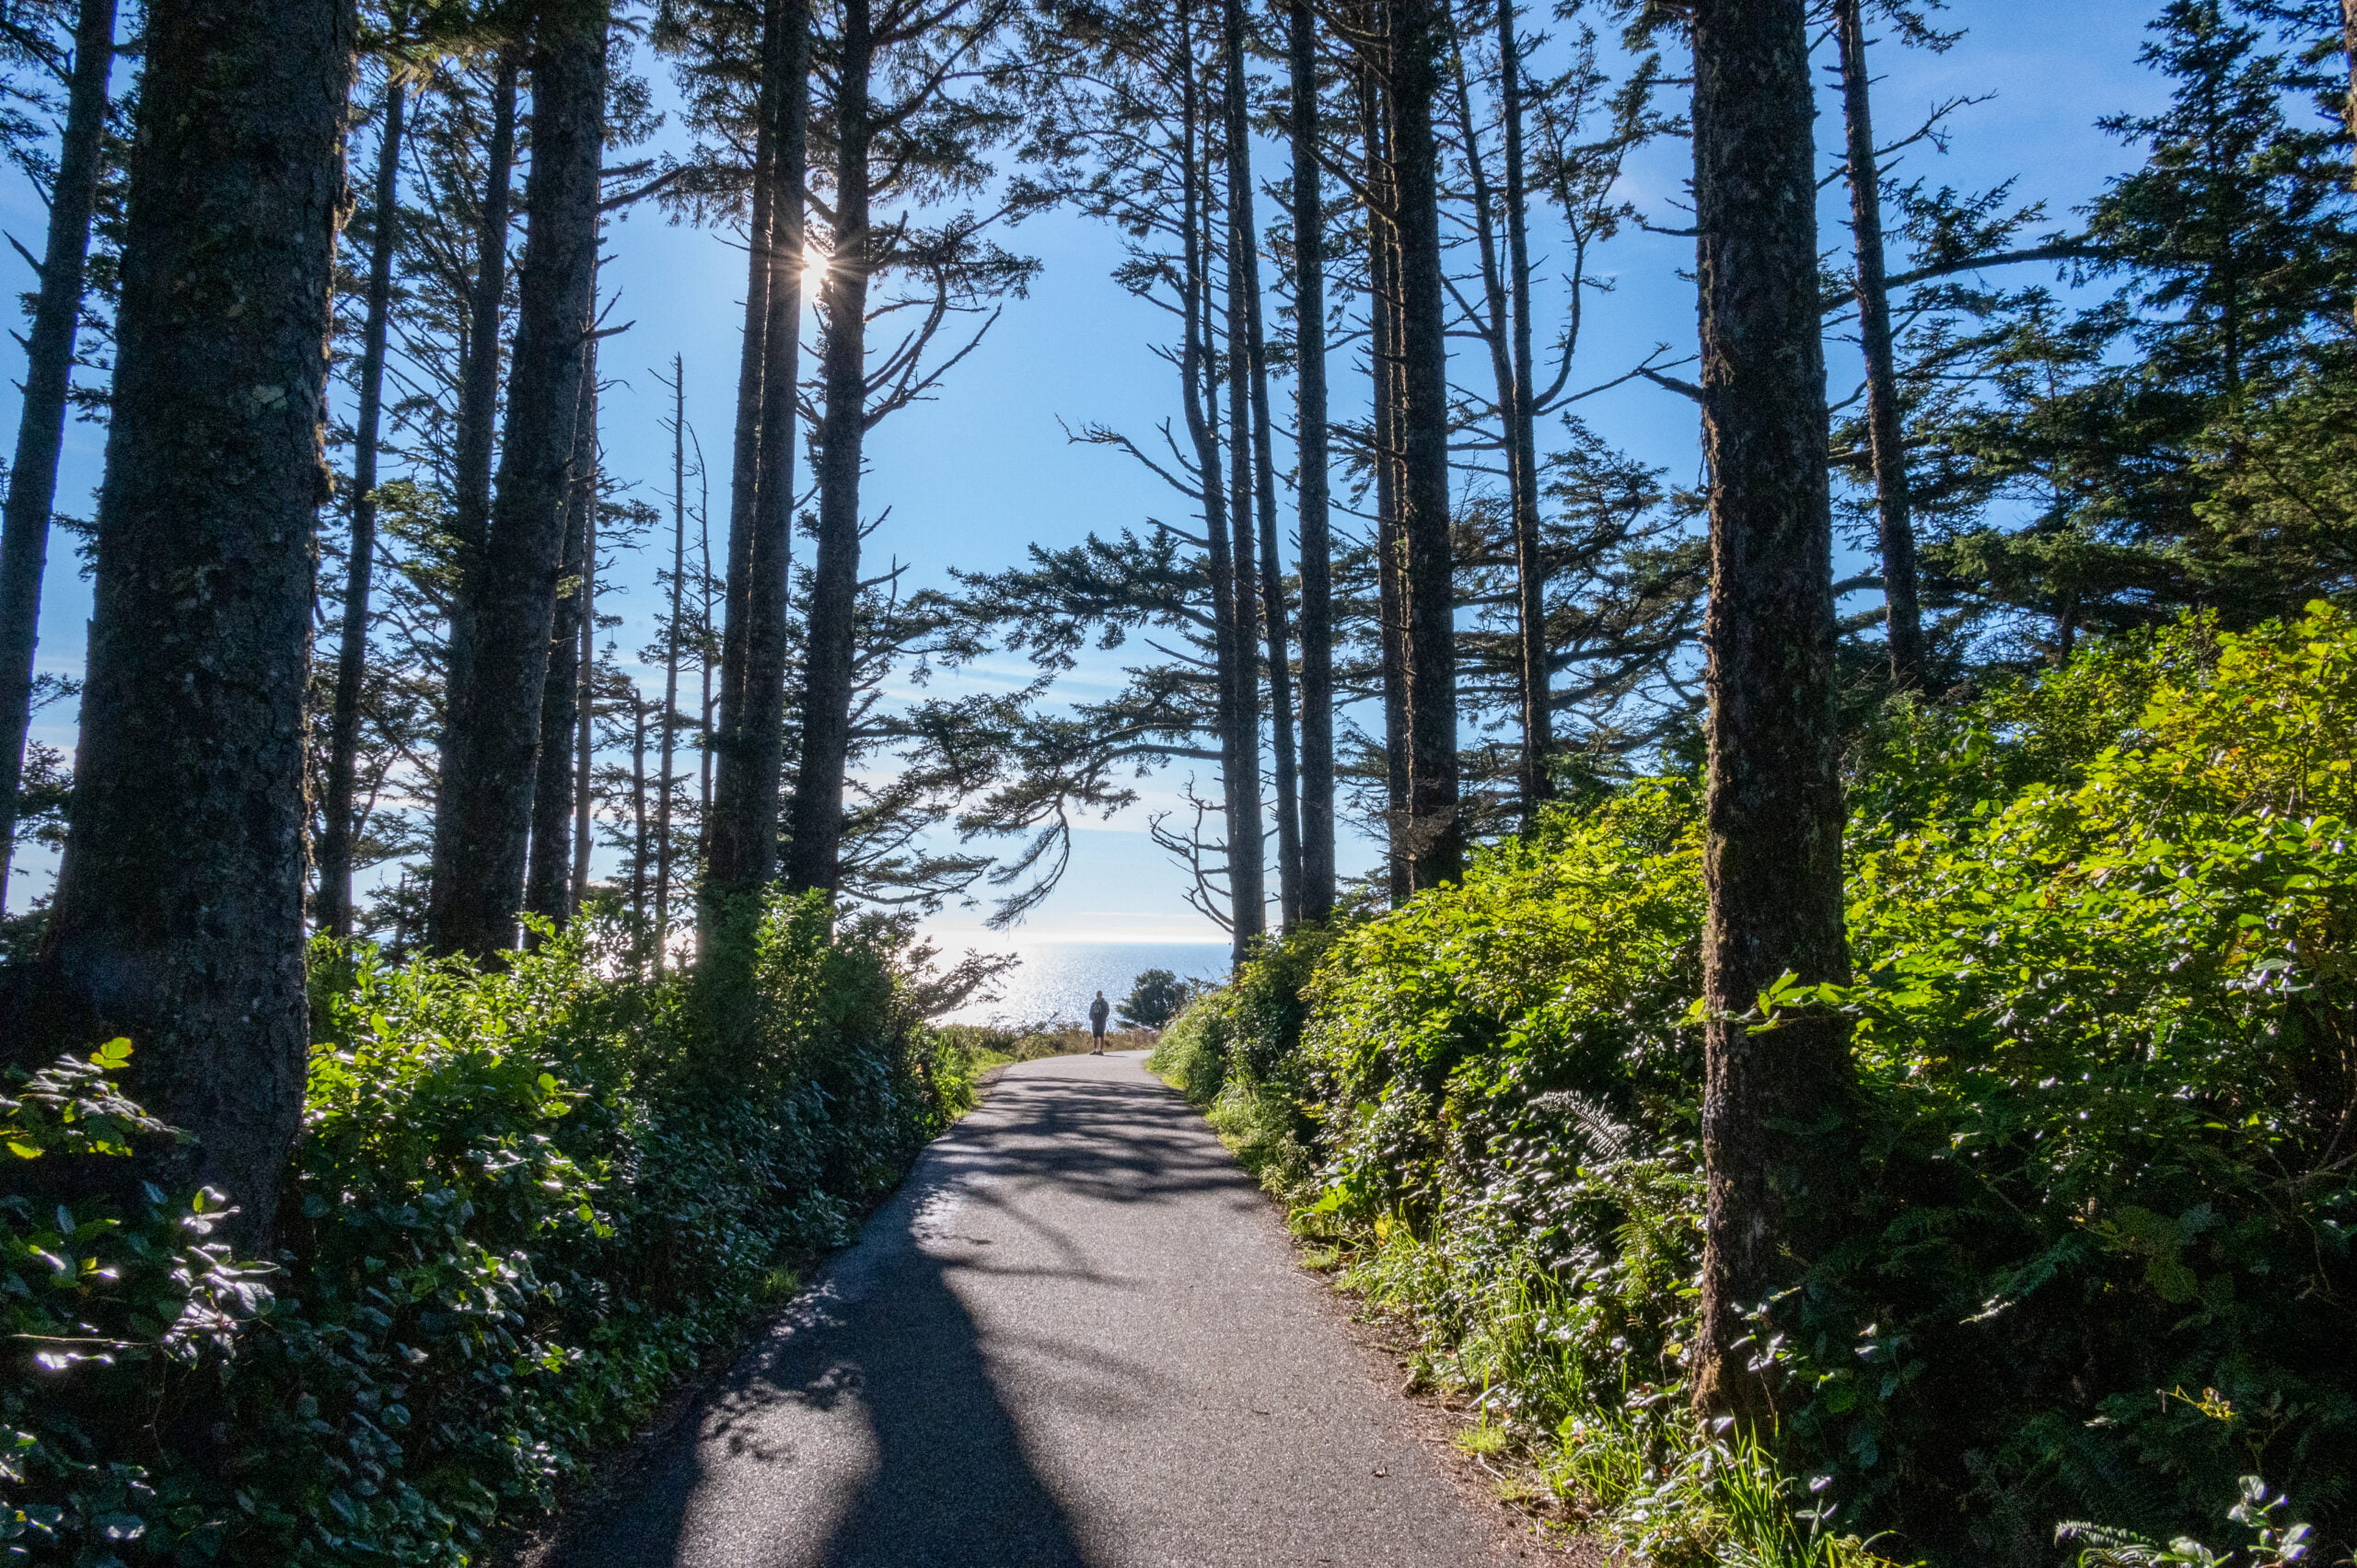
    Top 7 Things to Do at Cape Disappointment

    Cape Disappointment State Park is over 2,000 acres in size. You will certainly have no shortage of things to do during your visit here. Below I list what I think are the top 7 things to do here. You can see a lot in one day, but with two nights, you’ll enjoy a more relaxed visit with time to soak it all in.

    1) Beaches

    Beaches are always at the top of my list of to-dos.  I love the water! These three beaches at Cape Disappointment State Park are my top choices for your first visit here. They are great for flying kites, building sandcastles, looking through driftwood, seeing the lighthouse, and watching the surf.

    Benson Beach

    From the main entrance to the campground area, at the three-way stop, take a left onto North Jetty Road and drive past Waikiki Beach to find the parking area for Benson Beach near the end of the road. There is also a trail to the beach near the campground amphitheater in Loop A. 

    This two-mile stretch of beach is vehicle-free.  I know that might sound strange for me to mention that, but actually, most of the Long Beach peninsula is open to vehicles.  So it’s nice to know you and your family can explore Benson Beach without worrying about a car driving up behind you.

    Benson Beach
    Benson Beach as seen from the North Head Lighthouse trail.

    Waikiki Beach

    I know you probably thought Waikiki Beach was only in Hawaii. Me too!  It turns out Washington State also has a Waikiki Beach. If you’ve ever seen the photographs of the enormous waves crashing below the Cape Disappointment lighthouse, this is the beach where those photographs were taken.  The winter storms that hit this part of the coastline are pretty epic.  You most likely won’t catch any wave action like that during the summer but visit October through March, and you’ll have a good chance of seeing this firsthand.

    If you camp in the D Loop area, it’s a short walk to Waikiki Beach. You can also drive to the parking area via North Jetty Rd. There is a lot of parking space, some with views facing the Cape Disappointment Lighthouse. Watch the sunset here while enjoying a warm cup of clam chowder.  That’s what I did! I also saw kids and families building forts out of driftwood on the beach. It looked like a great way to spend a couple of hours creating memories, and there certainly is no shortage of driftwood here!
    Waikiki Beach
    Waikiki Beach in the morning.

    Beard’s Hollow

    You may have seen Beard’s Hollow viewpoint on your drive to the main entrance of Cape Disappointment State Park. Drive south about a half-mile past the viewpoint to a turnoff and parking lot for the Beard’s Hollow trailhead. Take the paved path straight ahead of the parking lot to access Beard’s Hollow and the beach.  The path to the right leading over the wooden bridge is for the Discovery Trail. Beard’s Hollow beach allows vehicles, so please be aware as you’re dipping your toes in the surf and sand.

    Isn’t this the perfect kite for the beach?

    2) Metal Detecting

    Cape Disappointment State Park is 1 of around 50 Washington State Parks that allow metal detecting.  You’ll need to complete this form and bring your metal detector. Cape Disappointment has about 240 acres of beach area designated for metal detection.

    3) Trails

    Whether on foot or by bicycle, Cape Disappointment has a lot of great trails. 

    The following trails are accessible from the Cape Disappointment campground.

    • Mackenzie Head
      0.5 mile (roundtrip) This short trail leads you to an old WWII battery and information boards describing its historical significance. It also has a nice view of the forest and ocean. Head toward the main A Loop campground area, and you’ll find a small parking area on the left about 0.5 miles along Fort Canby Rd. 
    • Coastal Forest Loop Trail
      The entrance to this loop trail is near Cafe D. You can take a shorter 0.5-mile loop or the longer 1.5-mile loop. If you take the longer loop trail, there is a 0.1-mile trail with a view of Baker Bay. This trail is typically wet and muddy, so come prepared.
    • North Head Trail
      This 3.0 mile (roundtrip) hike starts opposite the road from the Mackenzie Head trail and ends at the North Head Lighthouse trail area.

    These hikes require driving to the trailhead parking areas:

    • Bell’s View 
      This paved 0.5 mile (roundtrip) trail takes you to beautiful views of the coast as well as passing by more WWII outposts. Learn about the history and the incredible winds that hit this coastline in this short, informative hike. 
    • Beard’s Hollow
      The trail to Beard’s Hollow is a nicely paved trail within Cape Disappointment State Park, suitable for bikes and wheelchairs.  I am not sure of the actual mileage of this trail. It was a 10-minute leisurely pace to the beach along this mostly flat trail, and I’d guess maybe 0.3 miles each way.
    • Discovery  Trail
      Starting from the North Head Lighthouse Parking area, this 7.3 mile (one-way) trail takes you to the town of Long Beach, with lots of beautiful views along the way. (You can also start this trail from the Beard’s Hollow Parking area, shortening the hike to 6.3 miles. However, I think this trail is best on a bike — see #6.)

    4) History

    In addition to seeing WWII sites along the trails, you can also visit Fort Canby and explore what’s left of this historical site. You can also tour the Lewis & Clark Interpretive Center and learn about two of our most famous explorers–Lewis and Clark! 

    The Lewis & Clark Interpretive Center is worth a stop, even if you aren’t sure about the historical exhibits.  Why? Because of the views!  The path in front of the interpretive center is one of the best spots in Cape Disappointment State Park to see where the Columbia River meets the Pacific Ocean.  It also offers a much closer view of the Cape Disappointment Lighthouse. 

    Fort Canby
    Fort Canby

    I think we stood along the viewpoint area in front of the Lewis and Clark center for at least 30 minutes, just seeing what we could see.  We watched double-crested cormorants as they searched for food, diving from the cliffs to the water and back again. Then we counted the 100’s of boats just past the line in the water created by the convergence of the Columbia River and the Pacific Ocean. 

    If that weren’t enough, though, the Interpretive Center is full of fascinating history and facts about lighthouses and early explorers.  The upper floor is free and worth taking a look around, and it has huge windows with views of the lighthouse and ocean.  

    Additionally, you can pay $5 to see the entire exhibit, which starts on the basement level. There is a wonderful video about Lewis & Clark’s incredible 4,000+ mile journey to come to their stopping point at Cape Disappointment.  I heard a small boy exclaim to his parent as he watched the video, “That’s here, that’s where we are!”  I saw history made real to him as he watched the video about Lewis & Clark’s journey.  That’s what it’s all about!

    Lewis & Clark Interpretive Center

    244 Robert Gray Drive Ilwaco, WA
    Ilwaco, WA 98624-8624

    Phone: (360) 642-3029

    5) Lighthouses

    Cape Disappointment State Park has two lighthouses within its borders.  This stretch of coastline was so dangerous they built not one but two lighthouses! I love looking at lighthouses. Their architecture and beautiful locations never disappoint (see what I did there). 

    During my visit, I learned that lighthouses were the original GPS. They not only emit light to keep ships from running ashore, but each one is uniquely painted, and they each emit a specific light pattern.  Sailors use these two distinguishing features to help them know where along the ocean they were. Pretty cool, right!

    Cape Disappointment Lighthouse 

    This is the lighthouse you see in the photos taken from Waikiki Beach.  It gets the huge waves crashing at its base during the winter. You can no longer access the lighthouse, but you can see it from both Waikiki Beach and in front of the Lewis & Clark Interpretive Center.

    North Head Lighthouse 

    Constructed in 1898 after continued shipwrecks along this rocky coast demonstrated the need for a second lighthouse.  The North Head Lighthouse is still used to aid in navigation today. It was currently closed for tours during my visit, but I’m optimistic it will reopen to the public again soon. The paved trail to the lighthouse is a beautiful walk, and you pass by the guesthouse for the Lighthouse Keeper.  You can stay here by reserving it online through the WA State Parks website.  Now wouldn’t that be a unique experience!

    North Head Lighthouse Cape Disappointment

    6) Cycling

    There are plenty of paved roads within the main campground areas for families to enjoy biking in a low-traffic area.  However, for a real adventure, consider cycling the Discovery Trail.  

    The Discovery Trail is a mostly paved 8.5 mile (one-way) trail that stretches from Cape Disappointment State Park to the town of Long Beach!  There are viewpoints along the route, historical markers, and even art sculptures to enjoy.  It is a beautiful trail, and even if you don’t feel like making the entire 16-mile round trip consider cycling at least a portion of the trail.  Here is a trail map that gives you an overview of the Discovery Trail route.

    Start the trail from the North Head Lighthouse parking area and ride toward Long Beach as far as you feel like, or if you have someone to drop you off, you could do a one-way shuttle. You could start in Long Beach and then cycle south back to Cape Disappointment State Park. No matter what you choose, you’ll enjoy this beautiful trail!

    crab on Beard's Hollow Beach

    7) Fishing

    You can go fishing and boating at Cape Disappointment State Park.  Although, if it were me, I think I’d try my hand at crabbing.  There were so many Dungeness crabs washed onshore here it made me hungry! 

    Fishing from the shore is allowed, but you can also bring a boat if you have your own. The Baker Bay Boat Launch is next to Cafe “D,” just across from the park’s main entrance. 

    Make sure to have all the appropriate licensing required for boating and fishing. Plus, you’ll want to check with the Washington Department of Fish & Wildlife to see what is currently open and allowed.  Some years the biotoxin levels close fishing here. 

    North Head Lighthouse Keeper's House

    Accommodations at Cape Disappointment

    Camping

    The best tent campsites are sites 1-180 toward the rear of the park.  There are a few tent sites in the D Loop near the main entrance, but these have less privacy and more road noise.  We ended up staying in one of these and could hear the loud ship horns and road traffic throughout the night.  There are also a lot of RV campsites, including those with full hookups.

    Rentals

    In addition to campsites, Cape Disappointment State Park also has cabinsyurts, and two vacation houses for rent. 

    Getting to Cape Disappointment State Park

    Cape Disappointment is a little over a 3-hour drive from Seattle, Washington, and a 2-hour drive from Portland, Oregon.

    You’ll either take Hwy 101-S from the Seattle area or Hwy 101-N if coming from the south/Oregon.

    For some reason, Google directions take you to the general area of Cape Disappointment State Park rather than to the entrance of the park.  So, the easiest way to get to the campground entrance and park’s pay station for Cape Disappointment State Park is to navigate to Cafe “D,” located directly across from the park’s main entrance.

    Cafe “D” Address: 243 Robert Gray Dr, Ilwaco, WA 98624

    Besides being a waypoint to the entrance of the park, Cafe “D” also offers Wi-Fi, miscellaneous camping supplies you may have forgotten, as well as ice cream cones and coffee.

    Cape Disappointment Sign

    ADA Accessibility

    The following had paved trails and parking areas suitable for walkers and wheelchairs.

    • The North Head Lighthouse trail
    • Lewis & Clark Interpretive Center and viewing area that looks at Cape Disappointment Lighthouse
    • Bell’s View
    • Beard’s Hollow (the paved trail ends at the beach)
    • Beard’s Hollow Viewpoint (parking area with an overlook)
    North Head Lighthouse Trail

    Restaurants to Try Near Cape Disappointment

    The Chowder Stop (Makes great chowder and can easily pack it to go too.)

    The Chowder Stop
    203 Bolstad W, Long Beach, WA 98631

    42nd Street Cafe and Bistro (Amazing breakfasts here, plus they serve beignets!)

    42nd Street Cafe
    4201 Pacific Way, Seaview, WA 98644

    The DEPOT Restaurant (If you eat out only once, make it The DEPOT Restaurant. Reservations required, but they can often squeeze you in same day if you call ahead.)

    The DEPOT Restaurant
    1208 38th Pl, Seaview, WA 98644

    Roots Drive-Thru Coffee (This is small coffee shop is in Ilwaco just outside the park boundary. It’s a quick drive in the morning to get your coffee fix!)

    Roots Coffee
    111 First Ave N, Ilwaco, WA 98624

    Weather at Cape Disappointment

    The weather at Cape Disappointment could be the best reason to call it such a name. It is the stormiest stretch of coastline, with hurricane-force winds during the winter and unrelenting rain. If you plan to tent camp here, I highly recommend you look ahead to the weather forecast before deciding to come. 

    I do not enjoy tent camping in the rain.  Rain and wind at Cape Disappointment can make tent camping miserable or, should I say, “disappointing.” You may decide a cabin or hotel in town would be better if your forecast appears to be stormy and grey.

    I used my new Coleman 4-Person Pop-Up Tent, and it did fine with the light rain we received early in the morning, however anything more, and we’d have had wet gear, I think. So plan to spray your tent ahead of time with waterproofing spray and pack some waterproof jackets for exploring.

    Sunset by Cape Disappointment Lighthouse

    Final Thoughts

    I loved visiting Cape Disappointment State Park! There is so much to do along the Long Beach Peninsula outside the park too. Washington State has some of the most beautiful coastline. I enjoy every opportunity I get to explore it.  I hope you will get a chance to visit here soon. Let me know if you have any questions regarding this area or if there’s a favorite activity here that I missed. 

    Here are a few articles that might interest you:


    Note: Travelffeine is reader-supported. This post contains affiliate links. When you make a purchase using one of these affiliate links, we get paid a small commission at no extra cost to you. And as always, all opinions are our own. Thank you!


    Happy Exploring!

    Cape Disappointment State Park
    North Head Lighthouse at Cape Disappointment
  • Exploring Sunrise: Mount Rainier’s Northeast Corner

    Sunrise sits at 6,400 ft. elevation, making it the highest point accessible by car in Mount Rainier National Park. Second only to Paradise as the most visited area of the park. There is a good reason people come here. It provides stunning views of Mount Rainier, hiking trails for all abilities, a huge meadow full of wildflowers, and a perfect place to watch (you guessed it) the sunrise!  Whether you spend the day or camp in this northeast corner of Mount Rainier National Park, you will leave full of wonder and beauty.

    Getting Here

    Mount Rainier has four main entrance stations from which to enter this large National Park. Sunrise is accessed from the northeast White River Entrance Station. Get directions for all the entrances to Mount Rainier National Park here.

    sunrise at Mt Rainier

    When to Visit Sunrise

    Due to its high elevation, Sunrise gives visitors a limited window of time to enjoy its beauty. Typically you can access it from late June through the first part of October. The Sunrise Lodge and Visitor Center is only open from July to early September.

    Try to come as early in the day as possible to avoid the crowds. Even on a weekday, the parking lot can fill up around noon.  The weekends are especially busy, so get an early start to avoid long lines at the park entrance and to ensure a parking spot.

    Things to Do at Sunrise

    Hiking

    There are so many hiking options that leaving from Sunrise. Here are a few favorite day hikes I recommend.

    • Frozen Lake Loop – 3.0 mi (Great place to spot mountain goats.)
    • Fremont Lookout – 5.6 mi (Old fire lookout with spectacular views.)
    • Shadow Lake Loop – 3.0  (An easy hike starting on the south side of the parking lot — opposite the Sunrise Lodge.)
    • Dege Peak – 4.0 mi (Hike to over 7,000 feet with 360-degree views!)
    • Sunrise Nature Trail Loop – 1.5 mi (Short hike that’s easy enough for younger kids too.)

    A few easy overnight backpacking options:

    Note that these backpacking options require a wilderness permit.  The good news is you can now reserve your spot and get your wilderness permit at Recreation.gov. This makes planning a lot easier!

    • Sunrise Camp near Shadow Lake (This is an easy overnight option for beginners and kids. It’s only 1.3 miles from the Sunrise Visitor Center. No potable water, but you can filter water from Shadow Lake or pack it in. It has vault toilets.)
    • Berkley Park (It’s only a 4.5-mile hike to Berkley Park, you’ll need to get a permit to camp here, there are bear poles for hanging your packs and a creek to filter water from (no potable water). There is also a primitive outdoor toilet.  Make sure to take time to hike up to Grand Park from here and admire its beauty and perhaps spot a bear or two.
    Yakima Park
    Yakima Park as seen from the main trail. Sunrise Lodge is in the distance.

    Watch the Sunrise

    I know it seems a little cliche to watch the sunrise at Sunrise, but there’s a reason they name these areas what they do. Here you’ll see the morning light as it first touches the top of Mount Rainier. It’s like a spotlight shining down and illuminating its snowcapped peak.  You can also watch from Sunrise Point just a short drive below Sunrise and enjoy the deeper colors that develop over the Cascade range.  If you’re feeling ambitious, consider hiking to Dege Peak for sunrise and enjoying the unobstructed 360-degree views.  Plus, you’ll get to stare at Mount Rainier for the entire hike back!

    Look for Wildflowers

    Walk the trails along Yakima Park (meadows in front of the lodge and visitor center). You don’t have to walk very far to enjoy the variety of wildflowers that grow here. Take a right and follow the wide path near the main restrooms, and in only about 5-minutes of walking, you’ll soon have the meadow on both sides with sweeping views of Yakima Park and the Sunrise Day Lodge.

    Look for Wildlife 

    It used to be fairly common to see cinnamon-colored black bears roaming the meadows at Yakima Park. I haven’t seen one in years, but if you hike up to the ridge either via Sourdough Ridge, Dege Peak, or Frozen Lake, you’re almost guaranteed to see some mountain goats and possibly a marmot or two.  Listen for their chatter as they tell other marmots of your approach.

    Visit the Sunrise Day Lodge

    Make sure to go inside the Sunrise Day Lodge and look at gifts and souvenirs. You can also purchase something to eat and chat with a Park Ranger.  If the Sunrise Visitor Center is open, you can learn more about Mount Rainier and the Sunrise area. The Sunrise Lodge is only open from July to early September. 

    Sunrise Day Lodge
    The Sunrise Day Lodge.

    Enjoy Having a Picnic With a View

    The Sunrise Picnic Area is a gorgeous place to enjoy a meal with your family. My family once celebrated my niece’s birthday here, and it was such a fun way to create memories together.  The picnic area at Sunrise also sports incredible views of Mount Rainier.  There are lots of picnic tables to choose from! Head past the Sunrise Day Lodge and make a right in front of the restrooms, then follow the wide path as it curves left, soon you’ll see a small trail on the right that leads to the picnic area.  Follow the labyrinth of small trails for more picnic options to choose from.

    Camping Near Sunrise

    Visiting Sunrise at Mount Rainier is a perfect way to spend a day, but I highly recommend you spend a night or two camping here for the full experience. The White River Campground, only a 25-minute drive away, is the closest campground to Sunrise.  It makes a great base for exploring the northeast corner of Mount Rainier National Park. 

    You can even hike to Sunrise from White River Campground. This takes about 3 hours roundtrip to do, or if you’re traveling in a group, you could always have someone drop hikers off at Sunrise and then hike back down to White River.  This is a fun idea if you’re camping with a family.

    Other Hikes Near Sunrise

    • Naches Peak Loop Trail (Gorgeous loop hike that takes you past alpine lakes, meadows, and forests.)
    • Tipsoo Lake Loop (Easy, mostly flat 0.5 mile loop around Tipsoo Lake, good for reflection photos and views of Mount Rainier.)
    • Emmons Moraine Glacier. (See my article on camping at White River Campground for more information on this hike.
    Mount Rainier at Sunrise

    Mount Rainier Webcams

    Perhaps you’re unable to make the trip up to Mount Rainier right now, or maybe you want to take a peek to see whether or not the mountain is out.  Whatever the case may be, Mount Rainier National Park has several webcams set up in the different areas of the park that allow you to see what’s happening on the mountain. 

    I personally love looking up at Camp Muir and Camp Schurman and seeing the tents for those making the trek to the summit.  It’s such an adventure they are embarking on and one I’ve secretly thought about doing.  Perhaps, you have to. Well, these webcams can give you a sneak peek into the mountaineering experience.

    Mount Rainier is such a beautiful place. It holds a special place in our hearts who live near it, and I believe everyone who visits will leave feeling a connection with its beauty and grandeur.

    So much mountain to explore, so little time!

  • Hike to Mount Rainier’s Dege Peak For 360° Views

    If you want a hike with 360-degree views of Mount Rainier, Mount Adams, Mount Baker, and the North Cascades, but with minimal effort, then consider hiking to Dege Peak. 

    Dege Peak is one of the less crowded trails from the Sunrise Visitor Center at Mount Rainier.  Most of the people I saw were headed toward the Burroughs Mountain or Frozen Lake trails. Once I passed the turn-off for the Sourdough Ridge Nature Trail,  I only saw about 10 people on my way to and from Dege Peak.  On a clear day, you have wonderful views, and along the way, you might even be fortunate enough to spot mountain goats, marmots, elk, or even bears!

    Getting Here: Which Mt Rainier Entrance to Use

    Mount Rainier has four main entrance stations from which to enter this large National Park. For this hike, you’ll enter the east side of the park using the northeast White River Entrance Station. Get directions for all the entrances to Mount Rainier National Park here.

    Two Ways to Access the Dege Peak Trailhead

    Sunrise Point

    You can begin this hike from the Sunrise Point parking area or Sunrise Visitor Center. If you start from Sunrise Point, it is 1.0 mile shorter round-trip (3.0 vs. 4.0 miles) than starting from the Sunrise Lodge parking lot, but there are no restroom facilities, and you have around an 800 elevation gain vs. 600 from Sunrise.

    Getting to the Trailhead:  Park at Sunrise Point parking lot.  From the west end of the parking lot, look for trail signs for the Sourdough Ridge Trail.  You’ll start your hike to Dege Peak here, and at about 1 mile in, you’ll come to the trail junction for Sunrise and Dege Peak. Make a right here. It’s just another .3 miles from the junction to Dege Peak summit.

    Sunrise Lodge and Visitor Center

    I prefer to start the hike to Dege Peak from the main Sunrise parking lot. There are restroom facilities here (there are none at Sunrise Point). Plus, with the Sunrise Lodge, there’s the ability to purchase a snack or drink before/after your hike.  You can also shop for souvenirs to remember your visit to Mount Rainier or buy gifts to take home. If this is your first visit to Mount Rainier, you’ll definitely want to spend some time at Sunrise exploring the meadow area and visiting the Sunrise Lodge and Visitor Center.

    Getting to the Dege Peak Trailhead: Follow the broad path next to the bathrooms (you walk past the Sunrise Lodge, and you’ll see the path on your right). From there, you hike up the dirt path, and soon you come to a large sign with a map of the Sunrise area trails. Follow the trail on the right side of the signs as it climbs up, and soon you come to a “Y” in the trail. Go right (away from Mount Rainier) for Dege Peak.

    About Dege Peak Trail – Starting from Sunrise Lodge

    Trail Length: ~ 4.0 miles (from Sunrise Lodge)

    Elevation Gain: ~ 606 feet

    Approximate Hiking Time: 2 hours (round trip)

    Trail Difficulty Rating: Easy to Moderate
    Overall I would rate this hike as easy. Even kids should be able to do this hike with minimal difficulty. However, I give it an easy to moderate rating given its exposure to the sun.  I hiked this on a hot summer day, and there is almost no shade for the entire hike.  In the summer, the heat combined with the elevation gain nudges this hike into the moderate range.

    Features: 360-degree views, stunning views of Mount Rainier, wildflowers, wildlife, lake views, and multiple glacier views

    Entrance Fee: There is a $30 single-vehicle entry fee good for 7-day consecutive use. 

    Restrooms: There are restrooms just past the Sunrise Day Lodge and snacks and drinks at the Lodge. Potable Water just outside the Sunrise Lodge entrance.

    How to Pronounce Dege

    Dege Peak was named after James Henry Dege, a notable businessman from Tacoma, Washington. During my visit here, I heard a variety of pronunciations. The two most common pronunciations were “deh-gay” or “day-gay.” The Park Ranger at the Sunrise Lodge pronounced it like “day-gay,” so perhaps that’s the correct one.

    What to Bring on the Hike

    • Water (I only brought 16 ounces and wished I had 32, so bring plenty, especially on a hot day.)
    • Bug Spray (The bugs were pretty bad, so make sure to apply before you hike and possibly during too.)
    • Hiking Boots (I hiked in running shoes, but the rocky areas made this a little uncomfortable for my feet, plus hiking boots are good for ankle support.)
    • Trekking Poles (I didn’t use these, but they would be helpful in the rocky areas and last 200 yards or so to the summit.)
    • Sunscreen (This hike is really exposed to the sun.)
    • Sunglasses (Sunscreen for the eyes.)
    • Snacks (Or possibly a picnic lunch for the summit.)
    • Camera (You’ll definitely want a photo or two!)

    Important to Know: Sunrise Parking lot is at 6,400 ft elevation and Dege Peak Summit is at 7,006. If you are not used to being at higher elevations you might get a little dizzy. Make sure to hydrate and snack during your hike to help avoid any elevation sickness symptoms.

    Hiking to Dege Peak

    I drove up to Mount Rainier that morning and settled into my campsite at White River Campground before driving up to Sunrise.  It was a gorgeous day, with clear skies and warm weather.  Warmer than I expected!  By noon it was already 77 degrees at Sunrise!

    I grabbed my camera and a bottle of water (later, I realized I should have brought two bottles), put on a bit of bug spray, and headed for the trailhead.  It was almost 1:00 p.m. when I started up the broad path just past the Sunrise Lodge.

    I stopped at the “Y” trail intersection to take a few photos of Mount Rainier and the meadow.  As I began hiking up the trail toward Dege Peak, I was chased by a very persistent wasp.  This is not the first time I was chased by a wasp while hiking at Mount Rainier.  During my hike to Spray Falls, I also had to flee for my life for a long way down the trail. 

    Perhaps “flee for my life” is overly dramatic, but it was a little traumatizing for me.  I won’t get into all my childhood run-ins with bees, but one only needs to watch My Girl once to realize these small creatures also come with a dark side.  I jest, but needless to say, although I love honeybees, I am less a fan of wasps. 

    Multiple times along my hike to Dege Peak, I was chased by bees. One even began circling me over and over again.  When I returned home, I did a little research and discovered bees and wasps alike are attracted to bright colors. Red, in particular, is perceived as a threat. What color do you think my favorite hiking shirt is?  Yep! You guessed it– bright red! I guess I may need to find a new favorite hiking shirt after learning this new information. 

    Sourdough Ridge Nature Trail

    Onward and upward.  Soon, I reach the ridgeline and turn off for the Sourdough Ridge Nature Trail.  The nature trail goes to the left, and Dege Peak continues to the right. The Sourdough Ridge Nature Trail is a great option if you’re hiking with smaller kids and want a shorter hike that still offers beautiful views of Mount Rainier. The loop only takes about 1-hour to complete and is mostly flat.

    Wildlife Viewing Opportunities

    Make sure to stop and look over the ridgeline along this section of the Dege Peak trail, as you’ll often spot wildlife below.  I saw a lonely mountain goat (pictured above) during my hike. (To my dismay I did not see any lonely goatherds.)

    I talked to another couple who frequently hikes at Mount Rainier, and they told me how they once hiked to Dege Peak, and at the top, they looked over the edge and saw a bear splashing around in the lake below!  What an unforgettable memory!  They also mentioned seeing elk here as there is an elk path that leads down the backside of Dege Peak.  So make sure to bring a camera and stop to look for wildlife during your hike.

    Sunset Point Trail Junction

    I continued along the ridgeline with views of Dege Peak in front and Mount Rainier at my back. I didn’t worry too much about taking photos of Mount Rainier on the hike up, as I knew I’d be looking at it the whole way back down and have plenty of opportunities to photograph it then.

    After the initial climb to the ridgeline, the trail flattens out for a long stretch before you dip down again and come to a fork in the trail.  This is the turnoff for the Sunrise Point parking area and where you’ll pop out should you start your hike there instead of at Sunrise. From here, it’s only 0.3 miles to the summit.

    The trail narrows and gets rockier as it begins a steady climb back up.  Soon the trail curves sharply to the left for the final 200 yards or so to the summit.  At this curve, there are nice views of the Sunrise Point parking area and Sunrise Lake. 

    Dege Peak Summit

    I begin the final rocky climb to the summit and stop at every tiny shade spot possible.  My water is now warm rather than cold, but I still appreciate having it!  I get to the top, and there is one group leaving as I arrive.  I have the entire summit to myself unless you count the 100’s of moths, flies, bees, and mosquitos who seem to think they own this place!  Sadly, the bugs were so bad during my visit that I didn’t hang around very long.  I took a few photos, admired the view in all directions, and headed back down the trail.  I didn’t pack any bug spray with me. Otherwise, I would have reapplied it at the summit.

    Bugs aside, the views at the top of Dege Peak are fantastic!  You are at over 7,000 feet from here and with minimal effort!  The summit would make a great picnic spot on a day when the bugs aren’t as bad. 

    The hike took me around 2 hours 10 minutes, and that’s with a lot of stops for photos and chats with other hikers.  I think most will complete it in around 2 hours, but with kids, you could plan for up to 3 hours and go at a leisurely pace.

    Now to enjoy staring at Mount Rainier for the hike back to Sunrise.

    Final Thoughts About Hiking to Dege Peak

    This trail typically has fewer hikers than the other trails in the area. The climb up is a gradual one, and during the summer, you have gorgeous wildflowers that line the path.  The trail is dusty, and as I mentioned, there is very little shade. Definitely remember to apply sunscreen and bug spray before heading out. 

    For a slightly longer hike, start from Sunrise and follow the route outlined in this post, but on the return hike to Sunrise, take the Sourdough Nature trail to the right along the ridgeline. You’ll follow the ridgeline before you loop down and to the left to Sunrise again. This adds a little over a mile of mostly flat terrain and about 45-minutes more hiking time.

    I bought a Klondike bar at the Sunrise Lodge.  The hot sun along the hike to Dege Peak and back left me wanting something cold to drink (filled up with potable water just outside the lodge) and a cold treat before heading back to camp.

    If you stay at White River Campground, consider hiking to Emmons Moraine Glacier from the campground and planning to hike the Naches Peak Trail the following day. I love hiking the Naches Peak Loop Trail! It has beautiful lakes, mountain views, and wildflowers everywhere!

    Do you have a favorite hike at Mount Rainier National Park?  I’d love to hear about it.  This place is like a second home to me, and I’m always interested in learning about new trails and hikes I haven’t discovered.


    Happy Trails!

  • Suntop Lookout: Easy Access to Incredible Views

    Do you want stunning views of Mount Rainier and the surrounding mountain ranges but without a long hike? Then look no further than Suntop Lookout.  Suntop Lookout was built in 1933 as a fire lookout and also served as a U.S. Army Aircraft lookout site during WWII. It is one of the only fire lookouts in the area that I know of that you can drive all the way up to see.  That is, if the gate is open, I’ll explain more about that below.  However, suffice it to say, even if the gate is closed, it’s a short hike to incredible panoramic views!  

    Getting to Suntop Lookout

    From the town of Enumclaw, head east on SR 410 for about 24 miles. About 6 miles after you pass through the town of Greenwater, you’ll make a right onto Forest Service road 73 (FS 73). It is the first right after passing the winter chain-up area.

    Follow FS 73 for a little over a mile before you make a left on to FS 7315.  Continue up forest road 7315 for about 6 miles before reaching Suntop Lookout. 

    *Please note that the gate to Suntop Lookout may be closed about a mile below the lookout. If this is the case, you’ll need to park below the gate and hike up the road or the trail just below the gate.

    Recreational Pass Required

    A Northwest Forest Pass is required to visit the Suntop Lookout and picnic area.  I did not see a pay station along the road either, so you’ll want to purchase your recreational pass before driving up. You have the option to buy a $5 day pass or a $30 annual pass.

    What Kind of Vehicle Do You Need?

    Road Conditions:

    The road to the Suntop Lookout is a mostly flat gravel road.  However, there are some very deep potholes and in one section of the road, some pretty deep grooves created by water rushing down the mountain.   

    Cars

    I recommend you have an AWD vehicle or one with some ground clearance.  That said, I did see people up there with minivans and small sedans.

    Motorcycles

    This is the option my hubby and I chose.  It is easy to swerve around potholes and makes for a fun ride unless, of course, you’re stuck behind a car choking on dust.  Okay, even then, we have fun! If you have a road-licensed dual-sport or motorcycle set up for off-road riding, this is a great option.  I even saw a couple of Harley riders up here.  However, I wouldn’t recommend a street bike.

    One thing to consider when riding up on your motorcycle is that if the gate is closed, you will need to hike up the rest of the way in your gear.  Plan ahead and make sure you have boots and clothing you’ll feel comfortable hiking in.  We did it with our gear, but it was hot and less than ideal, but do-able.

    Mountain Bikes

    This area is very popular with mountain bikers. We saw some people who had their bikes transported to the gate, and then cycled to the top from there and then back down.  However, others made the entire ride up, which I thought was pretty impressive!  From what I have learned, there are a bunch of excellent mountain biking trails in the area near Suntop Lookout.

    Best Time to Visit Suntop Lookout

    Summer & Fall:

    Summer and early fall are when most people will want to visit Suntop Lookout. The road is typically free from snow during this portion of the year and, therefore, the most accessible. It is also a drier and more pleasant time of the year to visit Suntop. 

    Spring:

    Depending on the snowpack from winter, the road will most likely still have snow.  My hubby and I tried riding our motorcycles up one year over Memorial Day Weekend and hit snow about 2 miles below the summit. It depends on the year, but if you want to be able to drive all the way up, or at least to the gate, then summer would be my recommendation for when to come.

    Winter:

    I have not attempted visiting Suntop Lookout during the winter, but I read that it is a popular snowshoe and cross-country ski destination. Many people snowshoe or ski up the road in the winter.  You will need chains and an AWD vehicle to access the sno-park during winter.

    Hiking to Suntop Lookout When the Gate is Closed

    If you find the gate across the road on your way up to Suntop, don’t worry, it’s only a short hike to the top from here. From the gate, you have two options for hiking to Suntop: walking up the road or taking the trail. Either option will take around 30-40 minutes at a slow, steady pace before reaching the top.

    Walking Up the Road

    If you hike up the road, you’ll have an easy but steady incline to the top. Hiking the road is my recommendation if you have any mobility issues that might make it hard when walking on a narrow trail with lots of loose rocks.  The road has less shade on hot days, so make sure to bring a bottle of water before making the walk up. It is about 0.8 miles to walk from the gate to the Suntop Lookout via the gravel road.

    A hiker walking up a trail.
    Jake is hiking up the trail just past one of the Mt Rainier viewpoints you’ll see along the way.

    Hiking the Trail to Suntop Lookout

    There is a trailhead just below the gate on the left side of the road (when facing the gate).  It is only a 0.5-mile hike to the lookout via the trail. The trail to Suntop is narrow, and there are a lot of loose rocks along the path.  I would still classify the hike up the trail as easy. However, due to the narrow trail, loose rocks, and sometimes steep incline, I think it is best for individuals without mobility issues and are in reasonable shape. I also recommend bringing hiking poles. That said, I passed small children and families along this trail that appeared to be traversing it without issue.  

    When hiking up the trail, you’ll pass a small, rocky trail shortly before reaching the top. This trail is a shortcut to one of the best views of Mount Rainier along this hike. The little trail leads you up to the road where you can get unobstructed views of Mount Rainier before continuing to the lookout.  You can also choose to stay on the main trail, which will curve around and lead you to the lookout first. Then, before heading back to your vehicle, you can walk down the road from the lookout to see gorgeous, unobstructed views of Mt Rainier.

    A hiker walking down a road toward Mt Rainier
    Jake was walking the short walk down the road from the restrooms at Suntop to the unobstructed views of Mt Rainier.

    Advantages of Each Option

    The advantage of the trail is that it is a slightly shorter hike up, and you have a little more shade on sunny days. The advantage of the road is that it is wide, mostly flat, and provides plenty of room for groups to pass and take breaks as needed.

    The road to the Suntop Lookout is also a popular mountain biking route, so you may encounter mountain bikers coming down either the road or the single track trail.  There isn’t much room to get out of the way when they come down the path, but do your best to pull over where it is safe to let them pass.

    What’s At the Top?

    Restrooms:

    You’ll be happy to know that there is a vault toilet just below the lookout and adjacent to the picnic area.

    Picnic Tables:

    There are picnic tables just past the vault toilets.  There is also another picnic table near the lookout. It is a beautiful place to sit and enjoy a picnic lunch with a view. 

    Views at Suntop Lookout

    Hike up to the lookout for 360-degree views of Mount Rainier and the surrounding mountain ranges. Mount Rainier is only 10 miles to the south, and on a clear day, you’ll enjoy views of the central Cascades, Olympic Mountains, and just maybe (and with the aid of binoculars) get to see Mount Baker! If you’re lucky enough to visit when there’s a forest ranger present, you may get a chance to see inside the lookout.  However, even if it is closed up when you visit, the views from the lookout are worth the trip!

    Suntop Lookout Photography

    Suntop lookout is an excellent spot for sunrise and sunset photos.  Look at the forecast the week you want to visit and then see if you can plan for a day with clear skies.  Both sunrise and sunset will provide stunning photo opportunities with the gorgeous colors of the sun reflecting off snow-capped Mount Rainier.  After dark, you can practice your astrophotography and enjoy stargazing at the summit. 

    What to Bring for the Hike

    Picnic Lunch & Snacks: Although it’s a short hike, you might as well make the most of it by enjoying a picnic at the top.

    Water: Water is always a good idea.  It gets hot at the summit during the summer, so having some extra water with you will help!

    Bug Spray: The mosquitoes weren’t bad when we visited. However, they can be depending on the time of year, so I’d bring bug spray just in case.

    Hiking Poles: These are especially useful if you hike up the narrow trail.

    Layers: Depending on what time of year you visit, you may want to bring extra layers. If you chose to come up for the sunset, you’d need layers for when the sun goes down as it can get quite cold.

    Downloaded Offline Map: I always like to have an offline map when I’m going off-road just in case I lose my way.

    Recreational Parking Pass: A Northwest Forest Pass is required at Suntop Lookout.

    Things to Do Nearby

    Places to Eat

    Greenwater Outfitters:  58410 WA-410 east, Enumclaw, WA 98022

    Enjoy lunch at Greenwater Outfitters or pop in for some delicious ice cream.

    Wapiti Outdoors: 58414 WA-410 E, Enumclaw, WA 98022

    Stop in at Wapiti Outdoors for some fantastic coffee and ice cream. If you’re lucky to visit during huckleberry season, make sure to try a huckleberry milkshake. They also have a great selection of t-shirts and outdoor gear.

    Naches Tavern: 58411 WA-410, Enumclaw, WA 98022

    If you’re looking for a bite to eat and something cold to drink after a day of hiking, stop in at the Naches Tavern. 

    Camping

    Dispersed Camping:

    Dispersed (free) camping is allowed in the Mt Baker-Snoqualmie National Forest around the Suntop Lookout area. There are no toilets provided. Follow “leave no trace” principles and clean up your site before leaving. In addition to dispersed camping off of FS-73, if you travel 5 miles past FS-73 on SR-410, you’ll come to NF-7160. Make a right here, and you’ll find more dispersed camping by the Ranger Creek Airstrip.

    Established Campgrounds near Suntop:

    There are also so many other great trails in the area, such as Snoquera Falls, Skookum Flats Trail, and many more.  Plus, you are a short drive to the White River entrance at Mount Rainier National Park.  Why not make it a weekend adventure! I love visiting the Sunset visitor center at Mount Rainier and camping at the White River campground.  

    Here are a couple of articles to get you started planning.

    Happy Trails!
  • Hiking to Spray Park & Falls: My Beautiful Misadventure

    The Spray Park trail and Spray Falls have been on my list of hiking to-dos for years.  The Spray Park trail checks off all my hiking favorites.  It has an alpine lake (Mowich Lake), waterfalls, stunning views, and wildflowers. Plus, I get to see snow in August! It is easy to see why this trail and area of Mount Rainier is so popular. So when I read that the road to the trailhead parking lot was open, I knew I had to go!

    I’ll tell you about my experience hiking to Spray Park and also give some tips and advice on what to bring. Make sure to read over the Know Before You Go, What to Pack, and Additional Tips sections before your trip as they will help you be a little better prepared than I was my first visit here. 

    It may take some extra effort to get to this corner of Mount Rainier, but Mowich Lake and the surrounding area is known for its stunning beauty and outstanding hikes, and it is well worth the effort! 

    Here’s a video montage that gives an overview of my hike to Spray Falls.  You can continue reading about my day below as well as my tips for what to know and how to get there.  You can also click on the links above to jump to each section.

    My Experience Hiking to Spray Park & Spray Falls

    The Drive Up

    I leave my house around 6:45 a.m. I have 2 hours to go before I reach the Mowich Lake parking lot. It is a Tuesday morning, so I hope that it won’t be too busy when I arrive.

    As I drive through the small town of Wilkeson, I think how it looks like a set from an old western. I make a mental note to come back another day to explore the town. 

    After passing through Wilkeson (which has the last gas station along this route), I pass through the town of Carbonado and eventually cross the anxiety-inducing Fairfax bridge.  It is a one-lane bridge suspended high above the canyon, and honestly, it looks a bit rickety, but I go ahead and trust its stability and cross it safely.

    Where the Pavement Ends

    Not long after Fairfax bridge, the pavement ends.  It’s less than 17 miles to the parking lot on this stretch of dirt road, but it will take me almost an hour to get there.  I am in an SUV, but even so, I keep my speed around 20-25 for most of the road. There is a section that is labeled “30 mph,” and it is still very rough. 

    Additionally, I am driving in the direction of the sunlight, so it hits my dirty windshield as I go in and out of the shadows, making it difficult to see.  This part of the drive up is the hardest, but on a clear day, the views of Mt Rainier help to pass the time.

    Mt Rainier from Hwy 165
    This is one of the views on the drive to Mowich Lake.

    I pass by the Paul Peak Trailhead and pay station, I already have an annual national park pass, so I do not need to stop.  I’ve only got another 5 miles to go before arriving at the Mowich Lake Parking area.

    It’s about 8:30 a.m. when I reach the Mowich Lake parking lot. I count at least 20 cars already parked here, but there is still plenty of parking spaces available. I gather my gear and make a quick stop at the pit toilets. They are clean and include hand sanitizer. I grab my camera bag, which doubles as my day pack and head to the trailhead.

    Hiking to Spray Falls and then on to Spray Park

    I walk to the Spray Park trailhead just past the pit toilets, and I notice the trail sign says it’s only 6.0 miles roundtrip to Spray Park. My guidebook and other online sources state that it is 8.0 miles roundtrip. The distance you hike depends on how far into Spray Park you want to go. There is no “you’ve arrived” sign, you hike as far into the meadow as you feel like before returning. The further up you go, the better the views.

    The trail gradually descends into the forest, and soon I cross a small creek.  I love the sound of the water as it makes its way over the rocks. The sights, sounds, and smells of the forest are comforting, and it makes me smile. It feels so good to get away and unplug! 

    Eagle Cliff Viewpoint
    My view while at the Eagle Cliff viewpoint.

    Eagle Cliff Viewpoint

    At about 1.5 miles into the hike, I come to the Eagle Cliff viewpoint. Make sure to stop here, it’s only an extra 100 feet of trail, and on a clear day, it has some beautiful views of Mt Rainier.  I enjoy a mostly clear view of the mountain during my stop.

    After taking some photos, I continue along the main trail, and about .25 mile past Eagle Cliff, I come to the junction for Eagle’s Roost camp.  The campground goes to the right, but the trail for Spray Falls and Spray Park continues on the left. I follow the sign for “water .10 mile,” and soon, I cross another wooden bridge and look up to see a series of small cascading waterfalls flowing over mossy rocks. It’s so beautiful. 

    Shortly after this creek crossing, I arrive at the trail junction for Spray Park and Spray Falls. I head right to take the path toward Spray Falls as I want to stop and see the falls before heading up to Spray Park.

    mossy rocks and cascading waterfalls at spray creek
    A series of small cascading waterfalls shortly before the Spray Falls trail junction.

    Spray Falls

    I’ve seen photos of Spray Falls, and many of them showed people right next to the waterfall.  However, I’m not sure what time of the year they visited as this was not possible during my hike here. There was so much water coming down the mountain that I was unable to cross the rushing water to get unobstructed views of the falls. 

    I was disappointed but unwilling to risk getting my camera gear wet or worse for a better shot.  I will try again at a different time when there isn’t so much water rushing down the mountain.

    Spray Falls at Mt Rainier
    Spray Falls in the distance.

    Spray Park

    I make my way back to the main trail and start my climb up to Spray Park.  The trail sign at the Spray Falls junction says it’s .8 miles to Spray Park. This is where the trail rating turns from “easy” to “moderate.” 

    I read somewhere that there is only a 600-foot elevation gain for the hike to Spray Falls. However, the hike to Spray Park has a 1700 foot elevation gain. It feels like the majority of that is in this .8 mile hike to the entrance of Spray Park. 

    As I climb upward, I’m serenaded by the sounds of Spray Falls in the distance. Soon though, I no longer hear the falls as I continue my climb up to Spray Park.  “Slow and steady wins the race,” I tell myself, and soon I arrive at a log footbridge, which marks the entrance into Spray Park. 

    The entrance to Spray Park at Mt Rainier.
    The entrance to Spray Park at Mt Rainier.

    I chat with a dad and daughter who stop by the log bridge for a break. They offer to take a photo for me with my phone, which is nice as typically, I don’t get pictures of myself on these solo excursions.  We realize, though, as we stop that the mosquitoes are worse here, and no one wants to linger here too long. Soon the dad and daughter leave to continue their hike into Spray Park.  

    I take a few photographs, and eat a snack and then continue following the trail up.  It winds its way through some scattered trees and maintains a steady, but not too steep climb upward.  Soon I get views of Mount Rainier on the right and views of Mt Pleasant and Hessong Rock on the left. 

    A hiker with Mt Rainier in the background.
    A photo a fellow hiker volunteered to take with my phone.

    Alfred Hitchcock’s “The Birds”

    I see a hiker headed my way, and I move to the side to let her pass. As she passes, she tells me there are more beautiful views to come–but, she says, the mosquitoes are “ferocious!”  Yes, that was the exact word she used.

    She said they get “much worse.”  She planned to eat lunch further up in Spray Park, but the mosquitoes were so bad she decided to hike back to Mowich Lake.  Great! I thought glumly, as I tend to be a bug magnet.  If there’s one bug in the room, it’s going to find me!  Now, I wish I’d have brought the can of bug spray with me so I could re-apply. 

    Despite the warning, I continue hiking further into Spray Park, hoping to find “the view.” I love the wildflowers dotting the meadow with beautiful colors!

    Spray Park trail with wildflowers on each side.
    The Spray Park trail continues upward, surrounded by wildflower.

    A little further up, I chat with another dad and daughter on their way back to Mowich Lake.  The dad said he’s hiked this trail before and saw seven bears, but this time not a single one.  They did get to see some goats, though, so that sounded pretty neat!  I love meeting people on the trail and seeing others out enjoying nature and life. I say my goodbyes to the dad and daughter and continue hiking a bit further into Spray Park.

    It’s Lunch Time, and I’m on the Menu

    It’s about a quarter to noon, and I’m hungry, so I decided to stop for a quick lunch break.  I put my bag on the ground to get my water and sandwich, and as I do, a swarm of mosquitoes lands on my backpack.  There’s not even any blood for them to get out of my pack!  

    Of course, they land on me as well, and I do my best to swat them off while trying to take a quick drink and a bite to eat. (Again, if only I’d have brought the bug spray with me!) This lesson will stick with me for about a week as the swelling and itching finally dissipate.

    It’s like Alfred Hitchcock’s movie The Birds, except replace birds with mosquitoes and you’d have a pretty accurate description of my experience.  

    I quickly zip my bag up and decide I too will not be lunching here. I put my pack on, take a few more photos while the mosquitoes make a lunch break out of me, and then decide I’ve got my views for the day. I’m heading back. I couldn’t stop for 5 seconds without being attacked. It just isn’t enjoyable any longer.  I did, however, enjoy the views and beautiful flowers. I even saw a patch of snow, but the bugs…

    The Bee & The Magic Hat

    I descend back into the trees, and soon I pass the junction to Spray Falls and continue toward Mowich Lake.  It’s around the Eagle Cliff viewpoint that a bee decides it wants to chase me.  I try to ignore it, I wave my hand at it, it flies towards my face, and I try to swat it away without making it angry. It does not want to leave me alone!  

    So, I start running. I figure if I run a little way down the trail, it will lose interest.  Nope.  It did not. It kept coming at me.  The last thing I want right now is to get stung by a wasp.  

    I hear voices up ahead, and I jog toward them,  a man and woman come into view, and I say, do you have a hat? I have a bee chasing me.  The woman says, “a hat?”  “Oh, you mean to swat at the bee?”  I say, yes!  So the man graciously takes his hat off, and you know what?  As soon as he takes his hat off, the bee flies away!  I am not kidding!  

    It was quite funny, and we all laughed about his “magic hat.”  Then they tell me a story of when they were hiking years ago, and a bee flew up his wife’s nose!  It sounded like a horror story to me, but she lived, although she did get stung.  I am very thankful the bee left me, but I still heard phantom buzzing noises for a while after I continued down the trail.

    spray park trail hessong rock
    Spray Park trail with views of Hessong Rock.

    The Flat Tire

    It takes about an hour for me to hike back to the Mowich Lake Campground from Spray Park.  I am tired and a little hungry, but happy to be away from the mosquitoes.  As I walk over to my car, I discover that I have a flat tire.  I must have run over something on the way up.

    I make a stop at the restrooms before changing my tire. As I’m walking back to the car, the dad and daughter duo that I spoke with earlier about seeing the goats spot me and say hi and ask me about my hike.  

    We chat for a bit, and then I walk over to change my flat tire.  I’ve never actually changed a tire on my SUV before. It takes me a little bit to figure out how to lower the tire from underneath the vehicle.  I do that, but I am not sure how to now detach it from the cable it is on. 

    I decided to ask the man I chatted with moments before for help. They were driving past my vehicle to leave for home when I stopped them to tell them about my situation. The man quickly parks his truck and very graciously helps me get the spare tire out from underneath the vehicle and then proceeds to change my flat tire.  I am so thankful he stayed to help too as he mentioned the lug nuts were on really tight, and he had a hard time getting them loosened.  I am so grateful for the kindness of strangers!

    Mowich Lake in the morning.
    Mowich Lake is a beautiful, clear alpine lake.

    Conclusion to My Hiking Experience

    I made it home safely but stopped in Wilkeson to air up my spare tire as it also appears to be losing air. All in all, between being eaten alive by mosquitoes, chased by a bee, and getting a flat tire, I’m not sure I’d do it again if I had to pick those exact circumstances, but I don’t regret going either.  

    So would I recommend you make the trip to Mowich Lake?  Absolutely! The hike to both Spray Falls and Spray Park is beautiful, the wildflowers are stunning, and Mowich Lake is a serene alpine lake accessible by car. I would not want to discourage anyone from going, only to suggest you plan ahead and don’t forget to pack bug spray for the hike! 

    In addition to applying bug spray in the parking lot, next time I will also bring it with me on the hike.  Read my tips on what to pack and how to be better prepared than I was before leaving home.

    Getting to the Spray Park Trailhead

    The trailhead for Spray Park is in the northwest corner of Mount Rainier National Park in the Mowich Lake campground. As I previously mentioned, you’ll have an almost 17 mile stretch of gravel road leading up to the parking area. The road ends at the parking lot for the Mowich Lake campground.  Whether you’re coming from Seattle, Tacoma, or Bellevue, the drive will take approximately 2 hours.  

    Driving Directions

    From the town of Wilkeson, you’ll drive south on Highway 165 for about 9 miles before coming to a fork in the road.  Stay to the right of the fork and continue south toward Mowich Lake.  Soon after the road turns into a dirt road, continue along this main road, and in about 9 miles, you’ll come across the Paul Peak Trailhead and pay station.  Stop here if you do not already have a National Parks pass.* You only have about another 5 miles to go from the pay station before you reach Mowich Lake. The road ends in the parking lot.

    *Please note the Washington Discovery Pass and the Northwest Forest Pass are not the same things as the National Park pass, you need to pay an entrance fee to be within the Mount Rainier National Park boundary.  Purchase online ahead of time or stop at the pay station mentioned above.

    Know Before You Go

    Best Time of the Year to Go: July to October

    The road to the Mowich Lake parking lot and Spray Park trailhead is typically only open from mid-July to October. 

    Fees: $30 for a 7-day park pass/$55 for an annual park pass

    You can purchase your national park pass ahead of time online, or you can stop at the pay station on the way up.  The pay station is at the Paul Peak trailhead.  You will see signs telling you to stop and pay.  If you already have a pass, just keep going up the road.

    Road Conditions: The last 17 miles of the drive to the trailhead parking area is on a dirt road.  

    The road is rough and has potholes and washboard conditions along the way—plan for this section of the road to take about one hour to complete. Recommended speeds range from 15-30 mph, depending on the conditions and the vehicle you are driving in. Cars and SUVs alike will have no issue making it. Just take it slow.  On a clear day, you’ll have views of Mt Rainier for the drive up.

    Fuel Up: Make sure to fuel up your vehicle ahead of time. 

    The town of Wilkeson is your last stop for fuel on the drive up.

    No Cell Service: There is no cellphone service in this area of the park. 

    Most people will lose cellphone signal in one of the small towns like Wilkeson before you ever hit the dirt section of the road.  Let someone know of your hiking plans, so in case of an emergency, they will know where to look.  This is always a good idea when hiking in the mountains.

    No Pets: Pets are not permitted on any of the trails within Mount Rainier National Park.

    No Potable Water Provided: There is no potable water for the Mowich Lake trailheads or campground.  

    You need to bring enough drinking water with you or a filtration system to filter lake or creek water.

    Check the Park’s Website for Alerts: Always check with the park to find out if there are any alerts for road closures or weather alerts you need to be aware of before your trip.

    What to Pack for Your Hike

    • Bug spray: Do not leave home without it! Bugs are notoriously bad at Spray Park, read my experience below, and make sure to apply and re-apply as necessary. You may also want to bring a mosquito net for your head.
    • Layers: I hiked this on a warm August day and didn’t need more than my t-shirt, but I still packed a sweatshirt just in case. Depending on what time of year you are here, you may need more layers, and in case you’re ever stranded on a hike, the extra layer may be a lifesaver.
    • Water: There is no potable water, so make sure to pack enough water for your hike, lunch break, and for the ride back down the mountain. 
    • Food: Make sure to pack snacks and food to keep your energy up. I like to bring snacks I can eat on the go and then a sandwich for my lunch break. 
    • First aid kit: It’s always good to have a first aid kit with you, in addition to that I also like to make sure I have moleskin when I’m hiking or backpacking, just in case I or someone in my group gets a blister. 
    • Buff/Bandana: I like the buff I purchased at REI as you can use it as a bandana, hat, face mask, or neck gator. A bandana will also work for most of those situations too.
    • Bear spray: You are hiking in bear country, and your odds of seeing a bear while hiking to Spray Park is pretty good.  So I recommend bringing bear spray, and if you’re by yourself, consider also getting a bear bell or calling out now and again to announce yourself.  
    • Hiking/Trekking Poles: These are optional, but useful for crossing small creeks and for keeping your balance over the rocky terrain and roots on the trail.
    • Sturdy Hiking Shoes: You may want hiking boots, or you may feel comfortable with good trail shoes.  Either way, make sure they’re comfortable and give you enough support.  Then pack a pair of flip flops for, after the hike, I always find my feet like to breathe after a hike.

    Prepare for the drive: Roadside Tools 

    Make sure your car is equipped with the necessary emergency roadside tools and make sure you know how to use them. Bring a tire pressure gauge, jumper cables, and a portable air compressor if you have one.

    Additionally, I recommend you check your tire pressure before leaving town and also make sure your spare tire is properly aired up. 

    Spray Falls Hike Overview

    Distance: 4.0 miles, round trip

    Difficulty Level: Easy

    Approximate Hiking Time: 1.5 hours to 2.5 hours

    The hike to Spray Falls is a mostly level hike with some smaller rolling hills. There is no significant elevation gain for this hike. The trail is narrow for most of the hike, and there are a lot of roots and rocks embedded in the path. If you have significant issues with your balance, the trail might not be a suitable choice.  However, for most people, including families with children, this hike should be a relatively easy hike accomplished in a few hours.

    Hiking to Spray Falls

    Start at the trailhead for Spray Park. You’ll find the Spray Park trailhead on the right, just past the pit toilets at the Mowich Lake Campground. The trail gradually descends into the forest, and soon you’ll cross a small footbridge over Lee Creek.  At about .2 miles into the hike, you’ll come to a trail junction for the Wonderland Trail. Continue to follow the trail signs for Spray Park. 

    About 1 mile past this trail junction, you’ll come to the Eagle Cliff viewpoint. You’ll see a small trail sign pointing to the right.  It is only 100 feet off the main trail.  I recommend stopping here for a quick look.  On a clear day, you’ll have incredible views of Mt Rainier and the Mowich glaciers. 

    After stopping at the Eagle Cliff viewpoint, continue on the main trail for about .25 miles where you’ll arrive at another trail junction. The trail sign will point right for Eagle’s Roost Camp, and to the left, it shows water .10 miles.  Stay to the left of the fork to continue to Spray Falls. 

    Soon you’ll reach the trail junction for Spray Falls. You’ll see a sign that points to the right for Spray Falls viewpoint .10 miles.  Take the trail on the right and follow this until it ends at the viewing area for Spray Falls.  

    Retrace your steps to return to Mowich Lake, or continue to Spray Park if you prefer a longer and more challenging day hike.

    Spray Park Hike Overview

    Distance: 6.0-8.0 miles, round trip

    Difficulty Level: Moderate

    Approximate Hiking Time: 3.5 hours to 5 hours

    The hike to Spray Park is moderately challenging.  However, I feel if you’re in reasonable shape, it should be one you can manage with relative ease.  For some comparison, if you’ve ever hiked to Poo Poo Point, I find the uphill gain to be similar to Spray Park.  The real uphill climb starts at the junction for the Spray Falls viewpoint. This is where the trail switches from easy to moderate difficulty. 

    The trail is narrow for most of the hike, and there are lots of rocks and roots and a variety of creek crossing, so I recommend sturdy hiking shoes and hiking poles will also be helpful, especially if you have troublesome knees.

    The park trail sign shows 6 miles roundtrip; however, my guidebook shows 8 miles roundtrip.  That is because Spray Park is a large area, and how far you choose to hike into Spray Park will determine how long your hike is.

    Hiking to Spray Park

    Follow the directions above for Spray Falls until you reach the junction for Spray Park and Spray Falls. From the junction for the Spray Falls viewpoint, the trail sign shows .8 miles to Spray Park.  This distance brings you to the beginning of Spray Park. You’ll know when you’ve reached it as you come into an open area and begin moving outside of the treeline into an alpine meadow. 

    You’ll soon have views of Hessong Rock and Mount Pleasant to your left and views of Mount Rainier to your right. You can hike an additional mile or so further to see more viewing areas, depending on how you feel or how far you wish to go. 

    Depending on the time of year that you go, if you hike far enough into Spray Park, you will come to the area known as Seattle Park.  Snowfields often surround this area, and I’ve read in the earlier months that hikers often get lost in the snowfields.  I was here in August during a heatwave, so that wasn’t an issue, but be cautious and play it safe if you come when it is snowy, it’s better to turn around than to get lost.

    After enjoying your time in Spray Park, head back the way you came to Mowich Lake campground.

    Camping near Spray Park

    You have a couple of campground options if you want to turn your day hike into an overnight trip.

    Mowich Lake Campground

    Mowich Lake campground is a walk-in, tent sites only, first come first served primitive campground. The walk from the parking lot to the campsites is a short one, though, and they provide a wheelbarrow to help you carry your supplies from the car.   The tent sites are set around a dirt circle, and there is no privacy between campsites. Bear boxes are provided for your food and gear.

    What this campground lacks in amenities and privacy, it makes up for in beauty and location. Mowich Lake is a gorgeous alpine lake!  You can bring your SUP or kayak and enjoy time in this serene mountain setting. It is also a fantastic base camp for hiking trails in the area.

    • Fee: There is no fee to camp here. Campers self-register at the campground, and no wilderness permit is required.
    • No Fires Allowed
    • Pit Toilets
    • No Potable Water (You must pack your water in, or bring a filter to filter lake or creek water.)

    Eagle’s Roost Camp

    This backcountry camp is an excellent place for a beginner backpacking trip or an overnight family backpacking trip.  The camp is located about 2 miles from the Mowich Lake campground, and it takes approximately one hour to hike there. There are seven campsites with bear poles provided for hanging your gear. Remember, you are in bear country, so make sure to take the necessary steps to keep yourself safe.

    • Fee: $20 per trip (good for up to 14 days). You also need a wilderness permit to stay here.
    • No Fires Allowed
    • Pit Toilets
    • No Potable Water (You must pack your water in, or bring a filter to filter lake or creek water.)

    Additional Tips for your Trip & Other Articles You Might Enjoy

    Come during the week to avoid the crowds.  If you do come on a weekend during July and August, plan to arrive early in the morning. This gives you the best chance to get a parking spot and completing the hike before the crowds come.

    Sometimes it is easy to think “I’m not going that far” and, therefore, not perform vehicle checks you might otherwise do for a more extended road trip. However, anytime you’re going to drive up a mountain or be out of cell service range, it’s good to make sure you are adequately prepared! Also, make sure to let someone at home know where you’re going and what your hiking plans are, just in case of an emergency.

    Other articles for things to do in Mount Rainier National Park:

    Have fun and create beautiful memories!

  • Twin Falls Hike: A Short Hike With Gorgeous Views

    Are you feeling a little stir-crazy? Do you need a good day hike to shake off some winter blues?  Well, that’s how I felt after what seemed to be a never-ending winter and a cold and rainy start to our summer in Seattle. I was ready to get outside and soak in the beautiful sunny day we finally had.  So I headed for one of my favorite waterfall hikes close to home, the Twin Falls hike near North Bend, Washington. 

    The Twin Falls trail is a beautiful path that winds its way along the river and through the trees (sorry no Grandma’s house) before leading you to spectacular waterfall views! I’ll tell you all you need to know to get there and as well as some tips, so you don’t extend your hike further than you want to.

    Useful Things To Know Before Getting Started

    • You need a Discover Pass to park at the trailhead for the Twin Falls hike.
    • You can purchase a day-use pass at the trailhead or buy ahead of time.
    • Bring bug spray, depending on what time of year you visit the mosquitoes can be quite bad.
    • Twin Falls is a popular trail, so if you plan to go on a weekend, be prepared for crowds and limited parking. I recommend you come on a weekday if possible, and try to get an early morning start.  Even on a weekday during the summer, the parking lot is often full by noon.
    • There are pit toilets with hand sanitizer provided.
    • I found it easy to follow social distance guidelines along this hike. However, on crowded days, you may want to wear a mask when passing other hikers if you are unable to follow social distancing guidelines.

    Hiking the Twin Falls Trail

    The Twin Falls trail is about 3 miles round trip from the trailhead to the Upper Falls Viewpoint. 

    If you have ever hiked the Franklin Falls trail near Snoqualmie Pass, I will share my thoughts on a comparison of the two. I have hiked the Twin Falls trail and Franklin Falls trail multiple times. I love the ability to get up close to the waterfall at Franklin Falls, but I think Twin Falls is the prettier hike.  You get more access and views of the river along the way, plus the forest opens up a lot more than with the Franklin Falls trail.  

    That said, Franklin Falls is the easiest of the two trails. So depending on your physical shape or the age of those hiking with you, be aware that hiking to Twin Falls is the more challenging hike. 

    It is still a fairly easy to moderate hike, but you will have some steep inclines along the way, and over 100 stairs to descend and ascend to see both waterfall viewing areas.  Take it slow, there are lots of places for breaks along the way and enjoy the journey!

    Starting at the Main Trailhead

    Starting from the main trailhead, you will begin your hike with almost immediate views of the river below.  If you’re itching to dip your toes in the water, don’t worry, you’ll have plenty of opportunities to do that later along the hike. Follow the trail as it winds its way down a hill and into the forest.  You’ll soon cross a little bridge (above photo).  After you cross the bridge, you’ll reach an area with easy access to the river.  

    There are several stops along the way with good river access. Huge boulders are separate the river into small pools. These are good for dipping one’s feet in to cool off on a hot summer day or letting the dogs have a little fun splashing around.

    Benches With a View

    As you continue along the trail, you’ll hike through narrow parts where the foilage crowds the path on either side.  Then you’ll come into large open areas with giant trees looming all around.  Make your way up a series of switchbacks before arriving at a resting point.  You’ll climb a steep switchback to arrive at a set of benches that offer your first glimpse of the upper falls. 

    The benches are a beautiful place to stop and rest.  There is usually a breeze blowing here, so in the summer, it is a refreshing place to sit and cool off.  However, in the colder months, you may wish to bundle up or only stop for a short break if it’s really windy.

    The Big Tree by the River

    When you’ve finished resting at the benches, follow the trail as it descends back down into the forest.  Near the bottom of the hill, you’ll come across a huge tree looming tall, not too far from the river’s edge.  Stop to take photos with the big tree and if you want you can also take another break by the river. I just love all the beautiful trees along this trail!

    Lower Falls Viewpoint

    After you leave the big tree, continue hiking upward to where it levels off, and before long, you’ll see some stairs that fork off to the right.  These stairs will take you down to the Lower Falls viewpoint. 

    This viewpoint, in my opinion, is the best one along the trail.  So make sure to either stop on your way to the Upper Falls Bridge or hike down to it on your way back.  Whichever you choose, you don’t want to miss it! I know hiking down and back up over 100 stairs may not seem worth the effort, but I assure you, it is!

    Upper Falls Viewpoint & Turnaround Area

    As you pass the stairs to the Lower Falls viewpoint, you’ll soon see a large bridge zigzagging through the trees.  There’s a clearing on the bridge providing views of the valley on one side, and the upper falls on the other.  If you want to continue past this point, you can hike a little further up to a small viewing area with a slightly closer view of the upper falls.  

    upper falls bridge
    The wooden bridge viewing area for the upper falls.

    From here, you will turn around and head back in the direction you came.  If you were to continue past this viewpoint and up the trail, it would take you to the John Wayne Trail/Iron Horse Trail that leads to the alternate trailhead I mention in the “Getting Here” section.

    Warning: Don’t make the mistake of passing the upper falls viewing area and thinking the trail will loop you back to the main trailhead.  I had a few families who started to pass me going further up the trail, and I asked them if they had parked at the Homestead Valley Road trail or not.  They had not, but mistakenly thought the trail continued on and somehow lead them back to the main trailhead off Exit 34.  There is no need to hike further (unless you want to) once you’ve seen the Upper Falls.

    Enjoy your hike back to your car, and if you didn’t take time to stop near the river, the walk back is a great time to do it.  I enjoyed having a snack break there, listening to the rushing water, and smiling as I saw a family further up the river enjoying their time together.

    Getting to the Twin Falls Trailhead

    The Main Twin Falls Trailhead:  SE 159th St, North Bend, WA 98045

    1. Take I-90 east to exit 34
    2. Turn right off the exit ramp onto 468th Avenue SE
    3. Drive about half a mile and make a left onto SE 159th Street.
    4. Follow the road until it dead-ends in the Twin Falls parking lot. (You will need a Discover Pass to park here.)

    Alternate Hiking/Parking Option:

    If the main Twin Falls trailhead parking is full, you can also hike to the falls coming from the opposite direction. The hike will be different than what I describe below, but if you drive out there and discover the main trailhead is full, this gives you an alternate option.

    1. Take I-90 east to exit 38
    2. Turn right off the exit onto SE Homestead Valley Road. Drive about 0.10 miles and make your first right, you’ll see a sign for Olallie State Park that lists various trails
    3. Follow this dirt road for a little over a quarter-mile, stay left as you pass two forks in the road along this route.
    4. You will park near the trailhead junction for Iron Horse Trail.
    5. Follow the Iron Horse Trail (may also see signs for John Wayne Pioneer Trail) for about a third of a mile before it connects with the Upper Twin Falls trail. 
    6. Once you reach the Upper Twin Falls and the big bridge, you’ll just need to hike a little further down where you’ll find stairs on your left, leading you to the Lower Falls viewing area.

    Read the following articles for more waterfall fun:

  • Spokane’s Georgeous Riverfront Park & the Numerica Skyride

    It’s incredible to me how many times I visited Spokane or drove past the city without ever stopping at Riverfront Park. It is one of the main attractions in this Eastern Washington city, and yet I hadn’t visited it!  Well, recently, during a visit to see some family, I discovered what I’d been missing. 

    The Spokane Riverfront Park is a 100-acre urban park with trails for walking and biking, plus plenty of green spaces for just relaxing too.  There are sculptures, bridges, a historic clock tower, and the Numerica Skyride and Skate Ribbon.  

    The Numerica Skyride at Riverfront Park is a short 15-minute ride over part of Riverfront Park and then across the river where you get to see the lower falls from a bird’s eye view.  You feel the spray coming off the falls as your gondola glides past.  It is a fun and unique way to view the river, and I highly recommend you try it!

    COVID-19 Update and Changes

    Currently, in Washington state, we are in “Phase 2” of the COVID re-start timeline. Phase 2 means more businesses are allowed to re-open.  One of the businesses to recently re-open is the Numerica Skyride at Spokane’s Riverfront Park.  

    An attendant sanitizes each gondola before permitting you to board. It takes a little more time as you have to wait for them to wipe each gondola down before boarding, but they do their best to keep things moving.  They also have multiple hand sanitizer stations in the waiting area for you to use before boarding and when you disembark.

    They only board by individual family groups.  This is sort of a perk from the new restrictions as my hubby, and I had the entire gondola to ourselves, which allowed me to easily enjoy views from both sides without fighting for a good view.  Okay, no fighting would have occurred, but it was nice to have it all to ourselves.

    The Numerica Skyride also has the Skate Ribbon, which was still closed at the time of our visit. Typically though, you can rent skates or bring your own and then skate around their track. The skate ribbon looks like a miniature race track for cars, but instead, it’s for skating.  In the winter, they turn it into an ice skating rink.  Hopefully, soon it will also re-open, and people can enjoy this fun activity in Riverfront Park.

    The Numerica Skyride Experience

    Tickets and Hours:

    You’ll purchase your tickets inside the Numerica Skate Ribbon building. Visit their website for current ticket prices and hours of operation. You can also book your ticket online if you prefer.  The Numerica Skyride is wheelchair accessible. They offer a variety of discounts for those in the Military, Seniors (55+), AAA, and college students.

    The Ride:

    After they sanitize your gondola, you’ll enter with your group and take a seat.  There are two benches on each side of the gondola. There are also open window slats behind each bench as well as in the door.  So you not only have good air circulation, but you can also take photos through the slats and avoid the glare/reflections off the glass.

    If You’re Unable to Ride the Skyride

    I realize there may be many reasons why you might be unable to ride the Skyride at Riverfront Park.  Perhaps you’re afraid of heights, or you don’t like enclosed spaces, or maybe you don’t have the funds for it right now.  Whatever the reason, you still have the option to view the lower falls up close without taking the gondola ride. 

    Walk west past the Skyride and follow the overhead line of the gondola.  This path will lead you down a series of staircases that will take you to a viewing platform at the base of the lower falls.  You can look up and see the gondolas above you.  You’ll enjoy beautiful views of the falls from the ground level. 

    More Fun Things to do at Spokane’s Riverfront Park

    In addition to the Skyride, I highly recommend you take time to explore other areas of this 100-acre urban park. Strolling around scenic Riverfront Park is a great way to spend an hour or two.  There are signs throughout the park, pointing you in the direction of the main attractions, so it is easy to find your way. 

    Spokane Visitor Center, Rotary Fountain, & Looff Carrousel

    You can also stop at the Spokane Visitor Center and pick up some maps and get ideas for other sites to see during your visit to Spokane. Next to the Visitor Center, you’ll find the Rotary Fountain. Follow the path a little further east, and you’ll see the historic Looff Carrousel.  The Looff Carrousel is currently closed due to the COVID-19 restrictions. However, you can check here periodically to learn about its future re-opening date.

    Sculptures in the Park

    Admire the sculptures scattered around the park like the ones shown above commemorating the runners in Spokane’s Bloomsday Run. You can get a map at the Visitor Center that shows the locations to the various sculptures.

    Bloomsday Run Sculptures

    Garbage-Eating Goat

    Don’t miss seeing the Garbage-Eating Goat. It is an interactive sculpture designed by Sister Paula Mary Turnbull, also known as the “welding nun” Make sure to bring a piece of garbage to feed it. Press the white button on the right side and then place your garbage in the goat’s mouth and watch it disappear! Try only to feed it paper trash as it’s an old goat, and larger trash items will choke (I mean clog) it. The garbage eating goat is on the east side of the Looff Carrousel.

    metal goat sculpture

    The famous garbage eating goat.

    Pavilion at Riverfront

    The Pavilion is another unique attraction at Riverfront Park.  Built for the 1974 World Expo, it used to be covered by a large canvas material.  Later, it was redesigned and now looks like a work of modern architectural art. The cables are illuminated with colorful lights to create the free light shows displayed every Friday, Saturday, and Sunday.  

    Pavilion at Riverfront Park
    Looking at the Pavilion near the Howard Street Bridge.

    The Great Northern Clock Tower

    Make sure to visit Havermale Island and see the historic clock tower. Completed in 1902, the Clock Tower was a part of the Great Railroad Depot.   You can easily spot it as it towers above the park. This giant clock is still wound by hand every week. A person must climb five stories and then crank the clock 98 times to keep the giant clock operating. That’s a lot of work! 

    It’s strange as I didn’t even realize I was on an island when I crossed the bridge to admire the clock tower more closely. The clock tower is on Havermale Island. The island was a refuge to the people in Spokane while fleeing from the Great Fire of 1889.  Make sure to read the plaques scattered around Riverfront Park to learn more about its interesting history. 

    The Great Northern Clocktower

    The Childhood Express (also known as “the Big Red Wagon”)

    Kids and adults alike will enjoy this giant red wagon.  It’s not only fun to look at, but it’s also a slide that kids (and kids-at-heart) can enjoy climbing up and sliding down via the front handle. Underneath the wagon are monkey bars for swinging on as the kids make their way back to the ladder.  The Childhood Express, created by artist Ken Spiering, is 12 feet tall by 12 feet wide and 27 feet long.  I love its playful design.  

    The Big Red Wagon in Spokane's Riverfront Park

    Upper & Lower Falls

    Another area I enjoyed walking to was the Howard Street Bridge and trail to see the upper waterfalls.  Make sure to look for the mountain goat sculpture just below the bridge. You can cross the bridge to access Snxw Meneɂ Island (sin-HOO-men-huh), formerly known as Canada Island (the plaques in the park were not yet updated to reflect this).  

    Another option that I chose to do is to follow the trail that goes below the Howard Street Bridge to get more views of the lower falls. If you continue down the stairs and along the path, you’ll come to a pedestrian suspension bridge, which you can also cross to access Snxw Meneɂ Island (formerly Canada Island).

    Howard St Bridge and a mountain goat sculpture
    The Howard Street bridge, as seen from the stairs that lead to the path below it and the pedestrian suspension bridge.

    Central Promenade

    Stroll along the newly completed central promenade, which you can access from the Rotary Fountain. Watch the ducks swim by, bring a blanket or picnic fixings, and enjoy making memories in the park.  There is so much to see and do at Spokane’s Riverfront Park.  You can spend an hour or half a day here–it’s really up to you!

    Where to Park

    Riverfront Park is in the process of being renovated.  They are continually working to improve the park, and the newly completed central promenade is just one of these beautiful improvements.  Because of this, there are many areas closed due to construction, including many of the park’s parking lots.

    You can park in Parking Lot 7, located at 527N N Lincoln St, which is on the north side of the Spokane River close to the Post Street Bridge. You can also look for street parking in the areas surrounding Riverfront Park. Visit the city’s website to learn more about parking lot closures due to construction.  

    Another option, which I used, was to park in the River Park Square parking garage located at 777 W Spokane Falls Blvd.  It is across from the Numerica Skyride and main entrance to Riverfront Park.  It costs more than Parking Lot 7, but it felt a little safer to me, and I also liked the added convenience of being across from the main entrance as well as places to eat in the mall and surrounding area.

    Places to Eat Near Riverfront Park

    There are so many food choices located close to the main entrance of the park and around the River Park Square shopping center.  You will find food to curb any craving from sushi, ramen, Mexican, or burgers. There are options for everyone!  More restaurants are opening for dine-in service as we continue to progress in the state’s phased plan for the post-COVID response. 

    Cafes

    There are also some great cafes around the area of Riverfront Park across from the Skyride and main entrance.  I recommend you try Atticus Coffee and Gifts, named after the character in To Kill a Mockingbird.

    Atticus Coffee: 222 N Howard St.

    Another excellent cafe option around the corner from Atticus Coffee is Indaba Coffee. You will be welcomed into the cafe like an old friend to enjoy some delicious coffee and food too if you’d like.

    Indaba Coffee: 210 N Howard St.  

    Last but certainly not least, if you’ve never tried Dutch Bros. Coffee, then you should experience it at least once while you’re on the east side of the state. They are scattered all around the city, so Google one to see which is closest to you.

    Getting to Spokane’s Riverfront Park

    Riverfront Park: 507 N Howard St, Spokane, WA 99201

    From Seattle:

    If you’re coming from Seattle it takes about 4 hours to get to Spokane, you could do it as a day trip if you got up early, but it will be a more relaxing visit if you stay overnight.  The drive from Seattle is a straight shot on I-90 East.  Enjoy the varied terrain as you make the road trip there.  

    You’ll cross Snoqualmie Pass and see the beautiful mountains and lush green forests and not too long after that you’ll be in a desert area with volcanic rock-lined canyons on either side. Soon you’ll pass by farms with signs along the way telling you what crop is grown there.  Bring your tunes, bring a friend, and have fun!

    Final Thoughts

    Whether you’ve never visited Spokane’s Riverfront Park before or whether it’s been a long time, I recommend you take the time to explore all the unique features of this beautiful park.  I also recommend you ride the Numerica Skyride and take in the beauty of the Spokane River falls.  

    The setting of this urban park is an incredible one with the Spokane River, the falls, small islands, multiple bridges and trails, and all smack in the middle of the city! 

    As more local businesses open up, I encourage those who are healthy to get outside and start making memories!  We may not be able to travel far, but everyone can explore their hometowns and their local states.

    Here are some ideas for those of you who live in Washington state to get out and start exploring.


    Have Fun Making Memories!

  • Hiking the Whimsical Gnomes Trail

    **Update** The Gnomes Trail has relocated to 25719 Maple Valley Black Diamond Rd SE, Maple Valley, WA 98038. This is also the parking area for the Maple Valley Farmers Market. Read my updated post on the NEW Gnome Trail here.

    Facebook
    Pinterest
    Reddit
    Twitter
    Email

    If you’re looking for a fun, family-friendly hike, then look no further than the Gnomes Trail in Maple Valley, WA. 

    Explore this whimsical trail located within Henry’s Ridge Open Space. Henry’s Ridge Open Space is a network of trails that extend within the Maple Valley and Ravensdale areas.  

    The Gnomes Trail is an easy 2-mile roundtrip hike suitable for all ages. The trail is mostly flat and has a very mild elevation gain of only about 150 feet.  I saw people of all ages and fitness levels hiking this trail. So if you are new to hiking or have younger kids, the Gnomes Trail is a great place to start.

    Getting to the Gnomes Trail

    There are two starting points for the Gnomes Trail in Maple Valley. 

    • 279th Street Park: Maple Ridge Way SE, Maple Valley, WA 98038
    • Henry’s Ridge Open Space: 253rd PI SE, Maple Valley, WA 98038

    I chose to start my hike at the 279th Street Park.  However, you can also start the hike from the Henry’s Ridge Open Space trailhead off of SE 281st Way and 253rd Place SE. 

    Click on the map and see the two trailhead parking areas as well as the mapped trail routes.  I recommend downloading the Google Map for offline use before leaving for your hike.  

    Google Maps will give you walking directions from whichever parking area you choose to start the hike. Google Maps displays the trail and shows you which path to take. You can refer to the map all along the way to make sure you’re on the right track.

    Parking for the Gnomes Trail

    Whether you choose to start from the 279th Street Park or Henry’s Ridge Open Space, just know that there is only street parking at both trailheads.

    I found the 279th Street Park to have less traffic and more parking areas than at the trailhead for Henry’s Ridge Open Space. You can always go to one, and if you can’t find parking, then try the next trailhead.  Refer to the above map for directions.

    Sharing the Trail

    The Henry Ridge Open Space is a multi-use trail system. This means that you are sharing the trails within this natural space with bicyclists, horses, and other hikers.  So yield to horses and move over for the bicyclists.  I know the sign says bicyclists should yield to both hikers and horses, yet, I find as a hiker it is easiest for me to move out of the way.

    Hiking the Gnomes Trail in Maple Valley, WA

    I started my hike from the 279th Street Park, but if you choose to start from the Henry Ridge Open Space trailhead, the directions are the same once you reach the Once Upon a Time trail. 

    It’s important to note that not all of the trails are clearly labeled, so use this guide to help you navigate. Additionally, download an offline map from Google Maps for directions before leaving home.

    fork in the trail
    Route 66 and the Once Upon a Time trail (left). You make a left onto the OUAT trail if coming from Stinger or a sharp right if coming from the 279th Park.

    Starting from the Henry Ridge Open Space Trailhead

    You’ll access the trailhead next to the road and continue straight (pass the Old Mike trail) until you reach the Stinger trail where you’ll make a right. Follow Stinger until you reach a wide gravel trail, this is Route 66, turn right on to the path. In about 20 feet, you’ll cross the road and make a left onto the Once Upon a Time trail (OUAT).  From here the directions are the same as if you were starting from the 279th Street Park.

    Starting from the 279th Street Park

    Park alongside the 279th Street Park and then cross the road to the trailhead. This gravel path is called Route 66 on the map. 

    Follow Route 66 for less than a quarter-mile before making a sharp right onto the Once Upon a Time trail (OUAT).  You’ll spot your first gnome shortly after starting this trail. I think he’s there to let you know you’re heading the right way.

    first gnome you see on OUAT
    This is the first gnome to greet you on your hike.

    This portion of the hike is a dirt trail with rocks and roots here and there, but ample space to stop on the side to let people pass when needed.  Enjoy the forest with its moss-covered trees and stumps left from larger trees that once grew there.   

    a tree growing over a stump
    I liked this tree growing over the old stump.

    The Derailer Trail and Two Choices

    Eventually, you’ll come to a fork in the path, and if you look right, you’ll see a diamond-shaped sign and a sign above it that reads “Derailer.”  You can go right or left here.  

    • If you go right on the Derailer trail, you will follow the path as it loops around and links up with the Lorax trail. Make a right onto the Lorax trail.  (Skip to the asterisk (*) past the directions for making a left to continue.) (The instructions from that point on are the same whether you make a right or left at the Derailer fork.)
    • If you go left at the fork where you see the Derailer trail sign, you will continue a short way down the trail before reaching another fork in the path.  Make a right here to continue on the OUAT trail (Bad Wolf is to the left). In about 250 feet you’ll make another slight right onto the Lorax trail (I don’t recall seeing a sign).  You’ll continue down the Lorax trail and soon pass the fork for the Derailer loop, just stay to the left. 

    *Continue along the trail, and soon you reach a footbridge made out of a fallen tree.  There are two bridges, I stuck with the larger one on the left, but both link you back to the same trail.  

    Cross the bridge and follow the path as it curves left; shortly up ahead, you’ll see the welcome sign for the Gnomes trail.

    footbridge on gnomes trail

    The Gnomes Trail

    Take the Gnomes trail on the right and stay right to follow the trail’s loop.  The Gnomes trail loop is around 0.5 miles. 

    At the entrance to the Gnomes trail, you’ll find a welcome area and a trailhead sign.  Continue up the path enjoying the gnomes scattered everywhere.  Make sure to look up in the trees and under shrubs.  You could make it a game for the kids to see how many gnomes they can find.

    Speaking of games, there is also a geocache hidden not too far from the entrance to the Gnomes trail.  If you’ve never been geocaching, it is a lot of fun for kids and adults alike!  You can download the app and look up geocaches near you to find more.

    Click on the photos below to view a larger image.  These are some of the signs that greet you near the entrance of the trail.

    The Gnomes trail loop is a series of switchbacks curving right and left and then right and left again as it winds its way up, and then down, and then back up before looping you down and around to the main entrance of the Gnomes trail.

    You see a huge variety of gnomes in the first part of the trail, there are even a few fairies, dwarfs, and I also spotted a troll. The gnomes appear to enjoy many of the same activities we do, such as camping, sports, gardening, and so on.  You’ll have fun spotting all the unique gnomes along the way.

    Here are some of the ones I found during my hike.  Make sure to visit and discover your favorites too!

    After the first series of switchbacks, you find yourself back near the main entrance, however, the trail curves right here and begins climbing up again.  The gnomes will appear less and less as you continue along this portion of the trail. 

    You’ll pass another trail junction, make sure to stay left, and soon you’ll come to a “T” in the path where you’ll make a left onto what is called the Ogre trail.  Soon you’ll see a fork on the right for the Ogre trail but continue straight and don’t turn right where you see the sign that reads “Ogre.” 

    You’re looping back, so you’ll want to stay left, and soon you will be back at the main entrance to the Gnomes trail. From this point on, you backtrack the way you came to return to your parking spot.

    Useful Information to Know

    • There are no restrooms at either the parking areas/trailheads or anywhere along the trail. So make sure to take a pitstop before you come.
    • The hike is a little over 2 miles roundtrip, and it took me a little over an hour to hike it. If you have small kids or a large group, plan for it to take 1.5 to 2 hours for the roundtrip hike.
    • The Gnomes trail is an easy hike with minimal elevation gain, but it is narrow in spots with rocks and roots and overgrown bushes along the way. So wear the appropriate shoes, and if you have any mobility issues, you may want to bring a hiking stick.
    • The trail is too narrow in most spots to accommodate a stroller, so plan accordingly.
    • Dogs are allowed, but make sure to pack your poo out as there are no garbages along the trail. This goes for all trash.  This trail system is within a neighborhood, and we must be respectful of the community and the trails.
    • Bring bug spray!  The mosquitos were quite bad on the trails, and I sadly forgot to apply bug spray before leaving.
    • Download an offline map through Google maps of the area, and Google can give you walking directions for the trail.  You can also use any favorite maps apps you might have, such as AllTrails or BackCountry Navigator, if you want to track your hike.
    • The Henry’s Ridge Open Space trails are designed in loops. So don’t panic if you do take a wrong path as it will link up with another one.  There are multiple ways to get to the Gnomes Trail. I am only sharing a couple of options. 

    Recommendations for a Post Hike Treat

    If you’d like something refreshing after your hike, why not head to Dairy Queen for a delicious ice cream treat or perhaps go through Gravity Coffee’s drive-through for a little pick-me-up for the ride home. I’ve marked both of these on the map at the beginning of this post.  There are a ton of other options for food in the Maple Valley/Four Corners area if you want to grab a bite to eat.

    Dairy Queen
    23924 SE Kent Kangley Rd, Maple Valley, WA 98038

    Gravity Coffee
    23912 SE Kent Kangley Rd, Maple Valley, WA 98038

    I’d love to hear from you if you have hiked the Gnomes trail and what you thought about it. If you have any questions, please feel free to send me an email or post them in the comments section below.