Our travel adventures throughout the United State of America. The United States is made up of 50 very unique states. There is so much to see! It makes a wonderful country for road trips, visiting National Parks, exploring cities, and even enjoying lush tropical beaches! Pick a state and start planning your next adventure!
Are you feeling a little stir-crazy? Do you need a good day hike to shake off some winter blues? Well, that’s how I felt after what seemed to be a never-ending winter and a cold and rainy start to our summer in Seattle. I was ready to get outside and soak in the beautiful sunny day we finally had. So I headed for one of my favorite waterfall hikes close to home, the Twin Falls hike near North Bend, Washington.
The Twin Falls trail is a beautiful path that winds its way along the river and through the trees (sorry no Grandma’s house) before leading you to spectacular waterfall views! I’ll tell you all you need to know to get there and as well as some tips, so you don’t extend your hike further than you want to.
Useful Things To Know Before Getting Started
You need a Discover Pass to park at the trailhead for the Twin Falls hike.
Bring bug spray, depending on what time of year you visit the mosquitoes can be quite bad.
Twin Falls is a popular trail, so if you plan to go on a weekend, be prepared for crowds and limited parking. I recommend you come on a weekday if possible, and try to get an early morning start. Even on a weekday during the summer, the parking lot is often full by noon.
There are pit toilets with hand sanitizer provided.
I found it easy to follow social distance guidelines along this hike. However, on crowded days, you may want to wear a mask when passing other hikers if you are unable to follow social distancing guidelines.
Hiking the Twin Falls Trail
The Twin Falls trail is about 3 miles round trip from the trailhead to the Upper Falls Viewpoint.
If you have ever hiked the Franklin Falls trail near Snoqualmie Pass, I will share my thoughts on a comparison of the two. I have hiked the Twin Falls trail and Franklin Falls trail multiple times. I love the ability to get up close to the waterfall at Franklin Falls, but I think Twin Falls is the prettier hike. You get more access and views of the river along the way, plus the forest opens up a lot more than with the Franklin Falls trail.
That said, Franklin Falls is the easiest of the two trails. So depending on your physical shape or the age of those hiking with you, be aware that hiking to Twin Falls is the more challenging hike.
It is still a fairly easy to moderate hike, but you will have some steep inclines along the way, and over 100 stairs to descend and ascend to see both waterfall viewing areas. Take it slow, there are lots of places for breaks along the way and enjoy the journey!
Starting at the Main Trailhead
Starting from the main trailhead, you will begin your hike with almost immediate views of the river below. If you’re itching to dip your toes in the water, don’t worry, you’ll have plenty of opportunities to do that later along the hike. Follow the trail as it winds its way down a hill and into the forest. You’ll soon cross a little bridge (above photo). After you cross the bridge, you’ll reach an area with easy access to the river.
There are several stops along the way with good river access. Huge boulders are separate the river into small pools. These are good for dipping one’s feet in to cool off on a hot summer day or letting the dogs have a little fun splashing around.
Benches With a View
As you continue along the trail, you’ll hike through narrow parts where the foilage crowds the path on either side. Then you’ll come into large open areas with giant trees looming all around. Make your way up a series of switchbacks before arriving at a resting point. You’ll climb a steep switchback to arrive at a set of benches that offer your first glimpse of the upper falls.
The benches are a beautiful place to stop and rest. There is usually a breeze blowing here, so in the summer, it is a refreshing place to sit and cool off. However, in the colder months, you may wish to bundle up or only stop for a short break if it’s really windy.
The Big Tree by the River
When you’ve finished resting at the benches, follow the trail as it descends back down into the forest. Near the bottom of the hill, you’ll come across a huge tree looming tall, not too far from the river’s edge. Stop to take photos with the big tree and if you want you can also take another break by the river. I just love all the beautiful trees along this trail!
Lower Falls Viewpoint
After you leave the big tree, continue hiking upward to where it levels off, and before long, you’ll see some stairs that fork off to the right. These stairs will take you down to the Lower Falls viewpoint.
This viewpoint, in my opinion, is the best one along the trail. So make sure to either stop on your way to the Upper Falls Bridge or hike down to it on your way back. Whichever you choose, you don’t want to miss it! I know hiking down and back up over 100 stairs may not seem worth the effort, but I assure you, it is!
Upper Falls Viewpoint & Turnaround Area
As you pass the stairs to the Lower Falls viewpoint, you’ll soon see a large bridge zigzagging through the trees. There’s a clearing on the bridge providing views of the valley on one side, and the upper falls on the other. If you want to continue past this point, you can hike a little further up to a small viewing area with a slightly closer view of the upper falls.
The wooden bridge viewing area for the upper falls.
From here, you will turn around and head back in the direction you came. If you were to continue past this viewpoint and up the trail, it would take you to the John Wayne Trail/Iron Horse Trail that leads to the alternate trailhead I mention in the “Getting Here” section.
Warning: Don’t make the mistake of passing the upper falls viewing area and thinking the trail will loop you back to the main trailhead. I had a few families who started to pass me going further up the trail, and I asked them if they had parked at the Homestead Valley Road trail or not. They had not, but mistakenly thought the trail continued on and somehow lead them back to the main trailhead off Exit 34. There is no need to hike further (unless you want to) once you’ve seen the Upper Falls.
Enjoy your hike back to your car, and if you didn’t take time to stop near the river, the walk back is a great time to do it. I enjoyed having a snack break there, listening to the rushing water, and smiling as I saw a family further up the river enjoying their time together.
Getting to the Twin Falls Trailhead
The Main Twin Falls Trailhead: SE 159th St, North Bend, WA 98045
Take I-90 east to exit 34
Turn right off the exit ramp onto 468th Avenue SE
Drive about half a mile and make a left onto SE 159th Street.
Follow the road until it dead-ends in the Twin Falls parking lot. (You will need a Discover Pass to park here.)
Alternate Hiking/Parking Option:
If the main Twin Falls trailhead parking is full, you can also hike to the falls coming from the opposite direction. The hike will be different than what I describe below, but if you drive out there and discover the main trailhead is full, this gives you an alternate option.
Take I-90 east to exit 38
Turn right off the exit onto SE Homestead Valley Road. Drive about 0.10 miles and make your first right, you’ll see a sign for Olallie State Park that lists various trails
Follow this dirt road for a little over a quarter-mile, stay left as you pass two forks in the road along this route.
You will park near the trailhead junction for Iron Horse Trail.
Follow the Iron Horse Trail (may also see signs for John Wayne Pioneer Trail) for about a third of a mile before it connects with the Upper Twin Falls trail.
Once you reach the Upper Twin Falls and the big bridge, you’ll just need to hike a little further down where you’ll find stairs on your left, leading you to the Lower Falls viewing area.
Read the following articles for more waterfall fun:
It’s incredible to me how many times I visited Spokane or drove past the city without ever stopping at Riverfront Park. It is one of the main attractions in this Eastern Washington city, and yet I hadn’t visited it! Well, recently, during a visit to see some family, I discovered what I’d been missing.
The Spokane Riverfront Park is a 100-acre urban park with trails for walking and biking, plus plenty of green spaces for just relaxing too. There are sculptures, bridges, a historic clock tower, and the Numerica Skyride and Skate Ribbon.
The Numerica Skyride at Riverfront Park is a short 15-minute ride over part of Riverfront Park and then across the river where you get to see the lower falls from a bird’s eye view. You feel the spray coming off the falls as your gondola glides past. It is a fun and unique way to view the river, and I highly recommend you try it!
COVID-19 Update and Changes
Currently, in Washington state, we are in “Phase 2” of the COVID re-start timeline. Phase 2 means more businesses are allowed to re-open. One of the businesses to recently re-open is the Numerica Skyride at Spokane’s Riverfront Park.
An attendant sanitizes each gondola before permitting you to board. It takes a little more time as you have to wait for them to wipe each gondola down before boarding, but they do their best to keep things moving. They also have multiple hand sanitizer stations in the waiting area for you to use before boarding and when you disembark.
They only board by individual family groups. This is sort of a perk from the new restrictions as my hubby, and I had the entire gondola to ourselves, which allowed me to easily enjoy views from both sides without fighting for a good view. Okay, no fighting would have occurred, but it was nice to have it all to ourselves.
The Numerica Skyride also has the Skate Ribbon, which was still closed at the time of our visit. Typically though, you can rent skates or bring your own and then skate around their track. The skate ribbon looks like a miniature race track for cars, but instead, it’s for skating. In the winter, they turn it into an ice skating rink. Hopefully, soon it will also re-open, and people can enjoy this fun activity in Riverfront Park.
The Numerica Skyride Experience
Tickets and Hours:
You’ll purchase your tickets inside the Numerica Skate Ribbon building. Visit their website for current ticket prices and hours of operation. You can also book your ticket online if you prefer. The Numerica Skyride is wheelchair accessible. They offer a variety of discounts for those in the Military, Seniors (55+), AAA, and college students.
The Ride:
After they sanitize your gondola, you’ll enter with your group and take a seat. There are two benches on each side of the gondola. There are also open window slats behind each bench as well as in the door. So you not only have good air circulation, but you can also take photos through the slats and avoid the glare/reflections off the glass.
If You’re Unable to Ride the Skyride
I realize there may be many reasons why you might be unable to ride the Skyride at Riverfront Park. Perhaps you’re afraid of heights, or you don’t like enclosed spaces, or maybe you don’t have the funds for it right now. Whatever the reason, you still have the option to view the lower falls up close without taking the gondola ride.
Walk west past the Skyride and follow the overhead line of the gondola. This path will lead you down a series of staircases that will take you to a viewing platform at the base of the lower falls. You can look up and see the gondolas above you. You’ll enjoy beautiful views of the falls from the ground level.
More Fun Things to do at Spokane’s Riverfront Park
In addition to the Skyride, I highly recommend you take time to explore other areas of this 100-acre urban park. Strolling around scenic Riverfront Park is a great way to spend an hour or two. There are signs throughout the park, pointing you in the direction of the main attractions, so it is easy to find your way.
Spokane Visitor Center, Rotary Fountain, & Looff Carrousel
You can also stop at the Spokane Visitor Center and pick up some maps and get ideas for other sites to see during your visit to Spokane. Next to the Visitor Center, you’ll find the Rotary Fountain. Follow the path a little further east, and you’ll see the historic Looff Carrousel. The Looff Carrousel is currently closed due to the COVID-19 restrictions. However, you can check here periodically to learn about its future re-opening date.
Sculptures in the Park
Admire the sculptures scattered around the park like the ones shown above commemorating the runners in Spokane’s Bloomsday Run. You can get a map at the Visitor Center that shows the locations to the various sculptures.
Garbage-Eating Goat
Don’t miss seeing the Garbage-Eating Goat. It is an interactive sculpture designed by Sister Paula Mary Turnbull, also known as the “welding nun” Make sure to bring a piece of garbage to feed it. Press the white button on the right side and then place your garbage in the goat’s mouth and watch it disappear! Try only to feed it paper trash as it’s an old goat, and larger trash items will choke (I mean clog) it. The garbage eating goat is on the east side of the Looff Carrousel.
The famous garbage eating goat.
Pavilion at Riverfront
The Pavilion is another unique attraction at Riverfront Park. Built for the 1974 World Expo, it used to be covered by a large canvas material. Later, it was redesigned and now looks like a work of modern architectural art. The cables are illuminated with colorful lights to create the free light shows displayed every Friday, Saturday, and Sunday.
Looking at the Pavilion near the Howard Street Bridge.
The Great Northern Clock Tower
Make sure to visit Havermale Island and see the historic clock tower. Completed in 1902, the Clock Tower was a part of the Great Railroad Depot. You can easily spot it as it towers above the park. This giant clock is still wound by hand every week. A person must climb five stories and then crank the clock 98 times to keep the giant clock operating. That’s a lot of work!
It’s strange as I didn’t even realize I was on an island when I crossed the bridge to admire the clock tower more closely. The clock tower is on Havermale Island. The island was a refuge to the people in Spokane while fleeing from the Great Fire of 1889. Make sure to read the plaques scattered around Riverfront Park to learn more about its interesting history.
The Childhood Express (also known as “the Big Red Wagon”)
Kids and adults alike will enjoy this giant red wagon. It’s not only fun to look at, but it’s also a slide that kids (and kids-at-heart) can enjoy climbing up and sliding down via the front handle. Underneath the wagon are monkey bars for swinging on as the kids make their way back to the ladder. The Childhood Express, created by artist Ken Spiering, is 12 feet tall by 12 feet wide and 27 feet long. I love its playful design.
Upper & Lower Falls
Another area I enjoyed walking to was the Howard Street Bridge and trail to see the upper waterfalls. Make sure to look for the mountain goat sculpture just below the bridge. You can cross the bridge to access Snxw Meneɂ Island (sin-HOO-men-huh), formerly known as Canada Island (the plaques in the park were not yet updated to reflect this).
Another option that I chose to do is to follow the trail that goes below the Howard Street Bridge to get more views of the lower falls. If you continue down the stairs and along the path, you’ll come to a pedestrian suspension bridge, which you can also cross to access Snxw Meneɂ Island (formerly Canada Island).
The Howard Street bridge, as seen from the stairs that lead to the path below it and the pedestrian suspension bridge.
Central Promenade
Stroll along the newly completed central promenade, which you can access from the Rotary Fountain. Watch the ducks swim by, bring a blanket or picnic fixings, and enjoy making memories in the park. There is so much to see and do at Spokane’s Riverfront Park. You can spend an hour or half a day here–it’s really up to you!
Where to Park
Riverfront Park is in the process of being renovated. They are continually working to improve the park, and the newly completed central promenade is just one of these beautiful improvements. Because of this, there are many areas closed due to construction, including many of the park’s parking lots.
You can park in Parking Lot 7, located at 527N N Lincoln St, which is on the north side of the Spokane River close to the Post Street Bridge. You can also look for street parking in the areas surrounding Riverfront Park. Visit the city’s website to learn more about parking lot closures due to construction.
Another option, which I used, was to park in the River Park Square parking garage located at 777 W Spokane Falls Blvd. It is across from the Numerica Skyride and main entrance to Riverfront Park. It costs more than Parking Lot 7, but it felt a little safer to me, and I also liked the added convenience of being across from the main entrance as well as places to eat in the mall and surrounding area.
Places to Eat Near Riverfront Park
There are so many food choices located close to the main entrance of the park and around the River Park Square shopping center. You will find food to curb any craving from sushi, ramen, Mexican, or burgers. There are options for everyone! More restaurants are opening for dine-in service as we continue to progress in the state’s phased plan for the post-COVID response.
Cafes
There are also some great cafes around the area of Riverfront Park across from the Skyride and main entrance. I recommend you try Atticus Coffee and Gifts, named after the character in To Kill a Mockingbird.
Atticus Coffee: 222 N Howard St.
Another excellent cafe option around the corner from Atticus Coffee is Indaba Coffee. You will be welcomed into the cafe like an old friend to enjoy some delicious coffee and food too if you’d like.
Indaba Coffee: 210 N Howard St.
Last but certainly not least, if you’ve never tried Dutch Bros. Coffee, then you should experience it at least once while you’re on the east side of the state. They are scattered all around the city, so Google one to see which is closest to you.
Getting to Spokane’s Riverfront Park
Riverfront Park: 507 N Howard St, Spokane, WA 99201
From Seattle:
If you’re coming from Seattle it takes about 4 hours to get to Spokane, you could do it as a day trip if you got up early, but it will be a more relaxing visit if you stay overnight. The drive from Seattle is a straight shot on I-90 East. Enjoy the varied terrain as you make the road trip there.
You’ll cross Snoqualmie Pass and see the beautiful mountains and lush green forests and not too long after that you’ll be in a desert area with volcanic rock-lined canyons on either side. Soon you’ll pass by farms with signs along the way telling you what crop is grown there. Bring your tunes, bring a friend, and have fun!
Final Thoughts
Whether you’ve never visited Spokane’s Riverfront Park before or whether it’s been a long time, I recommend you take the time to explore all the unique features of this beautiful park. I also recommend you ride the Numerica Skyride and take in the beauty of the Spokane River falls.
The setting of this urban park is an incredible one with the Spokane River, the falls, small islands, multiple bridges and trails, and all smack in the middle of the city!
As more local businesses open up, I encourage those who are healthy to get outside and start making memories! We may not be able to travel far, but everyone can explore their hometowns and their local states.
Here are some ideas for those of you who live in Washington state to get out and start exploring.
**Update** The Gnomes Trail has relocated to 25719 Maple Valley Black Diamond Rd SE, Maple Valley, WA 98038. This is also the parking area for the Maple Valley Farmers Market. Read my updated post on the NEW Gnome Trail here.
Facebook
Pinterest
Reddit
Twitter
Email
If you’re looking for a fun, family-friendly hike, then look no further than the Gnomes Trail in Maple Valley, WA.
Explore this whimsical trail located within Henry’s Ridge Open Space. Henry’s Ridge Open Space is a network of trails that extend within the Maple Valley and Ravensdale areas.
The Gnomes Trail is an easy 2-mile roundtrip hike suitable for all ages. The trail is mostly flat and has a very mild elevation gain of only about 150 feet. I saw people of all ages and fitness levels hiking this trail. So if you are new to hiking or have younger kids, the Gnomes Trail is a great place to start.
Getting to the Gnomes Trail
There are two starting points for the Gnomes Trail in Maple Valley.
279th Street Park: Maple Ridge Way SE, Maple Valley, WA 98038
Henry’s Ridge Open Space: 253rd PI SE, Maple Valley, WA 98038
I chose to start my hike at the 279th Street Park. However, you can also start the hike from the Henry’s Ridge Open Space trailhead off of SE 281st Way and 253rd Place SE.
Click on the map and see the two trailhead parking areas as well as the mapped trail routes. I recommend downloading the Google Map for offline use before leaving for your hike.
Google Maps will give you walking directions from whichever parking area you choose to start the hike. Google Maps displays the trail and shows you which path to take. You can refer to the map all along the way to make sure you’re on the right track.
Parking for the Gnomes Trail
Whether you choose to start from the 279th Street Park or Henry’s Ridge Open Space, just know that there is only street parking at both trailheads.
I found the 279th Street Park to have less traffic and more parking areas than at the trailhead for Henry’s Ridge Open Space. You can always go to one, and if you can’t find parking, then try the next trailhead. Refer to the above map for directions.
Sharing the Trail
The Henry Ridge Open Space is a multi-use trail system. This means that you are sharing the trails within this natural space with bicyclists, horses, and other hikers. So yield to horses and move over for the bicyclists. I know the sign says bicyclists should yield to both hikers and horses, yet, I find as a hiker it is easiest for me to move out of the way.
Hiking the Gnomes Trail in Maple Valley, WA
I started my hike from the 279th Street Park, but if you choose to start from the Henry Ridge Open Space trailhead, the directions are the same once you reach the Once Upon a Time trail.
It’s important to note that not all of the trails are clearly labeled, so use this guide to help you navigate. Additionally, download an offline map from Google Maps for directions before leaving home.
Route 66 and the Once Upon a Time trail (left). You make a left onto the OUAT trail if coming from Stinger or a sharp right if coming from the 279th Park.
Starting from the Henry Ridge Open Space Trailhead
You’ll access the trailhead next to the road and continue straight (pass the Old Mike trail) until you reach the Stinger trail where you’ll make a right. Follow Stinger until you reach a wide gravel trail, this is Route 66, turn right on to the path. In about 20 feet, you’ll cross the road and make a left onto the Once Upon a Time trail (OUAT). From here the directions are the same as if you were starting from the 279th Street Park.
Starting from the 279th Street Park
Park alongside the 279th Street Park and then cross the road to the trailhead. This gravel path is called Route 66 on the map.
Follow Route 66 for less than a quarter-mile before making a sharp right onto the Once Upon a Time trail (OUAT). You’ll spot your first gnome shortly after starting this trail. I think he’s there to let you know you’re heading the right way.
This is the first gnome to greet you on your hike.
This portion of the hike is a dirt trail with rocks and roots here and there, but ample space to stop on the side to let people pass when needed. Enjoy the forest with its moss-covered trees and stumps left from larger trees that once grew there.
I liked this tree growing over the old stump.
The Derailer Trail and Two Choices
Eventually, you’ll come to a fork in the path, and if you look right, you’ll see a diamond-shaped sign and a sign above it that reads “Derailer.” You can go right or left here.
If you go right on the Derailer trail, you will follow the path as it loops around and links up with the Lorax trail. Make a right onto the Lorax trail. (Skip to the asterisk (*) past the directions for making a left to continue.) (The instructions from that point on are the same whether you make a right or left at the Derailer fork.)
If you go left at the fork where you see the Derailer trail sign, you will continue a short way down the trail before reaching another fork in the path. Make a right here to continue on the OUAT trail (Bad Wolf is to the left). In about 250 feet you’ll make another slight right onto the Lorax trail (I don’t recall seeing a sign). You’ll continue down the Lorax trail and soon pass the fork for the Derailer loop, just stay to the left.
*Continue along the trail, and soon you reach a footbridge made out of a fallen tree. There are two bridges, I stuck with the larger one on the left, but both link you back to the same trail.
Cross the bridge and follow the path as it curves left; shortly up ahead, you’ll see the welcome sign for the Gnomes trail.
The Gnomes Trail
Take the Gnomes trail on the right and stay right to follow the trail’s loop. The Gnomes trail loop is around 0.5 miles.
At the entrance to the Gnomes trail, you’ll find a welcome area and a trailhead sign. Continue up the path enjoying the gnomes scattered everywhere. Make sure to look up in the trees and under shrubs. You could make it a game for the kids to see how many gnomes they can find.
Speaking of games, there is also a geocache hidden not too far from the entrance to the Gnomes trail. If you’ve never been geocaching, it is a lot of fun for kids and adults alike! You can download the app and look up geocaches near you to find more.
Click on the photos below to view a larger image. These are some of the signs that greet you near the entrance of the trail.
The Gnomes trail loop is a series of switchbacks curving right and left and then right and left again as it winds its way up, and then down, and then back up before looping you down and around to the main entrance of the Gnomes trail.
You see a huge variety of gnomes in the first part of the trail, there are even a few fairies, dwarfs, and I also spotted a troll. The gnomes appear to enjoy many of the same activities we do, such as camping, sports, gardening, and so on. You’ll have fun spotting all the unique gnomes along the way.
Here are some of the ones I found during my hike. Make sure to visit and discover your favorites too!
After the first series of switchbacks, you find yourself back near the main entrance, however, the trail curves right here and begins climbing up again. The gnomes will appear less and less as you continue along this portion of the trail.
You’ll pass another trail junction, make sure to stay left, and soon you’ll come to a “T” in the path where you’ll make a left onto what is called the Ogre trail. Soon you’ll see a fork on the right for the Ogre trail but continue straight and don’t turn right where you see the sign that reads “Ogre.”
You’re looping back, so you’ll want to stay left, and soon you will be back at the main entrance to the Gnomes trail. From this point on, you backtrack the way you came to return to your parking spot.
Useful Information to Know
There are no restrooms at either the parking areas/trailheads or anywhere along the trail. So make sure to take a pitstop before you come.
The hike is a little over 2 miles roundtrip, and it took me a little over an hour to hike it. If you have small kids or a large group, plan for it to take 1.5 to 2 hours for the roundtrip hike.
The Gnomes trail is an easy hike with minimal elevation gain, but it is narrow in spots with rocks and roots and overgrown bushes along the way. So wear the appropriate shoes, and if you have any mobility issues, you may want to bring a hiking stick.
The trail is too narrow in most spots to accommodate a stroller, so plan accordingly.
Dogs are allowed, but make sure to pack your poo out as there are no garbages along the trail. This goes for all trash. This trail system is within a neighborhood, and we must be respectful of the community and the trails.
Bring bug spray! The mosquitos were quite bad on the trails, and I sadly forgot to apply bug spray before leaving.
Download an offline map through Google maps of the area, and Google can give you walking directions for the trail. You can also use any favorite maps apps you might have, such as AllTrails or BackCountry Navigator, if you want to track your hike.
The Henry’s Ridge Open Space trails are designed in loops. So don’t panic if you do take a wrong path as it will link up with another one. There are multiple ways to get to the Gnomes Trail. I am only sharing a couple of options.
Recommendations for a Post Hike Treat
If you’d like something refreshing after your hike, why not head to Dairy Queen for a delicious ice cream treat or perhaps go through Gravity Coffee’s drive-through for a little pick-me-up for the ride home. I’ve marked both of these on the map at the beginning of this post. There are a ton of other options for food in the Maple Valley/Four Corners area if you want to grab a bite to eat.
Dairy Queen 23924 SE Kent Kangley Rd, Maple Valley, WA 98038
Gravity Coffee 23912 SE Kent Kangley Rd, Maple Valley, WA 98038
I’d love to hear from you if you have hiked the Gnomes trail and what you thought about it. If you have any questions, please feel free to send me an email or post them in the comments section below.
For more hikes in Washington read the following posts:
The beauty of the Quinault rainforest is something you need to see for yourself. It is breathtaking! The good news is, there are a lot of excellent choices for hikes around Lake Quinault, no matter your skill level. Whether you have younger kids or are just a beginner hiker, these Lake Quinault hikes offer you gorgeous displays of the area’s natural beauty with minimal effort.
Additionally, the drive around Lake Quinault is a beautiful adventure on its own. So, if you are unable to do any hiking at all, consider making the drive around the lake instead. In this post, I go over some of the easiest and most accessible hikes around Lake Quinault. The scenic drive around the lake combined with a hike in the Quinault rainforest will be a day you’ll never forget!
Quick Overview of Rainforests
We are very fortunate here in Washington state to have a part of the largest temperate rainforest ecosystems in the world, right in our own Olympic National Park. According to National Geographic, rainforests are Earth’s oldest ecosystems and home to over half of the Earth’s plant and animal population!
The Olympic National Park covers almost 1 million acres and includes some of the most well-preserved temperate rainforests in North America. For those of us living in Seattle, we have something truly unique in our own backyard–we shouldn’t take that for granted. Instead, we should explore it and protect it.
6 Easy Beautiful Hikes in the Quinault Rainforest
1) Maple Glade Rainforest Trail
This short 0.5 mile loop trail is probably my favorite out of all of the Quinault rainforest hikes I list in this post. I felt like I entered another world. It was as if I was on the set of Avatar or Endor, the forest moon inhabited by Ewoks. The wonder and beauty of the rainforest all in this short 1/2 mile walk.
Walking the Trail
You’ll start by the Maple Glade Rainforest sign and walk across the wooden bridge to begin. Follow the trail as it curves left and winds its way past giant Western hemlocks and redcedar trees. Soon the path meanders around and then curves left where it opens up alongside a small body of water. This bog or pond, or whatever it is called, most likely connects to the Kestner Creek.
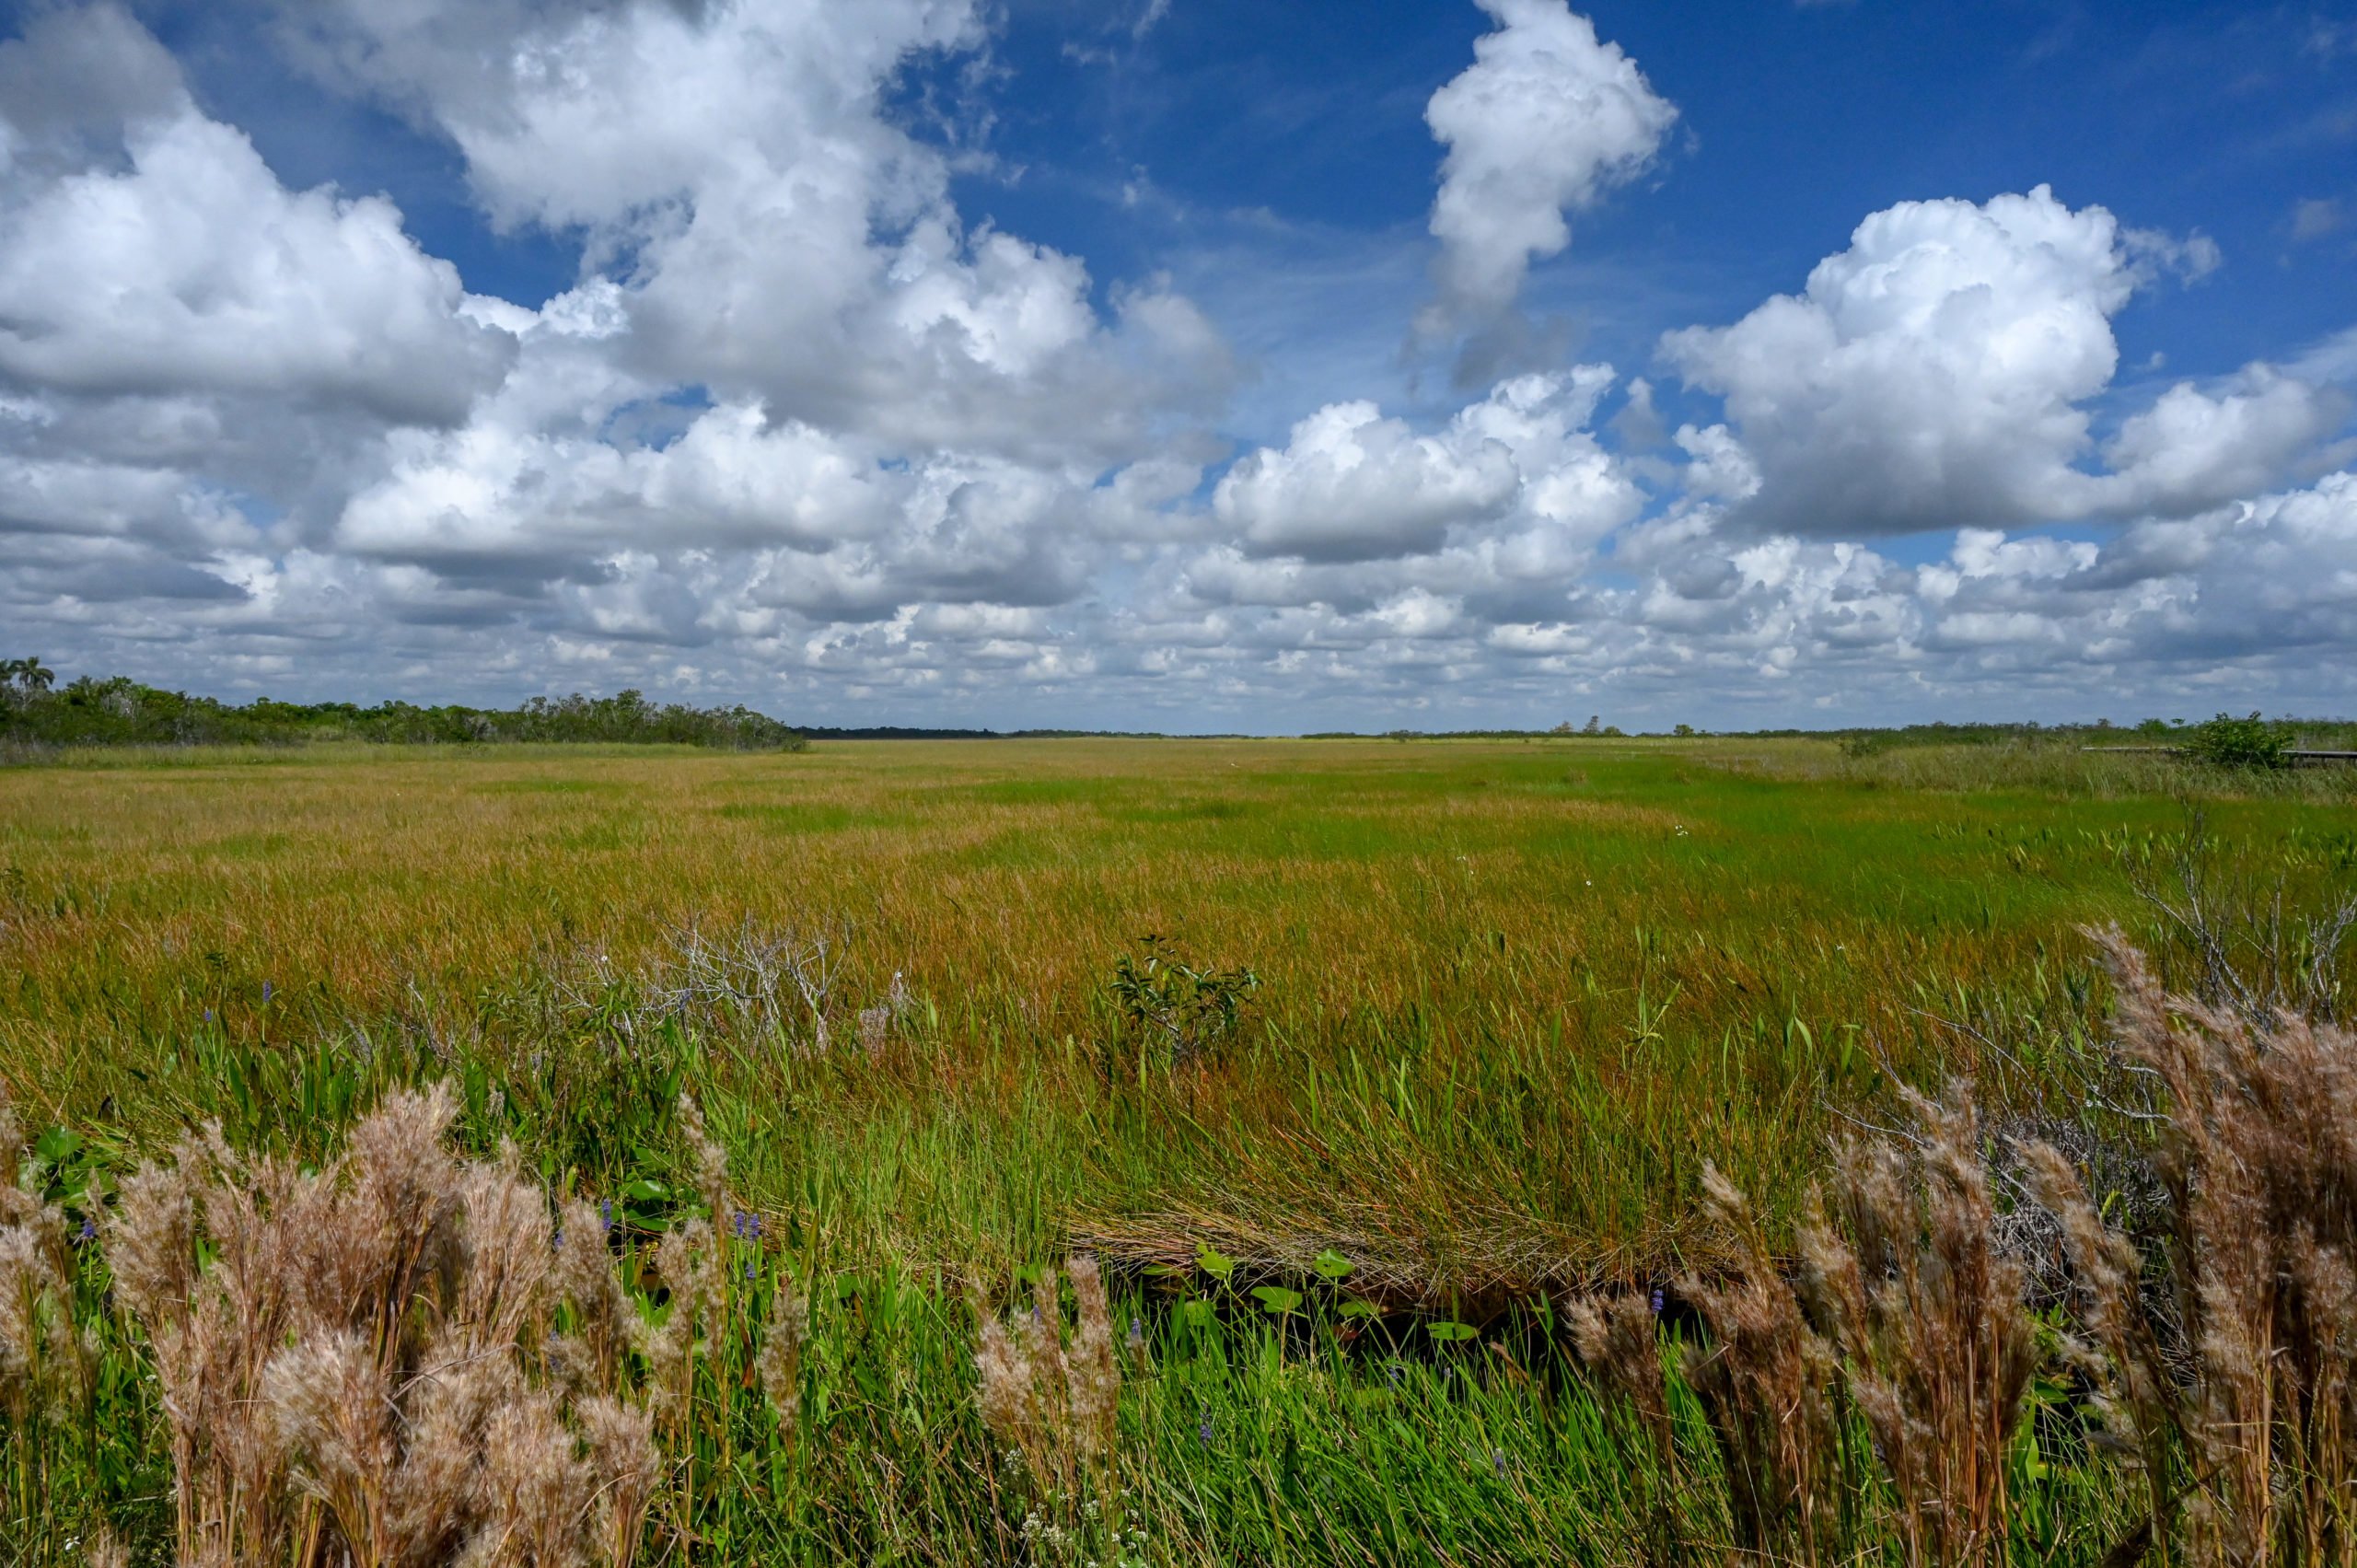
This is the area of the Quinault rainforest, where I feel as though I’ve entered another planet. There are mossy trees everywhere, forming an emerald canopy overhead, and small green plants that live under the water make it appear as a bright green pool of liquid. I really can’t describe it justly, you’ve got to see it for yourself. It is one hike I’d do on any day, rain or shine. It is stunning.
The trail loops around to the left and circles back to the trailhead. However, you can fork to the left and hike to the Kestner Homestead if you’re up for it. See my notes on this hike below. Make sure to stop and sit on the trail bench as you make your way back to the parking lot. The Maple Glade Rainforest trail deserves a slow meandering pace, filled with a lot of gazing upward in awe at the staggering beauty surrounding you.
Accessibility
This trail is marked as an accessible trail, although not fully meeting ADA accessibility guidelines. It is a flat trail with no real elevation change. However, when I hiked it, the path was not wide enough to push a wheelchair through it, plus it gets muddy due to all the rain. So, it’s certainly a flat, easy trail, that one can take very slowly, perhaps with a cane, but probably not with a wheelchair.
Getting Here
Turn onto N Shore Rd from US-101. There is a small grocery store on the corner where you turn. Then stay on N Shore Road for about 5.5 miles. You’ll see the turn for the Quinault Rainforest Ranger Station and trailhead parking on the left. The Maple Glade Rainforest Trailhead is also shared by the Kestner Homestead Trail, which I discuss below.
Facilities
There are accessible toilets by the Quinault Rainforest Ranger Station as well as picnic tables. The ranger station is only open part-time during the summer when it is; I recommend you go in and speak with the rangers on staff to learn more about the area.
2) Kestner Homestead Trail
The Kestner Homestead Trail is a 1.5-mile loop trail that starts from the parking lot at the Quinault Rainforest Ranger Station. The trailhead parallels Kestner Creek to the right, with the Maple Glade Rainforest Trail on the left. Look for salmon in the creek before starting the trail. I saw two huge salmon here when I visited in February. If you combine this hike with the Maple Glade Rainforest trail, it is about 2.0 miles roundtrip.
The Kestner family moved here in the late 1800s, and the homestead has a variety of structures left behind from these early homesteading days. There is also a large picnic area underneath one of the large barn-like structures—lots of space for kids to run around and explore.
Tip: If you don’t want to hike the 1.5 miles loop to the Kestner Homestead, you can also make a left out of the Quinault Rainforest Ranger station parking lot and follow the road about 0.5 miles.
You’ll see a small parking area on the left-hand side of the road near a gate. You can park here and then walk to the Kestner homestead from here. This option is wheelchair friendly as you have a wide dirt road and open paths that will easily accommodate a wheelchair.
Getting Here
Turn onto N Shore Rd from US-101. There is a small grocery store on the corner where you turn. Then stay on N Shore Road for about 5.5 miles. You’ll see the turn for the Quinault Rainforest Ranger Station and trailhead parking on the left.
Facilities
There are accessible toilets by the Quinault Rainforest Ranger Station as well as picnic tables. The Kestner Homestead does not have any toilet facilities, but it does have a picnic area.
3) July Creek Trail
This loop trail is at the July Creek Picnic Area about 3.5 miles down the North Shore Road when coming from US-101. You will see the parking area for this day-use picnic area on your right. It’s a very short “hike,” but I feel that the giant trees you find here make it well worth your time! You also have access to Lake Quinault from the picnic area.
It is a great place to enjoy a picnic by the lake or to take the short hike past towering Douglas firs and cedar trees. As you continue down the trail, past the main picnic area, you’ll cross July Creek and pass a few more picnic areas with views of the lake before the trail connects with the road.
You can walk up the road back to the parking lot from here, or, turn around and loop back up the side trail you passed earlier when crossing the creek bridge, and this will connect you back to the parking lot as well.
The picture below is of me standing by a fallen tree that is probably about 6’0 in diameter, and someone wrote the number of rings, the last marking I could read was “800” so I guess that means the tree was 800 years old? Either way, these are massive trees and so beautiful to admire.
Getting Here
Turn on to North Shore Rd from US-101. There is a small grocery store on the corner. Then drive about 3.5 miles east on North Shore Rd before you see the parking area for the July Creek picnic area.
Facilities
There are vault toilets here and lots of picnic tables scattered along the trail.
4) Quinault Rainforest Nature Loop
This 0.5 mile interpretive trail is on South Shore Rd about a mile from the Lake Quinault Lodge. The Quinault Rainforest Nature trail gives you a great sample of the rainforest ecosystem. You’ll gaze up at the towering giants around you and listen to the roar of the creek while admiring some waterfalls along the way.
This short hike packs a lot in! Stop and read the signs along the trail, explaining more about this unique area. There are some connecting trails you can choose from should you decide to extend your hike, look at the trail map before you begin to plan out the best route that loops you back to your car.
Getting Here
Turn on to the South Shore Rd from US-101 and drive about 1.5 miles to the trailhead parking lot, it will be on the right side of the road.
Facilities
There are restroom facilities here and a few picnic tables near the parking area.
5) World’s Largest Sitka Spruce
Be on the lookout for the trailhead to the Largest Spruce Tree. There is a small sign on the left side of the road when heading east on South Shore Rd. A large dirt parking lot is on the right side of the road. There are no toilet facilities here, so plan ahead.
This is a 0.3 mile trail, and it’s a beautiful walk down a path with moss-lined trees on each side before reaching a beautiful crystal clear creek where you’ll gaze across at the towering spruce. It gets even more impressive close-up!
Getting Here
Turn on to the South Shore Rd from US-101 and drive about 1.5 miles to the trailhead parking lot, it will be on the right side of the road.
Facilities
There are restroom facilities here and a few picnic tables near the parking area.
6) Quinault Lodge and Cascade Falls Loop Trail
This trail goes by a few different names. You might see the trail name as the Lodge Trail to Cascade Falls Loop or as the Quinault Lodge Trail. The trailhead begins across the street from the Lake Quinault Lodge. If you want more information about the trails in the area, go inside the lodge to the front desk, and they will be happy to answer your questions.
The hike is about a 2.0-mile loop that returns you to the lower side of the Lake Quinault Lodge. It is an easy and mostly level trail with only small elevation changes. The path rewards you with views of the Cascade waterfalls as well as some time walking along Lake Quinault.
Getting Here
Turn on to the South Shore Rd from US-101 and drive about 2.0 miles where you’ll see the Lake Quinault Lodge on the left-hand side. There is a dirt parking area on the right side of the road. Look for the trailhead sign to begin your hike. (You can also refer to the Google Map I linked at the top of the post.)
This trail is one of the trails I mentioned under the Quinault Rainforest Nature Loop that connects with that .5 mile trail. For an optional longer hike, from the Rainforest Nature Trail parking lot, you can take the Quinault Loop Trail #854, which connects the trail systems to create a 4.0-mile loop trail.
Facilities
There are restroom facilities at Lake Quinault Lodge and also at Falls Creek Campground. Also, the Lake Quinault Lodge front desk has trail maps and useful information regarding things to do in the area.
Quinault Rainforest Loop Drive
If you choose to drive the approximate 31 miles around Lake Quinault, here are a few things you should know. It takes almost 2 hours to complete the entire loop, and only half of the loop is paved. The pavement ends a little past the Quinault Rainforest Ranger Station on the North Shore Rd.
The pavement ends shortly past the Colonel Bob Trailhead turn off on the South Shore Road. The rest of the loop is a graveled dirt road with large potholes scattered here and there. It is doable in a car, but you will need to take it slow.
Where to Stay at Lake Quinault
There are several campgrounds scattered around Lake Quinault. However, these are closed during the winter months. You can also choose to stay at the Lake Quinault Lodge on the South Shore or Locharie Resort on the North Shore. There are also some RV park options on the South Shore Rd, one of them, the Rain Forest Resort Village RV Campground is next to the World’s Largest Sitka Spruce.
Additionally, you can drive about 30 minutes north on US-101 to Kalaloch and either camp at the Kalaloch campground or stay at Kalaloch Lodge. Both are excellent choices for ocean views.
Tips for Hiking at Lake Quinault
What to Pack
Make sure to pack rain gear (rain jacket, layers for warmth). The Quinault rainforest reportedly gets between 10-15 feet of rain each year! Also make sure to pack sturdy hiking shoes, preferably waterproof or water-resistant, although not required, your feet will appreciate this.
It’s always a good idea to pack extra water and snacks. Even though these are shorter hikes, if you combine a few of these or even a drive around the lake, you’ll appreciate having a little extra food for the journey. I like to pack peanut butter and jam sandwich fixings to make in the car.
Also, don’t forget to bring your camera gear and tripod if you wish to photograph some of the waterfalls, capture the sunset, or take group shots. A tripod is a handy thing to have! Plus, none of these trails are that long, so the extra weight shouldn’t be too much of a hassle.
Wildlife
Be prepared to see Roosevelt elk during your drive and hikes in the Quinault rainforest. This area is a popular feeding area for the elk, so your chances of seeing one are pretty good. I saw the one below while driving on South Shore Road.
You’ll also have excellent opportunities to see eagles, bears, coyote, salmon, and other wildlife that calls the area home. As always, remember these are wild animals, give them a safe distance and do your best not to disturb them.
Technology Needs
In addition to packing your camera and any extra batteries and chargers you’ll need, it’s also important to know how to prepare your cell phone. There is no cell service around Lake Quinault, so plan for this by downloading your Google Maps ahead of time, and if you use a hiking app (such as BackCountry Navigator), download the topography maps ahead of time too.
Related Articles
Here are more articles related to this post and the area around Lake Quinault.
If you’ve never visited the Olympic rainforest before, then take the opportunity to do it this year. It’s only a 3-hour drive from Seattle, and there are lots of great places to camp as well as lodges and private resorts, and even a few Air BnB options around the lake.
This area of US-101 and the Olympic National Park is someplace you need to visit at least once. Consider making a week of it and stop at a few of the park areas along the way, such as Lake Quinault, Kalaloch, Lake Crescent, and Sol Duc Hotsprings. You’ll be amazed at the natural beauty of this area.
Lake Quinault Lodge is a beautiful historic lodge set on a wooded lake. It’s a short 5-minute drive off US-101 North, and I had been missing it all these years. For almost two decades, I’ve made regular visits to Kalaloch Beach, only a 30-minute drive past Lake Quinault Lodge. I had no idea the beauty I was passing up each time I drove past the Lake Quinault sign on the side of US-101.
Imagine a pristine lake surrounded by rainforests filled with ancient trees dripping with emerald moss—a place where you and your family can get away and unplug. You can hike in the rainforest, paddle kayaks on the lake, and gaze up at some of the world’s largest trees. It is a breathtaking escape, and it’s less than a 3-hour drive from Seattle. If you’ve never been, I hope this post will inspire you to make a trip there this year.
History of Lake Quinault Lodge
Lake Quinault Lodge feels like stepping back in time. This rustic lodge was designed in 1926 by the Seattle architect Robert Reamer, who also designed Old Faithful Inn in Yellowstone National Park. What amazes me is that it only took 53 days to complete this stunning lodge! According to the USDA Forest Service, bonfires were lit around the construction site so that crews could work around the clock to complete the lodge before the rainy season started.
Cedar shingles cover Lake Quinault Lodge as it curves to form a v-shape or half-circle. Its two-story peaked roof rises tall, surrounded by towering cedar trees, Douglas firs, and even a few California coastal redwoods. President Franklin D. Roosevelt ate lunch at the lodge’s restaurant in 1937 during his trip around the Olympic Peninsula. The restaurant is now named the Roosevelt Dining Room in his honor.
His visit to the Olympic Peninsula inspired him to make it a part of the U.S. National Park system. He also named the Olympic elk the Roosevelt elk in honor of former President Theodore Roosevelt. President Theodore Roosevelt created the Olympic National monument in 1909 to help stop the decline of the elk population.
It is no surprise that once President Franklin Roosevelt saw the natural beauty of this area that he wanted to preserve it for future generations. I am thankful he did.
Accomodations at Lake Quinault Lodge
Main Lodge
The rooms in the main lodge are on both the first and second floors. They have queen or king bed accommodations and some lake view rooms to choose from as well. The lodge rooms provide you with the feeling of staying at the lodge during the early 20th century. Staying in the main lodge offers easy access to the lodge amenities such as the Roosevelt Dining Room, fireplace sitting room, and pool.
Fireplace Rooms
The fireplace rooms are in a separate building that is accessible through the second story of the main lodge. It is also accessed directly from the parking lot next to the main lodge. These rooms come equipped with gas fireplaces and offer lake views. Trees partially obstruct some of the lake views.
Each of the fireplace rooms includes a private balcony with a seating area. The fireplace rooms also include a mini-fridge, television (with about ten cable channels), and heated bathroom floors.
Boathouse Rooms
The boathouse is a separate two-story building located on the opposite side of the property from the fireplace rooms. It is not attached to the main lodge at all and sits a little below the main lodge and is closer to the lake.
Constructed with a wrap-around deck, guests enjoy easy access to the lawn and lake. Only some of the rooms at the boathouse offer lake views. The first-floor accommodations of the boathouse are the only rooms where pets are allowed to stay on the Lake Quinault Lodge property.
The Beverly Suite occupies the top floor of the boathouse and provides the experience of staying at your own private residence on Lake Quinault. It has two bedrooms, a sleeper sofa, a kitchen, and a living room area with a television.
Lakeside Rooms
The lakeside rooms have a more contemporary look of what you might expect from a modern hotel rather than a lodge retreat. All rooms offer partial lake views, televisions, and private balconies. There are also a few ADA accessible rooms available.
Lake Quinault Lodge Amenities
Room Amenities:
All rooms on the Lake Quinault Lodge property offer coffee makers and bottled water. I appreciated the two bottles of water I received each day during my stay. They were perfect for taking with me in the car for my day hikes around the lake. Some of the rooms include TVs and about ten or so cable channels, but most do not have any television. The main lodge and fireside rooms also include Wi-Fi.
There is no room service, and there are no phones in the rooms. Lake Quinault Lodge is about unplugging and unwinding.
Pool & Sauna:
The main lodge has a pool and sauna that is available to all guests, and it’s open from 9 a.m. until 10 p.m. each day. There are changing rooms outside the pool in case you happen to come during the winter and don’t want to make the chilly walk to the pool.
Game Room:
Next to the pool and sauna is the game room. There are a couch and television in one area where parents or kids can lounge around watching a little cable television. A shuffleboard is in one corner and a ping pong table (aka tabletop tennis) and a Foosball table in another area of the game room. The game room, combined with the pool option, makes for great spaces when the weather is less than desirable outside.
Roosevelt Dining Room
The Roosevelt Dining Room offers relaxing views of the lawn and lake. I dined here for breakfast on a rainy day, and it was so peaceful to watch the rain out the wall of windows.
There are also hummingbird feeders set up along the windows so we could watch the hummingbirds feed while eating our breakfast. The sausage biscuits and gravy, as well as the spinach, mushroom, and goat cheese omelet, were delicious!
Dinner here is also amazing. You can watch the sunset over the lake and catch glimpses of its colors through the trees. During the busy months, make sure to make a reservation and snag a window seat when possible.
Sitting Room:
On the main floor of the lodge is a large sitting area. Gorgeous timber beams painted with Northwest designs act as supports throughout the space, and in the center of the room is a giant fireplace. It’s the perfect place to settle into one of the comfy chairs for a cozy read with your favorite book.
Glance out the large windows on either side of the fireplace and enjoy views of the sprawling lawn and lake. This will be your favorite space on a rainy day. It feels so cozy, and the lodge makes you feel as though you’ve stepped into some time portal into the early 20th century.
The sitting room also has a jumbo-sized chess set, historical photographs scatter the walls, and there are puzzle tables replete with puzzle pieces (I assume all of the pieces are there). In the mornings, you can find complimentary coffee supplied here. What a great place for your first (or perhaps second) cup of morning coffee.
Deck and Lawn Area
When the weather is sunny, the deck off the backside of the main lodge is a beautiful place to enjoy a cup of coffee. Tables and chairs are scattered along it to create spaces to soak in the occasional bouts of sunshine. Adirondack chairs dot the lush green lawn in front of the deck area.
These chairs are my favorite type for lounging in, chatting with a friend, or reading a good book. There is also a gazebo on one side of the lawn, which lights up at night. Next to the gazebo is a horseshoe pit where you can test out your throwing skills. I admit, I’m lousy at horseshoes, but I still enjoy playing.
Lake Quinault
Follow the path from the lodge that leads down to Lake Quinault. This lake is 2 miles wide and around 300 feet deep. There are seating areas carved into some of the driftwood on the beach. These make perfect resting areas to watch the sunset.
In the summertime, you can rent kayaks, canoes, and paddleboards from the beach. They also offer boat tours of the lake during the summertime, with rates starting at $35. Check with the front desk at Lake Quinault Lodge to learn about all of their tour options.
Tours (boat tours, driving tours, and hiking tours offered seasonally)
Reading
Relaxing
Puzzles
Fishing
Horseshoe Pit
Stargazing (it’s so beautiful on a clear night)
Drive Around the Lake (Takes about 1.5 hours, un-paved road for half of the drive)
Drive to the Ocean at Kalaloch (only a 30-minute drive)
What to Pack
Here are some items I recommend bringing: Bug spray, swim clothes, cameras, books, notebooks, rain gear, layers, hiking shoes, board games, and activities in case of rain. If your kids need a movie or online entertainment, you can always download movies and shows ahead of time to your mobile device or tablet. Also, see my tip for light sleepers below, you’ll want to bring headphones or earplugs if that applies to you.
What Time of Year to Visit
Any time of the year is a wonderful time to visit. However, during the summer months, you will have the opportunity to rent boats and kayaks and spend more time playing on the lake. The downside is that it is busier and more expensive.
In the winter, it is rainier, colder, and you have frequent wind storms; however, you will also find better rates and fewer people. So it depends on your needs and what experiences you want to get out of it.
Useful Tips & Things to Know
Weather Tips
Make sure to pack layers. Whether you visit during the winter or the summer, due to the coastal location and forest shading, it can be chilly here no matter what time of year you visit. Also, you are visiting an area bordered by rainforests, and they are called “rainforests” due to the abundance of rain they receive. Therefore be prepared for rain. Pack your raincoats and waterproof hiking gear. Prepare to get a little muddy on the trails.
Another weather component to be mindful of, are the wind storms. This area often gets wind storms, especially during the winter. This can cause power outages and downed trees. Check with Quinault Lodge ahead of time if you are concerned about this, and of course, don’t ever go out hiking during a wind storm. A tour guide at Lake Quinault Lodge once told me that even the elk come out of the forest during a wind storm and find a safe meadow to wait out the storm.
Seasonal Hours
Certain activities like boat rentals and camping are unavailable during winter. The Mercantile store and restaurant is also closed. So you have fewer options for activities and places to eat during the winter months. This won’t keep you from having a pleasant visit, but it is something to be aware of.
Money-Saving Tips
To save money on food, I like to pack stuff for peanut butter and jam sandwiches. Then when I’m out all day hiking and taking photos, I don’t have to return to the lodge for food. I make a sandwich in the car, and I also pack a bottle of water and some snack bars.
Other ways to save money on food are to bring some ramen cups and then use your coffee maker to boil water. Maybe bring a box of your favorite donuts to have with your morning coffee. You’ll burn off the calories later.
Email Offers
You can also sign up for the Olympic National Park email list and learn about deals on accommodations throughout the year. I visited Lake Quinault Lodge during the winter on a buy one night, get 1-night free deal–major bonus!
No Cell Service
It’s important to know that there is no cell service at Lake Quinault Lodge. I overheard one person say that if you stood on the lawn, in a particular spot, you could get a spotty signal. I had no cell signal during my visit, so I would not count on that.
You do, however, have Wi-Fi at the lodge, and I also had coverage on the property around it. This means if you want to text or call someone, plan to use Google Duo or Hangouts (or similar app) for Wi-Fi calls and texts.
Smoking Policy
All rooms and facilities at Lake Quinault Lodge are non-smoking.
Alert for Light Sleepers
This is your public service announcement for all of you light sleepers (myself included). The walls separating the rooms at Lake Quinault Lodge are thin. You can hear the conversations of your neighbor at normal speaking volumes. You can also listen to them, brushing their teeth and snoring at night. Make sure to pack headphones or earplugs if this will be a problem for you. It will depend on your “neighbor.”
Dining Options
In addition to dining at the Roosevelt room at Lake Quinault Lodge you can also eat at the following places:
The Mercantile (opened seasonally)
The Mercantile sells a variety of gear from food to camping and fishing supplies and souvenirs. It also has a small restaurant where you can get burgers or pizza during the summer months.
Amanda Park
This is the small town only a 5-minute drive from Quinault. There is Dino’s Pizza & Grill (opened afternoon and evenings) as well as the Quinault Internet Cafe (closes at 3:30 p.m.), both are good choices when you’re looking for an alternative to dining at the Lake Quinault Lodge.
Kalaloch Lodge’s Creekside Restaurant
The Kalaloch Lodge is a short 30-minute drive from the Lake Quinault Lodge. Their Creekside Restaurant offers ocean views as well as a delicious, locally sourced menu and a full bar for drinks. Enjoy a meal and a walk on the beach afterward before heading back to Lake Quinault Lodge.
Getting to Lake Quinault Lodge
It’s less than a 3-hour drive from Seattle to Lake Quinault Lodge. Take I-5 South and cut over to Hwy 101 N. Watch for signs for the turnoff for Lake Quinault alongside the road. The turn off is about a 7-minute drive after passing the town of Nielton.
Don’t miss the incredible memories waiting to be made at Lake Quinault Lodge. I cannot believe I didn’t stop in Quinault sooner. It is quickly becoming my second favorite spot along the Olympic Coast. I now have another destination that competes for a spot that once only belonged to Kalaloch. The mossy trees and the otherworldly beauty of this area have sucked me in and now holds a piece of my heart.
Related Articles for the Area Around Lake Quinault Lodge
I recently returned from another trip to Kalaloch Lodge, and I realized that although I’ve written about camping at Kalaloch, I have yet to write about staying at the Kalaloch Lodge. My hubby and I love coming to Kalaloch each year. It’s our ocean getaway close to home. In the summer, we enjoy camping at Kalaloch Beach Campground, but in the winter, we prefer a little warmer (and dryer) resting place. Thus, we stay at one of the Kalaloch cabins.
Fall asleep to the sounds of the ocean, go for a sunset walk on the beach, and enjoy ocean views while you eat breakfast in the Kalaloch Lodge Creekside restaurant. It’s an excellent place for an annual getaway less than 4 hours from Seattle. In this article I share everything you need to know to get here, how to plan your trip, what to pack, and things to do during your stay.
Getting to Kalaloch Lodge
Kalaloch Lodge is a part of the Olympic National Park. It is set on a stunning stretch of coastline surrounded by old-growth forests and is only a 3.5-hour drive from Seattle. That is if you take I-5 south, like I do, down past Olympia and then cut over to Hwy 101 by either Montesano or Aberdeen. If you take the route that goes north to Port Angeles and take US-101 from there, it takes around 4.5 hours. Visit the Kalaloch Lodge maps and directions page for more info on traveling here via car and also ferry options.
I recommend using Google Maps and downloading an offline map of Washington state before your trip as there is no cell signal for a good portion of this drive. Your drive time will depend on your starting point and time of day. So far, Google Maps has been a reliable source for choosing the fastest travel time to Kalaloch Lodge.
Make sure to pack some snacks, coloring books, or Mad Libs to do with the kiddos and, of course, your favorite road trip music. I also like to download some audiobooks to help pass the time. You’ll be there before you know it, and once you breathe in that ocean air and hear the roar of the surf, you’ll know it was worth it! I know that’s how it works with me.
You can stay in the main Kalaloch Lodge, and these rooms provide a more traditional hotel setting. You can choose from one or two queen bed layouts, and you’ll also have a choice of an ocean view room or non-view room.
Additionally, you can stay in their Kalaloch Suite, which is the only room in the entire complex that has a TV. The Kalaloch Suite has a king-sized bed, sofa, dining table for four, and panoramic views of the ocean. It also has a soaking tub with a separate shower, whereas the other lodging options only offer a shower. It is also one of the more expensive room options at Kalaloch Lodge.
The guestrooms are on the second floor above the main lodge area. Although the Kalaloch Lodge is not as big as some lodges, it does include a gift shop with fireside seating, the Creekside restaurant, and even a small game nook where you can borrow board games and puzzles to enjoy during your stay.
Seacrest House
The Seacrest House is a condo-style unit set on the far end of the property away from the main Kalaloch Lodge. It provides a blend of standard hotel room options (carpeted floor, seating areas, but no kitchen) with the rustic feel of a cabin. The Seacrest House is situated behind the bluff cabins, but, second-floor units still have views of the ocean.
These are some of the second-row (non-bluff) Kalaloch cabins.
Each unit comes with a private balcony facing the ocean, perfect for enjoying a cup of coffee while listening to the ocean’s roar. The units at the Seacrest House also include fireplaces, and you are given a fresh bundle of wood each day during your stay. The wood-paneled walls and wood furniture provide rooms with a more rustic cabin feel than a standard hotel room. There are a variety of room options with the largest accommodating up to 6 people.
Kalaloch Cabins
The Kalaloch Cabins are what my hubby and I choose to stay in during our winter visits here. We love the cozy cabins with wood fireplaces and listening to the sounds of the ocean as we fall asleep. We also enjoy having a kitchenette to prepare meals from the comfort of our cabin. This is a great way to save money too.
Although the Kalaloch Lodge’s Creekside Restaurant makes some delicious food and has beautiful views, it is also on the expensive side. I’d say it averages around $20/person after tip and tax. So having the option to make a meal in our cabin, is a big plus for us!
One of the bluff cabins. These have a front-row seat to the ocean views.
Bluff Cabins
The most expensive of the lodging options at Kalaloch Lodge is the Bluff Cabins. These cabins are oceanfront cabins set on the bluff overlooking the beach. They offer all the same amenities of the other cabins (wood stove or fireplace and kitchen), but with an ocean view. The largest of the bluff cabins can sleep up to 7 people! They are also the most expensive option at Kalaloch Lodge.
Kalaloch Cabins
These cabins are in the second room behind the bluff cabins. You can still hear the ocean from your cabin, but you’ll need to walk a little bit further to see it. This has never been an issue for us, and these are the cabins we choose to stay in. All of the Kalaloch cabins have kitchenettes and wood stoves. A fresh bundle of wood is provided every day. They also include walking sticks inside each cabin for your personal use.
One of the two-bedroom Kalaloch cabins.
Cabin Kitchenettes
The kitchens in the cabins are stocked with pots, skillet, strainer, cutting knives, silverware, can opener/bottle opener, plates, bowls, water glasses and coffee mugs, a toaster, coffee maker (with coffee and filters), a microwave, cooktop stove, and a small refrigerator. You have all the basics to make yourself some spaghetti, soup, or heat something in the microwave.
They do not include wine glasses or paper towels. The bathroom also did not include any hand soap, but there was dish soap in the kitchen and a sponge for washing your dishes. Also, a select few of the cabins offer a small oven, but no baking sheets or pans, so you’d need to bring those as well if you planned to use the oven.
*All lodging options at Kalaloch Lodge include private bathrooms with a shower. Soap, shampoo, and conditioner are also provided. Rates range from $120 to $350 per night and vary based on the season.
The dining area of one of the two-bedroom cabins.
ADA Options
Kalaloch Lodge does offer a couple of ADA accessible cabins. To learn more about these options, check out Kalaloch Lodge’s website.
Useful Tips for Your Stay
Making Reservations
You can make your reservations online or call and make reservations over the phone at (866) 662-9928. I recommend you sign up for the Kalaloch Lodge email newsletter so you’ll get notified of their sales throughout the year. Kalaloch Lodge also offers discounts for early bookings (7 days or more in advance), AAA members, members of the military, and seniors (62 years and older).
It’s important to note that Kalaloch Lodge is a very popular destination during the warmer months. It is popular year-round, but it is generally easy enough to get a winter reservation with a week’s notice.
However, in the summer and fall, you may need to book months out to get a reservation and also during whale–watching season. This is also true for the campground. I make my campground reservations 2-3 months ahead of time when planning a camping trip here in the summer.
If, for some reason, you are unable to secure a reservation, then consider staying at the nearby Lake Quinault Lodge or perhaps a motel in Forks. The best way though is to plan ahead so you can make sure you get a spot at your desired location.
What to Pack
If you’re staying in the Kalaloch cabins here some additional items I recommend packing:
Hand soap (for the bathroom — the kitchen has dish soap)
Paper Towels (none are provided)
Wine Glasses (if you plan to bring your own bubbly, just know the cabins only provide small water glasses)
Food (some ideas: oatmeal packets, pancake mix, eggs, toast or bagels, peanut butter and jelly sandwich fixings, pasta (spaghetti) and sauce, microwave popcorn, cooking oil, salads, etc.) Pack whatever easy favorites you can make in a limited kitchen or cook in the microwave.
Flashlight
Rain coats, sweatshirts and layers for cold to warm weather. You may start the day out all bundled up, but later find yourself only needing a light jacket.
Bug Spray
Coffee (they provide you with a small bag, but you may want to bring your preferred brand or extra if you like to drink it multiple times a day)
Tea and Cocoa
Re-usable water bottles for taking on the go
Zip-lock bags for sandwiches and other items.
Saran wrap (always handy)
Slippers (the floors in the cabins get really cold)
Books, games, puzzles, coloring supplies
Kites
Sandcastle building supplies (buckets and shovels)
Gloves & Hats
Sunscreen
*Main Lodge or Seacrest House
If you’re staying in the main lodge or Seacrest House, you won’t have a kitchen, but you will have a coffee maker and a mini-fridge. You can use the coffee maker to heat water for oatmeal and ramen, as well as tea and cocoa. You can bring stuff for sandwiches and keep items like jam, meats, cheeses, and mayo in your mini-fridge or pack bottled smoothies and drinks to store in the fridge. This is an excellent way to cut down on costs for eating out.
Important Things to Know
There is no Wi-Fi or cell service at Kalaloch. There are no phones or TVs in the rooms (except as I mentioned earlier, the Kalaloch Suite which has a TV). I recommend downloading a map of Washington state on your Google Maps app before your trip, to be on the safe side.
High winds in the area can occasionally knock the power out, so come prepared with a flashlight and small LED camping lantern. Plus, it never hurts to pack some pb&j fixings. I have yet to experience a power outage during one of my stays at Kalaloch Lodge, but it’s always good to be prepared!
Always check the tide charts each day so that you’ll know when hide tide is. When you check in at the Kalaloch Lodge they will give you a printed copy of the daily tides. They also post the tide charts at the main lodge.
There is a convenience store next to the Kalaloch Lodge, which sells a variety of food and beverage options, plus souvenirs. They also have a small espresso stand where you can order your coffee to go.
If you want additional food and dining options, the town of Forks is about a 30-40 minute drive from Kalaloch Lodge. There are a variety of mom-and-pop restaurant choices, as well as a Subway where you can order some sandwiches to take on a picnic. Forks also has a grocery store if you need supplies for your cabin. You can also rent a charcoal grill for $15 per day from Kalaloch Lodge.
The Tree of Life (Tree Root Cave) at Kalaloch campground.
Things to Do
Gather around the communal fire pit (ask at the front desk in the lodge for firewood) and roast marshmallows
Go beachcombing
Have a bonfire on the beach
Sit near the gazebo and enjoy a nice book or watch the sunset from one of the Adirondack chairs
Go see the Big Cedar Tree (about a 4-mile drive north past Kalaloch Lodge)
Relax, pull up a chair, read a book, just enjoy being near the ocean.
Play tetherball, cornhole toss or horseshoes (there’s a small play area off to the side of the parking lot before the cabins)
Walk the short Spruce Burl Trail at Beach 1 and marvel at these strange and beautiful burl covered trees.
Drive over to Lake Quinault and explore some of the many trails around the lake.
Put together a puzzle or borrow a game from the community game closet in the main lodge.
Visit the Tree of Life (Tree Root Cave) (See it while you can, it seems to be sinking lower each year!) It’s located just below the Kalaloch Campground.
Explore one of many beaches close by. These are some of my favorite ocean beaches near Kalaloch. Don’t miss a stop at Ruby Beach, probably my favorite out of all the beaches – but each has its own unique charm.
Fly a kite
Build a sandcastle
Soak in a sunrise or sunset (or better yet — both!)
What Time of Year to Visit
Any time of the year is a good time to visit Kalaloch Lodge. However, I love visiting in the winter when prices are lower, and it’s easier to find available dates. Plus, it’s so cozy in the cabins with the wood fireplace and the sound of the ocean outside. Even if it’s rainy, it’s still beautiful, and you can stay inside your cozy cabin playing games and reading books or put on your rain gear and enjoy the beauty outside.
You can also look at the weather forecast each week and then book when you see a couple of days of sunshine. I’ve been going every winter for at least five years and have yet to be completely rained out.
In the summer, it is gorgeous and warm, and you can build sandcastles and dip your toes in the water’s edge. Prices will be higher, but you can also stay at the Kalaloch campground (make sure to reserve in advance) if you prefer. However, it is nice to have a bed to sleep in and the conveniences of a kitchen to cook in and, of course, a hot shower every morning!
If you stay in a cabin, you can save money by bringing groceries and limiting the number of meals you eat at the lodge. However, if money is no object, the lodge restaurant does have some excellent food and a welcoming staff.
Best Time for Whale Watching:
According to Kalaloch Lodge, the best times to spot whales are in April & May as well as October & November. However, I’ve seen whales when camping here at the end of August, and I’ve read other trip reviews which reported to have seen them even in July! So you never know!
A sea otter we saw one evening while walking on the beach.
Who Should Stay at Kalaloch Lodge/Final Thoughts
Kalaloch Lodge isn’t for everyone. If you’re someone who prefers a luxury resort or amenities like Wi-Fi, cable TV, and room service, then Kalaloch Lodge is not the place for you. However, if you’re looking for a place to get away from it all and enjoy the beauty and solitude of nature–then Kalaloch Lodge is perfect for you!
The area around Kalaloch Lodge is a stunning stretch of coastline set in the Olympic National Park. When you visit here, you will discover why so many like myself come back year after year. The area’s old-growth forests and unique coastline with beach logs, rock formations, and tidal pools are all a part of what draws visitors back each year.
I’ve seen whales, sea otters, eagles, salmon, starfish, and sea anemones during my visits to Kalaloch. Each year my visit is a little different due to the storms of that year and the change in tides. I leave with new memories and look forward to the next year when I return.
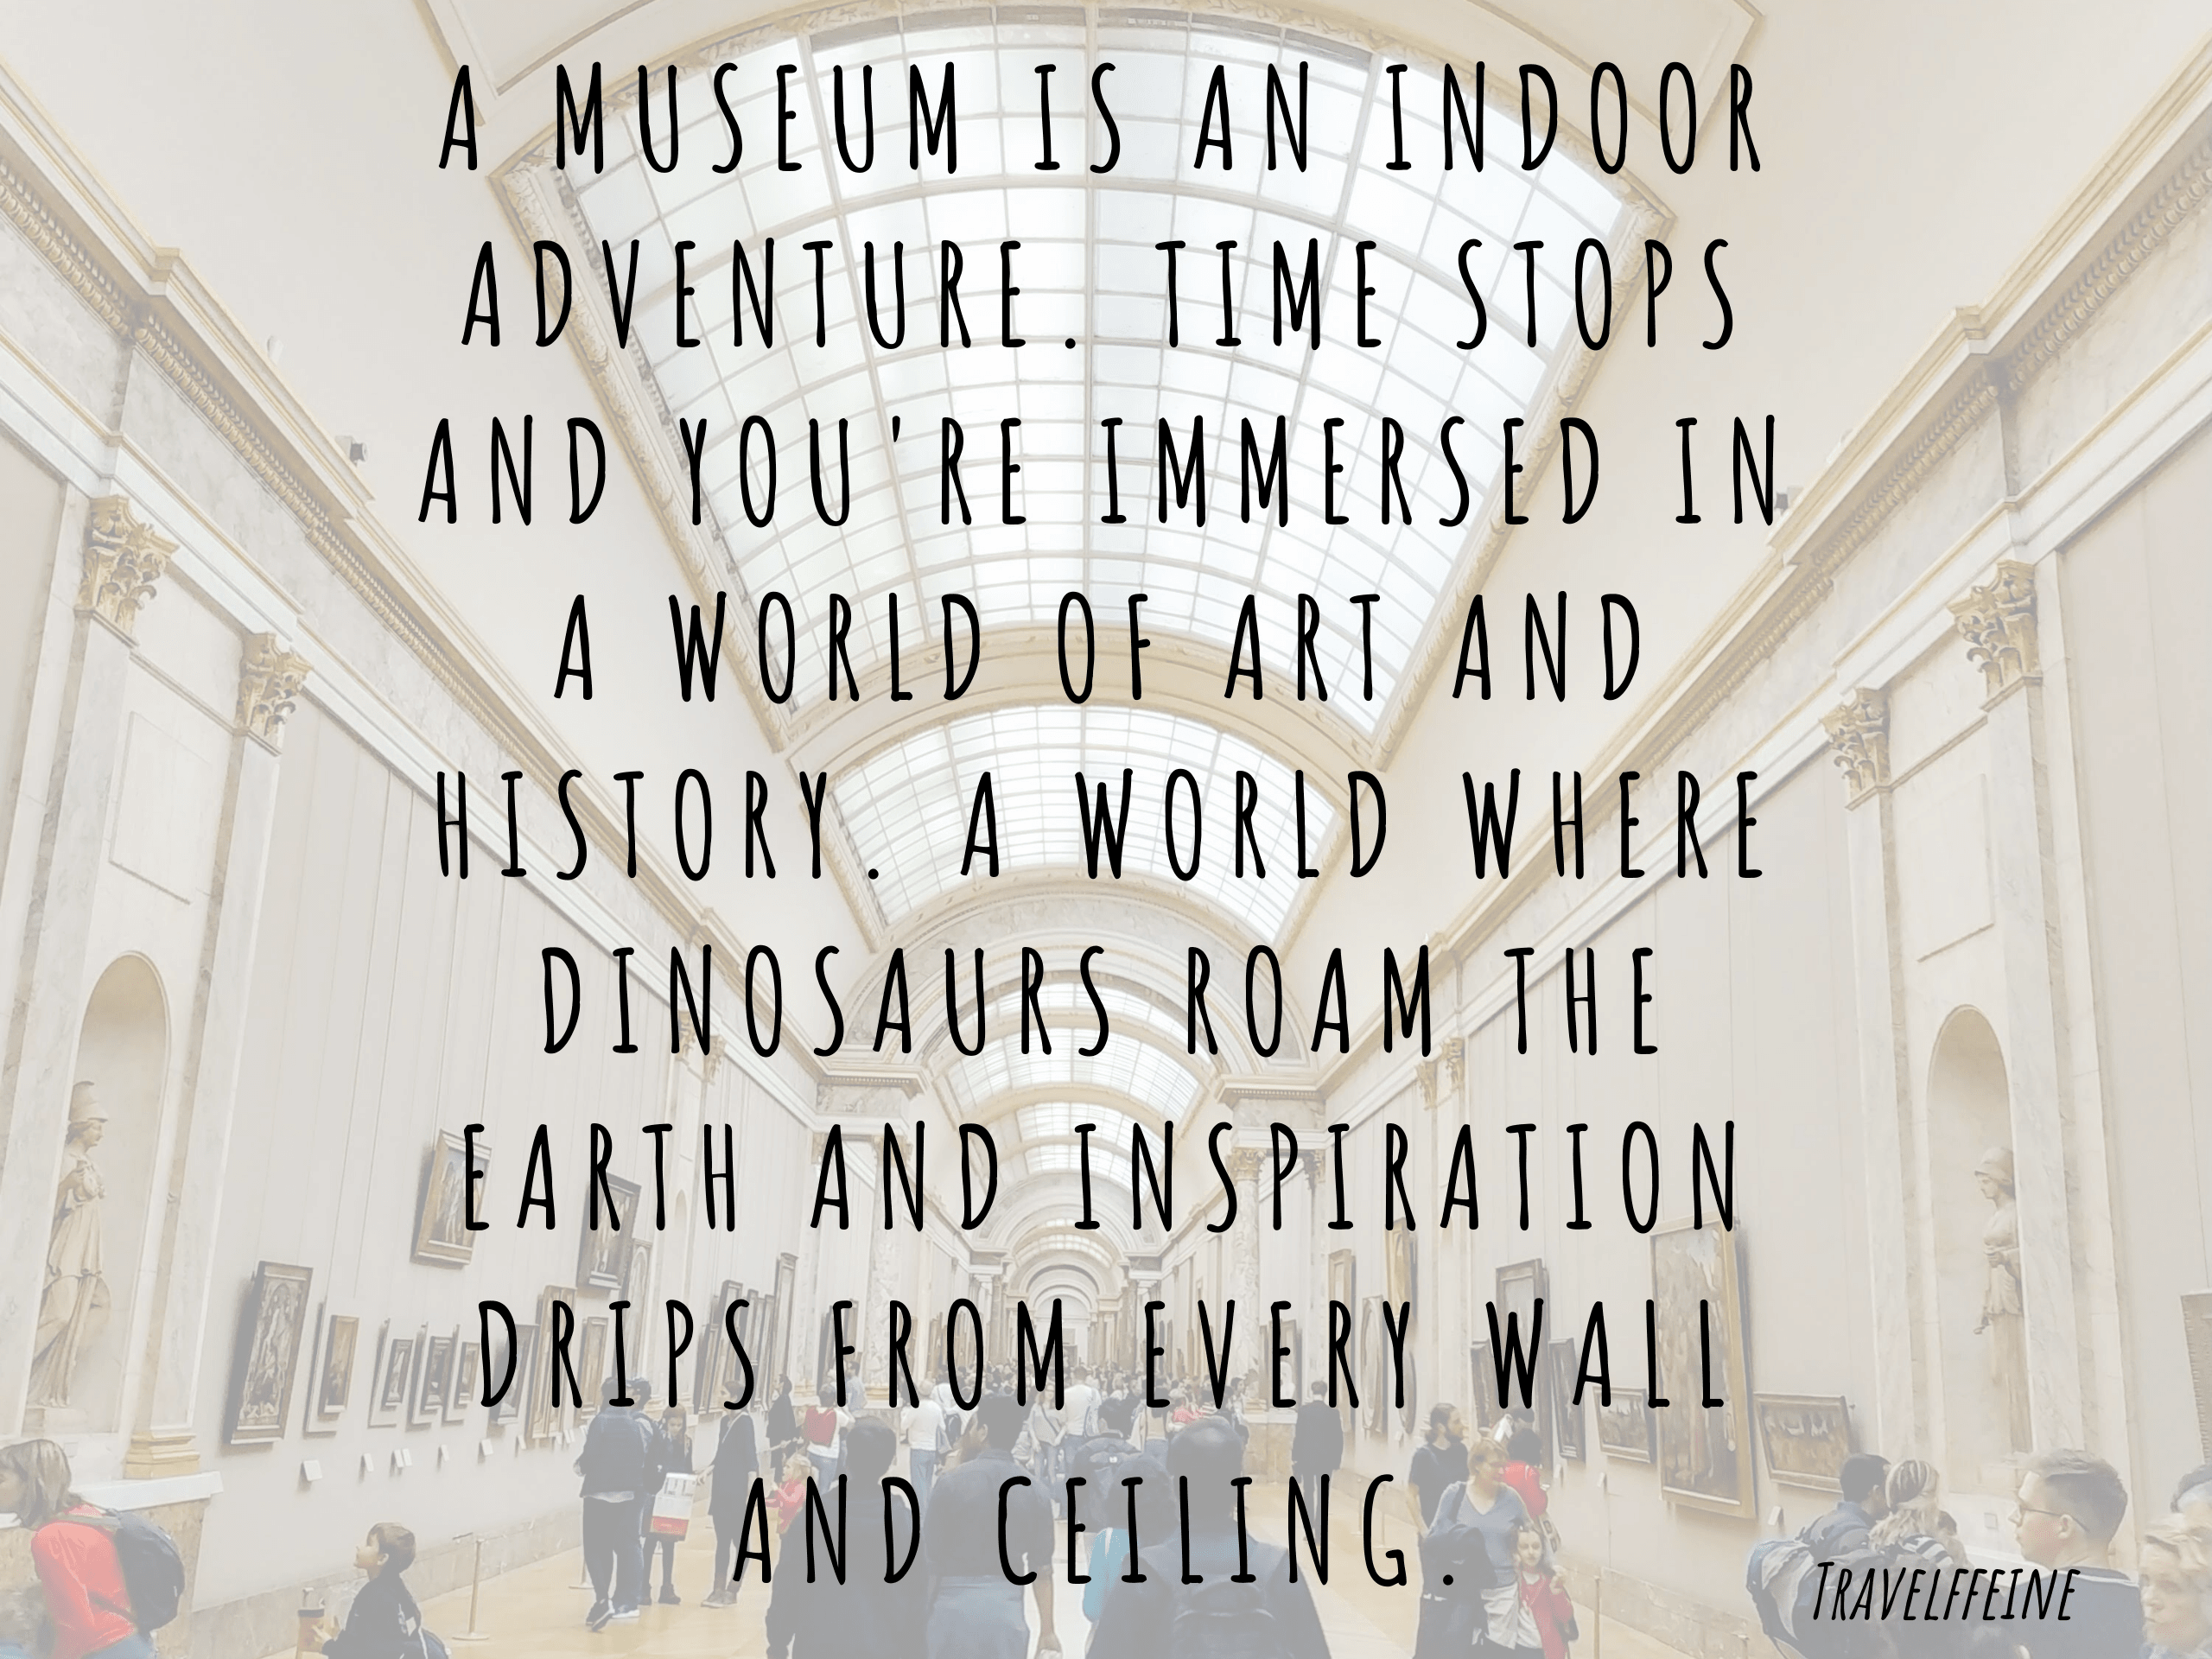
There are so many unique and fascinating museums in the Seattle area. So wouldn’t it be nice if you could get some free tickets? Guess what? You can! I know how inspiring a visit to the local art museum can be and the excitement of seeing a tiger at the zoo or an octopus at the aquarium.
I also realize that sometimes the budget can be a little tight, and you may not always have the funds to do these extra activities. That is why I created this post! I think everyone should have a chance to visit museums and zoos, no matter their income. They are perfect for making unforgettable memories for you and your family. It’s also an excellent way to spend a rainy day!
In this article, I share some great ways to get free tickets to over 25 of the top museums in the Seattle area, as well as the Woodland Park Zoo and the Seattle Aquarium!
For those of you in Pierce County, you are not only eligible to get a Seattle Public Library card (and therefore all the benefits that go with it), but there are also free museum programs through the PCLS, which I list below. If you don’t live in the Seattle area, check to see if your city has any of the additional options I mention in this post.
Updated January 20, 2022
After 2020 the museums offering free tickets through the KCLS have changed and continue to change. At this update, the Woodland Park Zoo is no longer one of the free museum pass attractions. Neither is the Seattle Children’s Museum, Seattle Art Museum, or Henry Art Gallery. This list could change again in the future, so please continue to check in with your library website to see the most up-to-date list.
One new addition to the KCLS museum pass system is the Washington State Parks! I am so excited about this option. You can reserve a 14-day Discover Park Pass for free! This allows you to use the many wonderful Washington State Parks without paying for a day pass. How great is that! There are a limited number of passes available, though, so place a hold today to reserve your spot. It’s sort of like putting a hold on a book that is currently checked out.
Continue reading my original post below.
How to Get Free Tickets to Seattle Museums & Attractions
Your Local Library
I love the library. My small-town library was a mainstay of my childhood. If you don’t have a library card, you need to get one! Your local library is an excellent resource for finding not only inspiration but also some great discounts! I doubt most people realize all the benefits they have through the power of their library card!
Below I discuss library museum passes and how to get free tickets using the following Puget Sound library systems: King County Library System (KCLS), Seattle Public Library System, and Pierce County Library System. If your library is not on this list, check with your local library to see all the benefits you have available in your area.
Those of us that live within the area of the King County Library System (KCLS) and the Seattle Public Library System have it especially good. In addition to a long list of free resources (language learning, job training, free printing, etc.) they also offer free tickets to visit the top museums in Seattle and Tacoma, plus the Woodland Park Zoo and the Seattle Aquarium! Keep reading to discover all of the included museums and attractions.
How to Get a King County Library System Museum Pass:
First off, you’ll need a KCLS library card. If you don’t already have a KCLS library card, but live in King County, visit the KCLS website to learn how to apply for a library card.
You can reserve a museum pass through the KCLS online. The King County Library System issues new museum passes each day at 2:00 p.m. So if you look for a pass, and one isn’t available for the date you want, just come back each day at 2:00 p.m. and try to get a pass then. Visit the KCLS museum pass website to learn more.
How to Get a Seattle Public Library Museum Pass:
If you live or work in one of Seattle Public Library’s “free service” areas, you can get a Seattle Public Library card. The “free service” areas include the cities of Seattle and Bothell, as well as those living in other areas in King County. If you have a library card from another county, such as the Pierce County Library System, you are also eligible to get a free Seattle Public Library card. Visit the Seattle Public Library to see the full list of eligible counties as well as what documentation you’ll need to get your Seattle Public Library card.
The Seattle Public Library Museum Pass works much like the KCLS Museum Pass in that you can reserve the passes ahead of time online (subject to availability). New passes are released nightly at 9 p.m. Visit the Seattle Public Library Museum Pass website for more information.King County Library System offers free museum passes to the following museums:
Learn about the people, places, and events that make up Washington state’s unique history. The KCLS Museum Pass is good for two adults and four children ages 17 & under. Passes not accepted during the annual Model Train Festival.
Visit the Bellevue Arts Museum for creative displays of art, craft, and design. I feel like the BAM tends to focus more on the craft and design side of art, a little more so than say the Seattle Art Museum. The first Friday every month is free. The KCLS Museum Pass is valid for two free tickets.
The Kids Quest Children’s Museum in Bellevue is a great place to spend a rainy day with the kids. It is tailored towards kids from 0-10, and they offer all sorts of hands-on activities, such as painting, storytime, and creative labs. They also have workshops just for adults too, make sure to check out their website to see what’s going on this month! The KCLS Museum Pass is good for two free tickets.
Location: 1116 108th Ave NE, Bellevue, WA 98004
Seattle Public Library offers free museum passes to the following museums:
The Seattle Children’s Museum is located at the Seattle Center and is a fun place for your child to explore their creativity in a hands-on interactive environment. It is the perfect place for your kids’ imaginations to come alive! They can build things in the Dunn Lumber Construction Zone or pretend to shop and play cashier at The Market, be a star of their theater production at the Bijou Theater or play optometrist for the day at The Eye Clinic.
John C. Maxwell once wrote, “Imagination is the soil that brings a dream to life.” The Seattle Children’s Museum is a great place to let your kids imagine and dream! The Seattle Public Library Museum Pass gives you 5 free admissions to the Seattle Children’s Museum, so bring a friend!
The newly redesigned Burke Museum of Natural History is now open for you and your family to explore. The building itself is a gorgeous piece of architecture; however, step inside and delve into the worlds of biology, archaeology, and paleontology. I mean, who doesn’t love seeing dinosaur bones! They have hands-on workshops and activities for the kids as well as some after-hours events for adults. You get two free tickets with your Seattle Public Library Museum Pass. Free tickets are available every first Thursday of the month, and you can even reserve your free ticket ahead of time online!
If you love boats and love being on the water, then the Center for Wooden Boats is a must-visit for you! They offer programs for all ages. Including sailing classes and boat building classes for adults, as well as programs for youth and teens such as learning to sail and beginner woodworking workshops.
In addition to historical exhibits, photography exhibits, and other hands-on displays, they also offer boat rentals (canoes, sailboats, kayaks, etc.). As you can imagine, there are many things to do at this “living” museum. They want you to come and touch, feel, and explore all there is to know about boats. This will make for a fantastic day of memories!
Admission is always free to the Center for Wooden Boats and exhibits. However, a Seattle Public Library Museum Pass permits one adult and up to three other people (assuming they fit in the boat) one hour’s use of one of the Museum’s historic rowboats on Lake Union. (Subject to the museum’s livery hours and availability of boats which rented on a first-come, first-served basis.)
Paul Allen’s Flying Heritage & Combat Armor Museum houses an exceptional collection of WWII tanks, combat armor, and aircraft. If you are interested in history, especially during WWII and vintage aircraft, then don’t miss this museum.
If The Museum of Flight is a favorite of yours, then you are sure to enjoy the Flying Heritage & Combat Armor Museum. They have special events throughout the year, including a unique Easter egg hunt. See their website for hours. A Seattle Public Library Museum Pass to the Flying Heritage & Combat Armor museum includes two free tickets.
Location: 3407 109th St SW, Everett, WA 98204 (at Paine Field)
The Henry Art Gallery is a contemporary art gallery located on the University of Washington’s main campus. Although a small gallery, they strive to be diverse and display contemporary artwork from artists around the world. Additionally, they also have an annual display of art from UW graduate students. The museum pass from Seattle Public Library gives you two free tickets to the Henry Art Gallery, and all youth 17 and under are free of charge. The Henry Art Gallery also offers free admission on the first Thursday and Sunday of every month.
Location: 15th Ave NE & NE 41st St University of Washington campus, Seattle, WA 98195
The Log House Museum is a small museum documenting the history of the early settlers to Seattle. Alki was the birthplace of what would become Seattle. It was where the first settlers landed ashore. Enjoy a day at the beach and stop in at this small historical museum to learn more about Seattle’s early history. A Seattle Public Library Pass admits up to 4 individuals to the Log House Museum.
The Museum of History and Industry (MOHAI) is located off beautiful Lake Union and is conveniently located next door to the Center for Wooden Boats, so you can visit two museums in one day if you plan accordingly. MOHAI is an interesting museum that tells the journey of Seattle’s development over the years.
Follow our history from the early Native Americans to the arrival of Europeans and all of the technological advances throughout our history. If you haven’t visited it before, definitely put this one on your list to see this year! With the Seattle Public Library Museum Pass, you get two free tickets, and children 14 and under are free. Additionally, the MOHAI offers free admission on the first Thursday of every month.
The Nordic Museum, located in Seattle’s Ballard neighborhood, is the largest in the United States. It displays the life, art, culture, and values of the five Nordic countries: Denmark, Finland, Iceland, Norway, and Sweden.
A pass through the Seattle Public Library includes admission for two individuals. Children 4 and under are free. The Nordic Museum also offers free admission on the first Thursday of every month. Their hours vary throughout the year, so make sure to check hours of operation when planning your visit.
Explore this unique museum located in Seattle’s International District. The Wing Luke Museum is dedicated to the history of Asian Pacific American immigrants. Learn what it was like for the first Asian Pacific immigrants and also what it is like for their culture today. In addition to the museum exhibits, they also offer walking tours that include history about the area as well as sampling delicious food along the way.
Admission also includes a 45-minute guided Historic Hotel Tour that transports you back in time to discover what the early Asian Pacific American pioneers must have experienced when first arriving in Seattle. A pass to the Wing Luke Museum through the Seattle Public Library includes two free tickets (includes a 45-minute tour).
Geeks everywhere will enjoy this museum. Discover the history of the computer and its initial uses. Learn about mainframes, green screens of the ’80s, and everything in between and up to the present day. Explore the future trends of augmented reality and robotics and be inspired for what is to come (or perhaps a little frightened).
They offer daily tours, talks, and hands-on exhibits, bring the whole family and geek it out! A pass through the Seattle Public Library is good for two tickets (children 5 and under are free). They also offer free admission on the first Thursday of the month.
Location: 2245 1st Ave S, Seattle, WA 98134
Free museum passes offered by both KCLS & Seattle Public Library:
*This list includes museum pass offers that are identical at both the KCLS and Seattle Public Library System. The lists above are for museum passes offered only at one or the other.
Learn about the history of African Americans in the Pacific Northwest at this museum located in Seattle’s Central District. It is located at the Jimi Hendrix Park. The museum is only open Wednesday through Sunday, so make sure to check their website for hours and information. Free admission on the first Thursday of every month. The KCLS Museum Pass/SPL Museum Pass is valid for four free tickets.
Location: 2300 S Massachusetts St, Seattle, WA 98144
The SAM is probably my favorite museum in Seattle. I have such fond memories of coming here with my hubby when we were dating. They offer some world-class exhibits throughout the year, and I love that they often have photography exhibits. The KCLS Museum Pass/SPL Museum Pass is good for two free tickets.
Also, as a tip, the best parking is beneath the SAM in the Russell Investment Center Garage. However, if you’ve got a raised vehicle, you may not fit, as only cars 6’7″ fit in this garage. Ask for a discount parking ticket at the ticket desk. We got 4 hours of parking for only $6 on our last weekend visit–that’s a steal!
I love that you can get free tickets to the Seattle Aquarium through the library program! Let’s face it–this aquarium is not cheap! With either your King County Library card or Seattle Public Library card, you can get four free tickets! So plan ahead and snag your four free tickets to the Seattle Aquarium. It makes a perfect way to spend a rainy day! (Children 3 and under are free.)
There is something for almost everyone at this museum. Enjoy movies? Science Fiction? Music? The MoPOP has it all. This is also one of the more expensive museums in the area, so getting some free tickets to visit is a total bonus! Learn about Seattle area musicians, explore the Minecraft exhibit, or see props from some of your favorite t.v. and movies. They also have regular movie showings in their theater throughout the year.
The MoPOP is conveniently located at the Seattle Center, so why not make a day of it and explore the Pacific Science Center too or head over to the fountain, and if it’s a hot day, have some fun cooling off! KCLS Museum Pass/SPL Museum Pass admits 2 adults and 2 children ages 5-17, children 4 and under are free (special exhibits may be extra).
This is a favorite museum of many in the Seattle area. If you love airplanes, space exploration, and history, the Museum of Flight has you covered! Learn about Amelia Earhart, immerse yourself in the Space Race and pretend to be an astronaut, explore the impact of flight during WWII or tour a retired Air Force One plane and pretend you’re the President for the day.
Additionally, the Vietnam Veterans Memorial Park, located next to the museum, was recently completed and is free to the public. KCLS Museum Pass/SPL Museum Pass admits 2 adults and 2 children ages 5-17, children 4 and under are free. Charges for interactive experiences and special exhibits are extra.
Location: 9404 E Marginal Way S, Seattle, WA 98108
Who doesn’t love a trip to the zoo? I love visiting the zoo and seeing all the beautiful animals. The Woodland Park Zoo prides itself on giving the best care possible to its animals, and they offer many interactive experiences and educational talks to improve our understanding of the animal kingdom. The KCLS Museum Pass/SPL Museum Pass is good for 4 free tickets to the zoo! So grab your family, pack a picnic lunch, ,and make some memories!
Location: 5500 Phinney Ave N, Seattle, WA 98103
Pierce County Library Museum Pass
For those of you who live in the Tacoma area and within Pierce County, you can “check out” museum passes at your local library. Rather than reserve individual passes online, as you would with the KCLS or SPL museum passes, the Pierce County Library Pass requires that you visit your local library. You then check out the pass(es) of your choice (subject to availability).
The passes work as your free ticket and are valid for one week and one museum per pass. However, you can check out passes for up to 6 different museums per week (museums listed below). Visit the Pierce County Museum Pass website for further information.
PCLS offers free museum passes to the following locations:
This museum is dedicated to maritime and boating history. You will discover the rich history of the Native American people who first called the area home as well as the early European settlers to the Tacoma area. Learn how the railway and shipping lines worked together to shape the Puget Sound region. Learn about the first tools and boats used by settlers and walk through the boat shop admiring the beautiful hand-crafted boats. Museum hours vary, so make sure to check the website for hours and admission information.
Present your Seaport Pass at the Foss Waterway Seaport front desk and receive free admission for up to 2 adults and 4 children under the age of 18. Children ages 5 and under are free. Location: 705 Dock St, Tacoma, WA 98402
This small museum located in Gig Harbor, Washington, is devoted to the remarkable legacy of the Gig Harbor Peninsula. Established in 1964, the museum offers hands-on exhibits and interactive displays to help tell the history of this area. Make a day of it and enjoy the beautiful drive out to the Peninsula as you learn more about the region’s history. Present the Harbor History Pass at the front desk and receive up to four free admissions. Children ages 5 and under are free.
Location: 4121 Harborview Dr, Gig Harbor, WA 98332
Enjoy exploring the trails throughout this 10-acre garden retreat in Lakewood, Washington. They are open year-round, and the gardens change with the seasons. You will find a peaceful retreat within these beautifully landscaped gardens. Opening hours vary based on the time of year, so make sure to check ahead of time before you plan to visit.
Present the Gardens Pass at Lakewold Gardens and receive free admission for up to 2 adults and 3 youth ages 13-18. Children ages 12 and under are free.
Location: 12317 Gravelly Lake Drive SW, Lakewood, WA 98499
Besides staring in awe at the gorgeous glass creations by Dale Chihuly and other outstanding artisans, you can also make your own glass creations or watch artists in the hot shop create their glass art live. Let the colors and shapes inspire you. There are workshops for kids and adults alike. They also have a night market where you can purchase glass creations from local artisans. Read here to learn more about hours, parking, and admission.
Present the Glass Pass at the Museum of Glass and receive free admission for up to 2 adults and unlimited family members under 18.
The TAM offers a unique selection of artwork highlighting the Pacific Northwest region as well as a focus on the American West. There is also a gorgeous collection of glass art donated from glass artists in Washington state.
Present the Art Access Pass at the TAM’s admission desk and receive admission for up to 2 adults and 4 children under the age of 18. Children ages 5 and under are free.
Learn about the people, places, and events that make up Washington state’s unique history. Present the History Pass for free admission for up to 2 adults and 4 children under the age of 18. Children ages 5 and under are free.
Location: 1911 Pacific Ave, Tacoma, WA 98402
Additional Options for Free Admission to Museums
Bank of America
If you are a Bank of America cardholder, then you are eligible to get free tickets to various museums nationwide as apart of their Museums On Us program. Look up your state to see the list of participating museums. This option is only available on the first full weekend (Sat and Sun) of each month. You get one free admission to the participating museum. Make sure to read all the details and restrictions on this offer and check with your local museum for hours and other information.
In the Seattle and Tacoma area you are eligible to get free tickets (as per links above) to the following:
Most museums have a free day each month. The most common free museum day in Seattle is the first Thursday of the month. However, check with each particular museum you’re interested in visiting to learn the exact day and hours offered. This is something to consider when you are visiting other states too. Check to see if they have any free museum dates during your visit.
I listed many of the ones that offer a monthly free museum day in my lists above. However, the Asian Art Museum isn’t included with any of the museum passes, and I think you should check it out when you get a chance.
Asian Art Museum:
The Asian Art Museum offers free museum days on the first and second Thursday of each month, as well as the first Saturday of each month. Another thing I love about the location of this Seattle museum is the free parking at Volunteer Park! Make sure to check out the museum’s website for opening hours and other useful information.
Location: 1400 E Prospect St, Seattle, WA 98112
Additional Options for Free or Discounted Tickets
Blue Star
Military personnel can go to all participating museums for free from May 18 through September 1st (the dates vary each year, so check Blue Star’s website each year to learn more).
Museums for All EBT Program
If you have a Snap EBT card, you can visit museums and some zoos for $5 or less at participating locations.
Student Discount
Almost all museums and attractions, such as zoos and aquariums, offer student discounts. If you are a student, always make sure to ask before purchasing your ticket, if there is a student discount. Then come prepared to show your Student ID.
AAA Discounts
If you have a AAA card, make sure to ask if there are any discounts before purchasing your tickets. It is not as common to find AAA discounts at museums. However, it never hurts to ask!
A small contemporary art museum (think large gallery) that houses artwork from the 19th century to current. They display art from both local artists as well as global artists. It’s worth a stop when you’re in the area.
Located by the Seattle Center, the Bill & Melinda Gates Foundation Discovery Center lets visitors learn more about the work the foundation is doing to help people around the world. Exhibits also display global needs and encourage visitors to discover what they can do to help in their local communities.
Location: North, 440 5th Avenue, Seattle, WA 98109
Journey through the history of Microsoft. Learn how they got started and what their plans are for the future. You’ll also get a chance to play Xbox games, try out your racing skills on the Forza simulator and shop at the Microsoft Store. Hands-on displays and products let you test out items you’re interested in purchasing as well as have some fun and be inspired by what’s coming next.
Did you know there is a National Park located within downtown Seattle? Well, there is! Sort of that is. It’s a National Park that is a museum dedicated to the history of the Klondike Gold Rush in our area.Visit and learn more about the impact of the Klondike Gold Rush on Seattle. It was an exciting time during the gold rush, with people streaming into the area with dreams of striking it rich! Have fun talking with a park ranger and learning all about this exciting time in Pacific Northwest history.
This small museum located on Seattle’s waterfront shares the history of the Coast Guard here in the Pacific Northwest. Volunteers on staff will be happy to give you a tour through the exhibits and answer any questions you might have. Plus, since you’re on the water, enjoy looking out to see what ships are docked during your visit. The Coast Guard plays an essential role in the U.S. Take some time to learn more about it here.
Location: 1519 Alaskan Way S, Seattle, WA 98134
Closing Tips
You need to print out a physical copy of your museum passes from both KCLS and Seattle Public Library. Make sure to bring your photo ID with the last name matching the last name on the pass.
In addition to the Blue Star program for military families, many museums also offer daily military discounts, so ask ahead of time.
If trying to get a museum pass through either the King County Library System or the Seattle Public Library, set a reminder on your phone’s calendar at either 2:00 p.m. (KCLS) or 9:00 p.m. (SPL) to check when new passes are released.
A museum is an indoor adventure. Time stops and you’re immersed in a world of art and history. A world where dinosaurs roam the earth and inspiration drips from every wall and ceiling.
In my blog post 20 New Year’s Resolutions for Travelers, I mention the idea of playing tourist at home. You don’t have to travel to far off places to make unforgettable memories. Going to the zoo or visiting a museum can become a favorite memory for both yourself and your family to remember for years to come. It’s about setting aside time to do something new, to be inspired, and to be reminded what a wonderful world we live in.
This post is a journal of the day’s sightseeing and experiences. I also wrote some travel guides to help you on your next trip to the Florida Keys. You’ll find these linked at the bottom of this post.
I visited Key West once before in the late ’90s; however, my husband had never been there before. He told me he wanted to see the Seven-Mile Bridge as he had seen it in the True Lies movie with Arnold Schwarzenegger.
I’m sure vacations have been planned on less. So we drove from Orlando, where he had just finished with a business conference, to Islamorada. We spent the night there before continuing our road trip to Key West.
Now before I continue, I thought I should put in a small disclaimer, just in case you’re reading this as a bedtime story to your kid or something.
Disclaimer: There are references to nudity and naked bodies in this post; if that bothers you, read one of my other posts instead.
Morning of our Florida Keys Road Trip
We packed up our camera gear, drone, swimming clothes, bottled water, and sunscreen and headed out the door! First stop was coffee and breakfast at the Midway Cafe and Coffee Bar in Islamorada.
I order some avocado toast and key lime pie for breakfast and a bottomless cup of coffee. I love a bottomless cup of coffee.
When I received my key lime pie, I was surprised to see it made with an actual pastry crust, not the graham cracker crust I was used to. You can read more about why that is in my post on finding the best key lime pie in the Florida Keys.
I enjoyed breakfast at the Midway Cafe and recommend you stop when you’re in the area. They have a little space where they sell handmade jewelry and other locally crafted items. It’s a brightly-colored, sunny spot, perfect for enjoying some coffee before heading to Key West.
Some say this is the traditional way to make a key lime pie.
After we finished, we went out to the car, where hubby was so excited to be driving a convertible Ford Mustang for our road trip. He made sure I took a few photos of him driving, and of course, we had a Florida road trip playlist that included “Ice Ice Baby.”
Back on the Road
It was great fun driving with the top-down and the wind blowing in our hair. However, I will say we didn’t leave the top down for our entire day of driving. For one thing, it is just too hot! And second, my hair-whipping about into a frantic rat’s nest did get old after awhile. It is still a lot of fun, and I recommend it if you get the chance for a free upgrade, like we did, to go for it!
Hubby loved driving with the convertible top down, wind in his hair.
Photo Stop at Duck Key
This one made me laugh, so I took a picture of the sign. Little Duck Key, get it? Hmm, perhaps you had to be there.
I love the play on words. The Florida Keys have lots of interestingly named Keys, which is part of the fun!
Hubby brought his drone, and we did a lot of research, including using apps that tell us whether it is okay to fly, what times of the day is better, and then we also read the local forums to find out where local Floridians went to fly their drones.
Unfortunately, there have been some not-so-bright drone owners who have flown their drones into restricted areas such as airports and other places most people would never dream of doing! This creates a very complicated and restrictive process for the rest of us drone owners.
So, after doing our do-diligence, we found a spot along the old seven-mile bridge that, according to locals, was approved for drone flying. We walked a little way up the bridge, away from other people (although there were some other tourists who at first gathered around hubby, as the drone always seems to bring spectators).
Once hubby felt we were a safe distance from people, and he had an open area to land when needed, he put the drone up in the air.
Walking the old seven-mile bridge. Beautiful, but hot!
The Heat Makes Me Crabby
I’m not sure how long we were out flying, but we did walk as far as we could on this section of the old seven-mile bridge, and needless to say, when I left the car, I had not planned on spending so much time walking in the hot sun. I didn’t put on sunscreen when I left this morning, as we headed to breakfast and then I thought I’d apply it afterward. I forgot.
So, now my shoulders are turning a bright red, and my feet are tired from walking miles on concrete, and I’m getting a little crabby. This always seems to happen when overheating. Hubby and I discussed this once when we were in Thailand. We were walking up the road in Koh Lanta, headed to a “secret” beach, and he mentioned how heat affects the way people act.
Sure enough, about 5 minutes into our walk, the conversation turned into a “whose idea was it to walk here anyway” argument. However, soon, we reached the beach, and as soon as we cooled off in the beautiful turquoise water, our attitudes were miraculously back to cheery and chipper.
That was how my walk back on the seven-mile bridge went. Of course, after I got back to the car, drank some water, put on some sunscreen, and turned on the a.c., I adjusted my overheated attitude, and we were on our way again.
This is, of course, the side social media doesn’t typically show. You see us in the pictures smiling together and looking like we never have a care in the world. Uh, no, we’re humans, only humans.
Sombrero Beach in Marathon, Florida.
Next stop Sombrero Beach
Sombrero Beach is reportedly one of the best beaches for swimming in the Florida Keys. For those of you who don’t know, the Florida Keys are formed from a protected reef system. In short, there are very few swimmable beaches here. Often, sand is brought in to form man-made beaches. So we headed for Sombrero Beach in Marathon, to check it out.
When we arrived, we found it under construction. The restoration project looked like it was in its final stages, and it appears to be a fantastic place to bring the family and spend the day. The one area you could still access had people swimming and sunbathing, so I’m sure this beach is a popular one and even more so once the restoration project is complete.
I hand hubby my camera for a little bit, not sure why. He took this “artistic” photo. I’ll let you see if it speaks to you.
“Beach Art”
Key West Here We Come!
With all the time we’ve had in the sun, we now prefer to sit in the air-conditioned car. So we decide to keep on rolling until we arrive in Key West. We can see anything we miss on the way back. A road trip through the Keys is about the journey, not the destination.
We Have Arrived!
We arrive in Key West and make our way for Old Town. Usually, I drive closest to my first sightseeing stop and then find a parking spot. Since today is Saturday, I navigate hubby to the nearest public parking garage, where we park and instead to walk to our destinations.
This was the best decision we could have made! We didn’t discover until later, but we arrived in Key West during their Fantasy Fest. The streets were blocked off for vehicle traffic, and crowds of pedestrians were everywhere! So, although the heat felt unbearable to a Pacific Northwestern like myself, I was happy we had parked and didn’t get tangled up in the mess of crowds and closed streets.
Lunch Stop
We head for lunch at Caroline’s Cafe on Duval Street. Breakfast was a long time ago, and we are hungry! As we walk there, we notice people carrying folding chairs and dragging coolers behind them. I say, “there must be a parade today.” Well, I was right, but it wasn’t quite what I expected.
As we cross the street to Caroline’s Cafe, I notice two people walking across the road towards us. I also see they have no clothes on. Their bodies are painted with patriotic “clothing,” stars and stripes “shorts” and giant “stars” up top. I think, hmm, that’s interesting, have we stumbled onto some Mardi Gras festival?
Let me say before I continue, that lunch was fabulous! I had the blackened chicken pasta, and it was SO good!! I highly recommend it if you are ever in Key West.
This blackened chicken pasta was so good! Hubby kept nibbling off of my plate as it was better than his Cuban sandwich.
Lunch-time “Sightseeing”
So, as we sit down to order, I notice the people at the table directly across from us, are also wearing painted “clothing.” Now, I’ve been to Europe, seen lots of statues, and even a few nude sunbathers, but this, this was not something I had seen before. We’re Americans. We don’t do public nudity.
So as I notice more and more people with their painted on clothing. Hubby leans across the table and tries to oh-so subtly tell me to look behind me. I think in my head, “Um, what could you possibly show me that I haven’t seen yet!” So I peer over my shoulder, in an “I’m not turning to look at you” sort of way and see another naked painted person.
It’s at this point that I realize my husband doesn’t know that he is surrounded by naked people. This is quite funny to me. So I also oh-so-subtly give him the nod to look at the table right next to us. A lot of glitter and paint–that is all my friend. Glitter and paint.
I will note here though that the men all have a grass skirt or some other covering for their lower front regions. Their backsides, not so much.
The resident rooster and vacuum cleaner at Caroline’s Cafe.
The Emperor’s New Clothes
So, as the realization hits my husband, he says, “they’re naked!” Yep. Bingo! He thought they were actually wearing something. Nope. Nothing but paint. He made a trip to the restroom while we waited for our check and saw the line of people waiting to be painted. As you can imagine, the people in line were wearing, um–the Emperor’s new clothes. Of course, the difference between them and the childhood story’s character was that they knew they were naked. They were naked as j-birds.
After lunch, we discussed his newfound realizations, and we laughed as he and I certainly had a new experience on this trip to Key West. We saw things we’d never seen before. I guess that’s what traveling is all about! We also discussed the problems that might arise from the lack of clothing.
Like where do they put their credit cards and wallet? Does every painted person bring a clothed person with them to carry stuff? What happens if they sweat or get wet? This question’s answer was discovered by hubby’s trip to the restroom, where he saw a sign stating that the paint was waterproof. Phew! That could have caused some problems.
Fantasy Fest
Fantasy Fest was created over 40 years ago as a way to increase tourism during Key West’s slow season. So every October for ten days, the city turns into a festival that is a mixture of Mardi Gras meets Halloween. The final weekend of the festival, which we just happened to arrive on, is when they block off a section of the city, for an adult-only area in which nudity laws are “relaxed.”
This is only in the sectioned off portion of the city and only during Fantasy Fest. We did not see any children in this area, or much at all, which of course makes sense. So, should you plan to visit Key West, during the off-season, you may want to keep this in mind when making your travel plans.
And in case you’re wondering how much people pay for their paint jobs, prices range from $100 to $1000. This depends on how much of your body is painted and how detailed of a design you want.
Kapok Tree in Key West
We left the restaurant and headed in the direction of our next stop, Ernest Hemingway’s former Key West residence. As we walked there, the heat felt unbearable. Soon I began to think there might be something to wearing no clothes.
A Kapok tree in Key West.
We passed this beautiful Kapok tree, which reminded me of the banyan trees in Maui. It was a nice place to stop in the shade. We kept crisscrossing the street to follow the shady side of the road. That is how hot it was in Key West. I later learned that they had a 234-day hot streak this year. During that time, Key West had temperatures at 80 degrees Fahrenheit or warmer.
Ernest Hemingway’s Home
When we finally arrived at Ernest Hemingway’s home, we discovered you had to pay in cash. We did not have any cash, and I was okay skipping it (when I’m hot and tired, I tend to lose interest). However, hubby asked the woman at the ticket window, “is it air-conditioned inside?” She replied “yes” that it was, and there was also an ATM around back to get cash. Well, that was enough for him. He heard the magic words “air-conditioned” and might have paid any price to get some reprieve from the heat.
The former residence of Ernest Hemingway.
So I got the cash, and we went inside where it was nice and cool. The inside of the home is decorated with some of Hemingway’s original furnishings. And on display are also some of his books, his typewriter, and movie posters from the many movies adapted after his books.
There is a swimming pool outside the house that calls to you to jump in; however, this is, of course, not allowed. We peeked inside Hemingway’s writing studio. I told hubby how nice it must be to have an entire studio dedicated to writing.
Soon, our tour was over, and after another stop in front of a fan, we went out into the heat to continue our sightseeing.
Southernmost Point in the Continental U.S.
Because it was hubby’s first trip to Key West, I thought he should go to the Southernmost Point in the Continental U.S.–just to say he had. As we walk, the sweat drips down our faces, and my husband assures me he does not need to walk all the way to the Southernmost Point. However, we were almost there, so we might as well finish.
We arrive only to discover there is a line, a line of people who all want a picture with the marker that shows they are at the Southernmost Point in the Continental U.S. It is crazy hot out! Hubby and I stand across the street in the shade, neither of us have any interest in standing in the hot sun for this photo opp.
The line stretches outside the frame. The heat is underrepresented in this photo.
We also conclude that we are way too hot, tired, and sunburned to walk back across town. It is at that moment, a man pedaling a rickshaw comes down the street, we ask him if he can take us to our next stop, the Key West Key Lime Pie Company. Thankfully, he says yes, and we hop on board!
Our driver pedals away almost effortlessly and chats with us about Key West and all the local sites. He said that this is cool, fall weather compared to the summer, where it can get over 100 degrees Fahrenheit, plus humidity! Yikes! Note to self, never visit Key West in the summer.
He takes us as far as he can before the closed roads prevent him from going further, and we thank him for the ride. This is the best $20 I have spent in a long time.
Key Lime Pie in Key West
We continue through the crowds, passing creatively painted people to make our way to the Key West Key Lime Pie Co. The man behind the counter is so friendly and welcoming. We purchase one of their mini key lime pies to share. The man pipes freshly made whipped topping on it before serving it to us. Yum!
The freshly piped whipped topping was a nice touch to this mini key lime pie.
We enjoy our pie and ice-cold water before walking down the street to our next stop, Kermit’s Key West Key Lime Shoppe. Yes, I have more key lime pie, all in the space of 10 minutes. I’m pretty sure I’ll sweat the calories off anyway!
We sit down to share a slice of key lime pie at Kermit’s. The pie at Kermit’s is everything I looked for in a key lime pie. Wonderful tart lime flavor with a buttery graham cracker crust–delicious!
Driving Back Through the Florida Keys
It is late afternoon, and with the parade just around the corner, we both agree we’d rather not get stuck in traffic. Although we may not have hit all of the sights in Key West, we certainly have had a unique experience. So we make our way in the heat to the parking garage, excited to turn the air conditioning on and begin our drive back to Islamorada.
We enjoy the drive back through the Keys, put the top down again, turn up some fun Latin music, and pretended to be carefree teenagers. Of course, we had to stop for selfies at this giant lobster, and we weren’t the only ones. Another man in a red convertible Chevy Camaro stopped and asked if we’d take his picture with the giant lobster too. Nothing like sunshine and warm breezes to make you feel like a kid again!
Who can pass up a selfie with a giant lobster?
We end the evening with a gorgeous sunset while watching a thunderstorm across the water in the distance. It was a fun day!
You can’t come to the Florida Keys without trying the dessert they’re most famous for. As the official state pie, key lime pie can be found all across the state of Florida. It is made from the tiny key limes grown in the Florida Keys. So on a recent trip to the Florida Keys, I decided I needed to eat key lime pie from breakfast to dinner in my quest to find the best key lime pie in the Florida Keys.
Below I share the results of this quest with you and also tell you about an alternative key lime option that isn’t a pie. It was so good I would come back just to eat another one! So continue reading below to find out what this delicious key lime dessert was.
Plus, I’ll list a bonus place to get amazing key lime pie in Miami, just in case you wish to stop there too. The below list is in order of my favorite key lime pie to my least favorite with bonus options listed below.
Two Main Ways to Make Key Lime Pie
You will find two main styles of key lime pie when you visit the Florida Keys. One is made using a graham cracker crust with optional whipped topping, and the other is made with a traditional pastry crust with a meringue topping. Florida residents hotly debate which way is best.
As a West Coast visitor, I was used to eating key lime pie baked with a graham cracker crust and then optional whipped topping. However, I did try the traditional pastry crust version with meringue topping while I visited the Keys, and I will share with you where that was and my thoughts below.
Best Key Lime Pie in the Florida Keys
Kermit’s Key West Key Lime Shoppe
Kermit’s has been around for over 25 years and is a Key West staple for all things key lime. So it comes as no surprise when I declared their key lime pie to be the best key lime pie I tasted in the Florida Keys!
If you aren’t able to make it to Key West to sample some for yourself, they will even ship it to you! In addition to key lime pie, they also sell key lime candy, jelly, salsa and dressings, bath and body products, and so on. You get the picture. They have tried to use key limes in just about everything!
It may not look like much, but this is one delicious piece of pie!
My Pie Impressions: It had a nice strong key lime flavor and a good graham cracker crust. It is important to me that I can taste the tartness of the key limes, I don’t want a key lime pie that is overly sweet. I also want a nice graham cracker crust, still crunchy, not soggy. If I had to find one thing wrong with it, I felt it’s filling was a little too dense (that’s just if I’m super picky).
Conclusion: Kermit’s Key West Key Lime Shoppe had my vote for the best key lime pie in the Florida keys. Try them on your next visit, you won’t be disappointed!
Kermit’s has two locations in Key West. Kermit’s Address: 200 Elizabeth St, Key West, FL 33040 or 431 Front St #2, Key West, FL 33040
Key West Key Lime Pie Co
This was my runner up for best key lime pie in the Florida Keys. I loved that you could purchase little mini key lime pies and also that they made their whipped topping fresh. I’m kind of a snob when it comes to store-bought whipped topping, but when I saw them piping the fresh-made whipped topping on their pies, I knew I wanted to try it!
In addition to selling key lime pies, they also offer a key lime pie class where they teach you to make your own mini key lime pie. That sounds like my kind of class!
The freshly piped whipped topping was a nice touch to this mini key lime pie.
My Pie Impressions: The pie filling was nice and creamy. I loved the texture of the filling, however the key lime flavor wasn’t as strong as I prefer it to be. Also, the crust fell apart and was a little too thin; thus, it became slightly soggy. So overall, I did enjoy their pie, but remember, I was on a quest to find the best key lime pie, so I had to nitpick a little to narrow it down.
Key West Key Lime Pie Co Address: 511 Greene St, Key West, FL 33040
Midway Cafe & Coffee Bar
The Midway Cafe & Coffee Bar is an excellent choice for breakfast if you happen to be in or near Islamorada. On this day, I decided I needed to have key lime pie for breakfast (don’t judge me). The Midway Cafe has the traditional key lime pie recipe, and for locals, they might argue that because of this, it is the best key lime pie.
For me, coming from the West Coast, this was my first time having key lime pie baked in a pastry crust and topped with a meringue topping. So, I was a little surprised when I received my pie. However, I do love trying new things, and it was still key lime pie, so I figured you couldn’t go too wrong with it. Plus, I was served some delicious fresh brewed coffee to go along with my pie.
This is the traditional way of making key lime pie using a pastry crust with meringue.
My Pie Impressions: This key lime pie was made in a traditional pastry crust, and served with a thick meringue topping. It was good, as a pie, but not quite what I expected for a key lime pie. The crust was nice and flaky, and they did an excellent job with the meringue. However, the flavor of the key limes was somewhat lost, I feel, due to the taste and thickness of the pastry crust. So, although not my choice for the best key lime pie, I would still recommend you try it since it is the contested “traditional” way to make a key lime pie.
Lorelei’s is a wonderful spot to watch the sunset in Islamorada. We had a table next to the water and were able to walk over and watch a small shark swim by and two manatees during the time we sat there for dinner. They also had a live band as well as a magic act. So they are a great place to catch dinner, entertainment, and a sunset if you are in Islamorada.
That being said, their key lime pie was a bit of a let down for me. It is not a traditional key lime pie; it is a frozen key lime pie topped with mango sauce and whipped topping.
View from our table at Lorelei’s.
My Pie Impressions: There was very little lime flavor, and the texture was more like a mousse than pie, perhaps that was because it wasn’t frozen when it was served to me. It was a bit of a let down on my quest for the perfect key lime pie. The atmosphere, waterfront view, and service I received at Lorelei’s, however, was terrific! So skip the key lime pie and enjoy dinner and a sunset here instead.
Tip: No assigned seating here, just show up and pick an empty table.
Best Key Lime Dessert That Wasn’t a Pie
In a category, all their own, are the key lime muffins at Harriette’s Restaurant in Key Largo. These muffins were SO good! They have a delicious tart filling, the muffin itself is fluffy and light, not dense and hockey-puckish like so many muffins can be. It is topped with powdered sugar and tastes oh so good with a cup of coffee.
I know this photo doesn’t show it, but this is the best tasting key lime muffin you’ll ever eat!
I want another one just thinking about it. It might have been one of the best muffins I’ve ever eaten. If I had to choose between a slice of key lime pie or this key lime muffin, I’d choose the muffin. It was that good. Plus, I can make a good key lime pie on my own, I do not know how to make this delectable muffin – but I want to learn!
In addition to Harriette’s amazing muffins, they also have excellent breakfast and coffee. The service was top notch too! I know if I lived in Key Largo, this would be a regular hang out of mine. I also know I would need to run every day to keep the pounds off!
So first things first, if you go to Miami, then you should try Cuban food. Let me just put that out there first off. If you’ve never eaten Cuban food, Versailles Restaurant in Little Havana is a great place to start.
If you happen to be in the area, but don’t want to eat a meal, they also have a bakery adjoining their restaurant where you can purchase all sorts of yummy baked goods made fresh each day. Their key lime pie happens to be really good! It might have tied Kermit’s for my first place position had I been able to do a side by side comparison, although, I still think the flavor of Kermit’s filling is better.
I love palm trees!
My Pie Impressions: It had a fantastic graham cracker crust, it was probably the thickest graham cracker crust I’d ever seen, and the filling had good lime flavor. However, the downside is that the crust may have stolen the show a little from the filling. So that’s where I have to get picky, the crust was so good, that it overpowered the filling just a little.
The food here was also amazing! If you come, I highly recommend–in addition to the key lime pie, that you try their imperial rice dish, you’ll be glad you did!
So there you have it. My choice for the best key lime pie in the Florida Keys is Kermit’s Key West Key Lime Shoppe. However, if you happen to be in Miami, check out the bonus key lime pie option there too.
Also, do not miss eating the muffin at Harriette’s Restaurant. I mean, you still need to try the key lime pie at Kermit’s, but also make Harriette’s a stop. You can buy the muffins to go, but I highly recommend you enjoy it with a cup of coffee, then get another for the road.
Okay, now that I am thoroughly craving a key lime pie, I think I will go on a hunt for a muffin recipe.
Driving to Key West is a sun-filled, top-down, only-in-Florida kind of road trip. Just remember when you’re road tripping through the Florida Keys, that it is about the journey rather than the destination. Yes, there is plenty to see in Key West, the end of the line for a Florida Keys road trip, but half the fun is getting there.
Driving to Key West should be a series of stops in whichever Key grabs your fancy, eating huge amounts of key lime pie, photo ops, and listening to your favorite road trip music.
Where to Start Your Road Trip to Key West
My hubby and I just finished a road trip from Orlando to Key West. We stayed two nights in Islamorada and spent one full day driving to Key West. We also stopped in Miami and spent a fun-filled day there before heading back to Orlando to catch our flight home.
I recommend spending at least one night in the Florida Keys and giving yourself one full day to drive to Key West. Here are some examples of non-stop drive times to Key West:
Orlando to Key West ~ 6 ½ hours
Miami to Key West ~ 3 ½ hours
Key Largo to Key West ~ 2 hours
Marathon to Key West ~ 1 hour
It’s About the Journey, Not the Destination
This should be a relaxed road trip, with lots of time for stopping whenever it strikes your fancy, and extra time to spend sightseeing in Key West. I mean, you’ve taken the time to drive all the way there, might as well spend a couple of hours before returning to the car and starting the adventure in reverse.
Driving to Key West is not a trip of speed. US Hwy 1 is a mostly two-lane highway with lots of traffic. So you shouldn’t take this trip thinking you’ll speed all the way to Key West. It’s not going to happen. Enjoy the journey.
I’ll cover things to do in the Florida Keys, places to eat, and where to find the best key lime pie. Now put the top down or crank up the a.c. and let’s hit the road!
Top Things to Do On Your Drive to Key West
Americana Photo Ops
This is one thing I love to do when taking a road trip in the U.S.! Stop and see the world’s largest ball of yarn, or a giant talking cow, these are a part of the quintessential American road trip. The Florida Keys have lots of fun ones like this giant crab at the Rain Barrel Artisans Village in Islamorada. Keep a lookout, and you’ll see a billboard-sized mermaid, a large conch shell, and other fun stops to take photos of when driving to Key West.
Stop at a Park and Enjoy Some Beach Time
Although the Florida Keys aren’t known for their traditional beaches, you can still find a sandy shore or two to walk along the water, rent kayaks, snorkel the reefs or even go for a swim if you can find a spot deep enough.
Due to the reef system that protects the Florida Keys, it prevents the large waves from coming in and creating the large sandy beaches most people are accustomed to finding. Sand is often brought in to develop man-made beaches in the Keys. This barrier of protection also creates a shallow bottom, but there are some areas you can still go for a swim or wade out for deeper waters.
Don’t forget your sunscreen and also bring water shoes if you have them as the shoreline can be rocky due to the reef system that makes up the Florida Keys.
John Pennekamp Coral Reef State Park and Bahia State Park are two great choices when looking for a park to spend some time by the water in the Florida Keys.
Another beach that makes a great place to go for a swim is Sombrero Beach in Marathon. The park has been completely renovated and is a beautiful park to spend the day snorkeling and swimming. It has bathrooms, showers, playgrounds, picnic areas, and a lovely beach area for sunbathing and relaxing.
If you prefer, you can always save the beach time for your ride back through the Keys after visiting Key West.
Feed the Tarpon at Robbie’s in Islamorada
Stop at Robbie’s on your drive to Key West and create some fun memories feeding the giant silver tarpon. It costs $2.25 to gain access to the feeding dock. You can buy a bucket of fish for $4.00 to feed the tarpon, or you can watch others feed the fish from the pier. Visit Robbie’s to watch a video of what it’s like to feed a tarpon.
Stop on Little Duck Key (yeah that made me smile too) at the parking lot for the boat launch and old 7 Mile Bridge near mile marker 40. The old 7 Mile Bridge is now a pedestrian walkway, and it runs parallel to the new 7 Mile Bridge. Walk along it and enjoy some beautiful views of Little Money Key. Take time to watch people fishing, look for starfish, sea turtles, and to spot fish swimming below. Enjoy a stroll in the sun in a unique setting you probably won’t find anywhere else.
Visit the Dolphin Research Center on Grassy Key
If you love dolphins, then consider stopping at the Dolphin Research Center and learn about the dolphins they have rescued and the rehabilitation efforts of the facility. You can also book a dolphin encounter and get in the water with the dolphin. Depending on your interest level or program you want to do, you’ll need to book in advance and plan for a few hours here. So keep that in mind if you only have one day to drive through the Florida Keys.
General Admission Fees: $28 for adults and $23 for kids. Program fees vary with each program you choose. Visit the Dolphin Research Center to learn more about all the plans they have to offer and to book your experience.
Dolphin Research Center address: 58901 Overseas Hwy, Grassy Key, FL 33050
Eat Key Lime Pie at Kermit’s Key West Key Lime Shoppe
You’ve finally made it to Key West! Your drive to Key West has been a full one so far, why not congratulate yourself with some key lime pie for a trip well done, or whatever reason you can create to tell yourself its okay to eat another piece of key lime pie.
I tried key lime pie from breakfast to dinner during my day in the Florida Keys, and Kermit’s was one of the best pieces of pie I ate! You can read all abut the amazing key lime pie I ate, plus an unexpected, but delicious key lime creation that was a favorite of mine on Where to Find the Best Key Lime Pie in the Florida Keys.
Visit Ernest Hemingway’s house in Key West
Take a glance into the life of this famous American writer. Enjoy a break from the sun inside the air-conditioned house of what was Ernest Hemingway’s former residence. Hemingway lived here from 1931 to 1939.
The house is full of memorabilia from the many movies inspired by Hemingway’s books as well as his original possessions. One of his typewriters, books he owned and you can peer into his writer’s studio, his own space to create his masterpieces.
You can wander around the grounds as well. Look at the refreshing swimming pool, but don’t give in to its call to jump in. The grounds around the house offer lots of shaded spots for sitting and thinking. There is also a bookstore on the backside of the house where you can purchase souvenirs.
General Admission is $14 for adults and $6 for children. It’s important to note that they don’t accept credit cards for tickets. They do, however, have an ATM by the bookstore in case you need to get some cash for payment. There is also an optional 30-minute guided tour included in the price of general admission.
Address: 907 Whitehead St, Key West, FL 33040
Hike to the top of the Key West Lighthouse
Across the street from Ernest Hemingway’s house is the Key West Lighthouse. You can climb the 88 stairs to the top to get a bird’s eye view of Key West. This historic lighthouse was built in 1848 and was one of the first to have a woman as its Keeper. You will have a chance to tour the lighthouse as well as the Keeper’s Quarters and learn a little more about the history of the Key West Lighthouse.
General Admission is $12 for adults and $5 for kids. Address: 938 Whitehead St, Key West, FL 33040
Walk Around Old Town Key West
Enjoy walking around town, shopping at the small boutique shops, and admiring the beautiful buildings in Old Town Key West. You can start at Mallory Square and walk down Duval Street to the Southernmost Point. Stop by the historic cemetery or visit Mile Marker Zero. Old Town is a fun area to park the car and spend your time on foot.
Tour the Truman Little White House
Get a chance to see where President Harry S. Truman spent his winters. It seems like a pretty excellent alternative to winter in Washington D.C.! Learn more about this historic house and its use since constructed by the U.S. Navy in 1890.
General Admission is $21.45 for adults and $10.75 for kids. If you purchase your ticket online, you can save a couple of dollars.
Address: 111 Front St, Key West, FL 33040
Stop at the Southernmost Point in the Continental U.S.
Enjoy another photo op, however just know that you may have to get in line to take your photo with the marker stating it is the Southernmost Point in the Continental U.S. There isn’t any shade either. So you can decide just how important this photo op is to you.
The Drive Back Thru the Florida Keys
If you didn’t get a chance to spend some time on the water, now would be an excellent time to visit one of those parks I mentioned earlier. It’s also a good time to grab some more key lime pie and decide where to watch the sunset.
Watch the Sunset
Wherever you happen to be in the Florida Keys, make sure to enjoy a beautiful Florida sunset. Here are a few options for places to watch the sunset either in Key West or on your drive back.
Sunset Tiki Bar and Grille (at the Galleon Resort): 617 Front St, Key West, FL 33040
Lorelei Restaurant and Cabana Bar: 96 Madeira Rd, Islamorada, FL 33036
You have so many choices for where to stay. I’d pick one based on where you’re traveling to next. Marathon is an excellent choice for a Key close to Key West, but outside the busy Key West party scene. Islamorada was a great stop for us as we were heading to Miami the next day, so it was a good midway point. If you want choices galore and don’t mind driving the full length of the Florida Keys in one day, then you might research options in Key Largo.
For a unique option, you might consider one of these Air BnB options:
As I stated at the beginning of this post, driving through the Florida Keys, is not a race to the finish, but more like a leisurely Sunday drive. It should be full of sunshine and fun stops and road trip memories to last a lifetime.
Pack sunscreen, beach towels, extra water, flip flops, maybe a change of clothes, depending on your dinner plans and your favorite road trip music. I suggest some fun hits like “Ice Ice Baby” to get everyone laughing and then throw in some upbeat Cuban music that’ll have you dancing in your seats. Smiles for everyone!
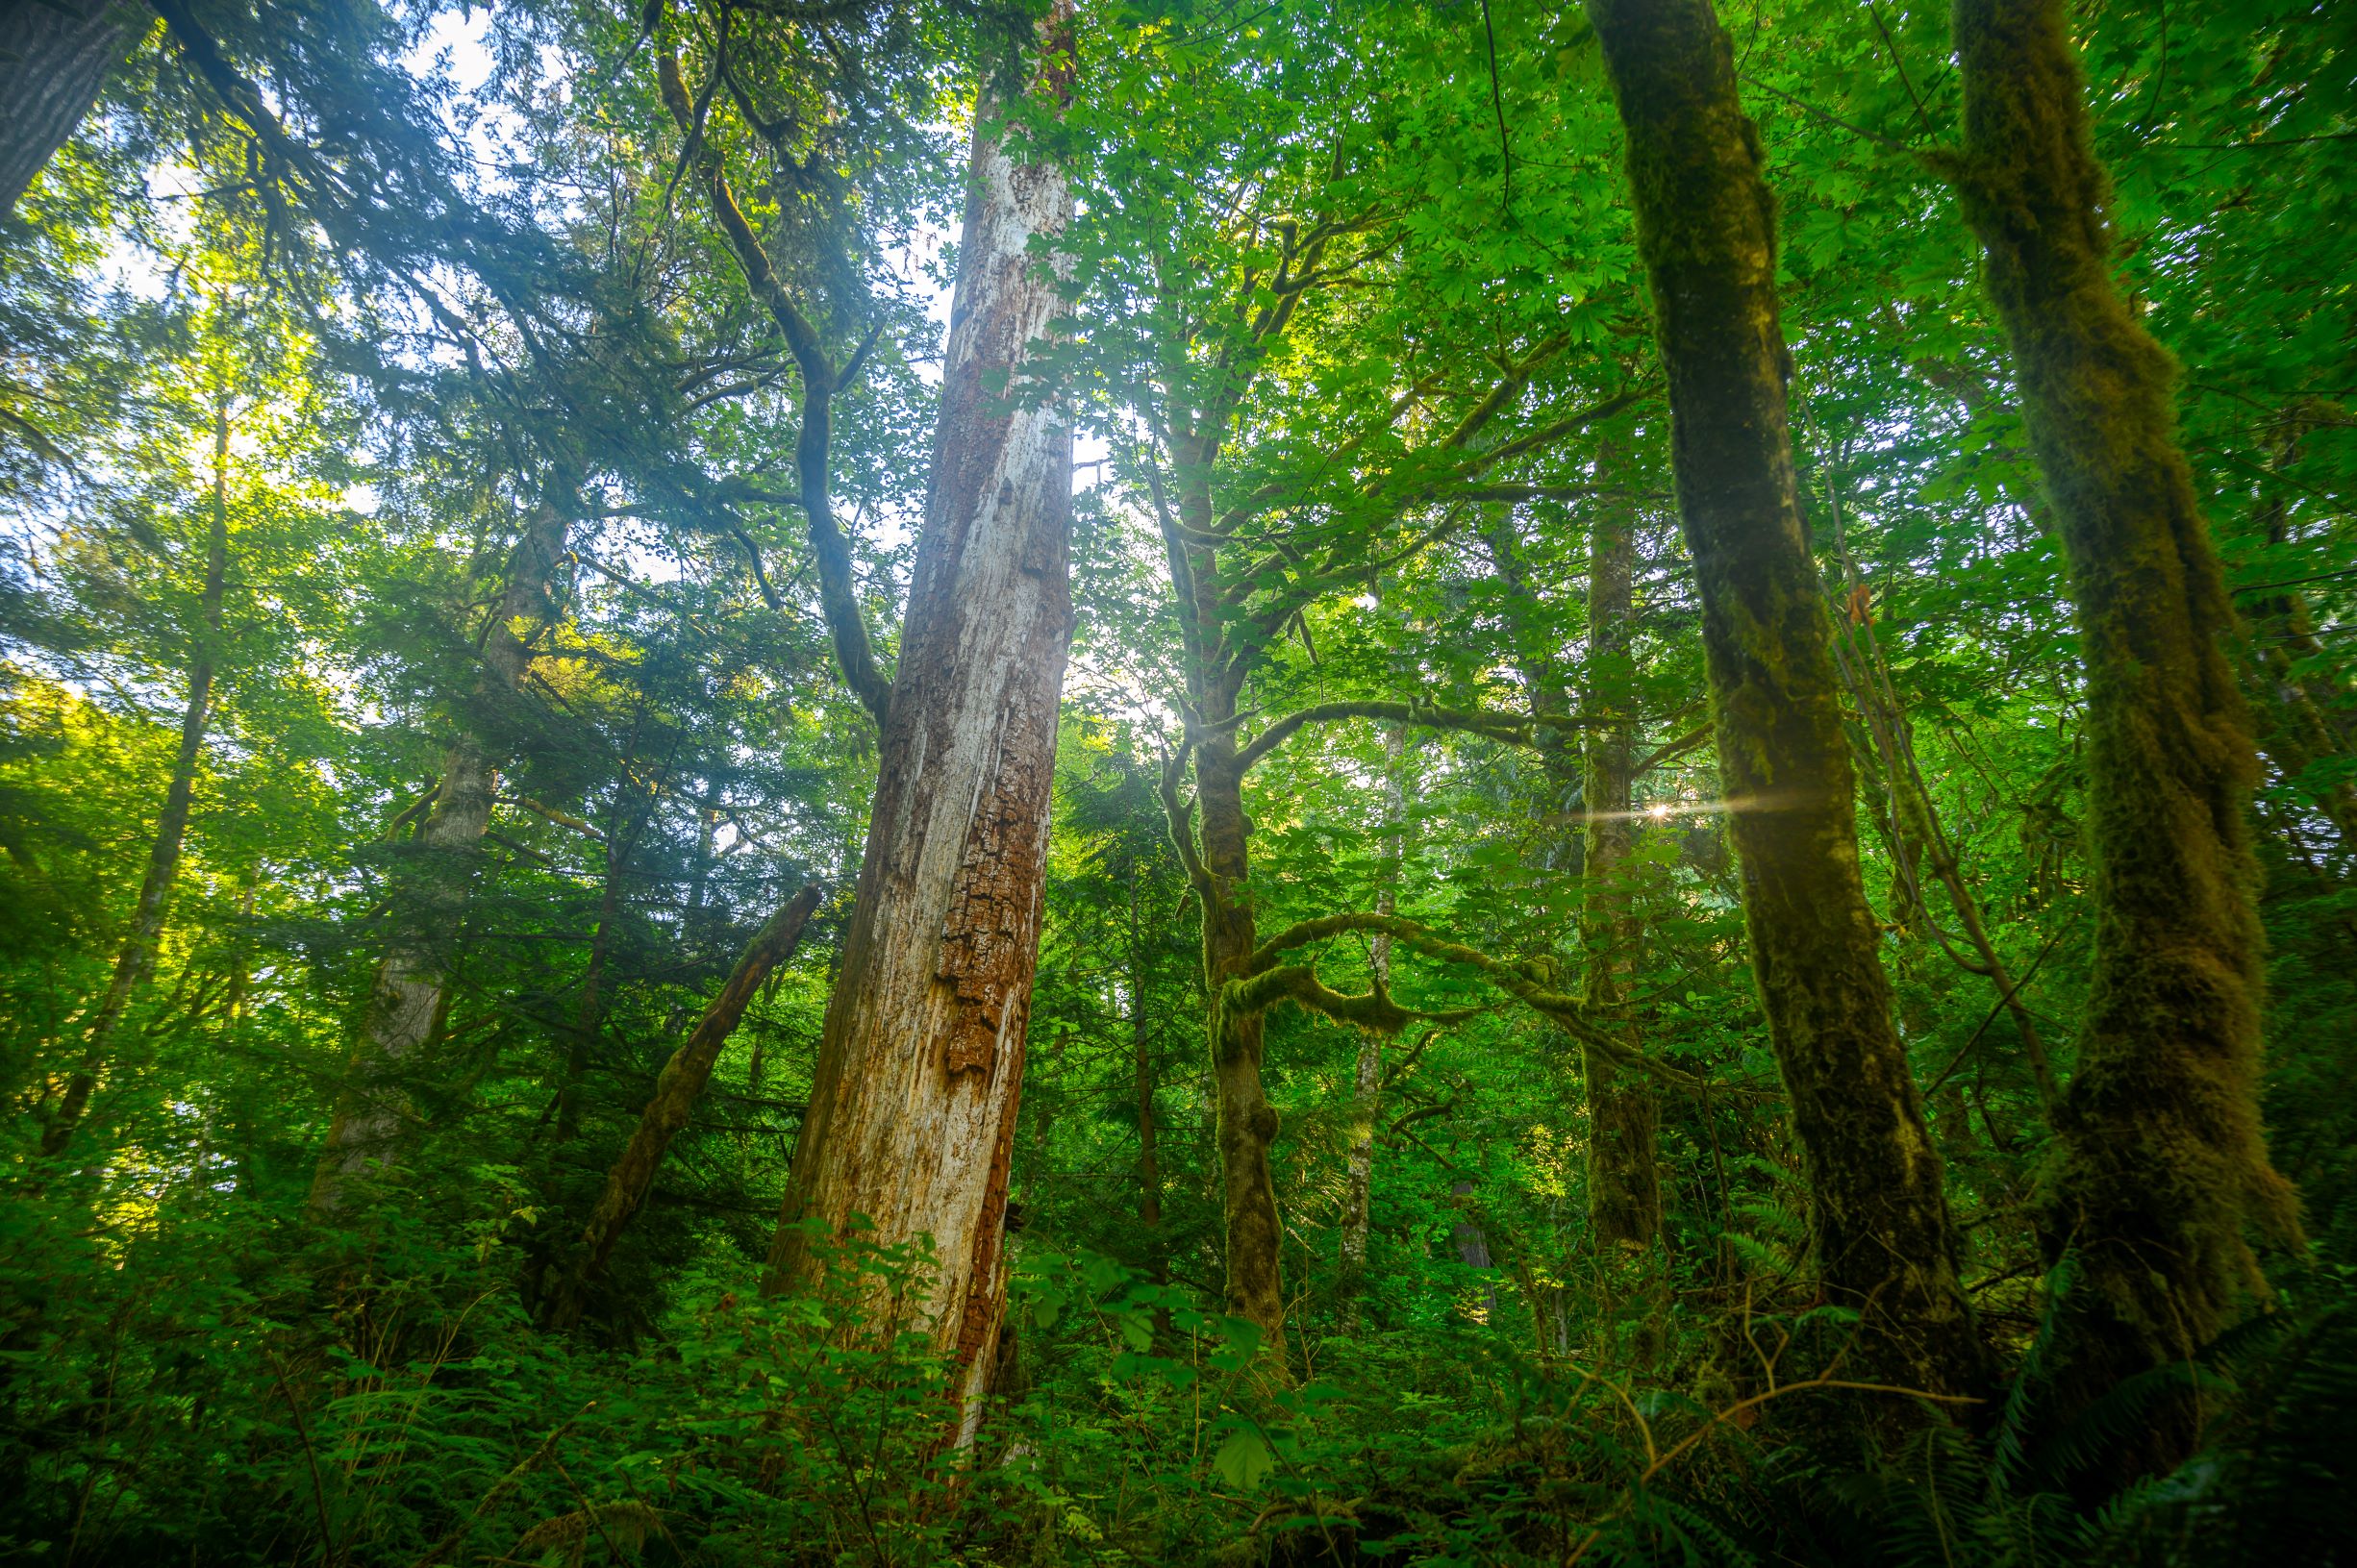

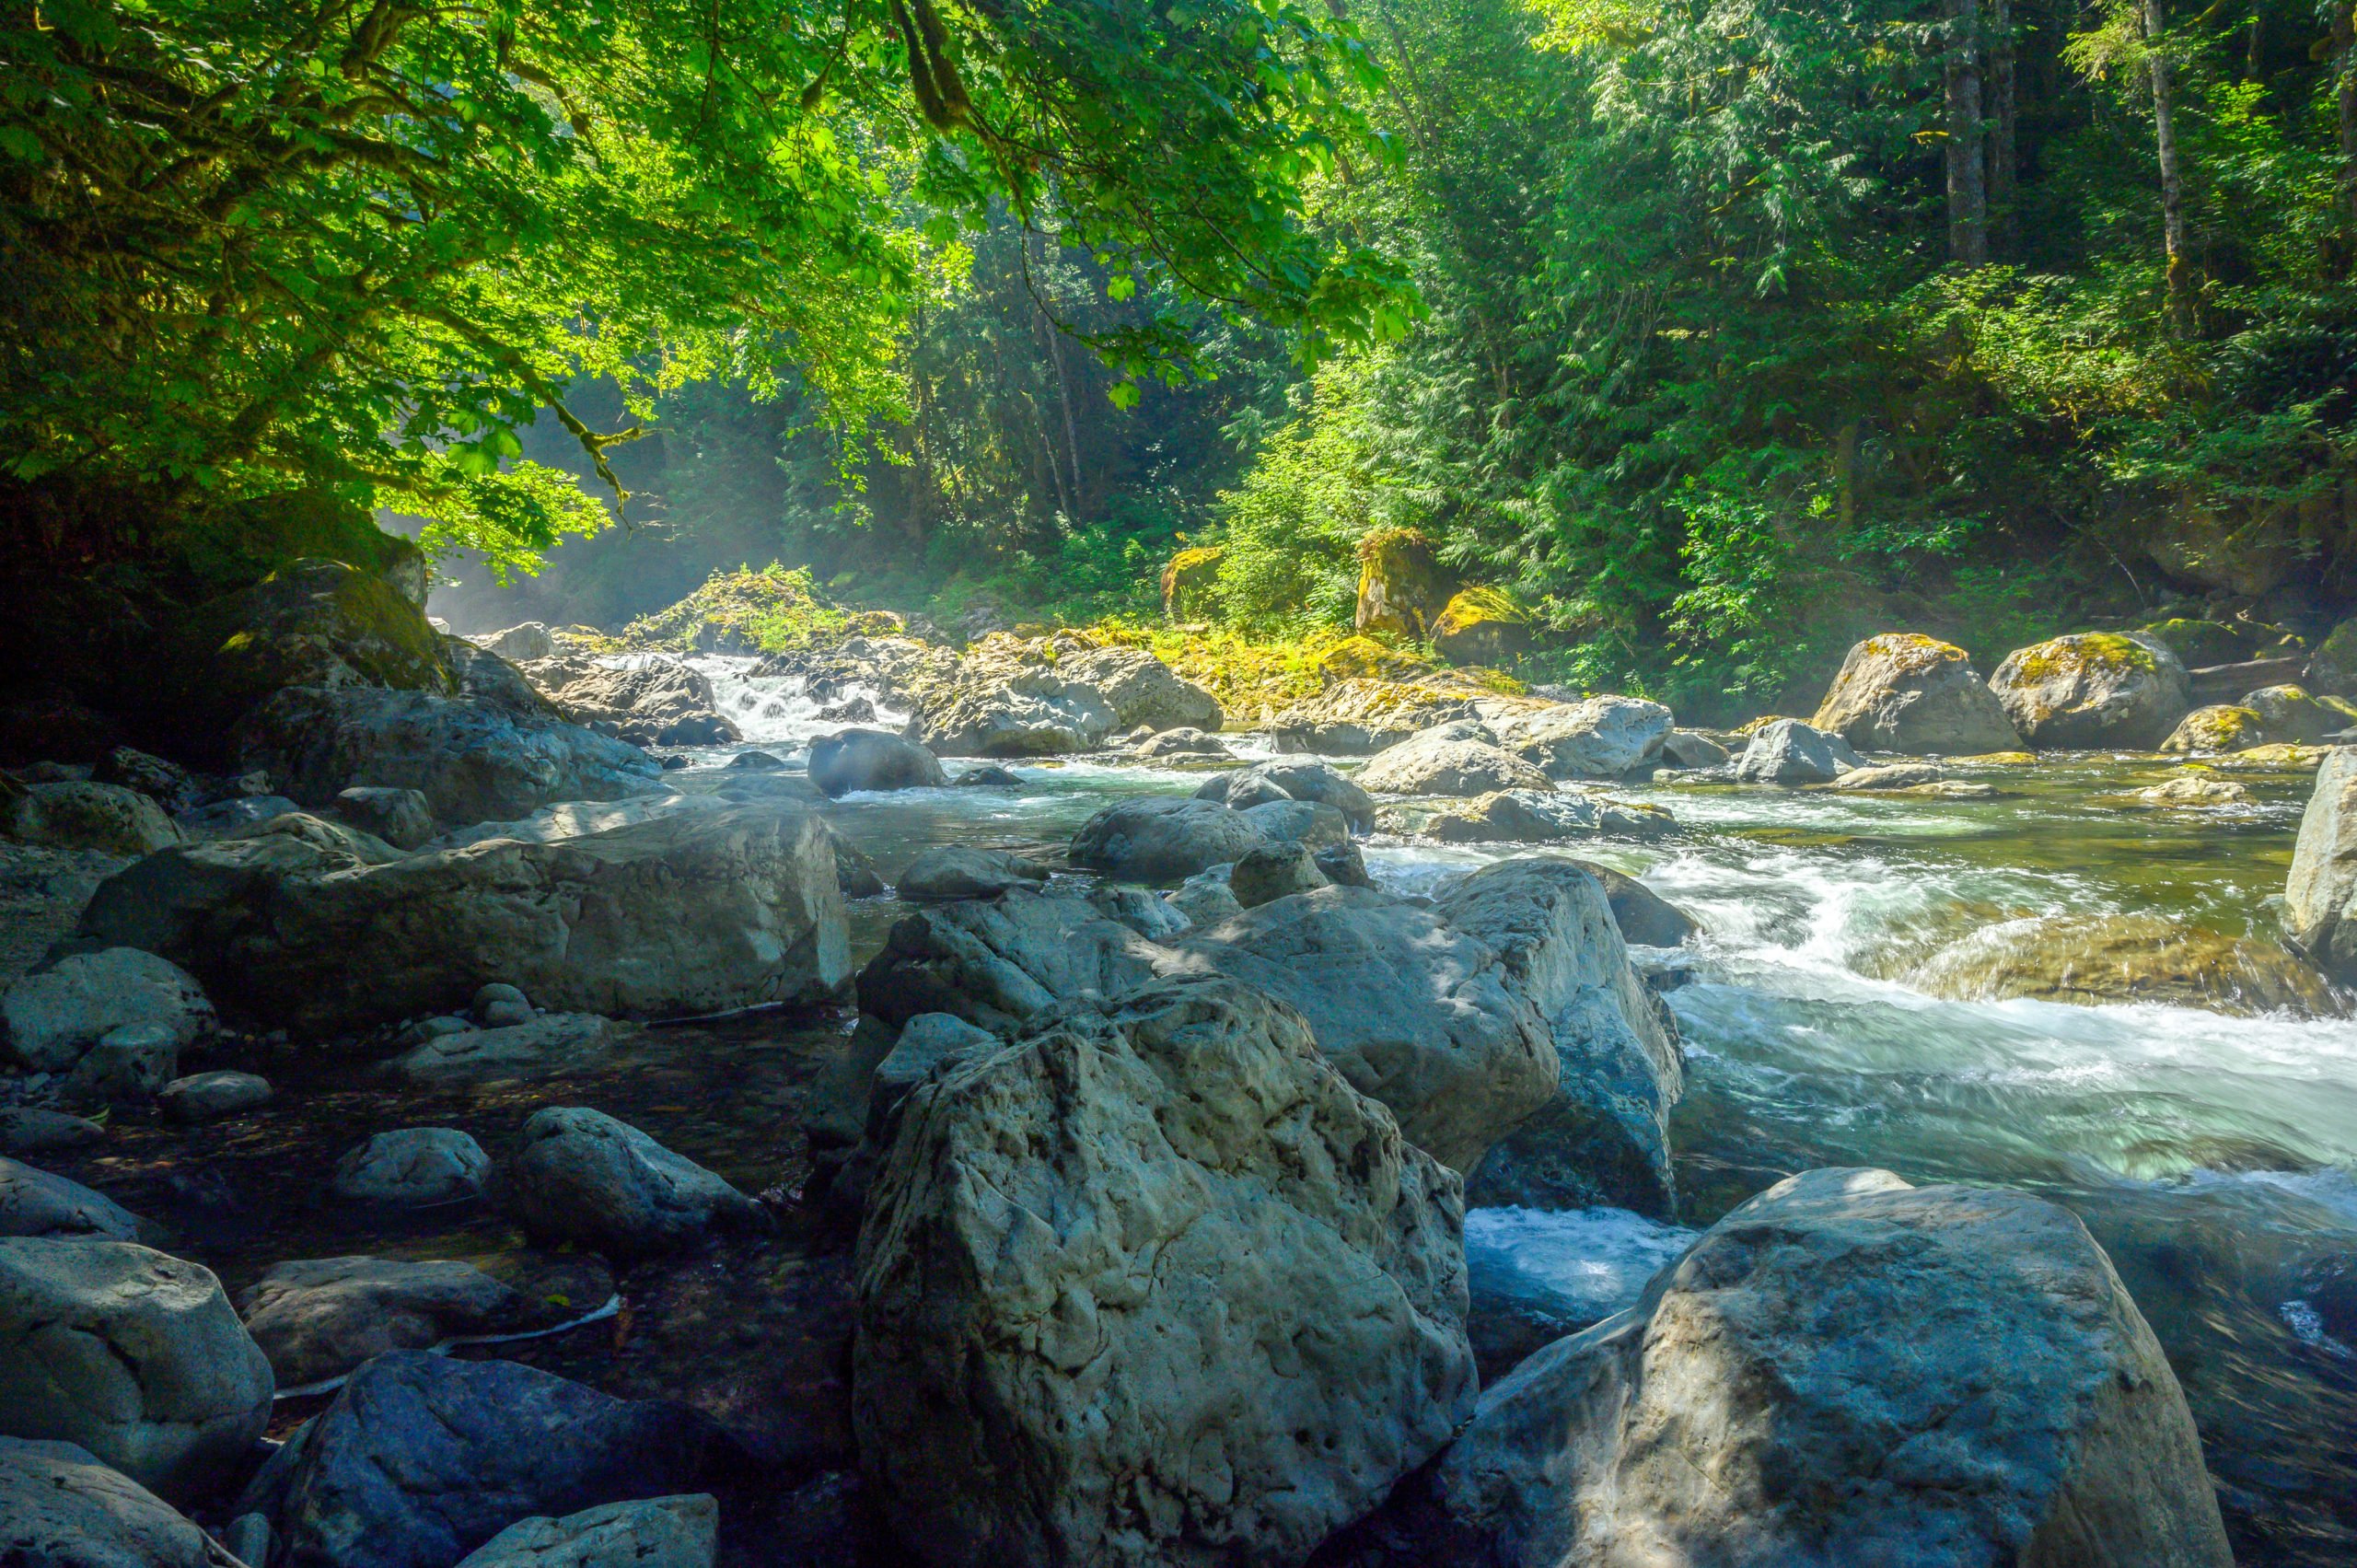

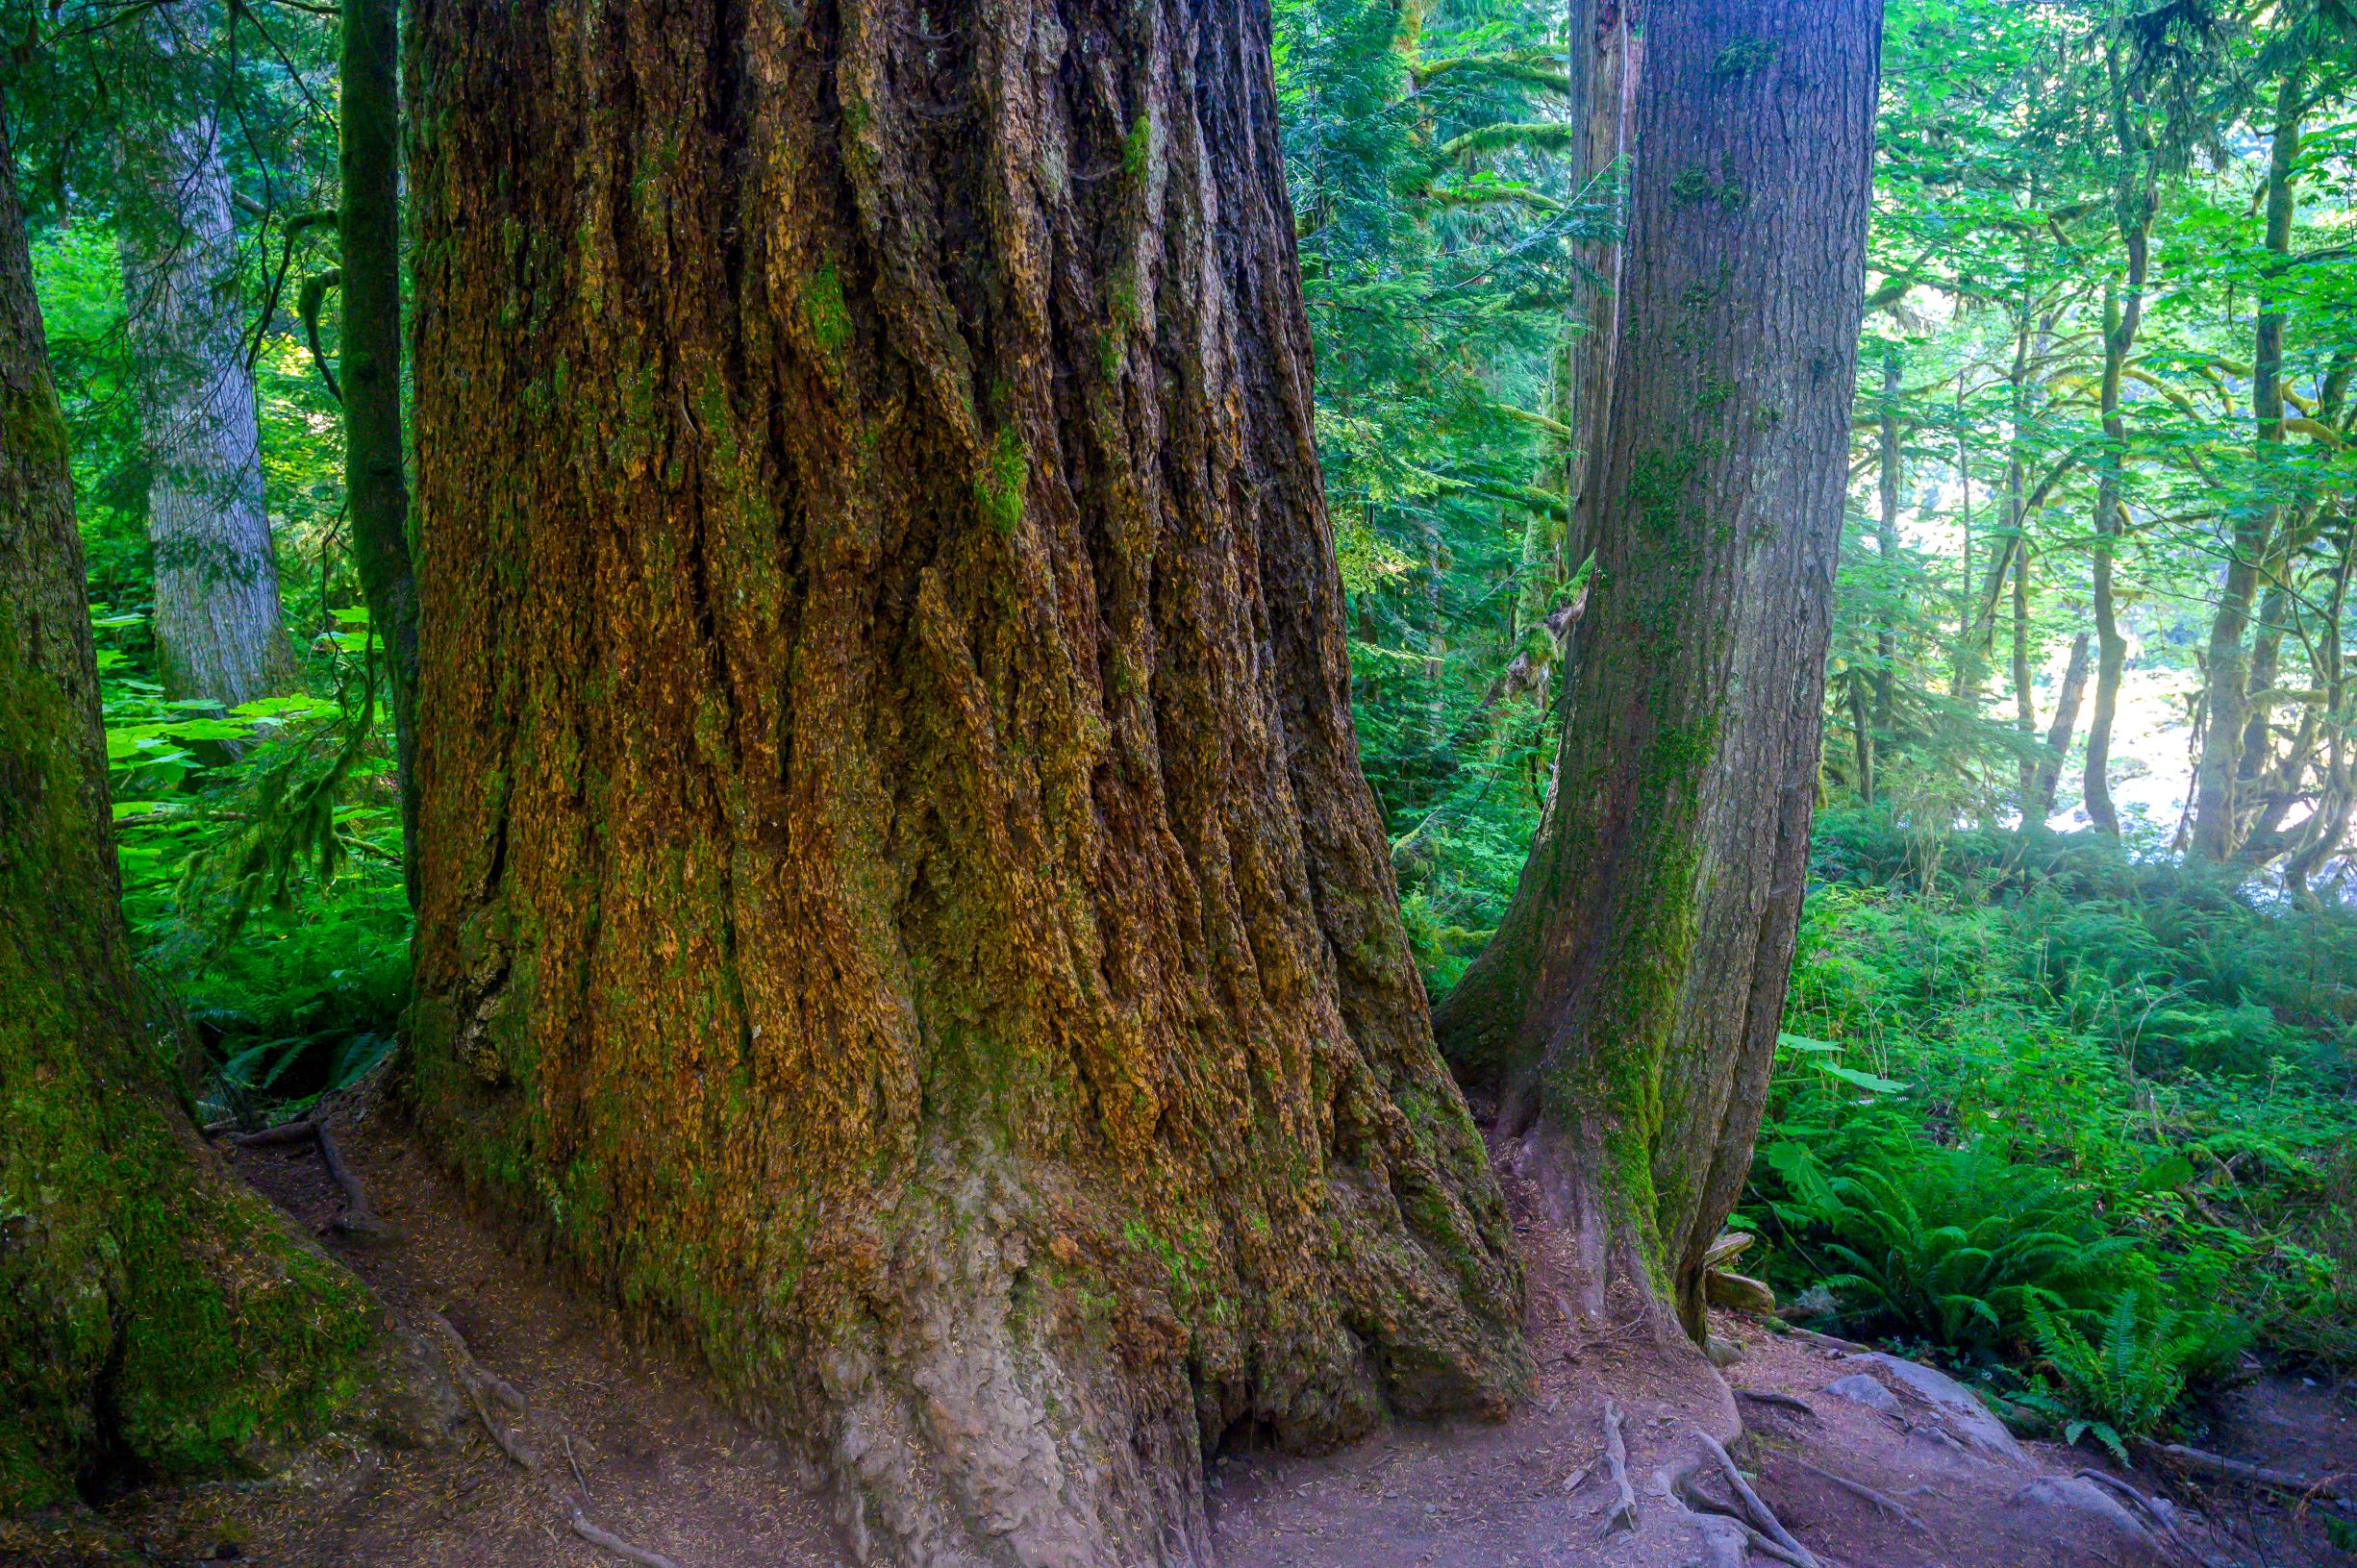
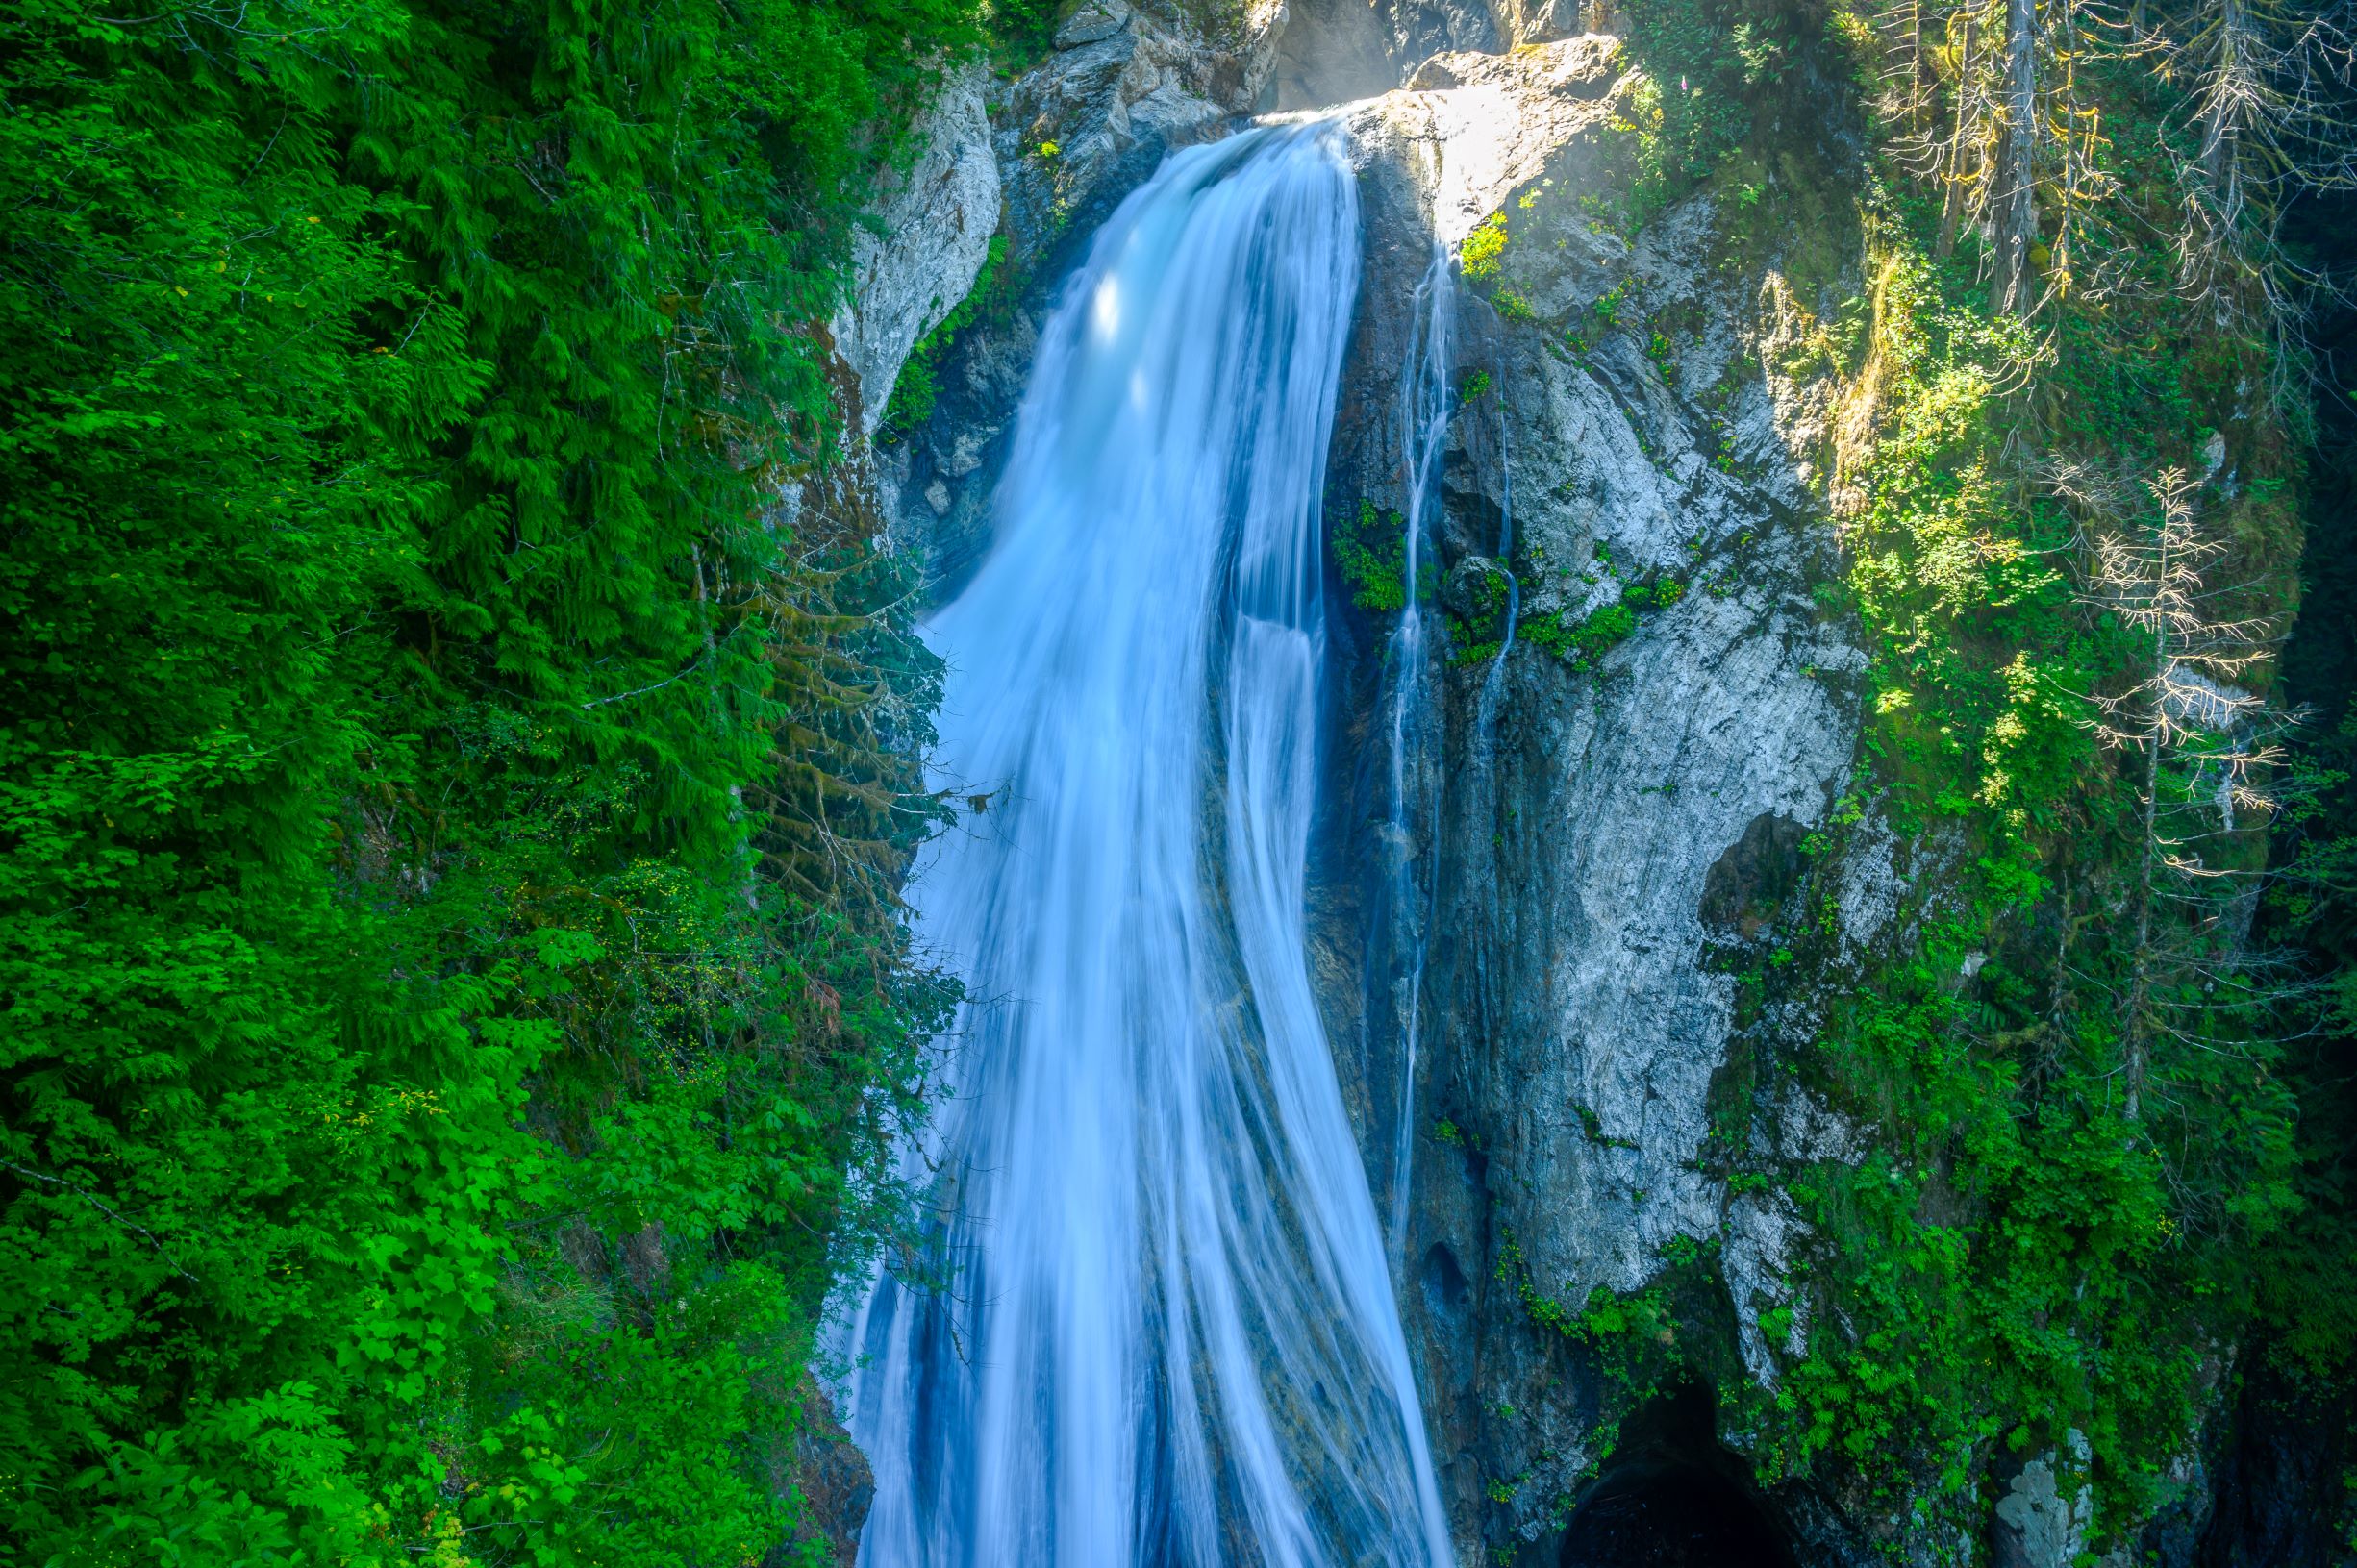

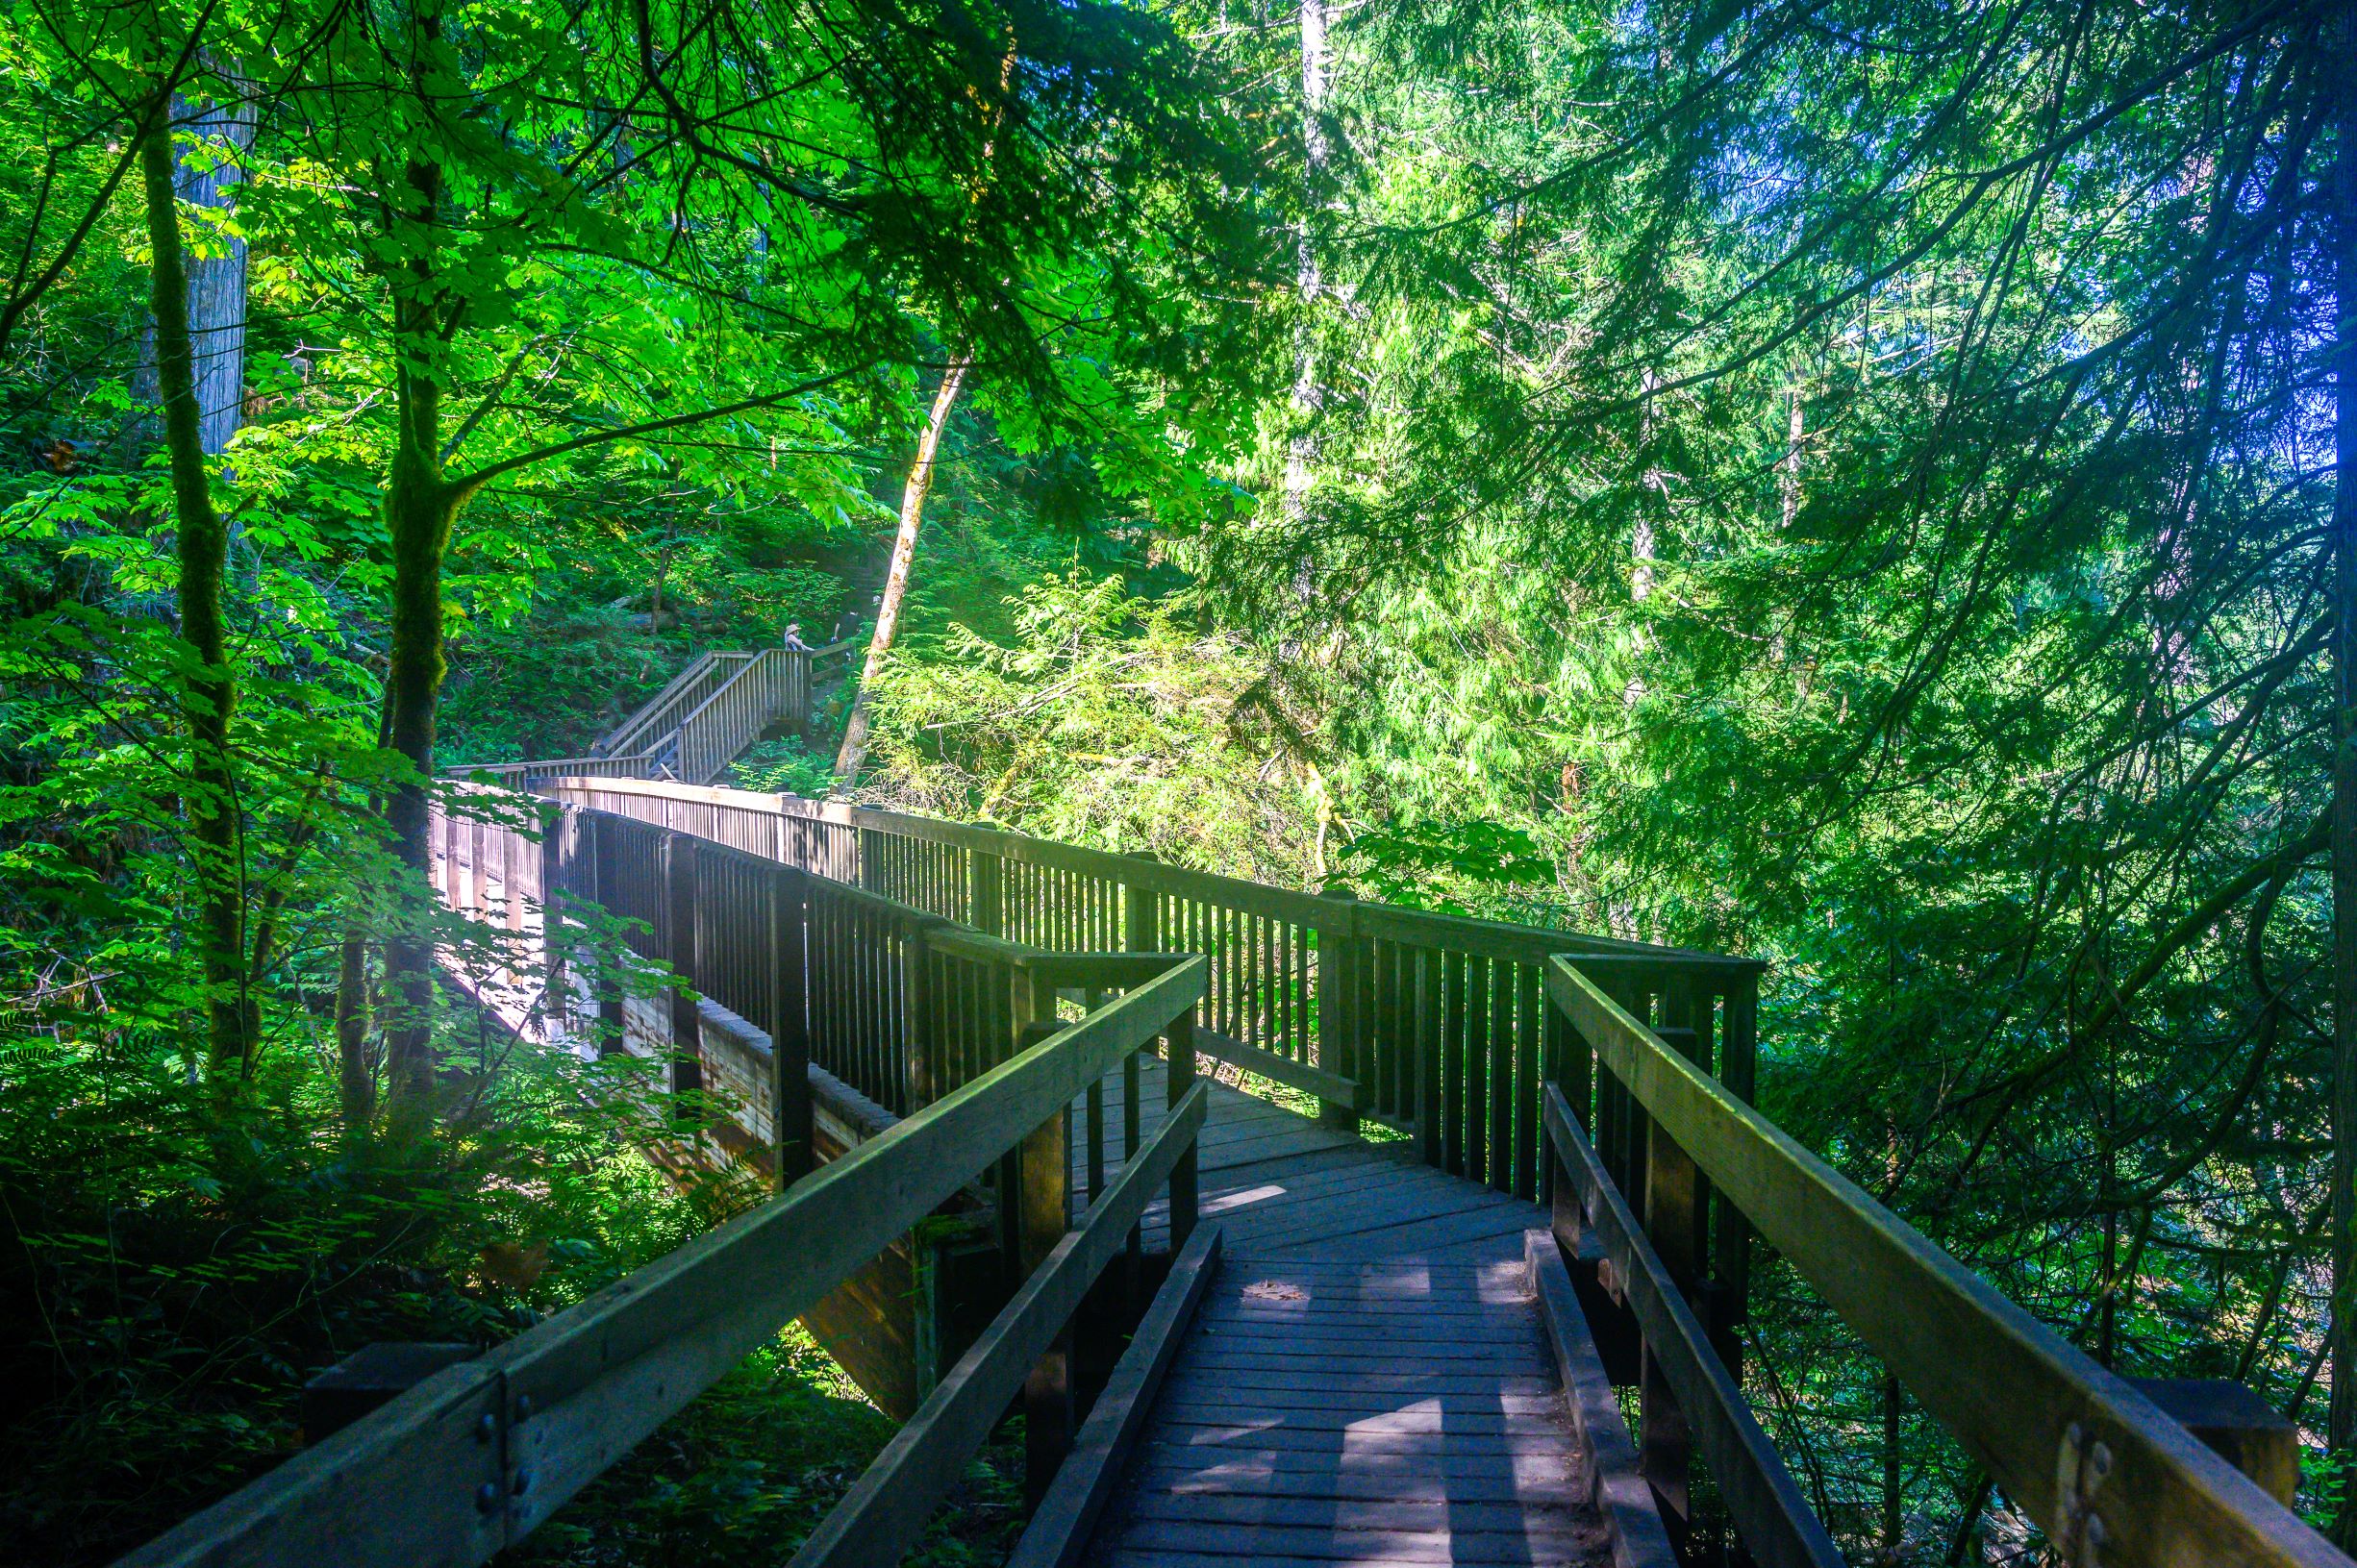
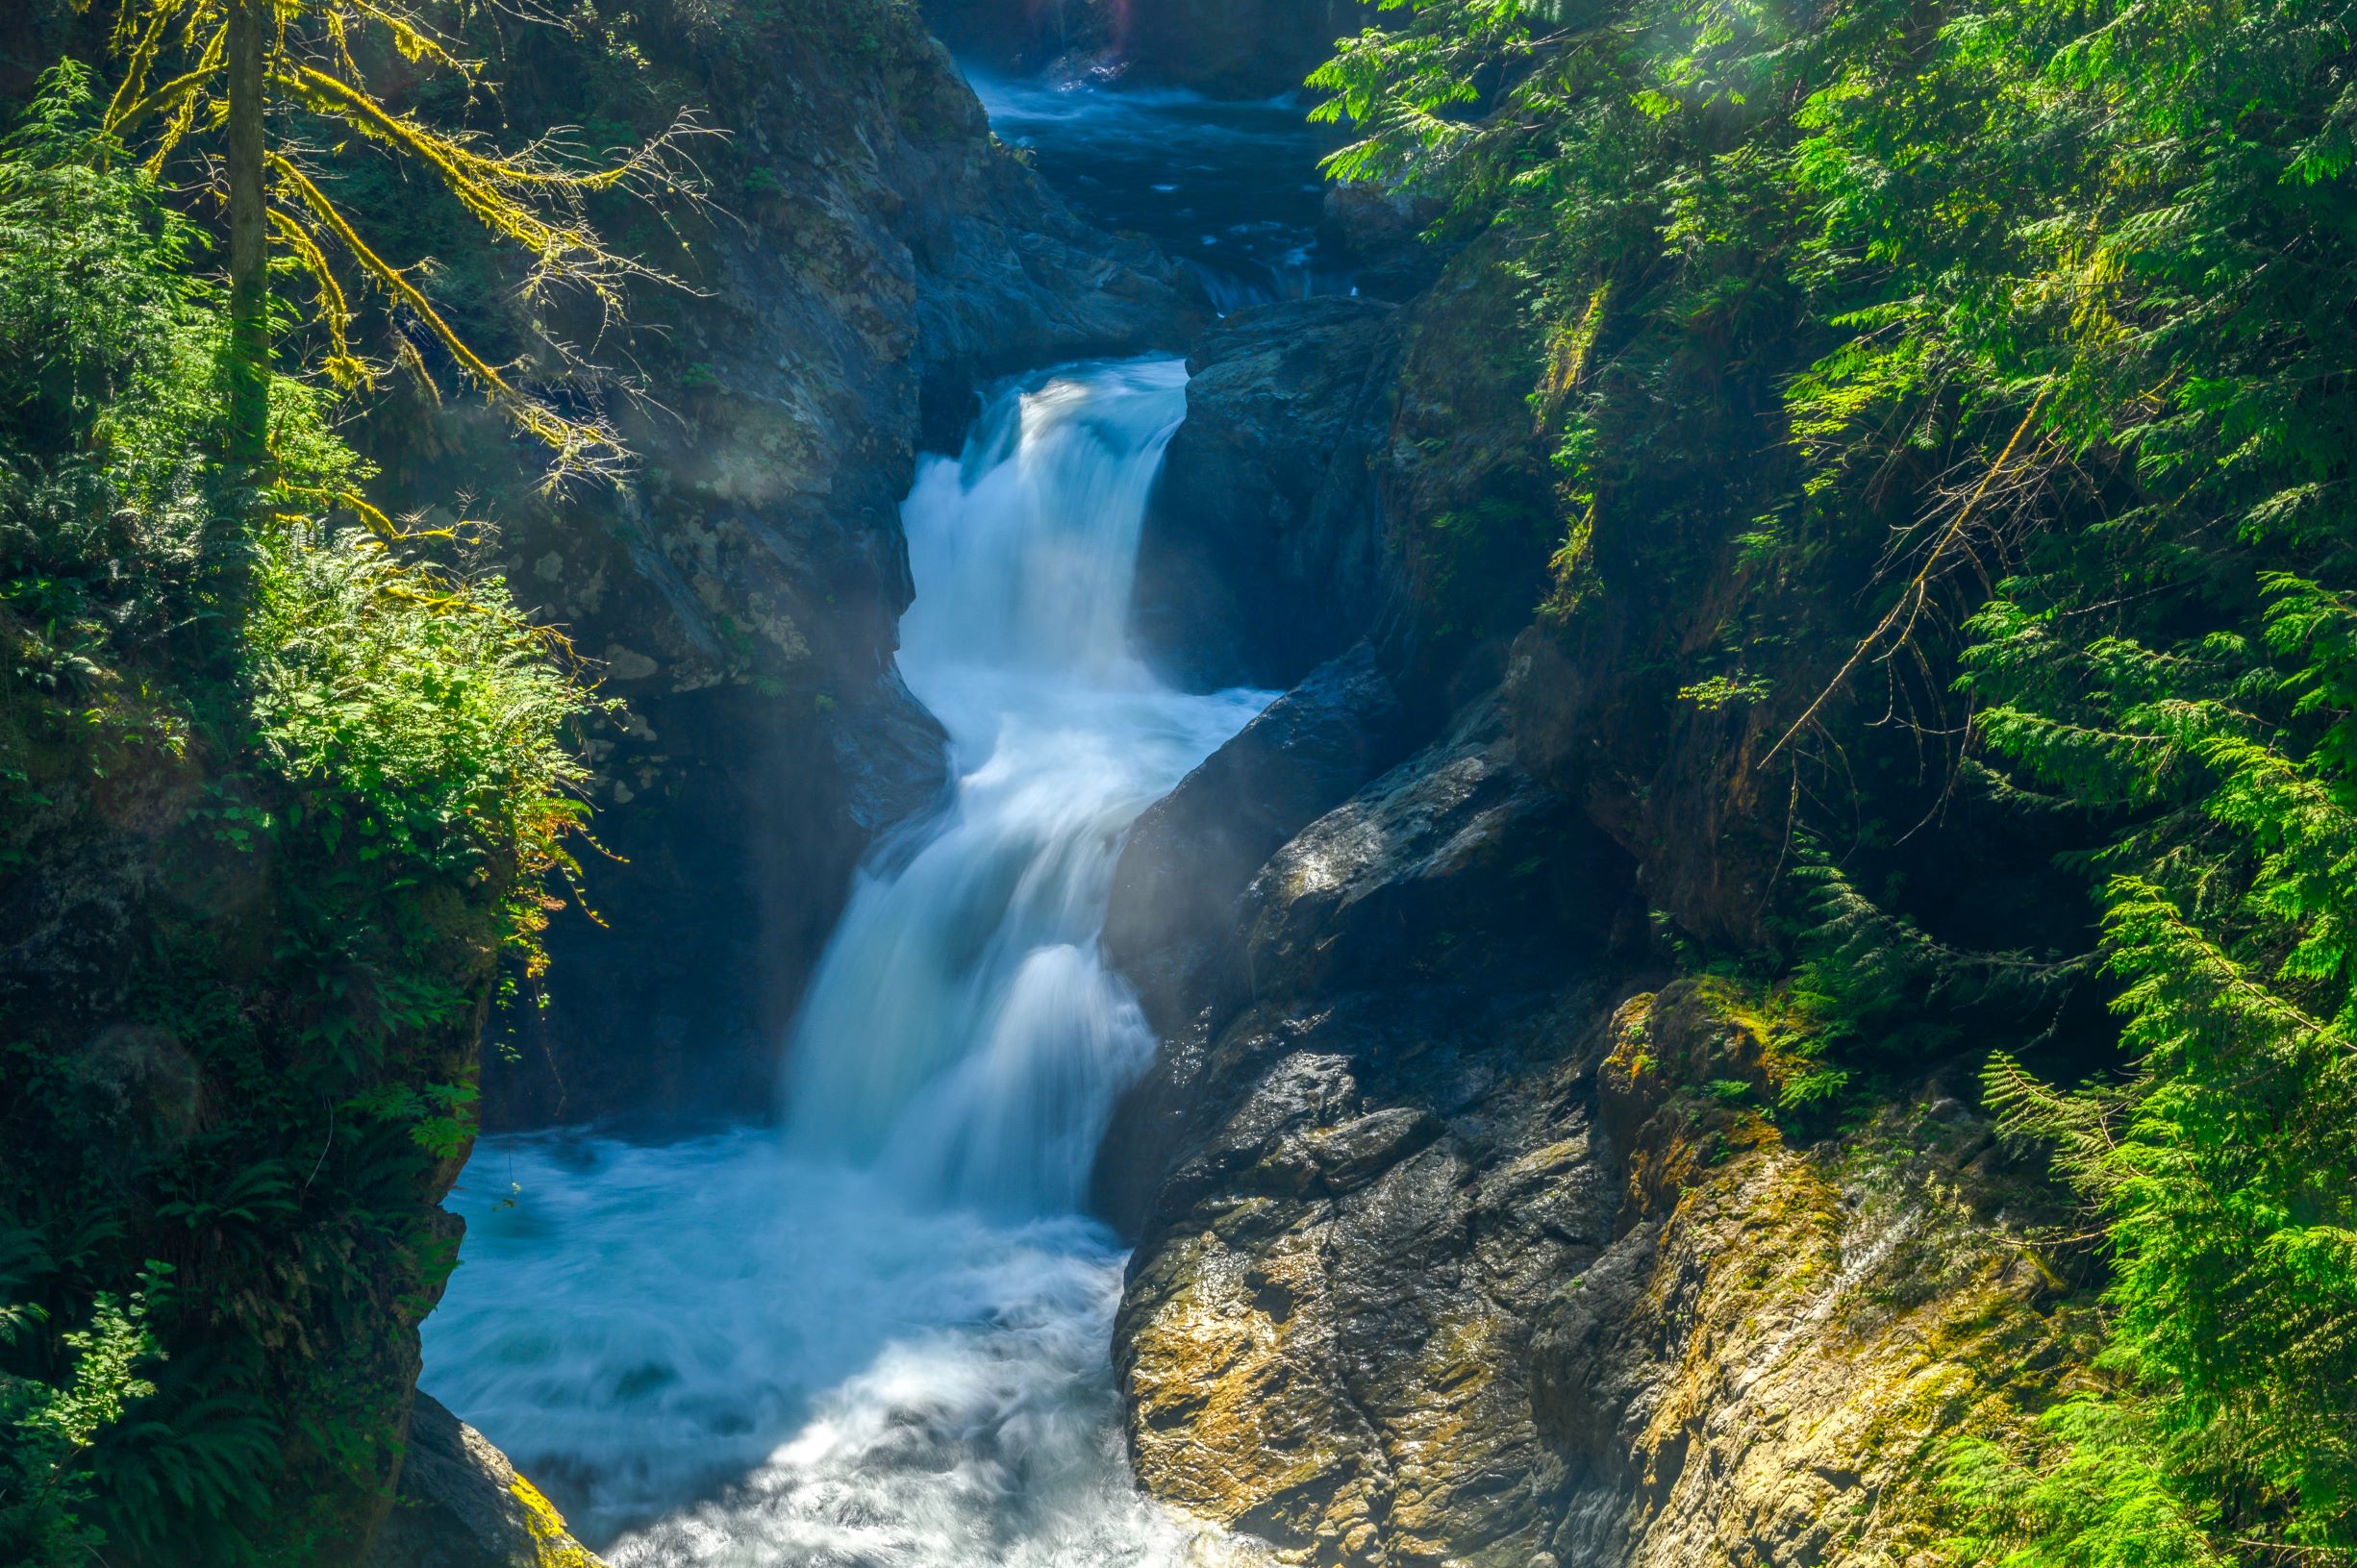
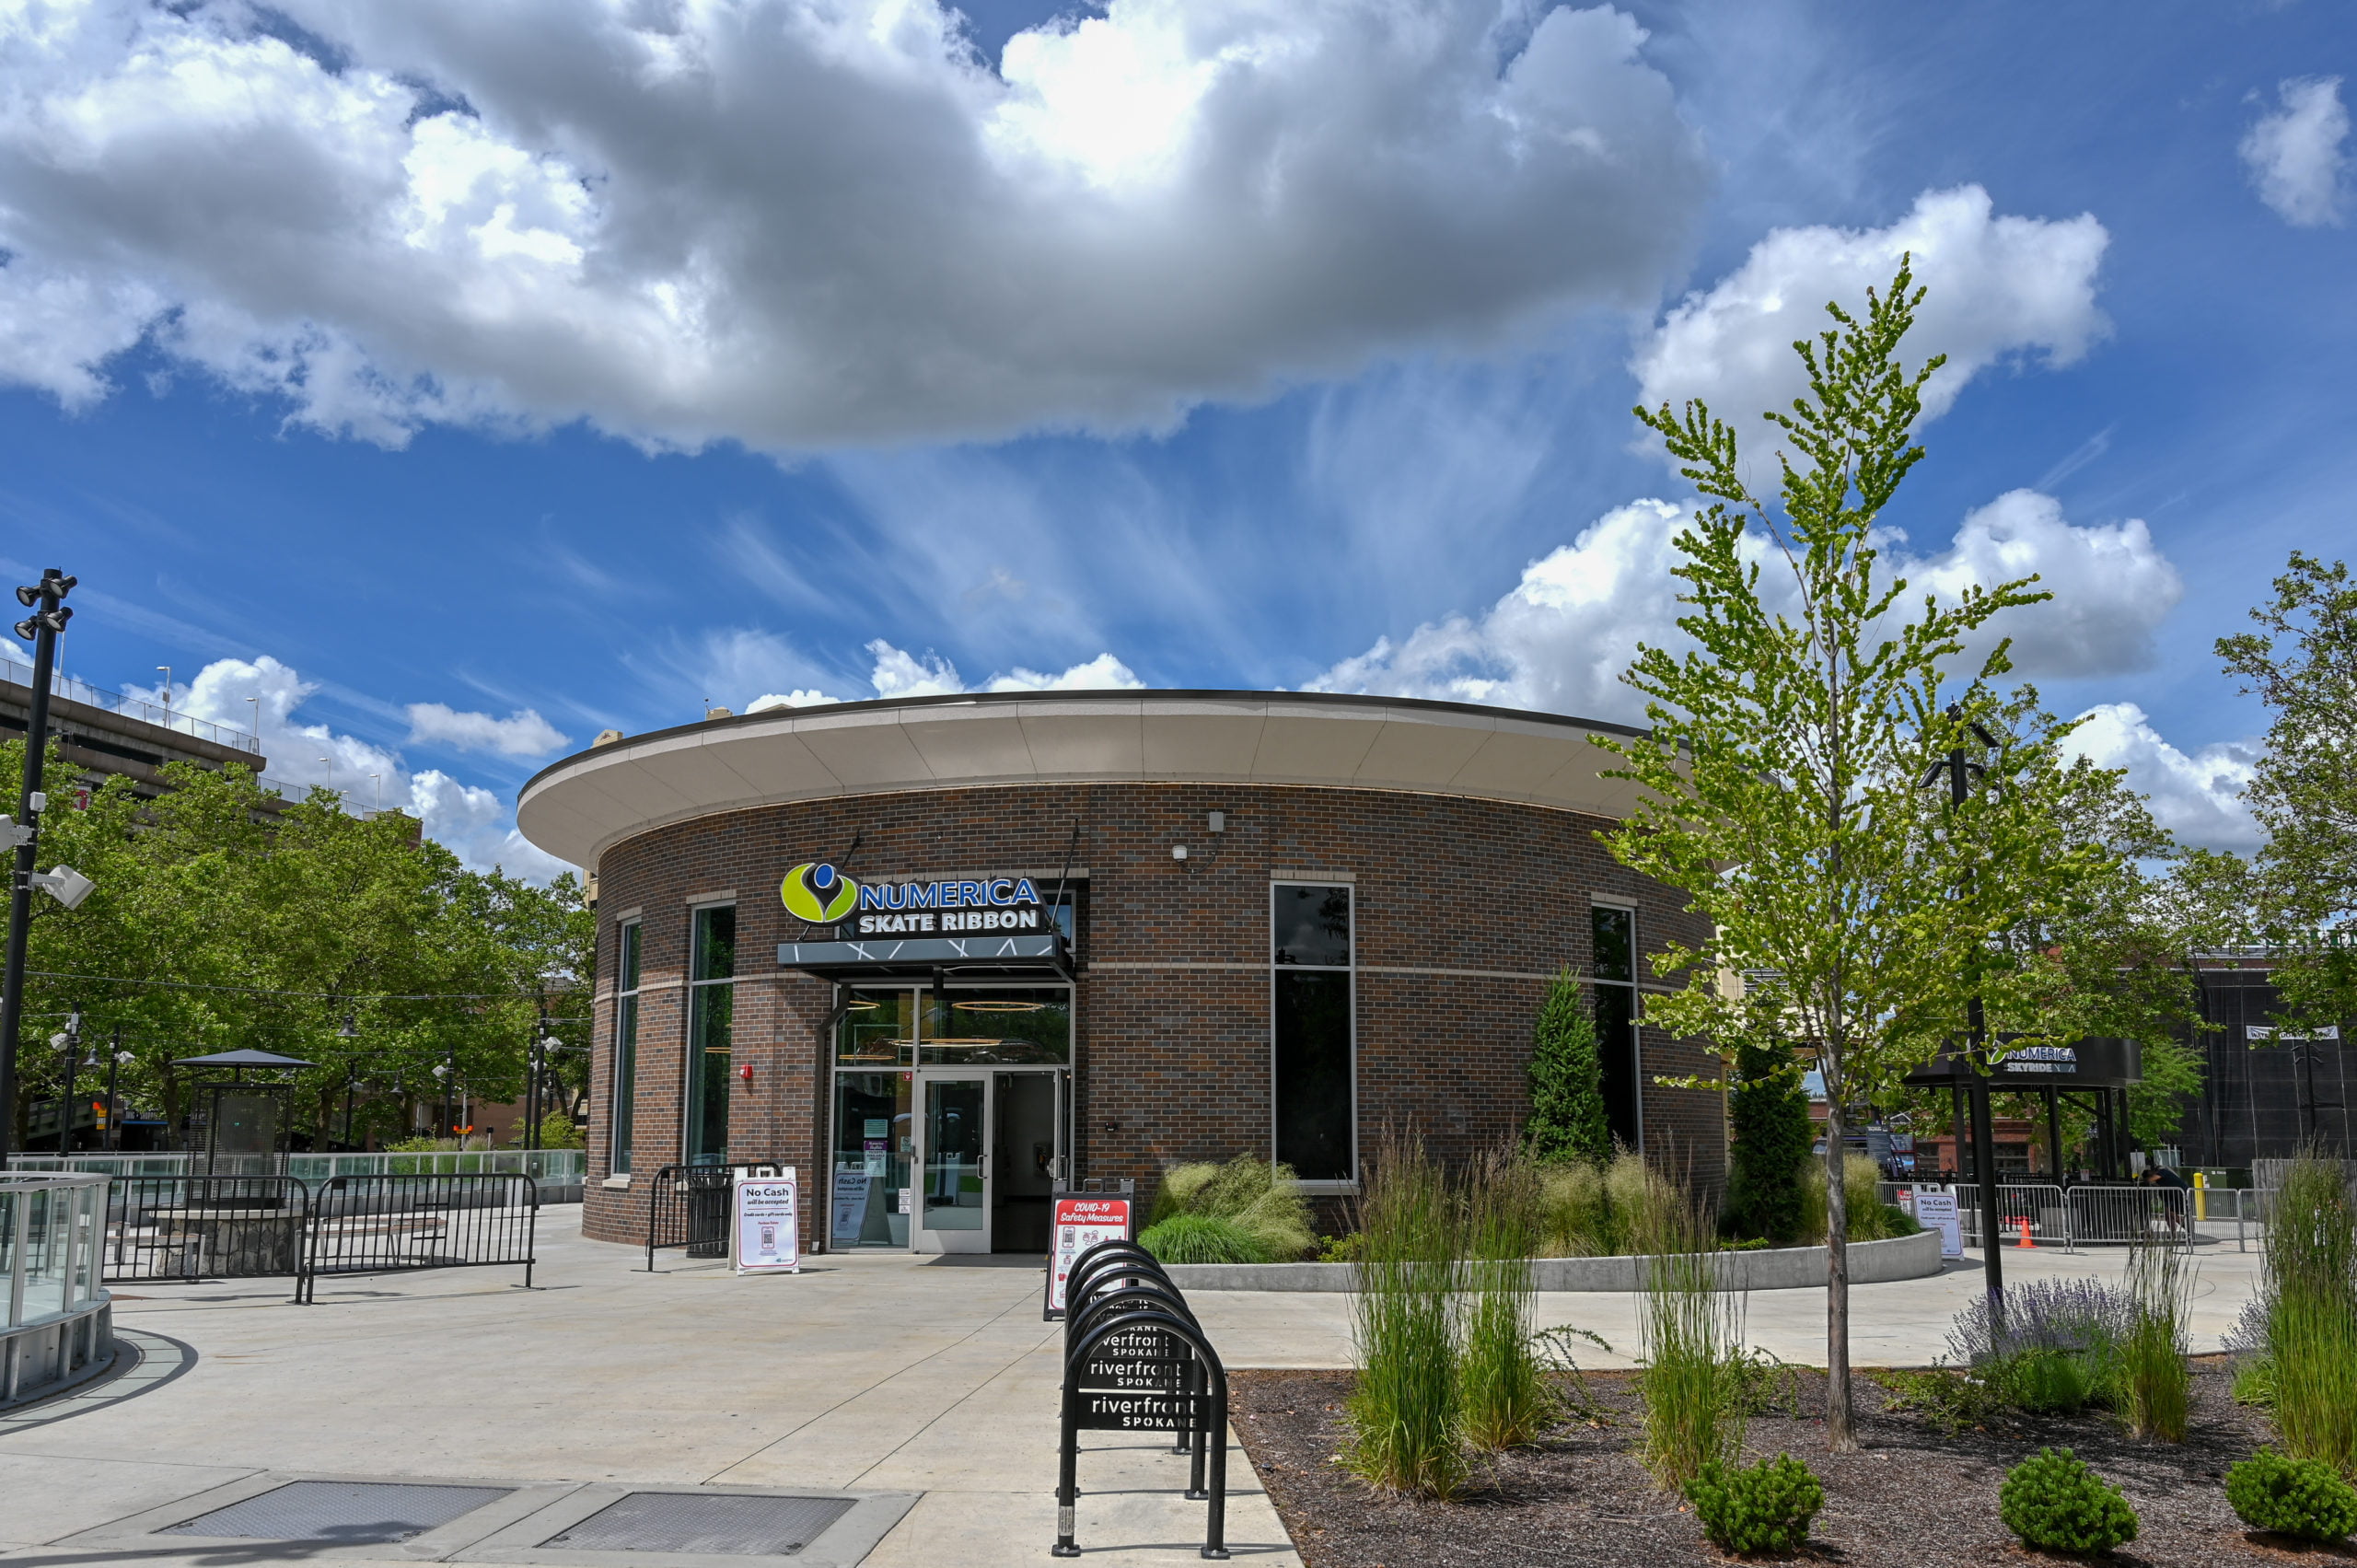
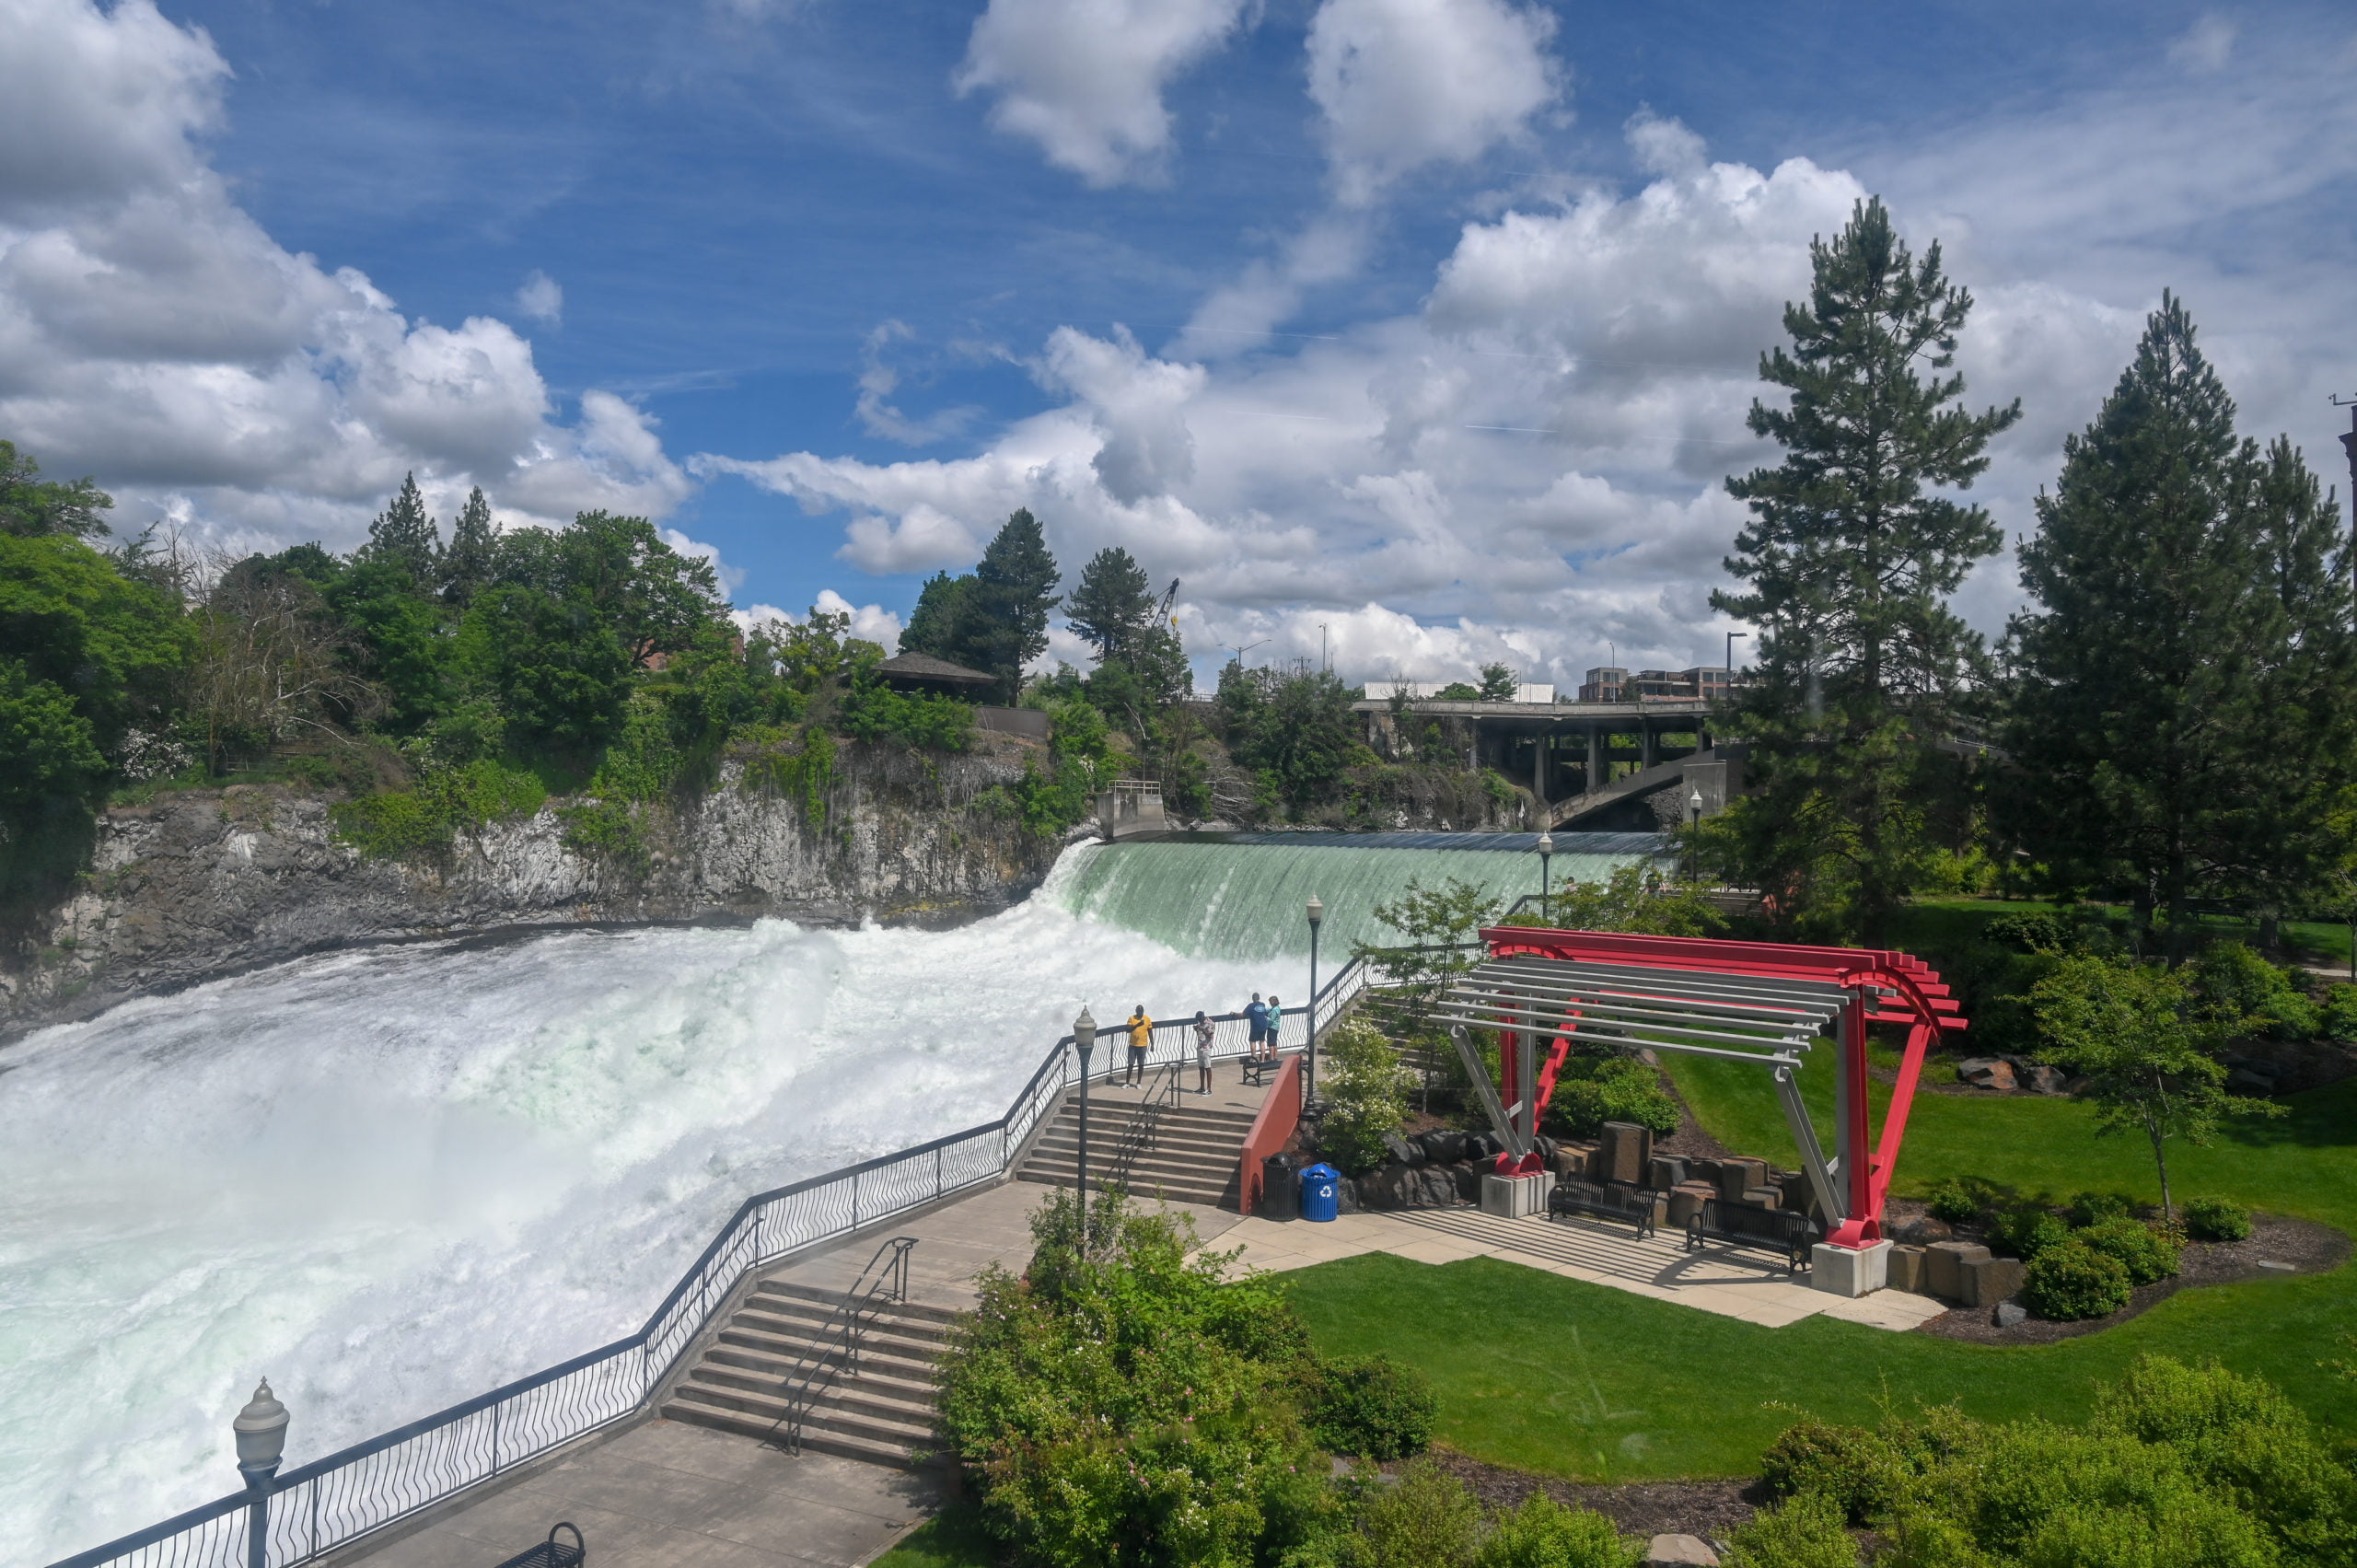
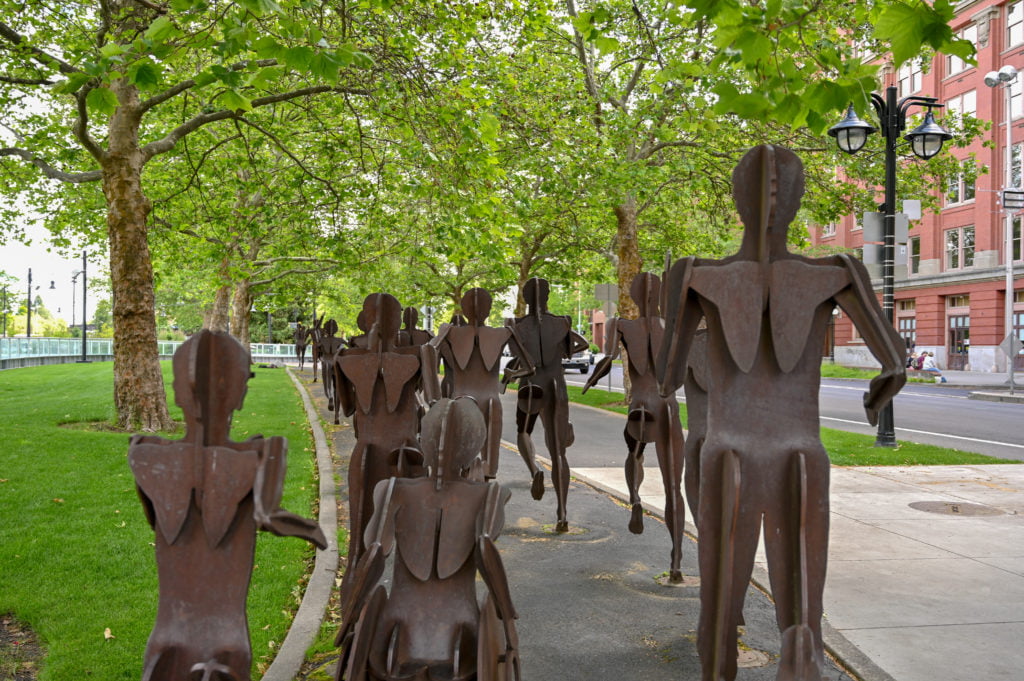
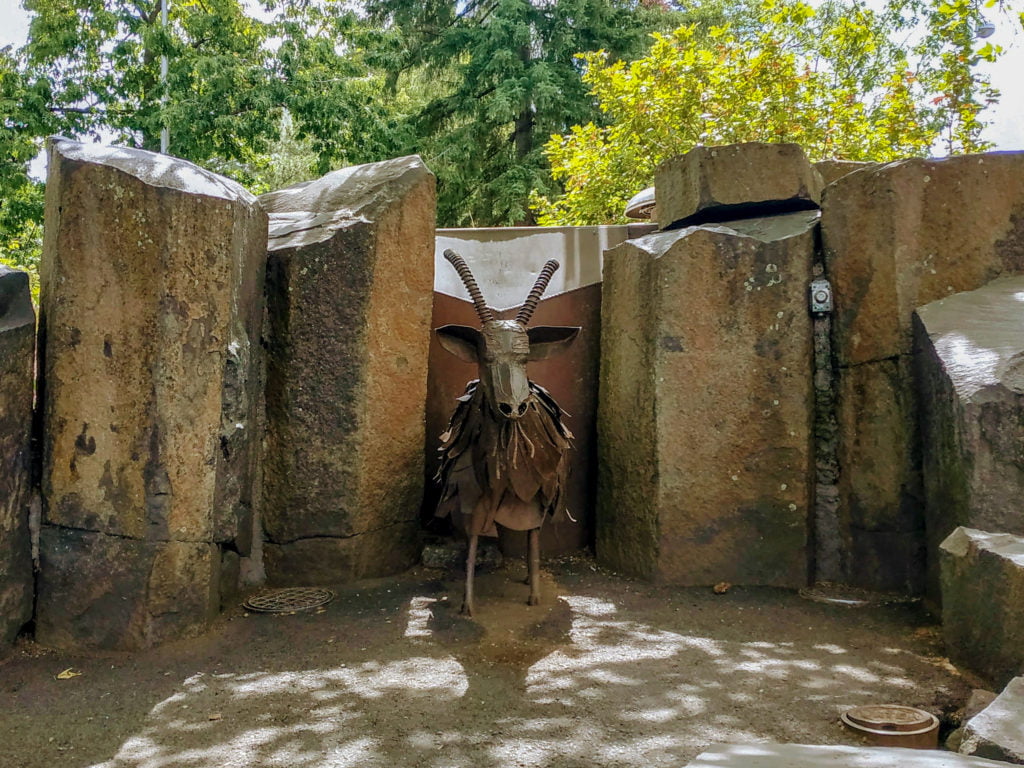
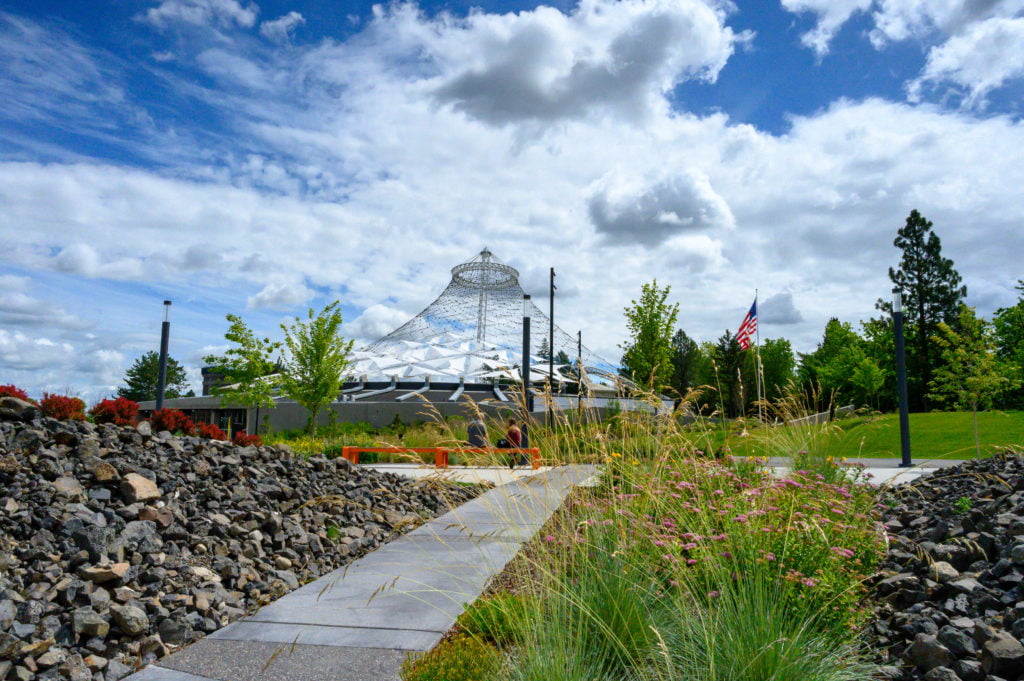
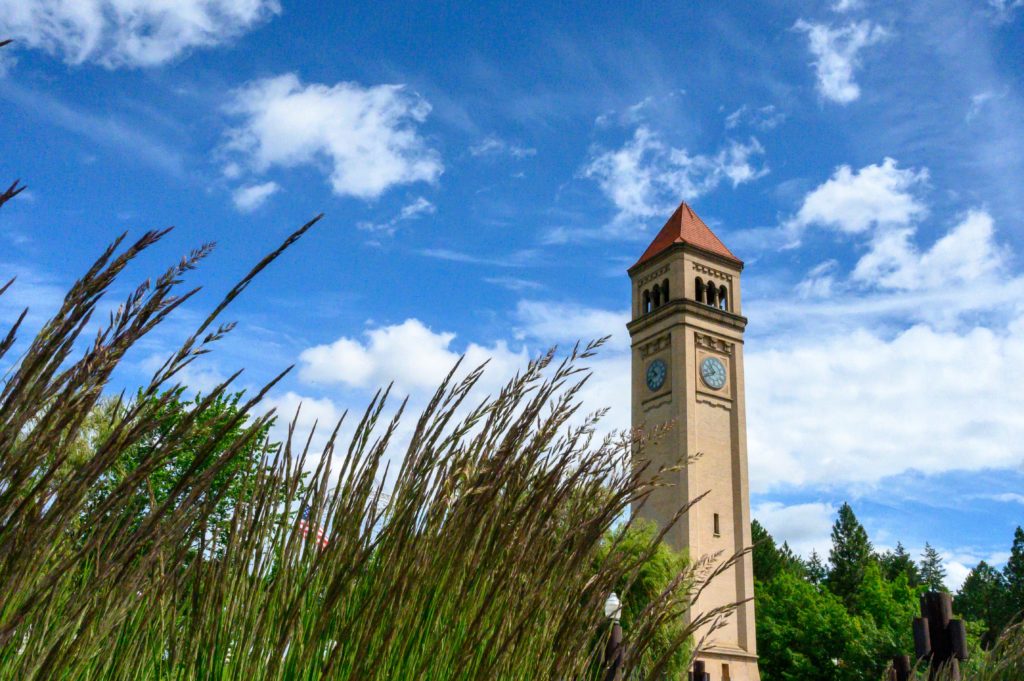
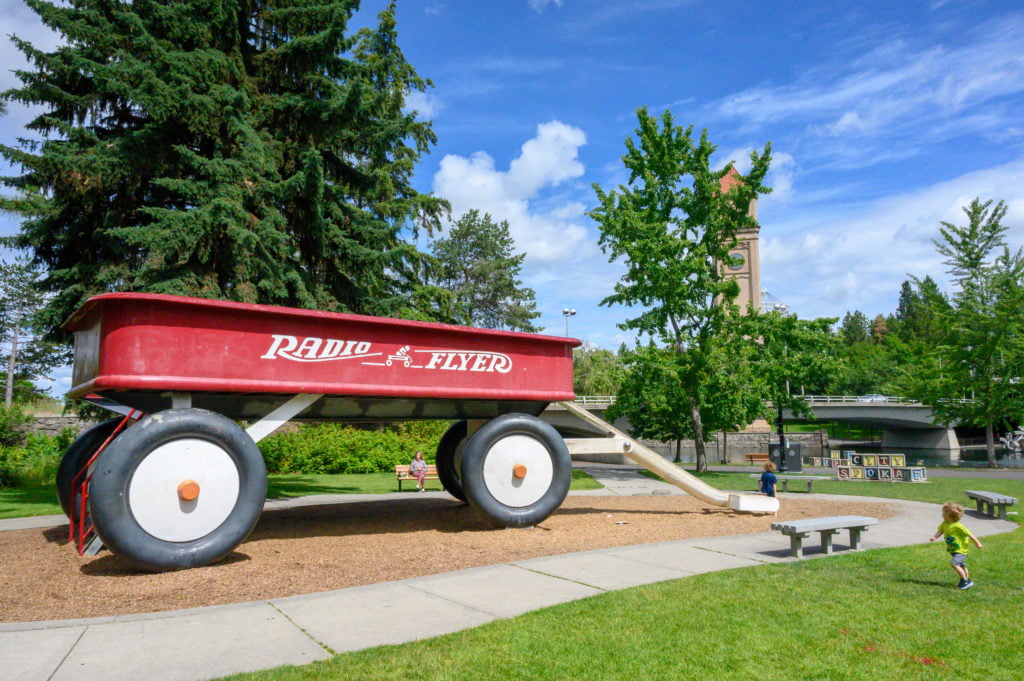

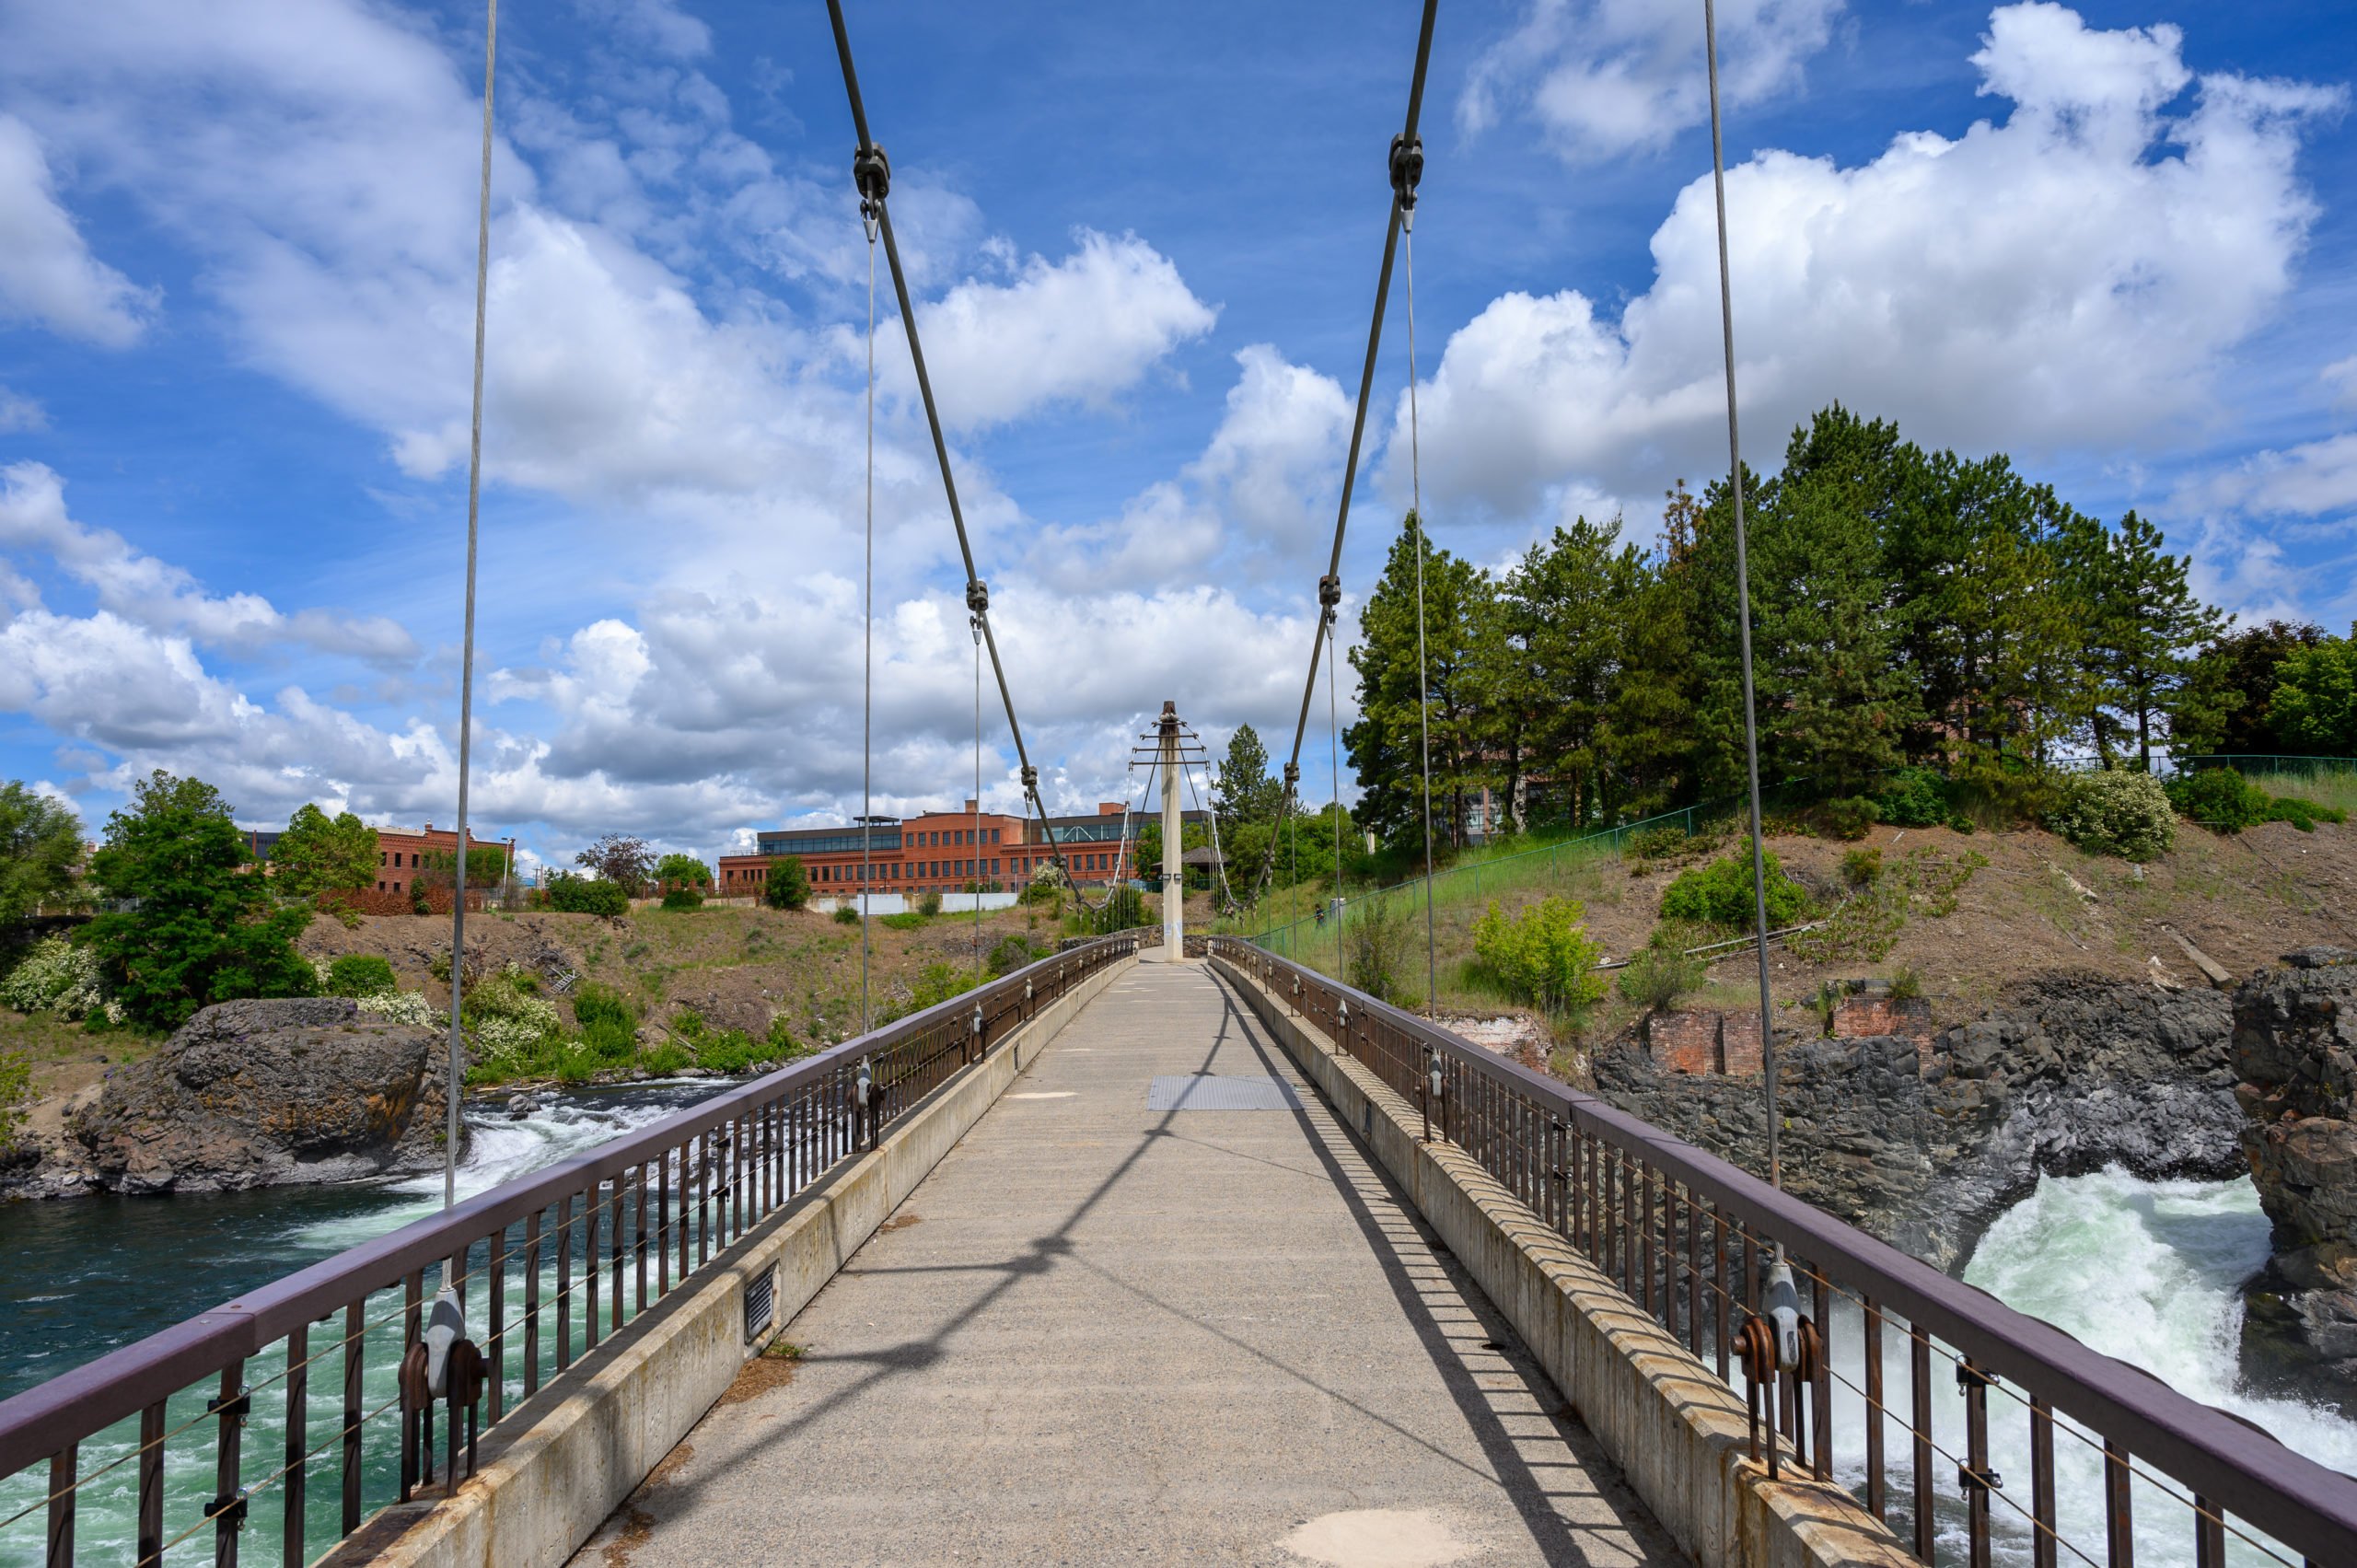
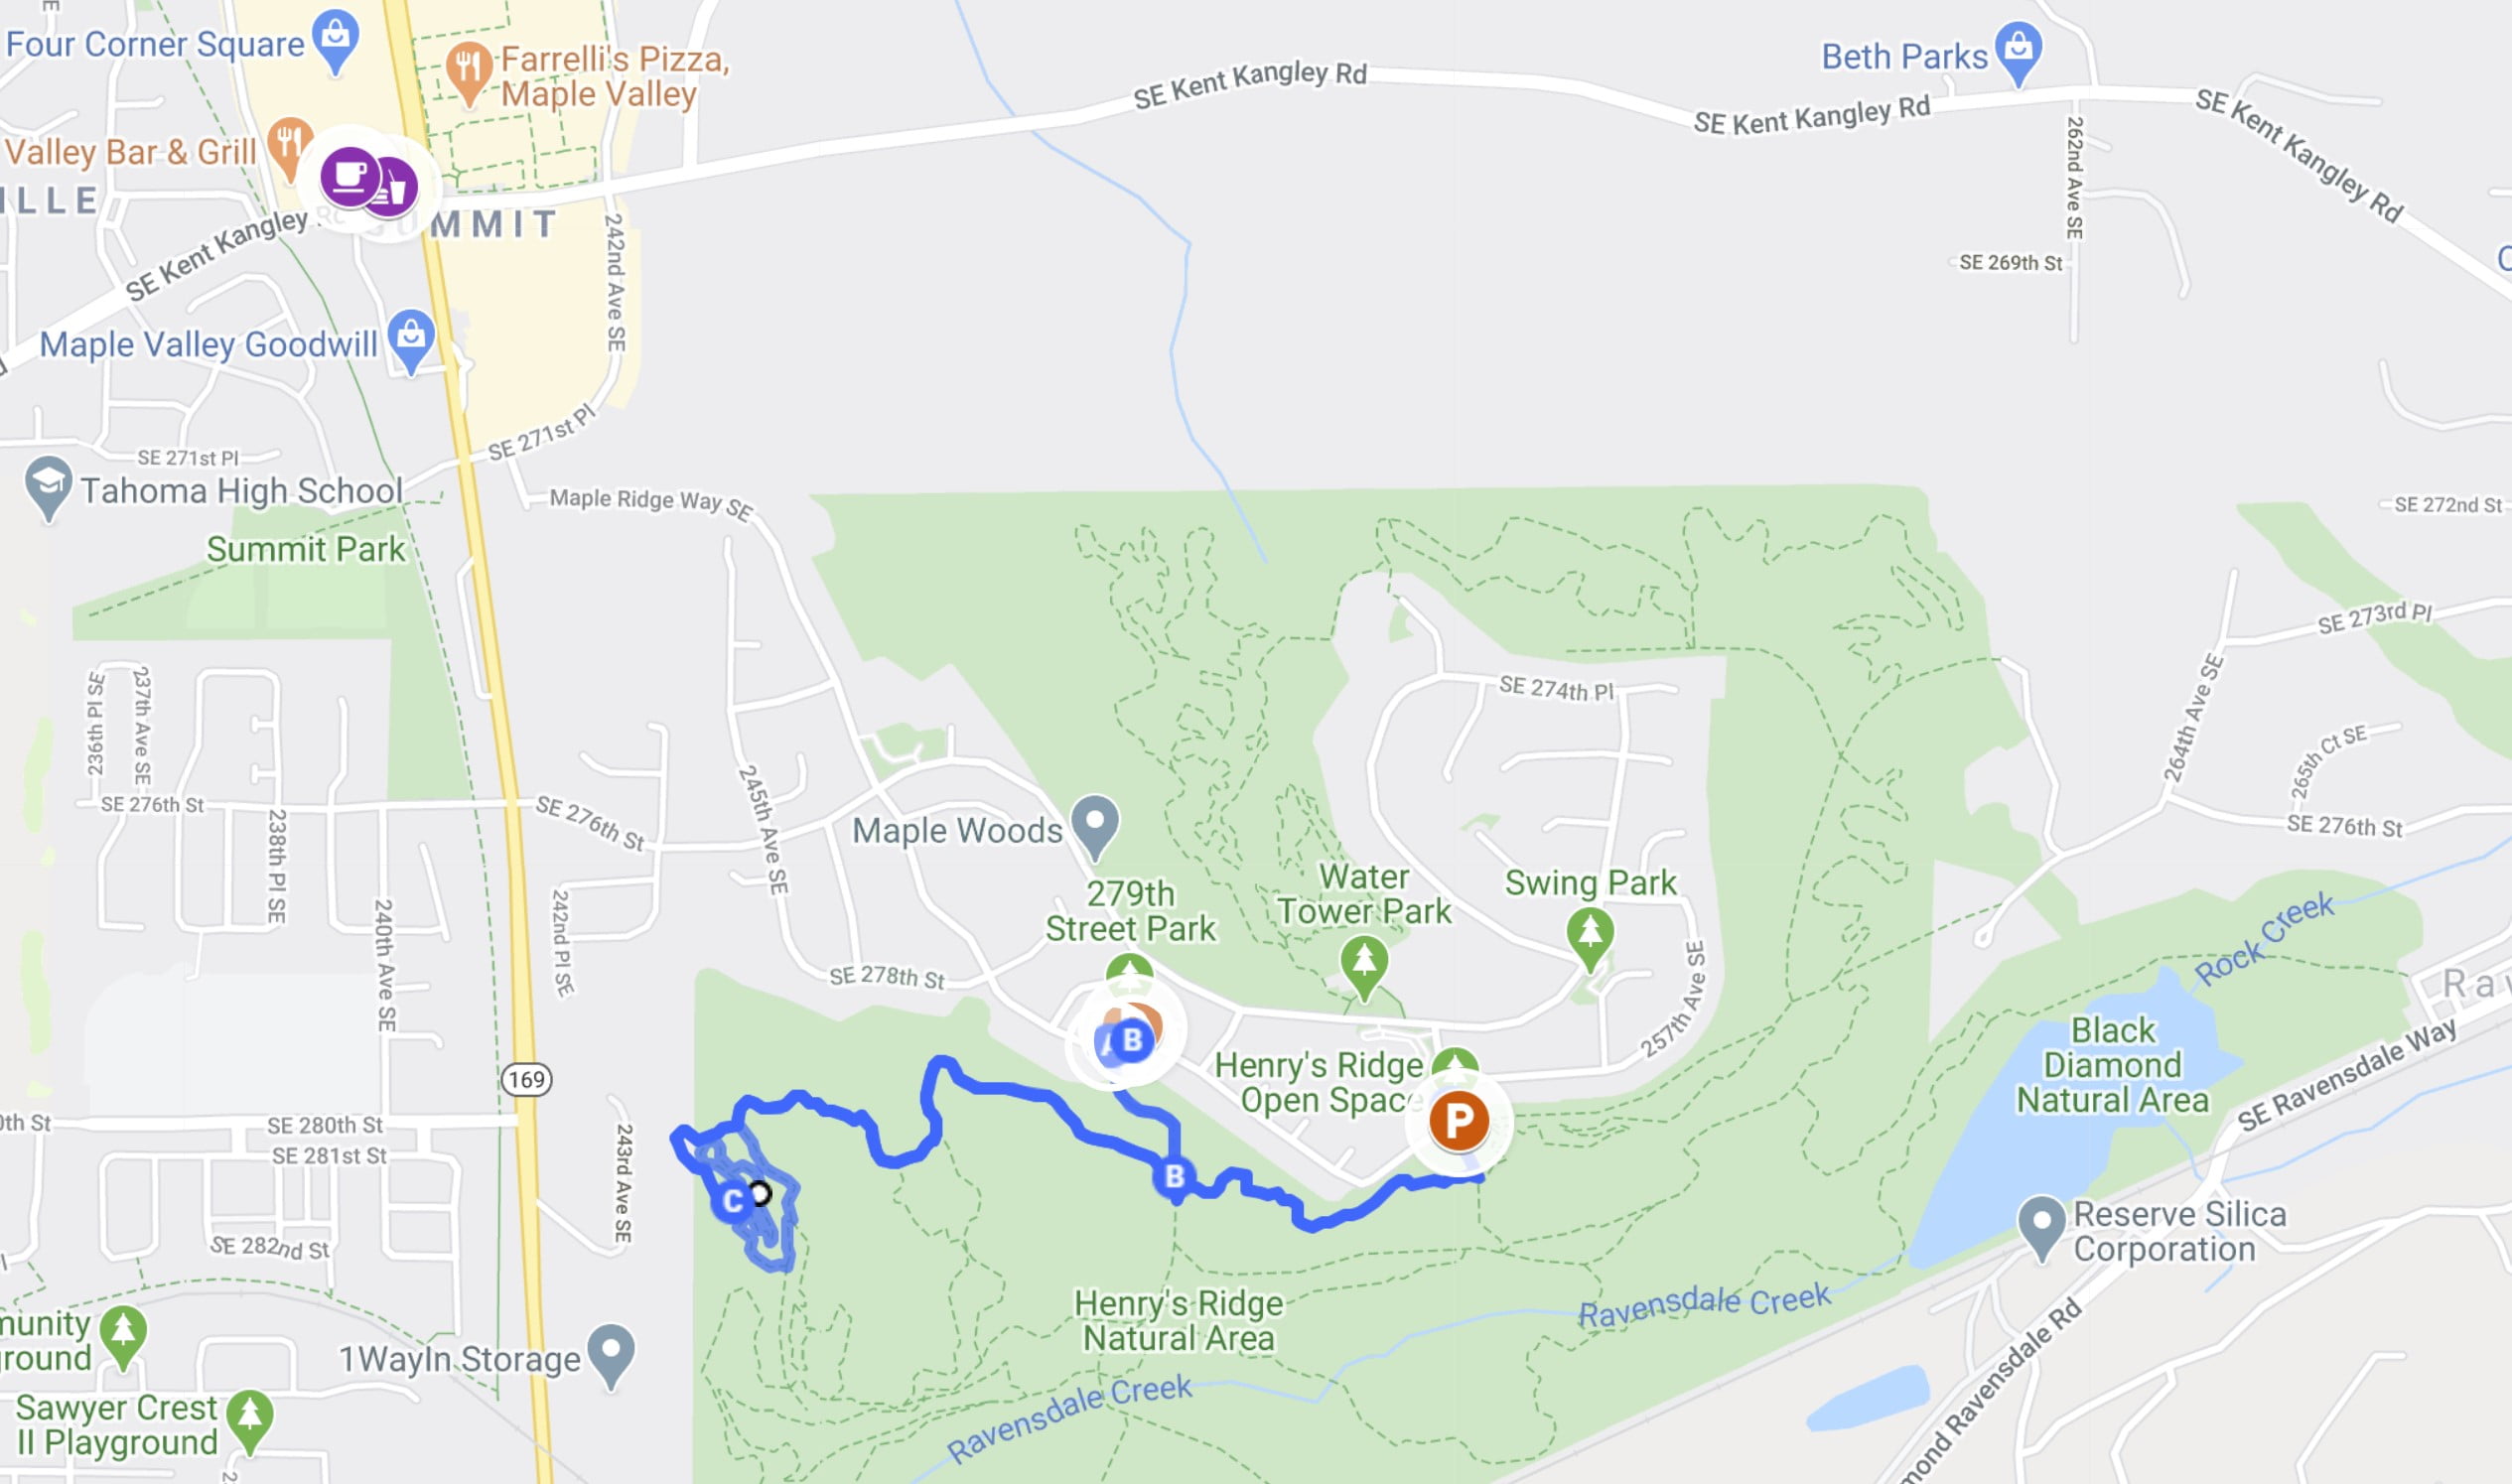
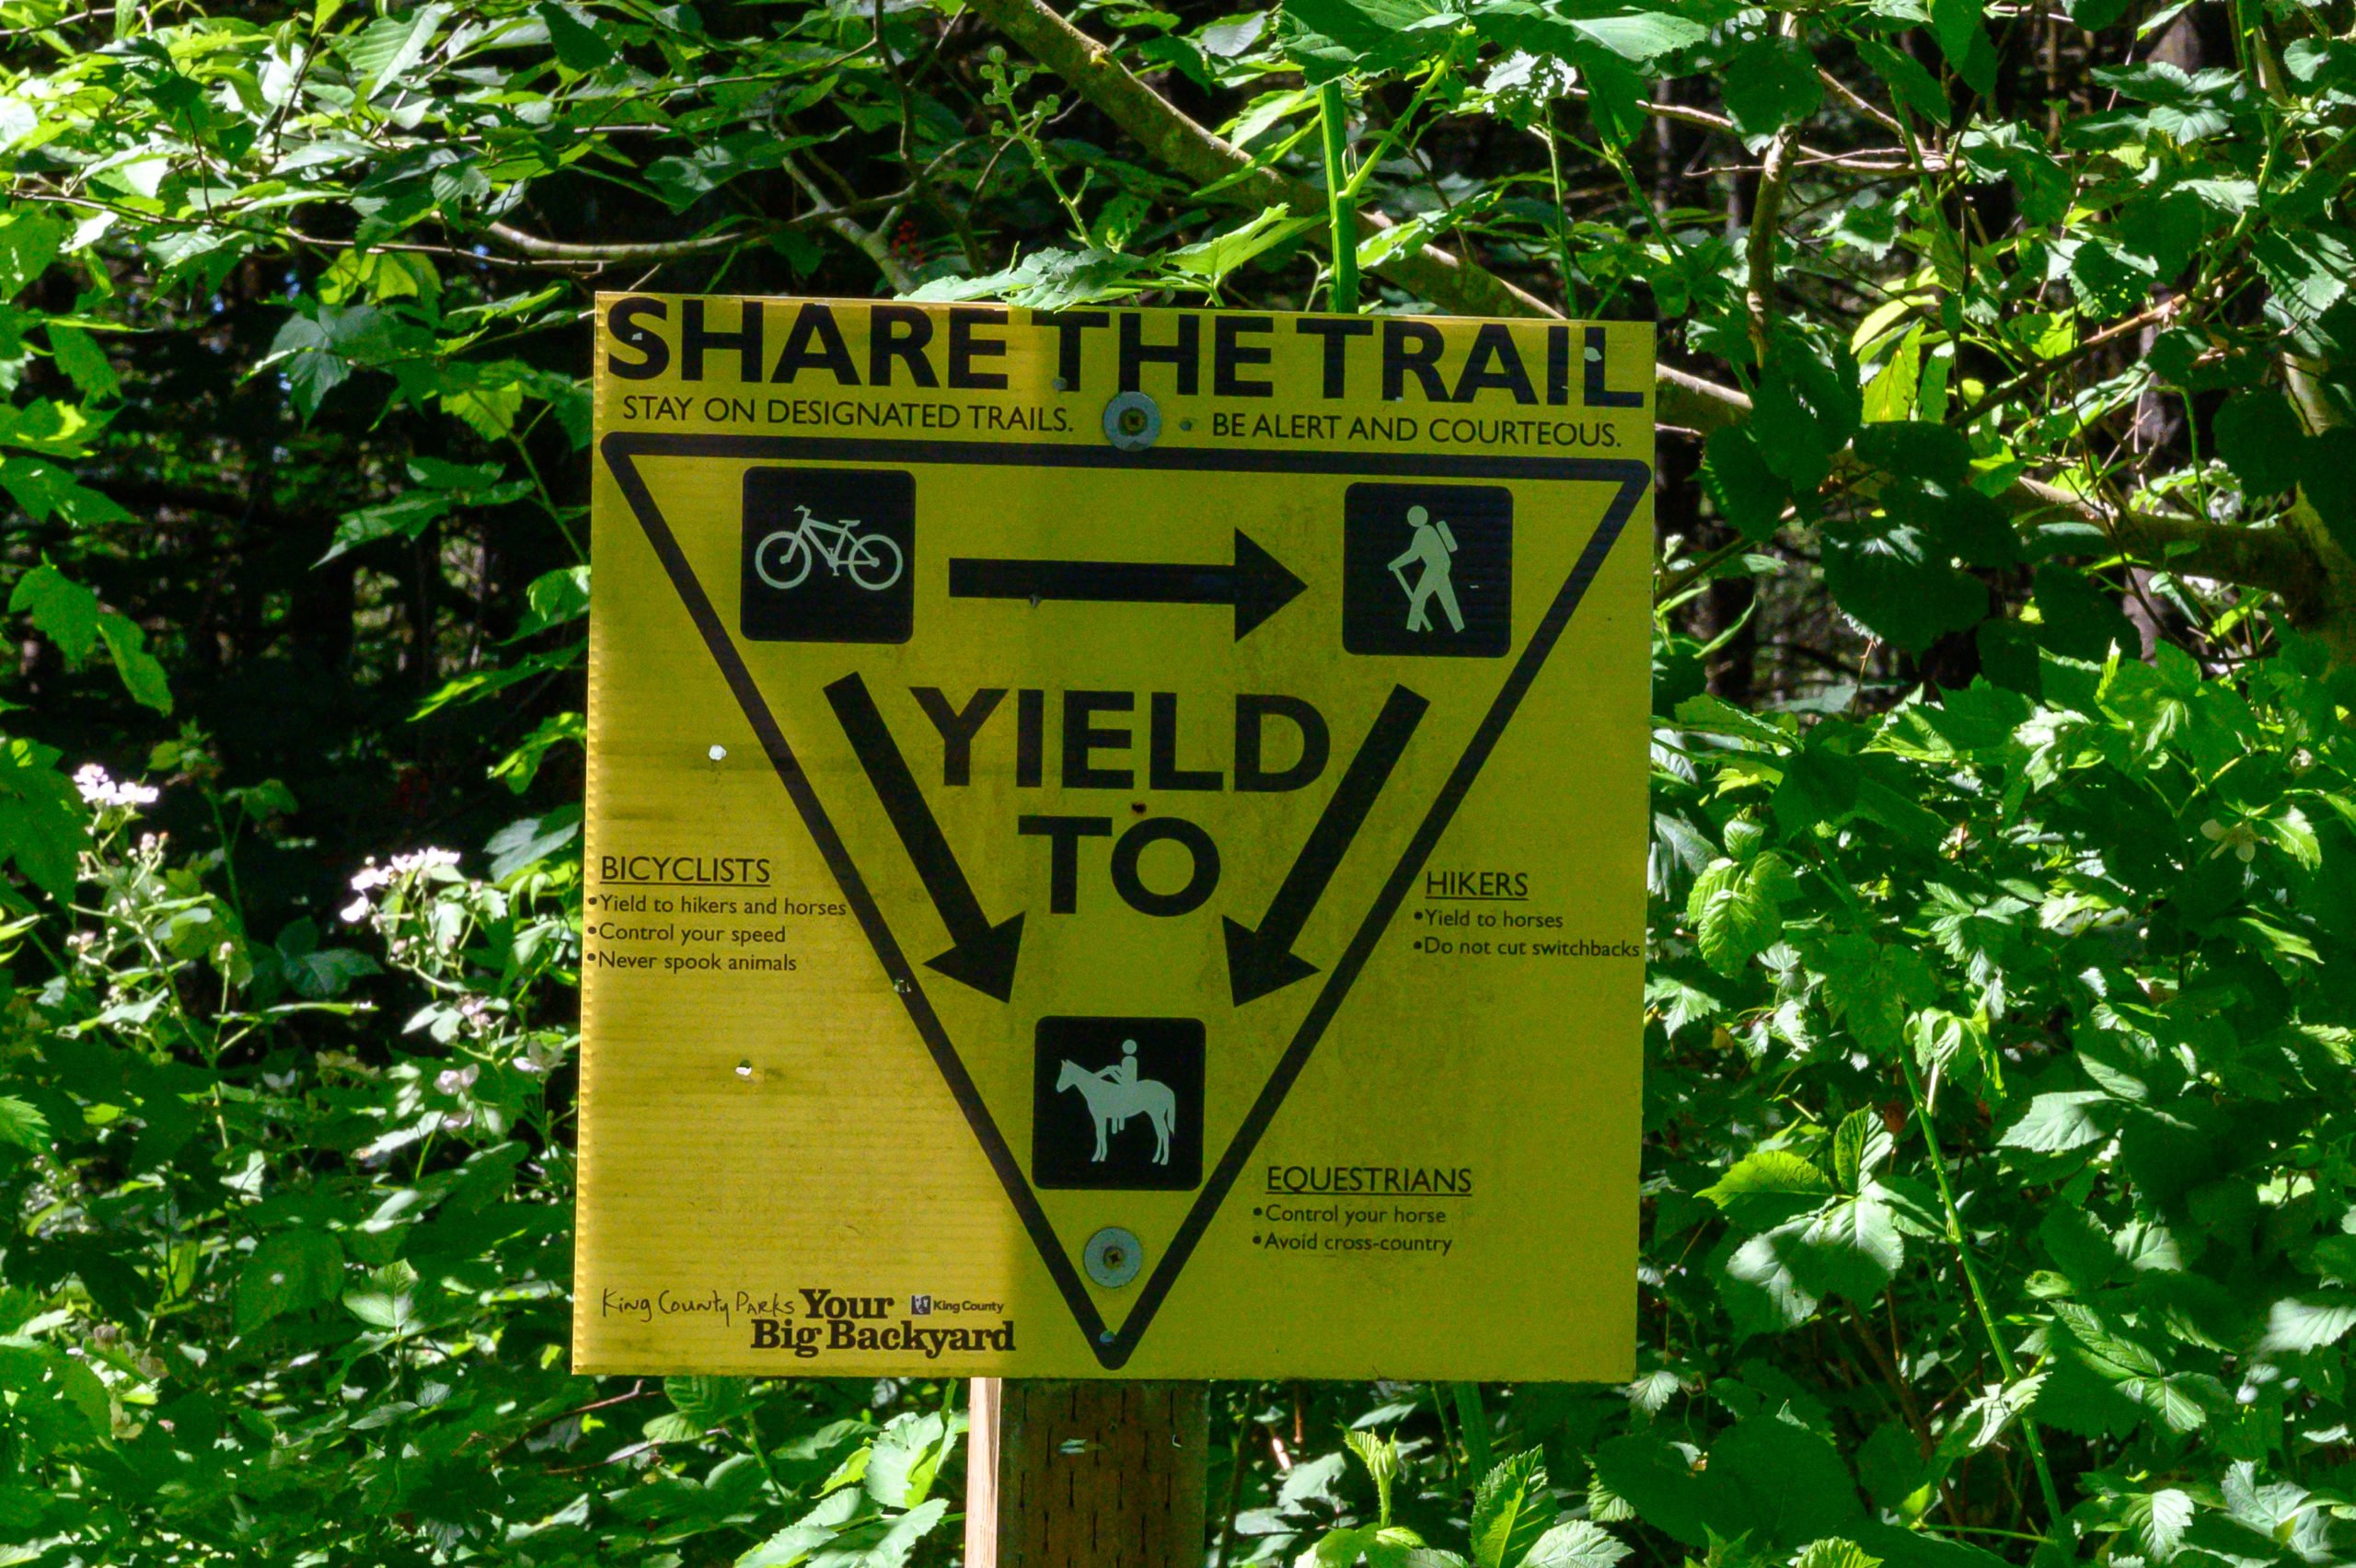

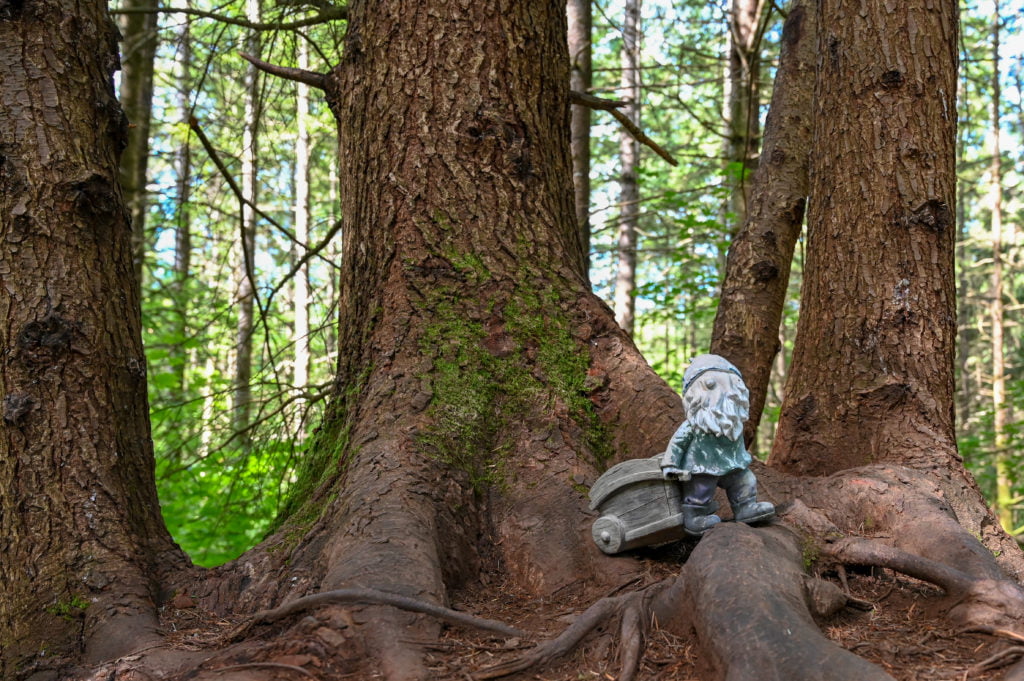
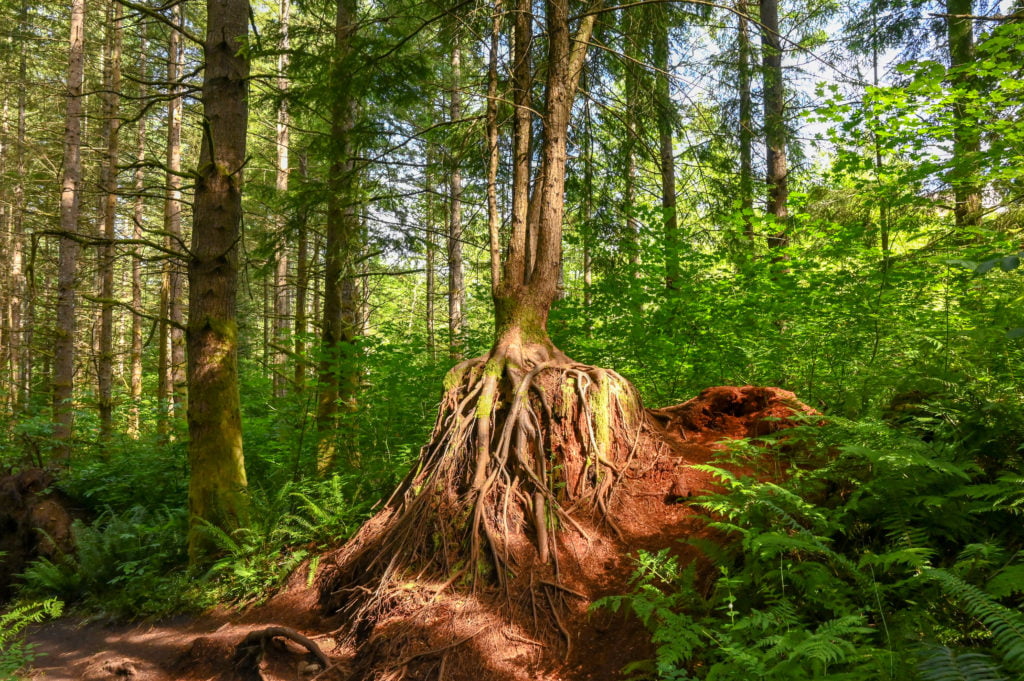
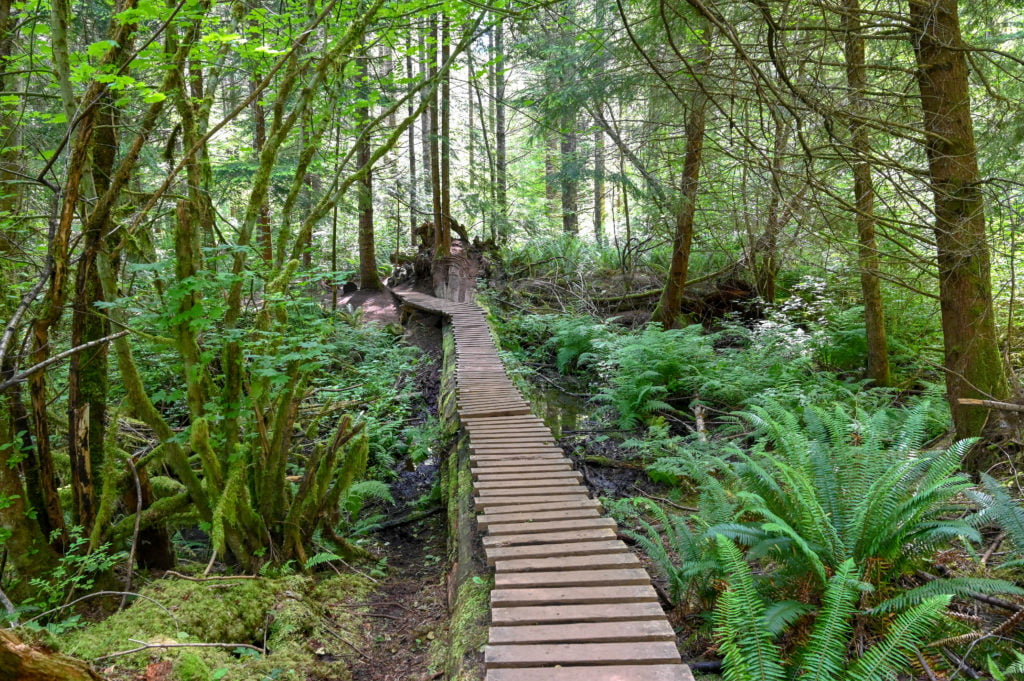
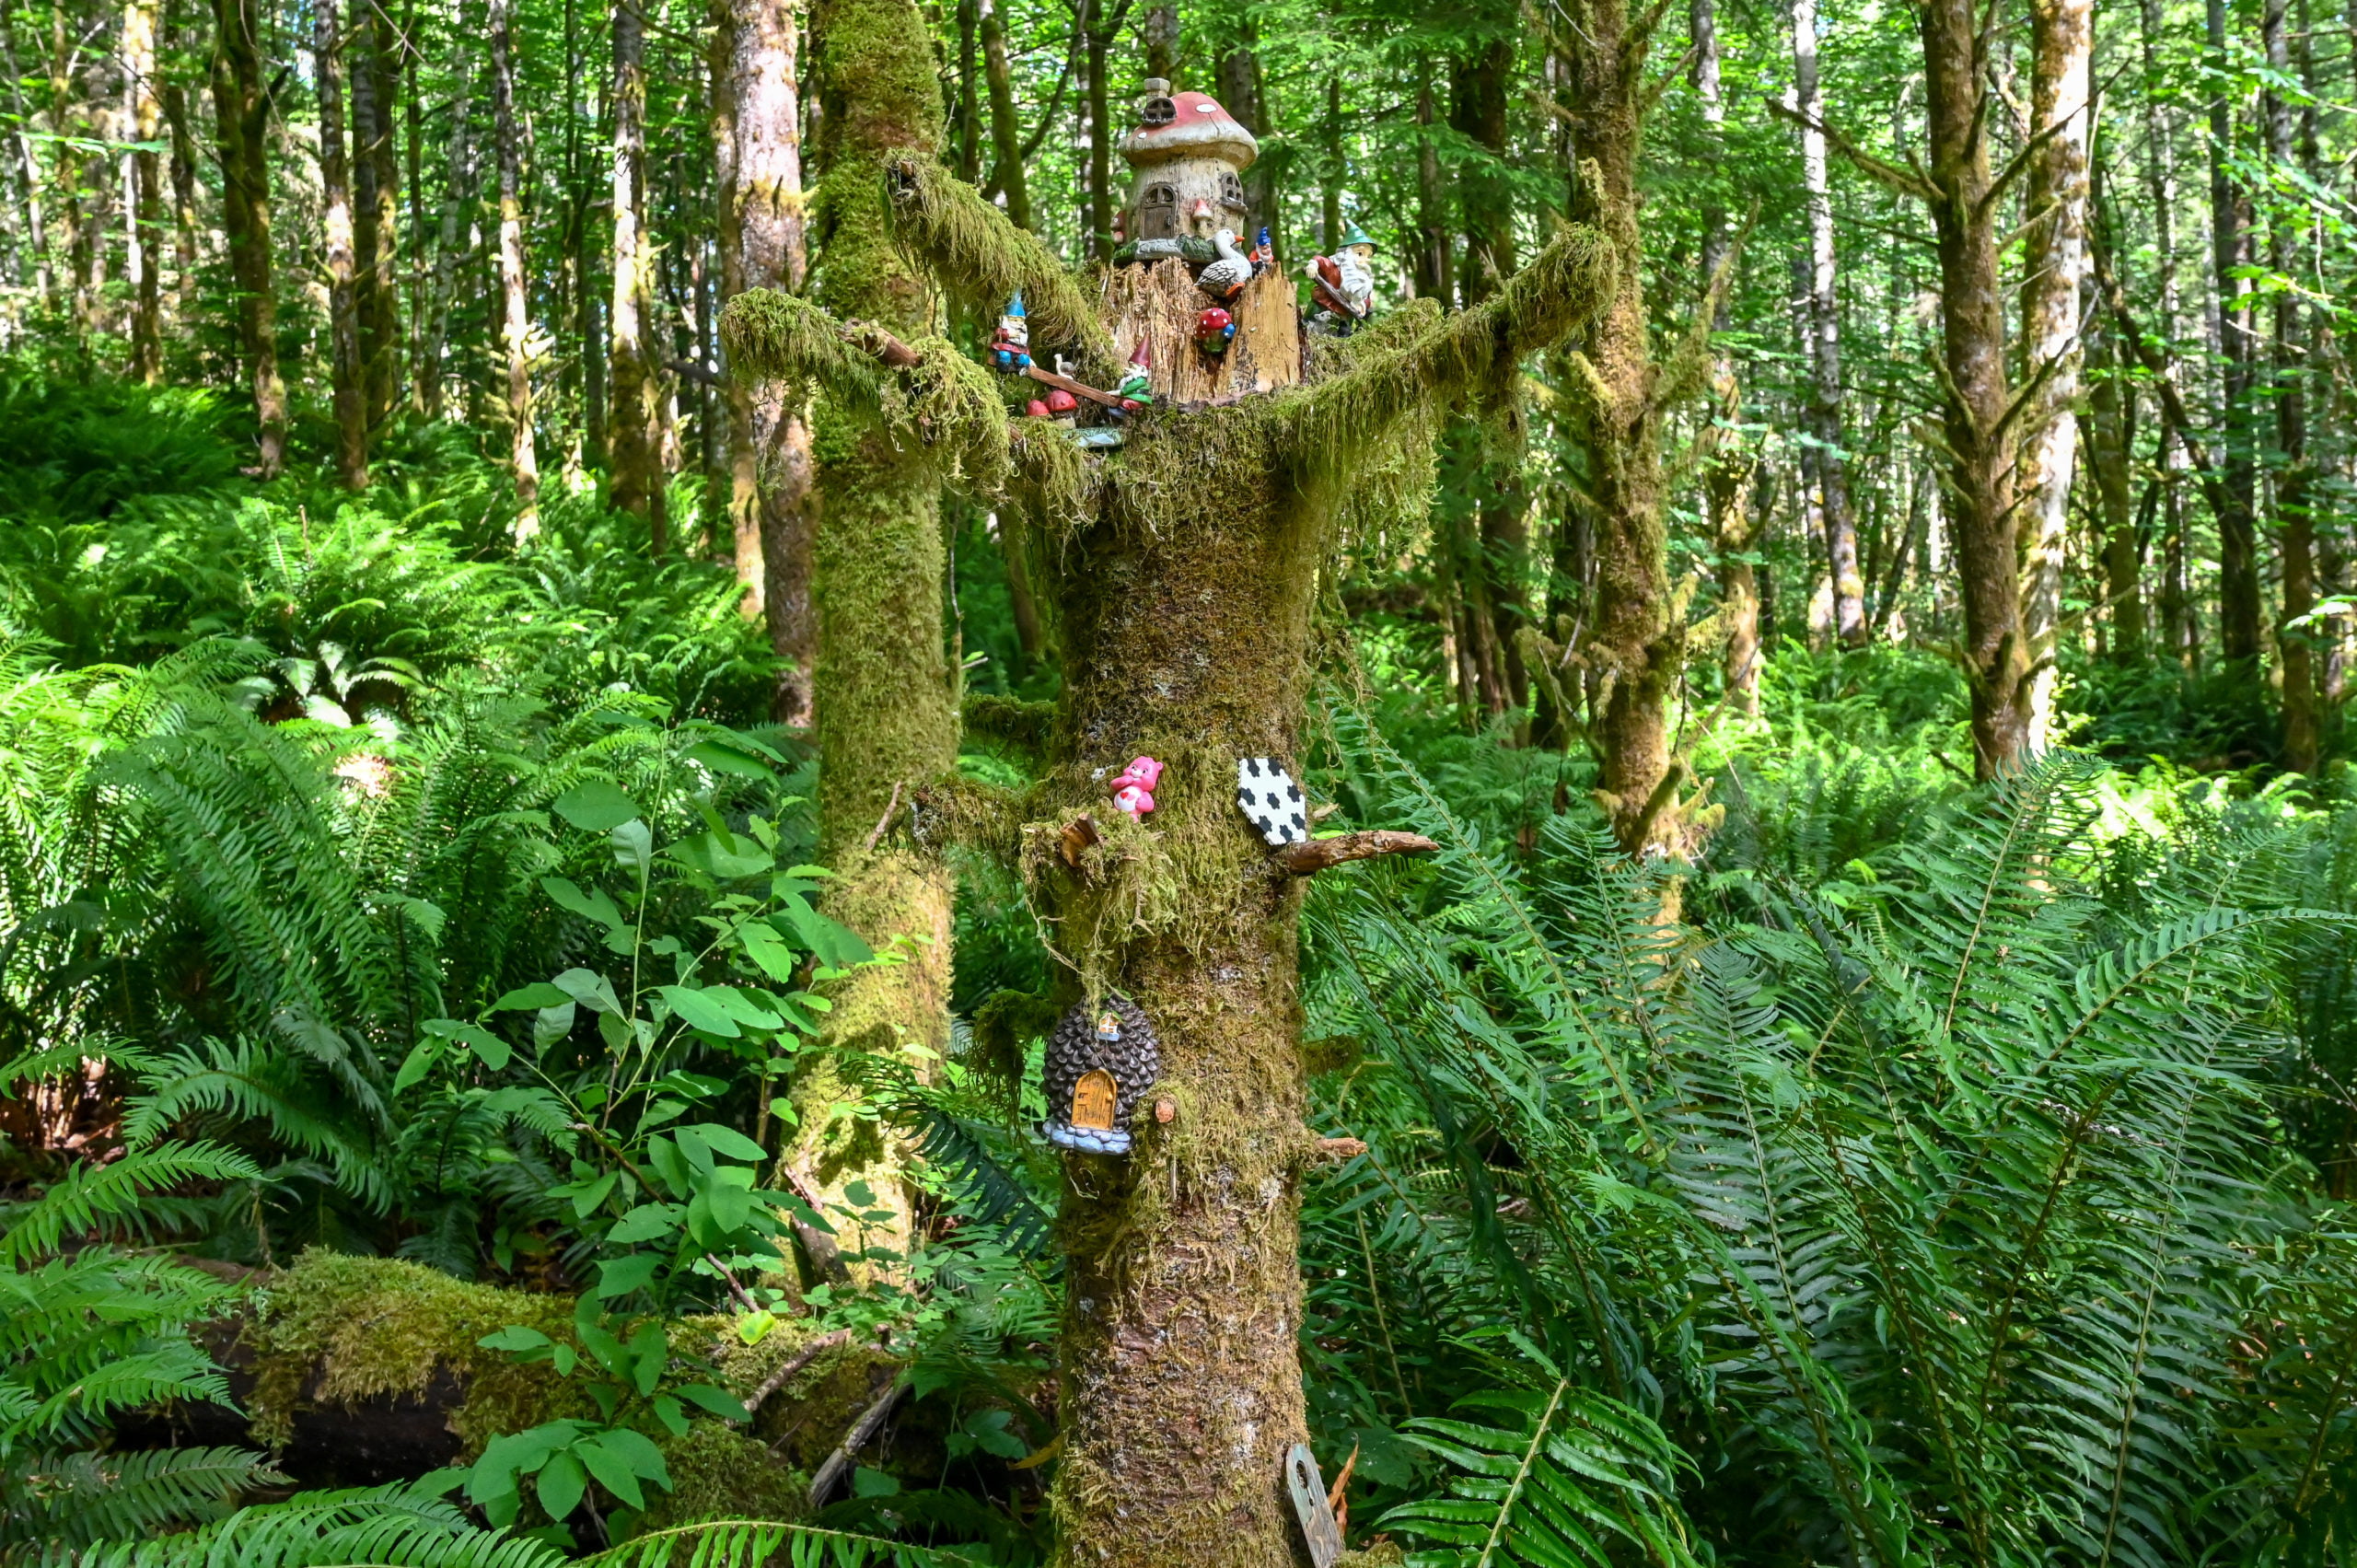
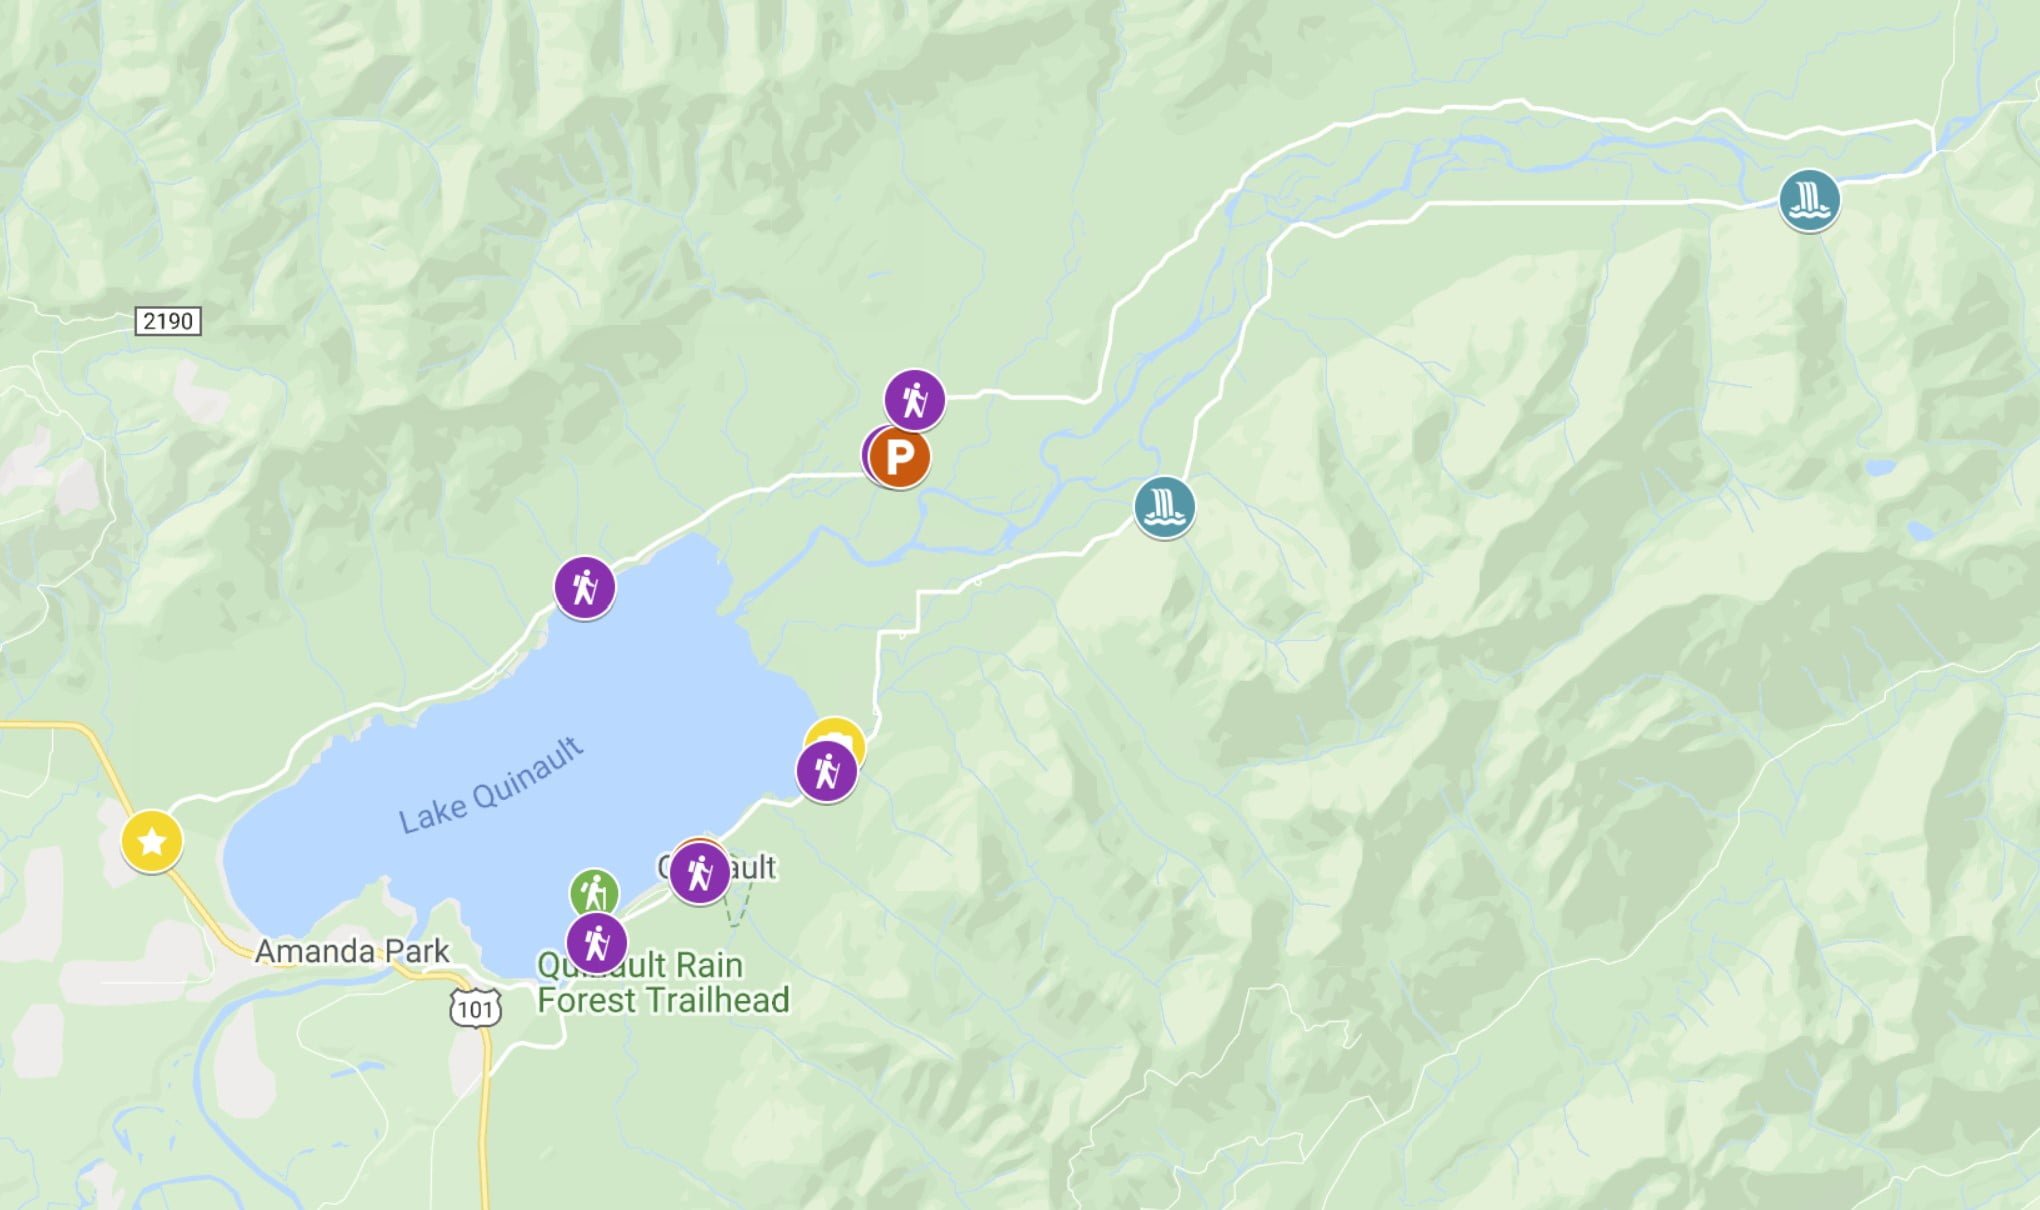
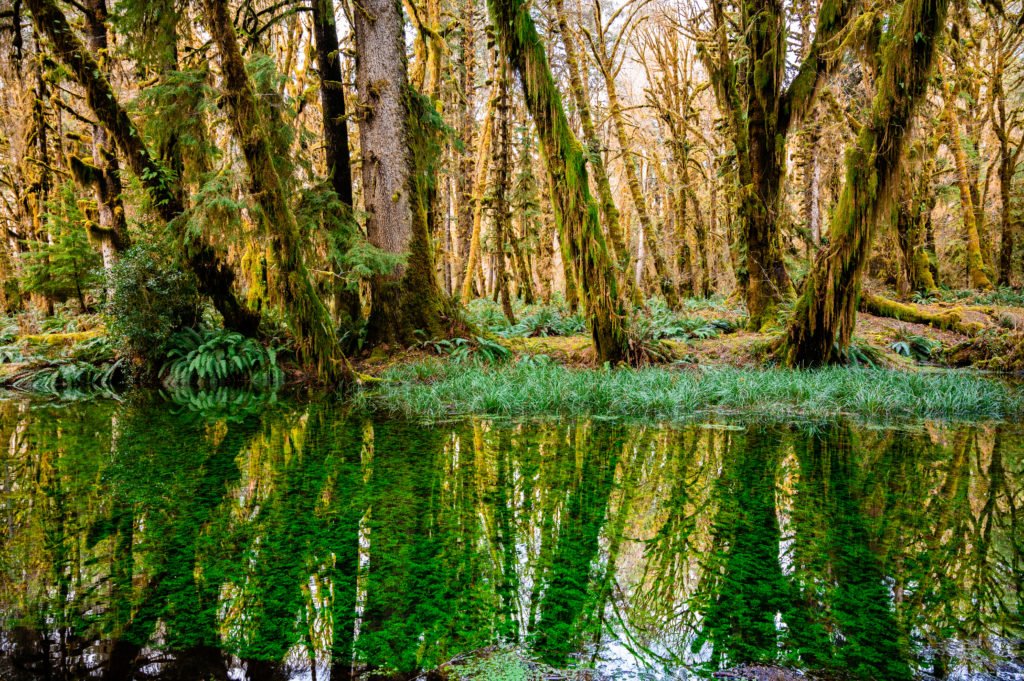
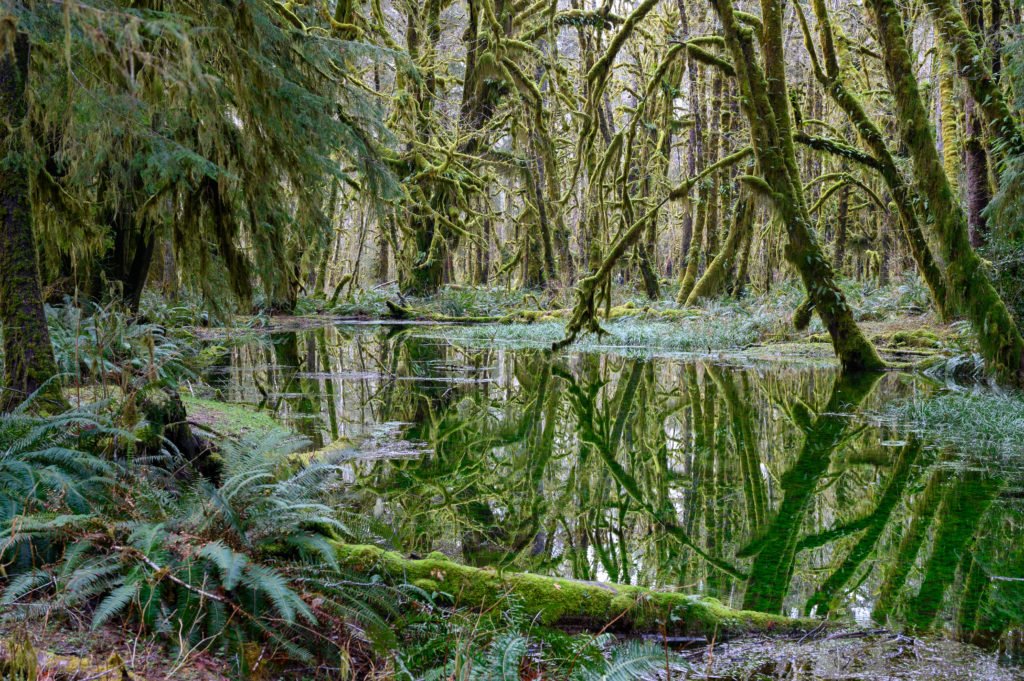
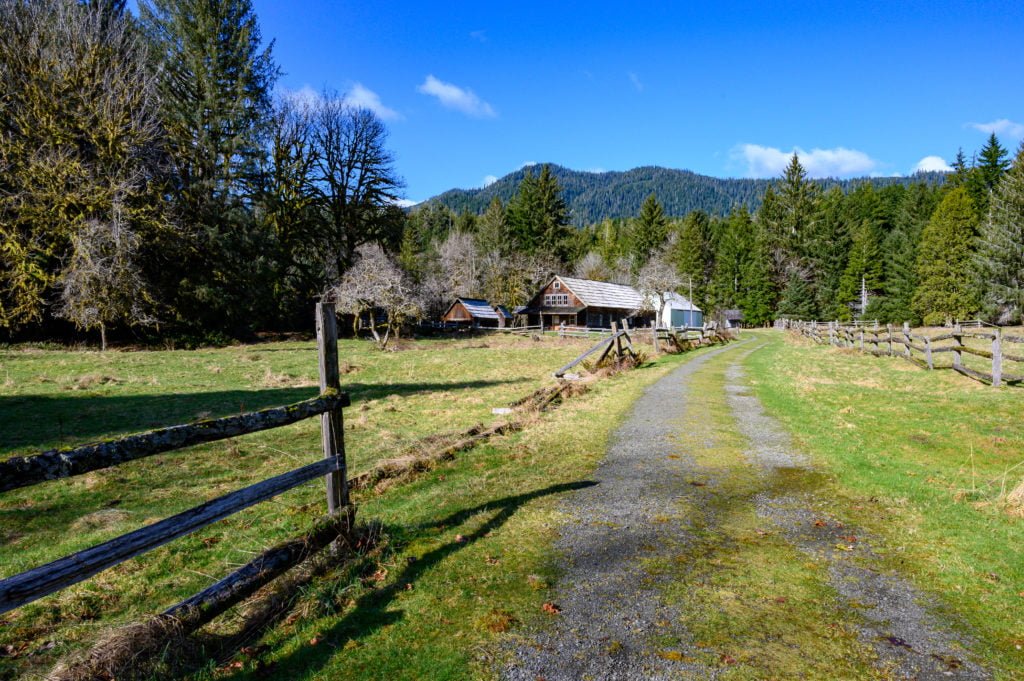
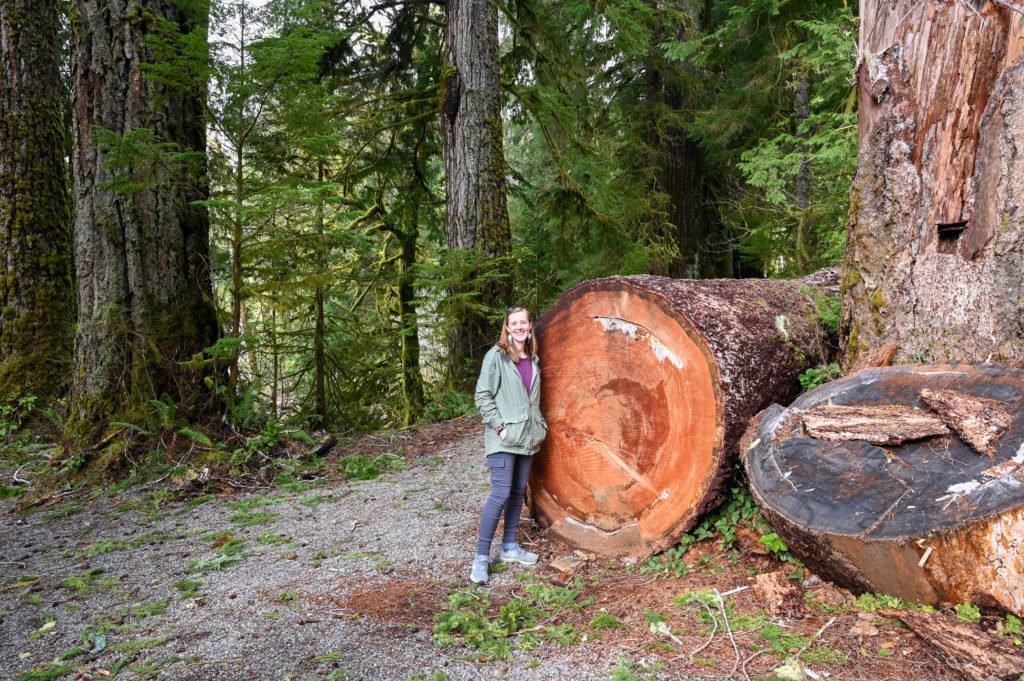
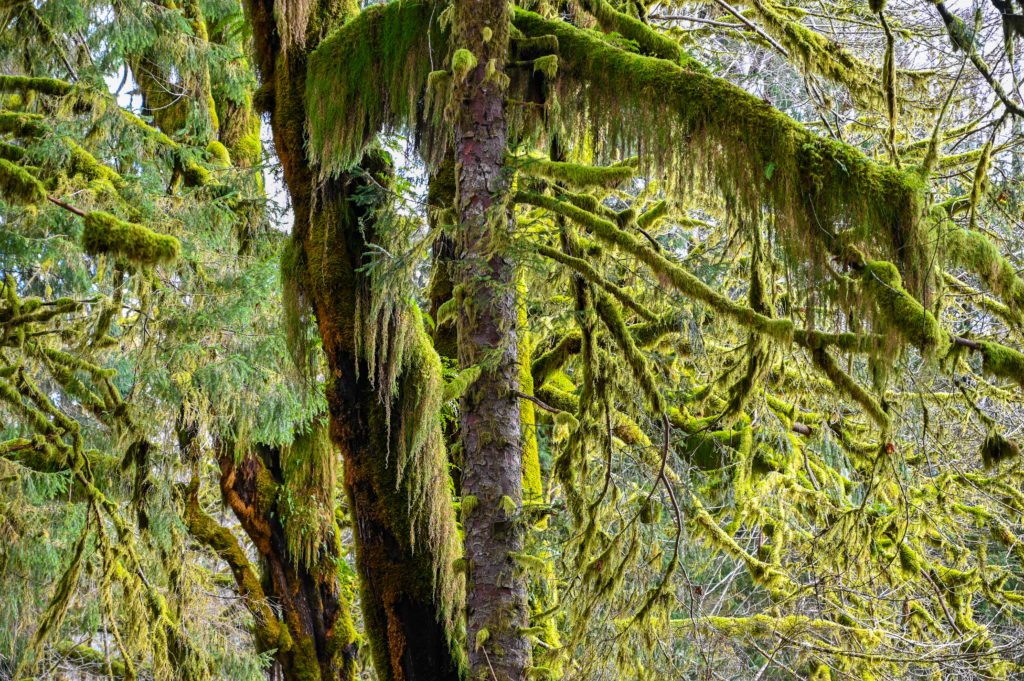
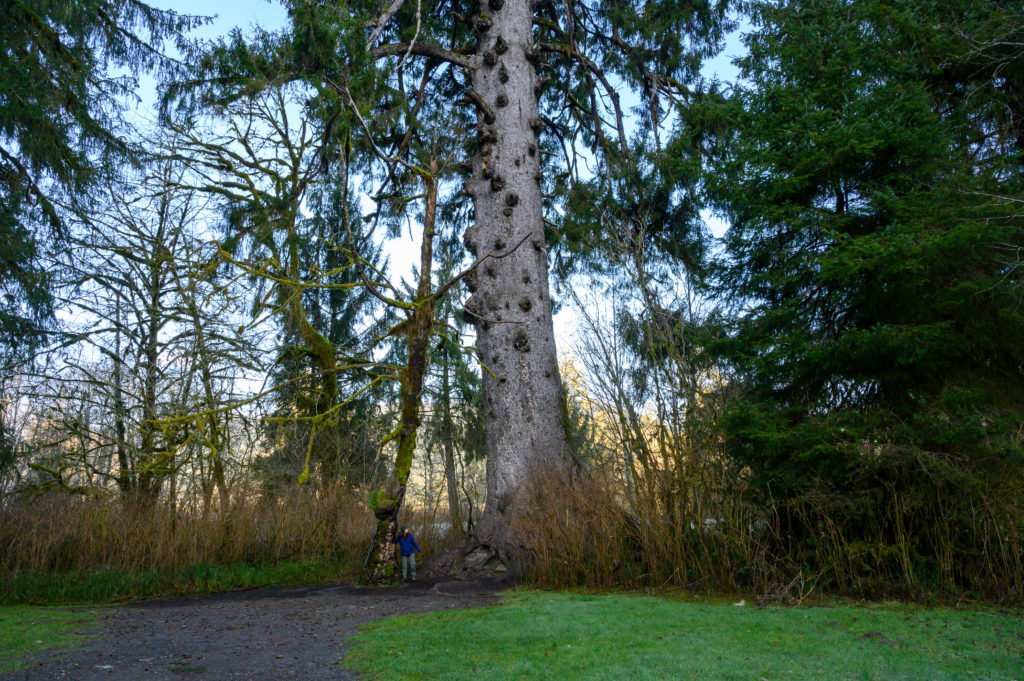
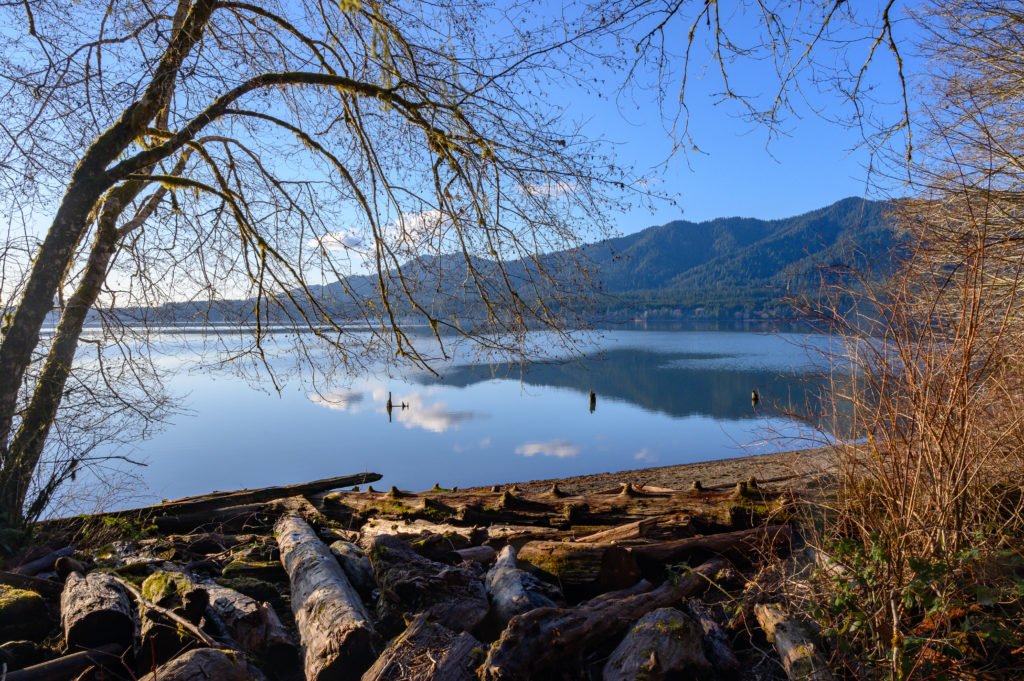
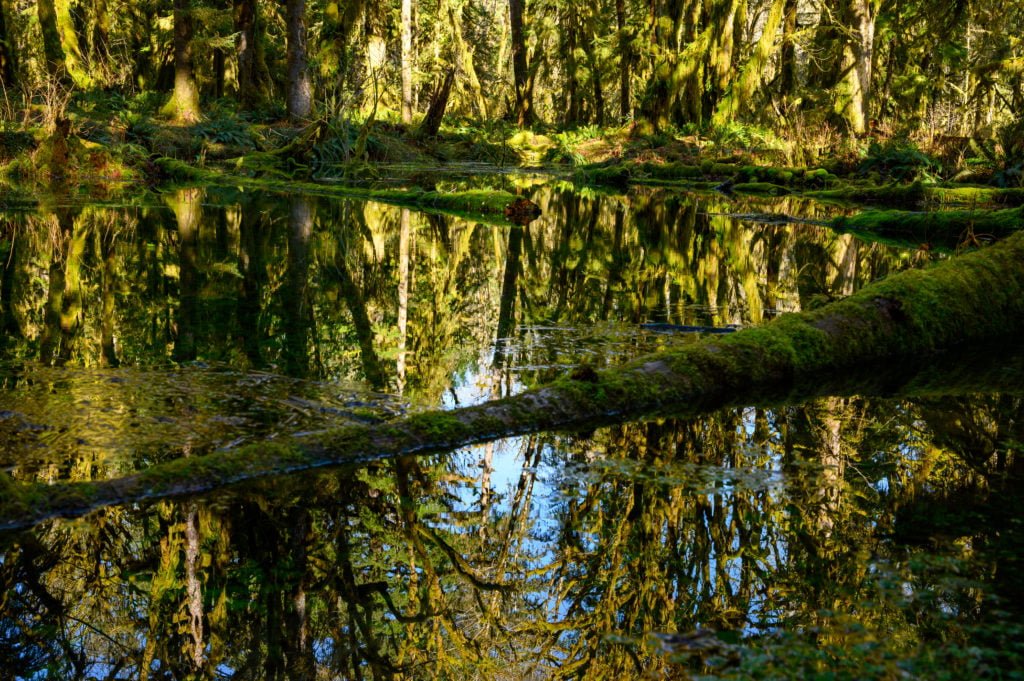
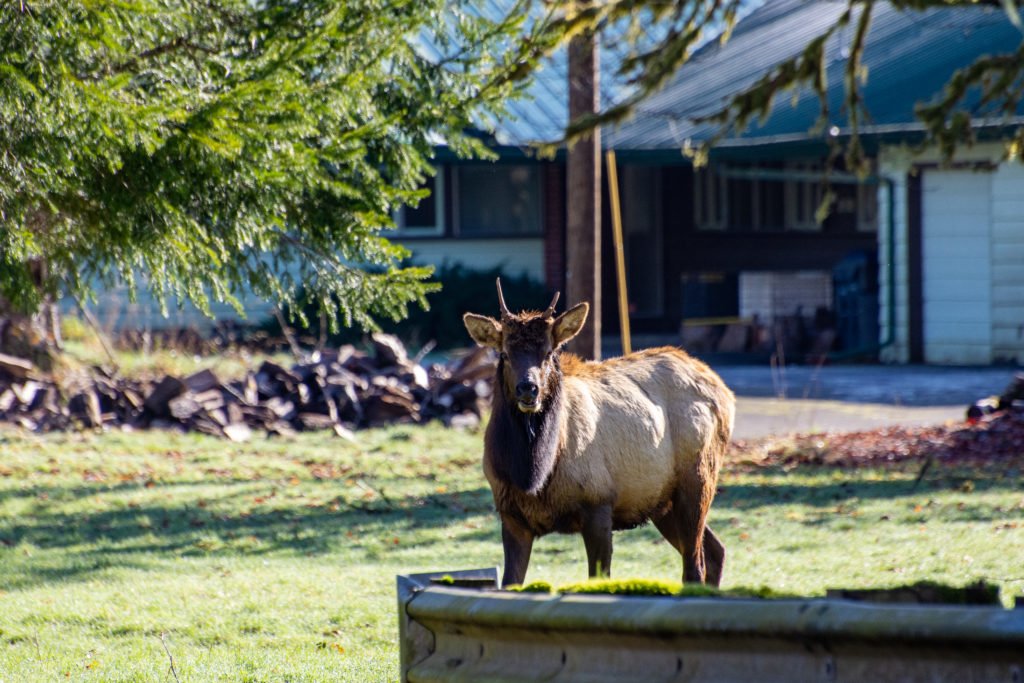
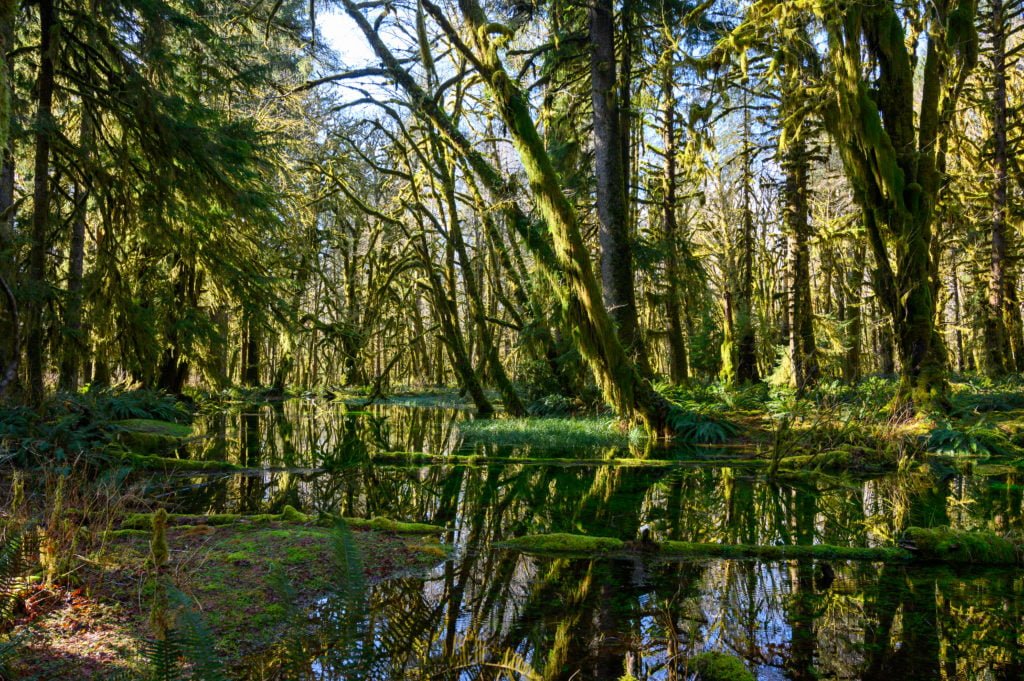
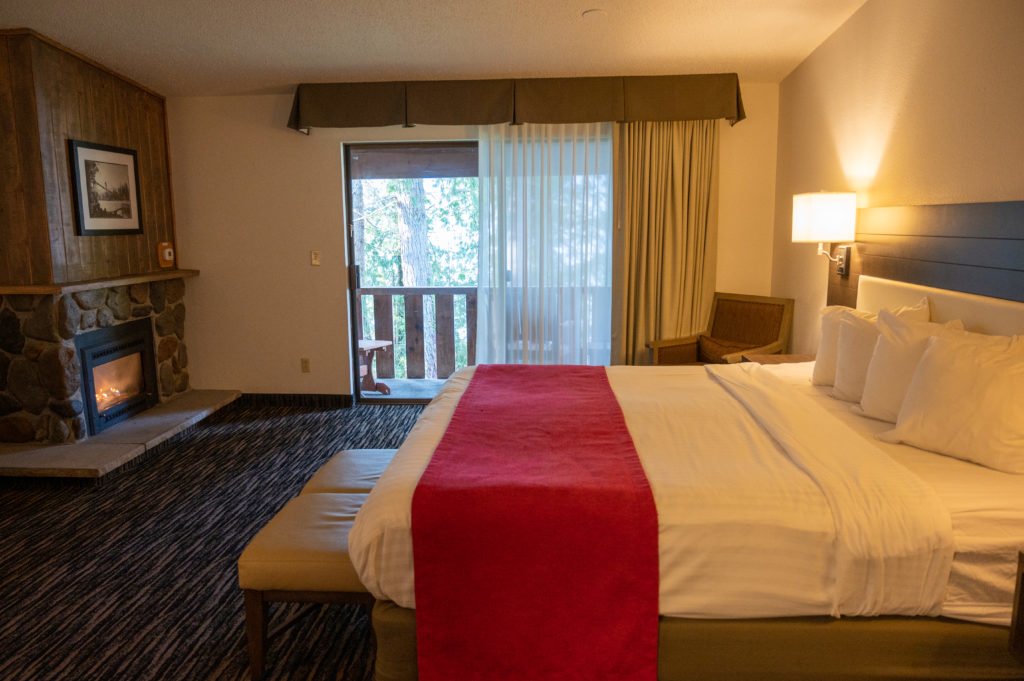
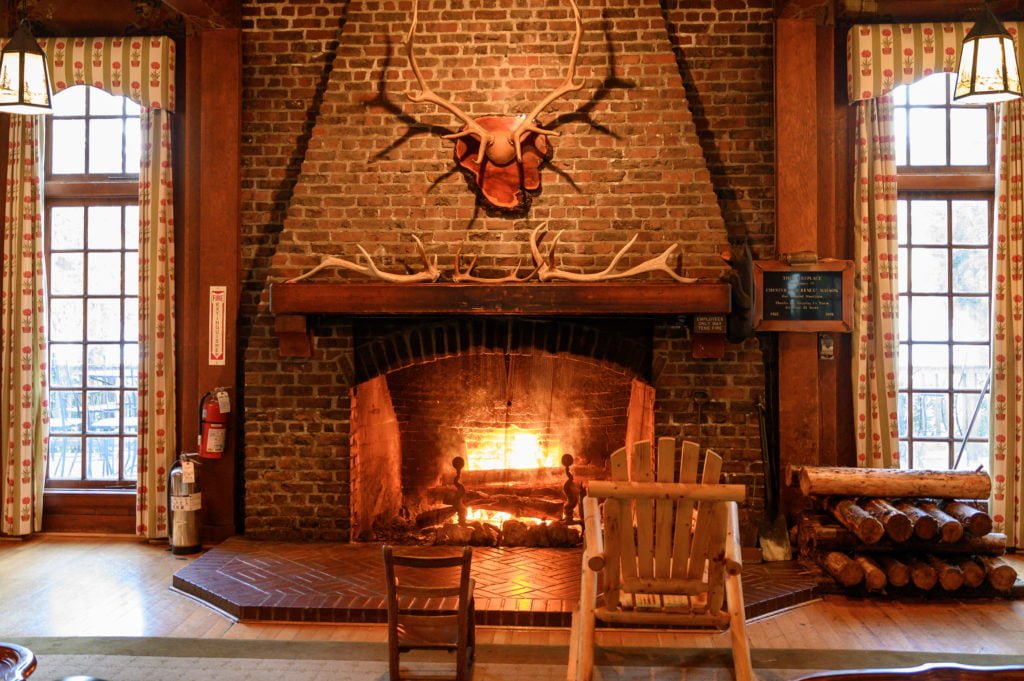
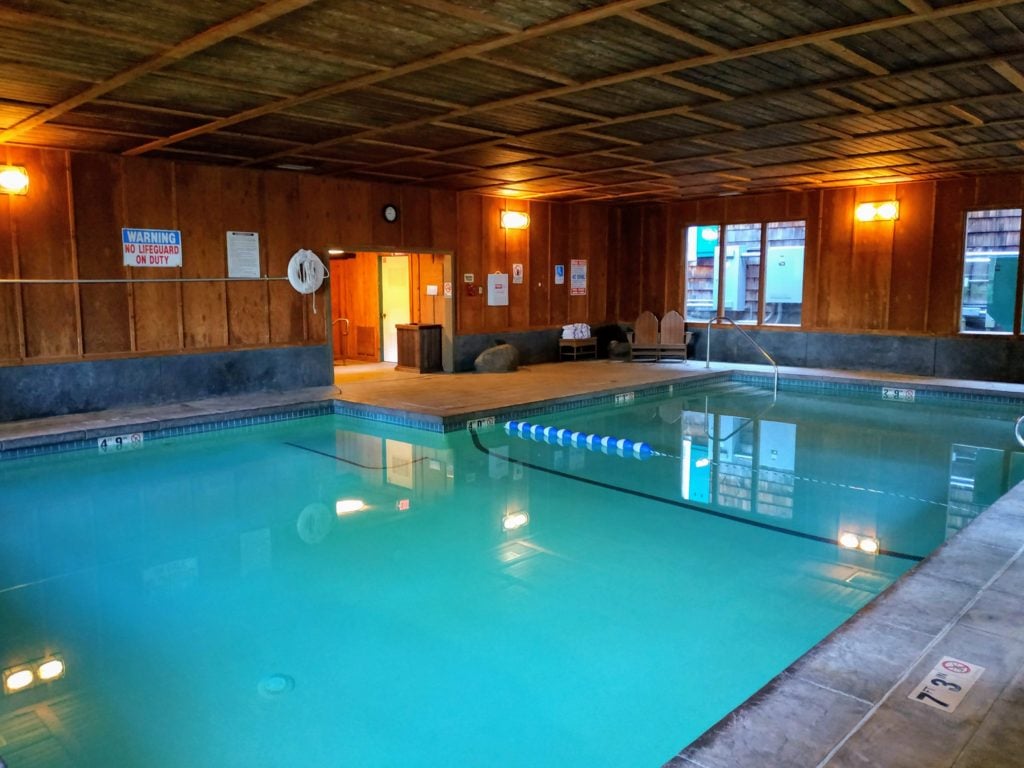
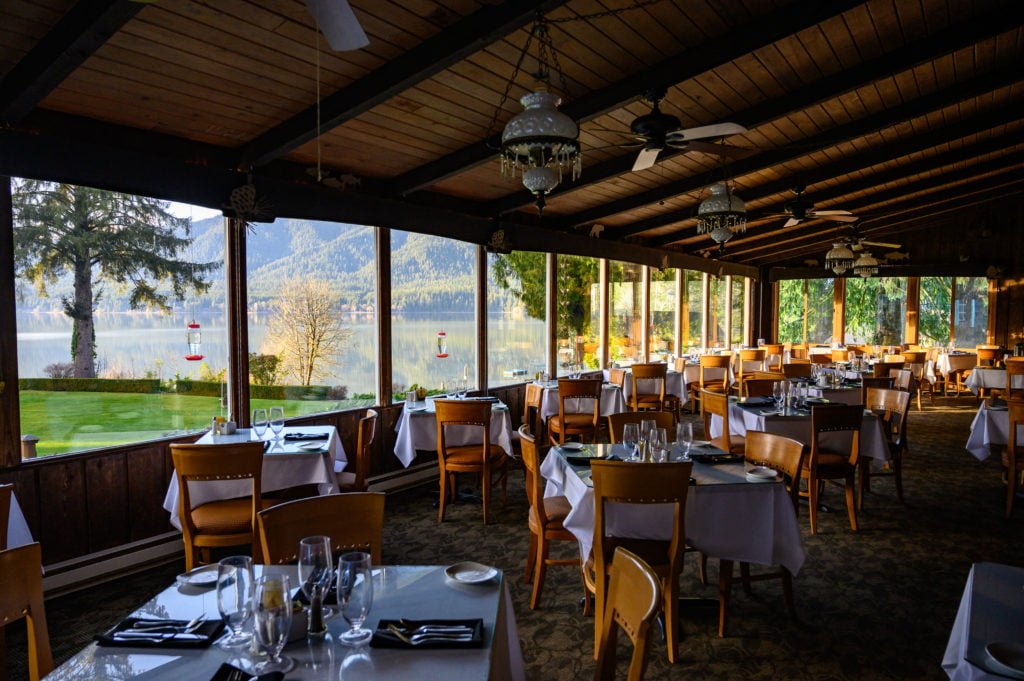
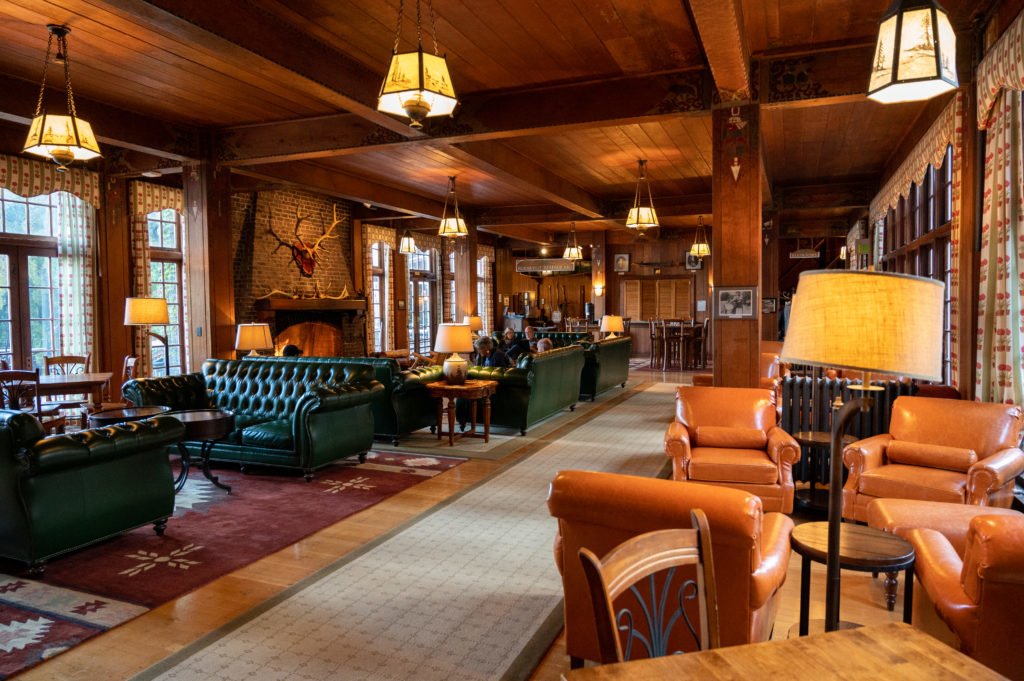

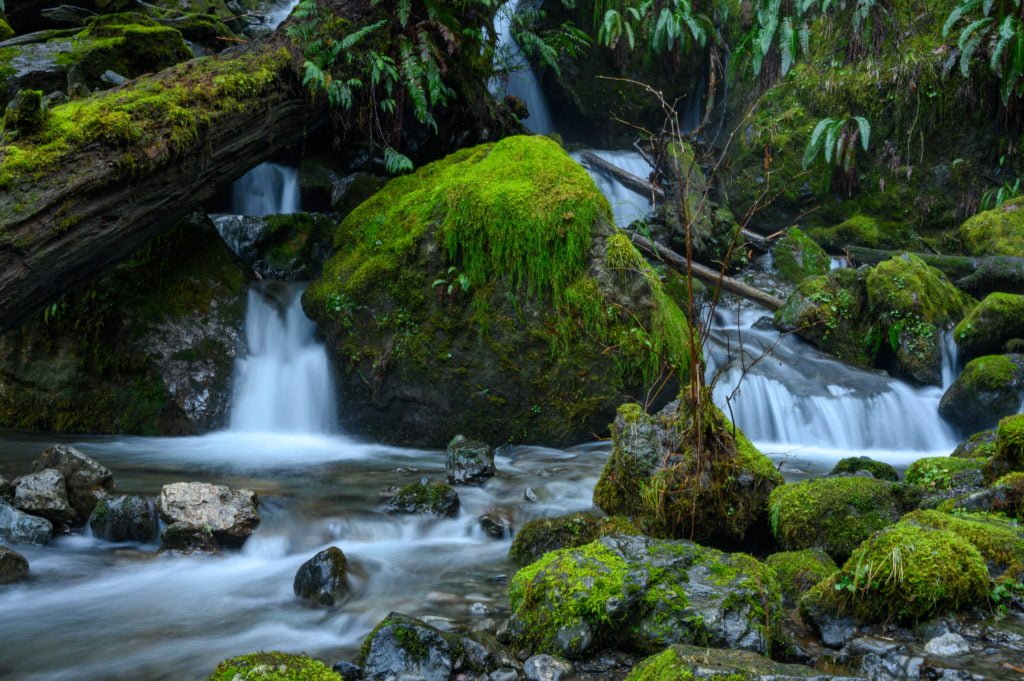
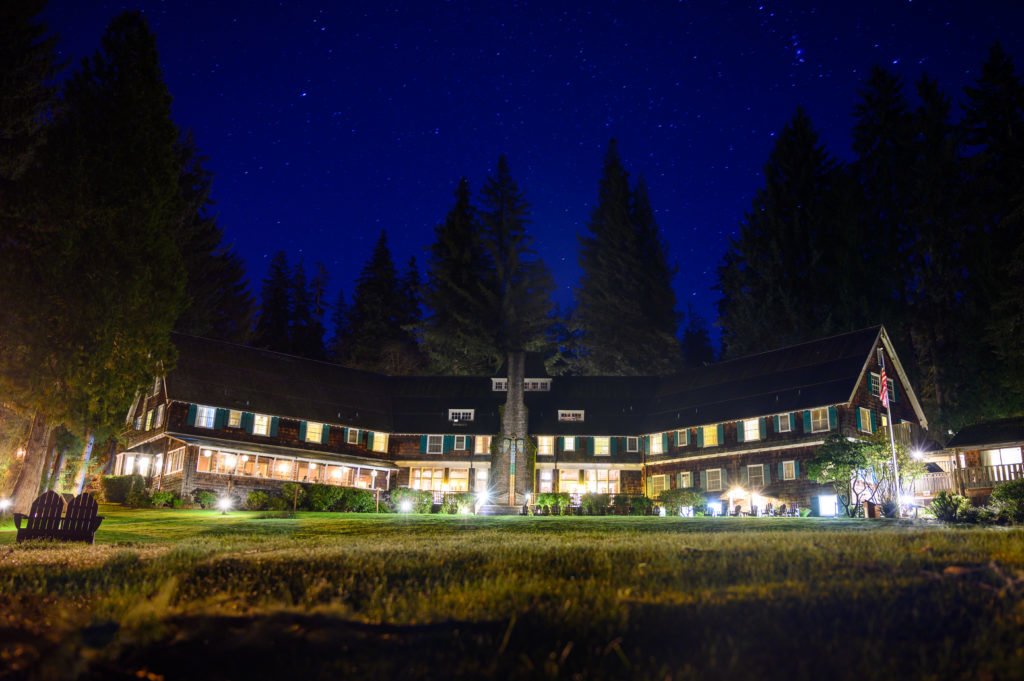
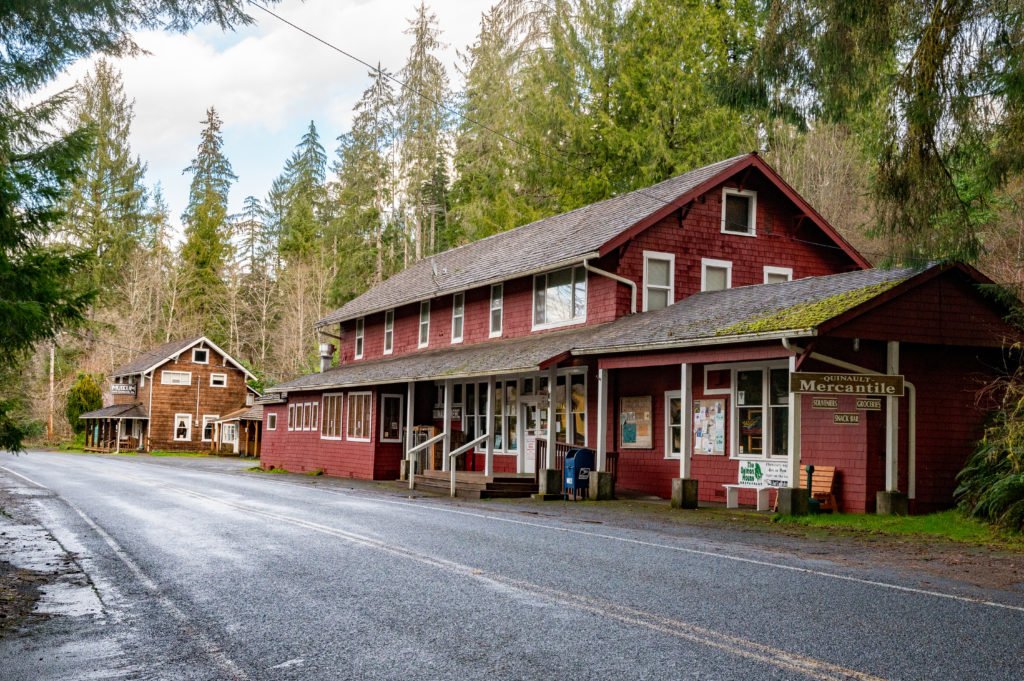

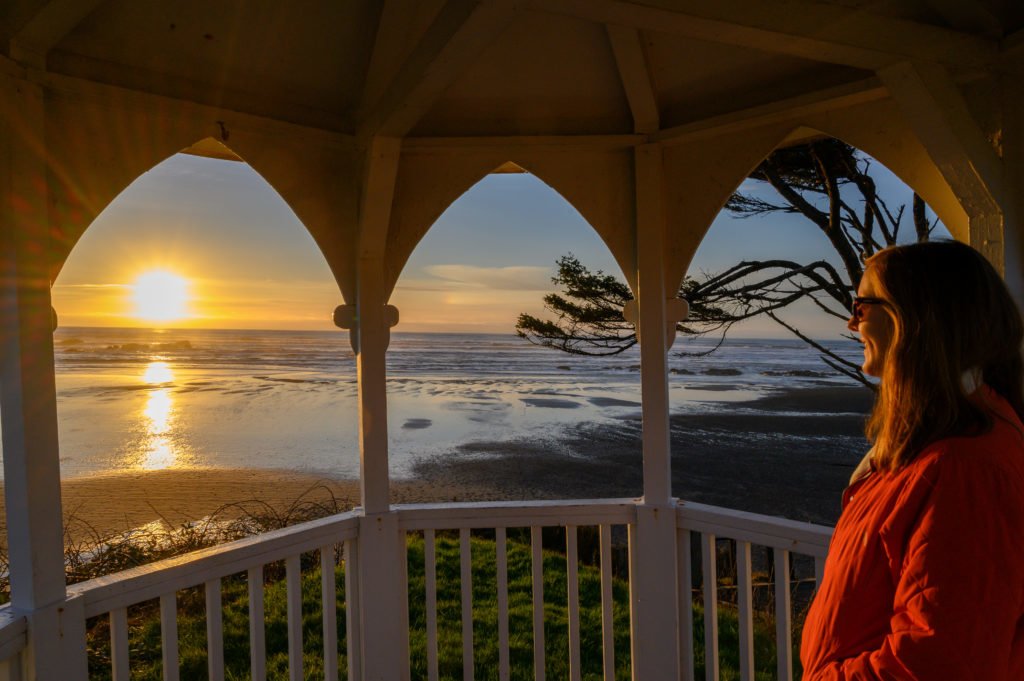
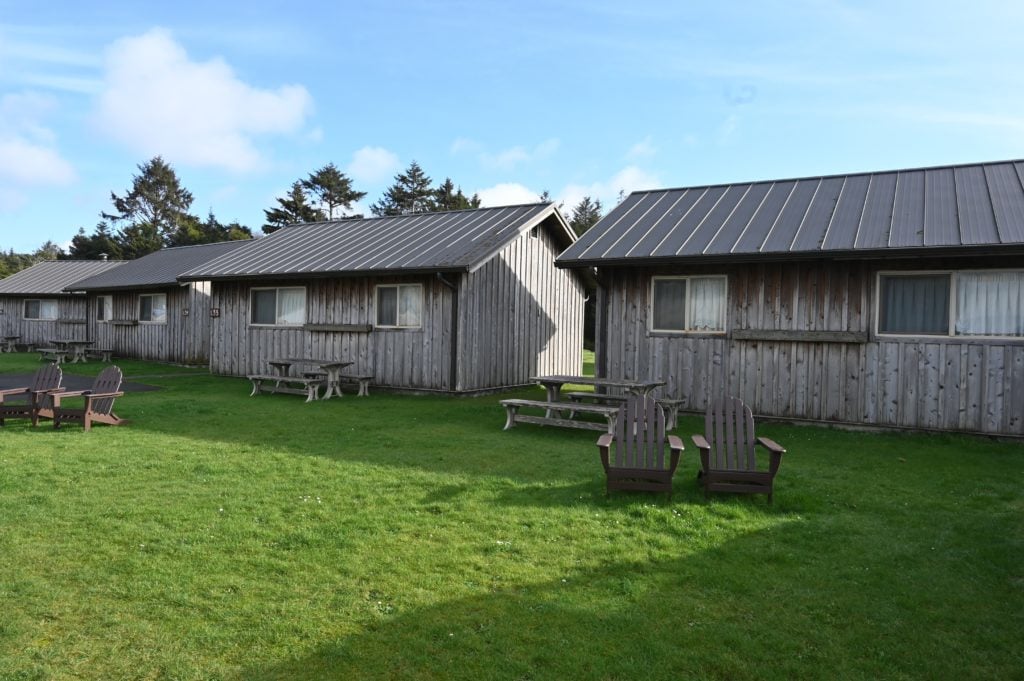
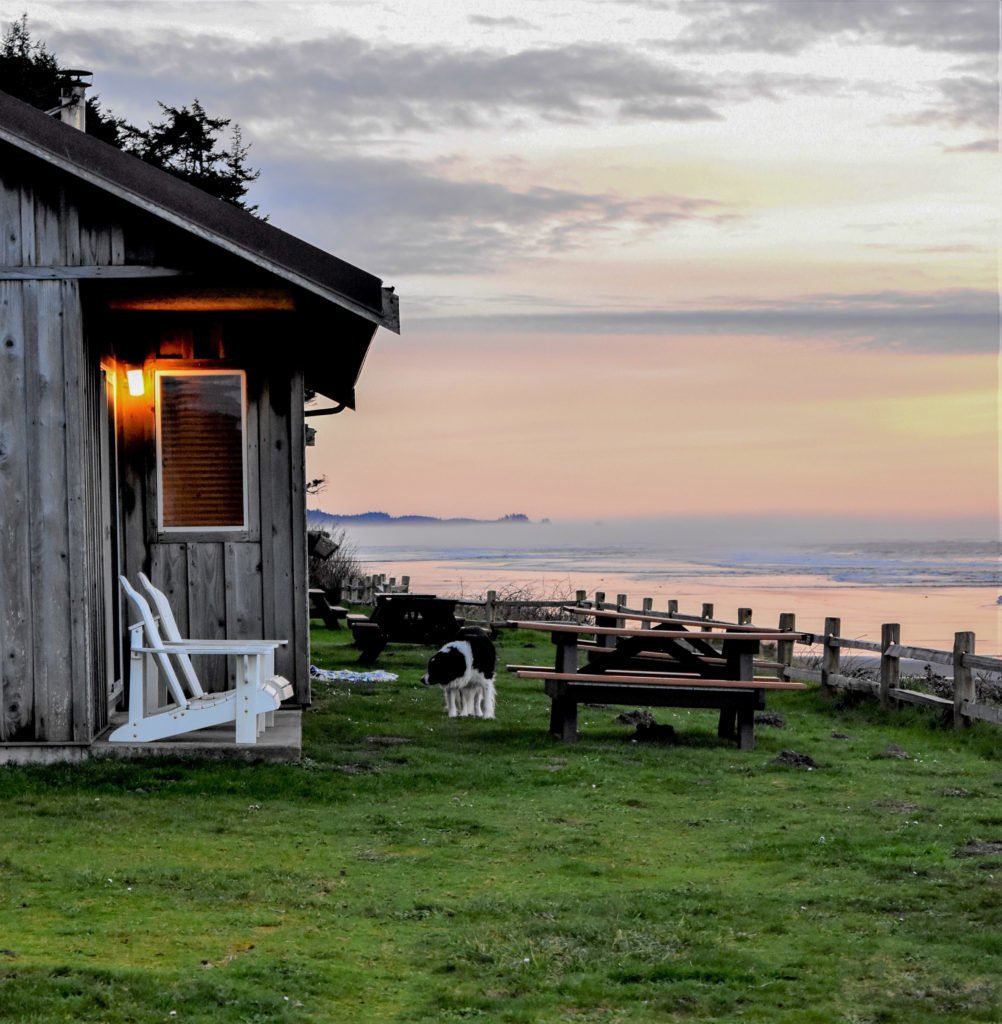
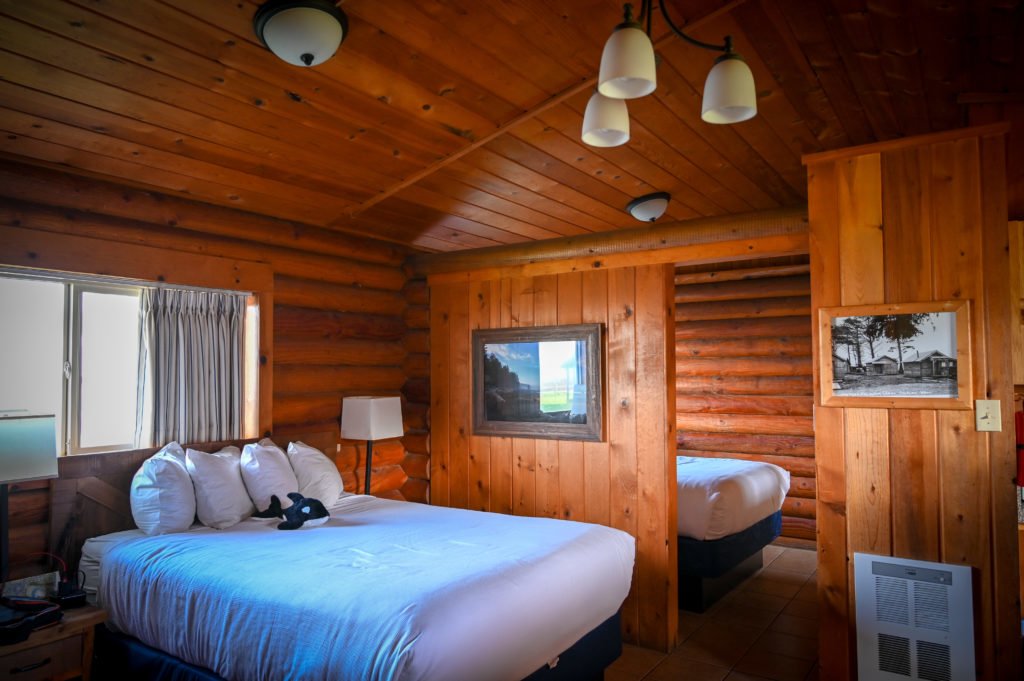
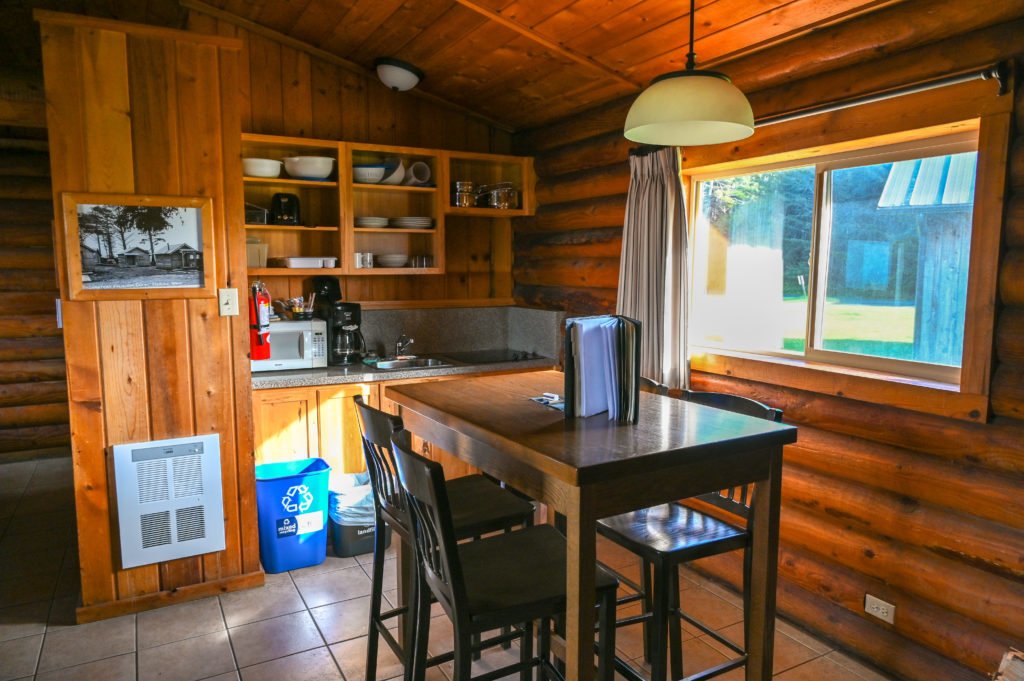
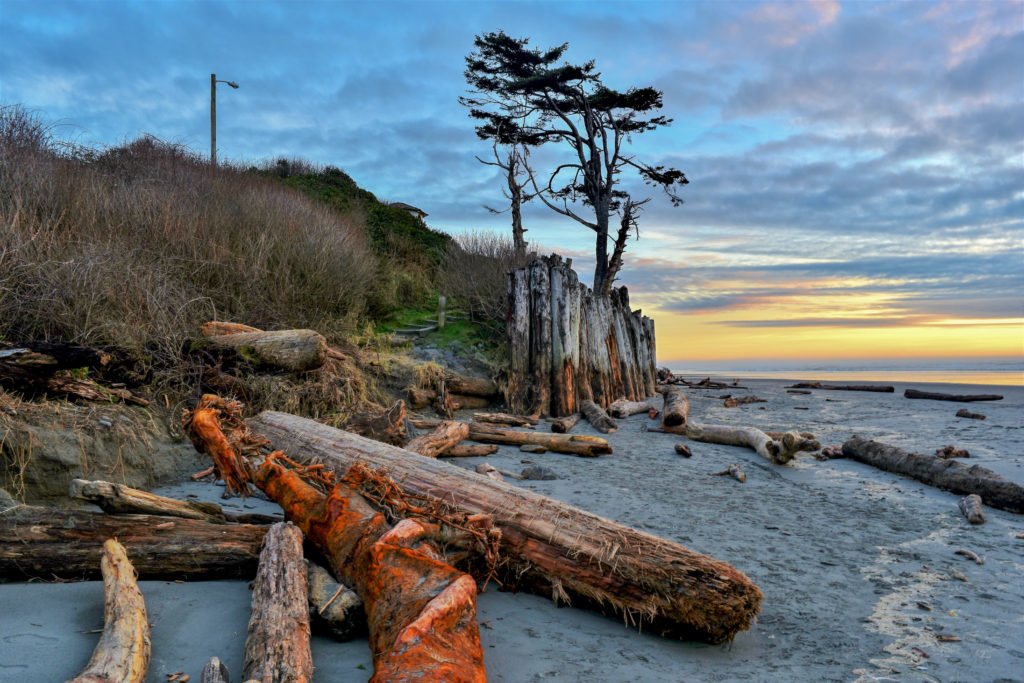
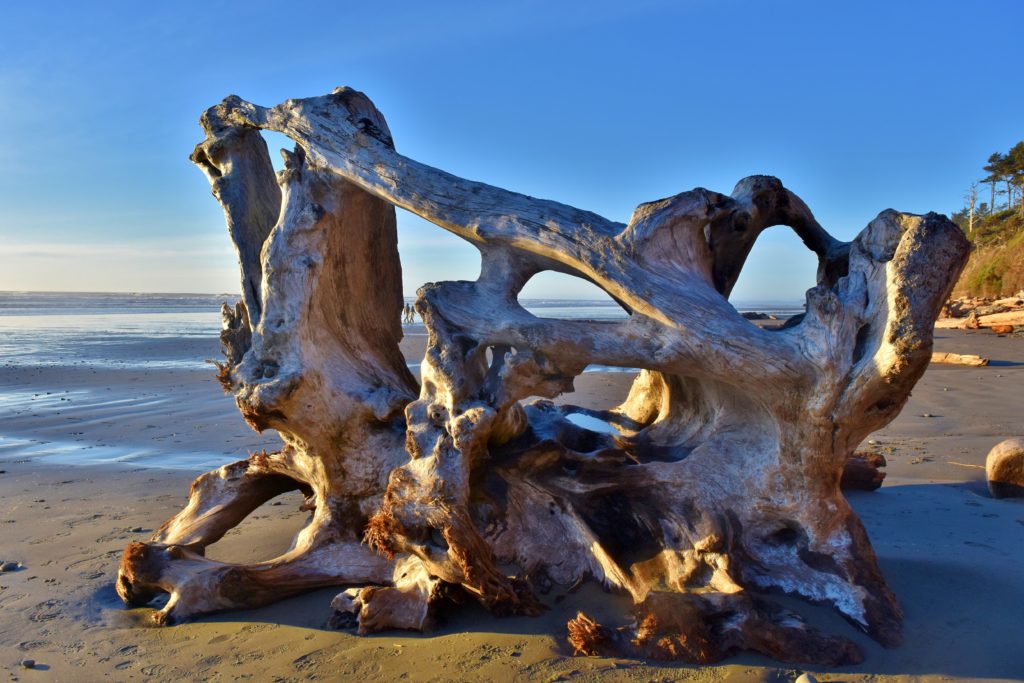
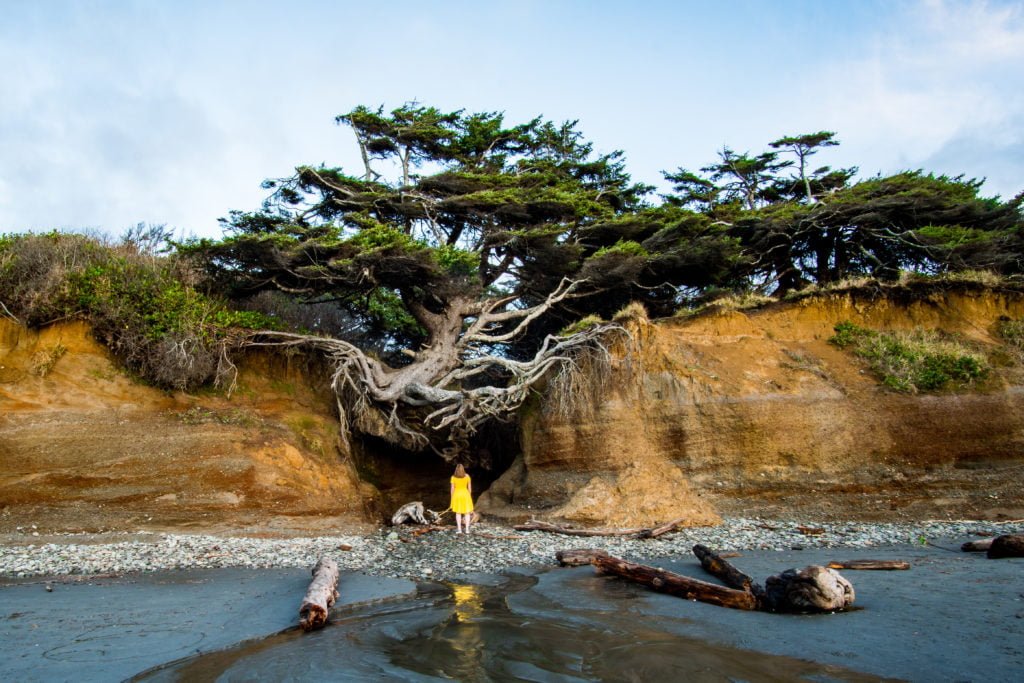
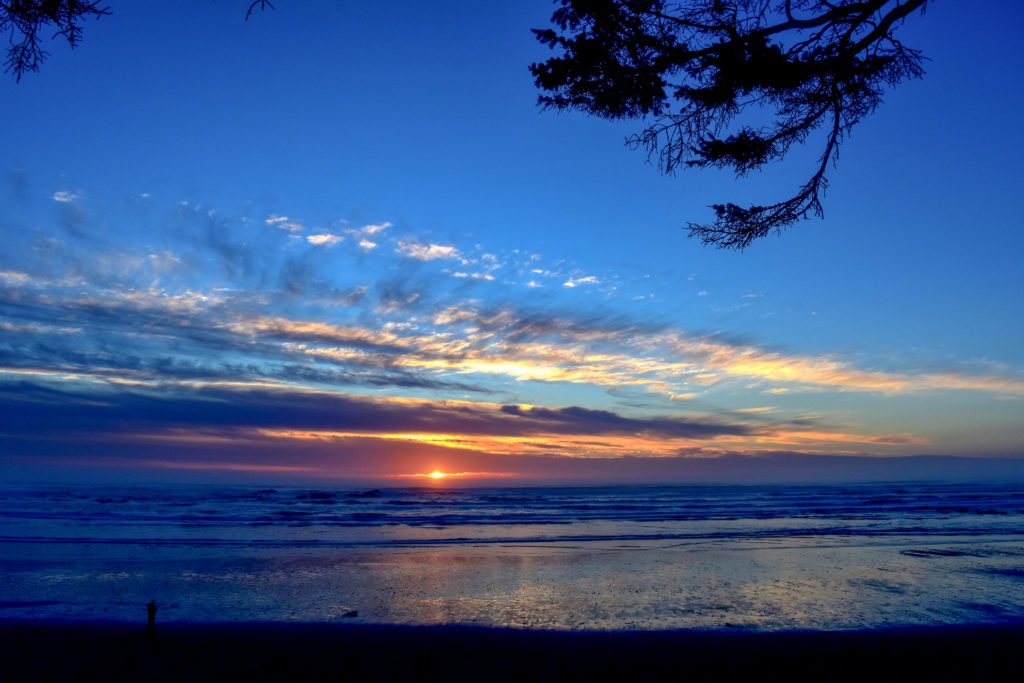

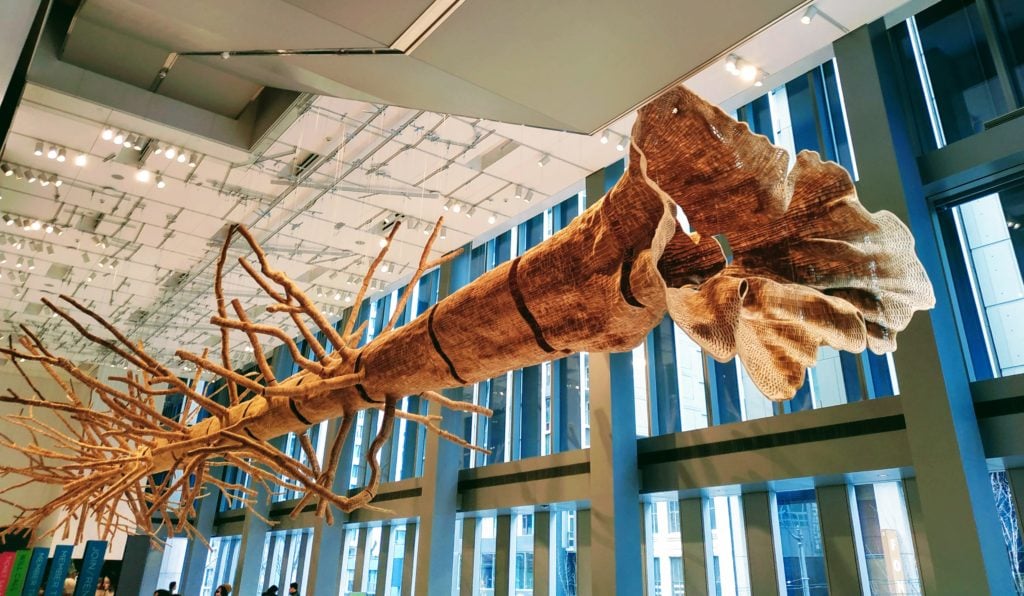 King County Library System offers free museum passes to the following museums: