author.travelffeine.com

Tag: recipes

  • Japanese Coffee Jelly: Not Your Mama’s Jello

    One of the dishes I tried during my visit to Japan was coffee jelly.  Let’s face it. They had me at “coffee.” I loved it!  It has a jello-like texture and tastes like coffee; it is simple and refreshing.  A perfect dessert for a warm summer’s day! I decided to make this dessert at home and share the recipe with you.  I hope you like it too!

    Kohii Zerii: Japanese Coffee Jelly

    You might be surprised to know that Japan is one of the world’s top importers of coffee. Coffee was introduced to the Japanese by the Dutch around the year 1700, and for the past 50 years, coffee roasters and cafes have made a massive surge in popularity. There are so many excellent choices for coffee in Japan!  

    Kohii Zerii, or Japanese coffee jelly, is one of their unique coffee creations. It’s a delicious and refreshing coffee dessert, and it is so easy to make! All you need is coffee, water, sugar and agar-agar powder (or gelatin). Top your coffee jelly with whipped cream or milk and voila! You have a delicious coffee-flavored dessert!

    This is not your mama’s Jello recipe! This is jello for coffee-loving adults!  *Feed to your kids at your discretion.  You can, of course, always make a batch of decaf, if you’re feeling generous. Either way, get ready to enjoy your coffee in a whole new way!

    Agar-agar Powder or Gelatin

    I made several batches of coffee jelly to make it the way I remembered from Japan.  I found that although the uses for gelatin and agar-agar powder are similar, they do thicken recipes a little differently.

    Agar-agar powder is the traditional choice for Japanese coffee jelly. It is made from seaweed and is vegan friendly. Whereas, gelatin, is made from collagen in animal bones.  Both of these powders are used as thickening agents. 

    My attempts using agar-agar powder produced a much firmer coffee jelly than those made with gelatin. The agar-agar jelly was stiff, and when I held it, it did not move or bend at all. Whereas, the coffee jelly I made with gelatin produced a more jiggly, jello-like texture.

    If you want to serve this cut up into small cubes in a glass of milk or cream, then the firmer agar-agar texture might be to your liking. You can also use the coffee jelly-like boba in an iced coffee.

    However, I found, when eating it as a dessert, scooped into a bowl and topped with whipped topping, that I preferred the softer texture the gelatin produced.  I read that the brand of agar powder can affect its firmness, and since the coffee jelly I ate in Japan was softer, it must be the difference in the brand.

    Brewed Coffee or Instant Coffee

    In addition to choosing which thickening agent to use, you can also choose to make this with instant coffee or brewed coffee.

    If you choose to use brewed coffee, make sure to brew strong coffee.  You can choose a flavored coffee if you’d like. I made a batch with Don Francisco’s Hawaiian Hazelnut, adding extra coffee to make it stronger. I enjoyed the hazelnut flavor that came through in my coffee jelly.  A French roast or other dark roasts would also make a good choice.

    When I tried this recipe with instant coffee, I experimented with both Folgers instant coffee and Medaglia D’Oro espresso instant coffee. The Folgers instant coffee had a robust, distinct flavor, whereas the Medaglia D’Oro instant espresso had a smoother taste. 

    I wanted to increase the amount of instant coffee in the recipe when I used Medaglia D’Oro. However, not with the Folgers, it was too strong and bitter when adding extra coffee crystals to the recipe.

    coffee jelly cubes

    Ways to Enjoy Your Coffee Jelly

    No matter how you choose to make your coffee jelly, make sure to top with milk or whipped topping. You can also drizzle with sweetened condensed milk.  If I make a firmer batch, I enjoy pouring half-and-half over a glass of cubed coffee jelly and let it sit for a while.  This allows the coffee jelly to flavor the half-and-half-yum!  

    You can also cut it into tiny cubes and pour your favorite coffee creamer over the cubes for a refreshing twist on an iced coffee.

    When making a softer, more jiggly coffee jelly, I love to scoop it into a bowl and top with whipped topping and cinnamon. That is my favorite way to eat it!  You should try both and see what you like the best too. 

    Japanese coffee jelly is so easy to make and to serve, bring this to your next potluck or picnic and introduce your friends and family to their new favorite dessert!

    For another great coffee recipe, try my Vietnamese Iced Coffee recipe.

    Kohii Zerii: Japanese Coffee Jelly

    A delicious and refreshing coffee dessert.
    Prep Time 5 minutes
    Cook Time 10 minutes
    Resting Time 6 hours
    Total Time 6 hours 15 minutes
    Servings: 8 people
    Course: Dessert
    Cuisine: Japanese

    Ingredients
      

    • 2 tsp agar-agar powder or 2 (.25 ounce) packages unflavored gelatin
    • 1/4 cup water (room temperature)
    • 2 cups strong brewed coffee (can substitute for 2 cups water and 1 tbsp instant coffee)
    • 1/4 cup sugar (Adjust to personal preference: 2 tbsp to 1/4 cup)
    Optional Toppings
    • whipped topping
    • sweetened condensed milk
    • cinnamon or cocoa powder

    Method
     

    1. Brew a pot of strong coffee (skip this step if using instant coffee)
    2. Mix the agar-agar powder (or gelatin) in a glass with 1/4 cup room temperature water and stir to dissolve. Then set aside. (Don't worry if it forms a congealed lump)
    3. Add 2 cups brewed coffee and 1/4 cup sugar to a medium saucepan. Stir to dissolve, then add agar-agar and water mixture to the saucepan and whisk to dissolve. Cook over medium-high heat until it's just barely starting to boil.
    4. (If using instant coffee, add 2 cups water to the saucepan, then stir in instant coffee, sugar, and agar/gelatin mixture, continue stirring until all are dissolved and heat to a low boil.)
    5. Then remove the pan from heat and pour into a heatproof container. (8×8 pan or 2 qt casserole dish works good)
    6. Let cool until room temp, then cover with plastic wrap and refrigerate overnight (or until set, approx. 6 hours).
    7. After the jelly is set, cut in small 1-inch squares and place them in a glass with milk. Or scoop into bowls and top with whipped topping.

    Notes

    You can also cut the coffee jelly into smaller cubes and use like boba in iced coffee or place in jello molds and top with whipped cream for a fancier look. Try it drizzled with sweetened condensed milk for a truly decadent dessert. Cinnamon and cocoa powder make delicious toppings too!
  • Coffee Cake for A Crowd: A Cup of Coffee in a Cake!

    I love coffee! So when I found this coffee cake recipe, I knew I had to make it! You see, I’m not much of a “cake” person. I tend to gravitate toward spicy and salty snacks before desserts.  When I do want a dessert, I typically choose a pie or cobbler rather than a sugary cake topped with cavity-inducing frosting.

    All that changed when I found this coffee cake recipe. Six years ago, I purchased the Pioneer Woman’s “Food From My Frontier” Cookbook, and it changed my life! Okay, that’s a little dramatic, but it certainly gave me a new reason to eat cake on my birthday! I’ve made this every year for my birthday since getting this cookbook, that’s how much I like it. I recommend you consider buying her cookbook as it has a bunch of other great recipes in it!

    However, in the Pioneer Woman’s cookbook, she makes this as a double layer round cake, and although I’ve made it this way, it’s not always the best choice when feeding a large crowd. So when my husband requested I make this for his team at work, I decided I needed to figure out a way to make this in a 9 x 13 cake pan or a 1/2 sheet. 

    A larger cake not only serves more people but I think a rectangular cake is also easier to transport. This comes in handy when the requests start streaming in for you to bring to all the group functions and holiday gatherings. It’s that good! So be prepared for this to become a new favorite!

    Not Your Ordinary Coffee Cake

    First off, let me say this isn’t your typical coffee cake recipe. You know the coffee cake you make to eat with your cup of coffee.  Don’t get me wrong. I love that kind of coffee cake too. However, this is not that coffee cake. No, this coffee cake recipe is your coffee and your cake in one delicious treat! Think of it like you’re eating your coffee rather than drinking it.  It’s a slice of coffee–coffee heaven!

    This coffee cake is for true coffee lovers. If you don’t like the taste of coffee, then this recipe isn’t for you (and we should probably talk). However, if you’re like me and you like to take slow walks down the coffee aisle at the grocery store just to smell the coffee beans, then this recipe is for you. And if you want to try another coffee recipe of mine, check out these three ways to make Vietnamese coffee.

    Soon, you will remember your life as “before this coffee cake” and “after eating this coffee cake.” It’s life-changing! Perhaps it’s the caffeine talking, but I’m pretty sure you’re going to think so too once you try it.

    My Tips & Modifications for Making this Coffee Cake

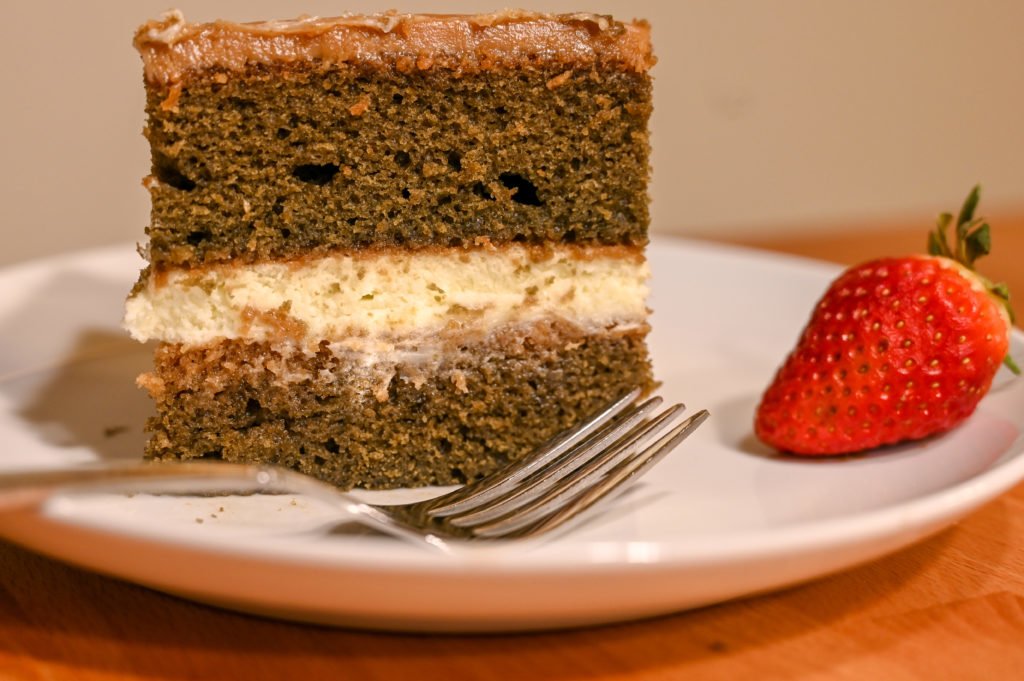
    When determining how to make this coffee cake recipe for a crowd, I needed to figure out a way to still have a double cake layer, but without it being too thick. You’re going to want a crowd to help you eat it too. Otherwise, you may be tempted to eat the whole thing by yourself!

    A traditional 9 x 13 cake pan wouldn’t work for me as this is a double layer cake with a filling in between the layers. So I didn’t want each of the cake layers to be as thick as a standard 9 x 13 cake. I didn’t have two 1/2 sheet pans either, so I used the next closest thing I had, two 10 x 15 jelly roll pans.

    Tips: Use parchment paper in your jellyroll pans for easier removal. Otherwise, make sure to use a baking spray that contains flour and spray your jellyroll pans down good before pouring in the batter.

    I use a large cutting board to place over the cake after it’s cooled for 10 minutes in the pan, then I gently flip it over onto the cutting board. For the other layer, I do the same, but flip it onto my cake tray (I have a lid that fits over the top of this carrier, which I put on when it’s all finished).

    Final note: I don’t take any credit for the deliciousness of the original recipe. That was all the Pioneer Woman’s doing. I want to make that clear. This is my adapted version for those of you who wish to make this cake to serve more people. It’s great for birthday parties and holiday parties at the office.

    Step by Step Recipe

    Feel free to jump ahead to the printable recipe below if you don’t wish to see the step-by-step instructions.

    Step 1 Preheat the oven and Prep Your Pans:

    Preheat your oven to 350 degrees and line two 10 x 15-inch jelly-roll pans with parchment paper. If you don’t have parchment paper make sure to spray your pans generously with a flour baking spray. Set those aside for now.

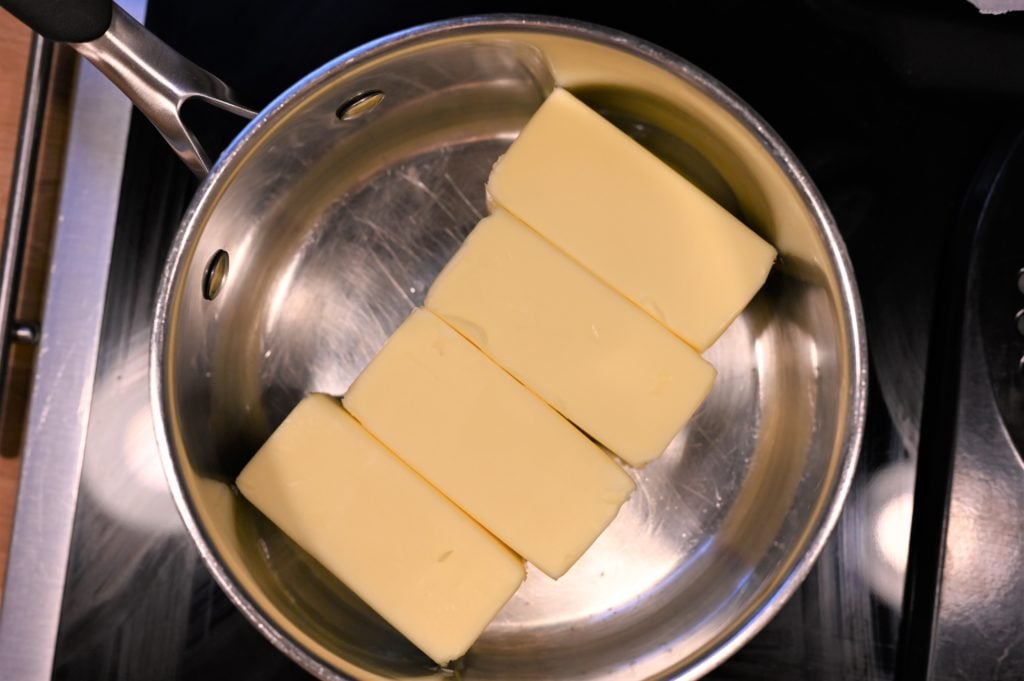
    Step 2 Add a Whole Lot of Butter:

    Place four sticks of butter in a medium saucepan and put the burner on medium-low to melt the butter slowly.  You don’t want it to boil and splatter butter everywhere.

    butter sticks in a saucepan

    Step 3 Melt Butter & Prep Dry Ingredients:

    While the butter is melting, begin measuring the flour, sugar, and salt into a large mixing bowl. (I use a 4.5-quart bowl) Whisk the flour, sugar, and salt together and set aside. Boil 2 cups of water. I like to boil the water in my tea kettle. I love using my tea kettle for boiling water. It’s so convenient!

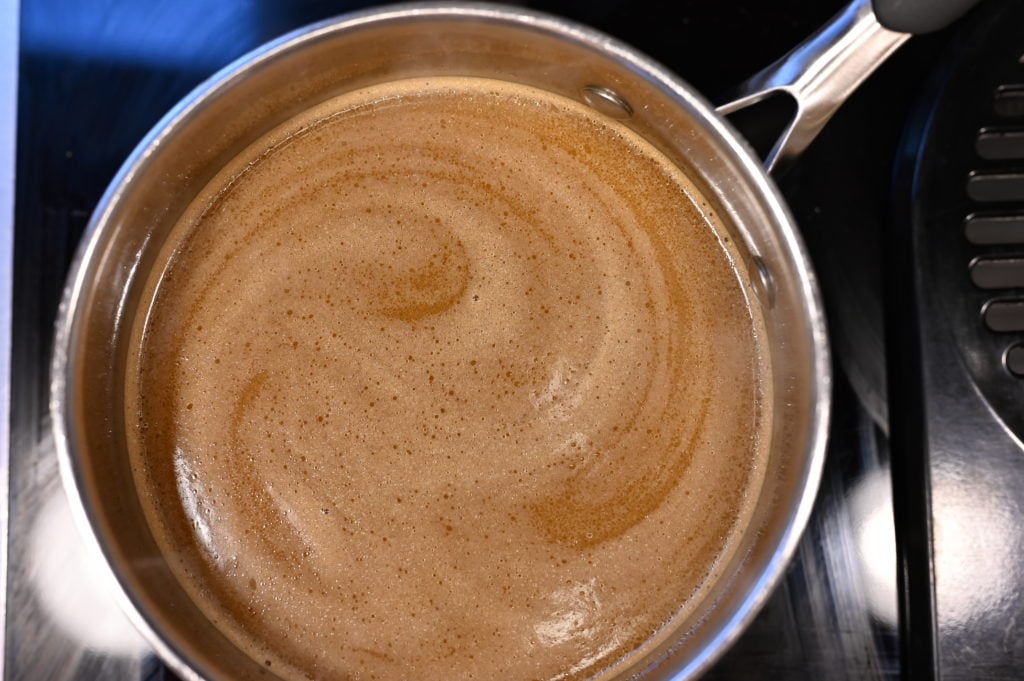
    Step 4 Add the Coffee & Breathe in the Aroma:

    Now, add in the coffee crystals to the melted butter mixture and the 2 cups boiling water.  And stir it until the coffee crystals melt and combine with the butter and water. Then let it begin to bubble just a little, about 5 seconds before you turn the burner off.

    Coffee and butter mixture

    Step 5 Prepare Buttermilk Mixture:

    While the coffee sits on the burner with the heat off, prep the buttermilk mixture, whisking it all together, and then set aside. I use a 4-cup Pyrex measuring cup for this step.

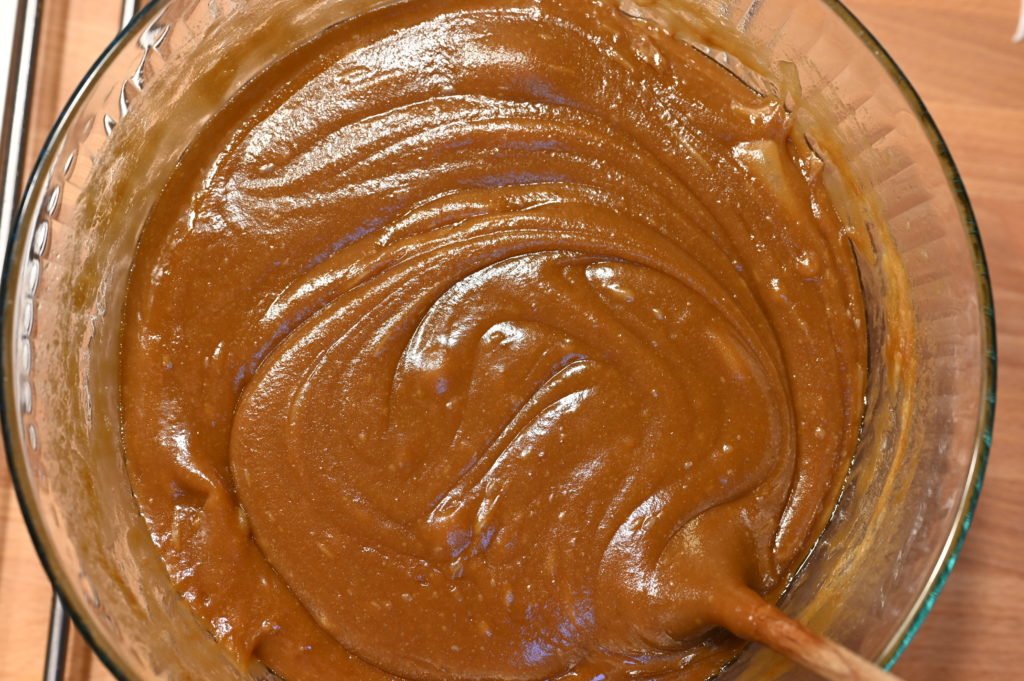
    Step 6 Mix Your Batter:

    Next, take your hot coffee mixture and pour it into the flour mixture. It’s essential to take your time and stir this together really well. When it’s all mixed, it reminds me of ginger snap cookie batter.

    coffee cake batter mixture

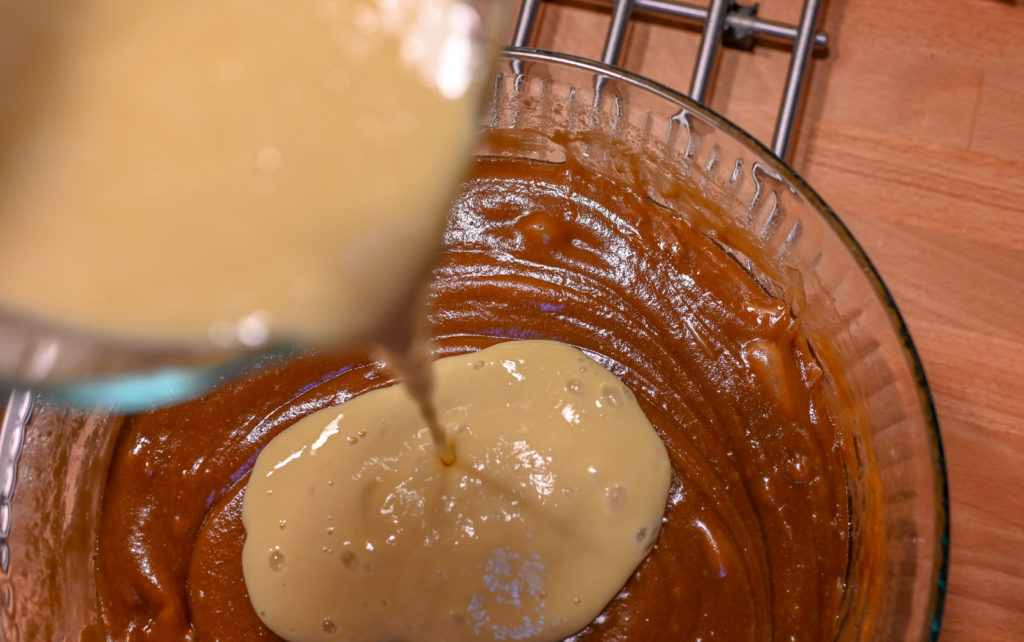
    Step 7 Finish Mixing the Batter Completely:

    Now add in the buttermilk mixture and slowly mix it into the batter.  This may take a few minutes to get it fully incorporated.

    buttermilk and eggs being poured into cake batter

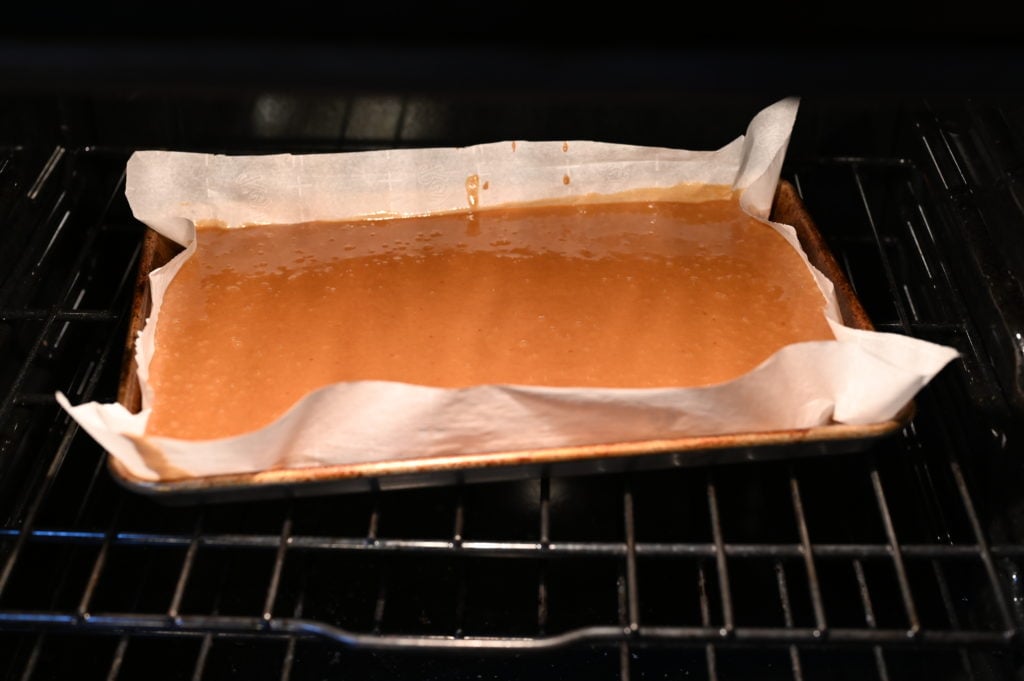
    Step 8 Pour Into Pans & Try Not to Lick the Bowl Clean:

    Pour the thoroughly mixed batter into the two prepared jelly roll pans. Try your best to divide the mixture equally, but it doesn’t have to be perfect.

    Step 9 Bake your Cake:

    Then bake in the 350º Fahrenheit oven for 20 minutes (or until an inserted toothpick comes out clean).

    cake in the oven

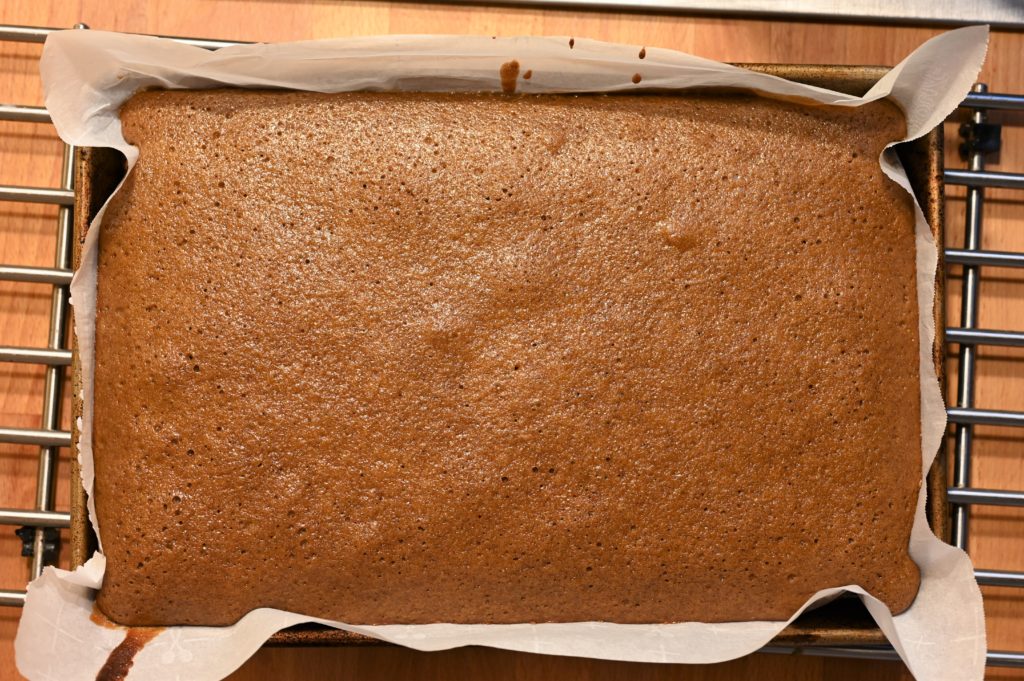
    Step 10 Remove Cakes From Pans:

    Remove the baked cakes from the oven and let cool in their pans for 10 minutes. Then using a cutting board or if you have a cake platter/tray gently place that on top of your cake and slowly invert the cake pan. Your cake should easily come out of the pan and on to whatever surface you inverted it on top of.

    single layer of cake baked

    Step 11 Cool the Cakes Completely:

    Let the cakes sit there and cool completely.  In the meantime, you can whip up your cream filling.

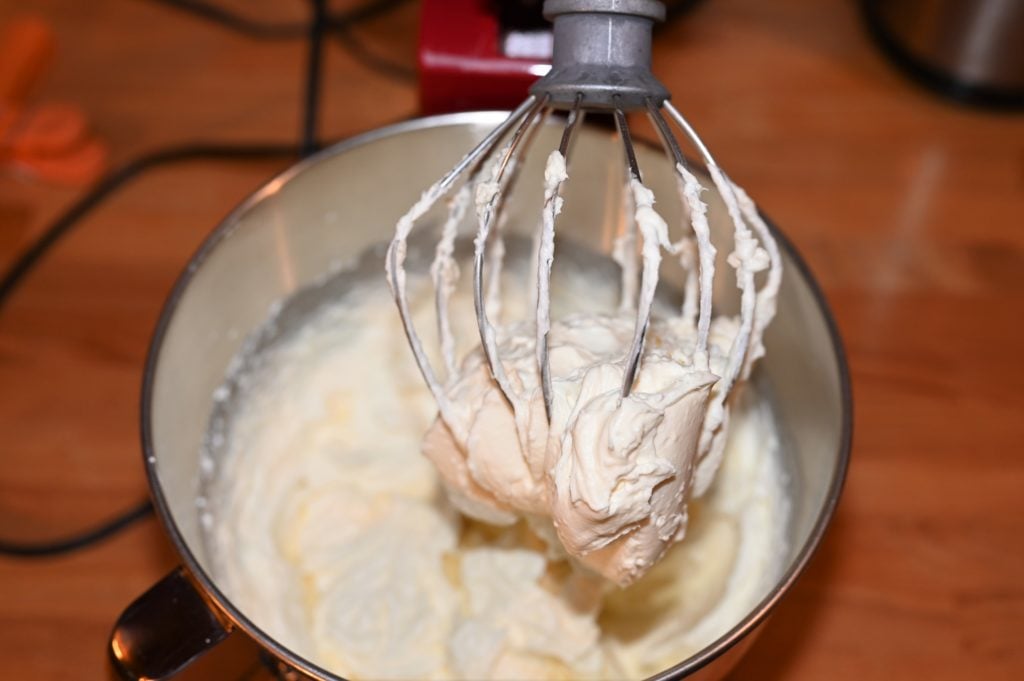
    Step 12 Whisk Together the Delicious Cream Filling:

    Fit a whisk attachment to a stand mixer and add the cream cheese, 2 cups powdered sugar, and heavy cream to a large mixing bowl. Beat this all together until it is light and fluffy.

    whipped creamy cake filling

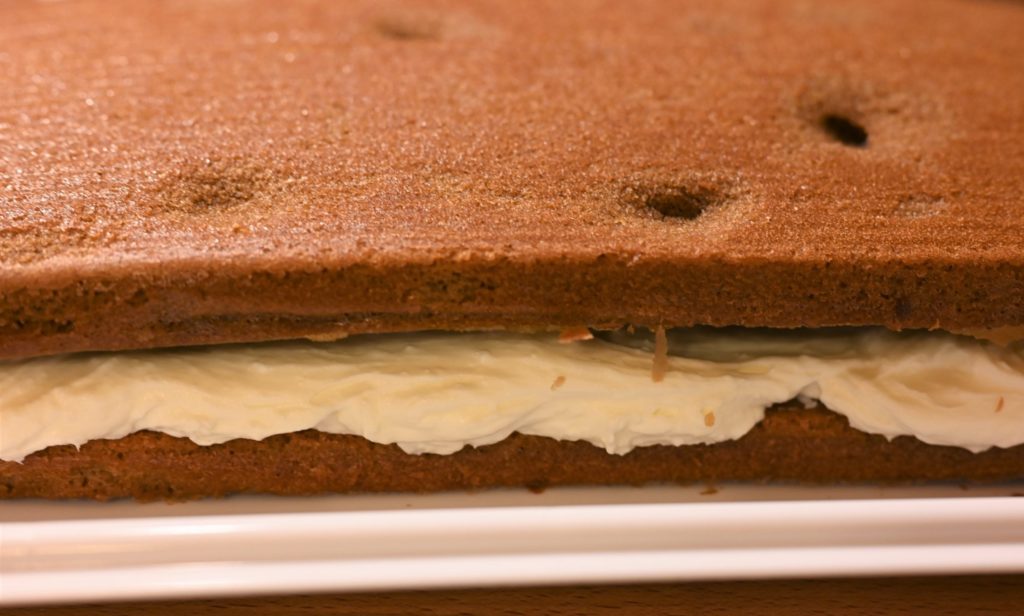
    Step 13 Spread the Creamy Filling Over the Bottom Cake Layer:

    After your cakes are thoroughly cooled, place your bottom layer on a cake platter (if you haven’t already done this), and spread the creamy filling all over it. I use a big spatula for this part. 

    single layer with filling on top

    Step 14 Add the Top Layer of Cake:

    Then invert your cutting board or whatever surface you’re using over the bottom cake layer and gently lay the top layer of cake on top of the creamy filling. It should now look like some giant delicious cookie sandwich or cake sandwich. 

    cake with creamy filling no frosting

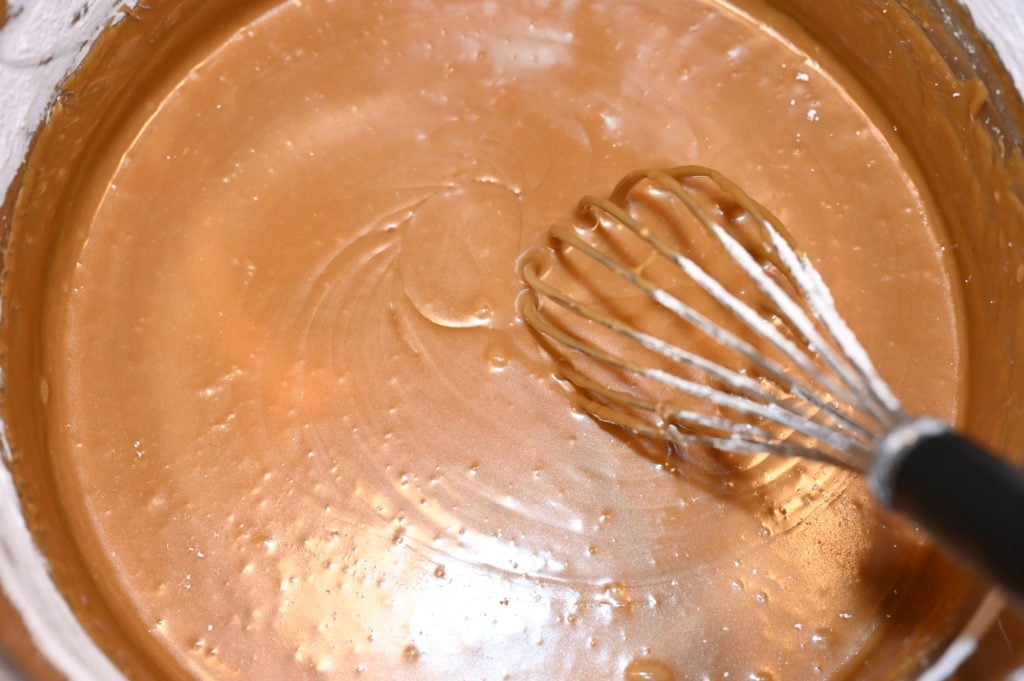
    Step 15 Make the Icing:

    Melt three sticks of butter in a large saucepan. Then add the 1/4 cup instant coffee crystals. Stir together with a whisk, then add in the half-and-half and whisk together good. Now add the 8 cups powdered sugar and 4 tsp vanilla. Whisk the icing until smooth.  

    whisked coffee icing

    Step 16 Frost Your Cake & Try Not to Eat All the Leftover Icing:

    Let it cool for 5 minutes, then gently begin pouring it over your cake, making sure to cover the top of your cake evenly.  I let mine drip all down the sides of my cake. If you want, you can always take a knife and try to spread it around the sides of the cake.  No matter how it looks, you can be sure it’s going to taste amazing!

    Step 17 Eat Cake!:

    Considering that as I write this, my birthday is only two days away, I think an early piece of cake is in order! However, I’ll try to wait at least until my hubby gets here.  In the meantime, I’ll grab some graham crackers, spread them with a little leftover cream filling, then drizzle with some icing and top with another graham cracker.  I just made the best graham cracker sandwich ever!  Try it with your leftovers.

    Warning: This coffee icing is addicting. You may want to hide it from yourself, so you don’t devour it all in one sitting.

    slice of cake

    Best Ever Coffee Cake

    5 from 1 vote
    This delicious coffee cake is made with actual coffee!
    Prep Time 25 minutes
    Cook Time 35 minutes
    Resting Time 1 hour 30 minutes
    Total Time 2 hours 30 minutes
    Servings: 20 slices
    Course: Dessert
    Cuisine: American

    Ingredients
      

    Cake Batter
    • 2 cups butter (4 sticks)
    • 6 tbsp instant coffee crystals (3/8 cup)
    • 2 cups boiling water
    • 4 cups all-purpose flour
    • 4 cups granulated sugar
    • ½ tsp salt
    • 1 cup buttermilk
    • 4 eggs
    • 2 tsp baking soda
    • 4 tsp vanilla extract
    Cake Filling
    • 2 8-oz packages cream cheese softened at room temp
    • 2 cups powdered sugar
    • 2 cups heavy cream
    Coffee Cake Icing
    • 1 ½ cups butter (3 sticks)
    • ¼ cup instant coffee crystals
    • ½ cup half-and-half
    • 8 cups powdered sugar
    • 4 tsp vanilla extract

    Method
     

    Cake Batter Instructions
    1. Preheat oven to 350° Fahrenheit.
    2. Spray two jelly roll pans (10 x 15 inch) with a flour baking spray or line with parchment paper.
    3. Melt the 4 sticks of butter in a medium saucepan.
    4. Add the 6 Tbsp of instant coffee and then add the 2 cups boiling water.
    5. Let this mixture bubble for about 5 seconds, then turn off the heat.
    6. In a separate large bowl, whisk together the flour, sugar, and salt. Then pour the hot mixture over the dry ingredients and stir to combine.
    7. In another medium bowl, mix together the buttermilk, eggs, baking soda, and vanilla extract. Pour this mixture into the ingredients in the large bowl and stir together. Mix until fully incorporated.
    8. Pour this batter into the two jelly roll pans, dividing the batter equally between them both. Bake for about 20 minutes.
    9. Take the pans out of the oven and let the cakes cool in the pans for about 10 minutes. Then turn the pans over on to a clean, prepared surface, and remove from the jelly roll pans. Gently peel off the parchment paper (if used) and allow the cakes to cool completely.
    10. While the cake is cooling, begin preparing the filling.
    Cake Filling Instructions
    1. Fit a stand mixer with the wire whip attachment. (A hand mixer should work too)
    2. Add the softened cream cheese, 2 cups powdered sugar, and heavy cream to a large mixing bowl. Beat until light and fluffy, then set aside while the cake cools completely.
    3. When the cake has cooled completely, move it to your cake holder or cake stand. Then spread the creamy filling over the bottom layer.
    4. Gently add the second layer of cake on top of the filling.
    Coffee Cake Icing Instructions
    1. Melt the 3 sticks of butter in a large saucepan and add ¼ cup instant coffee crystals. Stir together.
    2. Add the half-and-half to the saucepan and whisk together. Then turn off the heat.
    3. Add the 8 cups powdered sugar and vanilla. Whisk together really good to create a smooth icing.
    4. Let the icing cool for 5 minutes. Then gently pour the coffee icing over the top of your cake. Make sure you pour it so it covers the entire cake and drips down over the sides.
    5. Enjoy this delicious cup of coffee served as a slice of cake. Coffee and cream all in one bite!

    Notes

    *TIP: If some of the cake peels off with the parchment paper, don’t panic, you smooth it back on with a butter knife. However, you’ll cover with filling and icing later so any small patches won’t be noticed.
    *When frosting the cake, you can try to smooth the icing along the sides for better coverage. However, I find pouring it and letting it just drip down works best as it is hard to smooth after it begins to cool on the cake. So you have to act fast!