author.travelffeine.com

Blog

  • Valley of Fire State Park: A Perfect Day Trip From Las Vegas

    Valley of Fire State Park is magnificent with its red and pink striped rock formations.  It is home to the Fire Wave, pastel-colored slot canyon, Elephant Rock, mountain sheep, and other plants and animals. It’s full of historical and cultural history too! It has many hiking options to choose from as well as a gorgeous scenic drive.

    Valley of Fire State Park makes for a perfect day trip from Las Vegas! Although one could easily spend a couple of days here, in this article, I share my tips for what to see and how to prepare when you only have one day at Valley of Fire.

    About Valley of Fire State Park

    Valley of Fire State Park spans almost 42,000 acres. It features beautiful red Aztec sandstone, multiple types of limestone, and shale. It is also home to a variety of wildlife and desert plants. It is home to roadrunners, lizards, coyotes, foxes, and desert tortoises, to name just a few of the creatures that live here .  Valley of Fire State Park is also home to mountain sheep. I saw both rams and female mountain sheep during my visit.  They are so majestic as they climb with ease on what appears to me to be sheer rock faces.

    Valley of Fire History

    According to information in the park, the area was once inhabited by the Basket Maker people and later the Anasazi Pueblo farmers.  They have found examples of rock art and other evidence suggesting they lived here from 300 BC to 1150 AD.  Additionally, the park has well-preserved petroglyphs dating back almost 4,000 years!

    Park Fees

    Valley of Fire is a part of Nevada’s State Parks system.  If you have a National Parks Pass that will not work here at Valley of Fire.  The entrance fee for vehicles with non-Nevada plates is $15 per vehicle. For vehicles with Nevada plates, it is $10.

    Hours of Operation

    Open daily from sunrise to sunset. 24-hour access is given to those camping at one of the campgrounds inside the park.

    Overlook near White Domes trail

    Park Amenities

    Camping

    There are two campgrounds at Valley of Fire State Park. With only a total of 72 campsites, these campgrounds fill up fast during the peak seasons.

    In addition to the entrance fee, there is a per night camping fee.  It is $25/night for non-NV vehicles and $20/night for Nevada vehicles. RV camping with utility hookups costs an additional $10/night.

    If you can get a campsite, I highly recommend it! You’ll have more time to explore the park, plus you get to experience sunrise and sunset and see how the sun’s light illuminates the fiery red rocks the park is named for.

    All campsites are first-come-first-served, so you need to plan to get there early to get a spot! I arrived around 10 a.m., thinking I was early enough. Boy, was I wrong!  There was already a line to enter the park, and the ranger at the entrance station told me the camping spots were full.  

    Tip: You can also camp for free on Bureau of Land Management (BLM) land located outside the park boundaries, you will see RVs parked on the BLM land as you drive toward the park along the Valley of Fire Hwy after exiting off I-15 N.

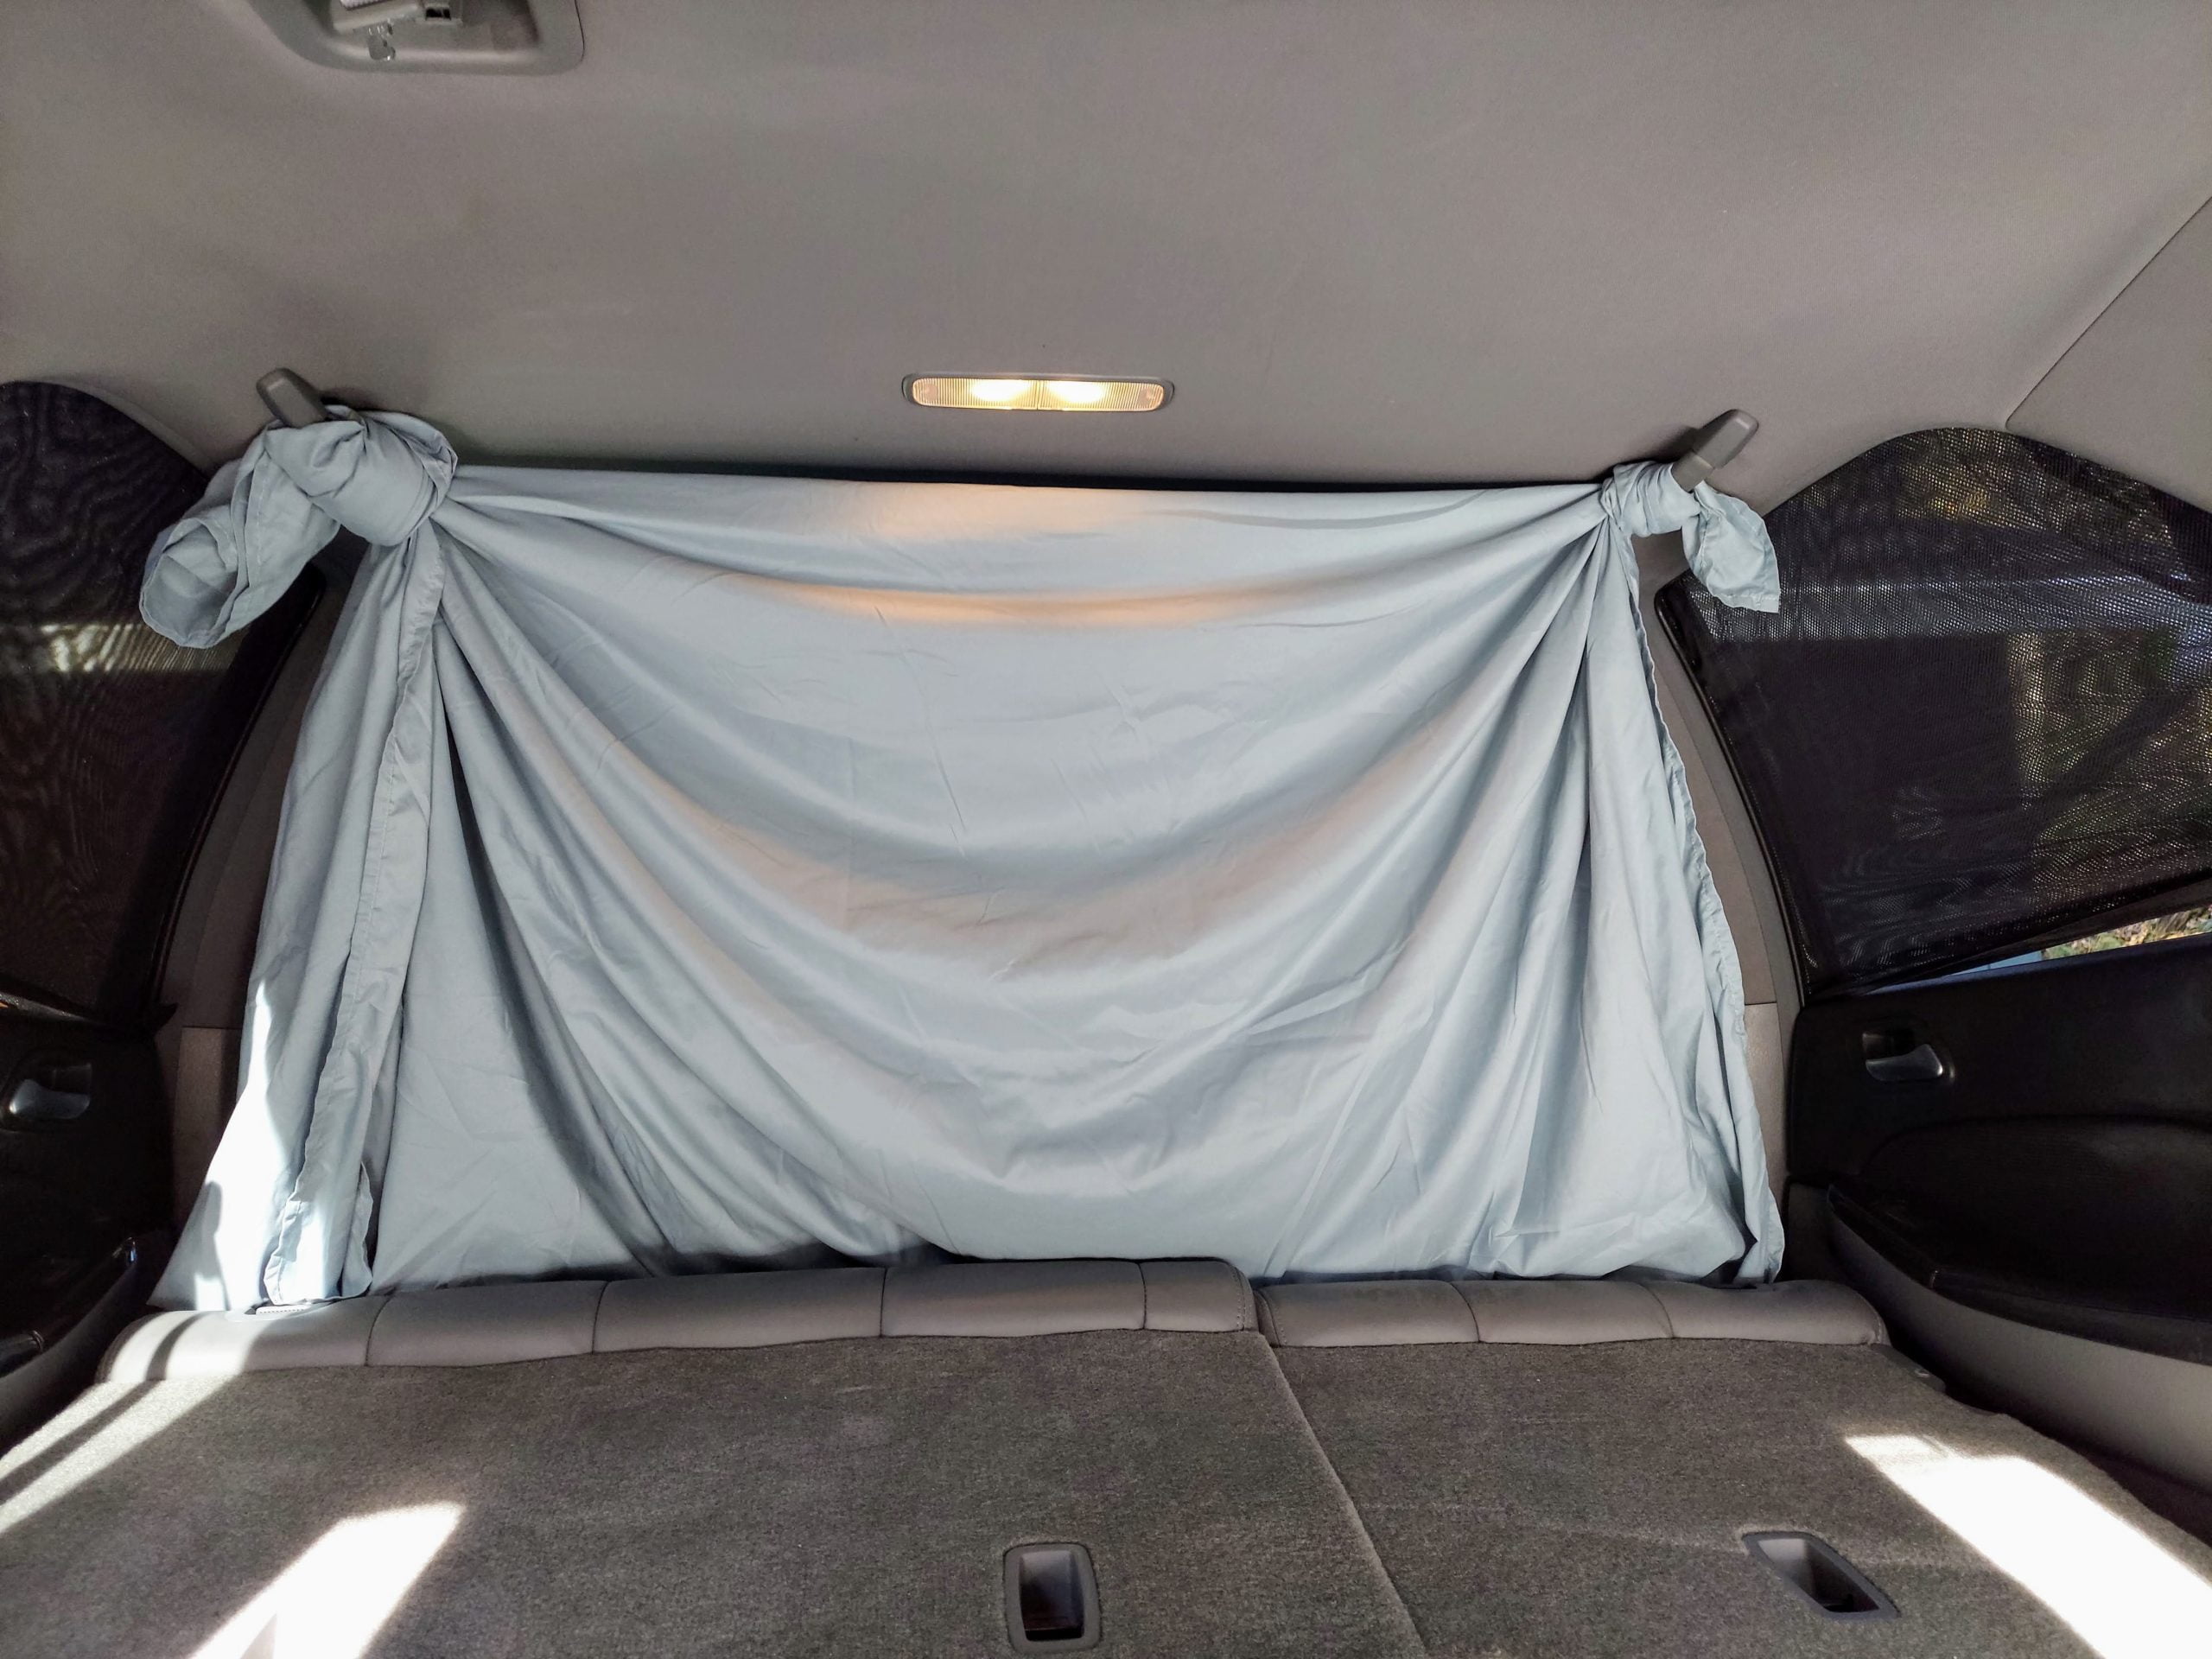
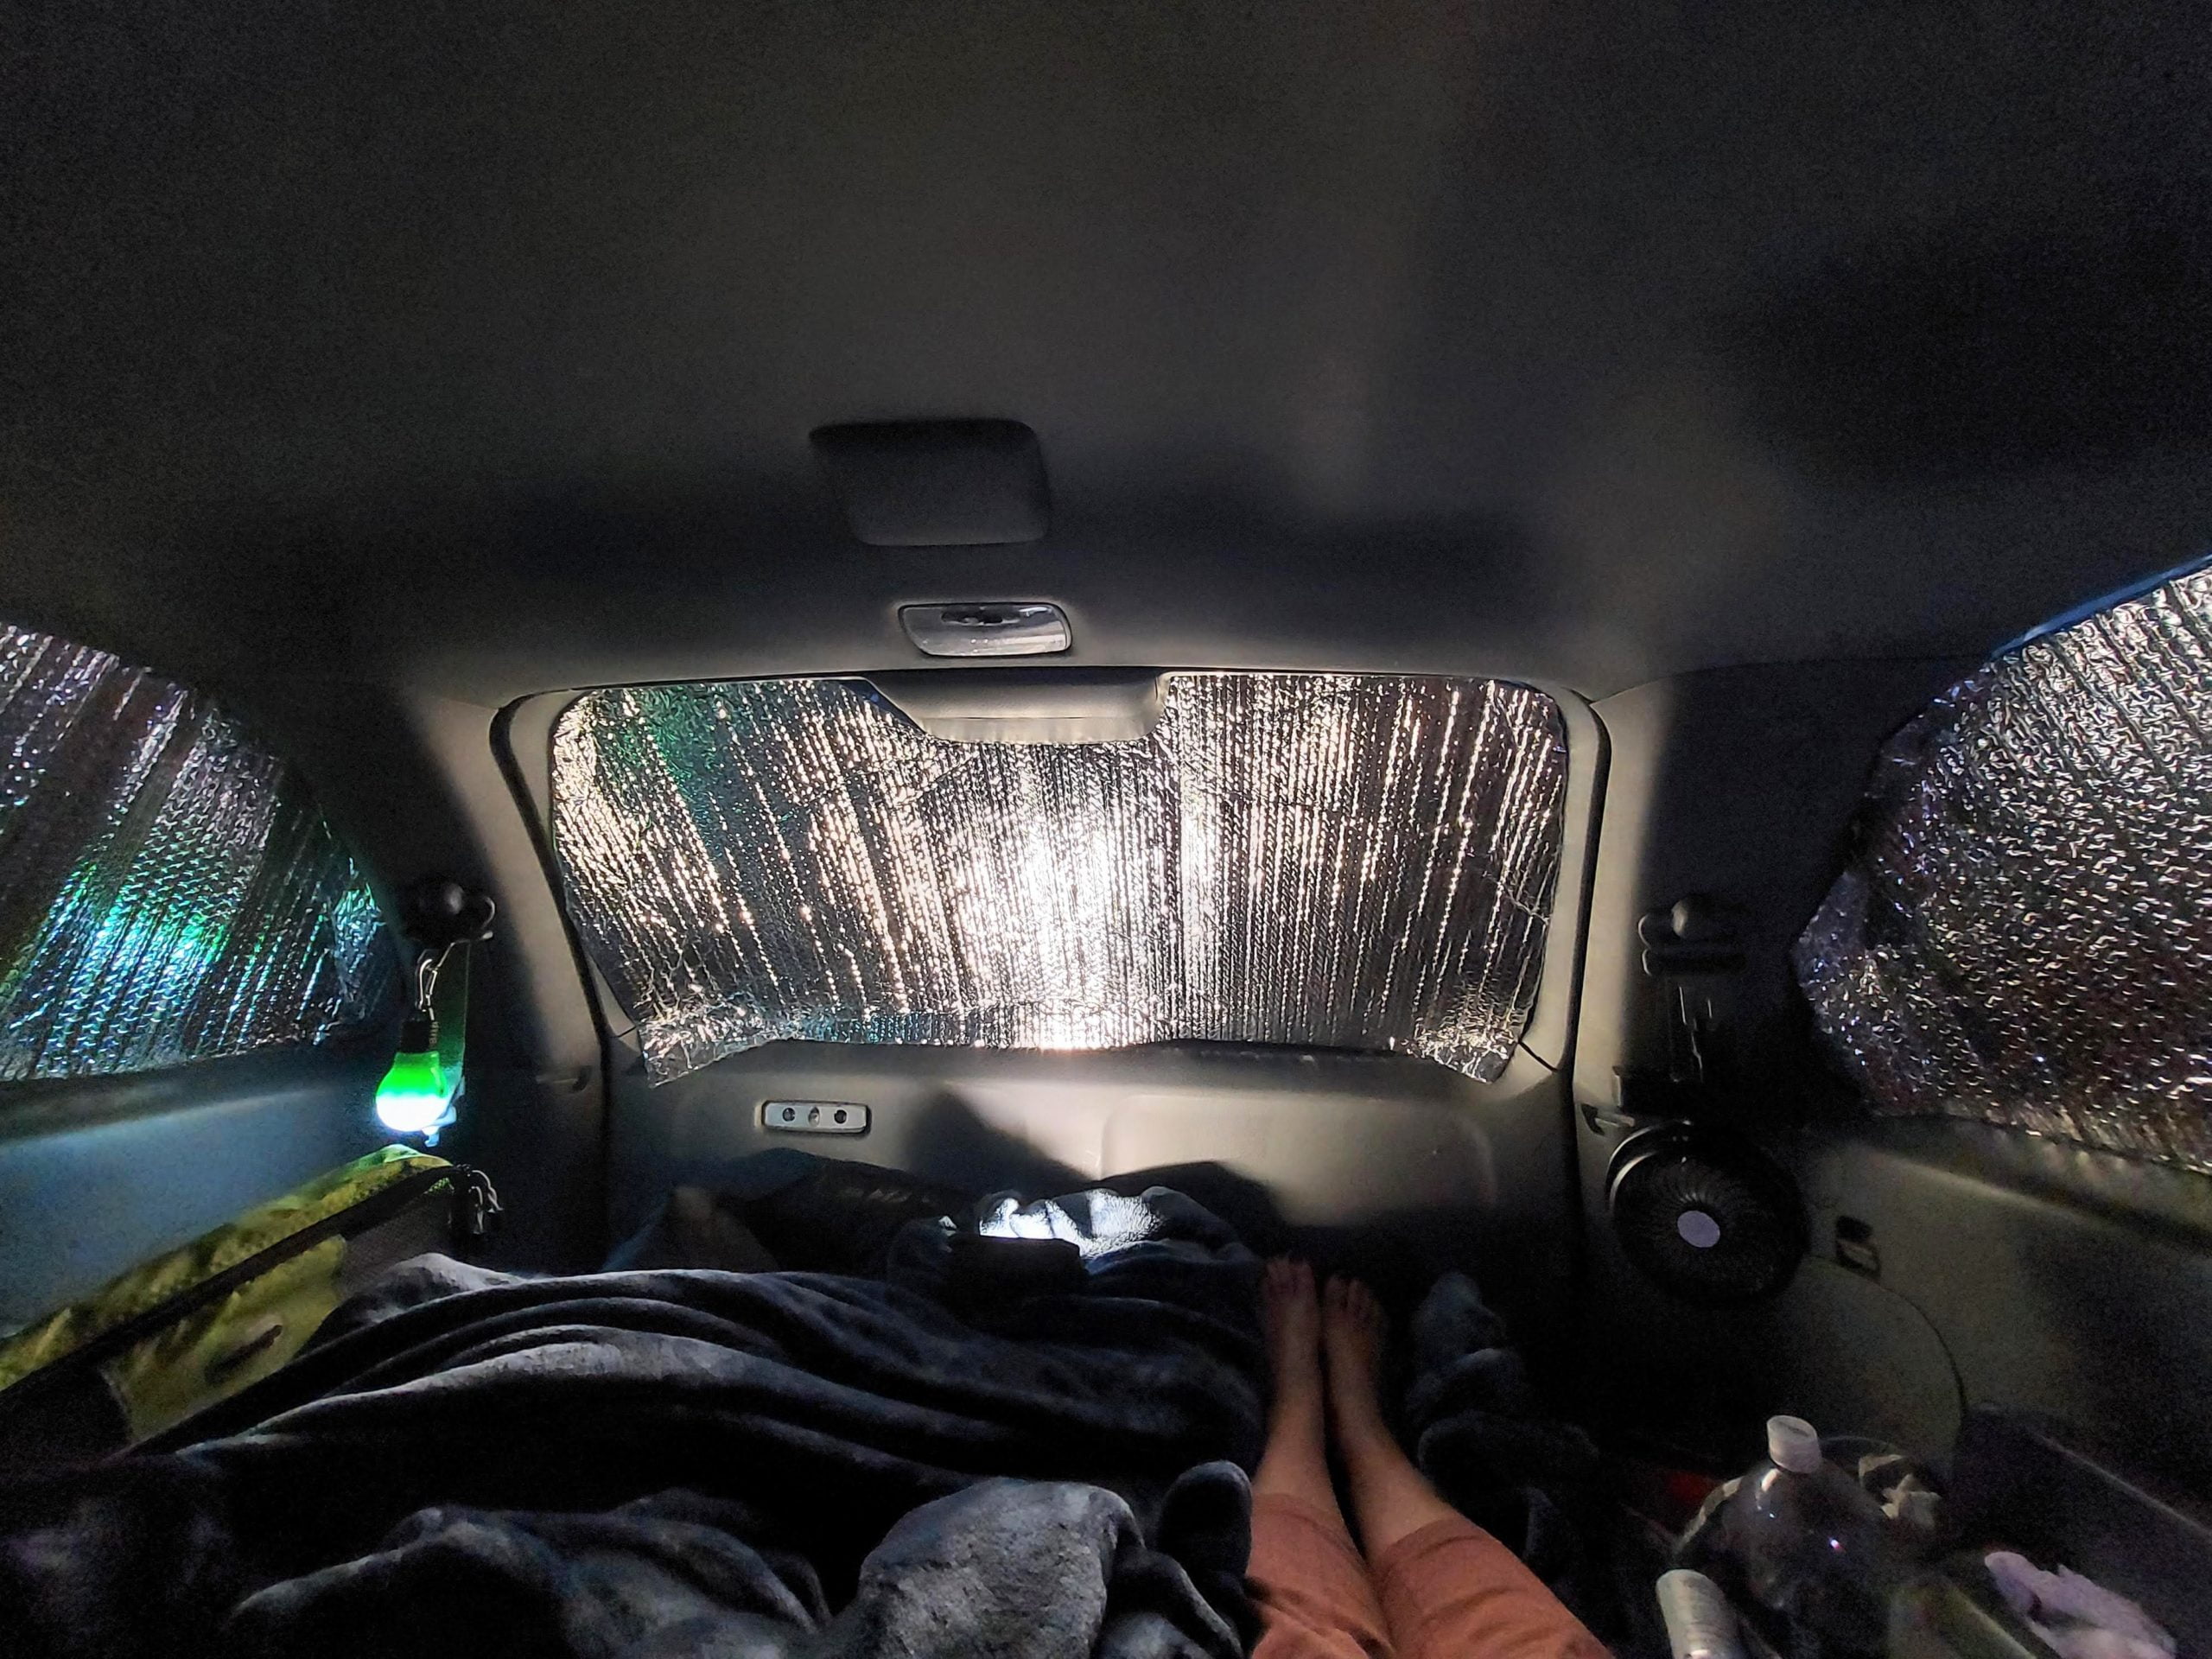
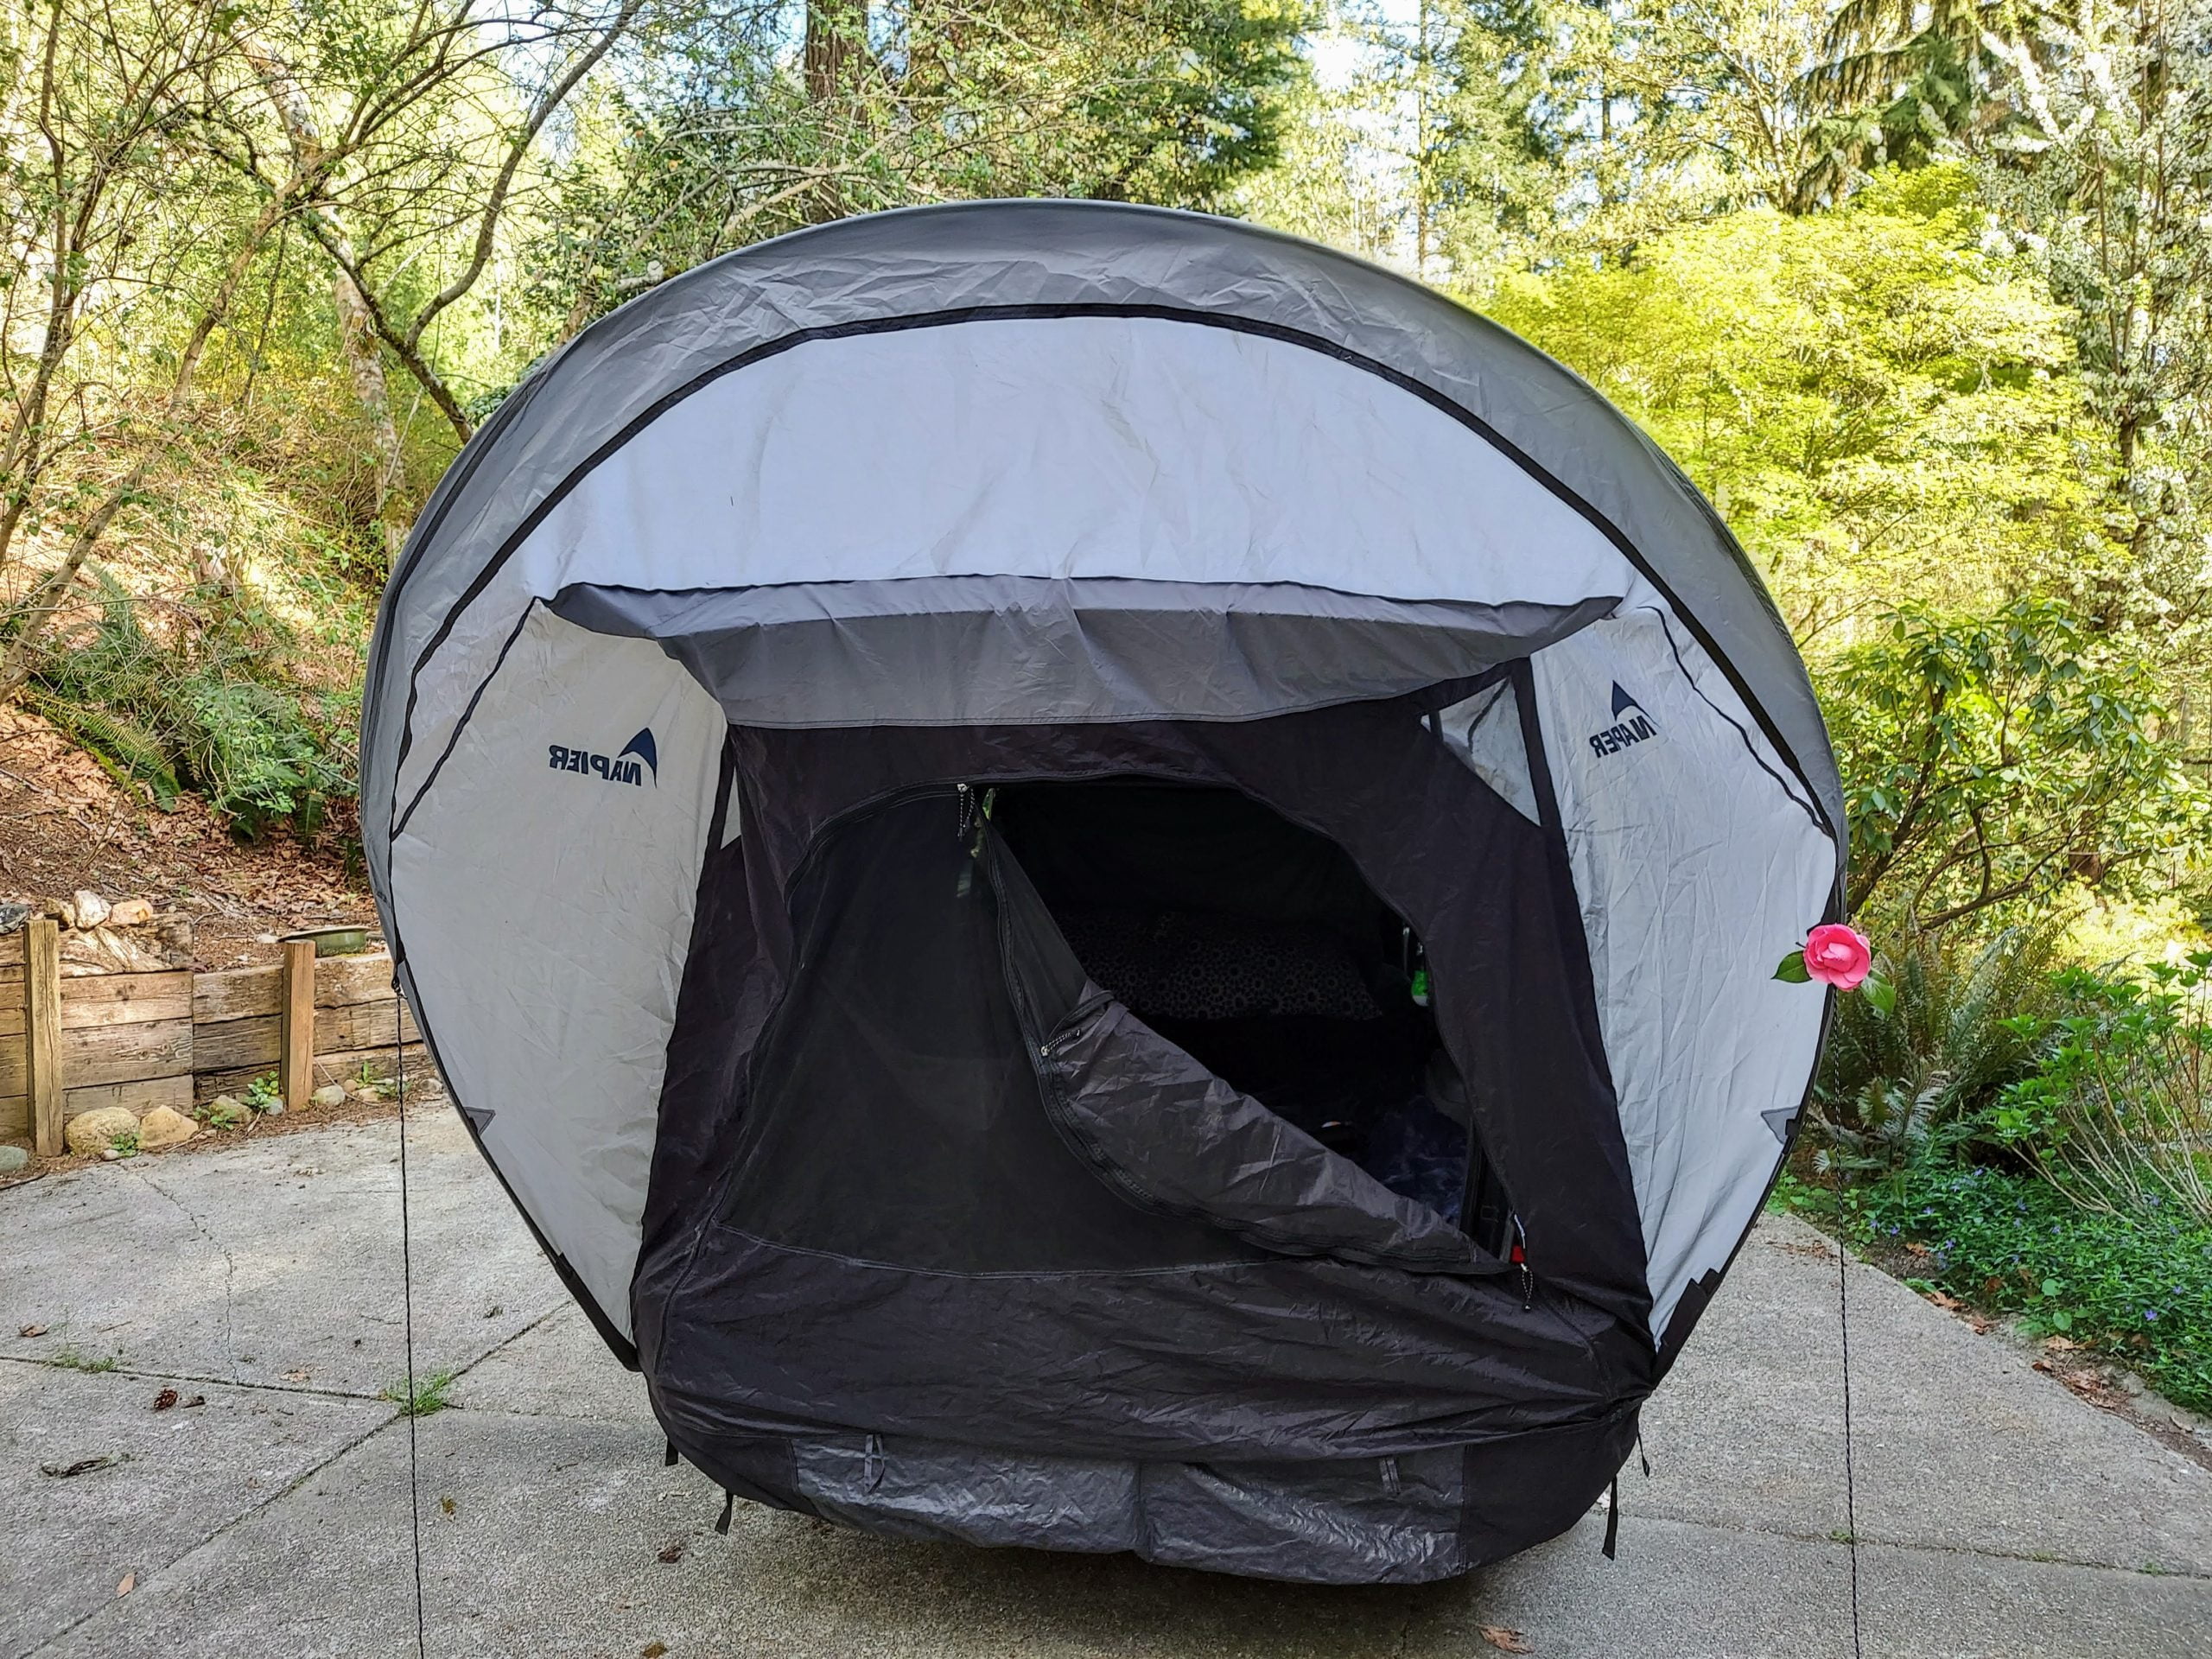
    When I visited Valley of Fire, I was on a road trip to see some Southwest National Parks. While doing this, I tried SUV camping for the first time.  I considered camping on the BLM land outside of Valley of Fire, however, due to the fauna in the desert, there is next to no privacy, and since BLM land has no amenities like a bathroom, I opted for staying in Las Vegas instead.

    White Domes Trailhead
    White Domes Trailhead

    Wi-Fi

    Valley of Fire is one of the few parks I’ve found with Wi-Fi for purchase. I did not use it during my visit, so I can’t say how well it works. Cell data is very spotty inside the park, so if you plan to stay here longer than one day, you may find it useful to pay for one of their Wi-Fi plans.

    Picnic Areas

    There are no restaurants or food amenities within the park, so make sure to bring picnic supplies for your day trip to Valley of Fire State Park. There are small briquette BBQ grills at the picnic areas, so you can BBQ  while enjoying the view. Peanut butter and jelly sandwiches are always a good go-to option for hiking that doesn’t require a cooler.  

    Bring lots of water, Gatorade, and drinks for your day trip here. I tend to go with what’s easy.  So I stick with PB & J sandwiches or bring meat and cheese snackables.  Snack bars are also nice to have during your hikes, and make sure to hydrate! This is especially important if you visit during the summer as it gets hot here!  You are in the desert, so the heat brings its own element of challenge to hikes that would be easier if not for the heat.

    Tip: One of the best picnic areas I found in the park is the Seven Sisters picnic area. It has good shade, BBQ grills, and great views!

    Best Time of the Year to Visit Valley of Fire

    Spring: I visited in late spring, and it was beautiful! The morning air was still cool, but by the afternoon, the temps were in the upper 80’s. When you’re hiking in the open with no shade, even springtime heat can begin to take its toll.

    Summer: This is probably the busiest time to visit Valley of Fire State Park. It is also the hottest time of the year, with highs between 100 degrees and even sometimes reaching as hot as 120 degrees F! If you visit in summer, plan to get an earlier start than normal and bring lots of water and sunscreen!

    Fall: Temperatures in the fall can range anywhere from the mid-60s to the low 90’s.  It’s closer to summer temperatures in the Pacific Northwest.  

    Winter: Temperatures can get as low as freezing during the winter, but typically the daytime temps are mild and are often in the mid-70s.

    Make sure to pack lots of water and sunscreen!

    Welcome to Las Vegas Sign

    Getting to Valley of Fire State Park

    Valley of Fire State Park is only a 1-hour drive from Las Vegas.  It is about 55 miles outside of Las Vegas off Interstate 15. Take I-15 N to Exit 75. After exiting, follow signs for Valley of Fire. It is about another 12 miles along the Valley of Fire Highway before you reach the entrance station for the park.  

    If you’re staying closer to Henderson, NV, you can also access Valley of Fire via Northshore Road (highway 167) through the Lake Mead National Recreation Area. However, be aware that there is an additional National Park Recreation Fee of $25 per vehicle.  The fee gives you access to the Lake Mead National Recreation Area for 7 consecutive days.  It is a separate fee from the entrance fee at Valley of Fire State Park.

    Two Entrance Stations:

    If you drive up I-15, you will arrive via the West Entrance Station.  There are maps and restrooms here.  If you come before the pay station opens, there are self-pay envelopes you can complete in the little parking area to the right.  Make sure to have exact cash if paying using the envelopes.

    If you come via Lake Mead, then you’ll enter the East Entrance Station.  This station is closest to Elephant Rock.  It also has maps and restrooms in the parking area by the entrance.

    Giant Red Rocks that Mark the beginning of the Fire Wave trail

    Things to See During Your Visit

    There are more stops and hikes to do at Valley of Fire than you will want to do with only one day to spend here.  Below is a list of the main stops within the park. I also provide a suggested one-day itinerary below, as well as a Google Maps itinerary you can download for your trip.  Make sure to download an offline map of the area before your drive to Valley of Fire.

    • Beehives (Quick photo stop from the parking area. ~5 min)
    • Atlatl Rock (Short walk and some stairs to climb to see these well-preserved petroglyphs. ~ 15 minutes)
    • Visitor Center/Ranger Station (look up times) (good for info and additional hikes for longer stays)
    • Mouse’s Tank Trail (0.75-mile roundtrip, sandy trail with petroglyphs ~ 1 hour)
    • Rainbow Vista (This 1-mile hike is along a sandy trail, best suited for the coolest part of the day as there is also no shade.)
    • Fire Wave (1.5 miles round trip to photogenic rock wave)
    • Pastel Canyon (0.25-mile unmarked trail through the short canyon to see pastel striped rocks. ~10 minutes)
    • White Domes (1.25-mile loop. Scenic loop trail where movies like Star Trek Generations and The Professionals were filmed. There’s also a picnic area here.)
    • Seven Sisters (Great picnic area)
    • Elephant Rock (quick stop by East Entrance)

    Scenic Drive: Even if you’re unable to do the hikes listed above, you make sure to drive Mouse’s Tank road (later becomes White Domes Road) for an incredibly scenic drive. It is gorgeous driving both up and back down, and there’s a high chance you’ll also see mountain sheep during your drive.

    In the one-day itinerary below, I share what I think are the best stops for your first trip here.  Remember, depending on when you visit, the weather may be very hot.   You might be surprised by how the heat affects your stamina, especially if you come from a milder non-desert area.  I realized this after visiting Joshua Tree and Death Valley the week before I came to Valley of Fire. I found I could not pack as much into my day as I might in a cooler environment.

    Suggested One-Day Itinerary to Valley of Fire State Park

    Try leaving Las Vegas by 8:00 a.m. or before.  The earlier you get there, the better your daytime heat and also the more time you’ll have before the crowds come.  Make sure to bring your picnic lunch, snacks, water, and other drinks to stay hydrated and fueled for your hiking and sightseeing.  Also bring extra sunscreen and a sunhat of some sort is also a good idea.  This itinerary assumes you’re starting at the West Entrance Station.

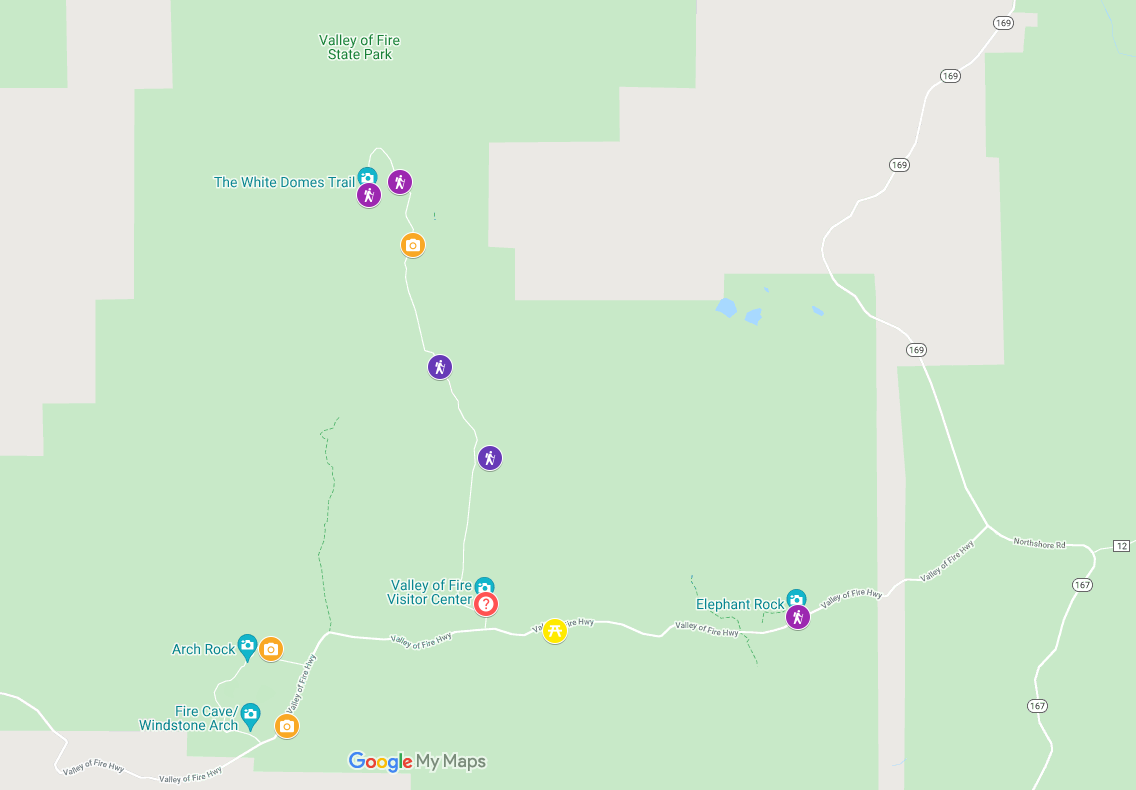
    Arriving at Valley of Fire State Park

    Arrive at Valley of Fire State Park by 9:00 a.m., pay the entrance fee, and make the quick stop for a photo of the beehive rocks.
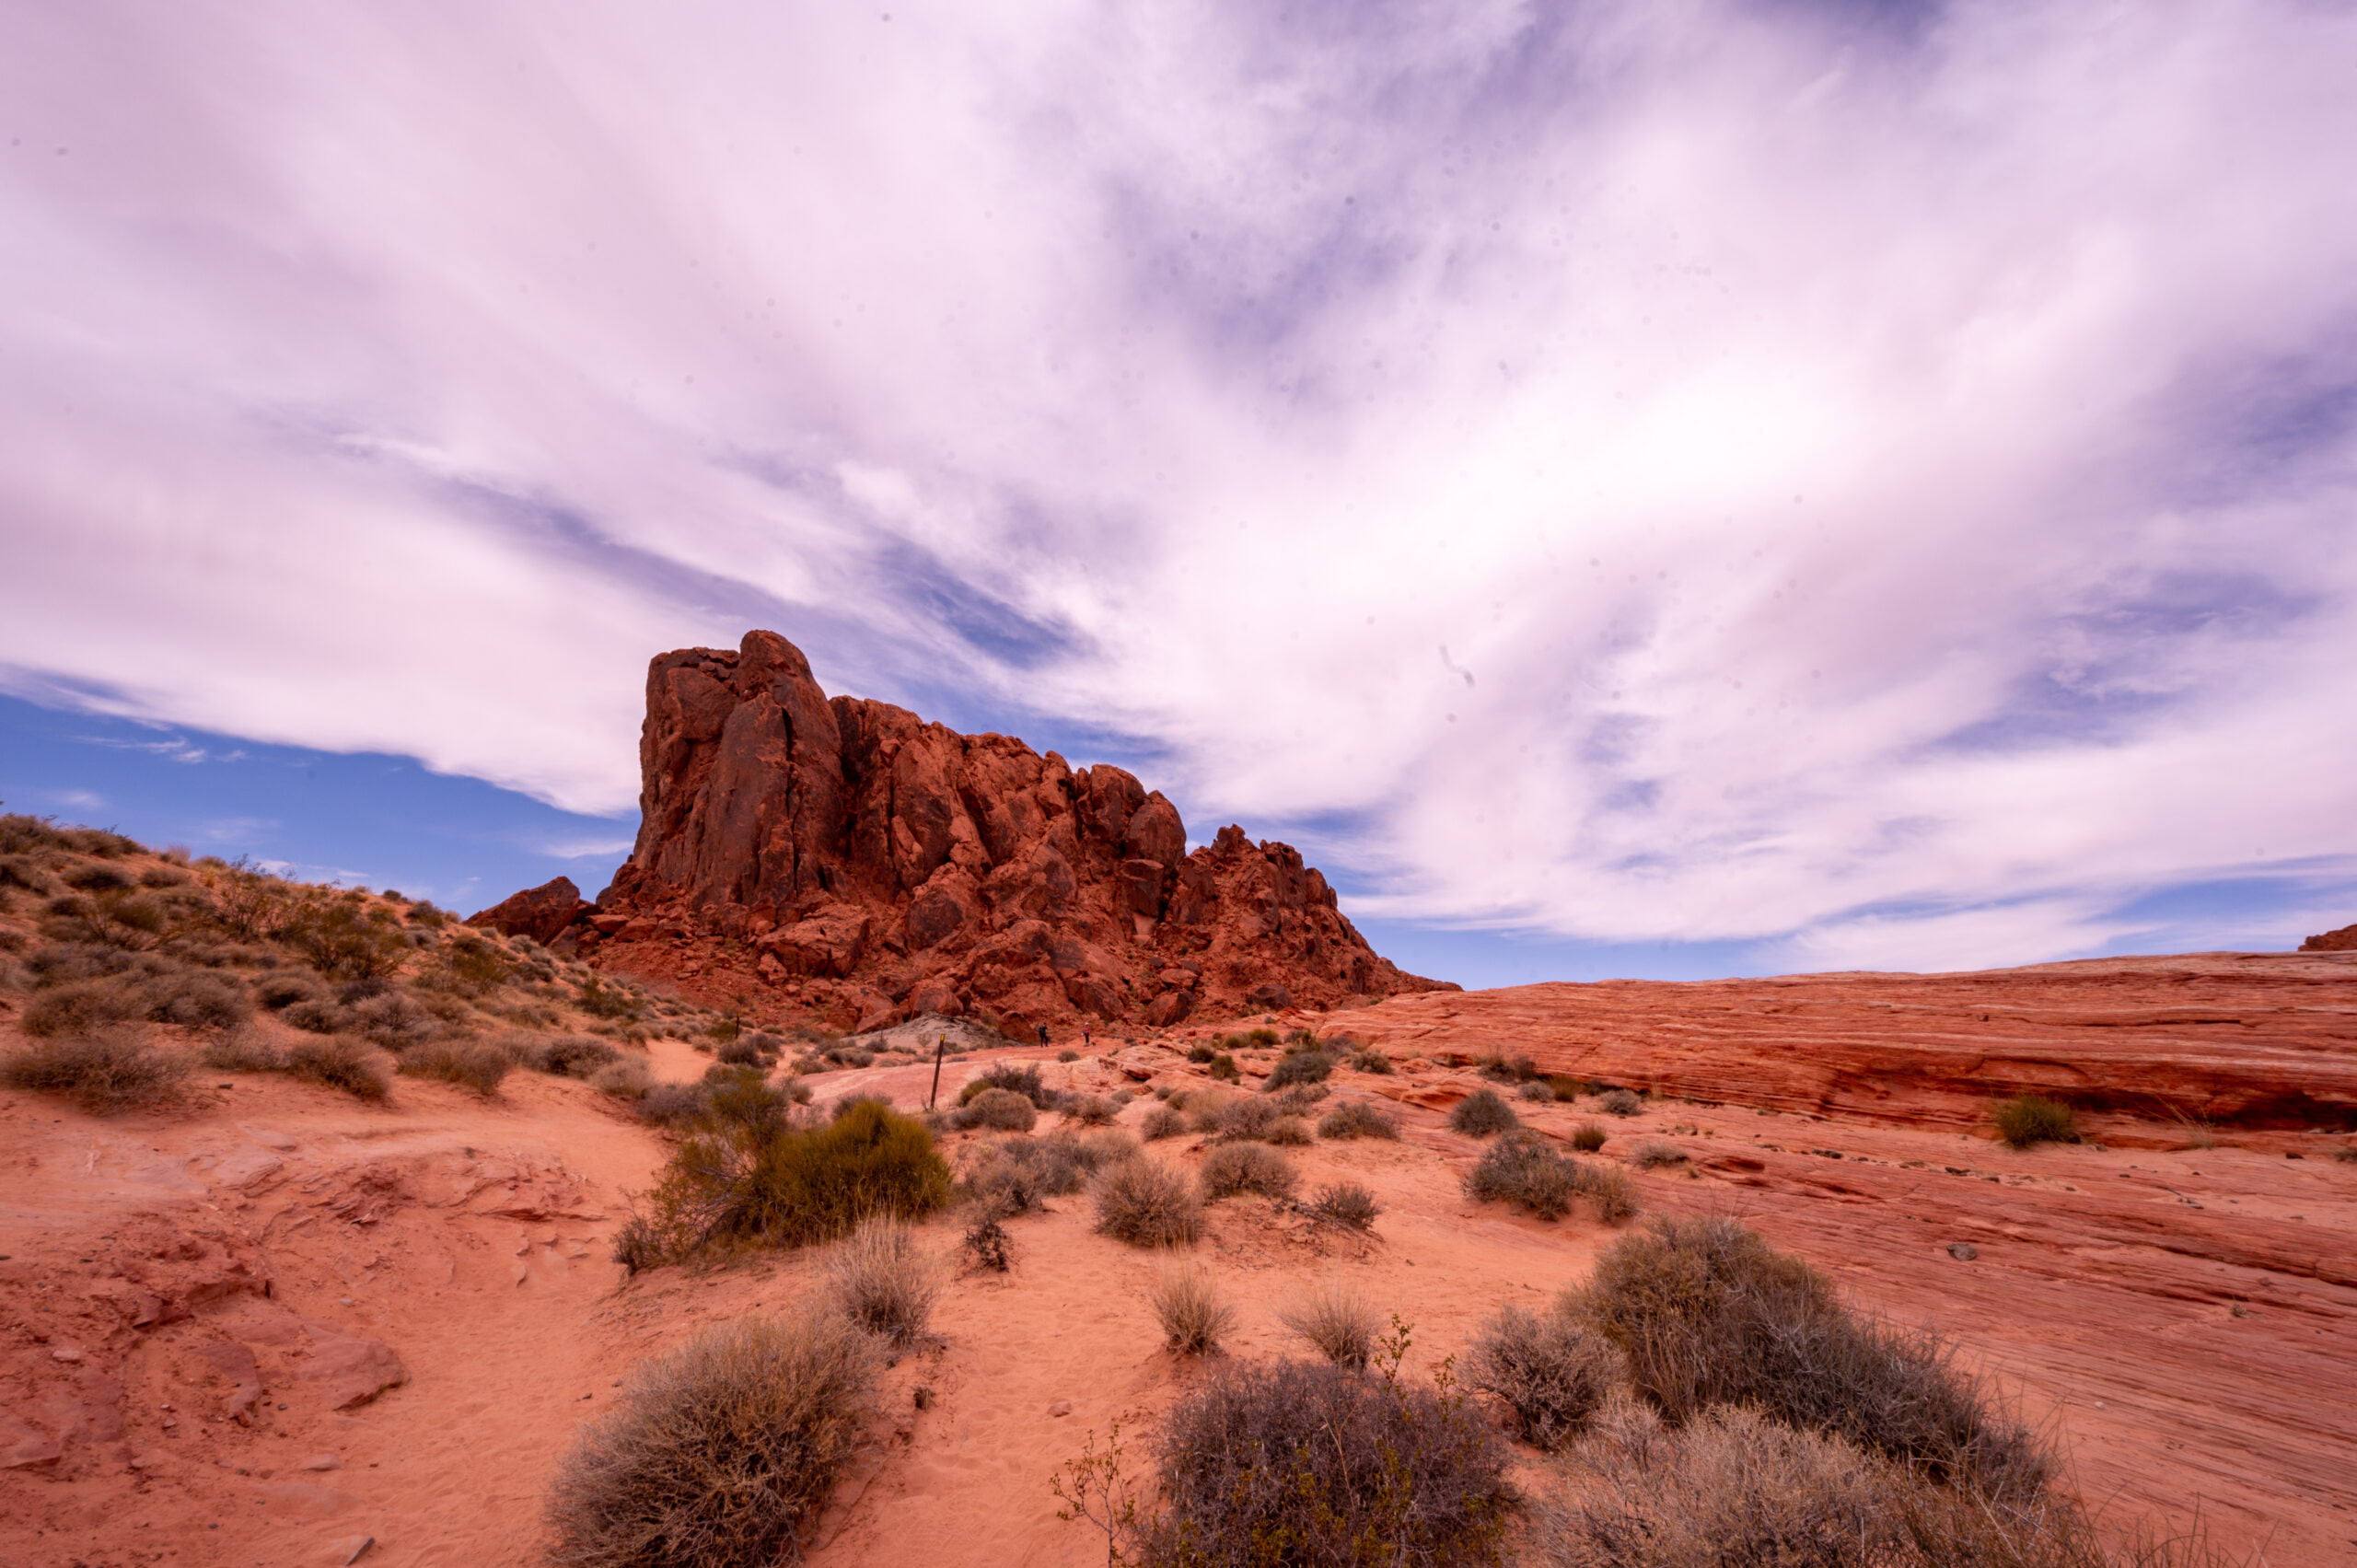
    Beehives

    This is a quick photo opportunity of some rocks that look like, you guessed it, beehives! It’s a quick stop on the right side of the road. Unless you’re really running behind, you might as well stop. Probably only 5-minutes to hop out and snap a few photos and hop back in the car!

    Fire Wave
    The Fire Wave at Valley of Fire State Park.

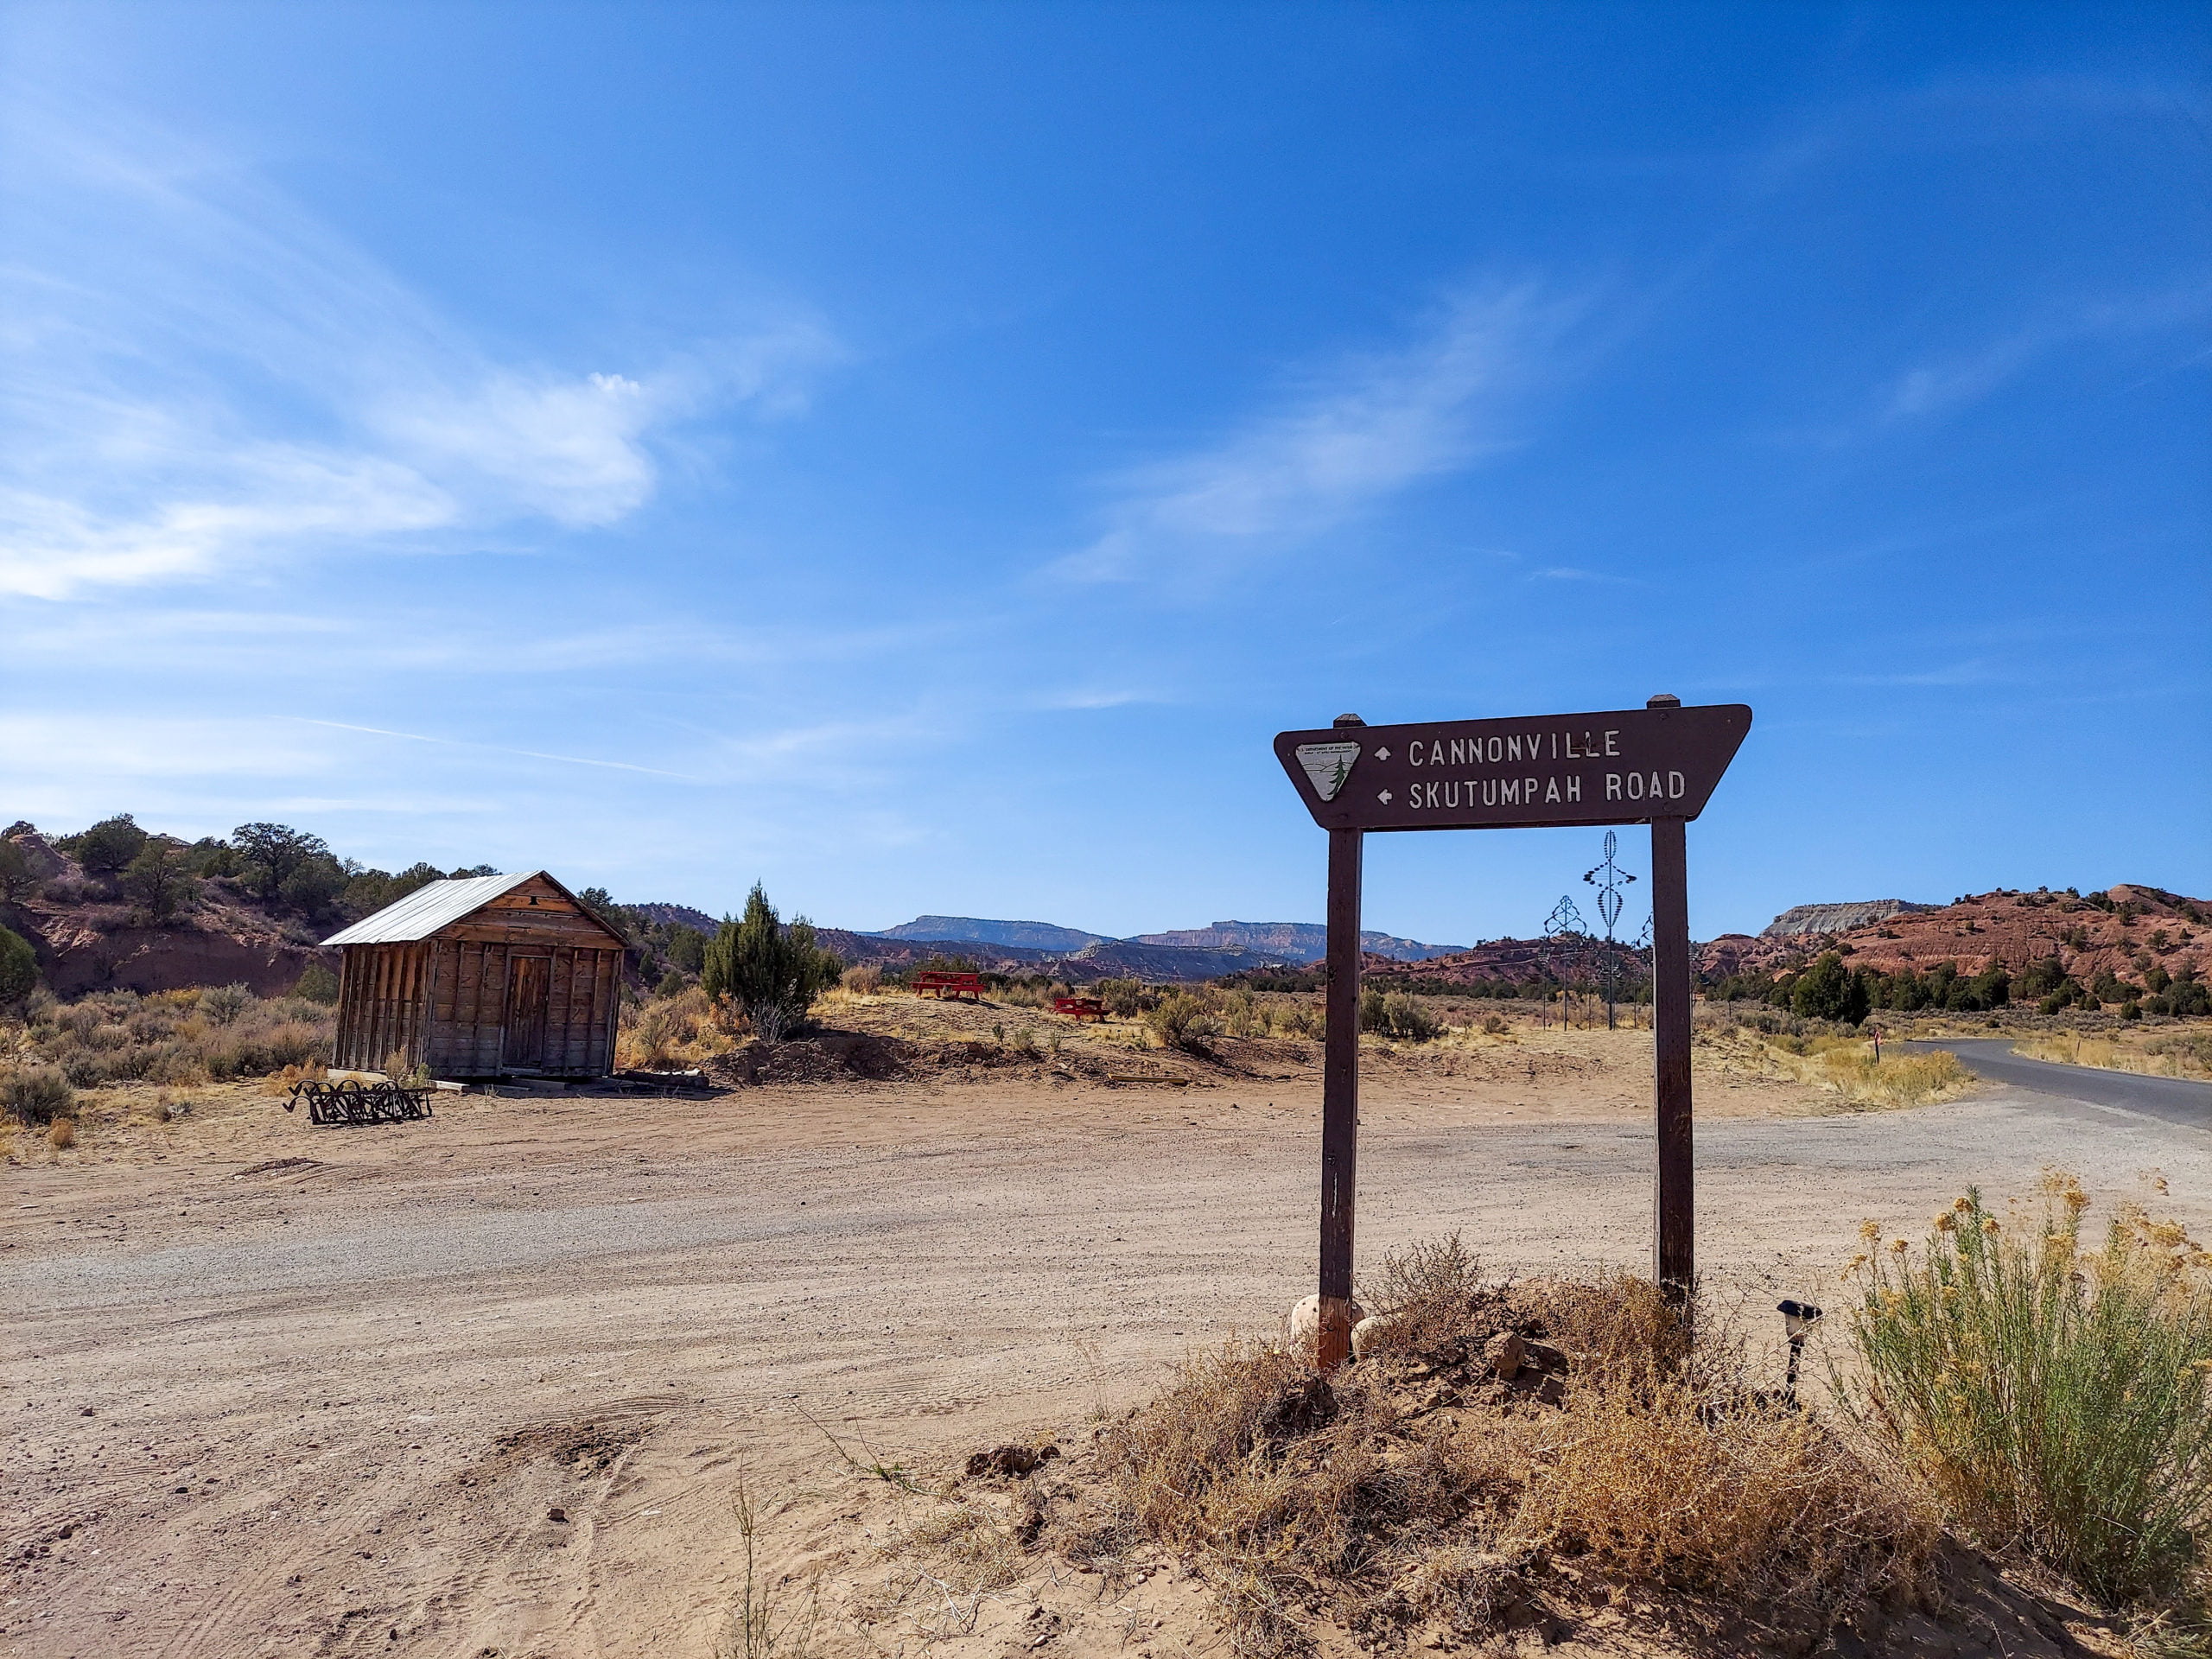
    Valley of Fire Visitor Center

    After leaving the Beehives, continue straight until you see the (left) turn for the Visitor Center and Mouse’s Tank Road.  The Visitor Center is a good place to stop and use the restroom and learn more about the desert environment at Valley of Fire State Park. 

    After your pit stop at the Visitor Center, continue up Mouse’s Tank Road. This is the most scenic drive in the park, well worth the drive alone! 

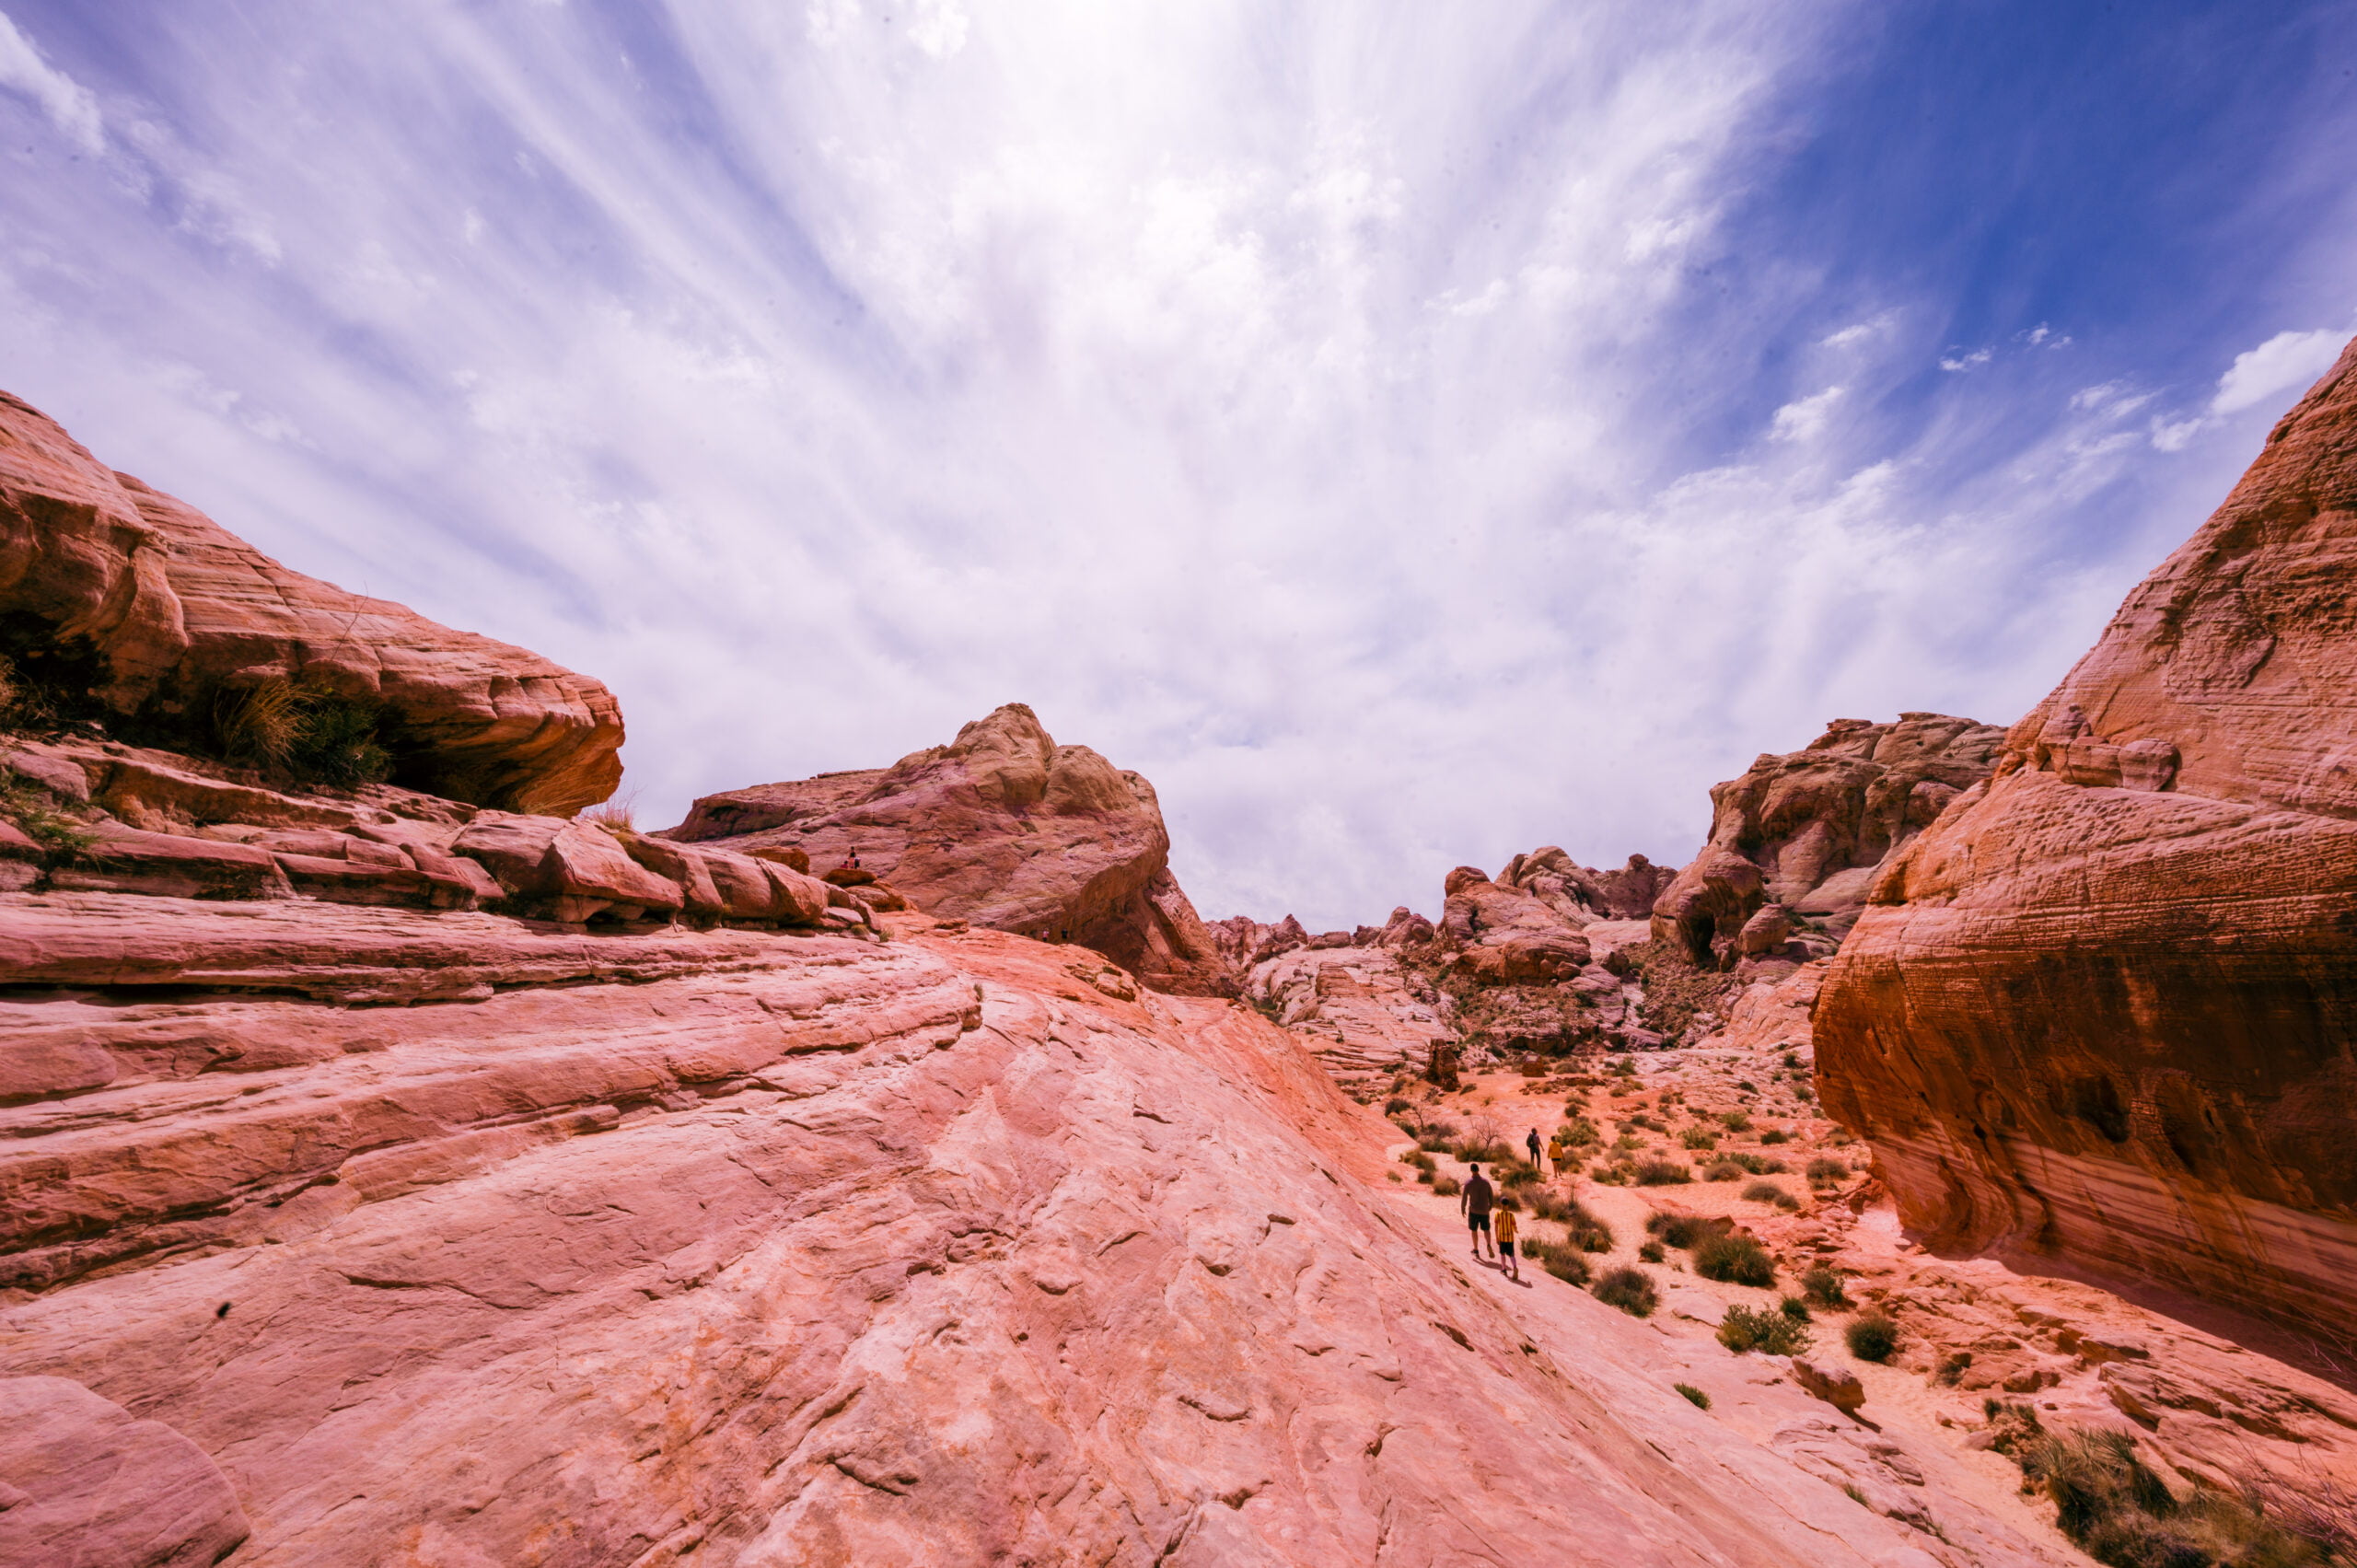
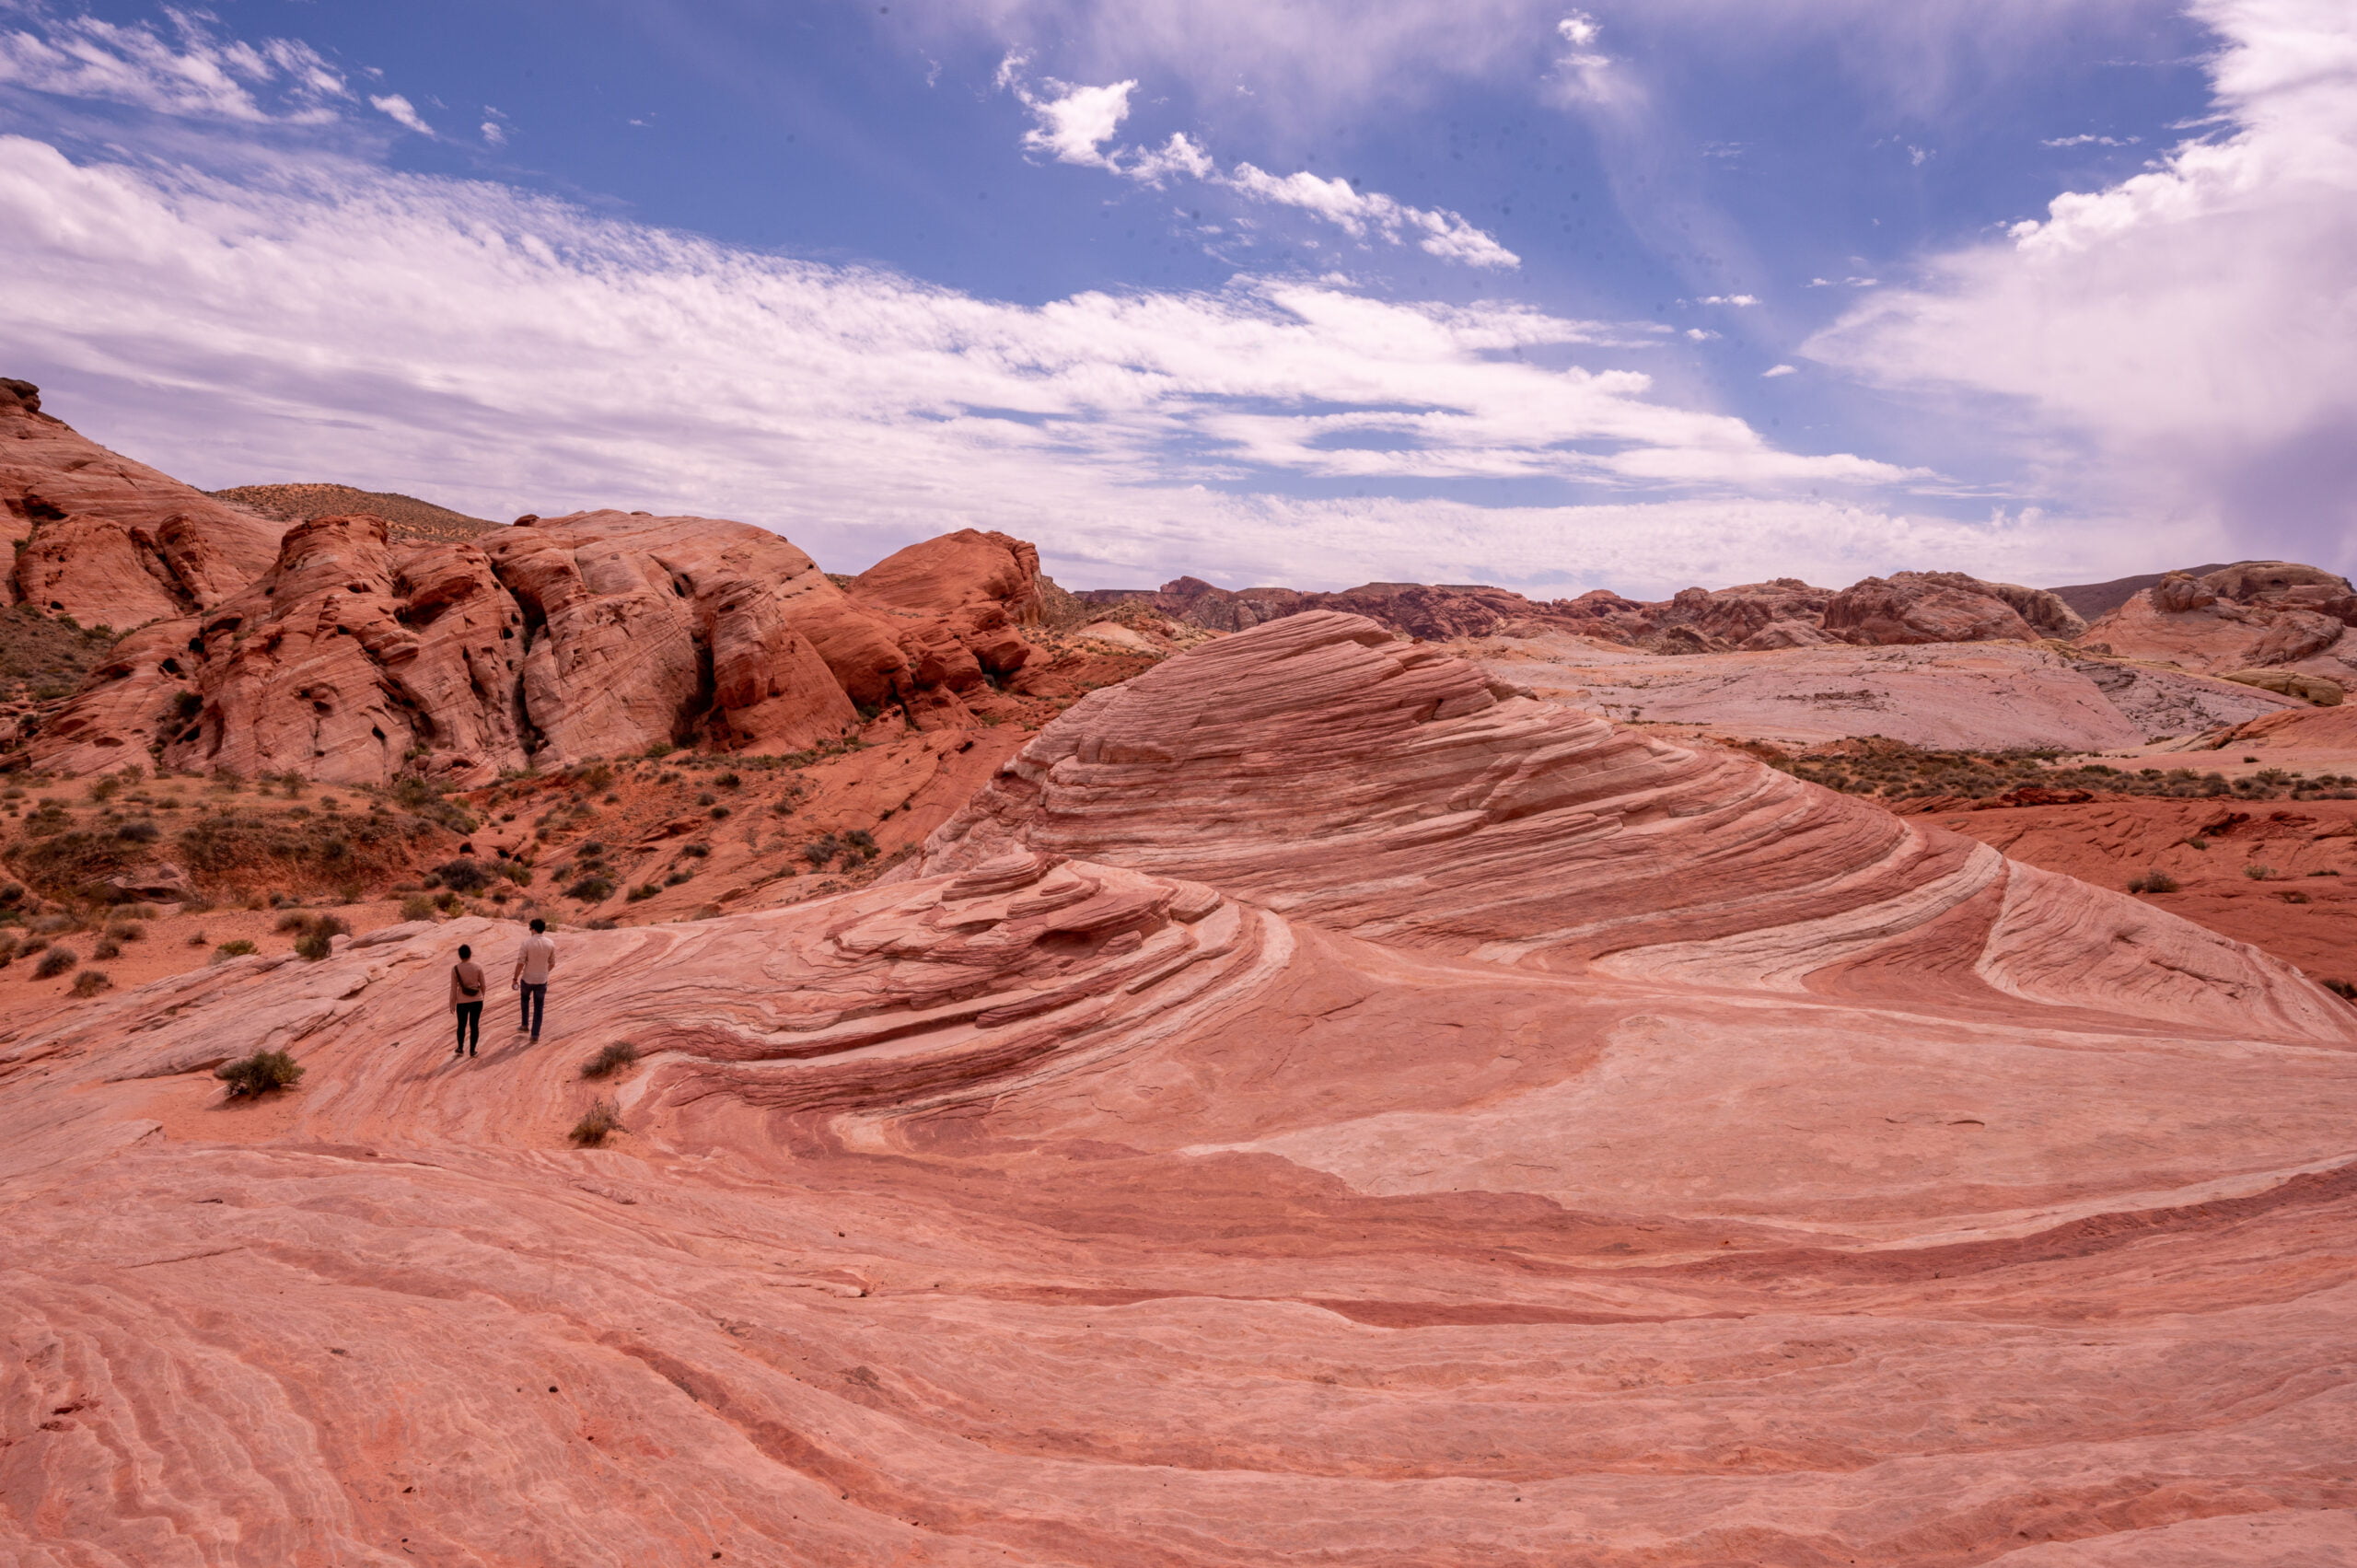
    The Fire Wave – 1.5 miles roundtrip

    You’ll pass several stops as you make your way up to Parking Lot 3 (P3). The parking for the Fire Wave is on the right side of the road. The trail also starts on the right side. The Fire Wave is the longest hike on this itinerary, and it is also the most popular. I recommend getting it out of the way while it is cooler and before the crowds come. This hike will not disappoint! Plan 1-2 hours for this stop.

    Sometimes during the summer, they close this trail due to a high number of heat-related emergency calls. The desert is no joke, so make sure always to have plenty of water with you and do your best to stay out of the sun during the hottest part of the day.

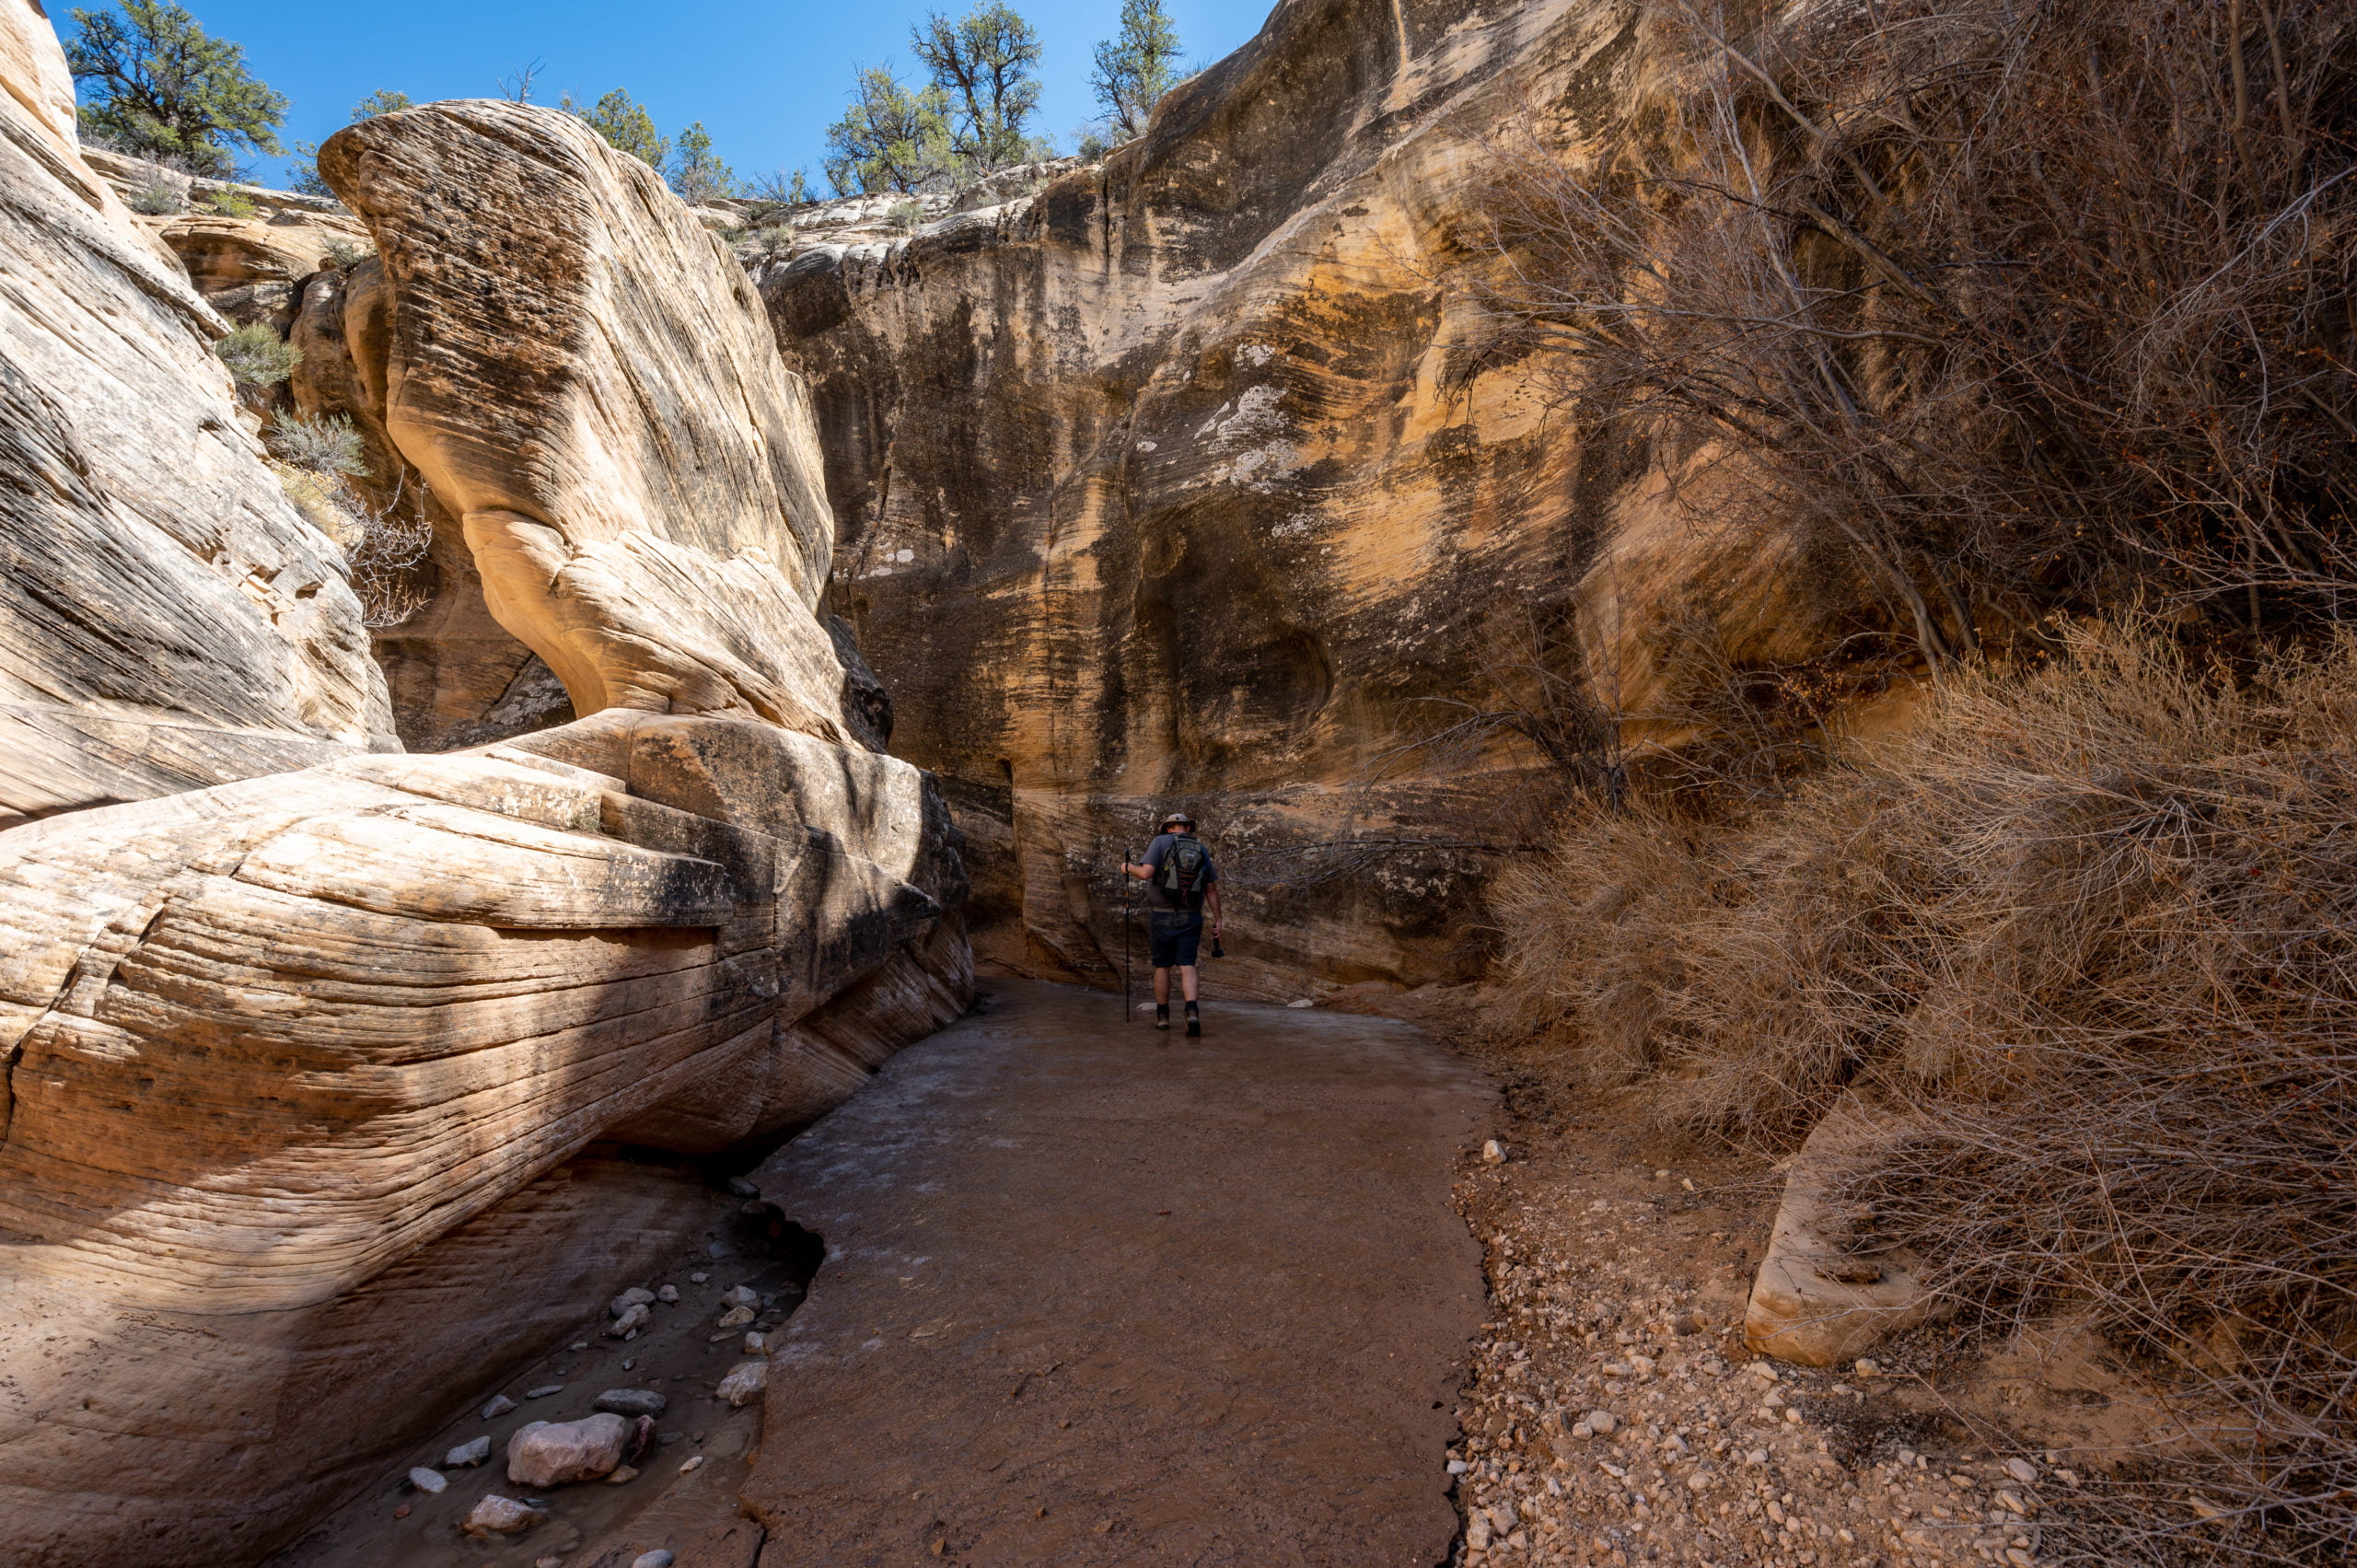
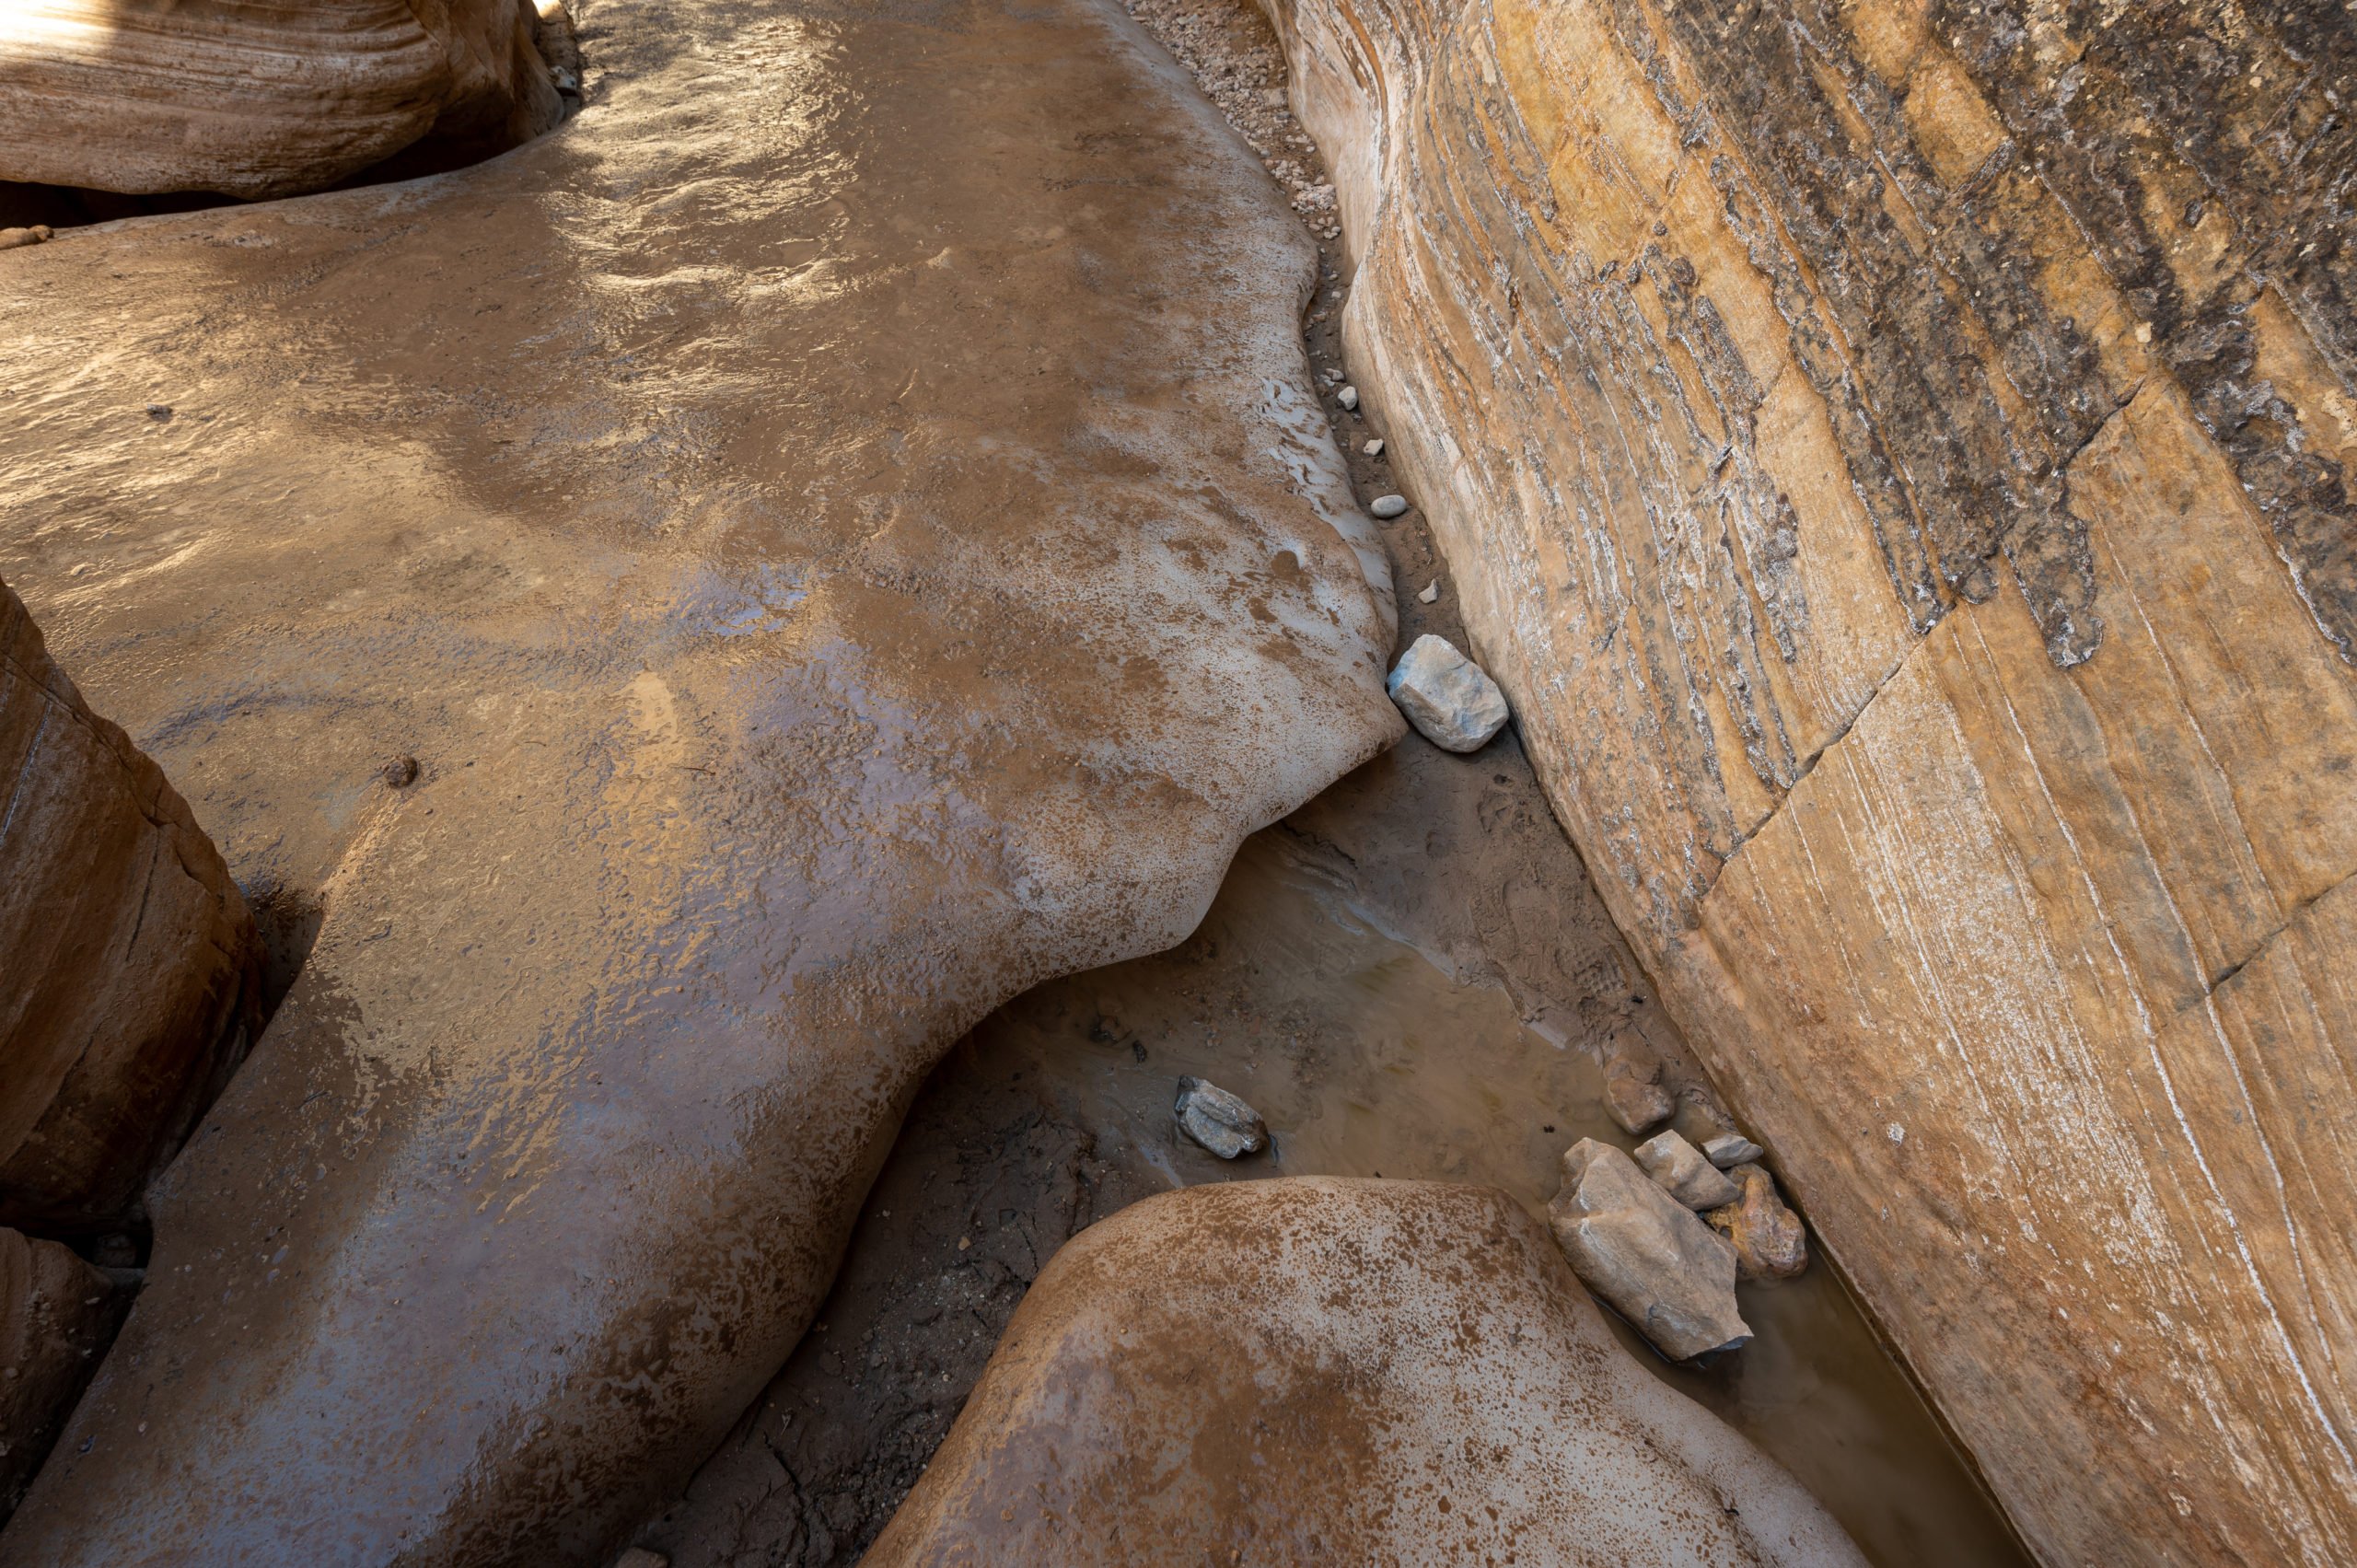
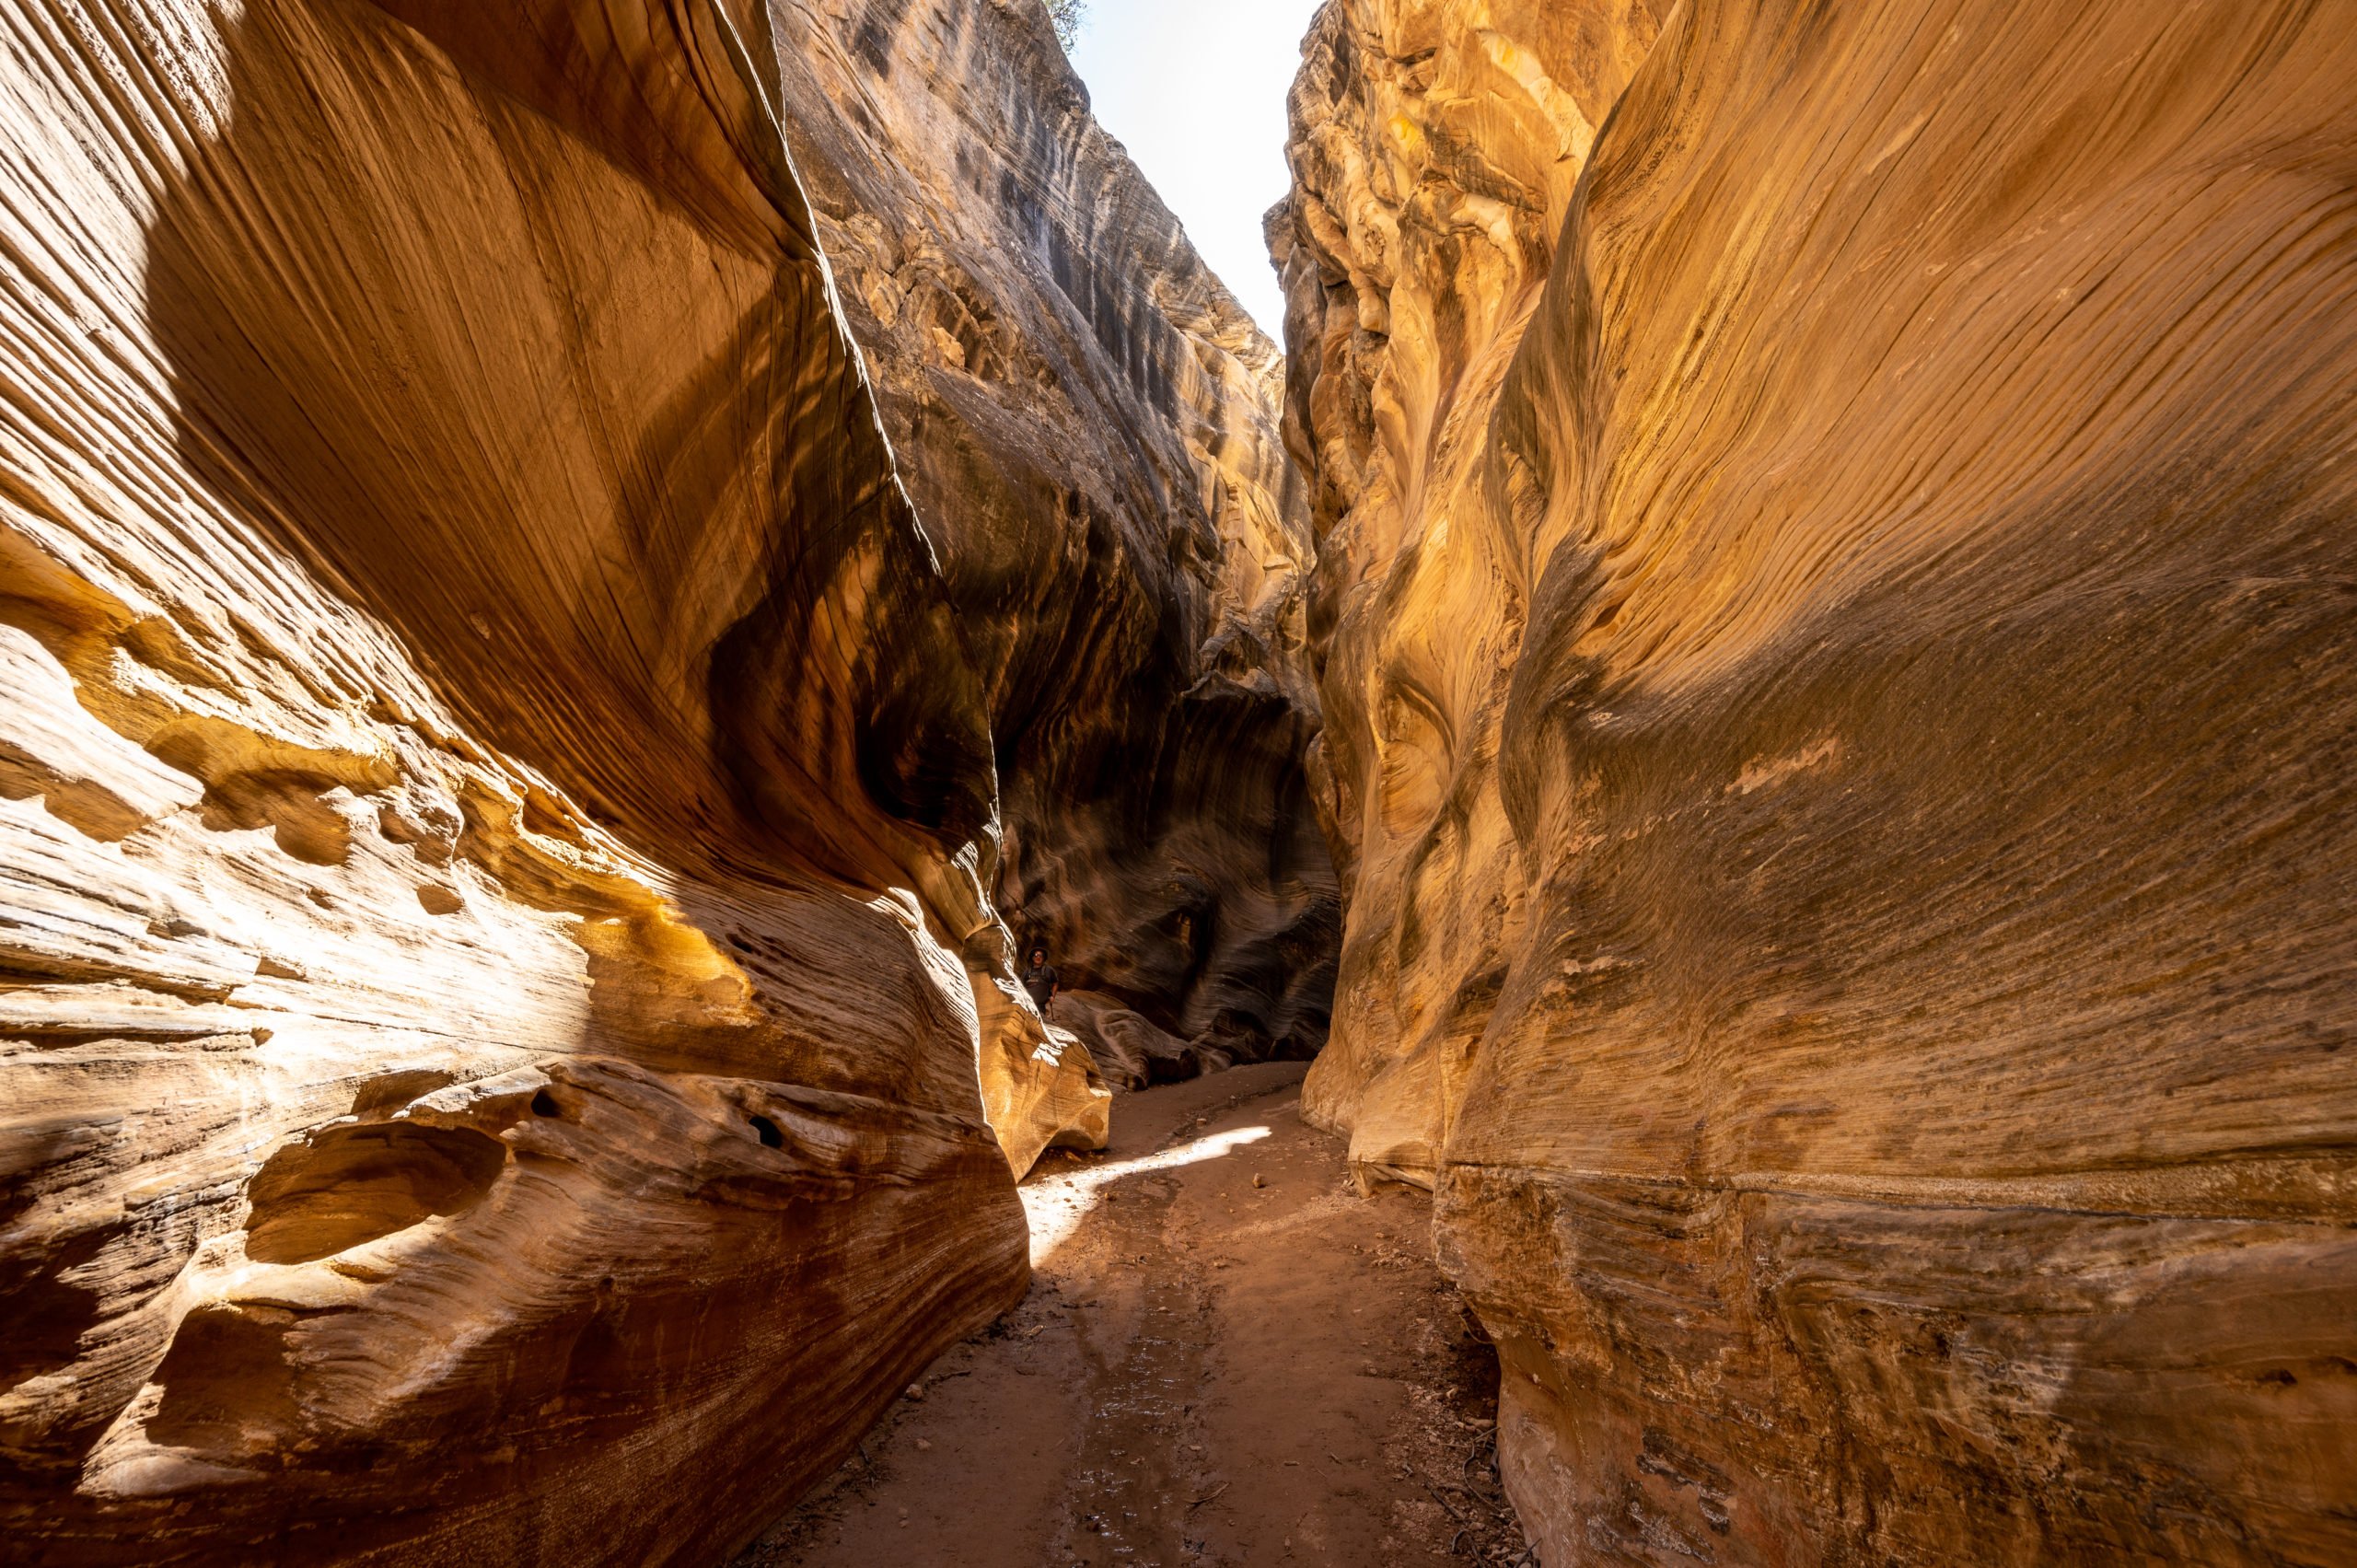
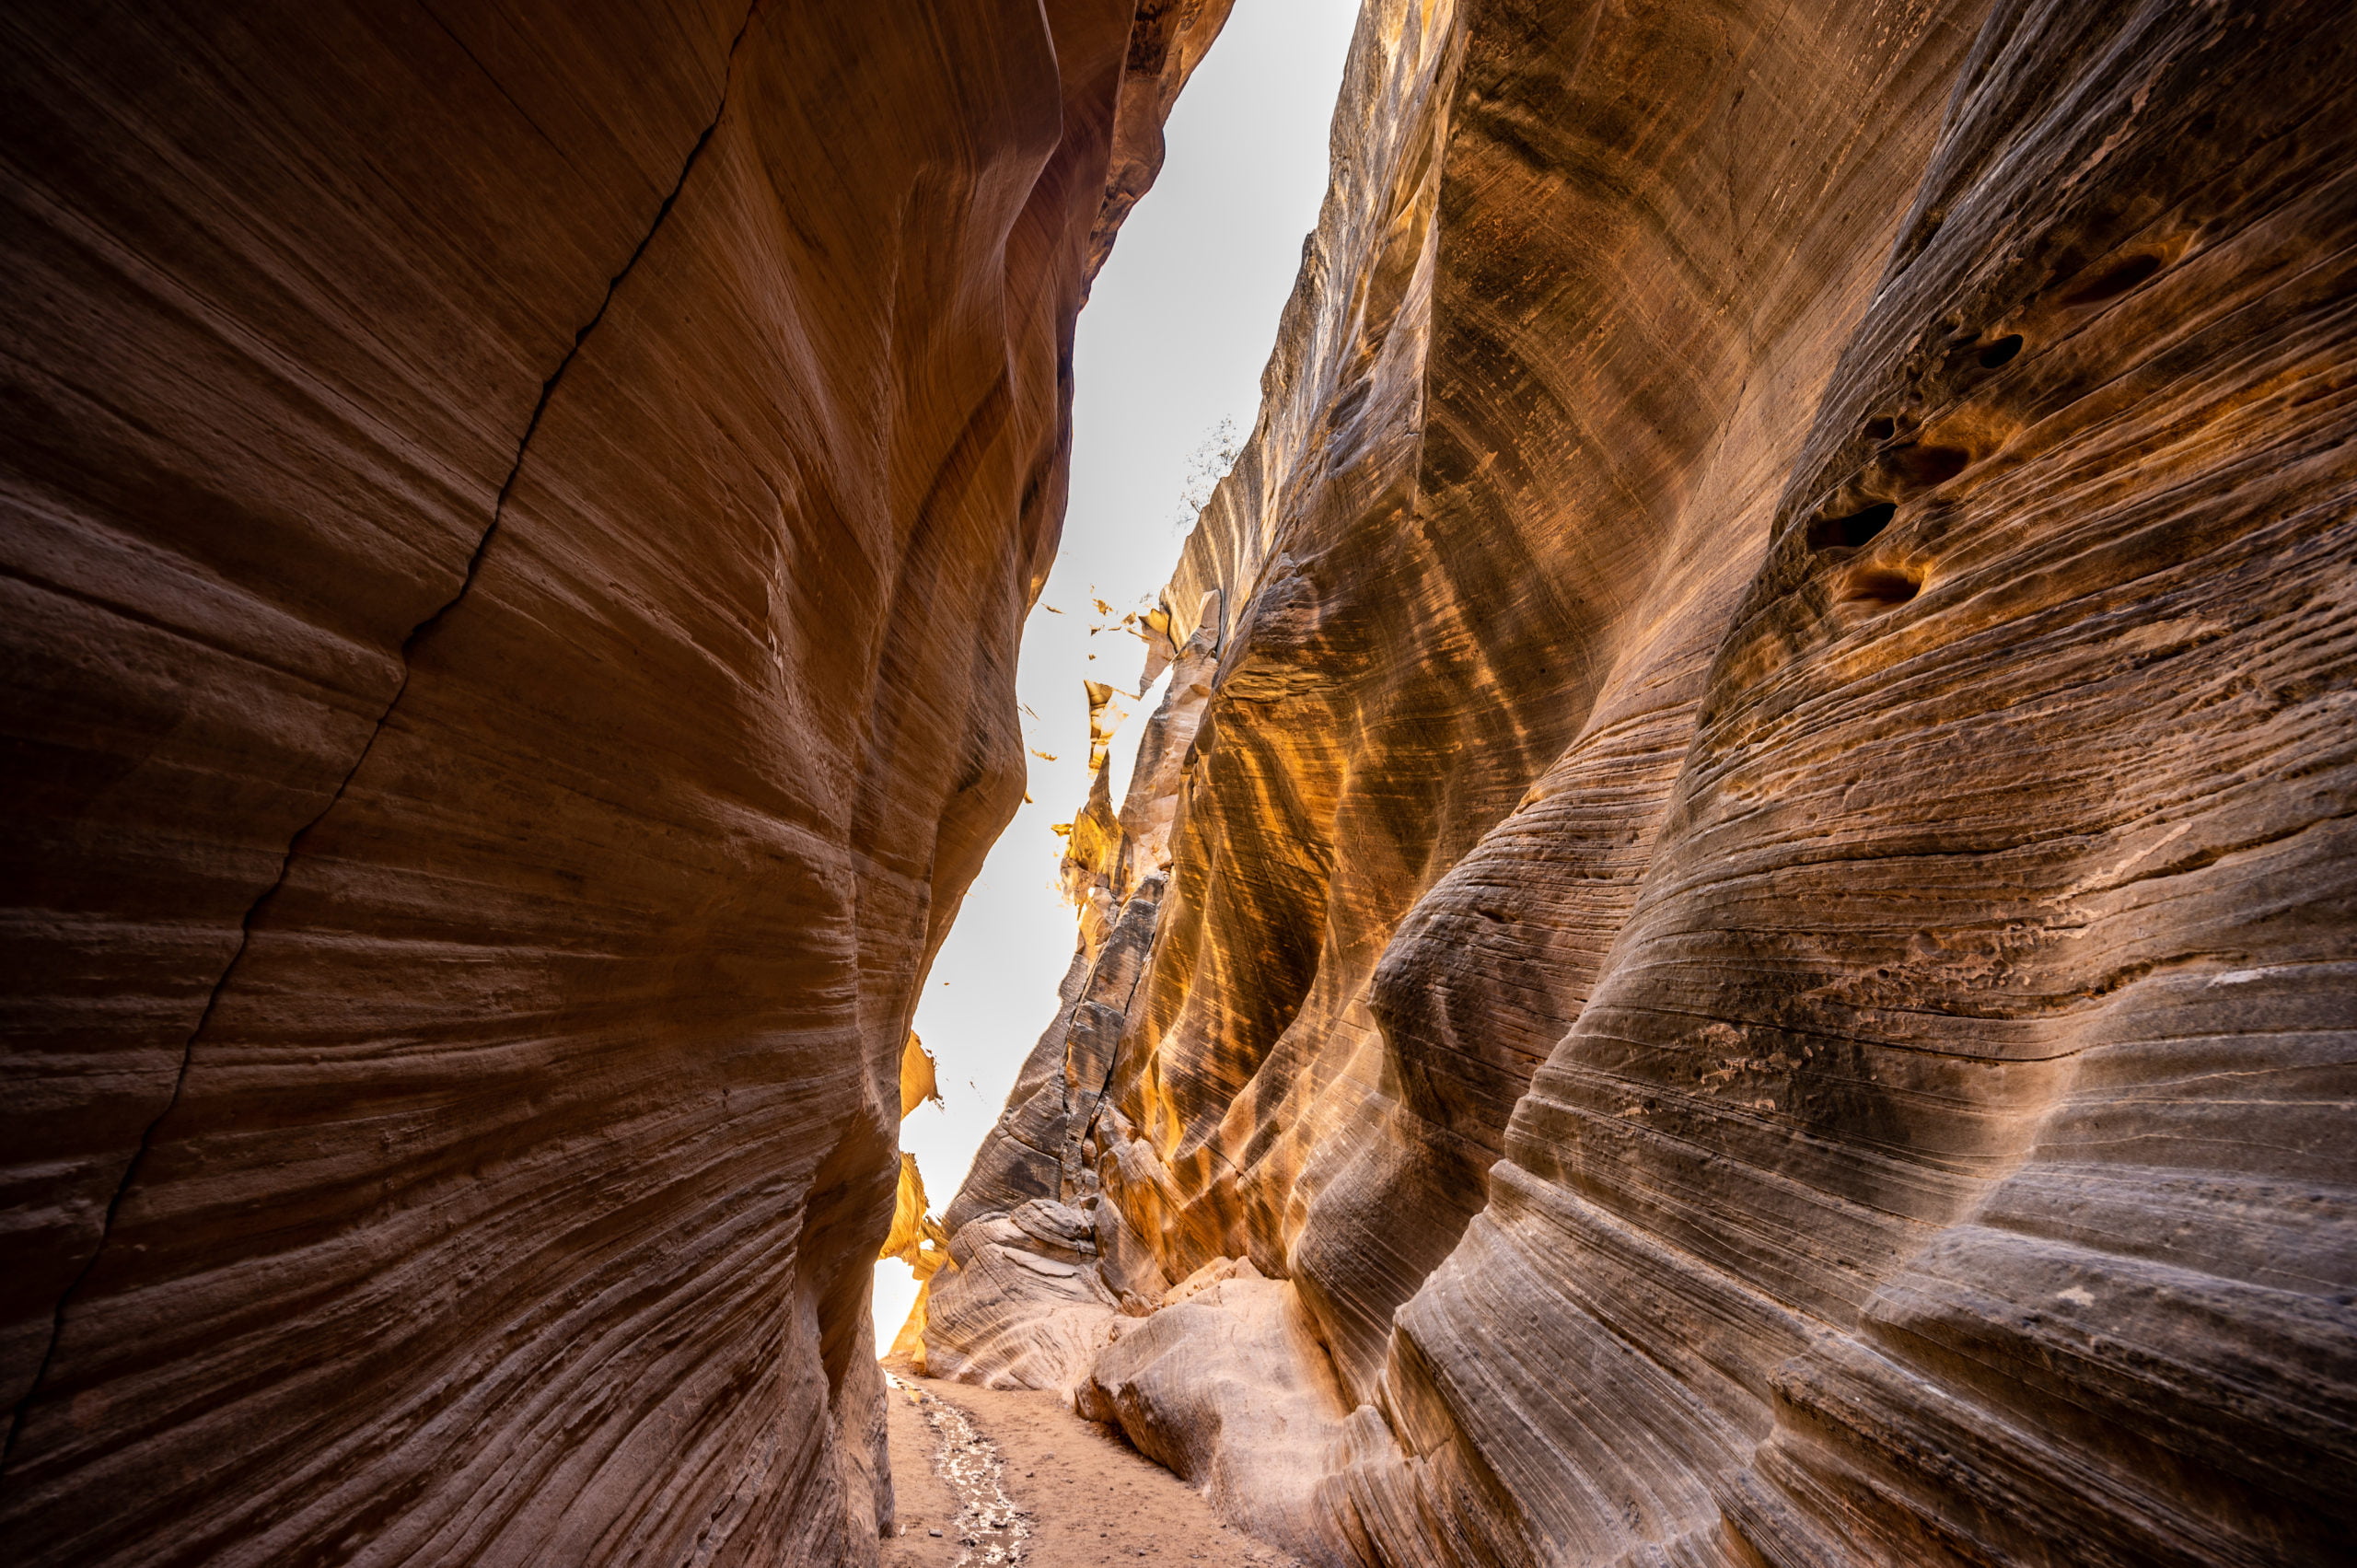
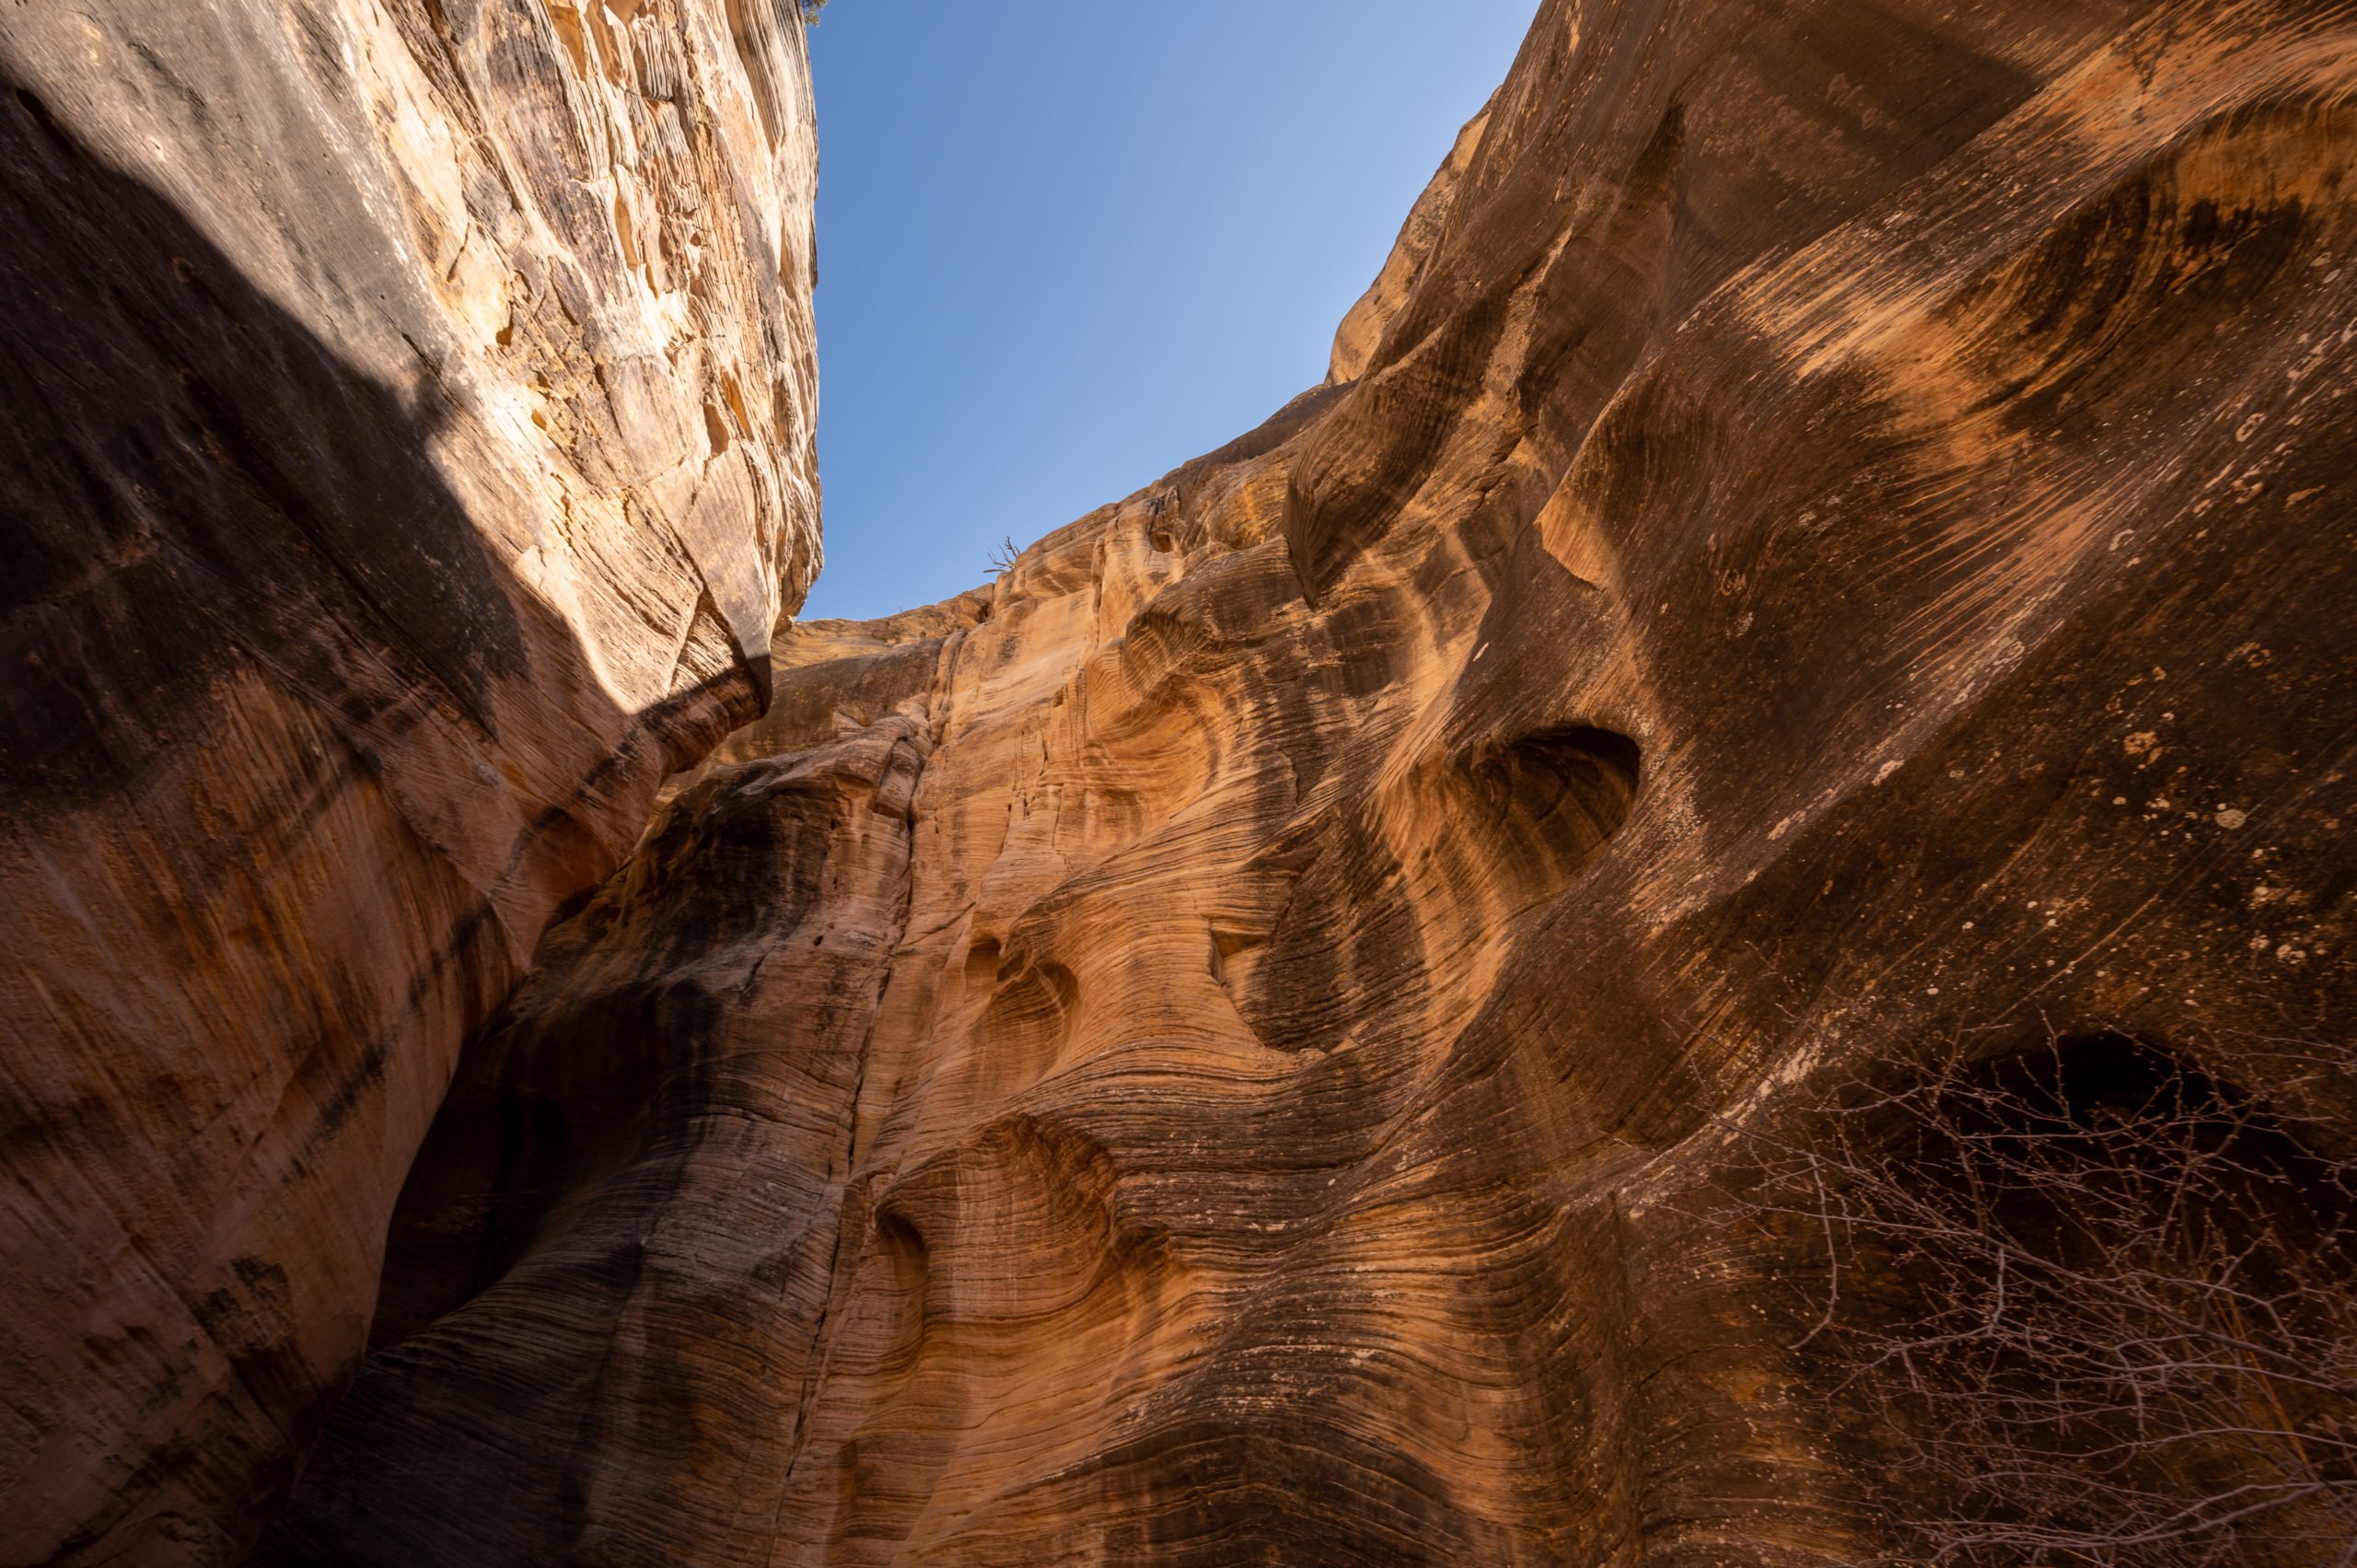
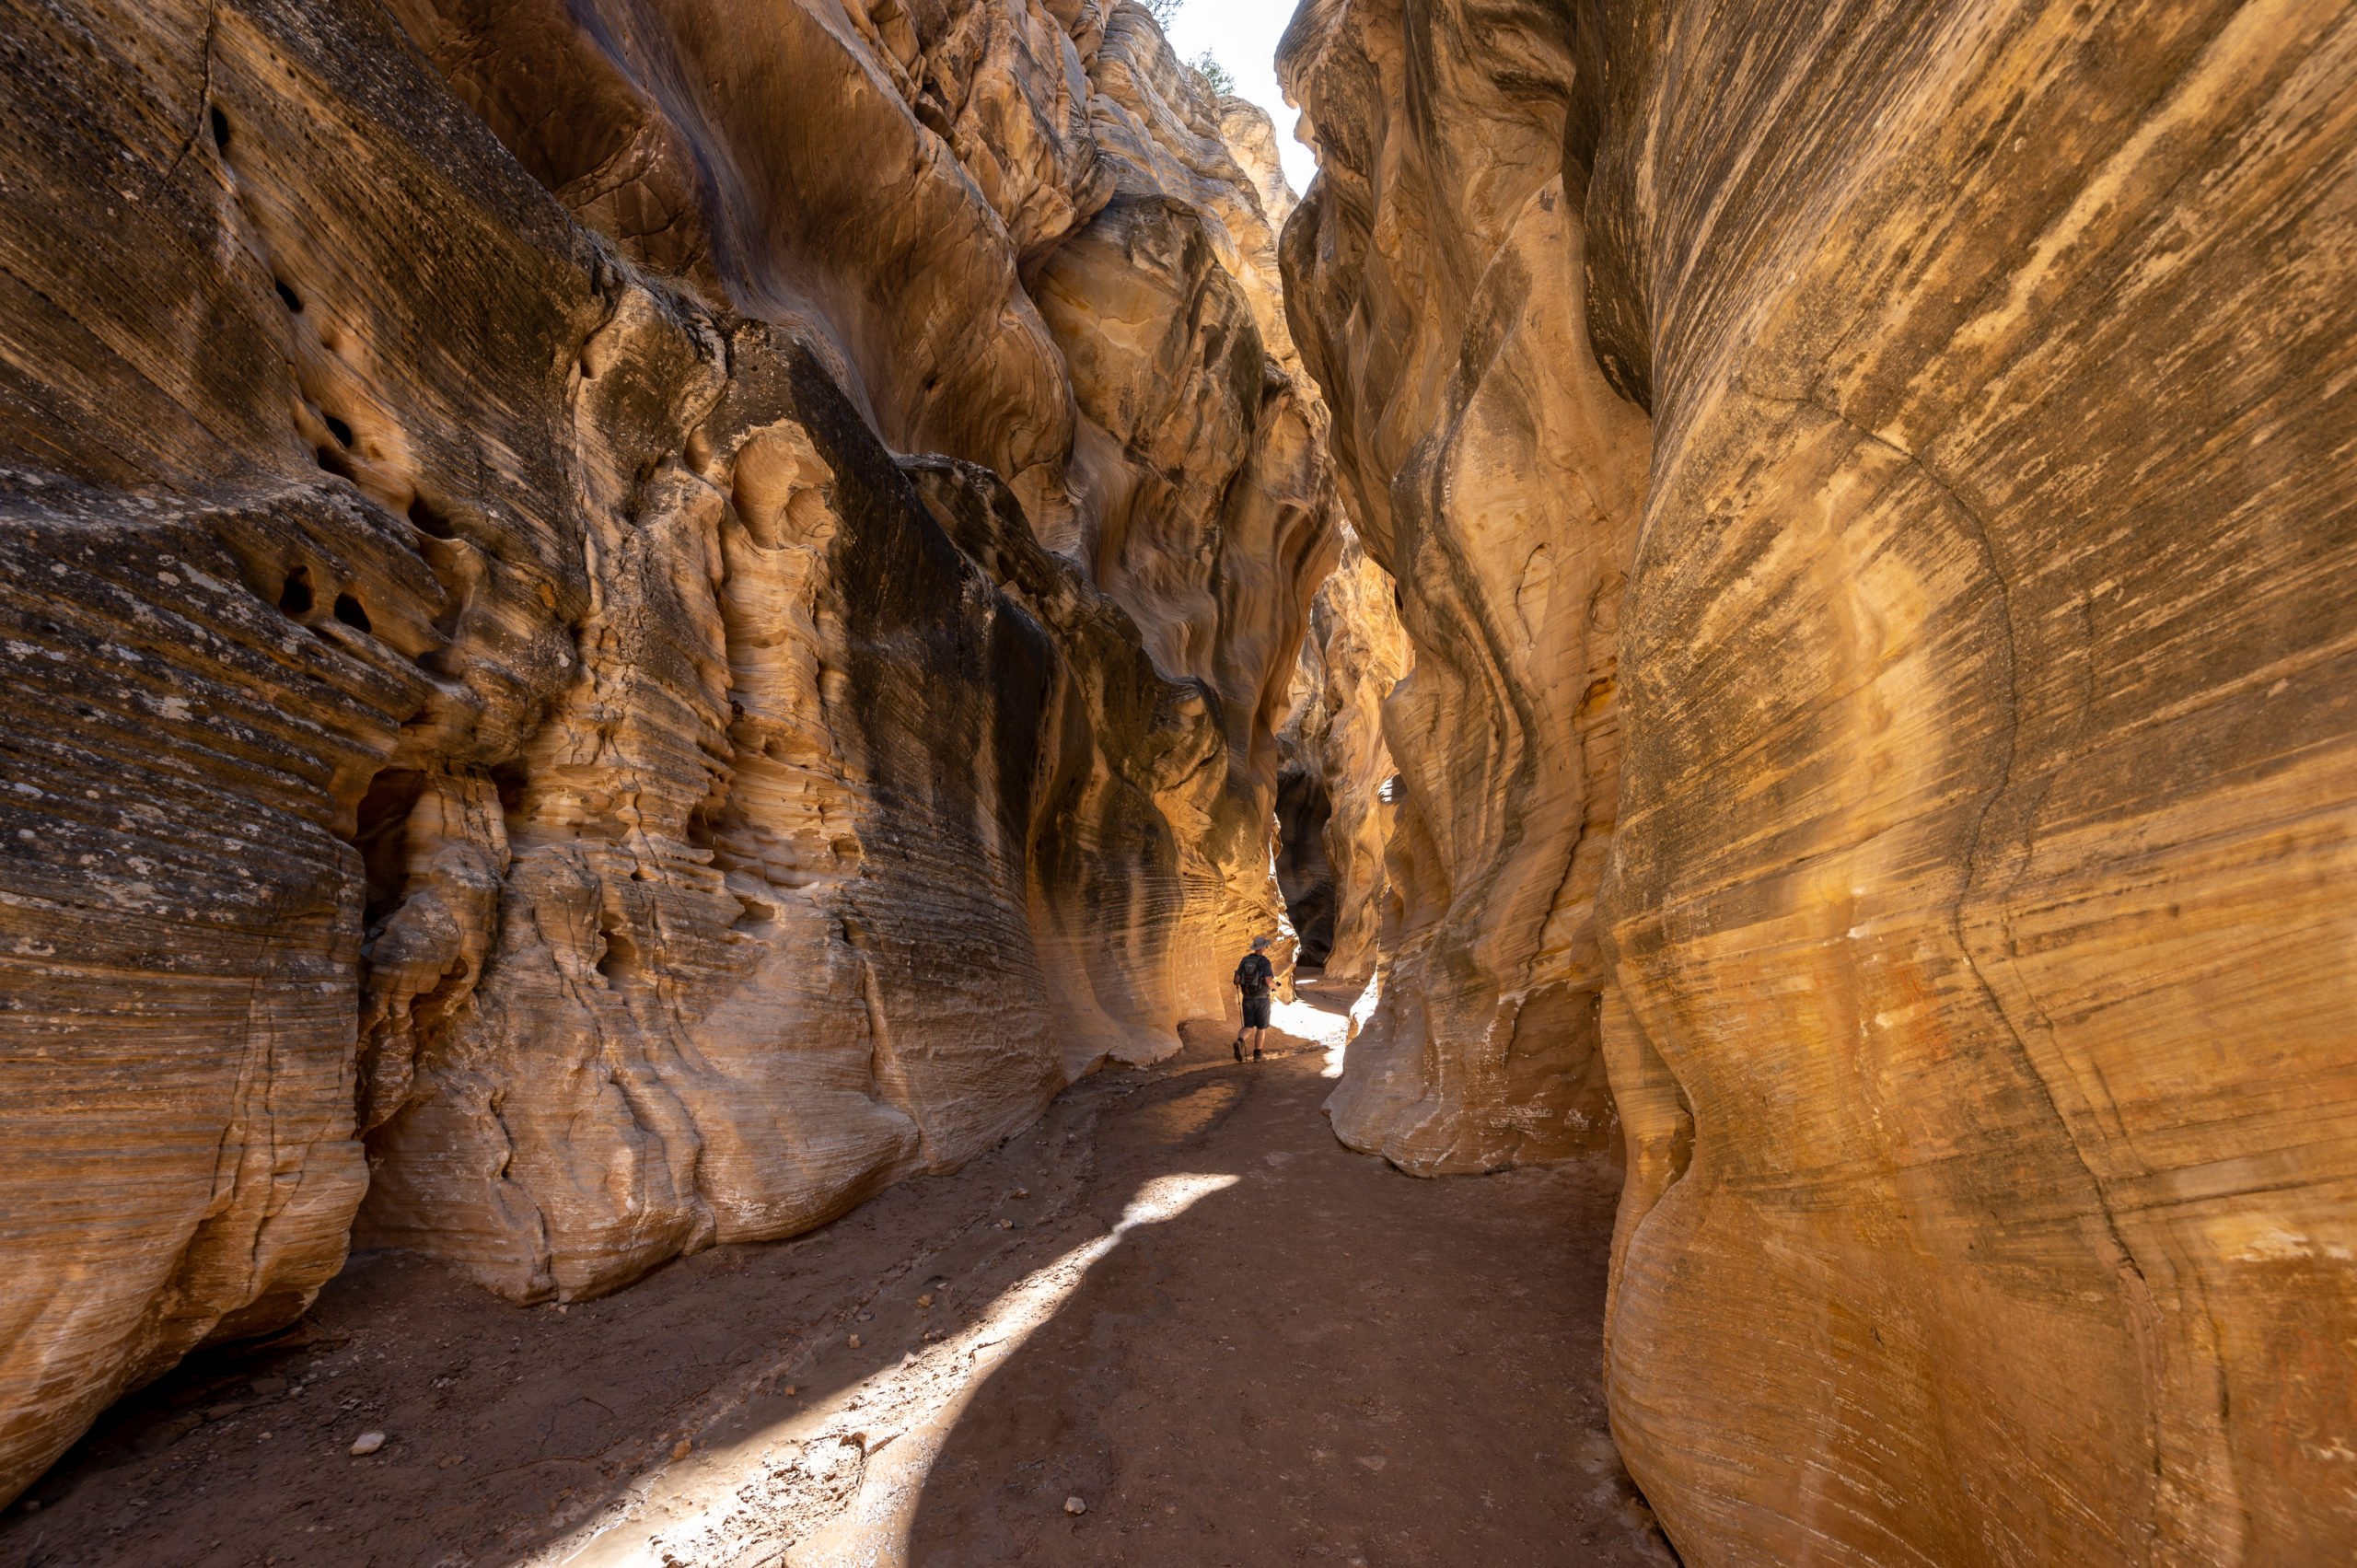
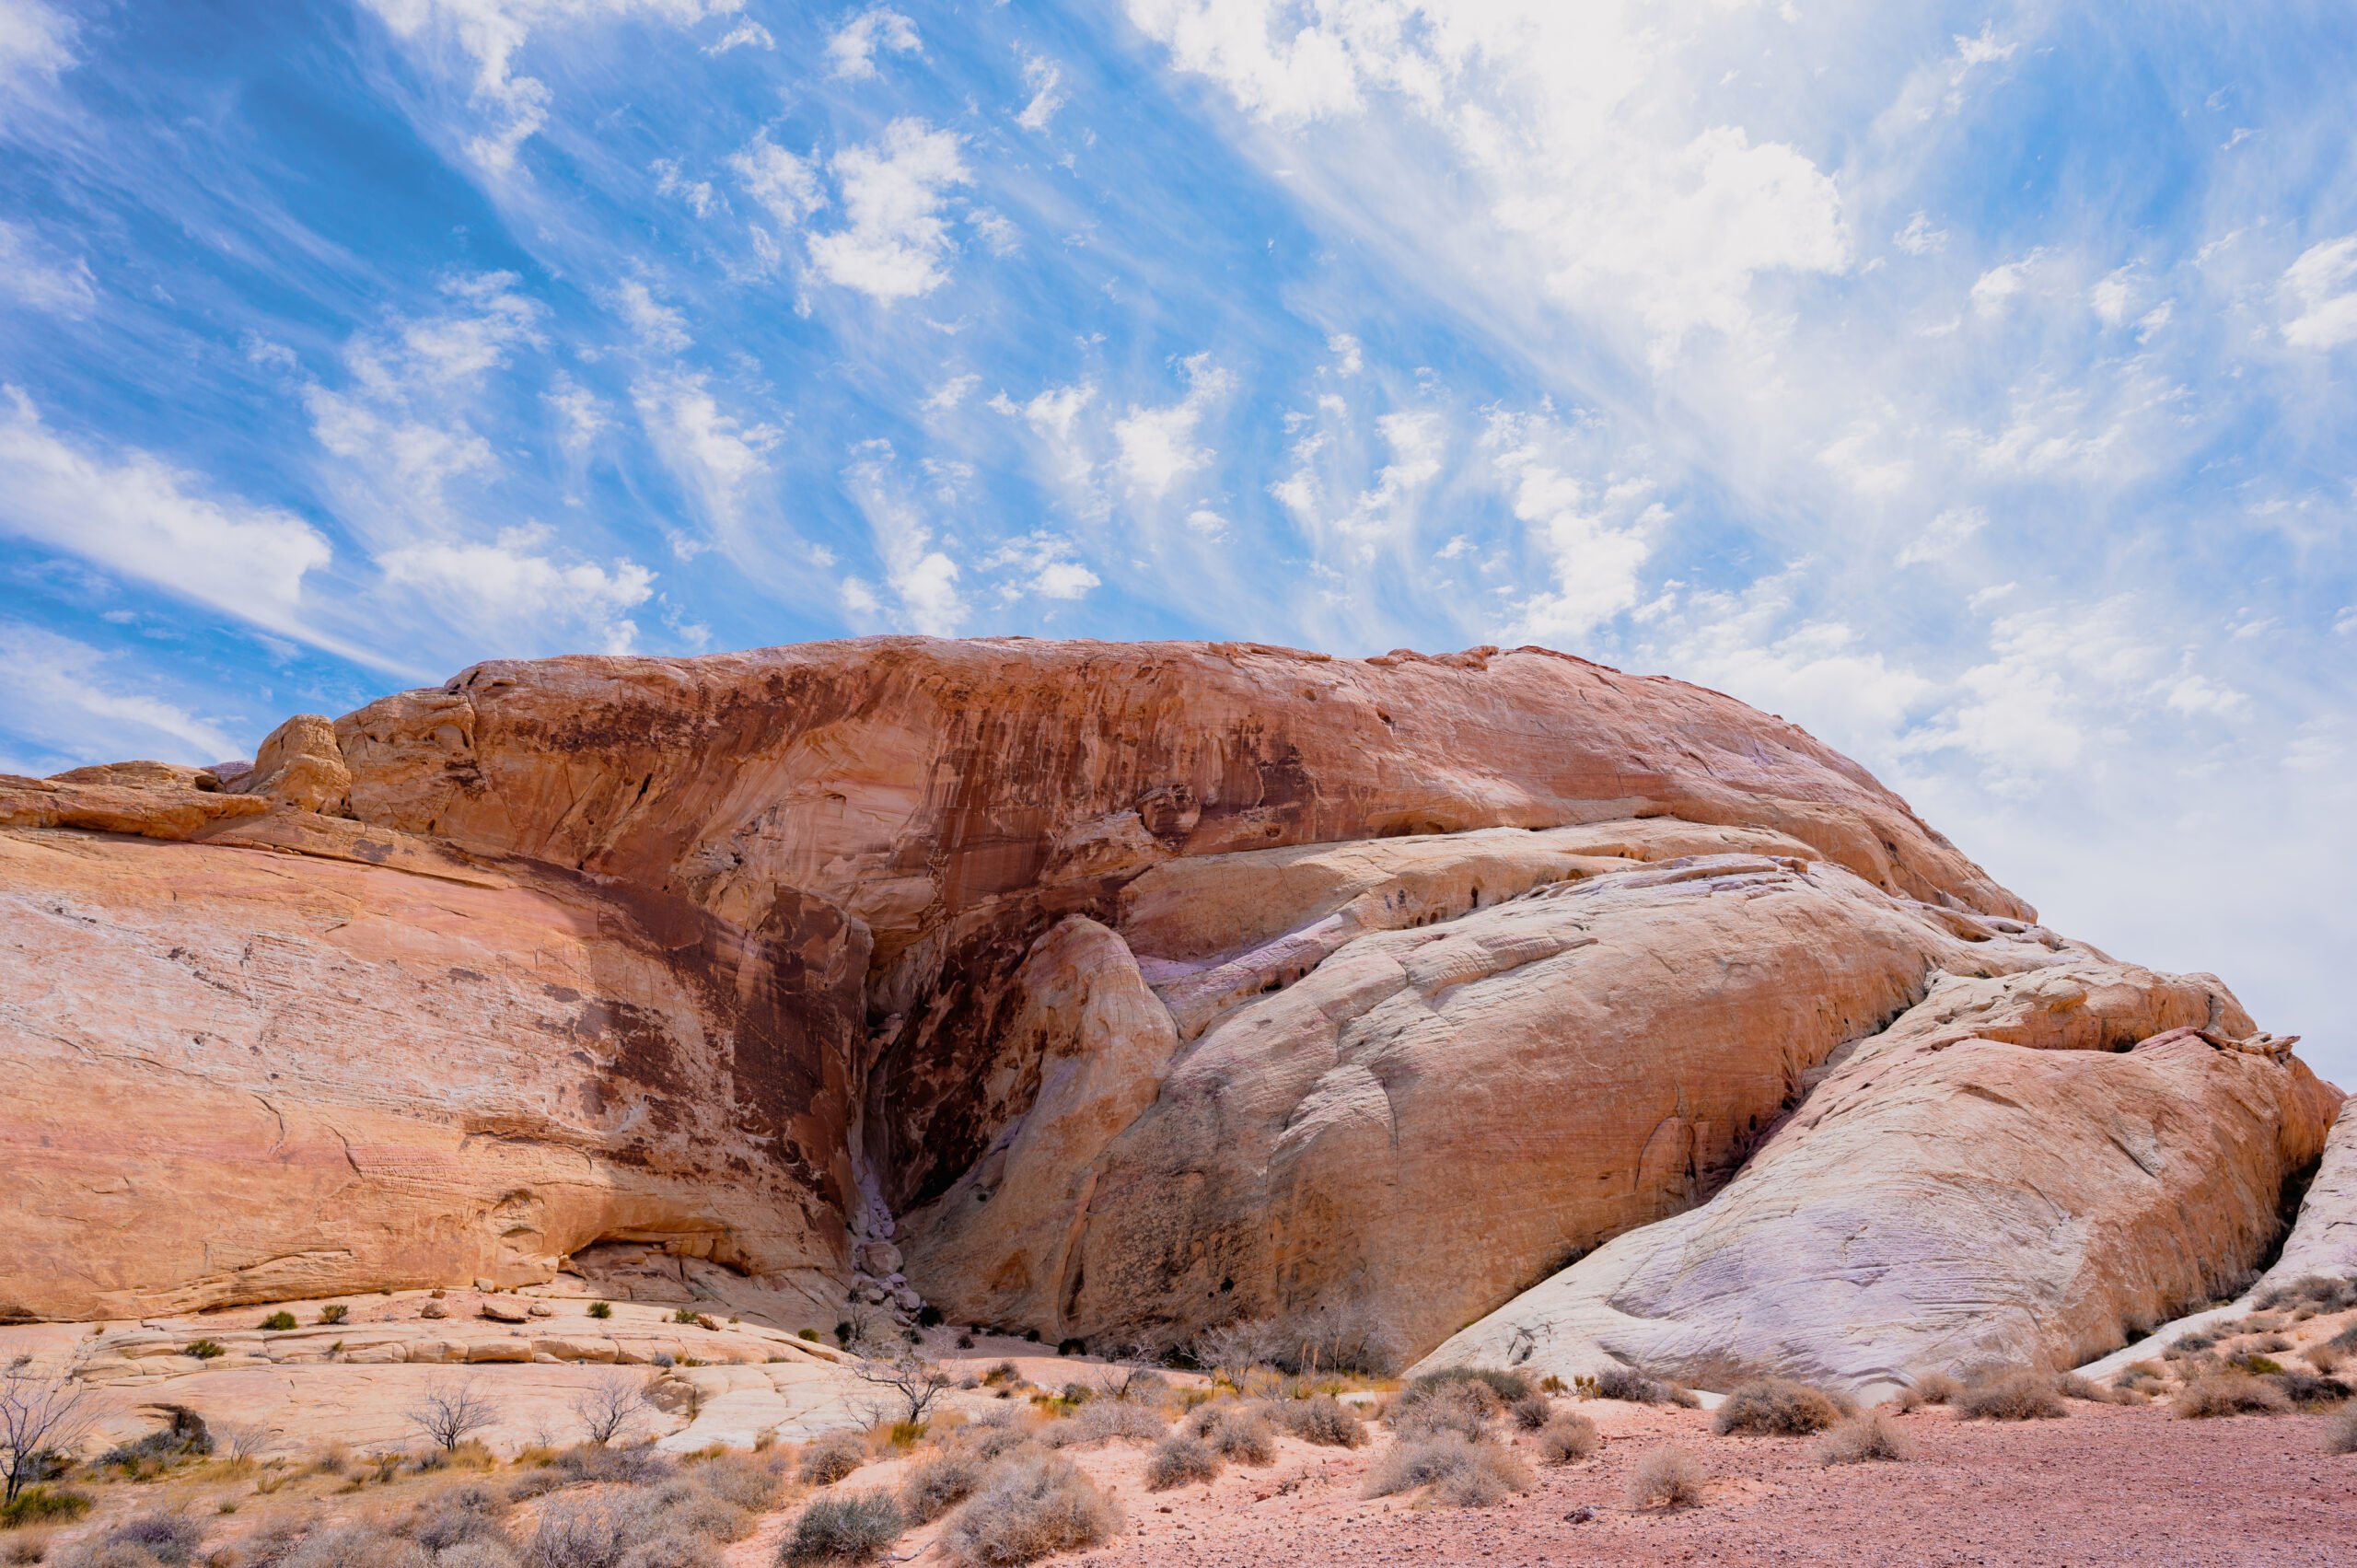
    White Domes – 1.25-mile loop

    After your hike to the Fire Wave, continue up Mouse’s Tank Road, and soon it turns into White Domes Road. You’ll follow the road all the way to the end, where you’ll find parking and a picnic area for the White Domes trail area. You may want to take a snack break or have a picnic here either before or after completing the White Domes loop trail.

    The return loop makes a gradual ascent back and around to the parking area. The steepest part of the hike is that initial descent. This hike is a beautiful one, don’t let the steep sandy descent stop you as the trail levels out at the bottom, and you get a nice cool slot canyon to hike through before popping back out onto the trail. This stop takes 2-3 hours.

    Picnic Stop

    You can either have your picnic lunch at the White Domes picnic area or hop back in the car for what I think is the best picnic spot in Valley of Fire. You’ll drive back down to the main road (near the Visitor Center). At the “T” intersection for the main road, make a left, then drive about a mile where you’ll come to the Seven Sisters picnic area.  This picnic area has good shade, large spaces, and BBQ grills too! Make sure to look for mountain sheep along your drive. 
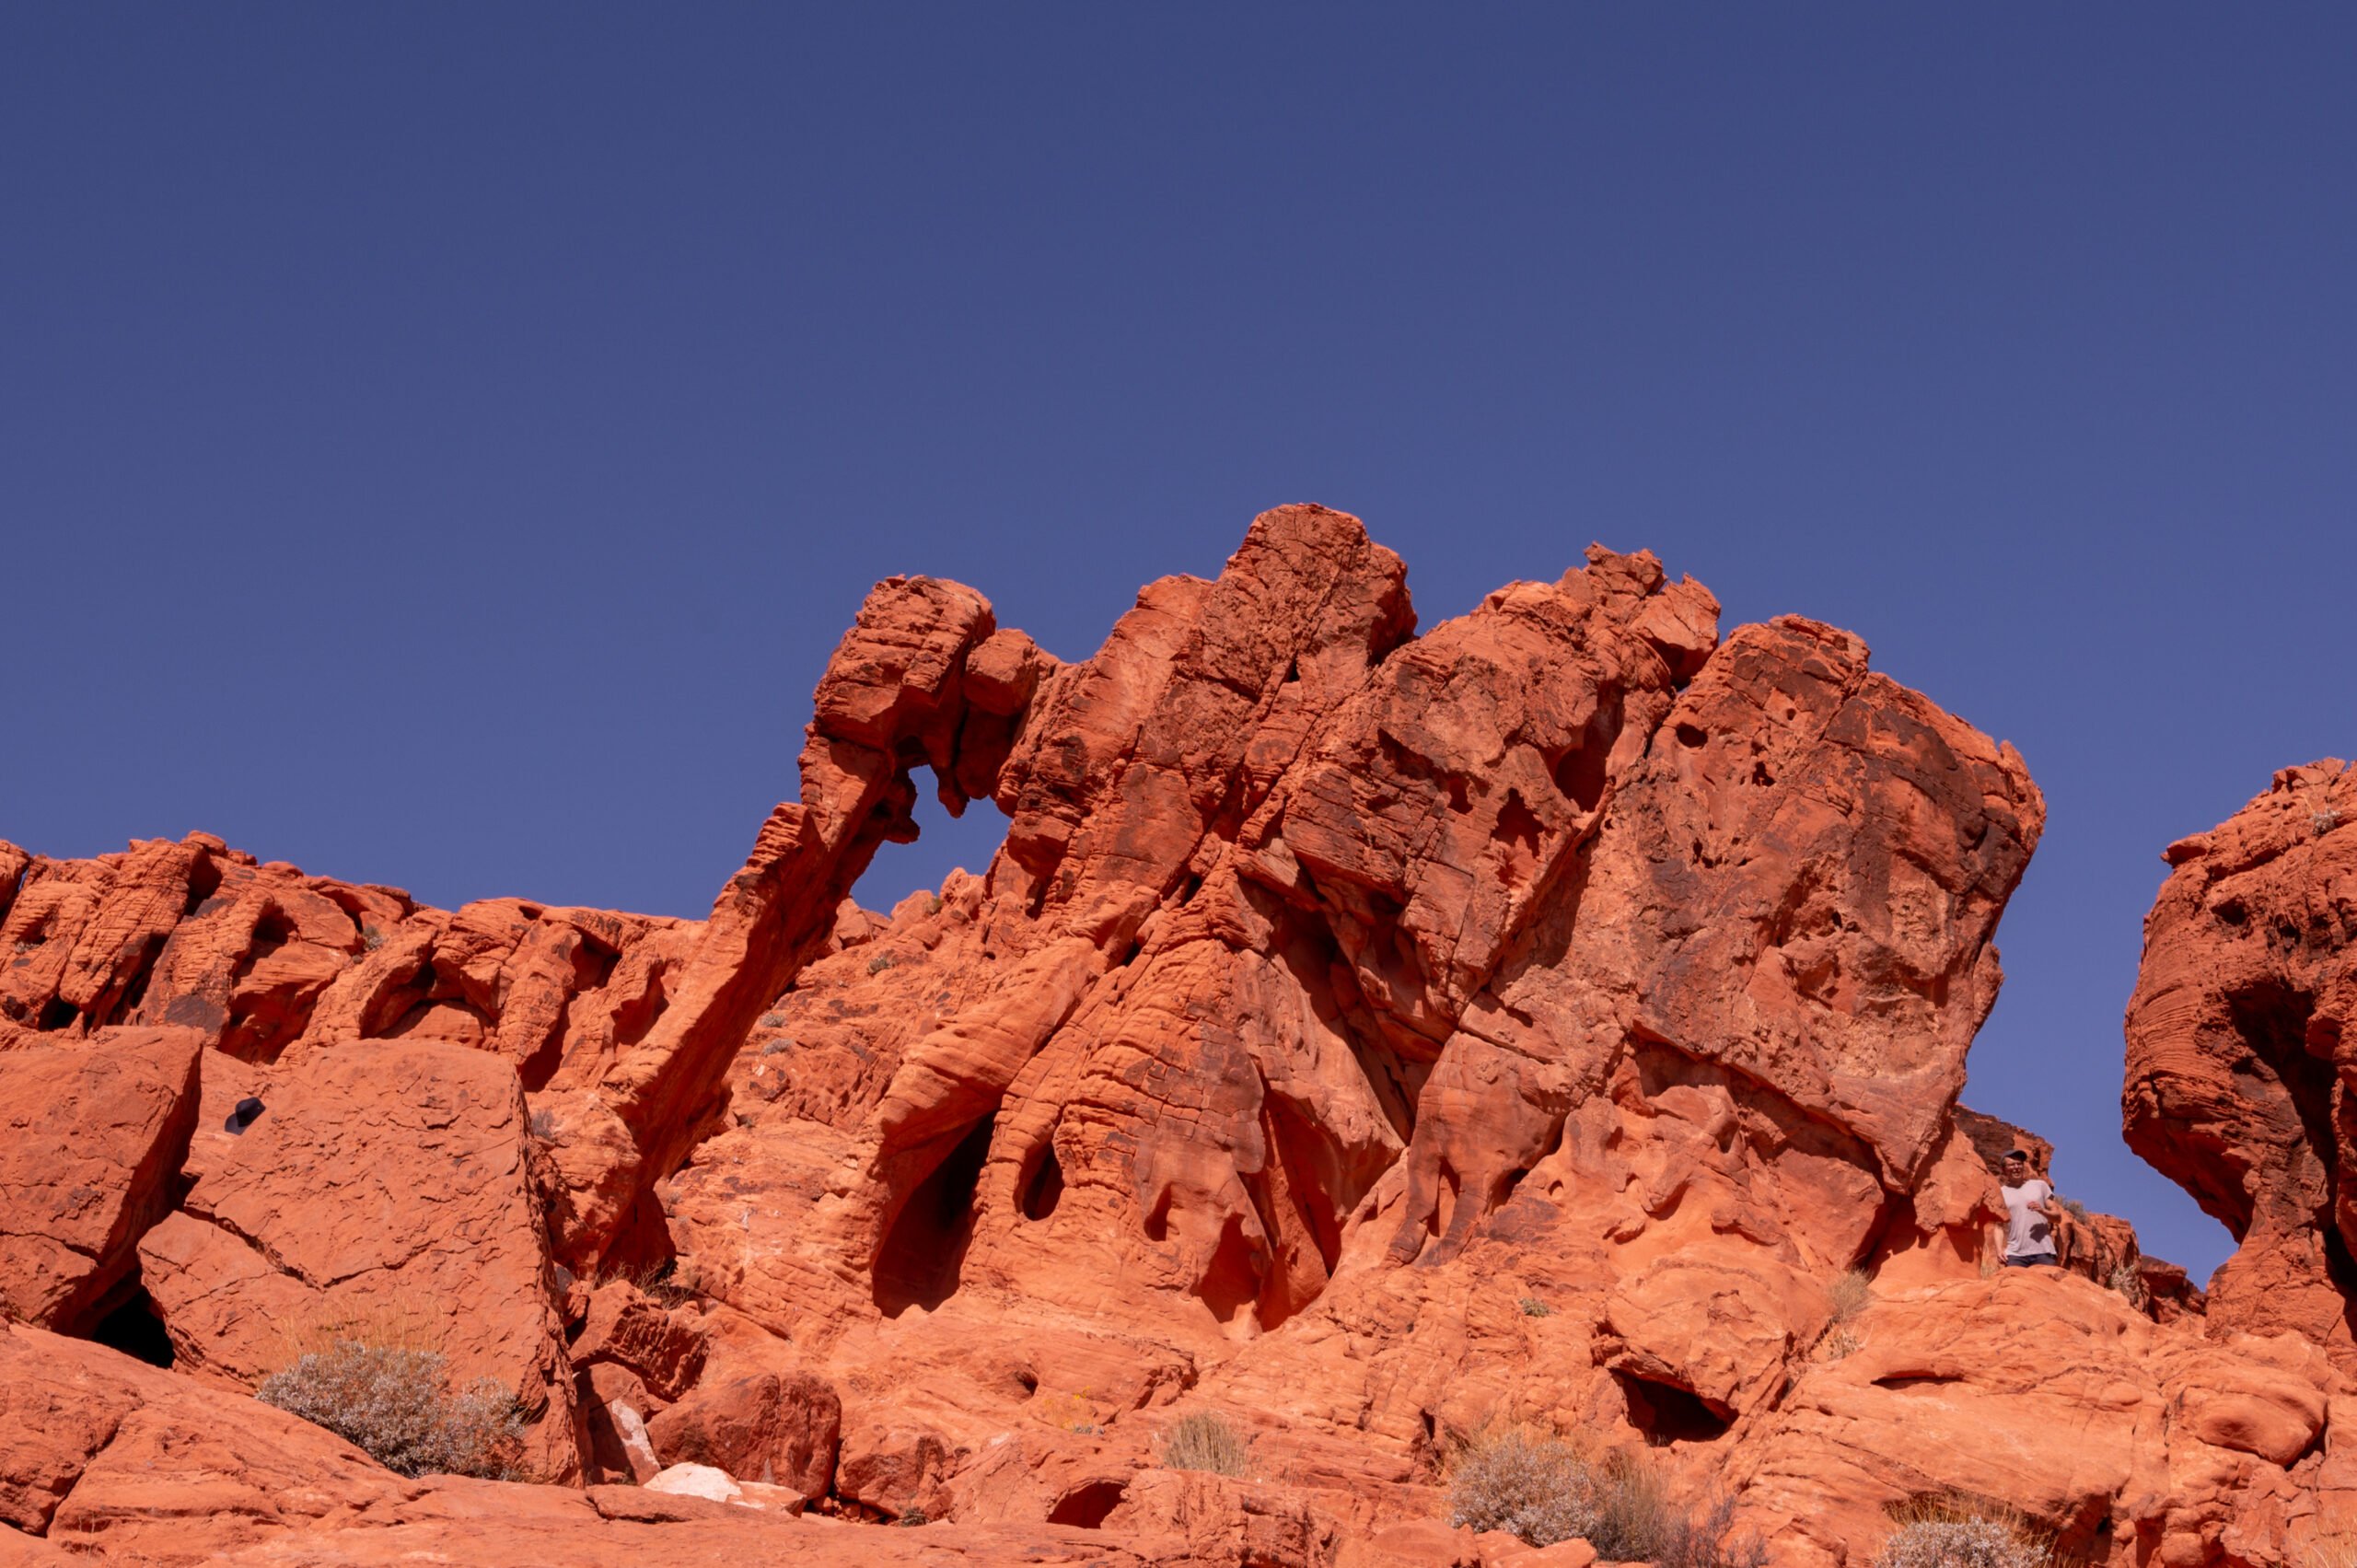
    Elephant Rock
    Elephant Rock

    Elephant Rock

    After you’ve had lunch, continue along the main road toward the park’s east entrance. You’ll see a parking area by the entrance station. Park here for the short walk back to Elephant Rock. It’s a 0.3-mile hike there and back from the parking area to Elephant Rock.  You’ll follow the trail that goes alongside the highway. There is also a longer 1.2-mile loop that takes you up and around Elephant Rock. Please do not climb on the rock itself.  It is fragile, and they want to preserve this as long as possible for future visitors to see.

    Atlatl Rock

    After visiting Elephant Rock, return the way you came, heading back toward the West Entrance. It’s about 5.5 miles from Elephant Rock to the Atlatl Rock Parking lot. From the road, you can see Atlatl Rock with its staircase rising above the desert.

     The petroglyphs at Atlatl Rock date back to almost 4,000 years and are so well preserved they are worth this short stop. If it’s busy, you may need to wait in line to go up the stairs to see the petroglyphs. 

    By this time, you will most likely be ready to head back to Las Vegas to get some dinner and enjoy a relaxing evening in the city and possibly an In-N-Out burger on the way back.

    With Extra Time

    If you have time or want to add to your one-day itinerary, then you might consider adding one of the following short hikes to your itinerary.

    Mouse’s Tank Trail, 0.75 miles. This is a sandy trail with no shade. It features more ancient petroglyphs.

    Rainbow Vista – 1-mile hike, also sandy and hot, leads to a viewpoint of the rocky terrain. I do not recommend doing this during the hottest part of the day. It’s not worth it.

    An optional 10-min stop on the way to the Fire Wave: The Pastel Canyon

    This is an optional quick stop you can add to your one-day itinerary on the way to the Fire Wave. It only takes about 10-minutes to walk to this short but beautiful pastel-colored canyon and back again.  There is no designated parking lot and only a small pullout on the right side of the road that fits 2-3 cars.  You begin hiking on the right, following the rocky wash to a very short canyon with beautiful striped rocks of varying hues of reds and pinks. 

    Please read my article on hiking to the Fire Wave for tips on visiting it from this trail. (5-10 minute stop at Pastel Canyon unless using this as an alternate route to the Fire Wave)


    Now to get that In-N-Out Burger…

  • Coleman 4-Person Pop-Up Tent Gear Review

    Imagine driving up to your campsite, getting out of your vehicle, and setting up your tent in less than a 1-minute.  You are now free to go about your day and enjoy your campsite and its surroundings.  Sounds too good to be true, right?  Well, actually, it’s totally possible with the Coleman 4-Person Pop-up Tent!  It’s so easy you can have your kids set it up and still be done in a minute!  Plus, it’s entertaining when you camp with a group and your tent is up in less than a minute, and you get to sit there watching them spend 10 minutes setting theirs up.  That’s worth the purchase of the tent all on its own!

    Okay, jokes aside, as with every purchase, there are pros and cons. I’ll discuss what led me to purchase this tent and what I like and don’t like about it.  If you’re in the market for a new tent, then continue reading to decide if the Coleman 4-Person Pop-up Tent is right for you.

    My History of Tent Purchases

    Over the years, I’ve gone through a few tents. I started with a cheap dome tent that was probably rated for 4 people but really fit two comfortably. Then I upgraded to a Wenger 4-person tent with shoe ports, little corner pockets, and a place to hang a lantern in the center.  It also had better airflow than my cheaper dome tent.

    Bigger Must Be Better

    One day I decided it might be nice to have a tent you could stand up in, perhaps even use cots in and sleep more than two people. So I purchased a large 6-person tent, and we began using it for our annual camping trips with the nieces and nephews. My hubby and I tried the tent for when it was just us, and although it is nice to be able to stand up in the tent and sleep on cots, the time it took to set it up coupled with the amount of time we actually spent inside the tent didn’t make it worth it for us. For a large tent, it’s easy enough to set up, and it works great when we have a large group. However, for the two of us, it just wasn’t the right fit.

    Bitten by the Backpacking Bug

    Soon though, I got the backpacking bug, and my hubby and I purchased an REI Passage 2 tent.  After backpacking the Northern Loop at Mount Rainier, we never did any serious backpacking after that; although there are still plans to do a portion of the PCT, they have yet to materialize.  Even so, we found that we loved our new REI Passage 2 tent.  It is easy to set up with only two poles. It takes about 5 minutes to have it up and ready to go. Because of this, we continued to use our backpacking tent for our regular camping needs for almost a decade.  It also works great when we’re off-roading on our motorcycles.

    Because we often camp with groups, it also allowed us to fit our tent and the larger group tents into one campsite as ours had such a small footprint.  Then this year, I decided it would be nice to have a little more space. Space to keep our bags with us in the tent and a larger area for sleeping.  However, I still wanted something quick and easy to set up. So as I began my research, I came across the Coleman 4-Person Pop-up Tent. 

    The Coleman 4-Person Pop-up Tent

    I started reading about the Coleman 4-Person Pop-up Tent, and to be honest pop-up tents make me think of something you bring to the beach.  It sounded a little too good to be true that I’d actually camp in one.

    However, the promise of an instantaneous setup lured me in.  Plus, at less than $80, it seemed like a risk I was willing to make. So I went ahead and ordered it for an upcoming camping trip with friends.  When it arrived, I was anxious to see it in action, so I opened it inside the house.  Sure enough, within about 10 seconds, the tent was up and ready to crawl into!

    It was a lot of fun when we went camping with our friends because not only were we set up in under a minute, but when it came time to take down the tent, it only took about 2-minutes, thus leaving us with plenty of time to give our good-natured friends some fun (albeit childish) “haha, look who’s done with their tent first” comments. It’s the little pleasures in life.

    Coleman 4-Person Pop-up Tent Dimensions

     According to Coleman, the tent dimensions are as follows:

    • 9 ft. 2 in. x 6 ft. 6 in.
    • 3 ft. 4 in. center height

    You can fit a queen size air mattress inside the tent.  They show four people sleeping in it width-wise.  I am a little under 5’9, and I can sleep width-wise. However, if you’re 6′ and above, your head and feet would be hitting the tent. That is unless you’re able to lie completely still while sleeping.  I don’t know anyone like that, though, so I recommend lying lengthwise.  That is how my hubby and I used it, and that gives you plenty of space plus lots of room for your gear with only two people.

    You could also sleep to “average-sized” adults and two kids comfortably.  I think four adults under 6 ft could, of course, make it work, but it’ll be cozy! Watch my YouTube video for more information on the size and shape.

    Pros and Cons of the Coleman 4-Person Pop-Up Tent

    Coleman 4-Person Pop-up Tent

    After camping in the Coleman 4-Person Pop-up Tent, these are some of the pros and cons I’ve discovered.

    Easy Set-up

    This is by far the biggest “pro” for purchasing a pop-up tent. It takes less than 30-seconds to unzip the tent case, remove the straps, and voila! The tent is ready to go!

    Fast Storage

    Initially, putting away a pop-up tent can be challenging for most people. I know it was for me. You feel like you’re wrestling some unwieldy creature that keeps trying to get away from you. However, with practice putting your pop-up tent away should only take 1-2 minutes to do.

    The Downside

    Well, putting it away, as I just mentioned, can be a challenge. However, probably the main downside for some would be the shape of the pop-up tent. Most tents come in a long round shape that makes them good for backpacking or shoving into tight spaces in the back of the car. The Coleman 4-Person Pop-up Tent packs into a large disc shape. This makes them pretty much a no-go for backpacking. There is a smaller Coleman 2-Person Pop-up Tent option that might work for this or cycling, but again, I think it would be hard to pack due to the disc shape. 

    Packing the Car

    It also means you need to rethink how you pack your car.  Normally I might put the tent in first with some of my longer items like camping chairs. However, due to its disc shape, I ended up putting it in last and laying it on top of my other camping gear.  Also, if you have a small trunk space, you might have to carry it behind your front seats as it’s possible the disk might not fit in your trunk.  You’ll want to measure this ahead of time to make sure.

    Summer to Early Fall: Seasonal Use

    This is not a 4-season tent, probably not even a 3-season tent, and although I have yet to try it in the rain, I doubt it would do well in heavy rain.  However, for a summer camping experience, it works great.  

    We first camped in our Coleman 4-Person Pop-up Tent in late May on the Olympic Coast. We were sleeping on a thin backpacking-style air mattress and a blanket underneath for a layer between us and the cold ground. It was cold and damp in the morning and evenings, and the sides of the tent felt a little wet from dew.  We, however, stayed dry and warm in our sleeping bags. 

    Tent Footprint

    The Coleman 4-Person Pop-up Tent does not come with its own footprint. They also don’t appear to sell one specifically made for it.  I purchased a cheap tarp that was roughly the same dimensions as the tent floor. Make sure you don’t purchase one that is too big. Otherwise, it will collect water.  I learned that lesson early on as a kid.

    Coleman 4-Person Pop-up Tent Disc

    Review Summary for the Coleman 4-Person Pop-Up Tent

    So, to summarize this review. I really enjoy the simplicity of the Coleman 4-Person Pop-up Tent. It makes car camping so easy! If you’re looking for a tent for summer camping and maybe late spring and early fall, then the Coleman 4-Person Pop-Up Tent is worth considering. 

    You can purchase the tent by click on this link or the photo below.

    We will continue to use ours for weekend car camping trips when we want a little more space than our tiny backpacking tent. I think we’ll also bring it for road trips when we’re only camping for a night or two. It will make set-up and takedown much quicker when we need to get back on the road.

    I recommend spraying the tent down with Scotch Guard or some other type of waterproofing spray.  I always do this with outdoor gear and wouldn’t even consider camping in the rain in this tent without it. 

    All in all, I am happy with my purchase. If you have any questions regarding this tent or the camping gear I use, please let me know. Also, if you’ve used this tent or the 2-person version, I’d love to hear what you think about it.

    Happy Camping!

    Note: This post contains affiliate links. When you make a purchase using one of these affiliate links, we get paid a small commission at no extra cost to you.

  • Coffee Memories: Road Trips and Coffee

    My husband was reading my post “Bucket Lists & Good Friends,” and he paused on the picture of my friend and me in front of our tent and said, “I like this photo!” Then he says, “Hey, your shirt says coffee on it!” I said: “What? That’s funny! That was my nightshirt.” And then we both started laughing and talking about my obsession with coffee and how it’s been going on a lot longer than we both realized.

    After he pointed out my coffee shirt, it triggered a memory from that road trip that I hadn’t thought about in a long time. This memory only further confirmed my love of coffee. As if there was any doubt.

    U.S.A. Road Trip Plans: A Short Overview

    Recently graduated from high school, my friend and I began planning a road trip around the U.S. We made a huge list of all the places we’d like to see, and we used books to do it!  I know, how archaic! This was long before Google and still a few years away from Mapquest (does anyone still use Mapquest?) 

    We bought a road atlas and mapped out all the stops we’d make along our journey.  Our trip took a life of its own, and soon we had a route mapped out that took us around the entire country!  We decided we could save up to take a little over 2 months off to make this happen. Thus the adventure began.

    Road Trip Car Coffee Maker – Important Decisions

    Before leaving on our road trip, I purchased a coffee maker that allowed you to brew your coffee in the car using the car’s adapter/cigarette lighter.  Hey, I was going on a 2-month road trip, on a budget, with a friend that doesn’t drink coffee! (I know it’s a sore point in our relationship, but I try to overlook it.) Going without coffee was not an option, and with my limited budget, I didn’t think I could afford to purchase one every day.  Thus my purchase of a portable coffee maker.  It looked a lot like this one. Now of course I would have brought my Aeropress but then I would have missed out on creating this “fun” memory.

    Starting Out

    Our route had us working our way through Washington and along the Oregon coast before continuing down along the California coastline. In a matter of a couple of days, we were in California. This meant a lot of driving and very little sleep.  We ended up getting a hotel in Crescent City after sleeping in the car the night before and driving on very little sleep. This hotel was also our first encounter with a cockroach.  Needless to say, I don’t think I slept very well here either.

    So after leaving Crescent City, we drove for probably less than an hour before discovering beachside camping near the small town of Orick, California. Warm sunshine and waves beckoned us to stop and enjoy it!

    We spontaneously pulled over and decided to camp here.  The stretch of beach used to be open to camping. There weren’t any assigned spots. You just found a parking spot, paid a few dollars, and pitched your tent on the beach.  It was great! We spent the rest of the day relaxing in the sun, spending time walking along the water, and listening to the waves.

    Funnily enough, this was also the only time we used our tent during our 2-month road trip.  The rest of the time, we slept in our car, at friends or families scattered along our route, or at the occasional motel.  

    Beach camping in California
    The photo that triggered this memory. And the tent that was used only once.

    Beach Camping & Coffee

    The next morning, I awoke to the sound of the ocean. We discovered the night before that we lacked fire-making supplies (and skills), so I knew boiling water over a fire to make coffee was out of the question. Good thing I have a portable coffee maker sitting in the car, all ready to brew coffee! What better way to spend the morning than sipping coffee and staring out watching the waves roll in.  

    I trudged through the sand and found my coffee supplies, I filled the maker with water, and soon I had a delicious pot of coffee brewing–no fire required!  It was wonderful. I walked back to the beach and enjoyed my coffee while waving to our camping neighbors, who were making their cowboy coffee over the fire.  Boy, did I feel superior with my high-tech car coffee!  

    Soon, it was time to pack up and hit the road.  So we put our tent away, packed up the car, and prepared to leave.  The funny thing is, when I brewed my coffee earlier, well, I didn’t turn the car on to do it. Whoops! Needless to say, our car battery was dead.  

    I can tell you this, if I had coffee before I went to make coffee that morning, my brain would not have been so fuzzy, and I would have thought to turn the car on.  So I blame this on not having enough coffee, not on the actual making of said coffee.

    Some campers who were parked nearby gave our car a jumpstart, it was probably our camping neighbors who made their coffee over the fire. Now, who’s the superior one! Okay, I don’t remember who it was exactly, but I imagine they sat there quietly smiling and enjoying their coffee. Sometimes the simple way is the best way.

    What Ever Happened to my Car Coffee Maker?

    Remembering this gave me a good laugh. Then, I was also a little sad, as I remembered that my coffee maker mysteriously disappeared after that trip. I never saw it again.  And my friend Moe says she doesn’t know what happened to it, but I have my suspicions… I’ve come a long way since this trip and now have a variety of ways that I make coffee while camping, and I have never run my car battery dead making coffee again.

    latte art in a cup

    Coffee-Infused Memories

    This is just one of my many memories that involve coffee. Others include sipping coffee on the lanai in Maui or at a cafe in Prague.  Even better are the memories with loved ones no longer here, like coffee with my Grandpa.  He liked it, black, very black. I would sneak milk into mine when he wasn’t looking.  I tried to be tough and drink his sludge, er coffee, but it was a little too strong for my taste. It didn’t really matter, though. I was with my Grandpa sharing our love of coffee as he told me stories of his youth. Coffee, much like food, brings people together.   

    I like to think that I’m creating a sensory memory by combining moments with friends, family, and life while drinking coffee.  That down the road, I’ll smell a certain blend and will be transported to a beautiful moment in time. Yes, I admit, I enjoy drinking coffee because it’s delicious, but the added benefit of creating memories and special moments is pretty great too!

     
    What are some of your favorite memories that involve coffee? I’d love to hear about them!
     
    Off to grab another cup!
     
    Note: This post contains affiliate links. When you make a purchase using one of these affiliate links, we get paid a small commission at no extra cost to you.
  • Exploring Sunrise: Mount Rainier’s Northeast Corner

    Sunrise sits at 6,400 ft. elevation, making it the highest point accessible by car in Mount Rainier National Park. Second only to Paradise as the most visited area of the park. There is a good reason people come here. It provides stunning views of Mount Rainier, hiking trails for all abilities, a huge meadow full of wildflowers, and a perfect place to watch (you guessed it) the sunrise!  Whether you spend the day or camp in this northeast corner of Mount Rainier National Park, you will leave full of wonder and beauty.

    Getting Here

    Mount Rainier has four main entrance stations from which to enter this large National Park. Sunrise is accessed from the northeast White River Entrance Station. Get directions for all the entrances to Mount Rainier National Park here.

    sunrise at Mt Rainier

    When to Visit Sunrise

    Due to its high elevation, Sunrise gives visitors a limited window of time to enjoy its beauty. Typically you can access it from late June through the first part of October. The Sunrise Lodge and Visitor Center is only open from July to early September.

    Try to come as early in the day as possible to avoid the crowds. Even on a weekday, the parking lot can fill up around noon.  The weekends are especially busy, so get an early start to avoid long lines at the park entrance and to ensure a parking spot.

    Things to Do at Sunrise

    Hiking

    There are so many hiking options that leaving from Sunrise. Here are a few favorite day hikes I recommend.

    • Frozen Lake Loop – 3.0 mi (Great place to spot mountain goats.)
    • Fremont Lookout – 5.6 mi (Old fire lookout with spectacular views.)
    • Shadow Lake Loop – 3.0  (An easy hike starting on the south side of the parking lot — opposite the Sunrise Lodge.)
    • Dege Peak – 4.0 mi (Hike to over 7,000 feet with 360-degree views!)
    • Sunrise Nature Trail Loop – 1.5 mi (Short hike that’s easy enough for younger kids too.)

    A few easy overnight backpacking options:

    Note that these backpacking options require a wilderness permit.  The good news is you can now reserve your spot and get your wilderness permit at Recreation.gov. This makes planning a lot easier!

    • Sunrise Camp near Shadow Lake (This is an easy overnight option for beginners and kids. It’s only 1.3 miles from the Sunrise Visitor Center. No potable water, but you can filter water from Shadow Lake or pack it in. It has vault toilets.)
    • Berkley Park (It’s only a 4.5-mile hike to Berkley Park, you’ll need to get a permit to camp here, there are bear poles for hanging your packs and a creek to filter water from (no potable water). There is also a primitive outdoor toilet.  Make sure to take time to hike up to Grand Park from here and admire its beauty and perhaps spot a bear or two.
    Yakima Park
    Yakima Park as seen from the main trail. Sunrise Lodge is in the distance.

    Watch the Sunrise

    I know it seems a little cliche to watch the sunrise at Sunrise, but there’s a reason they name these areas what they do. Here you’ll see the morning light as it first touches the top of Mount Rainier. It’s like a spotlight shining down and illuminating its snowcapped peak.  You can also watch from Sunrise Point just a short drive below Sunrise and enjoy the deeper colors that develop over the Cascade range.  If you’re feeling ambitious, consider hiking to Dege Peak for sunrise and enjoying the unobstructed 360-degree views.  Plus, you’ll get to stare at Mount Rainier for the entire hike back!

    Look for Wildflowers

    Walk the trails along Yakima Park (meadows in front of the lodge and visitor center). You don’t have to walk very far to enjoy the variety of wildflowers that grow here. Take a right and follow the wide path near the main restrooms, and in only about 5-minutes of walking, you’ll soon have the meadow on both sides with sweeping views of Yakima Park and the Sunrise Day Lodge.

    Look for Wildlife 

    It used to be fairly common to see cinnamon-colored black bears roaming the meadows at Yakima Park. I haven’t seen one in years, but if you hike up to the ridge either via Sourdough Ridge, Dege Peak, or Frozen Lake, you’re almost guaranteed to see some mountain goats and possibly a marmot or two.  Listen for their chatter as they tell other marmots of your approach.

    Visit the Sunrise Day Lodge

    Make sure to go inside the Sunrise Day Lodge and look at gifts and souvenirs. You can also purchase something to eat and chat with a Park Ranger.  If the Sunrise Visitor Center is open, you can learn more about Mount Rainier and the Sunrise area. The Sunrise Lodge is only open from July to early September. 

    Sunrise Day Lodge
    The Sunrise Day Lodge.

    Enjoy Having a Picnic With a View

    The Sunrise Picnic Area is a gorgeous place to enjoy a meal with your family. My family once celebrated my niece’s birthday here, and it was such a fun way to create memories together.  The picnic area at Sunrise also sports incredible views of Mount Rainier.  There are lots of picnic tables to choose from! Head past the Sunrise Day Lodge and make a right in front of the restrooms, then follow the wide path as it curves left, soon you’ll see a small trail on the right that leads to the picnic area.  Follow the labyrinth of small trails for more picnic options to choose from.

    Camping Near Sunrise

    Visiting Sunrise at Mount Rainier is a perfect way to spend a day, but I highly recommend you spend a night or two camping here for the full experience. The White River Campground, only a 25-minute drive away, is the closest campground to Sunrise.  It makes a great base for exploring the northeast corner of Mount Rainier National Park. 

    You can even hike to Sunrise from White River Campground. This takes about 3 hours roundtrip to do, or if you’re traveling in a group, you could always have someone drop hikers off at Sunrise and then hike back down to White River.  This is a fun idea if you’re camping with a family.

    Other Hikes Near Sunrise

    • Naches Peak Loop Trail (Gorgeous loop hike that takes you past alpine lakes, meadows, and forests.)
    • Tipsoo Lake Loop (Easy, mostly flat 0.5 mile loop around Tipsoo Lake, good for reflection photos and views of Mount Rainier.)
    • Emmons Moraine Glacier. (See my article on camping at White River Campground for more information on this hike.
    Mount Rainier at Sunrise

    Mount Rainier Webcams

    Perhaps you’re unable to make the trip up to Mount Rainier right now, or maybe you want to take a peek to see whether or not the mountain is out.  Whatever the case may be, Mount Rainier National Park has several webcams set up in the different areas of the park that allow you to see what’s happening on the mountain. 

    I personally love looking up at Camp Muir and Camp Schurman and seeing the tents for those making the trek to the summit.  It’s such an adventure they are embarking on and one I’ve secretly thought about doing.  Perhaps, you have to. Well, these webcams can give you a sneak peek into the mountaineering experience.

    Mount Rainier is such a beautiful place. It holds a special place in our hearts who live near it, and I believe everyone who visits will leave feeling a connection with its beauty and grandeur.

    So much mountain to explore, so little time!

  • Hike to Mount Rainier’s Dege Peak For 360° Views

    If you want a hike with 360-degree views of Mount Rainier, Mount Adams, Mount Baker, and the North Cascades, but with minimal effort, then consider hiking to Dege Peak. 

    Dege Peak is one of the less crowded trails from the Sunrise Visitor Center at Mount Rainier.  Most of the people I saw were headed toward the Burroughs Mountain or Frozen Lake trails. Once I passed the turn-off for the Sourdough Ridge Nature Trail,  I only saw about 10 people on my way to and from Dege Peak.  On a clear day, you have wonderful views, and along the way, you might even be fortunate enough to spot mountain goats, marmots, elk, or even bears!

    Getting Here: Which Mt Rainier Entrance to Use

    Mount Rainier has four main entrance stations from which to enter this large National Park. For this hike, you’ll enter the east side of the park using the northeast White River Entrance Station. Get directions for all the entrances to Mount Rainier National Park here.

    Two Ways to Access the Dege Peak Trailhead

    Sunrise Point

    You can begin this hike from the Sunrise Point parking area or Sunrise Visitor Center. If you start from Sunrise Point, it is 1.0 mile shorter round-trip (3.0 vs. 4.0 miles) than starting from the Sunrise Lodge parking lot, but there are no restroom facilities, and you have around an 800 elevation gain vs. 600 from Sunrise.

    Getting to the Trailhead:  Park at Sunrise Point parking lot.  From the west end of the parking lot, look for trail signs for the Sourdough Ridge Trail.  You’ll start your hike to Dege Peak here, and at about 1 mile in, you’ll come to the trail junction for Sunrise and Dege Peak. Make a right here. It’s just another .3 miles from the junction to Dege Peak summit.

    Sunrise Lodge and Visitor Center

    I prefer to start the hike to Dege Peak from the main Sunrise parking lot. There are restroom facilities here (there are none at Sunrise Point). Plus, with the Sunrise Lodge, there’s the ability to purchase a snack or drink before/after your hike.  You can also shop for souvenirs to remember your visit to Mount Rainier or buy gifts to take home. If this is your first visit to Mount Rainier, you’ll definitely want to spend some time at Sunrise exploring the meadow area and visiting the Sunrise Lodge and Visitor Center.

    Getting to the Dege Peak Trailhead: Follow the broad path next to the bathrooms (you walk past the Sunrise Lodge, and you’ll see the path on your right). From there, you hike up the dirt path, and soon you come to a large sign with a map of the Sunrise area trails. Follow the trail on the right side of the signs as it climbs up, and soon you come to a “Y” in the trail. Go right (away from Mount Rainier) for Dege Peak.

    About Dege Peak Trail – Starting from Sunrise Lodge

    Trail Length: ~ 4.0 miles (from Sunrise Lodge)

    Elevation Gain: ~ 606 feet

    Approximate Hiking Time: 2 hours (round trip)

    Trail Difficulty Rating: Easy to Moderate
    Overall I would rate this hike as easy. Even kids should be able to do this hike with minimal difficulty. However, I give it an easy to moderate rating given its exposure to the sun.  I hiked this on a hot summer day, and there is almost no shade for the entire hike.  In the summer, the heat combined with the elevation gain nudges this hike into the moderate range.

    Features: 360-degree views, stunning views of Mount Rainier, wildflowers, wildlife, lake views, and multiple glacier views

    Entrance Fee: There is a $30 single-vehicle entry fee good for 7-day consecutive use. 

    Restrooms: There are restrooms just past the Sunrise Day Lodge and snacks and drinks at the Lodge. Potable Water just outside the Sunrise Lodge entrance.

    How to Pronounce Dege

    Dege Peak was named after James Henry Dege, a notable businessman from Tacoma, Washington. During my visit here, I heard a variety of pronunciations. The two most common pronunciations were “deh-gay” or “day-gay.” The Park Ranger at the Sunrise Lodge pronounced it like “day-gay,” so perhaps that’s the correct one.

    What to Bring on the Hike

    • Water (I only brought 16 ounces and wished I had 32, so bring plenty, especially on a hot day.)
    • Bug Spray (The bugs were pretty bad, so make sure to apply before you hike and possibly during too.)
    • Hiking Boots (I hiked in running shoes, but the rocky areas made this a little uncomfortable for my feet, plus hiking boots are good for ankle support.)
    • Trekking Poles (I didn’t use these, but they would be helpful in the rocky areas and last 200 yards or so to the summit.)
    • Sunscreen (This hike is really exposed to the sun.)
    • Sunglasses (Sunscreen for the eyes.)
    • Snacks (Or possibly a picnic lunch for the summit.)
    • Camera (You’ll definitely want a photo or two!)

    Important to Know: Sunrise Parking lot is at 6,400 ft elevation and Dege Peak Summit is at 7,006. If you are not used to being at higher elevations you might get a little dizzy. Make sure to hydrate and snack during your hike to help avoid any elevation sickness symptoms.

    Hiking to Dege Peak

    I drove up to Mount Rainier that morning and settled into my campsite at White River Campground before driving up to Sunrise.  It was a gorgeous day, with clear skies and warm weather.  Warmer than I expected!  By noon it was already 77 degrees at Sunrise!

    I grabbed my camera and a bottle of water (later, I realized I should have brought two bottles), put on a bit of bug spray, and headed for the trailhead.  It was almost 1:00 p.m. when I started up the broad path just past the Sunrise Lodge.

    I stopped at the “Y” trail intersection to take a few photos of Mount Rainier and the meadow.  As I began hiking up the trail toward Dege Peak, I was chased by a very persistent wasp.  This is not the first time I was chased by a wasp while hiking at Mount Rainier.  During my hike to Spray Falls, I also had to flee for my life for a long way down the trail. 

    Perhaps “flee for my life” is overly dramatic, but it was a little traumatizing for me.  I won’t get into all my childhood run-ins with bees, but one only needs to watch My Girl once to realize these small creatures also come with a dark side.  I jest, but needless to say, although I love honeybees, I am less a fan of wasps. 

    Multiple times along my hike to Dege Peak, I was chased by bees. One even began circling me over and over again.  When I returned home, I did a little research and discovered bees and wasps alike are attracted to bright colors. Red, in particular, is perceived as a threat. What color do you think my favorite hiking shirt is?  Yep! You guessed it– bright red! I guess I may need to find a new favorite hiking shirt after learning this new information. 

    Sourdough Ridge Nature Trail

    Onward and upward.  Soon, I reach the ridgeline and turn off for the Sourdough Ridge Nature Trail.  The nature trail goes to the left, and Dege Peak continues to the right. The Sourdough Ridge Nature Trail is a great option if you’re hiking with smaller kids and want a shorter hike that still offers beautiful views of Mount Rainier. The loop only takes about 1-hour to complete and is mostly flat.

    Wildlife Viewing Opportunities

    Make sure to stop and look over the ridgeline along this section of the Dege Peak trail, as you’ll often spot wildlife below.  I saw a lonely mountain goat (pictured above) during my hike. (To my dismay I did not see any lonely goatherds.)

    I talked to another couple who frequently hikes at Mount Rainier, and they told me how they once hiked to Dege Peak, and at the top, they looked over the edge and saw a bear splashing around in the lake below!  What an unforgettable memory!  They also mentioned seeing elk here as there is an elk path that leads down the backside of Dege Peak.  So make sure to bring a camera and stop to look for wildlife during your hike.

    Sunset Point Trail Junction

    I continued along the ridgeline with views of Dege Peak in front and Mount Rainier at my back. I didn’t worry too much about taking photos of Mount Rainier on the hike up, as I knew I’d be looking at it the whole way back down and have plenty of opportunities to photograph it then.

    After the initial climb to the ridgeline, the trail flattens out for a long stretch before you dip down again and come to a fork in the trail.  This is the turnoff for the Sunrise Point parking area and where you’ll pop out should you start your hike there instead of at Sunrise. From here, it’s only 0.3 miles to the summit.

    The trail narrows and gets rockier as it begins a steady climb back up.  Soon the trail curves sharply to the left for the final 200 yards or so to the summit.  At this curve, there are nice views of the Sunrise Point parking area and Sunrise Lake. 

    Dege Peak Summit

    I begin the final rocky climb to the summit and stop at every tiny shade spot possible.  My water is now warm rather than cold, but I still appreciate having it!  I get to the top, and there is one group leaving as I arrive.  I have the entire summit to myself unless you count the 100’s of moths, flies, bees, and mosquitos who seem to think they own this place!  Sadly, the bugs were so bad during my visit that I didn’t hang around very long.  I took a few photos, admired the view in all directions, and headed back down the trail.  I didn’t pack any bug spray with me. Otherwise, I would have reapplied it at the summit.

    Bugs aside, the views at the top of Dege Peak are fantastic!  You are at over 7,000 feet from here and with minimal effort!  The summit would make a great picnic spot on a day when the bugs aren’t as bad. 

    The hike took me around 2 hours 10 minutes, and that’s with a lot of stops for photos and chats with other hikers.  I think most will complete it in around 2 hours, but with kids, you could plan for up to 3 hours and go at a leisurely pace.

    Now to enjoy staring at Mount Rainier for the hike back to Sunrise.

    Final Thoughts About Hiking to Dege Peak

    This trail typically has fewer hikers than the other trails in the area. The climb up is a gradual one, and during the summer, you have gorgeous wildflowers that line the path.  The trail is dusty, and as I mentioned, there is very little shade. Definitely remember to apply sunscreen and bug spray before heading out. 

    For a slightly longer hike, start from Sunrise and follow the route outlined in this post, but on the return hike to Sunrise, take the Sourdough Nature trail to the right along the ridgeline. You’ll follow the ridgeline before you loop down and to the left to Sunrise again. This adds a little over a mile of mostly flat terrain and about 45-minutes more hiking time.

    I bought a Klondike bar at the Sunrise Lodge.  The hot sun along the hike to Dege Peak and back left me wanting something cold to drink (filled up with potable water just outside the lodge) and a cold treat before heading back to camp.

    If you stay at White River Campground, consider hiking to Emmons Moraine Glacier from the campground and planning to hike the Naches Peak Trail the following day. I love hiking the Naches Peak Loop Trail! It has beautiful lakes, mountain views, and wildflowers everywhere!

    Do you have a favorite hike at Mount Rainier National Park?  I’d love to hear about it.  This place is like a second home to me, and I’m always interested in learning about new trails and hikes I haven’t discovered.


    Happy Trails!

  • Nespresso Essenza Mini: The Complete Guide

    Let’s face it, a lot more people are working from home than there used to be, so swinging through your local coffee drive-thru isn’t always an option. Not to mention the high cost of buying a daily espresso at, say, your local Starbucks.  Enter Nespresso’s Essenza Mini original line coffee maker.  The Nespresso Essenza Mini makes a delicious espresso in only about 30 seconds! Making espresso at home has never been easier! So if you want a way to make a luscious, crema-topped espresso in less than a minute, then keep reading to find out how.  

    If you recently purchased an Essenza Mini and want tips on using it, feel free to jump ahead using the below links.  

    First Things First: What is Nespresso?

    Nestle, a Swiss company you probably think of in connection with chocolate, owns and operates Nestle-Nespresso or just Nespresso as it is known here in the States. Actually, the word “Nespresso” comes from combining “Nestle” and “espresso.” Nespresso has been around for over 30 years, but it’s only been in the last 10 years that it has made a name for itself in the U.S. market. In a nutshell, Nespresso is to espresso what Keurig K-cup is to coffee. They are the original single-use coffee maker, and as the forerunner in single-cup coffee makers, theirs are one of the best!

    Two Types of Nespresso Coffee Makers

    Nespresso has two different lines of coffee makers.  The original line of Nespresso espresso machines and the Vertuoline. The Vertuoline was created for the North American market, which prefers a larger American-style cup of coffee. In comparison, the original Nespresso makers were designed for espresso drinkers.

    3 Key Differences Between the Original & Vertuoline

    1) Coffee Sizes

    The Original Nespresso machines have two options: Espresso & Lungo.  The Espresso option brews a 1.35oz espresso shot. The Lungo option brews a 3.7oz “long” espresso shot.

    The Vertuoline coffee machines have 5 different size options: Alto (14oz), Mug (7.77oz), Gran Lungo (5oz), Double Espresso (2.7oz), and Espresso (1.35oz).

    2) Brewing Technology

    The Nespresso Original machines use the standard pump espresso machine technology that utilizes pressure to create an espresso shot.  The Nespresso Original machines use 19-bars of pressure to extract the espresso (a bar is a metric unit of pressure). 

    The Nespresso Vertuoline machines use proprietary centrifugal technology to brew coffee.   Essentially, it spins your coffee capsule really fast while ejecting water into it. It also spins it after brewing to “dry” the capsule out.  

    3) Coffee Capsules 

    The Original Nespresso machines and Vertuoline coffee makers also use different coffee capsules based on the technology used to extract the coffee.  This is important to note for ordering your Nespresso capsules and because it affects both price and variety when it comes to purchasing your Nespresso coffee pods.

    Vertuoline Capsules

    The Vertuoline capsules are still under patent, so you are restricted to the Nespresso brand of coffee pods/capsules.  The Vertuoline capsules range in price from $0.85 to $1.25 per capsule.  

    The Vertuoline capsules also use a barcode technology which the machine reads and then based on which type of pod it scanned, it then heats the appropriate amount of water designed for that specific pod.  This takes all the guesswork out of it for the customer. No more deciding on whether to choose a 6 oz or 8oz cup size. Instead, you pick your capsule, and the machine scans it and determines the optimal amount of water (and temperature) to brew that specific capsule.

    Original Capsules

    The Original line uses a small capsule that sort of looks like the little creamer capsules you get at breakfast diners. The main difference with the Original line is that in addition to Nespresso’s line of coffee pods, you can also purchase original capsules from coffee roasters such as Starbucks, LavAzza, Pete’s, Cafe Bustelo, and more.  Original coffee capsule prices typically range from $0.44 to $0.80.  

    Spoiler alert: The price per pod coupled with a choice in coffee roasters was a big factor in my choice to go with the Essenza Mini Original Nespresso maker. 

    Which One Should You Buy?

     If you mainly drink large cups of coffee but also want the option for the occasional espresso, then go for one of the Vertuo line coffee machines. This is also a good choice for someone looking to replace the Keurig with a single-cup coffee machine that brews a stronger cup of coffee. If that sounds like you, I recommend buying the VertuoPlus

    If you primarily want to make espressos and espresso-based drinks such as lattes, cappuccinos, etc., I highly recommend the Essenza Mini. It’s the perfect espresso machine for beginners and those looking for a quick espresso option that doesn’t require learning to pull their own shots or get the perfect espresso grind. Easy peasy, no muss, no fuss, delicious espresso!

    Nespresso Machines Brands

    One final note on branding before I tell you all about the Nespresso Essenza Mini. You will notice the machines comes in a variety of brand names. The two most commonly seen are De’Longhi and Breville. 

    The most important thing to note is the machine functions and features are essentially the same, even if the brands are not. 

    There is no advantage (that I found) to one brand over the other. It comes down to aesthetics.  So choose whichever Nespresso coffee maker you like the looks of best, or whichever has the best price.

    Please continue reading to learn about using the Nespresso Essenza Mini and some tricks I’ve learned to customize the espresso sizes.

    My Top Pick: The Nespresso Essenza Mini

    Why I Chose the Essenza Mini

    The short answer is, I wanted this for espresso, not for coffee.  I already have a Keurig, Aeropress, and Chemex that I use to brew coffee, but what I didn’t have was an easy way to make espresso.  I also wasn’t ready to spend the money to buy a semi-automatic espresso machine which often cost $500 to $1,000 for a good one. I’m not ready for the learning curve that comes with grinding my espresso beans just right and pulling my shots and the maintenance involved with owning an espresso machine.  

    The Nespresso Essenza Mini was exactly what I was looking for!  Plus, this makes it easy for my hubby and family and friends to make themselves an espresso quickly or at least make it easy for me to create them a latte or mocha on demand.  

    What is a Nespresso Essenza Mini?

    The Essenza Mini is an automatic espresso machine–a tiny one too! Its small size makes it easy to find space on just about any countertop.  In fact, it’s so compact that my hubby once had an executive visiting from Europe who packed his Nespresso machine with him!  Now that’s true dedication!

    Nespresso Essenza Mini

    Essenza Mini Brewing Sizes

    The Nespresso Essenza Mini brews two sizes of coffee.  Espresso (1.35oz) & Lungo (3.7oz).

    Espresso

    An espresso is a type of coffee and also the method of brewing coffee. This is, of course, a very summarized answer. There is a ton of information on all the intricacies of what makes an espresso an espresso, but this is my short answer.  Specific types of coffee beans are used for brewing espresso, and the method for brewing espresso uses intense pressure to extract the flavor from the beans. This gives you the lushes crema and dark rich flavor of espresso.

    Nespresso created a line of coffee capsules specifically tailored to create a delicious espresso.  They come in a range of intensity levels that correspond to your espresso’s bitterness and flavor profile.  The intensity ranges from 4-13. An intensity of 4 will result in a milder, more sweet flavor of espresso. The 13 will result in the highest level of intensity and create a stronger and more bitter flavor.

    Lungo

    What is a lungo? Lungo in Italian means “long.”  A lungo is a long shot of espresso that uses extra water to pull the espresso shot through.  It also takes longer to “pull” the shot and creates an espresso with a somewhat milder flavor profile.  Lungos typically use a slightly different coffee grind too.  

    Nespresso sells lungo-specific coffee capsules in addition to their espresso capsules. They also range in intensity from 4-10. You can also try their regular espresso capsules with the lungo brewing option. The flavor profile will be different, but you only live once, so feel free to give it a shot! (Do you see what I did there?) 

    Ristretto (not given a brewing button, but it is a capsule option offered by Nespresso)

    Now, to complicate it a little more, Nespresso also offers a ristretto Nespresso pod. A ristretto (“restricted” in Italian) pulls less water through a shot of espresso resulting in less bitterness. It also contains a little less caffeine than a standard shot of espresso.  You might wonder how you can make a ristretto with the Nespresso Essenza Mini, which only has two cup sizes? Keep reading below to find out how.

    TIP: You can customize the amount of water released when you press either the espresso or lungo buttons!

    How to Use the Nespresso Essenza Mini

    It’s SO EASY! Perhaps, too easy to brew an espresso shot with the Essenza Mini.  In about 30-seconds, you have a delicious shot of espresso (or maybe two shots–thus the “too easy” part). 

    Brewing Your First Espresso

    • When you first receive your Essenza Mini, the instructions have you fill the water reservoir with filtered water. Then you’ll run 3 cups of water through the machine using the Lungo button to rinse it for initial use.  After you complete this step, you’re ready to brew your first cup of espresso.
    • Fill the water reservoir and click it in place. 
    • Press the espresso or lungo button to turn the machine on (it takes about 30 seconds to heat up initially).  The Essenza Mini has an auto-off feature and shuts itself off after 9-minutes of inactivity.
    • Lift the lever on top of the Essenza Mini and insert an espresso capsule. (The Essenza Mini comes with a Nespresso sampler box of capsules.)  
    • Close the lever and place a cup below.  You can remove the drip tray if you want to use a larger coffee mug for brewing.
    • Press either the espresso button or the lungo button, depending on your preferred drink. You can stop the flow of coffee by pressing the button again during brewing.  After it finishes brewing, you can press the button again to create a weaker coffee by running water through the pod twice.
    • Lift the lever on top to eject the capsule into the used capsule bin.  This bin holds up to 6 pods before you need to empty it.  You can empty the used capsule container by pulling on the drip tray. *Be careful, though, as there is also a drip attachment under the capsule container, which catches any liquid that comes off the used pods.  Sometimes this has liquid that spills out when you pull out the capsule tray.
    You are ready to sit back and enjoy your delicious cup of espresso!  

    Additional Equipment for Creating Espresso Drinks

    If you want to use your Nespresso Essenza Mini to create lattes or cappuccinos, then consider purchasing a milk frother in addition to your espresso machine.  Some versions of the Essenza Mini come with an aeroccino milk frother like this one.  However, I purchased just the Essenza Mini machine as I already owned this milk frother, and I love it! It also froths thick cold foam for those who enjoy iced coffee drinks like an iced caramel macchiato or iced lattes.

    The other accessory I purchased was this original capsule storage drawer.  My Essenza Mini sits on top of it along with my syrups and sugar, thus taking up no extra countertop space to store my Nespresso coffee pods.

    How to Customize Your Brew Size

    This video from Nespresso explains how to customize your pre-programmed brew sizes to fit your coffee preferences. So, for example, if you prefer espresso and ristretto shots, you could program the “espresso” button to pull a smaller amount of water for ristretto shots and subsequently program the “lungo” button to pull an espresso shot.  It’s really up to you how you customize it based on your espresso drinking preferences.

    How to Reset Water Amounts to Factory Settings

    If you changed the factory-set water levels and now wish to change them back to the original factory settings (Espresso: 1.35oz, Lungo: 3.7oz), here is how to do it (you can also find these instructions in the Nespresso instruction booklet).

    1. With the Essenza Mini turned off, press and hold down the Lungo button for 5 seconds.

    2. LEDs will blink fast 3 times to confirm the machine has been reset to factory settings.

    3. LEDs will then continue to blink normally as it heats up until it is ready. – Steady Lights mean your Essenza Mini Nespresso machine is ready.

    Final Thoughts

    If you’re in the market for a Nespresso coffee maker, in addition to the links I’ve given you above, you may also want to check on Bed Bath & Beyond to see if you can use their 20% off coupon for a better deal.  Also, if you’re a Costco member, check to see what specials they have on a Nespresso machine.  Last I checked, they had both an Original machine and a Vertuoline machine for sale online, but their inventory is always changing. 

    Someday I may decide to spend the money on a semi-automatic espresso machine, but for now, I love how easy it is to create a fantastic espresso at the press of a button!  I especially love how easy it is to make an affogato on a hot summer day–so good!

    At the end of the day, it came down to what I wanted this new coffee maker purchase for.  For me, that was espresso.  I wanted a quick way to make an espresso with as little fuss as possible.  I couldn’t be happier with my decision!

    Let me know if you already have a Nespresso coffee maker, and if so, did you go with the Original line or the Vertuoline?  

    Note: This post contains affiliate links. When you make a purchase using one of these affiliate links, we get paid a small commission at no extra cost to you.


    Here are some other great coffee articles to check out:


    Ciao Everyone!
    (Yes, now that I’m drinking more espresso, I feel the need to add Italian into my daily conversations.)

  • The Best Viewpoint to Watch the Sunrise at Bryce Canyon

    Plan to get up early at least one morning to watch the sunrise at Bryce Canyon National Park.  Morning light is the best time to see the Bryce Canyon Amphitheater. You will be amply rewarded for your lack of sleep as you see the first rays glimmering over the tops of the hoodoos and bathing them in a gorgeous glow of light.  The yellows and reds seem to sparkle, and the whole canyon comes alive!  

    In this post, I tell you my pick for which viewpoint to see the sunrise at Bryce Canyon, as well as two other options that make my top 3 choices for watching the sunrise when visiting Bryce Canyon National Park.

    My Pick for Watching the Sunrise at Bryce Canyon

    Although there are several options for watching the sunrise at Bryce Canyon, Inspiration Point was my first choice when deciding where to photograph the sunrise during my visit. I love getting up to see the sunrise. There’s something special about greeting the beginning of a new day. Morning light is also one of the best times for photography.  This is especially true at Bryce Canyon!  The canyon glows in the morning light, and the hoodoos are on full display, whereas later, they will be encompassed by the afternoon shadows.

    Why Choose Inspiration Point?

    I like that Inspiration Point has multiple designated viewpoints along the half-mile climb to the top.  You get a closer look at the canyon from the lower viewpoint, then as you make your way to the upper viewpoint, you also pass a midpoint viewing area for an additional perspective.  

    Inspiration Point is also less busy at sunrise.  Most people generally head for Sunrise Point, which is a good option, but a more crowded option.  By choosing Inspiration Point, I was the first person there, and there was only a total of 6 of us up there for the entire sunrise!  This made it a very leisurely and enjoyable way to photograph the sunrise and enjoy the views.

    Inspiration Point allows you to look to the right toward Bryce Point and the left at Sunset Point and Sunrise Point.  The smaller crowds, expansive views, along with the multiple viewpoints are why I chose Inspiration Point for my first option to photograph the sunrise at Bryce Canyon.

    Getting to Inspiration Point

    • Trail Length: 0.6 miles (one-way)
    • Hiking Time: ~10 minutes to upper Inspiration Point
    • Elevation Gain: ~ 140 feet
    • Trail Difficulty Rating: Easy (It’s a little steep at the top, but it’s a wide trail and a short hike.)
    • Features: 3 different viewpoints of the Bryce Canyon Amphitheater, it’s also situated along the Rim Trail for those looking for a longer hike. It is wheelchair accessible to the lower viewpoint. 
    • Restroom Facilities: Yes. There are pit toilets alongside the parking lot.

    Tips for Photographing the Sunrise at Inspiration Point

    What Time to Arrive

    45-minutes before sunrise

    I typically try to get to a destination at least 1-hour before sunrise. However, 45-minutes was plenty of time at Inspiration Point during my visit in spring.  With 1-hour, you are assured of having the first pick of spots, even in the summer.

    What to bring?

    • Camera
    • Wide-angle lens
    • (A smartphone camera works too!)
    • Tripod
    • Flashlight (For the hike up in the dark.)
    • Warm Layers (Gloves & a hat were really nice to have in the spring.)
    • Hiking Poles (This hike is short but steep at the upper viewpoint, so hiking poles are handy to have.)

    Upper Viewpoint

    What to expect?

     There is a railing around the upper viewpoint so bring a tall tripod, or you’ll need to hold your camera to avoid the railing in your shots.  

    You are at a higher elevation, so the weather is typically colder than you would expect before the sun comes up. I visited in April, and there was still snow in spots along the trail. The Rim Trail to Bryce Point was also closed due to snow.  

    If, for some reason, you arrive and upper Inspiration Point is crowded, then walk back down the trail for a slightly lower vantage.  There is plenty of room along this trail for you to find a spot to watch the sunrise.  Be careful, though, as only the designated viewpoint areas have a railing. Keep small kids away from the canyon edge and watch your step, especially in the dark.

    I think this is fairly well-known, but no drones are allowed in any of the U.S. National Parks. However, while I visited, someone put a drone in the air at Inspiration Point, and a ranger was there within 5-minutes.  I have no idea how the ranger knew about it so quickly, but they did.  I think they only gave the person a warning, but I assume you could be fined, so I wouldn’t take any chances.

    Sunrise at Bryce Canyon

    Photography Tips

    Photograph it from various vantage points and angles.  I didn’t get a chance to scout out Inspiration Point the day before. Instead, I went directly to the upper viewpoint to set up my tripod for the sunrise.  Then I later photographed it from the midpoint and lower viewpoint.  Walk around the upper viewpoint and try some views on both the left and right sides of Inspiration Point.  Use trees and vegetation to create depth and interest.  

    Try shots from up high and down low.  Also, stick around a little while after the sunrise as the glow in the canyon gets brighter, and the colors really start to come out. 

    More Great Options for Watching the Sunrise at Bryce Canyon

    My other top choices for watching the sunrise at Bryce Canyon are Sunrise Point & Bryce Point. Both of these have gorgeous views! I especially liked the view from Bryce Point. Partly I think, because the viewing platform jutted out, and it felt like I was suspended over the canyon.  The trail to Bryce Point is completely paved, so although a little steep in spots, it is wheelchair accessible.  There are also restrooms at both Sunrise Point and Bryce Point.  Sunrise Point is popular for a good reason. It gives you sweeping views over the Queen’s Garden trail and canyon and makes a great (and popular) choice for photographing the sunrise at Bryce Canyon. 

    What to do After Watching the Sunrise

    After watching the sunrise at Bryce Canyon, you are ready to hike into the canyon and see it up close!  The morning light (and temperatures) make it the perfect time to hit the trails.  If you only have time for one hike in Bryce Canyon, I recommend the Navajo Loop Trail & Peekaboo Loop combination hike.  My hubby and I loved this hike, and it was the perfect way to see the canyon up close after viewing it from above at Inspiration Point.  It really added to the experience to see it from a birds-eye-view first to the ground level.

  • Navajo Loop Trail & Peekaboo Loop Hike: The Best of Bryce Canyon

    Bryce Canyon National Park is a gorgeous park worth spending a couple of days (minimum) exploring.  The Peekaboo Loop and Navajo Loop Trail combo is one of the best, if not “the” best option for sampling all that is Bryce Canyon, National Park.  Gaze up at the hoodoos as they tower over you, walk through an alpine forest and experience the Wall of Windows up close in all their glory. If you only have time for one hike in Bryce Canyon, this should be it!

    About the Hike

    This hike combines both the Navajo Loop Trail and the Peekaboo Loop Trail into a mini figure-8 combination loop. Depending on when you hike this trail, portions of it may be closed due to ice.  Bryce Canyon is at over 9,000 feet in elevation. It often has snow that lasts into late spring.  I visited in early April, and the Wall Street portion of the Navajo Loop Trail was closed due to ice.  

    • Trail Length: ~5 miles (roundtrip) 
    • Hiking Time: 3-5 hours (This really depends on how many photo stops you make, snack breaks, and overall pace.)
    • Elevation Gain: ~ 1580 feet
    • Trail Difficulty Rating: Moderate
      The National Park System rates this trail as “strenuous.” I found it to be moderate compared to other hikes I’ve done. However, I will say the heat certainly adds an element of difficulty to the hike, so I can see why they would give it a strenuous rating when factoring in elevation change and weather.
    • Features: Close-up views of hoodoos, the Wall of Windows, pine forest, and opportunities to walk through natural “doorways.”
    • Restroom Facilities: Yes. There are restrooms in the parking lot at the trailhead, and there is also one restroom on the Peekaboo Trail near the junction for the Bryce Point Trailhead.  This restroom is only open during the summer.

    What to Bring

    Water.  Do not take this hike or any hike in Bryce Canyon without bringing ample water. The temperatures here can be intense. It may start cold, but by afternoon, you’ll be very thankful to have enough water to drink. I always say you never regret having too much water!

    Trekking Poles.  A hiking pole or two will be handy for the steep descents/ascents and the loose sand and rock that make up the trail. Trekking poles are useful for anyone with knee problems.  My hubby had a bad flare-up with his knee bothering him, and his trekking poles were the only thing that made it possible for him to complete the hike.

    Sunscreen.  You will want to reapply during the hike. Trust me.

    Snacks. It’s always good to carry a little extra energy for the hike.  There are many great spots to sit and enjoy the views and have a little lunch break if you want to pack sandwiches and have a picnic among the hoodoos.

    Important Information:

    Hike this combination trail as early as possible.  It gets hot during the middle of the day, and the Navajo Loop Trail, in particular, gets incredibly busy!  Don’t allow the crowds to scare you off, though. Once you get on the Peekaboo Loop Trail, the crowds thin out considerably! When you are hiking back up the steep switchbacks of the Navajo Loop trail, you will be so happy you got an early start! 

    Plus, parking fills up at the Sunset Point parking lot, so the sooner you get here, the better. You can also park outside Bryce Canyon and take the park shuttle.

    Bryce Canyon Parking & Trail Map

    Here is a link to a map that gives you an overview of where the parking lots are located and the trailheads.  For this hike, you’ll want to park at the Sunset Point parking area. If you’re taking the Bryce Canyon Shuttle, you will also get off at the Sunset Point shuttle stop. Follow signs from the parking lot to the Navajo Loop Trailhead. It’s near the Sunset Point overlook area.

    Hiking the Navajo Loop & Peekaboo Loop Trails

    I hiked this trail in April.  I got up early to watch the sunrise at Inspiration Point and then drove to the Sunset Point Parking lot closest to the Two Bridges entry for the Navajo Loop Trailhead. My hubby was with me, and we ate a quick breakfast in the car before packing some water and snacks for the hike. 

    We started the hike a little after 9:00 a.m.  It was still cold out when we left, so we wore layers, which we removed about halfway through the hike. Due to Bryce’s high elevation, you experience both mountain weather and desert weather.  We started our days at freezing temps and then, by late afternoon, hovered near 80 degrees. 

    The Navajo Loop Trailhead

    Make sure to enjoy the Sunset Point overlook before starting the Navajo Loop Trail.  Chances are when you return to this spot, you’ll want to grab a bite to eat and relax, so take the time now while you’re still full of energy!

    We made our way down the first series of switchbacks before coming to a small viewing area near the turn-off to the Wall Street section of the Navajo Loop Trail.  Unfortunately, Wall Street was closed due to icy conditions, so we continued down the trail on the left side.

    The next series of switchbacks is beautiful and similar to the switchbacks on the Wall Street portion (see photo above), however not as narrow. You’ll pass by the “Two Bridges” before popping out from among the hoodoos and into the tree line.  

    A Fork in the Road: Queen’s Garden & Peekaboo Trail

    This trail continues a short way down from the Two Bridges before coming to a “T” in the trail. This is where you’ll have the option to go left for the Queen’s Garden Loop or head right to continue to the Peekaboo Loop Trail. 

    If you come down Wall Street, you pop out a little below this sign; however, the direction you go is the same. Go right for the Peekaboo Loop Trail. The left will take you back to the Queen’s Garden Loop and also the Navajo Loop Trail, which returns you to the top where you started.

    Peekaboo Loop Trail

    As you continue to the right, follow the connector trail as it crosses a big open section with pine trees and juniper bushes scattered around.  After about .25 miles, you come to another sign for the official start of the Peekaboo Loop Trail.  

    This trail is shared by both foot traffic and people on horseback. We followed the sign pointing to the right for foot traffic, which had us hiking the Peekaboo Loop Trail counterclockwise. After hiking it this way, I believe this also points you in the direction to give you the best views and vantage points straight ahead. Plus, I felt this half was the more interesting of the Peekaboo Loop Trail.

    From here, the trail quickly climbs back up into the hoodoos.  The Navajo Loop and Peekaboo Loop Trails take you down to the canyon floor, back up above, back down again, and finally back to the top where you started.  So prepare yourself for the ups and downs, but also know you will see so much beauty that it will all be worth it in the end.  This combo loop trail could quite possibly end up on your list of favorite hikes of all time.

    I did my best not to stop every 5 seconds to take a new photo, but it was still probably about every 30 seconds!  My hubby is a good sport and goes with the flow.  Both of us were enthralled by the variations in color and shapes of the hoodoos as we hiked along the Peekaboo trail.  It’s a lot of fun pointing out different shapes in the hoodoos, much like cloud gazing.  We’d say, “do you see that gnome over there?” Or “look at that elephant trunk!”  Kids will also enjoy finding “creatures” among the hoodoos.

    Nature’s Doorways

    It wasn’t too long after hiking up the Peekaboo Loop Trail that we walked through our first “doorway,” or perhaps “window” is a better word to use.  It’s like nature created a live polaroid for us to enjoy.  As we walked toward it, the light was so bright that we couldn’t see the view on the other side.  However, as we walked through the small tunnel, the view “developed” before our eyes.  I don’t know why I love these as much as I do, but I was excited to walk through each one.  I think we walked through three of these on the Peekaboo Loop Trail.

    A Tricky Washout

    The trail descends through another series of switchbacks similar to the Wall Street section on the Navajo Loop Trail, and briefly, you’re back among the trees. A washout area forked to the right, and we took a short snack break here.  This was probably a good thing, as two hikers came by and started walking to the right up the wash, not realizing they were no longer on the trail.  We let them know the trail was on their left, they thanked us and continued on their way.  I think this was the only part of the Peekaboo Loop Trail where one could get off track. However, you would figure it out pretty quickly if you did accidentally miss the trail.

    The Wall of Windows

    Almost immediately after your descent through the short switchbacks, the trail heads back up, and we hike toward the Wall of Windows. We loved this section of the trail as we gazed up at the towering Wall of Windows.  It looked so small earlier this morning as we peered down at it from Inspiration Point, and now here we were right next to it!  There are many great points along this section to take photographs of the Wall of Windows and the view of the hoodoos in the canyon below.

    Bryce Point Trailhead – The Halfway Point

    After leaving the Wall of Windows, you descend into the tree line and out of the hoodoos.  Soon you pass the trail which takes you to Bryce Point.  Bryce Point is another starting point for those who want to hike the Peekaboo Loop Trail without hiking the Navajo Loop Trail.  The Bryce Point trail was, however, closed due to snow when we visited in April. At this point, you are now about halfway through your hike around the Peekaboo Loop Trail.

    Trail Restrooms

    Not long after you pass the trail for Bryce Point, you come to a shaded resting area with a sign on the right for restrooms.  These are closed from fall to spring.  The main trail continues past the sign for the restrooms.  There is also an area here where people on horseback can let the horses take a water break. 

    Back in the Hoodoos

    I’ll admit, the section of trail after leaving the Wall of Windows was probably my least favorite of the whole Navajo and Peekaboo Loop Trails.  It was a lot of walking through trees without a lot of scenic viewpoints. You do get a good amount of shade here, though, which you will soon miss when you pop back out above the treeline and into the hoodoos.

    Soon, you’re admiring hoodoos, and there’s another “window” to walk through and more beautiful views to look forward to before you begin your descent back to the start of the Peekaboo Loop Trail. There is very little shade along this section of the trail.

    Once back at the start of the Peekaboo Loop, retrace your steps (heading left) back to the fork for the Navajo Loop Trail and Queen’s Garden Trail and begin your climb back up to Sunset Point.

    Alternative Hiking Options

    Shorter Hike Option: For those who aren’t up to the longer Navajo Loop combined with the Peekaboo Loop, hike the Navajo Loop on its own for a shorter option.  You won’t see the Wall of Windows up close or walk through the “doorways” carved in the rocks, but you still get a sense of the grandeur of the hoodoos and their colorful features.  Plus, you also walk through a small section of the pine forest.  

    Longer Hike Option: For those wanting an even longer option, consider the “one hike to rule them all,” which combines the Navajo Loop Trail, Peekaboo Loop Trail, and the Queen’s Garden Trail! I still recommend starting at the Navajo Loop trailhead by Sunset Point and following the directions for the Navajo Loop & Peekaboo Loop combo listed above before exiting out via the Queen’s Garden Trail. 

    This gets the steeper portion of the loop out of the way on the descent.  Then, you come up the Queen’s Garden Trail and end near Sunrise Point when you return. You take the paved footpath from here back to the Sunset Point parking lot.  This is the easier option for the ascent. This figure 8 hike is considered a strenuous hike and is around 6.4 miles round-trip.

    Sunrise Recommendation

    To complete your scope of Bryce Canyon, I recommend watching the sunrise at either Sunrise Point or my choice, which was Inspiration Point.  I watched the sunrise at Inspiration Point and then drove over to the trailhead for the Navajo Loop Trail. I think the morning hours are the best time to experience Bryce Canyon’s hoodoos as the sun causes them to glow red and orange.

    At Inspiration Point, I looked out over the Bryce Canyon Amphitheater and saw the Wall of Windows far below. Later, as I hiked next to the Wall of Windows, it gave me a greater appreciation for the scale of Bryce Canyon.  My hubby and I said to each other, “remember this morning when the Wall of Windows looked so far away?”  It was a neat way to spend the day going from a bird’s-eye-view to the ground level.

    More Articles You Might Enjoy


    If you hike the Navajo Loop Trail and Peekaboo Loop Trail, I’d love to hear your thoughts about the hike and your visit to Bryce Canyon.  I loved my time here and would like to go back to explore it and the surrounding area more.

    Happy Hoodoo Hunting!

  • Willis Creek Slot Canyon: A Fun & Easy Hike

    If you want a fun and easy slot canyon that doesn’t require any big scrambles over rocks or narrow squeezes that require months of dieting to perform, then look no further than the Willis Creek Slot Canyon! The Willis Creek Slot Canyon is located in Utah’s Grand Staircase-Escalante National Monument. 

    This hike is perfect for families and anyone looking for a mostly flat slot canyon hike. I saw multiple families with young children, probably around the age of 5 or possibly younger doing this as well as older kids and teens.  It’s a beautiful and enjoyable slot canyon hike good for all ages.  

    We chose to do this hike on a day where we spent the morning at Bryce Canyon, but we still wanted a short hike to do that afternoon.  The Willis Creek Slot Canyon Hike is about 1-hour from Bryce Canyon National Park and only 30-minutes from Kodachrome Basin State Park. If you’re in the area, you’ll want to consider this fun hike!

    Getting to the Willis Creek Slot Canyon Trailhead

    The turn-off for the road to Willis Creek Slot Canyon is just outside the small town of Cannonville.  Stop at the visitor center in Cannonville to double-check road conditions.  If it has rained or will rain, then skip this hike.

    Directions:

    From Cannonville, head south on Kodachrome Road/Main Street for about 2.5 miles before it turns into Cottonwood Canyon Road. Take a right on BLM 500/Skutumpah Road.  Stay on BLM 500 for about 6.1 miles before arriving at the parking area for the Willis Creek Slot Canyon trailhead.  You will come to multiple forks in the road, but as long as you stay on BLM 500, you will arrive at the parking area after about 30-minutes of driving time.

    *I used Google Maps to navigate to the Willis Creek Slot Canyon trailhead and had no issues. However, I read reports online of others who had issues with Google Maps telling them to turn down private roads.  Perhaps Google fixed that issue? 

    About the Willis Creek Slot Canyon Hike

    Distance: ~2.8 round trip

    It’s approximately 1.4 miles one-way to the end of the slot canyon portion of this trail. We hiked to this point and then turned around.

    Difficulty: Easy

    It is a mostly flat, uneven, and rocky trail. Most people can navigate it without any issues.

    Duration of the Hike: 2 to 2.5 hours

    This will depend on how far you hike down the trail. We took around 2 hours to hike the 2.8 miles to the end of the slot canyon portion and back.

    Road Conditions: 

    The dirt road to the trail is rough but typically doable with a 2WD vehicle.  I saw everything from small cars, RVs, camper vans, and trucks on this road. It is a lot of washboard gravel road with some large potholes here and there.

    Make sure to check road conditions at the Visitor Center in Cannonville. If it has rained the day before your visit or will rain, save this for another day. When the sand on this road gets wet, it turns into a muddy mess you do not want to deal with. It’s also not safe to hike in slot canyons if there is the potential for a flash flood. You can also call the Visitor Center at 435-826-5640 for more information.

    The Trail:

    The Willis Creek Slot Canyon trail starts across the road from the parking lot.  Follow the dirt path through some brush and down to the creek bed.  This is a mostly flat trail with very little elevation change.  You’ll hike through a small section of slot canyon before it opens up into a wide wash area which you’ll follow for approximately 10-minutes before you’ll wind around another bend and find both a small waterfall and entrance to the main Willis Creek Slot Canyon area.

    What to Bring

    Bring hiking poles, plenty of water, and a snack bar or two. Make sure to apply sunscreen before starting the hike. Although you’ll be inside a slot canyon or the majority of the hike, there are a couple of stretches out in the open sun where it gets really hot.

    Depending on when you visit, you will either encounter ice (we did in April), muddy conditions, or you’ll be walking through the creek water as you make your way through the slot canyon.  Because of this, you will want to consider wearing shoes that you’re comfortable getting wet.

    Things to See Nearby

    Closing Thoughts & Places to Eat Nearby

    Willis Creek Slot Canyon is an easy hike, good for kids and families or for someone who wants an easy but beautiful hike to add to their day.  This is another one of those hikes where it’s about enjoying the journey, not necessarily getting anywhere in particular.  Enjoy the shapes of the canyon as far as you want to go and then turn around and head back when you’re ready.

    We enjoyed this hike after a morning spent at Bryce Canyon and after a long day of hiking at Bryce the day before.  Sometimes you just want something fun and easy, or maybe you’re like us and need to work off that pie you ate for lunch. If you decide you want to do what we did and eat some really yummy cherry pie before your hike, check out Bryce Canyon Pines. Or maybe you need a pick-me-up before your hike, then stop at Bryce Canyon Coffee Co on your way. They have great coffee and friendly service too!

    If you want some dinner after your hike, then grab some BBQ at i.d.k. Barbecue in the town of Tropic, Utah. A warning though, lines can be ridiculously long here. We had to wait over an hour to place our order! The good news is your food is ready within 10-minutes of ordering.

    Other Articles You Might Be Interested In for Your Trip to Utah:

  • 5 Essentials You Need for Car Camping or SUV Camping

    Have you ever thought it might be nice to pull up to your campsite and not need to put up a tent? Perhaps you have visions of crawling into the back of your car and curling up in a cozy bed, all ready for you without any extra work.  Well, that’s exactly what I decided I wanted on my recent road trip where I tried camping in my SUV.  This is not to be confused with the typical type of car camping where you pack everything in your car and stay in a tent.  That is the type of camping I normally do, but I thought I would see how I liked actually sleeping in my car.  

    Below I share the five things I found to be extremely useful when camping in my SUV.  They were essential items I am so glad I purchased before I left for my trip and will continue to use in the future.  If you plan to try car camping or SUV camping, I highly recommend you consider getting these five things first!

    Facebook
    Reddit
    Twitter
    Pinterest

    5 Things You Need for Your First Car Camping Trip

    These are the main essentials I found to be helpful when camping in a car or SUV.  In the video above, I discuss some of these items and the pros and cons of my setup.  At the bottom of the article, I’ll also list a few “nice to have” options to consider getting in addition to these five essential items.

    1) Privacy & Shading When Car Camping

    Since you’re car camping and sleeping in your car, you will want to cover your windows with something to give you both privacy and shade from the sun and block lights from cars and other campers that might pass by your vehicle.  

    I purchased a roll of Reflectix from my local hardware store, and it was a lifesaver!  I cut out shapes to fit all of my windows, except the front windshield and the front side windows.  

    Covering the rear door windows and back windows of the vehicle with Reflectix made a HUGE difference!  It made my vehicle dark at night, and it also helped create some shade for my car during the day.  

    This was incredibly helpful since I was camping in the desert!  I started in Joshua Tree National Park and then went to Death Valley National Park and then on to Utah’s national parks.  So, having some extra shade was really nice!

    In addition to the Reflectix, I had these windshield pop-out shades for the front windows.  I also used a sheet strung across the backs of the two front seats to give me more privacy since the two front side windows did not have any Reflectix.  

    For future trips, I’d cut out Reflectix for those as well.  I forgot those when making my window cut-outs and ended up using the sheet, as you can see in the photo below, for an additional layer of privacy.  The sheet was easy to put up and take down.

    2) Lighting

    I purchased these LED light bulbs from my local hardware store, and I loved them! You can also purchase similar ones on Amazon if you can’t find them locally.  They have little clips that make them easy to hang in different areas, plus even if you decide to sleep in a tent, they work well for clipping to the ceiling of a tent.  They have a high setting and a low setting when you want it a little dimmer.

    I also purchased these Duracell LED lights that have a built-in stand so you can set it down on the ground or set it on the floor of your SUV when you’re getting ready for bed or just sitting in the car reading at night.  If you face it toward the Reflectix, it really brightens up the vehicle!  

    I made sure to shut off my dome light to my car during my trip as I didn’t want to take any chances that I’d accidentally leave a door open. Also, when using the SUV tent attachment (read more below in #5), the rear hatch is left open, and thus the light on the hatch door stays on unless you shut off all dome and ceiling lights. So if your dome lights are turned on, your battery will most likely be dead by morning.

    3) Organization System

    This is a must when camping in your car! I felt like it was even more necessary than when I went tent camping. Each day, I’d need to move stuff from the rear passenger seats to my car’s front seats to lay down the rear seats and get ready for bed.  Then the next day, it would get moved back.  Needless to say, things got moved around a lot.  When it was just me, I could still lose track of things, but I pretty much knew where I kept everything.  However, when my husband later joined me on the trip, the organization became an even greater issue.  

    Totes

    Having totes to keep your food, electronics, and other miscellaneous supplies organized in will really help!  Label totes for one thing, such as a tote labeled “food” or a tote labeled “electronics” and so on.  That way, if you’re traveling with someone else, everyone will know where specific items go, and then when you need them, you’ll know where to find them.

    Zip Lock Bags

    I love zip lock bags.  I always bring these when I travel, whether it’s a trip abroad or a road trip close to home. There always seems to be a need for these.  When camping in your car, you might use these to contain food items like sugar or trail mix, or PB & J sandwiches. You can also use them to keep extra batteries, USB cables, headphones, etc.

    Cube Organizers

    These cube organizers for traveling are also great when camping in your car or SUV. I used them for clothing items as well as keeping certain electronics together.  For example, in one of mine, I put all my GoPro gear, chargers, gimbal, batteries, etc.  Then I always know where my GoPro accessories are.  “Oh, it’s in the green organizer.”  This sounds simple, but it really saves you a lot of time looking for things.

    Shoe Bags

    The last thing that sort of falls under organization is shoe bags. I use these when I travel to keep my shoes from getting my clean clothes dirty.  However, they are also useful for carrying extra shoes, like flip-flops (don’t forget to pack those for your trip around camp), and I also sometimes use them to store socks in.  So it makes socks easier to find rather than rummaging through a duffel bag.

    4) Portable Power for Car Camping

    You’re essentially living in your car when you’re car camping or SUV camping.  This means you’ll need some way to charge your camera batteries, cell phone, laptop, and any other miscellaneous electronics you travel with.  I purchased the Jackery Portable Power Station Explorer 300 before my trip, and I loved it!  

    I was able to charge my Nikon batteries, GoPro batteries, cell phone, laptop, drone batteries, and even power my little coffee grinder when I needed some freshly ground coffee beans.  

    You can charge the Jackery in the car when you are driving, or if you’re like me, you’ll probably want the occasional stay at a motel to take a real shower and feel a little more “human.”  Let’s face it, camping in your car is still camping.  

    Many of the campgrounds in the National Parks do not have showers, so eventually, you’ll need something.  So when considering your charging needs, you can plan to use a small generator like the Jackery and then use stays at a motel or KOA for extra charging as needed.

    If you plan to bring a portable shower and stay off-grid for longer periods of time where you won’t be driving (or staying at a motel) to charge your Jackery, then you might also consider purchasing one of their solar panels, which will charge your Jackery without needing to run your vehicle. 

    5) Airflow & Ventilation

    One thing you’ll notice if you crawl into the back of your car or SUV and close all the doors is how quickly things can get stuffy, and you’ll most likely find yourself wanting some airflow, especially if it is warm out. 

    Fans

    I used this rechargeable fan which, believe it or not, was really nice to have in the desert heat.  Even the small amount of air blowing on you at night when it’s hot will really help! Plus, it also has a built-in LED light. I liked that I didn’t need batteries for it either. I never had to recharge it on my trip, so it lasted a pretty fair amount of time between charges.

    Bug screen covers

    I purchased two different types of these, and I’ll admit, neither was perfect.  Getting ones that fit your vehicle just right can be a challenge.  The first set I purchased has larger holes which are nice as it allows more air in.  However, I also have to believe they could potentially allow some bugs in too. The second set was a thin, tight mesh material with perhaps too little ventilation as it didn’t seem to let much airflow in.  

    That being said, if it is really hot, you’re going to want some airflow; these allow you to keep your windows rolled down about halfway to allow airflow but keep the bugs out. You can see them in the photo above on the windows on either side of the sheet I had strung across the rear seats.

    SUV Tent for Car Camping

    The last item that I tried on this trip was an SUV tent attachment.  This turns your SUV into a tent.  It gives really nice airflow and also provides easy rear entry and access to your sleeping area.  This was nice because in my MDX, once I close the rear hatch, I can’t open it. I have to crawl out the side door when I want to get out again.  So with the SUV tent, you can unzip it like you would a tent and climb out the back.  As I mentioned before, if you use this, make sure to shut off your dome lights since the rear hatch is open when the SUV is attached.

    Napier sells this SUV Family tent which attaches to the back of your vehicle and can also be used as a traditional tent on its own.  It’s a bit pricey, but it would allow for a couple to sleep in the back of their vehicle while the kids or other companions slept in the tent portion.  It also has the added benefit of being used as a sitting area during the day to read or take a break from the sun.  So although pricey, depending on your needs, you may want to consider it.

    I used the Napier Sports Cove SUV tent, and it worked very well and was easy to set up. I’d say it takes about 5-minutes to attach to the vehicle and probably about the same to take it down.  I also demonstrate how it attaches to the vehicle and how easy it is to get in and out of the car in my video.

    Car Camping Wishlist Items: “Nice to Have”

    After taking my first maiden voyage of camping in my SUV, there are some changes I think I’ll make for future trips.

    One simple item I want to invest in is a mini-fridge.  I looked at these before I left but decided I wasn’t ready to spend the money.  However, trying to keep fresh ice in the cooler while spending almost a month in the desert was a little bit of an inconvenience.  With a mini-fridge/electric cooler made for cars, I can charge it in the car or use my Jackery to run it.  This eliminates my need to purchase ice.

    The other thing I plan to make before I take another SUV camping trip would be a platform for the bed.  I’ve seen lots of builds by people online (like this one), and I want to create something that would allow me to organize my belongings underneath my bed, thereby eliminating the need for me to move things around each day from the rear seats to the front seats to put my bed down.  With storage under the bed area, I could leave the bed in place during the entire trip.  That would be really nice!  

    If I planned to spend more time camping on BLM land, where typically you have no bathrooms or privacy, then I would consider getting one of these instant shower shelters.  You can use them for showering, changing, and I’ve read some people place a porta-potty in them for a makeshift restroom.

    Final Thoughts

    So there you have it!  These are things I highly recommend when car camping or SUV camping. You may also want to consider adding some of the wishlist items before you take your first car camping trip.  

    I know I don’t go into all of the gear I used, but you can rest assured I had my coffee camping gear with me!  Plus, I used RISE oat milk and almond milk as both don’t need to be refrigerated until after opening.  This is very convenient for storing!

    If you are a seasoned car camper and want to share what you have found useful when camping in your car, please drop your insights in the comments below.  I’d love to hear from you!

    Happy Camping!


    *Disclaimer:
    Travelffeine is a reader-supported blog. When you buy via links on this site, we may earn a small affiliate commission at no cost to you.