author.travelffeine.com

Category: Travel Tips

Find ways to save money while traveling, how to plan your next trip, survive a long flight, or the best travel gear, it’s all right here!

  • Post-COVID Travel: My First Experience Flying in 2020

    In this post, I want to update those of you who haven’t flown post-COVID on what has changed and what hasn’t. I also want to let those of you who might be concerned about wearing a mask for extended periods of time know what it was like from my perspective and tips I found helpful.

    Please keep in mind this was my first flight in 2020, and my experience is with flying Hawaiian Airlines from Seattle to Maui. Not every airport is the same, and each airline might have slightly different procedures.

    If you’re interested in planning your own trip to Hawaii, you can read about my experience on how I skipped the 14-day quarantine in Hawaii.

    What is Mask Anxiety

    Mask anxiety is a general term someone gave to the anxiety many people feel when wearing a face mask.  There are different levels of anxiety and discomfort mask-wearing produces. They cause some people to feel trapped, dizzy, disoriented, and can even produce full-on panic attacks for others. People that have claustrophobia, asthma, ADHD, and anxiety disorders often struggle with mask anxiety.

    I have minor claustrophobia, which, as it turns out, caused me anxiety when wearing a mask.  I didn’t really realize what was going on until recently when I came across the term “mask anxiety” in an online article.  That’s when a light bulb went off, and I realized, oh, so that’s what it is.  

    My face would sweat, and I struggled to concentrate; I felt like I couldn’t get enough air. It was very uncomfortable when I first went grocery shopping while wearing a face mask. Thankfully, over time, I found masks that work better for me, and I’ve now become somewhat used to wearing one when shopping.

    However, I knew it would be much longer than just 1-2 hours for my flight to Maui.  This caused me some anxiety, and I began to think about canceling my trip. That right, there should tell you something because I LOVE Hawaii!  Instead of giving in to my fears, I decided to do some research to find ways to make wearing a mask easier.

    3 Tips to Reduce Mask Anxiety

    #1 Find a face mask that is comfortable to wear and easy to breathe in.

    Don’t wear a mask that is too tight as this can not only make it hard to breathe, but I read that it can also pull on your ears and jaw and potentially cause TMJ problems that will lead to headaches. 

    I tried neck gators, cotton masks, thick masks with inserts, and disposable masks. I found that most were too thick and difficult for me to breathe in. Through a process of elimination (I wore each at home first), I chose a disposable mask for my flight.  I also brought extras to keep in the rental car, condo, day bags, etc.  

    #2 Build up to wearing a face mask all day. Start in 30-minute increments at home.

    This was a great tip I read online from a dive instructor.  She said students who struggled to wear the breathing apparatus in their mouth were sent home with one to practice with.  They would wear them for incremental periods of time to build up their tolerance and comfort.  That made total sense to me, as I recall my first diving lesson in the pool and how I felt like I couldn’t breathe. When, of course, I had oxygen flowing directly into my mouth and lungs.

    #3 Add a calming scent to the inside of your mask. 

    I chose cinnamon, but some might like lavender or mint. I took a cinnamon stick and rolled it up inside my mask the day before my flight. It worked perfectly! It wasn’t too strong but left a subtle cinnamon smell, which I found comforting.  You could also try a pack of spearmint gum as some find peppermint to be calming. You can use any smell you find to be relaxing and calming. Just make sure it’s not so strong it gives you a headache.

    The Day of Our Post-COVID Flight

    8:00 a.m. Masks On

    We got a ride with Uber to the airport at 8:00 a.m. Our mask-wearing starts now, as you must wear a mask when taking an Uber or other rideshare service.

    Security Screening at the Airport:

    The post-COVID airport experience at Seatac International Airport was pretty much the same as every other flight we’ve taken there. The main difference was that everyone wore masks.  Security lines were the same, slightly longer perhaps as they make them zigzag more to improve social-distancing.  This time we didn’t take out any electronics, which was new for me, as typically, I have to remove my laptop and camera before going through security.  We placed all our bags and shoes, etc., in bins and then walked through the screening checkpoint.

    Eating at the Airport:

    In case you’re wondering, yes, you can still eat when waiting for your plane.  You remove your mask while you eat/drink and then replace it again.  It is the same procedure we follow here in Washington state when eating in a restaurant.  Quite a few people were eating at their seats while waiting for their plane to depart. 

    One thing that was different was how many of the businesses in the airport have closed.  Due to the limited amount of travel, they haven’t had enough business to stay open.  You may want to pack extra snacks in case you arrive at an airport and nothing is open.  This is one aspect of traveling post-COVID that we experienced both at the airport and in the towns. Expect that you’ll have limited dining options.

    Our Flight with Hawaiian Airlines

    Boarding the plane also felt pretty much the same, except that they scan your forehead temperature at the gate. Other than that, I felt it was pretty typical of every other boarding experience I’ve had.

    Another thing that is different is the meal and snack service. This was done at the very beginning of all of our flights, and there were no other meals or snack services provided for the duration of the flight.  They passed out the meal within the first hour of the flight. That means for the rest of the flight, nothing else is provided.  On our flight to Hawaii, they did pass through the cabin late into the flight carrying some water bottles for those that needed them.  However, on our flight to Seattle, they did not do this.

    Everyone who eats or drinks removes their masks while they are “actively” eating or drinking. They announce this over the intercom, “please keep your mask on when you are not actively eating or drinking.”

    Mask is briefly removed around 10:30 a.m. 

    I removed my mask while I ate my meal and then put it back on when I finished. I sat next to a young man who chose not to eat. He kept his mask on for the entire flight.  That is one thing to note. You will most likely be seated next to strangers. To me, this didn’t matter since everyone is already on an enclosed plane together, and the air is filtered. However, if that concerns you, be aware that airlines are now booking every seat and no longer trying to space people out as they once were.

    Arriving at the Airport in Hawaii

    Our forehead temperature is once again scanned upon arrival at the airport in Hawaii. Temperature checks seem to be a regular part of post-COVID travel.  We had a connecting flight in Oahu, and our temperature was scanned both there and in Maui.   We proceed through a COVID-19 testing checkpoint where we show our I.D. and negative COVID-19 test results as well as the QR code issued by Hawaii’s Safe Travels site.  You can read more about our post-COVID travel experience to Hawaii in this post.

    8:00 p.m. Mask is Finally Removed

    Due to our connecting flight in Oahu, our travel time to Maui was much longer than normal.  I was apprehensive about this initially, as I didn’t know if I could handle 10+ hours wearing a mask.  After getting our rental car and finally removing our masks, we had worn them continuously for almost 12 hours, with only small breaks for eating. 

    How I felt after wearing a mask for 12 hours.

    I did okay during the flight to Oahu, however by the time we boarded our flight for Maui, I had a headache.  I think this is a fairly common side effect of long-term continuous mask use.  My hubby also complained of a headache.  I did my best to take deep breaths once my mask was off, and by the time we arrived at our condo an hour later, my headache was gone.

    I am glad I faced my fear and anxiety over wearing a mask for a long day of travel. We had a wonderful trip to Maui, and I would regret not having gone.  I am also sort of glad that we had a connecting flight as it showed me that I could, in fact, wear a mask for 12 hours if I really had to.  It also gives me more appreciation for those that work in jobs that require them to wear a mask all day long. You make it look easy!

    Final Thoughts About Flying Post-COVID

    If you are concerned about being in enclosed spaces with other people, seriously consider whether you are ready to fly.  I personally take all the precautions I normally would before a flight.  This includes packing hand sanitizer (which they also handed out on the plane), taking Airborne or Emergen-C before my flight and after my flight.  I’ve been flying for years now, and I’ve always understood that flying and traveling put me at risk to catch airborne viruses. So I do my best to mitigate the risks while still enjoying my love of travel.

    Not everyone is ready to do that, and I respect that decision. That is why I want to let people know how my experience was so you can decide for yourself whether you are ready to fly or not.

    If you have any other questions about my flight or travel experience post-COVID that I didn’t cover here, please let me know.

    Safe Travels!

  • How to Skip the 14-Day Quarantine in Hawaii

    The islands are officially back open to visitors from the mainland!  If you want to book a trip to Hawaii but don’t want to spend 14 days quarantining in a hotel room,  I am here to help!  My hubby and I rescheduled our 2020 trip to Maui three times due to delays in their re-opening and pre-testing option. We did not want to spend all that money to fly to Hawaii, only to sit in a room for 14 days. Finally, we had success when we rescheduled our trip for the third time to travel to Maui in November.  

    For those of you planning your trip or thinking about it, I’ve included all of the links and information I found useful when planning my own post-COVID trip to Maui.  Most of the information will apply to the rest of the Hawaiian islands as well.  

    The information I include here was up-to-date as of November 2020.  I am sharing my experience to help others plan their trip to Hawaii. However, please check Hawaii’s COVID-19 Portal for the most up to date and current information for travel to Hawaii.   

    Also, this information only applies to travelers coming from the mainland U.S. I traveled to Maui from the West Coast, so my experience might differ slightly from someone coming from other parts of the U.S.  However, the links I provide will give you the necessary information to plan your trip from anywhere in the lower 48 states.

    Overview of Steps to Avoid the 14-day Quarantine

    1. Take your COVID-19 test 72 hours or less before the last leg of your departure. This means if you fly from Dallas to L.A. to Hawaii, you’ll take the test based on the departure time of your L.A. flight.
    2. Create a Safe Travels account.
    3. After receiving your negative test results, upload a PDF version to your Safe Travels account. Also, notify your condo or hotel as needed. *Please note the State of Hawaii now requires your negative results to be uploaded before landing in Hawaii. Failure to do so will result in a 14-day quarantine, even if you receive your negative results after landing.
    4. Print a copy of your negative test results, flight reservations, and condo/hotel reservations and bring these with you.
    5. 24 hours prior to your departure, complete the Safe Travels Health Questionnaire and get your QR code. Save the QR code as a screenshot and also print and bring with you.  You are required to show this QR code at the airport upon arriving in Hawaii.

    *If you have a connecting flight to a second island, you will need a QR code for that flight as well.  We needed one for our flight to Honolulu and then our connecting flight to Kahului.  The QR codes have no identifying features to tell you which QR code is for which airport, so keep that straight to show the correct code for scanning at the corresponding airport.

    72 Hour Pre-test Requirements

    The COVID-19 State of Hawai’i Portal is where you’ll want to go for all the update to date information on their COVID-19 testing requirements.  At the time of my trip, the 72-hour pre-test requirements were as follows:

    Take your COVID-19 test 72 hours or less before your flight departure time. If you have a multi-city flight itinerary, the departure time is from the last city you leave before arriving at a Hawaii airport. So if you travel from Dallas to L.A. to Honolulu, you use your L.A. flight’s departure time to determine your 72-hour window. 

    You must take a Nucleic Acid Amplification Test (NAAT) from a certified Clinical Laboratory Improvement Amendment (CLIA) lab to bypass the State of Hawai‘i’s 14-day mandatory quarantine. These are also referred to as RT-PCR tests. Visit the State of Hawai’i’s travel partner page to see a list of approved testing facilities. The test must be administered by one of these approved testing facilities.

    Once you receive your negative test results, you will upload them as a PDF to Hawai’i’s Safe Travels websiteYou will need to create a Safe Travels account first. To do this, you’ll need your trip itinerary (flight information, duration of the trip, and where you’ll be staying). You’ll also need your State I.D. as they will ask you to fill this in. 

    *Each island may create their own additional test requirements, so check for any additional island-specific requirements.  You can check with the appropriate county office: County of Kaua‘iCounty of MauiCounty of Hawai‘i.

    Questions to Ask When Choosing Your 72-Hour Pre-Test:

    • How quickly will you get your results back?
    • Are they having any issues running out of tests? 
    • Do they process results on the weekends? (Some locations told me it was business days online, others said they process 7 days a week.)
    • How much does it cost? 
    • Can you use your health insurance to pay for it?
    • Is the test a diagnostic test (no antigen tests allowed), specifically a NAAT test? (They may use the words RT-PCR, this is a type of NAAT test.) 

    What Happens if Your Test Does Not Come Back in Time

    If your test results do not come back in before your flight departs, you will have two choices.  

    One: Cancel your trip plans and try to get your tickets and travel plans rescheduled for later. 

    Two: Fly to Hawaii and hope your test comes in by the time you arrive.  If it does, then you’ll upload your results to the Safe Travels site on your phone when you arrive in Hawaii, and you should be good to go.  If it does not, you are then required to quarantine at an approved location until your test results come in.  *UPDATE: You are now required to have your test results uploaded to Safe Travels before arriving in Hawaii. They will automatically quarantine you for 14 days if you do not, even if your negative test results come in when you land.

    You cannot get a rental car, and you cannot go to your condo (you’ll need to check the list to see if your hotel is on the approved quarantine list) if you have not uploaded your negative test results before arrival. If your test results are positive, then you’ll be forced to quarantine for 14 days at an approved quarantine location, and you will not be able to rent a car, get groceries, or go anywhere until the quarantine is completed.  They do follow up, and multiple tourists were arrested for breaking quarantine.

    *This situation is always changing. Please monitor the changes via Hawaii’s website and following news updates from Hawaii and your specific island destination.

    Setting Up Your Safe Travels Account

    As I mentioned in the steps above, you will need to create a Safe Travels account.  The Hawaiian State Government requires you to enter your travel itinerary details here.  This is also where you will upload the PDF results of your COVID-19 test.  

    To set up your account, you’ll need to provide your trip itinerary (flight information, duration of the trip, and where you’ll be staying) and your State I.D. as they will ask you to fill this in.  Make sure you use whatever I.D. you are bringing with you. For example, if you’re only bringing your Driver’s License and not your Passport, don’t enter your Passport info on the Safe Travels site as they will want to see the same I.D. when you arrive in person.

    24-Hour Health Questionnaire

    Then 24 hours before your departure, you will log-in to your Safe Travels account and complete the 24-hour Health Questionnaire. Upon completing this questionnaire, you are given a QR code.  

    QR Code

    You must show this QR code when arriving in Hawaii.  Take a screenshot of this QR code and save it on your phone. (Note: If you have a connecting flight that is also in Hawaii, you will need two QR codes. They don’t have any description to tell you which QR code is for which flight, so make sure to keep that clear when saving on your phone and when printing.) For example, we flew from Seattle to Honolulu, then Honolulu to Kahului.  We needed two QR codes.  To get this, you must enter each flight into your Safe Travels account separately.

    My Experience Getting Our Covid-19 Test:

    This was probably the most stressful part of planning our trip to Hawaii.  Our was condo booked, our flights booked, and rental car, but it all hinges on whether we get our test results back within the 72-hour pretest window.  If we do not get our test results back before landing in Maui, we will be directed to a quarantine facility until our test results come in.  That means we won’t be able to pick up our rental car or check in to our condo until the negative test results are processed. If our test results came back positive, then we’d be forced to quarantine for 14 days.* 

    *UPDATE: The State of Hawaii now requires the negative test results before arrival. Otherwise, you are forced to quarantine for 14 days–no exceptions. Visit the State of Hawaii website for the most up to date information.

    I researched all the options listed and determined which options were available to me in Washington State.  Due to the high number of visitors that travel from Seattle to Hawaii, I honestly thought there’d be more airport options available, but those seem to be popping up in California first.  We’re the ones with the rain here, people!  We need the sun more than those Californians!  Okay, all kidding aside, I am sure more choices will become available in the future as airlines do their best to provide travelers with additional options. 

    Check with your airline to see if they partner with any testing sites for travel to Hawaii, as these give your test results priority and give you the best chance of receiving your results back in time for your flight.

    Some of the options I found for travelers flying out of SeaTac Airport:

    • Bartell Drugs (Alaska Airlines partner)
    • Carbon Health (Alaska Airlines partner)
    • Walgreens (free to qualified participants)
    • Quest Diagnostics (you need to find out where they have locations)
    • Vault Health (Hawaiian Airlines customers receive priority processing for this at-home testing option.)

    We flew with Hawaiian Airlines who plans to expand drive-up testing options, but only San Francisco had a drive-up option available at the time of this article.  Hawaiian Airlines also partnered with Vault Health, an at-home approved test, for Hawaii’s 72-hour pretest requirements. 

    I initially researched using Quest Diagnostics and Walgreens.  I contacted Quest but never heard back from them, and their site did not show where their drive-up locations were located in Washington State.  So without knowing how close that option would be, and since they never replied to me, I moved on to the other two options available to me.

    Walgreens was next on the list, and I discovered I had two options: a 72-hour RT-PCR test or a rapid test option that allowed you to receive results the next day (only some locations offer this). Walgreens was also the only facility that allowed you to submit to insurance and didn’t require you to pay out of pocket (this may vary based on your location). 

    I loved the idea of not needing to pay anything for my test, as, let’s face it, it all adds up.  However, my main concern was that they only allowed appointments to be scheduled out 3 days in advance.  So I would need to wait to schedule until Monday before our flight.  This also meant that if there were no appointments available (I read reports from other travelers who couldn’t get appointments due to demand) that we would be out of luck and left scrambling to find a backup plan.  I was also told by a Walgreens employee that they were running out of the tests at some locations.  

    Testing Thru Vault Health

    After lengthy discussions with my hubby, I decided to turn to Hawaiian Airlines’ partner Vault Health. Hawaiian Airlines partnered with Vault Health to provide at-home testing kits.  This was the most expensive option at $150 per test.  However, Hawaiian Airlines passengers are given priority processing to ensure the 72-hour window is met.

    How it Works:

    You take your test online via a zoom video call where a technician will step by step tell you what to do and observe you administering the test.  Don’t eat, drink, smoke, or chew gum for 30 minutes before your video call.  When you’re ready, you’ll log in to your Vault Health account and download the Zoom app for your video call.  This can be done on your computer, tablet, or phone. 

    The technician in the zoom video call will instruct you how to open the test’s packaging (don’t do this before your call, it’s crucial you do not open the specimen tube packaging before your zoom call). It should take less than 10 minutes to do the test with the practitioner over the zoom video call.

    Afterward, you’ll place your sample tube in the plastic bio bag, and then you’ll place that inside the white box that your kit came in, seal that up and then place that inside the shipping pouch with the pre-paid Next Day Air shipping label.  

    Drop it off at the nearest UPS store.  The lab receives your sample the following day, and you should get your results a day after this. They have a chart to show you examples for when to order your kit, when to take the test, and when you should get results back based on when your flight leaves.

    Our Experience Using the Vault Health At Home Testing Kit:

    We filled out the online order form for our tests. Each adult must create their own individual order (make sure to use the link on Hawaiian Air’s website for each order). Vault Health also requires an uploaded copy of our photo ID, so the technician who proctors our test can verify we are who we say we are.  Within an hour of completing our orders, we received an email notification that provided us with a UPS tracking number for our test kits. Our testing kits were shipped via UPS Next Day Air.  

    By using Vault Health for our tests, I was able to order our tests almost two weeks before our flight. I ordered ours on a Sunday night, and we received them Tuesday at 10:30 a.m.  Look at Vault Health’s recommended schedule for when to order your tests and when to take them.

    The testing kit arrived in a nondescript white box that is also the box you ship your test sample back in.  It is an ingenious design with low waste. I was impressed with that. Inside the box are instructions, the DNA specimen collection tube, alcohol wipe, a bio envelope to put that in, and a shipping bag pre-labeled with a UPS Next Day Air label for their New Jersey based lab.

    My husband and I took turns with our Zoom calls.  I showed the technician my I.D., and he had me unpack my kit and then walked me through how to provide a testing sample. Honestly, the hardest part was spitting in the collection tube, once you get that done, it’s just an easy stop at a UPS shipping store, and you’re set! 

    Make sure you get your sample dropped off before the last UPS Air pickup at your local UPS store.  Call and ask when that is or look on their website.

    The Waiting Period

    The test was the easy part; now, the hard part began. Waiting for our test results. I was so anxious, I felt like the fate of my travel plans were in someone else’s hands.  I prayed and I talked to my hubby about it. He got stressed by me being stressed. So I prayed some more and talked to a friend about it. 

    I dropped our tests off on a Thursday; our flight was scheduled to leave Sunday morning. A hurricane was hitting the East Coast, where our samples were headed.  Friday morning, I got up and entered the tracking numbers; I was so happy to see our test samples had already made it to New Jersey.  Around 10:00 a.m. PST, we received a notification from Vault Health that the lab received our test samples.  More waiting.

    Then it happened, on Friday night, at 5:44 p.m., we got the email with our test results.  We were COVID-19 negative, and we were going to Maui! 

    Summary Timeline of our Vault Health Testing Experience:

    • I ordered the test kit on a Sunday, received it via UPS Overnight Air on Tuesday morning.
    • We took our test with a lab tech via Zoom Thursday morning before our scheduled Sunday departure, and I dropped our test results off at UPS that morning.
    • The tests were sent via Overnight Air to New Jersey (I’m on the West Coast) and arrived their Friday morning.  We received our negative test results Friday night. I had all day Saturday to pack in peace.

    Next Steps After Getting Negative Test Results

    After receiving our negative results, I logged into our Vault Health accounts to download the PDF version of our test results.  This is required to submit to the Hawaii Safe Travels website.  I uploaded the PDF results, and then I also text the team at Chase’N Rainbows to let them know our results were negative.  They asked me to send them a copy of the negative results, and the following day I received instructions for checking into our condo.

    I also printed copies of the PDF results along with copies of our flights and condo reservations.  The state of Hawaii recommends you do this for faster processing and just in case your mobile device doesn’t work.

    Lastly, 24 hours before our scheduled flight departure, I logged into my Safe Travels account and completed the Health Questionnaire. Upon completion, you’re sent a QR code, which you’ll want to save as a screenshot on your phone and print out and bring with you.  This is required for each airport in Hawaii.  We had a connecting flight in Honolulu, so that meant I needed to generate a QR code for our flight from Seattle to Honolulu and then also a QR code for our flight from Honolulu to Kahului. I created two separate trips on their Safe Travels site to do this.

    Our Experience at the Airport in Hawaii

    Before boarding the plane, our forehead temperature is scanned. Other than this, and of course, everyone wearing face masks, the flight experience was pretty much the same. They gave us one meal, and everyone takes their masks off to eat and then put them back on.  There were no additional snack or meal services during the flight.  Also, expect that you may be seated next to a stranger, as flights are filling back up again, and they are no longer leaving the middle seats empty.

    QR Code Checkpoint at Airport:

    We had a connecting flight in Honolulu before continuing to Kahului, Maui. Upon arriving at the Honolulu airport, we were placed in two lines, one for those staying in Honolulu and another for those connecting to other flights.

    We stood in line for probably 30 minutes before we stopped at the checkpoint, where they asked for our QR code and proof of negative test results. They also checked our I.D. After that, we were free to head to our gate and get something to eat.  

    The options available for eating and shopping is one of the things that has changed.  Many of the options are closed, and the open ones don’t always offer seating areas or have limited hours.  We got food at Burger King in the Honolulu airport as it was one of two options, not counting Starbucks.  We then took our food to our seats, where we removed our masks to eat before replacing them again.

    Upon arriving in Maui, we once again waited in line to show our QR code, I.D., and negative COVID-19 test results.  Thankfully, the Maui line was much shorter than the line at the airport in O’ahu. 

    We asked if we needed a paper to show we had been screened with negative test results; the airport agent we spoke with said no, we could show our test results if asked.  However, the car rental counter agent said the airport checkpoint had been providing a piece of paper and that we should take a screenshot of our Safe Travels page that showed the negative results received. She said we could show this if needed.

    Mask Requirements in Maui

    No one in Maui asked us to show proof that we are exempt from the 14-day quarantine. However, I overheard someone saying if you take a boat tour, you must show this. Our Maui experience is the same as previous trips, except for the mask mandate and that many businesses are still closed. You don’t need to wear one at the beach when socially distancing or in the water.  However, when in public areas or places of business, a mask is required. We are still enjoying the water, still enjoying the sunshine, and still loving our time in the beautiful Hawaiian islands!

    Tips for Researching and Planning Your Trip

    Regularly review Hawaii’s COVID-19  Portal* as this is the official State of Hawaii page for traveling under the COVID-19 restrictions.  I made sure to check it multiple times during the weeks leading up to my departure.  I didn’t want to miss any important announcements.  

    Another method I used for staying up on any current changes was by searching “Hawaii travel” on Google, and then I click the “News” tab and sort by the past week.  This way, I read about any recent press releases that might be pertinent to my trip. 

    I verified the cancellation policy with my condo rental. When my hubby and I visit Maui, we stay in a condo.  We have had wonderful experiences booking our condos through Chase’N Rainbows: West Maui Condos.  We appreciate the fantastic customer service and communication that we get with the Chase’N Rainbows team.  They were quick to respond to our questions and keep us updated on any COVID-19 updates that would affect our stay with them. I also emailed them any questions and concerns I had and was so appreciative of their fast replies and willingness to work with us and the ever-changing travel situation. If you’re headed to Maui and want a condo on the west side, consider booking with Chase’N Rainbows. 

    No matter who you book through, make sure to ask them any questions you have, such as, “if our COVID-19 tests come back negative, can I still cancel and receive a full refund?” You will also want to keep them updated about any trip delays and as soon as you receive your negative test results, let them know as they need confirmation to finalize your trip plans.

    *Always verify you have the most up to date information when planning.  The COVID-19 situation, restrictions, and regulations are constantly changing. Always check for the most current information.

    Important Websites for Planning:

    Visiting Restaurants, Businesses & Tours

    Call before visiting a restaurant unless you know for sure that it is open.  Google is not entirely up to date with what businesses are currently opened, closed permanently, or temporarily closed.  It is pretty good, but not 100%. To avoid any disappointment, it is best to verify first before heading out.  This is the same when booking tours. Call and find out if they’re operating and what restrictions are in effect at that time.  

    Sadly, many businesses closed permanently due to the loss of business in 2020, and even more, are still temporarily closed.  When possible, spend your money where it will help the local economy. They really need it right now.  Many more places were opening in December in anticipation of increased tourism, so it may have changed greatly by the time you arrived. 

    Final Planning Thoughts On Post-COVID Travel to Maui

    Try not to stress too much.  We contacted our condos ahead of time to find out their cancellation policy if our test results didn’t come back in time or were positive and we had to cancel our trip.  Most places have a very lenient cancellation policy due to the demands and restrictions of living in a post-COVID world.  Once we knew we had options for canceling that didn’t cause us to lose our money, we felt a lot better about moving forward with our trip plans.

    Some people are not ready to start traveling yet, and that is okay.  However, many places, like Hawaii, rely almost solely on tourism for their economy. If you’re healthy and want to travel someplace, you couldn’t do much better for a travel destination than Hawaii.  

    Hawaii is a diverse state with a diverse set of islands.  Be respectful of the local customs, try to support local businesses when you visit, and soak in the sun and relaxing atmosphere of this incredible destination. I know so many people need time to relax and time to recover from this year. Perhaps more so than any other year.  So if you need a place to get away, Hawaii can offer you a respite from your cares and perhaps some mental healing too.

    I hope this article helps you plan your trip to Hawaii. I know I’ve repeatedly said this, but I cannot stress enough how fluid the COVID-19 situation is and how important it is to make sure you get the official travel information from Hawaii’s state COVID-19 webpage.

    Additional Articles You Might Enjoy

    *Please note these articles were written before 2020. Please keep in mind some of the places listed may not currently be open for business.  I am writing this from Maui and have already encountered favorite restaurants that are now permanently closed for business due to the COVID-19 shutdown.  I will update my posts shortly to reflect this.
     
    Aloha and Mahalo!
  • A Beginner’s Guide to Photographing Waterfalls

    I love waterfalls! I’m not sure what it is about water cascading down rocks and over cliffs, but I can’t seem to get enough of it! Thankfully, here in the Pacific Northwest, we have no shortage of waterfalls.  Snoqualmie Falls and Franklin Falls are a couple of my favorites, just a short drive from Seattle.  

    I especially love hiking to see waterfalls. The waterfalls are my reward at the end of the trail.  You know, sort of like the pot of gold at the end of the rainbow, but without the actual gold.  And speaking of rainbows, waterfalls are great places to see those too!

    As a photographer, I enjoy capturing a waterfall’s beauty to share with others who might not get a chance to see it in person, or better yet, to inspire others to see it themselves! Waterfall photography is a skill I am still learning, but I wanted to pass along some tips I found especially useful when just beginning. Use the tips in this post as a foundation for developing your skills, and most of all, have fun!

    What Kind of Camera Do You Need

    You can use any camera to photograph waterfalls. However, if your camera doesn’t allow you to adjust your settings manually, you will be limited in the type of photograph you can get. 

    So in this post, I’m going to assume you have a DSLR camera, mirrorless camera, or some type of digital camera that allows you to manually change your ISO setting, aperture, and shutter speed.  

    I know some smartphones allow you to adjust some of these settings, so even if all you have is a smartphone or point-and-shoot camera, you can still apply many of these tips using the camera you currently own. I think getting out and using what you have now is better than not getting out at all.

    What Kind of Lens Should You Use

    I recommend you start with a wide-angle lens.  I like to use my 24mm to 70mm zoom lens as it allows me a little flexibility on zooming in and cropping areas of my scene to achieve a different look.  

    If you have fixed lenses, then bring a wide-angle lens and also a telephoto lens and use both to see what you can capture with each.  While it may seem like you should always try to photograph the entire waterfall, often you will find by zooming in or using a telephoto lens you can highlight one unique area of the waterfall that might be overlooked with a wide-angle shot.

    Remember, you should have fun when you’re out photographing the world. Develop your eye, learn new techniques, but always have fun while doing it.

    Additional Gear to Bring

    Other gear you might want to bring would be a backpack for your camera and additional lenses, plus any snacks or water you might want.  Another item that can be useful depending on the temperature you’re shooting in is a pair of gloves. Preferably ones that allow you to touch your smart phone or camera screen without removing them. I’ll also go over other gear you’ll want, such as filters, lens cloth, and waterproof clothing in the tips below.

    12 Tips for Photographing Waterfalls

    #1 Bring a Sturdy Tripod

    A good tripod is necessary for photographing waterfalls, especially if you want to try to blur the water’s movement, rather than stop it. When using a tripod, you can slow your shutter speed down and capture the silky motion of the cascading water.

    One other tip regarding the use of a tripod is to be mindful of where you place it.  If you put it in a stream or at the edge of the waterfall’s flow, the vibrations from the water flowing around your tripod’s legs can cause blurry images.  So keep that in mind when choosing where to set up your shot.

    #2 Wear Water-Resistant Clothing

    You will get wet while photographing waterfalls, so make sure to wear clothing that is water-resistant or waterproof. A good rain jacket and waterproof shoes will go along way in keeping you comfortable while photographing waterfalls.

    #3 Pack a Lens Cloth

    This one is also essential to remember to bring. Often, you will be close to the waterfalls you are photographing, and a lens cloth will be a lifesaver! Trust me, when your lens is covered in spray from the waterfall, it makes it hard to take that photo!

    You don’t want to scratch your lens either by using your shirt, so it’s nice to have a lens cloth tucked in your pocket so you can easily pull it out whenever you need to wipe your lens off.

    #4 Set Your ISO to the Lowest Setting

    To capture the flow of water and not have the highlights in the water completely blown out, you need to set your ISO at the lowest setting on your camera.  This will probably be around ISO 100, depending on your camera’s settings. You may even want to underdevelop your photos a little and then correct the exposure in post-processing to get the best results.

    Where you might want a higher ISO is if you’re working in low lighting conditions, and you’re trying to freeze the water’s motion.  Then you might want to use ISO 200 or ISO 400.

    #5 Set Your Aperture to Capture the Details

    In addition to setting your ISO to the lowest setting, you’ll also want a smaller aperture (also known as an f-stop). The aperture controls the amount of light reaching your camera’s sensor.  A small aperture allows less light in but will enable you to capture more of the detail of your waterfall and surrounding scenery.  Whereas, the opposite is true when using a wide aperture. A wide aperture allows more light in but has less of the scene in focus.

    The higher the f-stop number (f/22), the smaller the opening and the least amount of light reaching the sensor.  The lower the aperture or f-stop (f/2.8), the larger the opening and the more light entering your camera’s sensor.  I suggest playing around with f-stops starting at f/11 through f/22 (or up to the highest f-stop your camera allows). 

    Sometimes you may want to have a wider aperture like an f/5.6 depending on what part of the scene you want in focus(or out of focus) or if you need to allow more light in to freeze the water’s motion. Other times, to achieve a longer exposure time (slow shutter speed), you’ll need a smaller aperture to let in less light. The more you experiment with your camera’s settings, the more you’ll learn and improve your photography skills.

    #6 Setting Your Shutter Speed

    You can adjust the shutter speed to create different effects when photographing waterfalls. You can freeze the motion of the water with higher shutter speeds, or you can slow it down and create a blurred, silky movement with longer exposure times.  I recommend trying different shutter speeds to see which effect you prefer. There is no perfect shutter speed or aperture; it all depends on the look you want.

    Experiment with your settings to see which effect you like the best.  If, for example, you want to try freezing the motion of the water than start at a shutter speed of 1/200, this will partially freeze the movement, then try 1/500 to freeze the water’s action completely.  You may need to use a larger aperture and increase your ISO to achieve this depending on the light in which you’re shooting.

    #7 Bring the Right Filters

    Two types of filters are handy to have when photographing waterfalls, polarizing filters, and a neutral density (ND) filter. The polarizing filter is useful when you’ve got a pool of water below your waterfall, and you want to capture what’s beneath the surface.  The polarizing filter will reduce the glare and reflections on the water’s surface.

    ND filters reduce the amount of light coming into the camera’s sensor.  They make your camera think it’s darker than it is. You can purchase them in varying strengths depending on how much light you want to block. Although not a requirement for photographing waterfalls, they help you achieve the lower shutter speeds you need to capture the motion of the waterfall without blowing out the highlights. 

    If you think you’ll photograph waterfalls regularly, then consider purchasing one. All of the images I’ve shown in this article were shot without an ND filter.  However, I also shot early in the morning, in a wooded landscape shaded from the sun. This is a good set to get started with, however if you’re looking for something a little less expensive you can always buy one to start with and then add on from there.  Make sure you purchase the correct filter size to match your lens size.

    You would not be able to achieve the low shutter speeds and retain the details in the waterfall if this were a bright sunny scene.  The highlights will be completely blown out.  ND filters are necessary when shooting waterfalls on a bright sunny day if you wish to slow the water’s motion.

    #8 Get a Shutter Release Cord

    Another helpful tool is a remote shutter release cord. They are useful when working with very low shutter speeds, as any amount of movement can blur your image. So by using a shutter release cord, you reduce the risk of camera shake when pressing down the shutter release button.  This is the one I use with my Nikon and ask you can see they’re relatively inexpensive.

    All of the images in this post were taken without a shutter release cord. So, you can certainly photograph waterfalls without them, but they are convenient to have and not all that expensive either.  Plus, if you have any interest in astrophotography or night photography, you’ll definitely want one!

    #9 Try Different Angles & Viewpoints

    Play around with the various angles at which you can photograph your waterfall. All of the photographs in this article were taken at the same waterfall setting. At the beginning of the post, I included a photo of the overall scene I was working with. I did this so you could see examples of shooting a single scene from many different angles and viewpoints.

    Try shooting down low, or finding a higher vantage point.  Perhaps, swap out your wide-angle lens for a telephoto lens and try focusing on just one area rather than trying to capture the entire waterfall. No matter what you’re photographing, it is always good to try to see it from different angles and viewpoints. 

    Many times people will just walk up, center their subject, snap, walk away.  However, if they took the time to compose their photo, choosing to highlight unique features in their scene, they would most likely create a more visually appealing photograph. 

    Take time to get low to the ground, or to climb that small hill close by, and discover a new way of viewing your subject. If you have a zoom lens, make sure to move it in and out to see what look you prefer. You might be surprised at what a difference cropping the scene in can make.

    #10 Be Careful of the Slippery Conditions

    This one should go without saying, but be careful when walking around a waterfall.  Slippery when wet, is a condition that always applies to waterfalls. So while I recommend that you try to photograph all the available angles, only do so when it is safe. You don’t want to injure yourself or break your camera–now that would be bad!

    #11 Shoot in RAW Mode

    If possible, shoot in RAW mode as this enables you to capture the most detail in the highlights and shadows.  This is important for post-processing as you can bring out those details later when you begin to “develop” your photo and correct any low-lighting and underdevelopment.

    If your camera does not allow you to shoot in RAW, then just choose the highest JPEG setting it allows. Often cameras will have JPEG-Fine or JPEG-Normal, if that is the case with yours, choose JPEG-Fine or the highest quality available when RAW isn’t an option.

    #12 Experiment & Take Notes

    Use bracketing on your camera to take multiple photos at different exposures. Try different combinations of aperture and shutter speed to achieve the effect you desire. 

    Consider bringing a small pocket notebook with you and a pen to take notes about what settings you’re trying, what you’re learning, and maybe any ideas that come to you for future photoshoots. 

    Yes, modern cameras now record all your settings for you, but sometimes it’s nice to write it down for easy viewing in the field.

    Final Notes on Photographing Waterfalls

    Best Weather for Photographing Waterfalls

    Often when photographing outdoors, we prefer sunny conditions, but when it comes to waterfalls, a cloudy day can often be a bonus!  You see, if it is a little darker out, it helps achieve the lower lighting conditions needed to fully capture the details of the waterfall. 

    A calm day is also essential when photographing waterfalls. This helps keep your camera from shaking and limits the risk of blurred, out of focus images. If you have a long exposure and it’s windy, then the trees and shrubs and water in the scene will be blowing and end up blurred due to the slow shutter speeds.

    No Perfect Setting

    Remember, there’s no “right” shutter speed or aperture.  However, some settings you can start with to freeze the water are a shutter speed of 1/200 and higher and then a wider aperture to let in more light.  If you want to capture the silky motion of the waterfall, in addition to choosing the lowest ISO, try a smaller aperture, maybe f/16 and a 1-second shutter speed for a starting point.  Then play around with the settings from there until you get the look you want.

    Have Fun

    Enjoy developing your photography skills (yes, I meant that as a pun). It is so much fun to try new things. When you look at your photographs later, it’s exciting to see what you’ve captured and to come up with ideas to try next time. 

    Remember, all the gear in the world won’t replace a good eye and regular practice. So learn to use what you have, and most of all, have fun doing it!  

    Go Chase Some Waterfalls!

    Note: Travelffeine is reader-supported. This post contains affiliate links. When you make a purchase using one of these affiliate links, we get paid a small commission at no extra cost to you. And as always, all opinions are our own. Thank you!

  • Choosing a Travel Credit Card in 2020

    Perhaps you’re like me, and you’ve put off choosing a travel credit card.  Maybe you aren’t sure if they are worth the annual fees, or whether they give you any additional benefits over your current credit cards. 

    Well, I have been in the same boat as you.  I’ve received the offers in the mail, and I’ve heard friends talking about their travel credit cards, but I never made the leap to get one myself.  Now that I look back on all my travel, I realize I have missed out on a lot of miles and bonus travel rewards.  So, this year, I decided I would do some research and decide on a travel credit card.

    This article is the outcome of that research. I hope it helps you decide whether or not a travel credit card is right for you and helps you choose the best card based on your travel spending patterns.

    Are Travel Credit Cards Still Beneficial in 2020

    2020 is an entirely different year than any I have experienced, and I’m guessing you would probably say the same. You may have wondered whether or not it even makes sense to get a travel credit card this year.  I mean, we haven’t really been able to travel yet this year.  So what’s the use of a travel credit card if you can’t use it for travel?  

    Money.com answers this question and explains some of the travel benefits you can earn during this time when travel is limited.  In their article on the Best Travel Cards in 2020, they explain that credit card companies are adapting to the current COVID-19 restrictions. Some are extending the eligible purchases window to give you more time to earn your sign-on bonuses. Many of them currently allow you to accrue bonus points for non-travel purchases such as groceries and streaming services. 

    As you can see, there are a variety of benefits you can still receive as well as accrue points for future travel based on your current non-travel purchases.  Travel credit card companies are adapting to the present situation and providing incentives and options for future travel.  

    I’ve also listed some travel credit card options that allow you to accrue travel miles based on everyday purchases.  These are an excellent choice during times like this when you are unable to make travel-related purchases.

    Why You Might Want a Travel Credit Card

    In case you’re not sure why you would want a travel credit card, here is a quick summary of some of the benefits they provide.

    • Earn travel rewards for purchasing you’re already making. Choose a travel credit card that rewards your everyday purchases, and you’ll get points to use on future travel for things you were going to buy anyway!
    • Get a complimentary companion fare.  Some airline travel cards reward you with complimentary companion fares–all you do is pay the taxes and fees!
    • Ever wished you could use those nice airport lounges? Some travel cards give you access to over 1,000 airport lounges.  That means a quiet place to rest, plug in your laptop, get complimentary hot coffee and snacks, and relax before your flight.
    • Get free upgrades on hotel rooms and flights.  Travel cards allow you to get exclusive upgrades with partnered hotels, and some even allow you to receive complimentary upgrades on flights.
    • Most travel credit cards offer no foreign transaction fees, and let me tell you from experience–those really add up!  Early on in my travels, I learned this lesson the hard way.  I quickly switched to only using a card with no foreign transaction fees.
    • You get added protection when you travel.  Travel credit cards offer a wide range of trip insurance coverage, lost luggage reimbursement, and even reimbursements for flight delays.
    • The main reason you might want a credit card is to accrue mileage points to use toward future trips.  You’re already spending the money on travel and everyday expenses, why not be rewarded with even more while doing it!

    Researching the Best Travel Credit Cards

    Now that we’ve established why you might want one and that travel credit cards are beneficial even during this no-travel period, I want to quickly go over my research to find the best travel credit cards.  I read numerous articles on this subject, specifically searching for the most up-to-date information for 2020 card options. I also looked over the travel credit card offers I received in the mail for comparison.

    After reviewing all of the available options I narrowed them down based on the categories I thought would interest most people. 

    I’ve summarized my research into the following categories.  Feel free to jump ahead and see my top picks for each group.

    Best First-Time Travel Credit Cards

    These are my top two choices for someone looking to get their first travel credit card but aren’t ready to pay the high annual fees charged for the more luxury credit cards.  Perhaps you only travel a few times a year, and you’re not sure you could maximize all the benefits of the luxury cards. These travel cards are an excellent place to start. Both provide great travel benefits, even when compared with some of the “luxury” cards.

    Chase Sapphire Preferred

    Currently, Chase offers new cardmembers 60,000 bonus points when you make $4,000 on purchases in the first three months after opening an account.  Cardmembers also earn 2X points on travel and dining and 1 point per dollar spent on other purchases.

    You can redeem your points through the Chase Ultimate Rewards site to receive 25% more return on travel-related purchases. Rewards earned with the Chase Sapphire Preferred card also give you a 1 to 1 point transfer with a variety of frequent flyer programs such as Southwest Airlines Rapid Rewards, United MileagePlus, and many others.

    Other benefits include trip cancellation insurance, auto rental collision damage waiver, and trip reimbursement. They also offer exclusive bonuses for Door Dash and Lyft customers. Additionally, you can redeem reward points for other non-travel related purchases. 

    When used with Chase’s Ultimate Rewards program, you can get more bang for reward-buck with the Sapphire Preferred card than say the below Venture Rewards card.  However, it is not as straight forward as some might prefer. See the Chase Sapphire Preferred website for more information on benefits and restrictions.

    Quick Overview:
    • Low annual fee of $95
    • 60,000 bonus points after spending $4,000 during the three months after initial sign-up.
    • 2X points on travel and dining and 1X for all other purchases.
    • Extra redemption benefits through Chase Rewards as well as 1:1 point transfer with airline/travel partners.
    • No Foreign Transaction Fees
    • A variety of trip insurance and travel protection benefits
    • Primary car rental insurance.
    • Additional offers for cardmembers with DoorDash subscriptions or Lyft accounts. 

    Capital One Venture Rewards Card

    The Capital One Venture Rewards travel credit card offers an easy way to earn points. There aren’t separate categories for earning miles. Instead, you earn 2X miles rewards for every dollar you spend on all purchases. New cardmembers get 50,000 bonus miles after spending $3,000 on purchases within the first three months after initial sign-up. 

    There are no foreign transaction fees with the Capital One Venture Rewards card.  Cardmembers receive travel accident insurance, car rental coverage, and extended warranty protection on qualified purchases. Redeem reward points for flights, hotels, and even use them to pay for purchases on Amazon.com.  

    You can also transfer rewards points to a variety of travel partners such as EVA Air, Jet Blue, and Air France. Another benefit not offered by Chase Sapphire Preferred is the reimbursement of up to $100 for the Global Entry or TSA PreCheck application fee. 

    The Venture Rewards card is a good choice if you plan to use it for everyday spending vs. travel purchases. Its simple accrual and redemption of points will appeal to many who prefer to find their own travel deals rather than book through a specific travel site such as Chase Travel. Visit the Capital One Venture Rewards card website to learn more about additional benefits and restrictions.

    Quick Overview:
    • Earn 2X miles rewards on all purchases.
    • Earn 50,000 bonus miles after spending $3,000 during the three months after initial sign-up.
    • No foreign transaction fees.
    • Low annual fee of $95
    • A variety of trip insurance and travel protection benefits
    • Transfer miles to other travel partners, redeem points for travel-related purchases and even use for non-travel purchases on Amazon.com
    • Receive up to $100 reimbursement for Global Entry/TSA PreCheck application fees.

    Best Luxury Credit Cards

    This category is best suited for frequent travelers—those that travel for business or work, rather than the vacation traveler. Review your travel needs to determine whether the high annual fees are worth the travel benefits you receive and what you will use.

    Chase Sapphire Reserve Card

    The Chase Sapphire Reserve Card is similar in many ways to the Chase Sapphire Preferred Card.  I highlight the extra benefits the Sapphire Reserve offers and where it might make sense to choose it over the Sapphire Preferred. If you want to look at an in-depth comparison of the two cards, I recommend reading this comparison done by The Points Guy.

    The Chase Sapphire Reserve is a travel credit card designed with the frequent traveler in mind. As such, it has travel perks not seen on the lower-tier Sapphire Preferred card. Benefits such as complimentary access to over 1,000 airport lounges or complimentary room upgrades at luxury resorts worldwide.  

    Cardmembers also receive up to $100 every four years as reimbursement for the Global Entry or TSA PreCheck application fee. Additionally, Chase Sapphire Reserve cardmembers earn an annual $300 credit for travel purchases charged to your account each year. If you factor in the yearly $300 credit, then the $550 annual fee is only $250.  Cardmembers who use Lyft will also receive 10X the points on Lyft rides vs. 5X with Chase Sapphire Preferred.

    New cardmembers receive 50,000 in bonus points after spending $4,000 in purchases within the first three months of opening an account. Earn 3X points on travel and dining (2X on the Sapphire Preferred) and 1 point per dollar spent on other purchases. Redeem your points through the Chase Ultimate Rewards site to receive 50% more return on travel-related purchases (Sapphire Preferred was 25%). See the Chase Sapphire Reserve website for additional benefits and restrictions.

    Quick Overview:
    • Annual fee of $550. 
    • $300 annual travel credit.
    • Access to over 1,000 airport lounges worldwide.
    • Earn 50,000 bonus points after spending $4,000 during the three months after initial sign-up.
    • 3X points on travel and dining and 1X for all other purchases.
    • Extra 50% redemption value when redeeming points through Chase Rewards
    • No Foreign Transaction Fees
    • A variety of trip insurance and travel protection benefits
    • Receive up to $100 reimbursement for Global Entry/TSA PreCheck application fees.
    • Earn 10X points on Lyft rides as well as extra benefits for DoorDash subscribers.

    American Express Platinum Card

    If you travel mostly in the U.S., another luxury card option to consider is the Amex Platinum card. It has a lot of the same benefits as the Sapphire Reserve, with a few rewards options not offered with the Sapphire Reserve.  However, Amex cards are not as widely accepted internationally as Visa or Mastercard, so you may have to carry a second card with you as a backup.  

    Some of the benefits the Amex Platinum has over the Sapphire Reserve are an annual Uber credit up to $200, up to a $100 credit to Saks Fifth Avenue, gold status with Marriot Bonvoy and Hilton Honors, and a more extensive airport lounge network with access to over 1,200 airport lounges.

    Currently, Amex offers 75,000 bonus points (usually 60,000) when cardmembers make $5000 in purchases within the first three months after sign-up.  You’ll earn 5X points when booking flights and hotels directly through the Amex Travel site and 1X points for all other purchases. You’ll also receive an annual $200 airline fee credit to cover fees charged by participating airlines. See the American Express Platinum website for additional benefits and restrictions.

    Quick Overview:
    • Annual fee of $550. 
    • $200 annual airline fee credit to use towards baggage fees and in-flight beverage fees, etc.
    • $200 in annual Uber credits
    • $100 in Saks Fifth Avenue credits annually.
    • Access to over 1,200 airport lounges worldwide.
    • Earn 75,000 bonus points after spending $5,000 during the three months after initial sign-up.
    • 5X points on travel and hotels booked directly through Amex Travel and 1X for all other purchases.
    • No Foreign Transaction Fees
    • A variety of trip insurance and travel protection benefits
    • Receive up to $100 reimbursement for Global Entry/TSA PreCheck application fees.
    • Excellent travel customer service and personalized travel planning with Amex Platinum Travel Counselors

    Best Airline Credit Cards

    Choosing an airline credit card will be a very subjective choice.  It depends on which airline you tend to travel with the most.  I list two options I would consider for an airline credit card based on my travel preferences.  You will need to review both and see if either of these match up with your travel habits.

    Southwest Rapid Rewards Priority Card

    If you are a frequent flyer with Southwest Airlines, then consider getting the Southwest Rapid Rewards Priority card.  This travel credit card has an annual fee of $149, but if you frequently fly with Southwest, the cost quickly pays for itself. 

    New cardmembers will receive 40,000 bonus points when they spend $1,000 during the first three months after opening an account. Cardmembers also receive 7,500 bonus points annually on their cardmember anniversary.  Earn 2X points on all Southwest Airlines purchases and 1X points on all other purchases.  Cardmembers also receive a $75 annual credit from Southwest, four upgraded boardings per year, 20% back on in-flight beverages and WiFi, and no foreign transaction fees.

    Cardmembers can also earn up to 15,000 tier-qualifying points each year to use towards A-list status rewards like priority boarding and same-day standby flights. Another fantastic benefit of using a Southwest travel card is it allows you to earn points toward receiving your Southwest Airlines Companion Pass

    With a Companion Pass, you can bring a friend or family member for free (just pay taxes and fees) on any flight you take! That is an excellent benefit!  Did you know Southwest now flies to the Hawaiian islands?  Yup, you could become the most popular person at this year’s Christmas party. See the Southwest Rapid Rewards Priority card website for additional benefits and restrictions.

    Quick Overview:
    • Annual fee of $149.
    • Earn 40,000 bonus points for new members after spending $1,000 in the first three months after sign-up.
    • Receive 7500 bonus points annually.
    • Earn 2X points on all Southwest purchases and 1X points on all other purchases.
    • $75 annual Southwest travel credit
    • Four upgraded boardings per year, plus 20% back on in-flight beverage and WiFi purchases
    • Earn up to 15,000 tier-qualifying points to help you achieve A-list status rewards.
    • No foreign transaction fees.

    Alaska Airlines Visa Signature Card

    If you live on the West Coast and frequently fly with Alaska Airlines, then consider the Alaska Airlines Visa Signature card. Currently, new cardmembers receive 40,000 bonus miles and one companion fare after making $2,000 in purchases during the first 90 days of sign-up. The current offer also includes a $100 statement credit.

    Cardmembers also receive an annual companion fare every year on their account anniversary.  The Alaska Famous Companion Fare means you only pay around $121 for a second companion ticket valid on Alaska flights book on alaskaair.com. You’ll also receive free checked bags for you and up to 6 guests on the same flight. 

    Earn 3X miles for every $1 spent on Alaska Airlines purchases and 1X miles for all other purchases. Cardmembers also get 50% off day passes at Alaska airport lounges and 20% back on all in-flight purchases when you pay with your Alaska Airlines Visa Signature card. 

    Although Alaska Airlines is primarily a West Coast-based airline, you can redeem mileage points to over 800 destinations worldwide on Alaska Airlines flights as well as with their global airline partners such as British Airways, Korean Air, and many others.  Upgraded Points wrote a detailed article on the various ways you can redeem your Alaska miles. 

    See the Alaska Airlines Visa Signature card website for additional benefits and restrictions.

    Quick Overview:
    • Annual fee of $75.
    • Earn 40,000 bonus miles, an extra companion fare, and receive a $100 statement credit after making $2000 or more in purchases within the first 90 days of opening an account.
    • Earn 3X miles on all Alaska Airlines purchases and 1X miles on all other purchases.
    • Receive an annual companion fare on your cardmember anniversary each year.
    • Get 50% Alaska airport lounge day passes and 20% back on in-flight purchases.
    • No foreign transaction fees.

    Best No Annual Fee Travel Credit Cards

    I know for some people the biggest drawback to choosing a travel credit card has been the annual fees.  Before my research, I would think, “why would I pay a credit card company just to use their credit card?” After doing a little homework on the subject, I can see that with the right card, the fee is quickly paid for in rewards benefits.  

    That said, I realize you might not be ready to pay an annual fee.  So here are a couple of good choices for travel credit cards with no annual fee.

    CapitalOne VentureOne Rewards Card

    The VentureOne Rewards card is CapitalOne’s no annual fee counterpart to the CapitalOne Venture Rewards card I mentioned above. With the VentureOne Rewards card, you’ll earn 1.25X miles per dollar you spend on all purchases. New cardmembers will receive 20,000 bonus miles when they spend $1,000 during the first three months of opening an account.

    One thing that makes this no fee card unique is that in addition to redeeming miles for statement credits, you can also transfer the miles to any of CapitalOne’s travel loyalty partners.  This is typically only an option with travel credit cards charging annual fees.  It can be a little complicated to learn when to use the statement credit and when to transfer the miles to a travel partner, but here is an article that explains some of the miles transfer options.

    Cardmembers also receive rewards like travel accident insurance, extended warranty coverage, rental car coverage, and no foreign transaction fees. In addition to redeeming rewards for statement credits and transferring to travel partners, you can also use your rewards point on Amazon.com purchases. See the VentureOne Rewards website for more benefits and restrictions. 

    Quick Overview:
    • No Annual Fee
    • Earn 20,000 bonus miles after spending $1,000 on purchases within the first three months of opening an account.
    • Earn 1.25X miles on all purchases.
    • No foreign transaction fees.
    • Travel Accident Insurance
    •  Car Rental Coverage
    • Transfer miles to other travel partners, redeem points for travel-related purchases and even use for non-travel purchases on Amazon.com

    Discover it Miles Card

    The Discover it Miles credit card is another option to consider when looking for a travel credit card with no annual fee. It offers a unique bonus to new cardmembers that I haven’t seen from other credit card companies. Instead of giving you a fixed bonus after you spend “x” amount of dollars, Discover offers a one-year unlimited bonus.

    At the end of your first year, Discover matches all the miles you’ve earned for the entire year! So the more you spend, the more you get. The regular earnings rate is 1.5X miles for every dollar spent on all purchases and no foreign transaction fees. So this means in the first year you’ll effectively earn 3X miles for every dollar you spend.

    Cardmembers can redeem their miles as a statement credit or have them deposited as cash in their bank account (one mile equals one cent).  There are no blackout dates, no foreign transaction fees,  your miles never expire, and you won’t lose your miles even if you close your account.  

    However, similar to American Express cards, Discover is also not as widely accepted internationally as Visa or Mastercard.  Thus, you might need to bring a secondary credit card when traveling abroad. For more information on benefits and restrictions, visit the Discover it Miles card website.

    Quick Overview:
    • No Annual Fee
    • Earn an unlimited first-year bonus. Get an unlimited miles match at the end of the first year for all miles earned.
    • Earn 1.5X miles on all purchases.
    • No foreign transaction fees.
    • Travel Accident Insurance
    •  Car Rental Coverage
    • No minimum for redeeming miles.
    • Redeem for travel or cash.

    Deciding Which Card is Right for You

    Deciding which travel credit card is the right one for you is a personal choice.  Review the sign-up bonuses and the regular earning of miles/points.  For example, if you typically spend on everyday purchases (rather than travel) such as groceries, bills, and online shopping, then you might consider the CapitalOne Venture card over the Chase Sapphire Preferred.  

    If you’re a frequent flyer with Southwest, then considering that card is a no brainer. Perhaps you aren’t ready for an annual fee, then either the Discover it card or VentureOne Rewards card make great choices. You must analyze your spending and traveling habits to determine which travel card is best for you. 

    Some argue that to truly maximize all the available travel benefits, more than one travel credit card is needed.  Many people have an “everyday” credit card that gives them the best rewards for everyday spending and then one that rewards them for travel purchases. Using two cards allows them to maximize rewards for both categories and provides even more significant travel benefits each year.

    Credit Score & APR

    Another important thing to consider is your credit score.  The cards on this list require average to excellent credit scores to qualify. You might try an airline card or a cash rewards card for starters as you build up your credit score.  Most of the travel credit cards will want a credit score of 650 or higher.  

    And one final point I want to make, these cards are not low APR credit cards.  So if you aren’t prepared to pay off the balance each month I suggest you wait and consider getting a low interest rate card instead.

    There are a variety of things to consider when getting a travel credit card. I hope this article narrows down which options to research when determining the one that is right for you. Whenever there is an opportunity to get free travel benefits, I think it’s worth looking into.  I can’t believe it’s taken me so long to do it! Please let me know if you have any questions, and I will do my best to help!  

    Happy Travels!

  • 13 Ways to Save Money on Food While Traveling

    One of the biggest expenses, when traveling, is our food budget.  Hey, it’s one of the biggest expenses we have when we don’t travel! So it comes as no surprise that if you want to stretch your travel budget, a good place to start is with food. Here are some easy ways to save money on food and stretch your budget a little further when you’re traveling.

    Top Ways to Save Money on Food While Traveling

    Book a room with a kitchen

    This is my favorite way to save money on food while traveling, particularly if I’m staying in one place for an extended period of time. 

    For example, when I go to Maui, I stay away from the large resort hotels and instead book a condo with a kitchen and an outdoor grill.  This saves me a ton of money on eating out!

    Even when staying in a place for only 2 or 3 nights, I try to book a room with a kitchenette.  That way, I have a microwave and a mini-fridge, so I can still make simple meals from my room if needed.

    Go to the grocery store

    Grocery stores are a great way to save money on food while traveling.  Whether you have a kitchen or not, you can purchase food to eat throughout your travels.  

    Fruit, snack bars, bread, peanut butter, nuts, bottled water, and so on are excellent options that save you money on food. Plus, many grocery stores also have a deli where they serve fresh salads and hot dishes too.  This is another option that is cheaper than eating out.  You can even purchase stuff for a picnic and turn it into an experience rather than just a meal.

    Pack snacks and water

    Often when I’m traveling, I will spend the entire day sightseeing.  I’ll leave after breakfast and won’t return until late afternoon.  One of the best ways I keep going and keep from getting hangry is to pack snacks and water in my day bag. This not only saves money on food and drinks, but it also makes sightseeing more enjoyable.  

    I’ve personally found that when my blood sugar dips down, I get tired and uninterested in seeing stuff.  If I can take a short 10-minute snack break, it turns my energy level around, and I’m ready to go again for at least another couple of hours.

    Pack a refillable water bottle or, as mentioned above, purchase bottled water at the grocery store and keep it in your room to take with you each day.  This saves a lot of money vs. buying single bottles at a time.

    Split meals with your traveling companion

    If you’re traveling with another person, why not consider splitting a meal.  My hubby and I do this when we travel and also when eating out near home.  We’ve found that the portion sizes at most places are more than enough for two people to share.  It’s a great way to save money and still have the experience of dining out.

    Book hotels with free breakfast

    Another easy way to save money on food while traveling is to book a room with breakfast included. This not only saves you money but also saves you time.  It’s very convenient to get up in the morning, grab breakfast at the hotel, and then head out for the day.  Some hotels even offer takeaway fruit options so you can have a snack for later.

    Farmers Markets

    Farmers markets are a fantastic way to support local farmers and artisans.  I enjoy browsing these markets for homemade souvenirs as well as for food you might not find anywhere else.  Often you’ll find seasonal fruit, baked goods, and a variety of food vendors.  It’s a fun local experience that gives you a feel for the neighborhood you’re visiting.

    Eat lunch rather than dinner

    Okay, I’m not suggesting you need to skip dinner altogether, but rather than you eat lunch at a restaurant rather than dining in for dinner.  Often, you can get the same menu for lunch as you would for dinner, but at lunch prices.  

    Many restaurants even offer lunch specials that come with a small appetizer and your main dish for much less than you would pay at dinner.  Ask about specials before ordering.

    Subscribe to our newsletter

    No kitchen, no problem

    If you’ve got a room with a coffee maker and a mini-fridge, you can still save money on eating in even if you don’t have a microwave or kitchen. I use the coffee maker to make oatmeal for breakfast and ramen noodles for lunch or dinner. 

    Additionally, if all I have is a mini-fridge, I purchase bread, peanut butter, and jam and make sandwiches to take on the go.  Just make sure you don’t forget to pack a knife and some zip lock bags for your sandwiches.  Bagels with cream cheese, yogurt, and bottled smoothies are also great options when all you have is a mini-fridge.

    Eat where the locals go

    If you eat at restaurants close to the main tourist attractions, you can be sure you are paying a higher price than if you were to go off the beaten path.  

    Try to find out where the locals eat.  Ask around and take a little extra time to walk a few blocks out of the tourist areas. If you look in a restaurant and you notice a lot of locals, the chances are that it’s cheaper and that the food is good!

    Eat with a local

    Several websites and apps allow you to meet with a local and share a meal or take a cooking class in someone’s home. This provides you with a unique experience to get to know the local culture better and to make a new friend.

    • Couchsurfing has been around for a while now, and although primarily used to find cheap lodging, you can also use it to find someone to share a meal with or tour the city with a local. Karen from Wanderlustingk explains how to do this, and gives some useful tips for staying safe.
    • Travelingspoon is another excellent way to meet a local and learning to cook a regional dish. Although this isn’t the cheapest option, if you look at it as both a meal and an experience, it’s a pretty good deal.  You will often spend as much on a meal at dinner as you will for the price of a cooking class through Travelingspoon.  Prices generally start around $20 and up.
    Also, make sure to ask around before your trip and see if anyone you know has any friends or relatives living in the destination you are visiting.  I’ve done this before, and it is a great way to save money and also to meet someone who lives in your destination.  They are an excellent resource for useful tips, recommendations, and history of the area you’re visiting. 

    Look for specials

    Restaurants in many cities offer prixe fixe menus.  These offer you an incredible fixed price on a three-course menu that includes your appetizer, main dish, and dessert.  This is a great way to try a fine dining restaurant without spending a ton of money.  

    Also, look for restaurants offering brunch specials and weekly dinner specials.  Many restaurants have once a week dinner specials where they serve a meal, say lobster, at a reduced rate.

    Plan for special experiences

    I understand that eating isn’t just about getting in your daily calories.  Food can be an experience too.  It’s a wonderful way to experience the local culture. So when you’re planning a trip, if you know, there is a particular food you want to try at your destination, plan ahead and pick out the best place to eat it.  Then budget for it. 

    You can eat peanut butter and jelly sandwiches for most of your trip but then splurge on those special occasions. I try to save money on food while traveling, but I allow for a couple of unique dining experiences.  This makes eating out more memorable.

    I’ve splurged on Peking duck in Beijing (at lunch to save money), a five-course meal in Italy prepared by a prince (no kidding), and a fondue dinner in Switzerland (nothing is cheap there).  I sacrificed eating out each day, to save for a few special meals.

    Skip Starbucks

    Okay, don’t worry, I’d never tell you to skip coffee, however planning to make coffee in your room will save you a lot of money. Pack a travel french press from or an Aeropress, then all you need is some hot water and ground coffee, and you’re good to go! You may also want to bring a collapsible mug or refillable bottle that works for both hot and cold drinks.

    Even if you use the coffee maker at your hotel or Airbnb, you may want to purchase some local coffee beans at the grocery store or if you’re lucky enough–a local coffee roaster. 

    If you do plan to grab a cup of coffee at a cafe, order the roast of the day and get a drip coffee to save money. There are, of course, times where splurging on your favorite coffee is warranted. However, these are ways to save money on coffee for the rest of the time.

    Suggested Meals You Can Make to Save Money on Food

    Here are some ideas for foods you can make in your room.  Make sure to plan ahead and pack utensils, refillable water bottle, and any coffee filters or gear you need. It may take a little extra planning, but it can save you hundreds of money during your trip.

    Breakfast

    • Breakfast bars
    • Bagels
    • Toast
    • Eggs
    • Cereal
    • Oatmeal packets (I pack from home)
    • Fruit
    • Muffins/bakery items
    • Yogurt

    Lunch/Dinner

    • Meats, cheeses and crackers from local grocery store or charcuterie
    • Peanut butter and jelly sandwiches
    • Instant noodles
    • Salads (from deli or produce section)

    Snacks

    • Jerky
    • Nuts
    • Fruit
    • Snack bars

    Final Thoughts and Tips

    Here are a few final tips to save money on food while traveling. 

    Drink water with your meals. It’s amazing how much that one act can save you.  I ask for lemon slices in mine and pretend it’s lemonade.

    Get take-out vs. dining in. Take your food to the park, or plan a cozy meal in your room. These little changes can add up to significant savings.

    Look for food trucks street food.  You can try food you’d never eat at a restaurant and make fun memories doing it. Have you ever tried scorpion?  I have, it tasted like salted popcorn.  What about squid stuffed with a quail egg, okay, take it from me and skip that one.  If those don’t sound appealing, never fear there are other less adventurous options at street food markets too. It’s a great way to try a bunch of different foods and eat cheap!

    This guide isn’t about never eating out or splurging, but on saving money and intentionally choosing to spend it on experiences that will provide memories to re-live when you’re back home.

    Bon appetit!

  • How to Get Free Tickets to Seattle’s Top Museums

    There are so many unique and fascinating museums in the Seattle area. So wouldn’t it be nice if you could get some free tickets? Guess what? You can!  I know how inspiring a visit to the local art museum can be and the excitement of seeing a tiger at the zoo or an octopus at the aquarium. 

    I also realize that sometimes the budget can be a little tight, and you may not always have the funds to do these extra activities. That is why I created this post! I think everyone should have a chance to visit museums and zoos, no matter their income.  They are perfect for making unforgettable memories for you and your family. It’s also an excellent way to spend a rainy day! 

    In this article, I share some great ways to get free tickets to over 25 of the top museums in the Seattle area, as well as the Woodland Park Zoo and the Seattle Aquarium!

    For those of you in Pierce County, you are not only eligible to get a Seattle Public Library card (and therefore all the benefits that go with it), but there are also free museum programs through the PCLS, which I list below. If you don’t live in the Seattle area, check to see if your city has any of the additional options I mention in this post.

    Updated January 20, 2022

    After 2020 the museums offering free tickets through the KCLS have changed and continue to change. At this update, the Woodland Park Zoo is no longer one of the free museum pass attractions. Neither is the Seattle Children’s Museum, Seattle Art Museum, or Henry Art Gallery. This list could change again in the future, so please continue to check in with your library website to see the most up-to-date list.  

    One new addition to the KCLS museum pass system is the Washington State Parks! I am so excited about this option. You can reserve a 14-day Discover Park Pass for free! This allows you to use the many wonderful Washington State Parks without paying for a day pass. How great is that! There are a limited number of passes available, though, so place a hold today to reserve your spot. It’s sort of like putting a hold on a book that is currently checked out.

    Continue reading my original post below.

    How to Get Free Tickets to Seattle Museums & Attractions

    Your Local Library

    I love the library.  My small-town library was a mainstay of my childhood.  If you don’t have a library card, you need to get one! Your local library is an excellent resource for finding not only inspiration but also some great discounts! I doubt most people realize all the benefits they have through the power of their library card! 

    Below I discuss library museum passes and how to get free tickets using the following Puget Sound library systems: King County Library System (KCLS), Seattle Public Library System, and Pierce County Library System. If your library is not on this list, check with your local library to see all the benefits you have available in your area.

    Those of us that live within the area of the King County Library System (KCLS) and the Seattle Public Library System have it especially good. In addition to a long list of free resources (language learning, job training, free printing, etc.) they also offer free tickets to visit the top museums in Seattle and Tacoma, plus the Woodland Park Zoo and the Seattle Aquarium! Keep reading to discover all of the included museums and attractions.

    How to Get a King County Library System Museum Pass:

    First off, you’ll need a KCLS library card. If you don’t already have a KCLS library card, but live in King County, visit the KCLS website to learn how to apply for a library card.

    You can reserve a museum pass through the KCLS online. The King County Library System issues new museum passes each day at 2:00 p.m. So if you look for a pass, and one isn’t available for the date you want, just come back each day at 2:00 p.m. and try to get a pass then. Visit the KCLS museum pass website to learn more. 

    How to Get a Seattle Public Library Museum Pass:

    If you live or work in one of Seattle Public Library’s “free service” areas, you can get a Seattle Public Library card. The “free service” areas include the cities of Seattle and Bothell, as well as those living in other areas in King County. If you have a library card from another county, such as the Pierce County Library System, you are also eligible to get a free Seattle Public Library card.  Visit the Seattle Public Library to see the full list of eligible counties as well as what documentation you’ll need to get your Seattle Public Library card. 

    The Seattle Public Library Museum Pass works much like the KCLS Museum Pass in that you can reserve the passes ahead of time online (subject to availability). New passes are released nightly at 9 p.m. Visit the Seattle Public Library Museum Pass website for more information.large tree art at Seattle Art MuseumKing County Library System offers free museum passes to the following museums:

    The Washington State History Museum

    Learn about the people, places, and events that make up Washington state’s unique history. The KCLS Museum Pass is good for two adults and four children ages 17 & under. Passes not accepted during the annual Model Train Festival.

    Location: 1911 Pacific Ave, Tacoma, WA 98402

    Bellevue Arts Museum

    Visit the Bellevue Arts Museum for creative displays of art, craft, and design. I feel like the BAM tends to focus more on the craft and design side of art, a little more so than say the Seattle Art Museum.
    The first Friday every month is free. The KCLS Museum Pass is valid for two free tickets.

    Location: 510 Bellevue Way NE, Bellevue, WA 98004

    Kids Quest Children’s Museum

    The Kids Quest Children’s Museum in Bellevue is a great place to spend a rainy day with the kids. It is tailored towards kids from 0-10, and they offer all sorts of hands-on activities, such as painting, storytime, and creative labs.  They also have workshops just for adults too, make sure to check out their website to see what’s going on this month! The KCLS Museum Pass is good for two free tickets.

    Location: 1116 108th Ave NE, Bellevue, WA 98004 

    Imagination is the soil that brings a dream to life

    Seattle Public Library offers free museum passes to the following museums:

    Seattle Children’s Museum

    The Seattle Children’s Museum is located at the Seattle Center and is a fun place for your child to explore their creativity in a hands-on interactive environment.  It is the perfect place for your kids’ imaginations to come alive! They can build things in the Dunn Lumber Construction Zone or pretend to shop and play cashier at The Market, be a star of their theater production at the Bijou Theater or play optometrist for the day at The Eye Clinic.  

    John C. Maxwell once wrote, “Imagination is the soil that brings a dream to life.” The Seattle Children’s Museum is a great place to let your kids imagine and dream! The Seattle Public Library Museum Pass gives you 5 free admissions to the Seattle Children’s Museum, so bring a friend!

    Location: 305 Harrison St, Seattle, WA 98109

    Burke Museum

    The newly redesigned Burke Museum of Natural History is now open for you and your family to explore. The building itself is a gorgeous piece of architecture; however, step inside and delve into the worlds of biology, archaeology, and paleontology. I mean, who doesn’t love seeing dinosaur bones! They have hands-on workshops and activities for the kids as well as some after-hours events for adults. You get two free tickets with your Seattle Public Library Museum Pass. Free tickets are available every first Thursday of the month, and you can even reserve your free ticket ahead of time online

    Location: 4300 15th Ave NE, Seattle, WA 98105

    Center for Wooden Boats

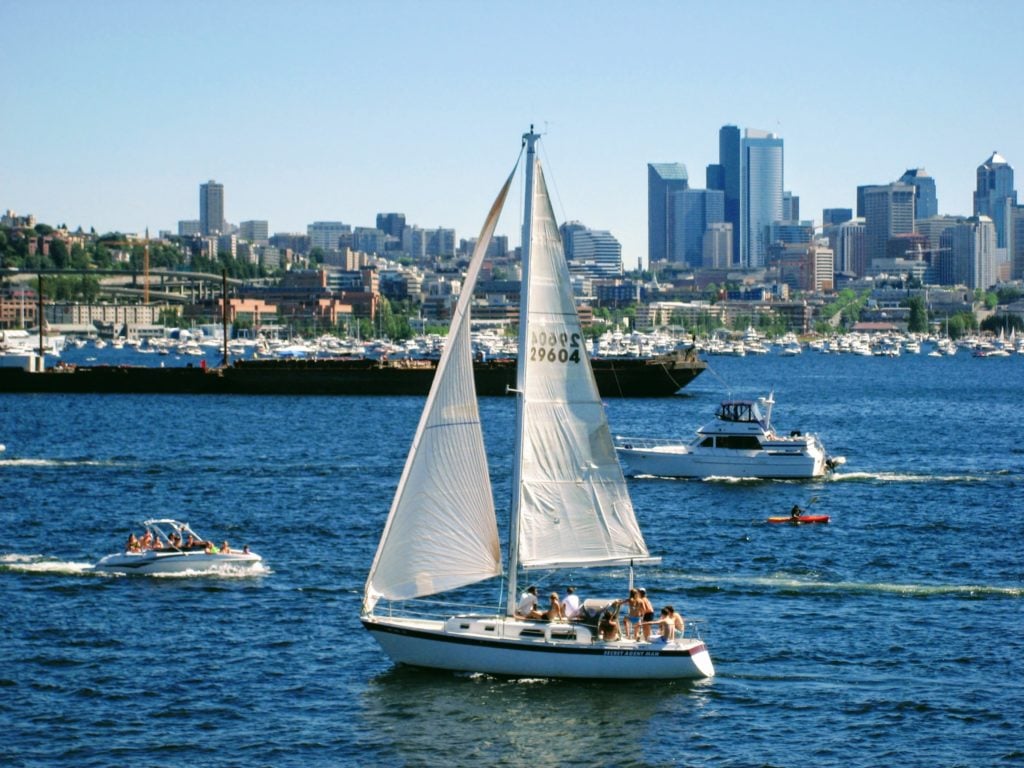
    If you love boats and love being on the water, then the Center for Wooden Boats is a must-visit for you! They offer programs for all ages. Including sailing classes and boat building classes for adults, as well as programs for youth and teens such as learning to sail and beginner woodworking workshops. 

    In addition to historical exhibits, photography exhibits, and other hands-on displays, they also offer boat rentals (canoes, sailboats, kayaks, etc.).  As you can imagine, there are many things to do at this “living” museum.  They want you to come and touch, feel, and explore all there is to know about boats. This will make for a fantastic day of memories! 

    Admission is always free to the Center for Wooden Boats and exhibits. However, a Seattle Public Library Museum Pass permits one adult and up to three other people (assuming they fit in the boat) one hour’s use of one of the Museum’s historic rowboats on Lake Union. (Subject to the museum’s livery hours and availability of boats which rented on a first-come, first-served basis.)

    Location: 1010 Valley St, Seattle, WA 98109

    sailboats on Lake Union in Seattle

    The Flying Heritage & Combat Armor Museum

    Paul Allen’s Flying Heritage & Combat Armor Museum houses an exceptional collection of WWII tanks, combat armor, and aircraft. If you are interested in history, especially during WWII and vintage aircraft, then don’t miss this museum.  

    If The Museum of Flight is a favorite of yours, then you are sure to enjoy the Flying Heritage & Combat Armor Museum.  They have special events throughout the year, including a unique Easter egg hunt. See their website for hours. A Seattle Public Library Museum Pass to the Flying Heritage & Combat Armor museum includes two free tickets.

    Location: 3407 109th St SW, Everett, WA 98204 (at Paine Field)

    Henry Art Gallery

    The Henry Art Gallery is a contemporary art gallery located on the University of Washington’s main campus. Although a small gallery, they strive to be diverse and display contemporary artwork from artists around the world.  Additionally, they also have an annual display of art from UW graduate students. The museum pass from Seattle Public Library gives you two free tickets to the Henry Art Gallery, and all youth 17 and under are free of charge. The Henry Art Gallery also offers free admission on the first Thursday and Sunday of every month.

    Location: 15th Ave NE & NE 41st St University of Washington campus, Seattle, WA 98195

    The Log House Museum

    The Log House Museum is a small museum documenting the history of the early settlers to Seattle.  Alki was the birthplace of what would become Seattle.  It was where the first settlers landed ashore. Enjoy a day at the beach and stop in at this small historical museum to learn more about Seattle’s early history. A Seattle Public Library Pass admits up to 4 individuals to the Log House Museum.

    Location: 3003 61st Ave SW, Seattle, WA 98116

    plane at the Museum of Flight in Seattle

    Museum of History and Industry

    The Museum of History and Industry (MOHAI) is located off beautiful Lake Union and is conveniently located next door to the Center for Wooden Boats, so you can visit two museums in one day if you plan accordingly. MOHAI is an interesting museum that tells the journey of Seattle’s development over the years.

    Follow our history from the early Native Americans to the arrival of Europeans and all of the technological advances throughout our history. If you haven’t visited it before, definitely put this one on your list to see this year! With the Seattle Public Library Museum Pass, you get two free tickets, and children 14 and under are free. Additionally, the MOHAI offers free admission on the first Thursday of every month.

    Location: 860 Terry Ave N, Seattle, WA 98109

    Nordic Museum

    The Nordic Museum, located in Seattle’s Ballard neighborhood, is the largest in the United States.  It displays the life, art, culture, and values of the five Nordic countries: Denmark, Finland, Iceland, Norway, and Sweden. 

    A pass through the Seattle Public Library includes admission for two individuals.  Children 4 and under are free. The Nordic Museum also offers free admission on the first Thursday of every month. Their hours vary throughout the year, so make sure to check hours of operation when planning your visit.

    Location: 2655 NW Market St, Seattle, WA 98107

    The Wing Luke Museum

    Explore this unique museum located in Seattle’s International District.  The Wing Luke Museum is dedicated to the history of Asian Pacific American immigrants. Learn what it was like for the first Asian Pacific immigrants and also what it is like for their culture today. In addition to the museum exhibits, they also offer walking tours that include history about the area as well as sampling delicious food along the way. 

    Admission also includes a 45-minute guided Historic Hotel Tour that transports you back in time to discover what the early Asian Pacific American pioneers must have experienced when first arriving in Seattle. A pass to the Wing Luke Museum through the Seattle Public Library includes two free tickets (includes a 45-minute tour).

    Location: 719 S King St, Seattle, WA 98104

    The Living Computer Museum and Labs

    Geeks everywhere will enjoy this museum. Discover the history of the computer and its initial uses. Learn about mainframes, green screens of the ’80s, and everything in between and up to the present day. Explore the future trends of augmented reality and robotics and be inspired for what is to come (or perhaps a little frightened).  

    They offer daily tours, talks, and hands-on exhibits, bring the whole family and geek it out! A pass through the Seattle Public Library is good for two tickets (children 5 and under are free). They also offer free admission on the first Thursday of the month

    Location: 2245 1st Ave S, Seattle, WA 98134

    artwork of tools at Seattle Art Museum

    Free museum passes offered by both KCLS & Seattle Public Library:

    *This list includes museum pass offers that are identical at both the KCLS and Seattle Public Library System.  The lists above are for museum passes offered only at one or the other.

    Northwest African American Museum

    Learn about the history of African Americans in the Pacific Northwest at this museum located in Seattle’s Central District.  It is located at the Jimi Hendrix Park.  The museum is only open Wednesday through Sunday, so make sure to check their website for hours and information. Free admission on the first Thursday of every month. The KCLS Museum Pass/SPL Museum Pass is valid for four free tickets.

    Location: 2300 S Massachusetts St, Seattle, WA 98144

    Seattle Art Museum

    The SAM is probably my favorite museum in Seattle. I have such fond memories of coming here with my hubby when we were dating. They offer some world-class exhibits throughout the year, and I love that they often have photography exhibits. The KCLS Museum Pass/SPL Museum Pass is good for two free tickets.

    Also, as a tip, the best parking is beneath the SAM in the Russell Investment Center Garage. However, if you’ve got a raised vehicle, you may not fit, as only cars 6’7″ fit in this garage. Ask for a discount parking ticket at the ticket desk. We got 4 hours of parking for only $6 on our last weekend visit–that’s a steal! 

    Location: 1300 1st Ave, Seattle, WA 98101

    fish at Seattle Aquarium

    The Seattle Aquarium

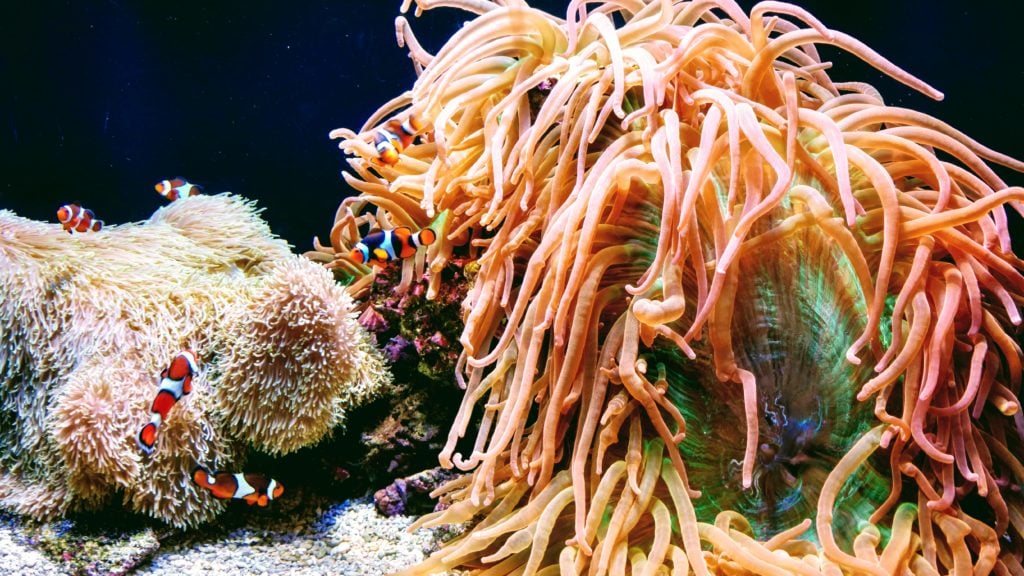
    I love that you can get free tickets to the Seattle Aquarium through the library program!  Let’s face it–this aquarium is not cheap!  With either your King County Library card or Seattle Public Library card, you can get four free tickets!  So plan ahead and snag your four free tickets to the Seattle Aquarium. It makes a perfect way to spend a rainy day! (Children 3 and under are free.)

    Location: 1483 Alaskan Way, Seattle, WA 98101

    MoPop (Museum of Pop Culture)

    There is something for almost everyone at this museum.  Enjoy movies? Science Fiction? Music? The MoPOP has it all. This is also one of the more expensive museums in the area, so getting some free tickets to visit is a total bonus!  Learn about Seattle area musicians, explore the Minecraft exhibit, or see props from some of your favorite t.v. and movies. They also have regular movie showings in their theater throughout the year. 

    The MoPOP is conveniently located at the Seattle Center, so why not make a day of it and explore the Pacific Science Center too or head over to the fountain, and if it’s a hot day, have some fun cooling off! KCLS Museum Pass/SPL Museum Pass admits 2 adults and 2 children ages 5-17, children 4 and under are free (special exhibits may be extra).

    Location: 325 5th Ave N, Seattle, WA 98109

    The Museum of Flight

    This is a favorite museum of many in the Seattle area.  If you love airplanes, space exploration, and history, the Museum of Flight has you covered! Learn about Amelia Earhart, immerse yourself in the Space Race and pretend to be an astronaut, explore the impact of flight during WWII or tour a retired Air Force One plane and pretend you’re the President for the day. 

    Additionally, the Vietnam Veterans Memorial Park, located next to the museum, was recently completed and is free to the public. KCLS Museum Pass/SPL Museum Pass admits 2 adults and 2 children ages 5-17, children 4 and under are free. Charges for interactive experiences and special exhibits are extra.

    Location: 9404 E Marginal Way S, Seattle, WA 98108

    grizzly bear at Woodland park zoo

    Woodland Park Zoo

    Who doesn’t love a trip to the zoo?  I love visiting the zoo and seeing all the beautiful animals.  The Woodland Park Zoo prides itself on giving the best care possible to its animals, and they offer many interactive experiences and educational talks to improve our understanding of the animal kingdom. The KCLS Museum Pass/SPL Museum Pass is good for 4 free tickets to the zoo! So grab your family, pack a picnic lunch, ,and make some memories!

    Location: 5500 Phinney Ave N, Seattle, WA 98103

    Pierce County Library Museum Pass

    For those of you who live in the Tacoma area and within Pierce County, you can “check out” museum passes at your local library.  Rather than reserve individual passes online, as you would with the KCLS or SPL museum passes, the Pierce County Library Pass requires that you visit your local library. You then check out the pass(es) of your choice (subject to availability).

    The passes work as your free ticket and are valid for one week and one museum per pass. However, you can check out passes for up to 6 different museums per week (museums listed below). Visit the Pierce County Museum Pass website for further information.

    PCLS offers free museum passes to the following locations:

    Foss Waterway Seaport

    This museum is dedicated to maritime and boating history. You will discover the rich history of the Native American people who first called the area home as well as the early European settlers to the Tacoma area. Learn how the railway and shipping lines worked together to shape the Puget Sound region. Learn about the first tools and boats used by settlers and walk through the boat shop admiring the beautiful hand-crafted boats. Museum hours vary, so make sure to check the website for hours and admission information.

    Present your Seaport Pass at the Foss Waterway Seaport front desk and receive free admission for up to 2 adults and 4 children under the age of 18. Children ages 5 and under are free.

    Location:
     705 Dock St, Tacoma, WA 98402

    Harbor History Museum

    This small museum located in Gig Harbor, Washington, is devoted to the remarkable legacy of the Gig Harbor Peninsula. Established in 1964, the museum offers hands-on exhibits and interactive displays to help tell the history of this area.  Make a day of it and enjoy the beautiful drive out to the Peninsula as you learn more about the region’s history. Present the Harbor History Pass at the front desk and receive up to four free admissions. Children ages 5 and under are free.

    Location: 4121 Harborview Dr, Gig Harbor, WA 98332

    Lakewold Gardens 

    Enjoy exploring the trails throughout this 10-acre garden retreat in Lakewood, Washington. They are open year-round, and the gardens change with the seasons. You will find a peaceful retreat within these beautifully landscaped gardens. Opening hours vary based on the time of year, so make sure to check ahead of time before you plan to visit.

    Present the Gardens Pass at Lakewold Gardens and receive free admission for up to 2 adults and 3 youth ages 13-18. Children ages 12 and under are free.

    Location: 12317 Gravelly Lake Drive SW, Lakewood, WA 98499

    chihuly glass creations

    Museum of Glass

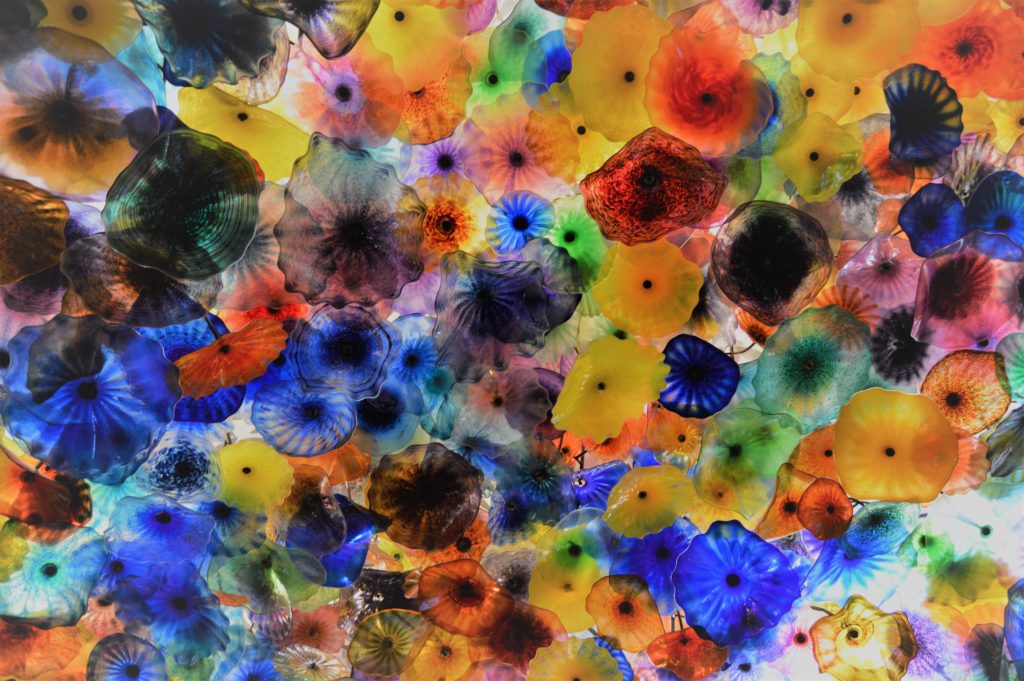
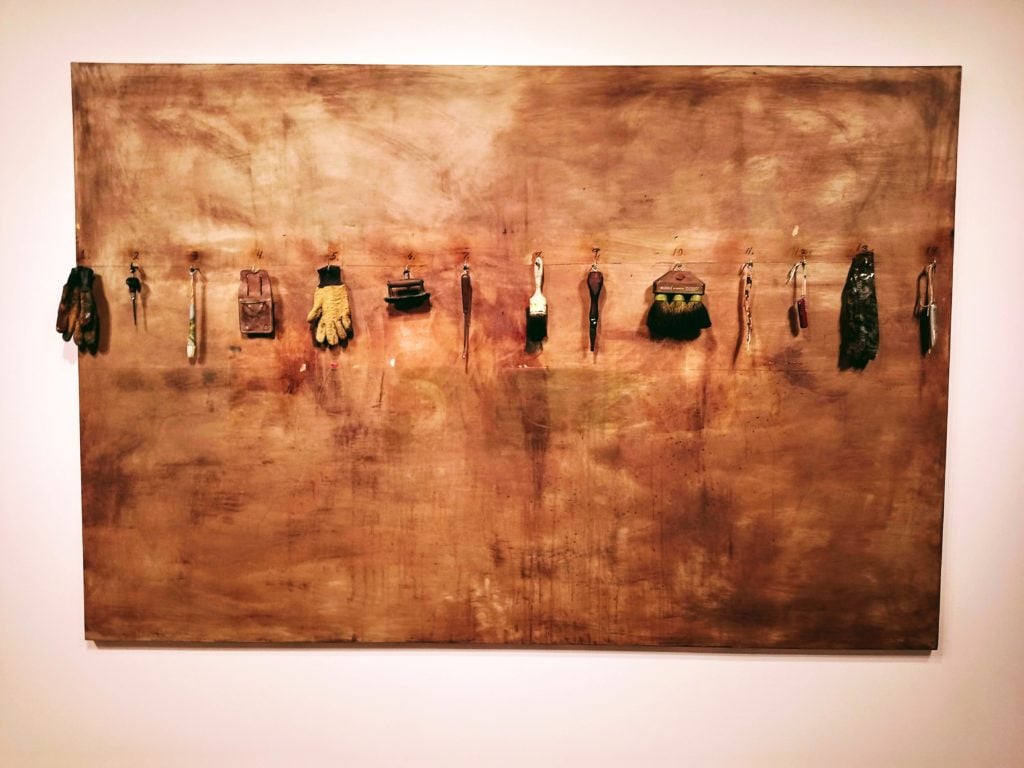
    Besides staring in awe at the gorgeous glass creations by Dale Chihuly and other outstanding artisans, you can also make your own glass creations or watch artists in the hot shop create their glass art live. Let the colors and shapes inspire you. There are workshops for kids and adults alike. They also have a night market where you can purchase glass creations from local artisans. Read here to learn more about hours, parking, and admission.

    Present the Glass Pass at the Museum of Glass and receive free admission for up to 2 adults and unlimited family members under 18.

    Location: 1801 Dock St, Tacoma, WA 98402

    Tacoma Art Museum

    The TAM offers a unique selection of artwork highlighting the Pacific Northwest region as well as a focus on the American West. There is also a gorgeous collection of glass art donated from glass artists in Washington state. 

    Present the Art Access Pass at the TAM’s admission desk and receive admission for up to 2 adults and 4 children under the age of 18. Children ages 5 and under are free.

    Location: 1701 Pacific Ave, Tacoma, WA 98402

    Washington State History Museum

    Learn about the people, places, and events that make up Washington state’s unique history. Present the History Pass for free admission for up to 2 adults and 4 children under the age of 18. Children ages 5 and under are free.

    Location: 1911 Pacific Ave, Tacoma, WA 98402

    Additional Options for Free Admission to Museums

    Bank of America

    If you are a Bank of America cardholder, then you are eligible to get free tickets to various museums nationwide as apart of their Museums On Us program.  Look up your state to see the list of participating museums. This option is only available on the first full weekend (Sat and Sun) of each month.  You get one free admission to the participating museum. Make sure to read all the details and restrictions on this offer and check with your local museum for hours and other information.

    In the Seattle and Tacoma area you are eligible to get free tickets (as per links above) to the following:

    Free Museum Days

    Most museums have a free day each month.  The most common free museum day in Seattle is the first Thursday of the month. However, check with each particular museum you’re interested in visiting to learn the exact day and hours offered. This is something to consider when you are visiting other states too.  Check to see if they have any free museum dates during your visit. 

    I listed many of the ones that offer a monthly free museum day in my lists above. However, the Asian Art Museum isn’t included with any of the museum passes, and I think you should check it out when you get a chance.

    Asian Art Museum: 

    The Asian Art Museum offers free museum days on the first and second Thursday of each month, as well as the first Saturday of each month. Another thing I love about the location of this Seattle museum is the free parking at Volunteer Park! Make sure to check out the museum’s website for opening hours and other useful information.

    Location: 1400 E Prospect St, Seattle, WA 98112

    Additional Options for Free or Discounted Tickets

    Blue Star

    Military personnel can go to all participating museums for free from May 18 through September 1st (the dates vary each year, so check Blue Star’s website each year to learn more).

    Museums for All EBT Program

    If you have a Snap EBT card, you can visit museums and some zoos for $5 or less at participating locations.

    Student Discount

    Almost all museums and attractions, such as zoos and aquariums, offer student discounts. If you are a student, always make sure to ask before purchasing your ticket, if there is a student discount.  Then come prepared to show your Student ID.

    AAA Discounts

    If you have a AAA card, make sure to ask if there are any discounts before purchasing your tickets.  It is not as common to find AAA discounts at museums. However, it never hurts to ask!

    Always Free Museums

    The following museums are always free year-round:

    Frye Art Museum

    A small contemporary art museum (think large gallery) that houses artwork from the 19th century to current. They display art from both local artists as well as global artists. It’s worth a stop when you’re in the area.

    Location: 704 Terry Ave, Seattle, WA 98104

    Bill & Melinda Gates Foundation Discovery Center

    Located by the Seattle Center, the Bill & Melinda Gates Foundation Discovery Center lets visitors learn more about the work the foundation is doing to help people around the world.  Exhibits also display global needs and encourage visitors to discover what they can do to help in their local communities.

    Location: North, 440 5th Avenue, Seattle, WA 98109

    The Microsoft Visitor Center

    Journey through the history of Microsoft.  Learn how they got started and what their plans are for the future. You’ll also get a chance to play Xbox games, try out your racing skills on the Forza simulator and shop at the Microsoft Store. Hands-on displays and products let you test out items you’re interested in purchasing as well as have some fun and be inspired by what’s coming next.

    Location: 15010 NE 36th St #92, Redmond, WA 98052

    Klondike Gold Rush National Historical Park

    Did you know there is a National Park located within downtown Seattle?  Well, there is! Sort of that is. It’s a National Park that is a museum dedicated to the history of the Klondike Gold Rush in our area.Visit and learn more about the impact of the Klondike Gold Rush on Seattle.  It was an exciting time during the gold rush, with people streaming into the area with dreams of striking it rich!  Have fun talking with a park ranger and learning all about this exciting time in Pacific Northwest history.

    Location: 319 2nd Ave S, Seattle, WA 98104

    Coast Guard Museum Northwest

    This small museum located on Seattle’s waterfront shares the history of the Coast Guard here in the Pacific Northwest.  Volunteers on staff will be happy to give you a tour through the exhibits and answer any questions you might have.  Plus, since you’re on the water, enjoy looking out to see what ships are docked during your visit.  The Coast Guard plays an essential role in the U.S. Take some time to learn more about it here.
     

    Location: 1519 Alaskan Way S, Seattle, WA 98134

    red row boat Seattle

    Closing Tips

    You need to print out a physical copy of your museum passes from both KCLS and Seattle Public Library. Make sure to bring your photo ID with the last name matching the last name on the pass.

    In addition to the Blue Star program for military families, many museums also offer daily military discounts, so ask ahead of time.

    If trying to get a museum pass through either the King County Library System or the Seattle Public Library, set a reminder on your phone’s calendar at either 2:00 p.m. (KCLS) or 9:00 p.m. (SPL) to check when new passes are released.

    A museum is an indoor adventure. Time stops and you’re immersed in a world of art and history. A world where dinosaurs roam the earth and inspiration drips from every wall and ceiling. 

    In my blog post 20 New Year’s Resolutions for Travelers, I mention the idea of playing tourist at home. You don’t have to travel to far off places to make unforgettable memories.  Going to the zoo or visiting a museum can become a favorite memory for both yourself and your family to remember for years to come. It’s about setting aside time to do something new, to be inspired, and to be reminded what a wonderful world we live in.

  • Creative Travel Gift Ideas to Fit Any Budget

    Do you have a traveler in your life that is hard to shop for? Or perhaps you’re the traveler, and you’re doing a little shopping for yourself.  Whichever the case, I will share a few of my favorite travel items as well as other excellent travel gift ideas that are sure to make the perfect gift for the traveler and adventurer in your life.  I include travel gift ideas for every budget, including some great DIY gift ideas and smaller items that would make great stocking stuffers! So start making that wish list!

    Favorite Travel Gear Ideas

    Portable Charger/Power Pack/Power Bank

    Portable chargers, also known as power banks, are invaluable when you’re traveling, which is why they make a perfect travel gift! I used mine for a two-month backpacking trip through Europe, and it kept my phone charged for all-day navigating using Google Maps.  Plus, I could also use it to charge my Sony Alpha a6500 mirrorless camera. 

    You’ll need to know the charging requirements of the traveler who will use the gift.  Meaning, will they only want to charge their cell phone with it?  Will they want to charge a camera or tablet with it?power banks

    If your traveler is only charging their cell phone, then something like this 10000mAh portable charger with Type-C input and output would be a good option.

    However, if your traveling needs include charging a camera or tablet, then I’d choose something with 24000mAh or higher, such as this portable power bank.  Make sure you know whether their devices use USB Type-C adapters or not and purchase accordingly.

    Here is a solar-powered option for the hiker, camper, or motorcyclist in your life.

    Also, note that power packs typically require you to charge them overnight, so plan ahead.  I charge mine while sleeping and simultaneously charging my smartphone.  This system worked great for me.

    Universal Power Adapter

    This would make a great travel gift idea for that traveler who is planning their first trip abroad.  A universal power adapter like this one should take care of your traveler’s power needs during their around the world travels.

    pile of travel adapters
    With just the one universal travel adapter, I can eliminate all the rest.

    Travel Shoe Bags

    As a traveler, I love having a shoe bag! I use it to put my dirty shoes in when I switch shoes during my travels.  The shoe bag keeps the rest of my luggage from getting the dirt and grime off my shoes.  Let’s face it streets are dirty, and I have stepped in all sorts of liquids, and otherwise— trust me, your traveler will thank you!

    Packing Cubes

    If you’ve never used a packing cube, you may wonder how you got by without them.  I especially love using these when traveling with a backpack.  I don’t want to rummage through my bag digging for all the loose items, these packing cubes solve that problem.  

    In addition to the regular packing cubes, you can also purchase compression cubes to fit even more!  However, be aware that although you may have shrunk the size of your items, they still weigh the same.  Perhaps someday they’ll create a weight-reducing sack, and if so, will they come in women’s dress sizes?

    travel organizers and packing cubes
    Shoe bags on the left, small mesh travel organizers top right, and packing cubes lower right.

    Re-usable Travel Liquids Bottles

    Say goodbye to buying new travel-sized shampoo, conditioner, and body wash bottles every time you take a new trip.  These reusable travel bottles are so easy to fill and re-use over and over again!

    Headphones

    I have two different headphones that I use for traveling. I don’t always take both, as the noise-canceling ones are bulkier, so when limited on space and weight, I leave them at home. However, the Sony Bluetooth noise-canceling headphones do fold down and come with a protective carrying pouch. They are great when you want to block out the noise on the airplane or enjoy some relaxing music during your long flight.

    The second pair I take and used throughout my 2 1/2 month backpacking trip in Europe are these lightweight sleeping earbuds. I am a side sleeper, and I needed some soft and small earbuds that would allow me to turn over in the night and not cause ear pain the next morning.  The ATECh Sleeping earbuds fit that bill! 

    bluetooth noise-canceling headphones
    These are my Sony noise-canceling headphones.

    Refillable Water Bottle

    During our trip to Thailand this year, we purchased some collapsible water bottles, much like these bottles on Amazon. It was an eco-friendly cafe in Bangkok that had great coffee, but that’s beside the point.  We found them to be so useful during the remainder of our travel in Thailand, and since then, we continue to use them when traveling.  

    They are great because you can collapse them and save space when you don’t have any liquids in them.  So they’d be perfect for carrying through security and then filling up with water before boarding your flight – thus saving a bunch of money on airport bottled water.  REI also has a lot of great choices for collapsible water bottles.

    I love my Yeti mug, it’s not compact like the above collapsible water bottles, but it is great for keeping your morning cup of coffee hot and is perfect for camping or road tripping in the U.S.

    collapsible foldable water bottles

    Laundry Washing Bag

    This one is on my travel gift wish list. It would have come in so handy during my travels over the years. The Scrubba Wash Bag is a new version of the old-fashioned washboard but in a bag.  Just put your soap in (shampoo will do the trick), add water, then your dirty clothes, now seal the bag up, and begin rubbing and scrubbing! When you’re finished, you empty the dirty water, rinse your clothes with clean water, and hang to dry.  Voila!

    The Scrubba Wash Bag can also double as a dry bag, perhaps for those overnight kayak camping trips or to keep your electronics dry when traveling.

    Local Adventures

    Why not encourage your traveler to be a tourist at home or perhaps create some memories together by visiting the local museums in your area.  Most museums offer gift cards and annual passes for purchase.

    Another great gift idea is to give them a gift card for an annual pass to your State Parks or buy them a National Parks pass.  These are perfect for your outdoor adventurer! I have three passes that I use for hiking, camping, and when I stand-up paddleboard or kayak here in Washington state.

    For those of us living in Washington State, we have a few options for recreational passes:

    Travel Gifts for the Coffee Lover

    If the traveler in your life is anything like me, they want to make sure their coffee needs are covered, whether they’re at home, camping in the woods, or traveling around the world. I wrote this post previously that goes over how I make French Press coffee while traveling. However, there are a few other options that would also make great gifts for your traveling coffee lover.

    Single-Serve Coffee Makers

    Travel French Press

    • The travel-sized French Press, as well as the Java Press mug, are two I recommended in the article I mentioned above.
    • This AeroPress coffee maker comes with a tote bag, and you can make a cup of espresso or add water for an Americano.
    • The Brew Buddy is a simple and lightweight option that is great when you are backpacking or motorcycle camping. Just put over a mug, add your coffee, then fill your cup with hot water and wait until it reaches your desired strength, remove brew buddy and enjoy!

    Travel Coffee Mugs

    These collapsible coffee mugs can also be used to eat oatmeal or soup or any other liquid items you might travel with or eat while on the go. I love them for backpacking and motorcycle traveling.  They are a real space saver!

    These insulated coffee mugs will keep your liquids hot for up to 6 hours or keep your cold beverages cold for up to 12 hours.

    Coffee and travel passport

    Coffee From Around the World

    What better gift to give your coffee-loving traveler than coffee? Here are a few ways your traveler can sample coffee from around the world.

    For the traveler who loves both coffee and chocolate, check out the ultimate Seattle coffee and chocolate tasting experience. You can also try their World Coffee Tour Tasting Box for a coffee trip around the world. Bean Box is a local, Seattle based company that works with small-batch coffee roasters here in Seattle to create and hand-pick these unique coffees for coffee enthusiasts everywhere!  Consider gifting a coffee subscription to the coffee lover in your life.  They will love you for it!

    For even more great gift ideas for coffee lovers check out this post for more gift ideas for the coffee lover in your life.

    Travel Gifts that Give Back

    Trades of Hope

    I love purchasing handmade gifts from local artisans or artisans around the world.  It is something I enjoy doing while traveling, and also at home.

    By purchasing a gift through Trades of Hope, you can buy beautiful gifts made by women in countries such as Thailand, India, Haiti, and Peru, to name a few. You’ll give your traveler a unique gift and also make a difference in the lives of women from other countries!  Trades of Hope helps women out of human trafficking, poverty, reuniting women with their children, and giving them a life of hope.

    Trades of Hope caters to the female shopper, so you may or may or not find a travel gift for your traveler if they are a man; however, it never hurts to look! And with each purchase, you’ll receive a card with the name of one of the women you are helping and a little about her story.

    Travel Clothing

    Scarves make great gifts for travelers.  I love packing a scarf when I travel as they are lightweight and so versatile!  Use them as a cover for your head, or wrap them around your shoulders and wear them like a shawl. For someone like myself, who loves to pack light, they are a go-to item for me.

    scarves from Trades of Hope

    Travel Bags

    Trades of Hope also has some great bag and purse options for your traveler.  They have everything from wallets, day bags, to overnight bags. 

    travel bags travel gift ideas

    Sseko Designs

    Sseko Designs is another company where your gift gives back by providing women in Uganda an income and an education. Sseko’s products are ethically sourced using only local materials.  The women are paid a fair wage with benefits, and Sseko also offers a matching tuition fund.  

    With every product you receive from Sseko, you also receive the name of the woman who made your product.  You can look that woman up on the Sseko website and learn more about her goals and what she is studying for.  Pretty great, right?

    Travel Shoes

    One of the items I love from Sseko is their ribbon sandals.  These sandals are very durable, and there is even one woman who has run over 200 miles in hers!  Now, I’m not running in mine, but I do use them for walking around and sightseeing. You can customize them by changing the look of your ribbon. The ribbons come in different colors and designs, plus you can change the look of your sandal by moving the ribbons in different positions (great videos on Youtube of how to do this).

    travel ribbon sandals from sseko

    Travel Bags

    Sseko also has some excellent travel bag options for both men and women to choose from.  They have high-quality genuine leather bags as well as beautiful canvas bags that will make great options while traveling. 

    • The convertible tote would make a great travel gift! It can be worn as a cross-body bag or as a backpack!  Using this as a day bag allows you to wear it on your back when you’re out sightseeing, but then, when you visit a museum, change the strap configuration, and now it looks like your everyday purse.  A lot of museums don’t want people to wear backpacks inside the museum, so they force you to check your bag.  Well, now you don’t have to!

    DIY Travel Gifts

    Do you have a talent for making crafts?  If you enjoy making sentimental, one-of-a-kind gifts, then these DIY travel gift ideas are perfect for you!

    Tonya at Travel Inspired Living shows how to make these fun DIY Photo Coasters using photos from your latest vacation or from the traveler who you’re creating this for.
     
    Krista from The Happy Housie created these DIY map magnets using simple materials you can find at your local craft supplier.  As a lover of all things map-related, I think they’re such a fun gift idea for the traveler in your life.  You could even create these, so the map shown in each magnet is from a country or place your traveler has visited.
     

    I made this DIY project using Ashlea’s instructions from Heart Hook Home.  Ashlea’s DIY World Map instructions are so easy to follow. Even a non-crafter like myself was able to create my own push-pin map to record where I travel. 

    travel map with push pins
    My finished push-pin travel map. I need more pins in more places!!
     
    This DIY Travel Shadow Box from Bethany at The Southern Couture is a great way to preserve a favorite travel memory.  I love how she used sand and shells from her beach vacation. However, you could do so many things with a shadow box.  Place your favorite photo inside along with museum ticket stubs, metro passes, cafe receipts, and so on. There are so many fun options!
     
    If you’re a scrapbooker, Boredart.com gives some creative examples of DIY Travel Scrapbook pages you can create. Use these to record your travels or give to the traveler in your life to inspire their travel journaling.
     
    No matter what you create, your gift is treasured for the love and time you put into creating it.

    Stocking Stuffer Ideas

    If you’re shopping for Christmas gifts, here are some items that make perfect stocking stuffers for your favorite traveler.

    • Eye mask: An eye mask is invaluable when flying and sleeping while traveling.  As a light-sleeper, it really helps when I can block out the surrounding light.
    • Washi Tape: I love having washi tape to attach souvenir tickets and receipts or photos and maps to my travel journal for safekeeping.  The great thing about washi tape is that you can safely remove the items later without any damage.
    • Chocolate Covered Coffee Beans: I love carrying these in my day bag during my travels.  They give me that little bit of pick me up when I’m on the go. Of course, I also like the taste!
    • Buff Headwear: I love my travel buff, I’ve used it for multi-day backpacking trips as well as international travels. Use it as a scarf, headband, hat, and even an eye mask should you forget yours.
    • Moleskin Blister Kit: Unfortunately, blisters, can often be a part of traveling. Whether you’ve spent too many hours sightseeing or hours hiking in the mountains, blisters can quickly ruin a trip fast!  Moleskin blister dressings have you covered!eye mask with travel journal

    Additional Travel Gift Ideas

    Here are a few more miscellaneous travel gift ideas to ensure you’ve got plenty of options!

    Feel free to forward this to that special someone who has a hard time finding your gifts.  There’s no shame in giving a little help to the gift-buying challenged.  I think we all fall into this category from time to time.


    Note: Travelffeine is reader-supported. This post contains affiliate links. When you make a purchase using one of these affiliate links, we get paid a small commission at no extra cost to you. And as always, all opinions are our own. Thank you!


    Have Fun Shopping!

  • Where to Get the Best Key Lime Pie in the Florida Keys

    You can’t come to the Florida Keys without trying the dessert they’re most famous for. As the official state pie, key lime pie can be found all across the state of Florida.  It is made from the tiny key limes grown in the Florida Keys.  So on a recent trip to the Florida Keys, I decided I needed to eat key lime pie from breakfast to dinner in my quest to find the best key lime pie in the Florida Keys. 

    Below I share the results of this quest with you and also tell you about an alternative key lime option that isn’t a pie. It was so good I would come back just to eat another one!  So continue reading below to find out what this delicious key lime dessert was. 

    Plus, I’ll list a bonus place to get amazing key lime pie in Miami, just in case you wish to stop there too. The below list is in order of my favorite key lime pie to my least favorite with bonus options listed below.  

    Two Main Ways to Make Key Lime Pie

    You will find two main styles of key lime pie when you visit the Florida Keys.  One is made using a graham cracker crust with optional whipped topping, and the other is made with a traditional pastry crust with a meringue topping.  Florida residents hotly debate which way is best.  

    As a West Coast visitor, I was used to eating key lime pie baked with a graham cracker crust and then optional whipped topping. However, I did try the traditional pastry crust version with meringue topping while I visited the Keys, and I will share with you where that was and my thoughts below.

    Best Key Lime Pie in the Florida Keys

    Kermit’s Key West Key Lime Shoppe

    Kermit’s has been around for over 25 years and is a Key West staple for all things key lime. So it comes as no surprise when I declared their key lime pie to be the best key lime pie I tasted in the Florida Keys!

    If you aren’t able to make it to Key West to sample some for yourself, they will even ship it to you!  In addition to key lime pie, they also sell key lime candy, jelly, salsa and dressings, bath and body products, and so on.  You get the picture. They have tried to use key limes in just about everything!

    Slice of key lime pie from Kermit's Key Lime Pie in Key West
    It may not look like much, but this is one delicious piece of pie!

    My Pie Impressions: It had a nice strong key lime flavor and a good graham cracker crust. It is important to me that I can taste the tartness of the key limes, I don’t want a key lime pie that is overly sweet. I also want a nice graham cracker crust, still crunchy, not soggy. If I had to find one thing wrong with it, I felt it’s filling was a little too dense (that’s just if I’m super picky).  

    Conclusion: Kermit’s Key West Key Lime Shoppe had my vote for the best key lime pie in the Florida keys.  Try them on your next visit, you won’t be disappointed!

    Kermit’s has two locations in Key West.
    Kermit’s Address: 200 Elizabeth St, Key West, FL 33040 or 431 Front St #2, Key West, FL 33040

    Key West Key Lime Pie Co

    This was my runner up for best key lime pie in the Florida Keys.  I loved that you could purchase little mini key lime pies and also that they made their whipped topping fresh.  I’m kind of a snob when it comes to store-bought whipped topping, but when I saw them piping the fresh-made whipped topping on their pies, I knew I wanted to try it!

    In addition to selling key lime pies, they also offer a key lime pie class where they teach you to make your own mini key lime pie. That sounds like my kind of class!

    Mini key lime pie from Key West Pie Co
    The freshly piped whipped topping was a nice touch to this mini key lime pie.

    My Pie Impressions: The pie filling was nice and creamy. I loved the texture of the filling, however the key lime flavor wasn’t as strong as I prefer it to be. Also, the crust fell apart and was a little too thin; thus, it became slightly soggy. So overall, I did enjoy their pie, but remember, I was on a quest to find the best key lime pie, so I had to nitpick a little to narrow it down. 

    Key West Key Lime Pie Co Address: 511 Greene St, Key West, FL 33040

    Midway Cafe & Coffee Bar

    The Midway Cafe & Coffee Bar is an excellent choice for breakfast if you happen to be in or near Islamorada. On this day, I decided I needed to have key lime pie for breakfast (don’t judge me).  The Midway Cafe has the traditional key lime pie recipe, and for locals, they might argue that because of this, it is the best key lime pie. 

    For me, coming from the West Coast, this was my first time having key lime pie baked in a pastry crust and topped with a meringue topping.  So, I was a little surprised when I received my pie.  However, I do love trying new things, and it was still key lime pie, so I figured you couldn’t go too wrong with it.  Plus, I was served some delicious fresh brewed coffee to go along with my pie.

    traditional key lime pie from the Florida Keys
    This is the traditional way of making key lime pie using a pastry crust with meringue.

    My Pie Impressions: This key lime pie was made in a traditional pastry crust, and served with a thick meringue topping. It was good, as a pie, but not quite what I expected for a key lime pie. The crust was nice and flaky, and they did an excellent job with the meringue. However, the flavor of the key limes was somewhat lost, I feel, due to the taste and thickness of the pastry crust. So, although not my choice for the best key lime pie, I would still recommend you try it since it is the contested “traditional” way to make a key lime pie.

    Midway Cafe Address: 80499 Overseas Hwy, Islamorada, FL 33036

    Lorelei’s Restaurant & Cabana Bar

    Lorelei’s is a wonderful spot to watch the sunset in Islamorada. We had a table next to the water and were able to walk over and watch a small shark swim by and two manatees during the time we sat there for dinner. They also had a live band as well as a magic act. So they are a great place to catch dinner, entertainment, and a sunset if you are in Islamorada. 

    That being said, their key lime pie was a bit of a let down for me. It is not a traditional key lime pie; it is a frozen key lime pie topped with mango sauce and whipped topping.

    water view table at Lorelei's in Islamorada
    View from our table at Lorelei’s.

    My Pie Impressions: There was very little lime flavor, and the texture was more like a mousse than pie, perhaps that was because it wasn’t frozen when it was served to me. It was a bit of a let down on my quest for the perfect key lime pie. The atmosphere, waterfront view, and service I received at Lorelei’s, however, was terrific! So skip the key lime pie and enjoy dinner and a sunset here instead.

    Lorelei’s Address: 96 Madeira Rd, Islamorada, FL 33036

    Tip: No assigned seating here, just show up and pick an empty table.

    Best Key Lime Dessert That Wasn’t a Pie

    In a category, all their own, are the key lime muffins at Harriette’s Restaurant in Key Largo.  These muffins were SO good! They have a delicious tart filling, the muffin itself is fluffy and light, not dense and hockey-puckish like so many muffins can be. It is topped with powdered sugar and tastes oh so good with a cup of coffee.

    key lime muffin
    I know this photo doesn’t show it, but this is the best tasting key lime muffin you’ll ever eat!

    I want another one just thinking about it. It might have been one of the best muffins I’ve ever eaten. If I had to choose between a slice of key lime pie or this key lime muffin, I’d choose the muffin. It was that good. Plus, I can make a good key lime pie on my own, I do not know how to make this delectable muffin – but I want to learn!

    In addition to Harriette’s amazing muffins, they also have excellent breakfast and coffee.  The service was top notch too!  I know if I lived in Key Largo, this would be a regular hang out of mine.  I also know I would need to run every day to keep the pounds off!

    Harriette’s Address: 95710 Overseas Hwy, Key Largo, FL 33037

    Delicious Key Lime Pie in Miami

    So first things first, if you go to Miami, then you should try Cuban food. Let me just put that out there first off. If you’ve never eaten Cuban food, Versailles Restaurant in Little Havana is a great place to start.

    If you happen to be in the area, but don’t want to eat a meal, they also have a bakery adjoining their restaurant where you can purchase all sorts of yummy baked goods made fresh each day. Their key lime pie happens to be really good! It might have tied Kermit’s for my first place position had I been able to do a side by side comparison, although, I still think the flavor of Kermit’s filling is better.

    palm trees in Florida
    I love palm trees!

    My Pie Impressions: It had a fantastic graham cracker crust, it was probably the thickest graham cracker crust I’d ever seen, and the filling had good lime flavor. However, the downside is that the crust may have stolen the show a little from the filling. So that’s where I have to get picky, the crust was so good, that it overpowered the filling just a little. 

    The food here was also amazing!  If you come, I highly recommend–in addition to the key lime pie, that you try their imperial rice dish, you’ll be glad you did!

    Versailles Restaurant Address: 3555 SW 8th St, Miami, FL 33135

    Key Lime Pie Conclusions

    So there you have it. My choice for the best key lime pie in the Florida Keys is Kermit’s Key West Key Lime Shoppe. However, if you happen to be in Miami, check out the bonus key lime pie option there too.

    Also, do not miss eating the muffin at Harriette’s Restaurant. I mean, you still need to try the key lime pie at Kermit’s, but also make Harriette’s a stop. You can buy the muffins to go, but I highly recommend you enjoy it with a cup of coffee, then get another for the road.

    Okay, now that I am thoroughly craving a key lime pie, I think I will go on a hunt for a muffin recipe.

    Happy Pie Hunting!

  • Travel Tech and Tips for Navigating Internationally

    Traveling can be stressful, especially when you’re trying to navigate in an unfamiliar place. The following travel tech and tips will help make sure you get to where you want to go with as little stress as possible. I share my favorite travel apps and travel gear that I use to navigate while traveling. I have yet to get lost, although, it’s certainly not for lack of trying.

    Get Your Travel Tech Set Up

    One of the most important things you’ll need to do is to get your travel tech set up. Starting with the number one, most used travel tech device–your smartphone!

    First things first, do you have a GSM smartphone?

    You’ve probably heard the terms GSM and CDMA.  These terms refer to the types of cellular technologies our phones use. Typically, in the US, if you are with AT&T or T-Mobile, then your phone is a GSM phone. And if you’re with Verizon or Sprint, then you would have CDMA Technology. This isn’t always the case, but that’s the general rule. I won’t get into the technical side of what GSM and CDMA mean, but for simplification purposes, a GSM phone means you can use your phone internationally.  Most of the world operates off the GSM technology.

    Is your GSM smartphone unlocked?

    If you have a locked GSM smartphone, you need to contact your service provider and request they unlock your phone for your trip.  They each have their own rules about this, so contact them to determine how to proceed. You need an unlocked GSM smartphone to purchase and use your international SIM card while traveling abroad.

    If you discover that you do not have a GSM smartphone, there are a lot of great low-cost unlocked smartphone choices. I purchased the Redmi Note 5 for my trip to Europe, and it worked great everywhere I went.  The Google Pixel 3a has a top-rated camera and starts around $350. You can also buy unlocked versions of Samsung, Motorola, and even iPhones. There are a lot of great unlocked phone choices ranging from $150 and up.

    Check the supported bands or frequencies of your phone.

    No matter the GSM phone you decide to go with, you need to make sure that it supports the bands that your destination uses. Different countries support different frequencies or bands. Google your phone’s bands and then cross-reference with the link above to determine if your phone supports the bands of the country you intend to travel to.

    Research and purchase your international SIM card.  
    pile of SIM cards

    By owning an unlocked GSM cell phone, you can purchase international travel SIM cards wherever you travel. This saves you a lot of money when compared to paying roaming fees from your local company. These international SIM cards are sold specifically for tourists who typically need 30-60 days or less of data and talk time.  You can also purchase additional top-up cards, that allow you to add data and talk time, should you run out of service during your travels.

    I recommend you do a little internet research before traveling to find out what sort of SIM card options you will have when you arrive at your intended destination. This should help you get an idea of where you can purchase your SIM card too.

    Depending on where you travel to, you may be able to purchase your SIM card ahead of time, online. I did this for a trip to Europe, and it was very convenient to land at my destination and already be set up with a cell phone plan.

    When I traveled to Japan and Thailand, I purchased my SIM cards at the airport (this is commonly where you can find them). There are some countries where you might have to buy them from a vendor in the city, but generally, you can purchase at the airport. However, research your intended destination and where you can buy SIM cards, before your departure, so you will know what options you have.

    Travel Gear For Extended Periods of Navigation

    Whether you’re traveling around Europe or navigating the streets of Tokyo, you will most likely be using your phone for extended periods. Navigating from museum to museum and attraction to attraction can suck your battery, so don’t leave home without purchasing a power bank and compatible quick charging cables.

    A power bank, also known as a battery pack, is a lifesaver! I will spend an entire day walking across cities using only my smartphone.  Typically I need my screen brightness turned way up to do this, so as you can imagine, this sucks the battery up.  However, with a power bank inside my day bag, I can always have my phone charging so that I never run out of battery.  Then charge the battery pack overnight, and you’re all set for the next day of sightseeing.

    They come in multiple sizes and offer varying degrees of charging. Some are extremely small, and I would only recommend these if you are really limited on weight. They are only going to be suitable for an emergency when you need just a little charge to get you by until you can plug in somewhere else.

    I own two that I use for different purposes.  I have one that I use for all-day navigating as well as charging my Chromebook and mirrorless camera.  The other one is a large capacity battery pack that will not only charge all of my electronics, but it can jumpstart my motorcycle or car if needed!

    Make sure you can charge these overnight as some of the larger ones take up to 10 hours to charge fully.

    Travel Apps for Navigating

    Google Maps

    If you’re not already using Google Maps to navigate where you currently live, I’d be surprised. So it probably comes as no shock that Google Maps is my number one, go-to app when traveling.  Do not leave home without it!

    The wonderful thing about Google Maps is that you can download maps of entire cities or even whole countries for offline use, before leaving home.  That way, should you be in an area where you have no internet access, you can still get directions to and from your destination.

    In addition to offline maps, you can create personalized maps ahead of time before your trip.  In your Google Drive account on the upper left-hand side, you will see a colorful plus sign next to “New.” Click on that, then click on “More” from the drop-down menu. Finally, click on Google My Maps.

    From this screen, you can create your personalized travel maps.  Add museums, restaurants, hotels, and other attractions you want to visit during your trip. You can also share this map with others and save it for future reference.  Perhaps later you’ll chat with a friend who is traveling to a city you visited before, and you recommend a favorite restaurant, now you can share the exact map and location for your trip.  They can even use your map as a trip itinerary. See an example of one I created for our Maui Itinerary.

    Maui Map of Itinerary

    Google Translate

    Chances are you will successfully navigate yourself using the Google Maps app at least ninety percent of the time. However, there are times where you will need to ask for directions.  Or perhaps you will get separated from your traveling companion who had your only access to data (see Misadventures in Kanazawa for my experience). Either way, it is always good to know how to ask for directions in the local language.

    Again, I recommend you use the offline feature so that no matter whether you have internet access or not, you will still be able to use the features of this app.  So save some common phrases for offline use.  This comes in very handy! Save them as favorites and quickly pull up the list of the most common phrases you will use.

    WhatsApp

    This app is great for staying connected with any travel companions or for contacting your hotel for directions or notify them of late arrival. I also use WhatsApp to text with my family and friends back home.

    Google Duo

    I prefer to use Google Duo for phone calls and video chats rather than WhatsApp. I found during my travels that its video quality was typically better than WhatsApp. However, you could use WhatsApp for both.

    Google Voice

    If you don’t have a Google Voice number yet, here’s why I recommend you get one:

    • Give this number to your hotels, Air BnB, airlines, etc. You can then receive text updates to your Google Voice number while traveling. Also, Google Voice will transcribe any message left at this number. So although you may not be able to receive international calls to your Google Voice number, you will get the transcribed messages. Then you can call the person back using your international SIM and number.
    • I also recommend that you use your Google Voice number for password retrieval. If you use your local cell number for password retrieval, you won’t be able to get your password while traveling abroad. However, if you use Google Voice, you can get it no matter where you are.
    • Make sure all your two-factor authentication sites use your Google Voice number so you will receive the text while traveling. Your other option is to shut two-factor authentication off on all your accounts until you return home.

    Local Travel Apps

    Depending on where you travel to, there will be useful local travel apps you will also want to download.  For example, when I spent two months traveling around Europe by train, I installed the Rail Planner App. There are times when I also install the local metro app or airline apps. You will research and download based on what makes sense for your trip.

    Uber App

    Many countries now offer Uber as a means of transportation. In Eastern Europe, I found that it is often cheaper than a taxi. And the time it saves you is often worth the extra cost over public transportation. This is especially useful when traveling in a small group or pairs. The Uber App allows you to split the cost with your group directly from the app.

    Travel Tips for Navigating

    If you will be driving:

    • Familiarize yourself with the local street signs and rules of the road before your trip.
    • Know what car rental insurance you will need and whether or not your credit card company already covers this.
    • Practice Using Google Maps at home before you travel. This ensures you know how to use its features. Practice using driving directions as well as walking and public transportation, so you are familiar with all its features.
    • Make sure you download the offline Google Maps using WiFi and save your data.
    • A paper map or road atlas can also come in handy when driving cross country. My husband chuckled a little when he saw I put this in here. Although we have all this travel tech to help us, sometimes it’s good to keep it low-tech just in case our electronic travel tech fails us.

    If you are using the Metro or Bus:

    • Google Maps public transportation directions will tell you which bus or metro station to take to your destination. It also provides you with walking directions to the bus stop or nearest metro line.
    • For metro stations, make sure to get one of the free metro maps or download the local metro app (if they have one). I also take a photo of the metro map in the station, so I can quickly glance at the lines for the city I’m traveling in.
    • I rely heavily on Google Maps to tell me which bus to take. However, I also asked locals for advice on the best way to get to and from my location. They are always the best experts you can consult when traveling.

    Recap of Travel Tech Needed for Navigating Internationally​

    I know that it can seem a little daunting if this is your first time traveling abroad, but all you need to make sure you have the right travel tech and gear are the following:

    • An unlocked GSM smartphone
    • International SIM card
    • Power bank and charging cable
    • Downloaded Apps, including offline maps and phrases
    • And last but not least, a good attitude and an appetite for adventure (and good food, of course).

    Final Thoughts on Navigating While Traveling

    All roads lead to Rome.

    While in ancient times, this may have been true, here it is just a gentle reminder that there are multiple ways to do the same thing and that one can rarely ever be truly lost.  So, determine which navigation methods work best for your travel, but never panic should you find yourself a little lost. You’re most likely just taking the “scenic way” to your intended destination.

    One final tip, make sure to leave a copy of your travel itinerary with someone you trust.  That way, should any emergencies arise, that person will know where to reach you.

    If you have any questions regarding travel tech and how to get set up for your travel needs, please don’t hesitate to ask. I would be happy to help any way I can.

    Happy and Safe Travels!

  • Off Road Motorcycle Adventures: A Beginner’s Guide to Packing & Planning

    My husband and I recently returned from an off-road motorcycle adventure. It was our first multi-day moto trip where we camped off our motorcycles. We were riding sections 4, 5, and 6 of the Washington Backcountry Discovery Route (WABDR). This beautiful off-road route stretches from the Oregon/Washington border and up to the Washington/Canadian border. 

    The WABDR is a mixture of challenging fire service roads as well as the easier and more maintained gravel forest service roads.  The Washington Backcountry Discovery Route is full of adventure with spectacular scenery all along the way. In this post, I share how I planned the trip as well as what gear I packed for moto camping. First, let me give you a little background on my motorcycle experience.

    My Motorcycle Riding Experience Thus Far

    I grew up learning to ride motorcycles on a Honda 50.  All of my siblings did, and to this day, all of their kids learn on the same Honda 50.  It is a fun legacy, and this Honda 50 is a beast! It rarely ever needs any work and keeps going and going — take that Energizer! 

    I eventually outgrew the Honda 50 (although let’s be honest, all of us adult kids still like to ride it once in a while, just to say we can). I transitioned into riding a Honda 250 and a Yamaha 400–all lightweight off-road motorcycles, always intending to get my motorcycle license eventually.

    One day while in Seattle at a motorcycle store (can’t remember why), my husband and I learned from the owner, that WA state had a new motorcycle endorsement program. They provided the motorcycles and put you through a course to get your license, and all it takes is one weekend.

    When we left, my husband said: “let’s do it!”  And so we did. It is a great program that teaches a lot of excellent road safety techniques. By the end, you take the motorcycle driving test, and pass (hopefully) and then head to the DMV, get a new mugshot, and you are officially a motorcyclist

    Beginning Our Off Road Adventure Riding

    That was over five years ago.  We purchased motorcycles right after getting our licenses and have been getting road experience ever since.  We bought a BMW F650GS and a BMW G650GS, both dual-sport motorcycles. This means you can ride on and off-road. We did some off-roading with my brother when he’d visit, but it was mainly just dirt or gravel roads, nothing too technical.

    We learned about the Washington Backcountry Discovery Route in 2015 and decided we’d ride the last half of the route when my brother came over for his annual summer vacation. Wildfires had a different plan, and due to the forest fires burning all over Washington state, we had to cancel our trip plans.

    Fast forward four years, and we have the best fire season we’ve had in a long time!  A former UW classmate of mine posted his pictures of completing the WABDR in his 4×4 Toyota, and I told him how I’d planned to do the route.  He said, “you should do it this year.” And I thought, “yeah, he’s right!” There is no guarantee we’ll get another year with so few fires, why not seize the moment and do it!  

    So I contacted my brother, told him my idea to do the last three sections of the Washington Backcountry Discovery Route in September, and he said to let him know the dates, and he’d put in for his vacation.  Next, I convinced my husband that this was a great idea, and soon we had our dates picked out.

    Planning our Off Road Motorcycle Adventure

    Now, it is essential to note that this decision was made right in the middle of our crazy hectic summer. Which meant I was busy planning camping trips, and get-togethers with friends and family and did not give our ride my usual planning attention.

    So this trip felt a bit more spontaneous than my trips usually are. I skimmed a few websites on the subject of riding the WABDR, and we bought the official WABDR printed map. I downloaded the GPS tracks and a free GPS app for my phone. From my minimal research, I determined that we should only need one day of riding per section. So I reserved some campsites for our ride and continued making plans with our group.

    We live in the Seattle area, and my brother lives in North Central Washington. So we decided to meet in Leavenworth the night before we began our ride. Also, my brother and his wife would be riding in their Toyota 4Runner for sections 4 and 5, so he agreed to pack extra water for our group and to carry any gear that might lighten the load in our panniers. That was wonderful! When you’re riding an adventure bike off-road, reducing the weight in your panniers is always helpful.

    Easy, Lightweight Food Options

    I packed our backpacking propane burner and some dehydrated meals that you can prepare right in their pouches. And I also packed oatmeal packets and coffee for breakfast. To make each meal, all I needed to do was to boil water on our tiny propane stove.

    I used a new style of lightweight coffee filters to make coffee on this trip as they took up less space than my usual french press options. I like them, but I need to practice more to get the right strength.  The first cup was a little too weak. My husband then decided to triple that amount in his cup and oh my goodness! Way too, acidic! So I will perfect it, but overall I am pleased with my purchase.

    So in addition to a lightweight propane burner and dehydrated food, I also packed jerky and snack bars.  I planned for these to be both our lunch and our snacks. And that was it for food.  

    Breakfast: oatmeal and coffee. Lunch: jerky and snack bars. Dinner: Dehydrated meals. Remember, you want to keep your motorcycle as light as possible when off-roading.

    Packing Essentials: Camping Gear & Supplies

    I packed the same gear I used for backpacking and used it for this off-road motorcycle camping adventure. I think these two “hobbies” really compliment each other. You need lightweight gear for backpacking, and you need the same type of equipment for moto camping. The backpacking gear was small and lightweight and fit great inside our panniers. In addition to backpacking gear, I also packed motorcycle emergency supplies and of course, our riding gear.

    Packing List

    • Lightweight, fast-drying towel
    • Moisture-wicking clothing
    • Smartwool or riding socks of choice
    • Flip Flops or Tennis Shoes (when you’re at camp or in town, it’s nice to have a break from your riding boots)
    • Hat (for when you’re off the bike — to hide helmet head or to keep warm)
    • Sunglasses
    • Balaclava (great for cold morning rides)
    • Thin fleece pullover (great for layering in the morning and at night)
    • Waterproof riding gear
    • Jacket
    • Pants
    • Gloves
    • Riding Boots
    • Backpacking tent (lightweight, easy to set up)
    • Pillow (or use clothing) (we had inflatable pillows from backpacking)
    • Backpacking sleeping bag (you want something smaller than your standard car camping bag)
    • Sleeping Mat (it’s incredible what even an inch of padding can do for a rocky surface)
    • Ziplock bags for toiletries (at higher altitudes these may leak)
    • Packing Cubes — These are a great way to organize gear in the panniers and be able to grab out what you need quickly.
    • Toiletries (shampoo, soap, face wipes)
    • Travel-size brush/comb
    • Coffee and filter
    • Dehydrated Meals
    • Instant Oatmeal
    • Jerky
    • Snack bars (quick snack stuff when you’re on the go)
    • Water (refillable and collapsible water bottles are great)
    • Eating utensils/plates/bowls
    • Collapsible cups (I love these, and they can double as bowls too)
    • Propane stove and propane (use a small pocket rocket one)
    • Cash (for emergencies)
    • Paper Maps (GPS is great when it works, can cause real problems when it doesn’t)
    • Bungees (for tying down the gear to the back of your bike or panniers)
    • Zip ties (always useful)
    • Multi-purpose tool
    • Spare Fuses
    • Engine Oil
    • Spare Tire/Tube or patch kit of some kind
    • Duct Tape
    • Fast Acting JB Weld
    • Loctite Threadlocker Blue
    • Tylenol/Ibuprofen
    • Allergy Medicine
    • Bug Spray
    • Hand Sanitizer
    • Chapstick
    • Raincover for your packs and sleeping bags
    • Small handsaw
    • Toolset for motorcycle
    • Waterproof Matches
    • Toilet Paper
    • First Aid Kit
    • Headlamp/flashlight
    • WD-40
    • Phone/GPS/Comms Charger (powerpack)
    • Charging cables
    • Communication Devices (we use the Sena SMH10 and loved the ability to communicate direction, needs of the group and sightseeing all along the ride)
    • Camera (bring proper padding and rain protection)
    • Passport (if needed)

    Packing Tips

    Practice packing up your motorcycle at least a day in advance, so you know how everything fits.  Make sure the weight in your panniers is evenly distributed so that it doesn’t throw the balance of your bike off.

    Also, when packing the day before, I reduced the weight even further by taking a second look at what I was packing. I discovered more items I could leave behind.  This tends to be the case. You can usually do without that extra shirt or shorts or “just-in-case” gadget. 

    Pack the miniature version of whatever you can — miniature brush or comb, travel size shampoo, small flashlight and so on. Moisture-wicking clothing is great because you can wear it for multiple days and easily wash it the night before a ride and hang to dry to wear the next day. 

    Also, you will eventually pass through towns during your off-road adventure whether you’re on the Washington Backcountry Discovery Route or some other adventure touring ride. So typically, you can purchase additional items, if you find you need them later. 

    I try to ask myself if I need the item in question. And if for some reason I discovered I did need it later on the ride, could I purchase it then?  If the answer is at first “no” I don’t need it and “yes” I could buy it later, then leave it at home. Chances are you won’t miss whatever it was.

    Final Tips for Planning Your Off Road Adventure and What to Expect

    If you are a beginner, like I was, you’re going to be really sore.  I highly recommend you start exercising ahead of time. Build up your shoulder muscles and your quads.  I would say these were the two sorest areas for me after a full day of off-road riding. 

    You should stand most of the time while riding off-road. If you haven’t built up your stamina yet, you will most likely be alternating between standing and sitting. This equates to doing squats.  By the end of the first full day of riding my quads were on fire, and it hurt to sit and stand up.  

    Give yourself extra time.  Yes, we could have done each section in one day, however, when you’re just a beginner at off-road adventure riding, it’s better to give yourself more time than you think. Plan to have downtime at your campsite. Rest, relax, discuss the day’s ride, and go over tomorrow’s trip. This will make your off-road adventure far more enjoyable.

    I made the mistake of not giving us enough time, and I will not make that mistake again.  I made too many assumptions about the trail and our abilities. These assumptions proved incorrect, and it made for some very stressful riding conditions.  So learn from my mistakes and add rest time to your schedule. 

    It’s also good to have extra time for any emergencies or detours that might come up. When you are riding off-road things get a bit more unpredictable.  And help is a lot further away.

    Drink plenty of water while riding and keep your energy levels up.  And have fun!! You can read Misadventures on the WABDR for more information about the route and our ride.

    Happy Adventuring!