author.travelffeine.com

Category: Camping

Camping
Camping is a fun way to enjoy the great outdoors, make memories with those you love, and connect with nature.
These are some of our favorite places to camp and we hope you’ll like them too!

  • 20 Useful Camping Accessories to Add to Your Packing List

    I love camping! Over the years, my camping supplies have grown to include various camping accessories depending on the camping style I am doing. If I’m camping off my motorcycle, I pack a much lighter load than if I am camping out of my car or planning a large family camping trip. I don’t like to waste space in my car with things I won’t use, so I adjust what I pack depending on my camping needs.

    The below list is some of my go-to camping accessories. Whatever camping gear you bring should enhance your experience and make it more enjoyable. After all, we want to look forward to camping and spending time outdoors. Camping can be such a rewarding experience if done right. This list of camping accessories will help you have a successful trip!

    Shelter

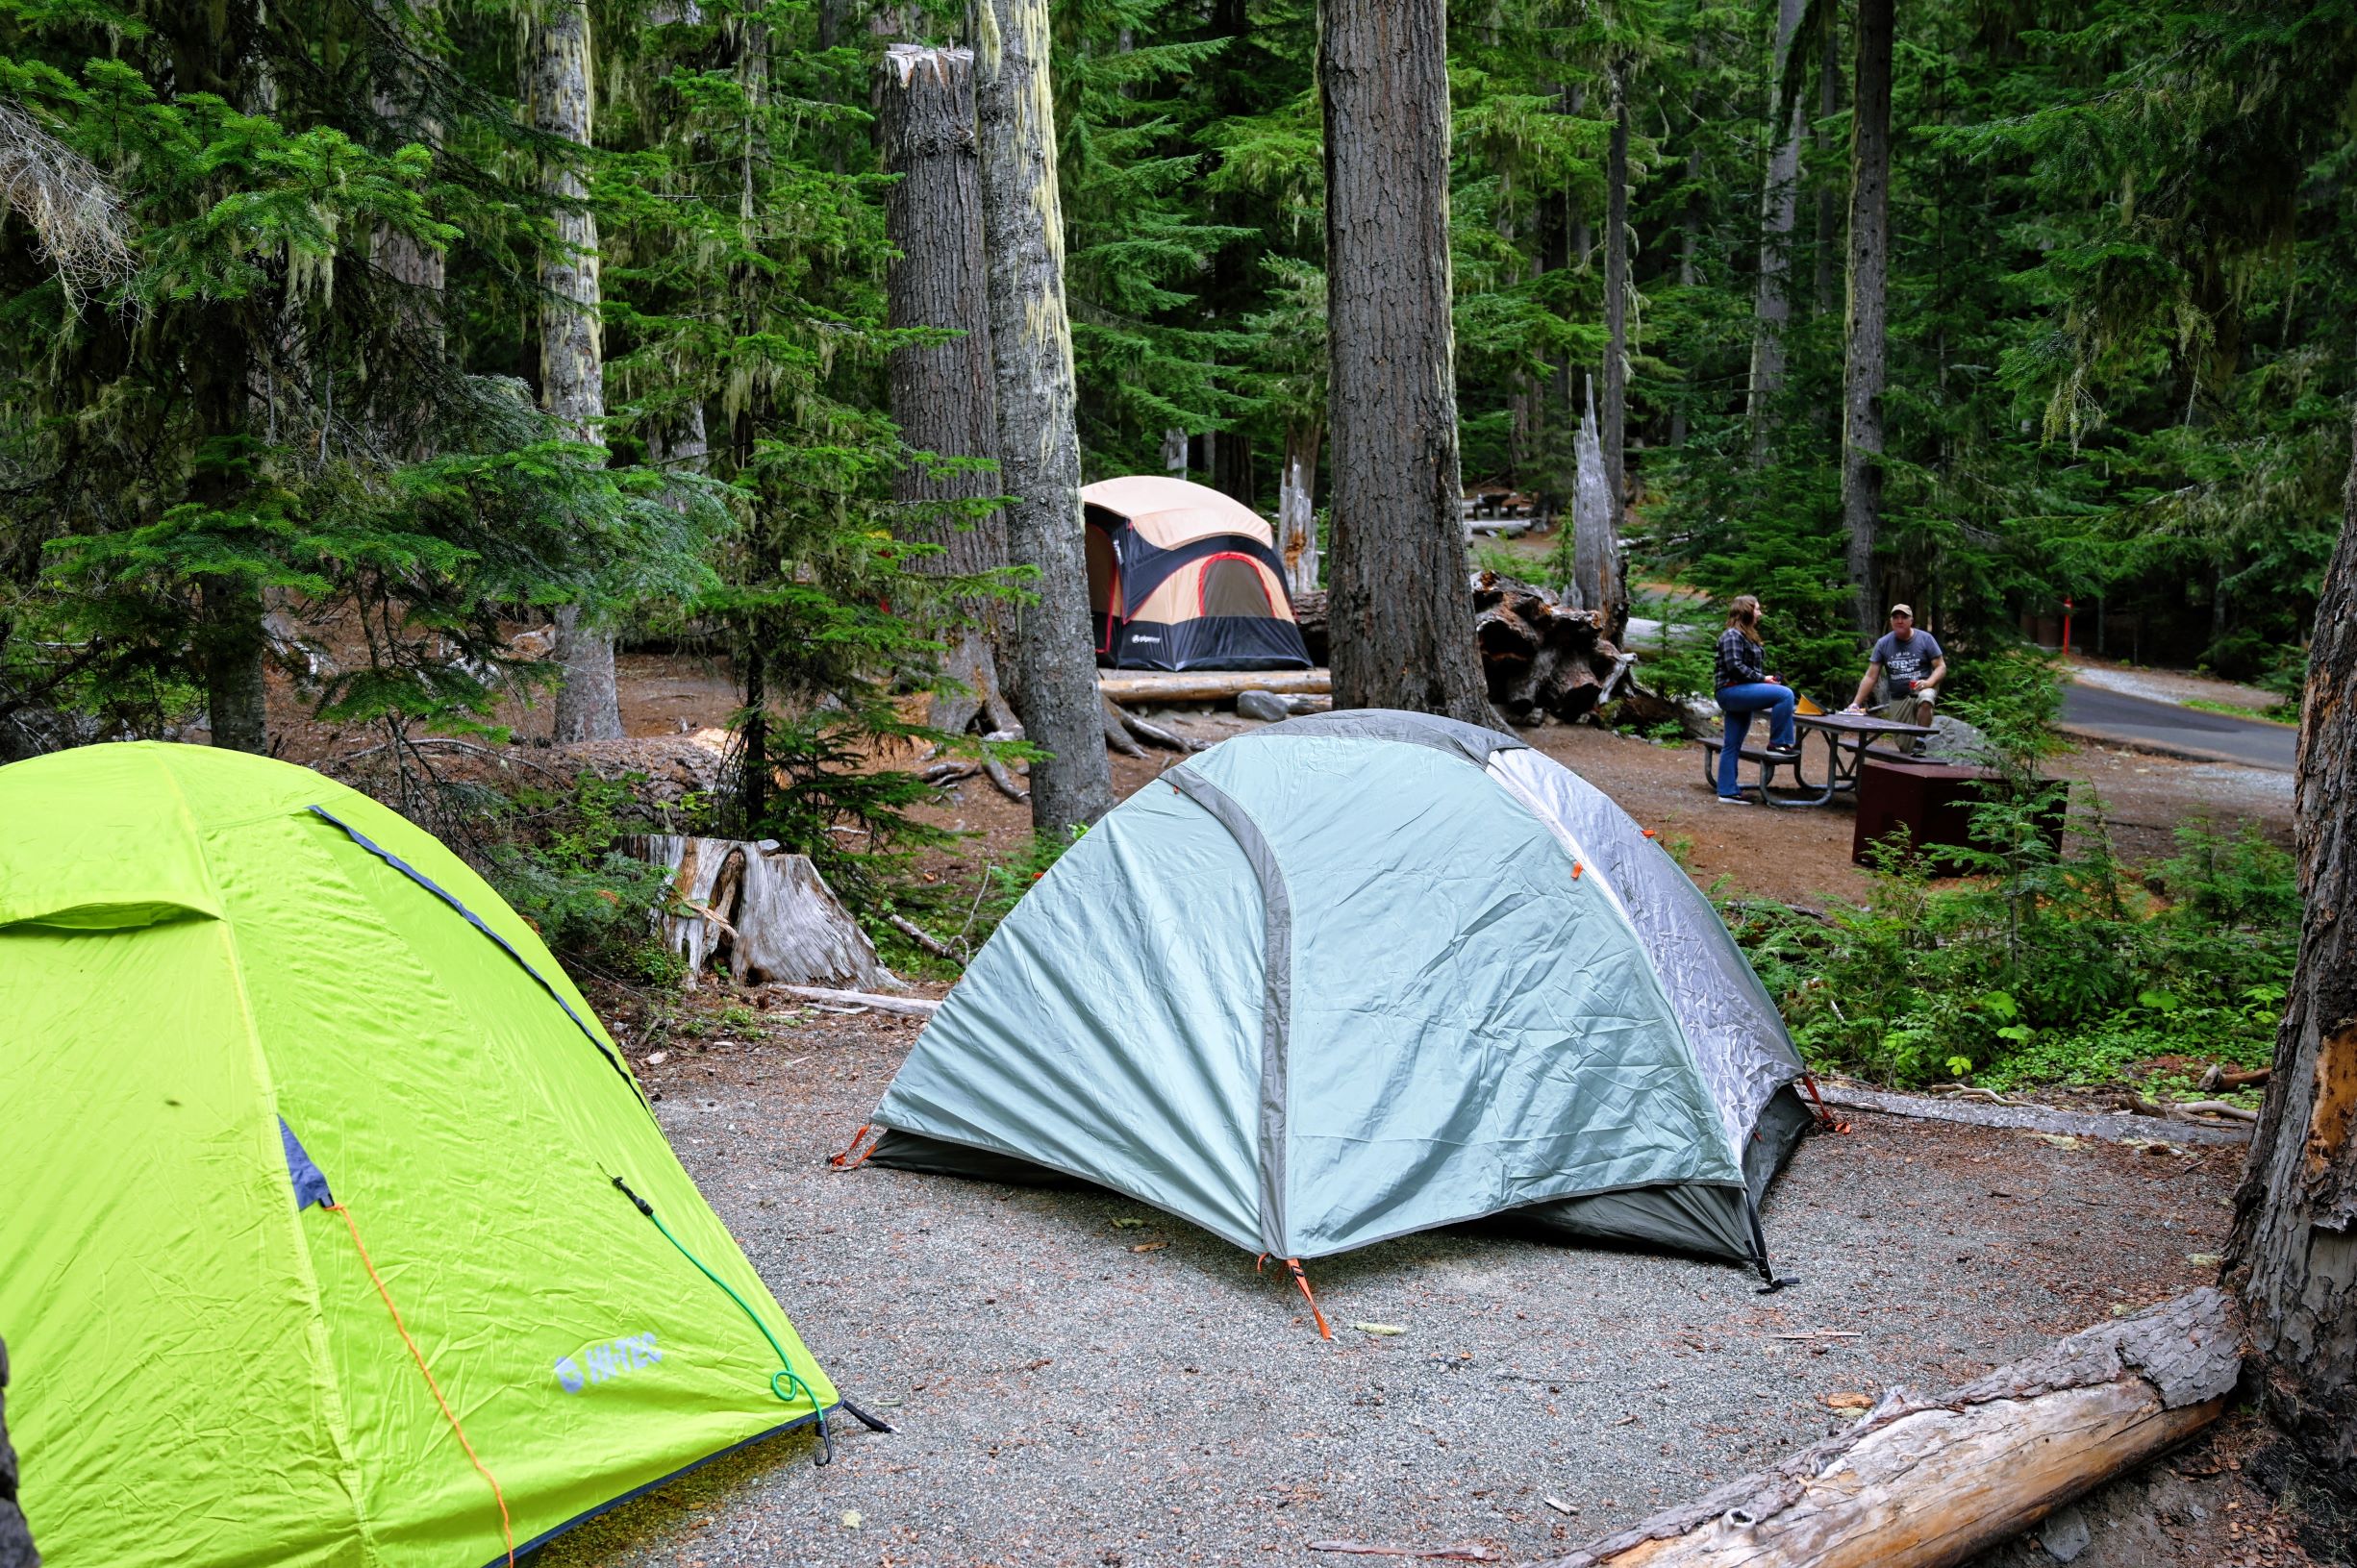
    This one is a no-brainer. Most of us don’t want to sleep under the stars with nothing to protect us from the bugs and morning dew. Unless you’ve got a camp trailer or are sleeping in the back of your car,  you’ll want a tent.  These are my top three suggestions based on ease of use, easy packing, and if you’re camping with a family.

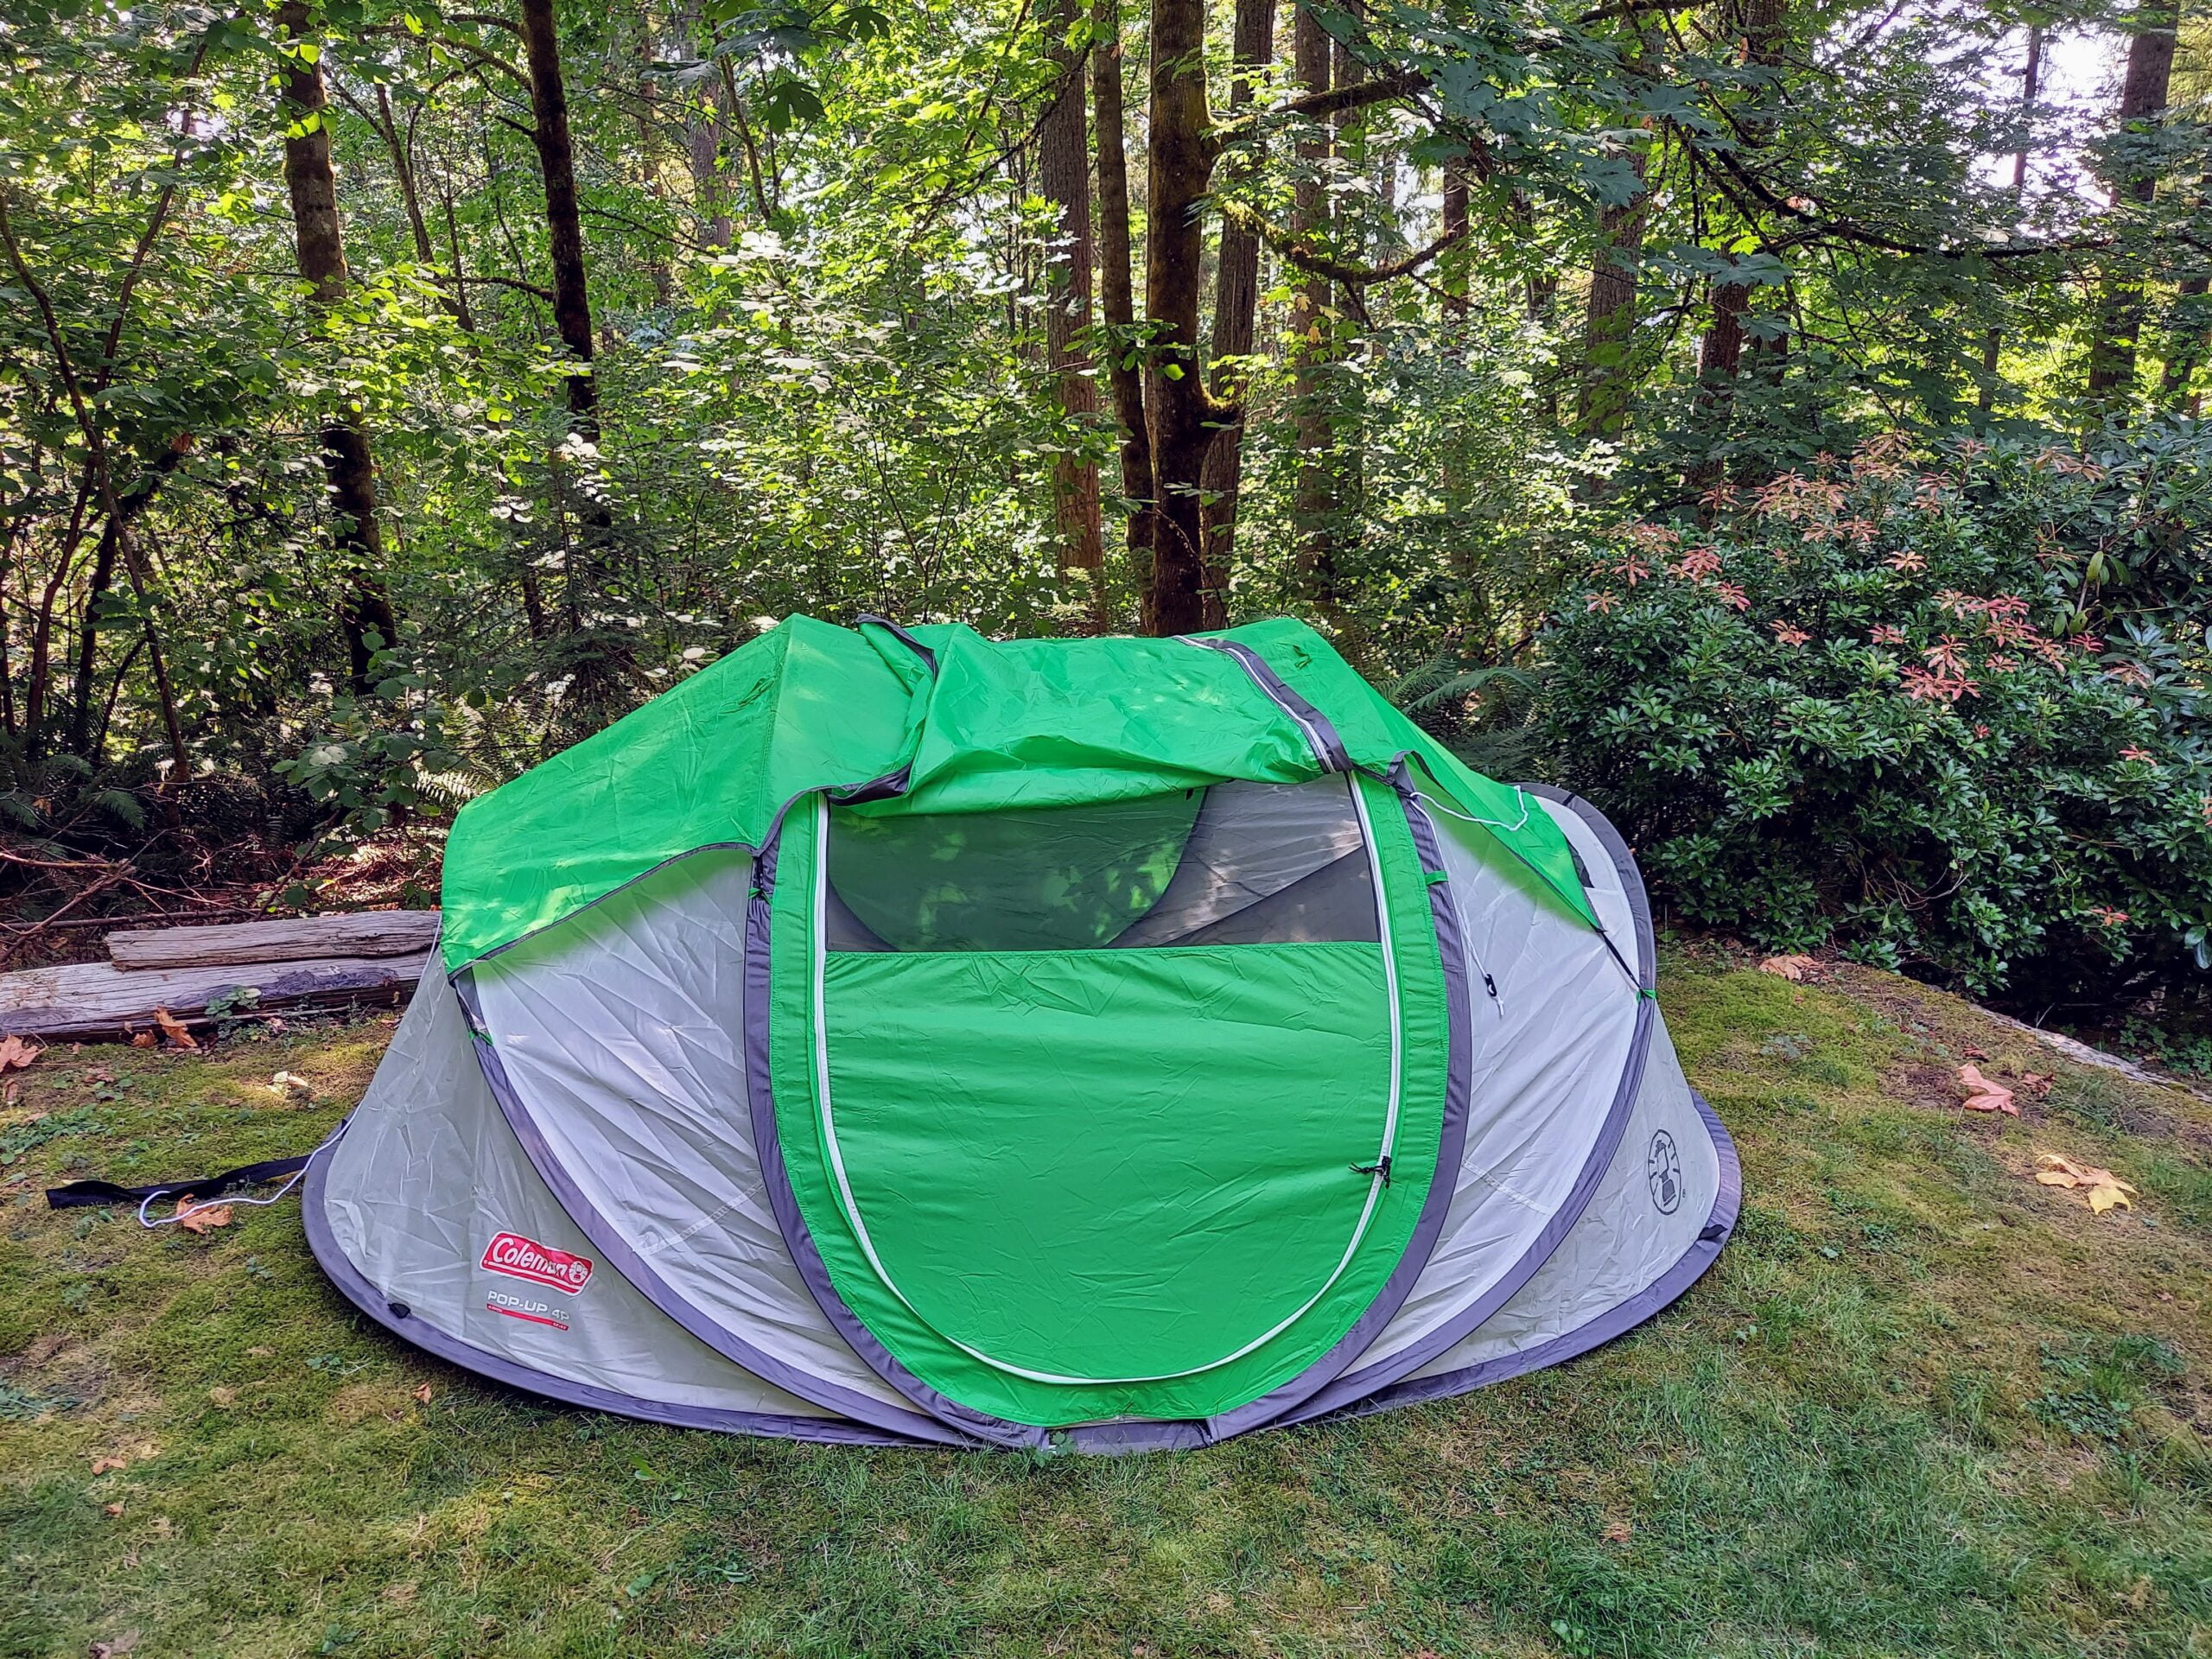
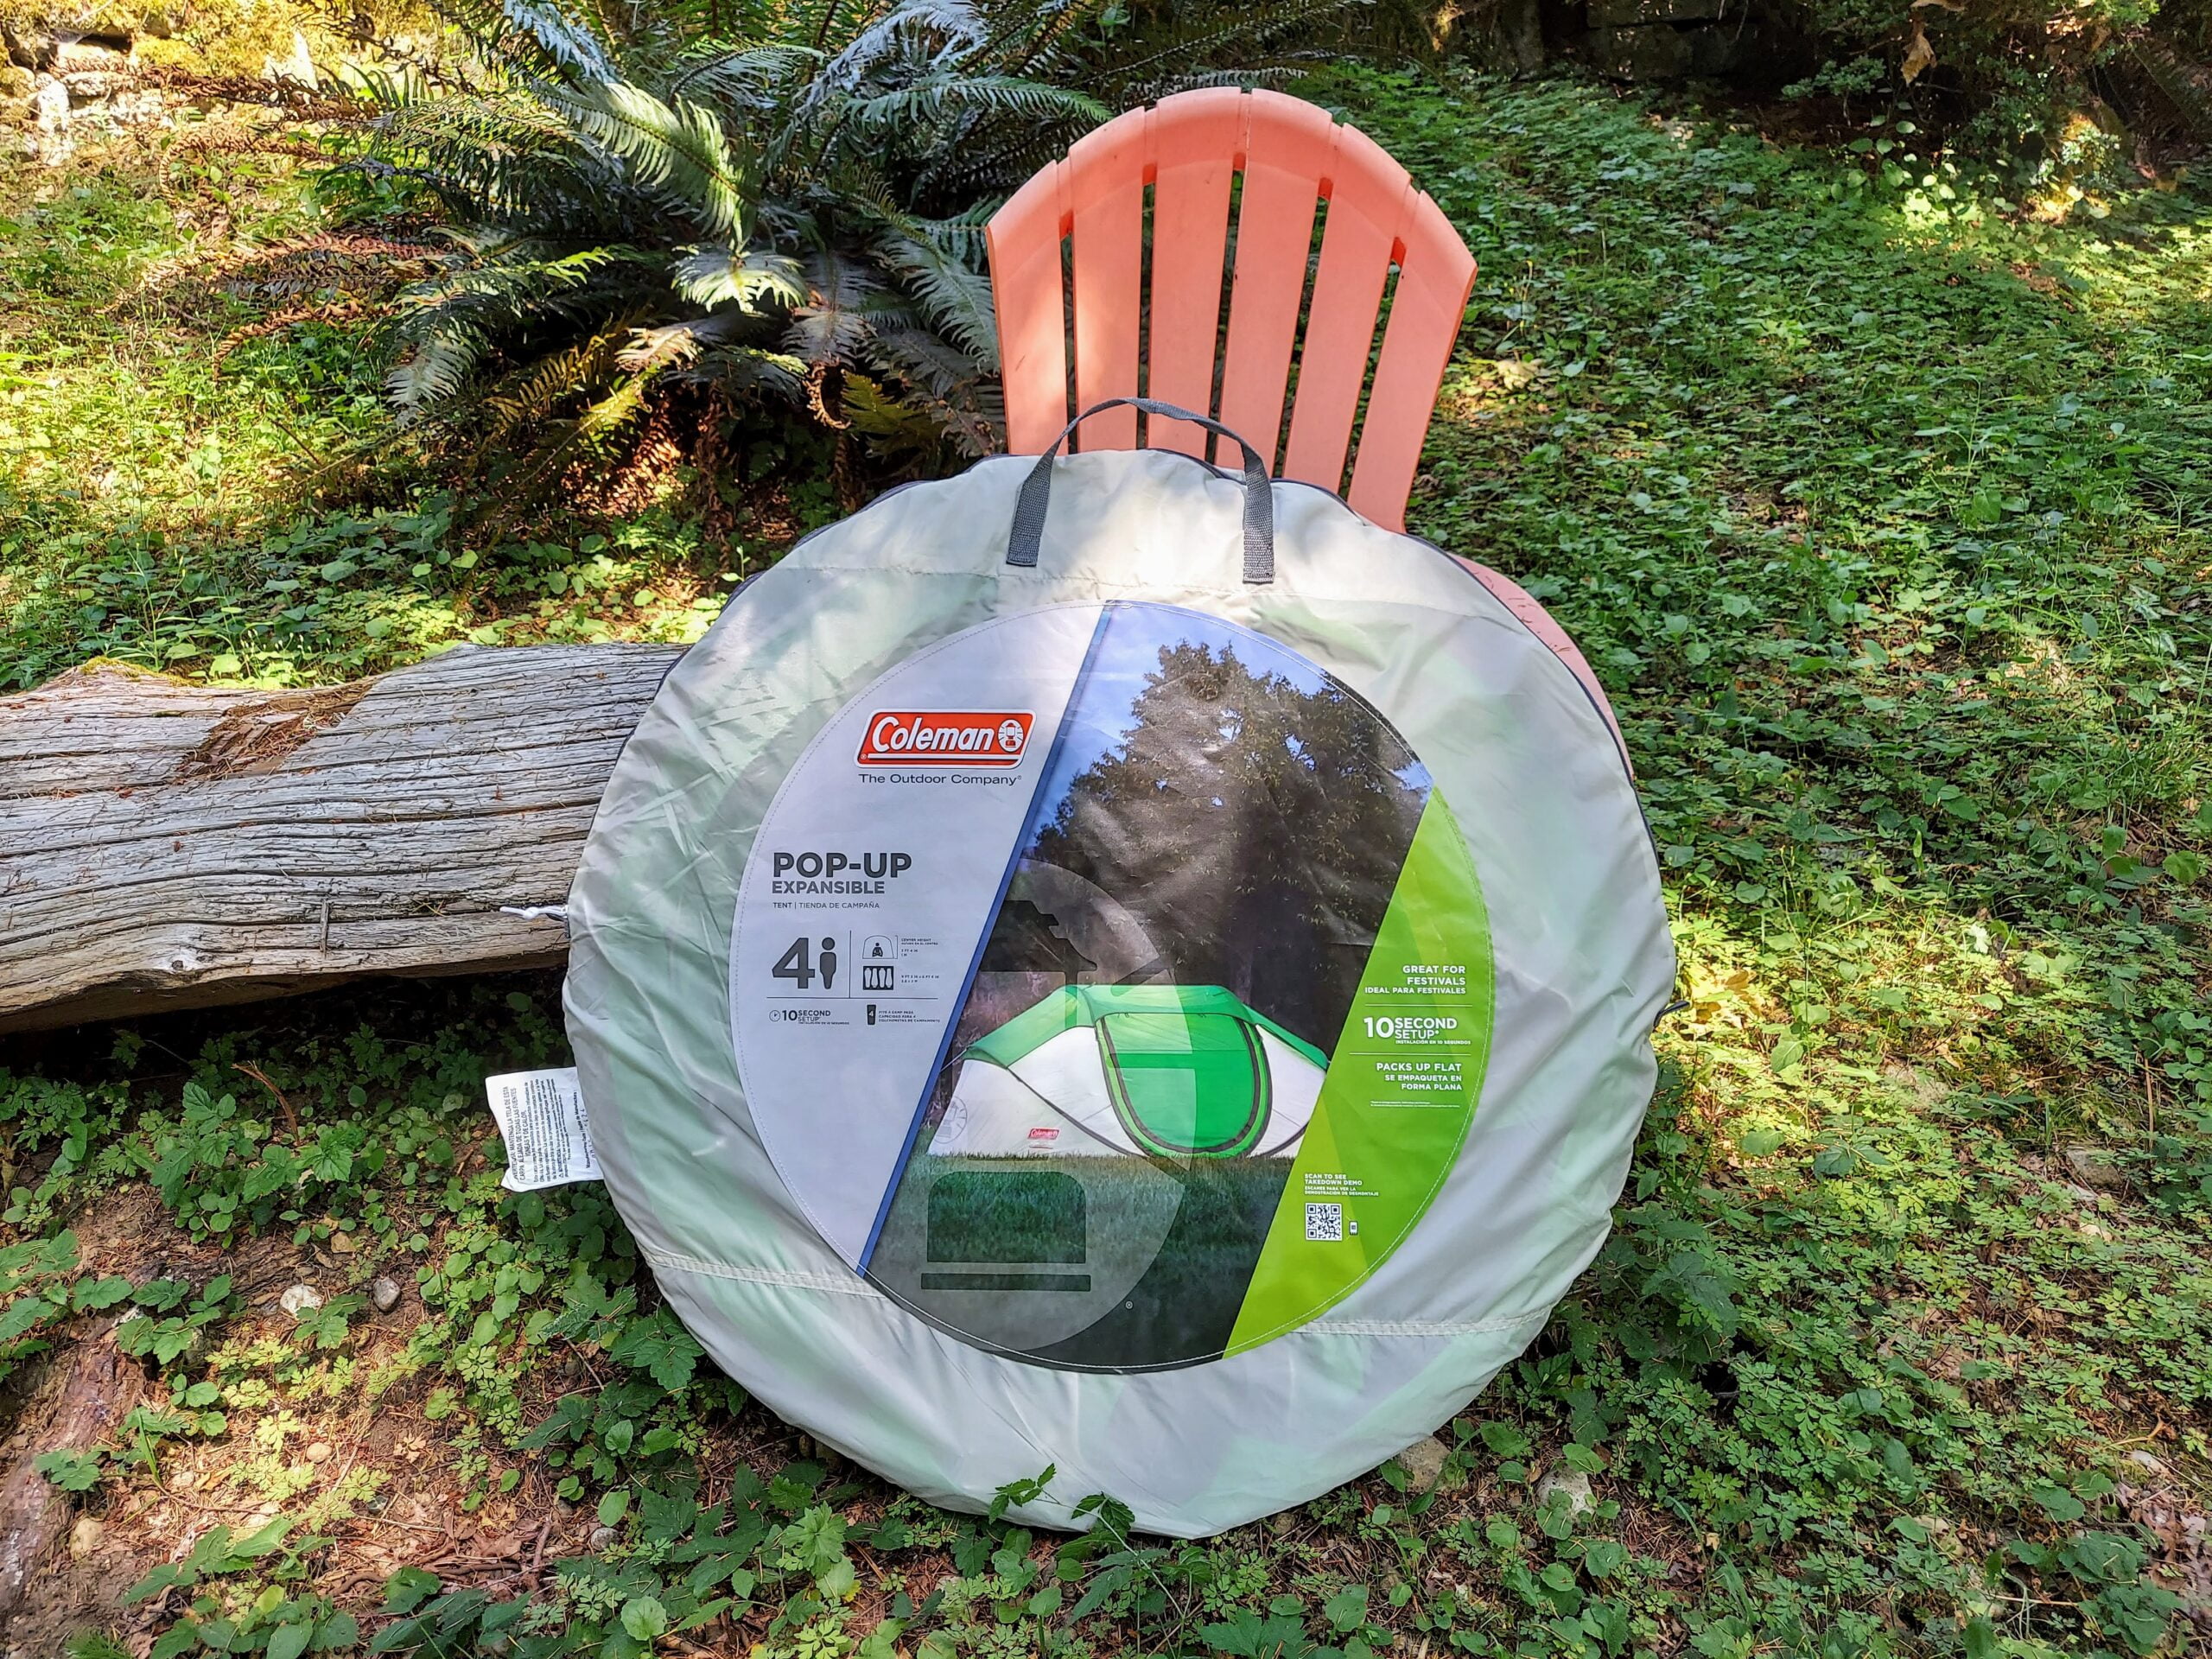
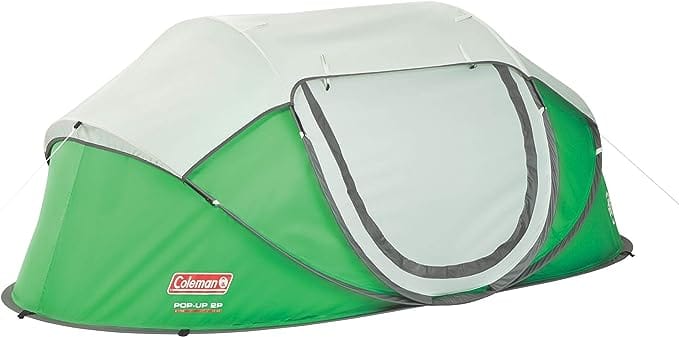
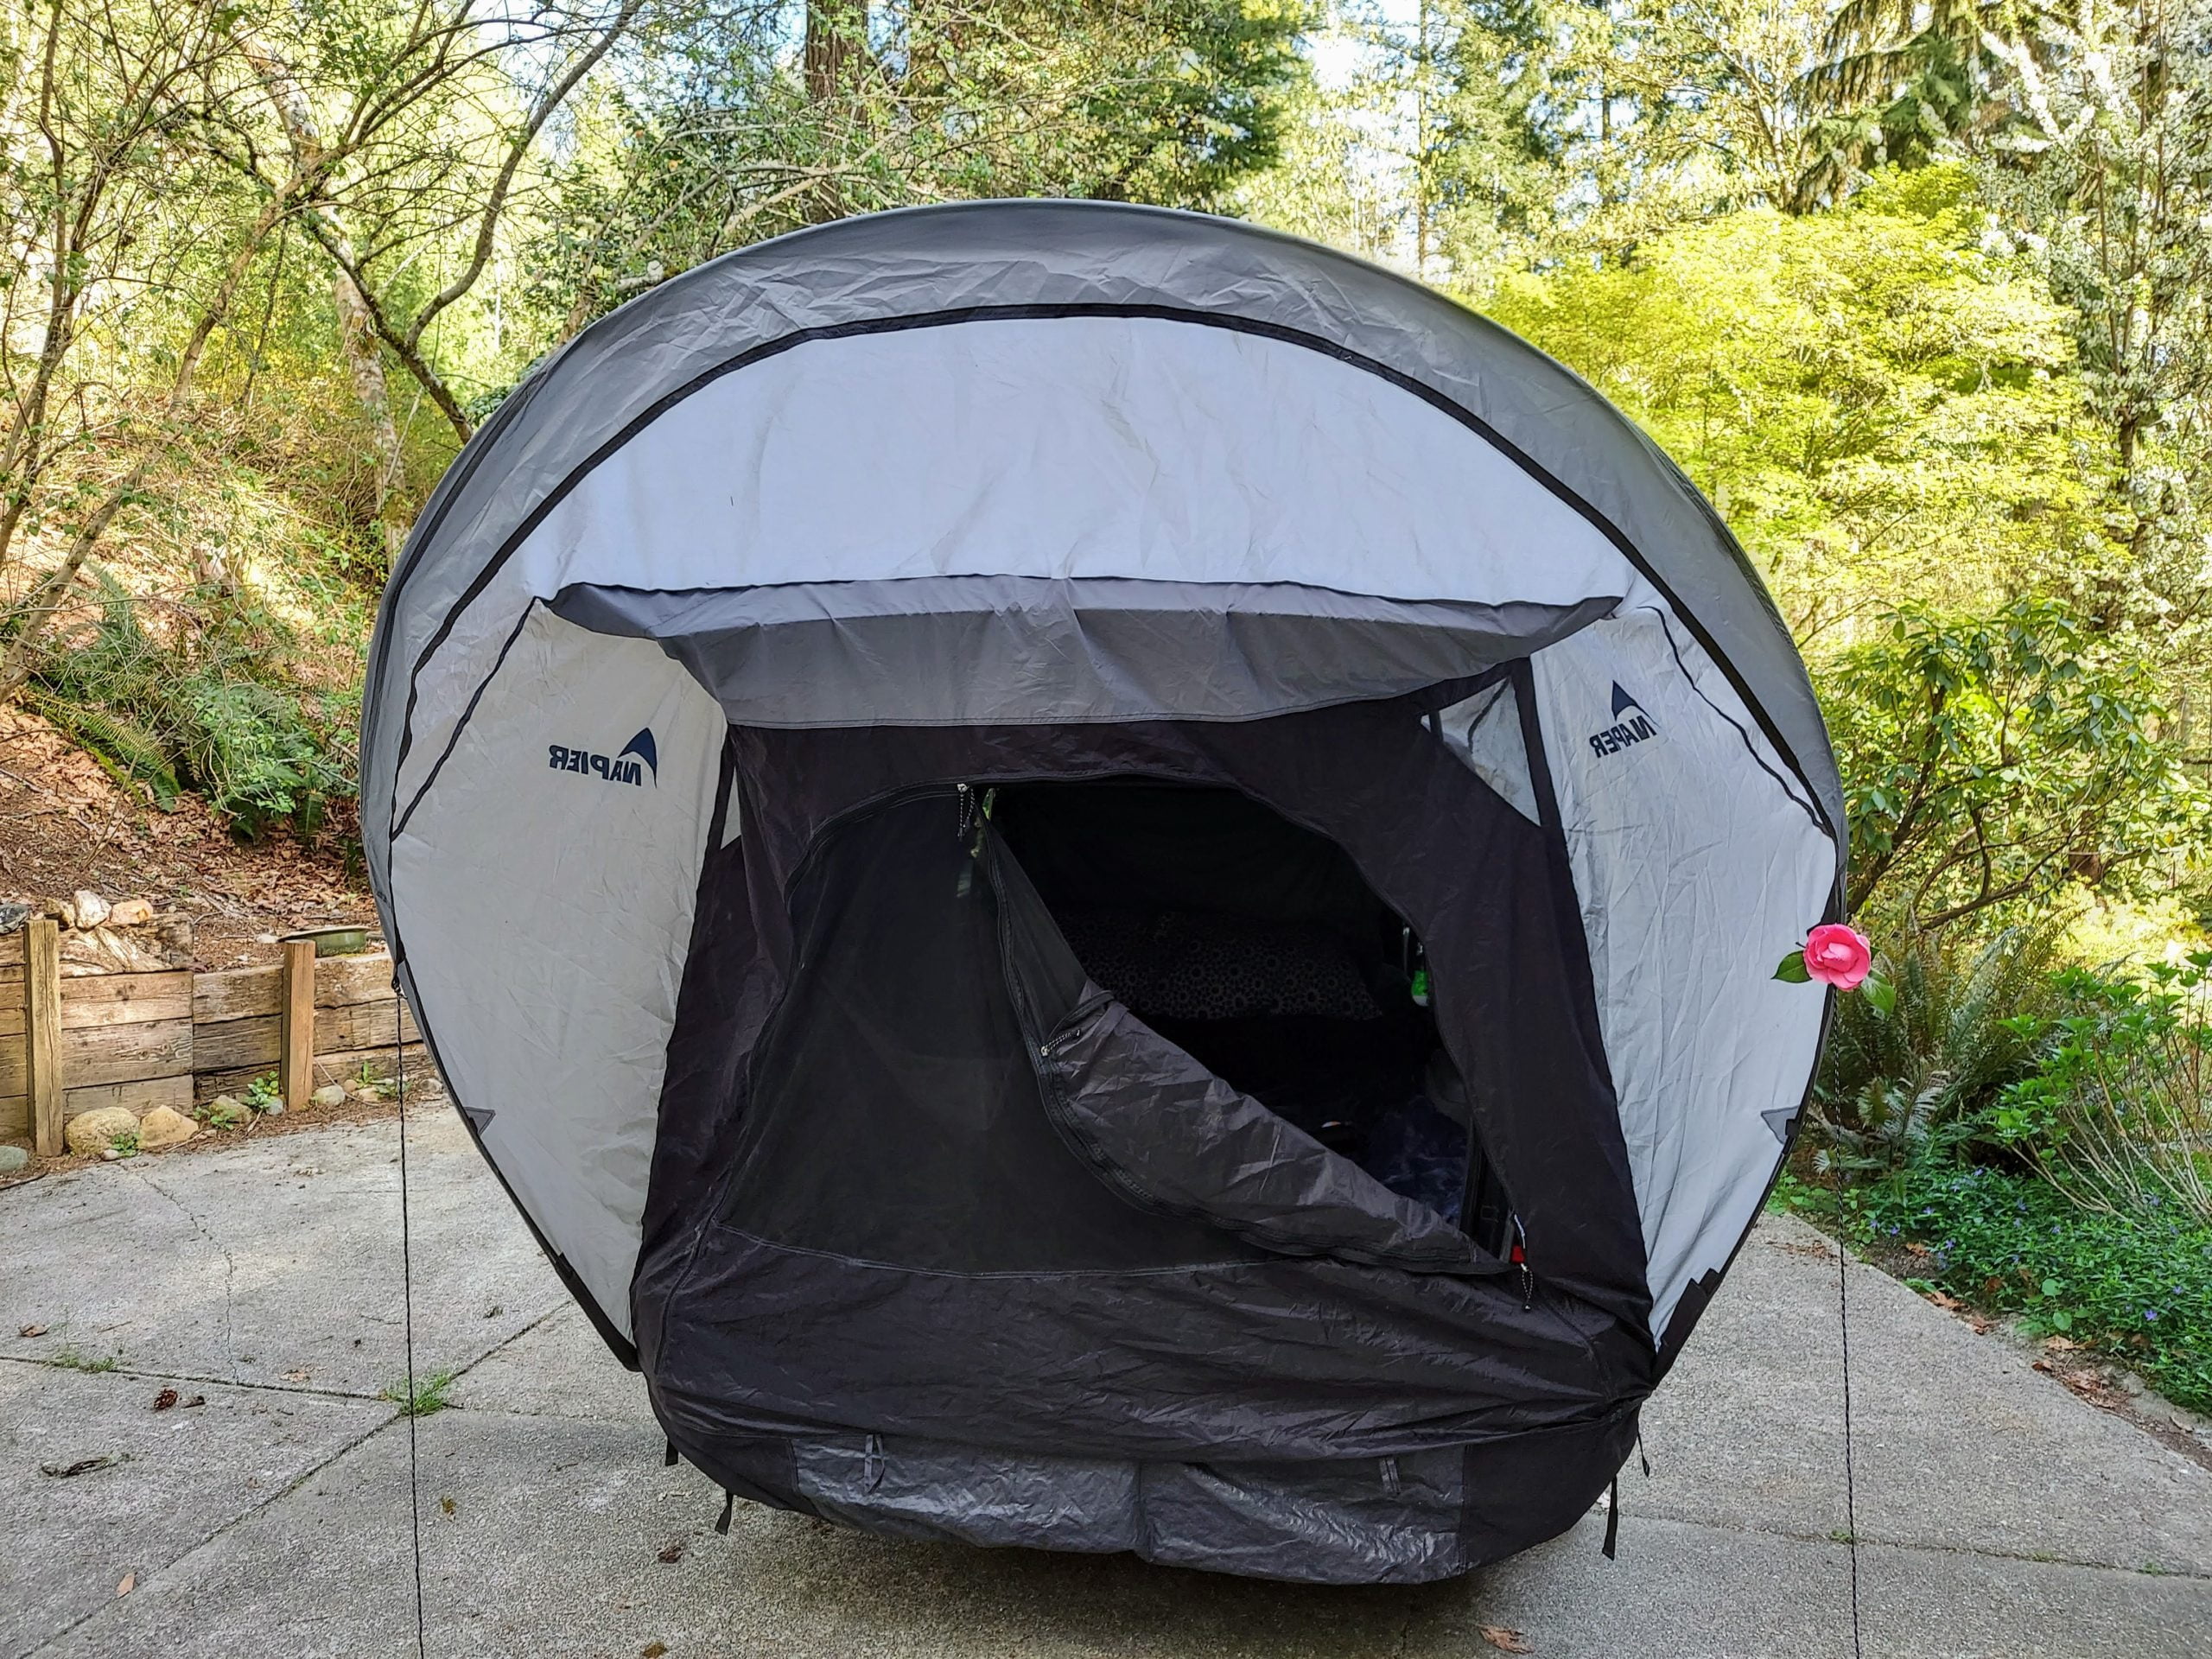
    The Coleman 4-person Pop-Up Tent

    I love how easy this tent is to set up. You can read my review and watch a video on how to put it up and stow it away. In about 1-minute, your tent is set up, and you’re ready to throw in your sleeping bags and begin enjoying camp.

    tent camping accessories

    REI Co-op Trail Hut 2 Tent with Footprint (2-person tent)

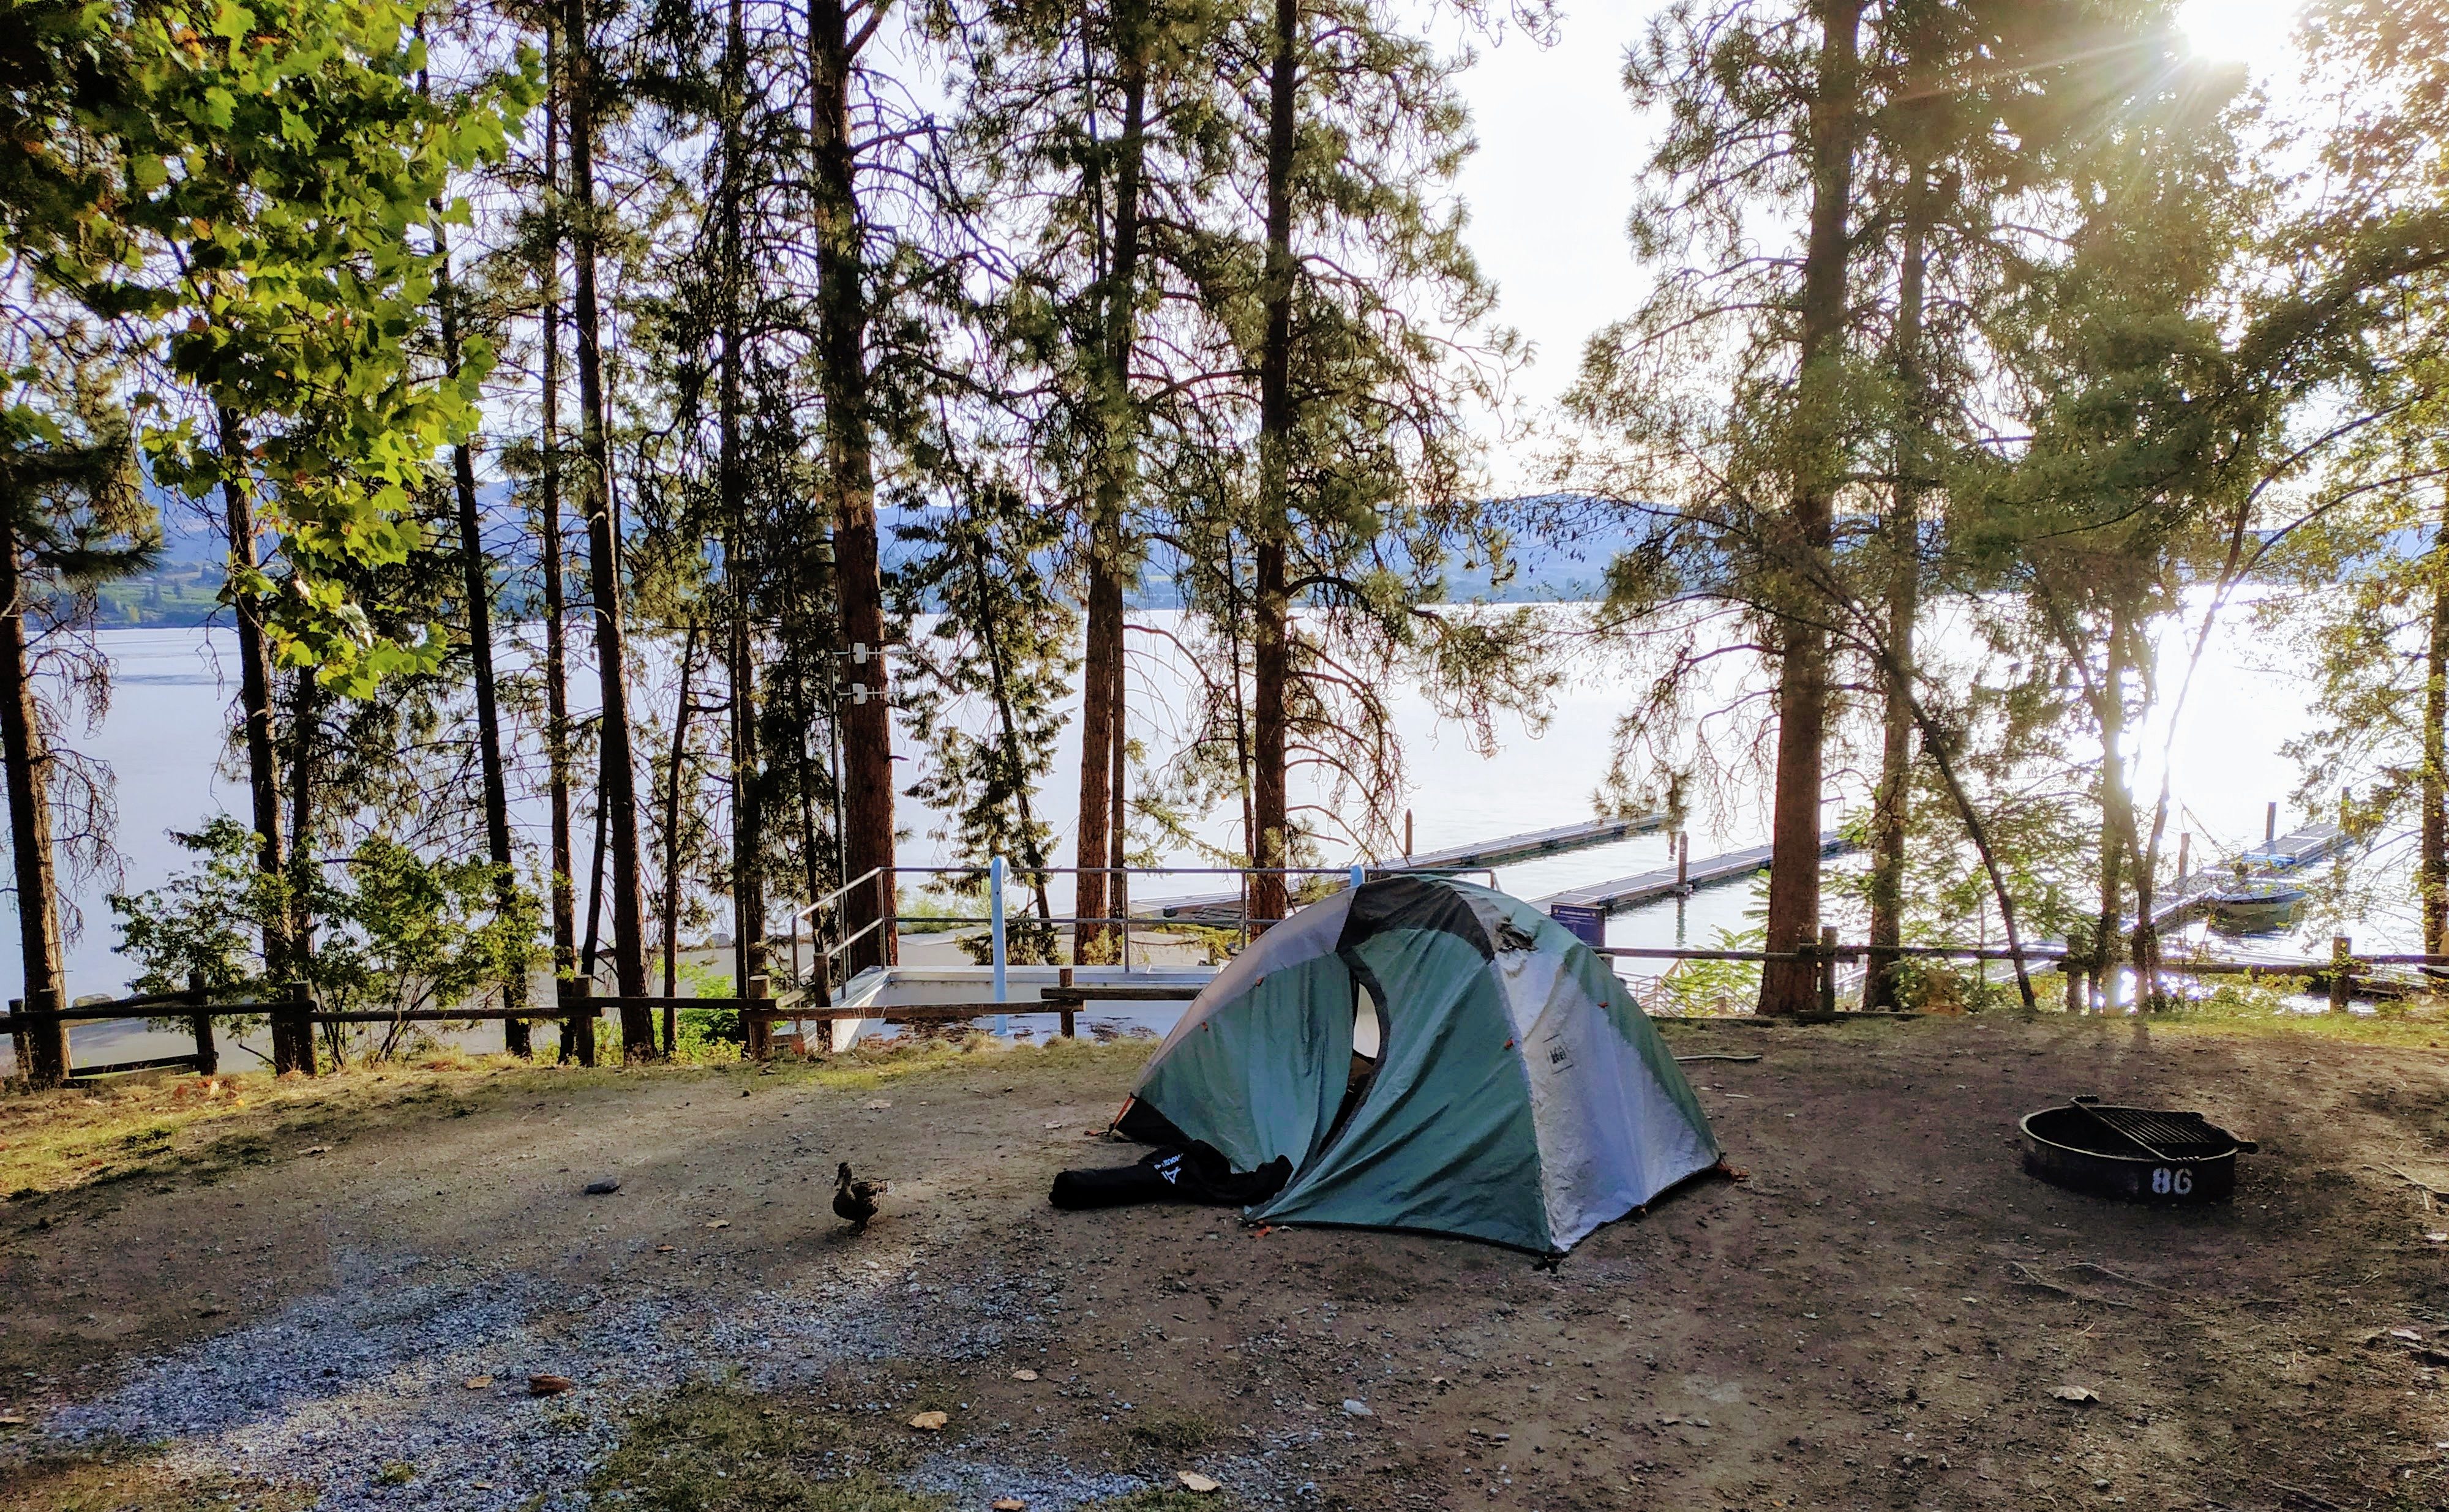
    I’ve used the REI Passage 2 tent for over ten years, and it’s still in great condition! Before getting the pop-up tent was my favorite tent to use. I bought it for a backpacking trip and loved how easy it was to set up that I continued to use it for car camping trips. It is also perfect for camping off my motorcycle. It appears that it may have been discontinued as it was unavailable as of this writing.  So the REI Trail Hut 2 appears to be the next closest equivalent to the Passage 2.

    Coleman Cabin Tent with Instant Setup

    For family camping trips, consider getting the Coleman Cabin Tent. It is designed with integrated tent poles so that it takes only a minute to set the tent up, then another minute to stake it down, and you’re ready to go! It comes in a 4-person, 6-person, and 10-person design.

    I have a large family tent for when I take my nieces and nephews camping, and I often hear groans from the older kids and adults when they have to set it up.  So upgrading to an easy set-up tent for groups might be something I do in the future.

    Camping Comforts

    Camping doesn’t have to be “roughing it.” Although I don’t need to bring my house when I camp, and my camping doesn’t reach the level of “glamping,” I still enjoy a few creature comforts. Some of these camping accessories are optional. I’ll admit that, but they certainly make camping a lot more relaxing and extend the amount of time you’re willing to “rough it.”

    REDCAMP Folding Camping Cot

    Cots are really nice as they keep you up off the ground, which keeps you a little warmer, and it’s easier for getting up in the morning. When shopping for a camping cot, it’s important to look for the weight capacity of the cot and how easy it is to fold and stow away. I also bring extra blankets to place as a layer of padding underneath the sleeping bag.  With an extra blanket underneath you, you don’t feel the cot’s support bars, and you have a little more insulation.

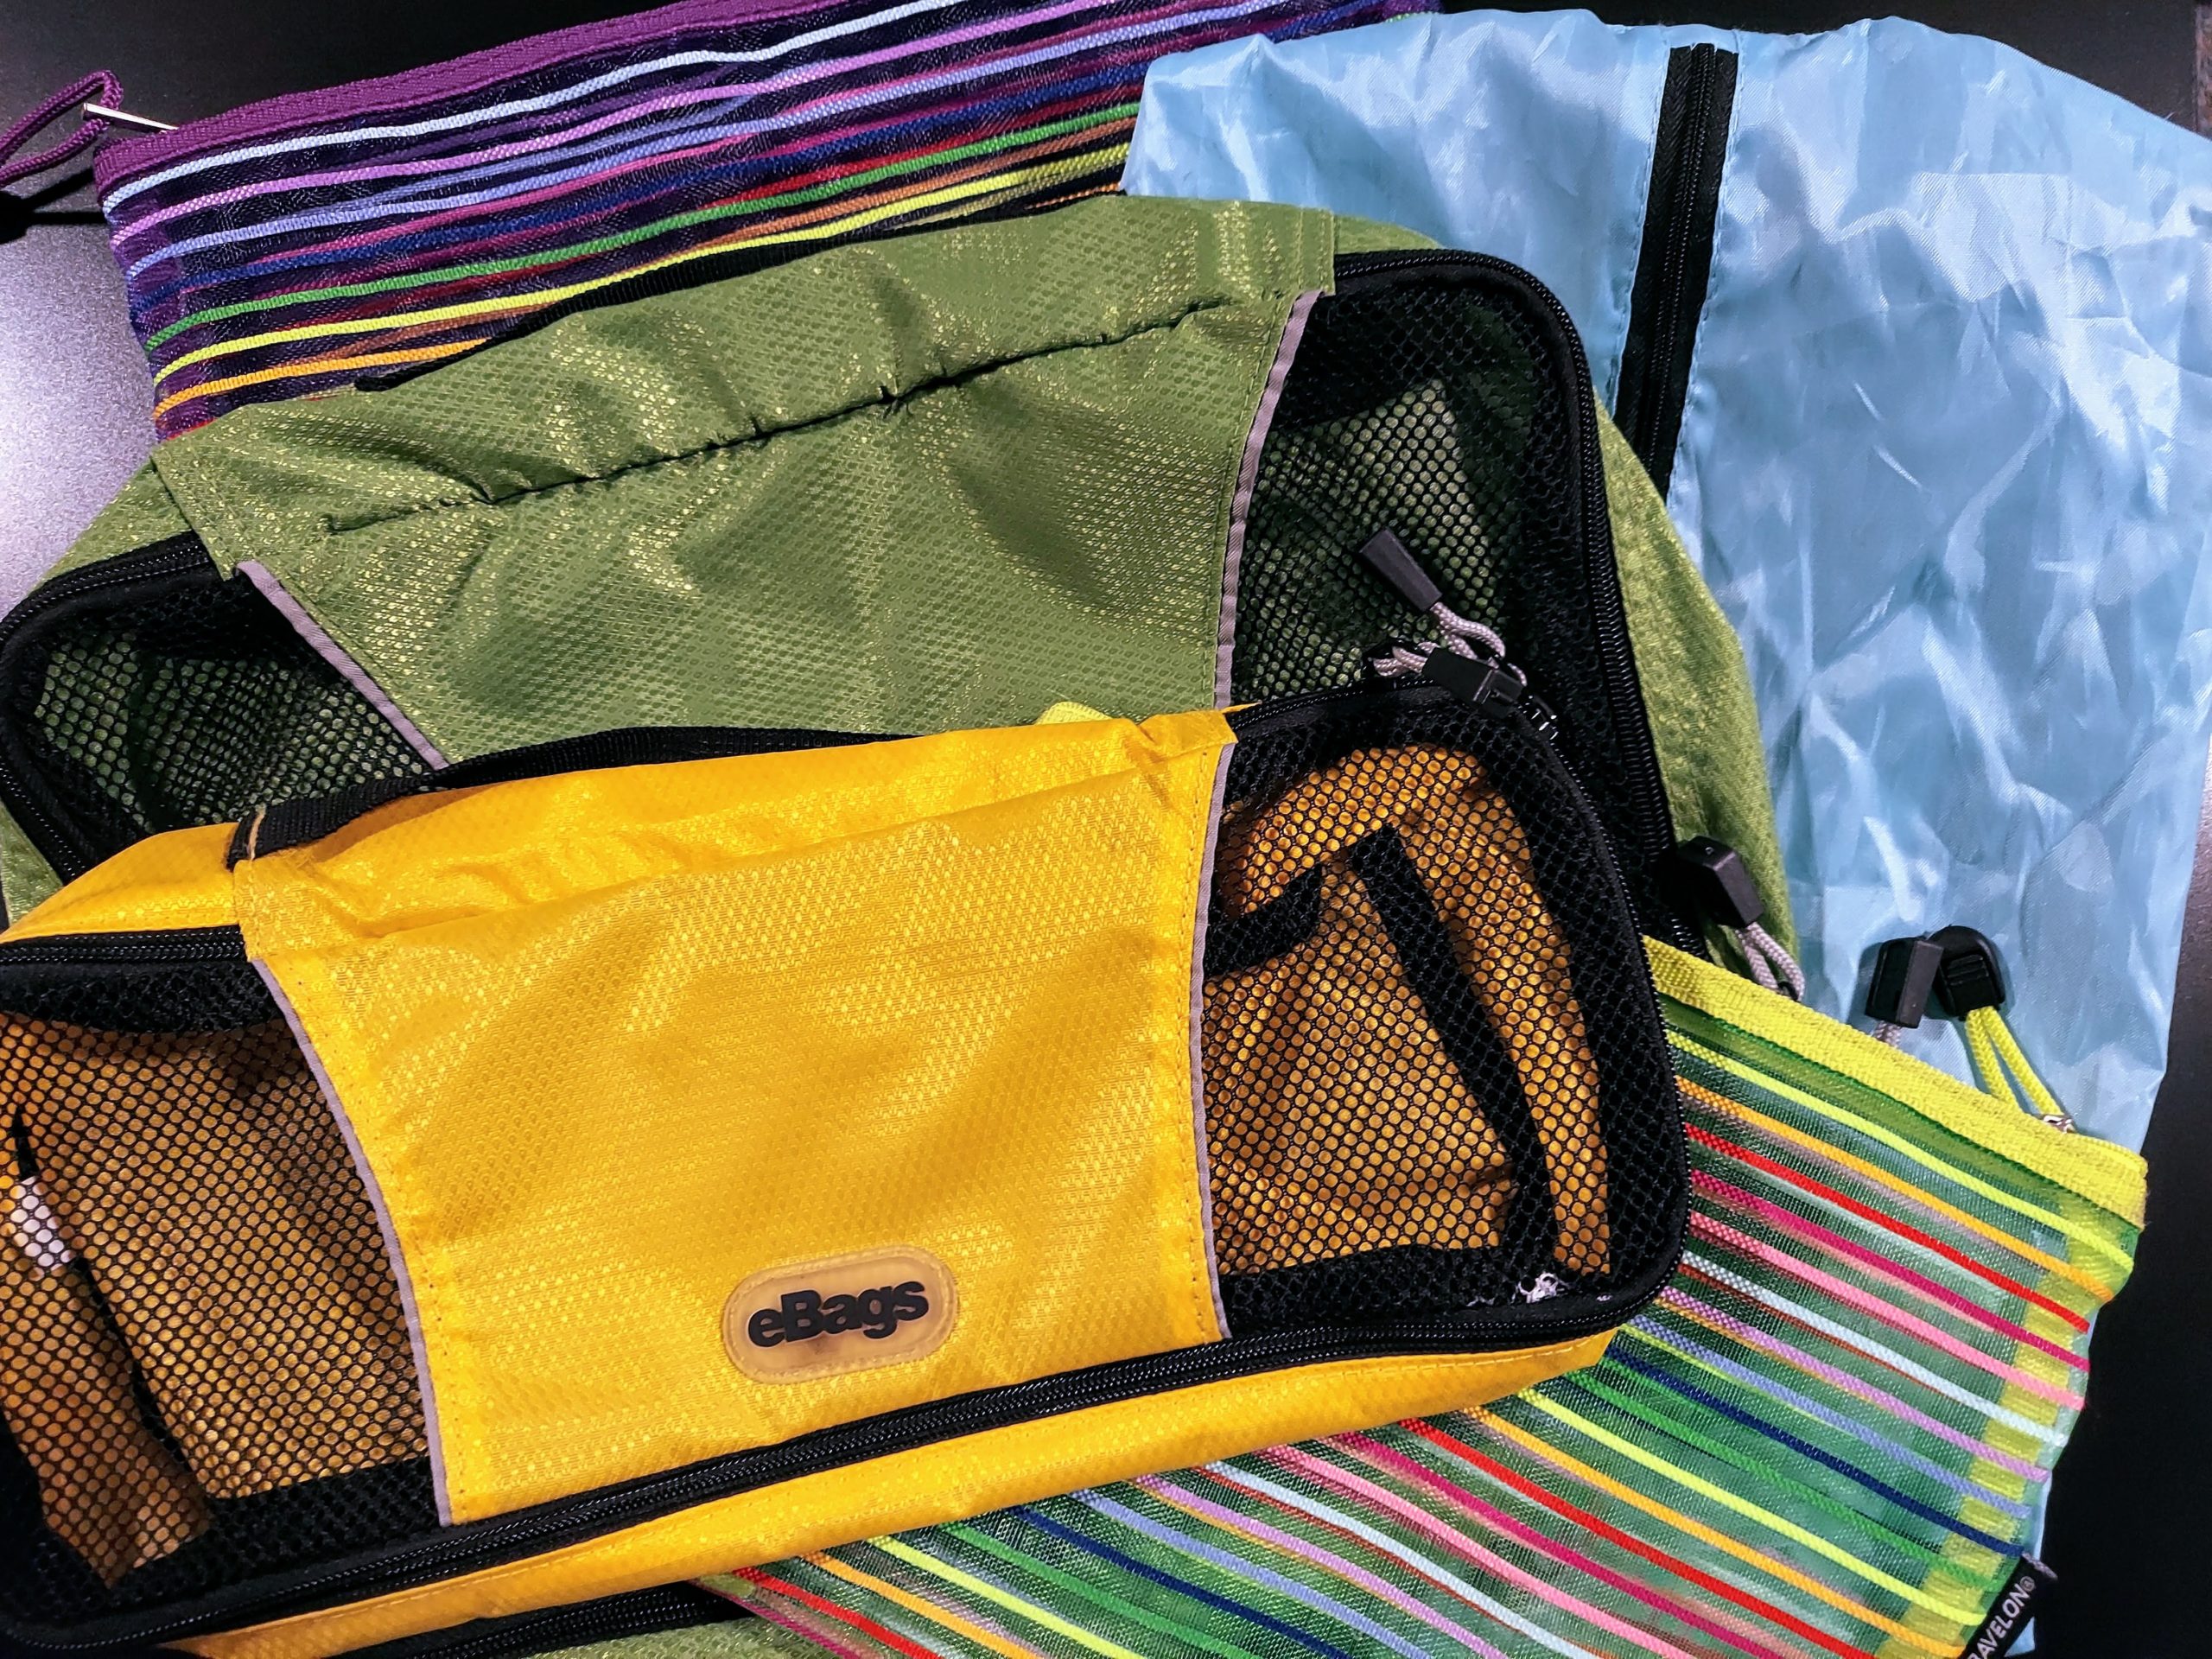
    Coleman Self-Inflating Camping Pad

    I own a couple of these, which I purchased for backpacking, but now I use them for car camping and motorcycle camping. They are small and easy to pack. Plus, they’re durable. I often give these to my nieces and nephews while the adults use camping cots or air mattresses.  They’re easy to set up and provide enough padding, so you don’t feel any loose rocks digging into your back. You’ll often find these at your local department store. Grab a couple when they have their camping sale.

    sleeping-bag

    Coleman Big Basin Sleeping Bag

    I think a mummy bag is one of the best styles of sleeping bags for keeping you warm at night.  My Dad bought me one when I was around 18, and I still use the same mummy bag whenever I go camping out of my car.  I have a lighter weight backpacking version when weight is a concern.  My husband loves being able to cinch the top of the bag around his head and burrow in to stay warm.  They also make them in kid sizes.

    I have a best friend whose main complaint is getting cold at night. She doesn’t, however, like the mummy-style sleeping bags.  So if you fall into that category, consider getting one of the traditional styles.  

    Try to get a sleeping bag that fits your body, with a little extra room for turning on your side but not too much extra space, or you have large pockets of cold air. I also bring extra blankets just in case the kiddos or anyone else gets cold in the night.

    camp chair camping accessories

    Coleman Camping Chair with Built-in Cooler

    The Coleman Camping Chair with Built-in 4 Can Cooler is a nice option as it has a drink holder and a side pocket you can stick your phone or notebook and so on in while you’re sitting around camp.  The ALPS Mountaineering King Kong Chair is rated for up to 800 lbs. It’s always good to pay attention to the weight rating on any camping accessory you purchase. 
    Also, when you go camping, the nicest camping chair is invetibly the one everyone will want to sit in.  We tend to bring a few nice ones for the adults and simple, cheap ones for the kiddos.

    Wise Owl Camping Hammock

    A hammock may not be a camping accessory you think you need. However, we set one up during last year’s group camping trip, and it was a favorite spot at the campground. After a day of hiking, you’d soon find someone sleeping in it.

    hammock camping accessory

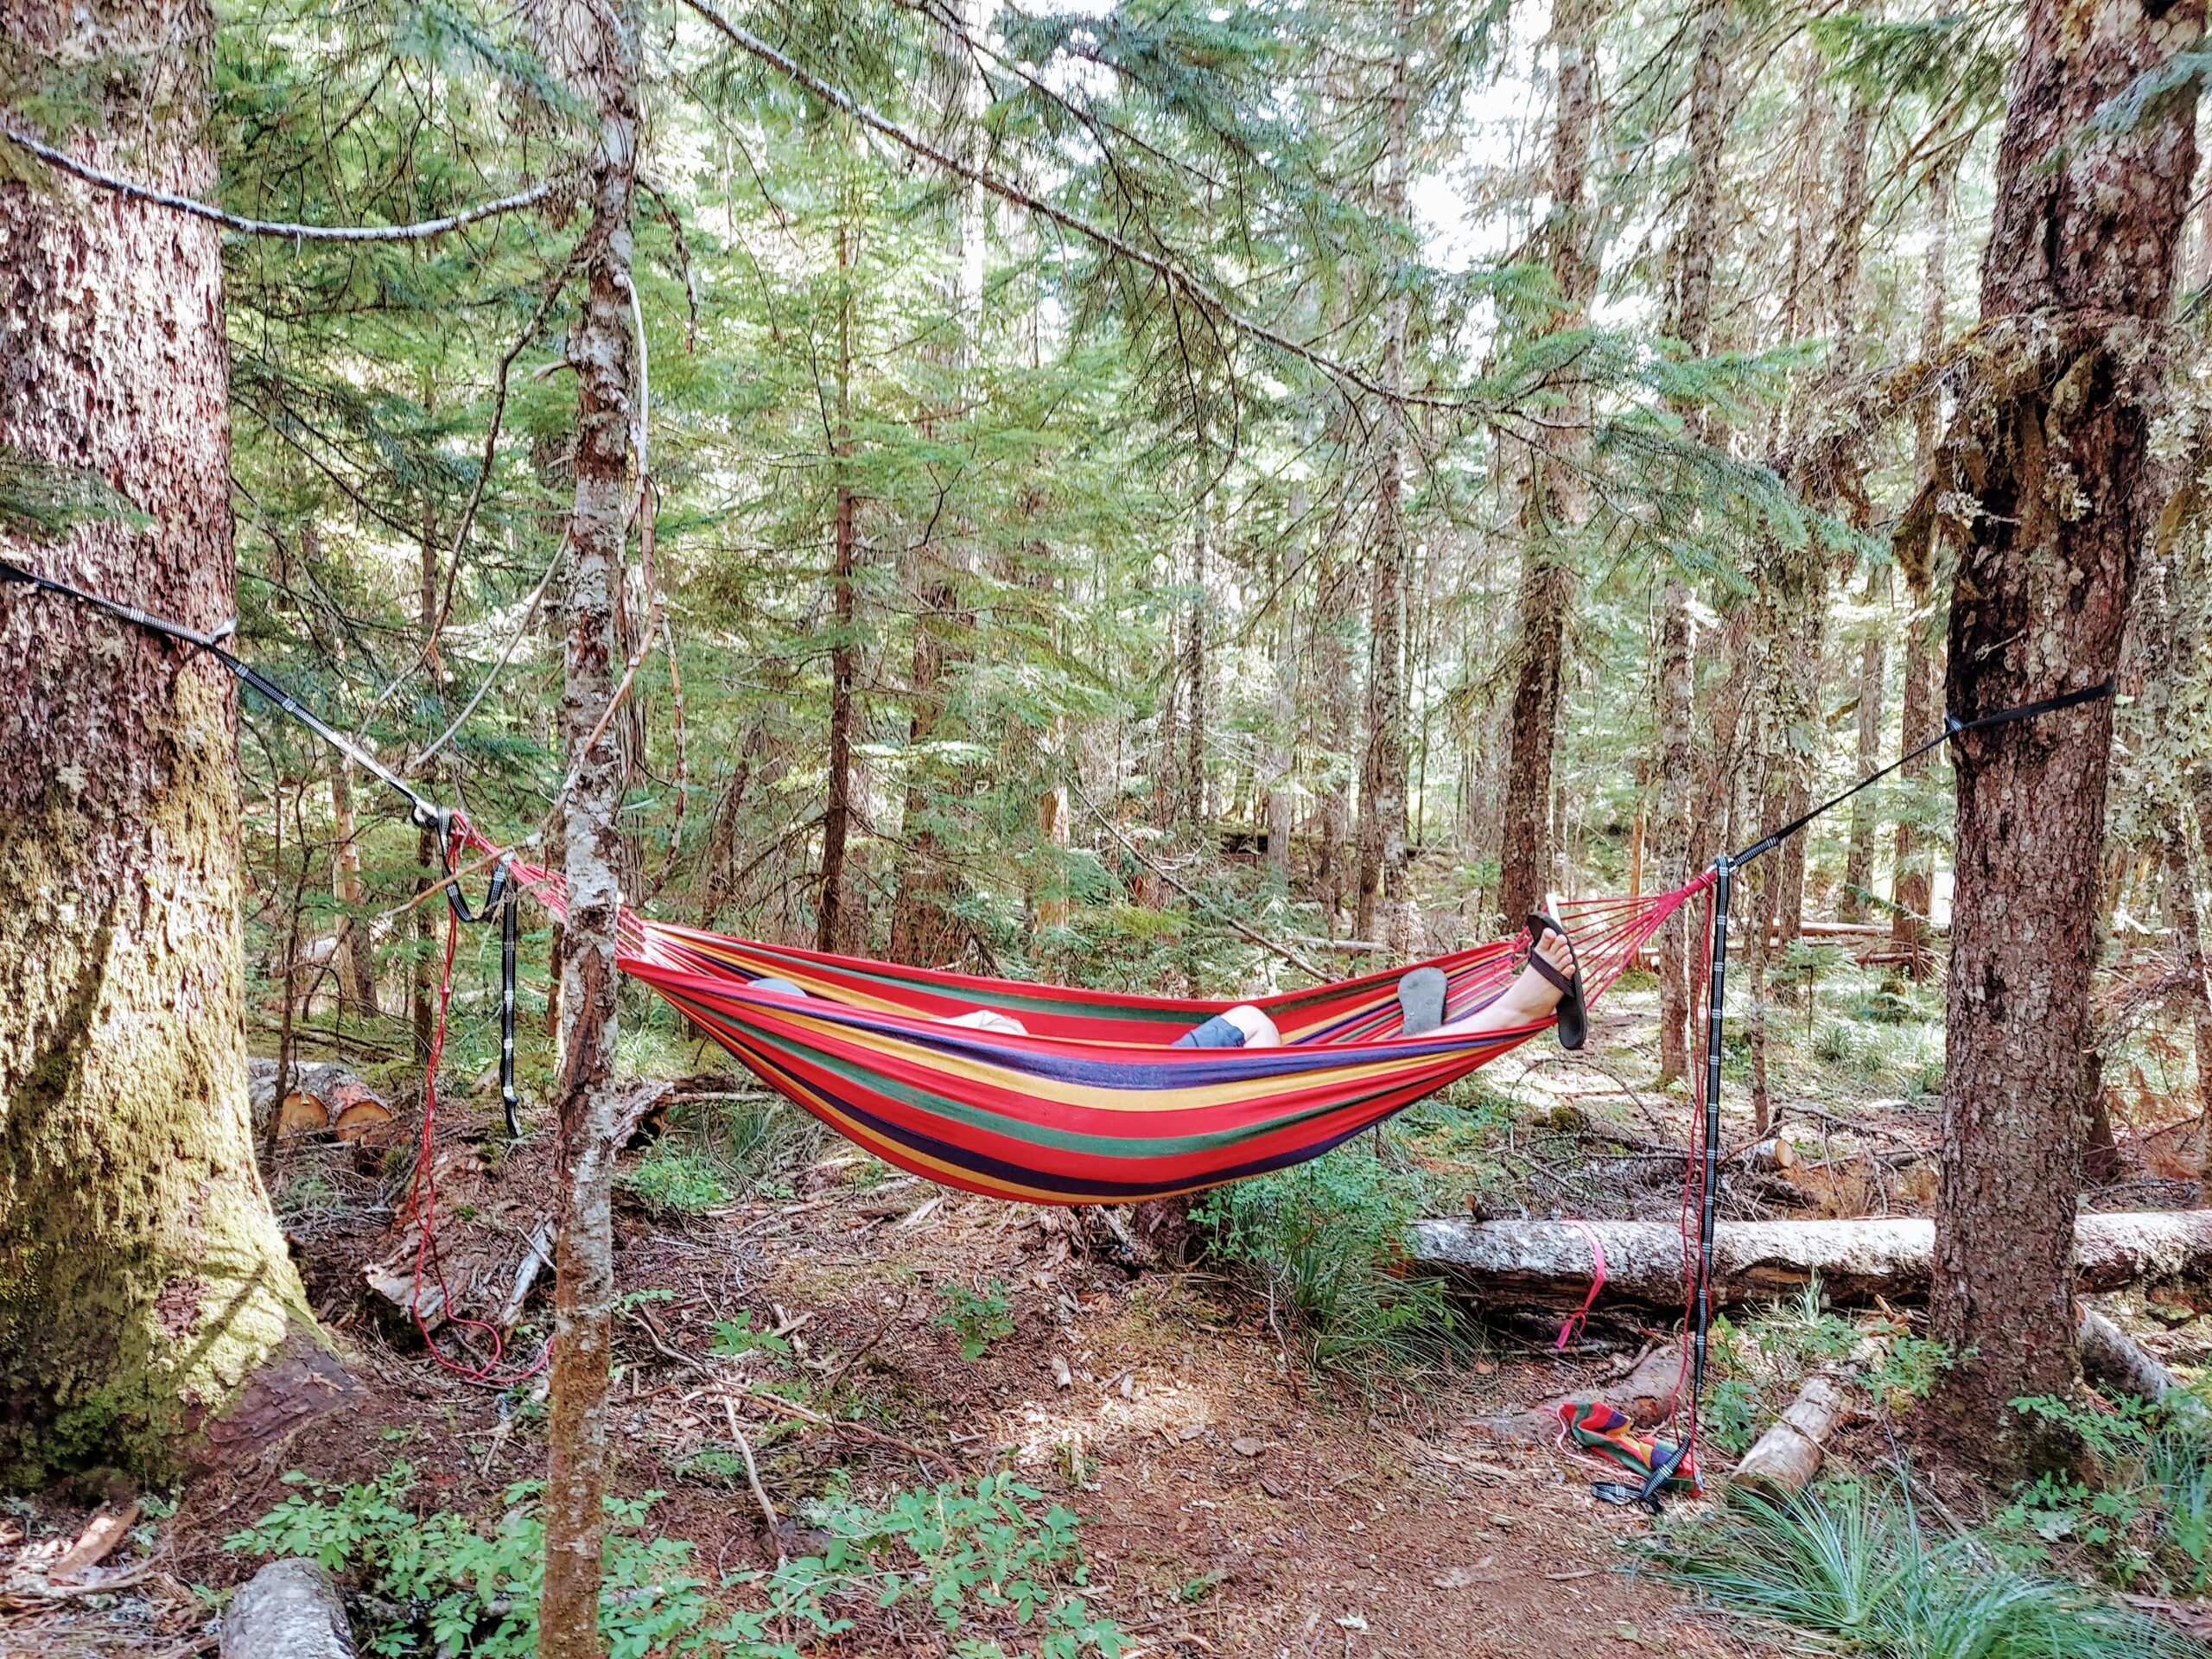
    You don’t need to purchase a camping-specific hammock. If you already have a hammock you use at home (see ours in the photo below), you can bring it instead. You can use it with these handy hammock straps that make it incredibly easy to hang a hammock. You can also purchase a portable hammock that comes with its own stand. These work well when you don’t have any suitable trees to hang a hammock from. They are also easier for younger kids to get in and out.

    Ozark Trail Instant 2-Room Shower

    Perhaps this is the ultimate luxury camping accessory.  It is something I keep thinking I’ll buy, but I haven’t yet.  This year might be the year I do.  It seems to be the one thing that everyone misses most when they’re camping. A shower helps us feel a little more human when we’re camping. Some of the teenagers in our camping group mention how they’d like a shower, so you might be surprised at the kids wanting to use it versus forcing them to.  

    The Ozark 2-room shower is a very versatile camping accessory as it can be used as a changing room as well as a shower. It also includes a solar shower, which is a nice plus. Some people even bring a porta-potty and stick it on one side when nature calls in the night. I suggest shopping around online to find it at the best price.

    camp-shower-camping-accessories

    If you prefer something a little smaller, this one-room shower tent is a good option, but you’ll need to purchase a shower to go along with it. The Nelio Portable Pressure Shower is one to consider and the budget-friendly portable shower that you can use in conjunction with a bucket of water for a simple shower setup.

    Camp Kitchen

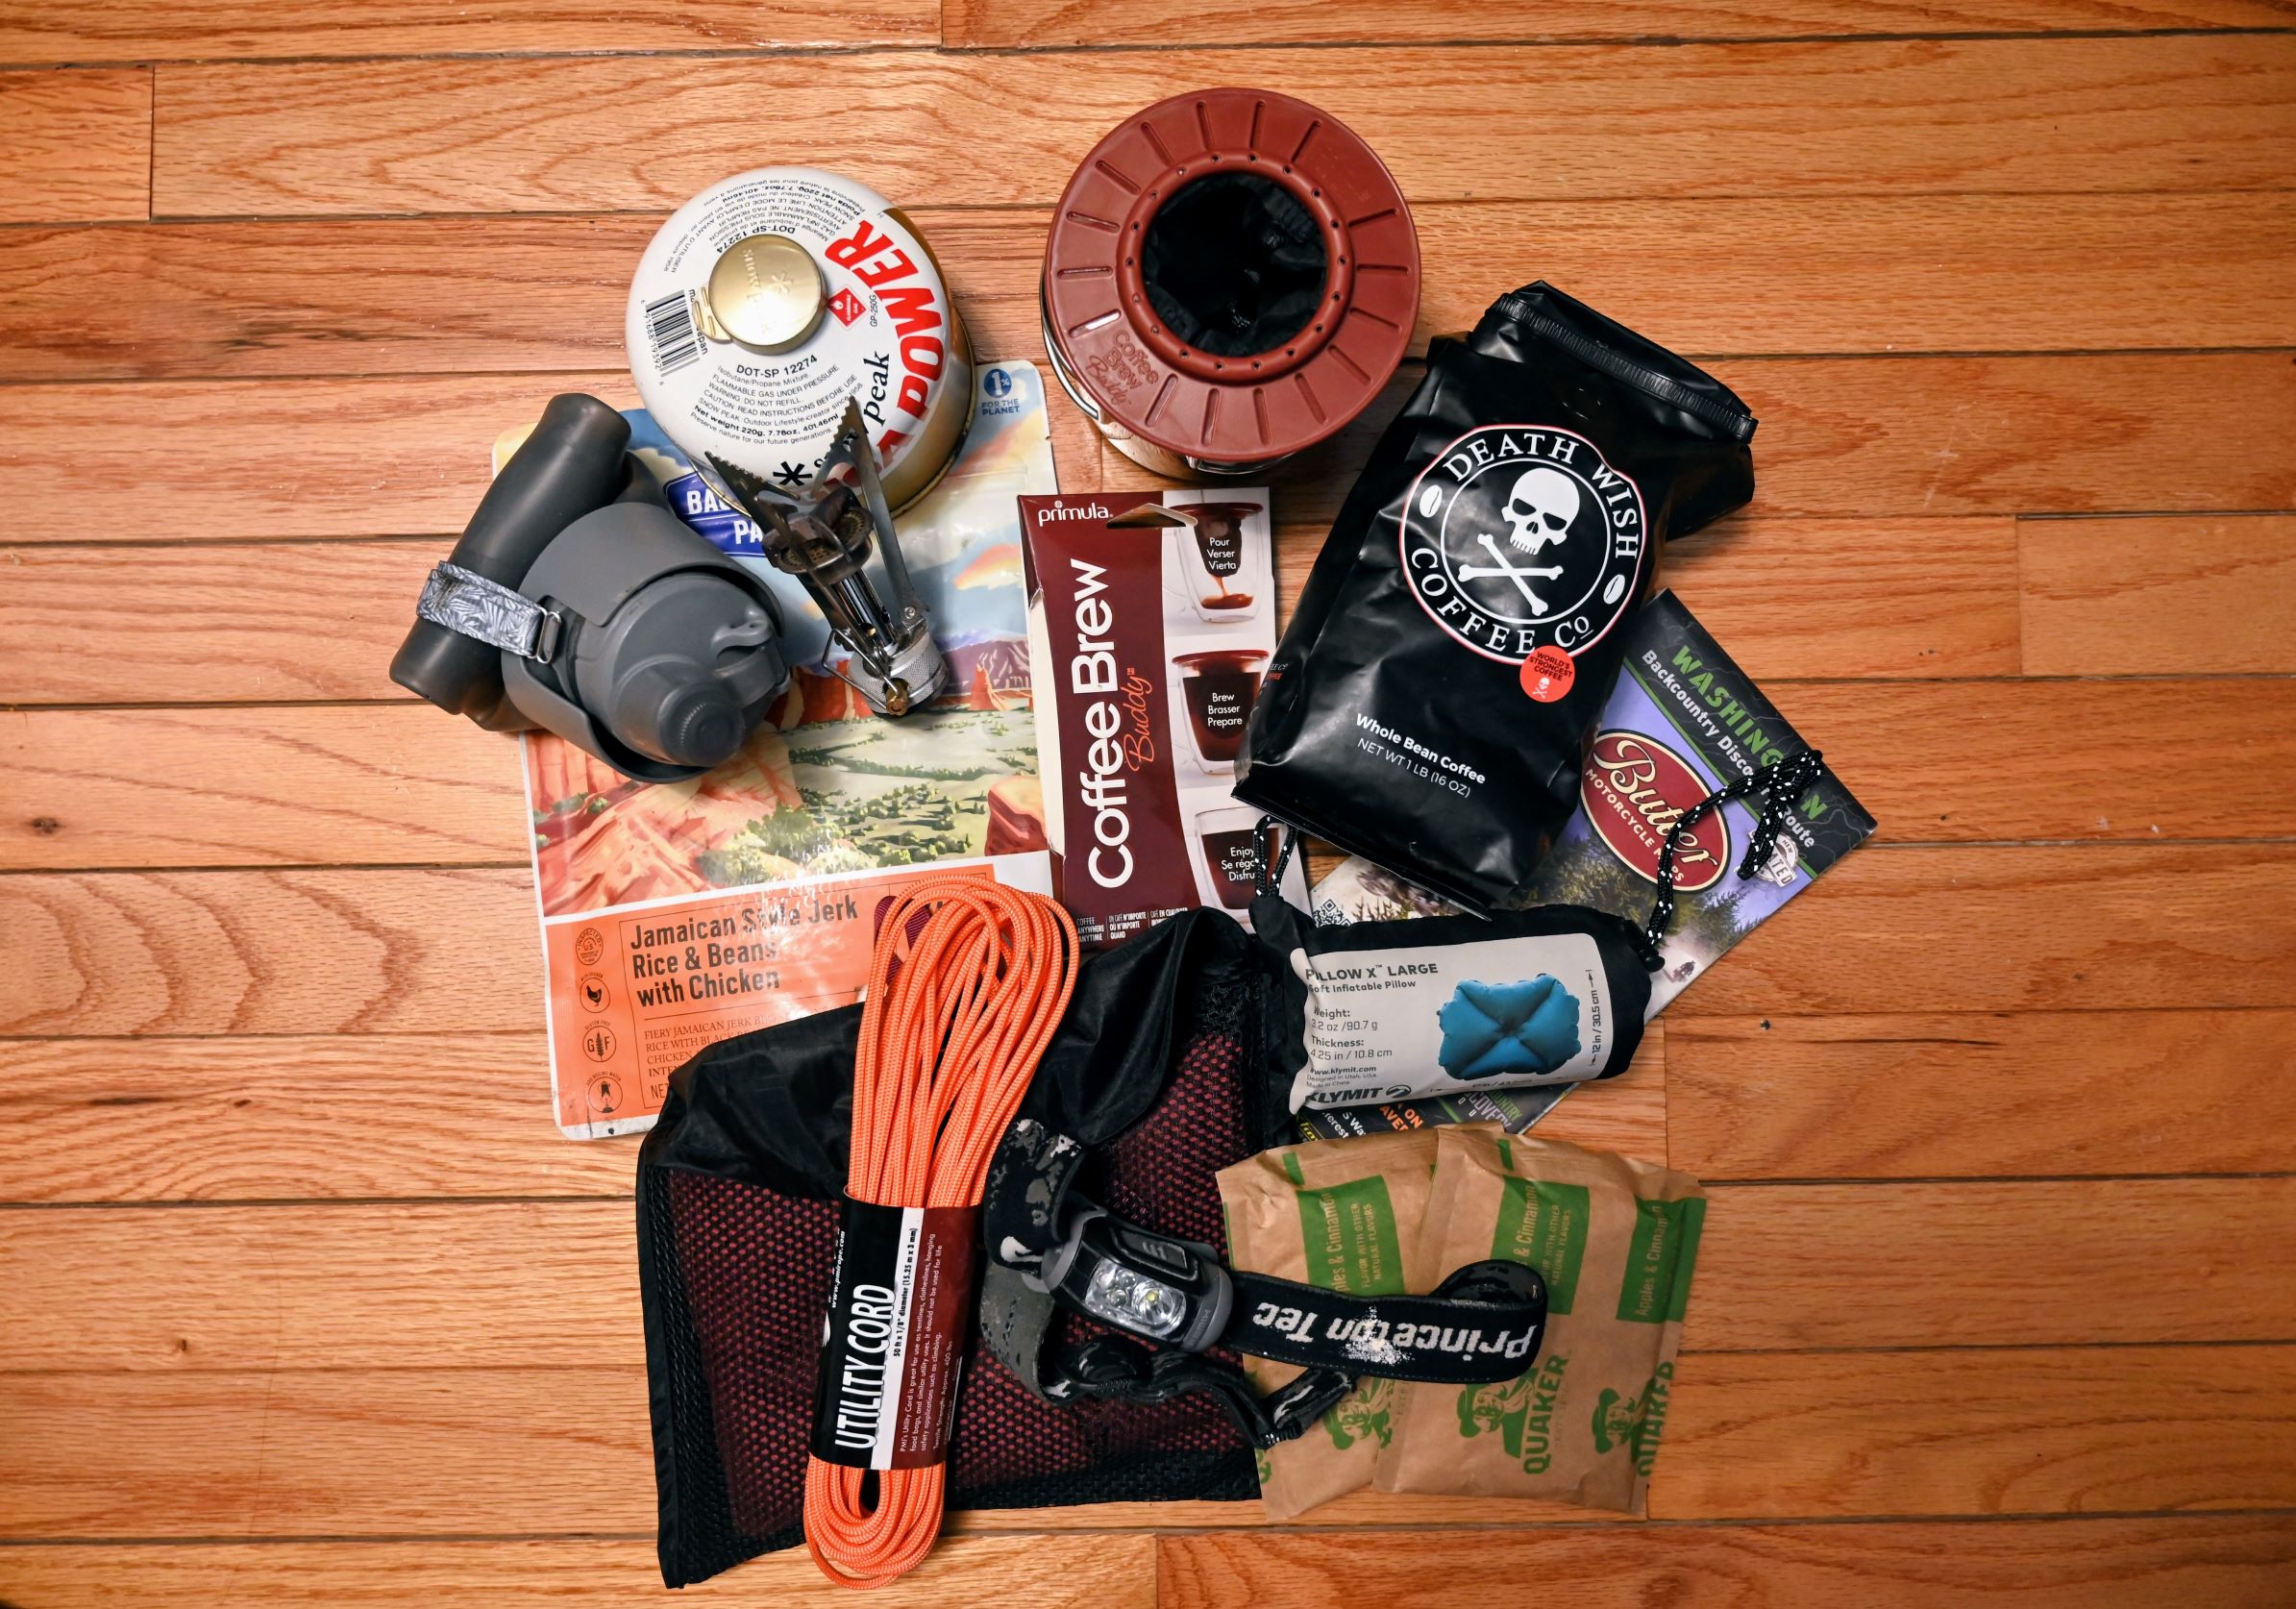
    Here are a few camping accessories I always bring for our camp kitchen. I need efficient ways to cook breakfast and an easy way to brew coffee in the morning. Typically we cook over the fire for dinner, and lunch is something simple like sandwiches or food we can take when we’re on the go.

    Coleman 60 Quart Cooler

    Often we’ll bring two coolers when it’s a large family trip. One for the drinks and one for the meat, dairy, and other food. When people are getting in, and out of the drinks cooler off and on throughout the day, it doesn’t cool down the food.

    Coleman Gas Camping Stove

    I love having two burners to cook on when camping.  I use one of the burners to boil water for my morning coffee. That leaves the other burning free for a skillet to cook eggs in.
    camp-stove

    Blackstone Table Top Stainless Steel Griddle 

    I love the Blackstone tabletop griddle my brother and sister-in-law gave us as a gift.  It is awesome for cooking breakfast when camping! Plus, you can cook up tepanyaki meals on it and impress all the other campers with your cooking prowess.

    Stanley French Press 48oz

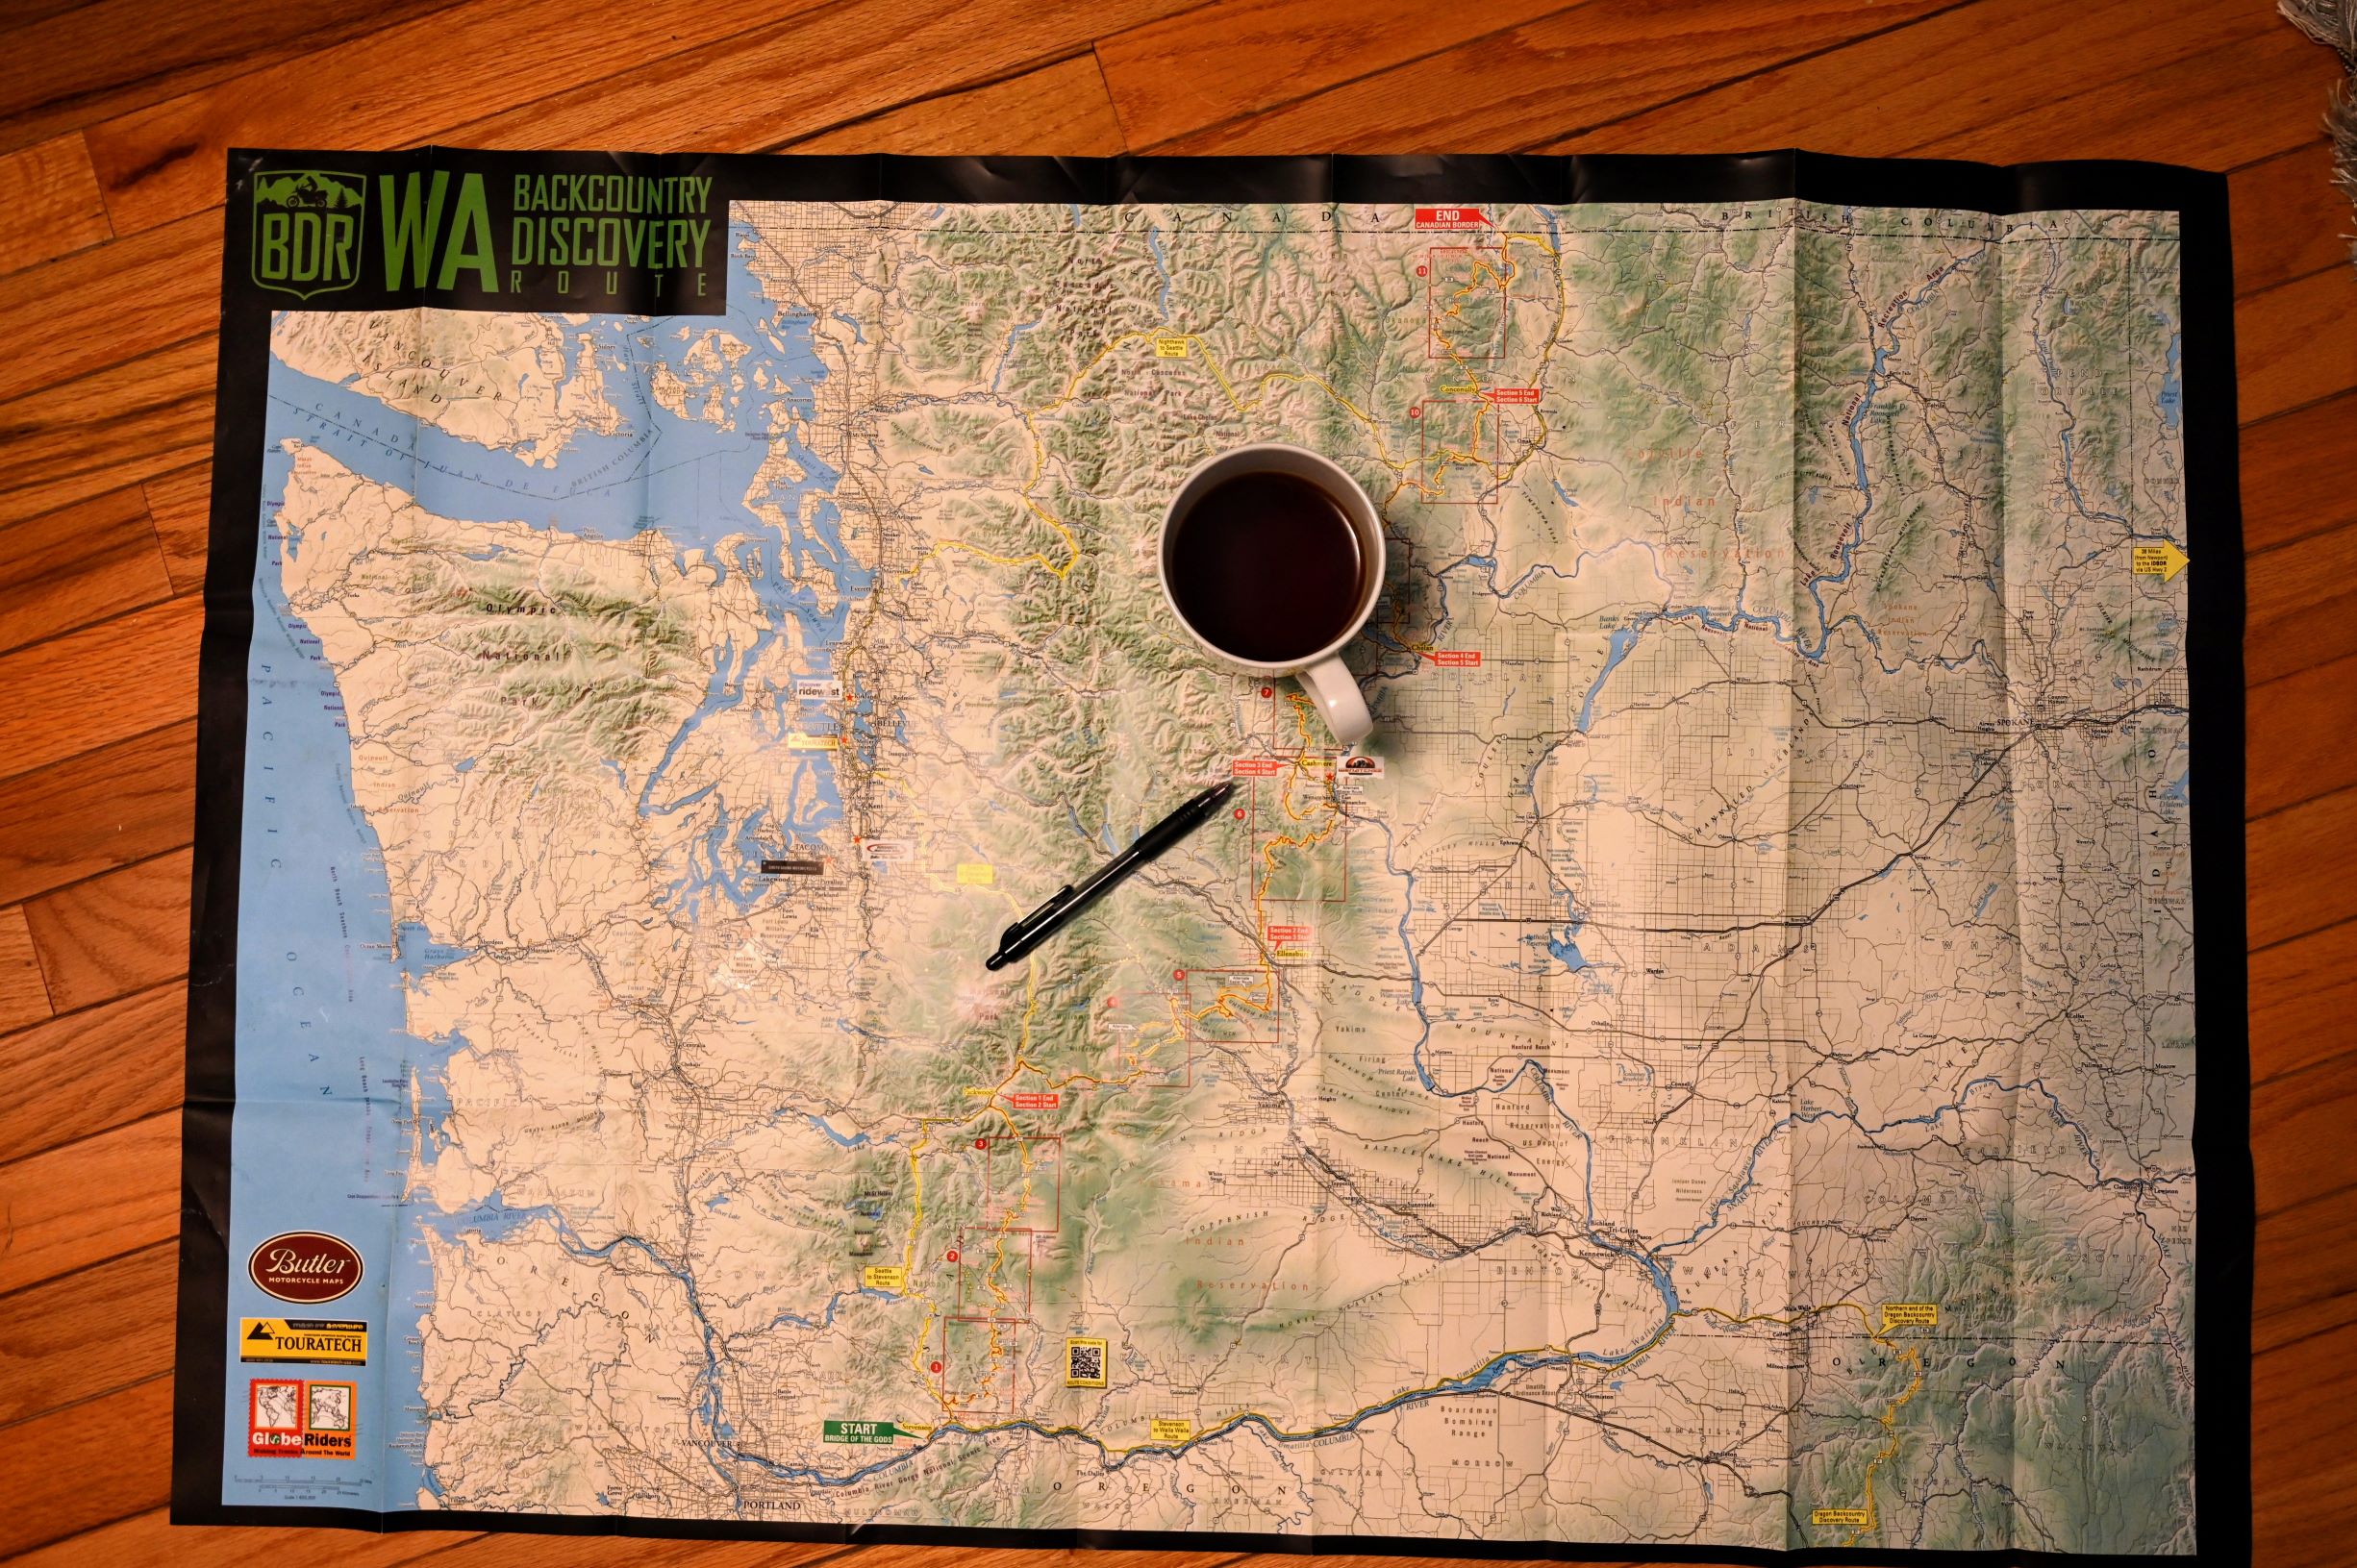
    I’ve written some articles about how I make campfire coffee, and which method I choose really depends on how many people I need to make coffee for.  If it is only myself and my hubby, I usually choose to use my AeroPress or Brew Buddy. However, when I have groups, I need something a bit bigger. I usually use my percolator, but I recently came across the Stanley French Press and added it to my wishlist as it is large enough to make coffee for four to six people, and it’s rugged!

    camp-coffee-camping-accessories

    Coleman Outdoor Folding Table

    This is handy when you need a little extra table space. I also like to use it for road trips as it packs up so nicely for easy carrying. 
     

    Coleman Instant Canopy

    This is a new addition to my camping accessories. However, I look forward to trying it out this season both when we’re at the beach and also when we’re camping in the woods.  Canopies are great for providing instant shade and protecting your food area from bird droppings, tree needles, morning dew, etc. If you have a Costco near you, I recommend checking there to see their options, as that is where I found mine.

    Lighting

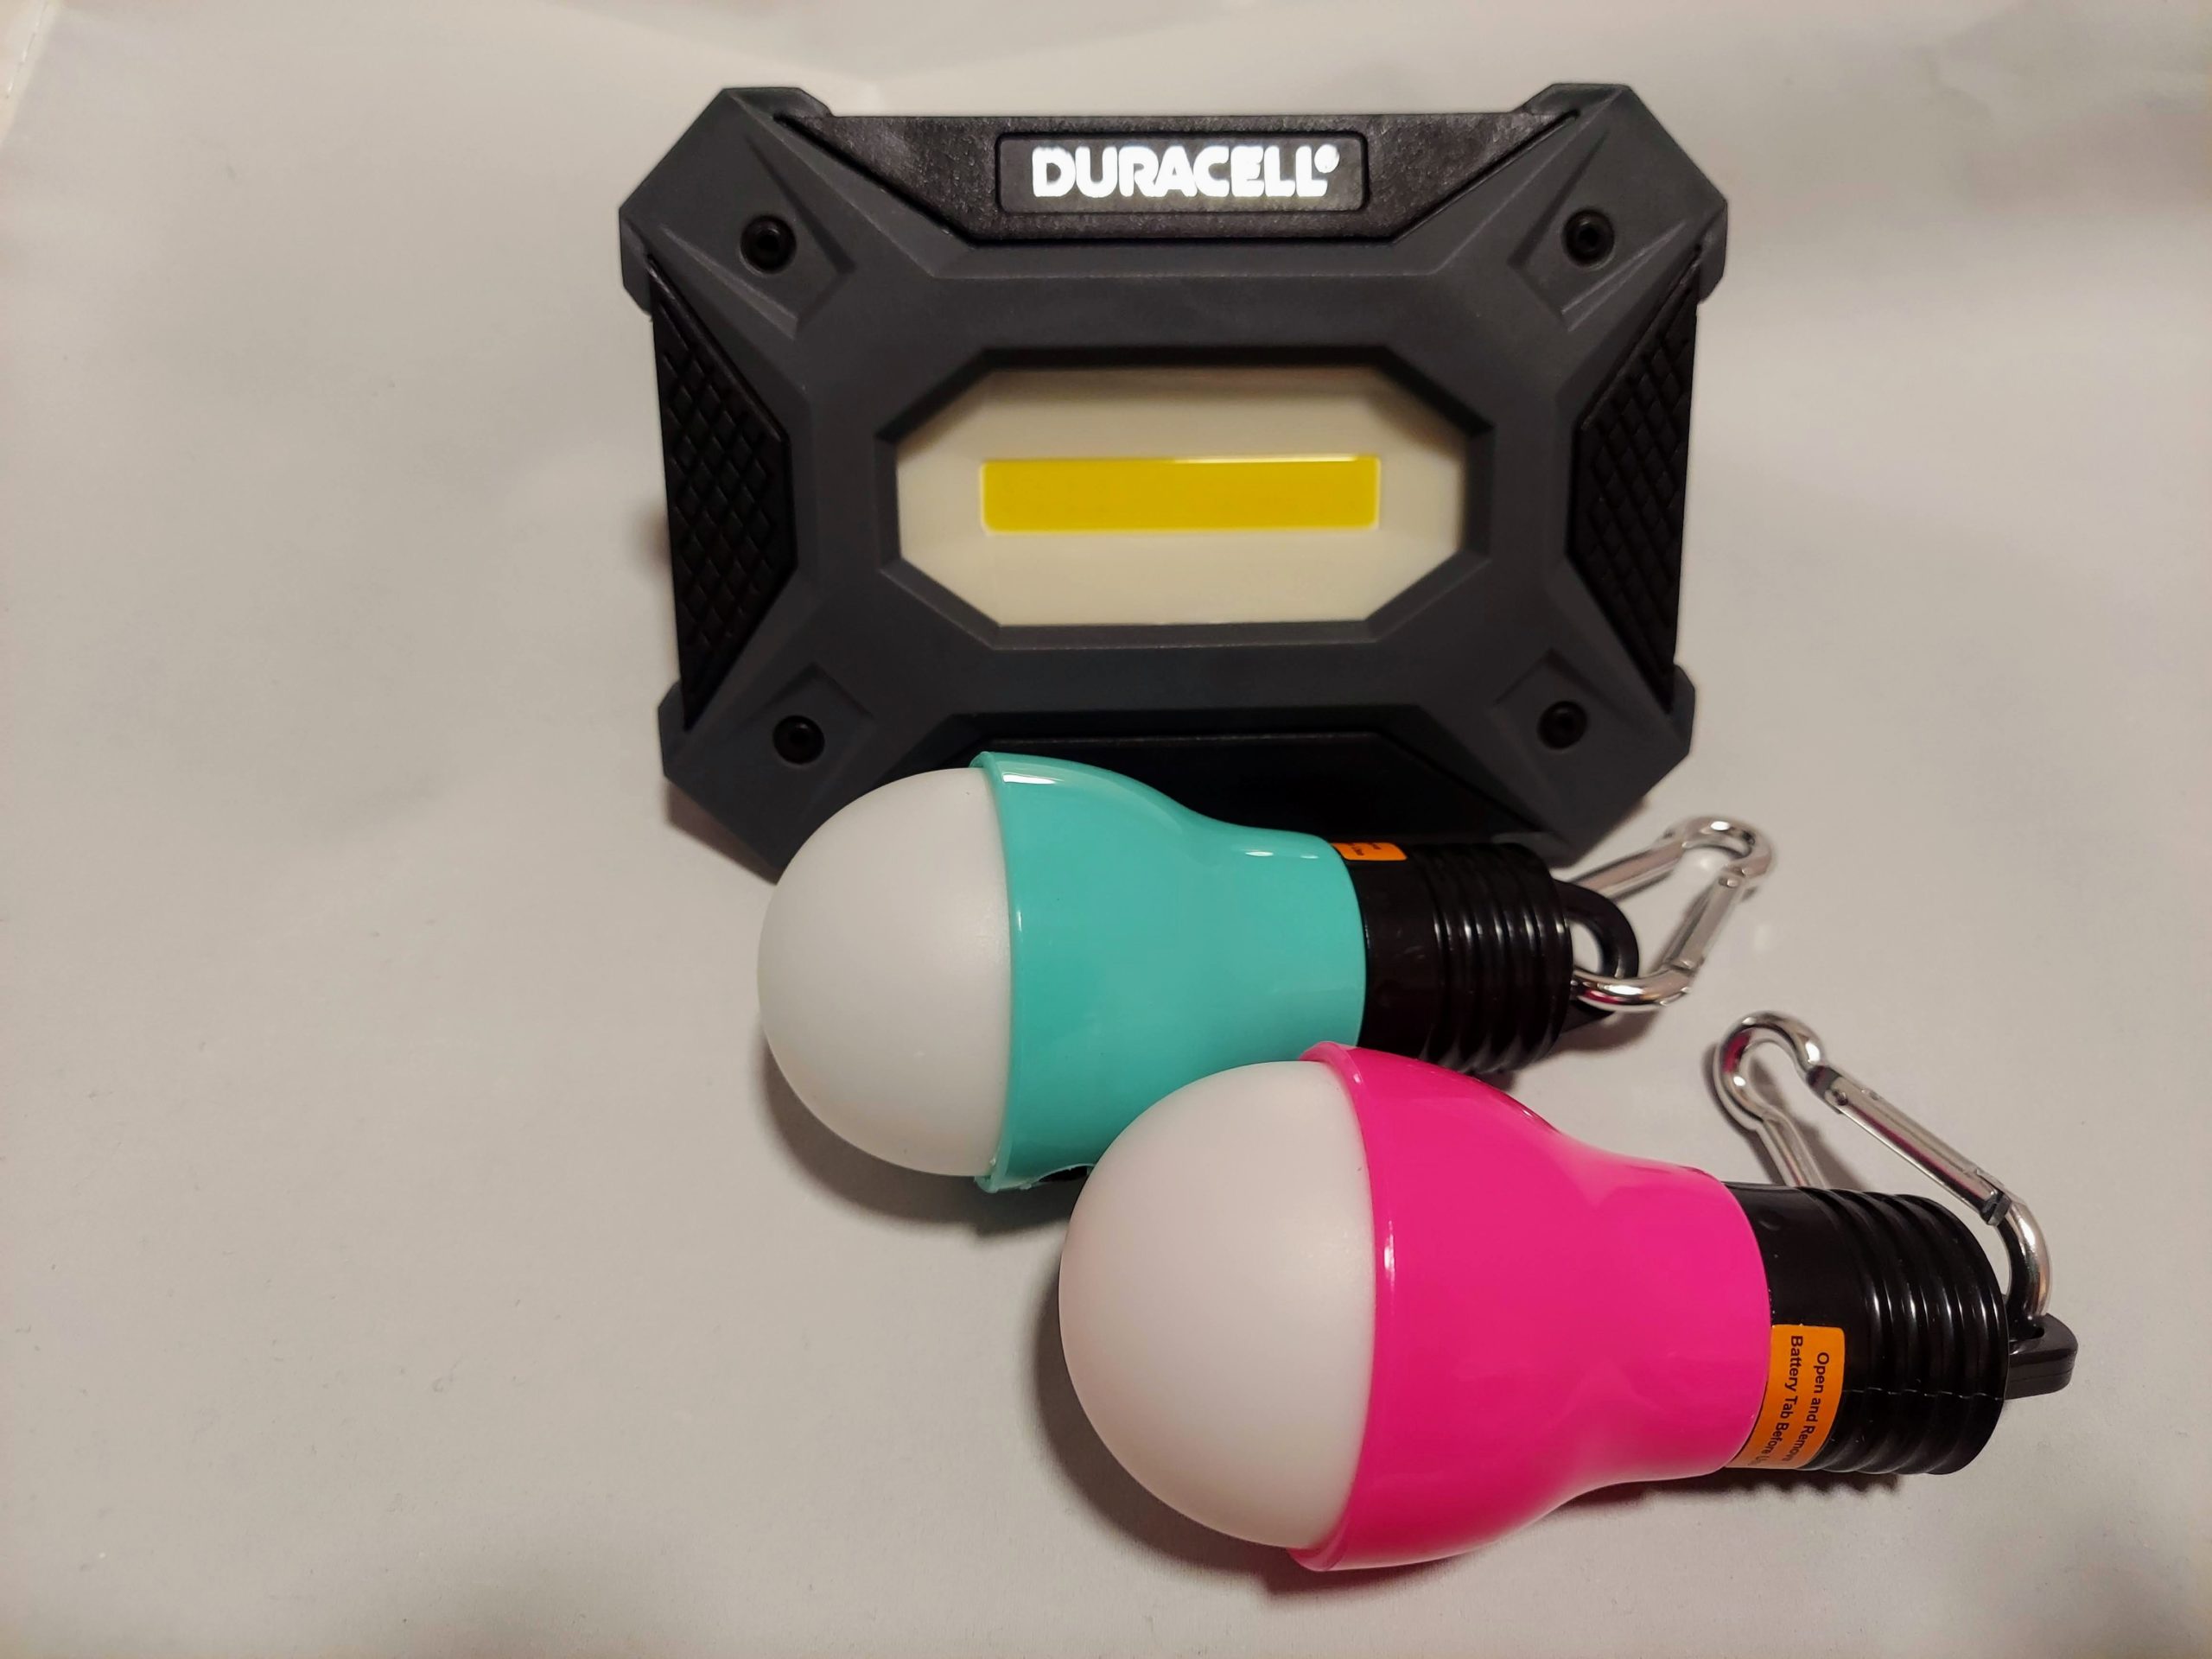
    LED lighting is where it’s at these days.  We used a propane lantern in our earlier camping days, but now we opt for the easier (and brighter) LED lantern

    I also like to bring these hanging LED lightbulbs that I use when I’m SUV camping, as you can clip them to your tent ceiling for easy hands-free lighting. You can also give them to the kids to use inside the tent.

    Additionally, we always bring a headlamp or two when we camp.  These are so nice to have at night when you’re cleaning up around camp, walking back and forth to the restroom, or reading in your tent at night.  It’s nice to have a hands-free light, plus they have a red light option for stargazing.

    Electronics

    As much as I’d like camping to be an electronic-free zone, that’s not going to happen, especially when kids are involved.  You can, however, restrict electronics to certain times.  Also, most people use their cell phones to document their camping memories, so having a few camping accessories to keep their portable cameras charged isn’t a bad thing.

    Jackery Portable Power Station

    We love our Jackery and use it for road trips and camping. You can use the Jackery to charge a portable DVD player and create a fun family movie night in the tent. I also use it to power my electric coffee grinder. Priorities, am I right?

    Anker Portable Power Bank

    A smaller charging bank is useful if you don’t think you need a larger power source like the jackery. We bring these whenever we’re traveling, and I charge my phone and DSLR with one. 

    Motorola T100 Talkabout Radios

    These are fun for kids to talk to each other and can be used to communicate with large groups when hiking. You can have the group leader keep one, and then the person in the rear of the group has the other.  Then if someone needs to stop, you can radio the leader to wait. 

    Misc. Camping Accessories

    Emergency Kit 

    It’s always good to have an emergency kit no matter where you go.  When we go camping, the most often used items are the following:

    You can purchase one with about every survival tool or pick one that has the main items you’d use when camping (minor scrapes, sprain kit, antiseptic ointment, headaches, etc.).

    Leatherman Multitool

    My husband never likes to go anywhere without his leatherman multitool. He has one he keeps at home and one he keeps in the car, and he always wants it when we go camping. They are useful camping accessories when it comes to cutting and opening things. I still prefer my Swiss Army knife, but to each their own.

    Thermacell Rechargeable Mosquito Repeller

    Last year, I purchased the Thermacell rechargeable mosquito repeller and was pleasantly surprised to discover it actually works! We sat around the campfire and didn’t even think about mosquitos, that is until the second night when it ran out of its repellant, and we started noticing them.  

    At first, we said, “that’s strange we didn’t have issues with  mosquitos last night.” Then, it dawned on me that we’d been using the Thermacell, and I realized what had happened.  When I returned home, I made sure to buy some for our next camping trip.

    This list is not a comprehensive list of all my camping accessories, but it has many of my favorite go-to items when camping.  Camping should be fun, and I think it can be enjoyable for just about anyone with a few of the right items.

    Do you have a favorite camping accessory that isn’t listed? I’d love to hear some of your recommendations too!

    Other Articles You Might Enjoy


    Note: Travelffeine is reader-supported. This post contains affiliate links. When you purchase using one of these affiliate links, we get paid a small commission at no extra cost to you. And as always, all opinions are our own. Thank you!

    Happy Camping!

    Useful Camping Accessories Travelffeine
    Useful Camping Accessories to Bring
  • Top 7 Things To Do at Cape Disappointment State Park

    Cape Disappointment State Park is at the southwestern tip of Washington State, where the Columbia River meets the Pacific Ocean. It is a stunning stretch of coastline that, contrary to its name, does not disappoint.

    I don’t know why it took me so long to explore this beautiful stretch of coast in my home state, but now that I’ve been there, I’m looking forward to a return trip.  In this article, I share some of the top things to do at Cape Disappointment State Park, plus tips for what to see along with info on camping and accommodations in the park in case you want to extend your visit.

    Why is it Called Cape Disappointment

    Cape Disappointment isn’t the only name given to this area. The Chinook Tribe called the region Kah’eese, and Spanish explorer Bruno de Heceta referred to the Columbia River as San Roque.  However, when British trader John Meares came to the area searching for the Columbia River, he mistakenly believed it was only a bay. So, he was “disappointed.” Therefore he named the area Cape Disappointment, and that name stuck. 

    Ironically, we now know he did find the mouth of the Columbia River.  So, had he realized this, it might have been named Cape Discovery instead.  Perhaps there’s a life lesson here.  Sometimes, we think a dream or goal attained will look a certain way; our success will be obvious. When it doesn’t look the way we believe it should, we often give up, when in fact, we are at the precipice of a great discovery. If only we’d give it a second look and not give up so quickly. 

    Maybe, or maybe I’m looking too deeply into John Meares’ disappointment. It’s interesting to see things through the lens of hindsight if only Meares could see what we see today.

    Columbia River bar

    Columbia River Meets the Pacific Ocean

    Although John Meares named Cape Disappointment due to his erroneous assessment that he did not find the Columbia River, this stretch of coast has undoubtedly led to many sailors’ disappointment.

    This is one of the most hazardous stretches of coastline in the world. Where the Columbia River meets the Pacific Ocean, it creates a “bar.” This is a huge sandbar that changes due to the waves, strong currents, and ocean tides.

    Hundreds of shipwrecks have occurred here, and even today, a Columbia River Bar Pilot is required to guide large ships through this treacherous bar crossing. It is interesting to see in person the distinct line created where these two massive bodies of water collide. 

    Read this in-depth article to learn more about how the jetties were created and the two lighthouses in the area.  This region is full of fascinating history!

    Cape Disappointment Lighthouse Waikiki Beach

    Top 7 Things to Do at Cape Disappointment

    Cape Disappointment State Park is over 2,000 acres in size. You will certainly have no shortage of things to do during your visit here. Below I list what I think are the top 7 things to do here. You can see a lot in one day, but with two nights, you’ll enjoy a more relaxed visit with time to soak it all in.

    1) Beaches

    Beaches are always at the top of my list of to-dos.  I love the water! These three beaches at Cape Disappointment State Park are my top choices for your first visit here. They are great for flying kites, building sandcastles, looking through driftwood, seeing the lighthouse, and watching the surf.

    Benson Beach

    From the main entrance to the campground area, at the three-way stop, take a left onto North Jetty Road and drive past Waikiki Beach to find the parking area for Benson Beach near the end of the road. There is also a trail to the beach near the campground amphitheater in Loop A. 

    This two-mile stretch of beach is vehicle-free.  I know that might sound strange for me to mention that, but actually, most of the Long Beach peninsula is open to vehicles.  So it’s nice to know you and your family can explore Benson Beach without worrying about a car driving up behind you.

    Benson Beach
    Benson Beach as seen from the North Head Lighthouse trail.

    Waikiki Beach

    I know you probably thought Waikiki Beach was only in Hawaii. Me too!  It turns out Washington State also has a Waikiki Beach. If you’ve ever seen the photographs of the enormous waves crashing below the Cape Disappointment lighthouse, this is the beach where those photographs were taken.  The winter storms that hit this part of the coastline are pretty epic.  You most likely won’t catch any wave action like that during the summer but visit October through March, and you’ll have a good chance of seeing this firsthand.

    If you camp in the D Loop area, it’s a short walk to Waikiki Beach. You can also drive to the parking area via North Jetty Rd. There is a lot of parking space, some with views facing the Cape Disappointment Lighthouse. Watch the sunset here while enjoying a warm cup of clam chowder.  That’s what I did! I also saw kids and families building forts out of driftwood on the beach. It looked like a great way to spend a couple of hours creating memories, and there certainly is no shortage of driftwood here!
    Waikiki Beach
    Waikiki Beach in the morning.

    Beard’s Hollow

    You may have seen Beard’s Hollow viewpoint on your drive to the main entrance of Cape Disappointment State Park. Drive south about a half-mile past the viewpoint to a turnoff and parking lot for the Beard’s Hollow trailhead. Take the paved path straight ahead of the parking lot to access Beard’s Hollow and the beach.  The path to the right leading over the wooden bridge is for the Discovery Trail. Beard’s Hollow beach allows vehicles, so please be aware as you’re dipping your toes in the surf and sand.

    Isn’t this the perfect kite for the beach?

    2) Metal Detecting

    Cape Disappointment State Park is 1 of around 50 Washington State Parks that allow metal detecting.  You’ll need to complete this form and bring your metal detector. Cape Disappointment has about 240 acres of beach area designated for metal detection.

    3) Trails

    Whether on foot or by bicycle, Cape Disappointment has a lot of great trails. 

    The following trails are accessible from the Cape Disappointment campground.

    • Mackenzie Head
      0.5 mile (roundtrip) This short trail leads you to an old WWII battery and information boards describing its historical significance. It also has a nice view of the forest and ocean. Head toward the main A Loop campground area, and you’ll find a small parking area on the left about 0.5 miles along Fort Canby Rd. 
    • Coastal Forest Loop Trail
      The entrance to this loop trail is near Cafe D. You can take a shorter 0.5-mile loop or the longer 1.5-mile loop. If you take the longer loop trail, there is a 0.1-mile trail with a view of Baker Bay. This trail is typically wet and muddy, so come prepared.
    • North Head Trail
      This 3.0 mile (roundtrip) hike starts opposite the road from the Mackenzie Head trail and ends at the North Head Lighthouse trail area.

    These hikes require driving to the trailhead parking areas:

    • Bell’s View 
      This paved 0.5 mile (roundtrip) trail takes you to beautiful views of the coast as well as passing by more WWII outposts. Learn about the history and the incredible winds that hit this coastline in this short, informative hike. 
    • Beard’s Hollow
      The trail to Beard’s Hollow is a nicely paved trail within Cape Disappointment State Park, suitable for bikes and wheelchairs.  I am not sure of the actual mileage of this trail. It was a 10-minute leisurely pace to the beach along this mostly flat trail, and I’d guess maybe 0.3 miles each way.
    • Discovery  Trail
      Starting from the North Head Lighthouse Parking area, this 7.3 mile (one-way) trail takes you to the town of Long Beach, with lots of beautiful views along the way. (You can also start this trail from the Beard’s Hollow Parking area, shortening the hike to 6.3 miles. However, I think this trail is best on a bike — see #6.)

    4) History

    In addition to seeing WWII sites along the trails, you can also visit Fort Canby and explore what’s left of this historical site. You can also tour the Lewis & Clark Interpretive Center and learn about two of our most famous explorers–Lewis and Clark! 

    The Lewis & Clark Interpretive Center is worth a stop, even if you aren’t sure about the historical exhibits.  Why? Because of the views!  The path in front of the interpretive center is one of the best spots in Cape Disappointment State Park to see where the Columbia River meets the Pacific Ocean.  It also offers a much closer view of the Cape Disappointment Lighthouse. 

    Fort Canby
    Fort Canby

    I think we stood along the viewpoint area in front of the Lewis and Clark center for at least 30 minutes, just seeing what we could see.  We watched double-crested cormorants as they searched for food, diving from the cliffs to the water and back again. Then we counted the 100’s of boats just past the line in the water created by the convergence of the Columbia River and the Pacific Ocean. 

    If that weren’t enough, though, the Interpretive Center is full of fascinating history and facts about lighthouses and early explorers.  The upper floor is free and worth taking a look around, and it has huge windows with views of the lighthouse and ocean.  

    Additionally, you can pay $5 to see the entire exhibit, which starts on the basement level. There is a wonderful video about Lewis & Clark’s incredible 4,000+ mile journey to come to their stopping point at Cape Disappointment.  I heard a small boy exclaim to his parent as he watched the video, “That’s here, that’s where we are!”  I saw history made real to him as he watched the video about Lewis & Clark’s journey.  That’s what it’s all about!

    Lewis & Clark Interpretive Center

    244 Robert Gray Drive Ilwaco, WA
    Ilwaco, WA 98624-8624

    Phone: (360) 642-3029

    5) Lighthouses

    Cape Disappointment State Park has two lighthouses within its borders.  This stretch of coastline was so dangerous they built not one but two lighthouses! I love looking at lighthouses. Their architecture and beautiful locations never disappoint (see what I did there). 

    During my visit, I learned that lighthouses were the original GPS. They not only emit light to keep ships from running ashore, but each one is uniquely painted, and they each emit a specific light pattern.  Sailors use these two distinguishing features to help them know where along the ocean they were. Pretty cool, right!

    Cape Disappointment Lighthouse 

    This is the lighthouse you see in the photos taken from Waikiki Beach.  It gets the huge waves crashing at its base during the winter. You can no longer access the lighthouse, but you can see it from both Waikiki Beach and in front of the Lewis & Clark Interpretive Center.

    North Head Lighthouse 

    Constructed in 1898 after continued shipwrecks along this rocky coast demonstrated the need for a second lighthouse.  The North Head Lighthouse is still used to aid in navigation today. It was currently closed for tours during my visit, but I’m optimistic it will reopen to the public again soon. The paved trail to the lighthouse is a beautiful walk, and you pass by the guesthouse for the Lighthouse Keeper.  You can stay here by reserving it online through the WA State Parks website.  Now wouldn’t that be a unique experience!

    North Head Lighthouse Cape Disappointment

    6) Cycling

    There are plenty of paved roads within the main campground areas for families to enjoy biking in a low-traffic area.  However, for a real adventure, consider cycling the Discovery Trail.  

    The Discovery Trail is a mostly paved 8.5 mile (one-way) trail that stretches from Cape Disappointment State Park to the town of Long Beach!  There are viewpoints along the route, historical markers, and even art sculptures to enjoy.  It is a beautiful trail, and even if you don’t feel like making the entire 16-mile round trip consider cycling at least a portion of the trail.  Here is a trail map that gives you an overview of the Discovery Trail route.

    Start the trail from the North Head Lighthouse parking area and ride toward Long Beach as far as you feel like, or if you have someone to drop you off, you could do a one-way shuttle. You could start in Long Beach and then cycle south back to Cape Disappointment State Park. No matter what you choose, you’ll enjoy this beautiful trail!

    crab on Beard's Hollow Beach

    7) Fishing

    You can go fishing and boating at Cape Disappointment State Park.  Although, if it were me, I think I’d try my hand at crabbing.  There were so many Dungeness crabs washed onshore here it made me hungry! 

    Fishing from the shore is allowed, but you can also bring a boat if you have your own. The Baker Bay Boat Launch is next to Cafe “D,” just across from the park’s main entrance. 

    Make sure to have all the appropriate licensing required for boating and fishing. Plus, you’ll want to check with the Washington Department of Fish & Wildlife to see what is currently open and allowed.  Some years the biotoxin levels close fishing here. 

    North Head Lighthouse Keeper's House

    Accommodations at Cape Disappointment

    Camping

    The best tent campsites are sites 1-180 toward the rear of the park.  There are a few tent sites in the D Loop near the main entrance, but these have less privacy and more road noise.  We ended up staying in one of these and could hear the loud ship horns and road traffic throughout the night.  There are also a lot of RV campsites, including those with full hookups.

    Rentals

    In addition to campsites, Cape Disappointment State Park also has cabinsyurts, and two vacation houses for rent. 

    Getting to Cape Disappointment State Park

    Cape Disappointment is a little over a 3-hour drive from Seattle, Washington, and a 2-hour drive from Portland, Oregon.

    You’ll either take Hwy 101-S from the Seattle area or Hwy 101-N if coming from the south/Oregon.

    For some reason, Google directions take you to the general area of Cape Disappointment State Park rather than to the entrance of the park.  So, the easiest way to get to the campground entrance and park’s pay station for Cape Disappointment State Park is to navigate to Cafe “D,” located directly across from the park’s main entrance.

    Cafe “D” Address: 243 Robert Gray Dr, Ilwaco, WA 98624

    Besides being a waypoint to the entrance of the park, Cafe “D” also offers Wi-Fi, miscellaneous camping supplies you may have forgotten, as well as ice cream cones and coffee.

    Cape Disappointment Sign

    ADA Accessibility

    The following had paved trails and parking areas suitable for walkers and wheelchairs.

    • The North Head Lighthouse trail
    • Lewis & Clark Interpretive Center and viewing area that looks at Cape Disappointment Lighthouse
    • Bell’s View
    • Beard’s Hollow (the paved trail ends at the beach)
    • Beard’s Hollow Viewpoint (parking area with an overlook)
    North Head Lighthouse Trail

    Restaurants to Try Near Cape Disappointment

    The Chowder Stop (Makes great chowder and can easily pack it to go too.)

    The Chowder Stop
    203 Bolstad W, Long Beach, WA 98631

    42nd Street Cafe and Bistro (Amazing breakfasts here, plus they serve beignets!)

    42nd Street Cafe
    4201 Pacific Way, Seaview, WA 98644

    The DEPOT Restaurant (If you eat out only once, make it The DEPOT Restaurant. Reservations required, but they can often squeeze you in same day if you call ahead.)

    The DEPOT Restaurant
    1208 38th Pl, Seaview, WA 98644

    Roots Drive-Thru Coffee (This is small coffee shop is in Ilwaco just outside the park boundary. It’s a quick drive in the morning to get your coffee fix!)

    Roots Coffee
    111 First Ave N, Ilwaco, WA 98624

    Weather at Cape Disappointment

    The weather at Cape Disappointment could be the best reason to call it such a name. It is the stormiest stretch of coastline, with hurricane-force winds during the winter and unrelenting rain. If you plan to tent camp here, I highly recommend you look ahead to the weather forecast before deciding to come. 

    I do not enjoy tent camping in the rain.  Rain and wind at Cape Disappointment can make tent camping miserable or, should I say, “disappointing.” You may decide a cabin or hotel in town would be better if your forecast appears to be stormy and grey.

    I used my new Coleman 4-Person Pop-Up Tent, and it did fine with the light rain we received early in the morning, however anything more, and we’d have had wet gear, I think. So plan to spray your tent ahead of time with waterproofing spray and pack some waterproof jackets for exploring.

    Sunset by Cape Disappointment Lighthouse

    Final Thoughts

    I loved visiting Cape Disappointment State Park! There is so much to do along the Long Beach Peninsula outside the park too. Washington State has some of the most beautiful coastline. I enjoy every opportunity I get to explore it.  I hope you will get a chance to visit here soon. Let me know if you have any questions regarding this area or if there’s a favorite activity here that I missed. 

    Here are a few articles that might interest you:


    Note: Travelffeine is reader-supported. This post contains affiliate links. When you make a purchase using one of these affiliate links, we get paid a small commission at no extra cost to you. And as always, all opinions are our own. Thank you!


    Happy Exploring!

    Cape Disappointment State Park
    North Head Lighthouse at Cape Disappointment
  • Coleman 4-Person Pop-Up Tent Gear Review

    Imagine driving up to your campsite, getting out of your vehicle, and setting up your tent in less than a 1-minute.  You are now free to go about your day and enjoy your campsite and its surroundings.  Sounds too good to be true, right?  Well, actually, it’s totally possible with the Coleman 4-Person Pop-up Tent!  It’s so easy you can have your kids set it up and still be done in a minute!  Plus, it’s entertaining when you camp with a group and your tent is up in less than a minute, and you get to sit there watching them spend 10 minutes setting theirs up.  That’s worth the purchase of the tent all on its own!

    Okay, jokes aside, as with every purchase, there are pros and cons. I’ll discuss what led me to purchase this tent and what I like and don’t like about it.  If you’re in the market for a new tent, then continue reading to decide if the Coleman 4-Person Pop-up Tent is right for you.

    My History of Tent Purchases

    Over the years, I’ve gone through a few tents. I started with a cheap dome tent that was probably rated for 4 people but really fit two comfortably. Then I upgraded to a Wenger 4-person tent with shoe ports, little corner pockets, and a place to hang a lantern in the center.  It also had better airflow than my cheaper dome tent.

    Bigger Must Be Better

    One day I decided it might be nice to have a tent you could stand up in, perhaps even use cots in and sleep more than two people. So I purchased a large 6-person tent, and we began using it for our annual camping trips with the nieces and nephews. My hubby and I tried the tent for when it was just us, and although it is nice to be able to stand up in the tent and sleep on cots, the time it took to set it up coupled with the amount of time we actually spent inside the tent didn’t make it worth it for us. For a large tent, it’s easy enough to set up, and it works great when we have a large group. However, for the two of us, it just wasn’t the right fit.

    Bitten by the Backpacking Bug

    Soon though, I got the backpacking bug, and my hubby and I purchased an REI Passage 2 tent.  After backpacking the Northern Loop at Mount Rainier, we never did any serious backpacking after that; although there are still plans to do a portion of the PCT, they have yet to materialize.  Even so, we found that we loved our new REI Passage 2 tent.  It is easy to set up with only two poles. It takes about 5 minutes to have it up and ready to go. Because of this, we continued to use our backpacking tent for our regular camping needs for almost a decade.  It also works great when we’re off-roading on our motorcycles.

    Because we often camp with groups, it also allowed us to fit our tent and the larger group tents into one campsite as ours had such a small footprint.  Then this year, I decided it would be nice to have a little more space. Space to keep our bags with us in the tent and a larger area for sleeping.  However, I still wanted something quick and easy to set up. So as I began my research, I came across the Coleman 4-Person Pop-up Tent. 

    The Coleman 4-Person Pop-up Tent

    I started reading about the Coleman 4-Person Pop-up Tent, and to be honest pop-up tents make me think of something you bring to the beach.  It sounded a little too good to be true that I’d actually camp in one.

    However, the promise of an instantaneous setup lured me in.  Plus, at less than $80, it seemed like a risk I was willing to make. So I went ahead and ordered it for an upcoming camping trip with friends.  When it arrived, I was anxious to see it in action, so I opened it inside the house.  Sure enough, within about 10 seconds, the tent was up and ready to crawl into!

    It was a lot of fun when we went camping with our friends because not only were we set up in under a minute, but when it came time to take down the tent, it only took about 2-minutes, thus leaving us with plenty of time to give our good-natured friends some fun (albeit childish) “haha, look who’s done with their tent first” comments. It’s the little pleasures in life.

    Coleman 4-Person Pop-up Tent Dimensions

     According to Coleman, the tent dimensions are as follows:

    • 9 ft. 2 in. x 6 ft. 6 in.
    • 3 ft. 4 in. center height

    You can fit a queen size air mattress inside the tent.  They show four people sleeping in it width-wise.  I am a little under 5’9, and I can sleep width-wise. However, if you’re 6′ and above, your head and feet would be hitting the tent. That is unless you’re able to lie completely still while sleeping.  I don’t know anyone like that, though, so I recommend lying lengthwise.  That is how my hubby and I used it, and that gives you plenty of space plus lots of room for your gear with only two people.

    You could also sleep to “average-sized” adults and two kids comfortably.  I think four adults under 6 ft could, of course, make it work, but it’ll be cozy! Watch my YouTube video for more information on the size and shape.

    Pros and Cons of the Coleman 4-Person Pop-Up Tent

    Coleman 4-Person Pop-up Tent

    After camping in the Coleman 4-Person Pop-up Tent, these are some of the pros and cons I’ve discovered.

    Easy Set-up

    This is by far the biggest “pro” for purchasing a pop-up tent. It takes less than 30-seconds to unzip the tent case, remove the straps, and voila! The tent is ready to go!

    Fast Storage

    Initially, putting away a pop-up tent can be challenging for most people. I know it was for me. You feel like you’re wrestling some unwieldy creature that keeps trying to get away from you. However, with practice putting your pop-up tent away should only take 1-2 minutes to do.

    The Downside

    Well, putting it away, as I just mentioned, can be a challenge. However, probably the main downside for some would be the shape of the pop-up tent. Most tents come in a long round shape that makes them good for backpacking or shoving into tight spaces in the back of the car. The Coleman 4-Person Pop-up Tent packs into a large disc shape. This makes them pretty much a no-go for backpacking. There is a smaller Coleman 2-Person Pop-up Tent option that might work for this or cycling, but again, I think it would be hard to pack due to the disc shape. 

    Packing the Car

    It also means you need to rethink how you pack your car.  Normally I might put the tent in first with some of my longer items like camping chairs. However, due to its disc shape, I ended up putting it in last and laying it on top of my other camping gear.  Also, if you have a small trunk space, you might have to carry it behind your front seats as it’s possible the disk might not fit in your trunk.  You’ll want to measure this ahead of time to make sure.

    Summer to Early Fall: Seasonal Use

    This is not a 4-season tent, probably not even a 3-season tent, and although I have yet to try it in the rain, I doubt it would do well in heavy rain.  However, for a summer camping experience, it works great.  

    We first camped in our Coleman 4-Person Pop-up Tent in late May on the Olympic Coast. We were sleeping on a thin backpacking-style air mattress and a blanket underneath for a layer between us and the cold ground. It was cold and damp in the morning and evenings, and the sides of the tent felt a little wet from dew.  We, however, stayed dry and warm in our sleeping bags. 

    Tent Footprint

    The Coleman 4-Person Pop-up Tent does not come with its own footprint. They also don’t appear to sell one specifically made for it.  I purchased a cheap tarp that was roughly the same dimensions as the tent floor. Make sure you don’t purchase one that is too big. Otherwise, it will collect water.  I learned that lesson early on as a kid.

    Coleman 4-Person Pop-up Tent Disc

    Review Summary for the Coleman 4-Person Pop-Up Tent

    So, to summarize this review. I really enjoy the simplicity of the Coleman 4-Person Pop-up Tent. It makes car camping so easy! If you’re looking for a tent for summer camping and maybe late spring and early fall, then the Coleman 4-Person Pop-Up Tent is worth considering. 

    You can purchase the tent by click on this link or the photo below.

    We will continue to use ours for weekend car camping trips when we want a little more space than our tiny backpacking tent. I think we’ll also bring it for road trips when we’re only camping for a night or two. It will make set-up and takedown much quicker when we need to get back on the road.

    I recommend spraying the tent down with Scotch Guard or some other type of waterproofing spray.  I always do this with outdoor gear and wouldn’t even consider camping in the rain in this tent without it. 

    All in all, I am happy with my purchase. If you have any questions regarding this tent or the camping gear I use, please let me know. Also, if you’ve used this tent or the 2-person version, I’d love to hear what you think about it.

    Happy Camping!

    Note: This post contains affiliate links. When you make a purchase using one of these affiliate links, we get paid a small commission at no extra cost to you.

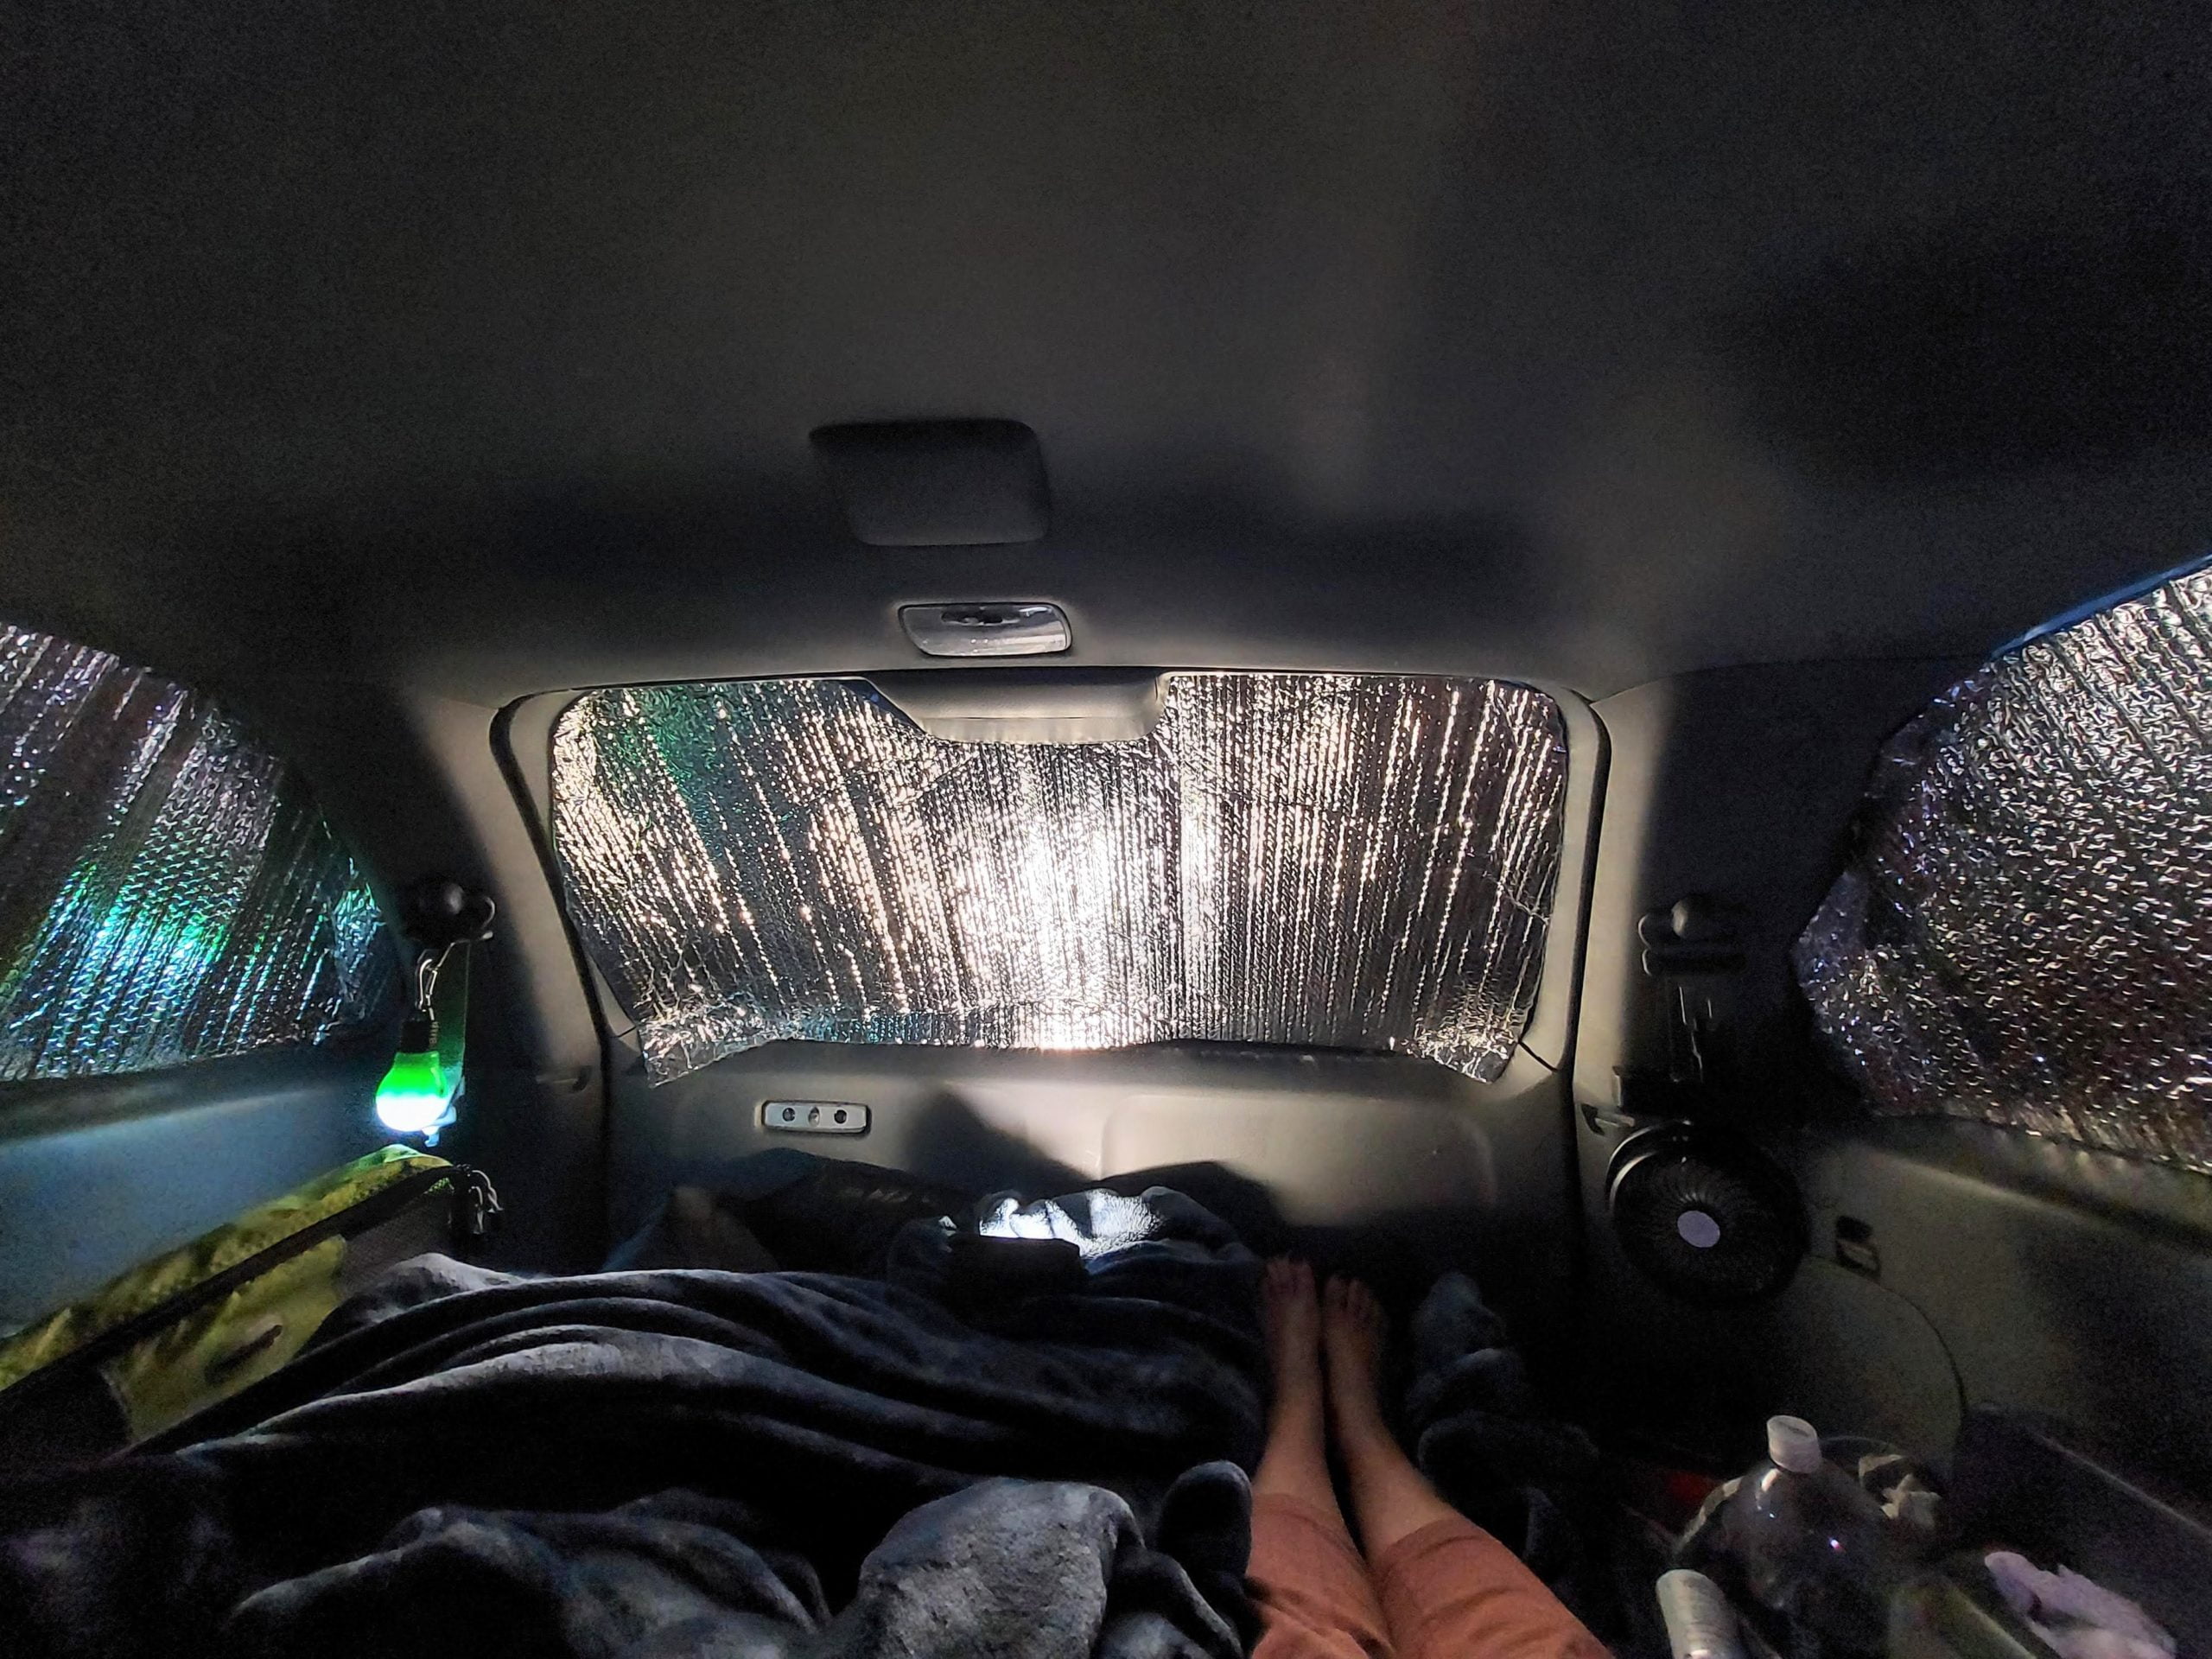
  • 5 Essentials You Need for Car Camping or SUV Camping
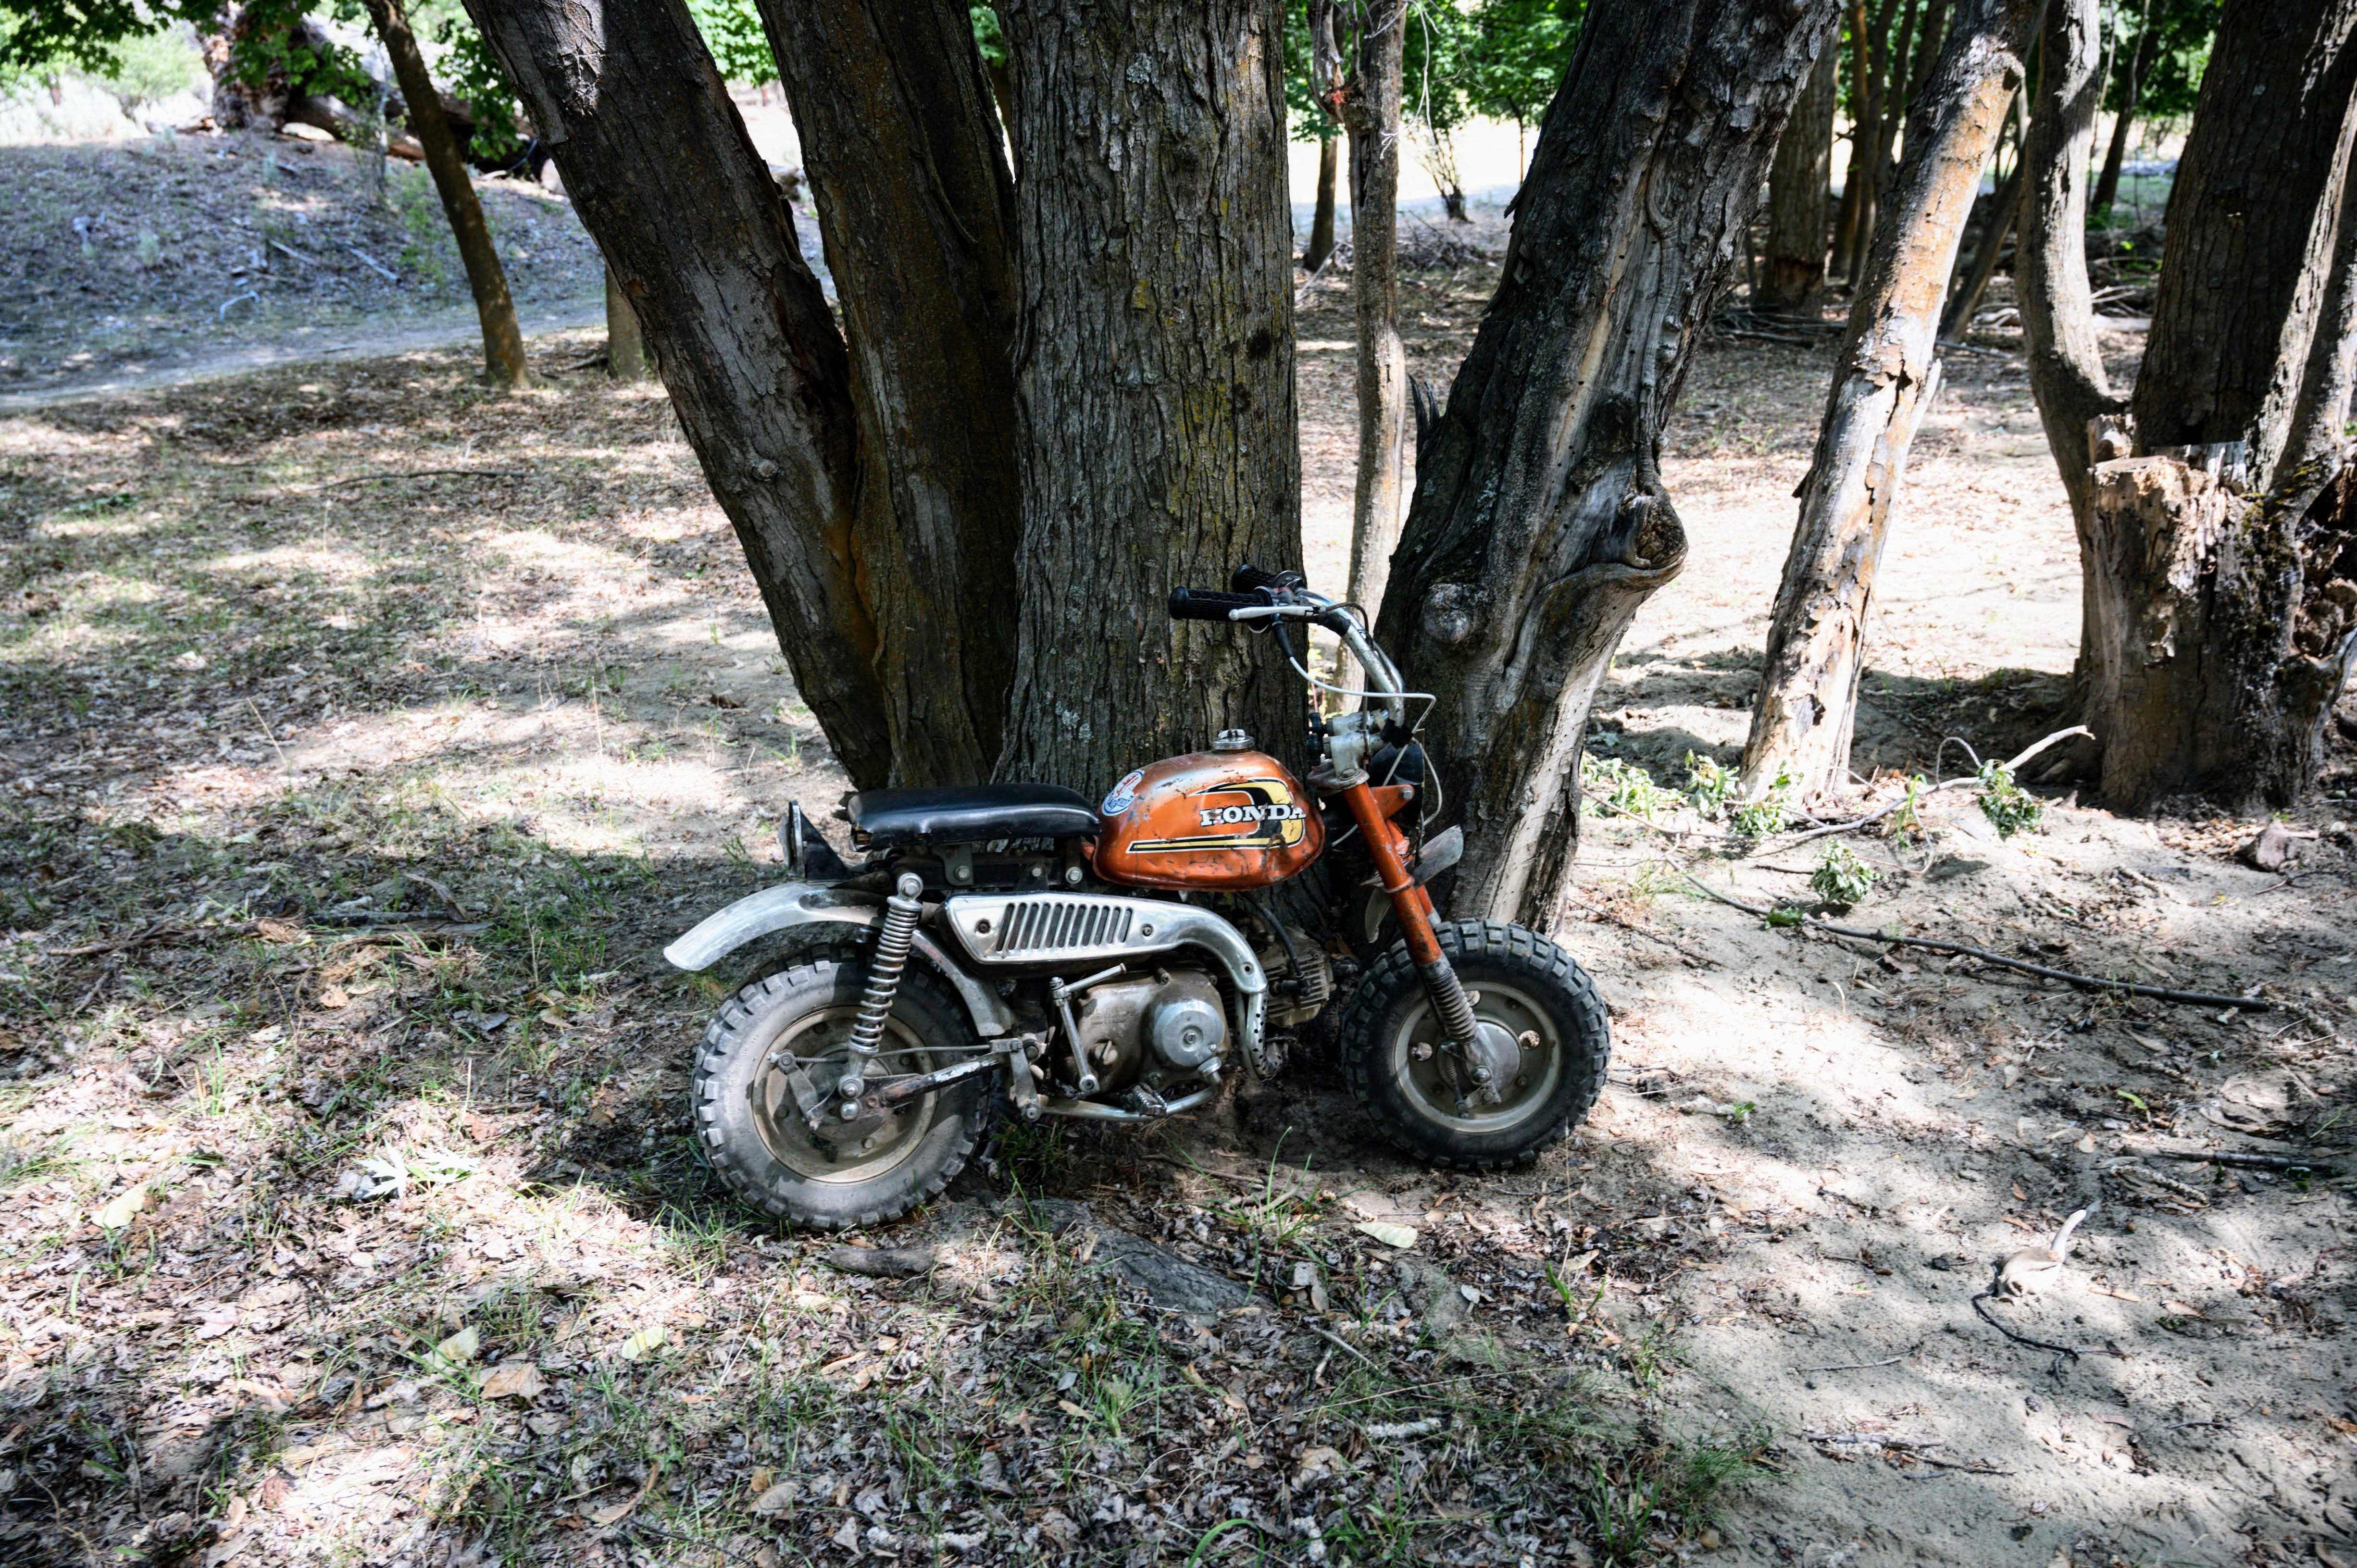
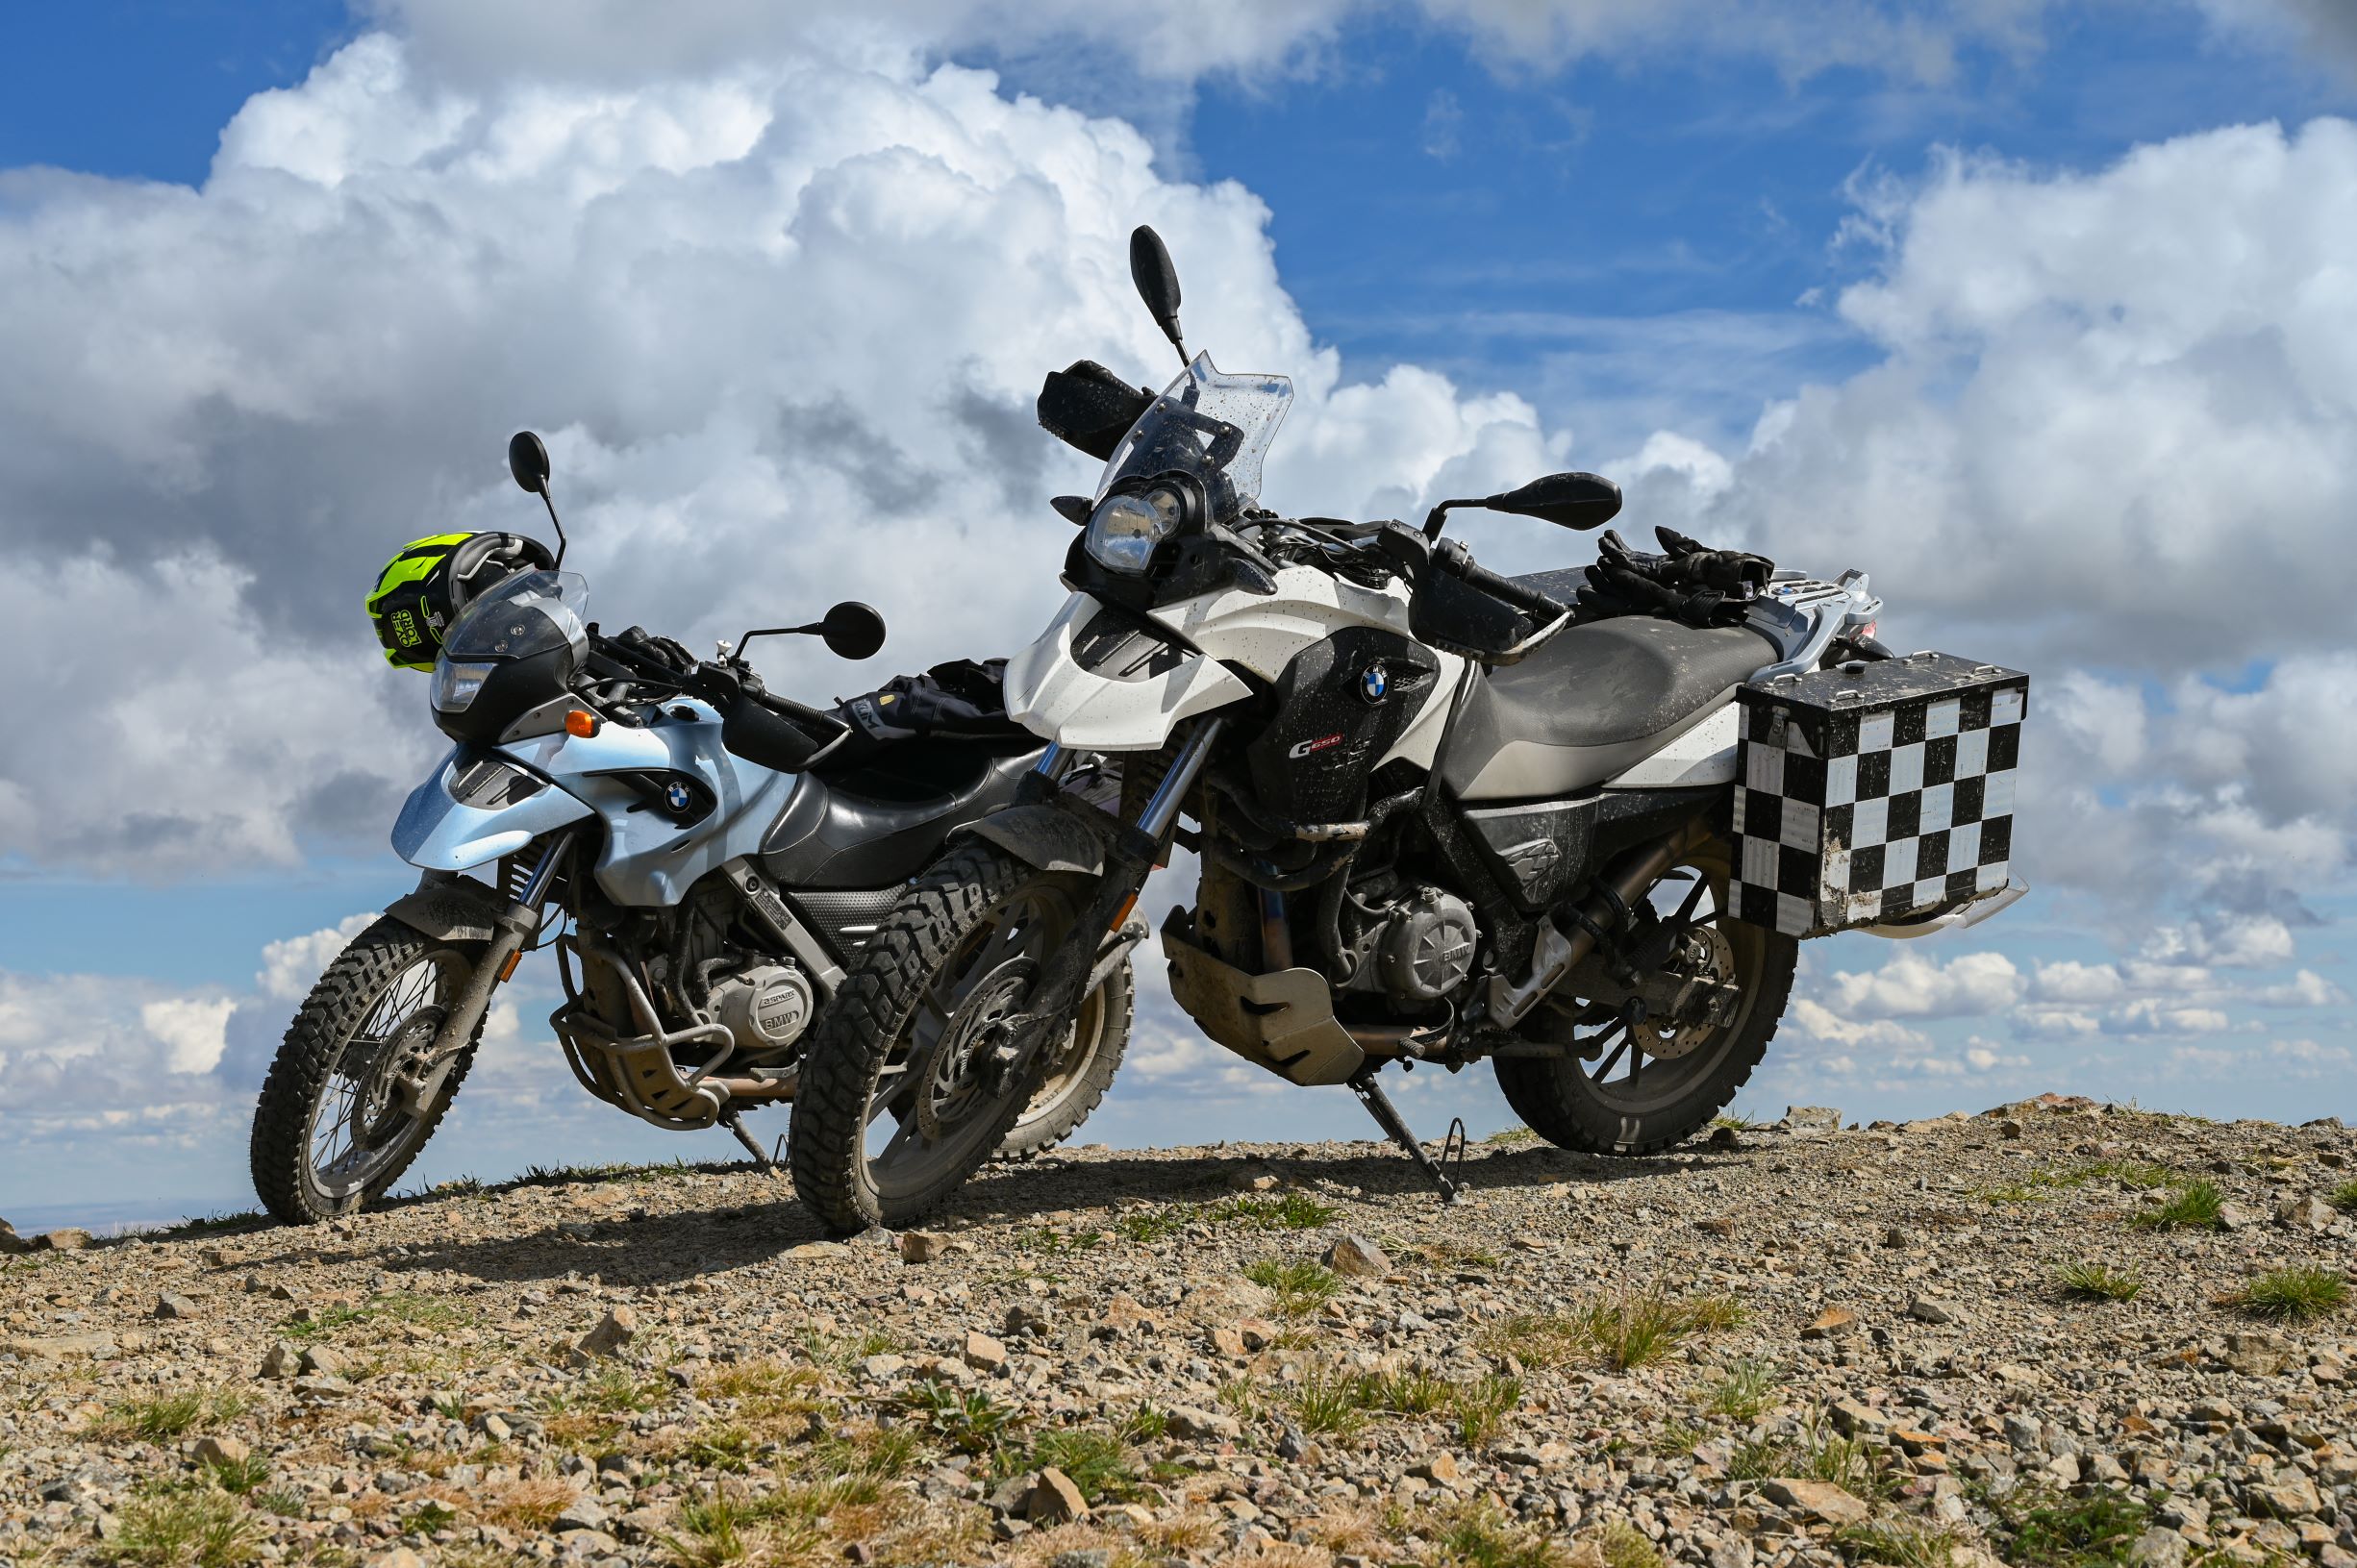
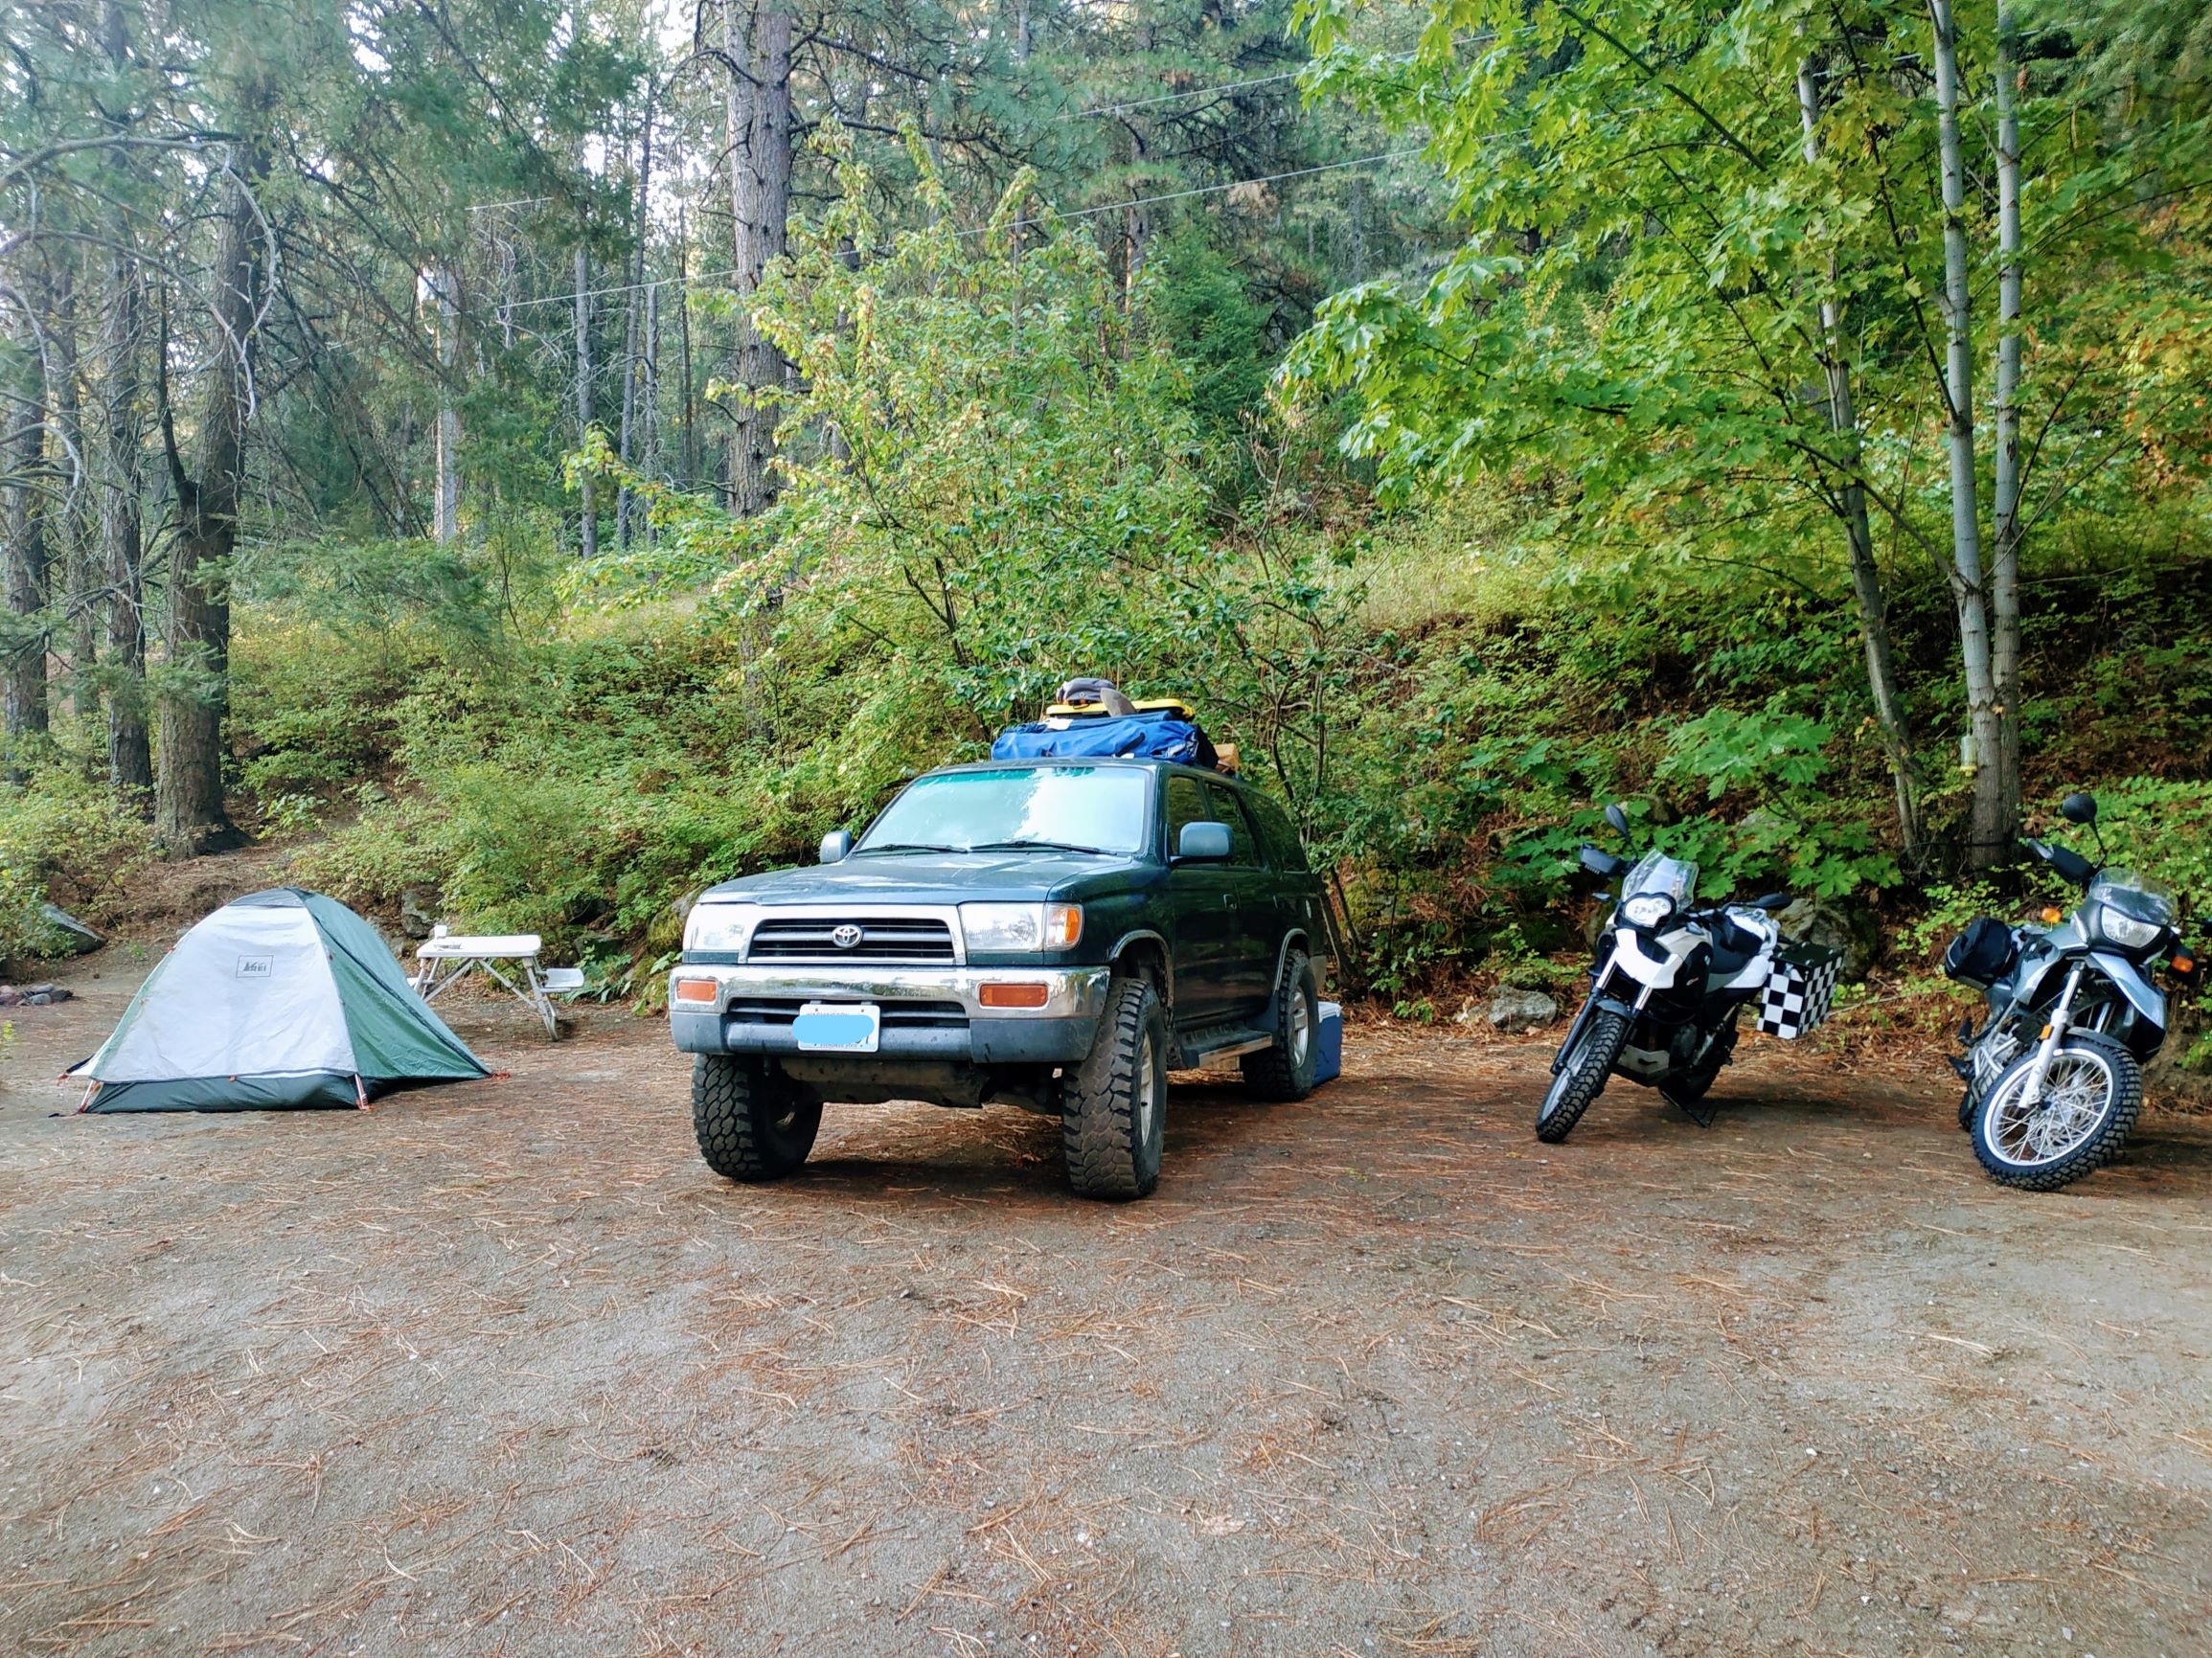
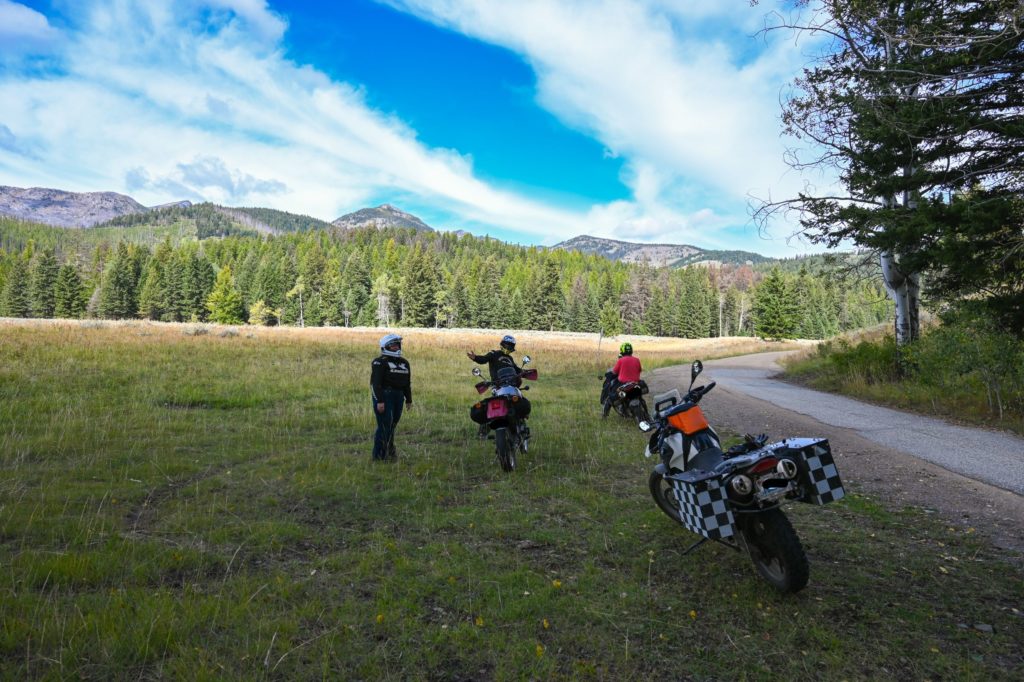
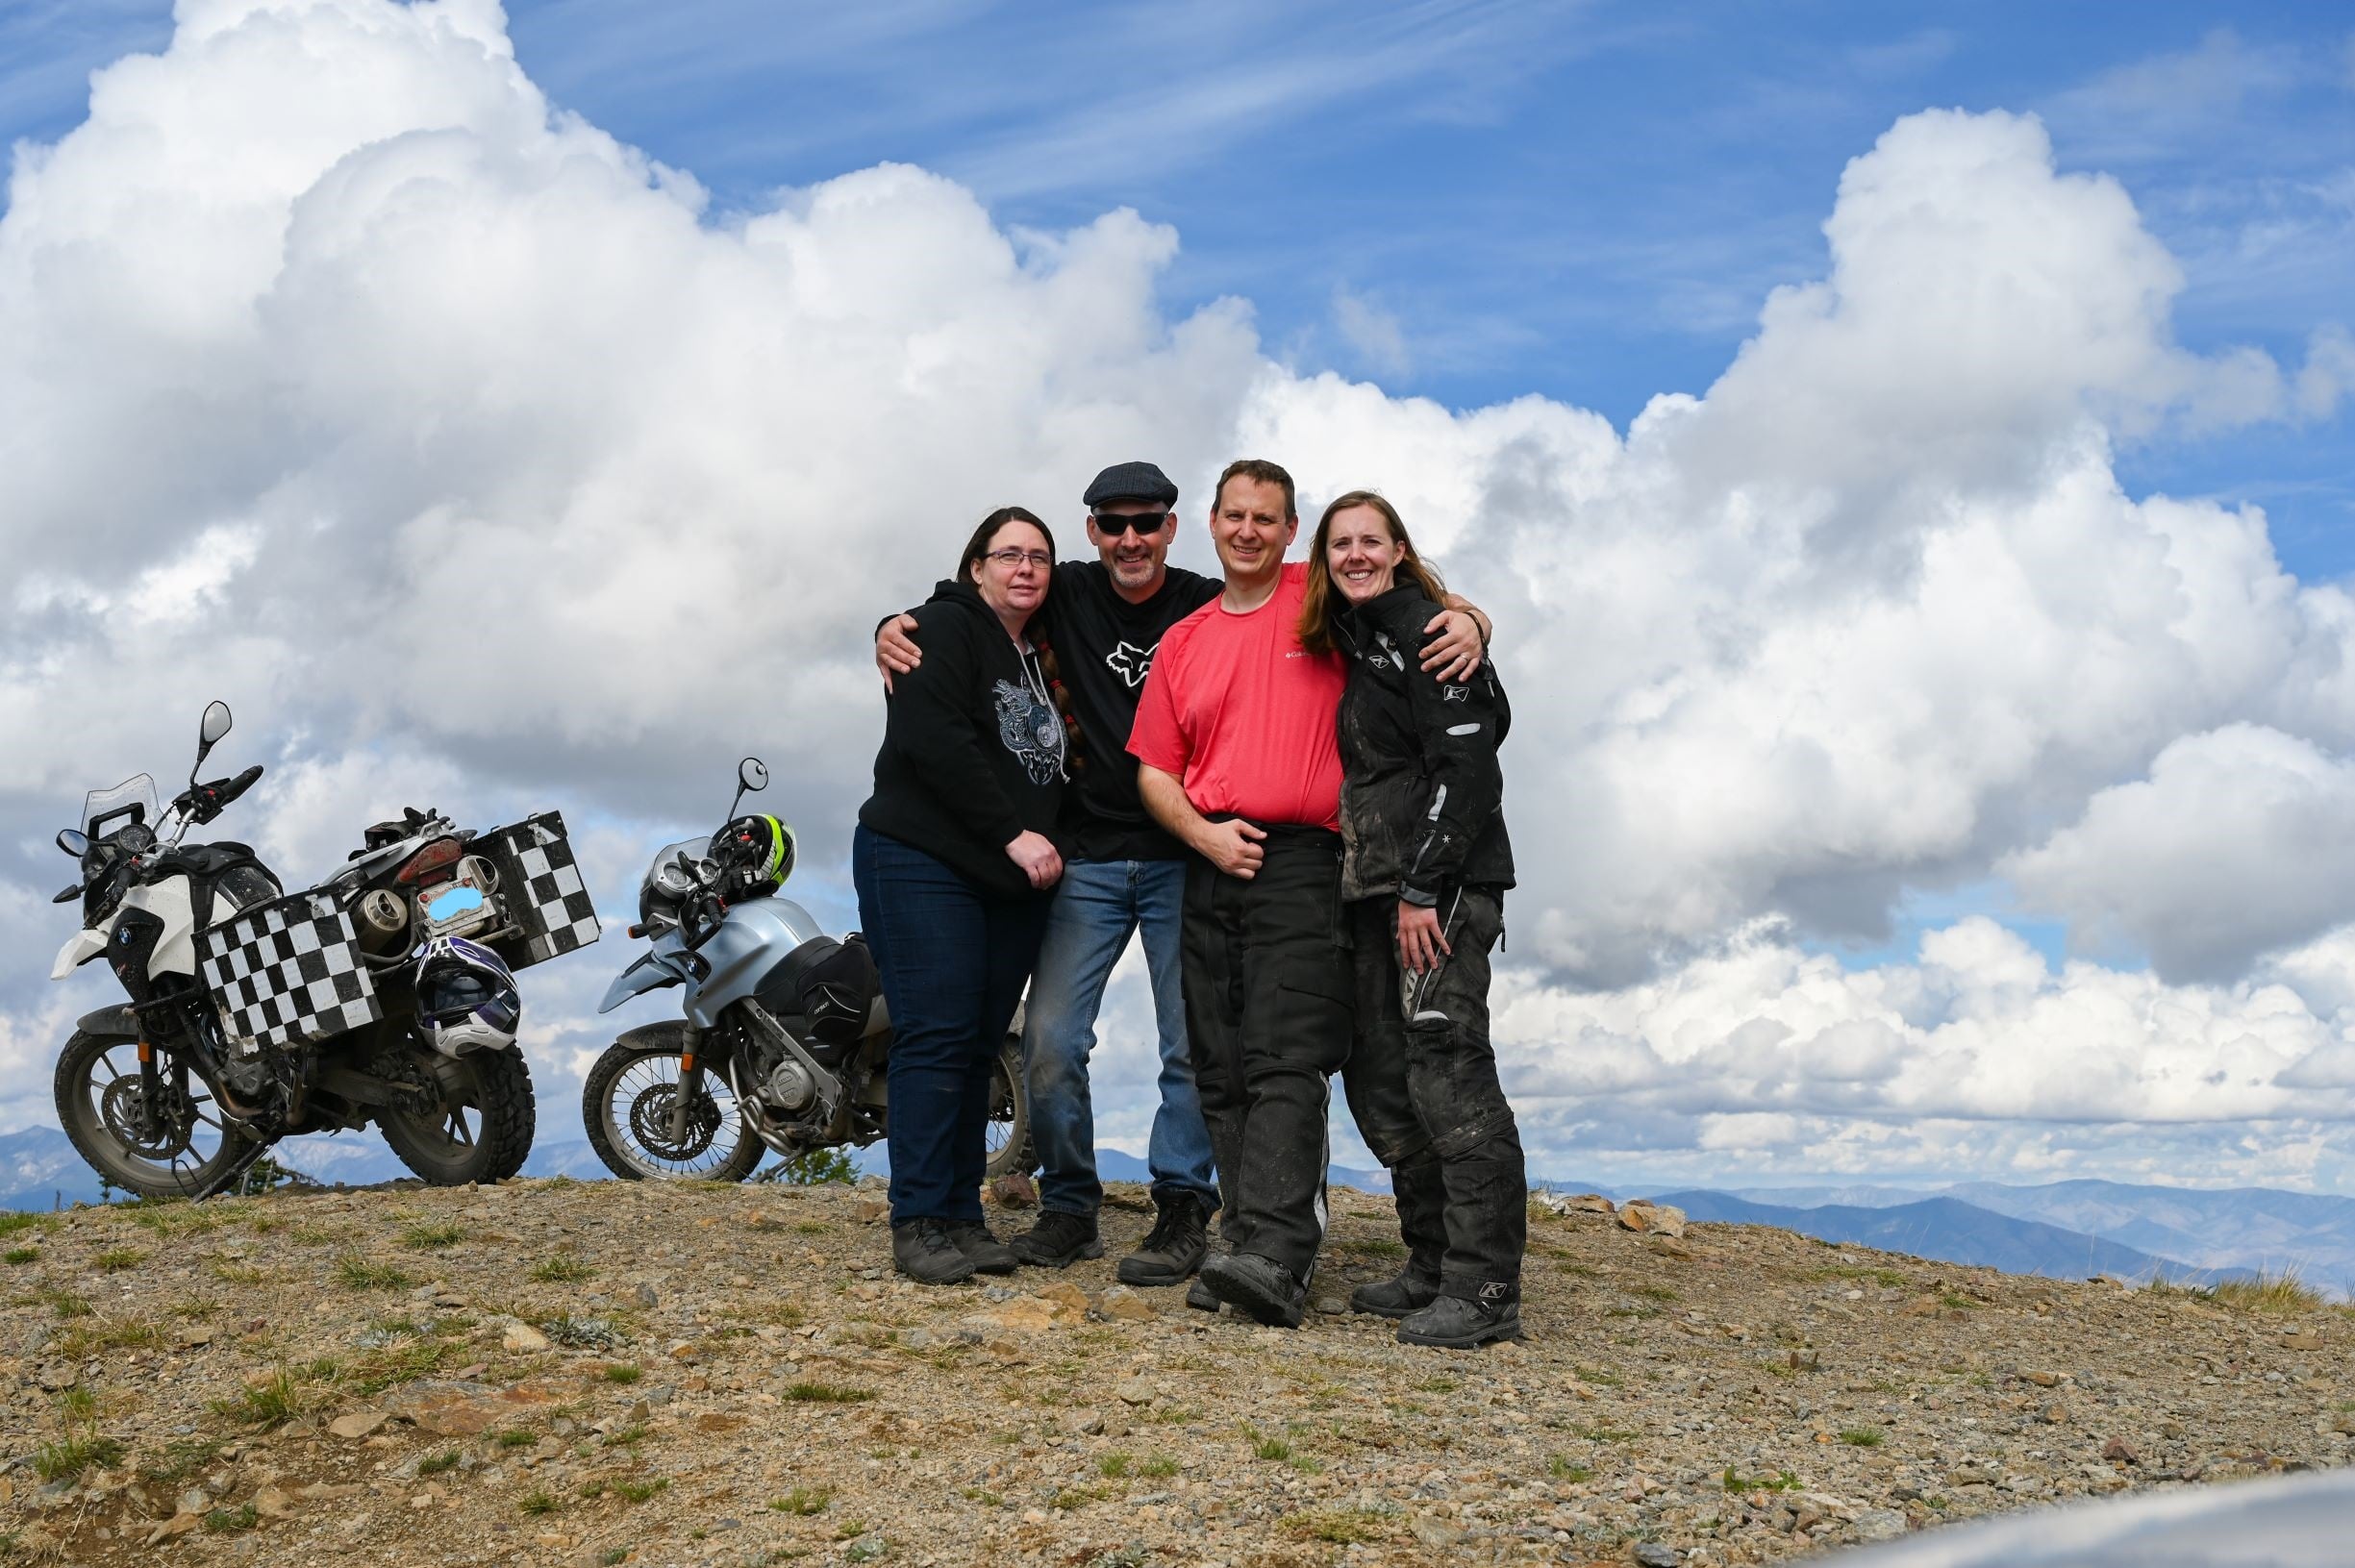
    Have you ever thought it might be nice to pull up to your campsite and not need to put up a tent? Perhaps you have visions of crawling into the back of your car and curling up in a cozy bed, all ready for you without any extra work.  Well, that’s exactly what I decided I wanted on my recent road trip where I tried camping in my SUV.  This is not to be confused with the typical type of car camping where you pack everything in your car and stay in a tent.  That is the type of camping I normally do, but I thought I would see how I liked actually sleeping in my car.  

    Below I share the five things I found to be extremely useful when camping in my SUV.  They were essential items I am so glad I purchased before I left for my trip and will continue to use in the future.  If you plan to try car camping or SUV camping, I highly recommend you consider getting these five things first!

    Facebook
    Reddit
    Twitter
    Pinterest

    5 Things You Need for Your First Car Camping Trip

    These are the main essentials I found to be helpful when camping in a car or SUV.  In the video above, I discuss some of these items and the pros and cons of my setup.  At the bottom of the article, I’ll also list a few “nice to have” options to consider getting in addition to these five essential items.

    1) Privacy & Shading When Car Camping

    Since you’re car camping and sleeping in your car, you will want to cover your windows with something to give you both privacy and shade from the sun and block lights from cars and other campers that might pass by your vehicle.  

    I purchased a roll of Reflectix from my local hardware store, and it was a lifesaver!  I cut out shapes to fit all of my windows, except the front windshield and the front side windows.  

    Covering the rear door windows and back windows of the vehicle with Reflectix made a HUGE difference!  It made my vehicle dark at night, and it also helped create some shade for my car during the day.  

    This was incredibly helpful since I was camping in the desert!  I started in Joshua Tree National Park and then went to Death Valley National Park and then on to Utah’s national parks.  So, having some extra shade was really nice!

    In addition to the Reflectix, I had these windshield pop-out shades for the front windows.  I also used a sheet strung across the backs of the two front seats to give me more privacy since the two front side windows did not have any Reflectix.  

    For future trips, I’d cut out Reflectix for those as well.  I forgot those when making my window cut-outs and ended up using the sheet, as you can see in the photo below, for an additional layer of privacy.  The sheet was easy to put up and take down.

    2) Lighting

    I purchased these LED light bulbs from my local hardware store, and I loved them! You can also purchase similar ones on Amazon if you can’t find them locally.  They have little clips that make them easy to hang in different areas, plus even if you decide to sleep in a tent, they work well for clipping to the ceiling of a tent.  They have a high setting and a low setting when you want it a little dimmer.

    I also purchased these Duracell LED lights that have a built-in stand so you can set it down on the ground or set it on the floor of your SUV when you’re getting ready for bed or just sitting in the car reading at night.  If you face it toward the Reflectix, it really brightens up the vehicle!  

    I made sure to shut off my dome light to my car during my trip as I didn’t want to take any chances that I’d accidentally leave a door open. Also, when using the SUV tent attachment (read more below in #5), the rear hatch is left open, and thus the light on the hatch door stays on unless you shut off all dome and ceiling lights. So if your dome lights are turned on, your battery will most likely be dead by morning.

    3) Organization System

    This is a must when camping in your car! I felt like it was even more necessary than when I went tent camping. Each day, I’d need to move stuff from the rear passenger seats to my car’s front seats to lay down the rear seats and get ready for bed.  Then the next day, it would get moved back.  Needless to say, things got moved around a lot.  When it was just me, I could still lose track of things, but I pretty much knew where I kept everything.  However, when my husband later joined me on the trip, the organization became an even greater issue.  

    Totes

    Having totes to keep your food, electronics, and other miscellaneous supplies organized in will really help!  Label totes for one thing, such as a tote labeled “food” or a tote labeled “electronics” and so on.  That way, if you’re traveling with someone else, everyone will know where specific items go, and then when you need them, you’ll know where to find them.

    Zip Lock Bags

    I love zip lock bags.  I always bring these when I travel, whether it’s a trip abroad or a road trip close to home. There always seems to be a need for these.  When camping in your car, you might use these to contain food items like sugar or trail mix, or PB & J sandwiches. You can also use them to keep extra batteries, USB cables, headphones, etc.

    Cube Organizers

    These cube organizers for traveling are also great when camping in your car or SUV. I used them for clothing items as well as keeping certain electronics together.  For example, in one of mine, I put all my GoPro gear, chargers, gimbal, batteries, etc.  Then I always know where my GoPro accessories are.  “Oh, it’s in the green organizer.”  This sounds simple, but it really saves you a lot of time looking for things.

    Shoe Bags

    The last thing that sort of falls under organization is shoe bags. I use these when I travel to keep my shoes from getting my clean clothes dirty.  However, they are also useful for carrying extra shoes, like flip-flops (don’t forget to pack those for your trip around camp), and I also sometimes use them to store socks in.  So it makes socks easier to find rather than rummaging through a duffel bag.

    4) Portable Power for Car Camping

    You’re essentially living in your car when you’re car camping or SUV camping.  This means you’ll need some way to charge your camera batteries, cell phone, laptop, and any other miscellaneous electronics you travel with.  I purchased the Jackery Portable Power Station Explorer 300 before my trip, and I loved it!  

    I was able to charge my Nikon batteries, GoPro batteries, cell phone, laptop, drone batteries, and even power my little coffee grinder when I needed some freshly ground coffee beans.  

    You can charge the Jackery in the car when you are driving, or if you’re like me, you’ll probably want the occasional stay at a motel to take a real shower and feel a little more “human.”  Let’s face it, camping in your car is still camping.  

    Many of the campgrounds in the National Parks do not have showers, so eventually, you’ll need something.  So when considering your charging needs, you can plan to use a small generator like the Jackery and then use stays at a motel or KOA for extra charging as needed.

    If you plan to bring a portable shower and stay off-grid for longer periods of time where you won’t be driving (or staying at a motel) to charge your Jackery, then you might also consider purchasing one of their solar panels, which will charge your Jackery without needing to run your vehicle. 

    5) Airflow & Ventilation

    One thing you’ll notice if you crawl into the back of your car or SUV and close all the doors is how quickly things can get stuffy, and you’ll most likely find yourself wanting some airflow, especially if it is warm out. 

    Fans

    I used this rechargeable fan which, believe it or not, was really nice to have in the desert heat.  Even the small amount of air blowing on you at night when it’s hot will really help! Plus, it also has a built-in LED light. I liked that I didn’t need batteries for it either. I never had to recharge it on my trip, so it lasted a pretty fair amount of time between charges.

    Bug screen covers

    I purchased two different types of these, and I’ll admit, neither was perfect.  Getting ones that fit your vehicle just right can be a challenge.  The first set I purchased has larger holes which are nice as it allows more air in.  However, I also have to believe they could potentially allow some bugs in too. The second set was a thin, tight mesh material with perhaps too little ventilation as it didn’t seem to let much airflow in.  

    That being said, if it is really hot, you’re going to want some airflow; these allow you to keep your windows rolled down about halfway to allow airflow but keep the bugs out. You can see them in the photo above on the windows on either side of the sheet I had strung across the rear seats.

    SUV Tent for Car Camping

    The last item that I tried on this trip was an SUV tent attachment.  This turns your SUV into a tent.  It gives really nice airflow and also provides easy rear entry and access to your sleeping area.  This was nice because in my MDX, once I close the rear hatch, I can’t open it. I have to crawl out the side door when I want to get out again.  So with the SUV tent, you can unzip it like you would a tent and climb out the back.  As I mentioned before, if you use this, make sure to shut off your dome lights since the rear hatch is open when the SUV is attached.

    Napier sells this SUV Family tent which attaches to the back of your vehicle and can also be used as a traditional tent on its own.  It’s a bit pricey, but it would allow for a couple to sleep in the back of their vehicle while the kids or other companions slept in the tent portion.  It also has the added benefit of being used as a sitting area during the day to read or take a break from the sun.  So although pricey, depending on your needs, you may want to consider it.

    I used the Napier Sports Cove SUV tent, and it worked very well and was easy to set up. I’d say it takes about 5-minutes to attach to the vehicle and probably about the same to take it down.  I also demonstrate how it attaches to the vehicle and how easy it is to get in and out of the car in my video.

    Car Camping Wishlist Items: “Nice to Have”

    After taking my first maiden voyage of camping in my SUV, there are some changes I think I’ll make for future trips.

    One simple item I want to invest in is a mini-fridge.  I looked at these before I left but decided I wasn’t ready to spend the money.  However, trying to keep fresh ice in the cooler while spending almost a month in the desert was a little bit of an inconvenience.  With a mini-fridge/electric cooler made for cars, I can charge it in the car or use my Jackery to run it.  This eliminates my need to purchase ice.

    The other thing I plan to make before I take another SUV camping trip would be a platform for the bed.  I’ve seen lots of builds by people online (like this one), and I want to create something that would allow me to organize my belongings underneath my bed, thereby eliminating the need for me to move things around each day from the rear seats to the front seats to put my bed down.  With storage under the bed area, I could leave the bed in place during the entire trip.  That would be really nice!  

    If I planned to spend more time camping on BLM land, where typically you have no bathrooms or privacy, then I would consider getting one of these instant shower shelters.  You can use them for showering, changing, and I’ve read some people place a porta-potty in them for a makeshift restroom.

    Final Thoughts

    So there you have it!  These are things I highly recommend when car camping or SUV camping. You may also want to consider adding some of the wishlist items before you take your first car camping trip.  

    I know I don’t go into all of the gear I used, but you can rest assured I had my coffee camping gear with me!  Plus, I used RISE oat milk and almond milk as both don’t need to be refrigerated until after opening.  This is very convenient for storing!

    If you are a seasoned car camper and want to share what you have found useful when camping in your car, please drop your insights in the comments below.  I’d love to hear from you!

    Happy Camping!


    *Disclaimer:
    Travelffeine is a reader-supported blog. When you buy via links on this site, we may earn a small affiliate commission at no cost to you. 
  • Off Road Motorcycle Adventures: A Beginner’s Guide to Packing & Planning

    My husband and I recently returned from an off-road motorcycle adventure. It was our first multi-day moto trip where we camped off our motorcycles. We were riding sections 4, 5, and 6 of the Washington Backcountry Discovery Route (WABDR). This beautiful off-road route stretches from the Oregon/Washington border and up to the Washington/Canadian border. 

    The WABDR is a mixture of challenging fire service roads as well as the easier and more maintained gravel forest service roads.  The Washington Backcountry Discovery Route is full of adventure with spectacular scenery all along the way. In this post, I share how I planned the trip as well as what gear I packed for moto camping. First, let me give you a little background on my motorcycle experience.

    My Motorcycle Riding Experience Thus Far

    I grew up learning to ride motorcycles on a Honda 50.  All of my siblings did, and to this day, all of their kids learn on the same Honda 50.  It is a fun legacy, and this Honda 50 is a beast! It rarely ever needs any work and keeps going and going — take that Energizer! 

    I eventually outgrew the Honda 50 (although let’s be honest, all of us adult kids still like to ride it once in a while, just to say we can). I transitioned into riding a Honda 250 and a Yamaha 400–all lightweight off-road motorcycles, always intending to get my motorcycle license eventually.

    One day while in Seattle at a motorcycle store (can’t remember why), my husband and I learned from the owner, that WA state had a new motorcycle endorsement program. They provided the motorcycles and put you through a course to get your license, and all it takes is one weekend.

    When we left, my husband said: “let’s do it!”  And so we did. It is a great program that teaches a lot of excellent road safety techniques. By the end, you take the motorcycle driving test, and pass (hopefully) and then head to the DMV, get a new mugshot, and you are officially a motorcyclist

    Beginning Our Off Road Adventure Riding

    That was over five years ago.  We purchased motorcycles right after getting our licenses and have been getting road experience ever since.  We bought a BMW F650GS and a BMW G650GS, both dual-sport motorcycles. This means you can ride on and off-road. We did some off-roading with my brother when he’d visit, but it was mainly just dirt or gravel roads, nothing too technical.

    We learned about the Washington Backcountry Discovery Route in 2015 and decided we’d ride the last half of the route when my brother came over for his annual summer vacation. Wildfires had a different plan, and due to the forest fires burning all over Washington state, we had to cancel our trip plans.

    Fast forward four years, and we have the best fire season we’ve had in a long time!  A former UW classmate of mine posted his pictures of completing the WABDR in his 4×4 Toyota, and I told him how I’d planned to do the route.  He said, “you should do it this year.” And I thought, “yeah, he’s right!” There is no guarantee we’ll get another year with so few fires, why not seize the moment and do it!  

    So I contacted my brother, told him my idea to do the last three sections of the Washington Backcountry Discovery Route in September, and he said to let him know the dates, and he’d put in for his vacation.  Next, I convinced my husband that this was a great idea, and soon we had our dates picked out.

    Planning our Off Road Motorcycle Adventure

    Now, it is essential to note that this decision was made right in the middle of our crazy hectic summer. Which meant I was busy planning camping trips, and get-togethers with friends and family and did not give our ride my usual planning attention.

    So this trip felt a bit more spontaneous than my trips usually are. I skimmed a few websites on the subject of riding the WABDR, and we bought the official WABDR printed map. I downloaded the GPS tracks and a free GPS app for my phone. From my minimal research, I determined that we should only need one day of riding per section. So I reserved some campsites for our ride and continued making plans with our group.

    We live in the Seattle area, and my brother lives in North Central Washington. So we decided to meet in Leavenworth the night before we began our ride. Also, my brother and his wife would be riding in their Toyota 4Runner for sections 4 and 5, so he agreed to pack extra water for our group and to carry any gear that might lighten the load in our panniers. That was wonderful! When you’re riding an adventure bike off-road, reducing the weight in your panniers is always helpful.

    Easy, Lightweight Food Options

    I packed our backpacking propane burner and some dehydrated meals that you can prepare right in their pouches. And I also packed oatmeal packets and coffee for breakfast. To make each meal, all I needed to do was to boil water on our tiny propane stove.

    I used a new style of lightweight coffee filters to make coffee on this trip as they took up less space than my usual french press options. I like them, but I need to practice more to get the right strength.  The first cup was a little too weak. My husband then decided to triple that amount in his cup and oh my goodness! Way too, acidic! So I will perfect it, but overall I am pleased with my purchase.

    So in addition to a lightweight propane burner and dehydrated food, I also packed jerky and snack bars.  I planned for these to be both our lunch and our snacks. And that was it for food.  

    Breakfast: oatmeal and coffee. Lunch: jerky and snack bars. Dinner: Dehydrated meals. Remember, you want to keep your motorcycle as light as possible when off-roading.

    Packing Essentials: Camping Gear & Supplies

    I packed the same gear I used for backpacking and used it for this off-road motorcycle camping adventure. I think these two “hobbies” really compliment each other. You need lightweight gear for backpacking, and you need the same type of equipment for moto camping. The backpacking gear was small and lightweight and fit great inside our panniers. In addition to backpacking gear, I also packed motorcycle emergency supplies and of course, our riding gear.

    Packing List

    • Lightweight, fast-drying towel
    • Moisture-wicking clothing
    • Smartwool or riding socks of choice
    • Flip Flops or Tennis Shoes (when you’re at camp or in town, it’s nice to have a break from your riding boots)
    • Hat (for when you’re off the bike — to hide helmet head or to keep warm)
    • Sunglasses
    • Balaclava (great for cold morning rides)
    • Thin fleece pullover (great for layering in the morning and at night)
    • Waterproof riding gear
    • Jacket
    • Pants
    • Gloves
    • Riding Boots
    • Backpacking tent (lightweight, easy to set up)
    • Pillow (or use clothing) (we had inflatable pillows from backpacking)
    • Backpacking sleeping bag (you want something smaller than your standard car camping bag)
    • Sleeping Mat (it’s incredible what even an inch of padding can do for a rocky surface)
    • Ziplock bags for toiletries (at higher altitudes these may leak)
    • Packing Cubes — These are a great way to organize gear in the panniers and be able to grab out what you need quickly.
    • Toiletries (shampoo, soap, face wipes)
    • Travel-size brush/comb
    • Coffee and filter
    • Dehydrated Meals
    • Instant Oatmeal
    • Jerky
    • Snack bars (quick snack stuff when you’re on the go)
    • Water (refillable and collapsible water bottles are great)
    • Eating utensils/plates/bowls
    • Collapsible cups (I love these, and they can double as bowls too)
    • Propane stove and propane (use a small pocket rocket one)
    • Cash (for emergencies)
    • Paper Maps (GPS is great when it works, can cause real problems when it doesn’t)
    • Bungees (for tying down the gear to the back of your bike or panniers)
    • Zip ties (always useful)
    • Multi-purpose tool
    • Spare Fuses
    • Engine Oil
    • Spare Tire/Tube or patch kit of some kind
    • Duct Tape
    • Fast Acting JB Weld
    • Loctite Threadlocker Blue
    • Tylenol/Ibuprofen
    • Allergy Medicine
    • Bug Spray
    • Hand Sanitizer
    • Chapstick
    • Raincover for your packs and sleeping bags
    • Small handsaw
    • Toolset for motorcycle
    • Waterproof Matches
    • Toilet Paper
    • First Aid Kit
    • Headlamp/flashlight
    • WD-40
    • Phone/GPS/Comms Charger (powerpack)
    • Charging cables
    • Communication Devices (we use the Sena SMH10 and loved the ability to communicate direction, needs of the group and sightseeing all along the ride)
    • Camera (bring proper padding and rain protection)
    • Passport (if needed)

    Packing Tips

    Practice packing up your motorcycle at least a day in advance, so you know how everything fits.  Make sure the weight in your panniers is evenly distributed so that it doesn’t throw the balance of your bike off.

    Also, when packing the day before, I reduced the weight even further by taking a second look at what I was packing. I discovered more items I could leave behind.  This tends to be the case. You can usually do without that extra shirt or shorts or “just-in-case” gadget. 

    Pack the miniature version of whatever you can — miniature brush or comb, travel size shampoo, small flashlight and so on. Moisture-wicking clothing is great because you can wear it for multiple days and easily wash it the night before a ride and hang to dry to wear the next day. 

    Also, you will eventually pass through towns during your off-road adventure whether you’re on the Washington Backcountry Discovery Route or some other adventure touring ride. So typically, you can purchase additional items, if you find you need them later. 

    I try to ask myself if I need the item in question. And if for some reason I discovered I did need it later on the ride, could I purchase it then?  If the answer is at first “no” I don’t need it and “yes” I could buy it later, then leave it at home. Chances are you won’t miss whatever it was.

    Final Tips for Planning Your Off Road Adventure and What to Expect

    If you are a beginner, like I was, you’re going to be really sore.  I highly recommend you start exercising ahead of time. Build up your shoulder muscles and your quads.  I would say these were the two sorest areas for me after a full day of off-road riding. 

    You should stand most of the time while riding off-road. If you haven’t built up your stamina yet, you will most likely be alternating between standing and sitting. This equates to doing squats.  By the end of the first full day of riding my quads were on fire, and it hurt to sit and stand up.  

    Give yourself extra time.  Yes, we could have done each section in one day, however, when you’re just a beginner at off-road adventure riding, it’s better to give yourself more time than you think. Plan to have downtime at your campsite. Rest, relax, discuss the day’s ride, and go over tomorrow’s trip. This will make your off-road adventure far more enjoyable.

    I made the mistake of not giving us enough time, and I will not make that mistake again.  I made too many assumptions about the trail and our abilities. These assumptions proved incorrect, and it made for some very stressful riding conditions.  So learn from my mistakes and add rest time to your schedule. 

    It’s also good to have extra time for any emergencies or detours that might come up. When you are riding off-road things get a bit more unpredictable.  And help is a lot further away.

    Drink plenty of water while riding and keep your energy levels up.  And have fun!! You can read Misadventures on the WABDR for more information about the route and our ride.

    Happy Adventuring!

  • Misadventures Riding the Washington Backcountry Discovery Route

    I attempted the Washington Backcountry Discovery Route sections 4, 5 and 6 in early September.  You will learn more about why I say “attempted” as you read along.  The Washington Backcountry Discovery Route (WABDR) is 575 miles of (mostly) off-road riding that goes from the Oregon/Washington border to the Washington/Canadian border.  

    Read how I planned and what I packed. And if it is your first time planning a similar ride, I hope you will learn from my mistakes.  In this post, I will journal our experiences on this motorcycle adventure, my expectations before the trip and my confrontation with reality after day one of our journey.  

    Meeting Our Group the Night Before

    I am riding sections 4, 5 and 6 of the Washington Backcountry Discovery Route with my hubby, brother, and sister-in-law. Section 4 covers backroads from Cashmere to Chelan. Section 5 is Chelan to Conconully, and Section 6 is Conconully to the border crossing at Nighthawk. These three sections total to approximately 273 miles. We plan to spend one day riding per section.

    My hubby and I rode over from Seattle Tuesday night after work to meet my brother and his wife in the town of Leavenworth, Washington. We reserved a campsite and planned to get dinner with them before getting some rest for our ride on Section 4  the next day. We had a great evening hanging out in Leavenworth, and everyone’s spirits are high and our hearts full of adventure.

    Day 1: Section 4 of the Washington Backcountry Discovery Route

    I was up around 6:30 a.m. No one else is awake, so I walk up the road to get coffee. Typically when we go camping, I make coffee at camp, but today’s campsite is conveniently located down the street from Starbucks. The campsite is still quiet when I return, and no one else is up yet.  I read, and I journal, I drink more coffee and finally decide to wake up my husband. It is now almost 7:45 a.m., and the rest of the group is finally getting up.

    This is the first in a series of lessons where my expectations meet reality and lack of planning.  I should have discussed with the group, the night before, what time we all thought we should leave. Then set the alarm and made sure everyone was up and getting ready on time.  However, I assumed that the day’s ride would only take 4 or 5 hours, so I wasn’t panicked. That was lesson two in setting expectations.

    We decided (against our better judgment) to go into town for breakfast. By the time we got into town for breakfast, it was already after 10:00 a.m.  I knew we should have just eaten at camp or stopped at a place along the route, but again, I thought today’s ride wouldn’t be that long.

    So long story short, we don’t end up starting the ride until almost noon!  Yeah, that was a big mistake!  

    In the Beginning, There Was a Puddle

    In the few days preceding our ride, the area had received heavy rain and flash flooding.  So shortly after starting the off-road portion of Section 4, we run into the mother of all mud puddles.  Think crater filled with water and mud. Then after you cross said crater, you must traverse along a thin stretch of dirt like a tightrope walker to avoid getting stuck in the large muddy ruts on each side.  The grooves were so deep in places that if I were to get stuck in them, my panniers would hit the sides of the rut.

    Hubby is in the lead, and he makes it through the mud puddle (crater) and safely to the other side.  I, however, stopped at the edge of the mud crater– that was a mistake. And then I let that pit get in my head and psych me out — another mistake.  My brother gets out of his 4Runner to give me some pointers on crossing the puddle. He offers to ride it for me, but I say no, I need to do this myself.  So I proceed to descend into the muddy pit only to shortly thereafter lay the bike over.  

    Puddle Wins 1-0

    My husband said he heard “glub, glub, glub” on the communication system.  Yes, that was me and my helmet immersed in muddy puddle water. I ask my brother to get my bike up quick. The last thing I want is for it to take in water.  So he gets in and soaks his feet and legs to help me get my bike up. He’s a good big brother. I’m unhappy at this point and frustrated with myself for letting this puddle get the best of me.  And I am also not happy about just starting the ride and being soaking wet!

    But, I get back on my bike, and now I am staring down the deep ruts on either side, willing myself to look forward to where I want to go and not at those deep ruts where I don’t want to go!  (There’s probably a life metaphor in there somewhere.) My brother once again helps me, as I’ve slid into a rut, and after he helps me out, I make it safely across to where my hubby is waiting.  

    Oh, and a quick note about our communication devices. We purchased Sena SMH10s for this ride, and we loved having comms! It was invaluable to be able to communicate directions and needs while riding.  Additionally, besides the mud puddle, we also road in heavy rain on our way back to Seattle and the comms seemed unaffected.  I highly recommend you consider a communication system when doing a group ride.

    If A Tree Falls In the Forest

    And now the irony of it all, no one thought to take any pictures of the muddy crater, the huge ruts, me dripping wet, nothing.  So I ask you: If you ride off-road and take a plunge in a huge mud puddle, but no one captured it on camera, did it even happen?

    Little did we realize, but the puddle was just a taste of what this day would hold. There were more deep grooves and washouts, rocky ascents and descents, road closures and detours all culminating in a dark and rocky ride down to the town of Chelan.

    Chumstick Mountain Summit to Ardenvoir

    We make it to the summit of Chumstick Mountain, elevation 5,810 feet and take a break and enjoy the views.  Our spirits are high, and we’ve had a great time riding thus far.  Each puddle I’ve encountered since “the” puddle has been easily crossed or avoided, and we’ve been gaining confidence and experience. I’ve heard “whoops” and “wahoos” over the comms and enough corny jokes to last a lifetime.  This is what the journey is about.

    As we enjoy our break, we notice a fire in the distance, and we hope that we won’t need to ride through it. We don’t and are happy about that. We eat a snack and continue our ride to the next waypoint in the town of Ardenvoir.

    As we are about to hit pavement for our ride into Ardenvoir, a “road closed” sign is blocking our path.  We followed the detour signs, and it felt like we were backtracking in the direction we had already come. After the initial detour, we came to another fork in the road with another detour sign. According to the map, the detour would not take us where we wanted to go, so we continued straight to stay on NF-5801. It was around 1 to 1 1/2 hours later that we arrived in the town of Ardenvoir. 

    The gas station is closed, because, you know, it’s Wednesday.  So we decide to keep going. It is now about 5:30 p.m. as we start our ascent of over 4,000 feet to reach McKenzie Ridge. After that, we will ride down Slide Ridge and hopefully reach Lake Chelan before dark.

    McKenzie Ridge Meets Misguided Expectations

    Oh, the optimism and the naivete I held at that moment. I was sure we could make it to Lake Chelan before dark.

    As we reached McKenzie Ridge, we saw beautiful views of Lake Chelan. And it filled us with hope. We could see our destination, and it felt closer than it actually was.

    The lake calls to us as we begin our descent down Slide Ridge, telling us, we were close. We were not close enough. Soon daylight turned into dusk and dusk to darkness.

    Riding in the Dark

    We continue our ride down the mountain in the dark, passing primitive campsites along the way. I call out to my hubby, who was in the lead, “we can camp here.” He continues riding, his reply, “I just want off this mountain.”

    We are exhausted and sore and riding down that rocky road full of ruts took every ounce of concentration and strength. On top of that, my husband’s rear brakes overheated and were no longer working. This meant he had to use a combination of riding his clutch and applying soft front brake pressure in the steep areas. 

    I, on the other hand, had not taken the time to clean my visor from my initial fall in the mud puddle. So I was riding with my visor up, all the while praying that those bats that kept flying across my path would not fly into my helmet.  Standing up in the rough parts now took every ounce of strength I could muster.

    We skip the optional “jungle” on section 4 and take the easier alternate route down.

    I thoroughly regretted my foolish assumptions at this point. Assuming things would take less time and assuming our skill levels were higher. I was feeling bad that I had pressured my hubby into continuing the ride from Ardenvoir when he had doubts about it — and desperately wanting to get off the mountain safely.  Off-road motorcycle riding at night was not part of the plan.

    Pavement Oh Sweet Pavement How I Missed You

    We rolled into our campsite at Lake Chelan State Park around 10:30 p.m. After over 10 hours of riding, we were never so happy to see pavement as we were that night. I didn’t know if I’d be able to walk the next day. I was completely spent.

    Riding is a workout, and riding off-road is both physically and mentally demanding.  Choosing your lines and hours and hours of standing and sitting (think of doing squats for an entire day) and being pounded by rough and rocky road conditions. Even my brother and sister-in-law in the Toyota were feeling it. 

    I realized that day that I was not in the physical shape, I needed to be in, and I overestimated my stamina and ability. I should have planned to camp on the mountain and split section 4 into two days rather than one. We are beginners, not seasoned adventure riders.  What I want to be and what I was at that moment were two very different things.

    We set up camp in the dark, my brother quickly grills up some hot dogs, and we crawl into our sleeping bags.

    Day 2: Section 5 of the Washington Backcountry Discovery Route

    We get up around 7:00 a.m. this morning. I can move, and I can walk, so I’m thankful for that.  My quads are really feeling the workout from yesterday. My brother fixes some pancakes and eggs on his grill, while I get the coffee going.  We eat and then pack up camp before taking a quick stroll down to the lake.

    It’s after ten, and we’re finally leaving camp.  However right after leaving, we discover the communication devices aren’t working correctly and neither is the GPS.  We fuel up and re-sync the comms again. The GPS signal keeps dropping.  We continue driving in the direction of Section 5, and my sister-in-law tells me thru the comms that it keeps saying, “GPS signal lost.” 

    Then it said re-routing when it connected again. So we turn off where the GPS instructs us, and soon we hit gravel roads. We stop again to re-sync the comms as my brother can hear me, but I can’t hear him.  GPS is still acting up, but we’re just going to try to follow the line on the map.

    The Road Less Traveled

    The ride starts with a grated gravel road and then turns into a fun climb up dirt roads. The stress of the previous night is behind us as we enjoy riding along this new path. There’s nothing quite like standing on your bike, wind in your hair, and a little dirt under your tires.

    Soon we hit a section of road that looks like no one has ridden on it for a very long time.  We climb up a rocky section with ruts on either side only to reach an overgrown jungle of a road where we decide to stop and regroup. 

    This does not feel like the right path.  While I get out the paper map (something I should have done at camp before leaving), my brother decides to walk the trail a bit further. Soon he comes back and says, “uh I don’t think we’re going any further.”

    Let me tell you right here, if my brother has doubts, then it is absolutely a no-go for me.  He has years of off-road riding experience and is known to do some crazy stuff, so I listen when I hear any tiny whisper of doubt coming out of his mouth.

    Off Road Motorcycle Trail in Washington
    Something tells me this is not the road we are looking for. You can’t see from the picture, but on the left, there is a drop-off. The Toyota has “just” enough space to get by the tree on the right, but its tires would have to ride the edge that is already sloughing off. Not worth the risk. Not to mention the road doesn’t improve beyond this point.

    I look at the map, and I say “we’re here and you see this road, way over across the mountain, yeah that’s the road we’re supposed to be on!”  The GPS re-routed us to link up to the original road, unfortunately, the path we’re on, isn’t used by anyone other than cows, so it’s a no-go for us.

    We come to the unfortunate conclusion that we must now turn around and go back to the highway to start again. We will discuss what to do once we make it back down.

    Tough Decisions

    We’ve finally returned to the highway where we missed the correct turn off for Section 5 of the Washington Backcountry Discovery Route. It is around 2:30 p.m., and we are still tired from the previous day’s ride.  Due to our time limitations, current physical state, and desire to be safe; we decide to skip Section 5 and instead ride up to Omak via the highway. 

    We aren’t happy about the decision, but we know it is the right one for us at this time. It is too late in the day to complete section 5, and we did not plan enough days to allow for an extra day of camping and riding.

    So we ride to Omak where we’ll spend the night and get our gear ready for the final section of the Washington Backcountry Discovery Route, Section 6.

    Day 3: Section 6 of the Washington Backcountry Discovery Route

    Three Off Road Dual Sport Riders near Conconully Washington
    We stop on Section 6 near Conconully, to fix our gear and have a little fun.

    My brother and his wife are riding his KLR today. Since we will not be camping, he doesn’t need to bring the Toyota.  In the future, he’ll purchase panniers so he can camp off his motorcycle too.

    We eat breakfast and fuel up.  Then start the ride around 9:30. We don’t need our GPS or maps today as my brother has covered practically every road in the mountains surrounding the Omak area. He knows today’s route forward and backward.  I mean he knows where the dips are and where the mud pits are. If anyone needs a guide to ride in the Okanogan Valley, he’s your guy.

    We ride up to Conconully to the start of Section 6. It’s getting cold, and we all stop to zip up the vents on our clothing and add any layers for the cooler temps.  Then we keep going. Soon we reach the top of Lone Frank Pass, elevation 6,667 feet. It’s a bit windy up here, but there are beautiful views of the mountains and fire-damaged forests below. 

    Lone Frank Pass Forest Roads for Off Road WABDR route
    Looking down the road at Lone Frank Pass.

    Skull and Crossbones Road

    Continuing on we soon reach the turn off for the Skull and Crossbones road.  It sounds ominous, but it’s not so bad. We stop at the Skull and Crossbones cabin, which collapsed during the previous winter, it is still a nice stop for a photo opp.  Then we continue our journey. Not too far after the Skull and Crossbones cabin, my brother tells us that we will ride through a mud pit.

    The bikes got a bit squirrely riding through this slick section of the road, and after I make it through safely, I say “wow, why does it smell like manure?”  My brother then lets us know that the “mud” isn’t just mud… We were all grateful none of us took a plunge in the “mud.”

    Skull and Crossbone Cabin on WABDR
    What’s left of the Skull and Crossbones Cabin.

    The Final Stretch

    The Skull and Crossbones Road eventually connects to a little bit of pavement before returning to a gravel road.  My brother takes us on a slight detour to see the local “Christmas tree” near Tiffany Springs. We look at the “ornaments” before returning to our route. 

    We come up behind a herd of cows running down the road in front of us.  Although I am not afraid of a cow, I do know they are still animals, and with that comes some unpredictability.  My brother coaches me to pick one side of the road and continue at a steady pace. He said I would be “herding the cows,” and they will move to one side.  He was right, as I stayed to the right, they moved to the left and allowed me to pass safely.

    Soon we can see the town of Loomis below us as well as part of Palmer Lake. It is a fun and easy ride back down to the pavement. 

    Palmer Lake from above
    A view of Palmer Lake.

    After returning to the paved roads below, we make a left and continue our ride around the beautiful Palmer Lake. There are a lot of neighborhood deer in the Palmer Lake area, so watch out if you ride that section.  It’s a short ride around the lake, and soon we are pulling into the old mining town of Nighthawk. We stop to take a few pictures on the town bridge. 

    The river in the town of Nighthawk Washington
    Looking over the river in the town of Nighthawk.

    We continue down the road before making a left turn for the Canadian border crossing and also the end of Section 6 and the Washington Backcountry Discovery Route. We take a snack break before driving down into the town of Oroville and ultimately making our way back to Omak for the night. It is the end of one journey, but there are many more to come.

    Canadian border with dual sport motorcyclist
    The Nighthawk Washington/Canadian border and the end of the WABDR.

    Setting Realistic Expectations

    I overestimated how simple the ride would be and underestimated the time it would take to complete each section.  I imagined we’d roll into camp late afternoon, relax,  chat about the day’s ride, eat dinner and get a good night’s rest. And I was so wrong. I should have assumed it would take us longer, that it would be harder and that we would be far more tired each day than I could have imagined.

    My assumptions about the ride and us as riders were faulty. I made mistakes. However, I’ve learned from them.  I am a more experienced rider now than I was before we started riding the WABDR. I will plan better for trips like this in the future.  And I will set better expectations and better communicate to my group the miles for each day and what time I’d like to leave each morning, etc.  

    That said, we have a great time!  We had laughs, we got dirty, and we saw beautiful scenery–we had an adventure! The best way to turn a misadventure into an adventure is your attitude.  Always keep a positive attitude, and you’ll always have adventures.

    Lessons Learned On the Washington Backcountry Discovery Route

    If you are new to off-road motorcycle riding or riding an adventure motorcycle off-road, then give yourself extra time.  Extra time to rest, recover and to enjoy the trip and the scenery. Riding is about the journey, not the destination.

    • Assume the ride will take longer. 
    • Set the time you want to leave by each morning and do your best to stick to it.
    • Review the map and route the morning of the ride.
    • Allow extra time for fun, relaxing, and resting.
    • Prepare physically for the ride, months in advance, if possible.
    • Add an extra day or two for detours, emergencies, and other setbacks.
    • When it stops being fun, take a break, and camp for the night if needed. Then start fresh in the morning.
    • Take more photos.  Get a helmet cam. Document the experience.  Most people who don’t ride won’t understand what you mean when you say a “steep rocky descent.” Or when you say “big ruts” or “a huge puddle.”
    • Drink more water along the way.
    This trip has been a fun learning experience. I am a more experienced rider now and I faced my fears and pushed myself further than I thought I could.  I don’t regret the rough stuff, and I am proud of myself for what I accomplished and look forward to completing the Washington Backcountry Discovery Route in its entirety one day soon.
     
    My motto: Find your limit and then push past it just a little. Repeat for life.

    More Info on the Washington Backcountry Discovery Route

    If you want to learn more about the WABDR, you can stream the official Washington Backcountry Discovery Route video on Amazon.com.

    Touratech USA has YouTube videos on each section of the WABDR for free. And you can also purchase the map of the WA Backcountry Discovery Route online from Touratech USA.

    In addition to Washington’s Backcountry Discovery Route, there are nine other states with completed backcountry routes and more in development.  So make sure to check out all the available routes and see if there is one near you.

    Let the adventure begin!

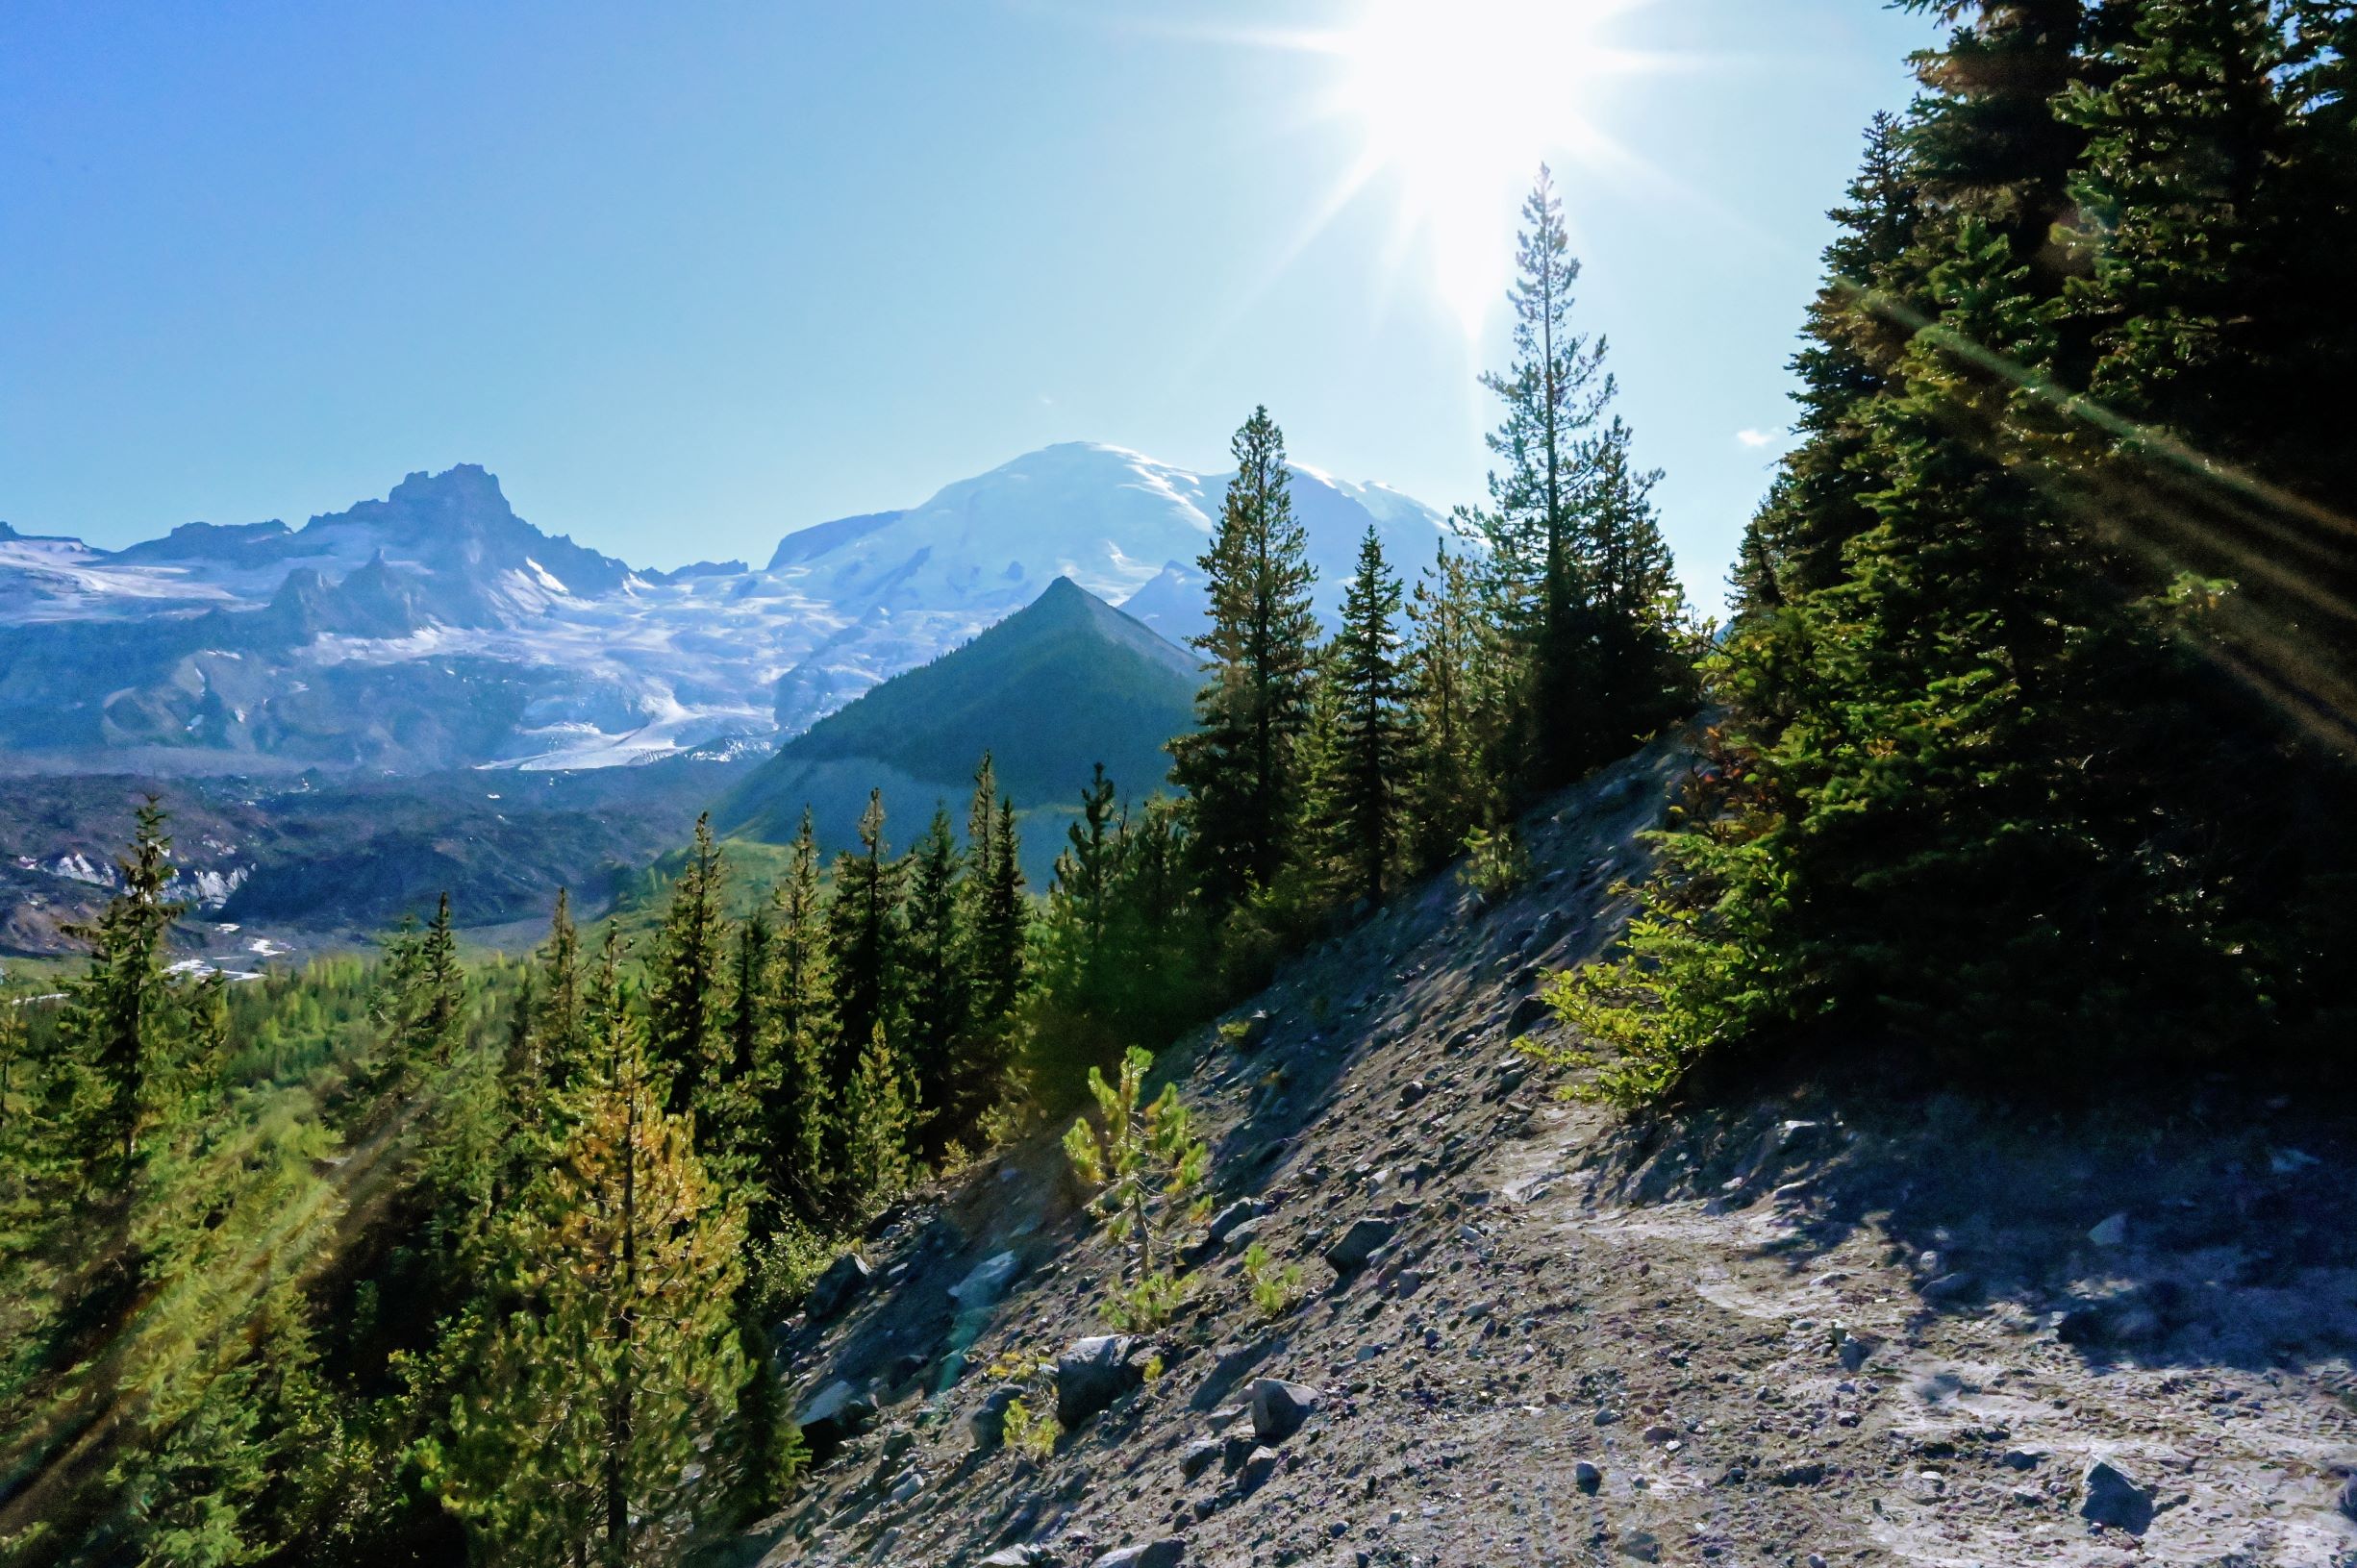
  • Scenic Camping and Hiking at White River Campground

    White River Campground is a first-come-first-served campground near the Sunrise Visitor Center in Mount Rainier National Park. Many visitors overlook the beauty found in this eastern section of the park for the more popular area around Paradise. However, if you don’t take time to explore the area surrounding Sunrise and White River Campground, you will be missing out!

    During the summer Cougar Rock Campground and Ohanepecosh Campground fill up due to their online reservation system. Whenever this has been the case, I have always been able to find a site at White River Campground. I think it helps that it has no online reservation system and is strictly a first-come-first-serve system.

    While camping at White River Campground, you can hike from the campground to see the largest glacier in the lower 48 States. Fall asleep to the sound of the roaring river. And wake up to the most beautiful views of Mount Rainier. Visit Sunrise Visitor Center, the highest point in the park you can drive to.  You do not want to miss the fantastic views and hiking trails here!

    Getting to White River Campground

    Drive east on WA Highway 410. It is approximately 1 hour from Enumclaw to White River Campground. Follow Chinook Pass Highway/Highway 410 until you see the road fork to the right for Sunrise Rd/White River Rd. You will turn right here and follow the road to the entrance station for Mount Rainier National Park. Pay the Mt Rainier National Park entrance fee and continue for another 5 miles before making a left at the entrance sign for White River Campground.

    Finding a Campsite

    Follow the road into the campground, and you will pass the pay station parking on your right. I recommend you stop here and pick up the pay envelope that you need to complete your campsite reservation. Then continue driving thru Loop A, B, C, and D to find an available spot. 

    Tip: Loop A, C and D all have restrooms with flushing toilets and sinks. Loop B has a pit toilet supplied with hand sanitizer.

    Once you have found the campsite you want, fill out the envelope with the necessary information, then tear off the tab and attach to your site number to reserve the spot while you go pay. You will take your envelope with payment (cash or check) and submit it at the pay station, by dropping it in the pay slot. A ranger will come by later in the day to add a tab to your campsite number showing the date you have reserved your spot thru. 

    Things to Do at White River Campground

    There are lots of things to do at White River Campground and one of them is the hike to see the Emmons Moraine Glacier.  Mount Rainier is home to many different glaciers, but this one is the largest. In fact, it is the largest glacier in the lower 48 states! Pretty impressive, huh?

    Getting to the Trailhead

    You will find the trailhead for the Glacier Basin Trail in Loop D. Your hike to Emmons Moraine starts here. This easy hike is about 3 miles total out and back. It has a steady uphill climb, but it never gets very steep. The 6 year old in our group practically ran the whole way there and back. It takes 1-2 hours total to complete the hike. 

    Glacier Basin Trail to Emmons Moraine Trail

    Follow the Glacier Basin Trail as it winds its way thru the beautiful wooded forest with views of White River below. You will pass small streams and waterfalls forging paths down the mountainside. After about 1 mile the Emmons Moraine trail will split from the Glacier Basin Trail and you will make a left to continue to the viewpoint for the glacier. 

    log bridge crossing White River
    Hiker crossing the log bridge that takes you to the viewpoint for Emmons Moraine.

    Continuing on the Emmons Moraine Trail

    As you turn left  you will walk down to the river and cross a log bridge before climbing back up the hillside where you are rewarded with spectacular views of the Emmons Moraine Glacier. You will also have beautiful views of the turquoise lake created by the glacier run off and glacial silt. It is quite the stunning view. Feel free to wander further up the trail for closer views of the glacier before turning around to make the hike back to camp.
    Hiker looking down at the glacial ponds formed from Emmons Moraine Glacier
    The glacial pond formed from Emmons Moraine.

    Optional Side Hikes from Emmons Moraine Trail

    If you prefer to do a longer hike, you can always take the trail down to the glacial lake (although it’s a bit of a scramble, so proceed with caution) or you can return to the junction for the Glacier Basin Trail and hike to Glacier Basin Camp which is another 2.2 miles from the junction. This adds a total of 4.4 miles to the Emmons Moraine hike, making it about a 7.5 mile hike by the time you return to camp.

    Additional Hikes and Things to Do at White River Campground

    If you want additional hikes to do from White River Campground, you can hike a portion of the Wonderland Trail starting at  Loop C near the old patrol cabin. This trail will take you up to Sunrise. It is about a 3-mile hike from White River Campground to Sunrise Visitor Center.

    From the day-use parking lot, you can follow a trail down to the river. Kids and adults alike will enjoy looking for unique rocks and perhaps tossing one or two into the river for fun. It is also a great place to spot views of Rainier and the Emmons Moraine glacier.

    In the summer the rangers will often lead evening talks at the community campfire just off the main road in the park (the road that goes by the different loops). You will find the bulletin board here too, which should list any upcoming programs.

    “And into the forest I go, to lose my mind and find my soul.” ~John Muir

    Visit Sunrise Visitor Center

    Don’t miss a visit to Sunrise Visitor Center while staying at White River Campground. The visitor center is another 11 miles up the road from the campground. Follow the road out of the campground and make a left at the junction to get back on Sunrise Rd. Continue to the top where you will find the Sunrise Visitor Center Complex and parking. 

    There are so many beautiful hikes to do here. There are easy nature hikes that will only take an hour or less to longer multi-hour hikes. Stop by the ranger station and ask them for some recommended trails based on your preferences. Some easier ones I recommend are the: Sourdough Ridge Nature Trail, Shadow Lake, and the Sunrise Rim loop.

    Tips for Camping at White River Campground

    • There is no electricity in the restrooms. So bring a flashlight or LED lantern for those nighttime trips to the bathroom.
    • There is also no soap in the restrooms, so make sure to pack some from home.
    • White River Campground is at a much higher elevation, which means it can get a lot colder here at night, so pack layers and extra blankets.
    • The campground host drives thru the campground loops each night selling firewood. Make sure to have cash. As of 2019, it was $7/bundle.

    If you haven’t had a chance to check out this Eastern section of Mount Rainier, don’t miss it!  You will be amazed by the beauty you find here.  And if you want another stunning hike only a 25-minute drive from the campground, you will find the Naches Peak Loop Trail. I highly recommend it!

    Happy Camping & Happy Trails!

  • 13 Fun Things to do at Kalaloch Campground

    If you are looking for a campground close to Seattle, look no further than Kalaloch Campground.  This campground is sure to become your family’s favorite getaway destination.  Long weekend? Summer vacation?  Head to Kalaloch Campground. It is the perfect Northwest getaway.  

    You’ve got miles of sandy beaches, piles of driftwood for building forts, tide pools for exploring the sea life, whale watching (depending on the time of year) and so much more!  And who doesn’t love waking up to the sound of the ocean? Keep reading as I share my favorite things to do when camping at Kalaloch Campground and why I keep returning year after year.

    1) Explore the Tide Pools

    This is one of my favorite things to do, even now as an adult.  I didn’t grow up near the ocean, so when I moved to Seattle at age 18, I had my first experience exploring tide pools.  The ocean fascinates me.  It is a beautiful “world” that we have barely explored. I know kids and adults alike will get excited seeing the sea anemones, colorful starfish, and barnacles in the many tide pools found at Kalaloch. You’ll see tiny crabs crawling out from under rocks, and you might even see the occasional sea otter foraging for food by the tide pools!

    2) Make Sandcastles on the Beach

    Okay, what’s a trip to the beach without time spent building sandcastles? I happen to believe that no trip to the beach is a success unless your suitcase comes home with a little sand in it.

    3) Visit the Tree of Life at Kalaloch Campground

    The Tree of Life is one of the unique treasures found at Kalaloch Campground. It is a beautiful tree suspended above the ground with its roots growing down below.  I’m not sure how long it can continue to hang on against the eroding soil around it, but while it is here, you definitely need to check it out!

    Tree of Life at Kalaloch Campground

    4) Watch the Sunset on the Beach

    Sunsets on the beach are beautiful at Kalaloch Campground. You have a vast sandy beach that reflects the light of the setting sun and casts orange and red light across the crashing waves.  I love watching the sunset over the ocean.  Whether I am here or in Maui, I’m a sucker for a good sunset!

    Oh, and in case you’re wondering, sunrises on the beach at Kalaloch are also spectacular! Cotton candy pinks mixed with baby blues reflected off the sand while the sunlight shimmers on the water. You feel the ocean breeze blowing in your face, and the glow of the sun warms you.  Yep, sunrises here are pretty great too!boy walking on beach at sunset

    5) Hiking at Kalaloch Campground

    The Kalaloch Creek Nature Trail connects to Kalaloch Campground. It is a short walk thru the beautiful wooded area surrounding the campground. The hike is less than a mile and is accessed from the campground’s Loop A.  Follow signs and be very careful when crossing Highway 101.

    The rangers also offer guided hikes depending on the time of year you go.  So definitely check in with them to see what is happening while you’re there.  I think it is fun for adults and kids alike to go on a guided walk with a ranger who knows the area. You learn fun facts and interesting information about the local habitat.

    6) Fly Kites on the Beach

    Plan ahead and pack your kite!  Now sing along with me: “let’s go fly a kite, up to the highest heights…”  Okay, if you haven’t seen the original Mary Poppins, stop reading now, watch it and then come back and finish reading this post.  Flying kites is such a fun family activity, and the beach in front of Kalaloch Campground is perfect for this at low tide. You will have a huge sandy beach to fly your kites to your heart’s content!

    flying a kite on the beach at Kalaloch

    7) Go Stargazing

    One benefit of taking a family vacation away from the city is viewing the stars at night. Away from light pollution, you begin to see the vast sea of stars above you.  Grab a blanket and some hot cocoa and find an open spot to admire these twinkling lights. We have made trips to Kalaloch just for this purpose. 

    My husband loves stargazing, so we bring a small telescope, along with our cameras and tripods and practice our astrophotography. You can stargaze at the Kalaloch Campground day-use parking lot, or if it’s low tide, then the beach makes a great place to bring your thermos of cocoa and blankets.  Just don’t forget your flashlights!

    8) Build a Fort on the Beach from Driftwood

    There is so much driftwood on the beaches surrounding Kalaloch campground, and with some teamwork and ingenuity, perhaps you will build yourself a fort that is discussed inside family circles for years to come! Come on, think big!

    9) Watch Whales Migrating

    Depending on the time of year you can watch grey whales migrating from the beach in front of Kalaloch Campground.  It is so much fun to watch them breach and see water shoot up from their blowholes.  Bring some binoculars so you can enjoy them close up. Typically the months of May, October, and November are the best months to watch grey whales at Kalaloch. However, believe it or not, we got to see them once during a camping trip at the end of August!  So you never know!

    10) Build a Bonfire on the Beach

    Who doesn’t love a good bonfire on the beach? This is the only time you can use driftwood for your fires.  You are not allowed to bring driftwood off the beach to use for your campfire, but you can use it on the beach. So bring your marshmallows and supplies for s’mores and enjoy a bonfire on the beach. Check with the rangers at Kalaloch Campground earlier in the day to make sure there are no fire restrictions during your stay.

    And of course, practice safety and make sure to extinguish your fire before leaving.  Be careful to cover all the hot coals with sand so that no one accidentally steps on them, during their nightly stroll on the beach.

    11) Wake up to Sunlight Streaming thru the Trees

    This is one of the joys of camping. Waking up to the sounds of birds, the smell of fresh air and sunlight streaming in thru the trees.  It says, “it’s going to be a great day!” Everyone starts stirring around; you grab a cup of coffee as you get the fire going for breakfast; it is a magical time in the stillness of the morning.

    Sunlight thru trees at Kalaloch Campground

    12) Biking Around Kalaloch Campground

    If you have the room to bring bikes, this is something fun that kids will enjoy.  Biking around Kalaloch campground.  It is something I see no matter where I go camping.  Kids off on their own adventure just cycling around the campgrounds with the carefree hearts that camping brings. They have huge smiles on their faces, and they are usually laughing and talking with each other.  I have even witnessed young kids who are just learning to ride their bikes for the first time.  It is fun for both them and their parents.

    13) Hanging out at the Campsite

    One of the things kids love to do is hang out at their campsite and explore the area surrounding it. Climbing trees, playing hide-and-seek and of course playing in the tents. I love watching their happy faces as they enjoy being outdoors. It makes the work involved in planning a camping trip all worth it!

    girl exploring area by campsite at Kalaloch Campground

    Important Information for Camping at Kalaloch Campground

    Make reservations in advance! This is a favorite campground for people who live in the Seattle area, and it fills up quick during the summer months. So plan ahead and reserve your campsite months in advance, if possible.  I booked our campsite in May, for an August visit.  The reservation period is from May to September, and you can reserve your spot online during this time frame. During the off-season, they don’t accept reservations. During this time, campsites are assigned on a first-come-first-served basis.

    You can purchase firewood at Kalaloch Lodge which is about a 1/2 mile from Kalaloch Campground. They also have a small store where you can buy snacks, drinks, and miscellaneous supplies you may have forgotten to pack.

    Always check the tide charts posted at the campground when making plans for your daily activities.  You never want to get caught on the beach during high tide.  Besides the strong currents, there are lots of large trees and driftwood that could easily knock a person out if you were to be hit by one.  So know when low tide and high tide are and stay safe!

    Getting to Kalaloch Campground

    Kalaloch Campground is located off Highway 101 about  34 miles from the town of Forks, Washington. It is around 3-4 hours drive time from Seattle. Depending on where you’re coming from you will either head north thru Bremerton and over to Highway 101 or south thru Olympia, cutting over to Highway 101.  I find driving south past Olympia and then cutting over to Highway 101 around Montesano is the quickest way for me.

    Kalaloch Lodge Address is: 157151 US-101, Forks, WA 98331 (Kalaloch campground is about a half-mile north from the lodge.)

    Conclusion

    No matter what you decide to do when visiting Kalaloch Campground, there is a lot to occupy your time and so many fun ways to create wonderful memories with your family. If you need more ideas for things to do near Kalaloch Campground check out these awesome beaches near Kalaloch.

    Happy Camping!