author.travelffeine.com

Category: Utah

  • Hiking The Narrows in Spring at Zion National Park

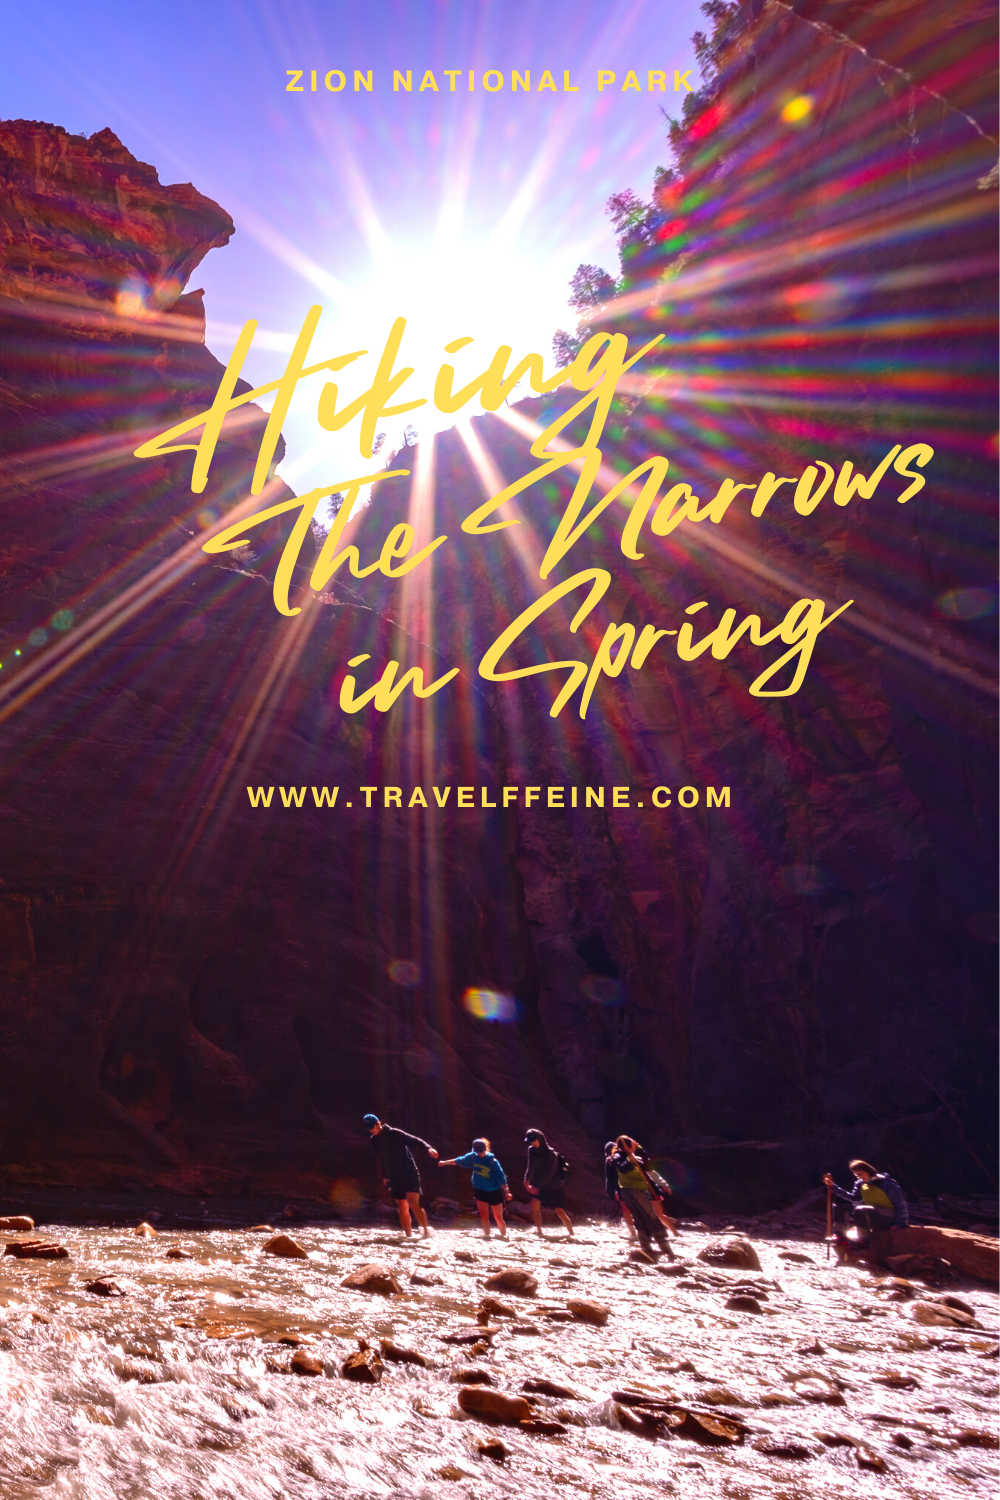
    Hiking The Narrows at Zion National Park is an experience you’ll never forget! The same could be said about hiking Angels Landing, but that’s for other heart-pounding reasons. The Narrows is the poster child for the saying, “it’s not the destination, it’s the journey.” 

    It isn’t just another trail to a beautiful vista or natural monument. It’s more about wandering up a river than reaching any particular destination. That’s part of its beauty. That and you’re hiking up the Virgin River the entire time! It’s guaranteed to be something you and your family talk about for years to come.

    The Narrows Bottom Up Day Hike

    This article is about hiking The Narrows from the Temple of Sinawava (also referred to as the bottom-up hike).  You can do a longer 16-mile-through hike, but it requires a permit.  The day hike in this post does not require a wilderness permit.

    Shuttle System

    Zion National Park operates on the shuttle system for most of the year. Starting in March, you are not permitted to drive your vehicle along the Zion Canyon Scenic Drive. Instead, you take a shuttle on a first-come, first-served basis. 

    For a while, you needed to reserve your time slot. Currently, Zion eliminated the need to purchase and reserve a shuttle ticket in advance. It is free but get there early. Check the park’s shuttle schedule for current hours of operation. Try to get to the park as early as possible to avoid the crowds.

    You also want to pay attention to the last shuttle, so you don’t miss it. If you miss the last shuttle of the day, you’ll have to walk back to your car. Depending on where you are in the park, that could be a long walk. So don’t miss it!

    Parking

    There is parking at the Visitor Center, but it fills up quickly! Usually, by 10 a.m., it is full. That is another reason for getting to Zion early and catching the first shuttle. If you can’t find parking at the Visitor Center, you can look for paid parking in the town of Springdale. The Springdale Shuttle takes visitors to the Zion National Park Visitor Center, and you can then catch a Zion National Park shuttle from there.

    Getting to the Trailhead

    To hike The Narrows, you want to take Zion’s shuttle to the last stop and get off at the Temple of Sinawava stop.  There is a restroom here, and the trail begins along the Zion Riverside Walk paved trail.

    The Narrows at Zion National Park

    About The Narrows Hike

    Trail Length: 5.0-10.0 miles (roundtrip)
    It depends on how far you decide to hike. The area referred to as “Wall Street” is about a 5.0-mile round trip hike. Hiking to Big Spring is 10 miles round trip. You can, of course, only hike in 1-2 miles and turn around. It’s up to you!

    Approx. Hiking Time: 4-8 hours
    Again, it will depend on how far you want to hike up the river and how many photo stops and snack breaks you take.

    Elevation Gain: No significant elevation gain.
    You’re walking up a canyon river bed with only slight increases in elevation. The first mile of the hike is along the paved Riverside Walk. The rest of the time, you are hiking up a rocky riverbed.

    Trail Difficulty Rating: Moderate to Strenuous
    The unique location of this hike makes it more difficult. You hike through a river, upstream, over slippery rocks, around boulders, and sometimes in waist-deep water. Depending on water levels, the current pulls at you more strongly too. All these factors combined make this a more challenging hike. That said, I saw families doing this. Just take your time and help each other out.

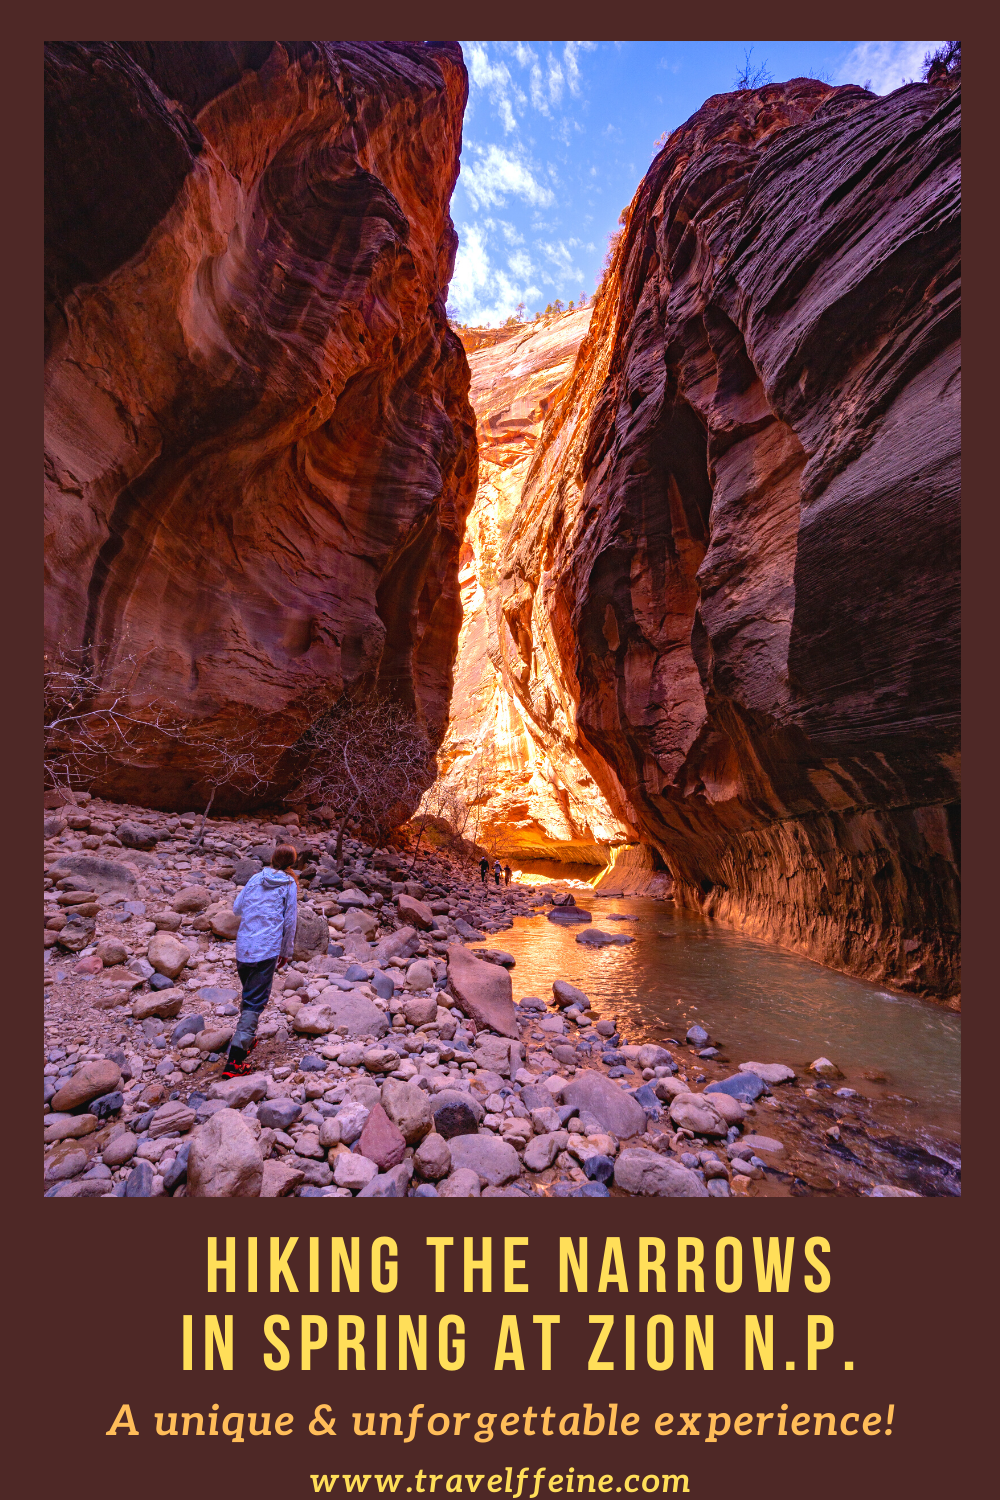
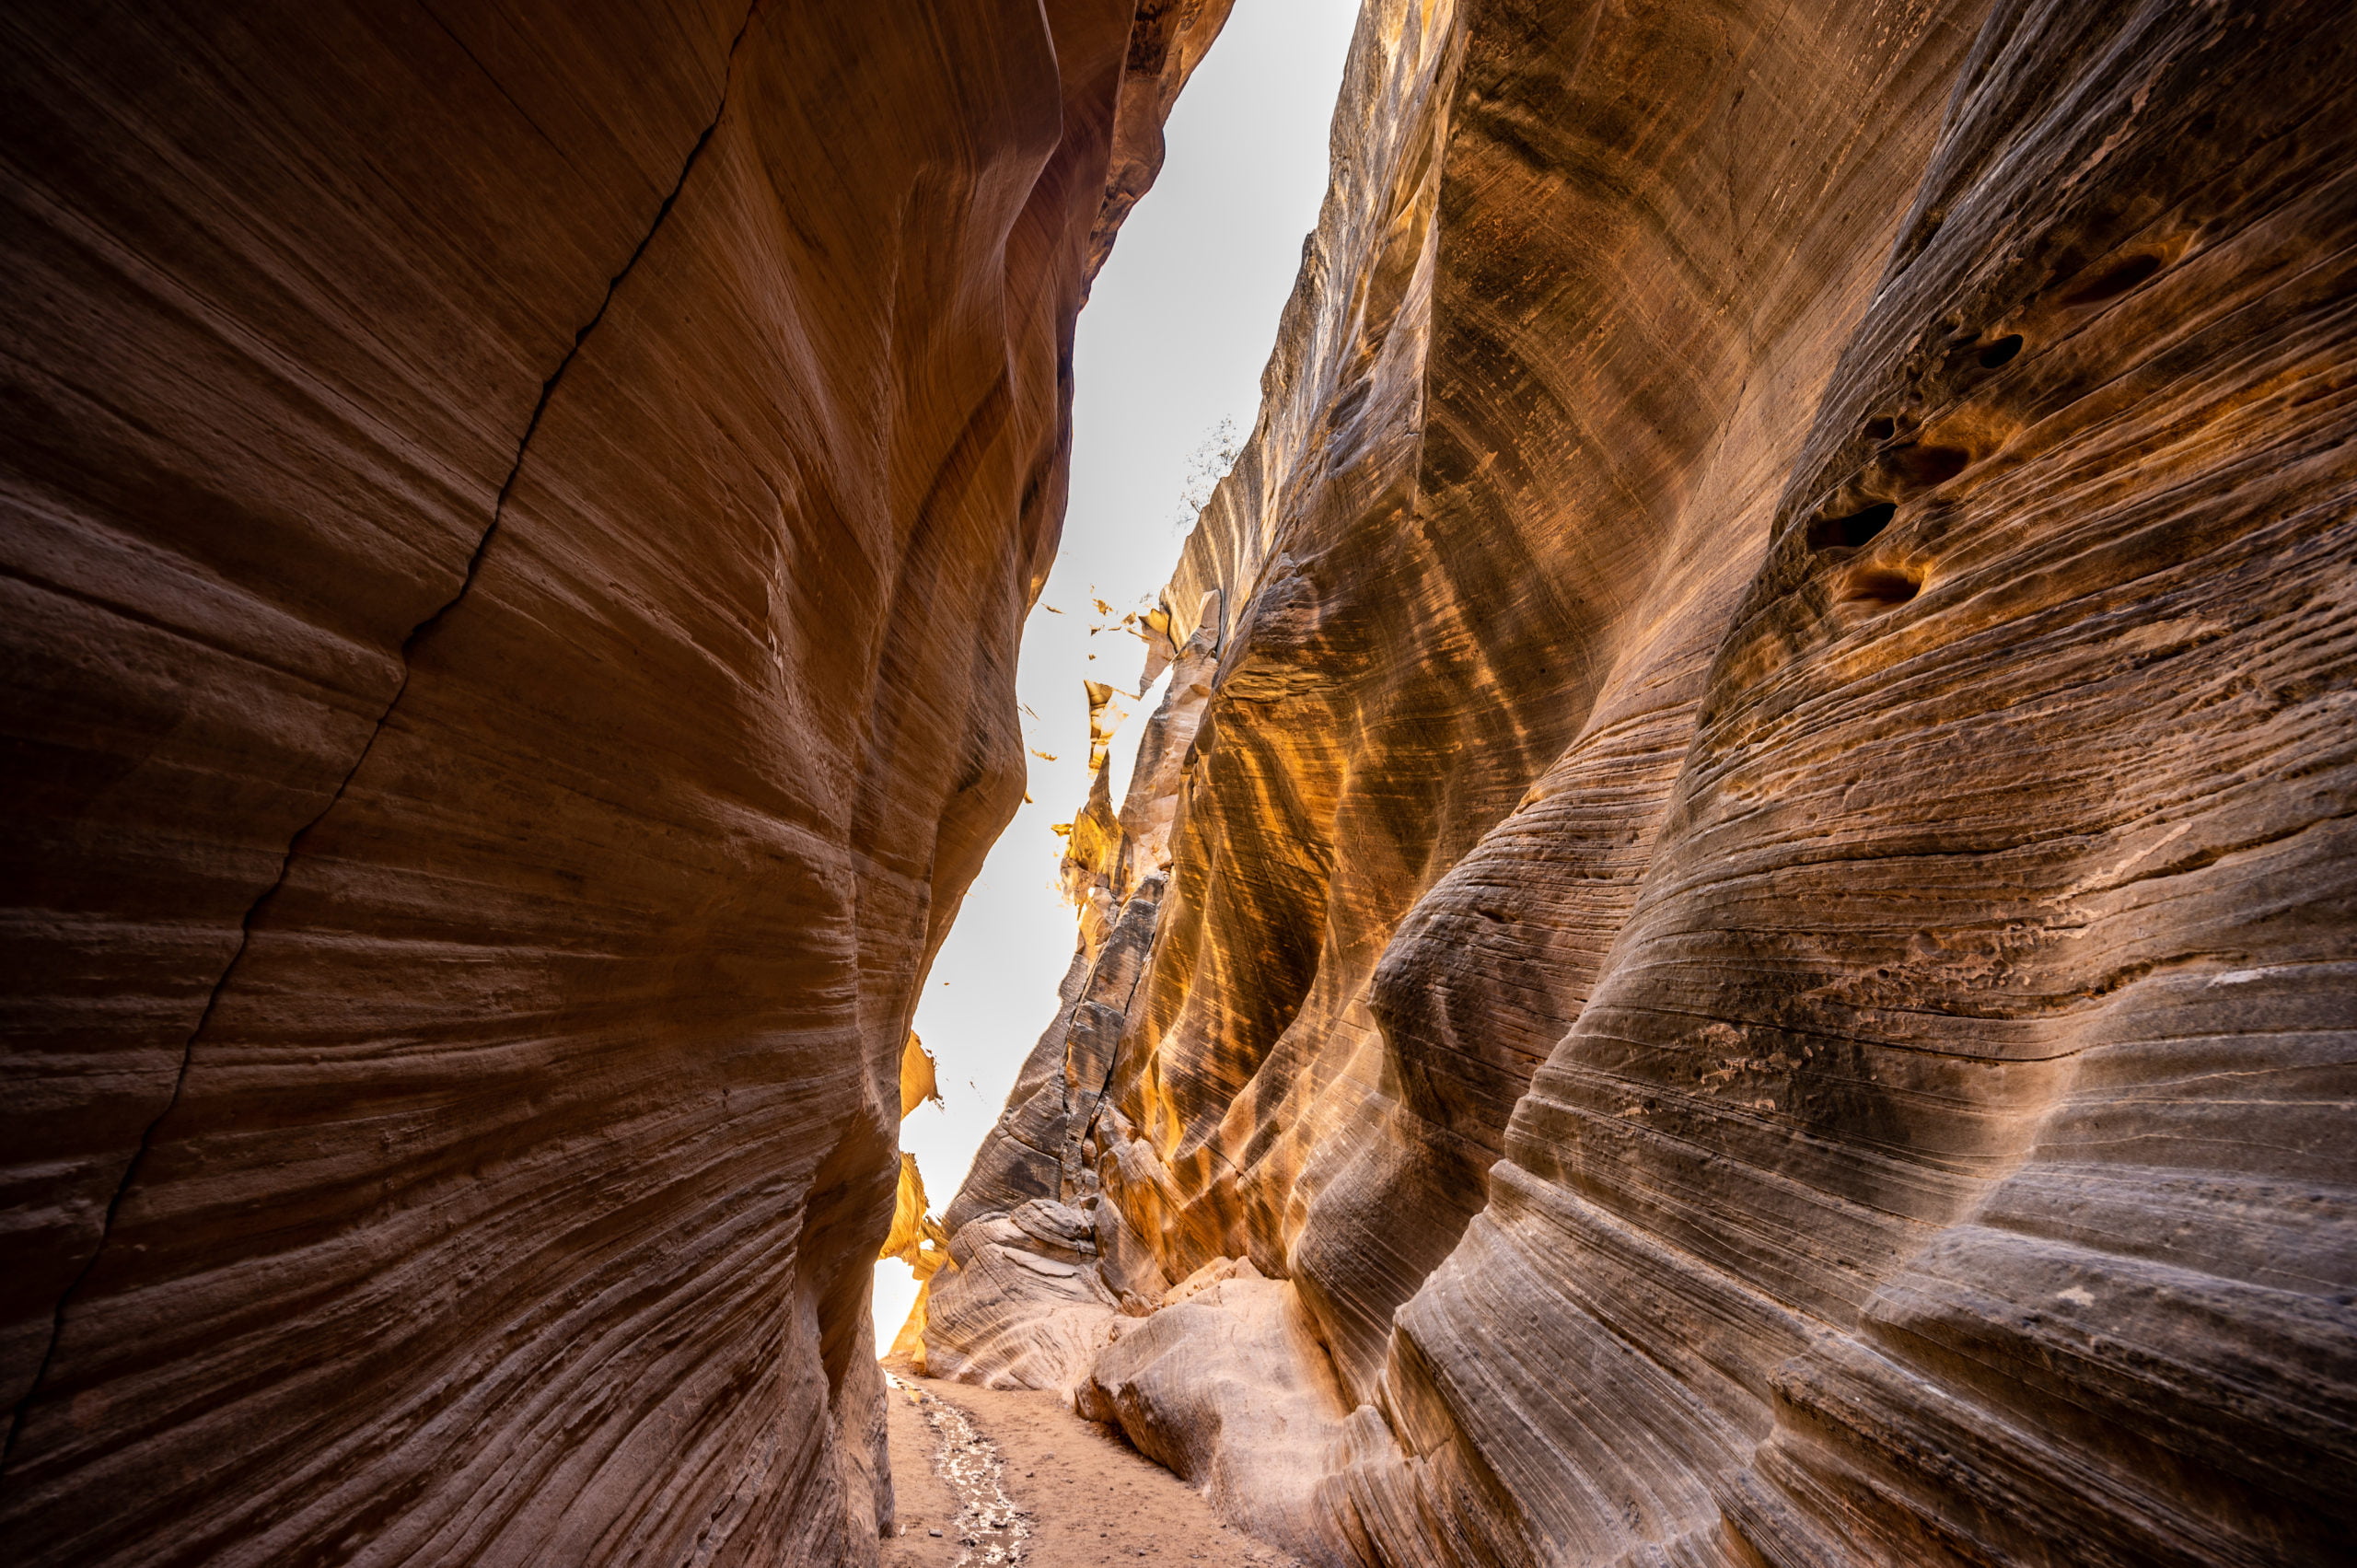
    Features: A unique hike up the Virgin River through the narrowest part of Zion Canyon. Gorgeous red canyon walls, waterfalls, and beautiful displays of light as the sun reflects off the canyon walls.

    Restroom Facilities: The only restrooms are at the Temple of Sinawava shuttle stop. There are no other restrooms along the hike, and all solid waste must be packed out.

    Riverside Walk at Zion Narrows Bundled Up

    What To Bring

    Water.  Do not take this hike or any hike without water. The river water is unsafe to drink, and although it typically is cooler in the canyon, it still gets hot in the summer. Make sure to bring plenty of water for everyone in your group.

    Trekking Poles.  A hiking pole or two helps navigate the slippery riverbed. It is also helpful for checking water depths.

    Sunscreen.  You may be surprised by how much sunlight filters down to you and reflects off the water.

    Snacks/Lunch. I highly recommend you pack a lunch, but make sure to bring snacks and drinks at a minimum.  It may depend on what time of day you start your hike whether or not you want to bring lunch. We had a morning shuttle time and hiked this early, eating lunch deep inside the canyon. We also had snacks, and we were thankful for all of it. You work up an appetite hiking up a river!

    Waterproof Gear. This isn’t a requirement, but I highly recommend it if you’re hiking in the spring or winter. Cameras or electronic gear you want to bring will be best kept in a waterproof backpack. A waterproof bag is also good for sandwiches and snacks.

    Close-toed shoes: Rent waterproof shoes at one of the outfitters outside Zion (see a list below under Tips) or wear tennis shoes or hiking boots. You are bound to stub your toe on a rock below the surface. Flipflops are a big no-no.

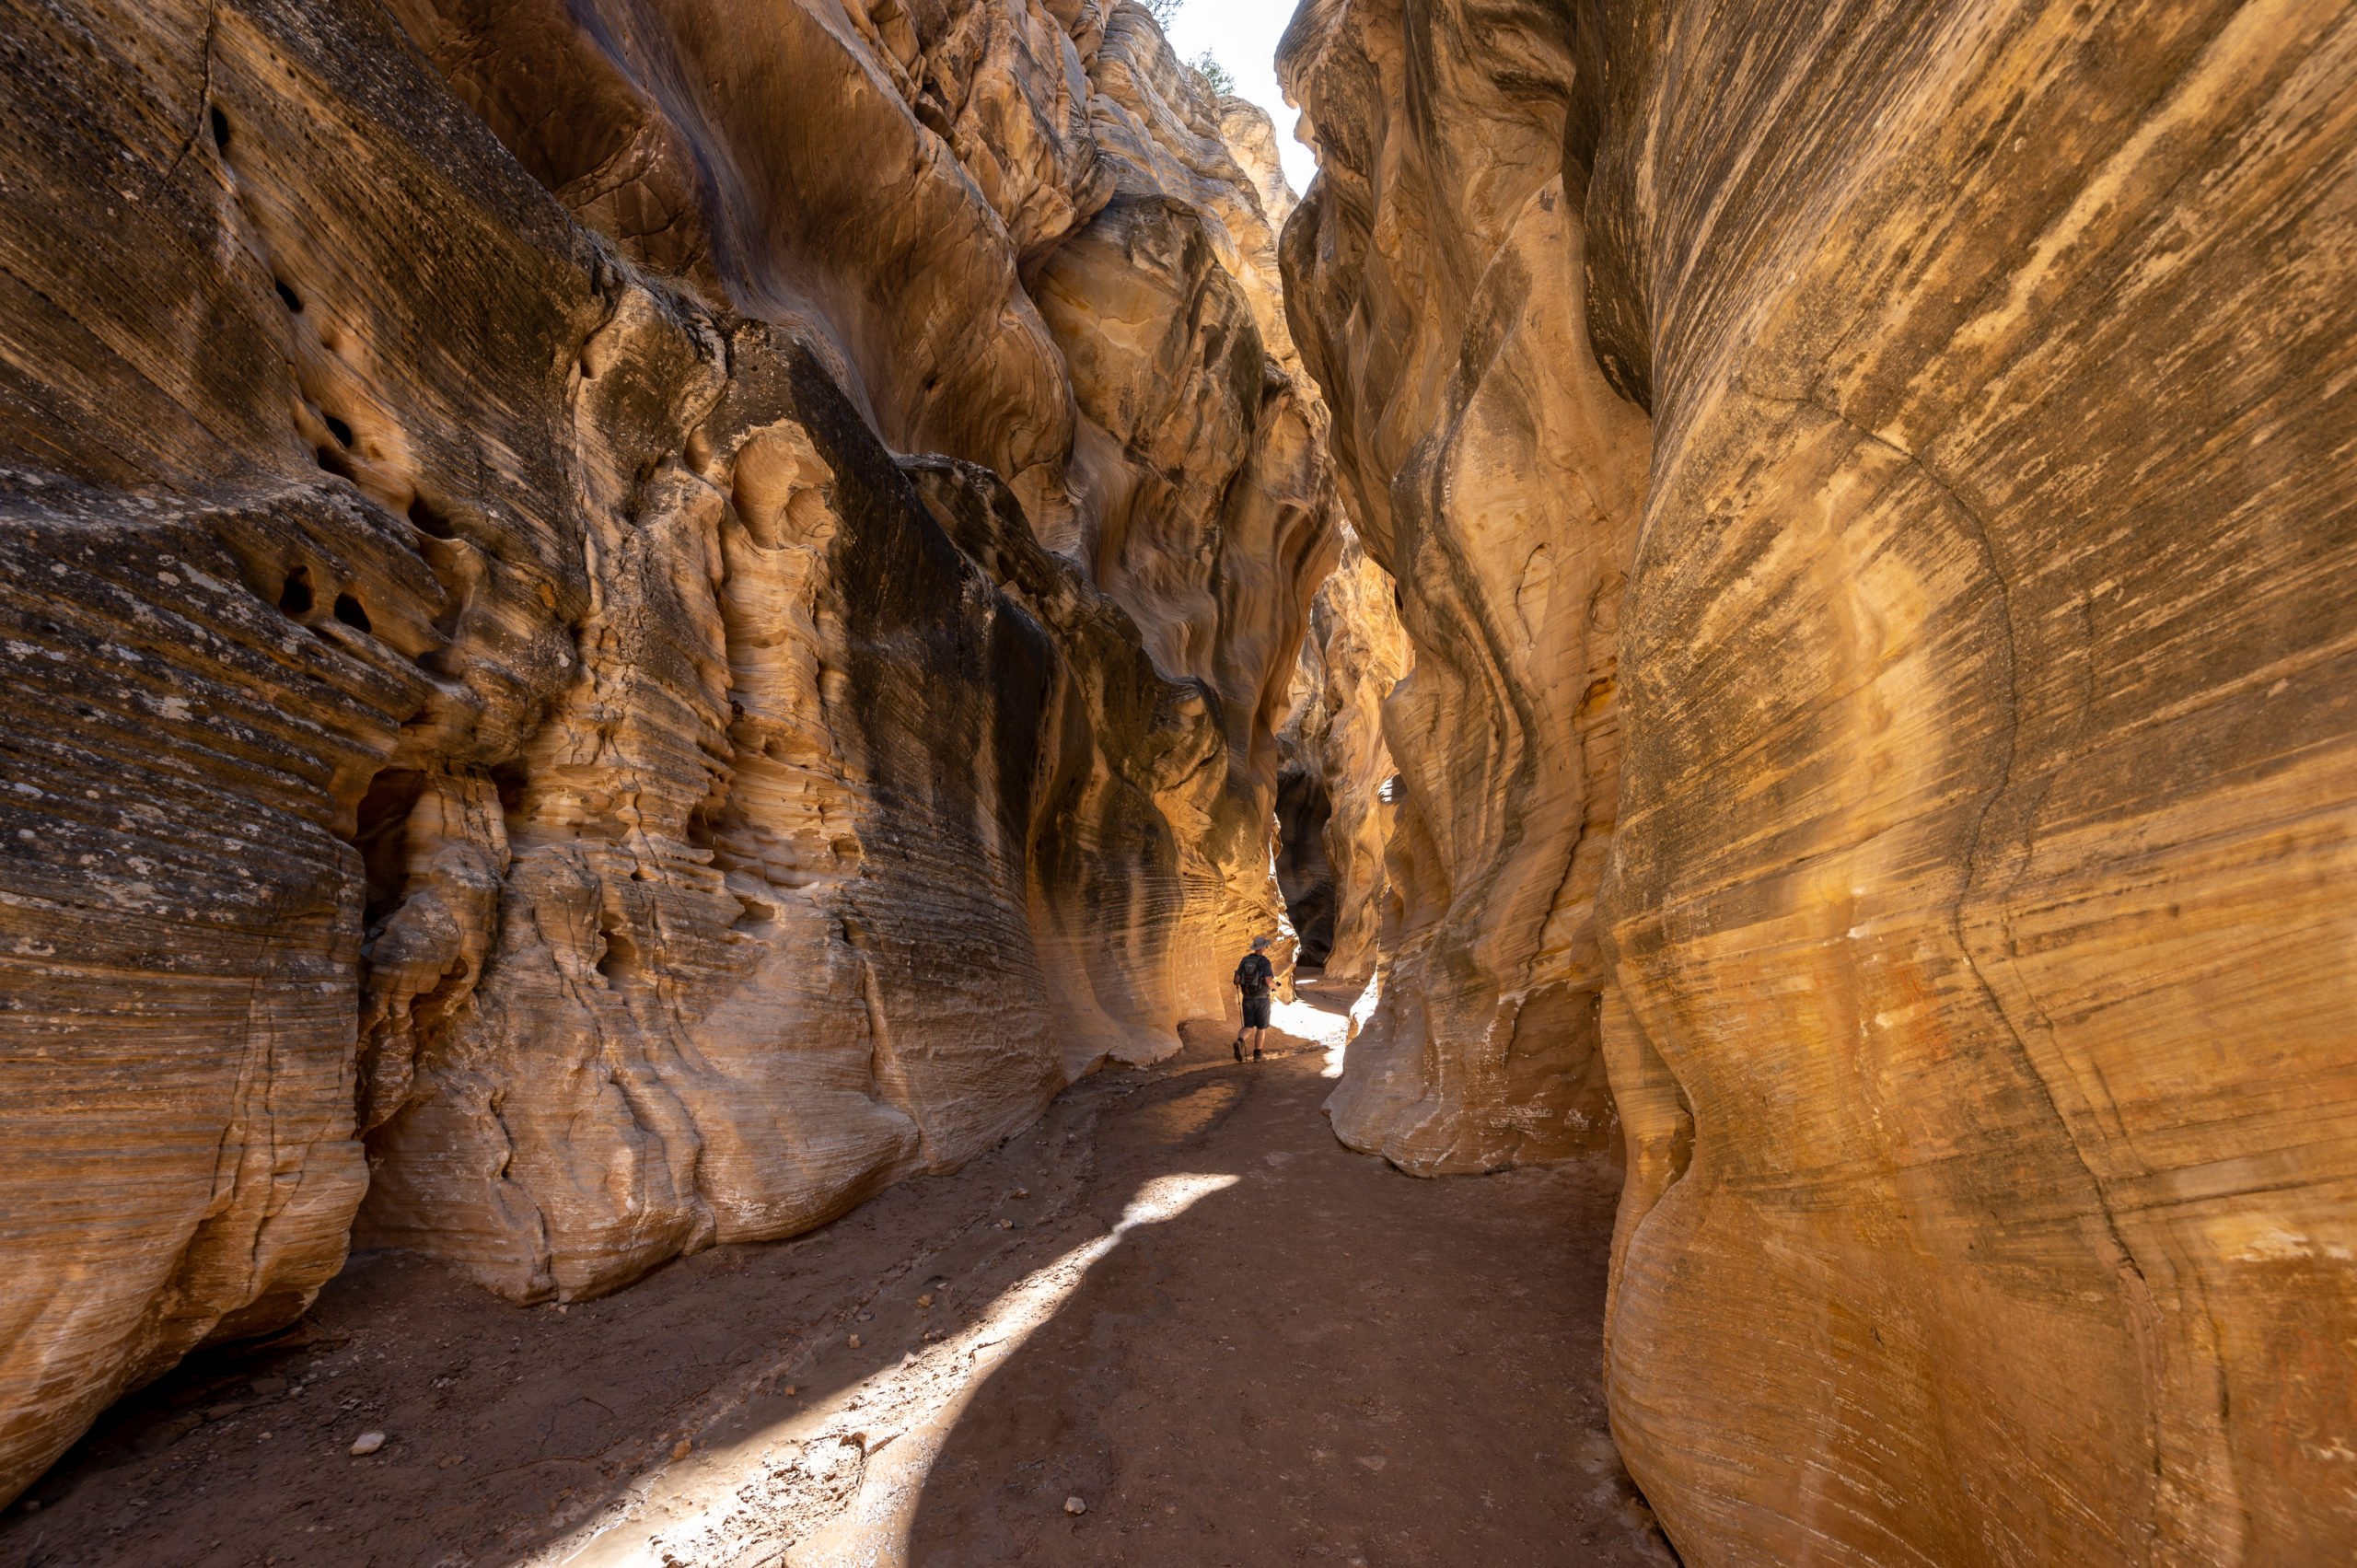
    Layers. Wear layers of clothing. It might be cold in the morning but hot by the afternoon. Additionally, the narrower sections of the slot canyon are shaded and cool. So although it can be over 100 degrees out in the sun, it is significantly colder in the river in the shade.

    Important Information

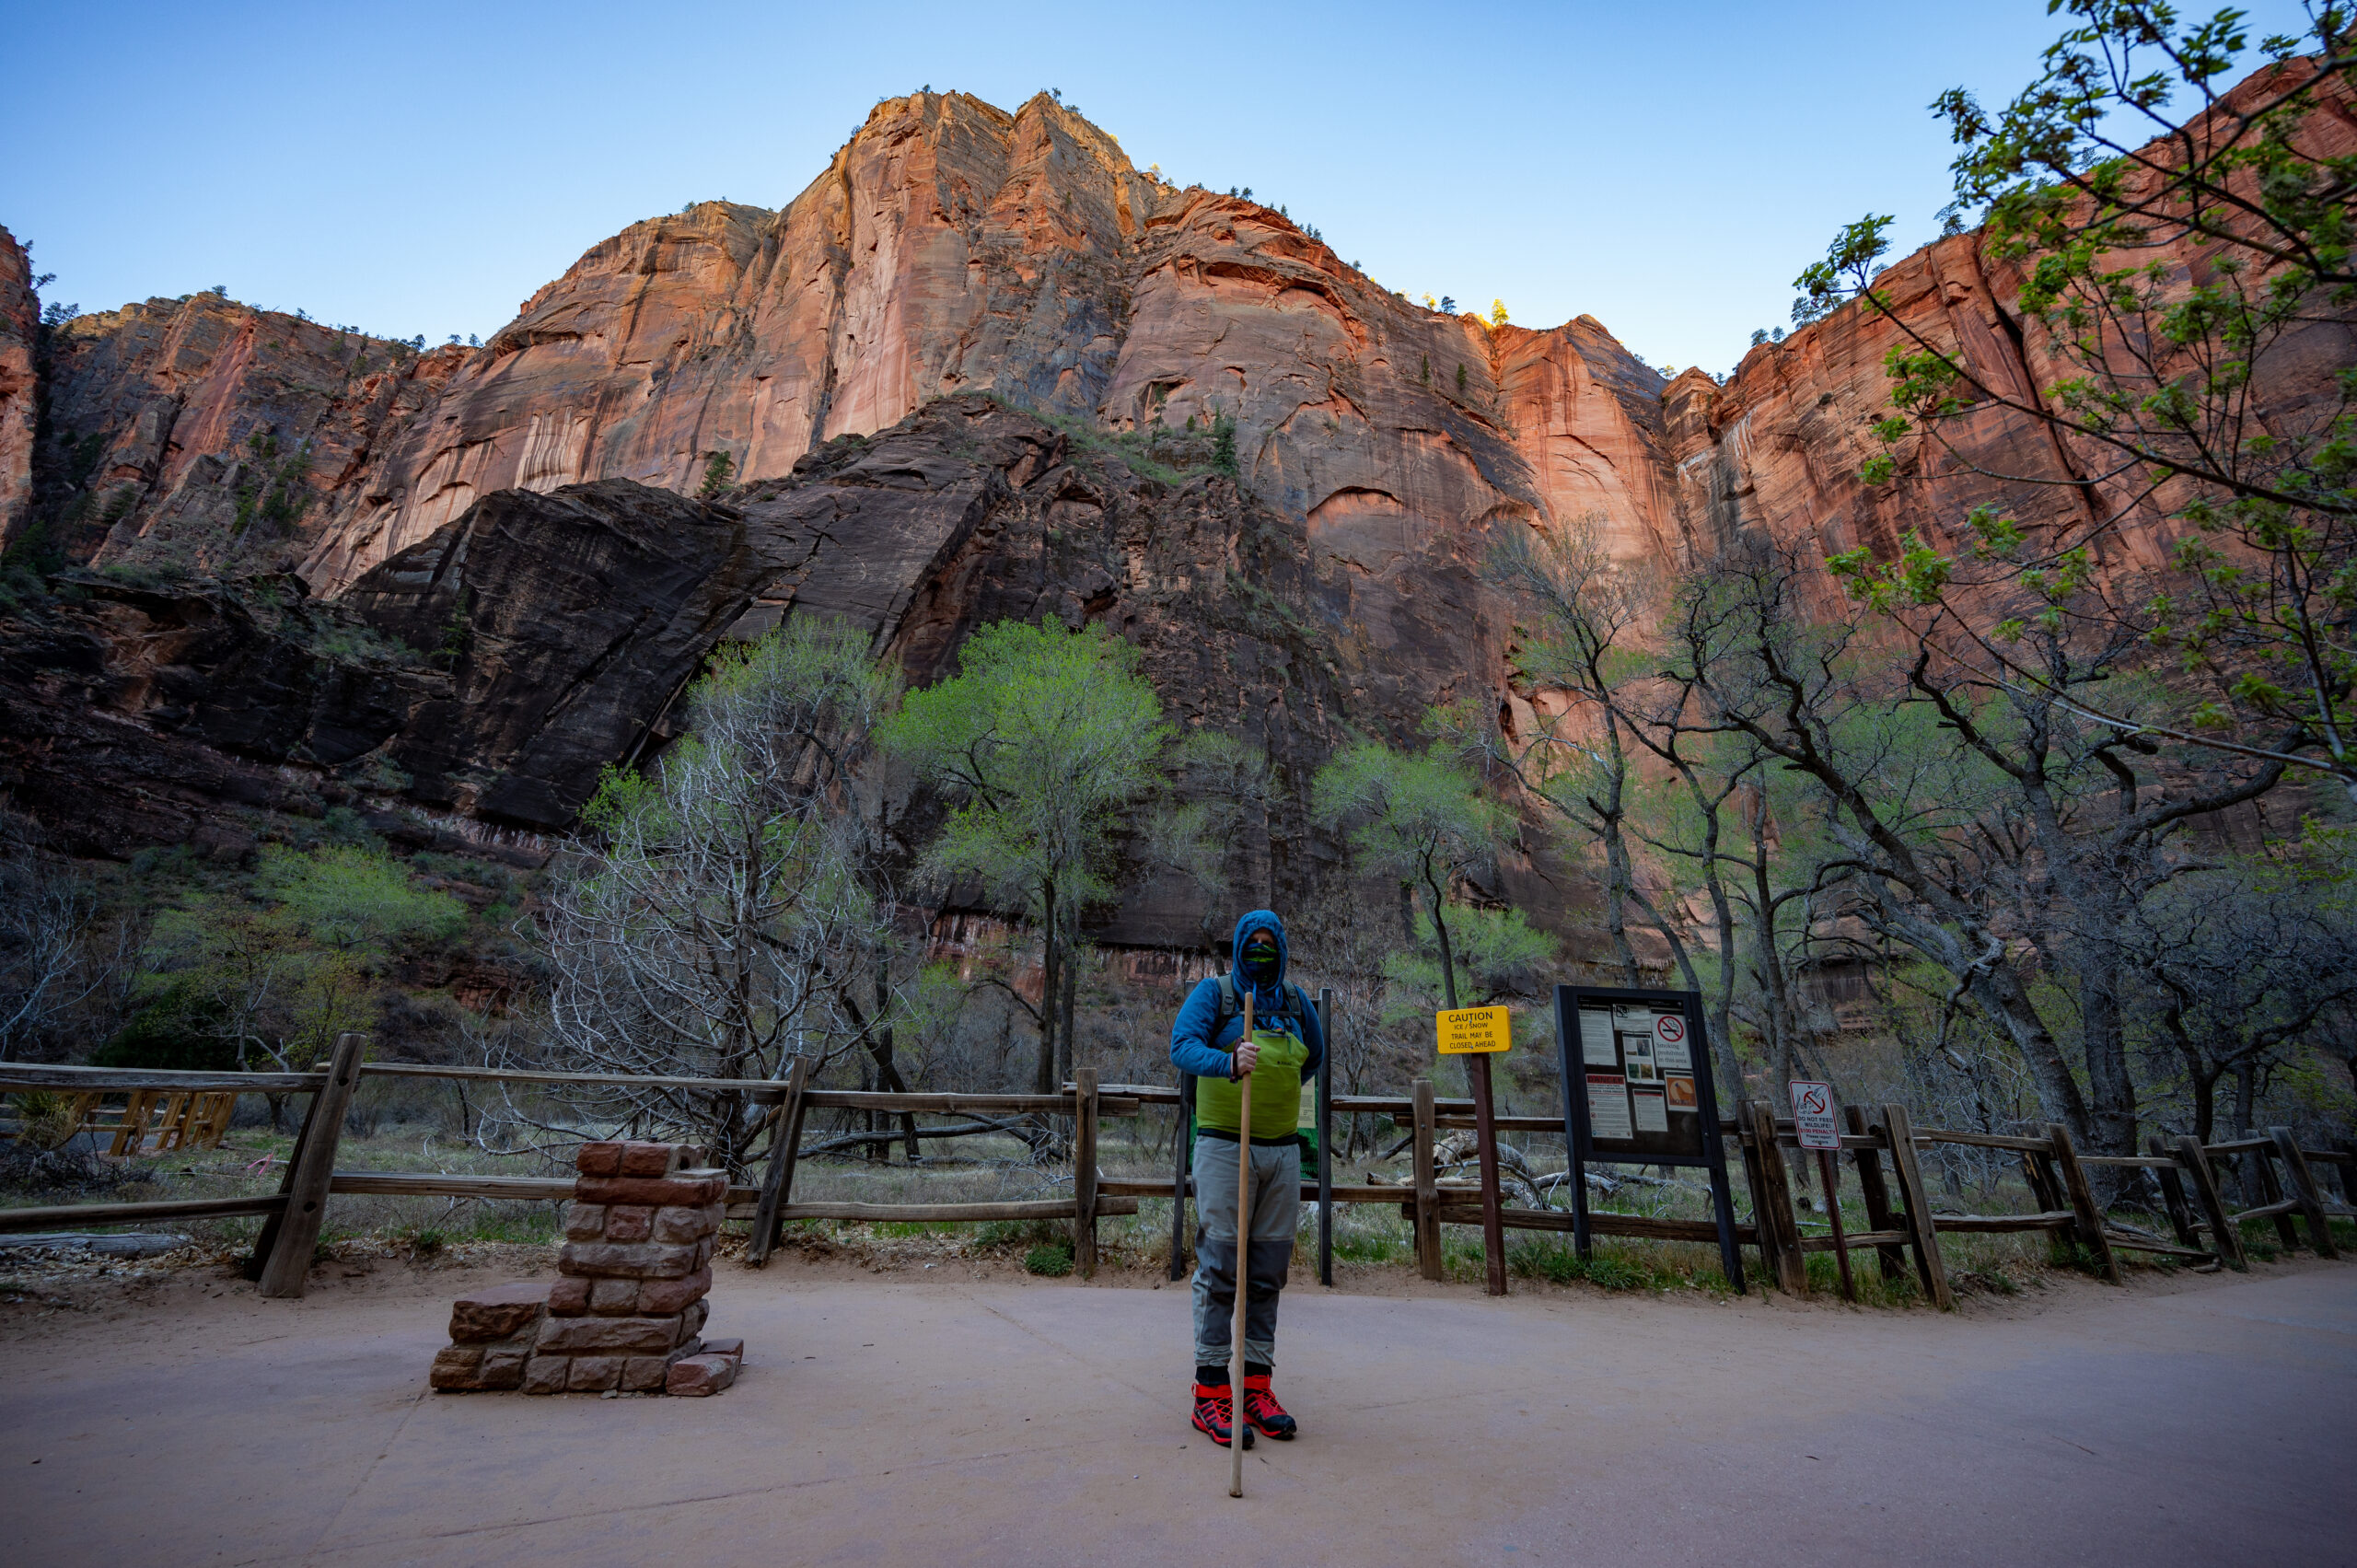
    You will get wet. I know, surprise, surprise.  You can rent waterproof gear or hike in your clothes and shoes, but again, you will get wet.  It was spring when we hiked this, and it was in the upper 30s in the morning. We thought the money spent on our waterproof pants and shoes was one of the best decisions we ever made as we took that first step into the river.

    You may also want to rent a waterproof backpack or bring your own. Renting a large waterproof bag to carry our gear and food was money well spent! I had expensive camera gear, which I did not want to get wet were I to take a tumble in the river.

    There is an inherent risk involved whenever you’re in a river or a slot canyon. Zion closes The Narrows hike if the levels are too high or if the National Weather Service issues a flash flood warning. Check with Zion National Park for the weather forecast and water levels ahead of time.

    Stop at the Visitor Center on the day of your hike or the day before and ask about the most up-to-date conditions and get tips on what to do if you’re in a thunderstorm or potential flash flood. This isn’t Disneyland, this is nature, and it’s often unpredictable. Zion park rangers will do their best to mitigate the dangers, but there is always an inherent risk, and they can’t always accurately predict these things.

    Deep Water in The Narrows at Zion National Park

    My Experience Hiking The Narrows in Spring

    6:30 a.m. In Line at Zion Outfitters

    We were waiting in line to rent waterproof gear at Zion Outfitters. There were around ten people ahead of us in line. We’re nervous we’ll miss our shuttle window, but an employee said not to worry. They’ll still let us on the shuttle even if we’re a little late. We rented the Bib Package and waterproof shoes, and a waterproof backpack.  Money well spent!

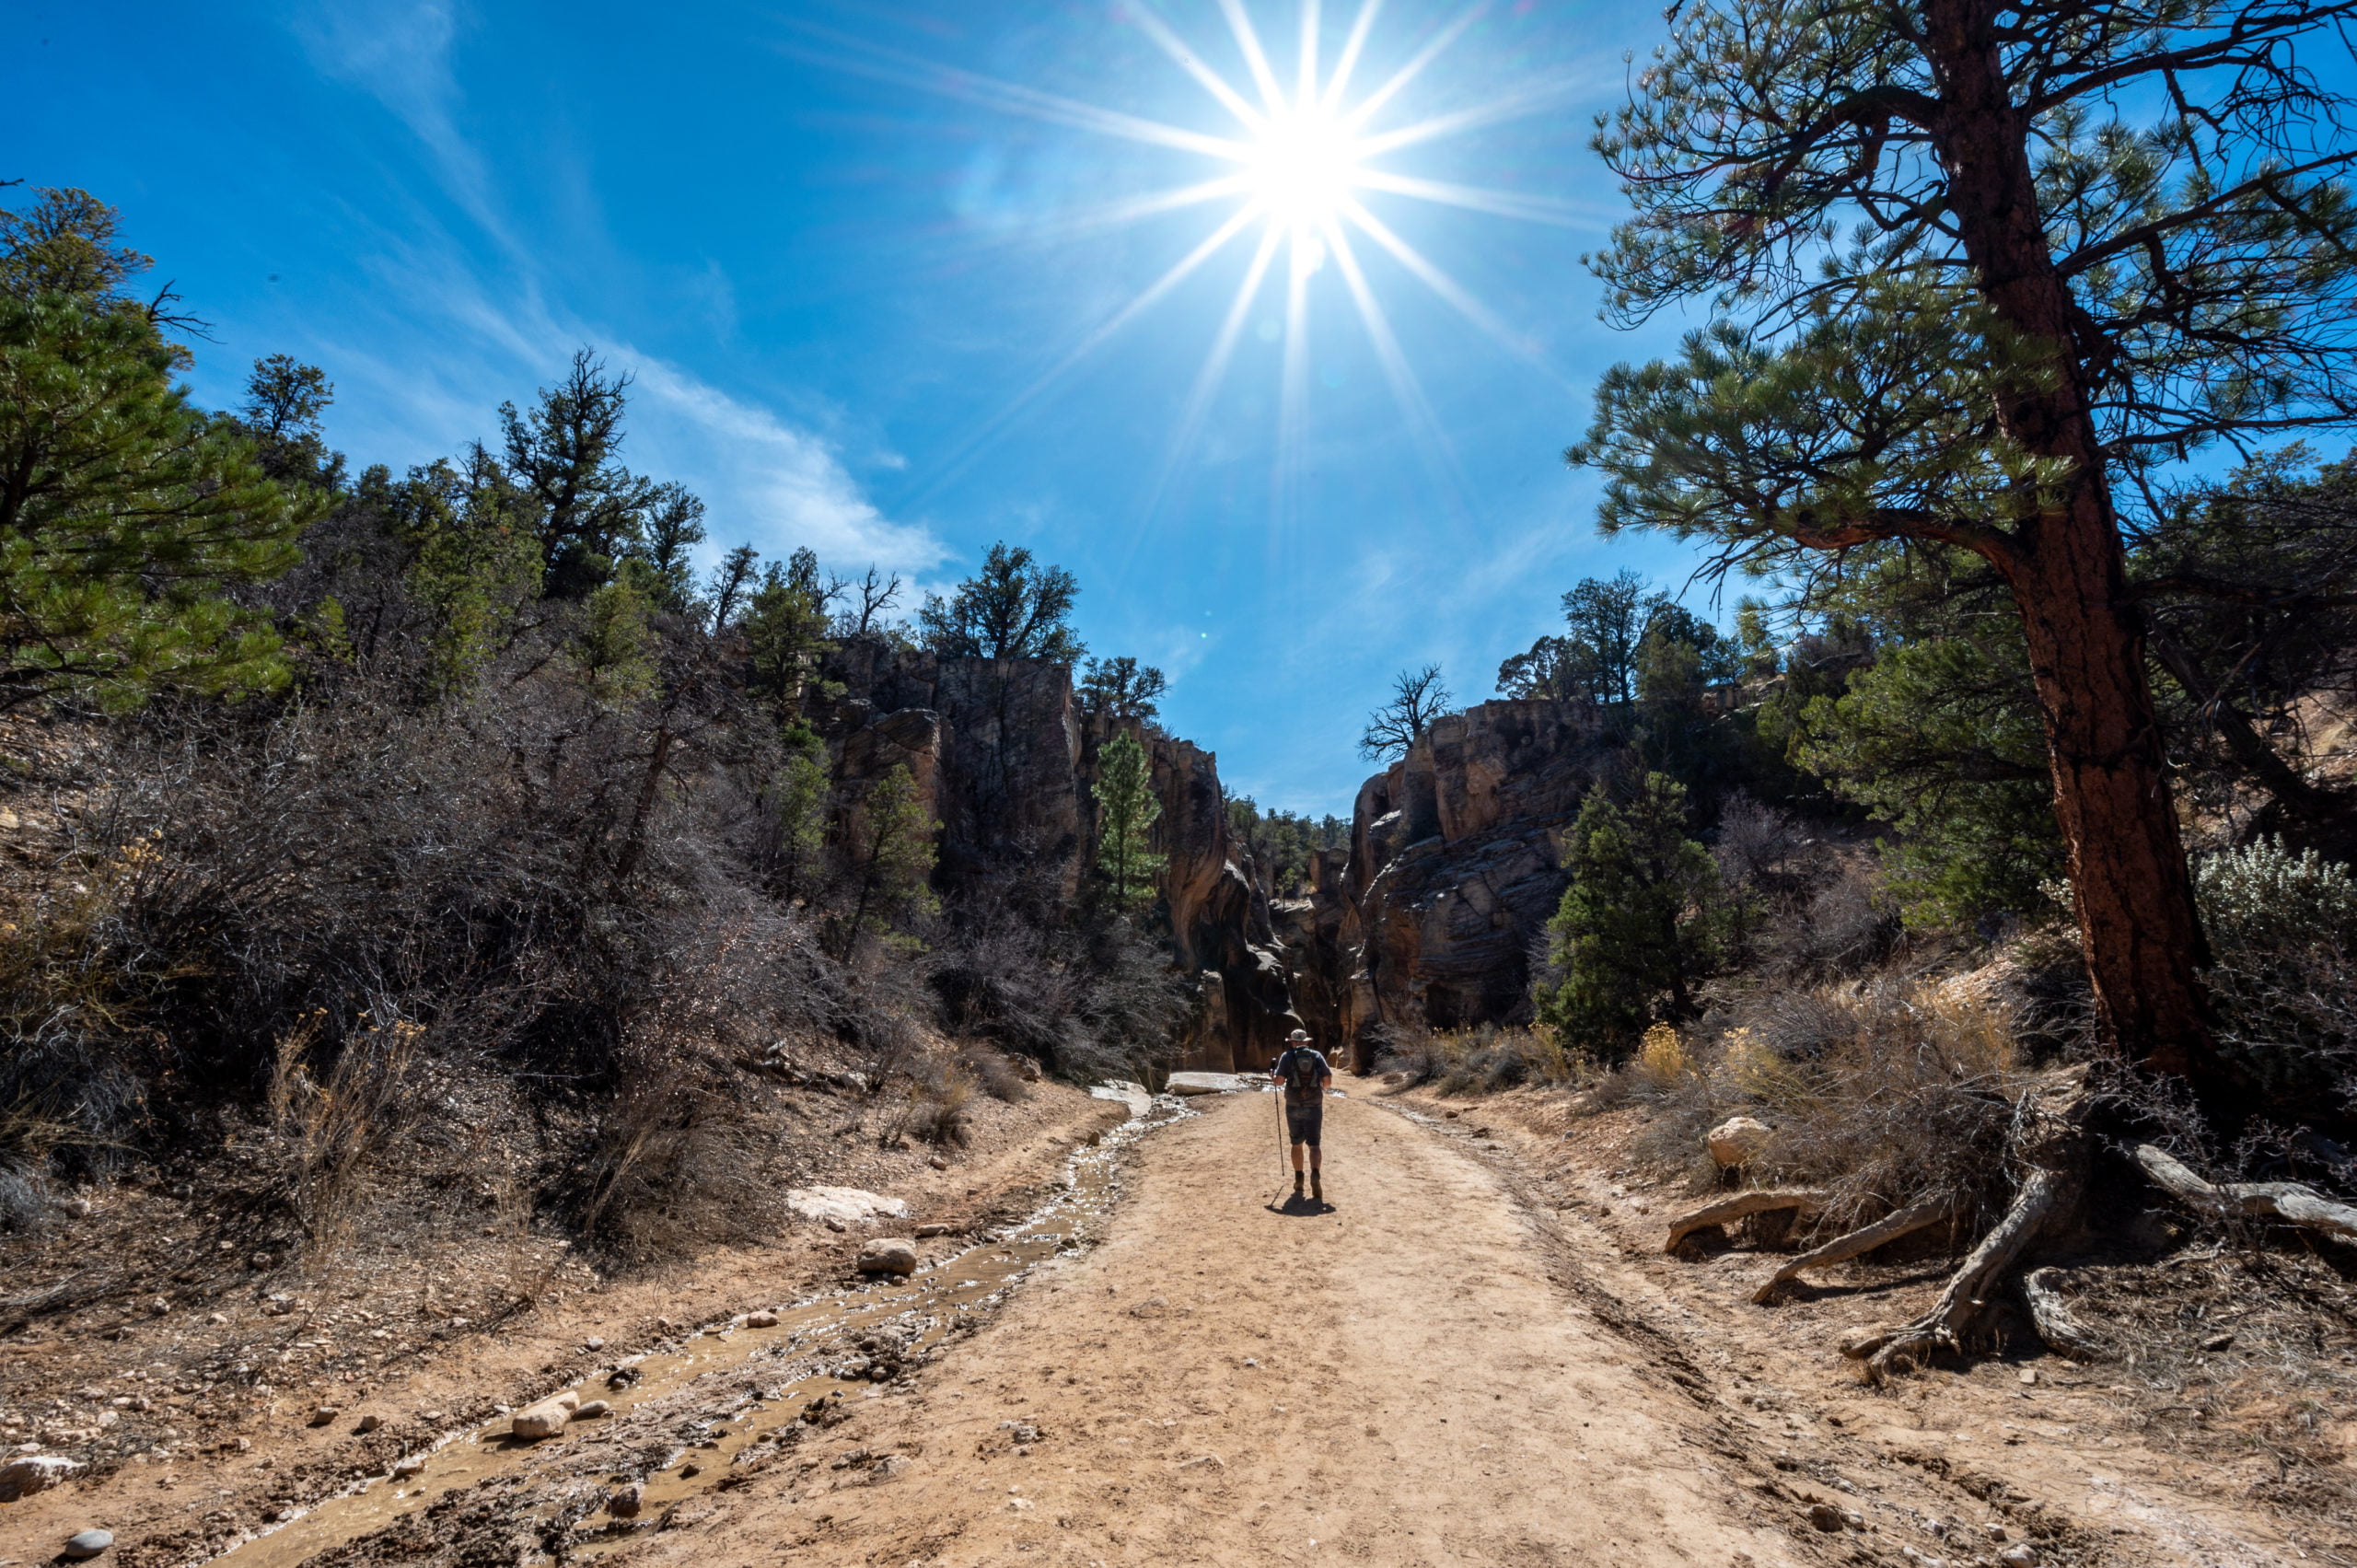
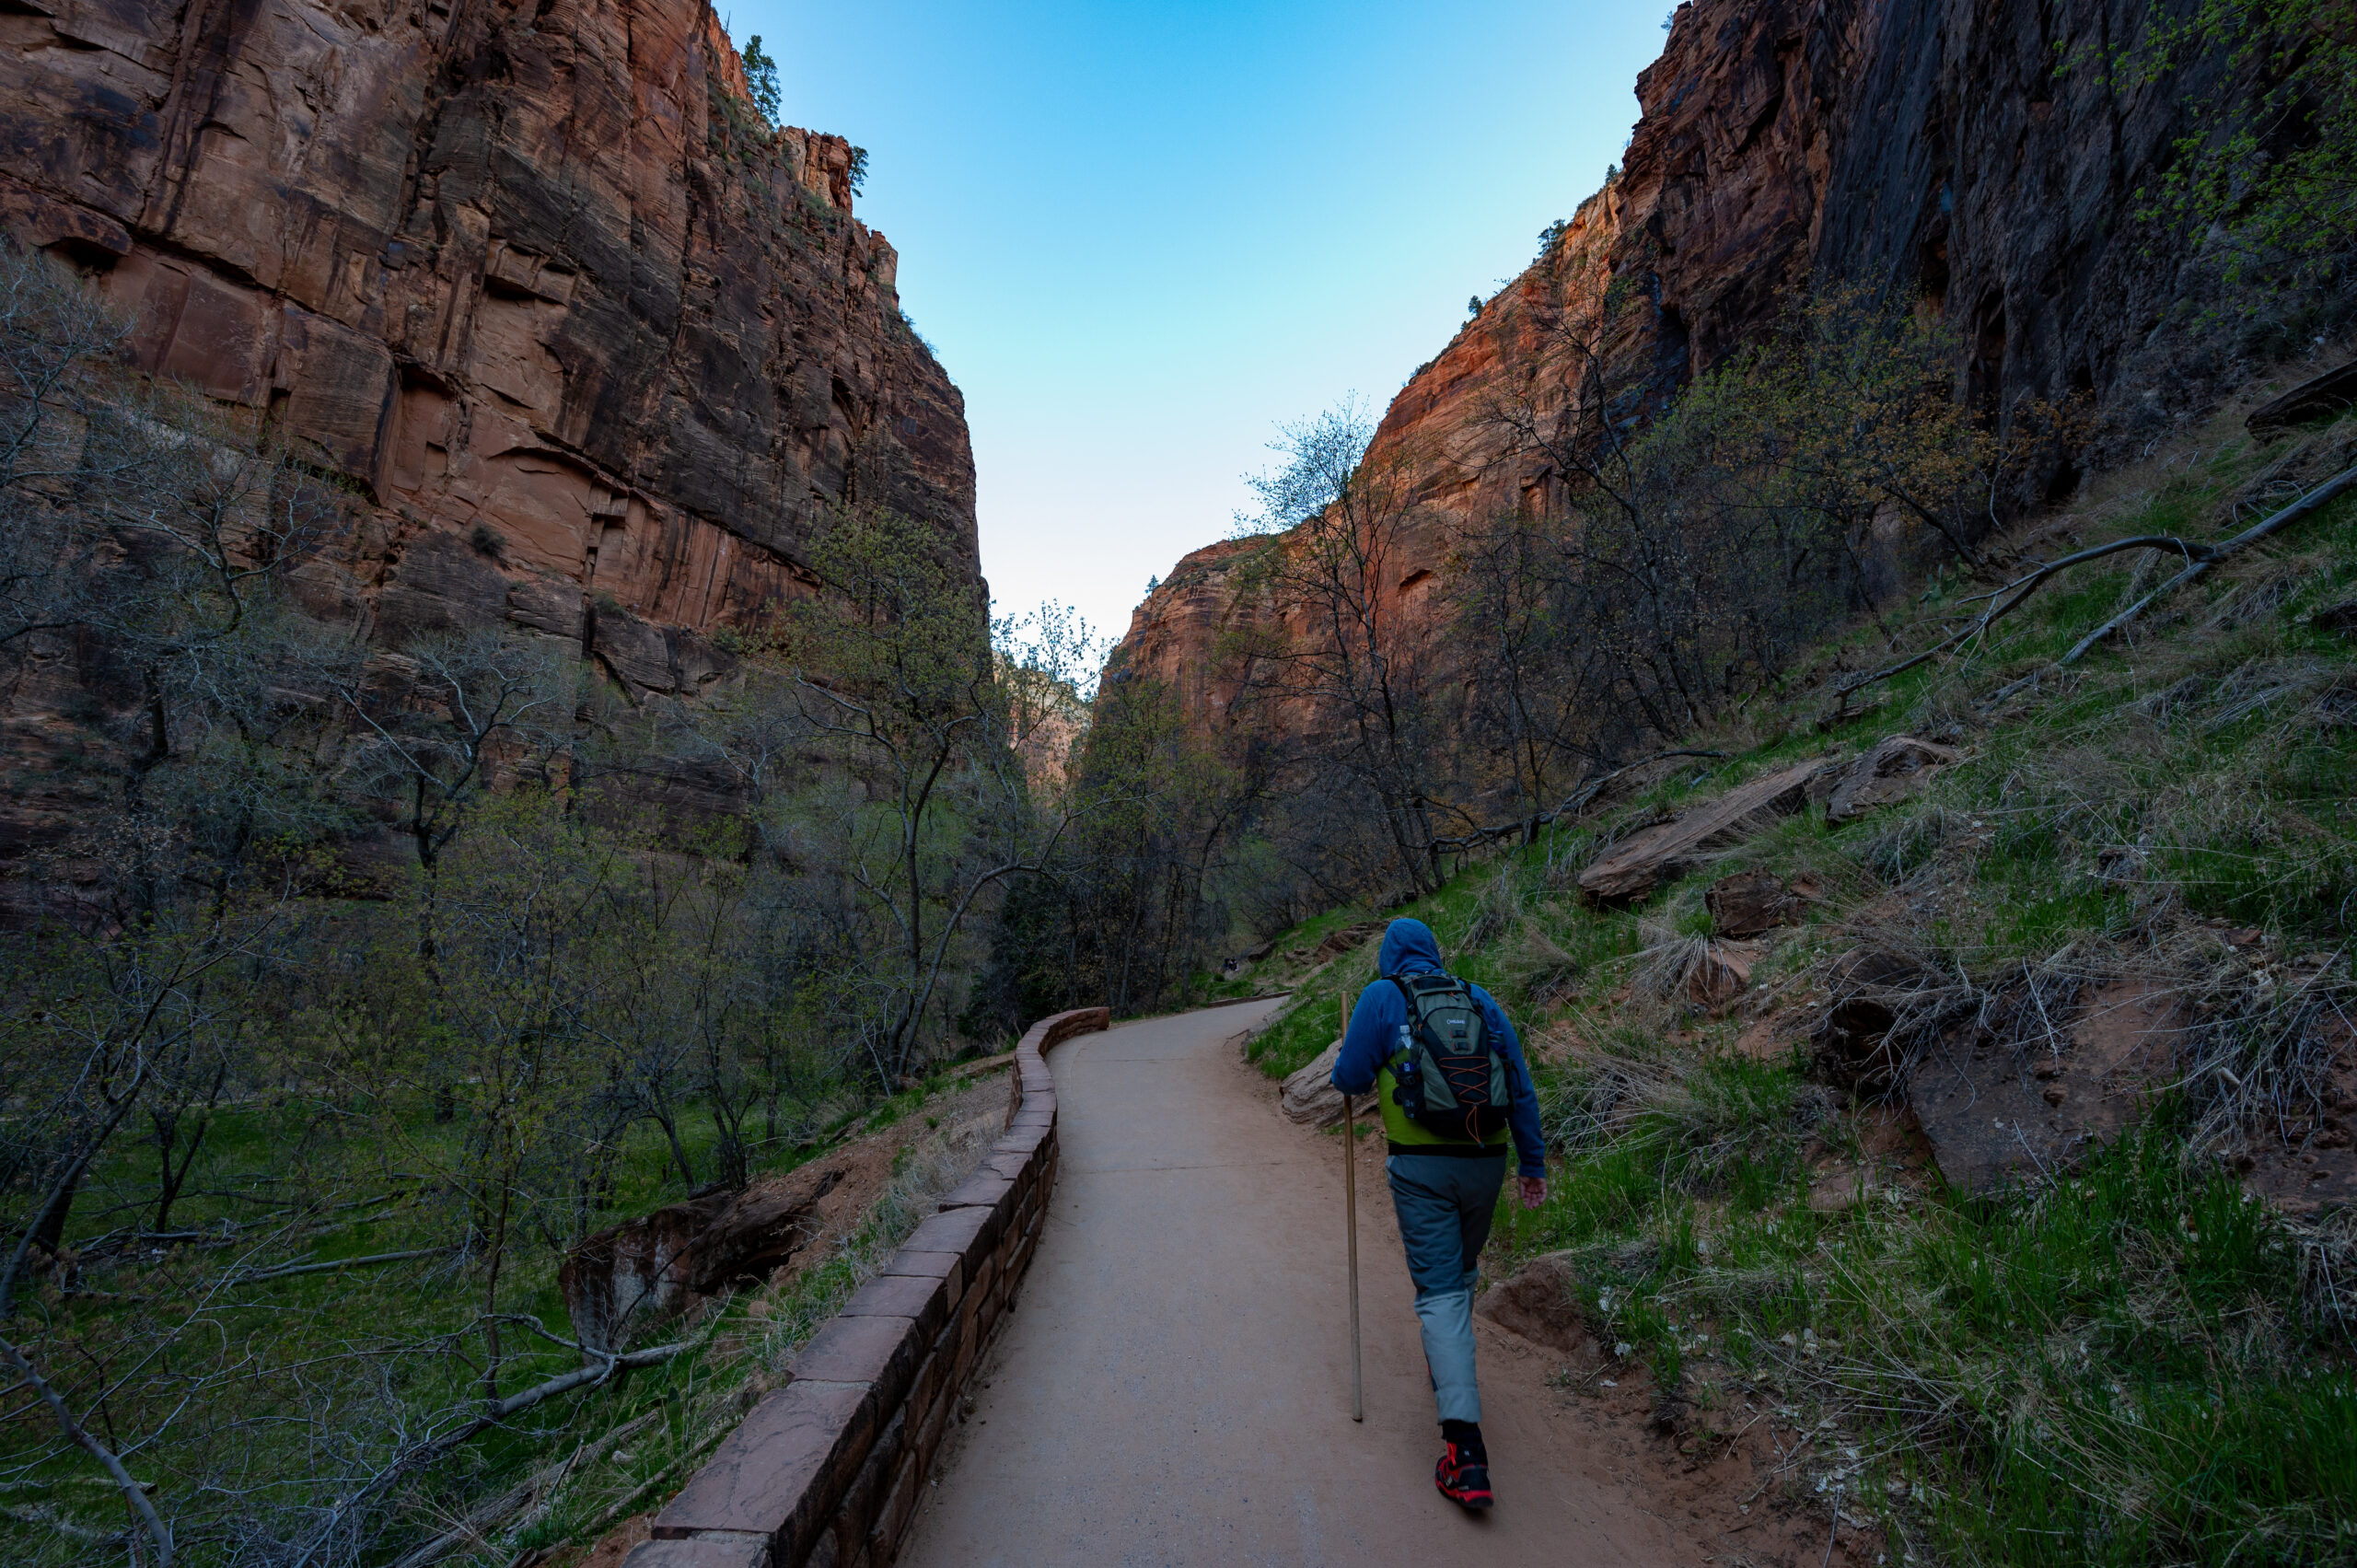
    8:30 a.m. Starting our hike along Zion’s Riverside Walk

    We begin our hike along the Riverside Walk. It’s freezing out, and we are layered up underneath our waterproof bibs and wearing jackets over the bibs.  The wind was blowing, and it was in the upper 30s when we started. I am nervous about getting in the water. It’s a 1-mile walk along the paved Riverside Walk before we reach the end of the trail and the beginning of the river portion in The Narrows.

    Zion Riverside Walk trail

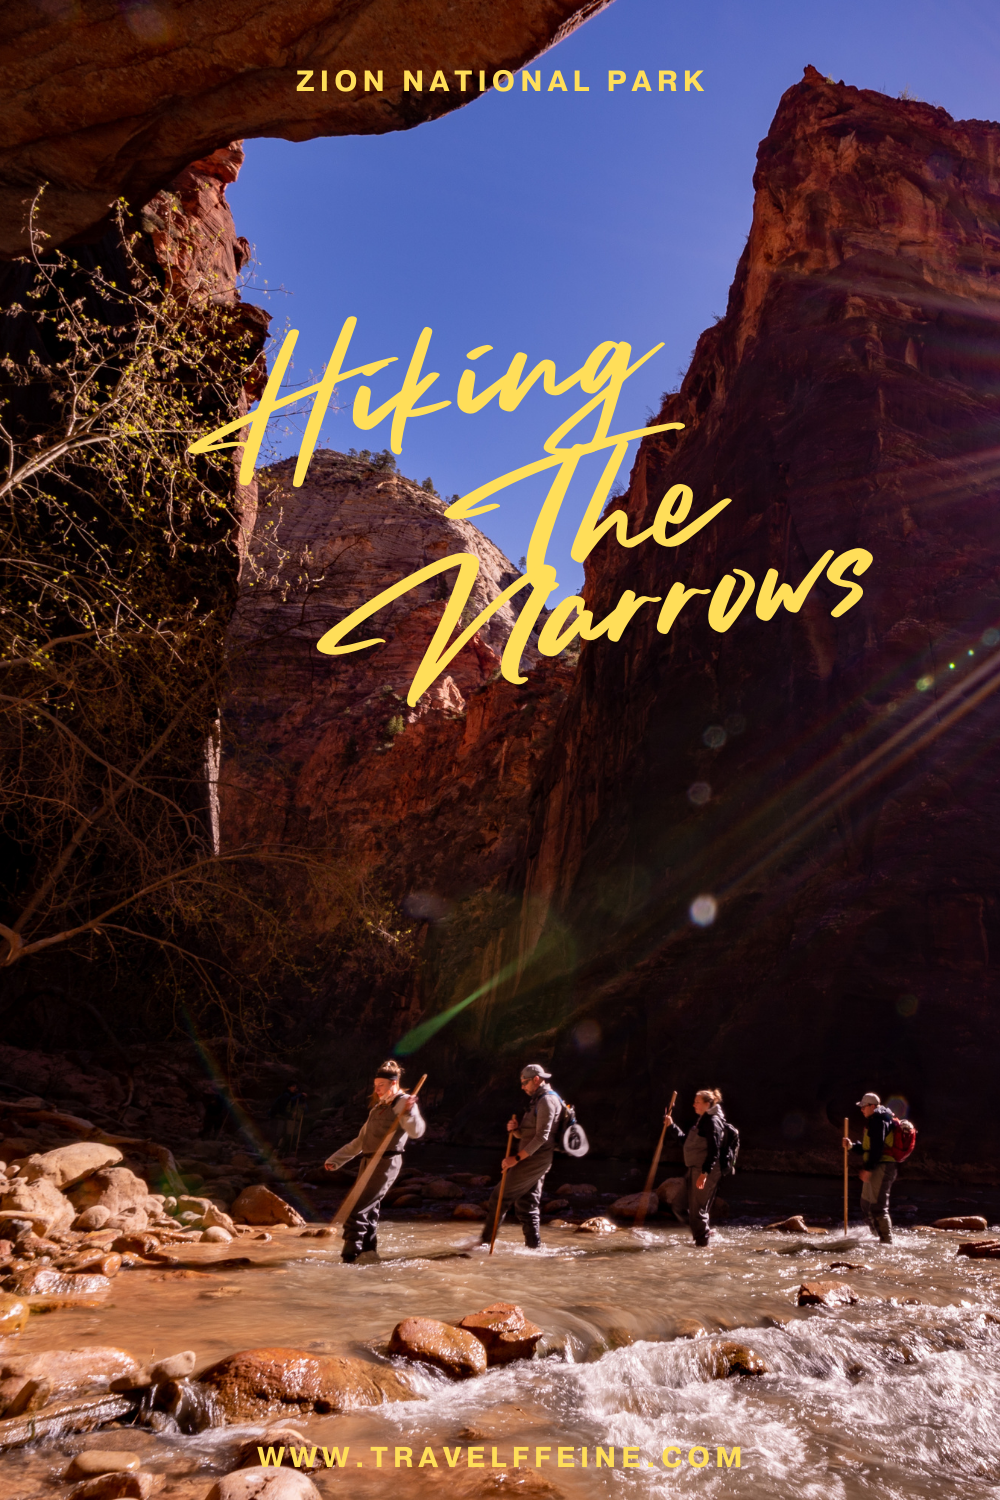
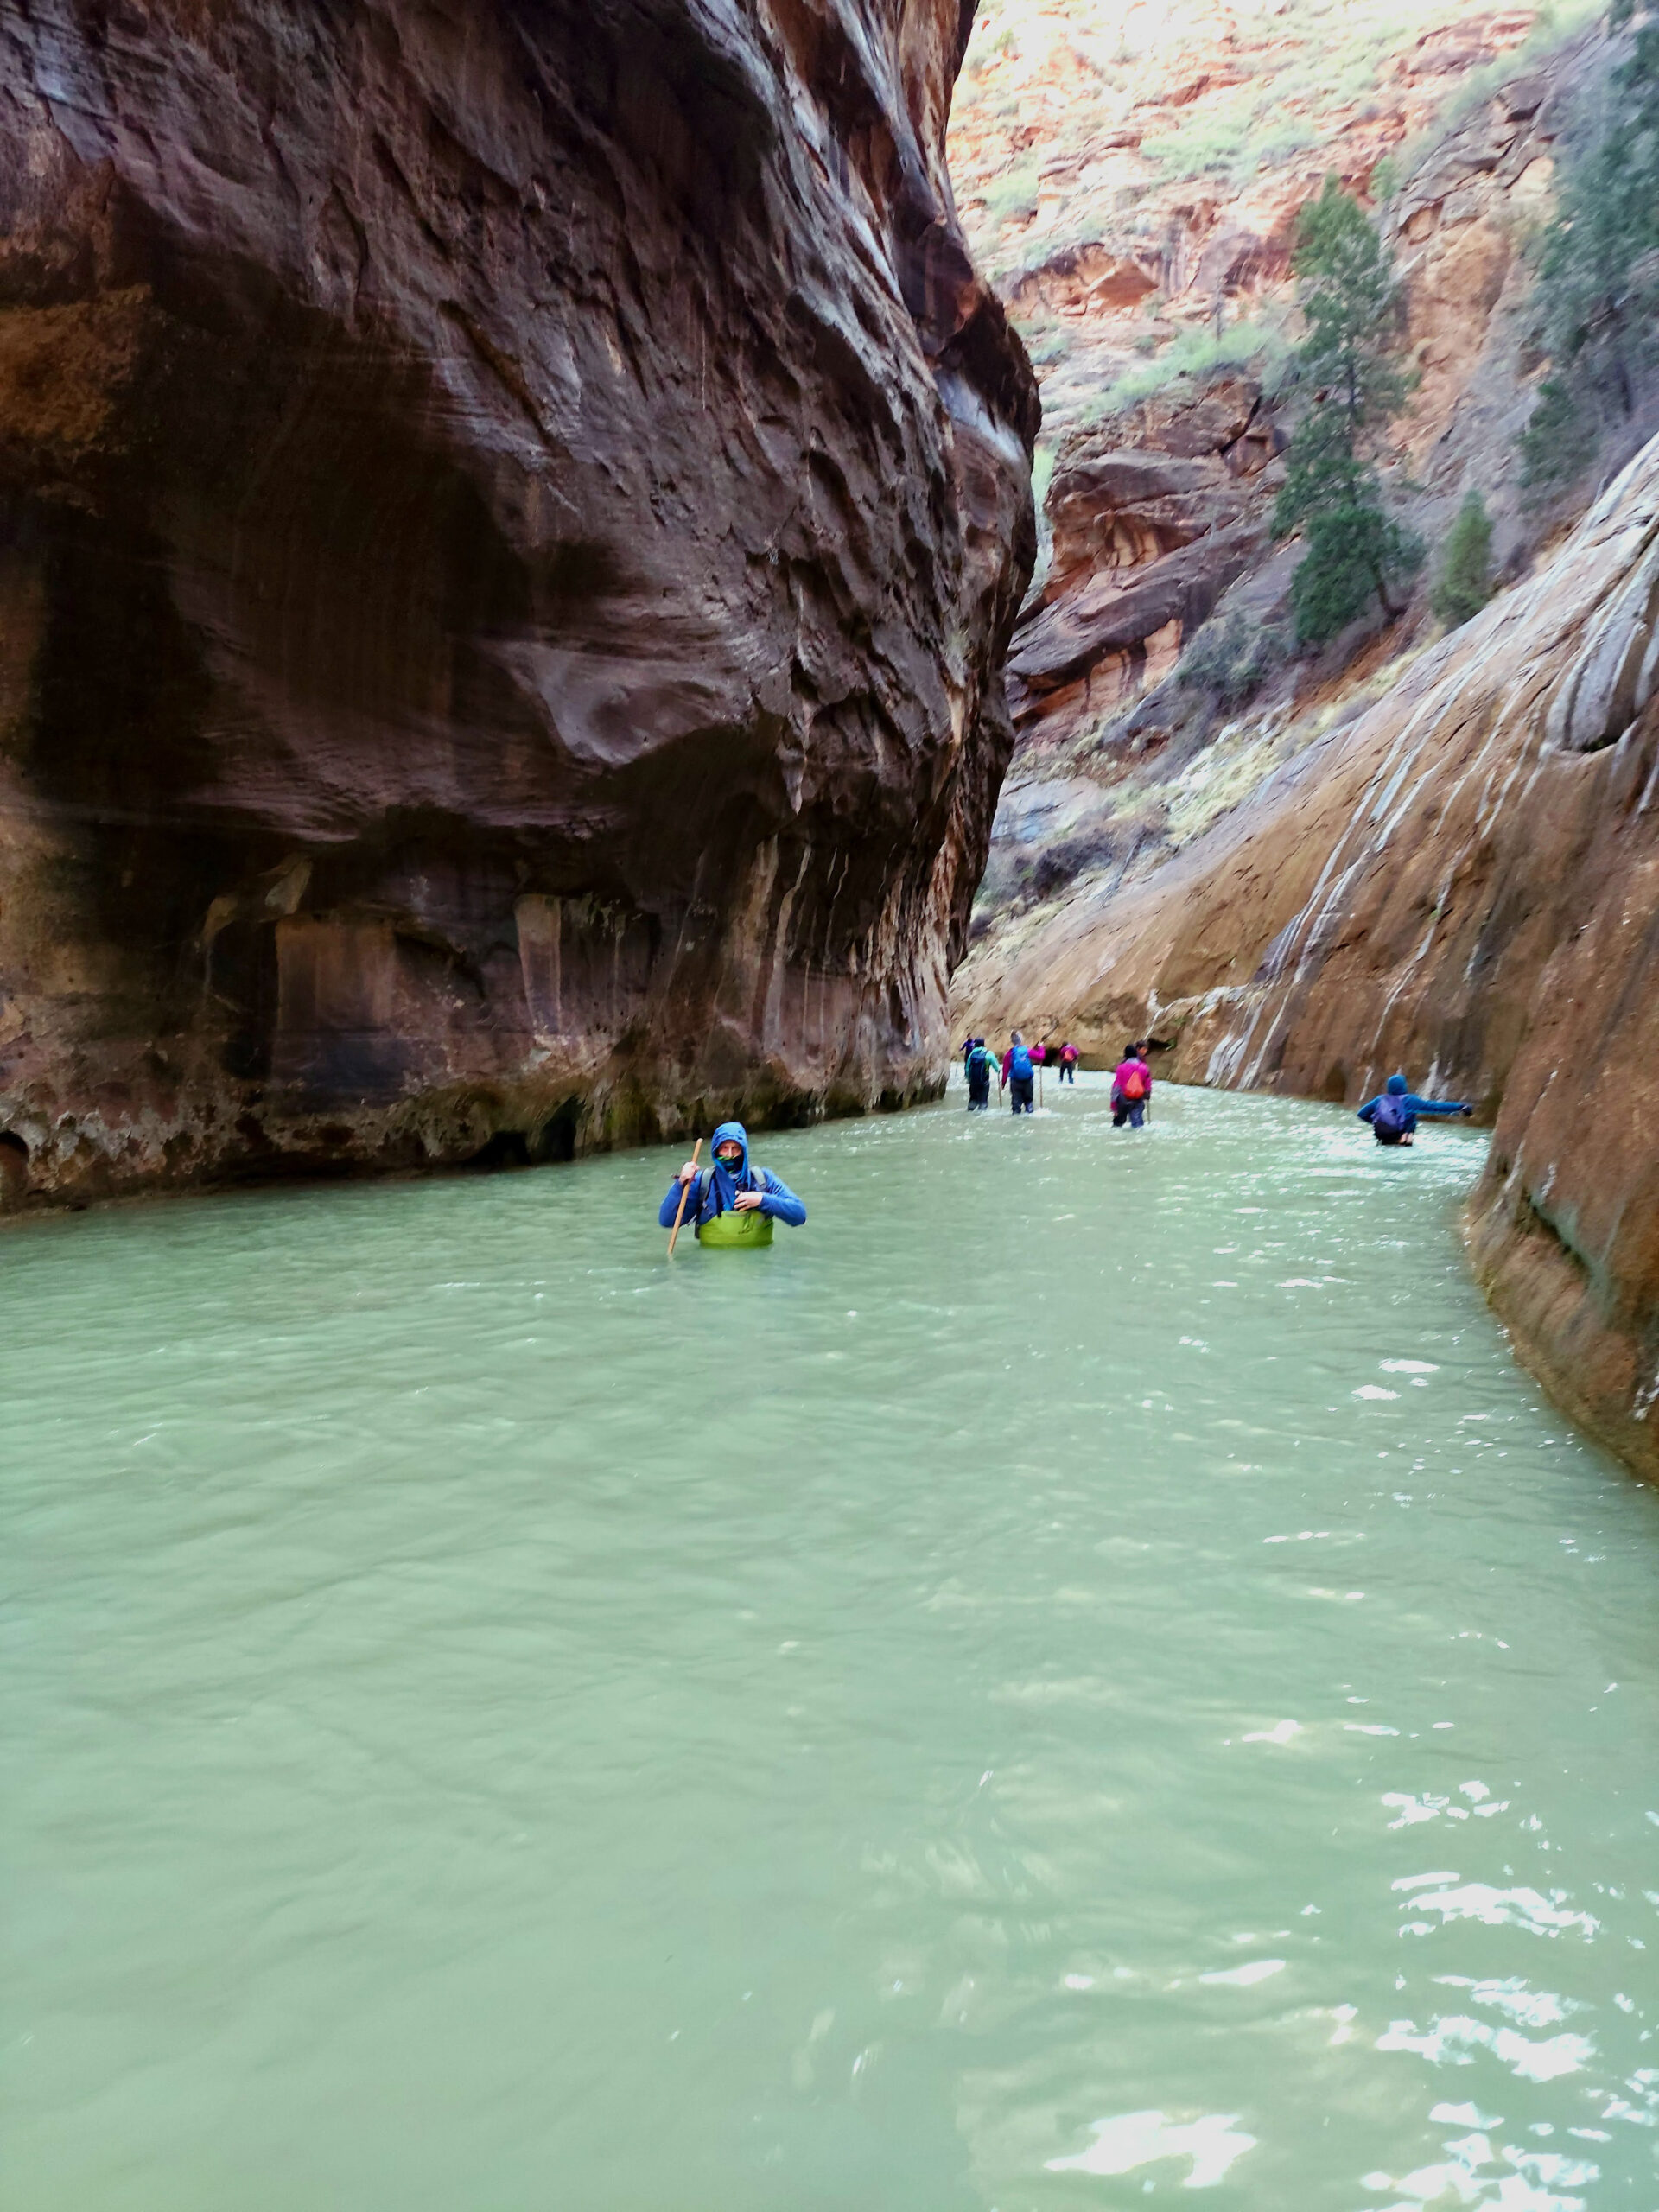
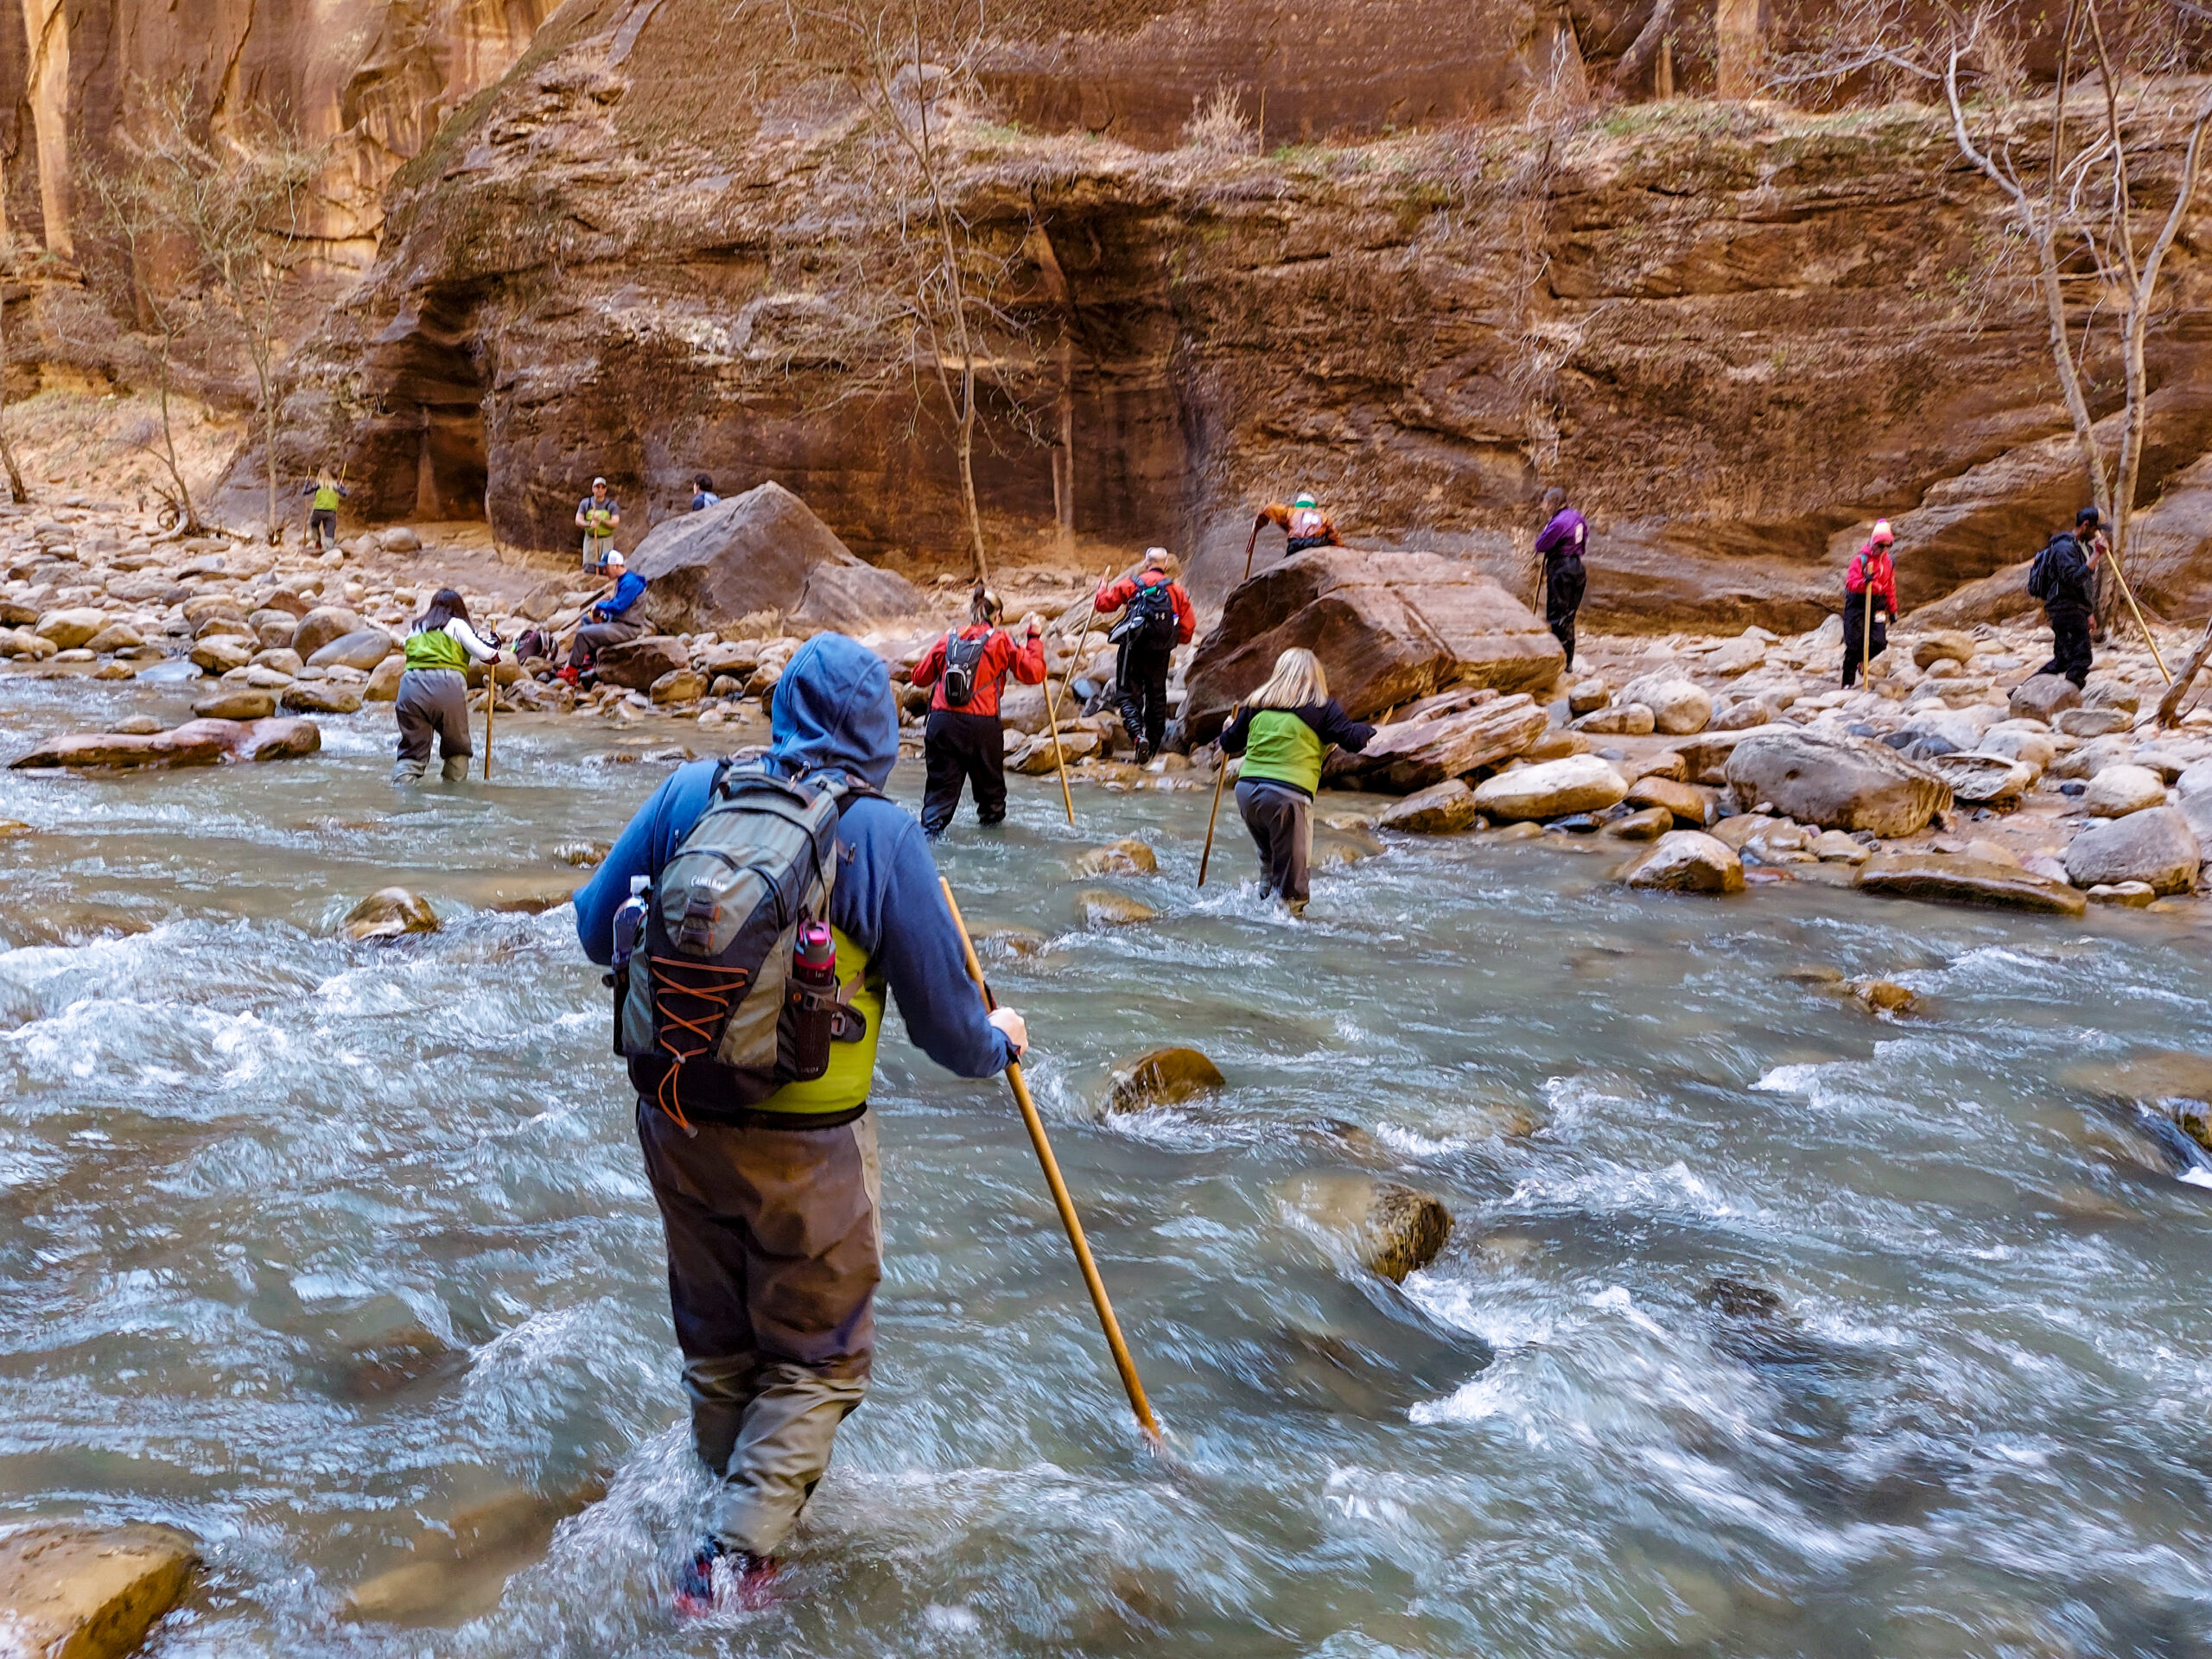
    9:00 a.m. Entering The Virgin River

    We reach the end of the Riverside Walk Trail and climb down to the river to begin our hike up The Narrows at Zion National Park.  It’s exciting as we take the first step into the river. I hesitantly put one foot in, then the other, and wait to see if water leaks in.  It doesn’t! It only feels a little cool on the outside of my feet and isn’t freezing as I expected. I couldn’t be happier with my waterproof gear!

    Hiking up the Virgin River

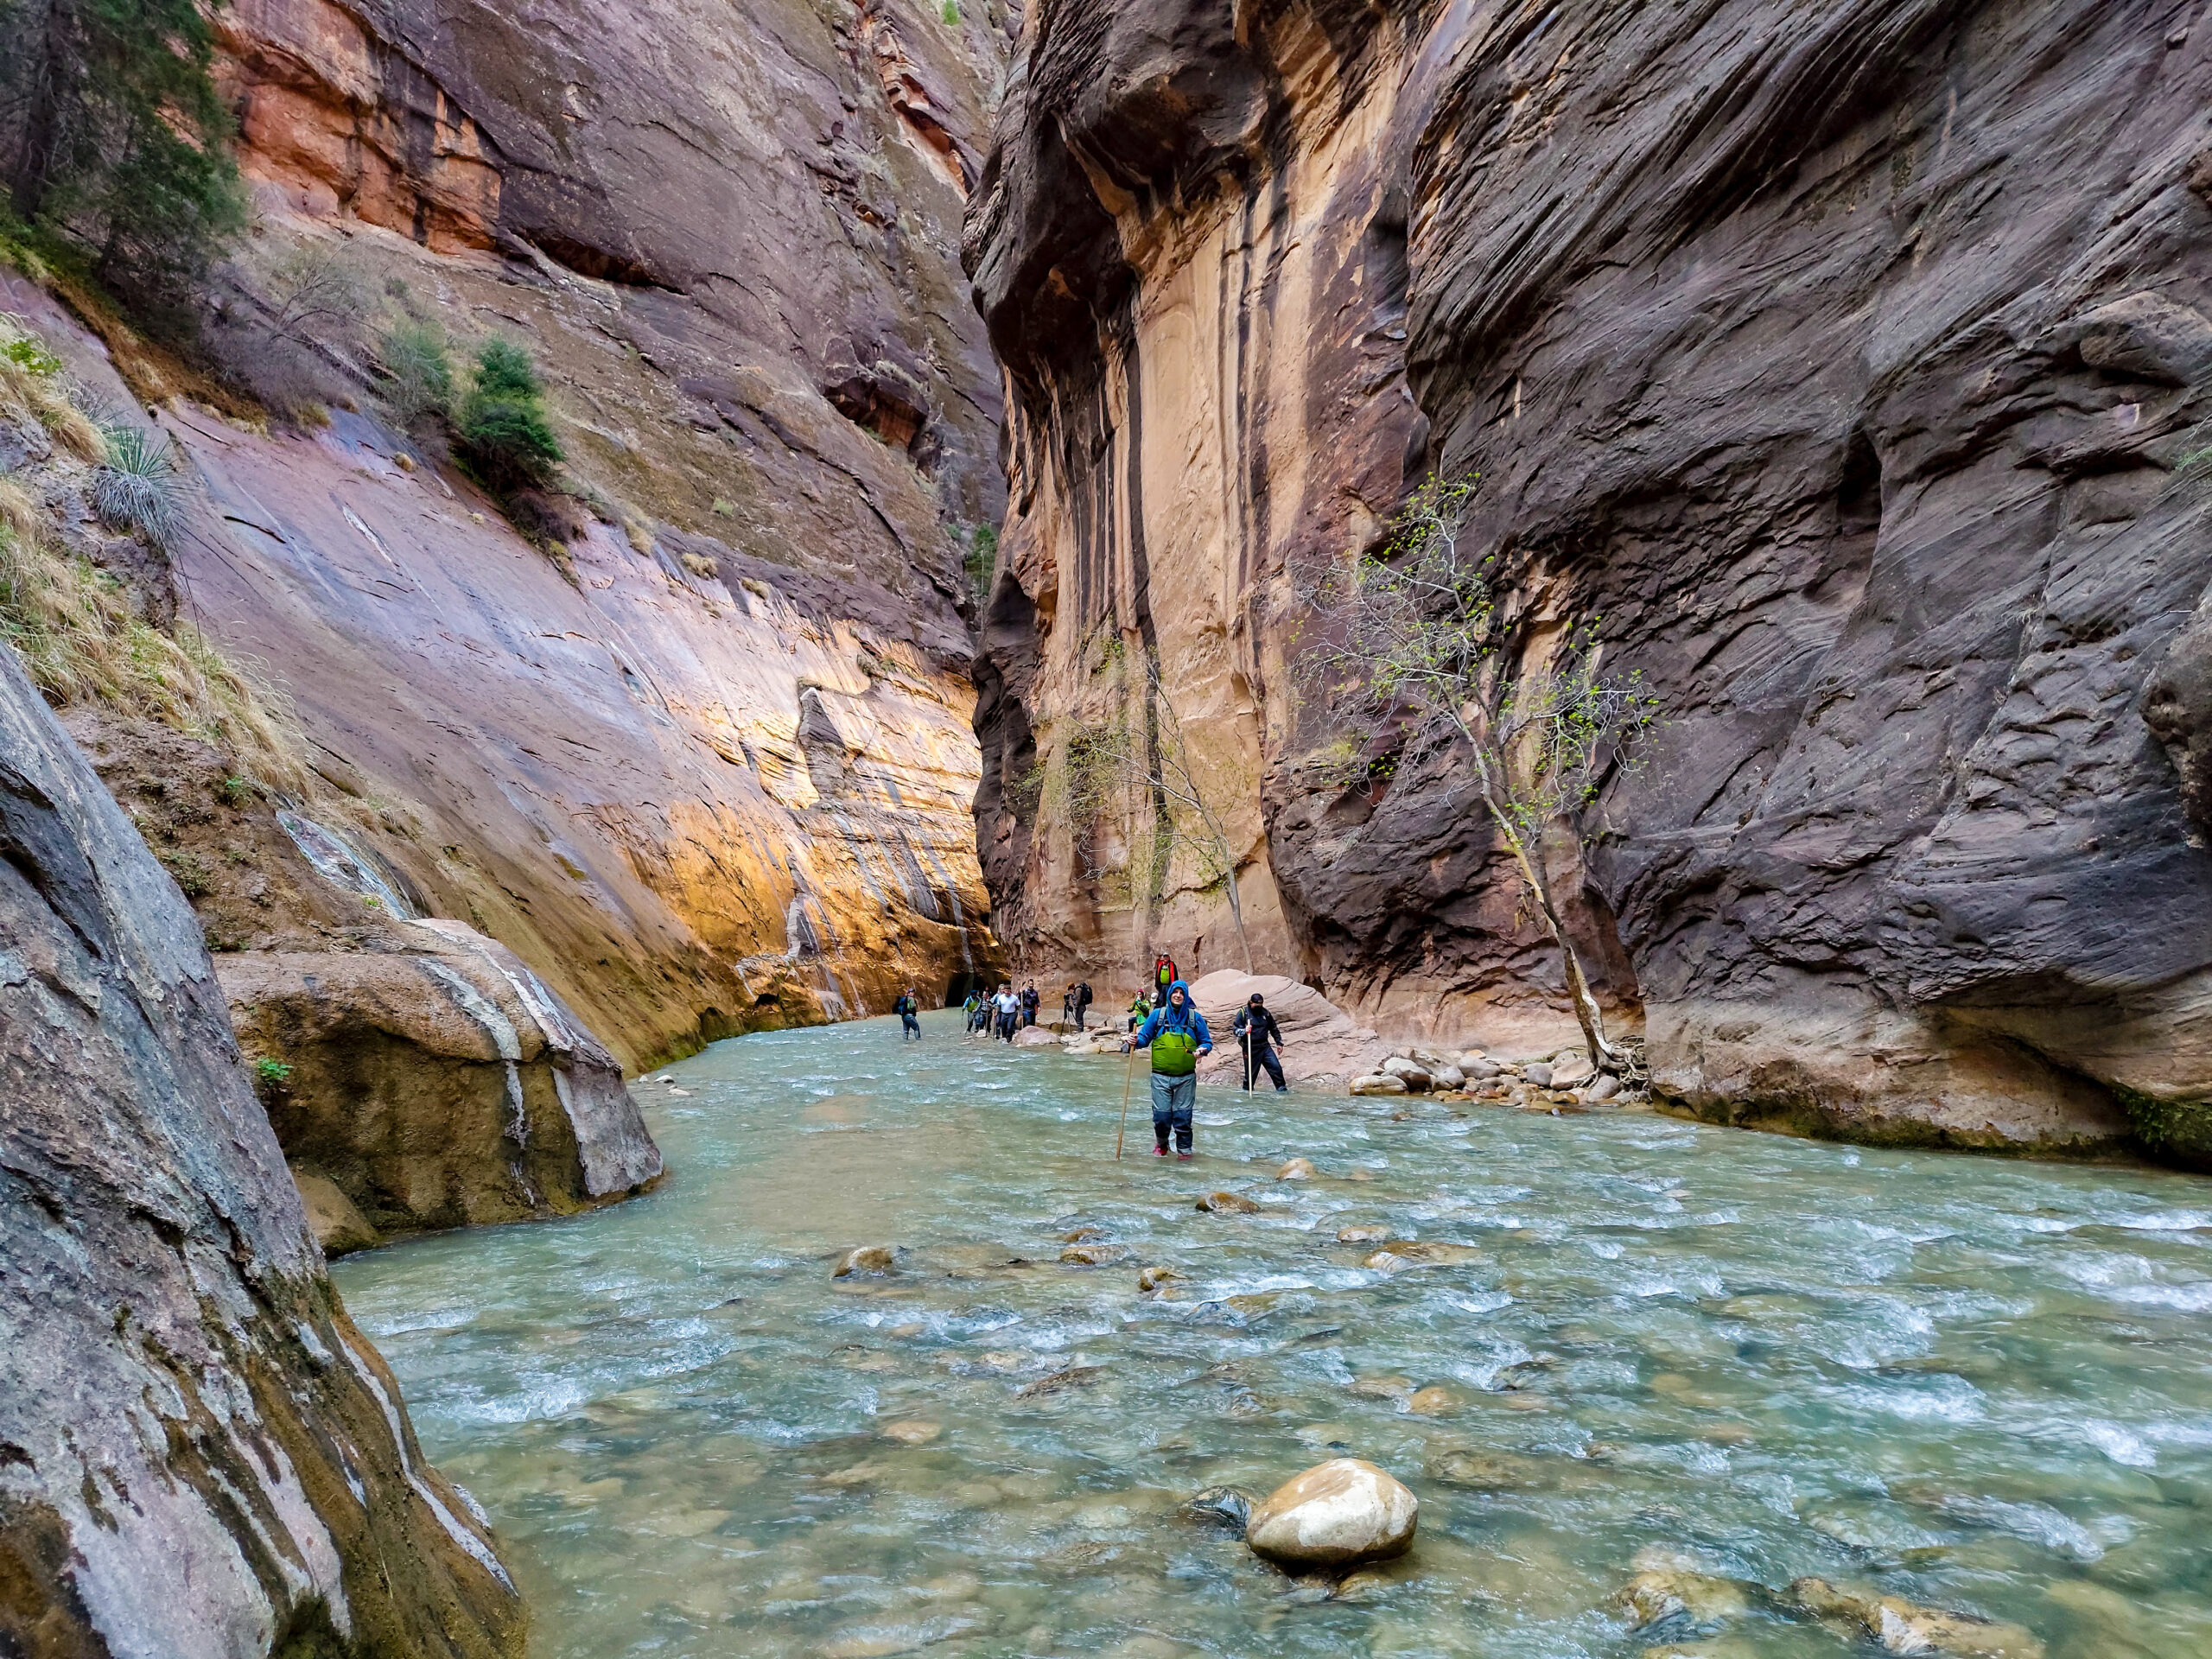
    Never Alone in The Narrows

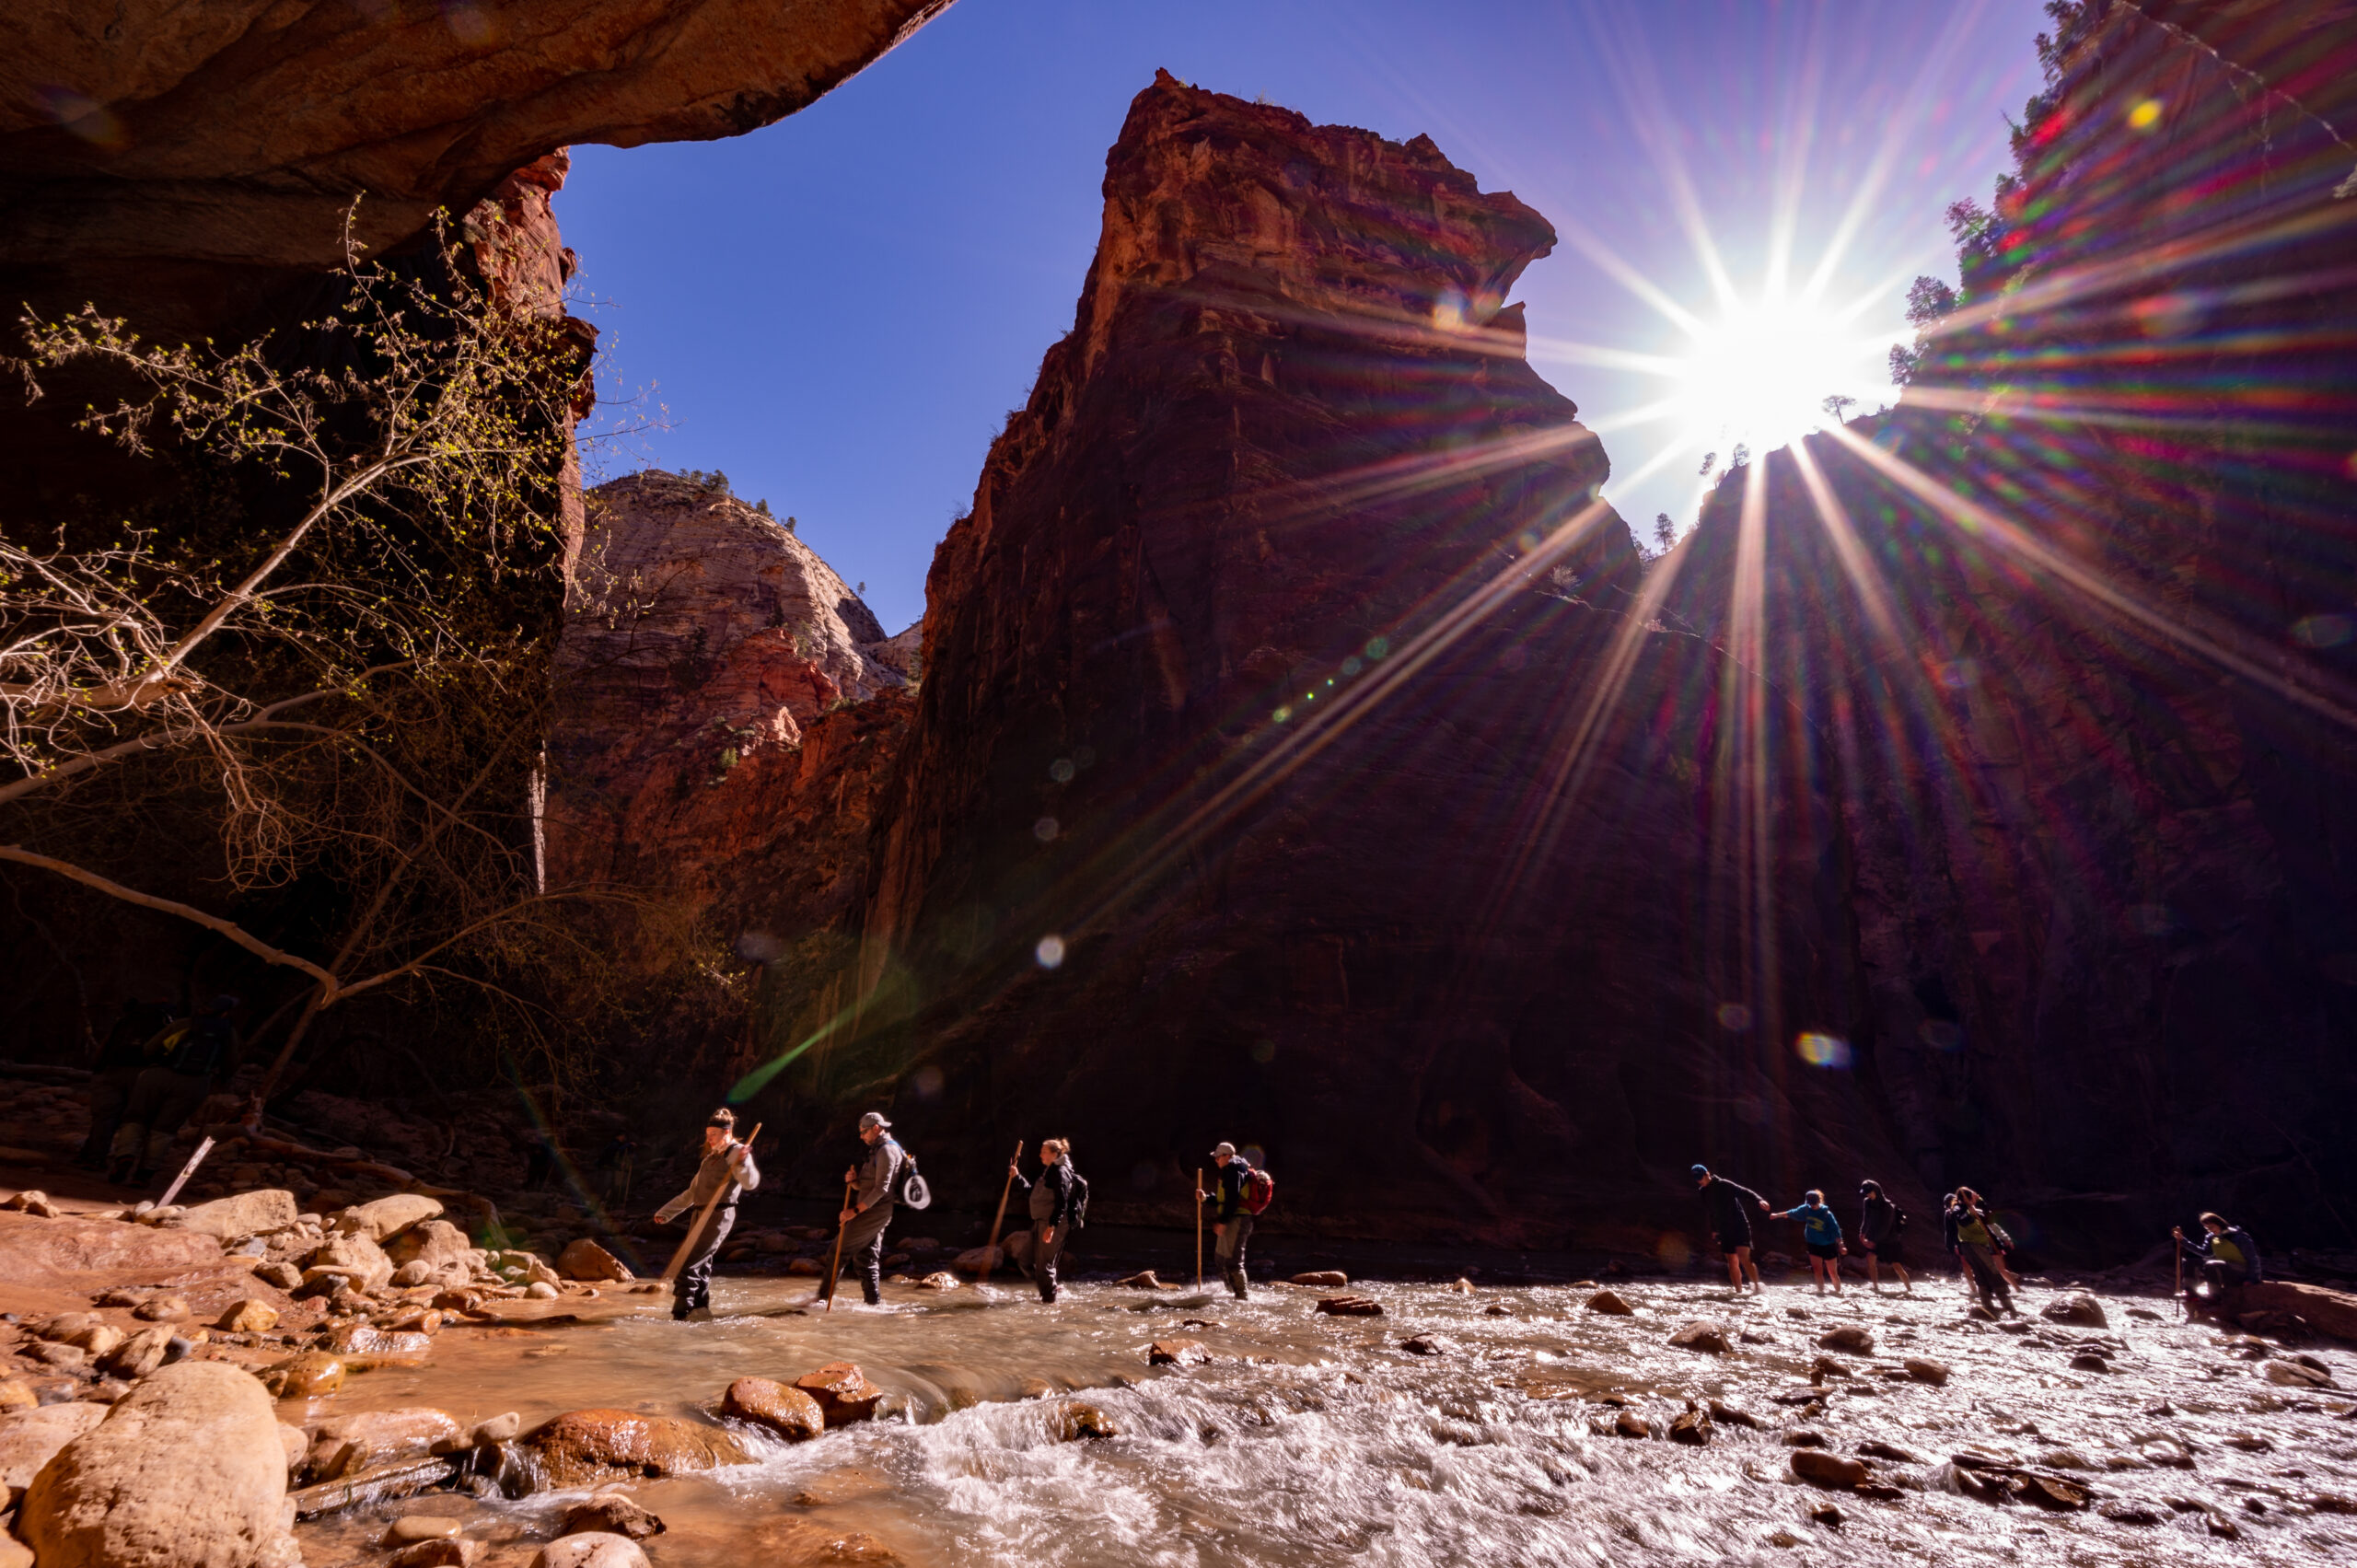
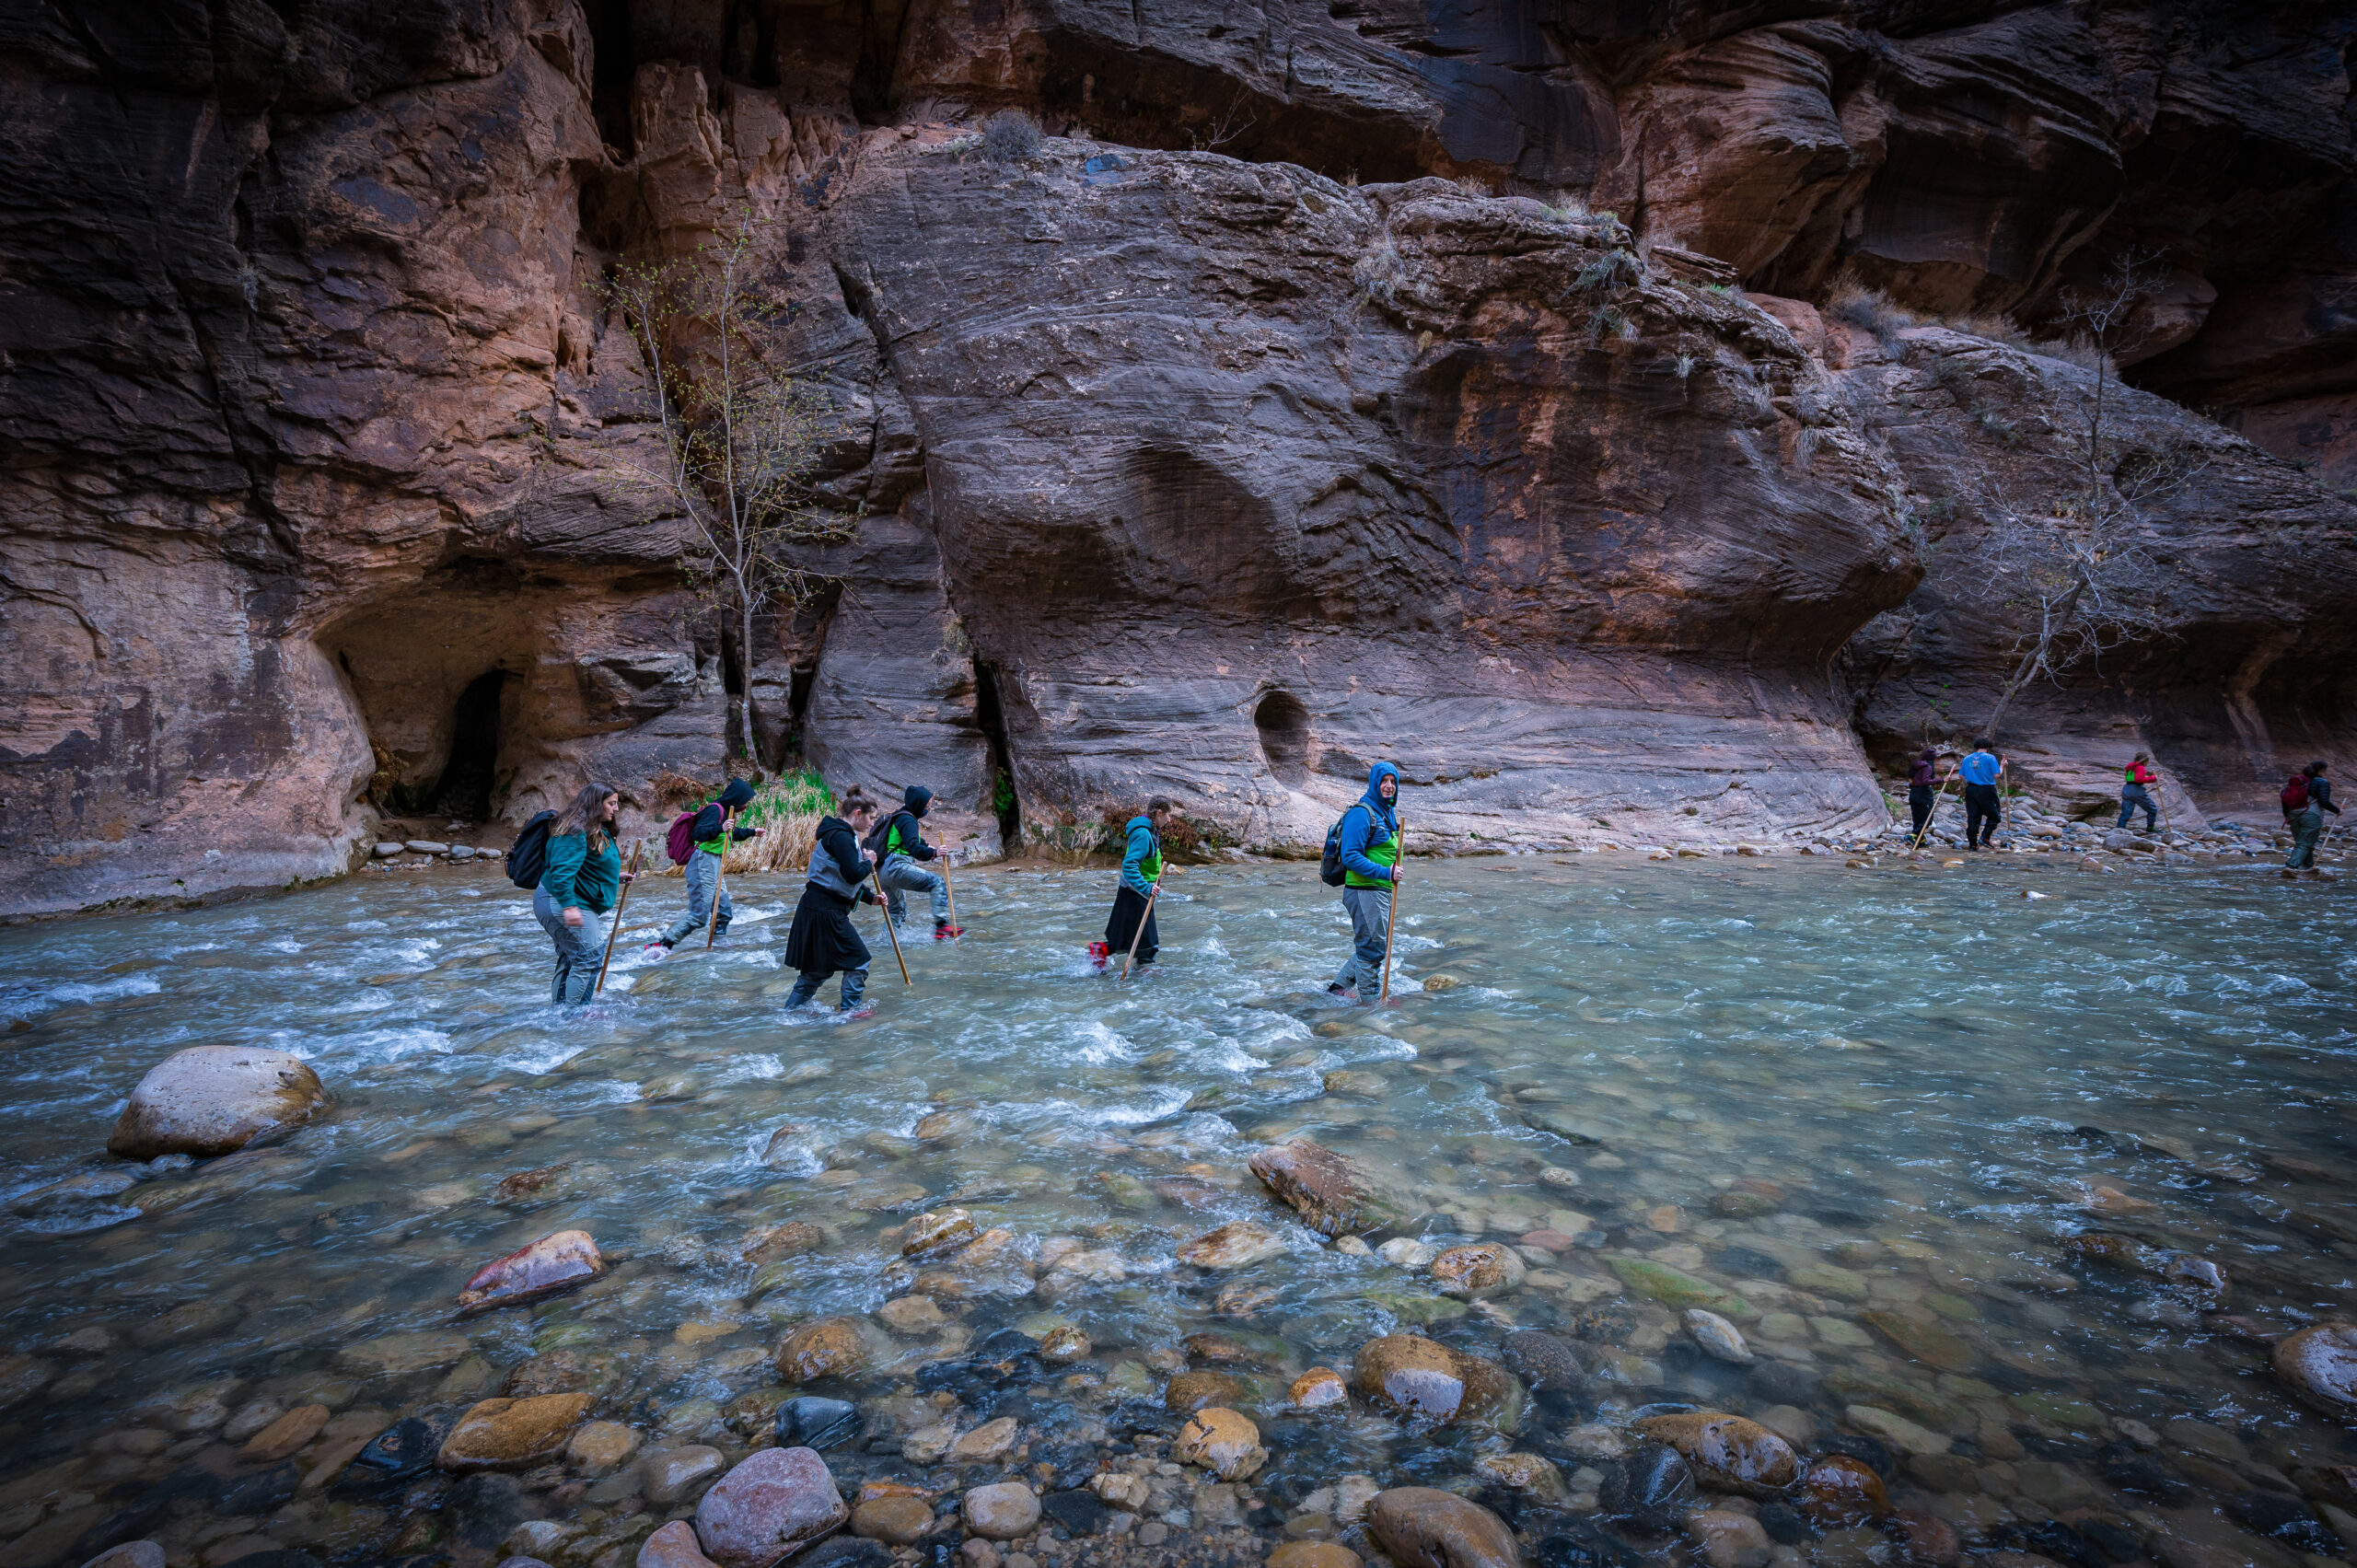
    One thing is true about the hike up The Narrows–you are never alone.  Even with our early morning start, there are at least 30 other hikers, and the number continues to grow to 100’s by the afternoon.  Early morning is your best bet if you want to get photos with the least number of people. 

    This is a community hike; we’re in this together, laughing and sharing in this utterly unique hiking experience. There were so many photo stops along the way! Look in both directions to capture how the sunlight filters into Zion Canyon. The colors change throughout your walk with the amount of light shining in.

    crossing small rapids hiking in The Narrows

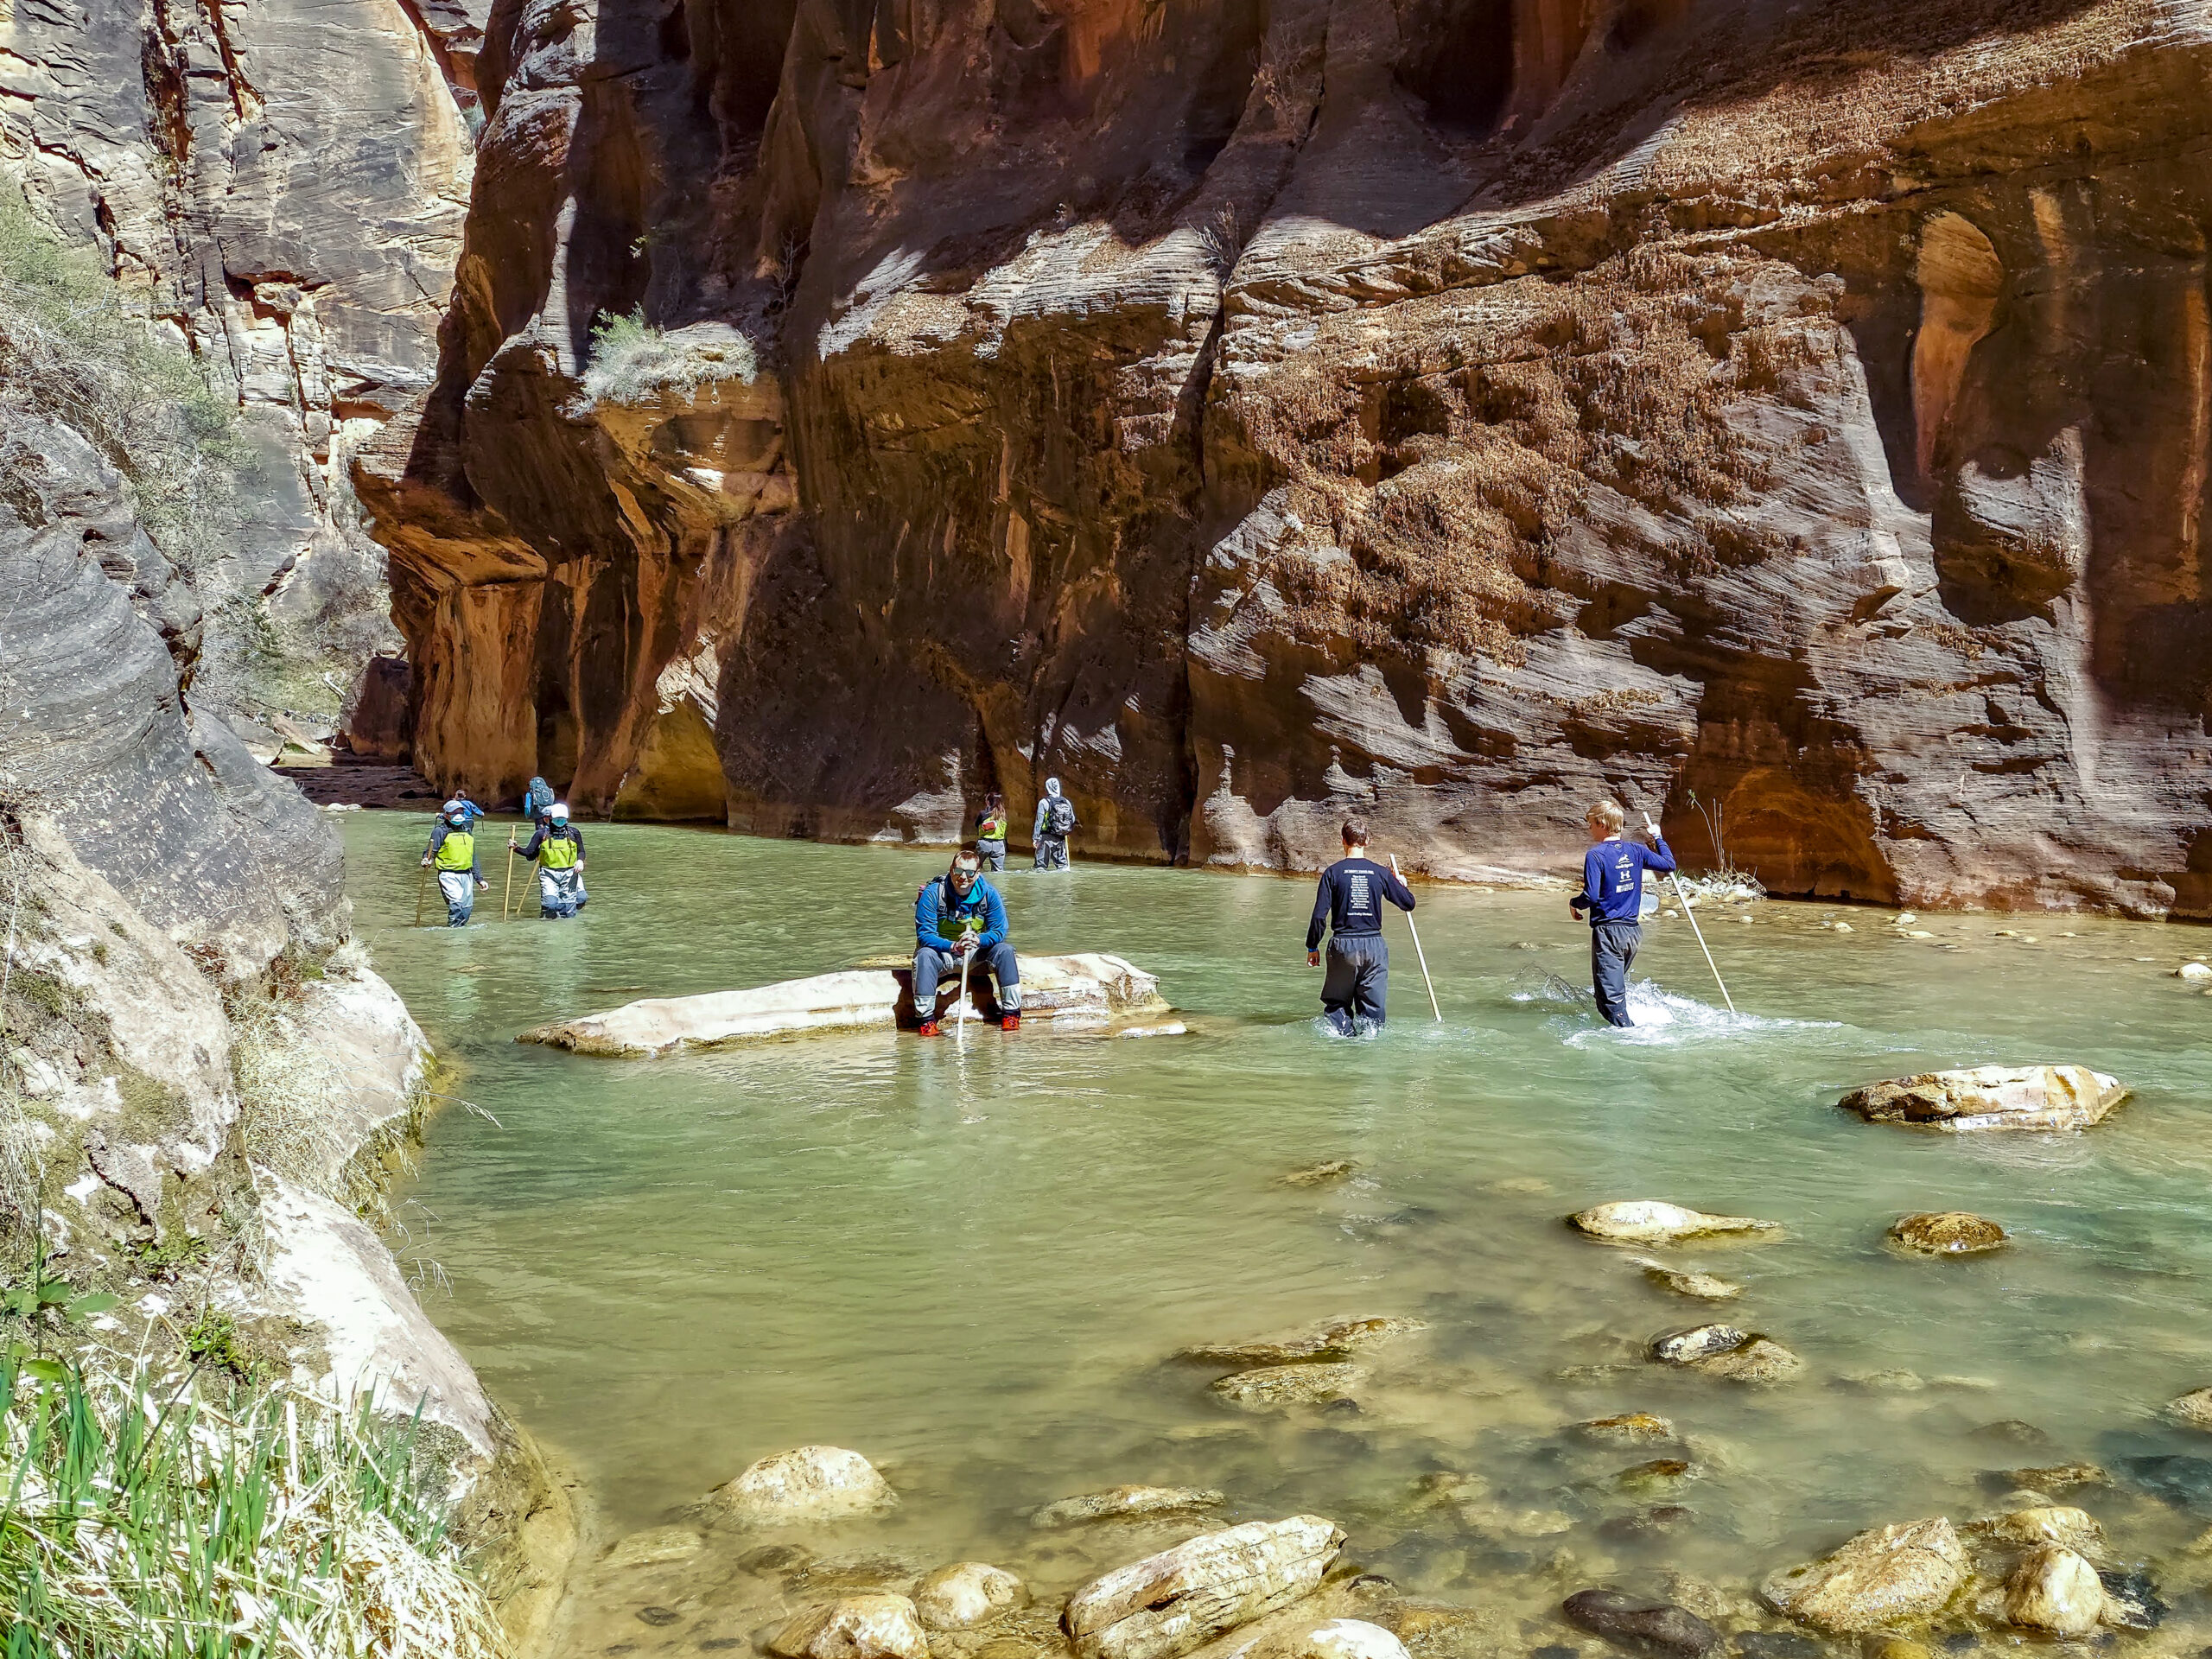
    Lunch and Snack Breaks

    There are a few different places along The Narrows where you can get out of the water and find a small patch of dry land to take a snack break or a lunch break.  If you start before lunchtime, I highly recommend packing a lunch. It is nice to take a break and enjoy the surroundings. It’s also easier to stop for a snack when you’re not actively walking up a river.
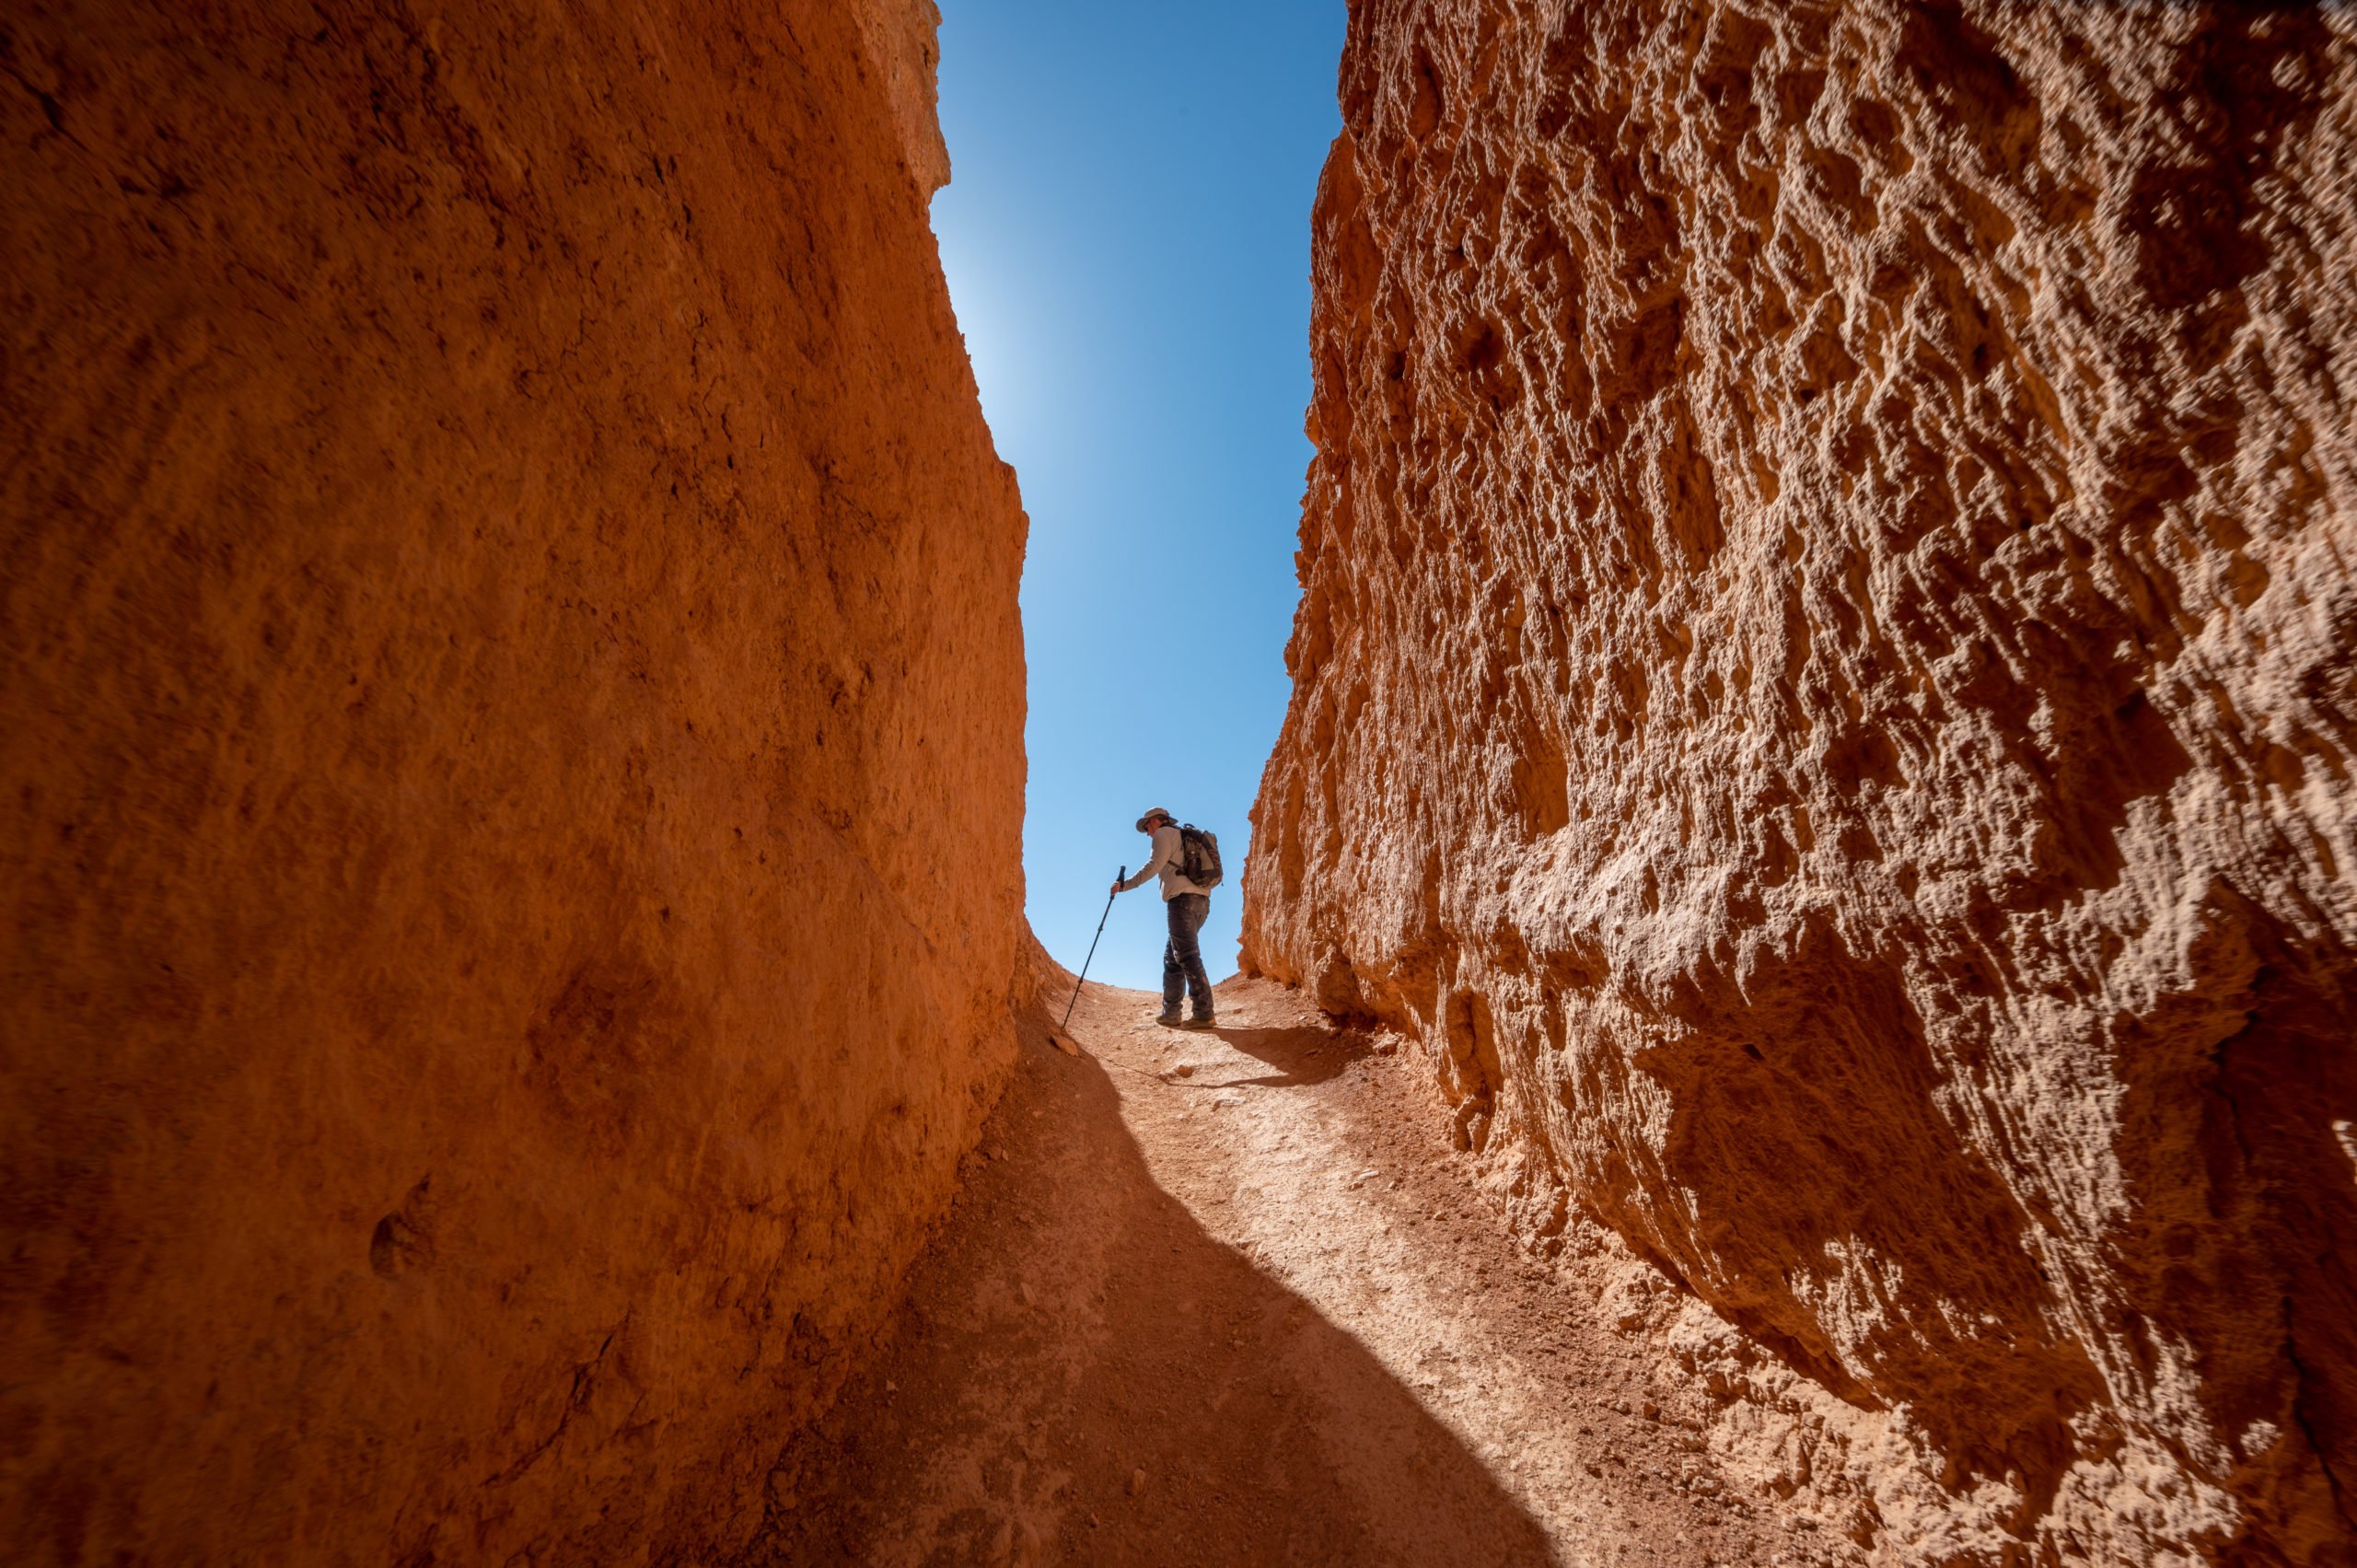
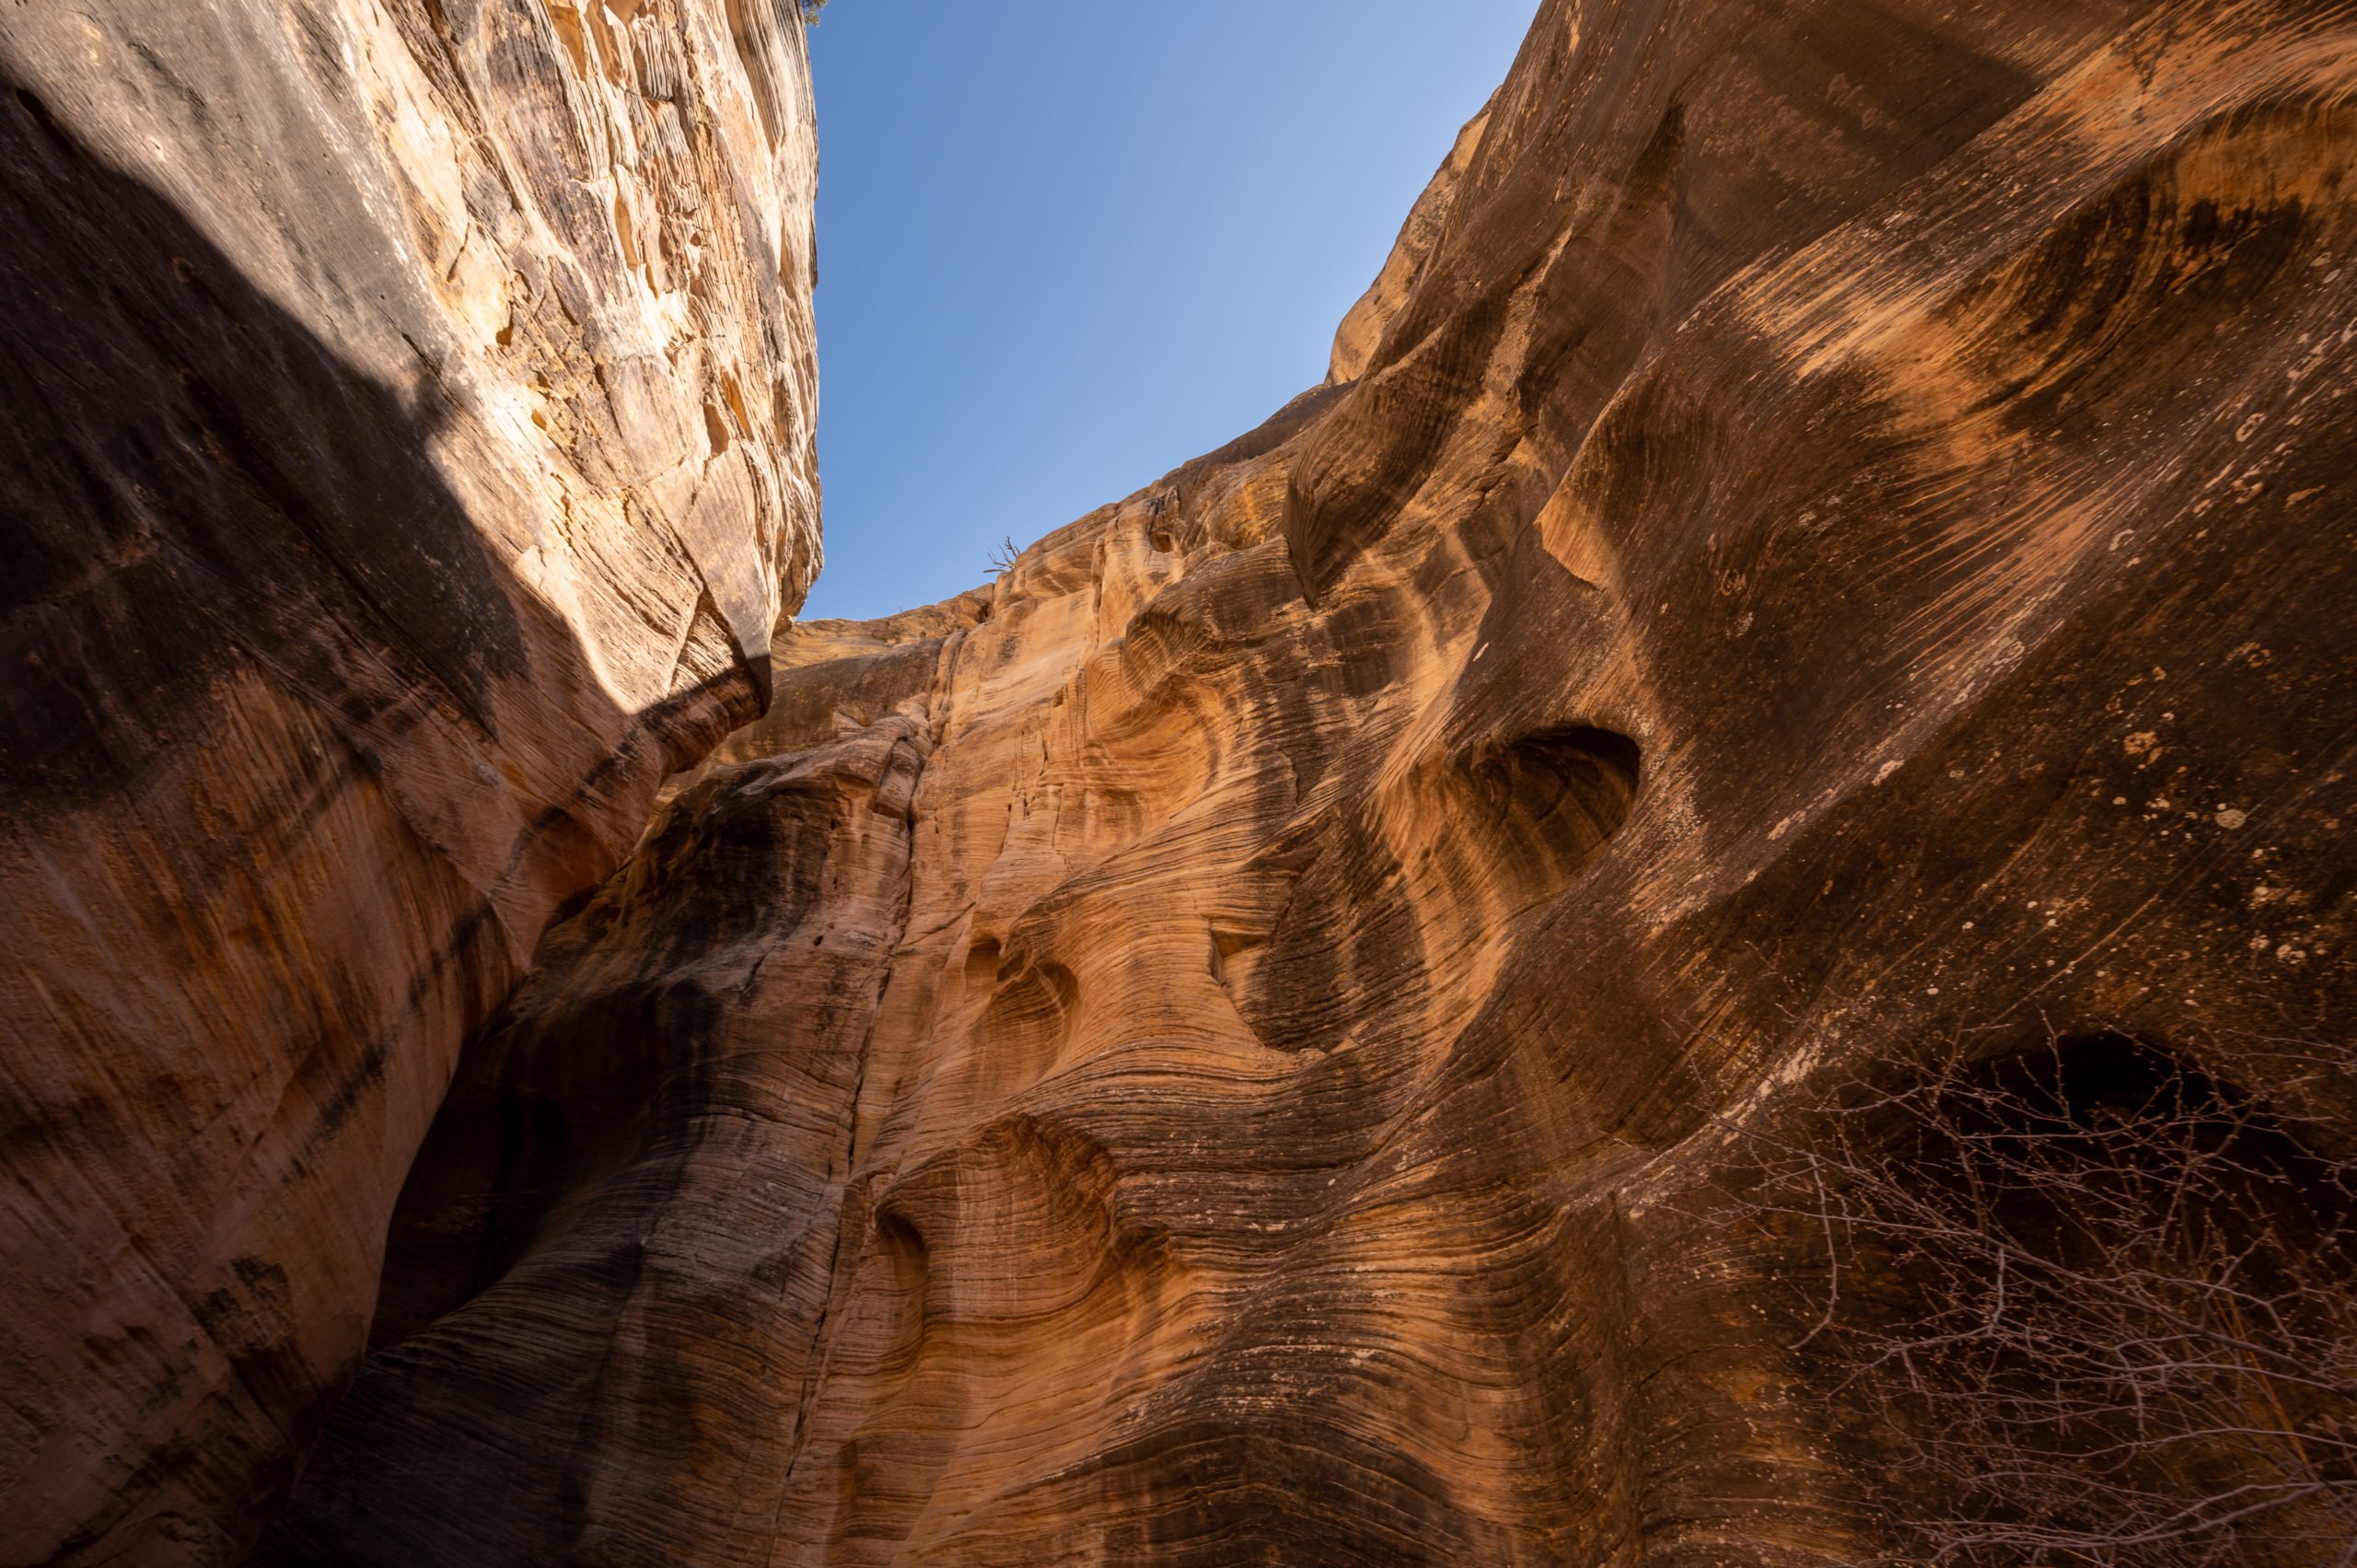
    Rest Break in the Virgin River

    Look Up

    Make sure to look up while hiking The Narrows. Zion Canyon towers above and looks so beautiful against the blue sky. Plus, you may find a ray of sunlight seeping down to the river, and you can basque in its glow as I saw other hikers doing. It gets a little chilly in the shaded parts of the canyon, so the sunlight is a welcome sight.

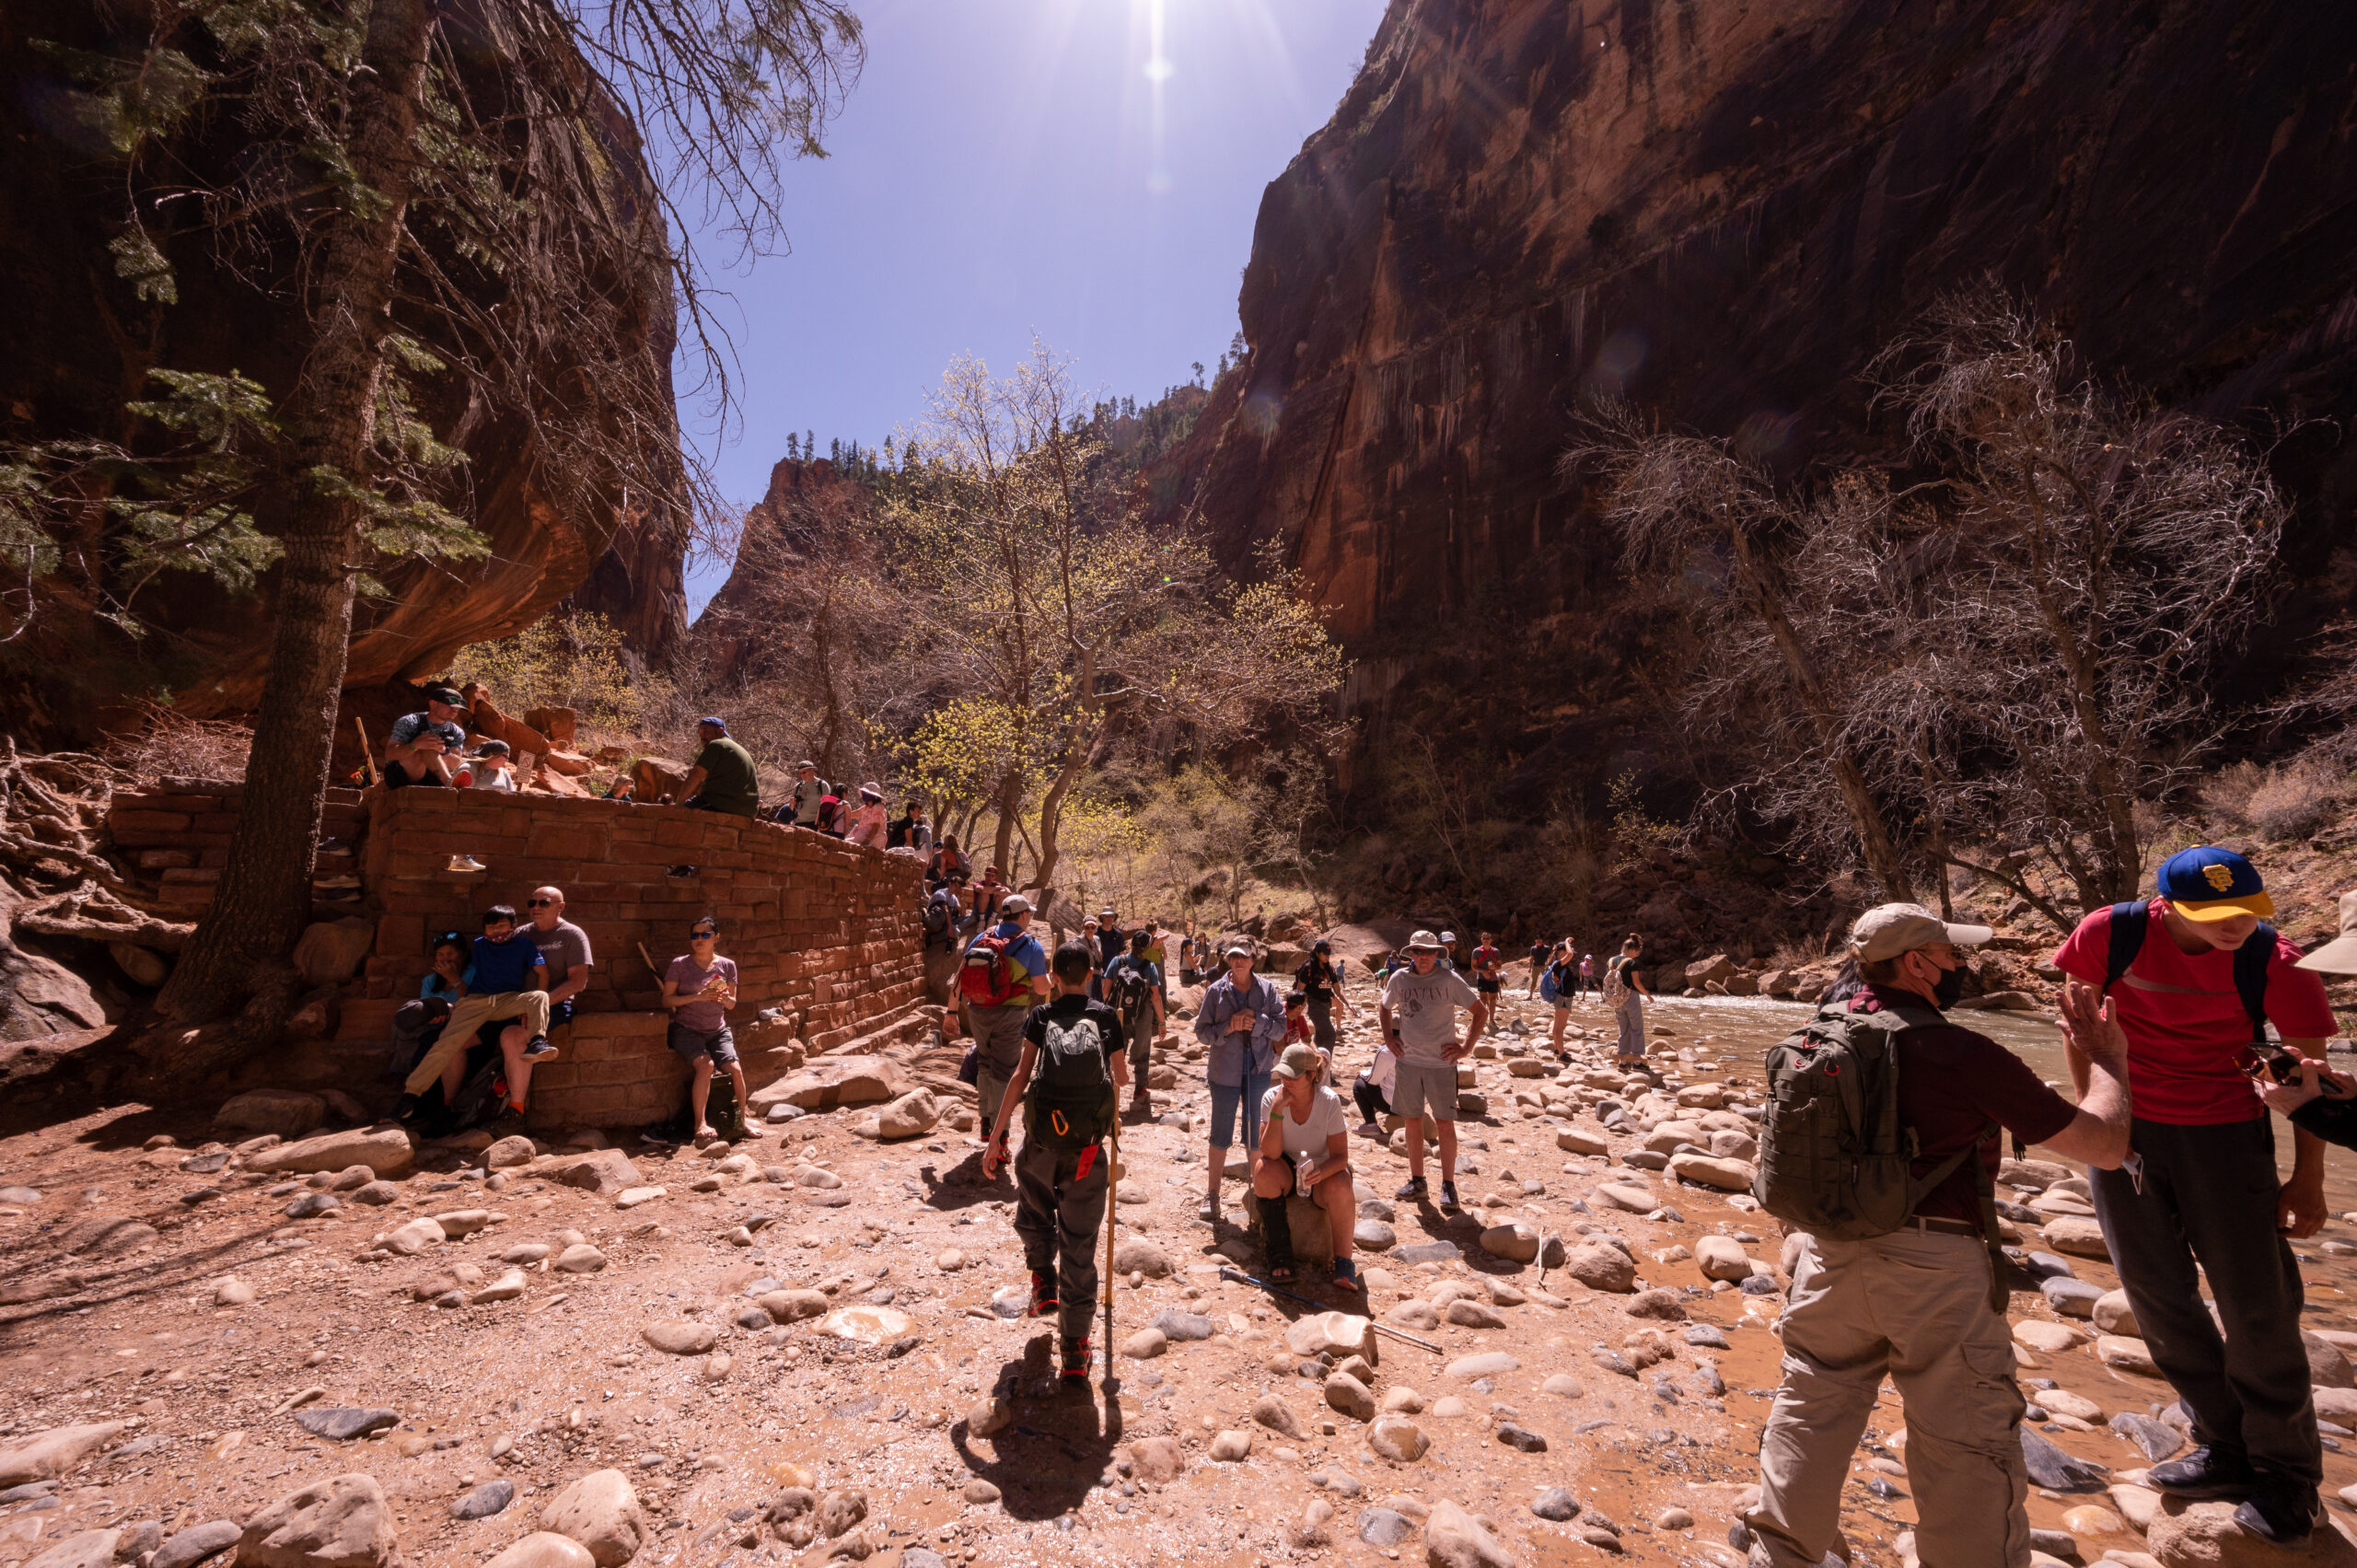
    2:30 p.m. Back on Dry Land

    We’re back where we started on the Riverside Walk. The trail is much more crowded now, with hundreds of people sitting around the end of the trail relaxing in the sun or playing in the river.  It is now in the 80s, and I can’t wait to be out of my gear and back into shorts! The hike back was faster, which always seems to be the case. You know where you’re headed on the walk back, and you’ve already taken most of the photos you want.

    Riverside Walk at Zion National park

    Overall Thoughts About Hiking Up The Narrows

    Who would have thought it could be so fun to spend the day hiking up a river? Not me. However, The Narrows was such a fun way to spend the day. It was beautiful to see the natural designs in the stone where the water carved it out and to gaze up at the canyon walls towering thousands of feet above. I think it is something you must experience for yourself to appreciate what the hype is all about.

    We visited in early spring, and water levels were still relatively low. A few deep spots went up to our waists, so I can only imagine what the current and levels are like a little later in the spring. Always check with the visitor center for the current conditions and prepare accordingly.

    A walk up the Virgin River

    Tips for Hiking The Narrows at Zion

    Reserve Your Gear Head of Time

    If possible, reserve your waterproof gear ahead of time. We did not have a reservation, but we got in line before Zion Outfitters opened, and we were fitted and checked out in around 30-minutes. It helped that they are right outside the main entrance to Zion National Park.

    Go Early

    Get to Zion National Park early to beat the heat and crowds and get parking so you won’t feel rushed for time or worry about missing the last shuttle out.

    Planning Your Day

    Don’t plan any other strenuous hikes for the day or any other hikes for that matter. If you’re anything like me, your feet will be sore after hiking over rocks for hours. I suggest grabbing some pizza and enjoying a leisurely day after your hike up The Narrows.

    Where to Eat

    The best tip I can give you is to drive to La Verkin and eat at River Rock Roasting Company.  They have incredible pizza with a view, plus the best cinnamon rolls you’ll ever eat.  They also sell their freshly roasted coffee beans to take with you. It’s your one-stop-shop for breakfast, lunch, and dinner! 

    Additional Articles You May Enjoy

    Hiking The Narrows in Spring
    Hiking The Narrows in Spring at Zion National Park
    Hiking The Narrows at Zion
  • The Best Viewpoint to Watch the Sunrise at Bryce Canyon

    Plan to get up early at least one morning to watch the sunrise at Bryce Canyon National Park.  Morning light is the best time to see the Bryce Canyon Amphitheater. You will be amply rewarded for your lack of sleep as you see the first rays glimmering over the tops of the hoodoos and bathing them in a gorgeous glow of light.  The yellows and reds seem to sparkle, and the whole canyon comes alive!  

    In this post, I tell you my pick for which viewpoint to see the sunrise at Bryce Canyon, as well as two other options that make my top 3 choices for watching the sunrise when visiting Bryce Canyon National Park.

    My Pick for Watching the Sunrise at Bryce Canyon

    Although there are several options for watching the sunrise at Bryce Canyon, Inspiration Point was my first choice when deciding where to photograph the sunrise during my visit. I love getting up to see the sunrise. There’s something special about greeting the beginning of a new day. Morning light is also one of the best times for photography.  This is especially true at Bryce Canyon!  The canyon glows in the morning light, and the hoodoos are on full display, whereas later, they will be encompassed by the afternoon shadows.

    Why Choose Inspiration Point?

    I like that Inspiration Point has multiple designated viewpoints along the half-mile climb to the top.  You get a closer look at the canyon from the lower viewpoint, then as you make your way to the upper viewpoint, you also pass a midpoint viewing area for an additional perspective.  

    Inspiration Point is also less busy at sunrise.  Most people generally head for Sunrise Point, which is a good option, but a more crowded option.  By choosing Inspiration Point, I was the first person there, and there was only a total of 6 of us up there for the entire sunrise!  This made it a very leisurely and enjoyable way to photograph the sunrise and enjoy the views.

    Inspiration Point allows you to look to the right toward Bryce Point and the left at Sunset Point and Sunrise Point.  The smaller crowds, expansive views, along with the multiple viewpoints are why I chose Inspiration Point for my first option to photograph the sunrise at Bryce Canyon.

    Getting to Inspiration Point

    • Trail Length: 0.6 miles (one-way)
    • Hiking Time: ~10 minutes to upper Inspiration Point
    • Elevation Gain: ~ 140 feet
    • Trail Difficulty Rating: Easy (It’s a little steep at the top, but it’s a wide trail and a short hike.)
    • Features: 3 different viewpoints of the Bryce Canyon Amphitheater, it’s also situated along the Rim Trail for those looking for a longer hike. It is wheelchair accessible to the lower viewpoint. 
    • Restroom Facilities: Yes. There are pit toilets alongside the parking lot.

    Tips for Photographing the Sunrise at Inspiration Point

    What Time to Arrive

    45-minutes before sunrise

    I typically try to get to a destination at least 1-hour before sunrise. However, 45-minutes was plenty of time at Inspiration Point during my visit in spring.  With 1-hour, you are assured of having the first pick of spots, even in the summer.

    What to bring?

    • Camera
    • Wide-angle lens
    • (A smartphone camera works too!)
    • Tripod
    • Flashlight (For the hike up in the dark.)
    • Warm Layers (Gloves & a hat were really nice to have in the spring.)
    • Hiking Poles (This hike is short but steep at the upper viewpoint, so hiking poles are handy to have.)

    Upper Viewpoint

    What to expect?

     There is a railing around the upper viewpoint so bring a tall tripod, or you’ll need to hold your camera to avoid the railing in your shots.  

    You are at a higher elevation, so the weather is typically colder than you would expect before the sun comes up. I visited in April, and there was still snow in spots along the trail. The Rim Trail to Bryce Point was also closed due to snow.  

    If, for some reason, you arrive and upper Inspiration Point is crowded, then walk back down the trail for a slightly lower vantage.  There is plenty of room along this trail for you to find a spot to watch the sunrise.  Be careful, though, as only the designated viewpoint areas have a railing. Keep small kids away from the canyon edge and watch your step, especially in the dark.

    I think this is fairly well-known, but no drones are allowed in any of the U.S. National Parks. However, while I visited, someone put a drone in the air at Inspiration Point, and a ranger was there within 5-minutes.  I have no idea how the ranger knew about it so quickly, but they did.  I think they only gave the person a warning, but I assume you could be fined, so I wouldn’t take any chances.

    Sunrise at Bryce Canyon

    Photography Tips

    Photograph it from various vantage points and angles.  I didn’t get a chance to scout out Inspiration Point the day before. Instead, I went directly to the upper viewpoint to set up my tripod for the sunrise.  Then I later photographed it from the midpoint and lower viewpoint.  Walk around the upper viewpoint and try some views on both the left and right sides of Inspiration Point.  Use trees and vegetation to create depth and interest.  

    Try shots from up high and down low.  Also, stick around a little while after the sunrise as the glow in the canyon gets brighter, and the colors really start to come out. 

    More Great Options for Watching the Sunrise at Bryce Canyon

    My other top choices for watching the sunrise at Bryce Canyon are Sunrise Point & Bryce Point. Both of these have gorgeous views! I especially liked the view from Bryce Point. Partly I think, because the viewing platform jutted out, and it felt like I was suspended over the canyon.  The trail to Bryce Point is completely paved, so although a little steep in spots, it is wheelchair accessible.  There are also restrooms at both Sunrise Point and Bryce Point.  Sunrise Point is popular for a good reason. It gives you sweeping views over the Queen’s Garden trail and canyon and makes a great (and popular) choice for photographing the sunrise at Bryce Canyon. 

    What to do After Watching the Sunrise

    After watching the sunrise at Bryce Canyon, you are ready to hike into the canyon and see it up close!  The morning light (and temperatures) make it the perfect time to hit the trails.  If you only have time for one hike in Bryce Canyon, I recommend the Navajo Loop Trail & Peekaboo Loop combination hike.  My hubby and I loved this hike, and it was the perfect way to see the canyon up close after viewing it from above at Inspiration Point.  It really added to the experience to see it from a birds-eye-view first to the ground level.

  • Navajo Loop Trail & Peekaboo Loop Hike: The Best of Bryce Canyon

    Bryce Canyon National Park is a gorgeous park worth spending a couple of days (minimum) exploring.  The Peekaboo Loop and Navajo Loop Trail combo is one of the best, if not “the” best option for sampling all that is Bryce Canyon, National Park.  Gaze up at the hoodoos as they tower over you, walk through an alpine forest and experience the Wall of Windows up close in all their glory. If you only have time for one hike in Bryce Canyon, this should be it!

    About the Hike

    This hike combines both the Navajo Loop Trail and the Peekaboo Loop Trail into a mini figure-8 combination loop. Depending on when you hike this trail, portions of it may be closed due to ice.  Bryce Canyon is at over 9,000 feet in elevation. It often has snow that lasts into late spring.  I visited in early April, and the Wall Street portion of the Navajo Loop Trail was closed due to ice.  

    • Trail Length: ~5 miles (roundtrip) 
    • Hiking Time: 3-5 hours (This really depends on how many photo stops you make, snack breaks, and overall pace.)
    • Elevation Gain: ~ 1580 feet
    • Trail Difficulty Rating: Moderate
      The National Park System rates this trail as “strenuous.” I found it to be moderate compared to other hikes I’ve done. However, I will say the heat certainly adds an element of difficulty to the hike, so I can see why they would give it a strenuous rating when factoring in elevation change and weather.
    • Features: Close-up views of hoodoos, the Wall of Windows, pine forest, and opportunities to walk through natural “doorways.”
    • Restroom Facilities: Yes. There are restrooms in the parking lot at the trailhead, and there is also one restroom on the Peekaboo Trail near the junction for the Bryce Point Trailhead.  This restroom is only open during the summer.

    What to Bring

    Water.  Do not take this hike or any hike in Bryce Canyon without bringing ample water. The temperatures here can be intense. It may start cold, but by afternoon, you’ll be very thankful to have enough water to drink. I always say you never regret having too much water!

    Trekking Poles.  A hiking pole or two will be handy for the steep descents/ascents and the loose sand and rock that make up the trail. Trekking poles are useful for anyone with knee problems.  My hubby had a bad flare-up with his knee bothering him, and his trekking poles were the only thing that made it possible for him to complete the hike.

    Sunscreen.  You will want to reapply during the hike. Trust me.

    Snacks. It’s always good to carry a little extra energy for the hike.  There are many great spots to sit and enjoy the views and have a little lunch break if you want to pack sandwiches and have a picnic among the hoodoos.

    Important Information:

    Hike this combination trail as early as possible.  It gets hot during the middle of the day, and the Navajo Loop Trail, in particular, gets incredibly busy!  Don’t allow the crowds to scare you off, though. Once you get on the Peekaboo Loop Trail, the crowds thin out considerably! When you are hiking back up the steep switchbacks of the Navajo Loop trail, you will be so happy you got an early start! 

    Plus, parking fills up at the Sunset Point parking lot, so the sooner you get here, the better. You can also park outside Bryce Canyon and take the park shuttle.

    Bryce Canyon Parking & Trail Map

    Here is a link to a map that gives you an overview of where the parking lots are located and the trailheads.  For this hike, you’ll want to park at the Sunset Point parking area. If you’re taking the Bryce Canyon Shuttle, you will also get off at the Sunset Point shuttle stop. Follow signs from the parking lot to the Navajo Loop Trailhead. It’s near the Sunset Point overlook area.

    Hiking the Navajo Loop & Peekaboo Loop Trails

    I hiked this trail in April.  I got up early to watch the sunrise at Inspiration Point and then drove to the Sunset Point Parking lot closest to the Two Bridges entry for the Navajo Loop Trailhead. My hubby was with me, and we ate a quick breakfast in the car before packing some water and snacks for the hike. 

    We started the hike a little after 9:00 a.m.  It was still cold out when we left, so we wore layers, which we removed about halfway through the hike. Due to Bryce’s high elevation, you experience both mountain weather and desert weather.  We started our days at freezing temps and then, by late afternoon, hovered near 80 degrees. 

    The Navajo Loop Trailhead

    Make sure to enjoy the Sunset Point overlook before starting the Navajo Loop Trail.  Chances are when you return to this spot, you’ll want to grab a bite to eat and relax, so take the time now while you’re still full of energy!

    We made our way down the first series of switchbacks before coming to a small viewing area near the turn-off to the Wall Street section of the Navajo Loop Trail.  Unfortunately, Wall Street was closed due to icy conditions, so we continued down the trail on the left side.

    The next series of switchbacks is beautiful and similar to the switchbacks on the Wall Street portion (see photo above), however not as narrow. You’ll pass by the “Two Bridges” before popping out from among the hoodoos and into the tree line.  

    A Fork in the Road: Queen’s Garden & Peekaboo Trail

    This trail continues a short way down from the Two Bridges before coming to a “T” in the trail. This is where you’ll have the option to go left for the Queen’s Garden Loop or head right to continue to the Peekaboo Loop Trail. 

    If you come down Wall Street, you pop out a little below this sign; however, the direction you go is the same. Go right for the Peekaboo Loop Trail. The left will take you back to the Queen’s Garden Loop and also the Navajo Loop Trail, which returns you to the top where you started.

    Peekaboo Loop Trail

    As you continue to the right, follow the connector trail as it crosses a big open section with pine trees and juniper bushes scattered around.  After about .25 miles, you come to another sign for the official start of the Peekaboo Loop Trail.  

    This trail is shared by both foot traffic and people on horseback. We followed the sign pointing to the right for foot traffic, which had us hiking the Peekaboo Loop Trail counterclockwise. After hiking it this way, I believe this also points you in the direction to give you the best views and vantage points straight ahead. Plus, I felt this half was the more interesting of the Peekaboo Loop Trail.

    From here, the trail quickly climbs back up into the hoodoos.  The Navajo Loop and Peekaboo Loop Trails take you down to the canyon floor, back up above, back down again, and finally back to the top where you started.  So prepare yourself for the ups and downs, but also know you will see so much beauty that it will all be worth it in the end.  This combo loop trail could quite possibly end up on your list of favorite hikes of all time.

    I did my best not to stop every 5 seconds to take a new photo, but it was still probably about every 30 seconds!  My hubby is a good sport and goes with the flow.  Both of us were enthralled by the variations in color and shapes of the hoodoos as we hiked along the Peekaboo trail.  It’s a lot of fun pointing out different shapes in the hoodoos, much like cloud gazing.  We’d say, “do you see that gnome over there?” Or “look at that elephant trunk!”  Kids will also enjoy finding “creatures” among the hoodoos.

    Nature’s Doorways

    It wasn’t too long after hiking up the Peekaboo Loop Trail that we walked through our first “doorway,” or perhaps “window” is a better word to use.  It’s like nature created a live polaroid for us to enjoy.  As we walked toward it, the light was so bright that we couldn’t see the view on the other side.  However, as we walked through the small tunnel, the view “developed” before our eyes.  I don’t know why I love these as much as I do, but I was excited to walk through each one.  I think we walked through three of these on the Peekaboo Loop Trail.

    A Tricky Washout

    The trail descends through another series of switchbacks similar to the Wall Street section on the Navajo Loop Trail, and briefly, you’re back among the trees. A washout area forked to the right, and we took a short snack break here.  This was probably a good thing, as two hikers came by and started walking to the right up the wash, not realizing they were no longer on the trail.  We let them know the trail was on their left, they thanked us and continued on their way.  I think this was the only part of the Peekaboo Loop Trail where one could get off track. However, you would figure it out pretty quickly if you did accidentally miss the trail.

    The Wall of Windows

    Almost immediately after your descent through the short switchbacks, the trail heads back up, and we hike toward the Wall of Windows. We loved this section of the trail as we gazed up at the towering Wall of Windows.  It looked so small earlier this morning as we peered down at it from Inspiration Point, and now here we were right next to it!  There are many great points along this section to take photographs of the Wall of Windows and the view of the hoodoos in the canyon below.

    Bryce Point Trailhead – The Halfway Point

    After leaving the Wall of Windows, you descend into the tree line and out of the hoodoos.  Soon you pass the trail which takes you to Bryce Point.  Bryce Point is another starting point for those who want to hike the Peekaboo Loop Trail without hiking the Navajo Loop Trail.  The Bryce Point trail was, however, closed due to snow when we visited in April. At this point, you are now about halfway through your hike around the Peekaboo Loop Trail.

    Trail Restrooms

    Not long after you pass the trail for Bryce Point, you come to a shaded resting area with a sign on the right for restrooms.  These are closed from fall to spring.  The main trail continues past the sign for the restrooms.  There is also an area here where people on horseback can let the horses take a water break. 

    Back in the Hoodoos

    I’ll admit, the section of trail after leaving the Wall of Windows was probably my least favorite of the whole Navajo and Peekaboo Loop Trails.  It was a lot of walking through trees without a lot of scenic viewpoints. You do get a good amount of shade here, though, which you will soon miss when you pop back out above the treeline and into the hoodoos.

    Soon, you’re admiring hoodoos, and there’s another “window” to walk through and more beautiful views to look forward to before you begin your descent back to the start of the Peekaboo Loop Trail. There is very little shade along this section of the trail.

    Once back at the start of the Peekaboo Loop, retrace your steps (heading left) back to the fork for the Navajo Loop Trail and Queen’s Garden Trail and begin your climb back up to Sunset Point.

    Alternative Hiking Options

    Shorter Hike Option: For those who aren’t up to the longer Navajo Loop combined with the Peekaboo Loop, hike the Navajo Loop on its own for a shorter option.  You won’t see the Wall of Windows up close or walk through the “doorways” carved in the rocks, but you still get a sense of the grandeur of the hoodoos and their colorful features.  Plus, you also walk through a small section of the pine forest.  

    Longer Hike Option: For those wanting an even longer option, consider the “one hike to rule them all,” which combines the Navajo Loop Trail, Peekaboo Loop Trail, and the Queen’s Garden Trail! I still recommend starting at the Navajo Loop trailhead by Sunset Point and following the directions for the Navajo Loop & Peekaboo Loop combo listed above before exiting out via the Queen’s Garden Trail. 

    This gets the steeper portion of the loop out of the way on the descent.  Then, you come up the Queen’s Garden Trail and end near Sunrise Point when you return. You take the paved footpath from here back to the Sunset Point parking lot.  This is the easier option for the ascent. This figure 8 hike is considered a strenuous hike and is around 6.4 miles round-trip.

    Sunrise Recommendation

    To complete your scope of Bryce Canyon, I recommend watching the sunrise at either Sunrise Point or my choice, which was Inspiration Point.  I watched the sunrise at Inspiration Point and then drove over to the trailhead for the Navajo Loop Trail. I think the morning hours are the best time to experience Bryce Canyon’s hoodoos as the sun causes them to glow red and orange.

    At Inspiration Point, I looked out over the Bryce Canyon Amphitheater and saw the Wall of Windows far below. Later, as I hiked next to the Wall of Windows, it gave me a greater appreciation for the scale of Bryce Canyon.  My hubby and I said to each other, “remember this morning when the Wall of Windows looked so far away?”  It was a neat way to spend the day going from a bird’s-eye-view to the ground level.

    More Articles You Might Enjoy


    If you hike the Navajo Loop Trail and Peekaboo Loop Trail, I’d love to hear your thoughts about the hike and your visit to Bryce Canyon.  I loved my time here and would like to go back to explore it and the surrounding area more.

    Happy Hoodoo Hunting!

  • Willis Creek Slot Canyon: A Fun & Easy Hike

    If you want a fun and easy slot canyon that doesn’t require any big scrambles over rocks or narrow squeezes that require months of dieting to perform, then look no further than the Willis Creek Slot Canyon! The Willis Creek Slot Canyon is located in Utah’s Grand Staircase-Escalante National Monument. 

    This hike is perfect for families and anyone looking for a mostly flat slot canyon hike. I saw multiple families with young children, probably around the age of 5 or possibly younger doing this as well as older kids and teens.  It’s a beautiful and enjoyable slot canyon hike good for all ages.  

    We chose to do this hike on a day where we spent the morning at Bryce Canyon, but we still wanted a short hike to do that afternoon.  The Willis Creek Slot Canyon Hike is about 1-hour from Bryce Canyon National Park and only 30-minutes from Kodachrome Basin State Park. If you’re in the area, you’ll want to consider this fun hike!

    Getting to the Willis Creek Slot Canyon Trailhead

    The turn-off for the road to Willis Creek Slot Canyon is just outside the small town of Cannonville.  Stop at the visitor center in Cannonville to double-check road conditions.  If it has rained or will rain, then skip this hike.

    Directions:

    From Cannonville, head south on Kodachrome Road/Main Street for about 2.5 miles before it turns into Cottonwood Canyon Road. Take a right on BLM 500/Skutumpah Road.  Stay on BLM 500 for about 6.1 miles before arriving at the parking area for the Willis Creek Slot Canyon trailhead.  You will come to multiple forks in the road, but as long as you stay on BLM 500, you will arrive at the parking area after about 30-minutes of driving time.

    *I used Google Maps to navigate to the Willis Creek Slot Canyon trailhead and had no issues. However, I read reports online of others who had issues with Google Maps telling them to turn down private roads.  Perhaps Google fixed that issue? 

    About the Willis Creek Slot Canyon Hike

    Distance: ~2.8 round trip

    It’s approximately 1.4 miles one-way to the end of the slot canyon portion of this trail. We hiked to this point and then turned around.

    Difficulty: Easy

    It is a mostly flat, uneven, and rocky trail. Most people can navigate it without any issues.

    Duration of the Hike: 2 to 2.5 hours

    This will depend on how far you hike down the trail. We took around 2 hours to hike the 2.8 miles to the end of the slot canyon portion and back.

    Road Conditions: 

    The dirt road to the trail is rough but typically doable with a 2WD vehicle.  I saw everything from small cars, RVs, camper vans, and trucks on this road. It is a lot of washboard gravel road with some large potholes here and there.

    Make sure to check road conditions at the Visitor Center in Cannonville. If it has rained the day before your visit or will rain, save this for another day. When the sand on this road gets wet, it turns into a muddy mess you do not want to deal with. It’s also not safe to hike in slot canyons if there is the potential for a flash flood. You can also call the Visitor Center at 435-826-5640 for more information.

    The Trail:

    The Willis Creek Slot Canyon trail starts across the road from the parking lot.  Follow the dirt path through some brush and down to the creek bed.  This is a mostly flat trail with very little elevation change.  You’ll hike through a small section of slot canyon before it opens up into a wide wash area which you’ll follow for approximately 10-minutes before you’ll wind around another bend and find both a small waterfall and entrance to the main Willis Creek Slot Canyon area.

    What to Bring

    Bring hiking poles, plenty of water, and a snack bar or two. Make sure to apply sunscreen before starting the hike. Although you’ll be inside a slot canyon or the majority of the hike, there are a couple of stretches out in the open sun where it gets really hot.

    Depending on when you visit, you will either encounter ice (we did in April), muddy conditions, or you’ll be walking through the creek water as you make your way through the slot canyon.  Because of this, you will want to consider wearing shoes that you’re comfortable getting wet.

    Things to See Nearby

    Closing Thoughts & Places to Eat Nearby

    Willis Creek Slot Canyon is an easy hike, good for kids and families or for someone who wants an easy but beautiful hike to add to their day.  This is another one of those hikes where it’s about enjoying the journey, not necessarily getting anywhere in particular.  Enjoy the shapes of the canyon as far as you want to go and then turn around and head back when you’re ready.

    We enjoyed this hike after a morning spent at Bryce Canyon and after a long day of hiking at Bryce the day before.  Sometimes you just want something fun and easy, or maybe you’re like us and need to work off that pie you ate for lunch. If you decide you want to do what we did and eat some really yummy cherry pie before your hike, check out Bryce Canyon Pines. Or maybe you need a pick-me-up before your hike, then stop at Bryce Canyon Coffee Co on your way. They have great coffee and friendly service too!

    If you want some dinner after your hike, then grab some BBQ at i.d.k. Barbecue in the town of Tropic, Utah. A warning though, lines can be ridiculously long here. We had to wait over an hour to place our order! The good news is your food is ready within 10-minutes of ordering.

    Other Articles You Might Be Interested In for Your Trip to Utah: