A visit to Maui wouldn’t be complete without exploring Haleakala National Park and Upcountry Maui. The drive through Maui’s Upcountry is a gorgeous ride up winding roads with incredible ocean views below. As you rise higher and higher, you soon find yourself looking down on the clouds. It is an incredible experience! You feel as though you’re looking down on the entire world below, a view often only seen from an airplane, and yet, here you are, feet on the ground as you stare in amazement at the unique, almost Mars-like landscape around you. Once again, you’re reminded of what a magical place Maui is.
Getting to Haleakala National Park
It takes an average of 1.5- 2 hours for most visitors to drive to Haleakala’s Summit. This, however, doesn’t take into account additional stops along the way in Upcountry Maui, stops for shopping and food. I recommend leaving no later than 10 a.m. to have plenty of time to stop at a few places in the Upcountry as well as take in a couple of day hikes in Haleakala National Park. You want time to take it slow and enjoy the views along the way.
Average Travel Times to Haleakala’s Summit Building:
Makawao’s Rodeo General Store: ~ 1 hour
Kula Market Place: ~ 45 minutes
Lahaina: ~ 2 hours
Kihei: ~ 1.5 hours
The Drive to Haleakala: Stops Along the Way
One of the best parts about the drive to Haleakala is driving through Maui’s Upcountry. If you’ve never been, you will most likely leave, considering a stay there during your next visit to Maui. I love being by the ocean when I stay in Maui, but the beauty and views in the Upcountry are too incredible to miss! On a clear day, you look down on the island of Maui, across lush fields dotted with eucalyptus trees, avocado trees, palm trees, and other gorgeous flowering plants. I feel like I’m driving through paradise as I climb up to Haleakala.
First Stop in Maui’s Upcountry: Makawao
Anytime I visit Maui’s Upcountry, I always come to Makawao. I love stopping at the Rodeo General Store. I wander the aisles looking for unique finds and locally sourced products. It’s here I’ve found some of my favorite coffee, locally grown fruit, and fun finds like Grandpa Joe’s lilikoi cotton candy. The staff is always helpful and friendly, and it is frequented by the locals, which gives it that homey feel rather than a place designed for tourists.
On my last visit, I was on a hunt for lilikoi (passionfruit), which I had discovered when one fell from a tree during our hike at Waihee Ridge Trail. After trying it, I knew I had to find more! We drove to Makawao since we knew Maui’s Upcountry is where much of the produce on the island is grown. Sure enough, we found lilikoi at Makawao’s Rodeo General store.
We spoke with one of the employees who had a daughter attending the University of Washington. I told him about my hunt for lilikoi, and he suggested some other fruit to try too. He helped me pick out strawberry papaya and some ice cream bananas. I love sampling new fruits wherever I go; it’s how I discovered mangosteen during our visit to Thailand.
Another great place to visit when in Makawao is the Komoda Store & Bakery. Go in and purchase some malasadas for your road trip to Haleakala. You may want to grab some milk at the general store too.
Makawao has many fantastic local shops, so spend 30 minutes to an hour browsing the shops on Baldwin Avenue before continuing to Haleakala. Better yet, plan to come back another day and spend the afternoon exploring the Upcountry even more.
Rodeo General Store 3661 Baldwin Ave Makawao, HI 96768
Komoda Store & Bakery 3674 Baldwin Ave Makawao, HI 96768
Next Up: Kula, Hawaii
Kula is another beautiful town in Upcountry Maui. I love the gorgeously manicured lawns, the sweeping island views, and best of all, locally sourced goodies! I recommend visiting the following three local businesses in Kula, Hawaii, during your day trip to Haleakala. If you have extra time to spare, I highly recommend exploring more as there are many great choices in Upcountry Maui.
It was during my hunt for all things lilikoi that I stumbled upon Maui Upcountry Jams and Jellies. We were in Kula when I came across Maui Upcountry Jams and Jellies’ website, which listed “lilikoi curd and lilikoi jelly.” I knew I had to go!
I thought Google must have led us astray when visiting their storefront, but after a quick phone call with Jan, the owner of Maui Upcountry Jams and Jellies, I found Google was correct. The storefront is in a residential neighborhood tucked behind a row of houses.
Jan helped us choose a variety of jams and jellies, and syrups. Oh, did I mention, she also has lilikoi syrup, and it is amazing! Afterward, she helped box and package our purchases to mail them home without any of them breaking. Our package arrived home in perfect condition, ready to eat.
I recommend you buy all the jams, jellies, syrups, and sauces while you’re in Kula and then ship them home from the post office in Kahului, Hawaii. We spent around $14 to ship ours home to Washington State, and it is a much cheaper option than purchasing on the Maui Upcountry Jams and Jellies website, which has a fixed shipping cost to the mainland of $48! So, stop in her shop when you’re in Kula and purchase a bunch to stock up on for home. You’re going to thank me later!
Another great place to buy locally sourced foods is at Maui Bees in Kula, Hawaii. Depending on what day you visit, you might even be able to get lunch on the farm. In addition to honey, they sell other foods from the farm as well as gluten-free goodies. I love their honey! The first kind I tried was their Macadamia Nut honey. It has such a wonderful, different flavor than the clover honey I’m used to back home. It was love at first bite! I highly recommend it, and if you’re like me, you’ll come home and order more from their online store. They offer free shipping for all orders $99 and over.
The Kula Market Place is a great source for more locally sourced crafts, food, and gifts. There is a small grassy area in front of the market with a picnic table. The Kula Market Place is next door to the Kula Lodge, so if you consider staying in Kula during your visit to Maui, you might want to check them out! Also, notice the faded sign along the fence that borders the Kula Market Place and the Kula Lodge. Unless you want to do dishes for the rest of your life, you might want to think twice about taking any of their avocados.
With Additional Time in Upcountry Maui
I listed just a few stops in Maui’s Upcountry on your way to Haleakala. However, you could easily spend an entire day in Upcountry alone. You will find more ideas of things to do in Upcountry Maui in my post Sunrise at Haleakala National Park: Don’t Miss It!
Some tours I recommend with more time in Upcountry:
Make sure to look up hours of operation for any businesses and tours in Upcountry Maui you plan to visit. Many of them have odd hours and days when they are open, so you want to check ahead of time to make sure they’re open before driving up.
The Winding Road to Haleakala
Your climb continues after leaving Kula, and this is where the road really starts to get those twists and turns Maui seems famous for. It may not have as many curves as the Road to Hana, but it definitely does a good job competing.
You’ll soon enter a free-range area for cattle. Please drive carefully as cows are frequently found standing in the middle of the road! You do not want to hit a cow, trust me. Besides the damage, it will do to your car and the cow, you could also be responsible for paying for the cow out of pocket if your insurance does not cover these types of accidents. So take it slow and enjoy the ride!
There are several pull-offs during the drive up to Haleakala, and I recommend you pull off at one or two of them and enjoy the views. The rolling green hills dotted with cattle and heather bushes are beautiful. You might even be lucky enough to catch a rainbow during your drive. Remember, the joy is in the journey, so stop when it suits you and make the most of it.
Arriving at Haleakala National Park
When you enter Haleakala National Park, you’ll pass by a small ticket booth, and if you’re in the park during normal business hours, a ranger will be in the booth to answer any questions, take your money, and provide you with a map of the park.
After passing through the park entrance, you’ll drive about another 5 minutes before coming to the Haleakala Park Headquarters and Visitor Center. You can stop here to talk to a ranger and also use the restroom. There aren’t any other restrooms until you get to Visitor Center near the summit.
Recommended Hiking Trails for a Day Trip to Haleakala
There are three hiking trails I recommend for your day trip to Haleakala. With limited time I think these three trails give you great views and provide you with a good overview of the Haleakala shield volcano. Continue reading for more information on each of these.
Leleiwi Overlook Trail
Pa Ka’oao Trailhead
Keonehe’ehe’e Trailhead
Leleiwi Overlook: Don’t Miss this Short Hike!
A day trip to Haleakala doesn’t give you much time for long hikes or in-depth exploring. However, this doesn’t mean you have to miss out on incredible views or hikes in this unique terrain. The Leleiwi Overlook trail is only 0.15 miles but gives you incredible views inside the volcano. It’s your first opportunity to look down on this Mars-like terrain and imagine what it must have been like as an active volcano. Really, don’t miss this stop. It’s well worth the short hike!
Haleakala Visitor Center & Hiking Trails
The Haleakala Visitor Center near the summit is another great place to stop and enjoy more spectacular views with a couple of great hiking options. There’s a large parking lot at the Visitor Center as well as restrooms. Even if the visitor’s center is not open, it’s worth stopping here to take in the view and do a little hiking.
Pā Ka’oao Trailhead
The Pa Ka’oao trailhead is to the right of the Haleakala Visitor Center. Follow the sidewalk path, and you’ll see a sign for it near the overlook area. It is a very short but rocky uphill climb, and soon you’re rewarded with sweeping views of the crater floor. You can also see the sliding sands trail to the far right as it winds its way down into this shield volcano.
If you want to come up for the sunrise but want to skip the crowds at the observatory, consider hiking to the viewpoint for Pa Ka’oao to watch the sun come up. Sunrise at Haleakala is an unforgettable experience.
Views from the Pa Ka’oao Trail Overlook.
Keonehe’ehe’e Trailhead
Walk to the opposite side of the parking lot from where you found the Pa Ka’oao trailhead, and you’ll find the Keonehe’ehe’e Trailhead near the road. This is also known as the Sliding Sands trail. With only a day trip to Haleakala, you won’t have time for a long hike into the crater, but depending on the time of day, you can plan for a short hike down this sandy trail. It gives you a new perspective on Haleakala, and there’s something special about walking into a volcano.
Make sure to pack plenty of water and some snacks for the hike. Although the trail might not look steep, the sand makes it a lot harder to hike than a normal hardpacked dirt trail. So plan for it to take longer than you think for the hike in and especially the hike back out.
The Summit at Haleakala
After spending time hiking and enjoying the views at the Haleakala Visitor Center, continue up the road all the way to the summit. There you’ll find an observatory (not open to the public) and the Haleakala Summit Building, which you can walk up to from the parking lot. There you’ll find the official elevation sign of 10,023 feet!
I later told my Dad about driving to over 10,000 feet on Maui, and he was surprised. He didn’t realize Maui had a mountain that tall. I think this is common with a lot of people who’ve never visited Maui. They think beaches and swimming, not cold, windy, over 10,000 feet elevation climbs!
There is a small trail above the parking lot, which you can hike from the Summit Building all the way around to the opposite side. I recommend you take the time to do this as it provides you with the highest views in the entire park and some great photo opportunities. If you’re staying for the sunset, consider scoping out a spot before it gets too crowded. Most people line up in front of the Summit Building or along the railing to the right.
Sunset at Haleakala
My first visit to Haleakala was to watch the sunrise. This required getting up in the middle of the night and driving over an hour from our condo in Kahana to arrive at the summit before the sun came up. It was freezing at the top, and I remember sitting there bundled in blankets sitting on the rock wall with other tourists as we anxiously awaited the sunrise. It was a spectacular scene and a memory I’ll never forget.
That being said, watching the sunset at Haleakala was also amazing, and guess what? I didn’t have to get up in the middle of the night to do it! A day trip to Haleakala is the perfect opportunity for you to watch the sunrise at Haleakala. You have a lot of options for where you watch the sunrise from. You can watch it on the summit at 10,023 feet. This is where most people view it, or you can drive down below the summit until you find a place to park and watch.
That’s what we did. This was partly due to my hubby needing to get back to our condo to finish some work before midnight. However, as the sun started to dip down and the brilliant colors started casting over the mountain, we knew we had to stop. We pulled off and set up our camera gear and enjoyed watching the gorgeous reds and oranges as the sun dipped below the clouds. It was just the two of us, and it was perfect.
Final Tips for Visiting Haleakala National Park
Avoiding Elevation Sickness
There is a good chance you will feel the effects of the change in altitude during your drive to the summit. It’s important to stay hydrated during your drive up and during any hiking. Also, bring snacks as this will help with the effects of the altitude. I personally felt lightheaded and a little nauseous, and I found that drinking water and eating the fresh coconut we’d packed really helped!
This article explains other ways to deal with altitude sickness, and it recommends eating foods rich in potassium, such as bananas or avocados.
Dress for Colder Weather
Most people don’t think of cold weather when they think of going to Maui. However, when you’re standing at over 10,000 feet, and the wind is biting your face and hands, you are going to be thankful for extra layers! It gets cold on Haleakala. They occasionally even get snow! When I visited for the sunrise, I wore base layers for skiing, jeans, coat, and hat. Additionally, I wrapped myself in a blanket, and still, I felt cold!
Even visiting in the evening, it was only around 40 degrees when I was there, and with the wind chill, it felt a lot colder. Make sure to pack a jacket (and sweatshirt) for hiking at Haleakala, and absolutely if you plan to visit for the sunrise or sunset, bring plenty of layers. You’ll be happy to have gloves too, so I’d toss those in when packing for your trip.
What to Pack
Plenty of water, snacks, sandwiches (if you’ll be there during meal times), layers of clothing, a jacket, hat, gloves, hiking shoes, tripod, and camera gear. There are no food services within Haleakala National Park. So you need to bring any drinks and food with you. If you stopped at the Rodeo General Store in Makawao on your way up, then you should be set! Make sure to wear comfortable shoes for hiking. The trails at Haleakala are very rocky. Flip flops are not appropriate footwear for hiking here.
Finally, remember to drive slowly, both going up and going back down. The cows are in the road both day and night, so this is especially important when you’re driving back down Haleakala in the dark. Also, watch out for Hawaii’s state bird, the nēnē. The nēnē is a medium-sized goose that sometimes crosses the road inside Haleakala National Park. They are an endangered species, so do your best to protect them and their habitat.
Waihee Ridge Trail in Maui is a gorgeous hike with lush jungles, eucalyptus forests, waterfalls, and stunning ocean views. It should definitely be on your list of things to do when visiting Maui, Hawaii. Hiking gives you a unique perspective on the place you’re visiting. You meet locals along the way, and it is a great way to connect and meet people in a non-tourist setting. I notice this when I am hiking back home as well. I meet visitors to our state and chat with them about their visit and where they are from. Connecting with others through nature and travel, it’s a beautiful thing!
During my latest visit to Maui, I hiked Waihee Ridge Trail with my hubby, and we loved it! It was a beautiful hike and offered a pretty decent workout too! I absolutely recommend you try it on your next visit to Maui. Below you’ll find all the info you need to get to the trailhead and prepare for hiking Waihee Ridge Trail.
About the Waihee Ridge Trail
Trail Length: 5.0 miles (roundtrip)
Elevation Gain: ~ 1500 feet
Trail Difficulty Rating: Moderate
Features: Lush foliage, waterfalls (from a distance), ocean views, eucalyptus trees, and flowers
Getting to Waihee Ridge Trail
The Waihee-Waiehu area is to the northwest of Kahului, and the trailhead is about 10 miles from the Kahului city center. If you’re coming from Lahaina, plan to take about 1 hour to drive to the trailhead. If you come from Kihei, it will most likely take around 35 minutes.
Take HI-30 E and Kahekili Hwy (Hwy 340) to Maluhia Rd. You’ll drive through the town of Wailuku to connect with the Kahekili Hwy. After about 6 miles on the Kahekili Hwy, you’ll make a left on to Maluhia Rd. Look for the Mendes Ranch on the right side of the road, and this is where you’ll make a sharp left onto Maluhia Rd. Maluhia Rd is a narrow road, so drive slowly and watch out for oncoming traffic. It’s about a mile on this road to the main trailhead parking lot.
Note: there is a parking area when you first turn off onto Maluhia Rd, continue past this to the main trailhead. You may find some people parking here on busy days, but I’d check first at the main trailhead parking.
I recommend using Google Maps for turn-by-turn directions from where you’re staying in Maui. You can click on the map below to get driving directions from your starting point.
My Experience Hiking Waihee Ridge Trail
My hubby and I left early from our condo in Kahana, grabbing coffee and breakfast at our favorite local coffee shop, Hawaiian Village Coffee. It is about an hour’s drive from our condo to the Waihee Ridge Trailhead. Although we could drive north and around the top of Maui, due to the narrow roads and nail-biting drop-offs in that section, we chose to drive south to Ma’alaea and then up through Wailuku.
Waihe’e (pronounced [why-HEH-eh]) Ridge Trail popped up on my radar when searching for new activities and areas to explore during our latest visit to Maui. It is highly rated, and I love a hike with a view, so I added it to our list of to-do’s, and I am so glad I did!
At the Trailhead Parking Lot
We arrived at the main trailhead parking lot around 8:00 a.m., and the parking lot was a quarter full. There are two porta-potties on one side of the parking lot closest to the trailhead. I used one of them before our hike and found it to be clean (for a pit toilet) with a hand sanitizer dispenser inside as well.
There is a small gate you walk through to begin the hike, and after that, begins a very steep hike up a paved trail. It appears it was a road at one time, perhaps to access the water holding tanks we passed. This initial steep climb was probably the steepest part of the whole hike! At least it felt that way. It definitely gets the heart going right out of the gate (pun intended).
If you find yourself short of breath going up this initial steep ascent, then turn around as I did and enjoy the view behind you as you climb up to the main trail.
Hitting Dirt
The steep paved portion of the trail ends and forks to the left, and soon you’re under a canopy of pine, guava, and eucalyptus trees. We passed through another hiker’s gate with a warning sign letting hikers know of cross-contamination dangers between islands. We only visited Maui, so we felt assured that our shoes would not carry the Rapid Ohai’a Death fungus.
As we weaved through the forests, we came to a bench that made a great resting point and viewpoint as we looked across at the Makamaka’ole Falls. After that initial steep ascent up the paved portion, the trail incline levels out a bit, and there is a nice mix of steady incline and flat trail for catching one’s breathe.
I enjoyed all the beautiful plants around me. We saw mushrooms, ferns, multiple species of trees, and flowers. It was so fun getting to see plants that are different than mine back home.
Viewing Platform 3/4-mile Mark
About a mile up the trail, we came to another viewpoint with a wooden platform. There was a beautiful Norfolk pine next to it and a gorgeous view of the emerald valley below. We could see many clouds near the top where we were hiking, but we remained hopeful that things would clear by the time we got to the top.
1.5-mile Marker
We passed beautiful koa trees and noticed small areas where they are replanting native plants and encouraging the local fauna’s growth. At around the 1.5-mile marker, we come along a small eucalyptus forest. I think these trees are so pretty with their twisted red and gold bark.
It is during the first 1.5 miles of trail that you’ll enjoy nice interludes of shade from the sun. However, after you pass the eucalyptus trees at the 1.5-mile marker, you’ll cross a field and begin your final ascent. This portion of the trail had very little shade covering, and it is also the portion of the trail we found to be the muddiest and most difficult to maneuver. There were deep ruts and slick mud where the trail was steep.
We saw a few people who chose to hike this trail with their bare feet. I don’t know whether that gave them an advantage over my tennis shoes or not, but I do know you wouldn’t want to try hiking the Waihee Ridge Trail in flip flops!
2.0-Mile Marker
At the 2.0-mile mark, I’ll be honest, but I thought to myself, “I’ve probably already seen the best of the views.” As the trail took us further inland, I realized we probably wouldn’t have much better viewpoints, but that didn’t matter. We were almost there! Plus, it allowed us to continue to stop and look below at where we’d come. We chatted with other hikers as we passed and even met a woman celebrating her 40th birthday by running the trail!
The End of the Waihee Ridge Trail
We arrive at the “top” and find a wooden platform with a picnic table. The clouds had not fully lifted. However, we could still enjoy the lush foliage around us and chat with various hikers and listen to the congratulatory greetings for those who succeeded in making it all the way.
Really, the hike down was even better as I didn’t have to stop to turn around to enjoy the views below. Plus, I feel it’s always easier on the way back as you know what to expect and how far you really have to go. Although we were sweating profusely, we both had such a wonderful time hiking the Waihee Ridge Trail. It was a great way to start our day!
We smiled and told people “just a little further” as we passed. I was happy we chose to come earlier in the day as it was already feeling hot as we hiked down, and it wasn’t even noon yet!
Make sure to use the provided shoe cleaners outside the hiker’s gate near the trailhead parking lot. I love that they provided these! I wish we had these at our trails near Seattle, as it is so useful!
Tips for Hiking Waihee Ridge Trail
Wear comfortable hiking shoes or at least tennis shoes. The trail gets steep and muddy in places, and you’ll want something with a little grip.
Bring plenty of water! The Waihee Ridge Trail is a steady climb up for 2.5 miles in humid conditions. You will not regret having too much water, but you will certainly regret not having enough.
Bring a snack. There’s a nice picnic area at the top, as well as a few spots along the way that make for a nice snack break. You’ll be happy to have the extra energy.
Check the Weather. This area of Maui gets a lot of rain, so check ahead and plan to come when it’s sunny. I would not recommend hiking this in the rain or after any heavy rain due to the upper trail’s slick and muddy nature.
Plan to come earlier in the day. The earlier you come, the more enjoyable your experience. I prefer to hike when it’s cooler. You could come later in the day before sunset, and I would also imagine that it would also be a nice time to hike this trail.
Things to Do Nearby
If you want more ideas for things to do near Waihee Ridge Trail, read my post on7 Fun Things to Do in Kahului Before Your Flight. You’ll see the Waiehu golf course on the list. You would have seen this golf course from your view on the Waihee Ridge Trail. It’s a beautiful public golf course located along the ocean. They have reasonable prices, and it’s a fun way to spend a few hours with friends, even if you aren’t “golfers.”
If you want some delicious Thai food, I recommend Thai Mee Upat the food truck lot across from Costco. If you’re not feeling like Thai food, they have lots of choices from the many food trucks located there.
Perhaps you need to cool down? Then why not grab some shave ice at the best place on the island!Ululani’s Hawaiian Shave Iceon Dairy Road is my favorite shave ice spot when visiting Maui.
One of the top things to do when vacationing in Maui is to go to the beach! It is the primary reason most people visit Maui and the Hawaiian islands. This article will go over the best Maui beaches for both snorkeling and swimming. There are some incredible beaches in Maui, but just because one is good for snorkeling, doesn’t mean it’s also good for swimming and vice versa. So I am here to share some of my favorite beaches in Maui no matter what you want to do. Most of the beaches in Maui that I list here are located in West Maui. So plan ahead if you are commuting from South Maui.
*How to use this map: Click on the star next to “Best Maui Beaches” and save this to your personal Google maps or click on the icons to pull up more info and driving directions.
Best Maui Beaches for Swimming
D.T. Fleming Park
This park is a great place to spend the day. It has shade trees at the back of the beach, picnic tables, BBQ grills, restrooms and lifeguards on duty. There is also the Burger Shack for food, and if you want, you can walk up to the Ritz-Carlton and eat at The Banyan Tree restaurant. D.T. Fleming Park also connects to the Dragon Tooth Trail which has beautiful views of the ocean and some incredible volcanic rock formations. It is a favorite stop of mine for any Maui itinerary. It has a beautiful stretch of white sand perfect for sunbathing. Make sure to bring your beach gear and enjoy one of the best beaches in Maui!
Address: Lower Honoapiilani Rd, Lahaina, HI 96761
Tip: Check out Maui Babe’s browning lotion and after browning lotion (I use this for sunburns too). It works great! And make sure you always wear sunscreen!
Napili Bay
This is a beautiful stretch of beach! It is on my list of best Maui beaches because of its sandy beach, and mostly rock-free water (in the center, not on the sides). It is located next to my favorite breakfast spot in Maui! The Gazebo restaurant. Just thinking of those piles of hot pineapple macadamia nut pancakes have my mouth watering. Depending on the time of year you visit, the waves can get really big. I mean REALLY big.
It is so much fun to body surf here, but be safe and respect the ocean’s power. When the weather is calm, it is a perfect place to go for a swim. I suggest you grab breakfast at The Gazebo, then drive over to Napili Bay and snag a good spot on the beach. You can relax here while you let your breakfast settle. There is parking for Napili Bay on the street leading down to the beach. The limited parking is probably the one drawback of this beach. However, you can usually find a spot along the road and then it is just a short walk to the end of the road where you’ll find the trail to the beach.
Address: 53 Hui Dr, Lahaina, HI 96761
Napili Bay. Keep your belongings as high up on the beach as possible to avoid getting wet. Even then, it may not be high enough.
Pohaku Park
This small park is sometimes referred to as S-Turns. It is a great place to watch the sunset and sits across from the island of Molokai. It is also a great area to go whale watching in the winter months. And sea turtles are often frequently spotted here. For swimming, I recommend you swim to the right of the park to avoid the rocks. Kahana Beach, which is just to the right of Pohaku, is a great stretch of beach for swimming. You will see the Kahana Beach resort next door to Pohaku Park.
There is a public access trail to Kahana Beach in between the Kahana Beach resort and the Sands of Kahana. This long sandy beach is great for swimming! It gets deep immediately in front of the Kahana Beach resort, but if you have kids or prefer a shallower entry, move a little further down the beach in front of the Sands of Kahana, and you’ll have a shallow entry.
Address: 4085 Lower Honoapiilani Rd, Lahaina, HI 96761 (*Pohaku has a few picnic tables and only a porta-potty for a restroom)
Pohaku Park at sunset.
Best Maui Beaches for Snorkeling
Kapalua Bay
Just a little further north from Napili Bay is Kapalua Bay. I go to this beach every time I visit Maui. It has excellent snorkeling (go in the morning) and such a picturesque setting. There are restrooms as well as an outdoor shower. It has a nice sandy beach with a few shady spots, plus it is alongside the Kapalua Coastal Trail so if you get tired of laying on the beach, you can go for a beautiful “hike” along this trail.
I think this beach is a little too rocky for swimming, but it is a favorite for snorkeling. I’ve seen turtles, eels, and all sorts of colorful fish here. They also rent kayaks and stand up paddleboards.
Address: Kapalua Coastal Trail, Lahaina, HI 96761
Kapalua Beach in the morning before the crowds arrive.
Tip: Snorkel early in the morning between 7 a.m. to 11 a.m. for the calmest and clearest snorkeling conditions.
Honolua Bay
Honolua Bay is an amazing snorkel spot in a marine life conservation area. It’s a bit of a drive to get to this protected bay, but it’s worth the trip! You have a short walk through a “jungle” before reaching the rocky beach. This is not your typical sandy beach either; it is covered in rocks, so be careful as you enter the bay. Its limited facilities and rocky beach make it best suited for snorkeling.
Snorkeling is best on the right side of this protected bay. You have to swim about 600 feet offshore to get to the reefs, so I recommend you wear a life vest if you have any concerns at all about swimming that far. Plus sometimes it is very shallow over the vast reefs, so I like a life vest as it helps me float over the reefs and avoid touching them.
There are portable toilets at the beginning of the trailhead, but no other facilities at the beach. Make sure you’ve got all your essentials packed in a beach bag, including good walking shoes.
Address: Bay Drive, Lahaina, HI 96761
Tip: Purchase a rashguard before coming to Maui. You will be so grateful to have this extra bit of sun protection when you’re out snorkeling for hours at a time.
Olowalu
Olowalu at mile marker 14 is another excellent option for snorkeling. You can book kayak tours here or rent a stand-up paddleboard and paddle out to the reef. The best snorkeling is about 100 feet offshore. So I would recommend bringing a life vest. There is also a blacktip reef shark nursery here; however, I have gone here multiple times and have never seen one. I have, however, seen turtles and plenty of interesting coral and colorful fish. Afterward, get some of the best pie in Maui at Leoda’s Kitchen & Pie Shop.I highly recommend the banana cream pie and coconut cream pie.
Address: Olowalu, look for dirt parking at Mile Marker 14. Leoda’s: 820 Olowalu Village Rd, Lahaina, HI 96761
Lava rocks at Dragon’s Tooth Trail near D.T. Fleming Park. It’s easy to see where the name came from.
Best Maui Beaches for Both Snorkeling and Swimming
Ka’anapali Beach & Black Rock
This is one of the largest and most popular beaches in Maui. This beautiful sandy beach stretches for almost a mile. It is also where the famous Black Rock is located. Get an early start and snag a free parking spot if you can. There are a few public parking areas scattered along Ka’anapali Pkwy. Look for beach access signs near the parking garages to find your way to the beach. Additionally, you can park in the parking garage for Whalers Village, where you can get a 3-hour validation if you purchase something at one of the stores.
There is excellent snorkeling at Black Rock when the conditions are calm. Just be careful as this area can also get some massive waves and currents near the rock. Watch the adventurous people who make the climb up Black Rock to jump off. Be careful if you are snorkeling and keep an eye on those jumping to make sure you don’t get in their way. I have seen eels, shark, turtles, octopus, and lots of fish all around Black Rock. Even if the snorkeling isn’t great during your visit, it is still a spectacular beach for swimming and sunbathing.
Ka’anapali is the perfect beach to spend the day. Sunbathing, swimming, snorkeling, and reading your favorite book are all perfect ways to spend the day here. There are also lots of restaurants and places to eat at Whalers Village, in addition to shopping. So make a day of it!
Address: 2525 Kaanapali Pkwy, Lahaina, HI 96761 (the beach is in front of a row of resorts, look for public parking signs along the Ka’anapali Pkwy)
Black Rock at Ka’anapali Beach. Snorkeling is best near the rock and around the tip. Just be careful of the currents near the rocks.
Kamaole Beach I, II or III
The Kama’ole beaches are a great set of South Maui beaches in Kihei. You will enjoy easy access to good food and shopping in addition to some of the best Maui beaches. Each beach offers its mix of swimming and snorkeling. I think Kama’ole I and Kama’ole II are better for snorkeling than III.
There are lots of unique lava rock formations in the water where you’ll find all sorts of fish, turtles and perhaps even an octopus all curled up. The beaches also have showers, bathrooms, and lifeguards. Depending on the time of year, you may find these beaches better for boogie boarding than snorkeling or swimming. They are worth checking out when in South Maui.
Address: S Kihei Rd, Kihei, HI 96753
Tip: Make sure you purchase reef safe sunscreen. In 2021, Hawaii will implement a ban on the sale of sunscreen containing the coral-harming chemicals oxybenzone and octinoxate.
Maui Sunset looking across at the island of Molokai
Funny Beach Experience You May Wish to Avoid
In case you’re as “lucky” as I was, to be on the beach in Maui on the first working day of the month, you may hear a loud siren. Yep, I was in the water snorkeling to my heart’s content at Kama’ole Beach II when I heard this loud siren go off. My first thought was “SHARK!” You have never seen anyone swim so fast to the shore! My husband says I pushed a young boy out of the way in my hurry, I, of course, deny that. Everyone in the water was scrambling for the beach like mad!
By the time I made it to the beach, I had overheard a local Hawaiian telling a visitor that it was “just” a tsunami drill. I am sure they are entertained each month to watch visitors race for the shore each time they test this essential warning system. I appreciate that they have the system in place, and honestly when my heart stopped trying to pound out of my chest, my friends and I all had a good laugh at each other and our moment of panic. It’s funny, but the thought of a tsunami didn’t scare us as much as the thought of a shark did!
What to Bring to the Beach
snorkel gear (rent or pack from home) sunscreen bug spray water bottles (I like to freeze some the night before) chapstick snacks rashguard (the Hawaiian sun can be brutal) hats beach umbrella (most condos supply these) beach mats & towels underwater cameras good book sandcastle building set beach bag swimsuit cover-up flip-flops sunglasses picnic lunch (optional) beach ball baby shampoo (use this inside your snorkel goggles to keep them from fogging)
Final Thoughts
Maui has many incredible beaches. As always, please make safety your priority. Don’t swim or snorkel alone; it’s always nice to have a buddy. When in doubt, stay out. If the waves look too big, or the situation doesn’t feel right, don’t go in. Ask a local, read weather reports, and take the necessary precautions to give yourself the best possible trip to Maui.
This list of beaches is what I consider to be the best Maui beaches for swimming and snorkeling. However, you should discover for yourself your favorite Maui beach. You’re going to want to return, so why not begin creating your future list of favorite places. If you’re like me, Maui will soon feel like your home away from home.
The Road to Hana is one of the best day trips you can take while in Maui. No Maui itinerary would be complete without including the road to Hana. The drive is an adventure in itself. It has 620 curves in its short 52 miles! You will see gorgeous waterfalls, hike thru dark lava caves, walk across black sand beaches and so much more!
How to Plan for the Road to Hana
Plan the whole day for your drive to Hana. Make sure and get up early to beat the crowds and tour buses. You won’t regret getting an early morning start when you have one of the many waterfalls all to yourself. Also, the sooner you go up, the more time you have to enjoy all the stops along the way and still be able to make it down before dark. I think you’ll find, it’s a road you prefer to drive in the daylight. So first things first, fuel up! There is only one gas station in Hana, so fuel up before heading up the mountain.
Getting to Hana
It’s about 1 hour to mile marker zero from Lahaina and around 40 minutes from Kihei. The beginning of the road to Hana starts just outside the town of Haiku. Haiku is where my recommended supply stop, Jaws Country Store, is located. You can use the embedded map below to get driving directions from your hotel or condo and plan for how long it will take you to get to the starting point. Even though it may only take around 3 hours to drive straight to Hana from West Maui, you will be making lots of stops along the way, which is why you need to plan for this to take up your whole day. And I can’t stress enough how important it is you get an early start!
What to Pack
If you are prone to motion sickness, I would recommend bringing Dramamine and riding up front if possible. Pack a picnic lunch (see my recommended stop below) as well as extra water and snacks. You have a full day ahead of you and it’s good to be prepared for any delays or emergencies that could come up. I also like to wear my swimsuit underneath a pair of shorts and a t-shirt, that way I am always ready to jump in the next swimming hole that tickles my fancy. Additionally, some of the hikes are best suited to strap-on sandals or tennis shoes, so bring something good for hiking as well as your flip-flops.
Road to Hana Packing Guide Swimsuits Rain Jacket Sunglasses Tennis Shoes or Strap-on Sandals Sweatshirt Hat (sun protection) Flip-flops Drinks/Water Dramamine Cameras Bug Spray Hairbrush/comb Towels Snacks Smartphone Sunscreen Picnic Lunch *Jaws Country Store on the map *Optional Change of Clothes (for dinner that evening)
Self-Driving Guide
I have included some of my favorite stopping points along the road to Hana on this Google Map. You may also want to download a self-driving guide from the app store. Shaka Guide or GyPSy Guide to Hana are both excellent app choices. You can download these to your phone for offline use. This saves battery and you will avoid losing connection in case your cell service doesn’t work on the road to Hana. These apps are great as they will not only recommend areas of interest along the road to Hana, but they will also give you historical information that you would otherwise miss on your own.
Stops Along the Road to Hana
How to use this map: Click on the star to the right of “Road to Hana” to add this to your own Google Maps. You can also click on the icon to the left of “Road to Hana” for a drop-down menu of all the places I have marked on the map. Click on any of the icons on the map to pull up driving directions and specific information.
Jaw’s Country Store
This one is actually before the official start of the road to Hana, however, it is a great place to pick up that picnic lunch I mentioned before. It is the perfect one-stop shop to begin your drive to Hana. Chances are you missed breakfast in your effort to get an early start. No problem! Jaw’s Country Store has you covered! Get your coffee fix and breakfast while you pick out your picnic lunch for later today.
Twin Falls Maui Waterfall
I stopped here on my very first trip to Maui and although I had a lot of fun here, I recommend you skip this on your way up to Hana. There are so many great waterfalls along the road and this one takes a bit of time walking to it and back. It can also get busy with tour buses stopping here. So continue past it and instead stop if you have time on the way back and want to see one more waterfall and swimming hole.
Garden of Eden
I stopped here with my husband on our first trip to Hana and we had the whole place to ourselves (thanks to an early start). It was such a beautiful garden to wander thru, admiring the views, the bamboo “forest” and an array of native plants. They have chairs you can lounge in and relax before returning to your drive to Hana. It was well worth the stop!
Kaumahina State Wayside
This is a great rest area to stop and use the restroom. Enjoy the scenic viewpoint and stretch your legs before continuing on your journey to Hana.
Ke’anae Lookout
This stop is a small detour off of the road to Hana, but I think it is well worth the extra effort. Turn off the Hana Highway on to Ke’anae Road and follow the road all the way to the end where you will turn around and come back the same way when you are finished. Make sure to stop at the different viewing areas to watch the waves crash against the shore. Towards the end of Ke’anae Road, you will find the Lanakila Ihiihi O Iehowa Ona Kava church, it is the only building to survive the massive tsunami that wiped out this village in 1946.
Take time to read the plaques posted that share information about this historic event. This short, beautiful detour, is full of historical significance. Oh and in case you didn’t take a bathroom break at Kaumahina State Wayside, they do have public restrooms. There is also a food stand where you can get banana bread and shave ice in case you need a snack.
The historic Lanakila Ihiihi O Iehova O na Kaua Church.
Ching’s Pond
If you’ve been anxious to go for a swim, here’s your chance. If you can handle the “refreshing” (aka very cold) water at Ching’s pond it is a beautiful spot for a quick swim and waterfall photo opp. This is a popular swimming hole with locals and visitors alike. The climb down is a little steep, so I recommend wearing your strap-on sandals or sneakers for the climb down. This is a fun stop on the road to Hana and I think it’s worth the icy plunge! Don’t expect to spend too much time here though, it’s more of a quick jump in, take photos, get back to the car and warm up, kind of stop.
Pua’a Ka’a State Wayside & Falls
The Pua’a Ka’a State Wayside is another great rest area stop along the road to Hana. There are restrooms and picnic tables, not to mention more waterfalls, making this a great option to eat that picnic lunch you brought. Eat lunch and enjoy the waterfalls (and lots of feral cats roaming around) before continuing towards Hana.
Exploring the Pua’a falls after our picnic lunch.
Hana Lava Tube
This was one of my favorite stops on the Road to Hana. I mean, how often do you get a chance to walk thru a cave that was carved out by hot lava? You get a chance to experience the darkness of the lava tube as well as discover some interesting facts about what has learned to live in these dark tunnels. This will be a fun stop for adults and kids alike!
Waianapanapa State Park
You definitely cannot miss stopping at Waianapanapa State Park! This beautiful state park is famous for its black sand beach. It also has a blowhole, multiple hiking trails, and campground. Stop here and enjoy the blowhole, take photos of this gorgeous stretch of coastline and if you want, go for a swim off the black sand beach. Just be careful as there are no lifeguards and the waves are big and the currents often strong, so use caution! Additionally, you can take the short paved trail to the Wainapanapa caves. Wainapanapa State Park is your last stop before reaching Hana.
The black sand beach at Wainapanapa State Park.
Hana
You made it! Pat yourself on the back! Now check out this town that had a highway named after it. If you need more snacks or drinks for the trip back, try Hasegawa General Store or the Hana Ranch Store. For most people who drive the road to Hana, this is where they turn around to head back down the mountain.
However, for some, they have one more stop on their list– the Pools of O’heo or the Seven Sacred Pools. Now I only recommend doing this, if you left early enough in the day, as it adds a little over 1-hour round trip drive time from Hana. Plus another 30-minute round trip hike to see the pools and then any additional time should you decide to swim (conditions permitting).
Tip:To see the Seven Sacred Pools at Ohe’o before the crowds arrive, drive all the way here first, then see all the sights in reverse order back down. Better yet, camp at Wainapanapa State Park (reservations required) or snag a first come first serve site at Kipahulu Campground.
Pools of Ohe’o (aka Seven Sacred Pools)
To get to the Kipahulu Visitor Center, and the trailhead for the Kūloa Point Trail which takes you to the Pools of Ohe’o, you will need to drive about 40 minutes past Hana. You will also need to pay an entrance fee for Haleakala National Park. If you plan to see the sunrise in Haleakala National Park, make sure to hang on to your receipt and as long as you go during the 3-days your receipt is good for, you won’t need to pay the entrance fee a second time. This, of course, works the other way as well, if you just visited Haleakala for the sunrise, and have a valid receipt, you can use that here and avoid paying another entrance fee.
Driving Back Down
Hopefully, you started your day early enough that you are now driving back with some daylight to spare. Either way, make sure to take it slow, watch out for pedestrians and be mindful of the locals who live on these roads. They tend to drive a lot faster and know the roads much better than we do. So if you see them wanting to pass, and can give them any space, go ahead, but otherwise, don’t worry, when they feel they can pass they will, whether you pull over or not. Once you have made it all the way back down, you can then officially congratulate yourself for surviving the road to Hana!
Tip: Plan ahead and reserve a table at Mama’s Fish House for dinner, it will make a wonderful ending to your day. Just don’t forget to reserve ahead of time and to pack that *optional change of clothes I listed.
Safety Tips for the Road to Hana
Fuel up in Paia before beginning the drive to Hana. There is one gas station in Hana, but it’s going to cost you! It makes a lot more sense to fuel up before starting your drive. Plus, it’s always a good idea to start any road trip on a full tank of gas. If you get to Hana or take the extra trip to the Pools of Ohe’o, check your fuel levels then, and you can decide whether you need to fuel up again before making the drive back.
Drive carefully and pull over when it is safe to do so to let other drivers pass. Locals who live off the Hana Highway are often on their way to work or on their way home, so give them preference. Do your best to get an early start for your drive to Hana so you can make the return trip before dark.
Swim with caution. There are some fun spots for swimming, but this area gets a lot of rain and the currents can be dangerous. So if in doubt, stay out.
When parking on the side of the road and walking to see waterfalls, exercise caution and watch out for vehicles. And the same applies when you are in your car, watch out for fellow pedestrians and take it slow around the 600+ curves as you never know what’s on the other side.
Final Thoughts on the Road to Hana
Driving the road to Hana and seeing the sunrise at Haleakala are both day trips that shouldn’t be missed on your visit to Maui. They are worth the extra effort. Just plan ahead and remember, the road to Hana is about the journey, not the destination. And what a journey it is!
There is nothing quite like watching the sunrise at Haleakala National Park. Sitting in the dark with others, waiting expectantly for nature’s light show. The sun creeps over the horizon, bathing a sea of clouds in light. You soon forget how cold you are and stare in awe at the beautiful display before you. It is something I feel should not be missed on your visit to Maui.
First Steps To Watching a Sunrise at Haleakala National Park
Book your reservation! Due to a large number of visitors to Haleakala to watch the sunrise each morning, the National Park has created an online reservation system to limit the number of visitors between the hours of 3 a.m. and 7 a.m. It costs $1.00, and you can reserve two months in advance which I highly recommend you do!
If you are unable to get a reservation prior to your trip to Maui, they do offer a small number of last-minute tickets 48 hours before the desired sunrise date. Visit Haleakala Sunrise Reservations for more information on reserving online as well as steps to get a last-minute ticket.
What to do if you can’t get a reservation?
If you are unable to get a sunrise reservation for your vacation to Maui, here is the next best option. See a sunset at Haleakala National Park instead! Sunsets here are beautiful as well, and there are some advantages to coming here for sunset.
First, you don’t have to get up in the wee hours of the morning! Second, you don’t need a reservation. Third, you can plan your day around exploring Maui’s Upcountry, then do some day hikes from the Haleakala National Park before watching a fantastic sunset. And finally, after your sunset, you can enjoy stargazing at 10,000 feet! You will be up above the air pollution, away from the city lights where you can enjoy the millions of stars twinkling above.
Entrance Fee to Haleakala National Park
You must also pay an entrance fee to visit Haleakala National Park. The sunrise reservation fee is only to reserve your spot to see the sunrise on the specific day you have reserved. It does not include the Haleakala National Park entrance fee.
You do not need to pay the entrance fee if:
If you have already visited the Kīpahulu District (perhaps on a visit to Hana) to see the Pools of Ohe’o (Seven Sacred Pools) and you still have a valid 3-day pass from that, you do not need to pay an additional entrance fee.
You have a US National Parks annual pass.
What to Pack & What to Wear
Before your flight to Maui, if you intend on viewing the sunrise at Haleakala National Park (or even sunset) make sure to plan ahead and pack warm clothes. I know when you think of packing for Maui, you are thinking swimsuits and flip-flops, and you definitely need those, but you’d be surprised how cold it can get at Haleakala. Freezing temperatures. No joke.
When I made my first visit to see the sunrise at Haleakala National Park, I read other traveler’s telling me to pack warm, and thank goodness I listened! I packed my ski base layers, thin, moisture-wicking layers I wear when I go skiing. Then I wore hiking pants on top of these as well as a t-shirt and sweatshirt on top. I also wore my ski hat. Additionally, we borrowed the blankets from our condo. And yes, I still got cold!
Also, it’s important to note that there are no concessions in the park. So you will want to pack extra water, snacks, and even a picnic lunch for later, especially if you plan to go hiking afterward.
Recommended Items:
Base Layers: Tights, moisture-wicking undershirt and/or pants Pants (hiking pants or something you can pull on over a pair of tights or base layer) Sweatshirt Scarf Jacket Hat Thick socks Tennis Shoes/Hiking Shoes Blanket from condo/hotel Snacks & Drinks (picnic lunch for later or bananas and a muffin for breakfast, plus water and something hot to drink) Sunglasses (it’s going to get bright!)
Things to Do After the Sunrise at Haleakala
After you enjoy the brilliant colors of the sunrise, drive over to the Haleakala Visitor’s Center. There are some great hikes you can do from the visitor’s center, ask a friendly park ranger, and they will be glad to offer you some suggestions. The hikes range from short paved trails to hiking for miles down the sandy trail into the crater of Haleakala. It is truly a breathtaking place, unlike any I had visited before. Here in Washington state, we have composite cone volcanoes and I’ve never been able to walk inside one of them! It was both a fun and educational experience to learn more about shield volcanoes like Haleakala.
It is important to remember that you might experience mild altitude sickness at this elevation, so don’t overdo it! If you are feeling dizzy or lightheaded rest and hydrate. Talk to a park ranger if you need assistance.
Take time to enjoy Maui’s Upcountry before heading back to your resort or condo. I have marked a few places you might want to stop on the map. Hali’imaile General Store, Maui Pineapple Tours, Piiholo Ranch Zipline, and Ali’i Kula Lavender Farm are just a few of the possibilities. Upcountry Maui is full of wonderful options and is worth staying a night or two if your visit to Maui allows it. You might even consider spending the night in Maui’s Upcountry the night before your scheduled sunrise visit and save yourself a little driving time that morning.
Tip: Hang on to your entrance receipt to Haleakala National Park. You can use this to gain entry to the Kipahulu District and the Pools of Ohe’o. (must be within the 3-day validation period)
Getting to Haleakala National Park
The best spot to watch the sunrise at Haleakala National Park is at the summit. There is a summit house you can stand inside to get warm if needed and it is the highest point you can drive to for viewing the sunrise. The Haleakala Visitor Center is also a great choice if the summit parking lot is full.
If you are coming from West Maui the drive will take you around 3 hours, so make sure to get up early enough to arrive at least 30 minutes before sunrise. For example, if sunrise at Haleakala National Park is at 5:30 a.m., then you will want to leave around 1:30 a.m. to 2:00 a.m. It’s early I know! It’s also totally worth it and makes for unforgettable memories!
The road up to the summit is full of switchbacks and steep drop-offs, so take your time as you drive up in the dark. Also later in the day, there are often hikers and bicyclists on the road, so always be on the lookout and drive slowly and carefully.
How to use this map: Click on the star to the right of “Haleakala N.P./Upcountry Maui” and you can add this to your own Google maps, you can also click on the icon to the left of this and use the drop-down menu to see the list of sites. Tap on the icons directly on the map to pull up options for driving directions.
Final Thoughts on the Sunrise at Haleakala National Park
“Haleakalā has a message of beauty and wonder for the soul that cannot be delivered by proxy.” ~ Jack London
I think Jack London is absolutely right. You really must see Haleakalā for yourself. I can describe the beauty of the red colored sand cascading down into the crater or the surprising beauty of the desert you find on this tropical island. I can do my best to paint a picture of watching the blackness of the night turn into a brilliant, blinding array of morning colors, but I really can’t do it justice. You must discover for yourself why the Hawaiians called Haleakala “house of the sun.” So what are you waiting for?
The day has arrived, you must leave the tropical paradise that is Maui. Chances are after checking out of your condo or resort you may have some downtime before your flight leaves from Kahului airport. I created this list of things to do in Kahului before your flight to help you make the most of your final hours in Maui.
How to use this map: Click on the tiny star next to “Things to Do in Kahului” to add this to your own Google maps. You can also click on the little icon to the left of “Things to Do in Kahului,” and you’ll see a drop-down list of each location in this post. You can click on the icons to pull up more information and to get driving directions.
7 Fun Things to Do near Kahului Airport
1) Iao Valley State Monument
This first one is technically not in Kahului, but it’s so close I had to include it. The paved loop trail to the Iao Needle Monument is only a little over a 1/2 mile in length. This makes it an easy hike to do before you need to catch your flight. The paved trail has interpretive signs along the path describing the history of the Hawaiians who settled in the Iao Valley. You will walk thru lush vegetation as you make your way to a scenic viewpoint of the Iao Needle. It’s a great way to see another side of what the unique island of Maui has to offer. There is a $5 parking fee that you will need to pay with a credit or debit card. I’d plan to spend about an hour here.
2) Golf at Waiehu Public Golf Course
The Waiehu golf course, in Wailuku, is about 20 minutes from Kahului Airport. It has incredible views, and the employees have always been so helpful and friendly! I’ll tell you something; I don’t typically golf when I’m at home. Occasionally I’ll go to a 3 par course with friends for fun, but if my feet touch the green more than once a year that’s a hot streak for me! However, I have gone to this golf course on my last two visits to Maui. We rent a golf cart, and that is just a ton of fun, plus it cools you off as you drive from hole to hole.
The real treat though is the beautiful views over the ocean and the gorgeous tree-lined fairway. Plus, my friends and I don’t get too serious about golf, it’s more about having fun together. This course is pretty laid back, and we’ve never had problems with anyone being rude or impatient with us. Although it’s never been too busy when I’ve been there, it is always a good idea to call ahead and reserve a tee time in advance.
3) Grab Something to Eat
So by now perhaps you’ve worked up an appetite for golfing or hiking. Why not grab some lunch or dinner and enjoy having someone else cook for you one last time before you return home to the “real world.” Da Kitchen is a great place to eat some Hawaiian cuisine. It can be busy, so come prepared to wait. Or if you prefer a little more variety, check out the food trucks by Costco. There is a big gravel parking lot, and they have picnic tables set up in the shade for seating. And in case you have already spent all your money, never fear, grab a foot-long hotdog with soda for only $1.50 at Costco.
4) Ululani’s Hawaiian Shave Ice
You’ve eaten your lunch, why not treat yourself to dessert! Ululani’s Hawaiian Shave Ice on Dairy Road is one of the best spots in Kahului for Hawaiian shave ice. It’s a favorite thing of mine to do in Kahului before heading to the airport. There are only a couple of picnic tables outside the shave ice “hut” so you might need to stand around in the shade or eat these in the car. However, after the first bite, you’ll tell yourself it is worth it.
5) Souvenir Shopping
In case you didn’t make time for souvenir shopping, these are some great options for buying souvenirs to take back home. I would recommend you save most of your souvenir shopping for Kahului as it has some fantastic choices. If you happen to be here on a Saturday, make sure to check out the Maui Exposition & Swap Meet. It meets every Saturday from 7:00 am. to 1:00 p.m. There is an entry fee of $0.50.
Another great option is Costco. If you have a Costco membership, this is a great place to stock up on boxes of chocolate-covered macadamia nuts, assorted seasoned macadamia nuts, Hawaiian coffee, Hawaiian shirts, Maui Gold pineapples, and more. You can also stock up with a variety of souvenirs from the local Target or Wal-Mart.
6) Beach Time
Squeeze in a little more beach time and hang out at Kanaha Beach Park. It is less than 10 minutes from Kahului airport. You can watch airplanes coming and going as well as the kite surfers enjoying the waves. It is a great spot to hang out before catching your flight back home.
7) Escape the Heat
Perhaps you have had enough sun for the day, or you have a much later flight and more hours than you know what to do with. Why not watch one of the latest movies released at the Regal Cinemas. Regal Cinemas Maui Mall Megaplex 12 (yeah that’s a mouthful) is just a 10-minute drive from Kahului Airport. And it is conveniently located in the Maui Mall so that you can do some last-minute shopping too.
Plus, you can try the cold treat of guri guri. The Tasaka Guri Guri Shop is the only place I know that makes it. It is also located in the Maui Mall. Guri guri is a mix between sherbert and ice cream, well sort of, you need to try it for yourself to see. I know, perhaps you’ve already had some Hawaiian shave ice earlier in the day, hey, you’re still on vacation, and you can’t get this anywhere else, so give it a try!
Final Thoughts on Things to do in Kahului:
As you can see, there are a lot of great options for things to do near Kahului airport before your flight. So don’t worry if you have extra time to spare. Make the most of your vacation to Maui by creating some final memories before going home. And if you’re still at home planning your trip to Maui, why not check out the Ultimate Maui Itinerary to help you plan your trip to this incredible island.
Maui is an extraordinary place. It has a unique combination of adventure and relaxation. In this Maui itinerary, you will have opportunities for outdoor adventures as well as pure, do nothing relaxation! Snorkel, surf, watch the sunrise at 10,000 feet elevation, devour macadamia nut pancakes by the plate full and test your nerves on the road to Hana. I have included all this and more.
This Maui itinerary is tailored to those staying in West Maui, but if you decide to stay in South Maui, plan extra travel time for the activities listed on the west side. Also, I like to stay in a condo when I visit, as it allows me to save some money on food and gives me the feeling that I’m at my home away from homes. However, if you prefer a resort where you can get room service, this itinerary will work for you as well.
This Maui itinerary is designed to be a self-driving guide. So I make the assumption you will have a rental car. Yes, Maui has a bus system, and yes you can take tours, but I feel this island is best seen with your own vehicle. It gives you more flexibility and allows for spontaneity.
When to Visit: Anytime. You can often get discounted airfare from late March to early June and also from September to November. December thru May is whale season and if you want to visit during the winter book around 6 months in advance as this is a popular time for travelers.
Getting Around: Car rental makes the most sense in Maui.
Weather: Nice year round. November-March tends to be the rainiest.
Maui Itinerary Highlights: Road to Hana, Haleakala National Park, Ka’anapali Beach, Kapalua Bay, and Coastal Trail, Molokini Snorkel Tour, Try Hawaiian Shave Ice, Warren & Annabelle’s, Hawaiian Luau
Length of Stay Recommended: 7-14 days
How to use this map: Click on the icons to see the address and get directions using Google Maps, you can also click the star next to Maui Itinerary to add this to your own Google Maps. And the icon to the left of Maui Itinerary will show you a list of all the regions and locations I have saved for each.
Day of Arrival:
You will fly into Kahului Airport, which is only a 5-minute drive to Costco & Wal-Mart. Depending on when your flight lands, I recommend taking time right after you get your rental car, to head to Costco and Wal-Mart to shop for your stay. If you’re staying at a condo, this is a great way to save money on your trip. Buy stuff to BBQ, cases of water, fresh fruit, salads, pb&j sandwiches, etc.
It is much cheaper to purchase your stuff here, rather than closer to the resorts. If you are a member of Costco, make sure to stop off at their bakery and pick up a pineapple coconut loaf with macadamia nuts. This paired with a cup of Hawaiian coffee while sitting on the lanai is the perfect way to start a day!
Tip: Make sure you purchase reef safe sunscreen. In 2021, Hawaii will implement a ban on the sale of sunscreen containing the coral-harming chemicals oxybenzone and octinoxate.
Day 2: Haleakala National Park
On your first full day, you will most likely wake up early. So why not be adventurous today and head to Haleakala to watch the sunrise. You must have a reservation to enter the park between the hours of 3am-7am. It costs $1.00, and you can reserve 2 months in advance which I highly recommend you do! Make sure to pack warm clothes & bring a blanket; it gets surprisingly cold up there!
Sunrise at Haleakalahas all the details on how to get there, what to pack and what you need to know for an unforgettable day trip to Haleakala. Or if you’re really not an early bird read this post on spending an amazing day at Haleakala and enjoying the sunset at Haleakala instead!
Take time to enjoy Maui’s Upcountry before heading back to your resort or condo. I have marked a few places you might want to stop on the map. Hali’imaile General Store, Maui Pineapple Tours, Piiholo Ranch Zipline are just a few of the possibilities. Upcountry Maui is full of wonderful options and is worth staying a night or two on a future trip to Maui.
Tip: If you can’t make it to the sunrise, sunsets here are spectacular too, so enjoy your day exploring Upcountry Maui, do a day hike in Haleakala’s crater and then enjoy a gorgeous sunset and star gazing afterward.
A breathtaking sunrise captured over a sea of clouds.
Tip: Try to snorkel first thing in the morning, prior to 11 am for the best snorkeling conditions. The trade winds tend to kick up in the afternoon and visibility is reduced.
Day 3: Kapalua Beach & Kapalua Coastal Trail
After breakfast head over to Kapalua Beach for some spectacular snorkeling. Get here early as the parking lot fills up quickly! I have seen turtles, eels, and all sorts of colorful fish here. It is one of my favorite snorkel beaches that I return to multiple times a visit. Plus it’s a beautiful beach! They also rent paddleboards, kayaks, snorkel gear, and beach umbrellas from a hut on the right side of the beach.
After you’ve had your fun at the beach, consider walking the Kapalua Coastal Trail. One of the highlights is the Dragon’s Tooth area connected to the trail. The Kapalua Coastal Trail trail is about 2 miles in length and stretches from Kapalua Beach to D.T. Fleming Park. It does get a little rocky in parts, so you may want to wear strap-on sandals or tennis shoes versus flip-flops.
Tonight treat yourself to a Hawaiian Luau. I recommend Old Lahaina Luau for an authentic luau experience. If you want to see fire dancers, Legends of Kāʻanapali Lūʻau is another good option. If you’re staying in South Maui consider Te Au Moana.
Day 4: Road to Hana
Give yourself a break from the sun by getting up early and driving to Hana. No Maui itinerary would be complete without including the road to Hana. The drive is an adventure in itself. It has 620 curves in the short 52 miles! You will see gorgeous waterfalls, hike thru dark lava caves, walk across black sand beaches and so much more! Plan the whole day for your drive to Hana. Get up early to beat the crowds and tour buses. Read our Road to Hana Guide to learn more about how to plan for this incredible day trip while in Maui.
Tip: To see the Seven Sacred Pools at Ohe’o before the crowds arrive, drive all the way here first, then see all the sights in reverse order back down. Better yet, camp at Wainapanapa State Park (reservations required) or snag a first come first serve site at Kipahulu Campground.
Honu is what the Hawaiians call these beautiful sea turtles.
Day 5: Ka’anapali Beach
After yesterday’s drive to Hana, you will want a relaxing day at the beach. Pack up your sunscreen, water, and beach gear, and get ready for a day at Ka’anapali Beach. This beautiful sandy beach stretches for almost a mile. It is also where the famous Black Rock is at. Get an early start and snag a free parking spot if you can. There are a few public parking areas scattered along the parkway. Look for beach access signs near parking areas. Otherwise, you can park in the parking garage for Whalers Village, where you can get a 3-hour validation if you purchase something at one of the stores.
There is excellent snorkeling at Black Rock when the conditions are calm. Just be careful as this area can also get some massive waves and currents near the rock. Watch the adventurous people who make the climb up Black Rock to jump off. Be careful if you are snorkeling and keep an eye on those jumping to make sure you don’t get in their way. I have seen eels, sharks, turtles, octopuses, and lots of fish all around Black Rock. Even if the snorkeling isn’t great during your visit, it is still a spectacular beach for swimming and sunbathing.
When you get hungry or would like to do some shopping, head down the beach away from Black Rock and go to Whalers Village, there are lots of places to eat and shop. Additionally, there is the Whalers Village Museum worth taking a peek at.
One thing not to be missed is enjoying the beautiful sunsets in Maui.
Day 6: Molokini & Kihei
You have a lot of tour options when planning a trip to Molokini. I recommend Kai Kanani Sailing; they are a smaller boat with a fantastic crew! I loved my trip to Molokini with them. Other options would be Pride of Maui Molokini and Turtle Town tour, or if you want a more all-inclusive option, Ali Nui Maui includes transportation with their packages.
Most tours leave from South Maui, so if you are staying in West Maui, make sure to consider how long it will take you to get there when choosing your tour time. Grab some breakfast at Kihei Caffe and then head to Kama’ole Beach II or III to enjoy more snorkeling and beach time. When you’ve had your fill of the beach, get some gelato or shave ice and enjoy all that South Maui has to offer.
Day 7: Napili Bay
Eat breakfast at The Gazebo. You must try the macadamia pineapple pancakes and fried rice! Oh and have the coconut syrup on your pancakes. Yum! Get there early, before it opens if possible, and be prepared for a line. The line moves fast, and if you’re lucky, you’ll get a seat with a view overlooking the ocean. After breakfast, take a little time to walk along the water and explore the tidal pools while your food settles.
Then head off to Napili Bay to find a good spot on the beach. This is the perfect beach to do some body surfing, but please exercise caution as these waves get huge! Oh and make sure you put your beach bag as high up as possible, or it will get wet!
Tonight, head to Warren & Annabelle’s to be entertained with comedy & magic. You’ve got to trust me on this one, I have gone to this show two different times, and each time it was different, and both times I thoroughly enjoyed myself. It is a great way to spend an evening! Make sure to book ahead of time.
Day 8: Day of Relaxation
Today is a good day for you to experience some of that “do nothing” relaxation I mentioned before. Grab your favorite book, sunglasses & sunscreen, and find the nearest beach umbrella and chair. And if napping in the sun isn’t relaxing enough, why not get a relaxing massage at a local spa.
Tip: Always carry extra water with you. You can freeze water bottles the night before at your condo and then you will have cold water in the car as it melts throughout the day.
Day 9: Historic Lahaina
Surf’s up! Today why not try one of the favorite pastimes for locals and learn to surf! It is easier than you think. I recommend Royal Hawaiian Surf Academy located right in Lahaina. You will walk to the harbor where they will teach you to surf. Or if you prefer a smaller group size away from the crowds, you can try Maui Surfer Girls. They offer small group size lessons at Ukumehame Beach Park.
After your surf lesson, grab some lunch before starting this self-guided walking tour of historic Lahaina. When you finish the walking tour, head up Front Street and cool off with gelato at Ono Gelato and Espresso Bar. They have a couple of tables in the back of the store with views over the water. If gelato isn’t your thing, then head to Ululani’s Hawaiian Shave Ice and enjoy more of this delicious treat!
These Banyan trees in downtown Lahaina are incredible to see!
Day 10: Honolua Bay, Nakalele Blowhole & Olivine Pools
Drive to Honolua Bay for an amazing snorkel spot in a marine life conservation area. Make sure you’ve got all your essentials packed in a beach bag, including good walking shoes. You will have a short hike through a “jungle” before reaching the rocky beach. Snorkeling is best on the right side of this protected bay. You have to swim about 600 feet offshore to get to the reefs, so I recommend you wear a life vest if you have any concerns at all about swimming that far. Plus sometimes it is very shallow over the vast reefs, so I prefer a life vest as it helps me float over the reefs and avoid touching them. There are portable toilets at the beginning of the trailhead, but no other facilities at the beach.
After you finish snorkeling, grab some shave ice or a fresh coconut at the Coconut Caboose you passed right before the parking lot to Honolua Bay. Then continue up the road towards the Nakalele Blowhole & the Olivine Pools. You want good shoes for getting to the Olivine Pools and the Nakalele Blowhole. It is a very steep and rocky climb. Please use caution when visiting here! If it is windy, or rainy or there are huge swells, don’t risk your life! People have died after being swept away by large waves. So don’t put yourself close to the edge or anywhere this could happen. It isn’t worth it. These are beautiful places to visit, but caution and safety have to take priority over everything else.
If you’re still feeling adventurous, you can continue up the road past the Olivine Pools and explore the historic town of Kahakuloa. Just know that this stretch of road will give the road to Hana a run for its money with some of its narrow curves and sheer drop-offs. But if you do make the drive, make sure to try the local banana bread and shave ice!
Day 11: Olowalu
Book a kayak tour and explore the reef at Olowalu, mile marker 14. Another excellent option for this fantastic reef system is to rent a stand-up paddleboard; you can paddle out to the reef and then snorkel off your board whenever you wish! Afterward, get some of the best pie in Maui at Leoda’s Kitchen & Pie Shop.I highly recommend the banana cream pie and coconut cream pie. Honestly, I got the banana cream pie by mistake and was blown away by how good it was! Drive towards Kahului and visit the Maui Ocean Center to learn more about all the marine life you have been snorkeling with for the past week.
The view from my stand-up paddleboard.
Day 12: Relax
I think by now it’s time for another do-nothing day! So grab that book you’re reading and find a cozy spot to curl up. Perhaps today is a good day to spend shopping for souvenirs or eating your fill of Maui Gold pineapples and fresh coconut. A great spot to get fresh coconut is at a store called the Farmer’s Market; they will cut the top off for you so you can drink its refreshing coconut water. Then scrape out the coconut back at your condo and let it dry out a little before enjoying your fresh coconut. And if you’re hungry for lunch, just down the street from the Farmer’s Market, you’ll find delicious fish tacos at The Fish Market. If you’re looking for something else to do, you might consider a glass blowing class and create a unique souvenir.
Day 13: Customize Your Day
Today is your day to decide what you want to do. This Maui Itinerary is packed with lots of snorkeling and beach activities. Perhaps you’d like to do some more relaxing or better yet, more shopping? Or if you’re like me and you can’t get enough of the ocean, why not rent a SUP for the day. Take the ferry to the island of Lanai or book a dolphin snorkel cruise to Lanai or a sunset dinner cruise with the Pacific Whale Foundation. Perhaps you need a little more adventure, get some spectacular views over Maui as you’re flying down a zip line! You decide! This is your last full day in Maui, make the memories you want to make.
Catching a glimpse of a rainbow along the Kapalua Coastal Trail.
Day 14: Day of Departure
Sleep in and then have macadamia pancakes one last time before you have to check out. If you have a late flight check out these 7 things to do in Kahului near the airport. Make the most of your last day in Maui!
Customize this Maui Itinerary
You can customize this itinerary to fit a vacation of 7, 10, or even 14 days. Feel free to change days around as suits your needs and tailor the activities to your interests. This Maui Itinerary covers the “must-see” highlights of Maui. However, there is so much more to see and do, you can’t do it all in one trip, and you wouldn’t want to try. Leave that for your return trip. Because if there’s one thing I’ve learned about Maui, it’s that you’ll miss it before your plane leaves the ground.
Final Thoughts
Hawaii is made up of beautiful islands with a unique culture and history. Make sure to take time to learn about the Hawaiians and their rich heritage. Be respectful of this beautiful area and do your best to preserve it for future generations. And if you want to learn ways you can do even more while on your vacation to Maui here are some great volunteer opportunities.
Make sure to check out these other great Maui guides to help you plan your trip to Maui.
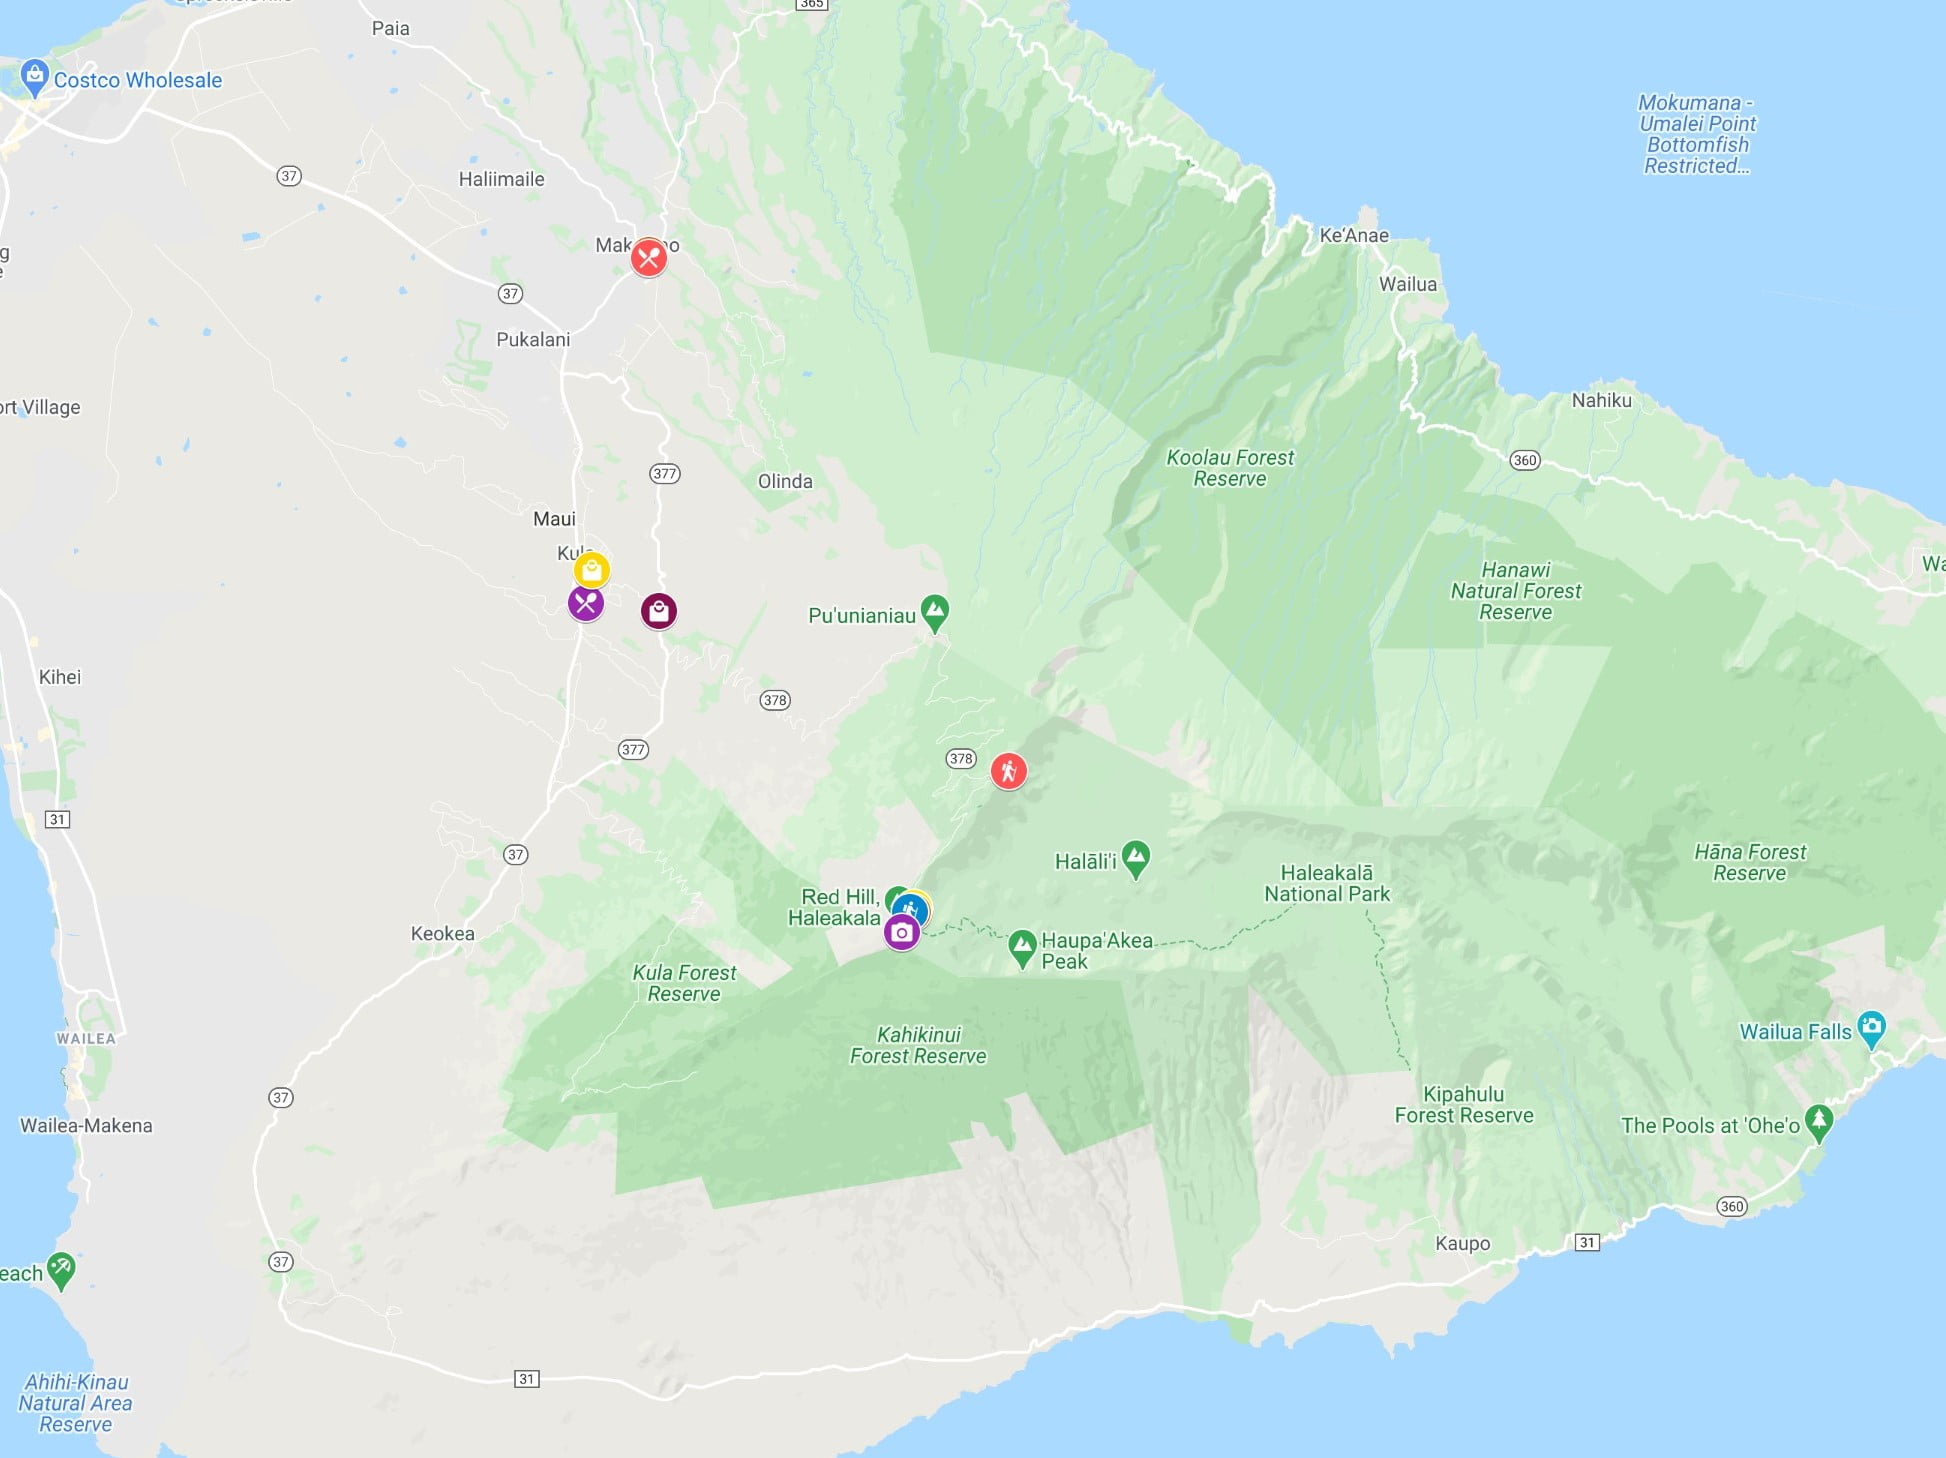
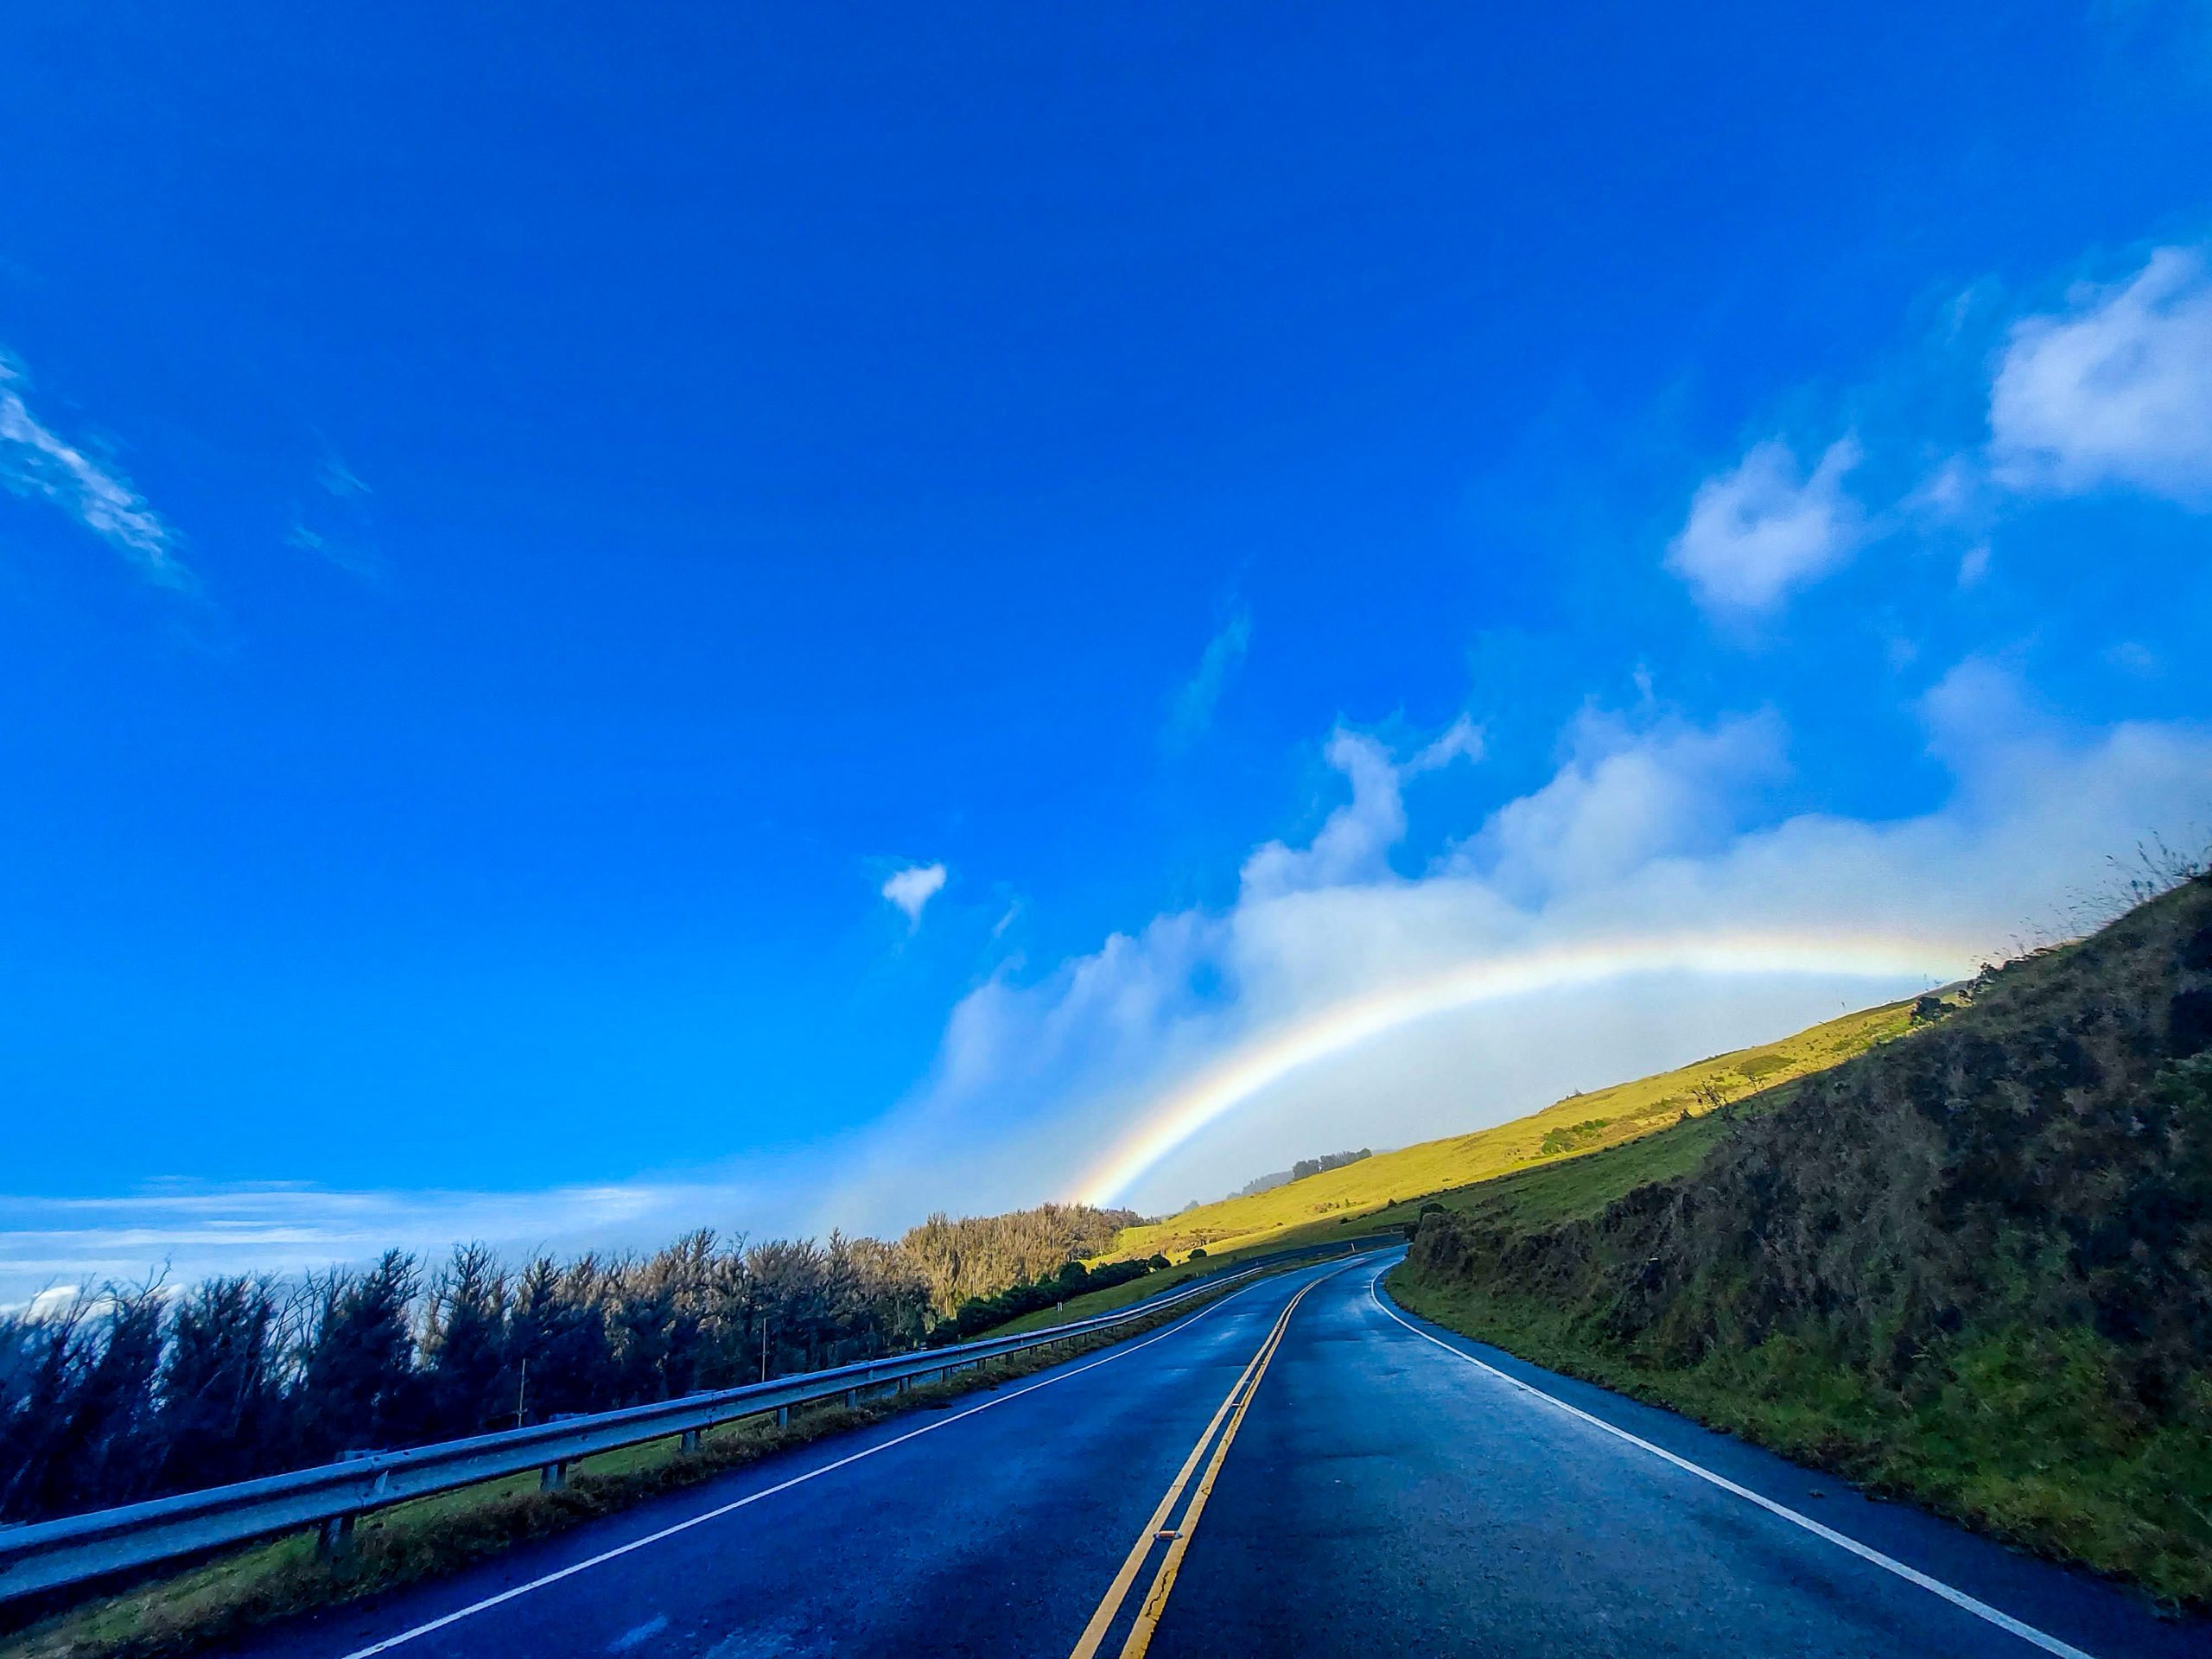
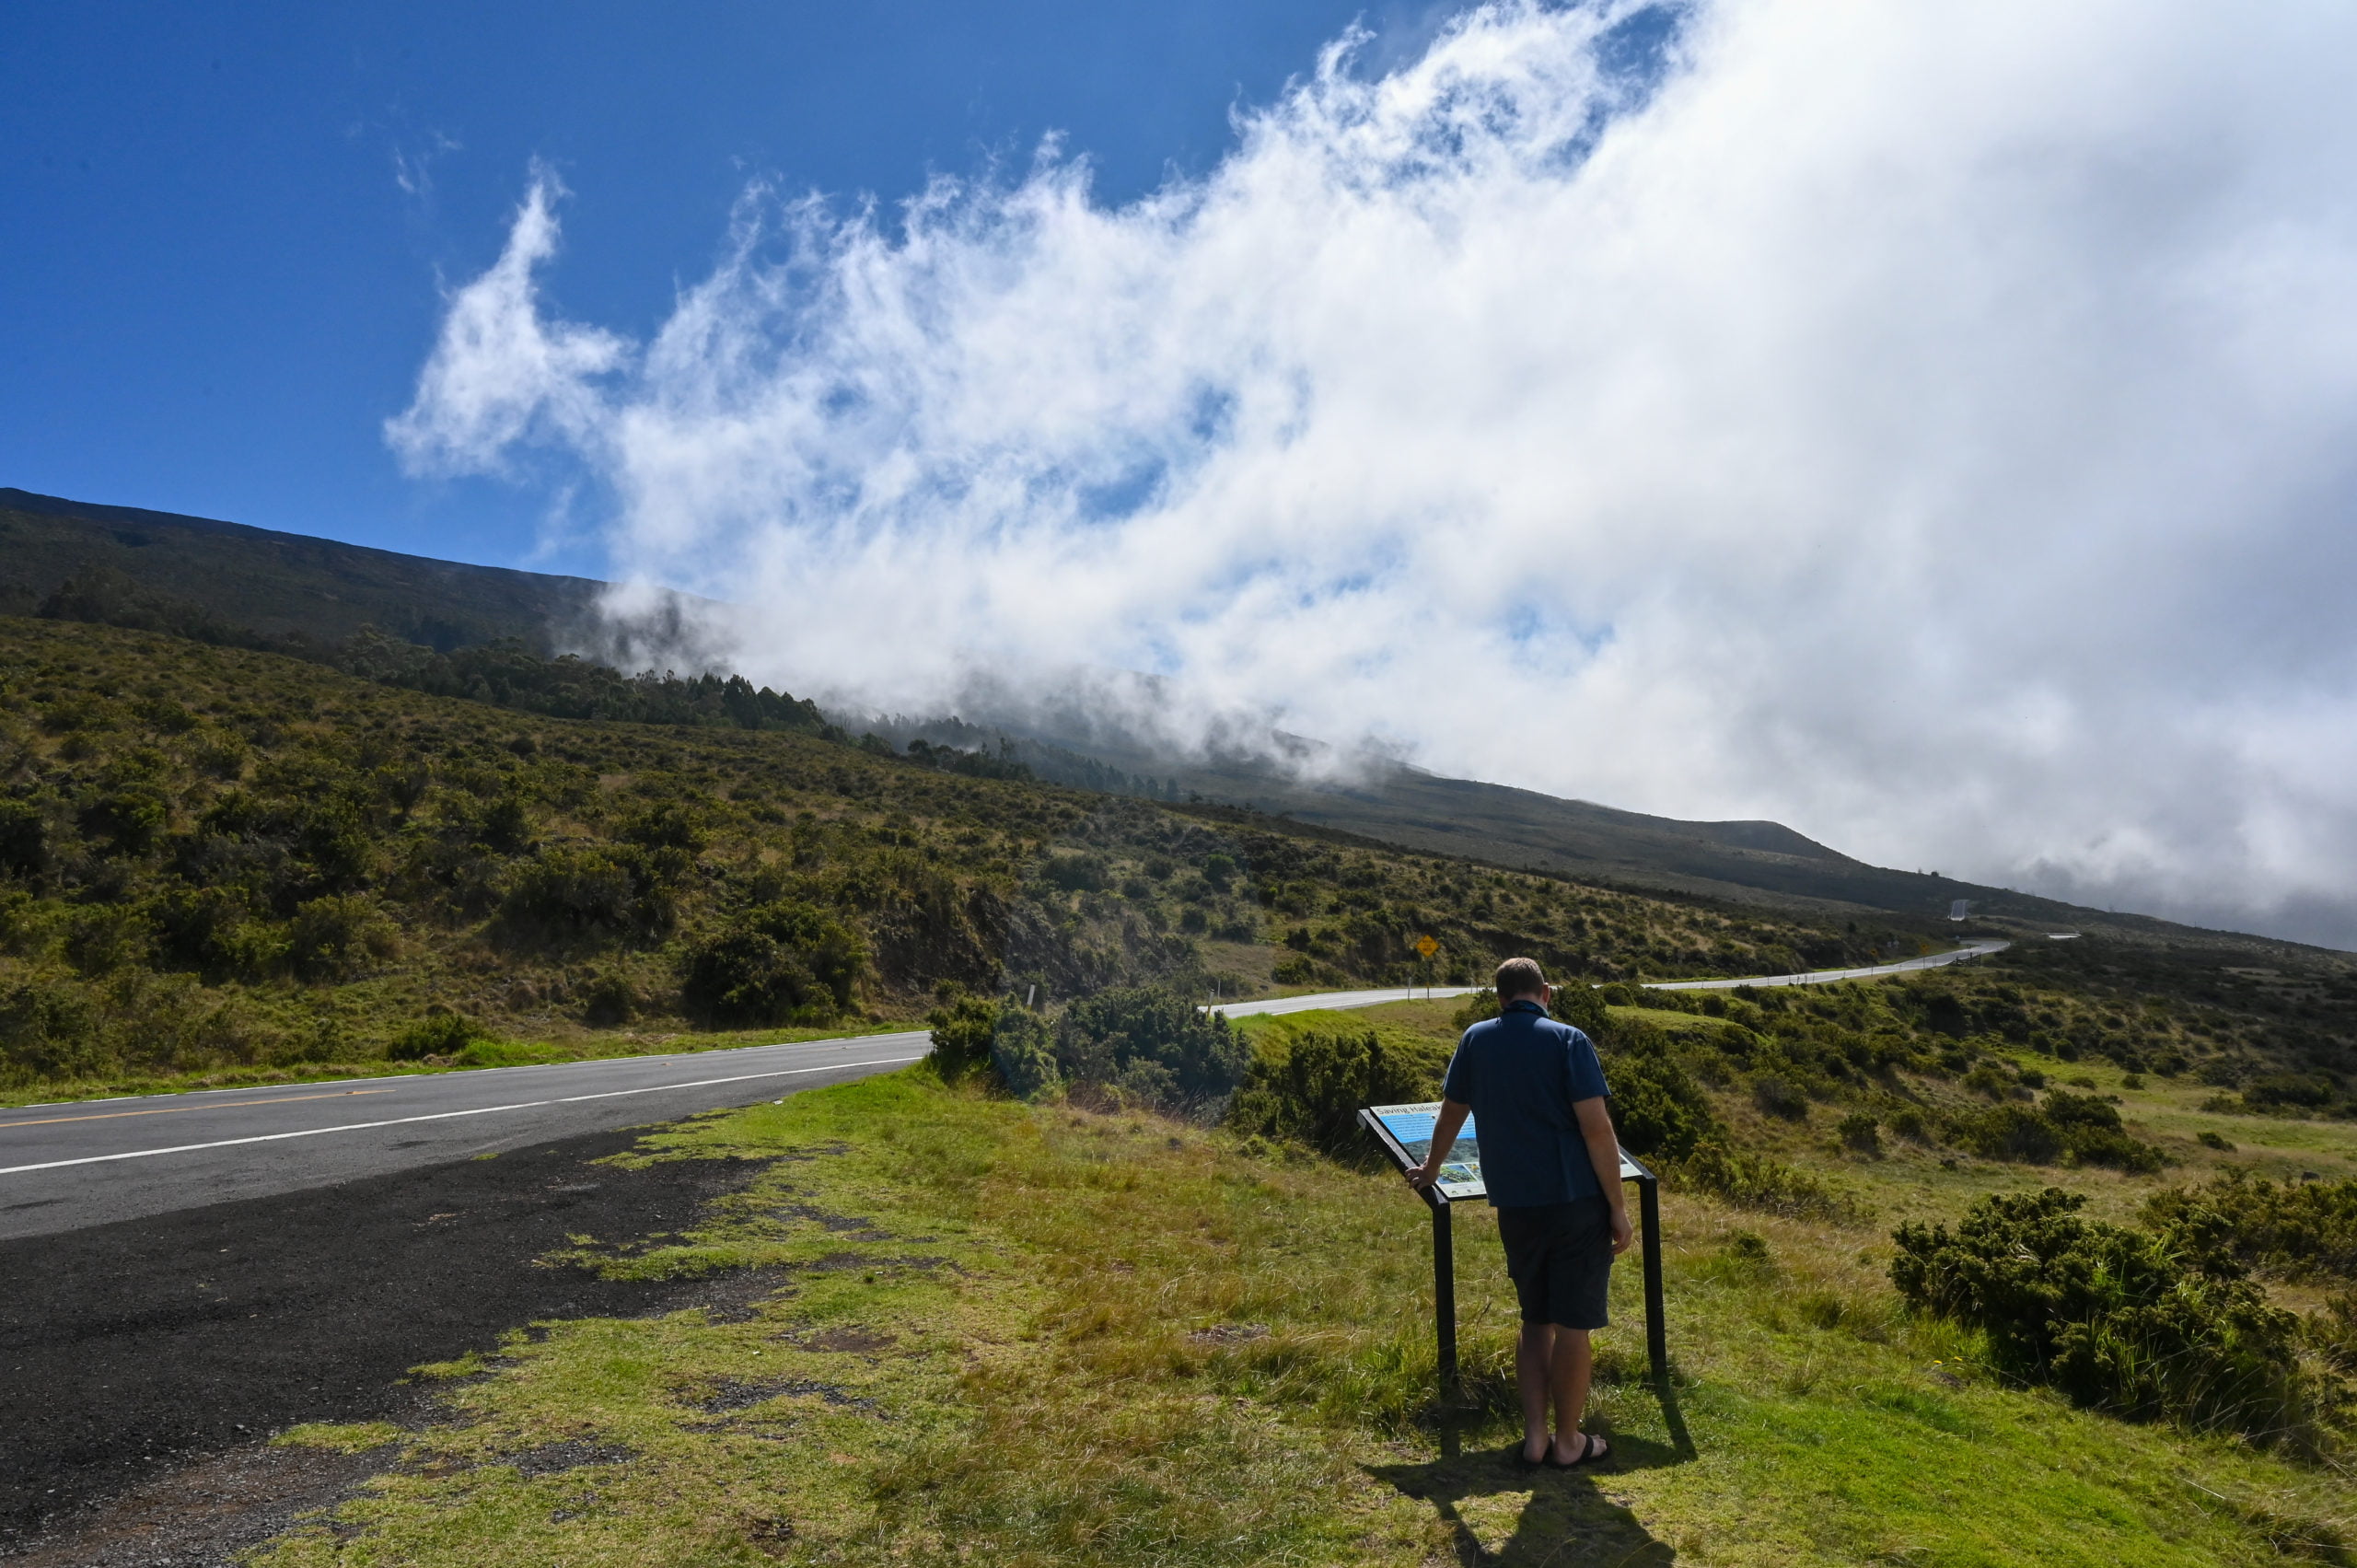
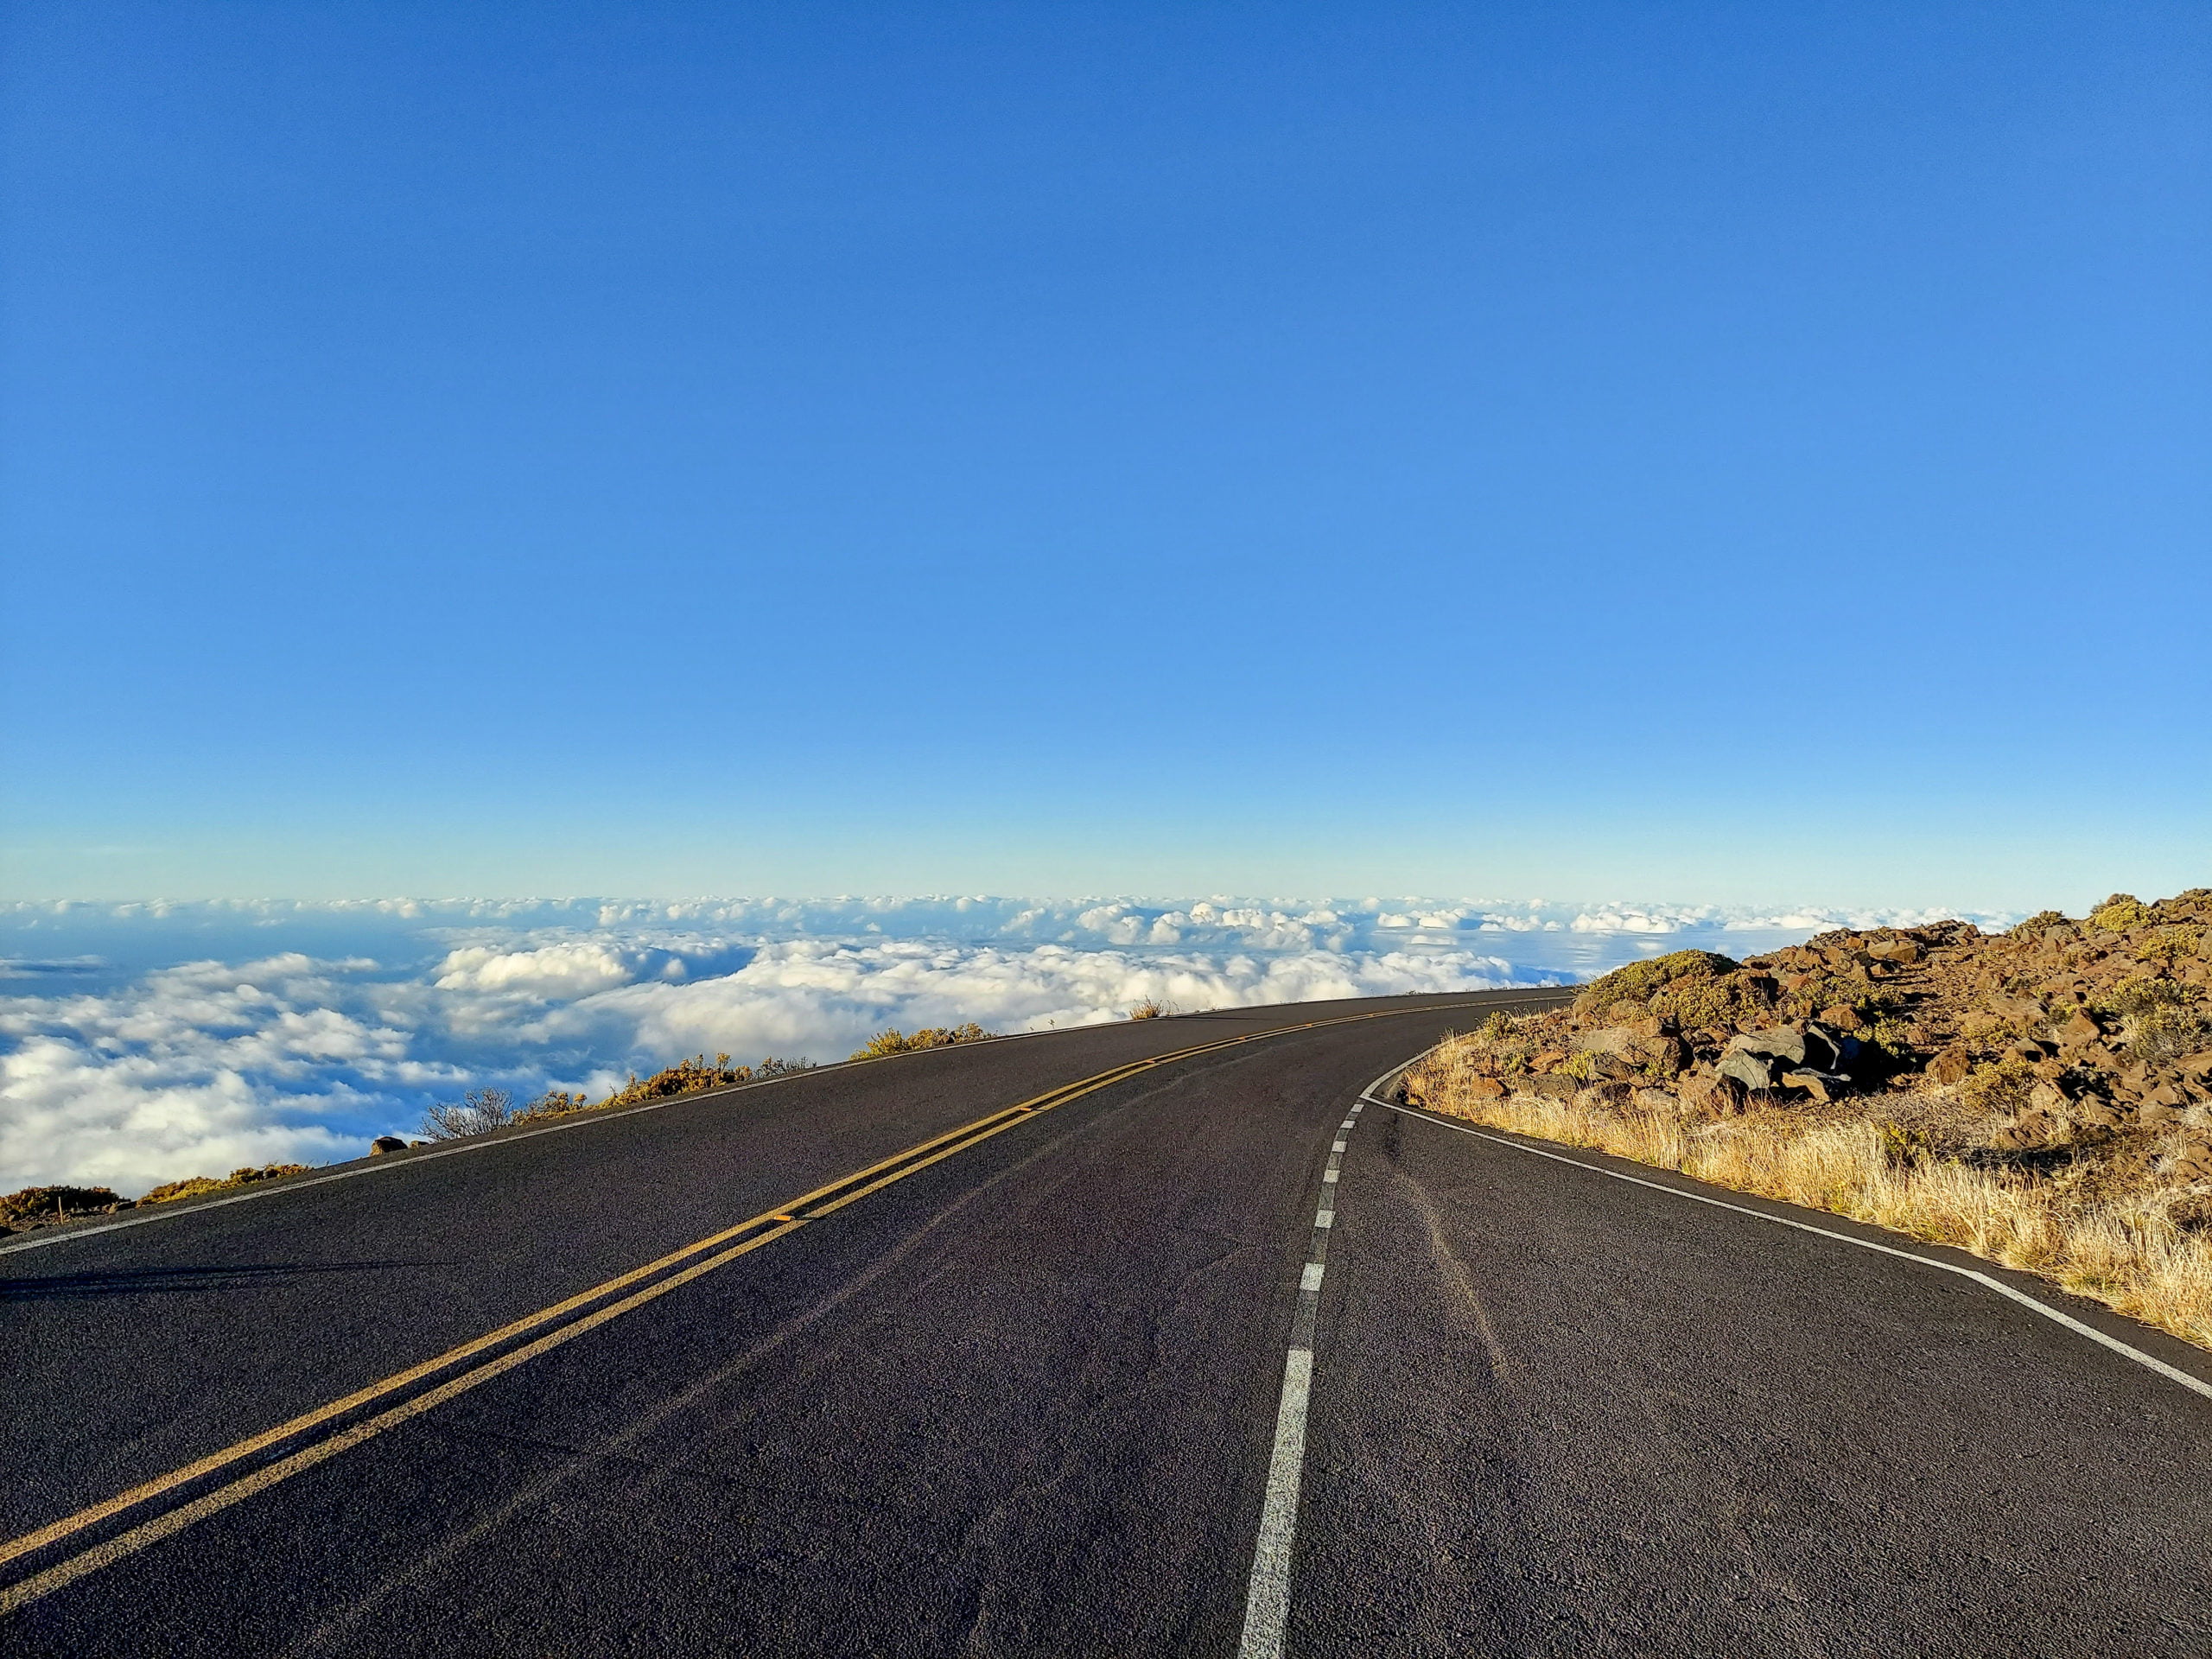
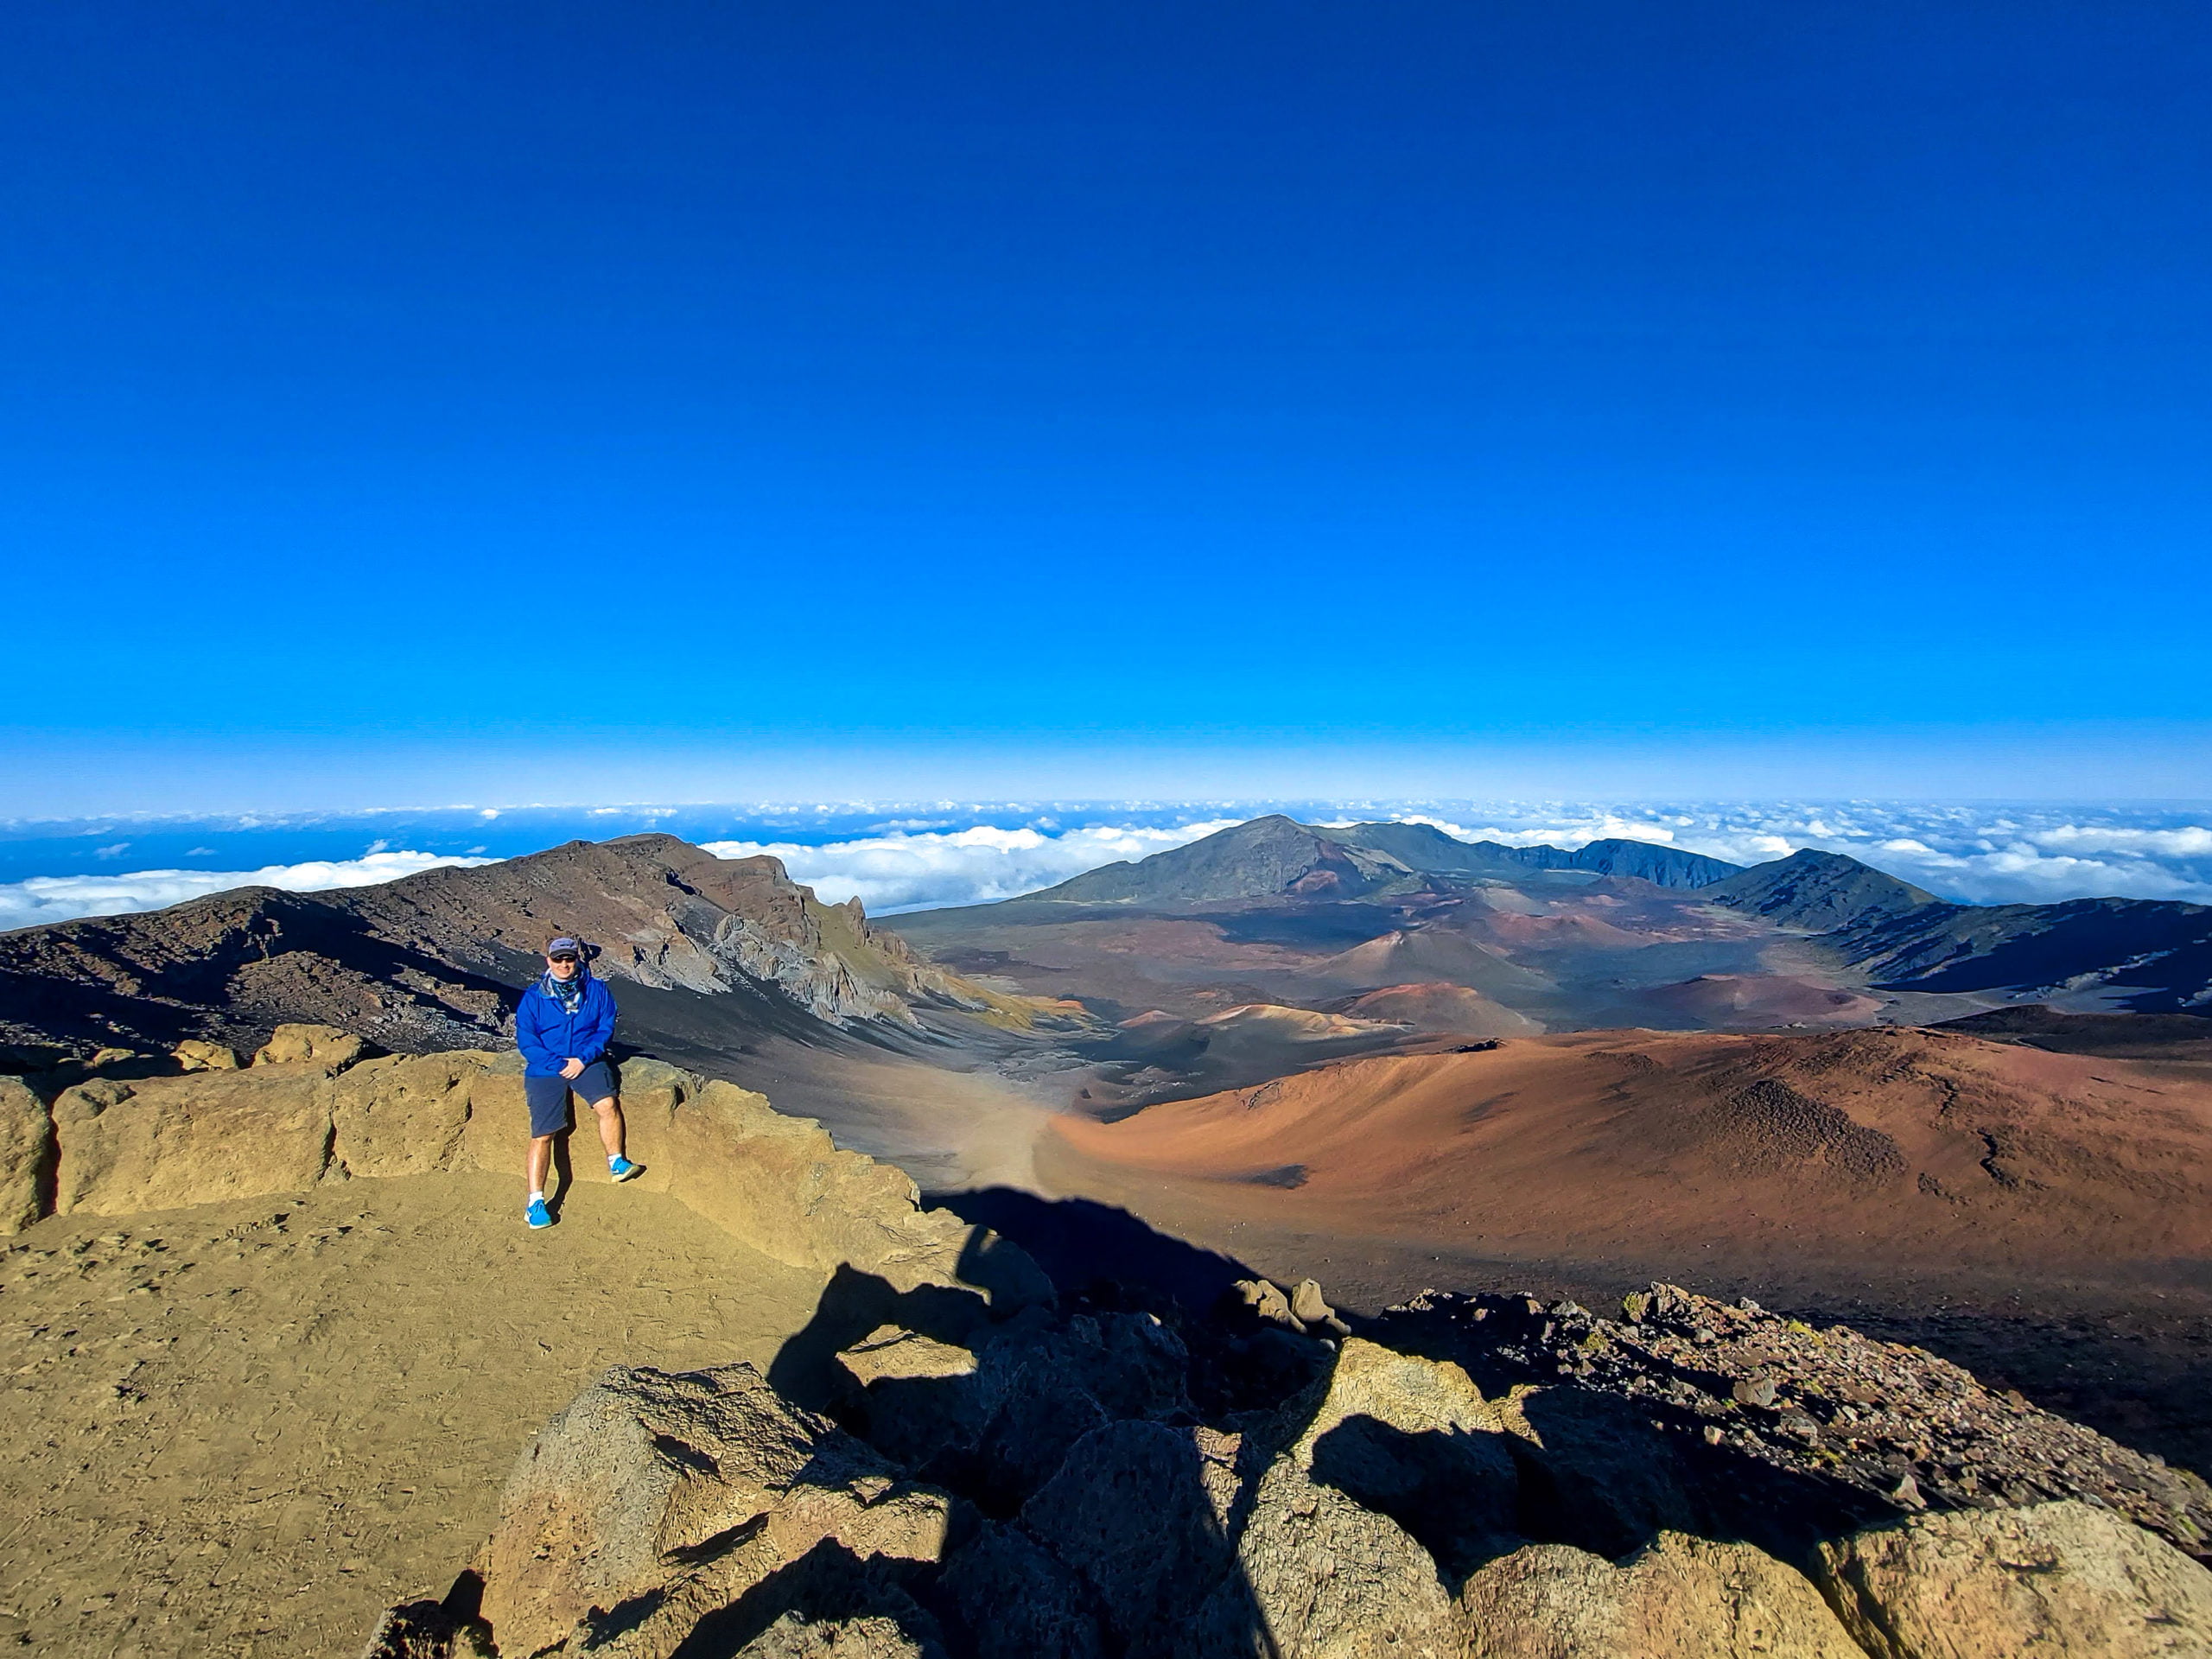
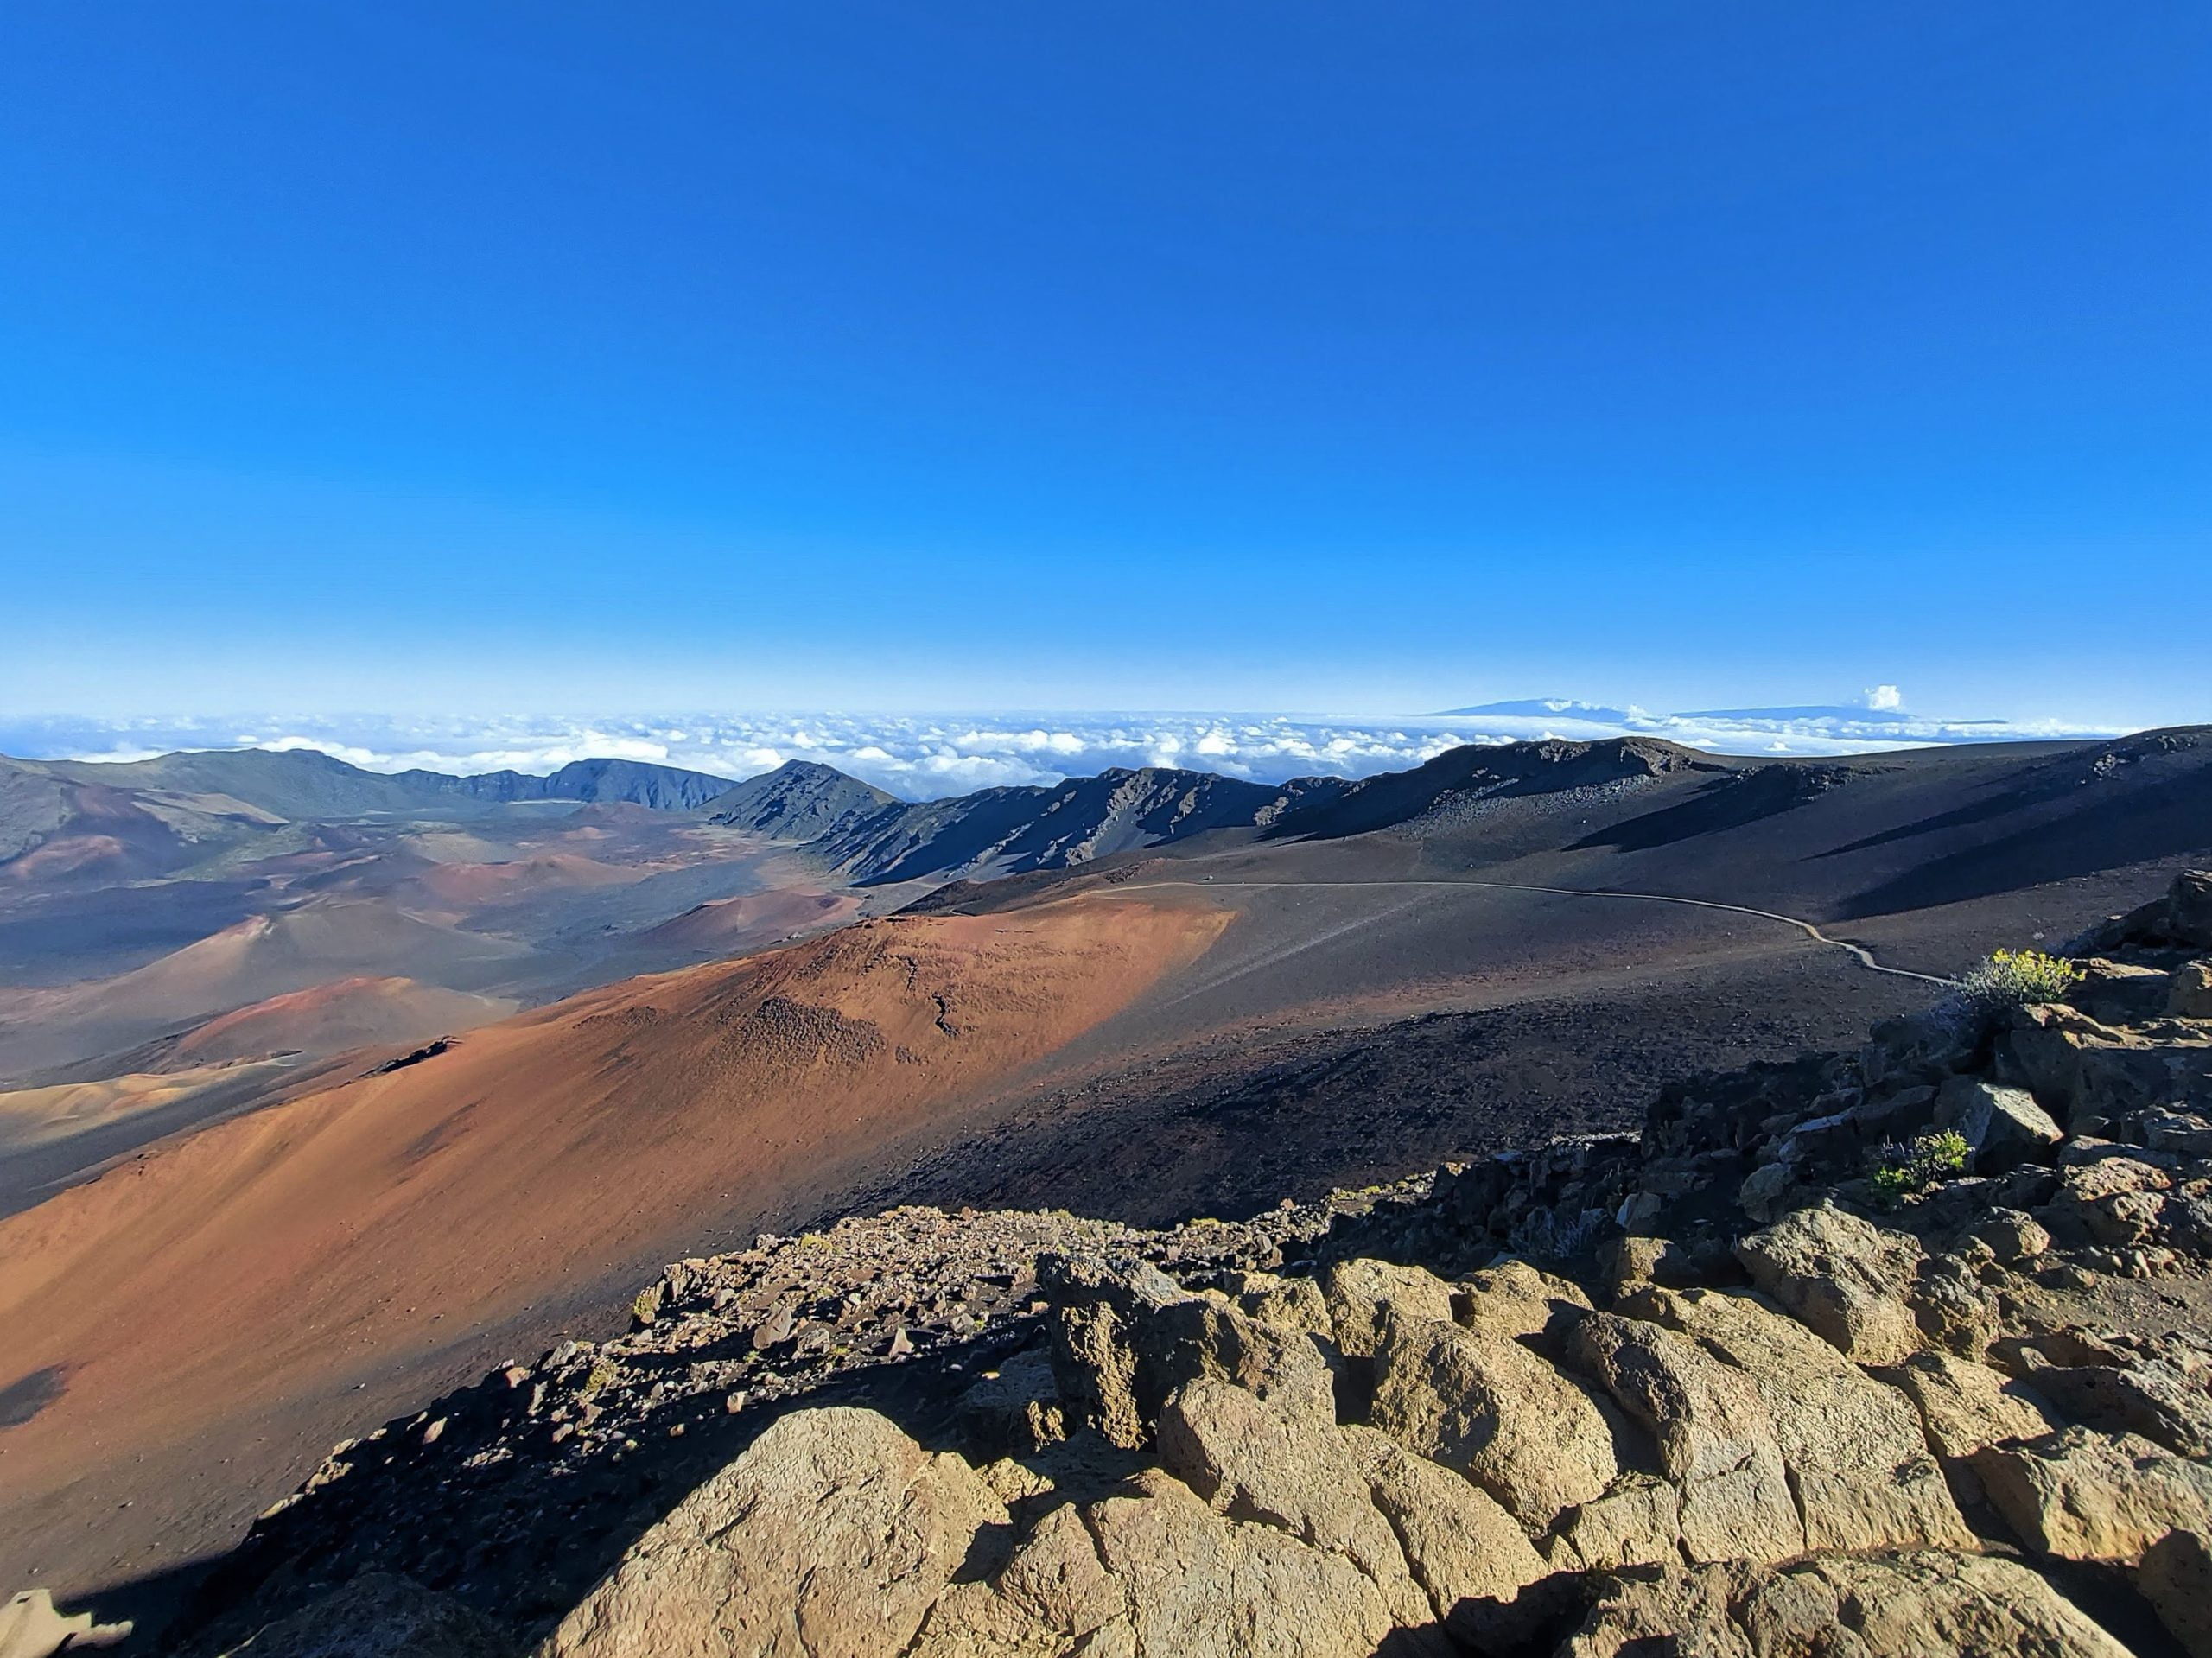
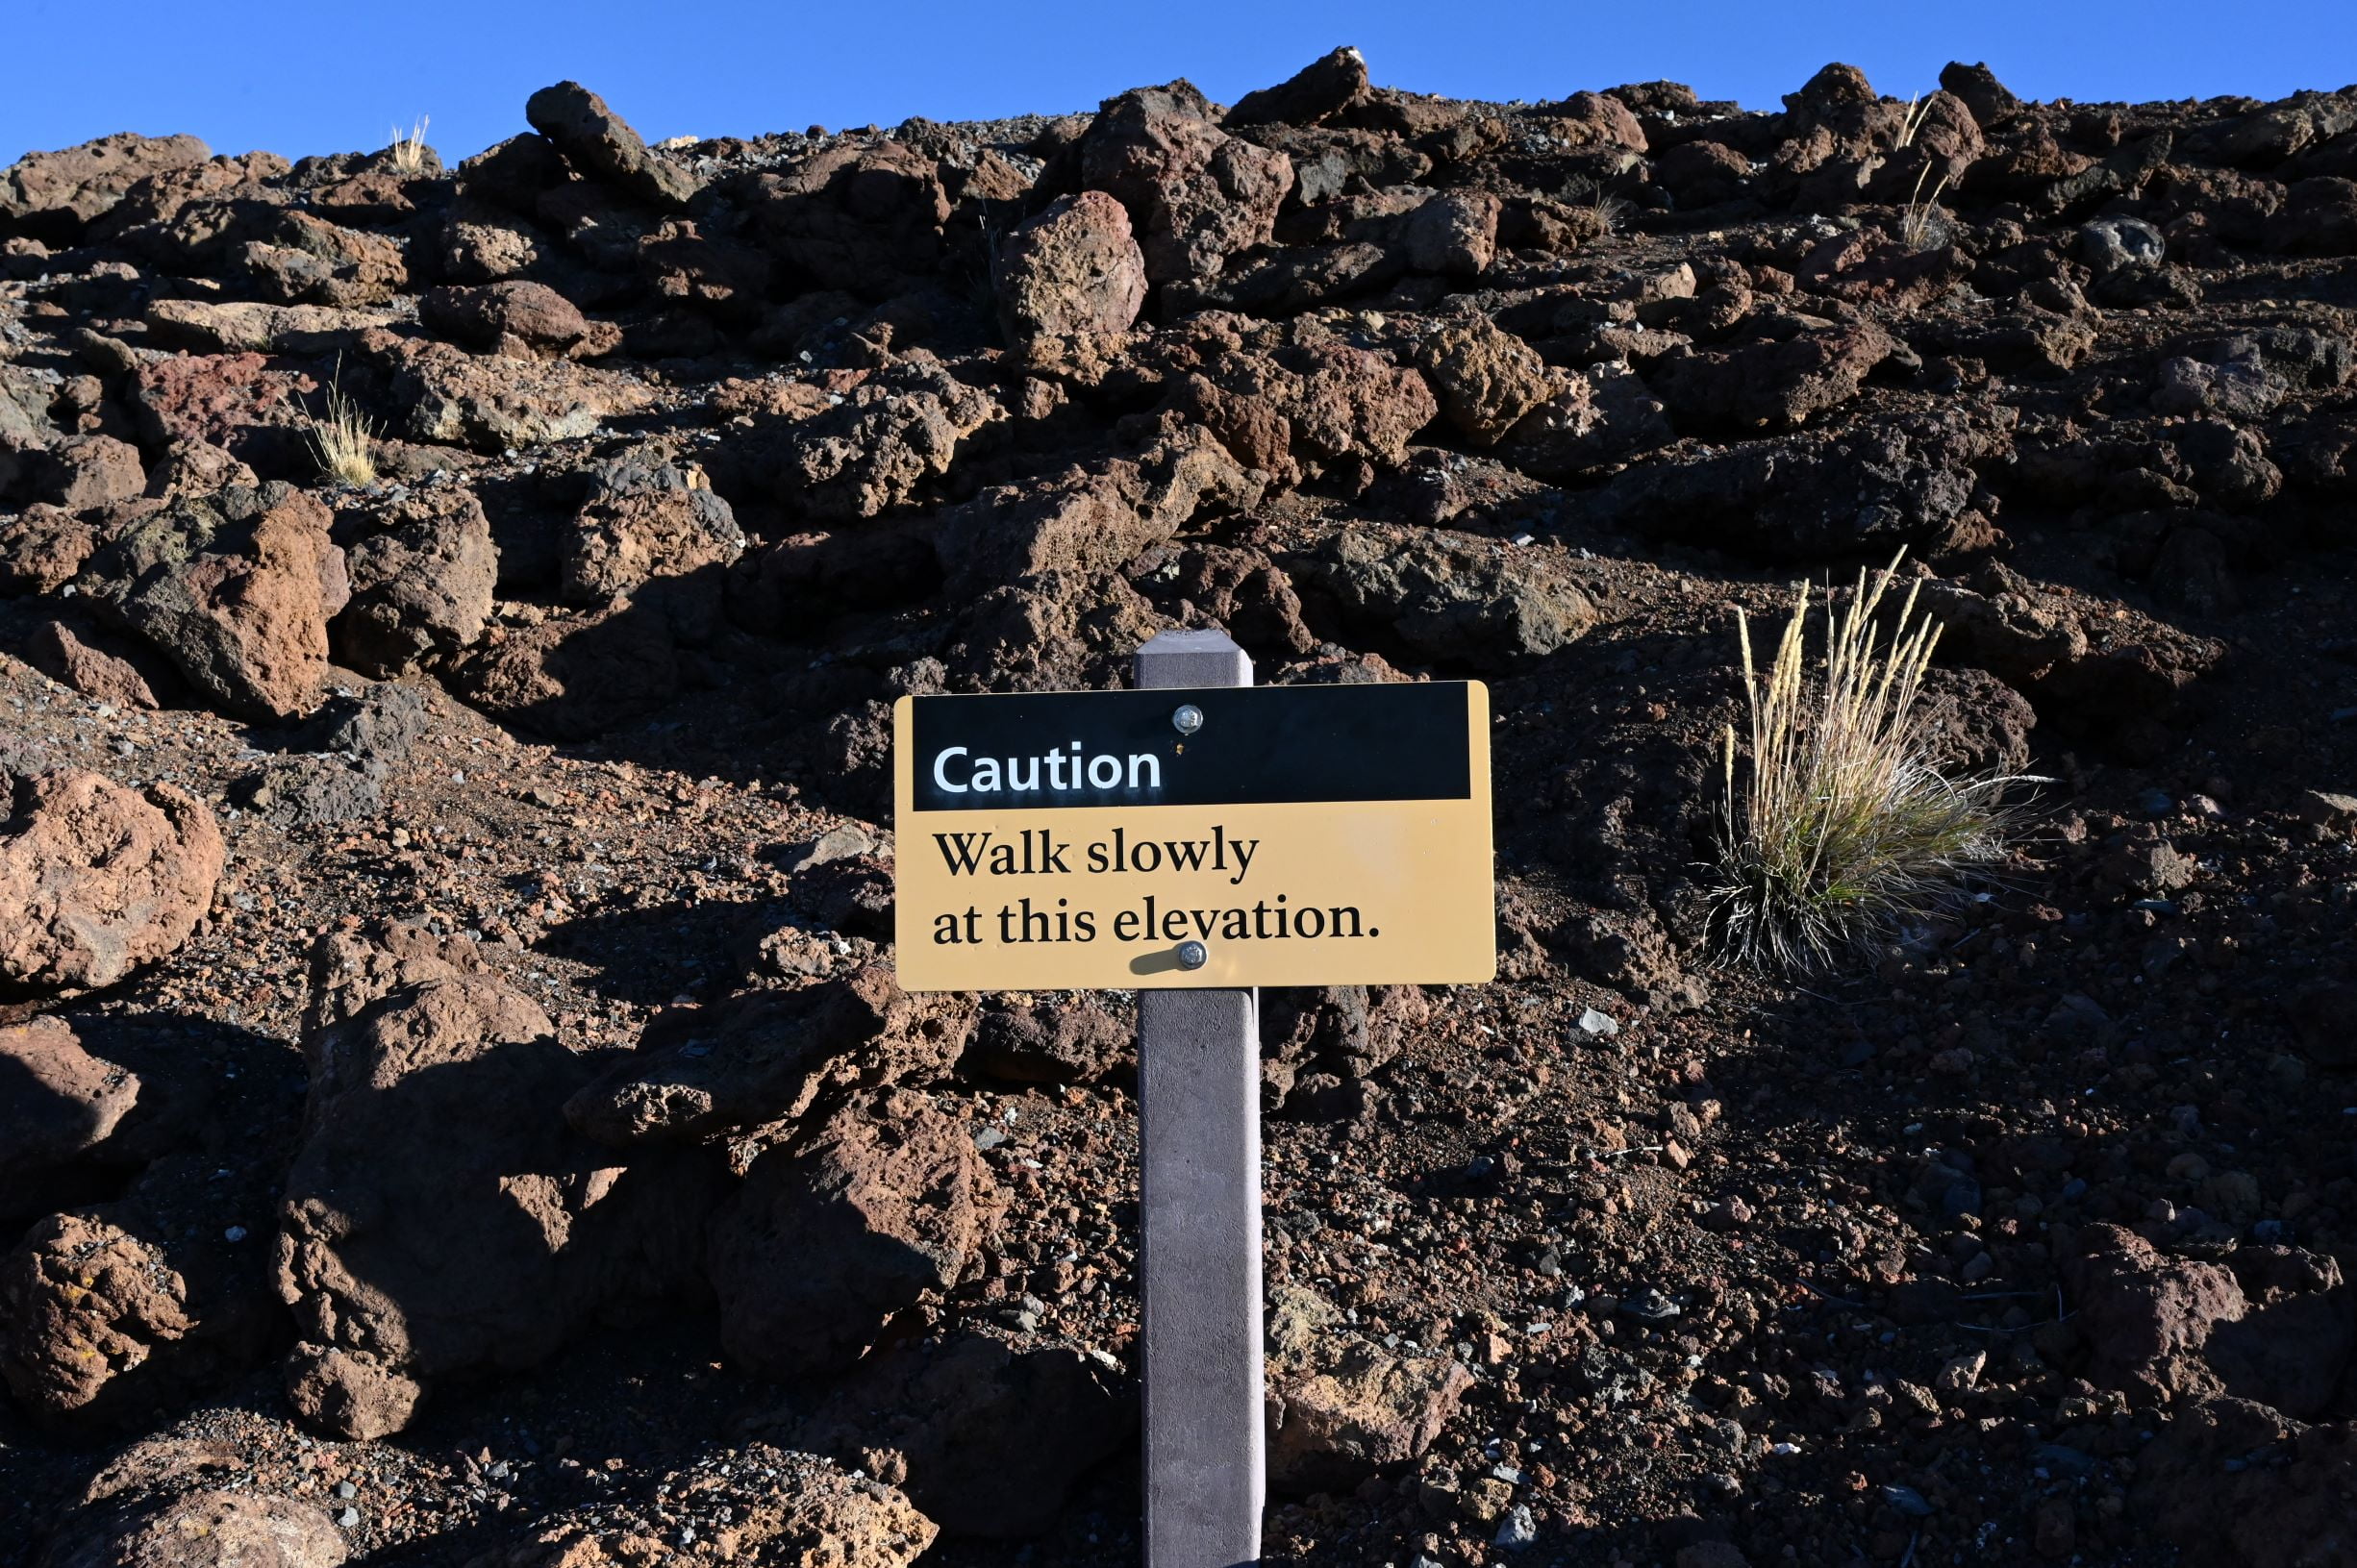
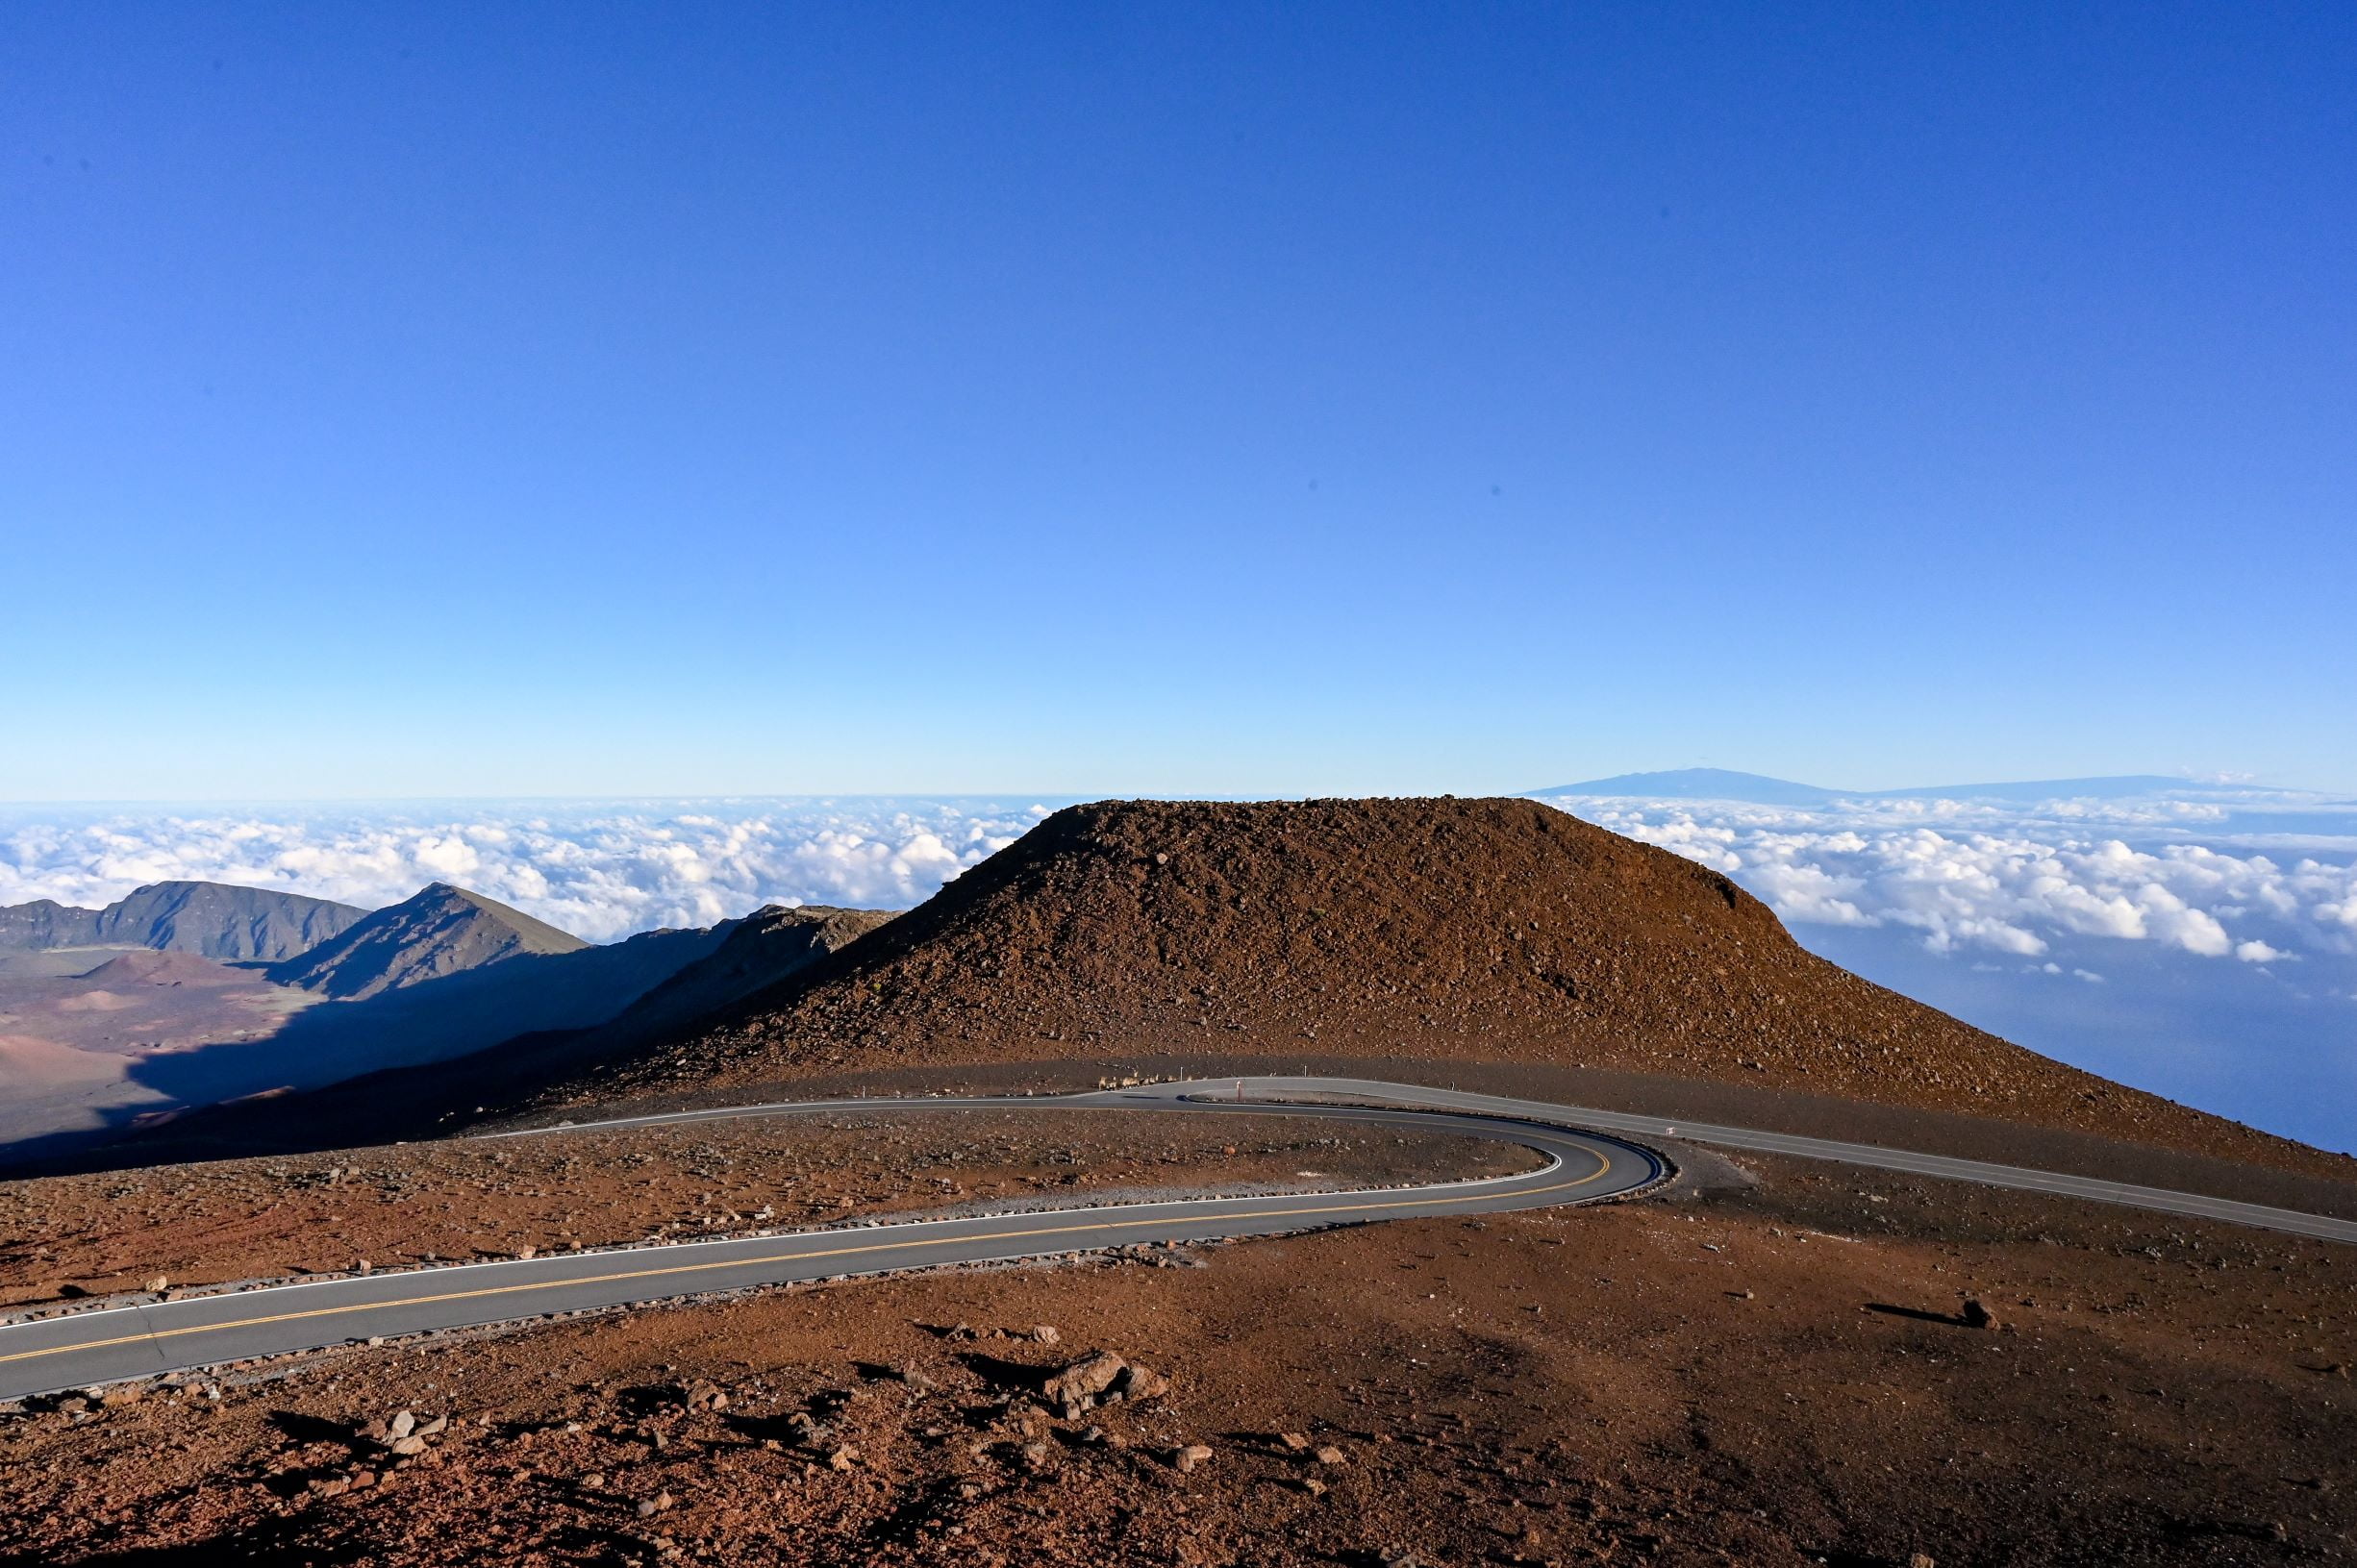


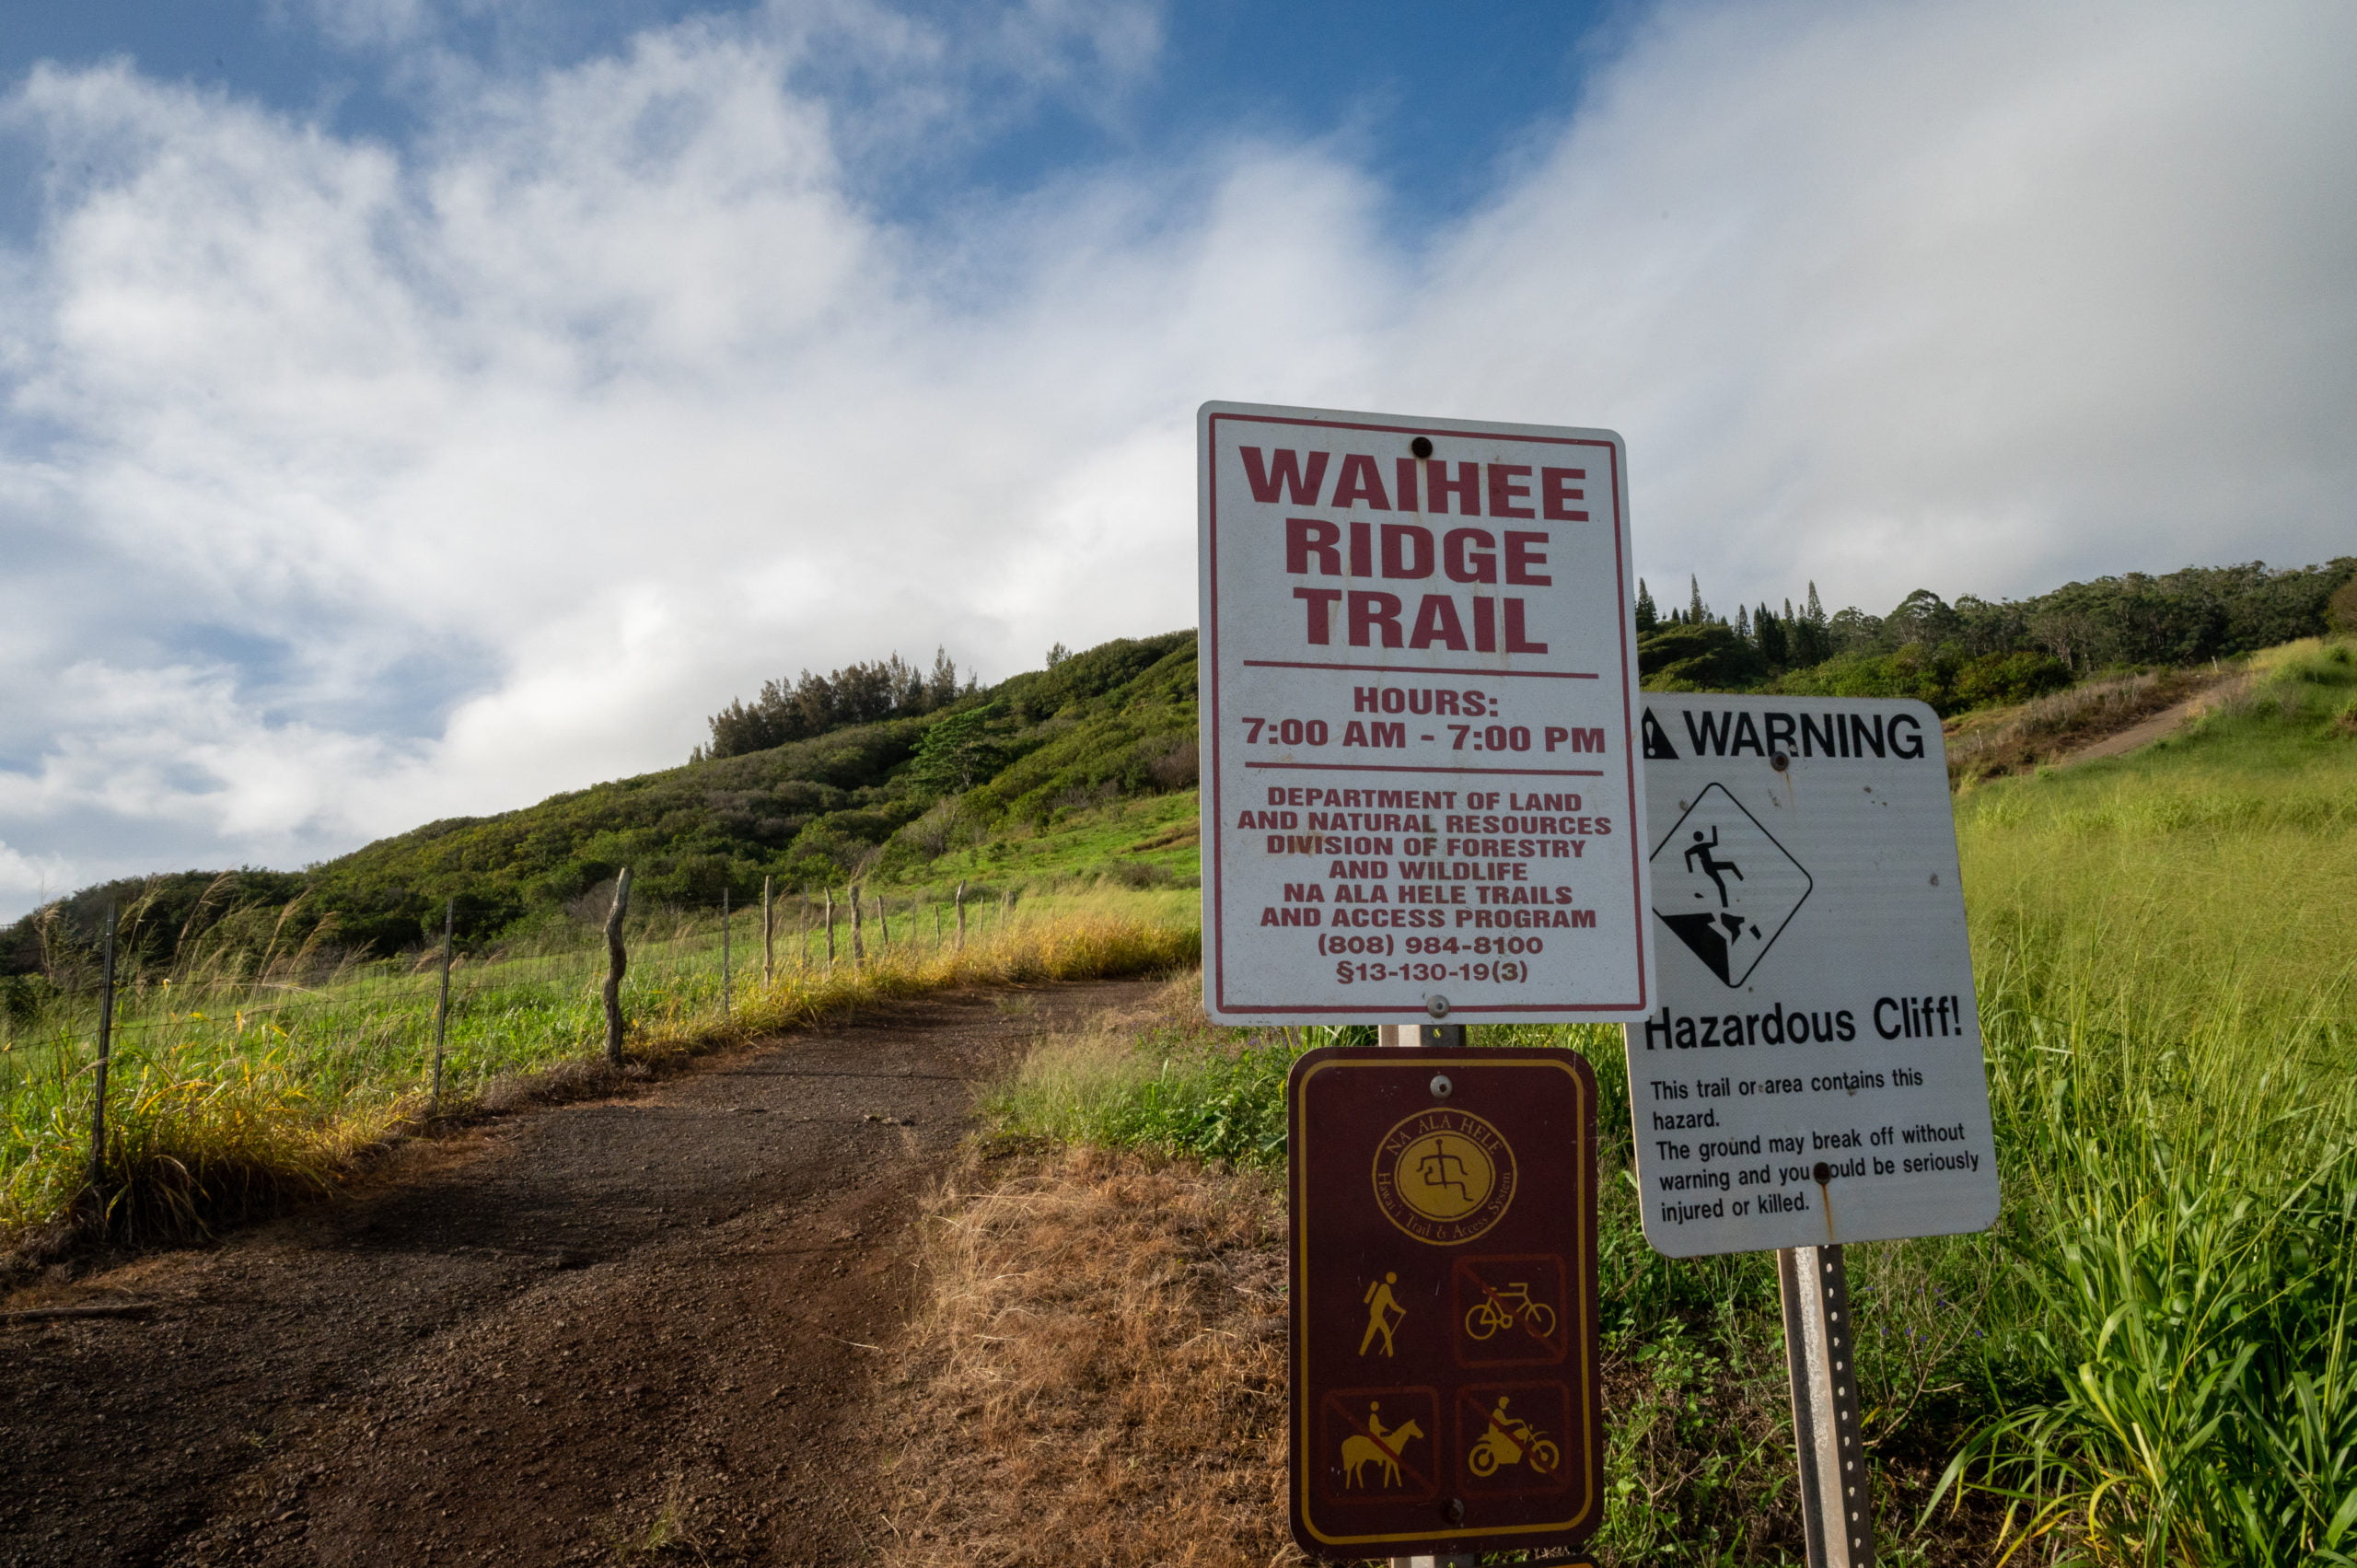
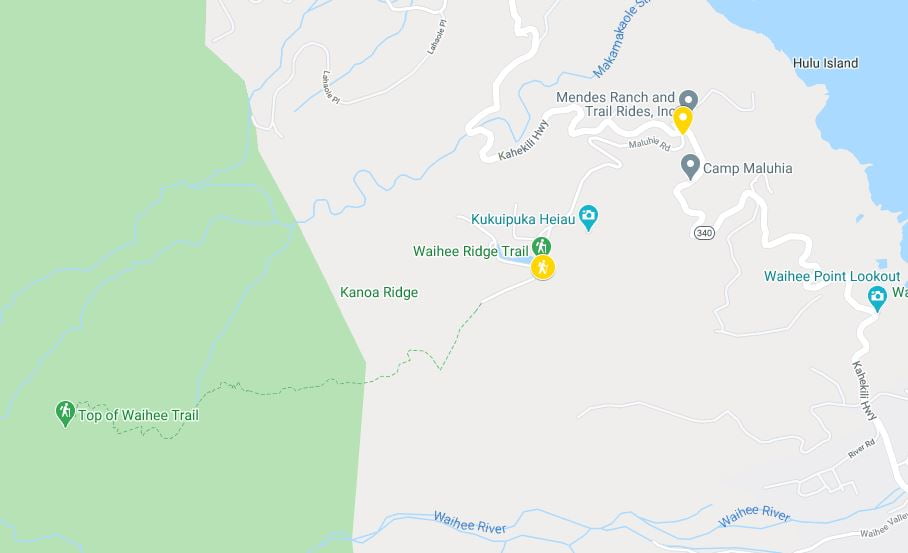
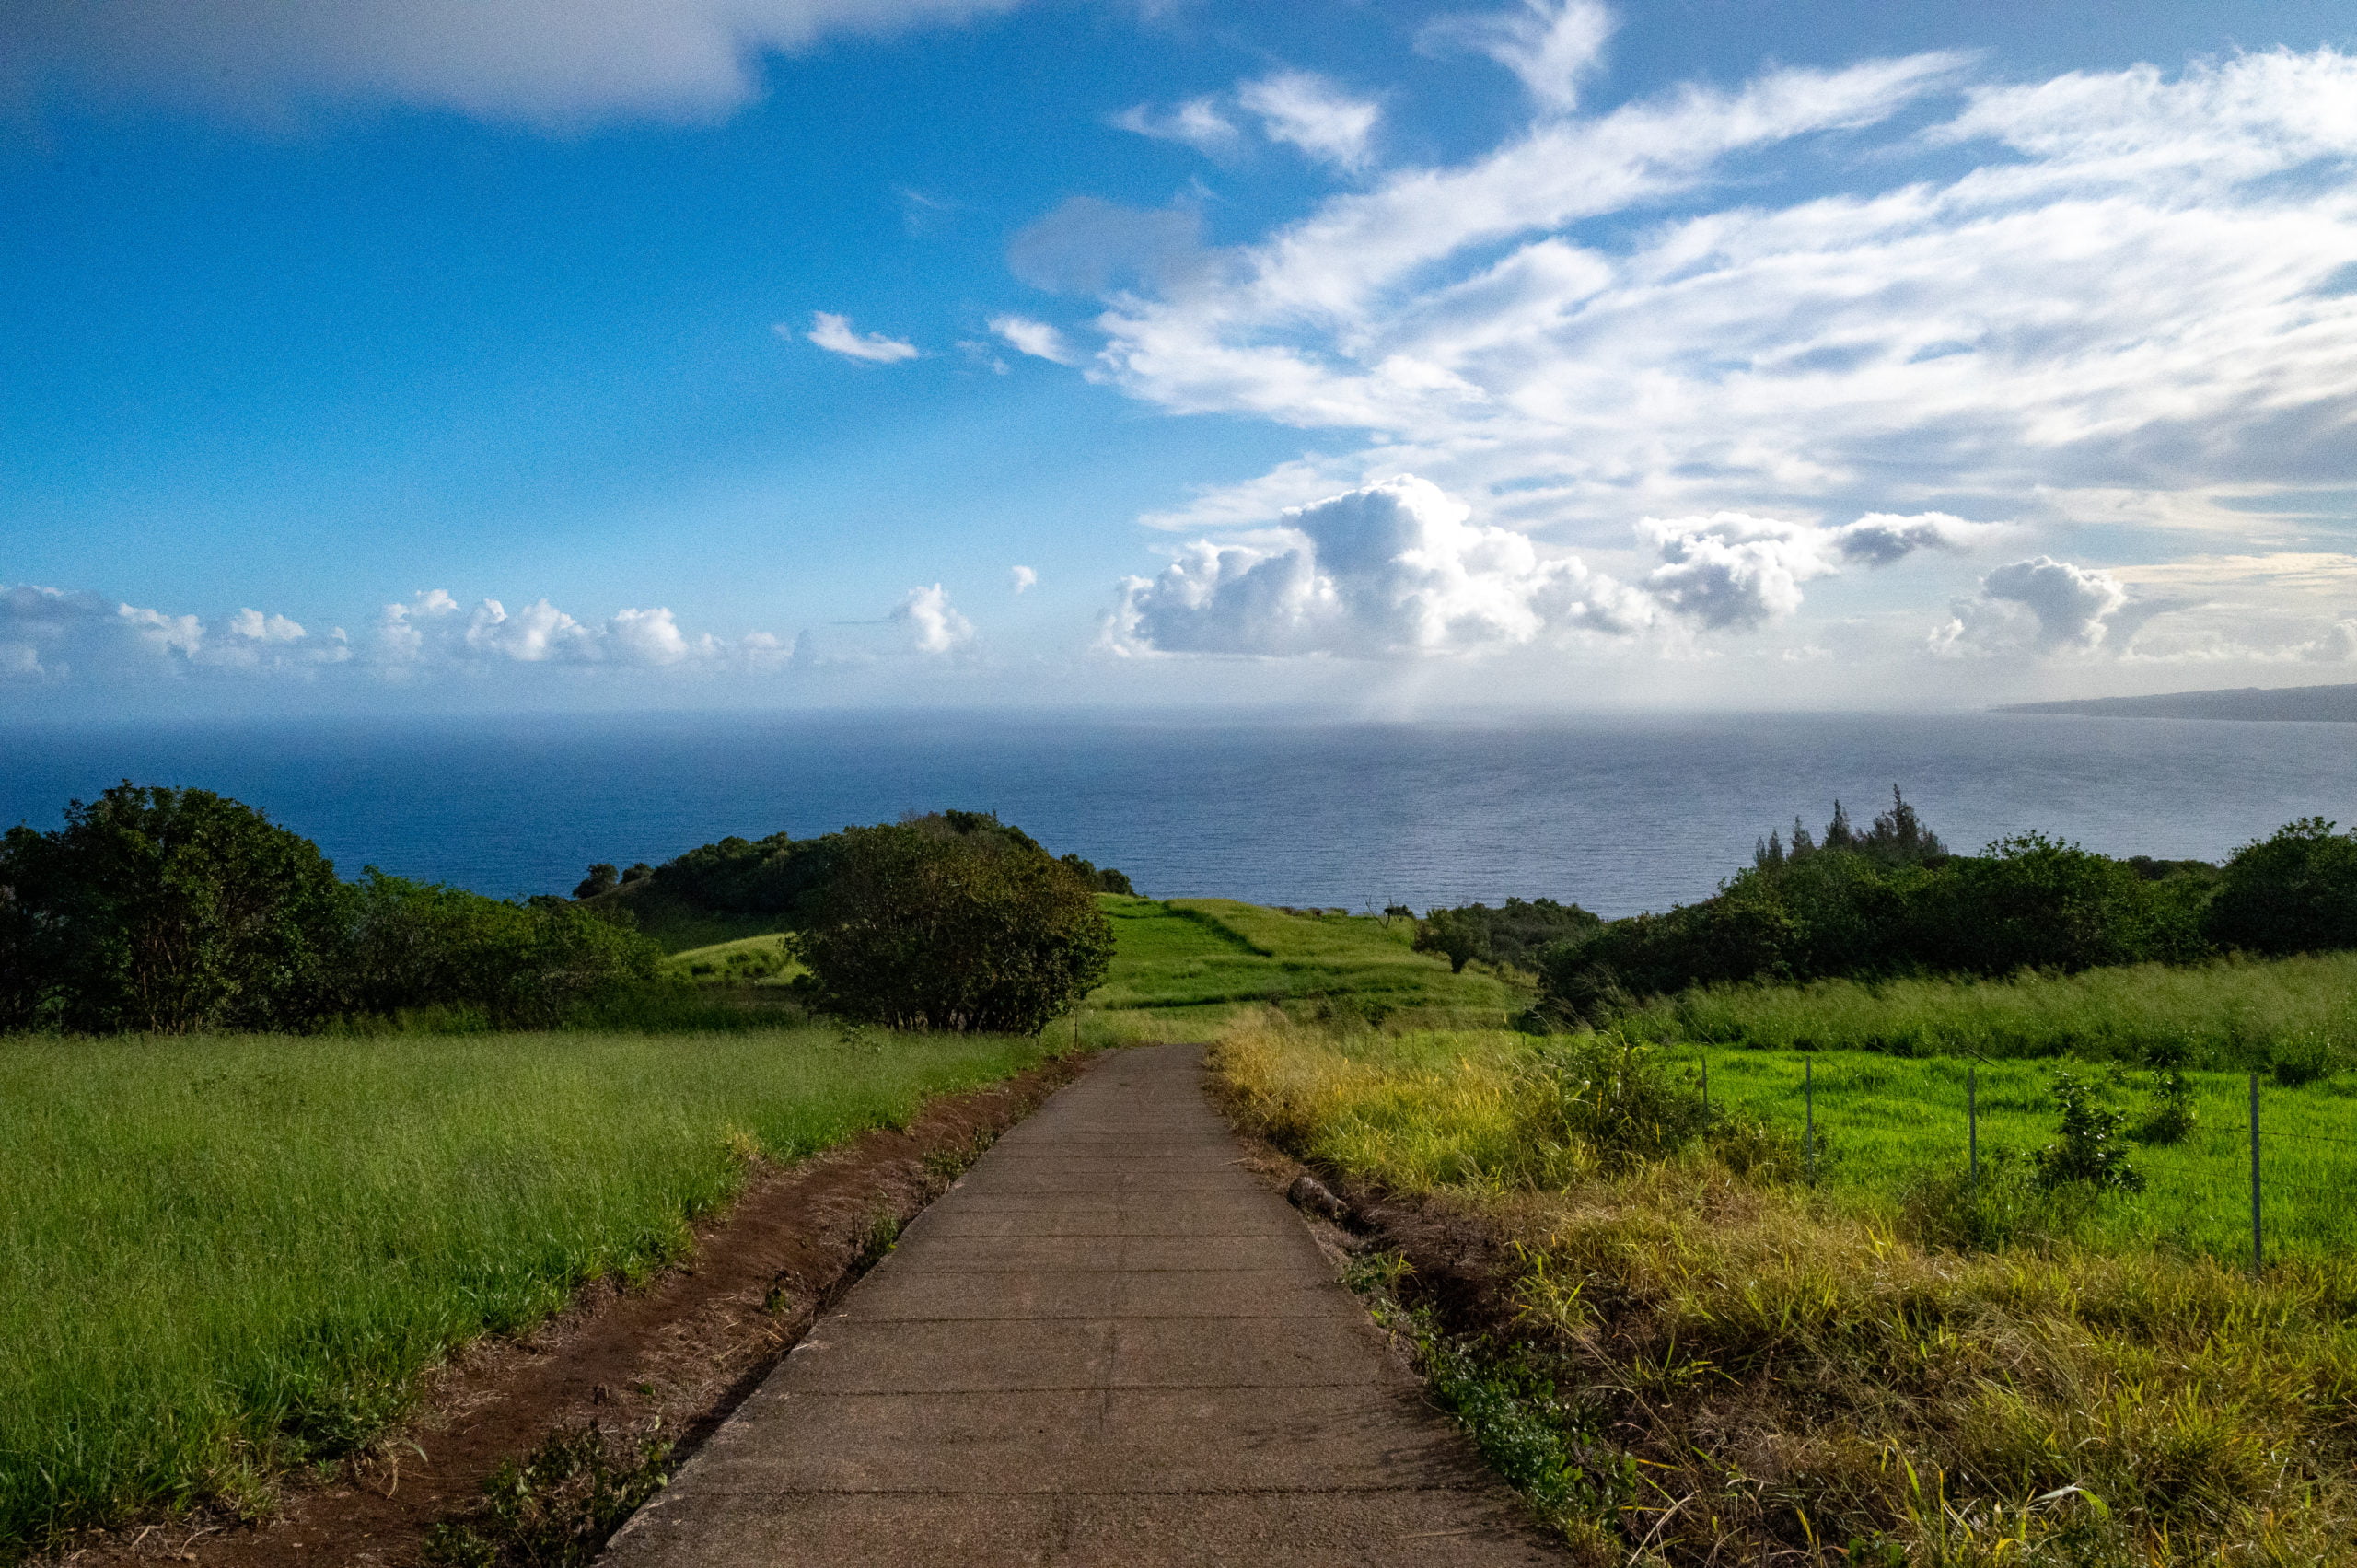
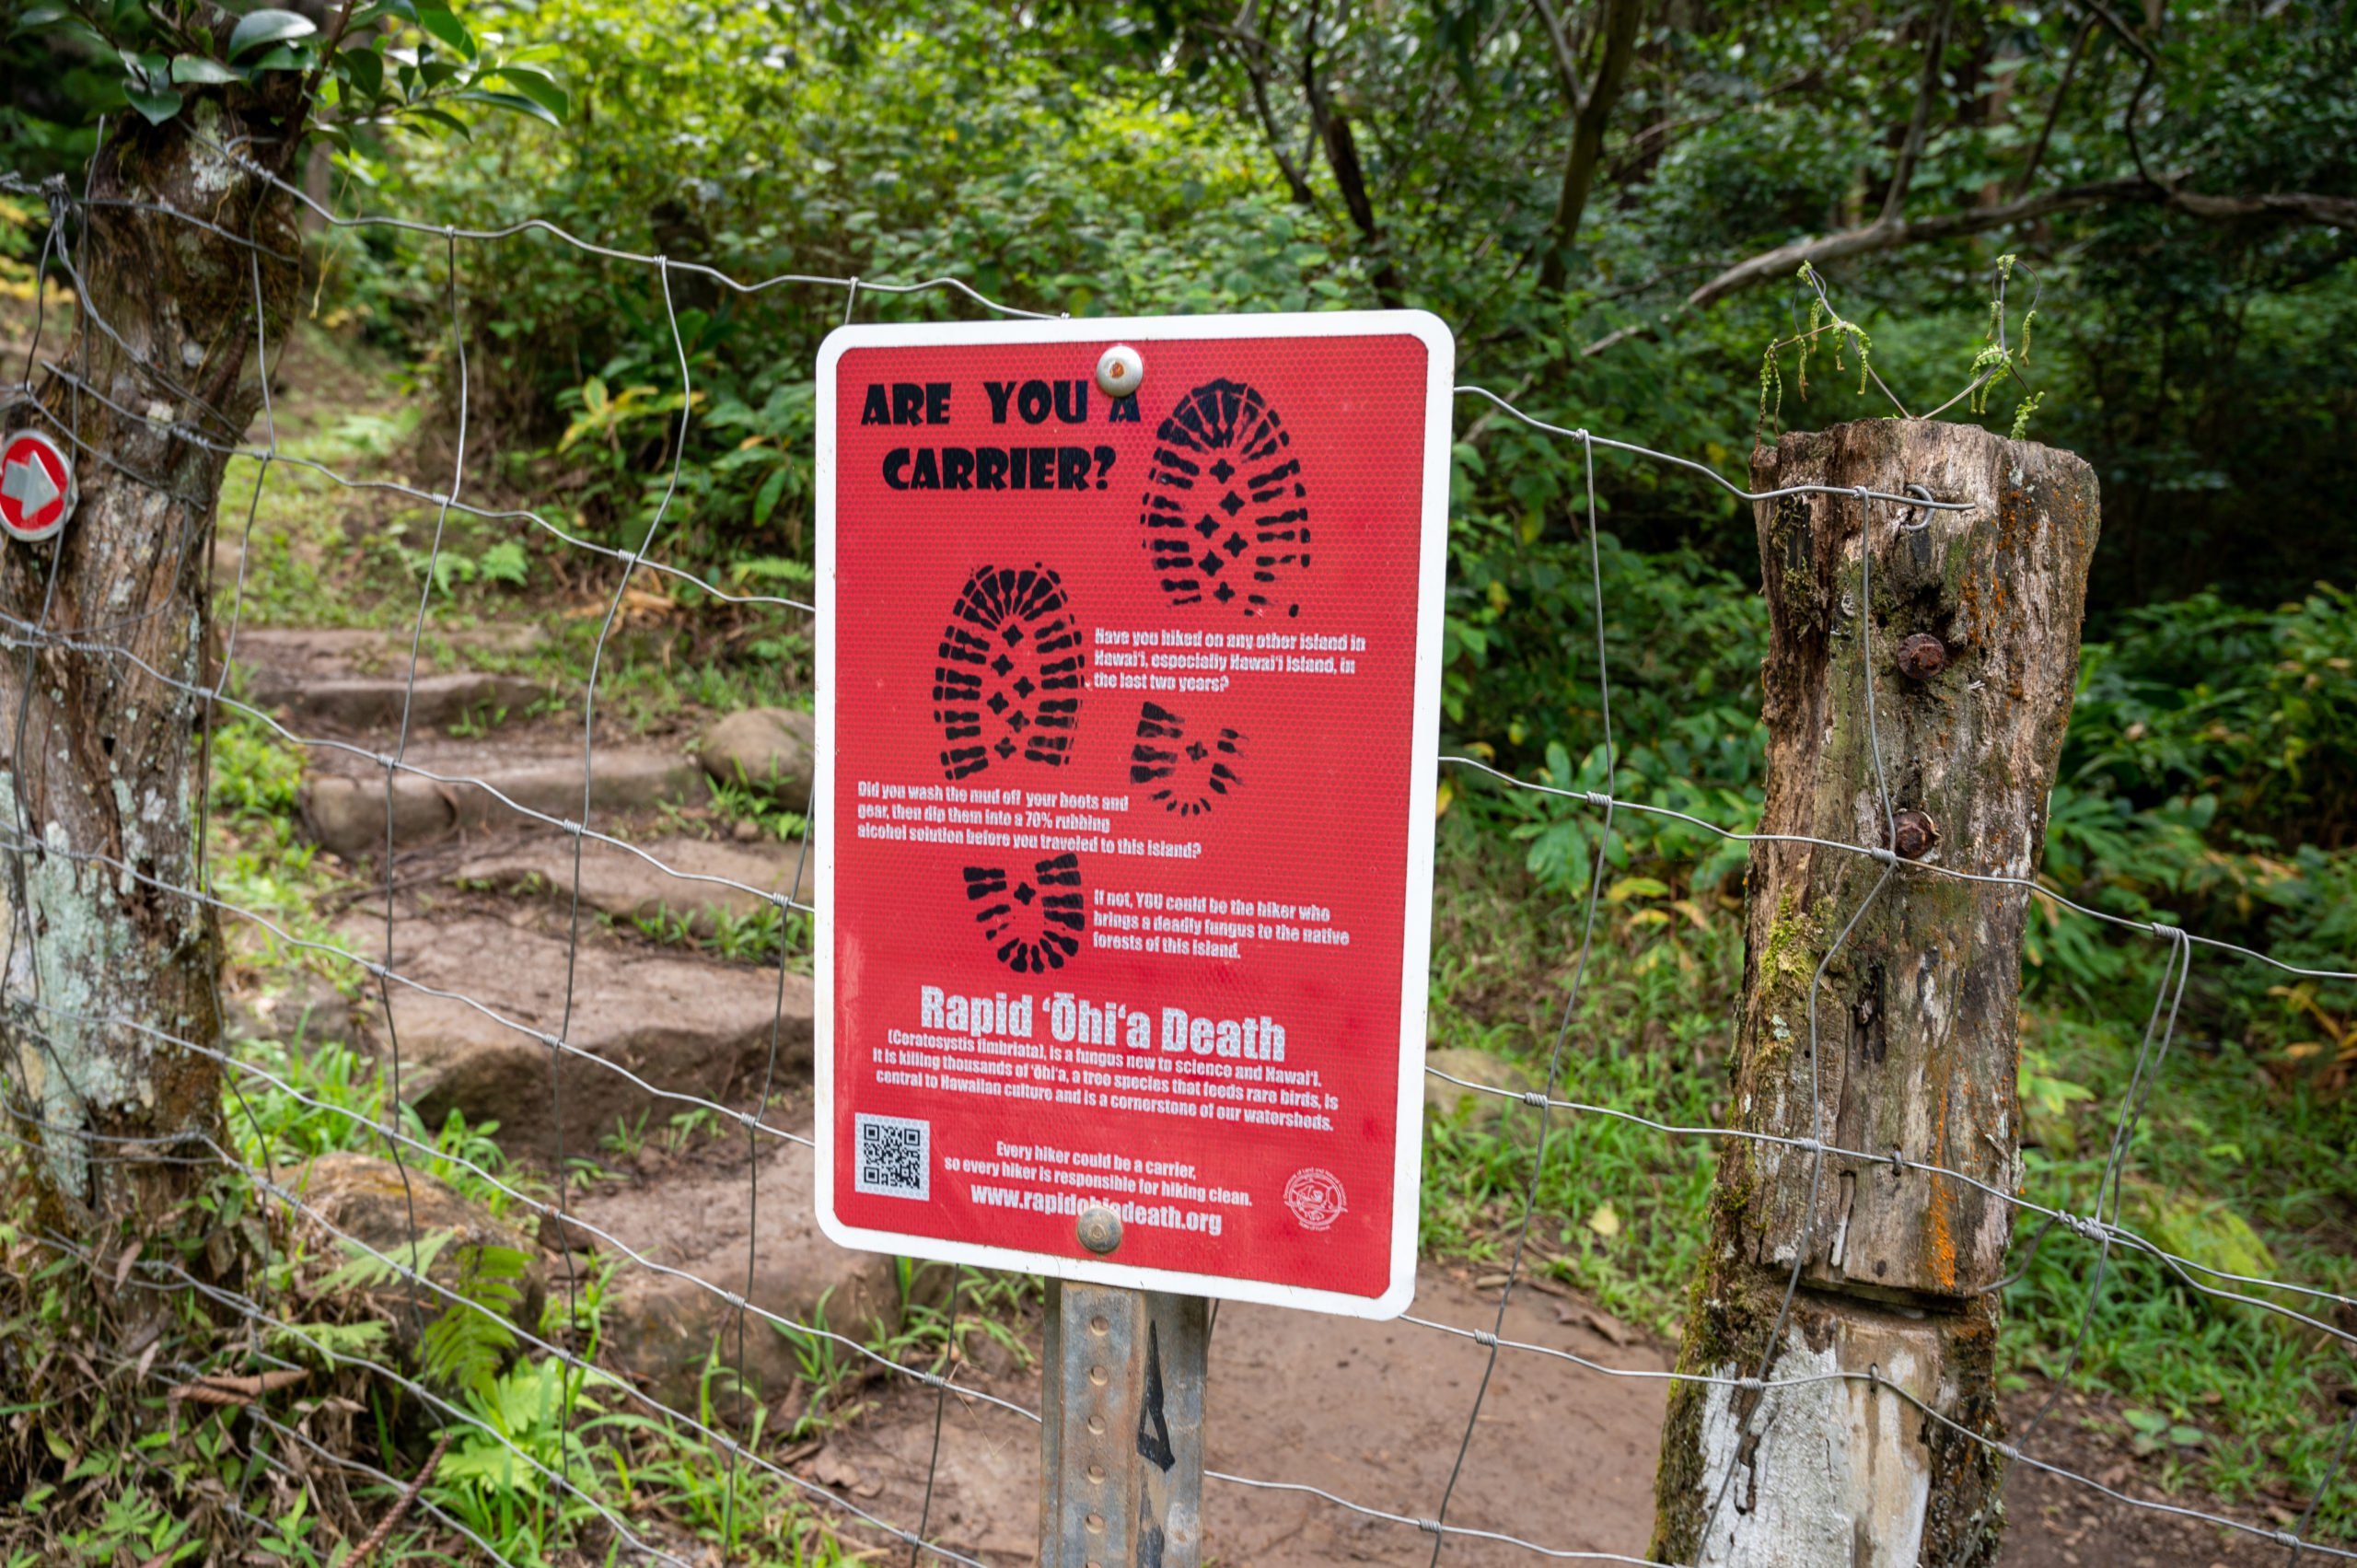
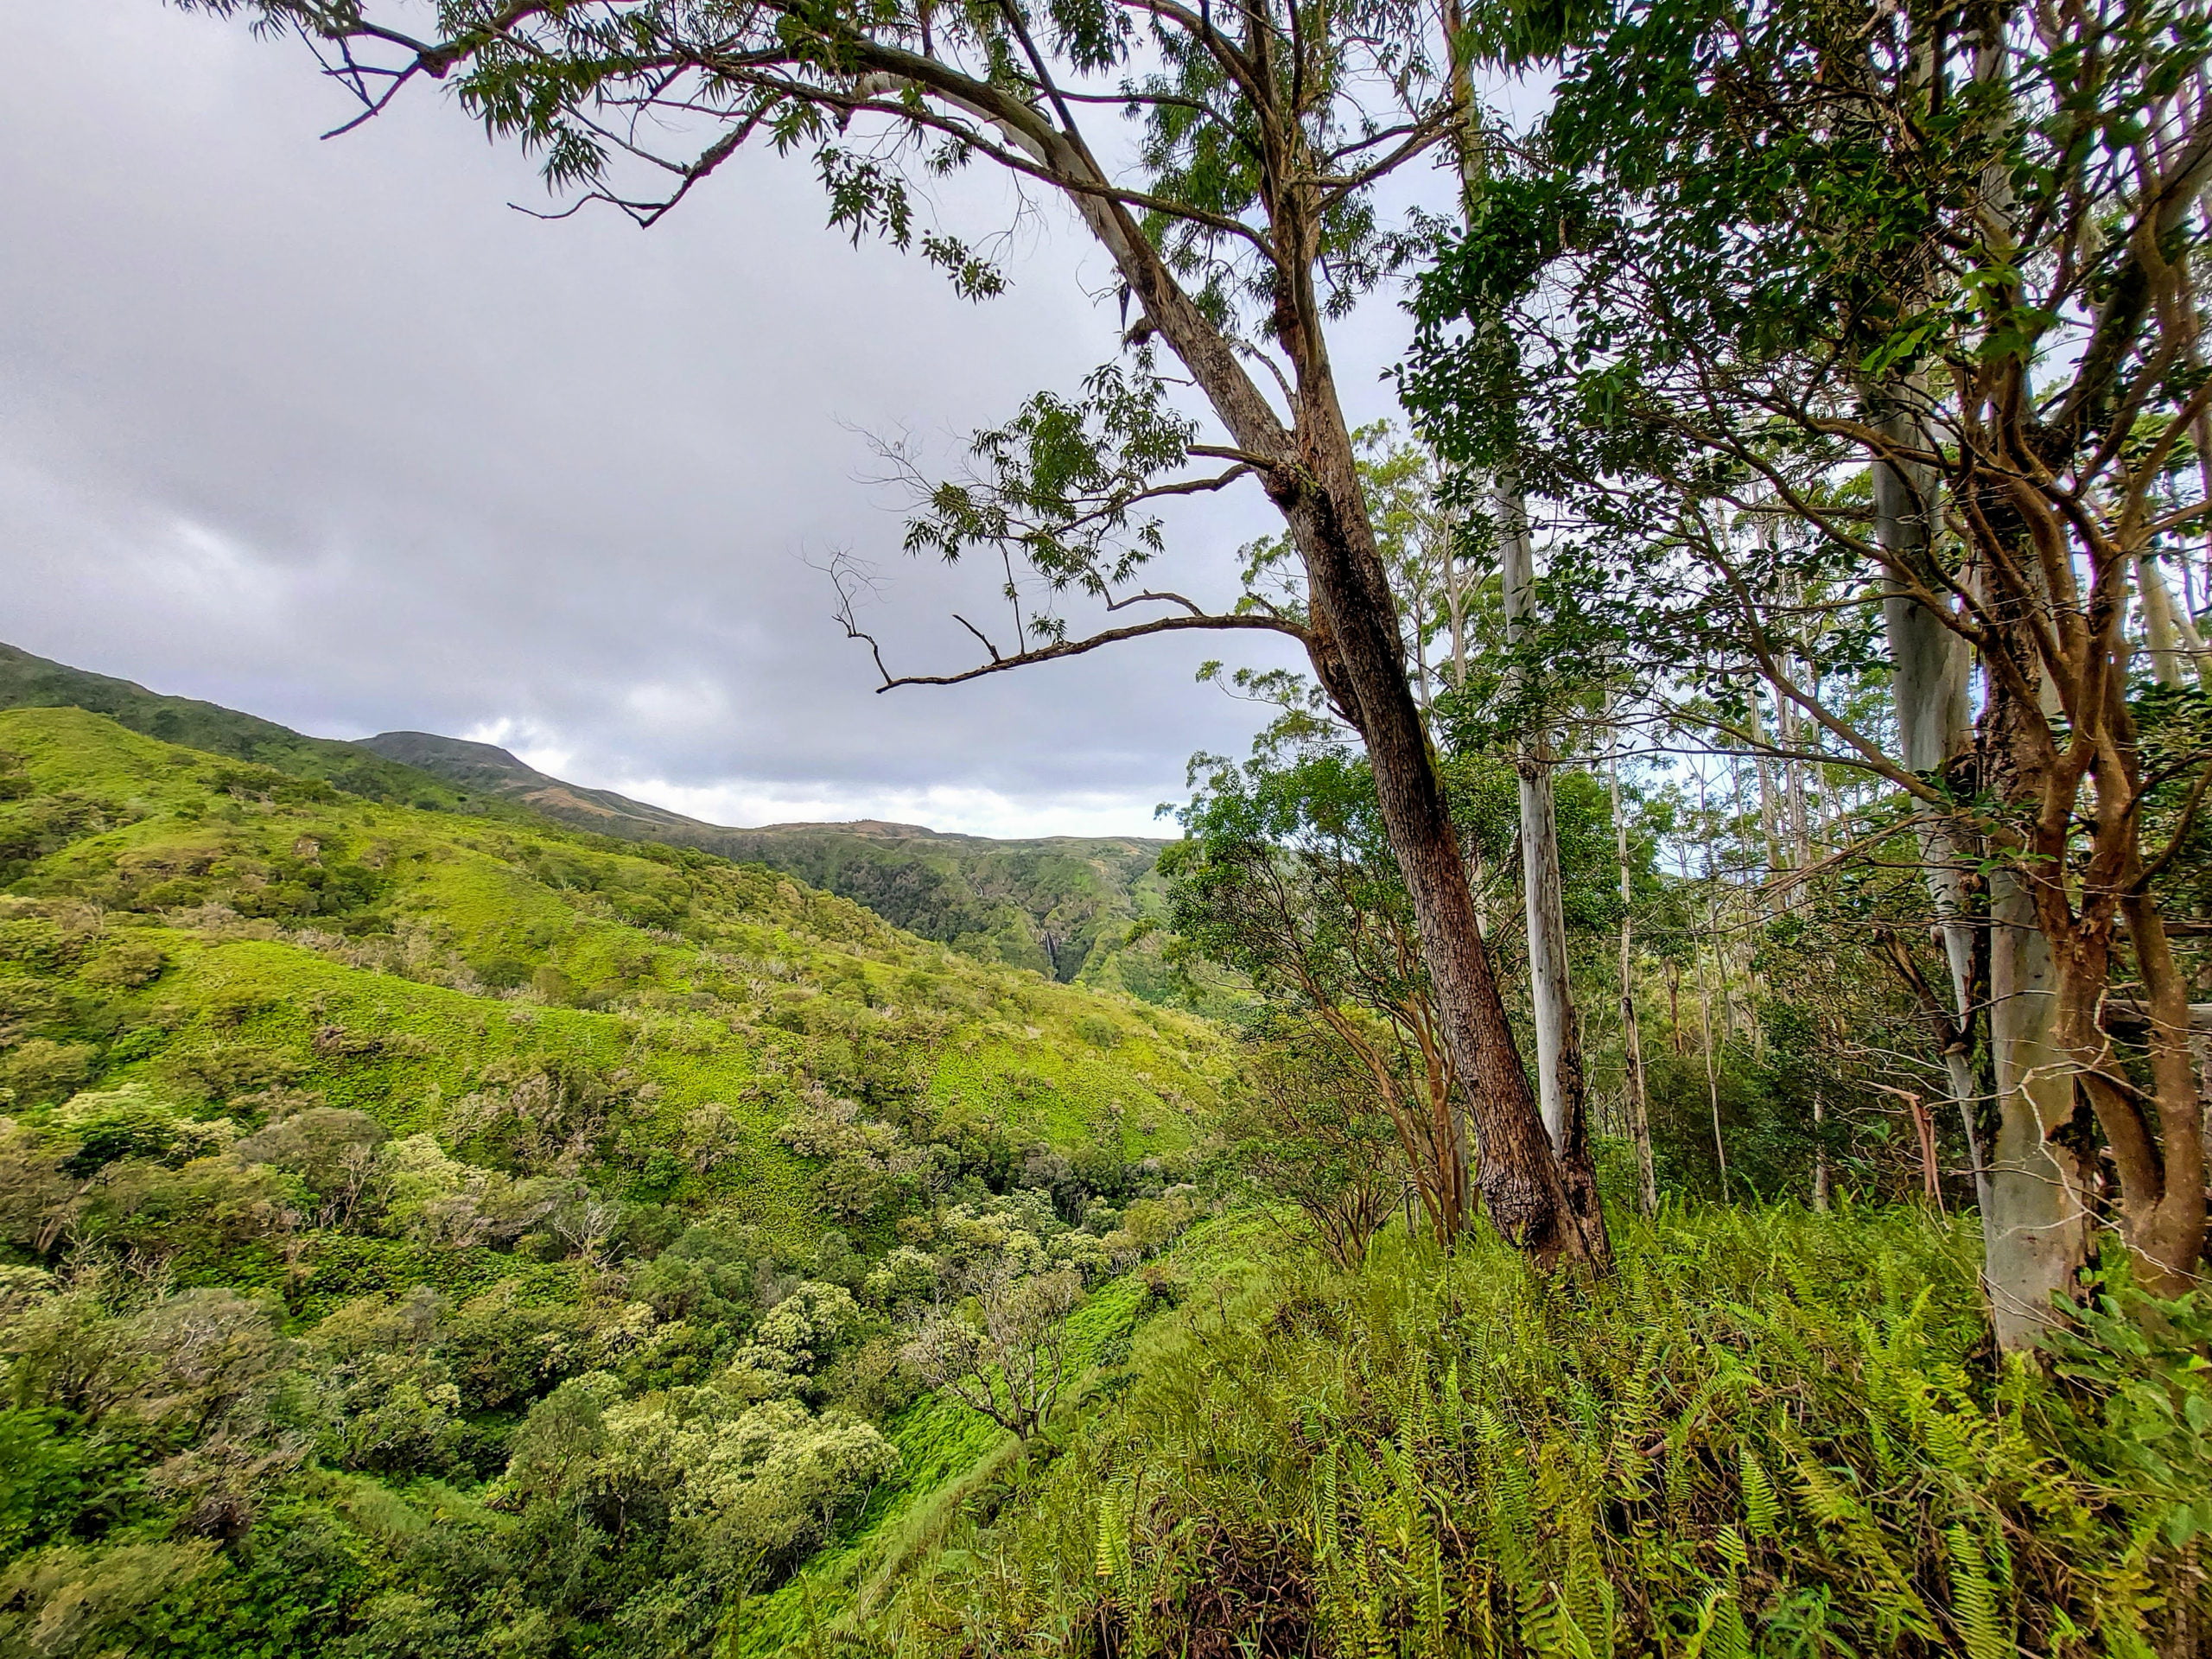
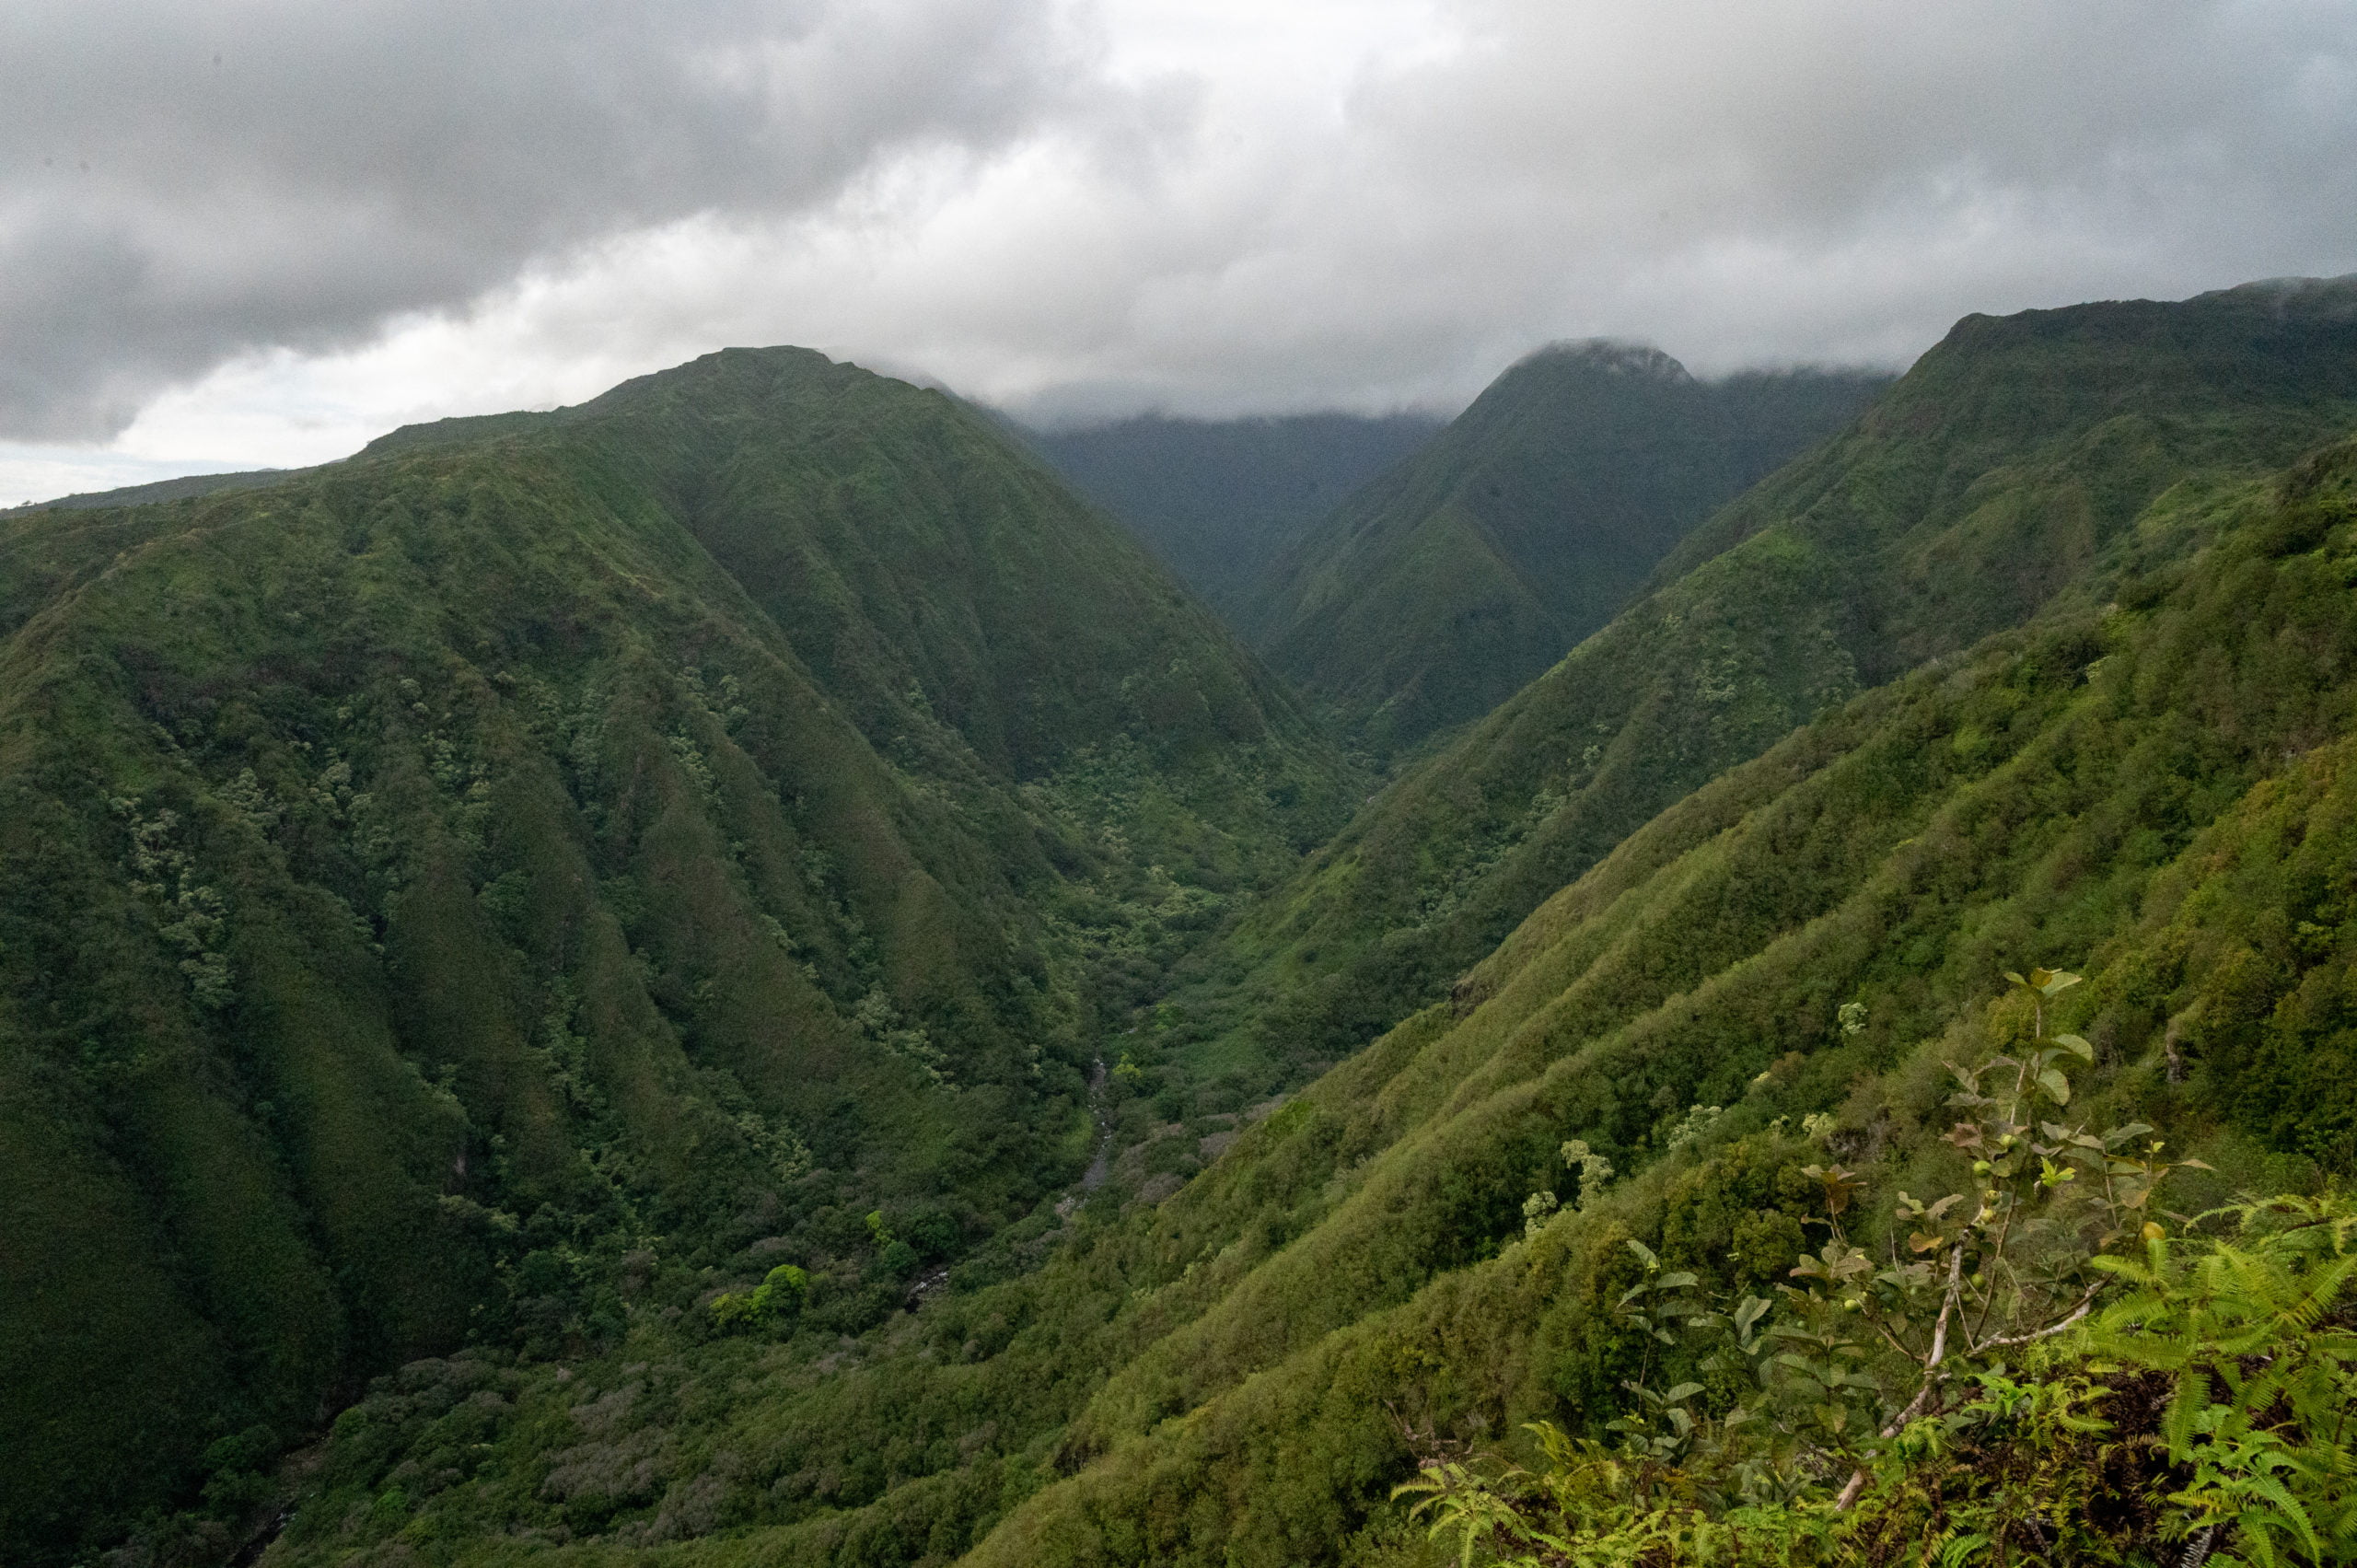
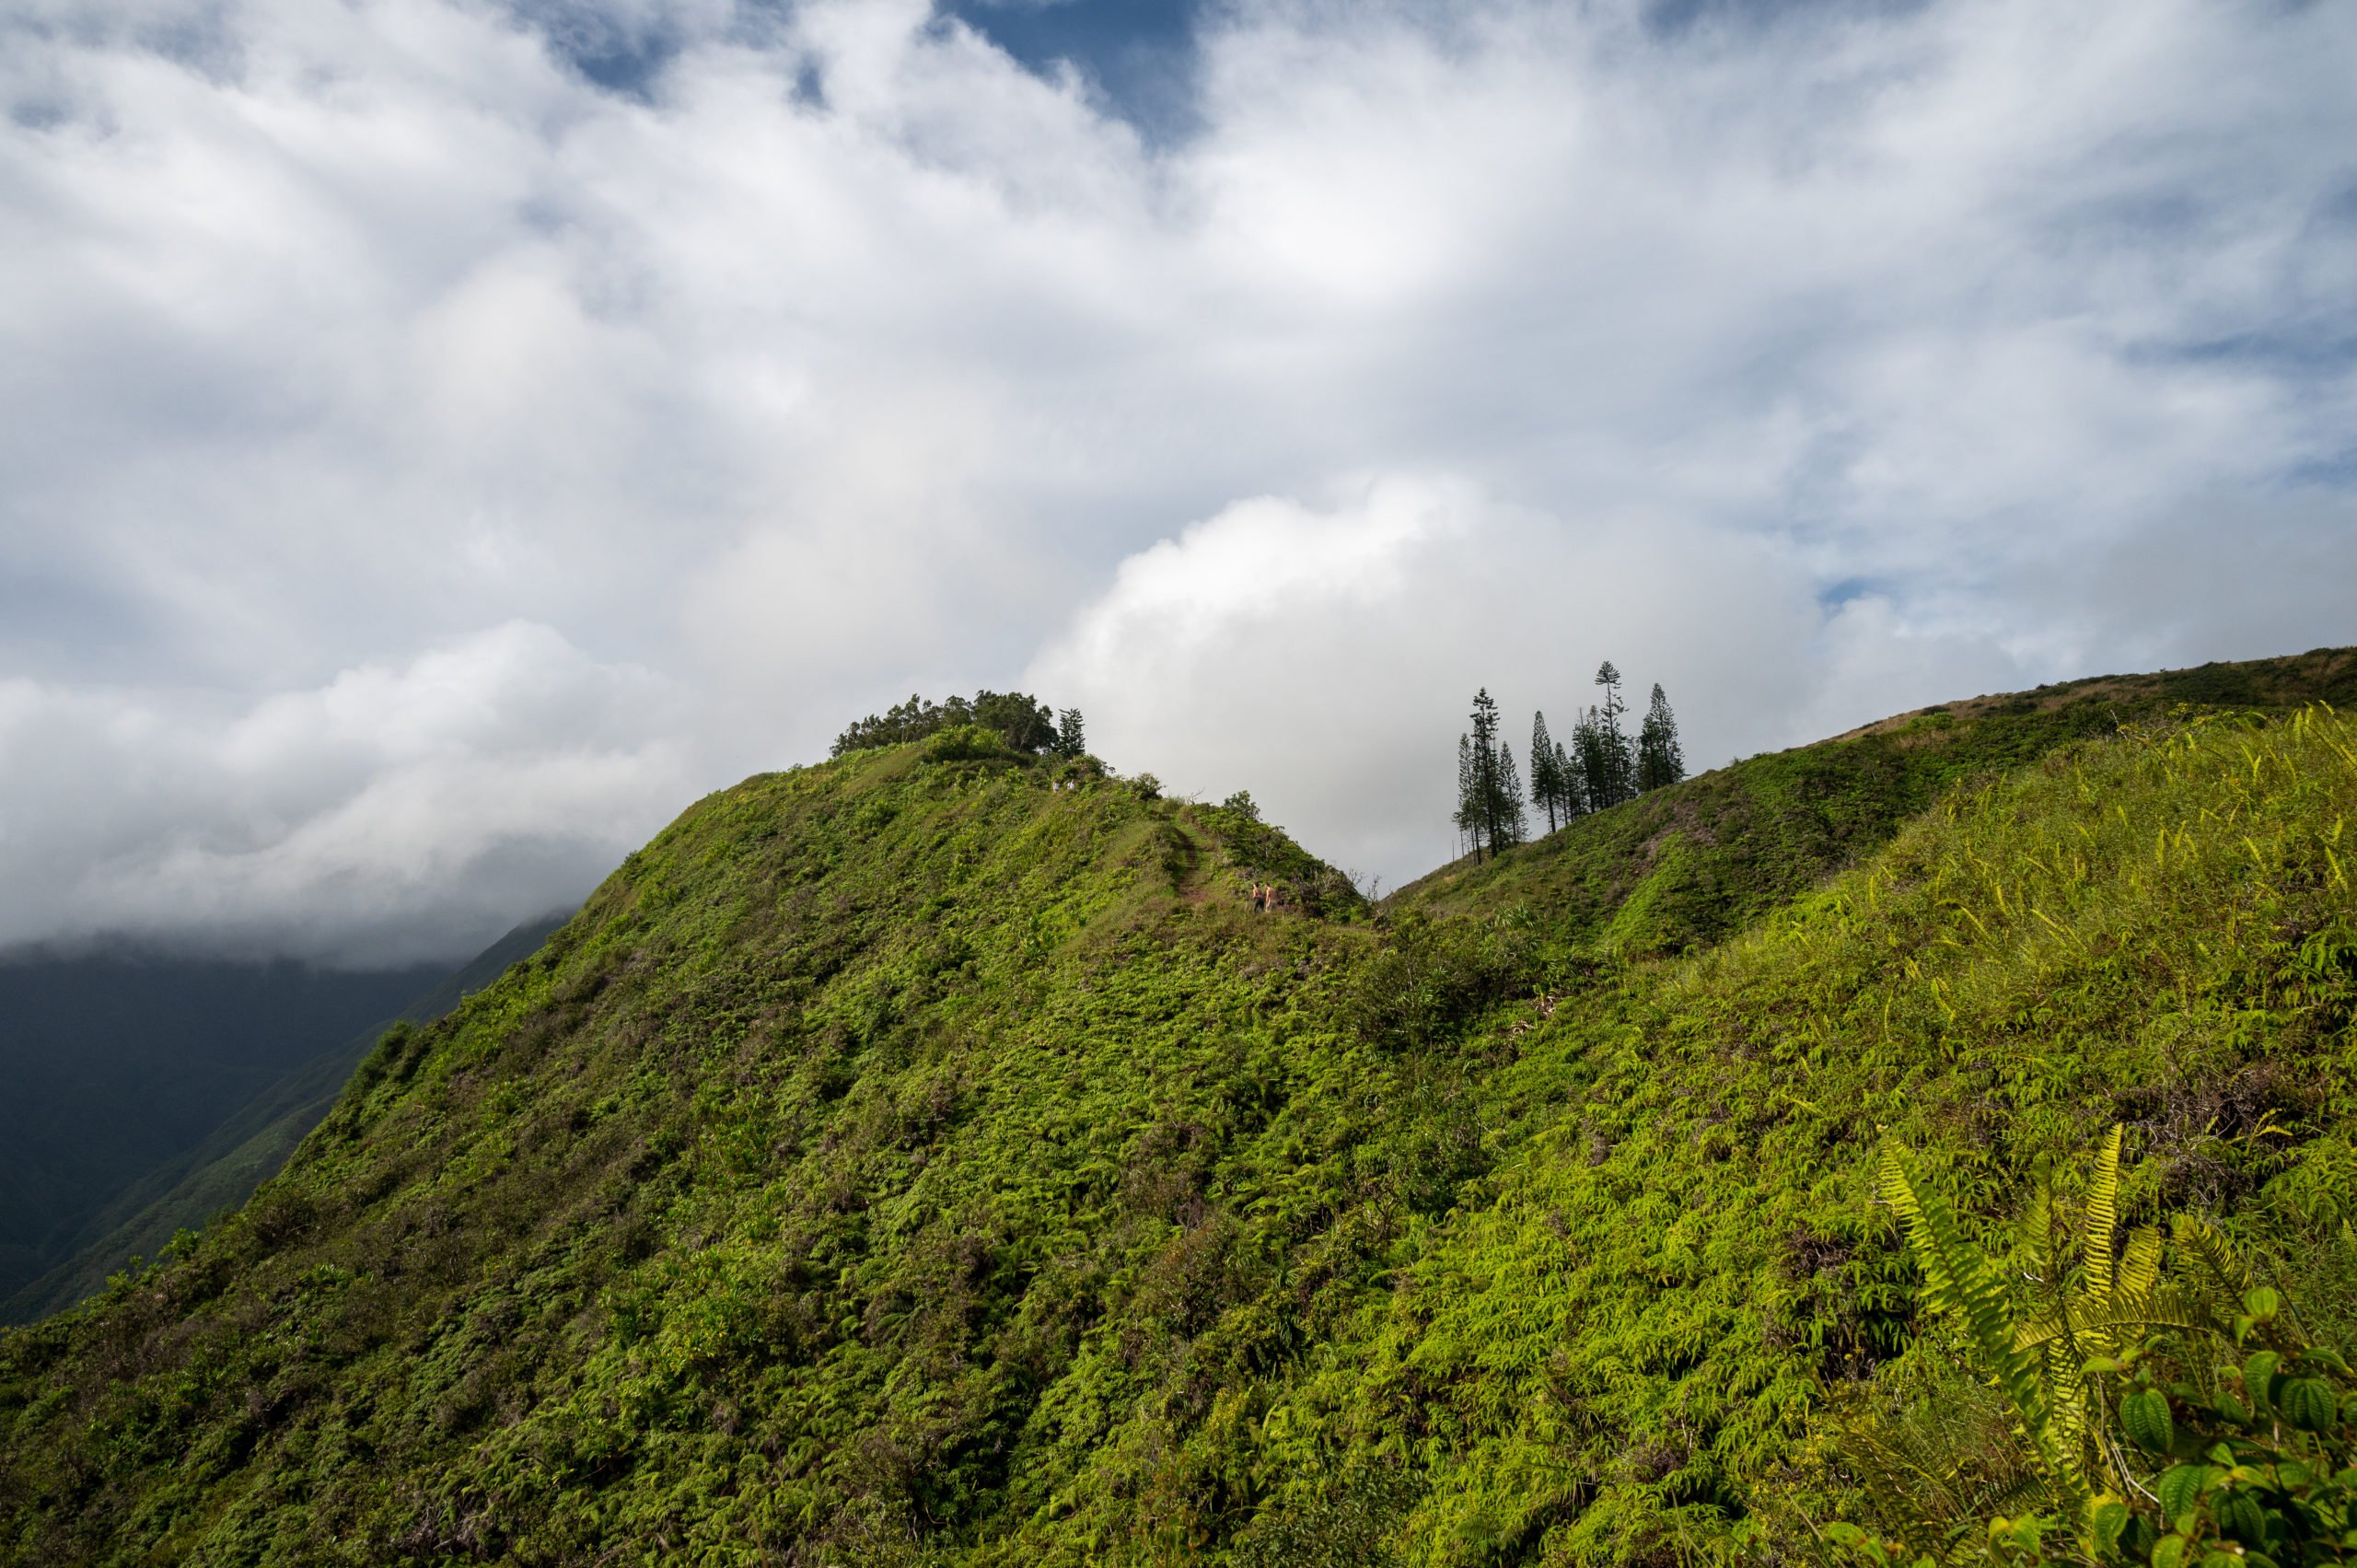
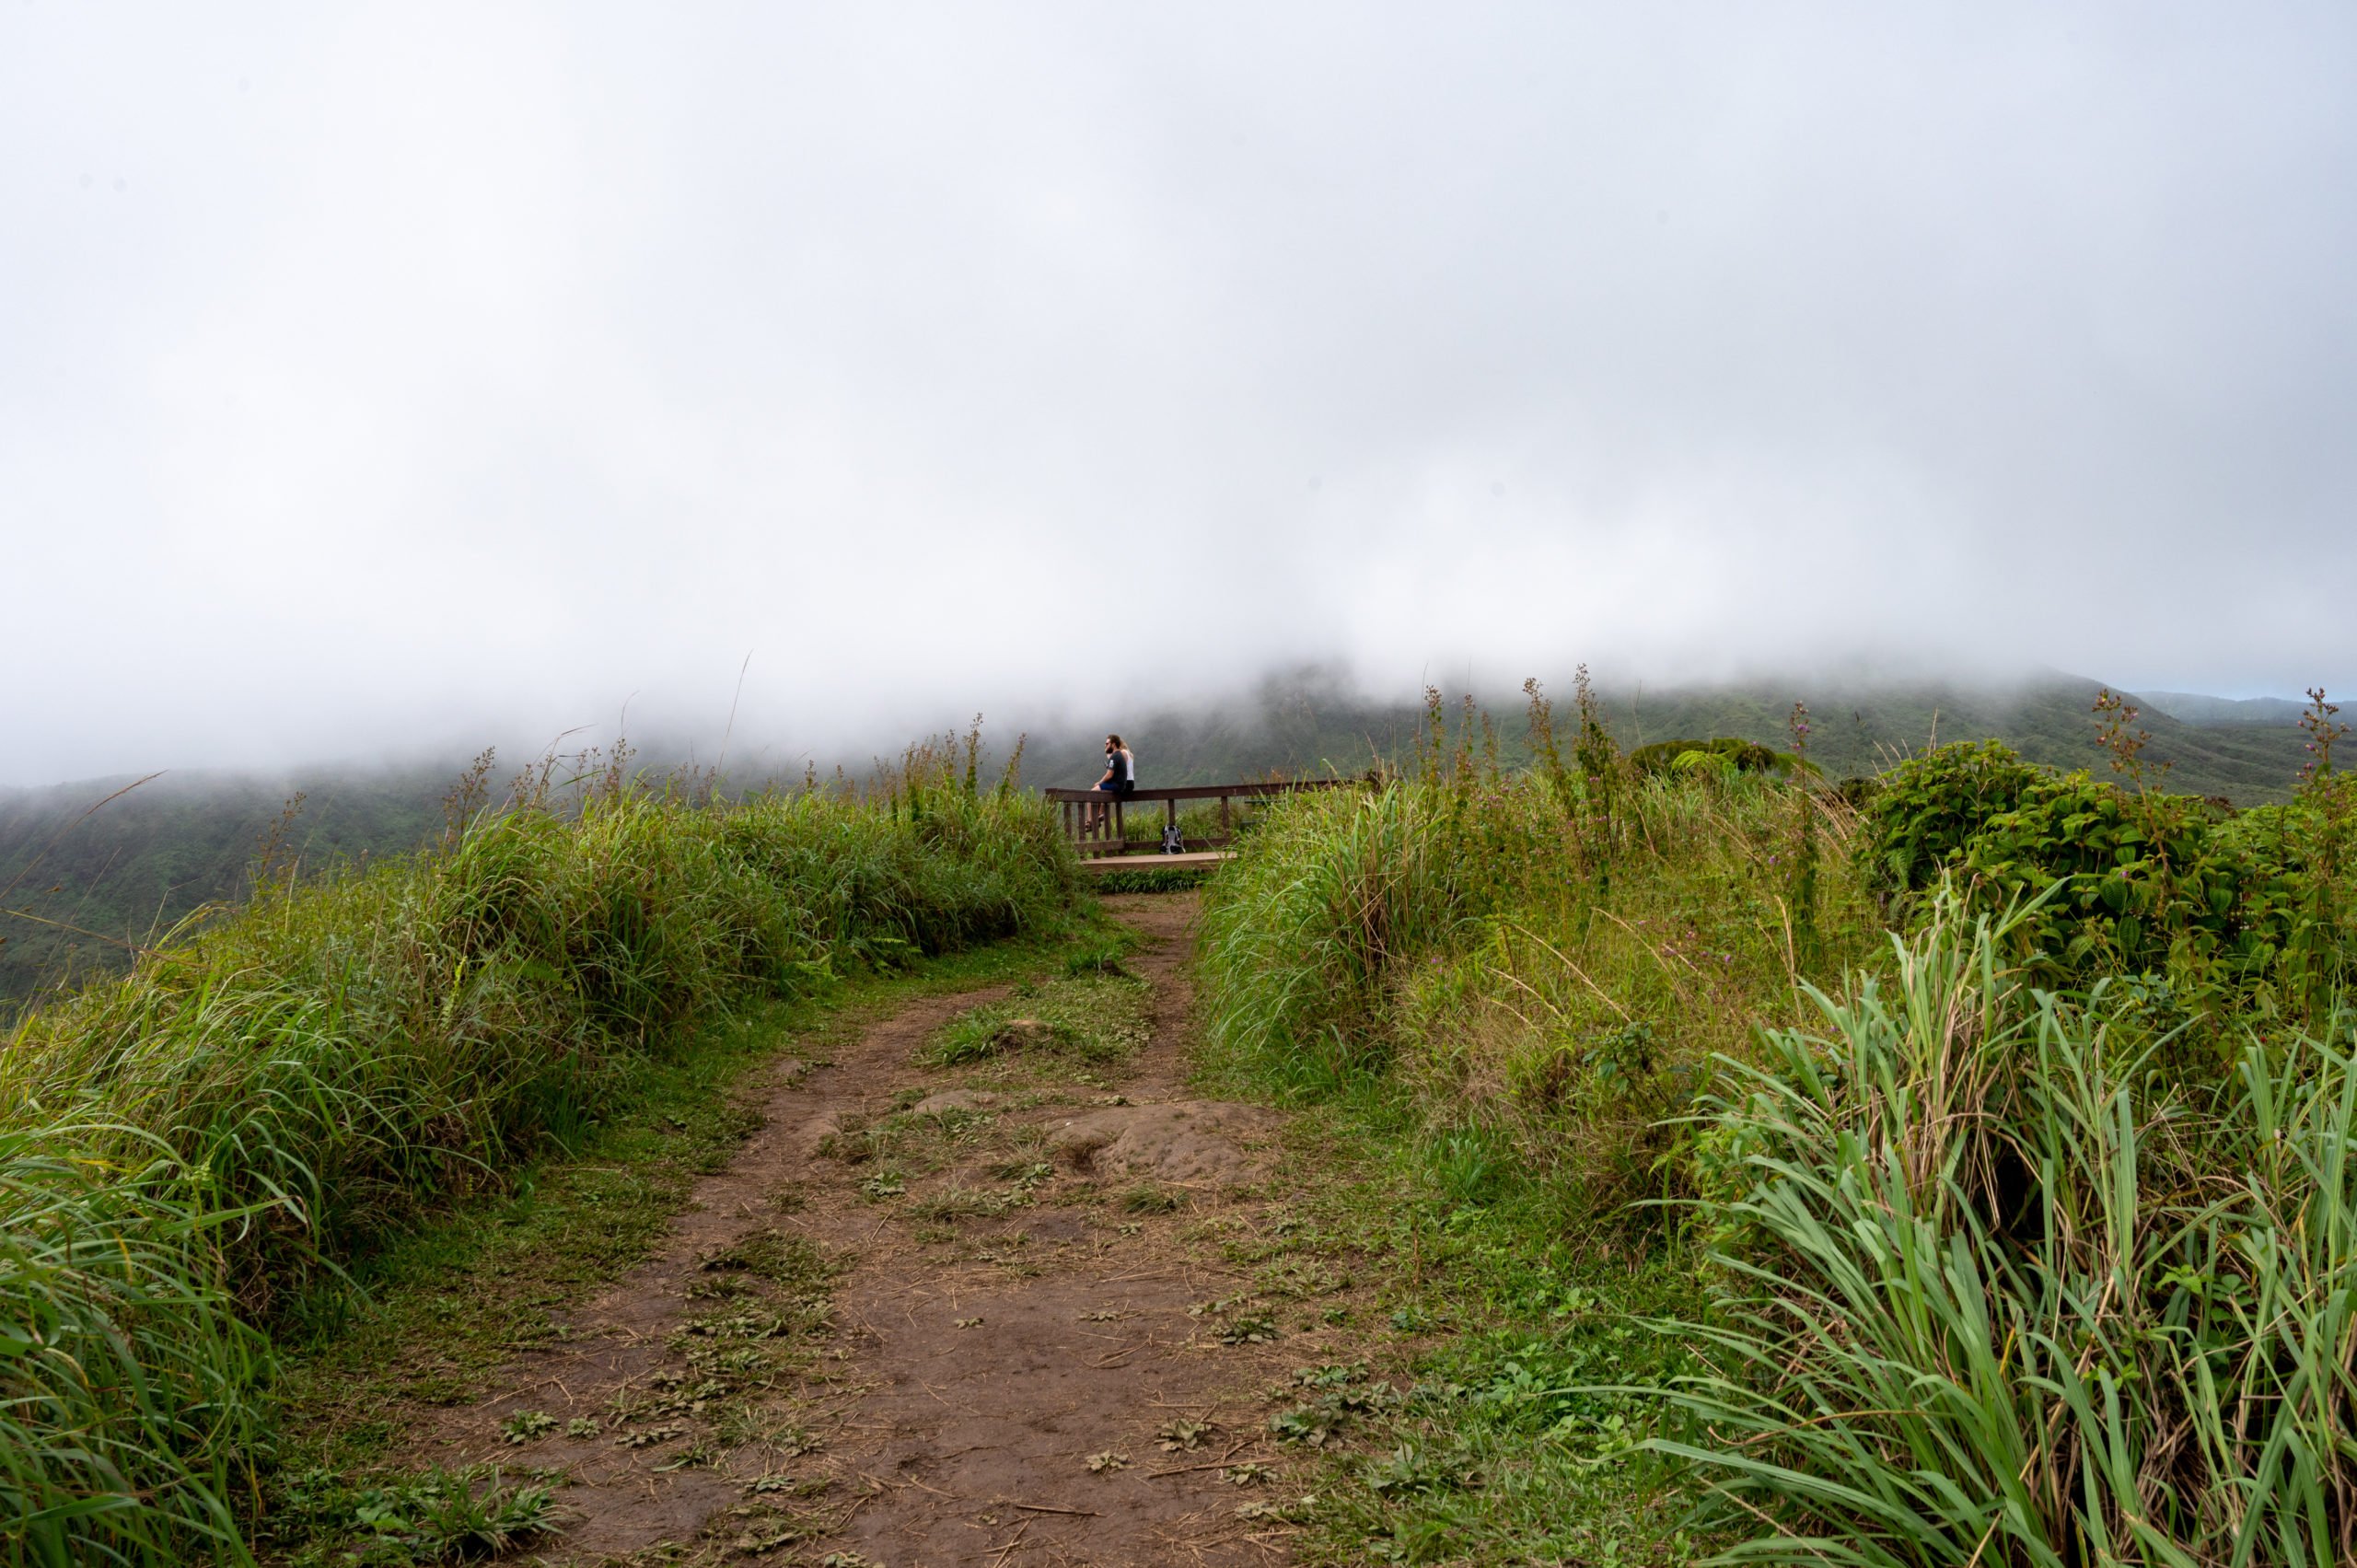
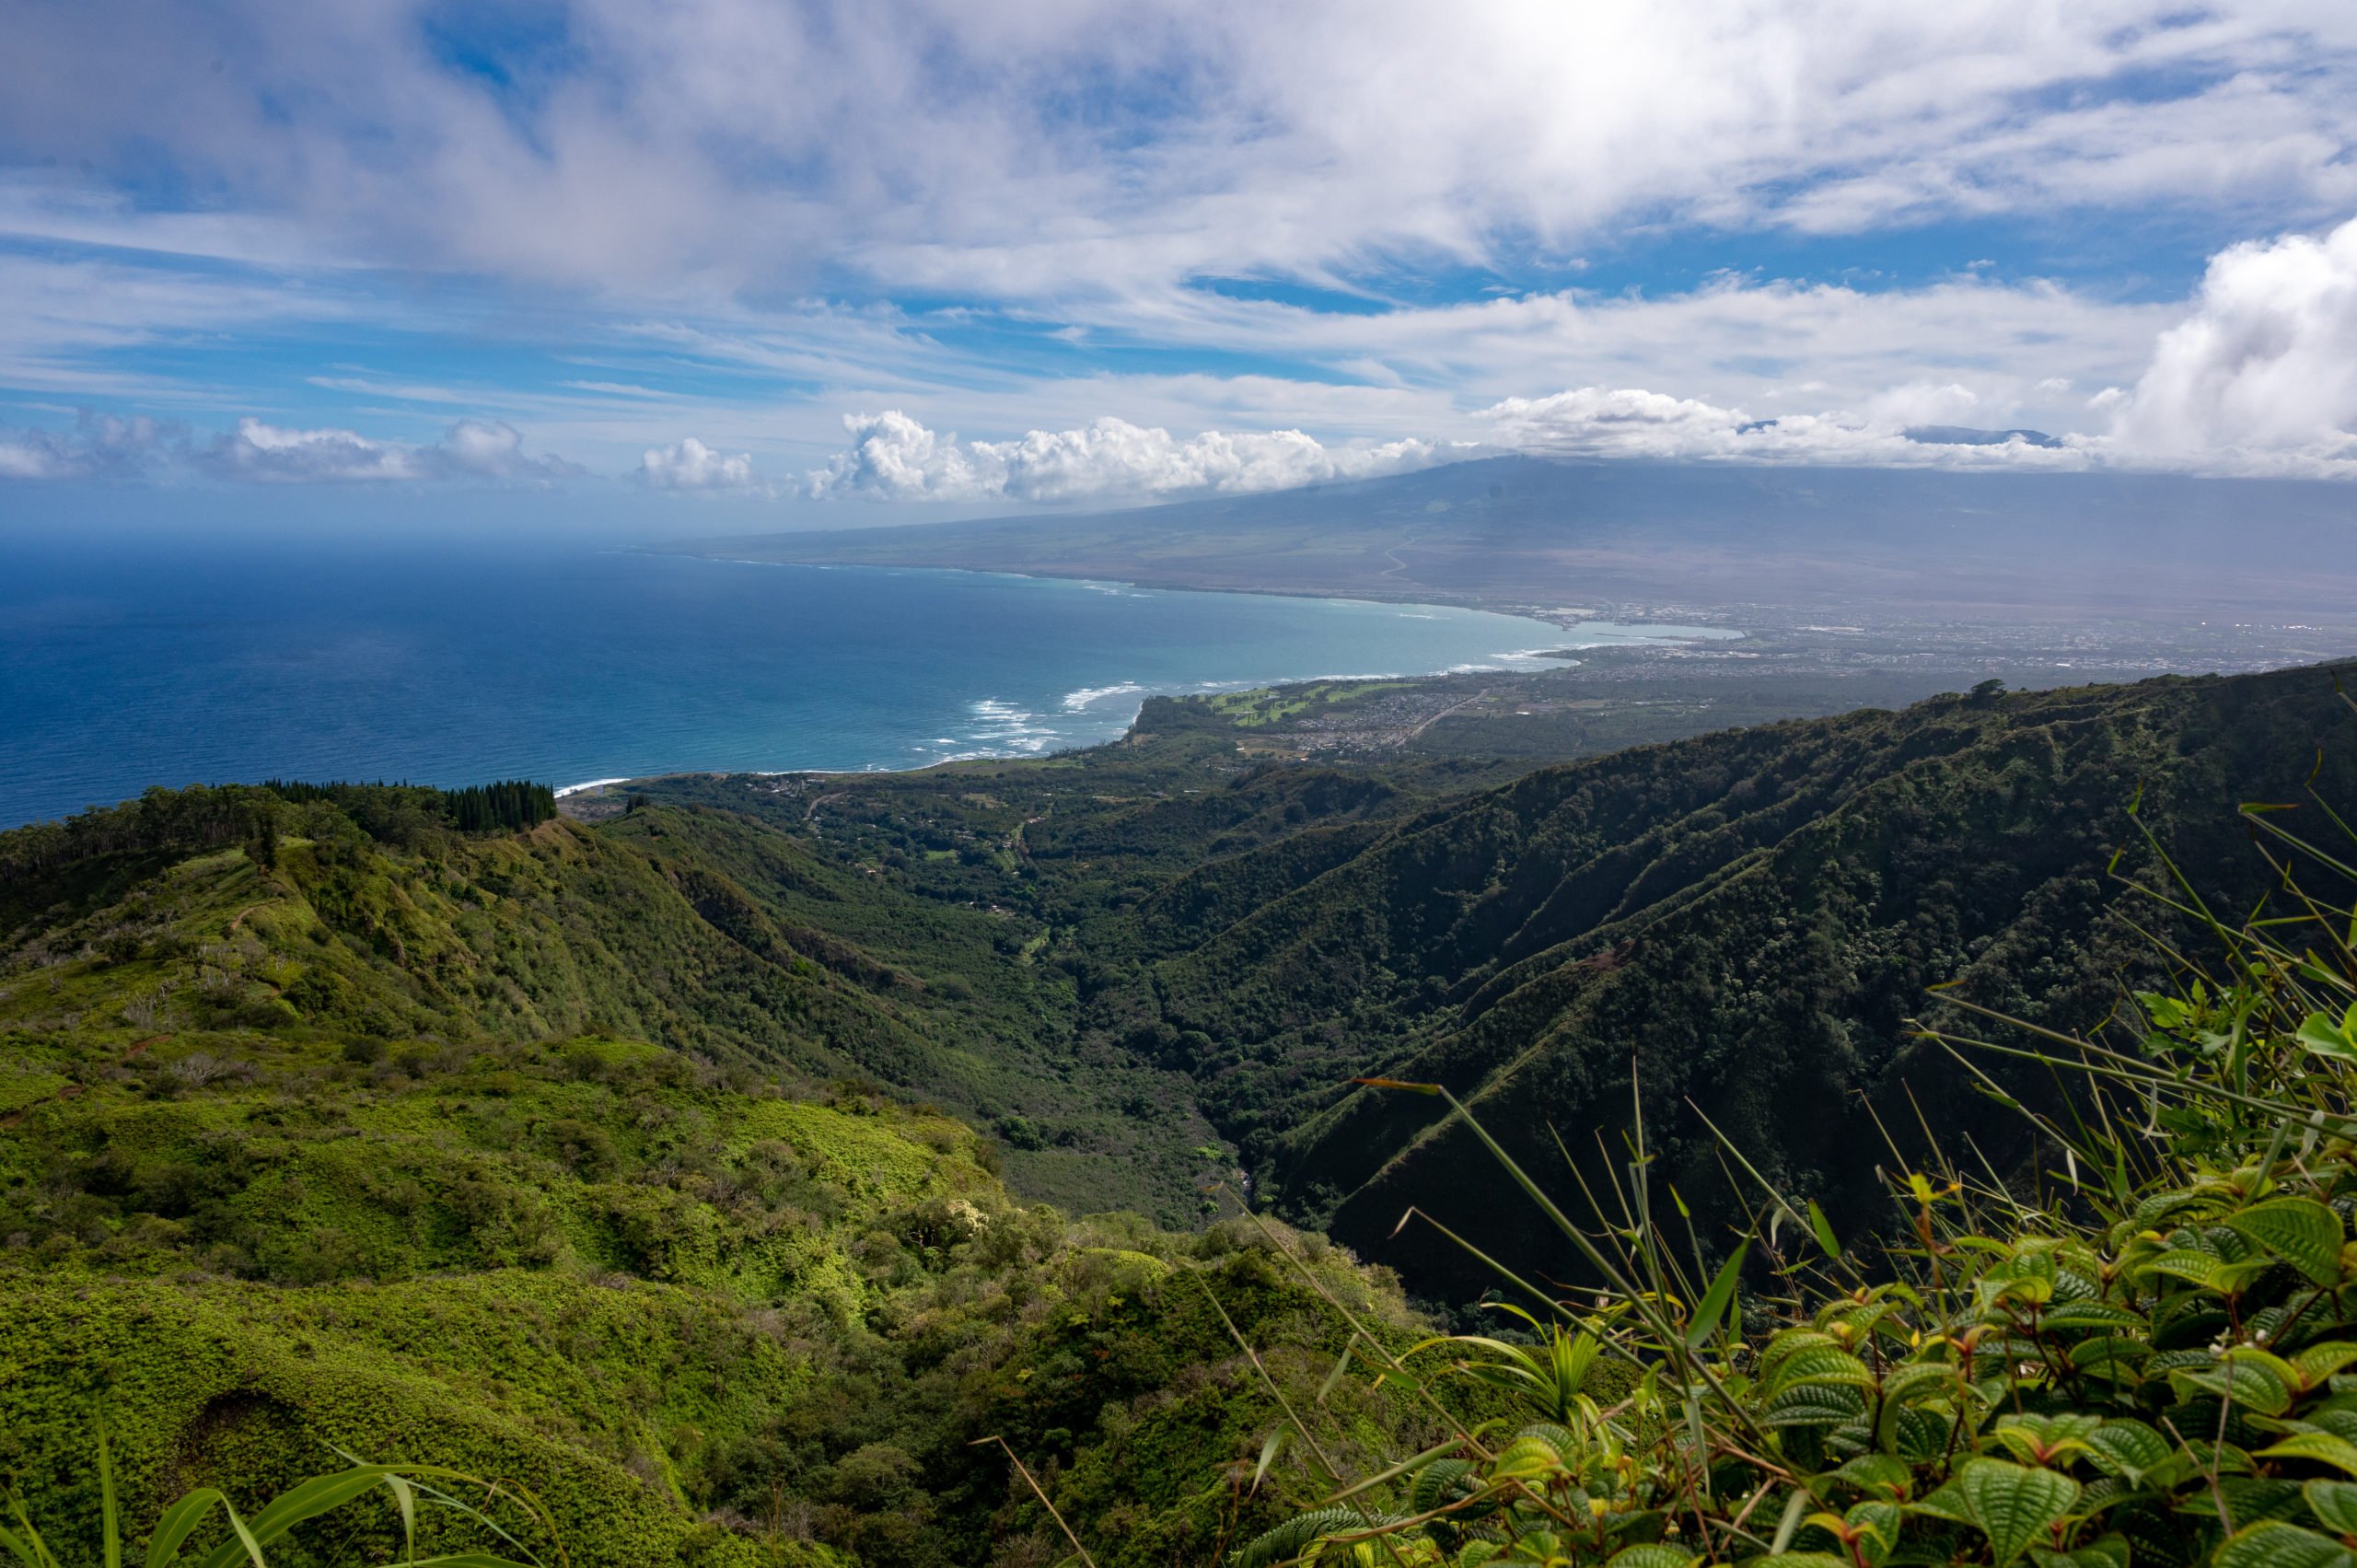
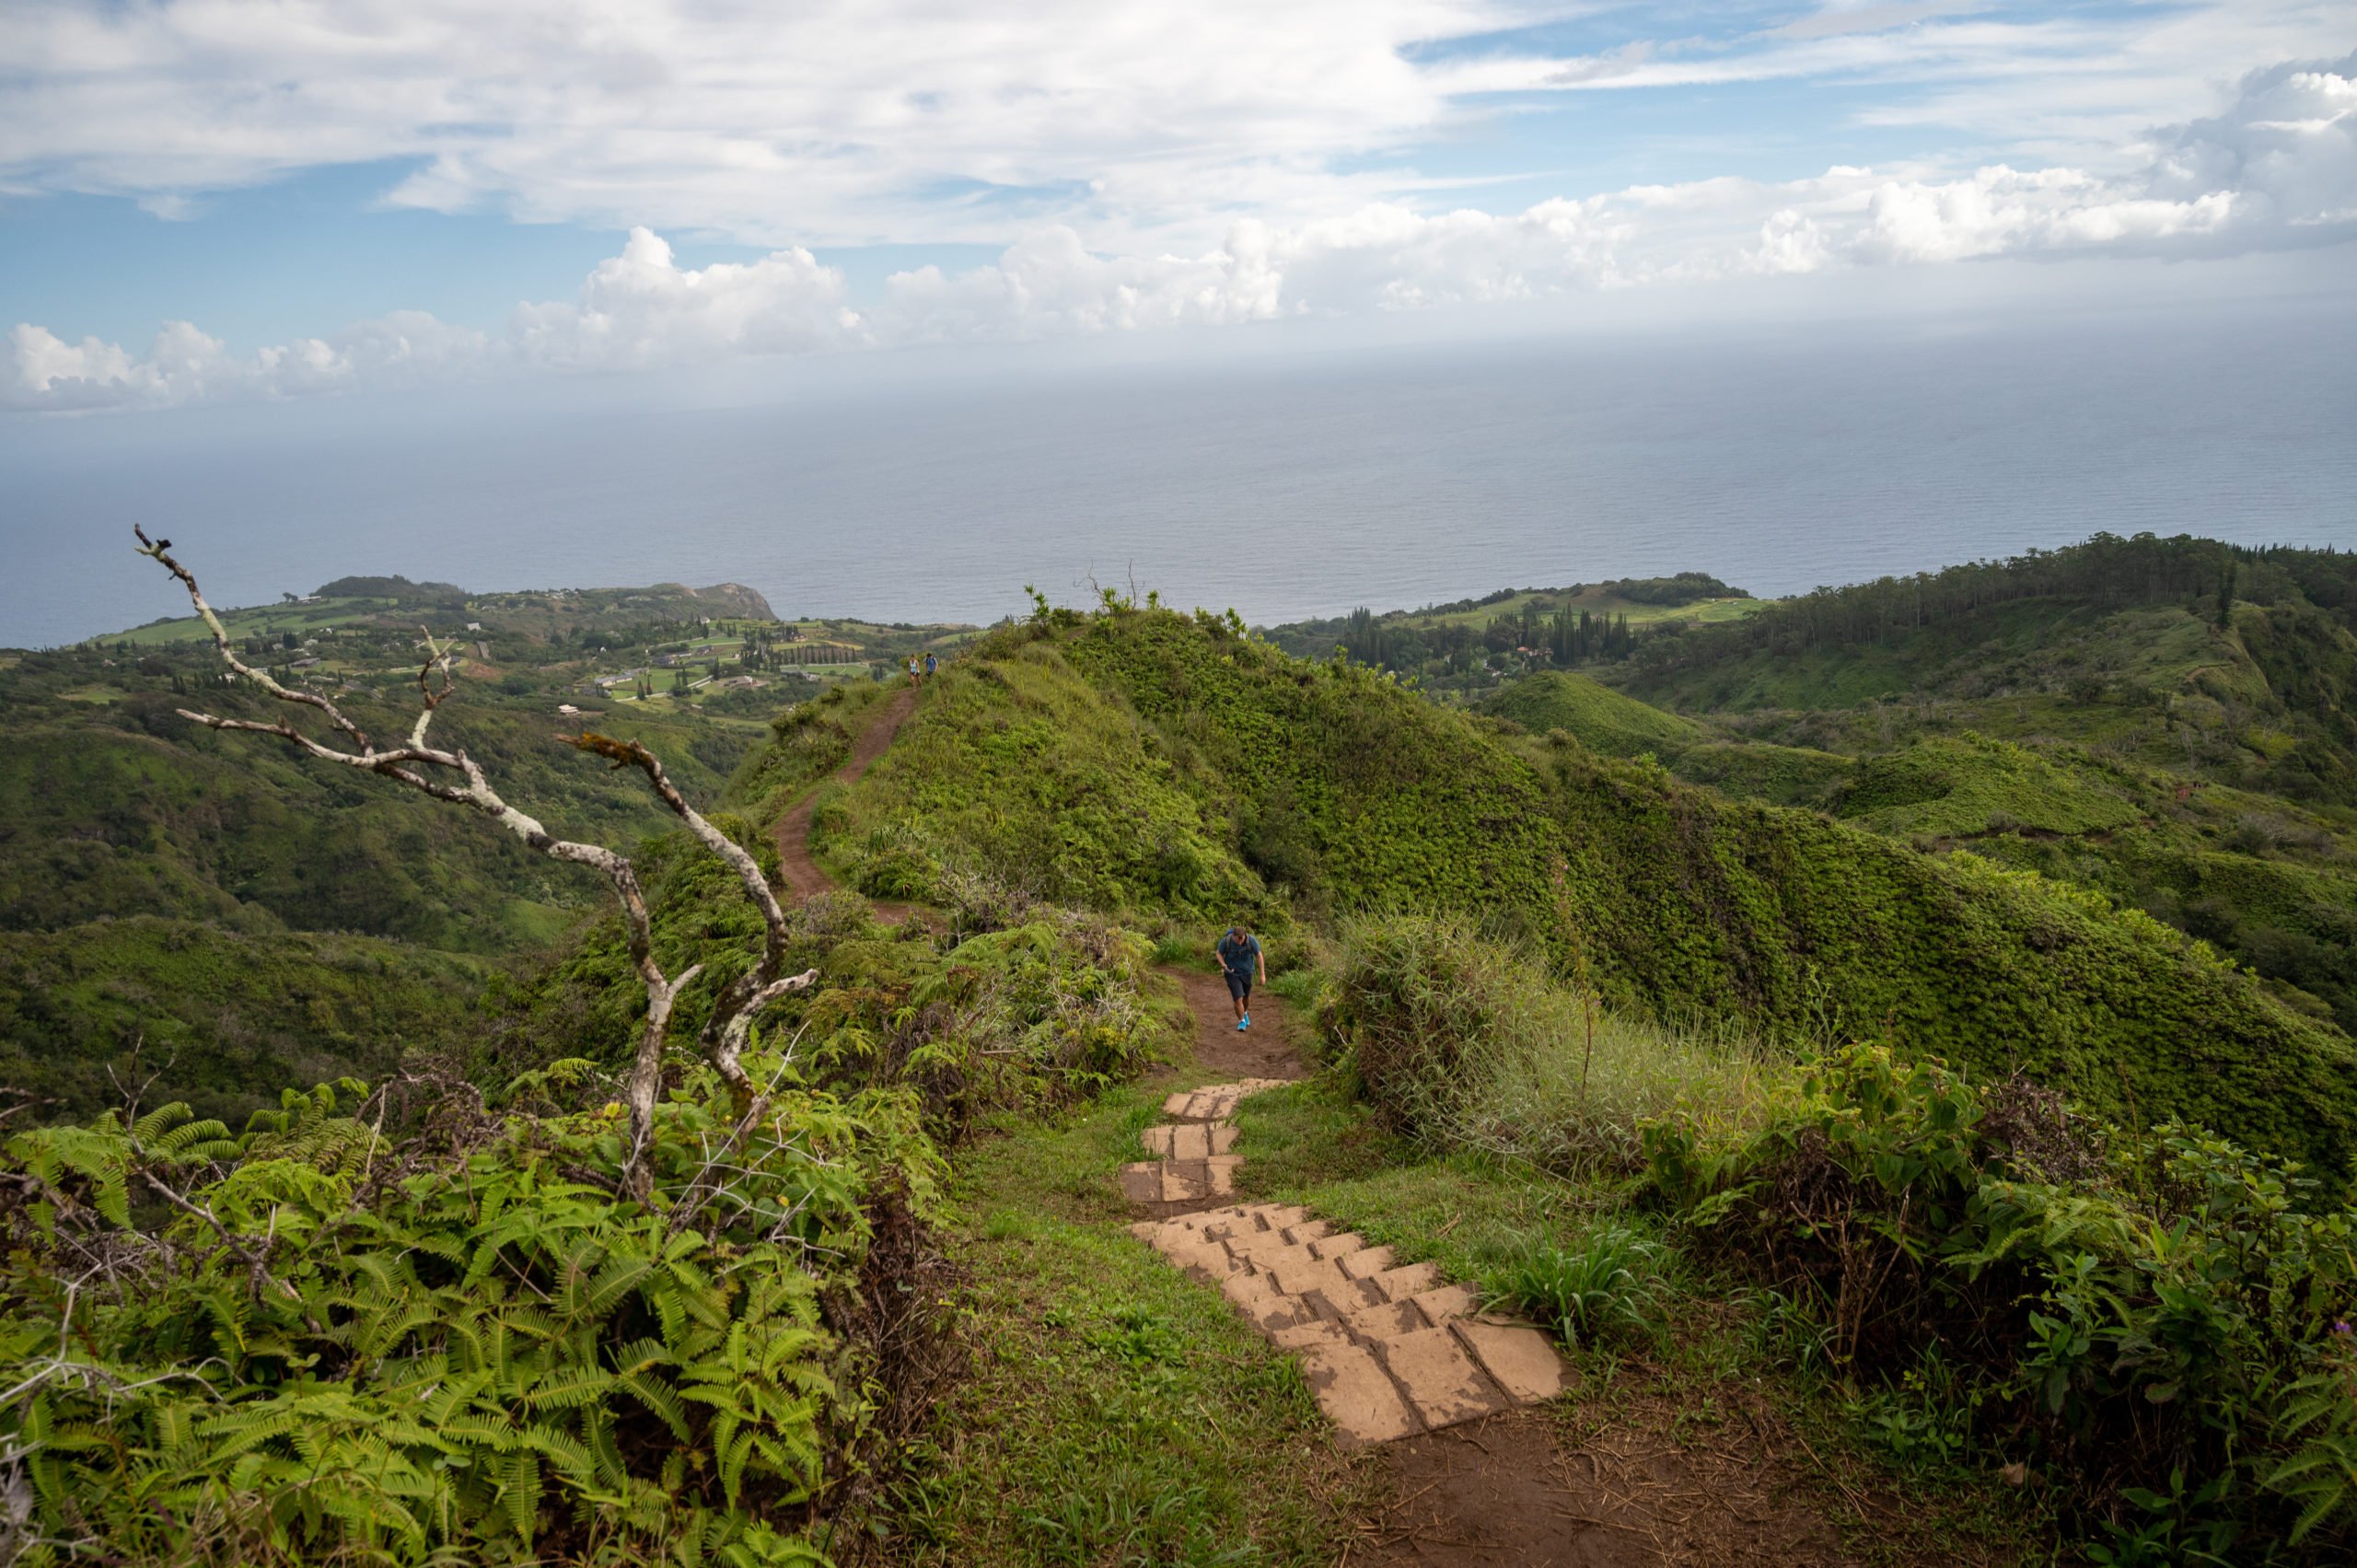
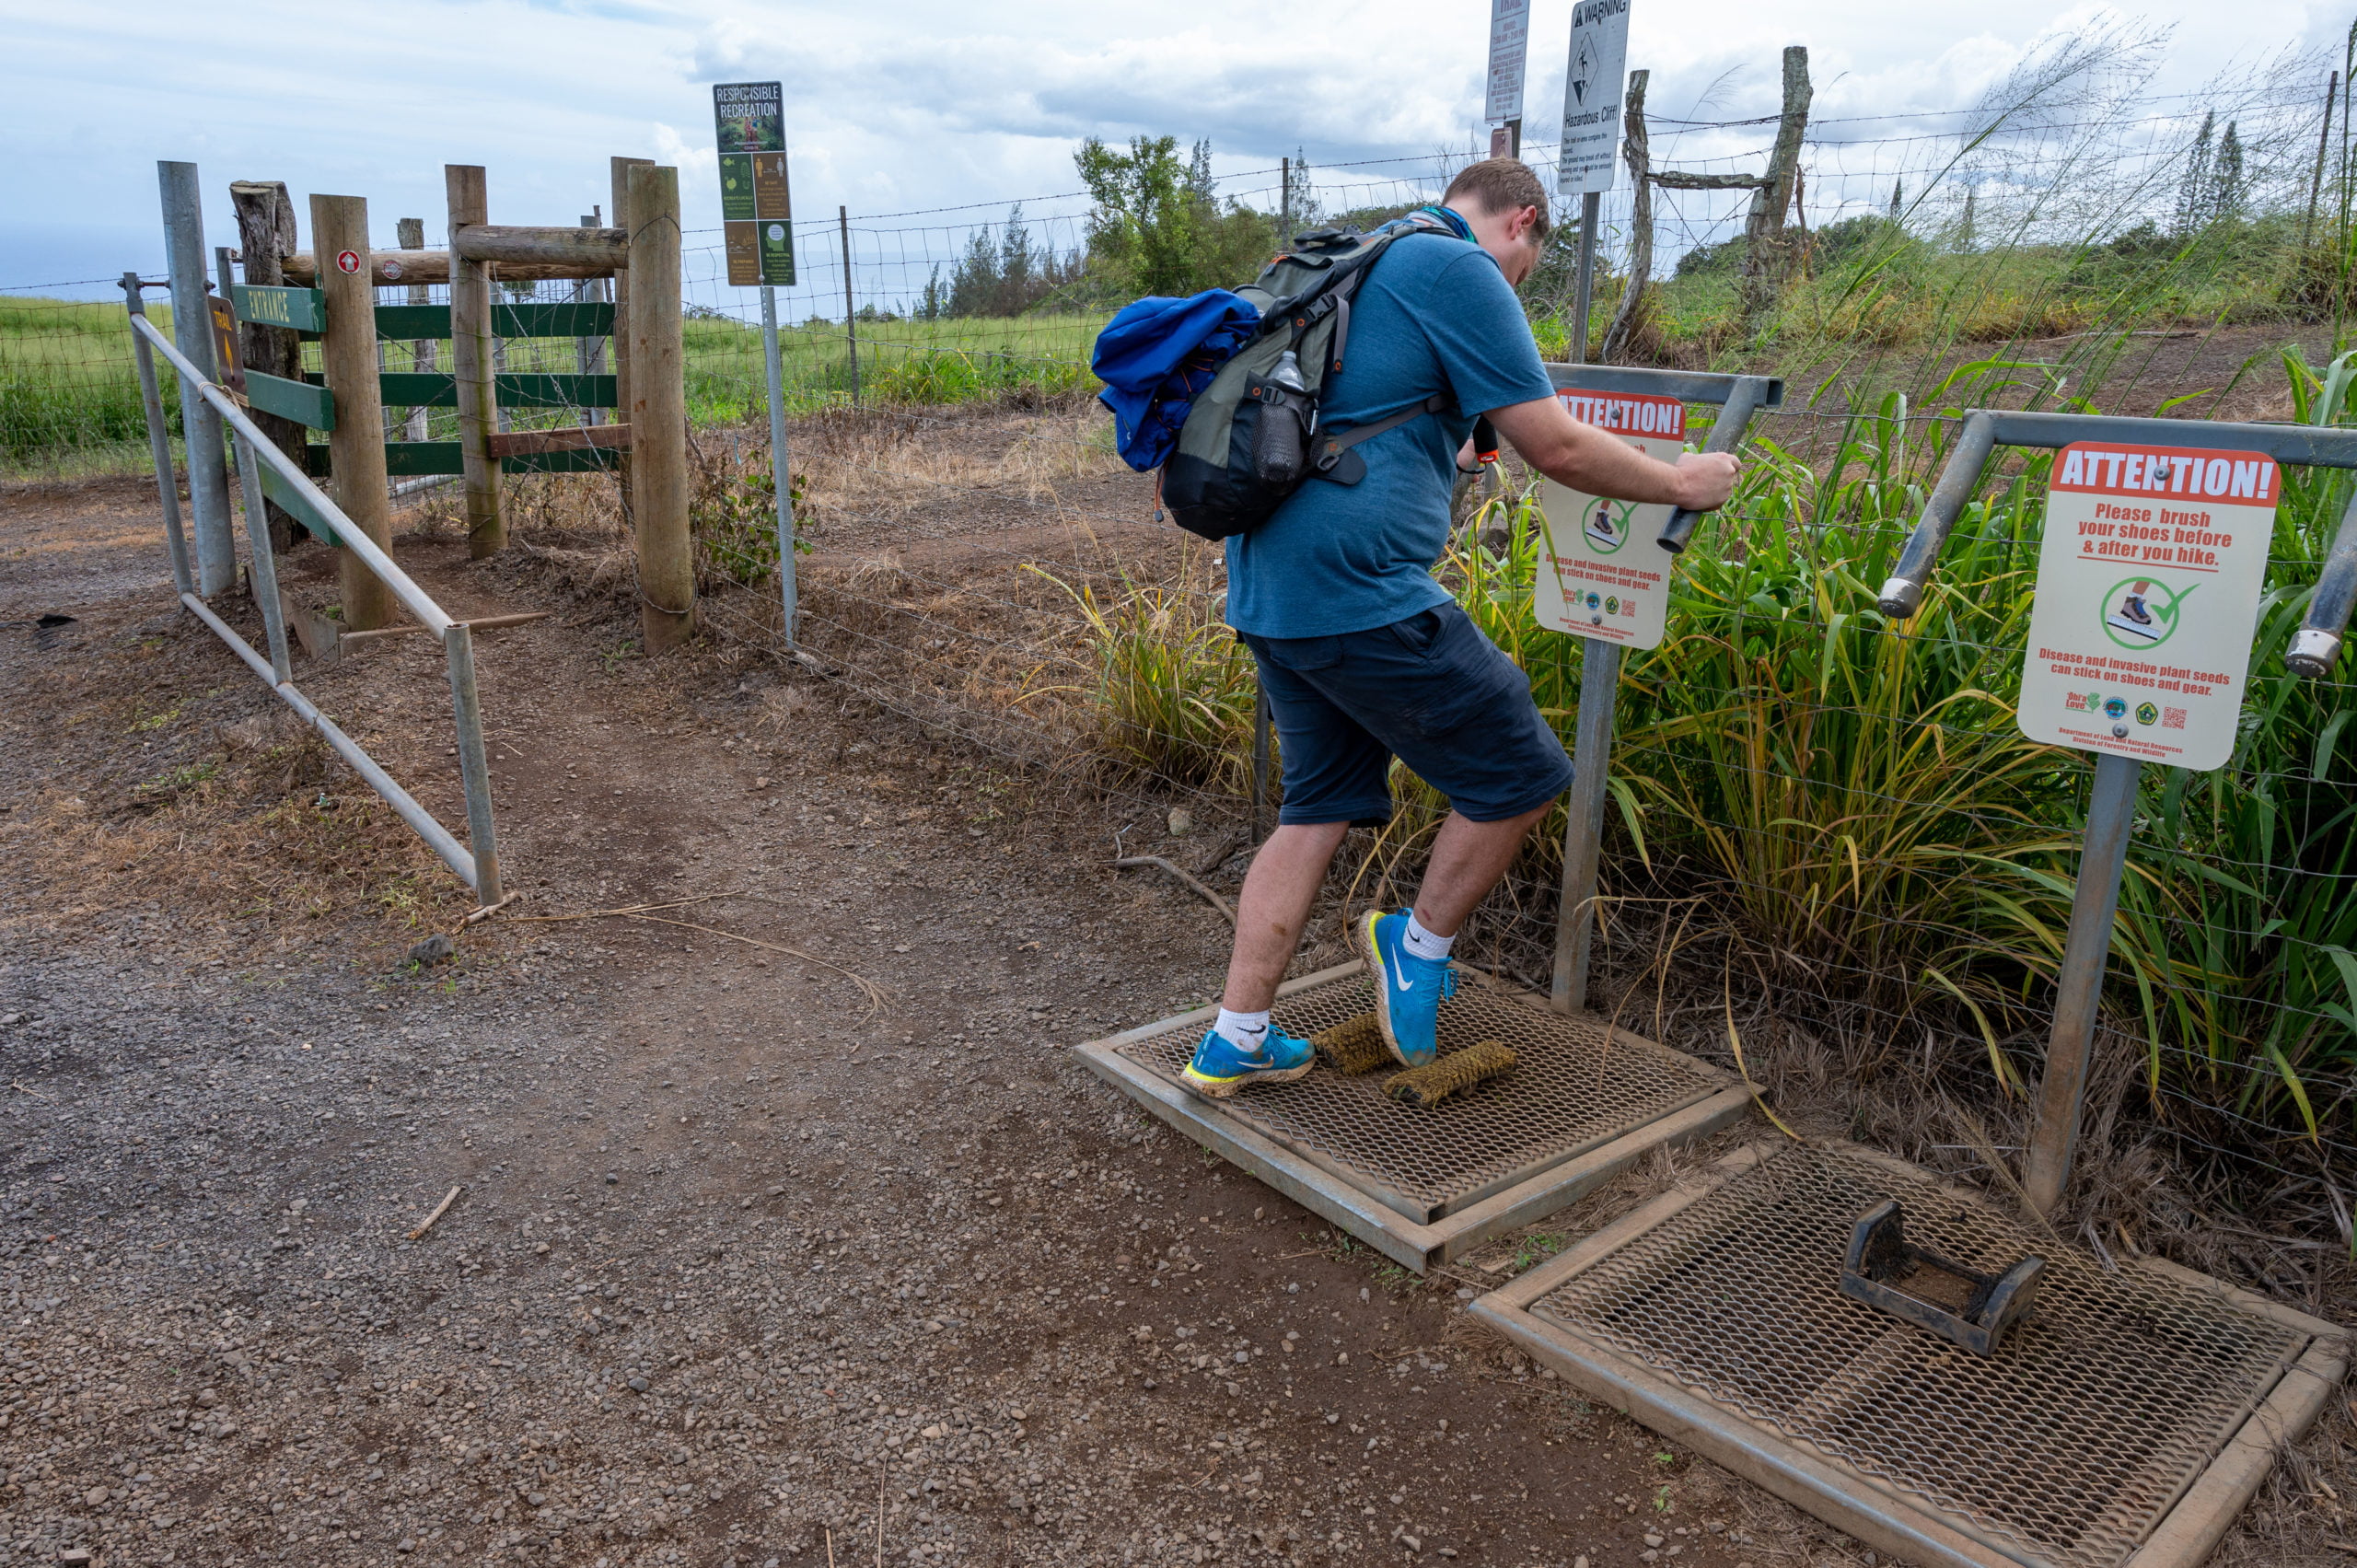
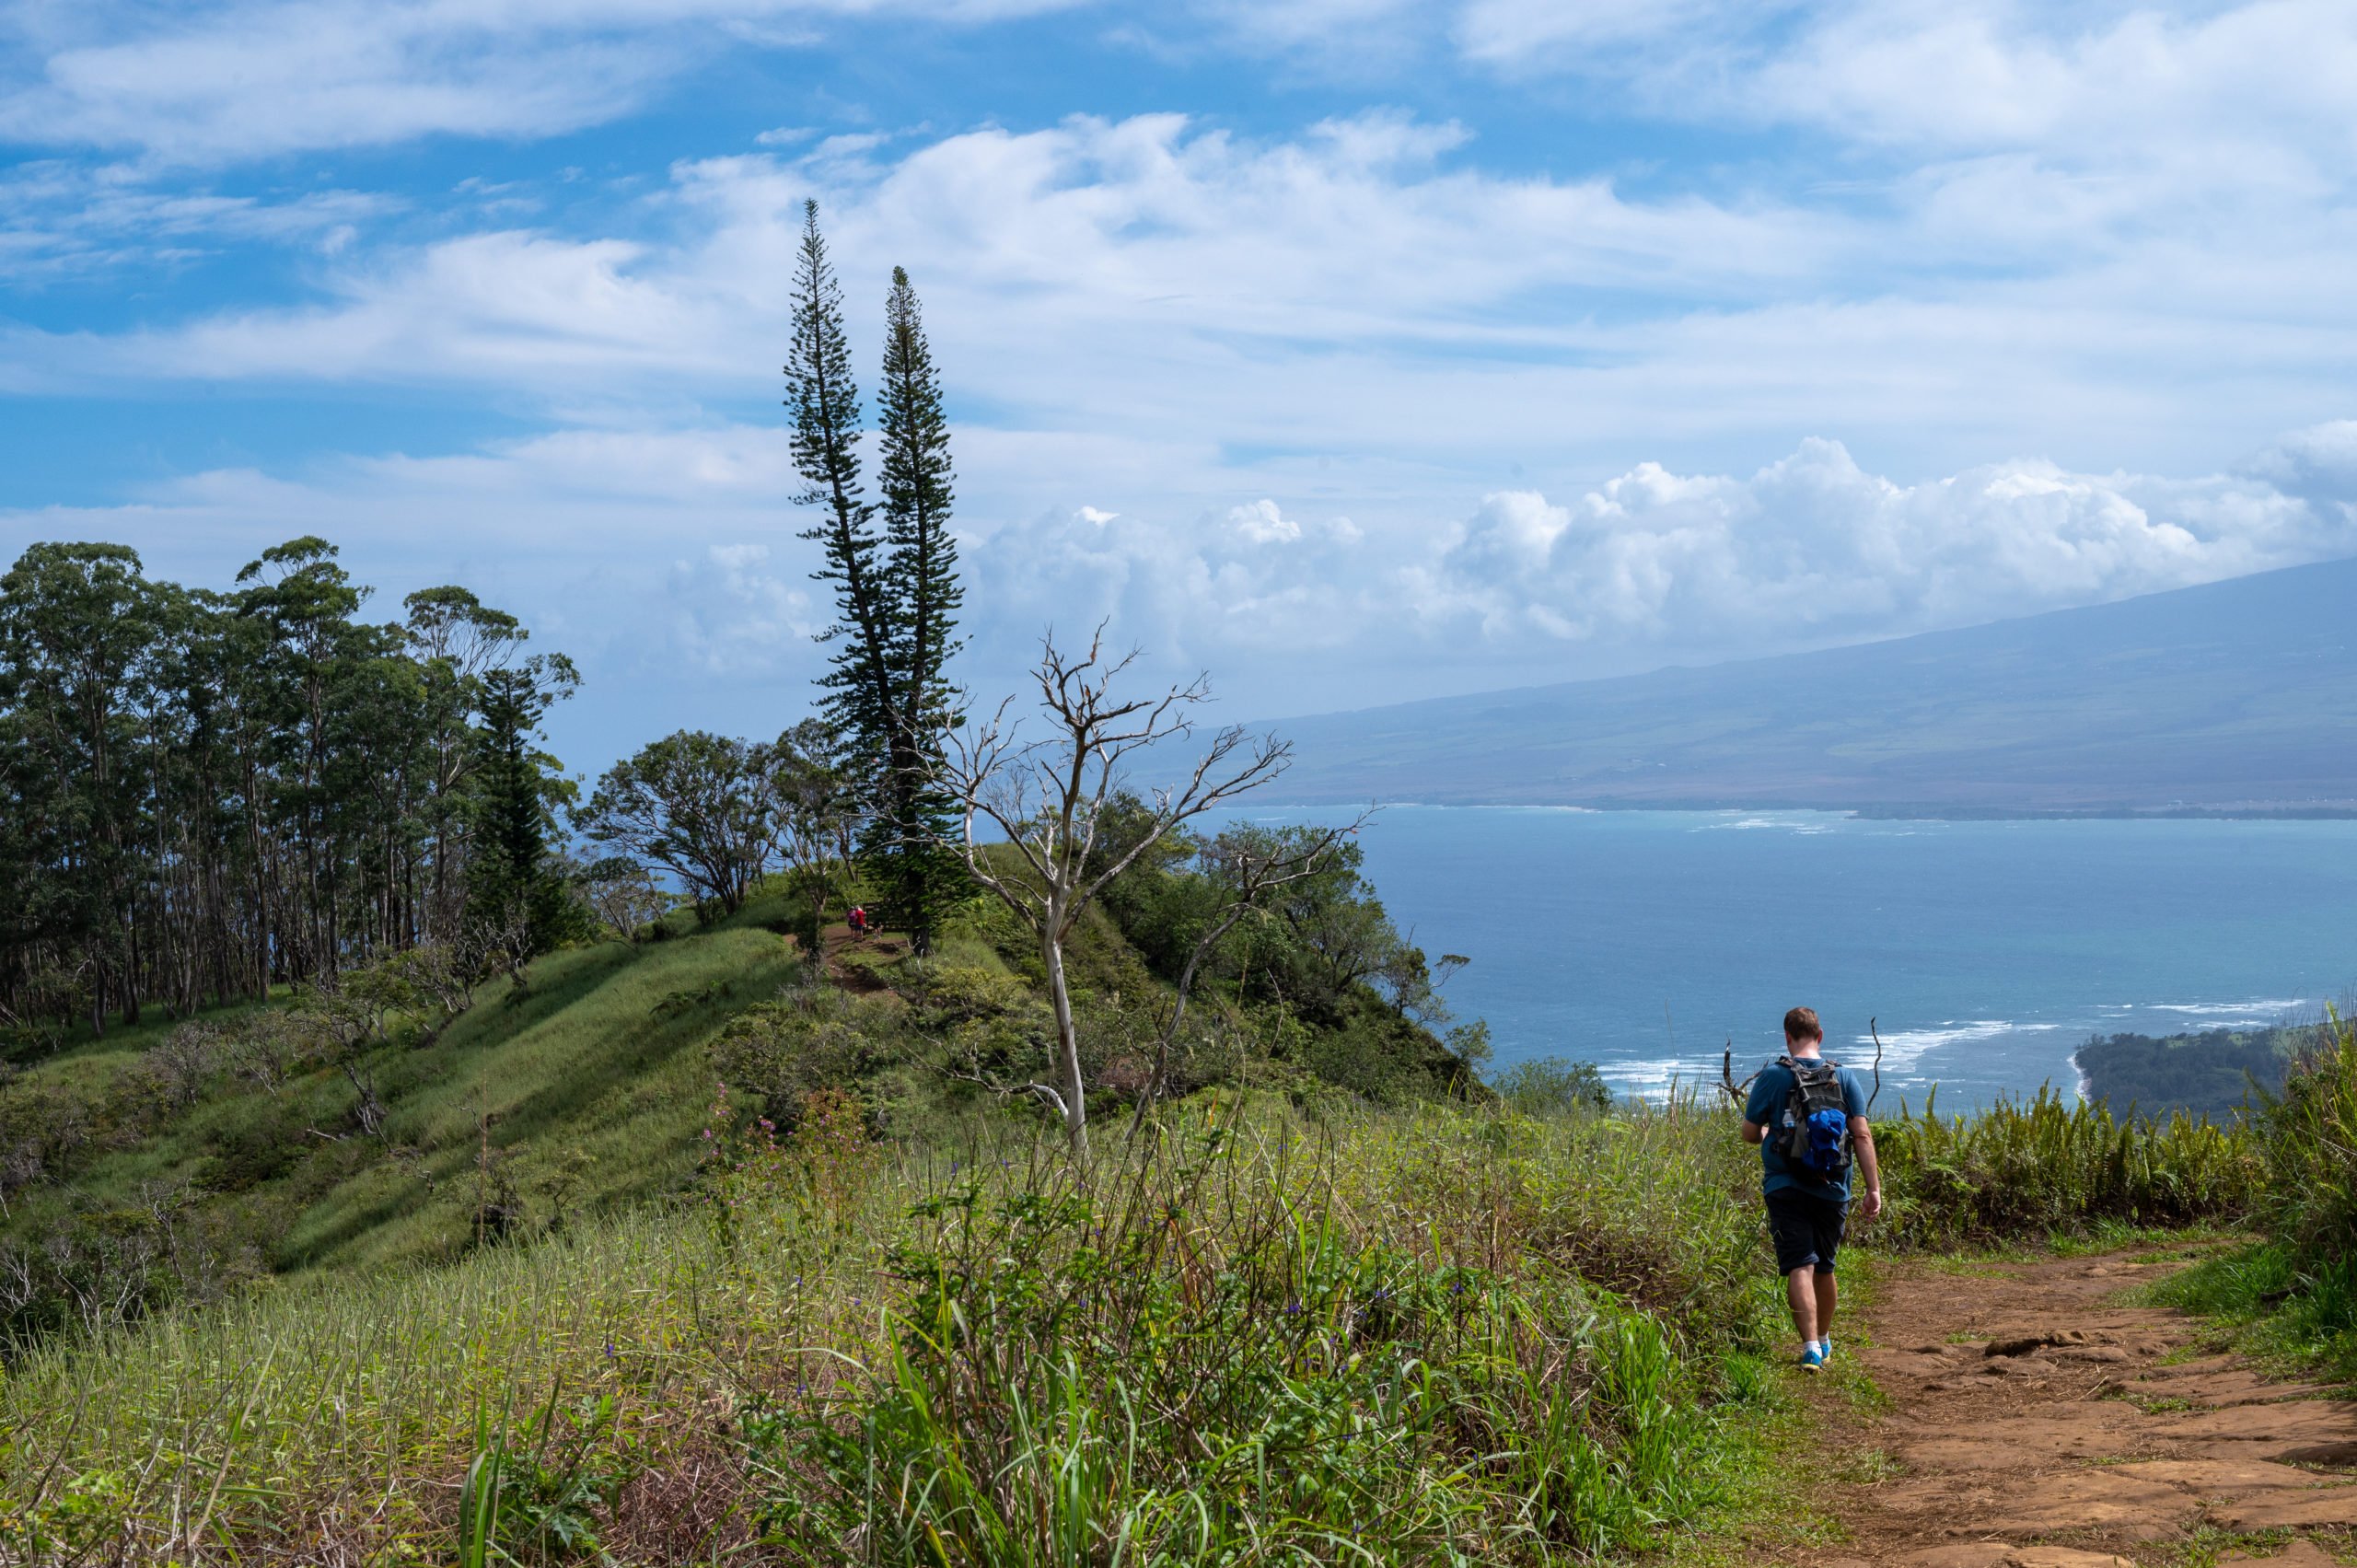
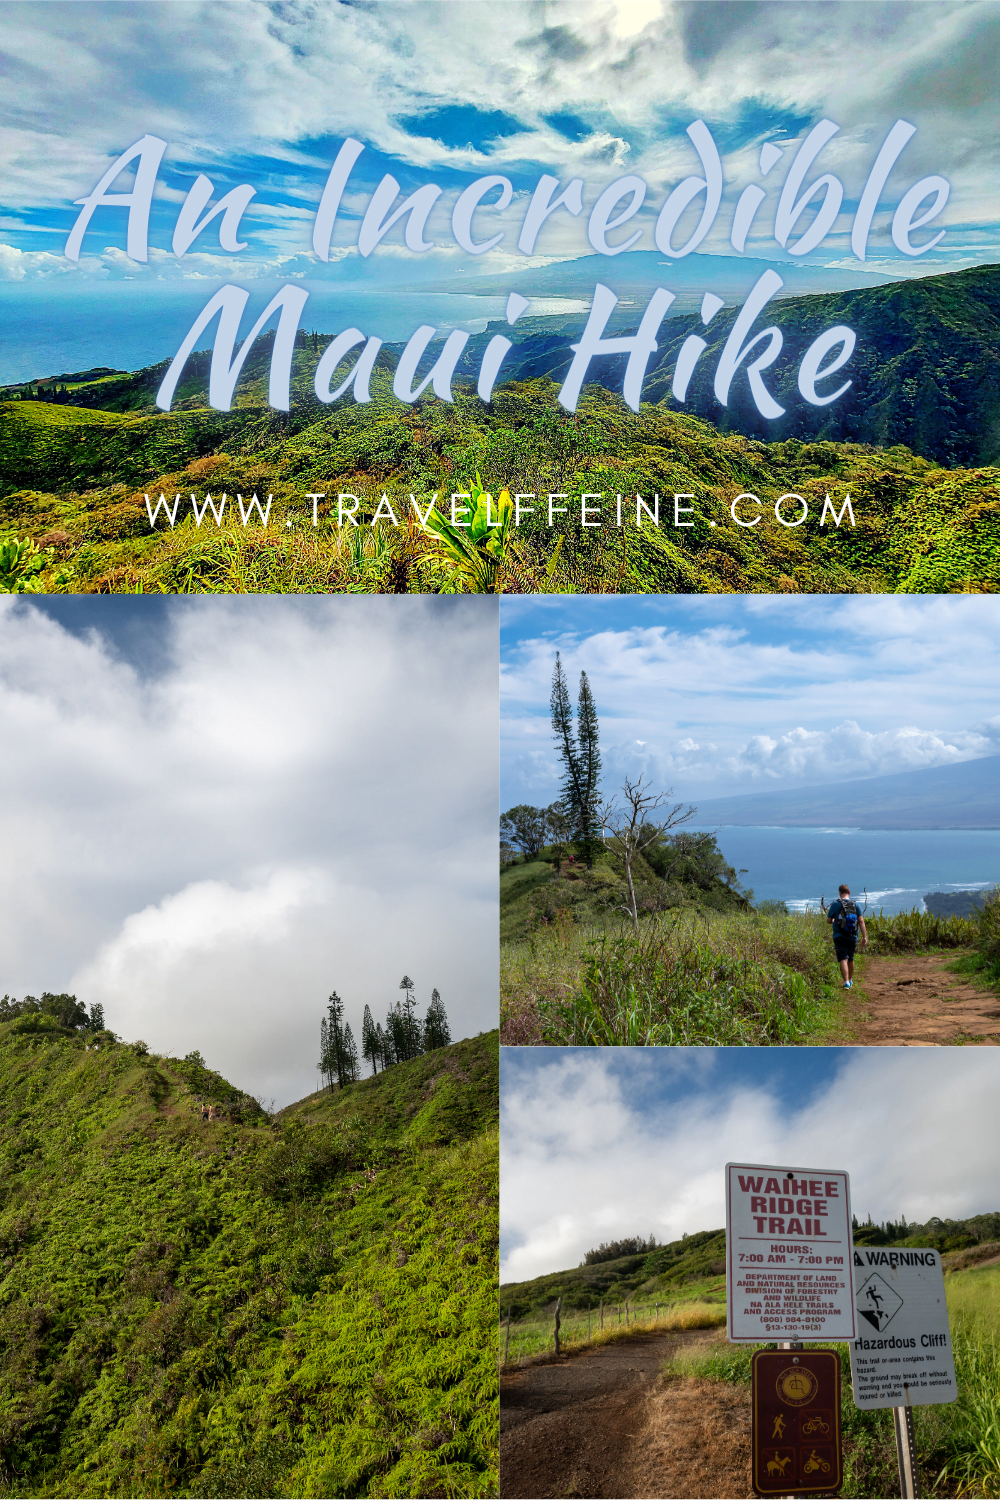

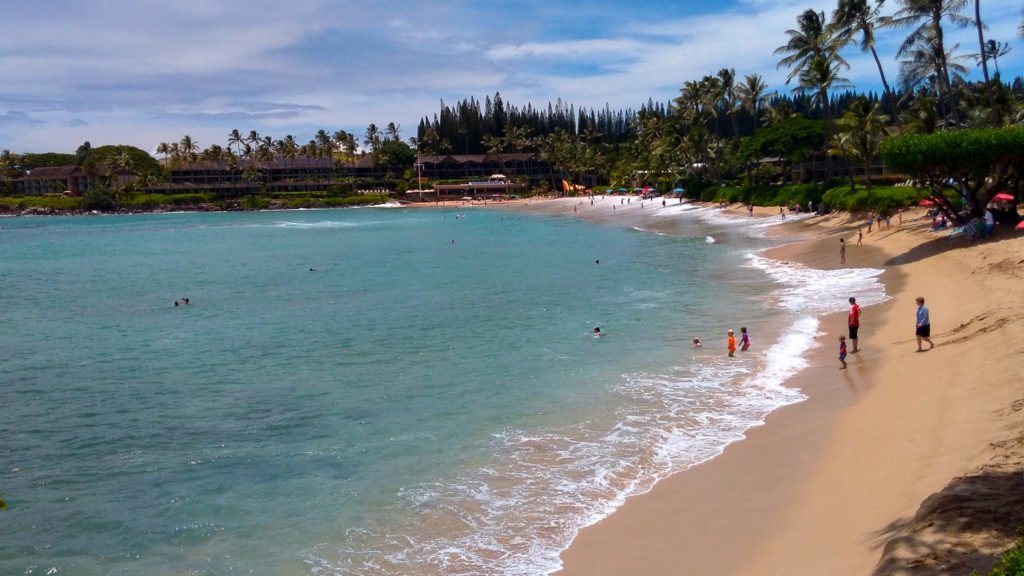

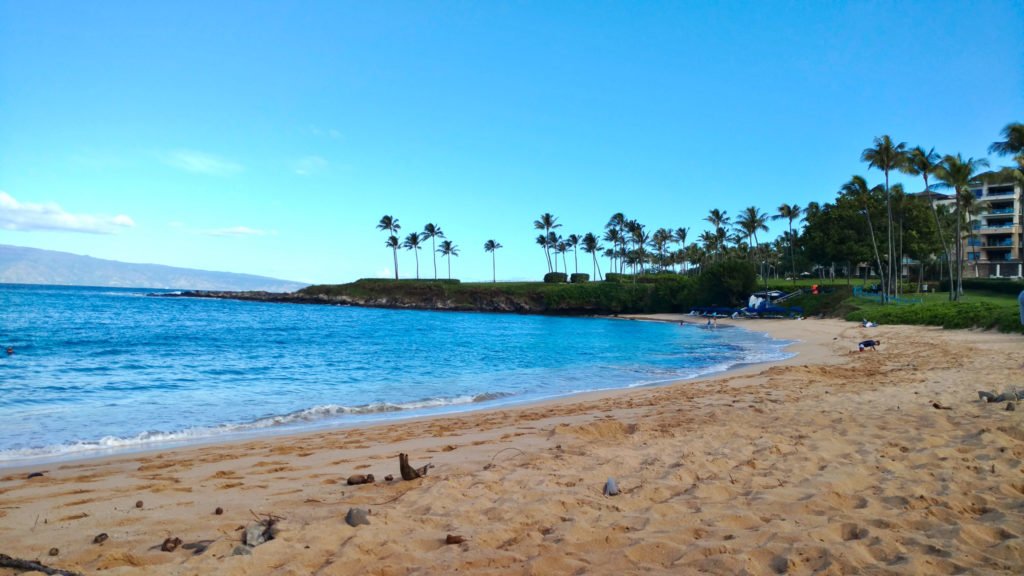
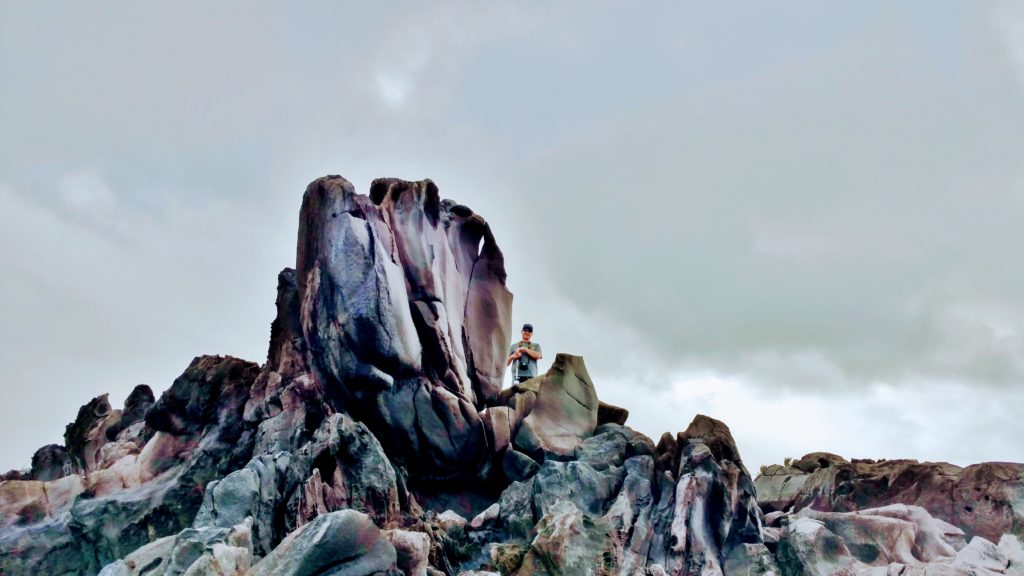
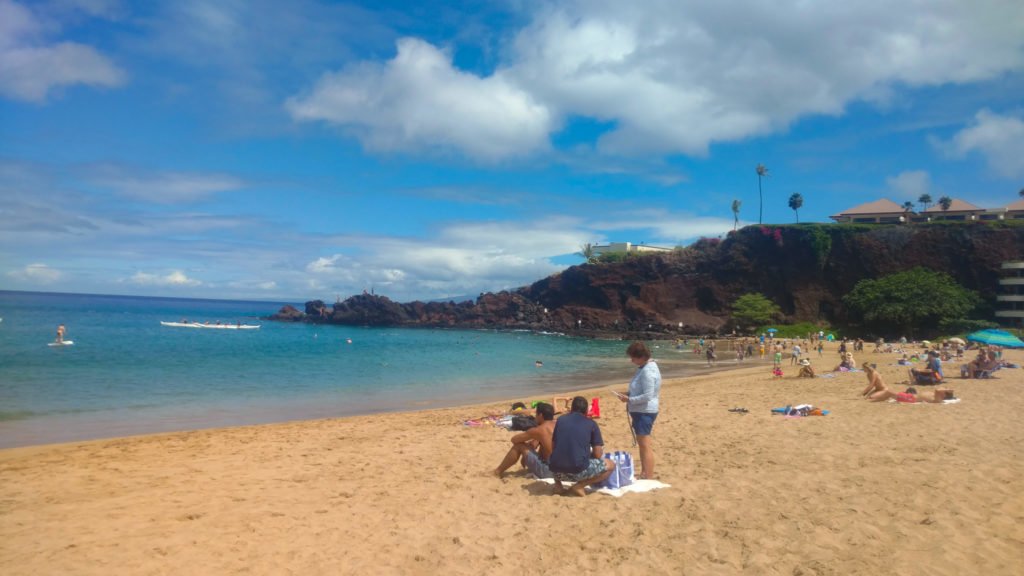
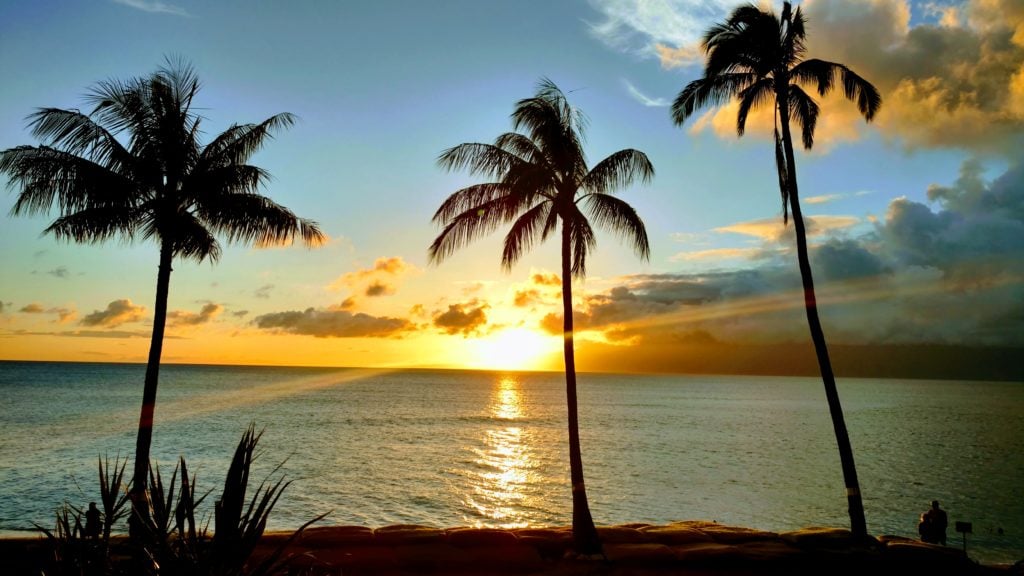


 4) Ululani’s Hawaiian Shave Ice


