author.travelffeine.com

Category: Coffee

You’ve come to the place for all things coffee. If you’re interested in coffee gear, coffee recipes, the best cafes, and great gift ideas for coffee lovers, then you’ve come to the right place! If it has to do with coffee you’ll find it here!

  • Bean Box Delivers World-Class Coffee to Your Door

    Whenever I travel, I frequent the local cafes and experience the local coffee culture of each destination I visit.  I get excited when I discover a cafe that roasts its coffee in-house.  Why? Well, for one, it means I get to sample coffee that I couldn’t anywhere else in the world, and two, it means I will have the freshest cup of coffee possible. 

    Here in Seattle, we are fortunate enough to have many options for local coffee roasters roasting small-batch coffee creations. However, I realize that not everyone has the coffee options available to those of us living in Seattle, and not everyone can afford to travel the world sampling coffee. Now, you don’t have to! 

    Enter Bean Box. A company I recently came across while researching my Travel Gift Ideas post. Bean Box works with local coffee roasters to bring you fresh, delicious coffee from all over the world to enjoy from the comfort of your home.

    *Travelffeine is reader-supported. When you buy via links on this site, we may earn an affiliate commission at no additional cost to you.

    Seattle Coffee Roasters

    Seattle is known for its coffee scene, and this is in large part due to Starbucks. If you live in Seattle, then you’re probably familiar with local coffee roasters such as Slate Coffee, Elm Coffee Roasters, Caffe Ladro, and Stumptown (to name just a few). However, for those of you who live outside of Seattle, you may not be aware of the massive growth of local coffee roasters or what that means for you. That’s where Bean Box Comes in.

    Bean Box is a driving force behind this new way of making freshly roasted coffee accessible to you in the comfort of your home. It is no longer only for those of us fortunate enough to live in Seattle, who can benefit from these local artisan roasters. Now, thanks to Bean Box, you can live anywhere in the U.S. and indulge in the Pacific Northwest coffee scene without traveling to Seattle to do it!

    Biscotti and Coffee Box
    Coffee + Biscotti Tasting Box

    What is Bean Box & What Is Artisan Coffee?

    Bean Box is a Seattle company started by two software engineers who loved coffee and recognized how fortunate Seattle was to be surrounded by so many local artisan coffee roasters. They saw this growing number of local coffee roasters and wanted to figure out a way to share the Seattle coffee experience with others, and now they do.

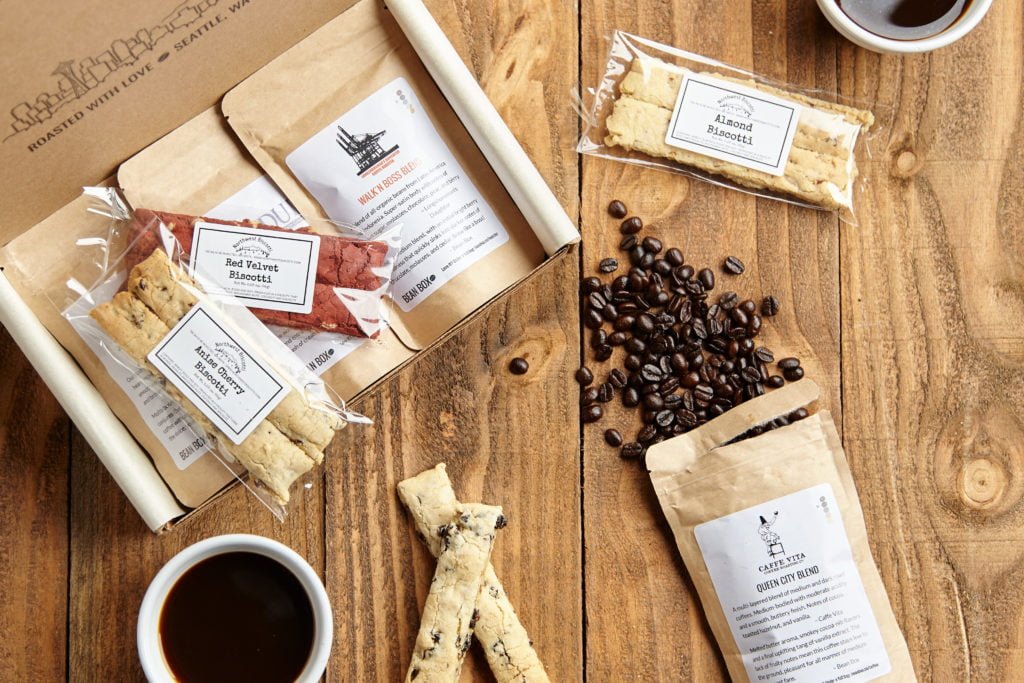
    Bean Box partners with 35 Pacific Northwest coffee roasters to make sure you get world-class coffee. The local coffee roasters work directly with coffee farmers to make sure they get the best product for their roasting needs.  Then they roast the beans in small batches, which Bean Box then samples and chooses based on quality and flavor to deliver straight to your door.  How awesome is that! You can think of Bean Box as your personal coffee connoisseur selecting only the best coffee to send your way.

    What does artisan coffee mean?

    For me, it means that each step in the process, from bean to cup, has been meticulously followed. The farmer works in direct relationship to the roaster, and the roaster works directly with the local supplier to bring you your delicious cup of coffee. 

    Bean Box explains this relationship as a “direct trade” relationship, citing Sebastian Simsch, founder of Seattle Coffee Works, defining direct trade as follows: “farmer and roaster work together to improve the quality of the coffee that gets to your cup.”  

    It means that these individuals (farmer, roaster, supplier) are working together in collaboration for the common good of each other, and you, the consumer. Every step in the process ensures you get a quality cup of coffee. Now, that’s something I can get excited about!

    Coffee and Chocolate Tasting Box
    Coffee & Chocolate Tasting Box

    No More Starbucks?

    There will always be a place for Starbucks, but I tend to look at it more like the fast-food of coffee, the corporate office coffeehouse.  Artisan coffee and local coffee roasters, they’re the fine dining of coffee, the creative-centered coffeehouse. I see a place for each, and I think everyone can enjoy both the Starbucks venue and the small-batch coffee roasters.  I mean, it’s coffee!

    However, just like you don’t always want to eat McDonald’s seven days a week, the same can be said for your coffee experience.  You want that unique, sip-it-slow experience while sitting on your deck watching the sunrise or chatting with a friend who stopped by for a visit.  That’s when you want the fresh-roasted artisan coffee Bean Box delivers to your door.

    The Global Coffee Experience

    So, now that you understand a little better what type of company Bean Box is, and what artisan coffee is, let’s talk travel.  Bean Box lets you travel the world inside a cup of coffee. I mentioned that they partner with 35 (and counting) local coffee roasters, however, let’s talk more about the coffee farmers these roasters get their coffee beans from.

    Coffee Farmers

    This is where your world travels begin.  Let’s explore Ethiopia and try the fruity flavors of Slate Coffee’s Ethiopian light roast coffee or visit vibrant Guatemala and sample a spicy dark roast blend from Middlefork Roasters. Say aloha to my favorite tropical destination and sip the nutty flavor of Keala’s Hawaiian medium roast coffee while imagining you’re in Maui listening to the sound of the ocean.  These are just a few of the many options you can try through Bean Box.

    Sampling world-class coffee from the comfort of your home is just one of the many benefits you get when subscribing to Bean Box and purchasing coffee gifts for the favorite coffee lover in your life. So let’s take a look at some of the coffee choices Bean Box offers.

    Monthly Artisan Coffee Subscriptions

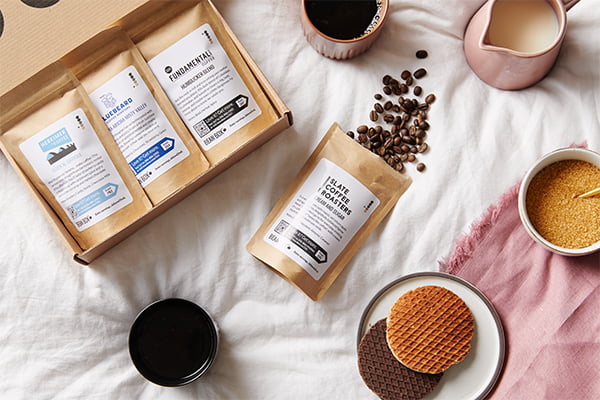
    You’ve got two great options when it comes to a monthly coffee subscription.  You can choose the Bean Box monthly subscription sampler, which includes four different coffees for you to try, or you can choose the Coffee of the Month subscription, which is a 12 oz bag of that month’s featured Coffee. 

    You can customize your subscription based on your coffee preferences. Choose from light and fruity blends to nutty mediums to rich, dark espresso blends, and you can even choose decaf coffee if you want.  They have a coffee option to fit every tasting preference.

    Monthly Coffee Subscription Sampler
    Bean Box Monthly Coffee Subscription Sampler

    Bean Box Coffee Gift Ideas

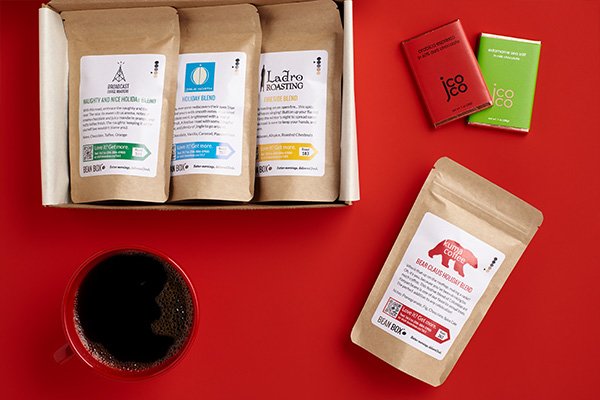
    I mentioned in my Travel Gift Guide Bean Box’s ultimate Seattle artisan coffee and chocolate tasting experience, and it’s such a great gift idea that I include it here too.  There are two options to choose from, a smaller standard Coffee & Chocolate Tasting Box and the Deluxe Coffee & Chocolate Tasting box.

    Deluxe Coffee + Chocolate Tasting Box
    Deluxe Coffee + Chocolate Tasting Box

    Plus, for those of you, like myself, who love Hawaiian coffee, the Hawaiian Coffee Sampler, or the Deluxe Hawaiian Coffee Sampler will make fabulous gifts (hint hint to my hubby in case you’re reading this).

    Another great gift idea is Bean Box’s Coffee & Tea Gift Box.  I am one of those coffee lovers who also loves me some tea!  I like to say it’s due to my American-English heritage, whatever the reason, this gift box is a perfect mix of both worlds! 

    My final coffee gift recommendation is for the traveler in your life who also loves coffee. Take them on a journey through some of the top coffee-producing countries and sample the delicious flavors and aroma of each delectable roast. The World Coffee Tour is sure to be a hit!

    World Coffee Tour
    Bean Box World Coffee Tour

    Who Should Try Bean Box?

    People who love coffee. Those who enjoy variety in their coffee experience. If you like supporting local and small businesses, then Bean Box makes a great choice! 

    If you want the freshest coffee possible, short of roasting it yourself or perhaps, driving to downtown Seattle. People who want a convenient and affordable way to get a quality cup of coffee at home. 

    Those that love Seattle’s coffee but live elsewhere in the U.S. and those who want to sample coffee from around the world without ever leaving home. Pretty much, if you like coffee, you should give them a try.

    Coffee Options for Every Budget

    Bean Box has artisan coffee options for every budget and right now they’re offering $5 off your first coffee subscription order! Coffee subscriptions start at $16.50/month, so you sample four coffees for only $11.50 with free shipping!  That’s about 16-24 cups of coffee (depending on your coffee cup size) for only $11.50!

    You can easily spend $5 on a single cup of coffee from Starbucks.  Why not support a local business and an independent coffee farmer instead? Not to mention the delicious smell that greets you when you check your mailbox, or how much better fresh roasted coffee is when compared with coffee that’s been sitting on the shelf for months.  Bean Box provides quality coffee, freshly roasted and quickly delivered to your door. Really, once you try it, you’ll wonder what took you so long!

    Enjoy $5 Off Your First Box

    Bean Box Coffee Sampler

    The Benefits of Small-Batch Artisan Coffee

    Small-batch artisan coffee guarantees you’ll always get fresh coffee, and you get to sample unique and rare coffee blends. With small-batch roasting, local coffee roasters can experiment with different coffee beans and coffee roasting styles to produce new flavors. You will never get bored with artisan roasted coffee.  Bean Box delivers variety to your door.  If you subscribe to Bean Box’s coffee delivery service, you get to try a new coffee blend every month. Say goodbye to hum-drum coffee days!

    The Downside to Small-Batch Coffee

    Of course, if you try something you like, you’ll want to buy more as fast as you can.  That is one downside of small-batch artisan coffee.  You can’t buy it in bulk, and they may sell out of your favorite blend.  That’s okay, though, as your new favorite will be in the mail to you shortly.

    So why not give it a try? You can cancel your subscription at anytime if you decide it’s not right for you.  Also, if you’re not sure you’re ready for a subscription, then try a single bag of this month’s latest fresh roasted coffee and see what you think.  A world of coffee deliciousness is waiting to be delivered to your doorstep!

    Other Articles You Might Enjoy


    Stay Caffeinated!

  • Coffee Cake for A Crowd: A Cup of Coffee in a Cake!

    I love coffee! So when I found this coffee cake recipe, I knew I had to make it! You see, I’m not much of a “cake” person. I tend to gravitate toward spicy and salty snacks before desserts.  When I do want a dessert, I typically choose a pie or cobbler rather than a sugary cake topped with cavity-inducing frosting.

    All that changed when I found this coffee cake recipe. Six years ago, I purchased the Pioneer Woman’s “Food From My Frontier” Cookbook, and it changed my life! Okay, that’s a little dramatic, but it certainly gave me a new reason to eat cake on my birthday! I’ve made this every year for my birthday since getting this cookbook, that’s how much I like it. I recommend you consider buying her cookbook as it has a bunch of other great recipes in it!

    However, in the Pioneer Woman’s cookbook, she makes this as a double layer round cake, and although I’ve made it this way, it’s not always the best choice when feeding a large crowd. So when my husband requested I make this for his team at work, I decided I needed to figure out a way to make this in a 9 x 13 cake pan or a 1/2 sheet. 

    A larger cake not only serves more people but I think a rectangular cake is also easier to transport. This comes in handy when the requests start streaming in for you to bring to all the group functions and holiday gatherings. It’s that good! So be prepared for this to become a new favorite!

    Not Your Ordinary Coffee Cake

    First off, let me say this isn’t your typical coffee cake recipe. You know the coffee cake you make to eat with your cup of coffee.  Don’t get me wrong. I love that kind of coffee cake too. However, this is not that coffee cake. No, this coffee cake recipe is your coffee and your cake in one delicious treat! Think of it like you’re eating your coffee rather than drinking it.  It’s a slice of coffee–coffee heaven!

    This coffee cake is for true coffee lovers. If you don’t like the taste of coffee, then this recipe isn’t for you (and we should probably talk). However, if you’re like me and you like to take slow walks down the coffee aisle at the grocery store just to smell the coffee beans, then this recipe is for you. And if you want to try another coffee recipe of mine, check out these three ways to make Vietnamese coffee.

    Soon, you will remember your life as “before this coffee cake” and “after eating this coffee cake.” It’s life-changing! Perhaps it’s the caffeine talking, but I’m pretty sure you’re going to think so too once you try it.

    My Tips & Modifications for Making this Coffee Cake

    When determining how to make this coffee cake recipe for a crowd, I needed to figure out a way to still have a double cake layer, but without it being too thick. You’re going to want a crowd to help you eat it too. Otherwise, you may be tempted to eat the whole thing by yourself!

    A traditional 9 x 13 cake pan wouldn’t work for me as this is a double layer cake with a filling in between the layers. So I didn’t want each of the cake layers to be as thick as a standard 9 x 13 cake. I didn’t have two 1/2 sheet pans either, so I used the next closest thing I had, two 10 x 15 jelly roll pans.

    Tips: Use parchment paper in your jellyroll pans for easier removal. Otherwise, make sure to use a baking spray that contains flour and spray your jellyroll pans down good before pouring in the batter.

    I use a large cutting board to place over the cake after it’s cooled for 10 minutes in the pan, then I gently flip it over onto the cutting board. For the other layer, I do the same, but flip it onto my cake tray (I have a lid that fits over the top of this carrier, which I put on when it’s all finished).

    Final note: I don’t take any credit for the deliciousness of the original recipe. That was all the Pioneer Woman’s doing. I want to make that clear. This is my adapted version for those of you who wish to make this cake to serve more people. It’s great for birthday parties and holiday parties at the office.

    Step by Step Recipe

    Feel free to jump ahead to the printable recipe below if you don’t wish to see the step-by-step instructions.

    Step 1 Preheat the oven and Prep Your Pans:

    Preheat your oven to 350 degrees and line two 10 x 15-inch jelly-roll pans with parchment paper. If you don’t have parchment paper make sure to spray your pans generously with a flour baking spray. Set those aside for now.

    Step 2 Add a Whole Lot of Butter:

    Place four sticks of butter in a medium saucepan and put the burner on medium-low to melt the butter slowly.  You don’t want it to boil and splatter butter everywhere.

    butter sticks in a saucepan

    Step 3 Melt Butter & Prep Dry Ingredients:

    While the butter is melting, begin measuring the flour, sugar, and salt into a large mixing bowl. (I use a 4.5-quart bowl) Whisk the flour, sugar, and salt together and set aside. Boil 2 cups of water. I like to boil the water in my tea kettle. I love using my tea kettle for boiling water. It’s so convenient!

    Step 4 Add the Coffee & Breathe in the Aroma:

    Now, add in the coffee crystals to the melted butter mixture and the 2 cups boiling water.  And stir it until the coffee crystals melt and combine with the butter and water. Then let it begin to bubble just a little, about 5 seconds before you turn the burner off.

    Coffee and butter mixture

    Step 5 Prepare Buttermilk Mixture:

    While the coffee sits on the burner with the heat off, prep the buttermilk mixture, whisking it all together, and then set aside. I use a 4-cup Pyrex measuring cup for this step.

    Step 6 Mix Your Batter:

    Next, take your hot coffee mixture and pour it into the flour mixture. It’s essential to take your time and stir this together really well. When it’s all mixed, it reminds me of ginger snap cookie batter.

    coffee cake batter mixture

    Step 7 Finish Mixing the Batter Completely:

    Now add in the buttermilk mixture and slowly mix it into the batter.  This may take a few minutes to get it fully incorporated.

    buttermilk and eggs being poured into cake batter

    Step 8 Pour Into Pans & Try Not to Lick the Bowl Clean:

    Pour the thoroughly mixed batter into the two prepared jelly roll pans. Try your best to divide the mixture equally, but it doesn’t have to be perfect.

    Step 9 Bake your Cake:

    Then bake in the 350º Fahrenheit oven for 20 minutes (or until an inserted toothpick comes out clean).

    cake in the oven

    Step 10 Remove Cakes From Pans:

    Remove the baked cakes from the oven and let cool in their pans for 10 minutes. Then using a cutting board or if you have a cake platter/tray gently place that on top of your cake and slowly invert the cake pan. Your cake should easily come out of the pan and on to whatever surface you inverted it on top of.

    single layer of cake baked

    Step 11 Cool the Cakes Completely:

    Let the cakes sit there and cool completely.  In the meantime, you can whip up your cream filling.

    Step 12 Whisk Together the Delicious Cream Filling:

    Fit a whisk attachment to a stand mixer and add the cream cheese, 2 cups powdered sugar, and heavy cream to a large mixing bowl. Beat this all together until it is light and fluffy.

    whipped creamy cake filling

    Step 13 Spread the Creamy Filling Over the Bottom Cake Layer:

    After your cakes are thoroughly cooled, place your bottom layer on a cake platter (if you haven’t already done this), and spread the creamy filling all over it. I use a big spatula for this part. 

    single layer with filling on top

    Step 14 Add the Top Layer of Cake:

    Then invert your cutting board or whatever surface you’re using over the bottom cake layer and gently lay the top layer of cake on top of the creamy filling. It should now look like some giant delicious cookie sandwich or cake sandwich. 

    cake with creamy filling no frosting

    Step 15 Make the Icing:

    Melt three sticks of butter in a large saucepan. Then add the 1/4 cup instant coffee crystals. Stir together with a whisk, then add in the half-and-half and whisk together good. Now add the 8 cups powdered sugar and 4 tsp vanilla. Whisk the icing until smooth.  

    whisked coffee icing

    Step 16 Frost Your Cake & Try Not to Eat All the Leftover Icing:

    Let it cool for 5 minutes, then gently begin pouring it over your cake, making sure to cover the top of your cake evenly.  I let mine drip all down the sides of my cake. If you want, you can always take a knife and try to spread it around the sides of the cake.  No matter how it looks, you can be sure it’s going to taste amazing!

    Step 17 Eat Cake!:

    Considering that as I write this, my birthday is only two days away, I think an early piece of cake is in order! However, I’ll try to wait at least until my hubby gets here.  In the meantime, I’ll grab some graham crackers, spread them with a little leftover cream filling, then drizzle with some icing and top with another graham cracker.  I just made the best graham cracker sandwich ever!  Try it with your leftovers.

    Warning: This coffee icing is addicting. You may want to hide it from yourself, so you don’t devour it all in one sitting.

    slice of cake

    Best Ever Coffee Cake

    5 from 1 vote
    This delicious coffee cake is made with actual coffee!
    Prep Time 25 minutes
    Cook Time 35 minutes
    Resting Time 1 hour 30 minutes
    Total Time 2 hours 30 minutes
    Servings: 20 slices
    Course: Dessert
    Cuisine: American

    Ingredients
      

    Cake Batter
    • 2 cups butter (4 sticks)
    • 6 tbsp instant coffee crystals (3/8 cup)
    • 2 cups boiling water
    • 4 cups all-purpose flour
    • 4 cups granulated sugar
    • ½ tsp salt
    • 1 cup buttermilk
    • 4 eggs
    • 2 tsp baking soda
    • 4 tsp vanilla extract
    Cake Filling
    • 2 8-oz packages cream cheese softened at room temp
    • 2 cups powdered sugar
    • 2 cups heavy cream
    Coffee Cake Icing
    • 1 ½ cups butter (3 sticks)
    • ¼ cup instant coffee crystals
    • ½ cup half-and-half
    • 8 cups powdered sugar
    • 4 tsp vanilla extract

    Method
     

    Cake Batter Instructions
    1. Preheat oven to 350° Fahrenheit.
    2. Spray two jelly roll pans (10 x 15 inch) with a flour baking spray or line with parchment paper.
    3. Melt the 4 sticks of butter in a medium saucepan.
    4. Add the 6 Tbsp of instant coffee and then add the 2 cups boiling water.
    5. Let this mixture bubble for about 5 seconds, then turn off the heat.
    6. In a separate large bowl, whisk together the flour, sugar, and salt. Then pour the hot mixture over the dry ingredients and stir to combine.
    7. In another medium bowl, mix together the buttermilk, eggs, baking soda, and vanilla extract. Pour this mixture into the ingredients in the large bowl and stir together. Mix until fully incorporated.
    8. Pour this batter into the two jelly roll pans, dividing the batter equally between them both. Bake for about 20 minutes.
    9. Take the pans out of the oven and let the cakes cool in the pans for about 10 minutes. Then turn the pans over on to a clean, prepared surface, and remove from the jelly roll pans. Gently peel off the parchment paper (if used) and allow the cakes to cool completely.
    10. While the cake is cooling, begin preparing the filling.
    Cake Filling Instructions
    1. Fit a stand mixer with the wire whip attachment. (A hand mixer should work too)
    2. Add the softened cream cheese, 2 cups powdered sugar, and heavy cream to a large mixing bowl. Beat until light and fluffy, then set aside while the cake cools completely.
    3. When the cake has cooled completely, move it to your cake holder or cake stand. Then spread the creamy filling over the bottom layer.
    4. Gently add the second layer of cake on top of the filling.
    Coffee Cake Icing Instructions
    1. Melt the 3 sticks of butter in a large saucepan and add ¼ cup instant coffee crystals. Stir together.
    2. Add the half-and-half to the saucepan and whisk together. Then turn off the heat.
    3. Add the 8 cups powdered sugar and vanilla. Whisk together really good to create a smooth icing.
    4. Let the icing cool for 5 minutes. Then gently pour the coffee icing over the top of your cake. Make sure you pour it so it covers the entire cake and drips down over the sides.
    5. Enjoy this delicious cup of coffee served as a slice of cake. Coffee and cream all in one bite!

    Notes

    *TIP: If some of the cake peels off with the parchment paper, don’t panic, you smooth it back on with a butter knife. However, you’ll cover with filling and icing later so any small patches won’t be noticed.
    *When frosting the cake, you can try to smooth the icing along the sides for better coverage. However, I find pouring it and letting it just drip down works best as it is hard to smooth after it begins to cool on the cake. So you have to act fast!
  • Vietnamese Iced Coffee Made Three Ways

    I like to sample the local caffeinated beverage of choice when I’m traveling and although I have yet to visit Vietnam, I tried Vietnamese iced coffee at a Phở restaurant and it was love at first sip! So I decided to learn to make these at home since I liked them so much.  Below I give step-by-step instructions for how you can make this delicious Vietnamese Iced Coffee at home too. 

    In addition to the original Vietnamese iced coffee recipe, I have also included instructions for two additional drinks you can make using variations of this recipe. Soon you will be able to make Vietnamese Iced Coffee, Vietnamese Coconut Iced Coffee, and a delicious Vietnamese Affogato. 

    A Quick Overview

    Vietnamese iced coffee or cà phê sữa đá as it is called in Vietnamese is a strong, bitter robusta coffee mixed with sweetened condensed milk and poured over ice.

    It uses a special Vietnamese Coffee filter also called a phin. The phin has three main parts: the brew chamber with drip tray, the spreader, and the lid. The brew chamber is where you put the coffee, the spreader is placed on top of the ground coffee and the lid is placed on last after the hot water has been poured over the grounds.

    You can purchase the Vietnamese Coffee Filter/Coffee Maker on Amazon.  And in case you’re not ready to buy one just yet, I will also include tips on how to make this recipe using a French press. So let’s get started!

    Vietnamese phin parts
    From left to right the parts are as follows: lid, spreader, filter and drip tray.

    Vietnamese Iced Coffee Step-by-Step Instructions

    This Vietnamese iced coffee recipe is simple to make.  The thing that sets this recipe apart is the type of coffee you use.  Purchase a medium-coarse ground robusta coffee for best results. Robusta coffee has a strong bitter flavor that pairs nicely with the sweetened condensed milk.  If you want to learn more about robusta coffee, this article does a great job of explaining the differences between arabica (most common) and robusta coffee beans.

    My personal coffee preference for this recipe is either the Trung Nguyen coffee brand or the Cafe Du Monde brand. You can use a French roast as a substitute if you can’t buy the previously mentioned brands. However, you must use a strong flavored coffee. 

    Step 1

    Boil water. The best temperature to use for this recipe is approximately 200º Fahrenheit. I use this tea kettle to boil water and love that it has different temperature settings! I also recommend for all of the following recipes, that you pour a small amount of hot water in your glass or mug and swirl it around.  This will prevent your hot coffee from cooling down too much as it won’t be going into a cold glass.

    Step 2

    Prepare a heatproof glass or mug by adding 3 tablespoons of sweetened condensed milk to the glass. You can put more or less sweetened condensed milk based on how strong you want your coffee. The purpose of this step is to offset the bitterness of the Vietnamese coffee.

    glass with sweetened condensed milk
    I typically use about 1/4 inch layer of sweetened condensed milk.

    Step 3

    Add 3 tablespoons (you can adjust to your personal taste) of medium-coarse ground coffee to your Vietnamese coffee filter.

    Vietnamese coffee filter with coffee
    Give your filter a slight shake to even out the layer of coffee grounds.

    Step 4

    Place the spreader (see below photo) on top of the coffee and gently press down and give it a slight turn. This is also referred to as tamping. When you tamp coffee you compress it and give it an even layer, this produces a stronger brew. 

    It is important to note that the tighter you pack down the coffee the longer your brew will take.

    Vietnamese phin filter
    I’m holding the “spreader” in the top photo, then I place on top of the coffee before adding in the hot water.

    Step 5

    Place the coffee filter with spreader over the glass of sweetened condensed milk. Then add a small amount of the hot water to the brewing chamber. (Approx. 1 ounce or 2 tablespoons)  Wait about 20-30 seconds for the coffee to “bloom“. This causes the coffee grounds to swell and expand.

    Step 6

    Fill the brewing chamber with hot water to just below the top. Then place the lid on top. Watch as it begins to brew.  It will take 3-5 minutes to finish brewing. (How firmly you packed your coffee as well as how course your coffee is, will affect the brew time.)

    Vietnamese phin filter over cup
    It’s fun to watch as the coffee drips down into the glass creating the contrasting layers.

    Step 7

    Once all the water has dripped thru, you will have a beautiful layer of coffee and sweetened condensed milk. Stir the coffee and milk together. Pour over ice and enjoy!

    Vietnamese coffee with sweet milk
    Look at that beautiful layer of coffee and sweetened condensed milk!

    How to Make Vietnamese Iced Coffee with a French Press

    If you don’t have access to a Vietnamese Coffee Filter, you can use a single-serve french press to brew your Vietnamese iced coffee instead. Add 3 tablespoons of coffee to your French press and then add about 3/4 cup of hot water (don’t forget to prime the glass by first swirling a little hot water around in your french press prior to adding the boiling water and coffee).  Let sit for approximately 3 minutes. Then pour into a glass with sweetened condensed milk, stir and add ice.

    You could also use the smallest cup setting on your Keurig K-cup machine (mine is 4 oz) and brew a French roast blend or if you have a re-usable K-cup you could fill it with a Vietnamese coffee.  Then mix this with the sweetened condensed milk and add ice.

    Subscribe to Our Newsletter

    Join Travelffeine today and receive our monthly newsletter with travel tips, latest blog updates, recipes and more!

    Vietnamese Coconut Iced Coffee Step-by-Step Instructions

    This version makes a creamy iced coffee with a hint of coconut flavor. To make this coconut iced coffee you will follow the steps above for making Vietnamese Iced Coffee, but with a few adjustments.

    Vietnamese coconut coffee ingredients
    Here are the supplies I used for this recipe.

    Step 1

    Brew your coffee as instructed above thru step 6 (Do not add the sweetened condensed milk to the glass in step 2 of the iced coffee instructions).

    Step 2

    While your coffee is brewing, in a blender mix together 1 cup crushed ice, 3 tablespoons of sweetened condensed milk and 1/4 cup coconut milk (I stir my can of coconut milk first, so the thick cream and “water” mix together). Blend until a creamy mixture is achieved.  

    creamy coconut mixture for Vietnamese Coconut Coffee
    The mixture will look something like this prior to place it in your freezer.

    Step 3

    Place this mixture in the freezer for about 1 hour.

    Step 4

    After about 1 hour your mixture should be more like a soft-serve ice cream texture.  Scoop this out and add to your now cold coffee.  Enjoy!

    Vietnamese coconut coffee
    This creamy coconut flavored “ice cream” mixed with the rich coffee is YU-mmy!

    Vietnamese Coffee Affogato Step-by-Step Instructions

    This variation is the simplest of all.  We’re taking the standard Italian Affogato, which is at the basic level, just brewed espresso poured over vanilla ice cream, but instead substituting the rich flavor of Vietnamese coffee.

    Step 1

    Brew the Vietnamese Coffee as instructed in the Vietnamese Iced Coffee Recipe thru step 6 (Do not add the sweetened condensed milk to the glass in step 2 of the iced coffee instructions).

    Step 2

    While your coffee is brewing, take your favorite brand of vanilla ice cream and place two scoops into a glass.

    Tillamook Vanilla Ice Cream
    Tillamook ice cream (and cheese) is a favorite choice here in the Pacific Northwest.

    Step 3

    When your coffee has finished brewing, pour the hot coffee over the scoops of vanilla ice cream.

    Enjoy this easy and delicious dessert!

    *Optional: Add shaved chocolate on top or try a sprinkle of cinnamon for something different. If you really enjoy a strong coffee flavor, I recommend trying this with an espresso ice cream for a real pop of coffee.

    Vietnamese coffee affogato
    Dessert or drink? You make the call!

    Recipe Tips

    Purchase a Vietnamese Robusta style coffee for the most authentic version.  You can find the Trung Nguyen brand at your local Asian market or online.  Many grocery stores carry the Cafe du Monde brand if you are unable to find Trung Nguyen.

    You can use a French press as explained in the above post to make this recipe if you do not have a Vietnamese coffee filter.

    For the coconut iced coffee recipe, try to find a good brand of coconut milk.  This will make the difference for that coconut flavor.  You may need to try a few brands to find your favorite.

    If you do not have a blender you can serve the coconut coffee over a glass of ice instead. Just mix together the coffee, coconut milk and sweetened condensed milk and pour over ice.

    Happy Caffeinating!

    Printable Recipes Below

    Vietnamese Iced Coffee (cà phê sữa đá)

    5 from 3 votes
    Quick and easy recipe to make Vietnamese iced coffee at home.
    Prep Time 5 minutes
    Cook Time 4 minutes
    Servings: 1
    Course: Drinks
    Cuisine: Vietnamese

    Ingredients
      

    • ¾ cup hot water (200° F)
    • 3 tbsp medium-coarse ground coffee (preferably Trung Nguyen or Café Du Monde Coffee)
    • 3 tbsp sweetened condensed milk (adjust according to taste preferences)
    • 1 cup ice cubes

    Equipment

    • Vietnamese Coffee Filter (phin)

    Method
     

    1. Boil Water.
    2. Add sweetened condensed milk to heatproof glass or mug.
    3. Place the coffee filter on top of the glass of sweetened condensed milk.
    4. Add the coffee grounds to the filter, give a slight shake to even out coffee grounds. Place spreader (filter press) on top of the coffee. Push slightly and give a small turn to tamp down.
    5. Add 2 tablespoons of the hot water to the filter, pouring on top of the spreader.
    6. Wait 30 seconds to "bloom". Fill the coffee filter with remaining water to just below the top.
    7. Place the lid on top of the filter and wait about 4 minutes for coffee to brew.
    8. After the coffee has finished brewing, remove the coffee filter and stir together the coffee and sweetened condensed milk.
    9. Pour over ice and enjoy!

    Notes

    Please see the instructions in the above post for using a French Press to make this recipe if you do not have a Vietnamese Coffee filter (also called a “phin”).

    Vietnamese Coconut Iced Coffee

    5 from 3 votes
    A delicious, creamy iced coffee with a hint of coconut!
    Prep Time 1 hour
    Cook Time 4 minutes
    Servings: 1
    Course: Drinks
    Cuisine: Vietnamese

    Ingredients
      

    • 3 tbsp medium-coarse ground coffee (Vietnamese Robusta coffee is preferred)
    • ¾ cup hot water (200° F)
    • 1 cup crushed ice
    • 3 tbsp sweetened condensed milk
    • ¼ cup coconut milk (mix together the coconut cream and water first)

    Equipment

    • Vietnamese coffee maker (phin)
    • Blender

    Method
     

    1. Boil water.
    2. Place the filter over a heatproof glass. Add coffee to filter and gently shake to create an even layer of coffee. Place spreader (removable filter insert) on top, push down and turn slightly to tamp.
    3. Add 2 TB of the hot water to the filter and wait 30 seconds for the coffee to expand. Then add the remaining hot water to the filter and place the lid on top.
    4. While the coffee is brewing add crushed ice, sweetened condensed milk and coconut milk to a blender. Blend until soft, creamy consistency.
    5. Place mixture in the freezer for approximately 1 hour. After one hour the ice mixture should be a soft ice cream-like texture. Spoon this mixture into your cold coffee and enjoy!

    Notes

    If you don’t have a blender you can serve over ice. Stir together the coffee, coconut milk, sweetened condensed milk and pour over ice.  Add a little shredded coconut for a flavorful garnish.

    Vietnamese Coffee Affogato

    5 from 3 votes
    Enjoy this Italian treat served with the rich flavor of Vietnamese coffee.
    Prep Time 5 minutes
    Cook Time 5 minutes
    Servings: 1
    Course: Dessert, Drinks
    Cuisine: American

    Ingredients
      

    • ¾ cup hot water (200° F)
    • 3 tbsp medium-coarse ground coffee (Vietnamese Robusta blend is best)
    • 2 scoops vanilla ice cream

    Equipment

    • Vietnamese Coffee Filter (phin)

    Method
     

    1. Boil water.
    2. Place the coffee filter over a heatproof glass.
    3. Add coffee to the filter, gently shake to even out the coffee. Place spreader on top, push down and turn slightly to tamp.
    4. Add 2 tablespoons of the hot water to your filter and wait 30 seconds to let the coffee "bloom" or expand.
    5. Fill the filter with the remaining hot water to just below the top. Then add the lid to the top of the filter and wait about 4 minutes for the coffee to finish brewing.
    6. Add two scoops of a good quality vanilla ice cream to a heatproof glass. When the coffee has finished brewing, remove the filter and pour hot coffee over ice cream and enjoy!

    Notes

    Use a Vietnamese robusta style coffee for best flavor. Trung Nguyen brand or Cafe du Monde coffee make for great choices.  Also use a good quality vanilla ice cream with lots of flavor.  Feel free to add some shaved chocolate on top for some extra flavor. 
  • Best Thai Massage in Bangkok & Coffee Bar

    If you’re looking for a great coffee or an amazing Thai massage in Bangkok, look no further! Stand Alone Coffee Bar & Spa combines an amazing Thai massage spa with an incredible coffee house! If they were to add an Air BnB rental into the mix, I am not sure I’d ever leave!  They have a fabulous coffee bar and two doors down is the Stand Alone Spa & Massage. It is located in a residential neighborhood and is a relaxing and quiet space.

    Stand Alone Coffee Bar:

    The coffee bar has a full menu, so if you’re hungry try a burger and fries or some pasta or whatever suits your fancy.  However, I would probably wait to eat until after your massage.

    In addition to the gorgeous industrial-style interior, the coffee bar also has an outdoor space for lounging.  I tried the cold brew and it was bold and flavorful.  In addition to their menu and coffee choices, they also roast their own coffee beans which are available for purchase.  Check out their business page at Stand Alone Coffee Bar.

    Location: Bangkok, Khwaeng Chom Phon, Khet Chatuchak, Krung Thep Maha Nakhon 10900, Thailand

    Hours: 7:30 a.m. – 9:30 p.m.

    Stand Alone Coffee Bar Massage Bangkok

    Stand Alone Spa & Massage:

    As I mentioned above, the spa and massage are separate from the coffee bar, you exit the coffee bar and walk to the other end of the building and you will find the spa.  We did not have reservations, as we had just wandered over to try a coffee before walking to the spa next door.  However, they were able to get my husband and me in for a one hour traditional Thai and foot massage.

    Previous Thai Massage Experiences:

    Now let me backtrack a little to tell you, this was our last day in Thailand before heading back home. We already had a Thai massage at the Wat Pho Thai Massage School (would not recommend it, you can read a little about my experience at 2 Days in Bangkok).

    Then we tried a traditional Thai massage again in Chiang Mai (this was much better than at the massage school, however, it still felt mechanical and just didn’t “wow” me). My husband got another massage on the beach in Phuket, which he said was good.  But up to that point, I was just feeling a little “meh” with regards to Thai massages.

    You see, I get deep tissue massages regularly at home and love them.  I have scoliosis and a lot of back pain, so they really help me manage my spinal health.  So when coming to Thailand I had been so excited at the prospect of getting 1-hour massages for less than $20!  Then I had a couple of massages and they just weren’t as good as I had expected.  That was until I got my massage at Stand Alone Spa & Massage.

    Massage Experience at Stand Alone Spa & Massage:

    The woman who gave me my massage was strong and firm and did a wonderful job of balancing stretching and pressure to create a massage that felt both relaxing as well as therapeutic. Honestly, I was so sad that this was my last day in Bangkok, as I would have gone back for another one the next day!

    And what is more incredible, it was the cheapest out of the four massages we had while in Thailand!  They have a special going where it is only 200 THB for a one hour Thai & foot massage. Please visit Stand Alone Spa & Massage for more information.

    Location: วิภาวดี​รังสิต​20​ Soi Chom Phon, ​, Khet Chatuchak, Krung Thep Maha Nakhon 10900, Thailand

    Hours: 10:00 a.m. – 9:30 p.m.

    I highly recommend Stand Alone Coffee Bar & Stand Alone Spa & Massage.  If you are in Bangkok and need a respite from the hustle and bustle of the city don’t miss this hidden gem. For a full trip itinerary to Thailand, check out What to See in Thailand For Your First Trip.

  • Eco-Friendly Coffee near BTS in Bangkok


    If you’re looking for an eco-friendly coffee option while in Bangkok, Better Moon x Refill Station has you covered.  They serve fantastic coffee and food and are doing their part to help the environment. Better Moon x Refill Station is conveniently located just a 5-minute walk from the On Nut BTS station. I went there for breakfast and tried the mixed berry acai bowl and it was so refreshing!  When the weather is hot, I prefer something cold, so an iced Americano and this cold acai bowl hit the spot!

    Eco-Friendly Mixed Berry Acai bowl

    Coffee Near BTS

    Better Moon x Refill Station is starting a trend of reducing plastic waste in Bangkok.  It’s a huge mission, but everyone has to start somewhere!  Even my straw was made of metal.  So if you’re looking for a great coffee near the BTS, Better Moon x Refill station is about a 5-minute walk from the OnNut BTS station and I highly recommend it!

    Eco-Friendly Cafe near BTS Bangkok

    They have a large open space with plenty of comfy seating choices as well as outdoor seating. They also sell kombucha and homemade soaps, bags and re-usable silicone water bottles (I purchased one and it has been so handy on this trip).  Check them out and support a local business trying to help improve their community. Not to mention you’ll be rewarded with a cup of real coffee – no instant stuff here!

    Eco-friendly bags

    Better Moon x Refill Station Cafe front door

    Where:

    Better Moon x Refill Station
    2031 Better Moon Cafe, Sukhumvit 77/1 Alley, Klongtoey Nuea, Khet Watthana, Krung Thep Maha Nakhon 10110


    If you like this please check out our other articles at Le Cafe & Travel.  And if you want to learn more about the mission behind Better Moon x Refill Station, check out this great blog article from Coconuts Bangkok.

    Have an amazing day and go get yourself some coffee too!

  • Single Serve French Press: Traveling With Coffee

    Single Serve French Press: Traveling With Coffee

    Ahh coffee…that first cup in the morning, it’s like a cozy sweater you wear on a rainy day or that friend that you want to chat with for hours.  I’d call it a comfort food, but I know it’s technically not a food, or is it? I do eat coffee beans, so perhaps I can call it a comfort food after all!

    Let’s face it, most of us start thinking about that first cup of coffee not long after our eyes open and we begin to get ready for our day.  The same is true whether you’re at home or whether you’re traveling.

    IKEA French Press

    I spent almost 4 months in China on a scholarship through the University of Washington. And it was during this stay that I realized how much I valued my coffee. The dorms that I stayed in did not provide coffee.  Also, water had to be boiled in order to drink it or to brush your teeth. I didn’t want to go out every morning before class to buy a cup of coffee so when I found this mini French press at an IKEA in China I was so excited!

    Single Serve Glass French Press

    Since I already had to use a tea kettle to heat my water, the French press made perfect sense!  I bought some ground coffee, which I also found at IKEA and my mornings at the dorm got a WHOLE lot better!!

    This was a good reminder to not take things for granted.

    Things like clean drinking water.  At home, I can just go to my sink and drink the water without fear of getting sick.  Or things such as my morning coffee, that at home is so easy to come by. Or even things like a good pillow, traveling will definitely make you realize all the little things we don’t think about, until they aren’t there.

    Traveling causes me to appreciate what I have and reminds me to be thankful for the little and big things in life. There is always something to be greatful for.

    I continue to pack my IKEA French press on other travels, it saves me time and money and it is also a fun way to sample local coffee while traveling.  I wrap my IKEA French Press in a T-shirt and pack it in the middle of my clothing, to protect it. You could also stick it in inside a shoe too for extra protection.

    REI French Press Coffee Mug

    REI is a store that was started in Seattle back in 1938 and they sell every kind of possible outdoor gear you could want as well as a large selection of travel gear.

    I use this REI French press coffee mug for camping and backpacking. It is not made of glass, and therefore is better for the rugged demands of camping and hiking.  It also has a little storage container built into the bottom where you can store extra coffee grounds.

    REI Single Serve French Press Mug

    Steps to Making Your Single French Press Coffee:

    1. Boil some water.
    2. Put in your coffee (3-5 tablespoons – adjust to taste preferences)
    3. Stir the grounds a little.
    4. Wait 1-3 minutes (again adjust according to your desired strength)
    5. Push down the filter and whether you’re out under the stars or in a hotel room in another country, you are set for all your coffee needs!

    In case you don’t live near an IKEA, here is a similar style single serve coffee maker you can purchase from Amazon.

    I also discovered that REI is no longer selling the French Press mug that I use for camping, however this GSI Outdoor Java Press would make a good substitute. And if REI doesn’t deliver to your location, Amazon also sells the GSI Java Press as well as this Travel Coffee Mug that is very similar to the one I use from REI.

    For more travel ideas check out these travel itineraries: Fun Things to Do in Lisbon, First Trip to Thailand and the Ultimate Maui Itinerary.

    Happy Travels!